70Mai Dash Cam Pro review

REVIEW – Dashcams are used to record outrageous occurrences on the road or provide evidence of collision, vandalism, or corruption. However, only Tesla has a built-in dashcam; in other cars, the dashcam is purchased separately. The 70Mai Dash Cam Pro is one of the newest models to hit the market. Read on to see what I think!

What is it?

A dashcam is a small digital video camera that mounts to the dashboard and records the point of view of the driver. Each country and jurisdiction within the country has rules about the use of dashcams and the distribution of the videos that they record, so users must ensure their legal right to operate the camera.  These legal restrictions are one of the reasons that automakers generally do not incorporate them. The benefit to these restrictions is that dashcam manufacturers can rapidly develop features outside of the snail’s pace of evolution that automakers are restricted to.  As a result, consumers and manufacturers are no longer satisfied with a dashcam as merely a windshield mounted HD wide-angle camera that can store video to a microSD card. As part of this trend, the 70Mai Dash Cam Pro has some very innovative design and features and is an example of the rapid evolution of the dashcam.
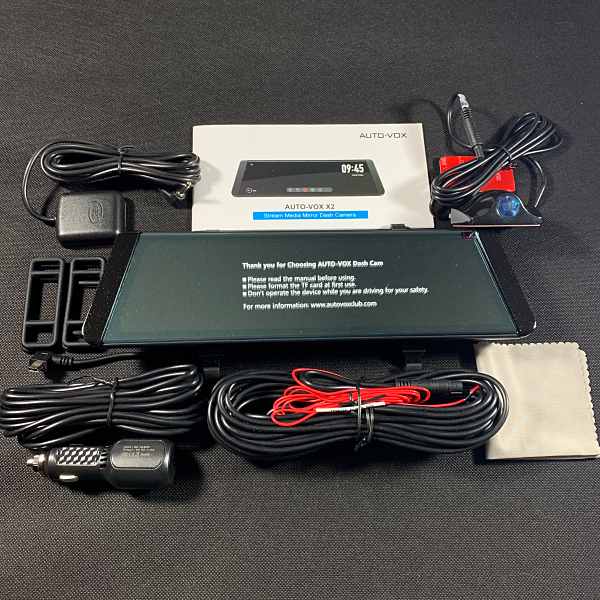
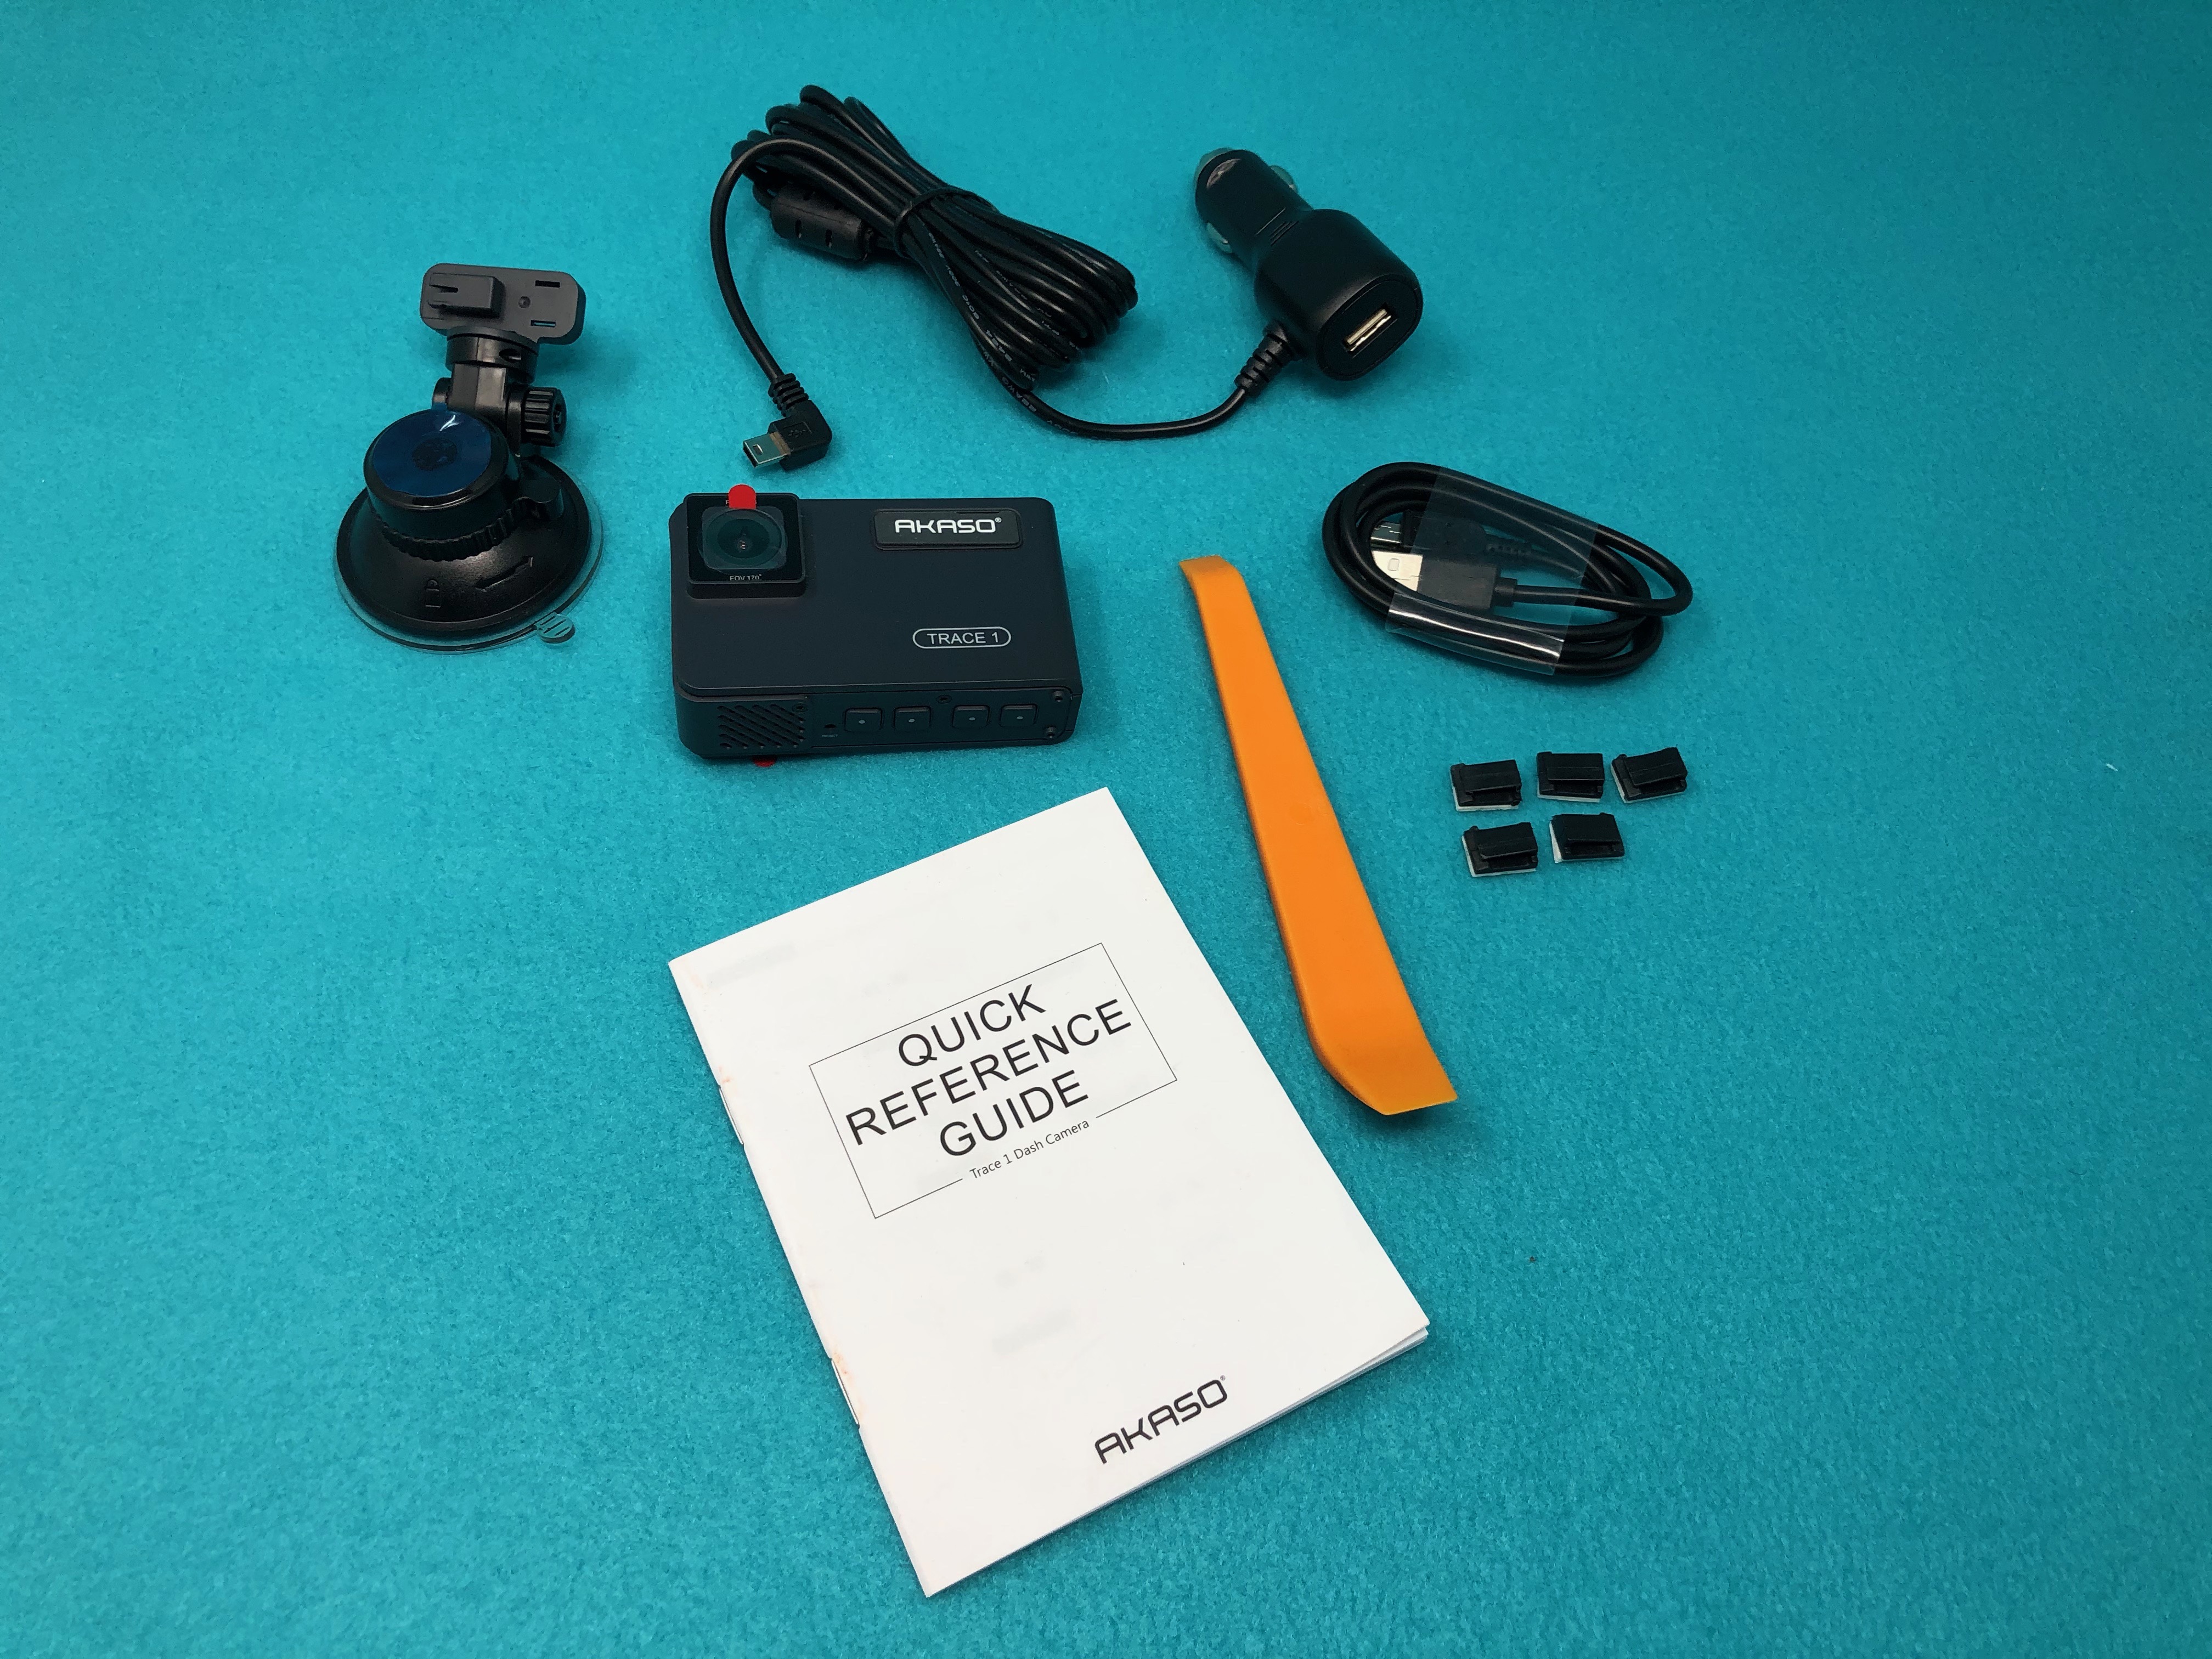
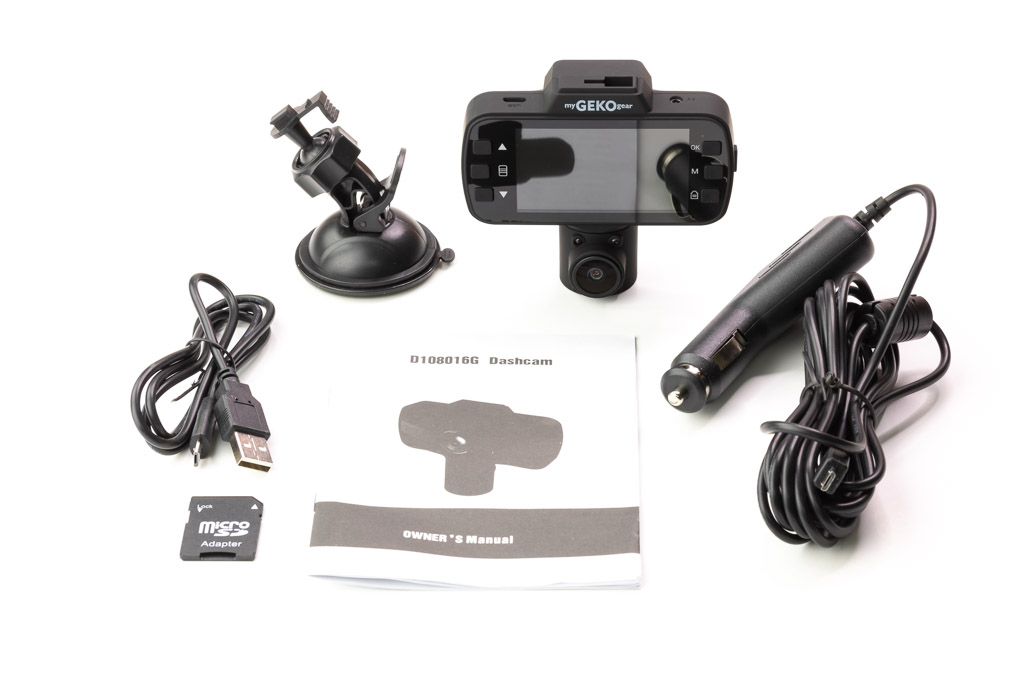
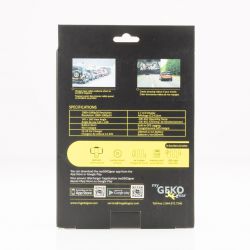
What’s in the box?

  • 70mai Smart Dash Cam Pro
  • Car Charger
  • USB Cable
  • Two Electrostatic stickers
  • Wiring tool
  • mounting bracket with heat resistant adhesive
  • manual

Hardware specs

  • Model: Midrive D02
  • Image sensor: SONY IMX335
  • Resolution: 2592 x 1944
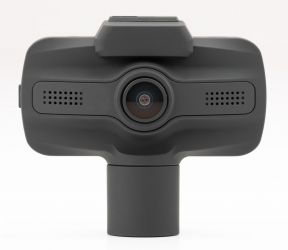
  • Camera: FOV 140° , F1.8, 6 glass
  • Wireless connection: Wi-Fi IEEE 802.11 b/g/n/ 2.4GHz
  • G-sensor: Acceleration sensor
  • Expandable memory: MicroSD card with a capacity of 16-64GB and read/write speed of Class10 and above
  • Supported OS: Android4.4/iOS8.0 and above
  • Power supply: car cigarette lighter
  • Battery type: li-polymer battery
  • Battery capacity: 500mAh
  • Input: 5V 2A
  • Operating temperature:-10C 60C
  • Dimensions: 82 x 58.2 x 40.5mm

Design and features

first thoughts

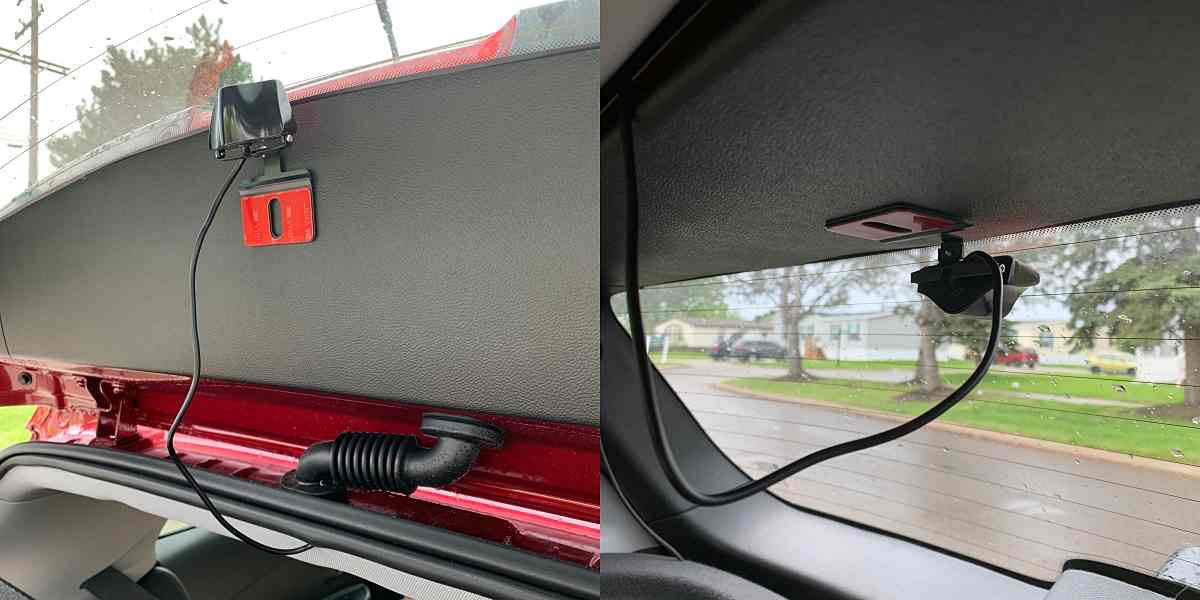
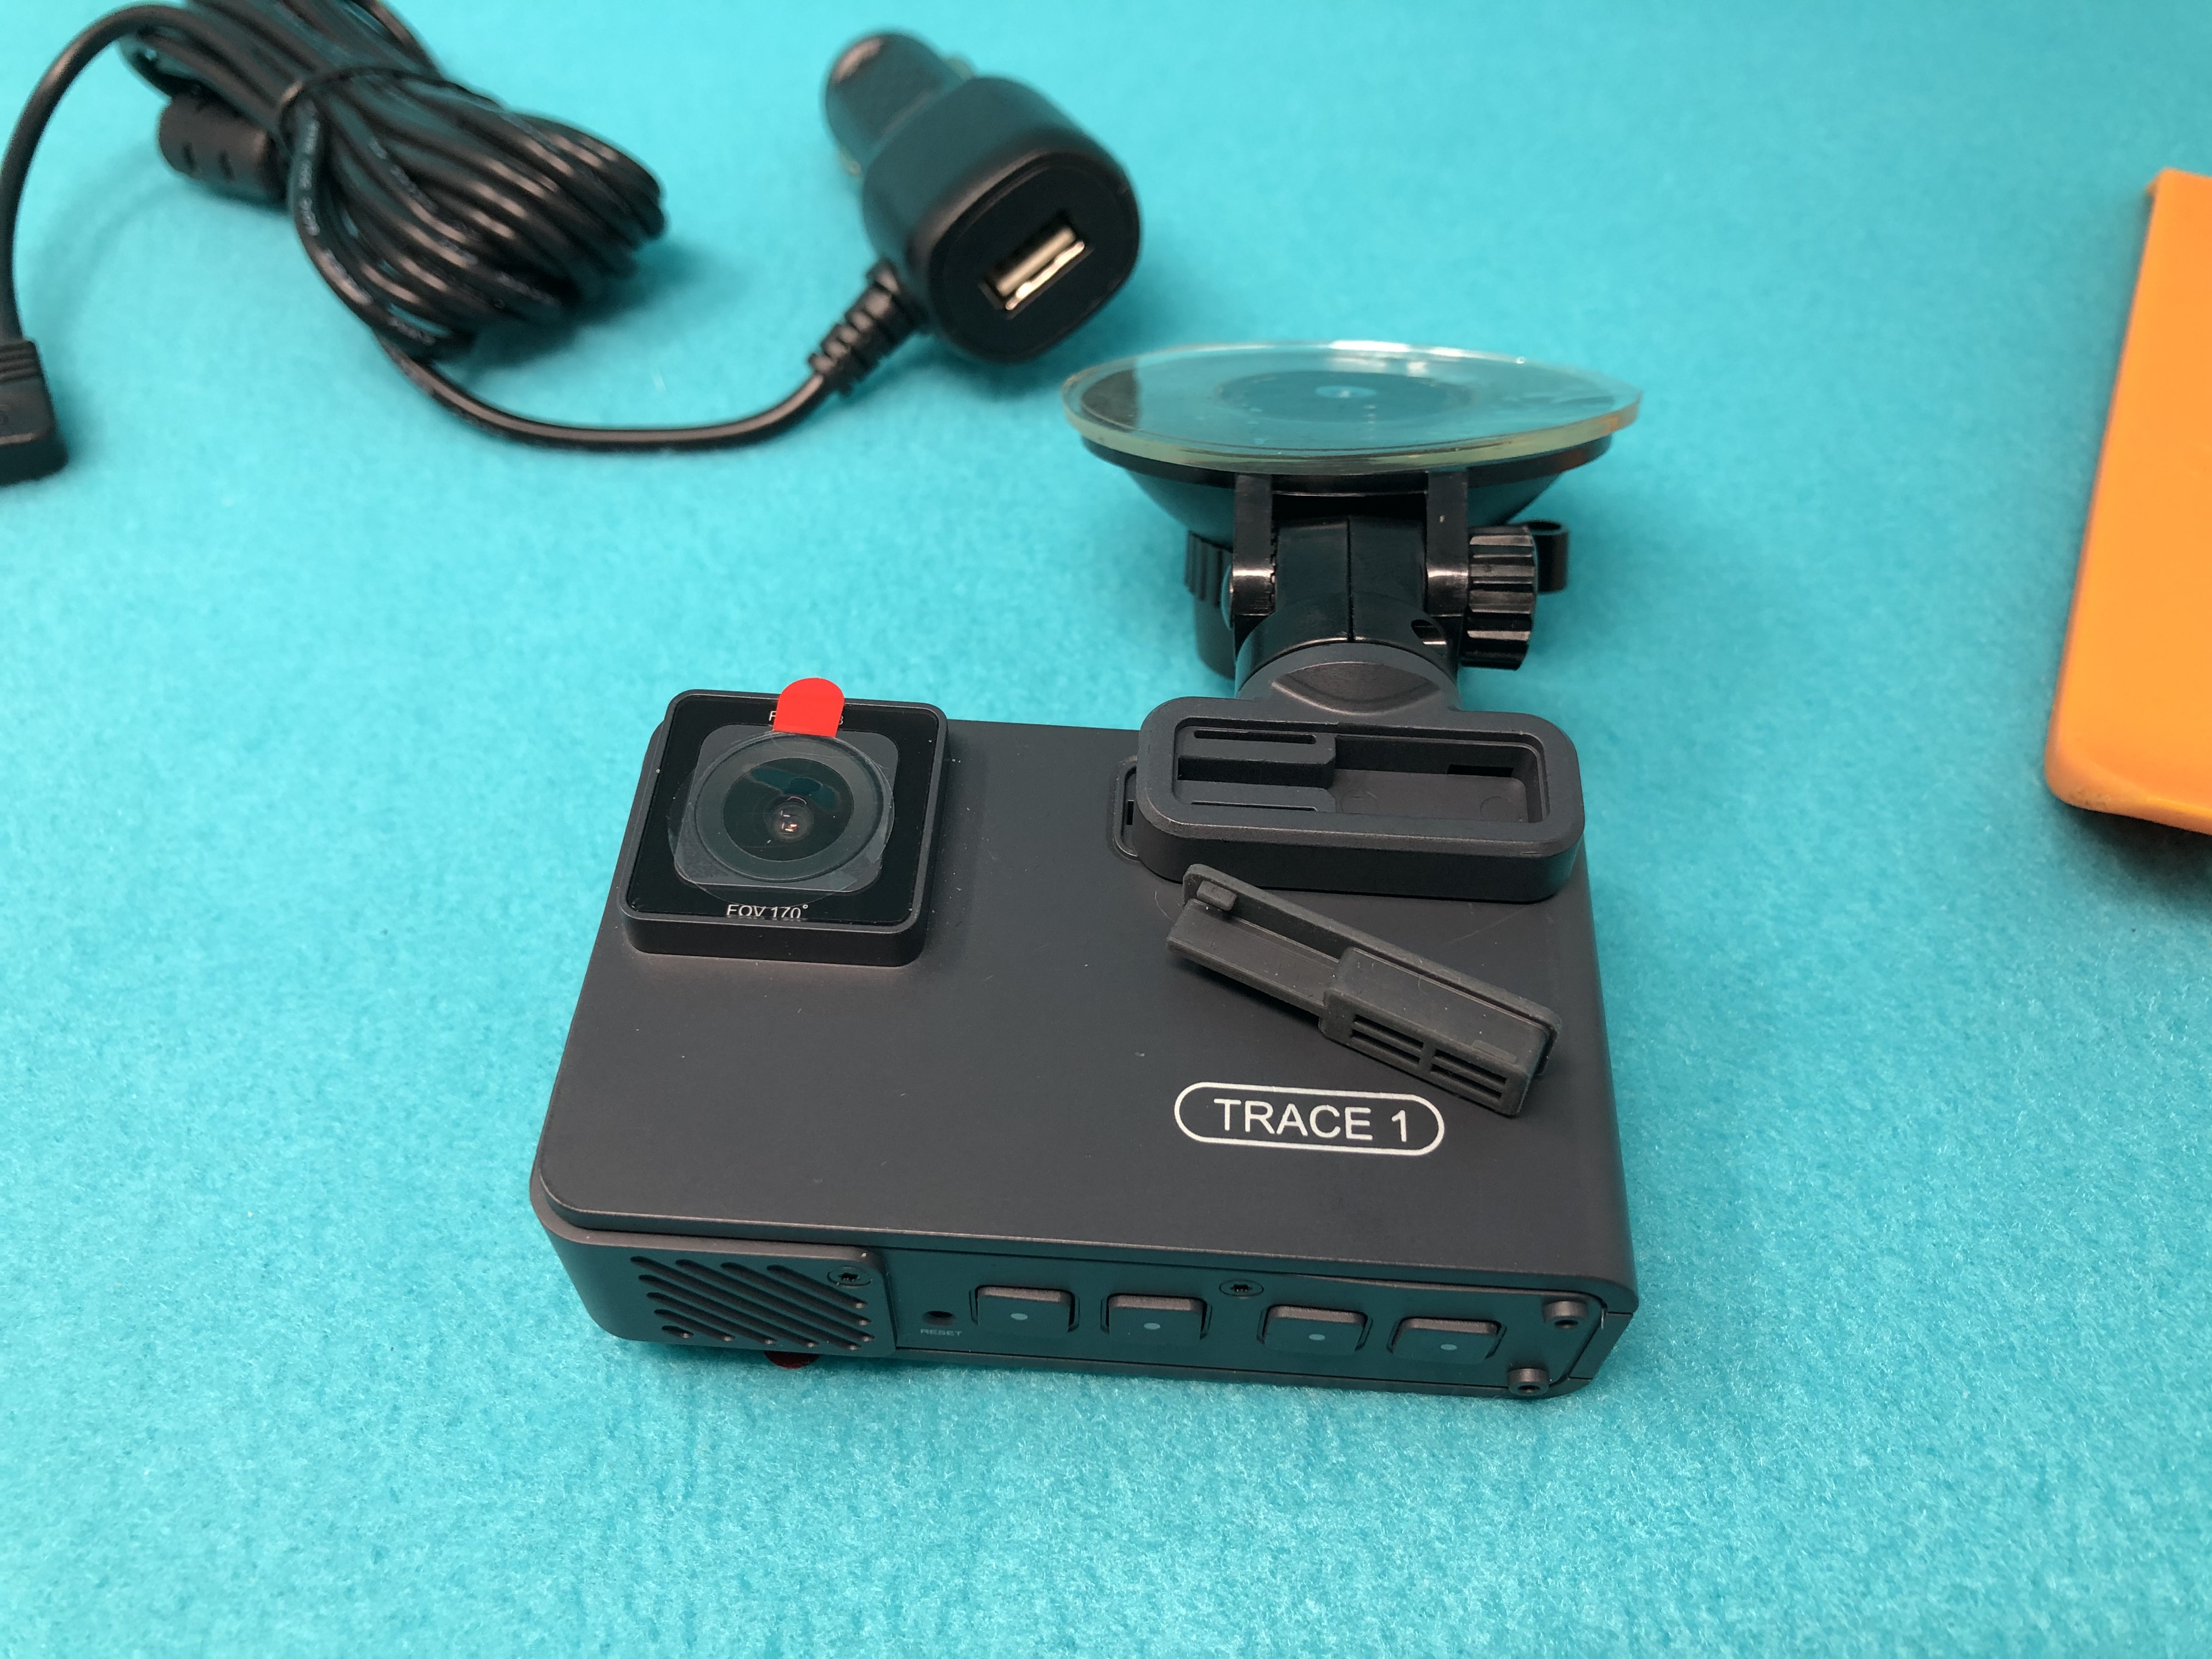
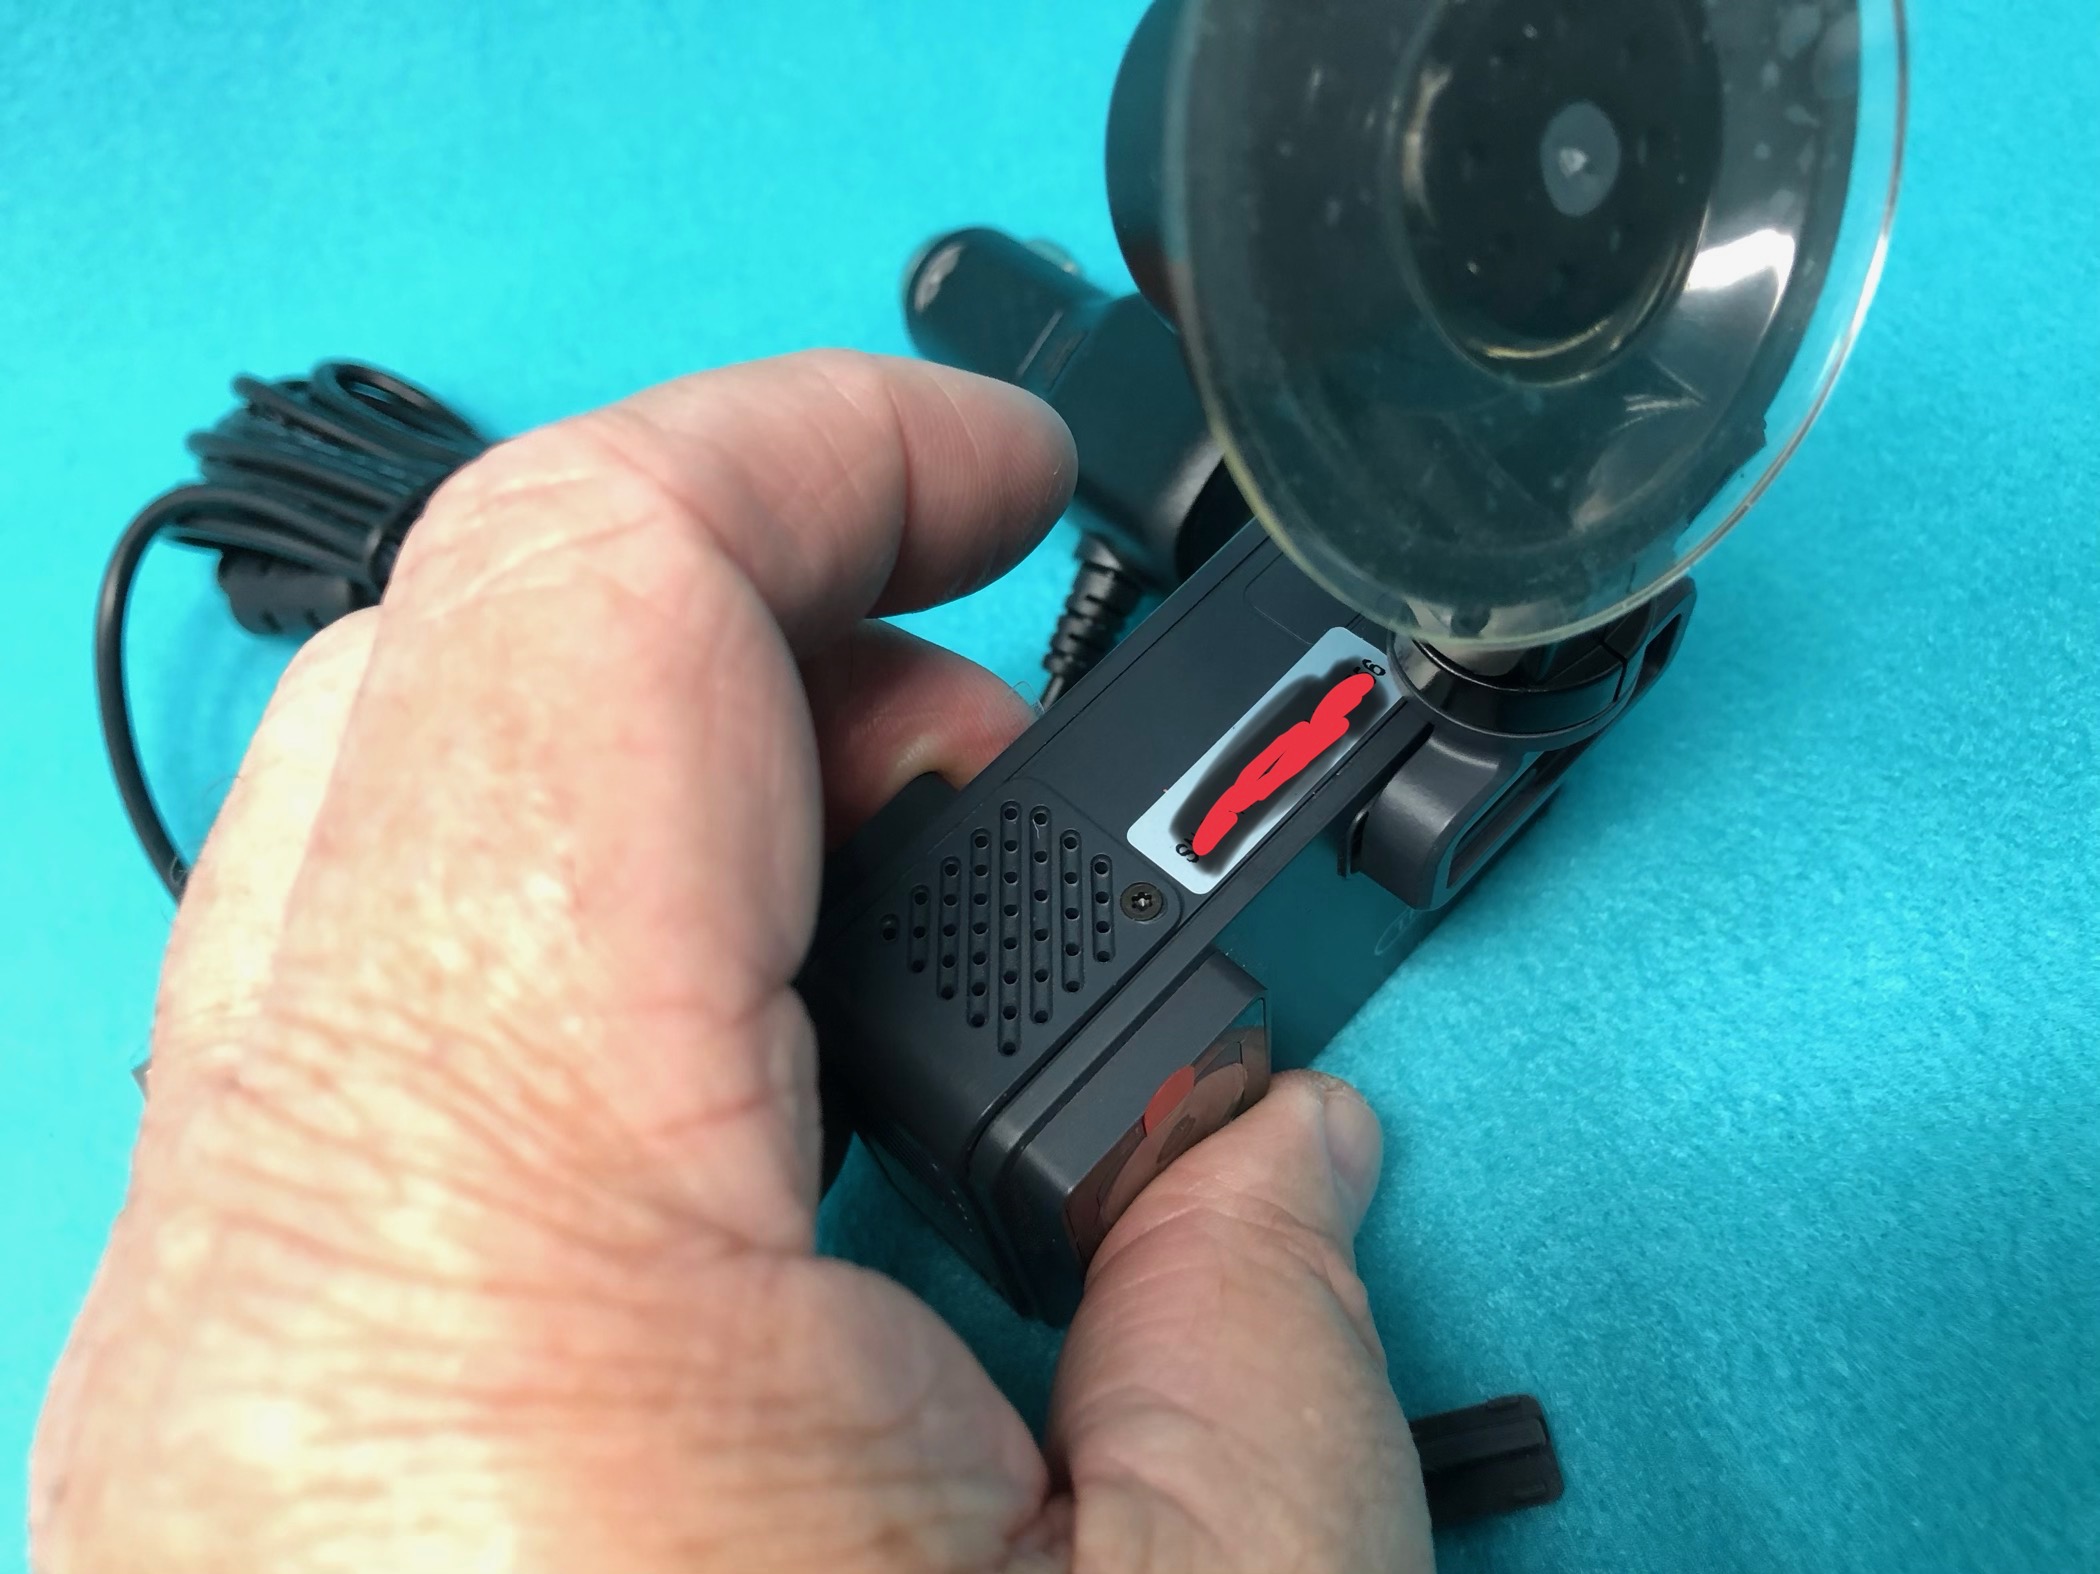
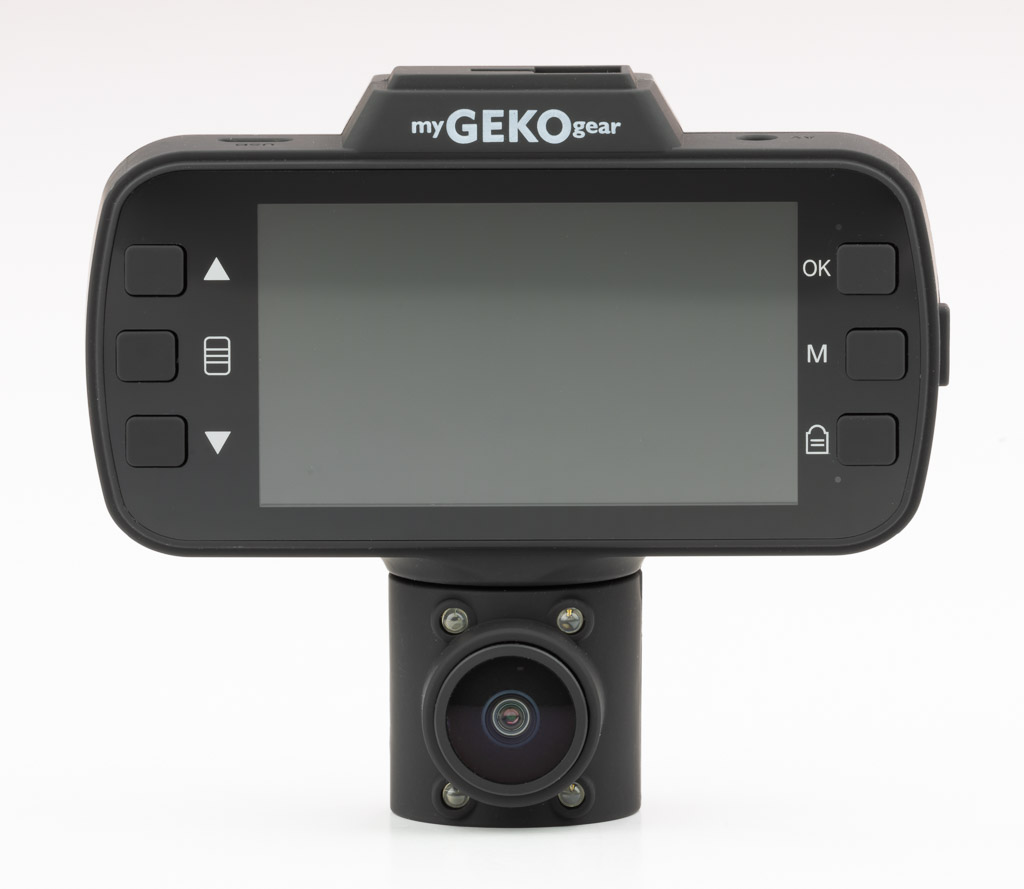
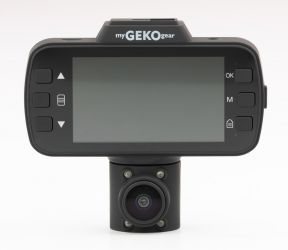
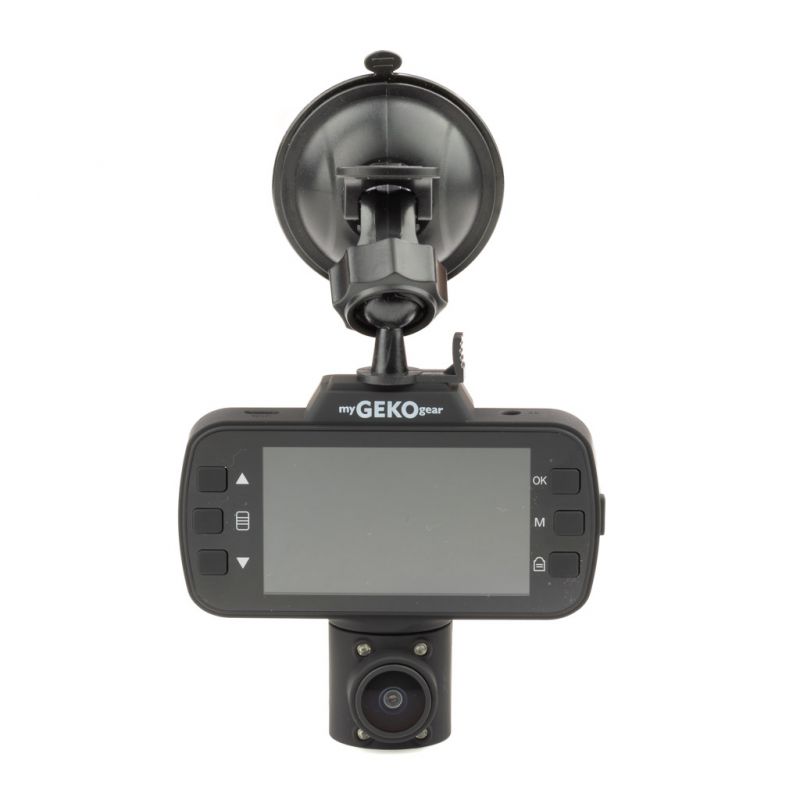
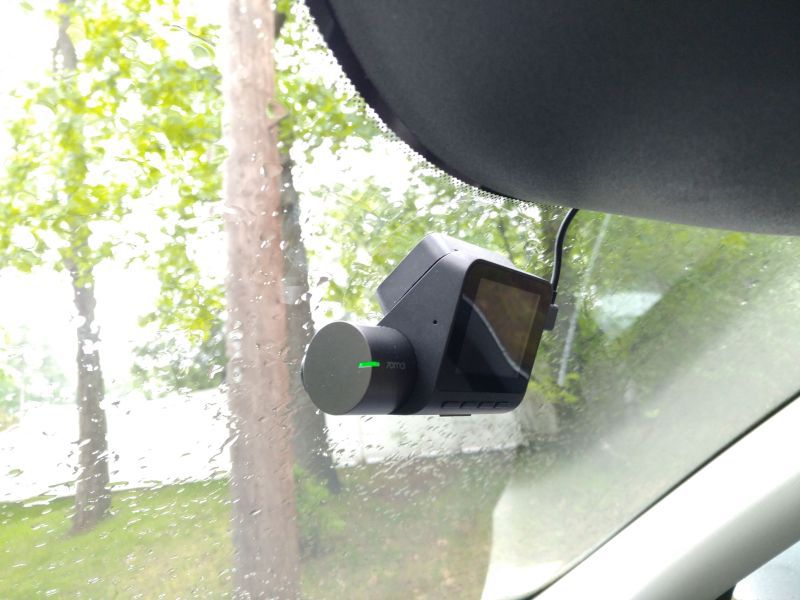
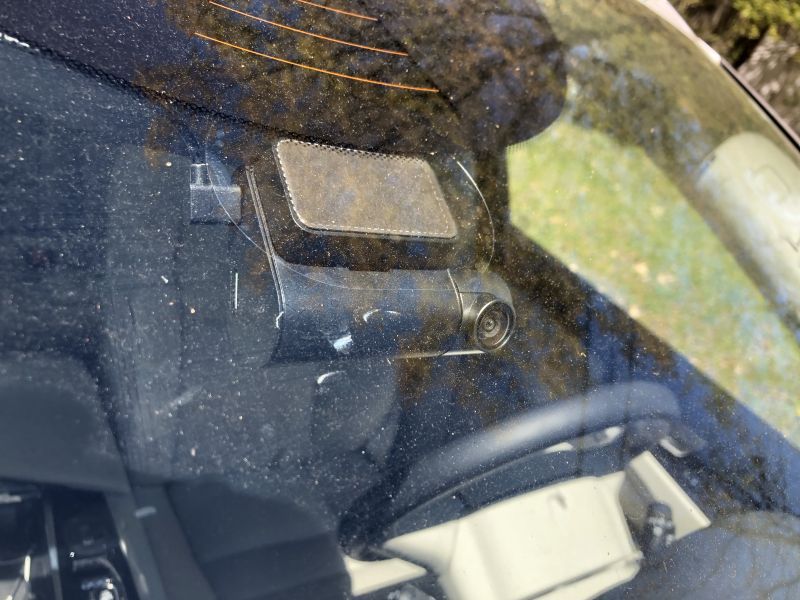
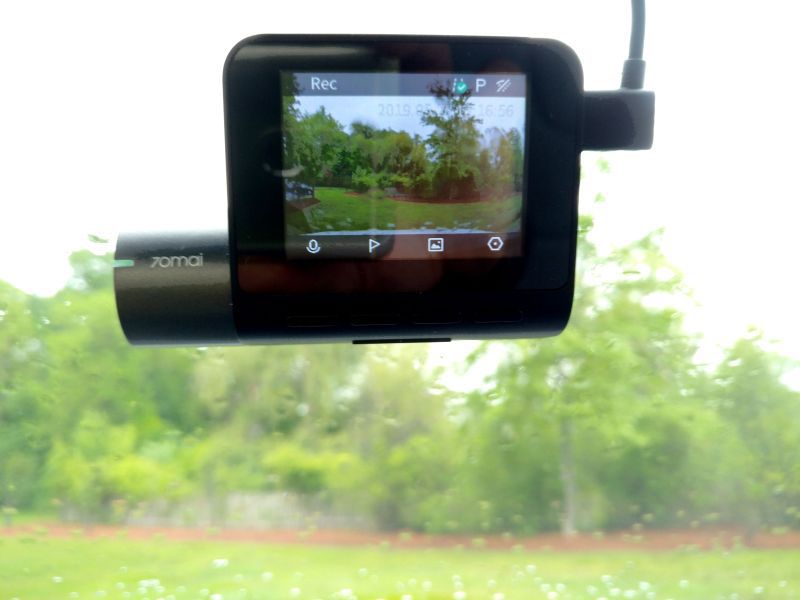
The physical design of the dash cam is very sleek and unobtrusive. This is the first camera that I have seen that supports mounting using an electrostatic film. This is similar to that film that is applied to glass phone screen protectors. Once the film has bonded to the windshield it is held securely in place but may be removed by peeling back one edge without leaving any residue. or film. This design allows the film to be freely repositioned without leaving traces of adhesive. This also permits the camera to be used on rented or other short term vehicle and then returned to the main vehicle. You can see the oval film in the photo below.

The camera mounts to the windshield so that the LCD display and buttons for the user interface are mounted in a fixed position against the windshield. This is a great option for a vast majority of vehicles but may be difficult to access for some vans or cars that have large windshields mounted at a low angle.

Setup

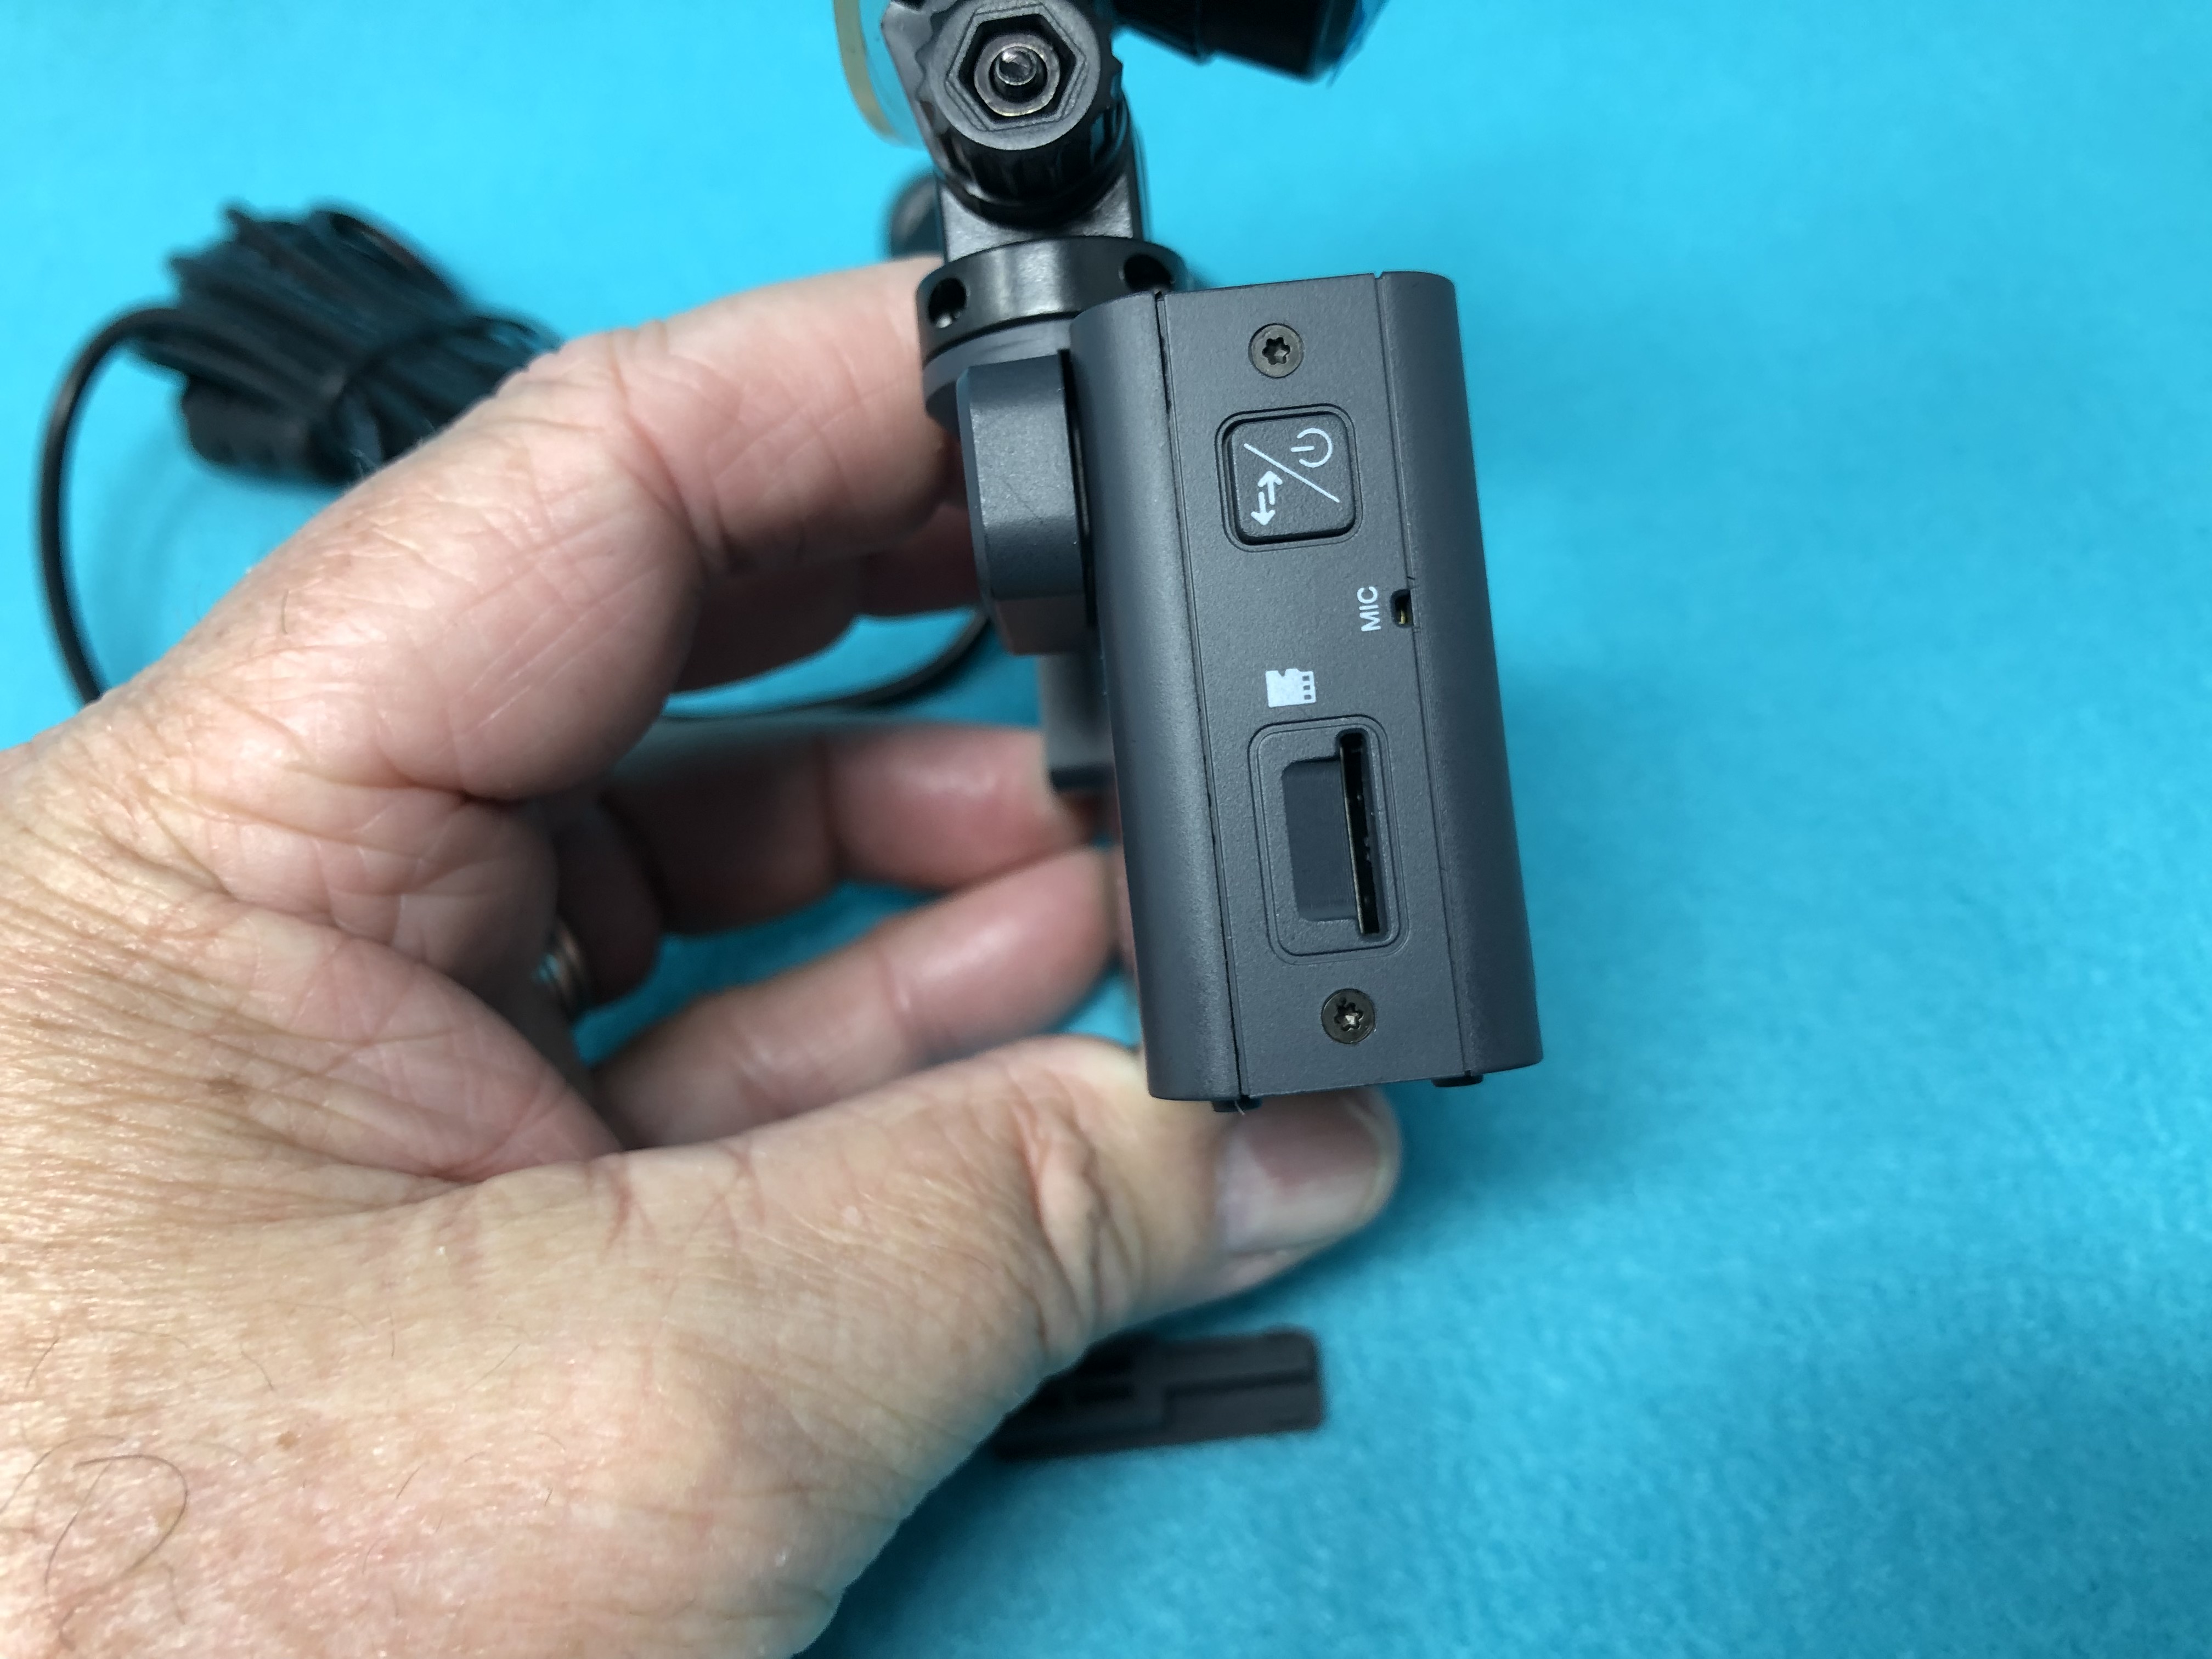
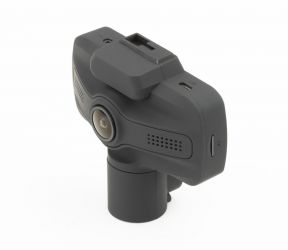
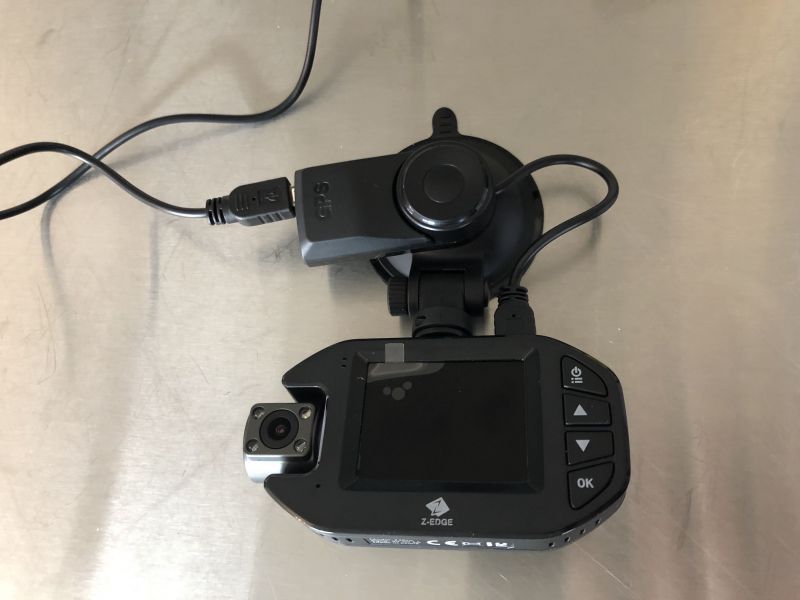
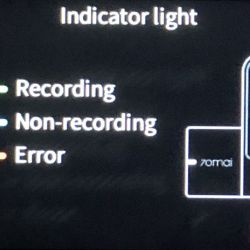
The camera is on the left-hand side and the USB cord is on the right-hand side. I would expect that since more cars are left side drive that the camera would be on the right-hand side so that the camera could be mounted center with the screen and buttons closer to the driver. The camera mount has an indicator light designed to alert the driver so a left side drive was definitely the target platform when the camera was designed. The camera is mounted on a rotating bezel so that the most use of the field of view can be obtained. The camera does not have any left to right adjustment, so the unit must be mounted in the center of the windshield to obtain the best results.

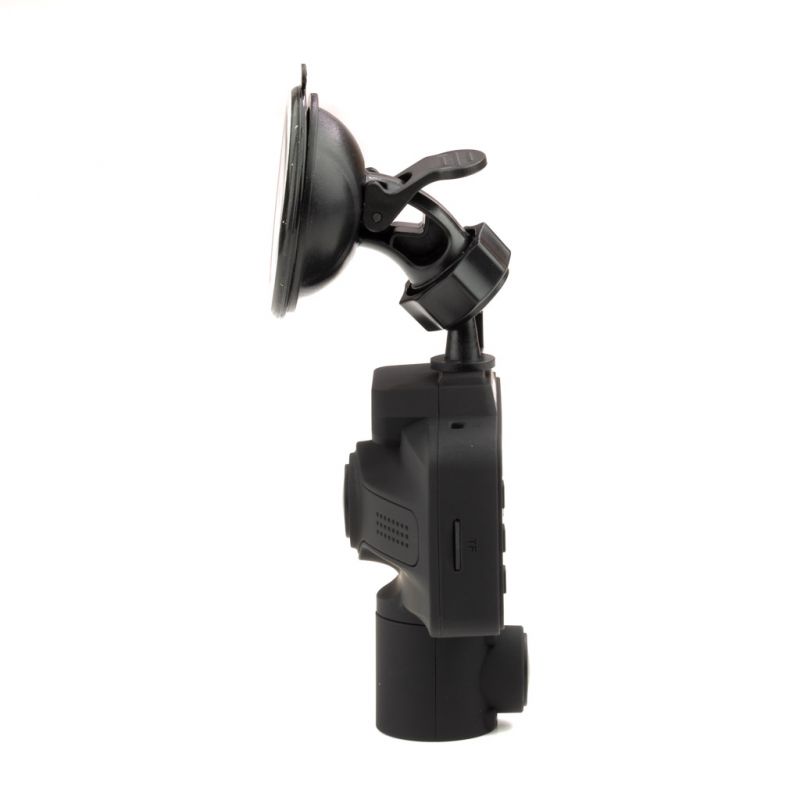
The review sample of the dashcam was provided with an accessory GPS mount holder that has an adhesive on it and is used to mount the camera to the electrostatic sticker. If the GPS mount is not purchased then a standard mount is provided. The mount allows quick connection and disconnection from the windshield without removing the electrostatic sticker. It also has small rubber feet so that it acts as a shock absorber for recording. The camera doesn’t have any built-in image stabilization so a little help from these rubber feet goes a long way.

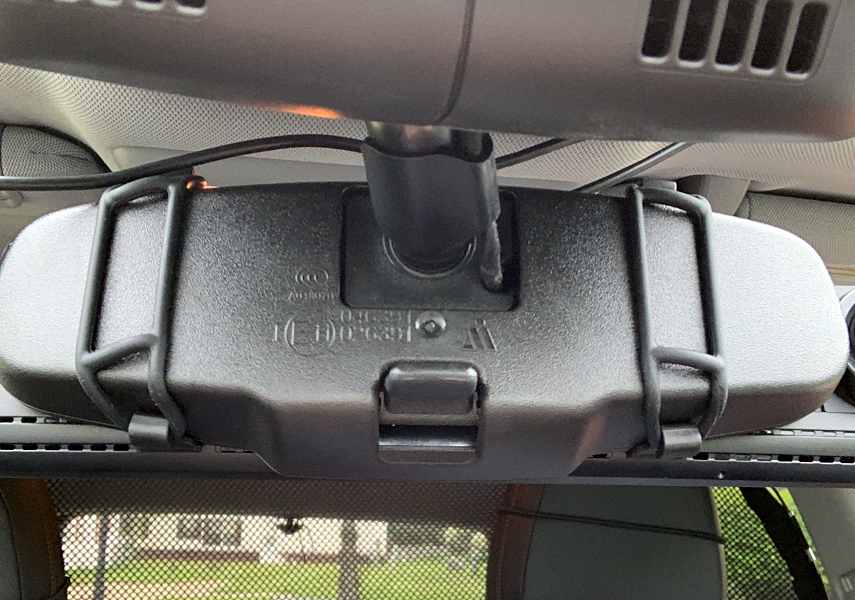
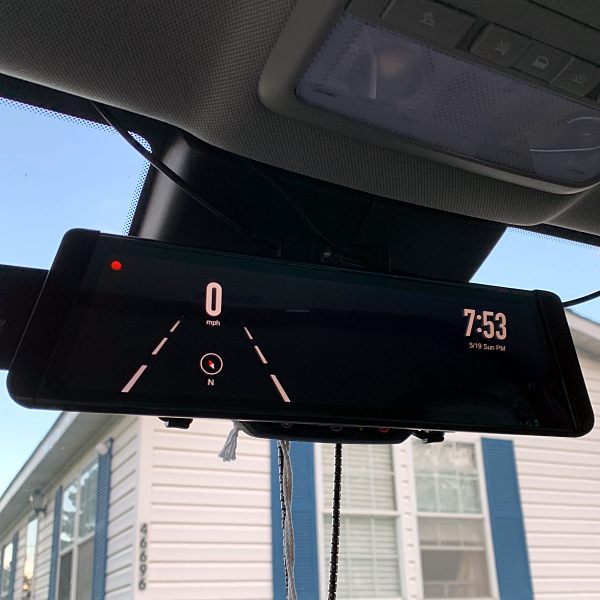
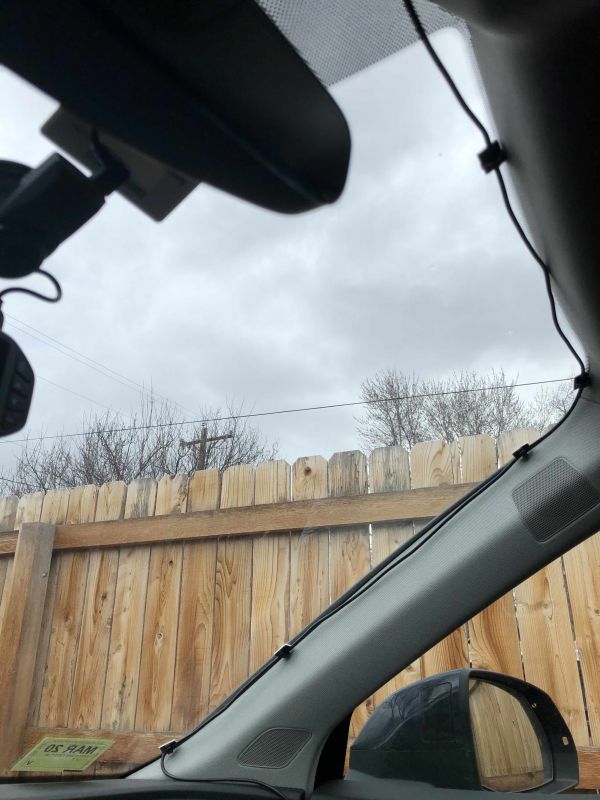
Once the camera is mounted it looks very sharp and more like a built-in piece of the car versus an accessory stuck on the windshield. The USB power cable is very long, about 10.5 feet, and should allow inconspicuous mounting of the camera cable in a variety of cars. Owners should be careful to not block the operation of airbags. If you are able to remove the A-pillar faring and tie the wire to the other cables running in this area then that is best.

Operation

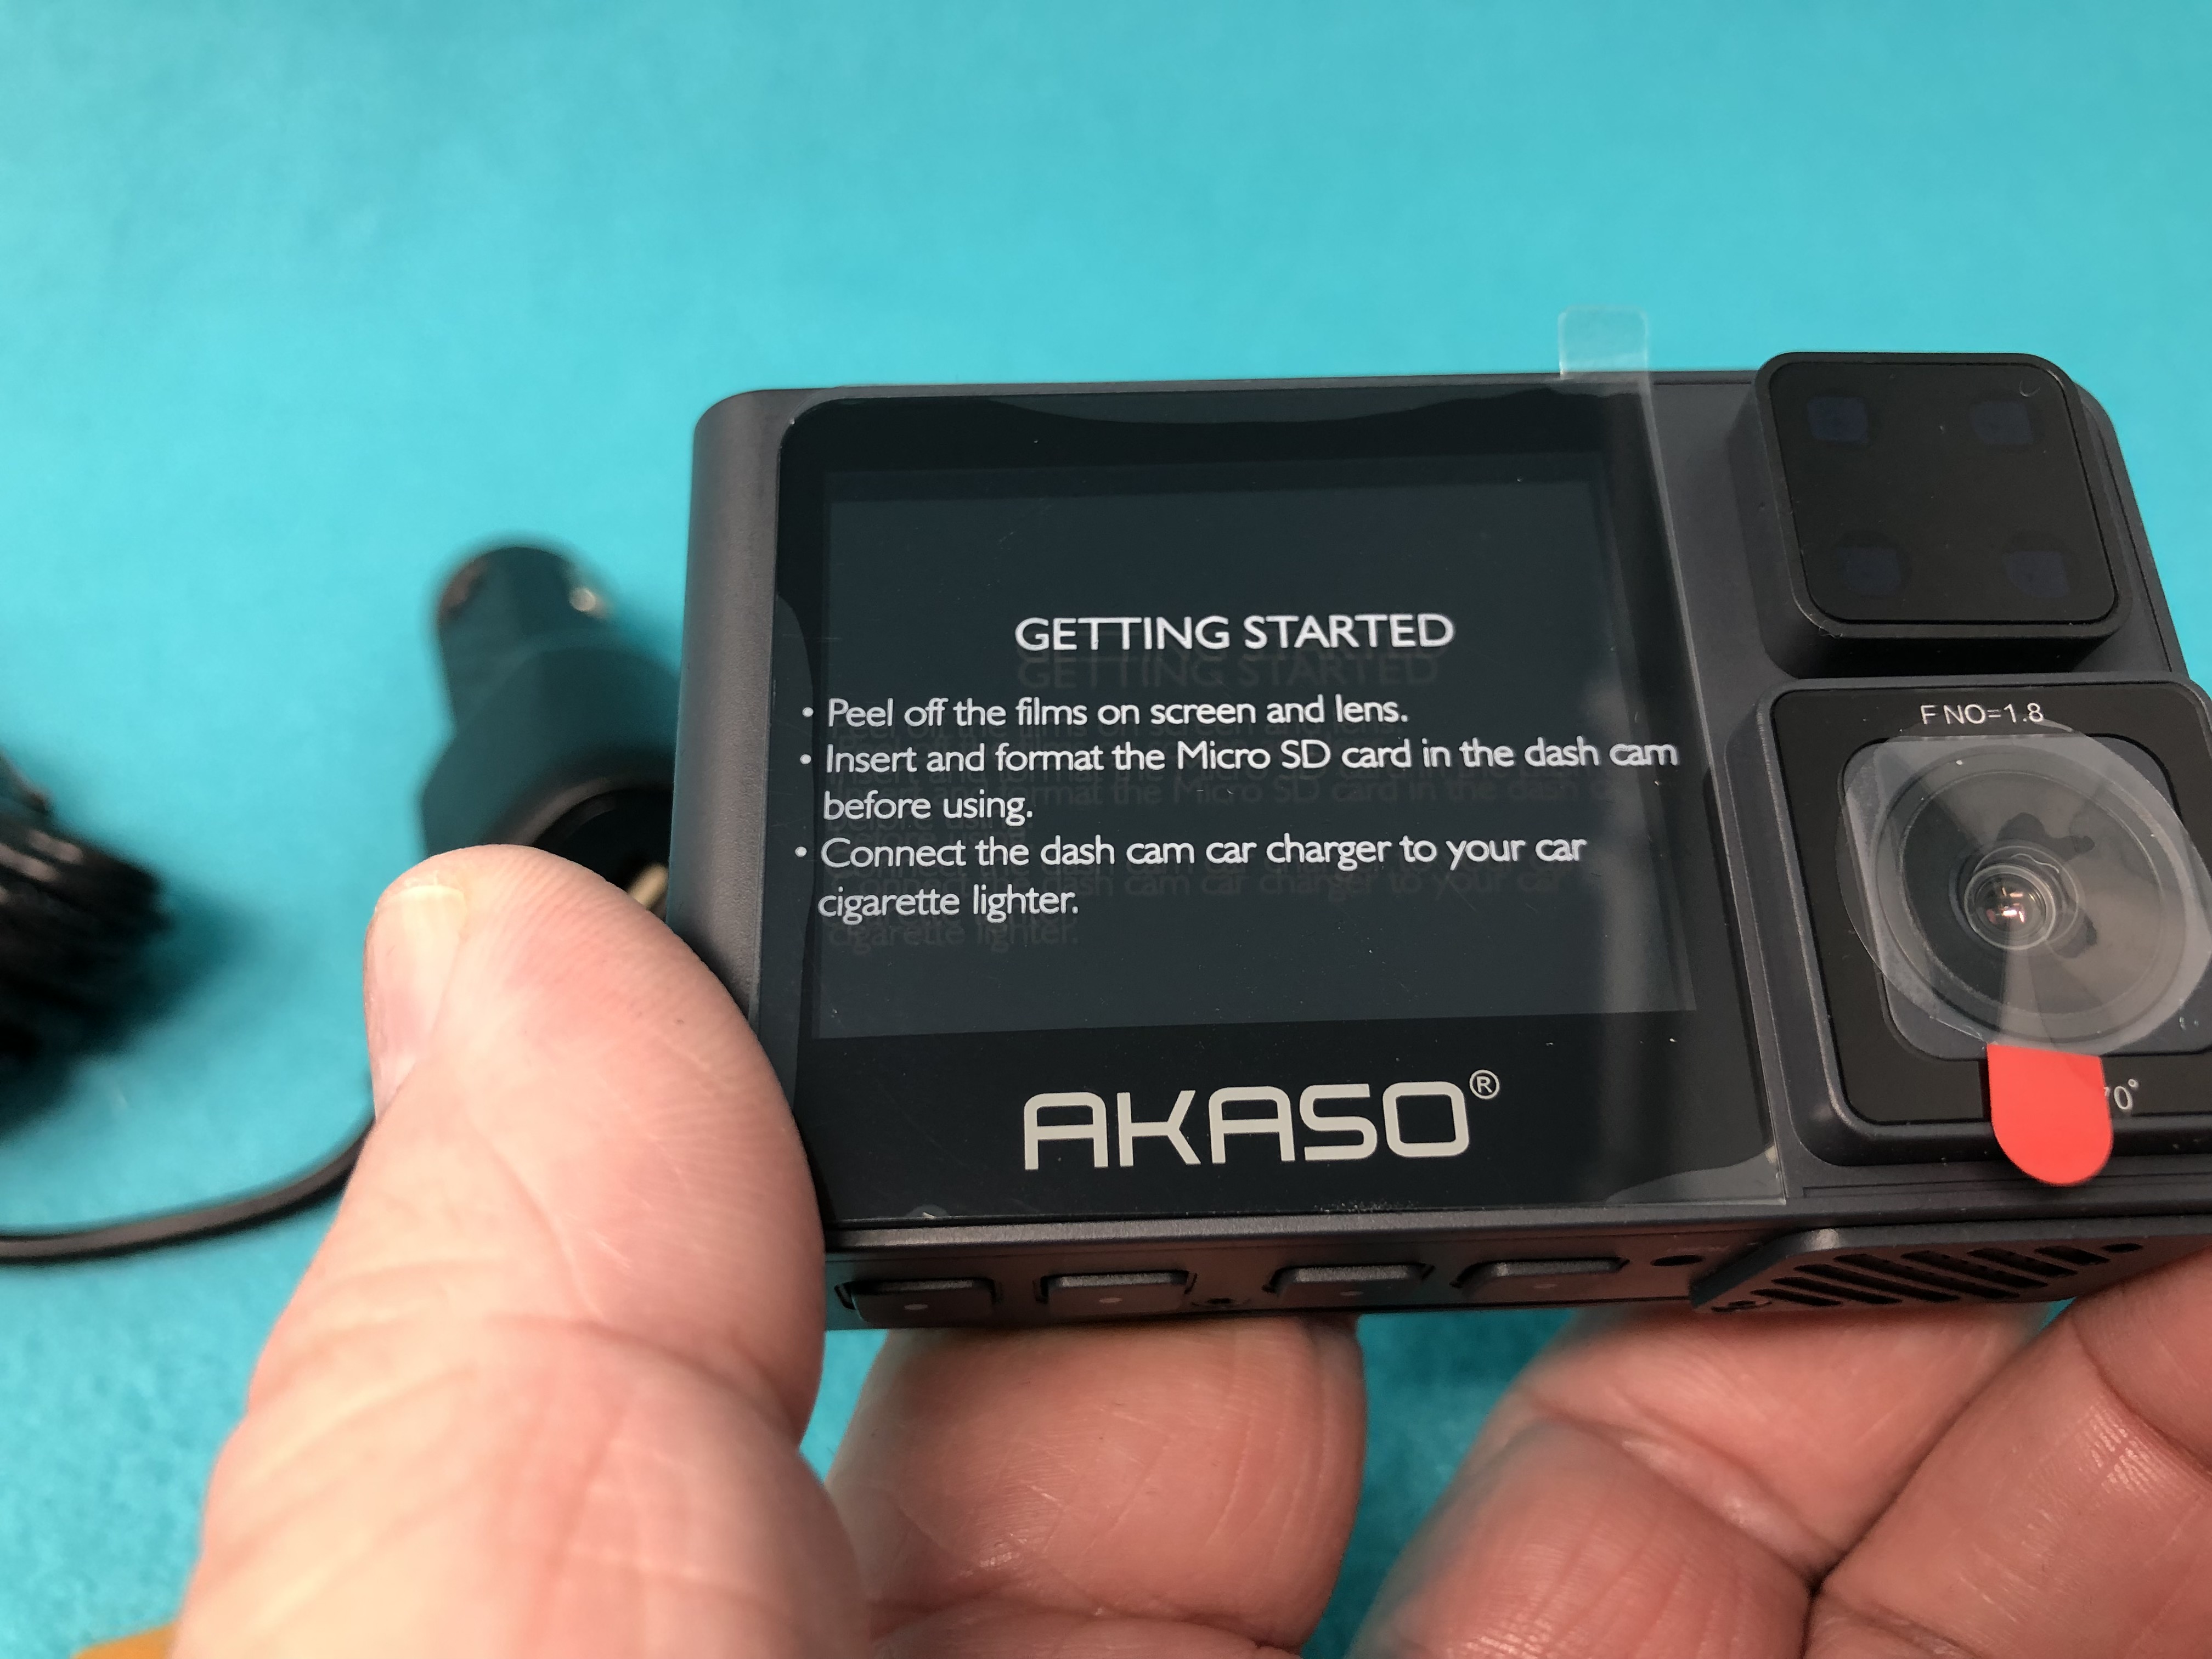
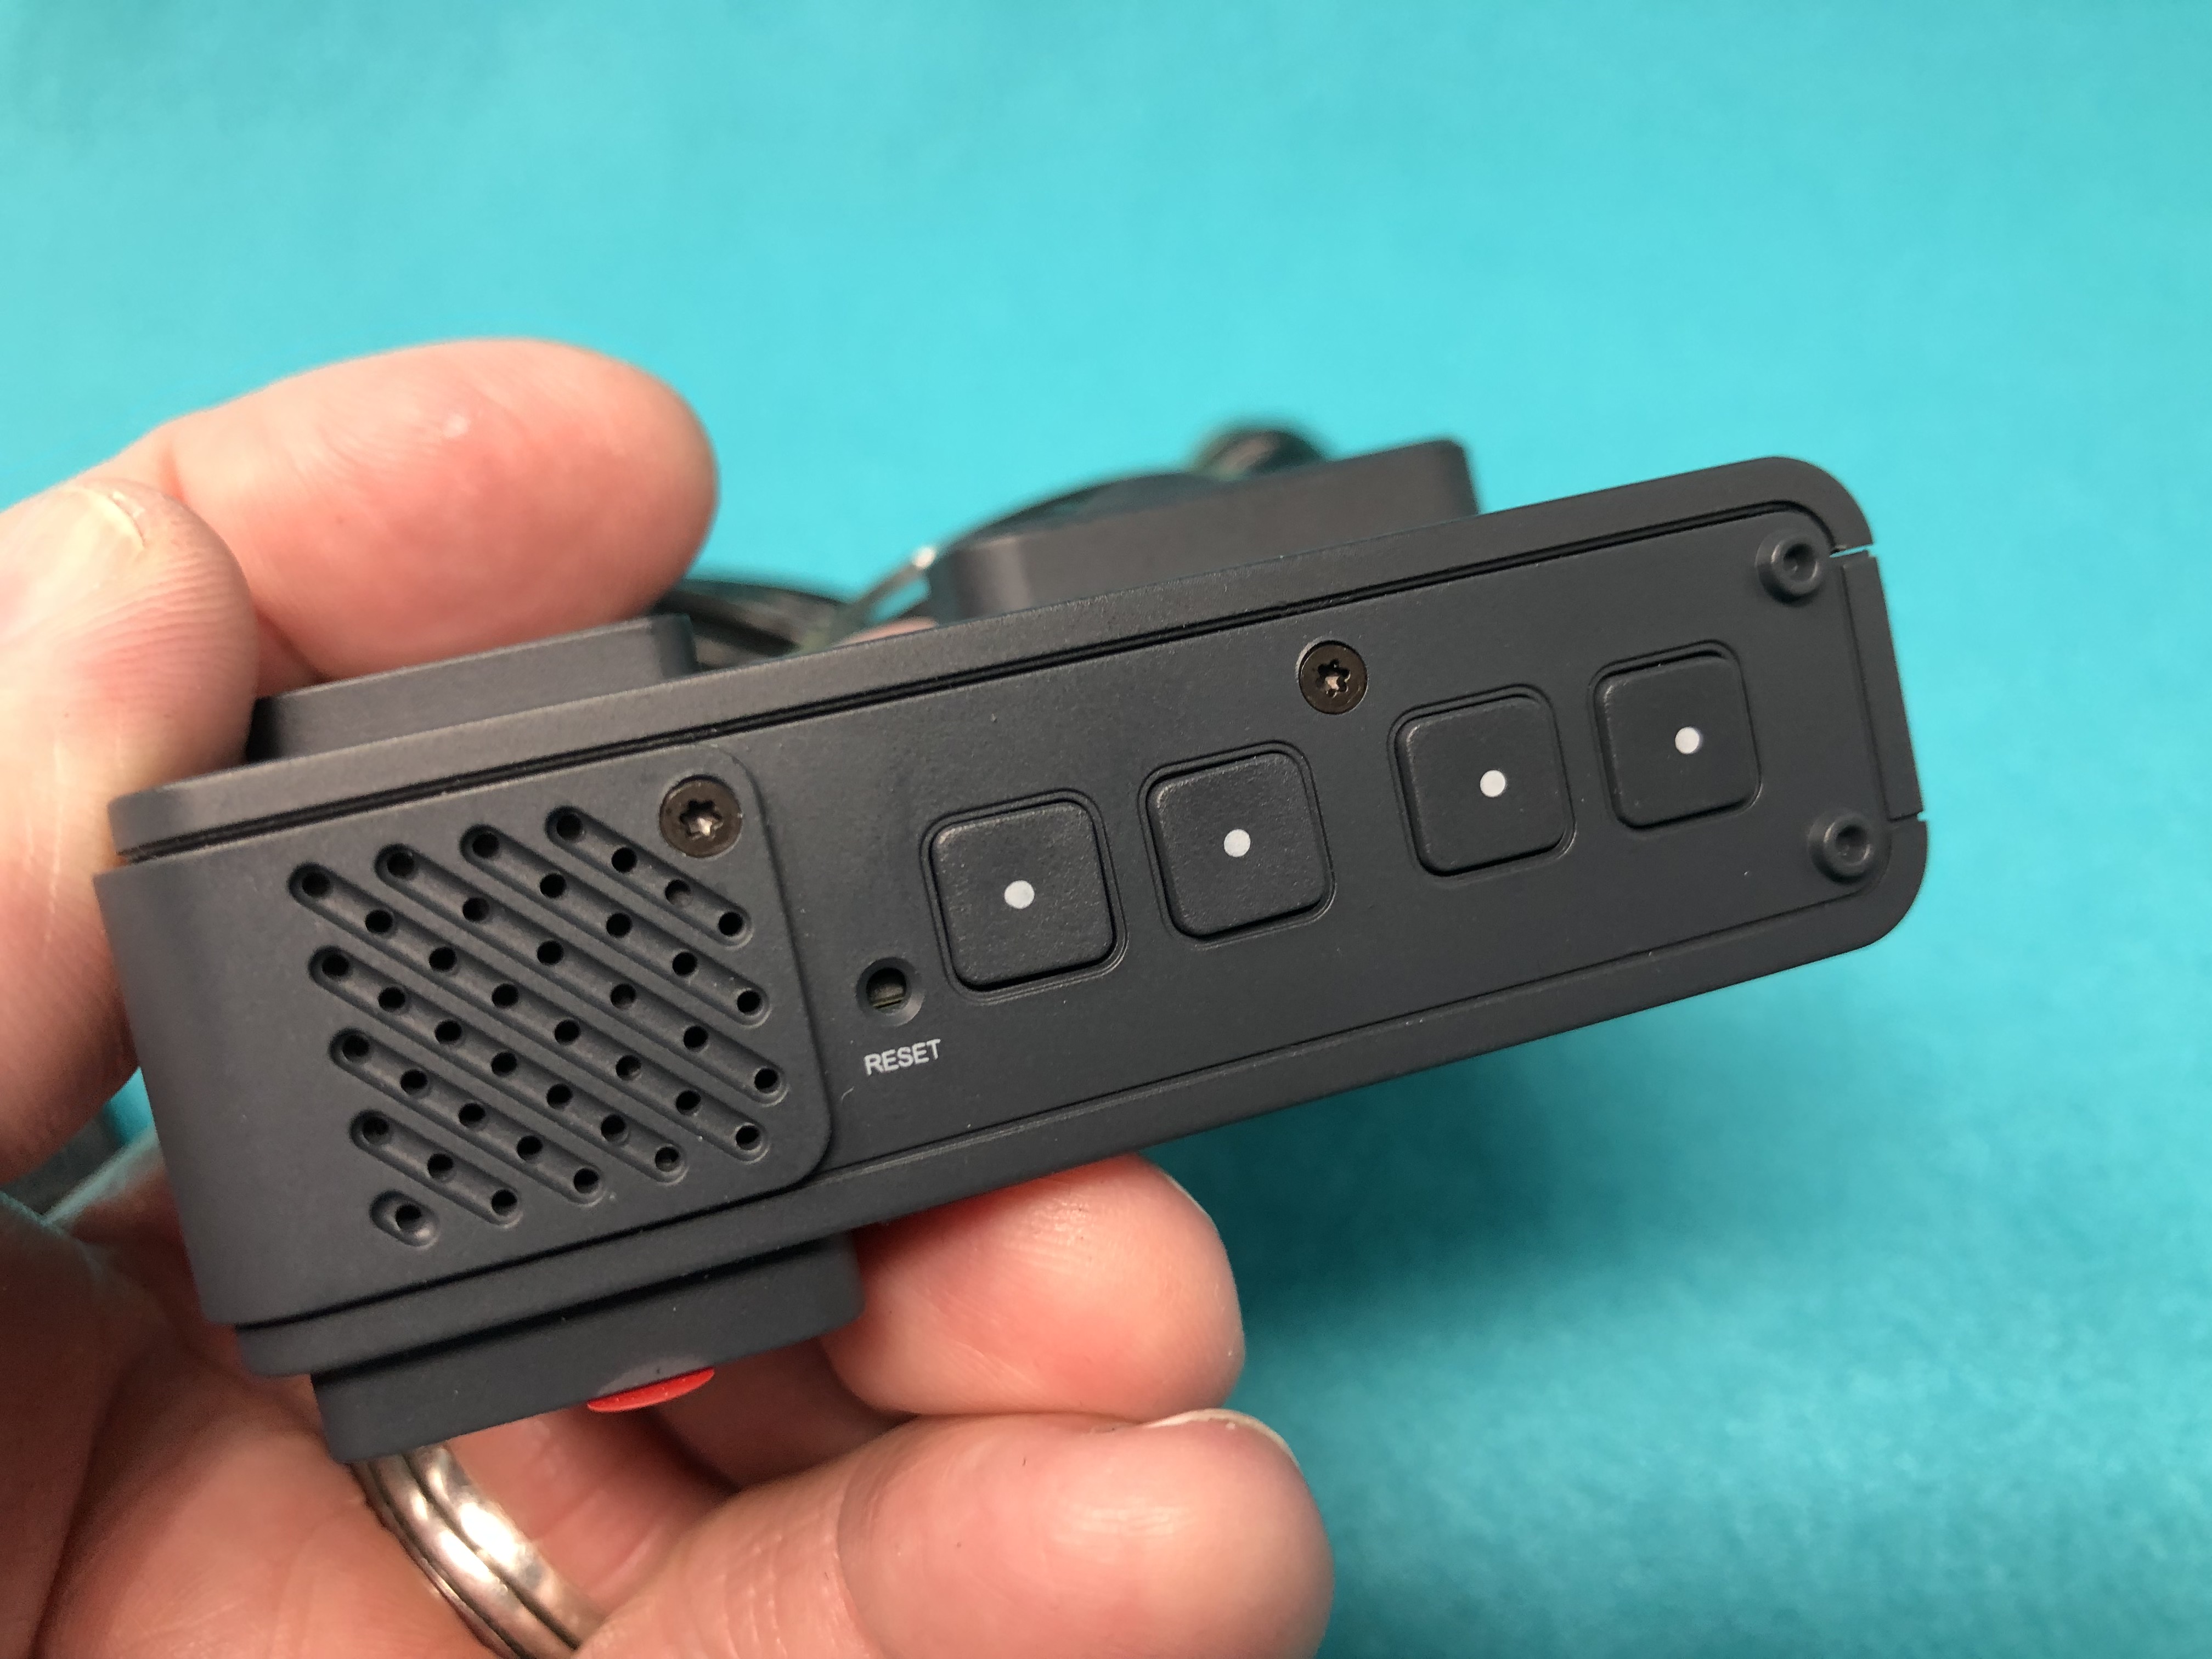
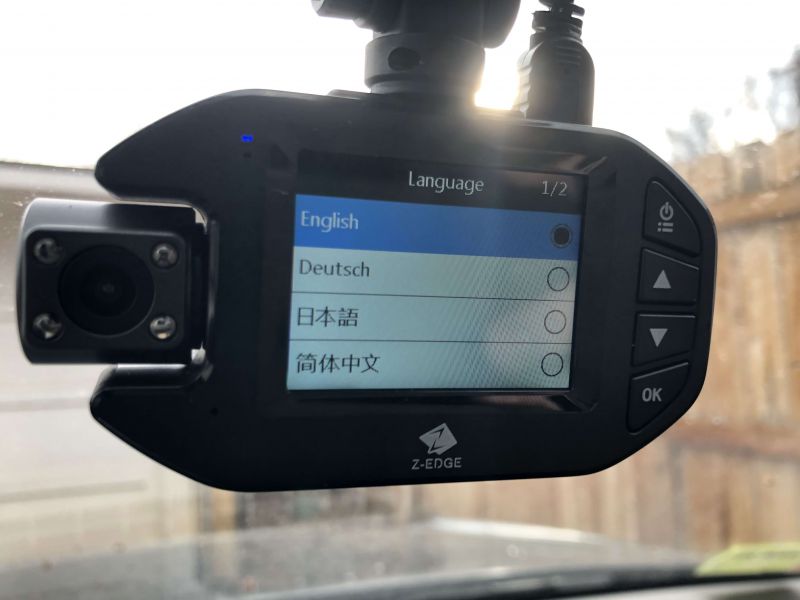
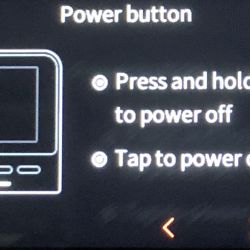
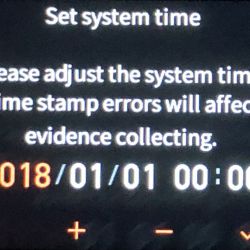
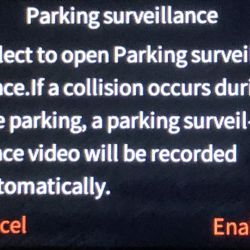
The instruction booklet is in the English language and gives a brief overview of the use. In addition, the camera and electrostatic mounts each come with screen protectors printed with instructive text. The camera screen protector indicates the function buttons and that the unit may be reset by holding the power button for 15 seconds. The electrostatic film protector describes the instructions for mounting the film and camera. The camera also provides some information upon the first use, but there is no way to revisit this information from a help submenu. The gallery below shows what it is like.


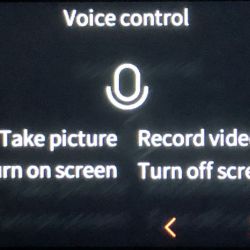
The website at the beginning of the book,  https://help.70mai.asia/278.html, is quite helpful and provides much more information than the booklet shipped with the camera.  Specifically, the website describes the voice control capabilities, the P vs N setting (PAL vs NTSC), the limited number of photos (100), and other items not mentioned in the booklet. (I suddenly long for the hundreds of pages that Microsoft Ofice included in the early ’90s.) One thing I couldn’t find any info on was what the 12V adapter said. The text is very hard to read amber on black and it is in Chinese. Good thing Google translate knows that this says “Dedicated power supply port.”

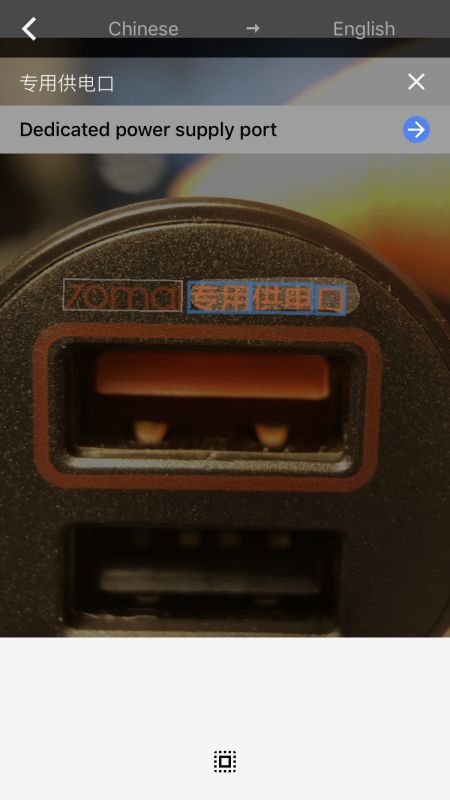
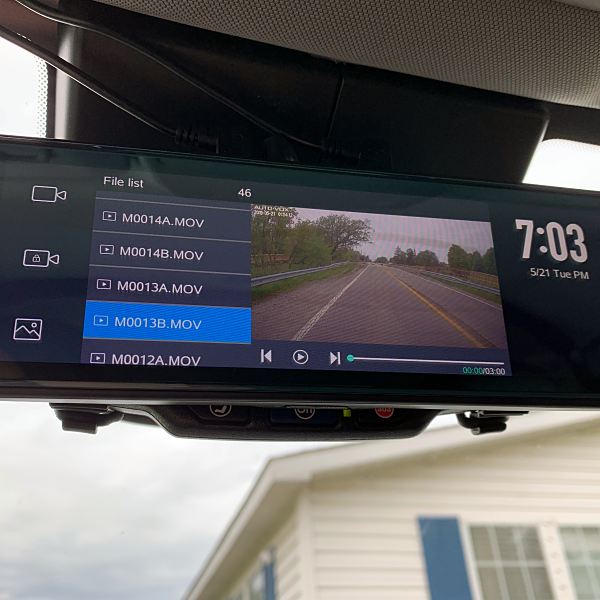
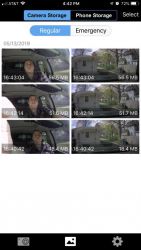
You will need to supply your own microSD card for the camera. The manual recommends a card that is 16 to 64 GB but I used a 128 GB card without issue and it was able to access the whole capacity. The camera records video in one-minute intervals and will delete the oldest video when the capacity of the memory card is nearly exhausted. The card capacity relates to how many minutes of driving record you wish to keep.  The card must be formatted in the camera and will have four directories of video storage: Normal video which is the looped record of the drive, Emergency video which is triggered by a hard acceleration during driving, Parking video which is triggered by the movement of the accelerometer after power is cut off, and photo storage. I was surprised to read that the emergency video is also looped. I would think that these videos should be persistent until the storage of the card is full.  The recordings are constant bit rate and each video has an audio track even when the audio is not recorded. The audio on silent clips is 1 minute of constant bit rate mono 44kHz 24bit sample.

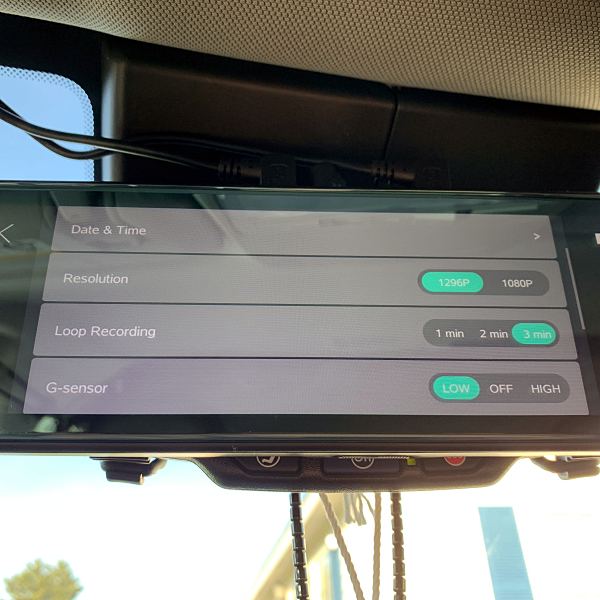
The camera is able to record video in 4 different resolutions. The higher resolutions are recorded in H.265, which may not be supported natively on all devices and the lower resolutions are recorded in H.264. Each video segment also has a preview video in 640×360 that is downloaded to the mobile app for preview. The total capacity for each video is identified in the table below.

resolution (pixels) codec Frame rate (1/sec) file size (KB)
2592×1944 H.265 30 163840
2560×1440 H.265 30 163840
1920×1080 H.265 30 122880
1920×1080 H.264 30 122880
1280×720 H.264 30 122880
640×360 H.264 30 20480

Photos are taken at the resolution that the camera is operating at. Each photo was stored in a 5 MB file. Even the highest resolution photo shouldn’t be more than 2 MB.

It seems based on this table that the incremental difference in the capacity required for higher resolutions is small based on the compression used and the way that video is stored on the card.  Apparently, the 128GB card I used was formatted with a 5120 MB cluster size.  I also tried a 32 GB card and it was formatted in the same way. The card is readable by a PC or Mac using an adapter.

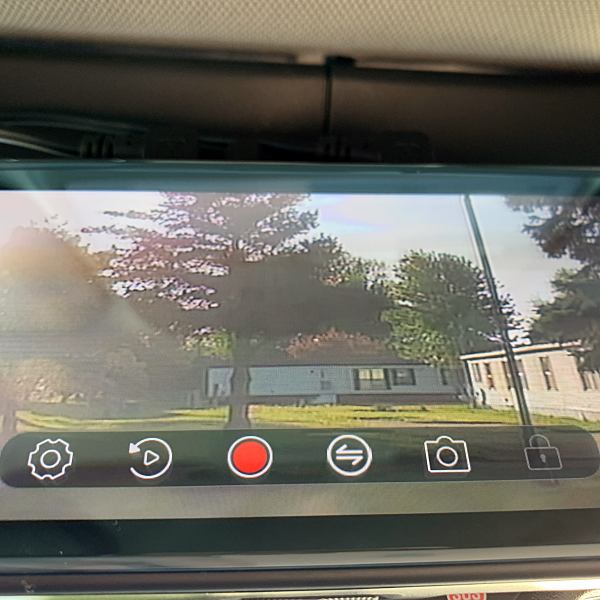
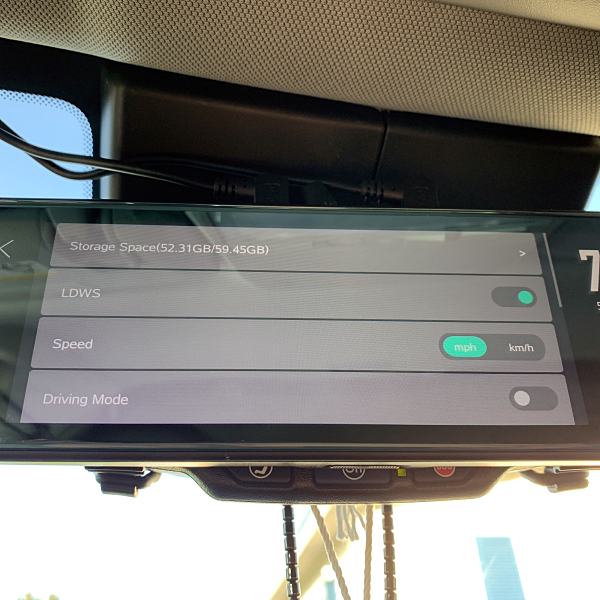
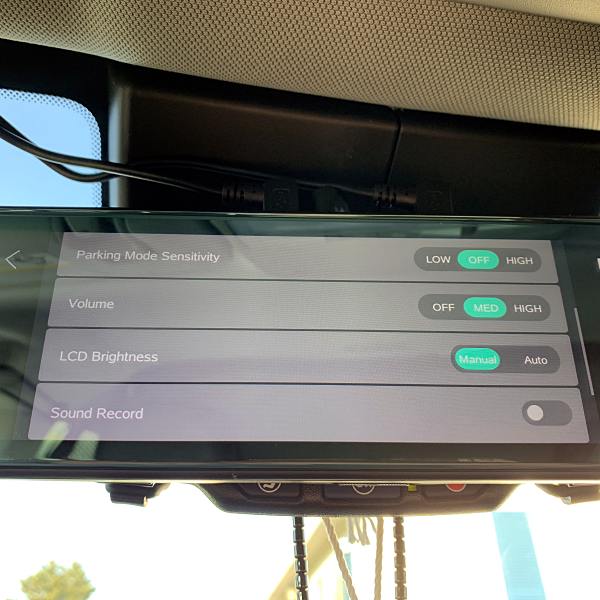
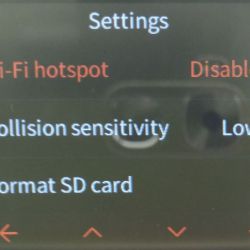
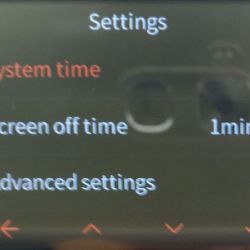
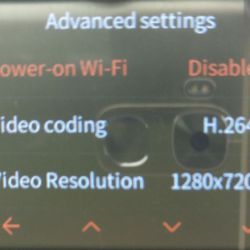
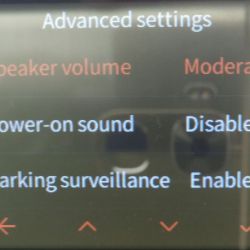
The operation of the camera is menu driven. I think that some menu items are in the wrong place, but here is the layout.


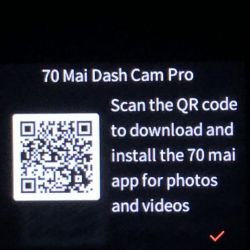
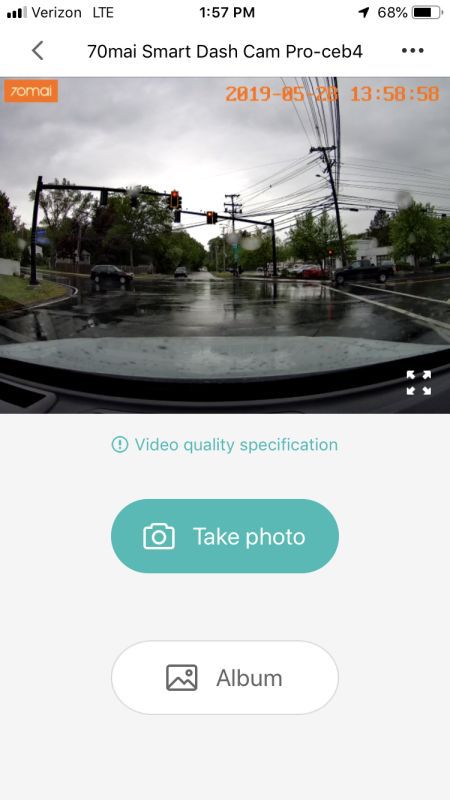
The camera app allows you to manage all of the 70mai gadgets. The app has a local album of videos and photos that you download to the app. The app also has the same info presented on the web page above. The app settings allow you to clear the app cache and provide feedback to 70mai. The main screen of the app is a preview window of the camera feed and allows the user to take a photo using a button on the app. The app pairs with the camera using a WI-FI access point.

Once the power is cut to the camera the camera will remain on standby. if there is any movement detected by the camera in this state it will record a video. The camera also records a video while the car is moving if there is sudden acceleration.

A de-fog algorithm sharpens video taken in snow, smoke or haze but without a way to turn it off, I was unsure how well it works.

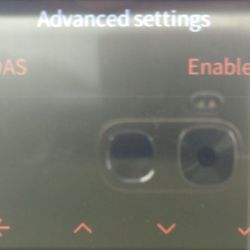
There is an optional GPS module that replaces the camera’s mount. The GPS mount enables a feature called Advanced Driver Assistance System, which gives real-time alerts when your car is leaving its lane or rapidly approaching a vehicle ahead. This feature didn’t work as well as my car’s built-in system. What I find frustrating is that the GPS isn’t used to EXIF tag the photos, label the files of the video or set the camera’s time. These should be minor programming changes that could have a profound benefit to understanding what happened on the road and when. One other item is that the operation is restricted to between 14 and 140 degF. Car’s interiors often reach conditions outside of this range and I’m not sure that the parking monitor will work in these extreme conditions.

Performance

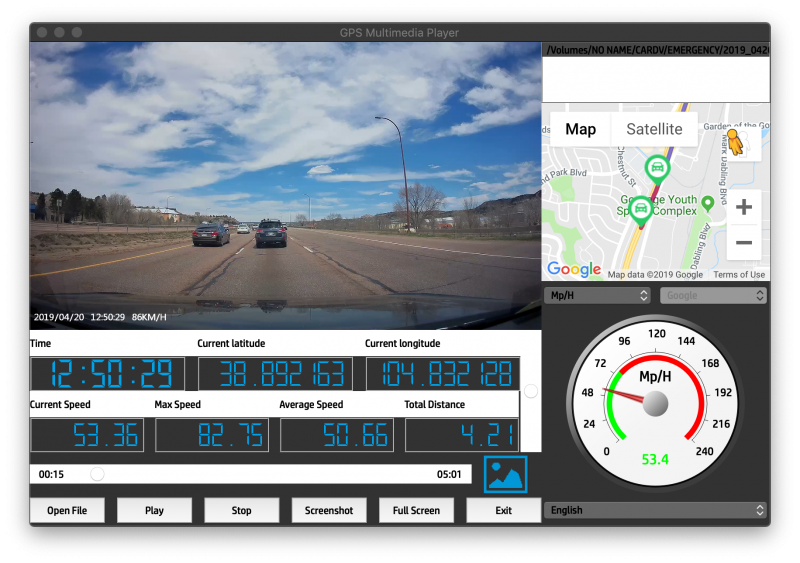
I’ve included a few videos of the performance at the links below. Overall the videos are clear. I think that the enhancement that the advertisement shows is more like CSI than reality, but license plates are visible and readable.

This is the manufacturer’s video:

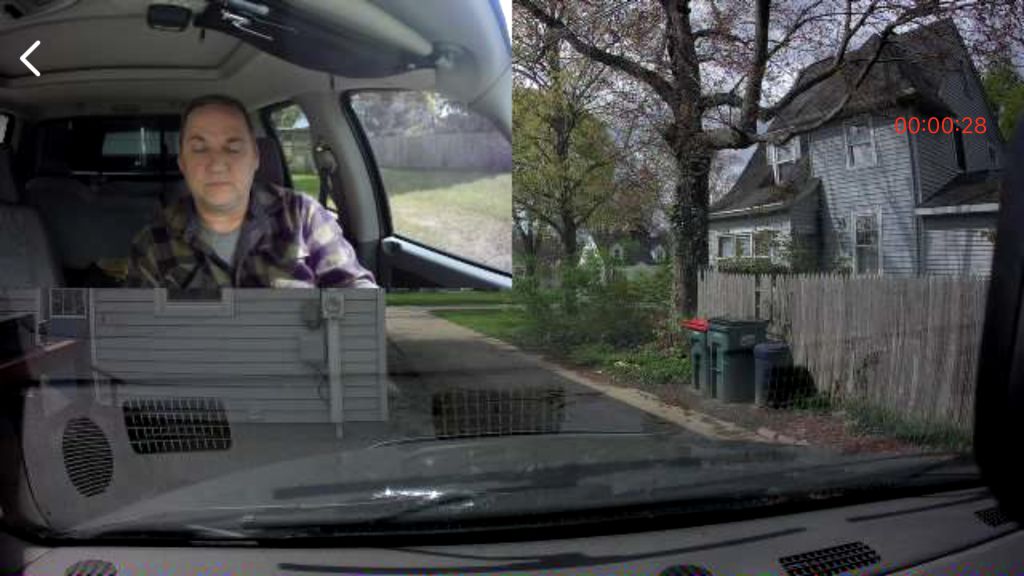
This is my video taken during the day at the highest resolution. The sun is setting to the left of the video but the glare doesn’t wash out the rest of the scene. I bet the couple who got in a collision had one of these cameras.

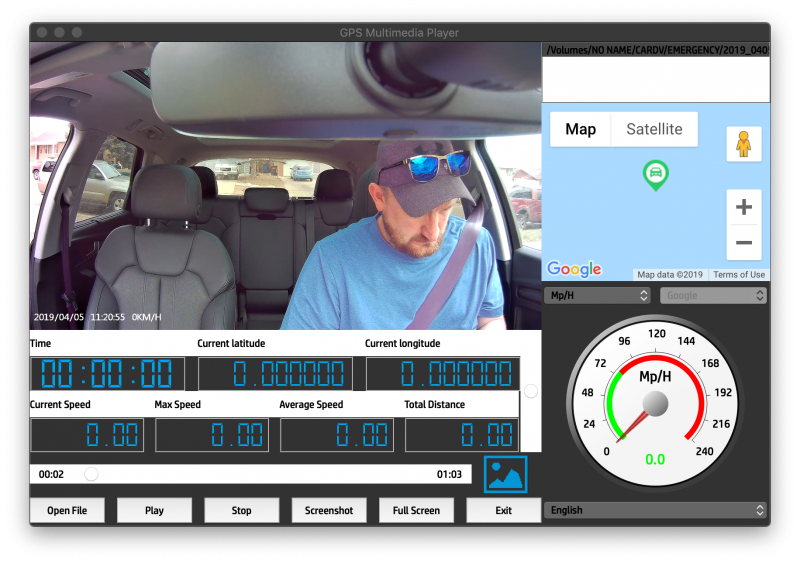
Here is another video that I captured taken at night. It is impressive how the sensor compensates when the headlights are turned off. It is actually brighter on the video display than it is through the windshield.

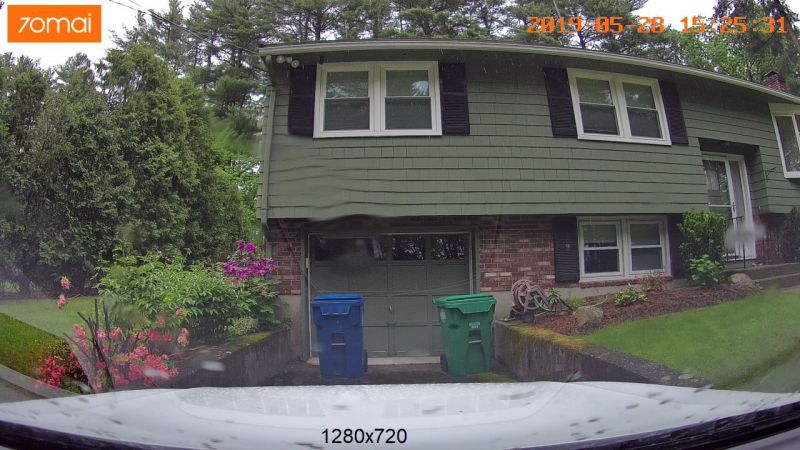
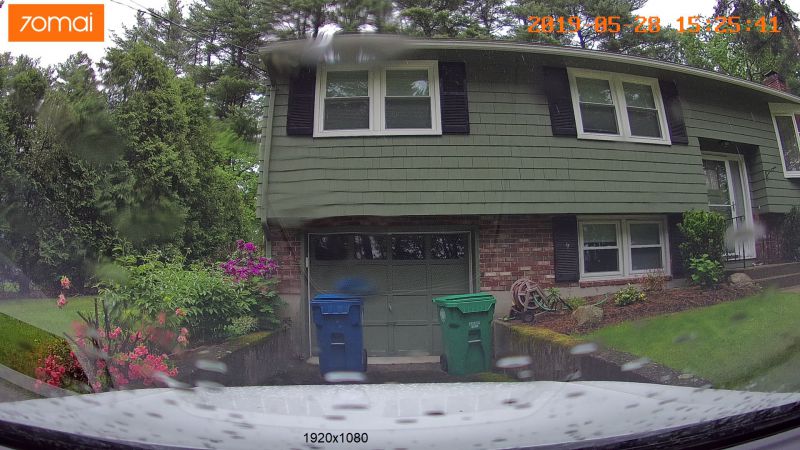
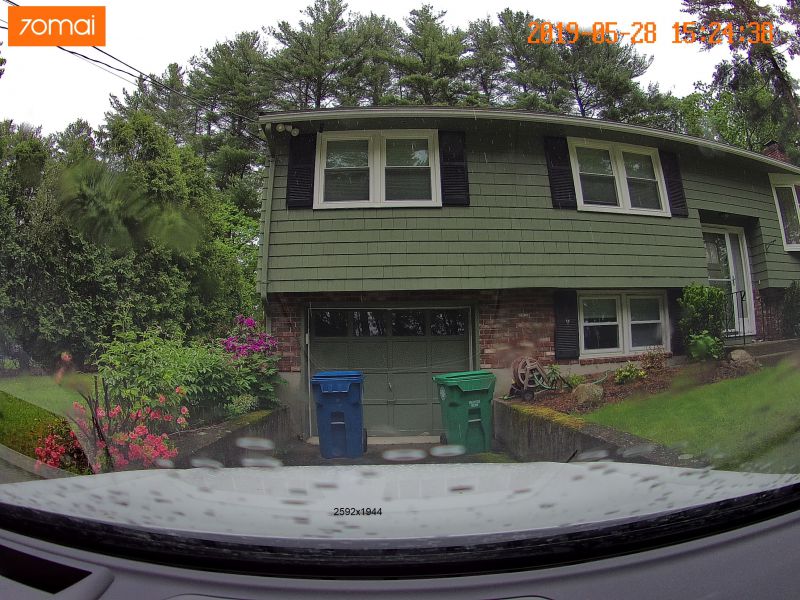
The images of my garage below show the different resolutions available. I added the resolution text but everything else is standard and not configurable.


What I like

  • Design
  • User interface (both verbal and button based)
  • App

What needs to be improved

  • ADAS implementation
  • GPS integration
  • Extreme weather operation
  • It is a bit difficult to get the microSD card in and out

Final thoughts

Ideally, the dashcam is the gadget that you won’t know you have until you really need it. This unit’s small size, easy function, and affordable price mean it won’t take up room in your car or burn a hole in your wallet.

Price: $75.97
Where to buy: Amazon
Source: The sample of this product was provided by 70mai.

Filed in categories: Reviews

Tagged: ,

70Mai Dash Cam Pro review originally appeared on The Gadgeteer on June 5, 2019 at 9:00 am.

Note: If you are subscribed to this feed through FeedBurner, please switch to our native feed URL http://the-gadgeteer.com/feed/ in order to ensure continuous delivery.

Auto-Vox X2 Streaming Media Mirror Dash Cam review

REVIEW – I’ve never reviewed a dash cam before. But with the terrible roads here in Michigan, and the increased number of distracted drivers on those roads, I thought it was time I did. Today I’ll be taking a look at the Auto-Vox X2 Streaming Media Mirror Dash Cam.

What is it?

The Auto-Vox X2 is a touch-screen streaming media mirror with a built-in dash cam and rear backup camera.

What’s in the box?

  • Auto-Vox X2 streaming media mirror
  • 2 sets of elastic attachment bands
  • Car charger
  • GPS antenna
  • Backup camera
  • Video cable
  • Lens cloth
  • Instruction manual

Hardware specs

Mirror:

  • Screen Size – 9.88-inches
  • Supply Voltage – DC 5-5.5V
  • Resolution – 1080P,1296P
  • Video – H.264 1296P@30fps+720P@25fps
  • Battery – Polymer lithium ion battery
  • TF Card – 64GB-128GB,Class 10(not included)

Front view camera:

  • Viewing angle – 140 degrees
  • Aperture Size – F2.2
  • Len Focus Type – Adjustable
  • Processor – High-definition HD image processor

Backup camera:

  • Viewing Angle – 140 degrees
  • Water-Proof – IP68 waterproof
  • Resolution – 720P

Design and features

The X2 is designed to fit overtop your cars existing rearview mirror. The front of the unit contains a 9.88” LCD touch sensitive screen.

On the back, there are attachment clips along with the front view dash camera.

The USB power port, TF card slot, AV port for the backup cam, and the GPS port are all located along the top of the monitor.

The power button is located in the center on the bottom.

The unit requires a MicroSD card (not included). It supports 64GB to 128GB. Note: make sure that you use a class 10 card which is meant for recording and playing back Full HD video.

Installation

The X2 attaches over the top of your cars rearview mirror using to elastic bands. It only took me a couple of minutes to strap it onto the mirror.

The most challenging part was running the various cables. However, after a bit of planning and some trial and error, I was able to run all 3 cables without much problem. And if I do say so myself, did a great job of hiding them too. 

I have a 2019 Chevy Trax which already has a backup camera. My reason for installing the X2’s rear camera was to use it in lieu of the rearview mirror. So I just mounted it inside the car using the 3M adhesive on the base of the camera.

Overall installation from start to finish was under 2 hours.

Display

The X2’s display has a 9.88” LCD touch-sensitive screen. The unit automatically powers on when you start your car and powers down when your car is turned off. To manually power the unit off, press and hold the power button for 3-seconds.

Time and date are shown in the upper right-hand corner of the display. In the lower left corner, a small compass icon indicates your driving direction.

A tap anywhere the screen brings up the Touch Screen Interface. This brings up six different icons. The Settings Menu, DVR video playback, Start/Stop video, Camera switching front/back, Screenshot, and Emergency Lock – Lock the Video as SOS file (will not be covered by Loop-recording).

The Settings Menu allows you to select and customize all of the X2 features. (Note: You need to pause recording before entering into the menu.)

X2 can be used in two different ways while driving. In Driving Mode the camera display is turned off, and it functions as a standard analog mirror that displays speed and direction information. 

If you choose you, can have the screen display the image from the rear cam. I really like this feature, and I use it almost exclusively. Using the rear camera, you get a full 140º wide angle real-time image. It almost totally eliminates the cars blind spots. And you feel like you can see everything behind you. Much better than my cars rear view mirror.

You can also toggle between the two modes. When in Drive Mode tapping the screen will bring up the rear cam view. You can go back to DM by pressing the power button.

The Lane Departure Warning System(LDWS) will sound an alarm when your car is veering into another lane. You can enable this feature in Settings.

I found the LDWS to be hit or miss. Sometimes I got a warning others times I didn’t. So I just turned the feature off.

Overall the display is very nice. The image is clear and bright, and the touch-screen is very responsive. My only complaint, it picks up a lot of glare, especially on sunny days. However, I was able to alleviate some of the glare by tilting the mirror.

Cameras

The front camera is mounted on the front of the unit. The camera has two resolutions, 1080P, which is the default resolution & 1296P. I set it at 1296P, and the image is very good. It’s bright and crystal clear so you can see details like license plate numbers. It also gives you a nice wide 140º viewing angle.

The rear camera has the same 140º wide viewing angle. Unfortunately, it has a disappointing 720P resolution. The image quality is still good, but not anywhere near as clear as the front camera. The rear camera is also IP68 waterproof. You can see both cams in action in the videos below (Front cam top/Rear cam bottom).

Both cameras do a good job of recording at night. The only issue, there’s blooming around the headlights of approaching vehicles. See the video below (Front cam top/Rear cam bottom).

You can also tilt both cameras up or down by sliding your finger up or down on the screen.

Video recording features

Video recording automatically starts the moment the unit is powered on. The unit uses Loop recording, which can be set at 1,2 or 3 minutes. With Loop recording enabled, you never have to worry about buying additional SD cards when capacity is full.

Parking Mode protects your car when it’s parked. When the DVR detects any collision, it will start recording for a short period of time. I tested it by slamming my cars door. When I turned the unit back on and went to the DVR, there were 2 short videos saved in the Emergency Video section. One for each camera.

Auto-Vox does recommend to hardwire the unit if you want to use Parking Mode. Unfortunately, they don’t provide you with the Hardwire kit. They can be purchased on Amazon for $19.

If you get into a collision, the units G-sensor will automatically lock the video, which means the video can’t be overwritten. It’s saved as an Emergency Video on the SD card and the units DVR.

The DVR function allows you to view all recorded videos directly from the display. You can view regular, emergency videos and screenshots. My complaint with the DVR is the video files are not displayed by date or time, which makes it difficult if you’re looking for a specific clip.

You can also playback videos from the SD card on your computer. I was able to view them on my MacBook Pro. Unlike the built-in DVR, the files are listed with date and time. Note: If you want access to the videos GPS info you must be using a PC.

What I like

  • Touch Screen is easy to use / very responsive
  • Both cameras have a good picture
  • Being able to use the rear camera as the rearview mirror
  • Great wide angle view from the rear camera

What needs to be improved

  • LDWS doesn’t work properly
  • Blooming from headlights at night
  • Can’t access video GPS info on my MacBook Pro
  • SD card slot placement makes it hard to remove the SD card

Final thoughts

On the surface, the Auto-Vox X2 may seem a bit pricey. But you not only get a dash cam, but you also get a backup/rearview camera and a nearly 10″ touch-screen monitor. I feel safer just having it installed in my car.

Price: $259.99
Where to buy: Amazon
Source: The sample for this review was provided by Auto-Vox.

Filed in categories: Reviews

Tagged: ,

Auto-Vox X2 Streaming Media Mirror Dash Cam review originally appeared on The Gadgeteer on June 2, 2019 at 9:00 am.

Note: If you are subscribed to this feed through FeedBurner, please switch to our native feed URL http://the-gadgeteer.com/feed/ in order to ensure continuous delivery.

Akaso Trace 1 dash cam review


REVIEW – I have tested several dash cams lately. Most have been OK, but cameras in general are improving at quite a clip. Witness the current dash cam under review, the Akaso Trace 1.

What is it?

A small box with both a front- and rear-facing camera that takes high-quality videos, with time stamping, and fantastic low-light resolution.

What’s in the box?

  • Camera unit
  • Suction mount
  • Power plug with captive miniUSB plug and pass-thru jack
  • Mounting clips and tool
  • Quick start guide

Hardware specs

(From company website)

  • FRONT AND INSIDE RECORDING: Trace1 dual dash cam is equipped with dual lenses to capture exterior and interior of the car simultaneously at 1080p30 (340-degree field of view combined). When inside recording is not needed and turned off, the front lens records 1080p60 for crisper and smoother image.
  • UNPARALLELED NIGHT VISION: Thanks to the state-of-art Sony STARVIS at both lenses, which extends the sensitivity of sensor beyond visible light to near-infrared range, and WDR technology, Trace 1 dash cam excels capturing every detail of your surroundings regardless of lighting conditions.
  • G-SENSOR & PARKING MONITOR: Loop recording comes standard, and built-in G-sensor locks the recording clip to ensure data integrity when collision gets sensed. Parking monitor protects your vehicle even when parked – it enables the car dash cam to turn on if any impact is detected, record for 30 seconds and turn off again.
  • OTHER FEATURES: Trace 1 dash camera supports up to 128GB of mircoSD storage (class 10 or above and at least 16GB recommended, memory card NOT included); efficient heat dissipation design; internal microphone with on/off option; auto LCD off to save power.
  • PERFECT DASHCAM FOR EVERYONE: With so many tech and safety features packed into an affordable package, this dash cam front and rear is a perfect option to everyone – beginners and seasoned taxi and rideshare (Uber, Lyft) drivers alike. All AKASO car camera – dash cam comes with 30-day hassle free return and 1-year limited warranty.

Design and features

The Trace 1 is small, even by today’s miniaturized standards. At 3” x 1.75” x 1”, it’s barely as large as an action camera. There’s a 2” (diagonal) screen on the rear side, and an f1.8 camera with a .5” diameter lens pointing out both sides. On the rear, there’s a 4-element IR light that allows for great night-time video of the car interior, as well as your blind spots to either side. Both cameras sport a 170º field of view.


The suction mount has a sticky silicone gripper 2.25” in diameter, with a quarter-turn locking mechanism. I only had it fall off once, after sitting out in the sun all weekend. When I brought it in for this review, however, I noticed that I had left the protective film on the silicone! It wouldn’t have slipped at all if I’d removed that film and actually stuck the bare gripper to the glass.


There are four function buttons across the bottom, as well as an on-off button above the card slot on one end. The miniUSB power port is on the top, and there’s a pin-hole mic between the card slot and the power button.


There are various protected grills/vents on several sides, at least some of which is for sound. For a tiny little unit, it’s easy for me to review my last drive home, with a podcast playing, over the noise of lawnmowers and kids that I’m hearing on my back deck writing spot.
The default setting for the firmware is for English, with no parking mode, incident mode (where the clip being recorded will be locked if a jolt or collision is detected based on the motion sensor), with a time-stamp on the videos. This is pretty standard. The four buttons across the bottom of the unit change function when you press them. They are used to replay captured video, format the data card, change the date, turn off the beeping sound, etc.

Setup

Setup of the Trace 1 was minimal. Other than installing a TF storage card (not included), affixing the suction cup mount to the windshield and routing the wire and attaching it to a power plug, there’s really nothing to it. (I didn’t set the time/date at this point, which shows in the video clips.) By default, it’s set to turn on when it has power and stay in “park” mode as long as the battery lasts. Park mode can be set to three levels of sensitivity (as can the normal “incident” mode). This will start recording video and audio if there is a jolt or crash to the vehicle. You can select the length of videos, and in Park mode, the camera will record video until there is no more motion, and then finish the clip. This will allow you to view what happened in case of a parking lot crash where someone hits your car, then drives off.

Here’s a short clip from my exciting commute into work. Note the car passing me on the left at about 7 seconds, which shows in the front camera after the view transitions from rear to front view.

Performance

What I like

  • Single unit takes front and rear-facing video
  • 170º coverage on both front- and rear-facing cameras totals 340º of coverage
  • Both cameras capture high-def video
  • Light and small
  • Runs on battery power for a good while.

What needs to be improved

  • I can’t think of anything.

Final thoughts

As noted in previous dash cam reviews, I have a very short commute and most drivers obey the rules of the road and tend to not try to make me hit them for insurance fraud like in some countries. But, given the nature of changes in our society, there seem to be increasingly many incidents that could be helped by having a video camera on and running all the time. If you’re feeling that vibe, this is a pretty nice little unit to consider.

Price: $99.99
Where to buy: Amazon
Source: The sample of this product was provided by Akaso.

Filed in categories: Reviews

Tagged: ,

Akaso Trace 1 dash cam review originally appeared on The Gadgeteer on May 30, 2019 at 9:00 am.

Note: If you are subscribed to this feed through FeedBurner, please switch to our native feed URL http://the-gadgeteer.com/feed/ in order to ensure continuous delivery.

myGEKOgear OwlScout dual dash cam review

REVIEW – I’ve reviewed a few dash cams in the past, but this time I tried out the myGEKOgear OwlScout dual dash cam. I’ve reviewed a few dash cams from this company, but none with dual built-in cameras. Let’s see how this one performs.

What is it?

The myGEKOgear OwlScout dual dash cam is a dual camera dash cam designed to record video of both the inside and outside of your vehicle simultaneously.

What’s in the box?

  • OwlScount Camera
  • Suction cup mount
  • Car charger plug and cord
  • Micro-USB Cable
  • 16GB Micro-SD card
  • Quick Start Manual


Hardware specs

Recording Resolution: 1080P + 1080P 30FPS
Imaging Sensor: Sony Exmor, Infrared Night Vision
Display Size: 2.7″ LCD
View Angle (F.O.V.): 145°+145° (F+V)
Max. Capacity of microSD card: 16GB microSD included
Batteries Included: 170mAh Li-ion battery embedded
Automatic Incident Detection (G-Sensor): Yes
Loop-Cycle Recording: Yes
Built-in Wi-Fi: Yes
Integrated Microphone: Yes
File Format: .mp4
Dimensions: (H x W x D) 3” x 3.7” x 1.3”

Design and features

The myGEKOgear OwlScout dual dash cam is a suction cup mounted dash cam that features a large 2.7″ LCD screen and both front facing and rear facing cameras. At the heart of each camera is a Sony Exmor imaging sensor that provides great video in both day and night conditions. The rear facing camera features infrared illumination. Both cameras feature a 145 degree field of view. Each camera’s video is saved to separate files on the memory card.


When recording video the rear facing video is displayed in the upper left quarter of the screen, allowing for easy positioning of the camera without having to press any buttons.

Screen capture from smartphone app

The micro-USB power cord is a welcome feature that allows you to use the provided car charger plug, or your own cable as you desire. A 170mAh embedded battery provides enough power to save video files when the camera is powered off via the ignition, or during a power loss in the event of a crash. In the event of a crash, the G-Sensor will detect the impact and automatically save the video so that it is not overwritten.

The OwlScout comes with a 16GB micro-sd card and features the ability to loop-record. Loop recording will save the video in 3, 5, or 10-minute clips, overwriting the oldest clips when the card is full.


I found the integrated microphone to be surprisingly good. The audio in my sample footage (below) is directly from the camera. I think the microphone should work great for capturing all conversations in the vehicle.

The camera has three modes: Video (dash cam), Photo, and Album. Photo mode takes up to 12MP images, and the Album mode is to view and playback photos and videos.

The OwlScout also has built-in Wi-Fi for connecting to the camera via an iPhone or Android smartphone. I found the app to be a bit limited, but sufficient to view and transfer videos or view live video. I did find though that the settings in the app would not correspond to settings that were already set in the camera, and the camera would revert some settings after the app was used. For example, I had the recording loop set for 3 minutes, and after going into the app and then disconnecting, the camera then showed a 10-minute loop interval.

There is a parking monitor feature that can be turned on which will start recording when an impact on the vehicle is detected.

I do like how the videos that are either automatically saved by the G-Sensor or by manually pressing the lock button are saved to a separate folder on the SD card, as well as accessible from the “Emergency” tab of the album view in the app.


The GPS logging feature mentioned on the website feature list was nowhere to be found in the camera or the app despite there being a GPS icon on the screen.

I did find that the playback operation was a bit confusing as to which button did what, such as play, fast forward, etc. I also found that after switching from video to photo to the album (playback) and then back to video, the dash cam video did not automatically start recording until I clicked the OK button. I lost quite a bit of video because of that. I think it should always revert to recording after a certain period of time when you are in video mode.

Here’s some sample video from the OwlScout camera, along with a few comments as I was driving. The video is unprocessed except that I overlayed one video on the other and spliced the 3-minute clips together. Other than that no video or audio editing was done.

What I like

  • Simple to use menus
  • Easy to see buttons
  • Great microphone
  • Wi-Fi connection with a smartphone
  • Dual Cameras
  • Range of motion for mount
  • Micro USB connection
  • Well named file names in the following format: yyyy_mmdd_hhmmss_001A

What needs to be improved

  • Price – a little high for the feature set
  • Confusing playback controls
  • GPS logging feature missing from app

Final thoughts

Overall the I really liked the video display and its size, and the video quality from this camera was pretty good. The audio captured was fantastic. I think the price might be a little high for the feature set, as some cameras have more features, but may not have video as good as this one.

Price: $199.99
Where to buy: myGEKOgear
Source: The sample of this product was provided by myGEKOgear.

Filed in categories: Reviews

Tagged: ,

myGEKOgear OwlScout dual dash cam review originally appeared on The Gadgeteer on May 20, 2019 at 11:00 am.

Note: If you are subscribed to this feed through FeedBurner, please switch to our native feed URL http://the-gadgeteer.com/feed/ in order to ensure continuous delivery.

Z-Edge Z3Pro Dual Lens Car Camera review

REVIEW – Dash cameras have almost reached “necessity” level these days. I won’t be surprised to see them become standard equipment much the way back up cameras have in the past couple of years. They provide security and protect you in case of an accident or even provide a little entertainment should something odd happen while out on the road. Last Christmas, my mom got me a camera for my truck and it’s been very useful so I jumped at the chance to review the Z-Edge Z3 Pro dual lens car camera to use in my wife’s car.

What is it?

The Z3Pro is a windshield mount car camera that has a forward and rear facing camera to capture both the road in front of you and the view of the interior of the vehicle.

What’s in the box?

  • Z-Edge dash cam
  • User Guide
  • USB Data Cord for downloading from mount to PC
  • USB Power Cord
  • Warranty Offer
  • Micro SD Card 32 GB
  • Windshield Mount
  • Power Adapter
  • Sticker Clips for power cord
  • Removal Tool
  • Camara

Hardware specs

The camara is a full HD 1920 x 1080P WDR (wide dynamic range) with a 150 degree field of view. The display is 2″ diagonal measurement LED screen. The camera also has a microphone that will record the audio if you choose.

Design and features

The Z3Pro provides an advanced camera for both the front and rear facing lenses, providing full HD in both directions. There are a few optional features to deactivate or adjust if you prefer: Motion Detection, Vibration Detection and Loop Recording. As is fairly standard these days, the loop recording uses the 32GB of available memory to record and then re-record continuously over the oldest unprotected data. Therefore, if you have something that you want to keep, you’ll need to either “protect” the file or download the file to a PC somewhat quickly. You can adjust the settings to record in 1, 3 or 5 minute segments. Motion Detection will activate the camera, even while the vehicle isn’t in use, to record motion detected outside the car. Vibration Detection will also record a snippet if the camera picks up the vehicle/camera being moved or shaken while not in motion – for instance, if someone is trying to break into your car or if your car is hit while parked.

As you start and turn off your car, the camera powers on and off as it’s provided power. Additionally, the default settings have the display showing the front view and then a picture-in-picture style display showing the rear facing camera. You do have the option to show only the front facing camera on the display, however, it will still record both cameras while in use. It does save each file as a FRONT and BACK recording. Even while recording, the display will turn itself off to conserve energy but can be woken up with the touch of one of the buttons.

The camera has 4 IR LED lights and supports night vision recording as well, so even in low light or night time driving, you’ll still get a quality recording. Additionally, the camera records GPS data so when you playback the videos on a Mac or Windows PC, it will display the data as well as your location on Google Maps. I would love to be able to show you this, however, after downloading the software on multiple computers, I could not get the software to open any of the files.

Finally, the rear interior view is ideal for those who use their vehicles as a ride-share vehicle – however, I don’t know the ethical ramifications of recording passengers with or without their permission so I won’t get into this topic in this review.

Setup

The initial set up involves taking the product components from the box and assembling the camera, mounting hardware and cord to prepare the camera to be mounted in the car via the simple suction cup mount common to GPS and dash cameras.

Then you follow a simple menu to set up the language, date and time settings.

Finally, you run the power cable up and around the windshield in the path you desire to get the power cord to the USB power port on the provided power adapter that you plug into your standard vehicle power port.

Performance

The camera has performed as expected throughout the three weeks it has been in use. It provides recordings of our trips throughout the city and occasionally picks up on movements while parked in our driveway or in parking lots – typically someone walking to their vehicle along side or in front of our car.

Unlike the camera I have in my truck, this camera does not have wifi or an app to access the videos. This then requires you to either remove the micro SD card and use an adapter to plug into your PC or take the entire camera off the windshield mount and plug into your PC via the provided USB data cable. If you find yourself in an accident or witness to an accident, you do end up then trying to show anyone the video on a small 2″ screen rather than being able to immediately download to your phone and share with officials or others involved in the accident.

The menu buttons take some getting used to as well. On many occasions, while simply trying to navigate the various menus we took unintentional selfies, which while hilarious was also rather frustrating. It would be highly advisable to keep the user guide in the vehicle, as there are also many different symbols that pop up on the status bar across the top of the display.

Finally, the performance of the software and interface with the camera unit is not the greatest. My first attempt at downloading videos involved using the provided USB cable to plug the camera unit directly into my laptop and desktop, neither would work properly and I had to go out and buy a MicroSD card reader to get the application to recognize the video and play them. However, taking the MicroSD card out of the camera is actually easier than taking the camera out of the car and plugging it in via the USB cable. Here is a screenshot of the software with a video loaded:

As you can see, it provides quite a bit of data: date & time stamp, speed, longitude & latitude along the route, current speed, max speed on the recording, average speed on the recording, & total distance for the recording. Additionally, it provides a google map overlay in the upper right corner that shows the start and tracks the route along the recording. The audio is very clear, picking up any conversation, noise or music playing within the cabin.

And here is an example showing the rear facing camera:

So, I’m not sure why but it does seem that some times the camera doesn’t get all the data points, map and speed info loaded when you open the video as you can see above. This could be a problem if you’re trying to prove something to an officer or otherwise and that data would support your claim. There is what looks to be a data file created with each recording so perhaps the data is still there, just doesn’t get picked up by the software when opening the file for some reason or another. That starts getting into technical info that I’m not educated enough to deduce.

I was able to upload the video directly from the MicroSD to YouTube. For this exercise, I selected a video where we had turned the audio off on a trip to the north side of town:

Finally, here is a look at the night time recording – which I was very surprised to find was extremely clear and well defined.

Not too bad for a trip to the store, I left the audio on this time to give an impression of the audio quality.

What I like

  • Full HD video
  • Rear Facing Camera providing additional video coverage in cabin
  • Protection of videos to keep from being recorded over
  • Easy physical setup
  • IR LED lights and night time recording

What needs to be improved

  • Access to videos – it would be great to have an app with wifi access to the videos instantly.
  • Menu navigation – the software takes some getting used to and could be clarified with clearer details in the user manual.
  • Power Cord – as with any of these cameras, having to route the cord and clip it around the edges of the windshield isn’t very aesthetically pleasing – not sure what the remedy would be outside of long life rechargeable batteries but until these style cameras are intrinsic to new vehicles, this is a problem we’ll all face.

Final thoughts

While we enjoy having this camera for the added security and safety features, I do not find that it provides enough value for the price point. There are equal quality cameras on the market at a lower price that provide much more efficient and convenient wifi data downloading and reviewing of video. For the price of this unit, I could buy two units like the one I have in my other vehicle & face one to the front and one to the rear, then download the footage to my phone without getting out of the car – and have some money left over. While originally struggling with the software, I did end up finding it easier to use once I got the MicroSD card reader – and the data it provides would be highly useful in any kind of investigation should it be needed. If you have no basis of comparison, I would imagine a buyer would be pretty impressed with the results of this camera, especially if they were unaware that wifi capable models are available. But again, you’re limited by having to wait until you get to a laptop or device to download/upload the content for whoever may need it. Overall, I think it’s a good camera system with great features, at just a bit too high of a price. So, if you see a price drop or see it go on sale, jump on it.

Price: $199.99
Where to buy: Amazon
Source: The sample of this product was provided by Z-Edge.

Filed in categories: Reviews

Tagged: ,

Z-Edge Z3Pro Dual Lens Car Camera review originally appeared on The Gadgeteer on May 1, 2019 at 4:46 pm.

Note: If you are subscribed to this feed through FeedBurner, please switch to our native feed URL http://the-gadgeteer.com/feed/ in order to ensure continuous delivery.