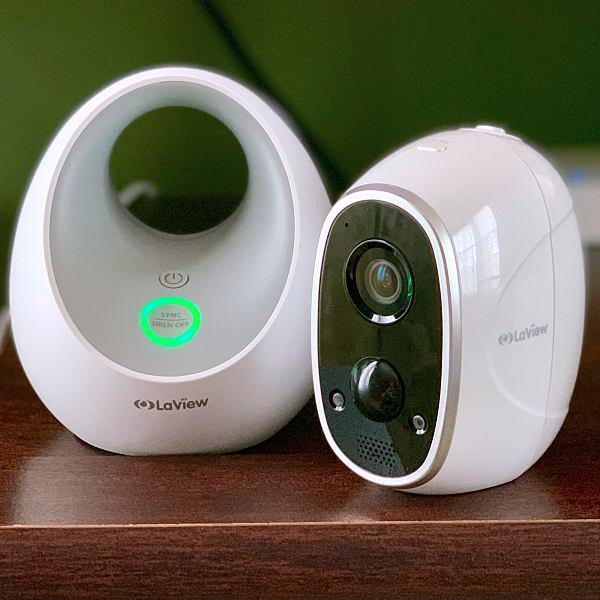
LaView ONE Link Battery Powered WiFi Outdoor Security Camera with Smart Station review

REVIEW – I live on a corner with lots of foot traffic both day and night. Pair that with the recent increase in porch thefts and I felt the need to install an outdoor security camera. I needed one that was totally wireless. The LaView ONE Link Wireless WiFi camera with Smart Station met all my needs, but does it work? Let’s find out.

What is it?

The LaView One Link WiFi security camera is a wireless 1080P security camera with a rechargeable battery and easy 2-step installation. The Smart Station plugs into your router. It connects to the camera with the touch of a single button, extends the cameras battery life and expands WiFi transmission.

Hardware specs

Camera

  • Field of view: Wide angle 130º
  • IR Night Vision: 25 ft IR distance
  • Weight: 0.47 lbs
  • Size: 3.6” x 2.2” x 2.8”
  • Storage: Laview Cloud storage – Micro SD Card (Max. 128GB)
  • Audio: Built-in omni-direction microphone – Built-in loudspeaker – Noise suppression
  • Video: Smart H.264 compression – 1920×1080 Max Resolution – 50hz @ 25fps, 60Hz @ 30fps, Adaptive frame rate
  • Power requirements: 5500 mAh rechargeable lithium battery and 5V DC

What’s in the box?
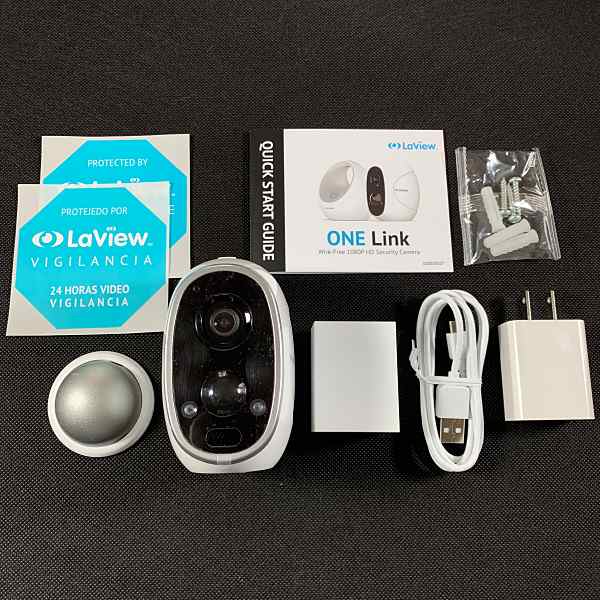
Camera

  • Battery
  • Magnetic mount
  • USB cable
  • Power adaptor
  • Screw kit
  • Surveillance stickers
  • Quick start guide

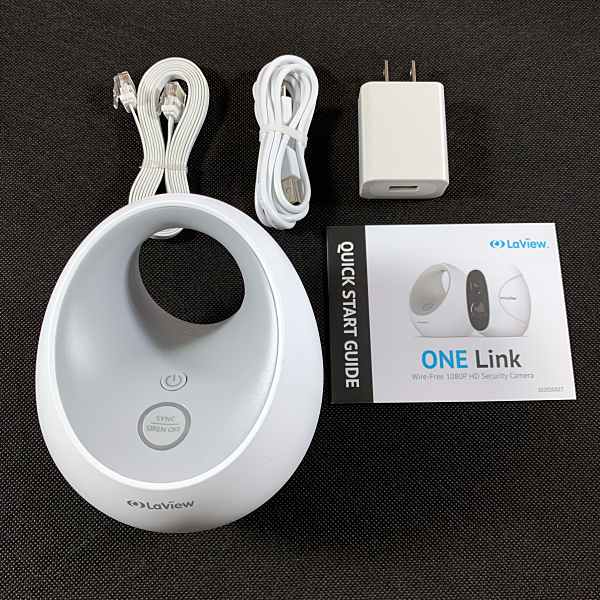
Smart Station

  • Smart Station
  • Ethernet Cable
  • USB Cable
  • Power adaptor

Design and features

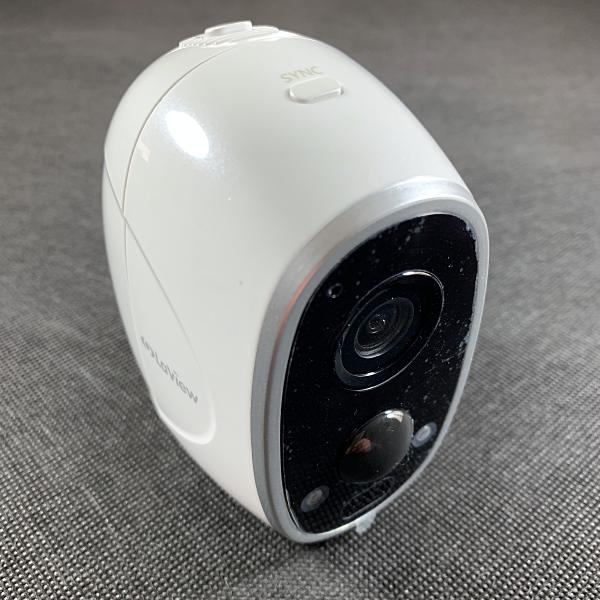
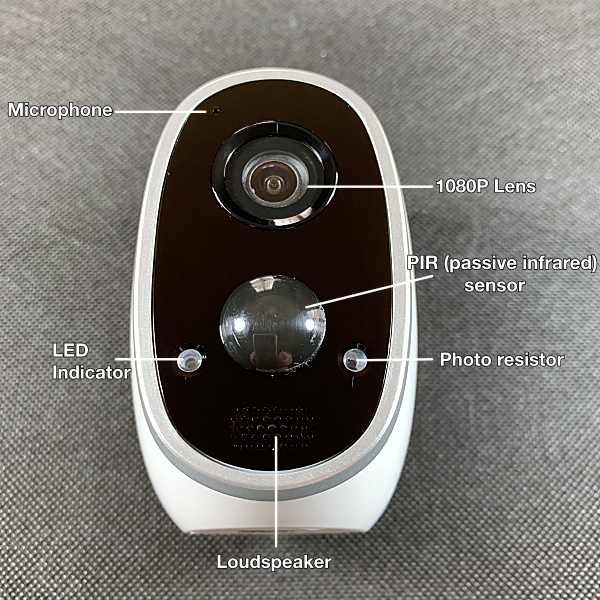
The Laview One Link camera has a pod-like design similar to those offered by Arlo and Eufy. On the front of the camera is the 1080P lens, microphone, IR light (used for supplementing recording light), LED indicator, loudspeaker, PIR (Passive infrared) sensor and Photoresistor (used to detect light conditions to activate the Day/Night switch functions.
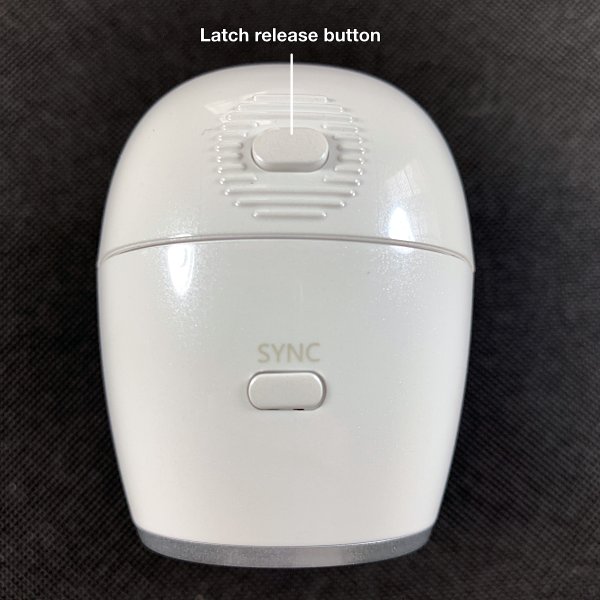
There’s a Sync button located on the top of the cam as well as a release latch to open the camera.
On the back of the cam, there’s a micro USB port used for charging the battery or powering up the camera. It’s protected by a flexible rubber cover that keeps out moisture.
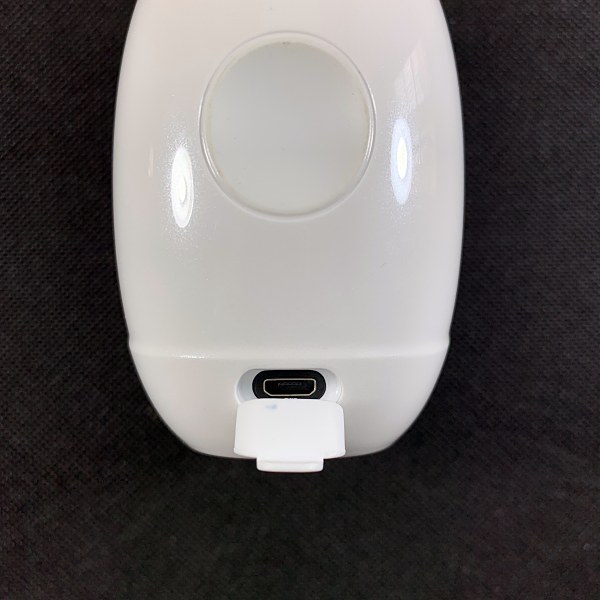
The bottom of the camera has a threaded socket for mounting it onto a tripod.

Opening the camera reveals the rechargeable battery compartment and Micro SD card slot.
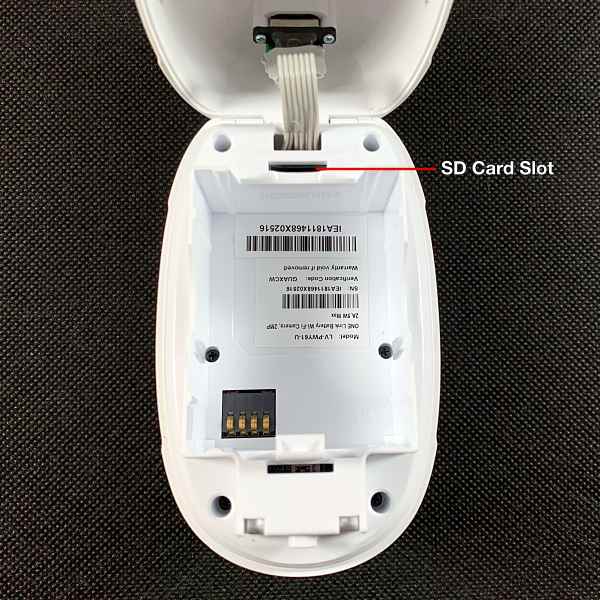
The slot supports up to 128GB of HD footage or if you prefer LaView offers affordable Cloud service options.

The camera comes with 30 free days of ONE Cloud service, after that, you must subscribe to continue to use the service.

Note: Although you can access the ONE Cloud service via the app I was unable to find any info on plans or pricing.

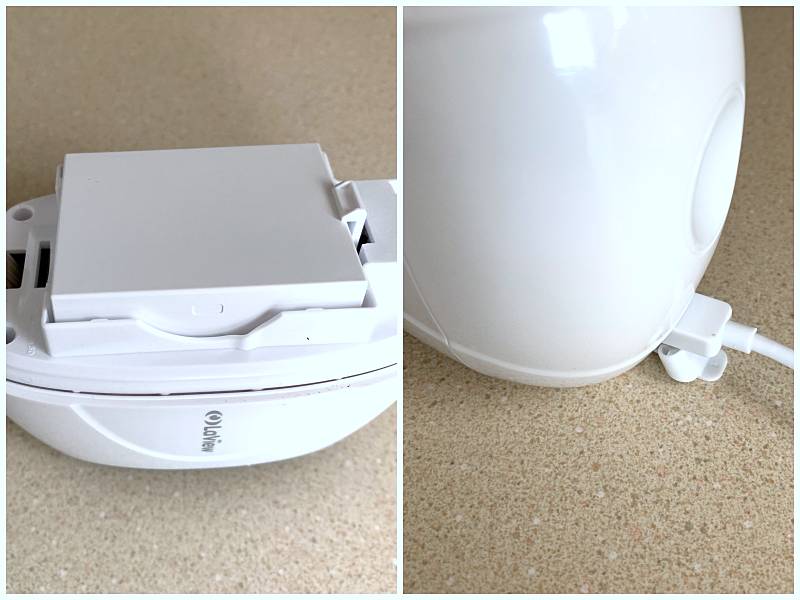
The 5500 mAh battery will last 6+ months on a single charge when paired with the Smart Station. And when it does need a recharge all you have to do is pull it down and plug it in.
Smart Station

The Smart Station is the brains of the security system, supporting access for up to 6 wireless cameras.

The tear-drop design is quite small (3.7” x 3.7” x 4.3”) and weighs less than half a pound.

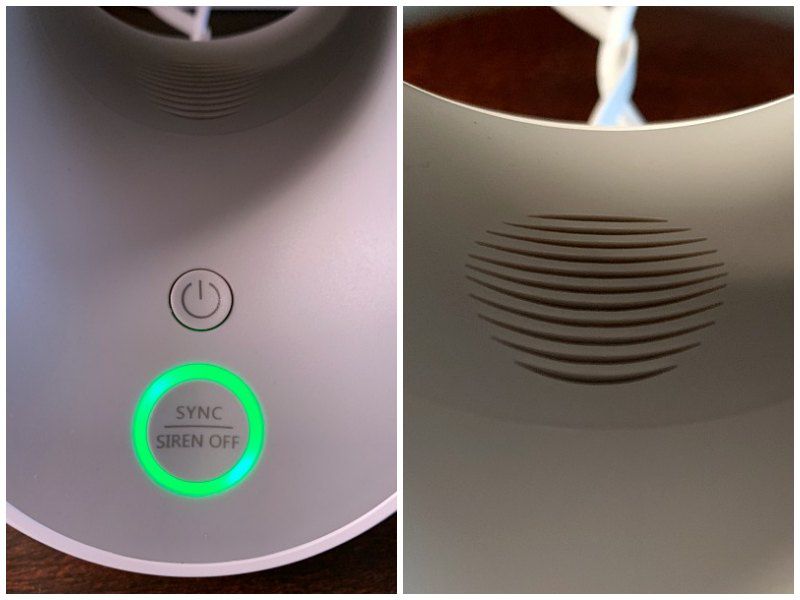
The front of the unit has a power button, a sync/siren off button with LED indicator ring and a speaker for the built-in 120-decibel siren.
One the back there’s a micro USB power port, an ethernet port for connecting the Station to your router and a reset button.
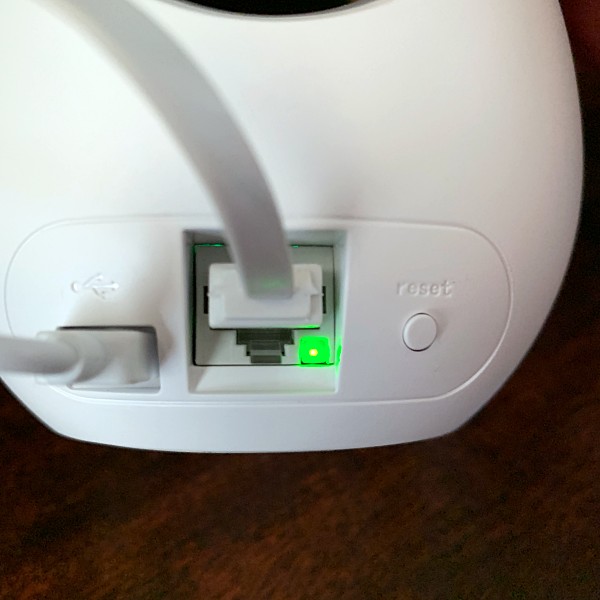
The Smart Station creates a secure ecosystem of WiFi coverage. It also extends the battery life of the cam from 3 months to 6 months versus a WiFi only connection.

The built-in 120dB siren works in conjunction with the cameras motion detection. When enabled it will go off when the cam senses motion. You can set it to stay on from one to five minutes. Or you can manually disable it by pushing the siren off button on the Smart Station. I tested it, and it’s VERY loud! In fact, it had my ears ringing for a couple of hours afterward. And it was audible outside even with the windows closed.

The siren might be a little much for everyday use (especially if your cams motion sensor is set off by a critter at 3am), but I could see it being effective if you have it linked to an indoor camera. Or use it to ward off trespassers while you’re away on vacation.

Pairing camera with the Smart Station

Setting up the camera and Smart station is relatively simple. First, you must install and fully charge the camera’s battery. Fully charging the battery takes 6-8 hours.

Plug the Smart Station in and connect it to your router using the Ethernet cable.

To pair the camera to the Smart Station press and hold the SYNC button on both for 5 seconds. When the camera is connected to the Smart Station, the LED indicator on the front of the cam will slowly flash blue. There are also voice prompts that will update you on the connection status.

Camera installation

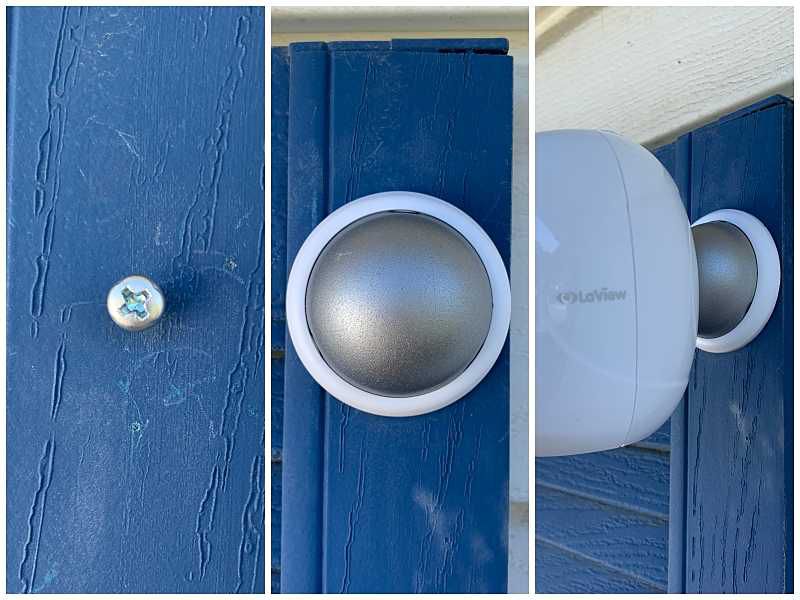
Installing the camera is as easy as 1-2-3. 1) screw provided screw where you want to mount the camera. 2) Secure magnetic dome to the screw. 3) Secure cam to the magnetic dome. You’re done!
LaView ONE app

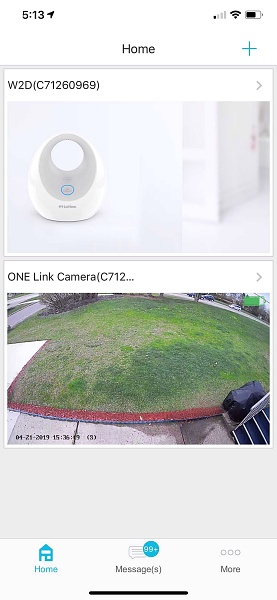
Launching the app takes you to the home screen which features thumbnails of both the Smart Station and the cams live view. From there you can access the cams live view by tapping the thumbnail.
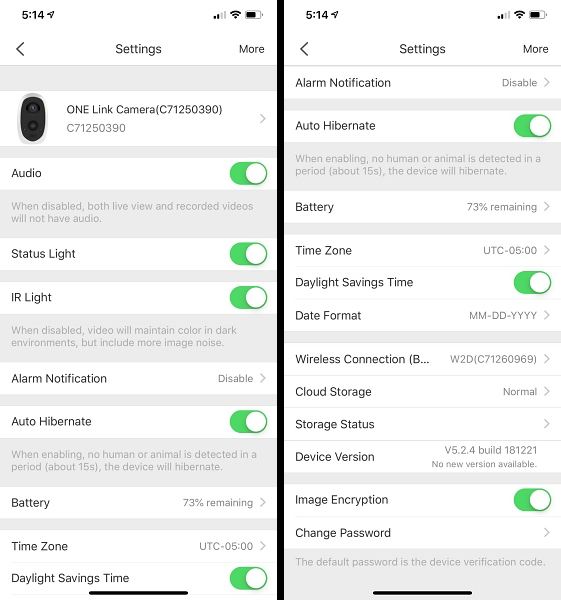
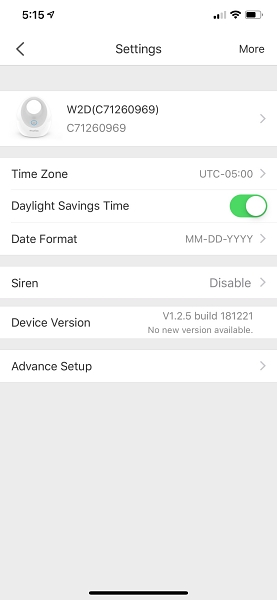
You can also access settings for both the Smart Station and cam. From there you can customize the camera and Smart Stations various features.
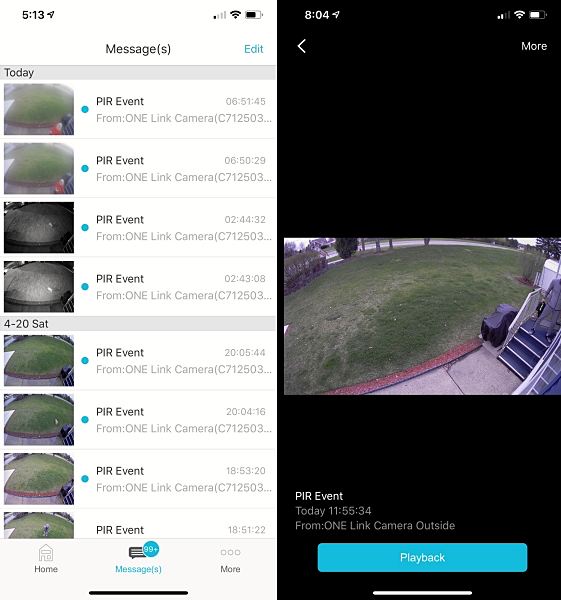
The Messages screen lets you view and playback recorded PIR (motion detection) events.
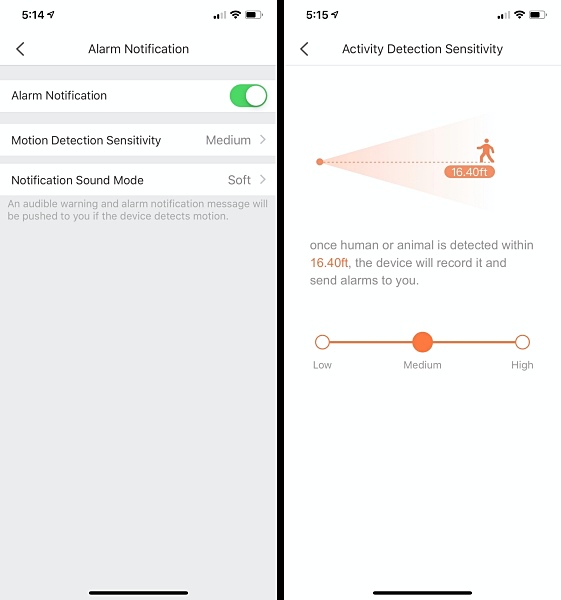
You can enable alerts and choose Motion Detection Sensitivity in the app’s settings.
When the cam detects motion, you receive an alert notification on your phones lock screen. Tapping the notification opens up the app, from there you have to go to Messages and tap on the thumbnail of the event to view it.

It would be nice if when tapping on an alert the app would open immediately to the cams live view or at least the recording of the PIR event.

Things I like about the app

  • Works with Face ID for faster login
  • Clean interface
  • Easy to navigate
  • You can view both live cam and recorded motion detection events
  • Easy to view and change settings for both the Smart Station and the camera
  • Ability to easily add cameras to the system

Things I don’t like about the app

  • Both the live view and recorded PIR events can be laggy
  • No way to check WiFi connection strength
  • Tapping on an alert doesn’t immediately take you to the cams live view
  • Not optimized for iPad

Camera performance

This camera has a lot of features, I wanted to touch on a few that I thought were the most important.

Motion detection

The camera has a PIR thermal detection sensor for advanced motion detection that focuses on objects with significant heat signals like people and animals. Weeding out false alarms caused by inanimate moving objects.

I did receive a few false alarms, but it was during extremely windy and rainy conditions. I found that lowering the Motion Detection Sensitivity level in the app helped with this.

During normal weather conditions, it works flawlessly.

Night vision

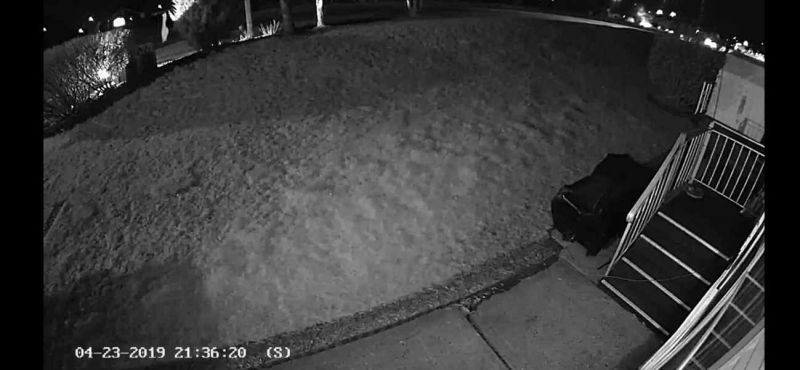
The cams night vision feature works at a distance of up to 25ft. As you can see from the pics below the picture quality is quite impressive.
2-Way audio

The 2-way audio feature is hit or miss at best. The biggest problem is that the built-in loudspeaker isn’t loud enough. And there’s no way to adjust the volume level to make it louder. I suppose that it would work to ward off a trespasser at night but trying to have a conversation with someone is nearly impossible.

What I like

  • Easy setup
  • Easy 2-step installation
  • Option of onboard SD card or Cloud recording
  • Good picture quality
  • Rechargeable battery lasts 6 month on a single charge
  • IP65 weatherproof

What needs to be improved

  • Viewing live cam and recorded alerts on the app can be laggy (Overall app performance is a little buggy)
  • 2-way audio doesn’t work as advertised

Final thoughts

The LaView ONE Link isn’t perfect, but its benefits far outweigh its flaws. If you’re looking for a totally wireless camera setup with lots of features that’s easy to install and use this camera should be on your shortlist.

Note: If you would like to add additional cameras to your system at a later date they can only be purchased by phone from LaView. To order call (626)566-7550.

Price: $229.99
Where to buy: Amazon
Source: The sample for this review was provided by LaView.

Filed in categories: Reviews

Tagged:

LaView ONE Link Battery Powered WiFi Outdoor Security Camera with Smart Station review originally appeared on The Gadgeteer on April 29, 2019 at 11:00 am.

Note: If you are subscribed to this feed through FeedBurner, please switch to our native feed URL http://the-gadgeteer.com/feed/ in order to ensure continuous delivery.

Dodocool DA189 True Wireless Earbuds review

REVIEW – Truly wireless Earbuds have been out in the world for a while now, but I have yet to pick up a pair for myself. They seemed nifty, but I always felt they’d just fall out. After testing out my friend’s EarPods, I decided the next time I had an opportunity, I’d try some out. The Dodocool DA189 Earbuds were in my price range, so I thought I’d give them a try.

What is it?

Dodocool DA189’s are truly wireless earbuds that also boast being sweat and water resistant.

Hardware specs

  • 42 mAh battery (headphones)
  • 450 mAh battery (charging case)
  • Working time: Up to 5 hours
  • Standby time: 500 hours
  • 10 m Wireless range

What’s in the box?

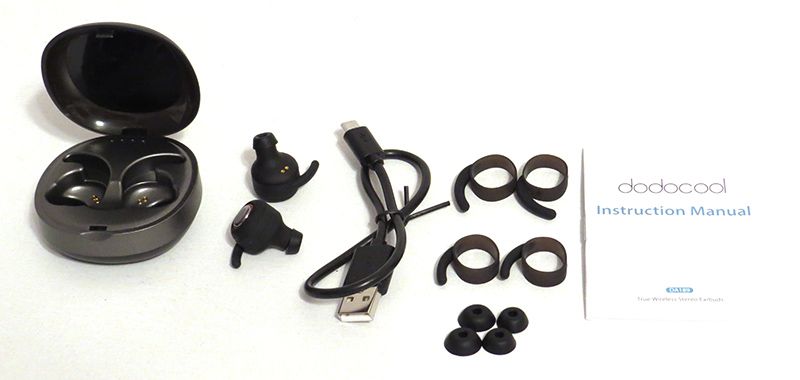
  • Dodocool Earbuds
  • Charging case
  • Micro-USB cable
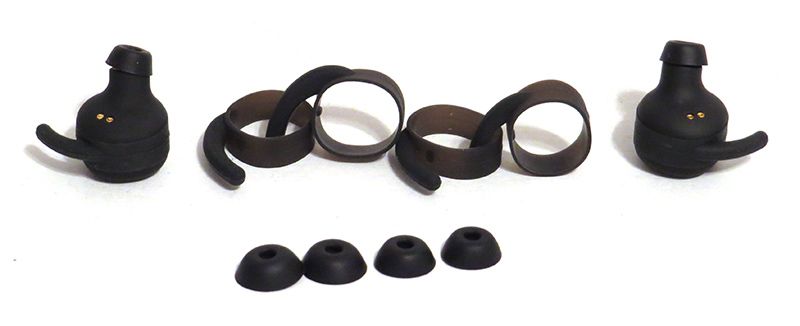
  • 3 Eartips
  • 3 Wings
  • Instruction Manual

Design and features

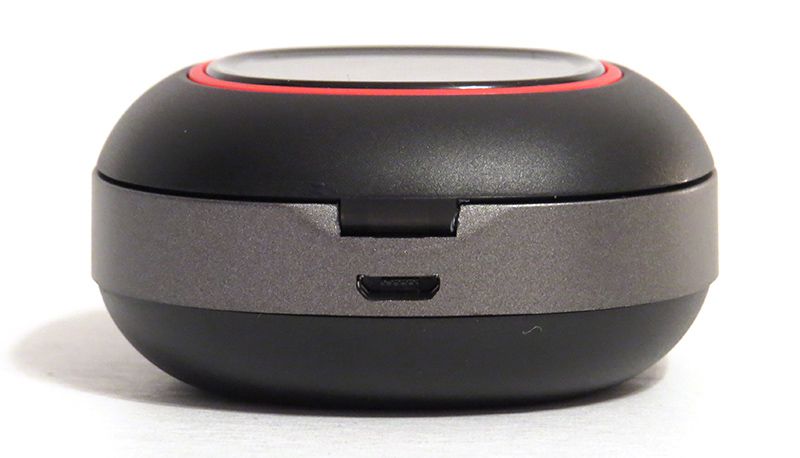
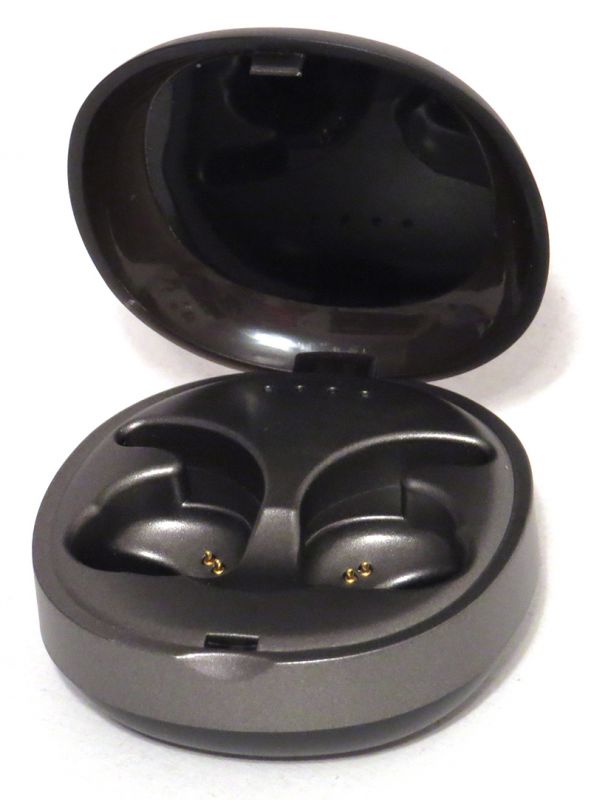
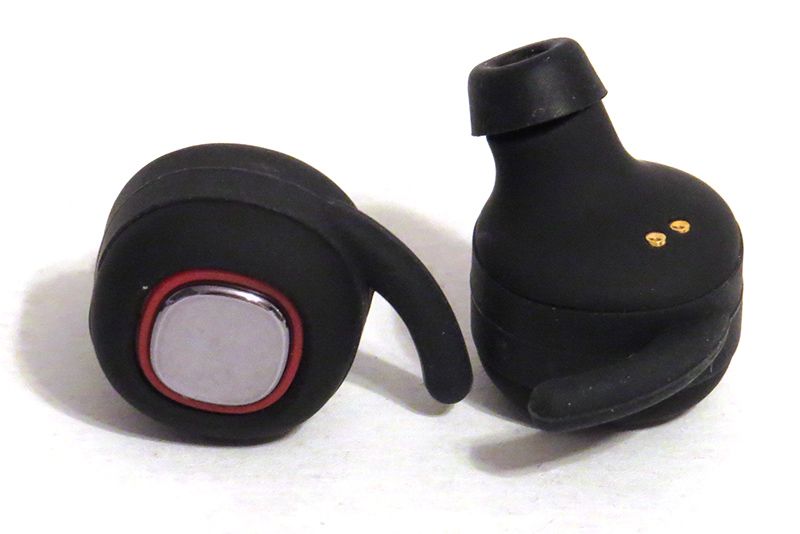
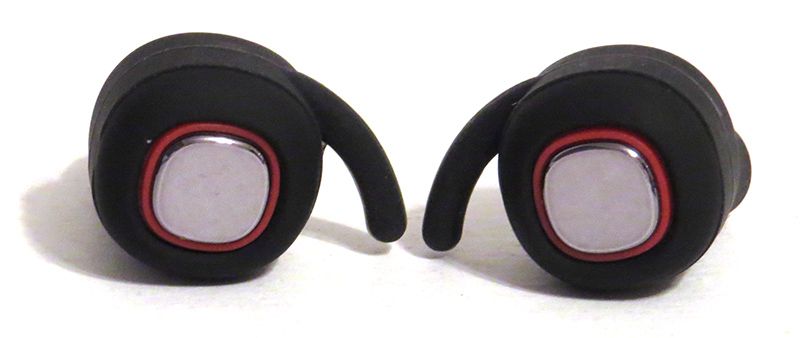
The case/earbuds took a little over a few hours to charge up, but the case charges the earbuds in less than an hour. I really liked how compact the case was, and that it was solid and could easily be tossed around.. Or batted to the floor in the case of my cats. It was also really easy to remove and replace the earbuds in the case. There was a magnetic pull that locked them into place. I did notice, however, that a bump would loosen the connections enough to turn on the earbuds. Enough of these bumps drained the battery down. It seemed random though, as major bumps like floor drops didn’t seem to bump the connection.

Each time I used the earbuds, I would drop them into the case to charge, with the longest use time at around 2.5 hours. They would also turn themselves off when they were not in use. This allowed me to use them for a good amount of time before needing a recharge.

Setup

When I initially paired these to my phone, I could only get one headphone to work at a time. They wouldn’t talk to each-other! Despite the instructions, they would continue to work in mono mode. I am not sure what I did, but eventually, after several tries, I got them to work together. Since then, they’ve worked flawlessly together without going back to mono mode.

Performance

I used these headphones for a solid week thinking they had terrible sound quality. They would fit fine in my ears, but there was no bass at all. I took them for a run, and when stopping to adjust them on my way back, I managed to push one into a better fitting position. The sound quality was night and day! After that, I made sure to push inward more than standard Earbuds, and if I got it ‘suctioned’ in, the sound quality was good. The mids and highs on these were just average, but the bass/lows were above average for the price range once they were suctioned into my ear.

During my run, they stayed in place for the most part. I had to adjust them once before heading back, but since my ears are terrible for earbuds, I was impressed. The wings help a lot, and I am really glad those come in three different sizes so that I could find the one that fit just right. Not only did they fit correctly, but they were comfortable to wear for a few hours as well.

What I like

  • Automatically connects to the phone when taken out of the case.
  • Compact
  • Customization for different ear sizes

What needs to be improved

  • Earbuds are loose in the case causing them to turn on by bumping the case
  • Pairing was a challenge

Final thoughts

Overall, the Dodocool DA189 Earbuds were ok for the price. They did stay in my ears during a run, and once I got the fit figured out, they had decent sound quality. I was disappointed when I went to use them when washing my car and they had no battery life due to being bumped every morning and evening on my nightstand. For less than $40 though, they weren’t too bad.

Price: $49.99
Where to buy: Amazon
Source: The sample of this product was provided by Dodocool.

Filed in categories: Reviews

Tagged:

Dodocool DA189 True Wireless Earbuds review originally appeared on The Gadgeteer on April 29, 2019 at 10:00 am.

Note: If you are subscribed to this feed through FeedBurner, please switch to our native feed URL http://the-gadgeteer.com/feed/ in order to ensure continuous delivery.
Upgrade your first gen Apple Pencil with this grip from Kaweco

NEWS – If you haven’t upgraded to the newest version of the Apple Pencil, you can put some new “clothes” on the first generation Apple Pencil with one of these cool looking grips from Kaweco.

Kaweco is known for their awesome pens, lead holders, and fountain pens, but this Apple Pencil grip is a new direction for them.

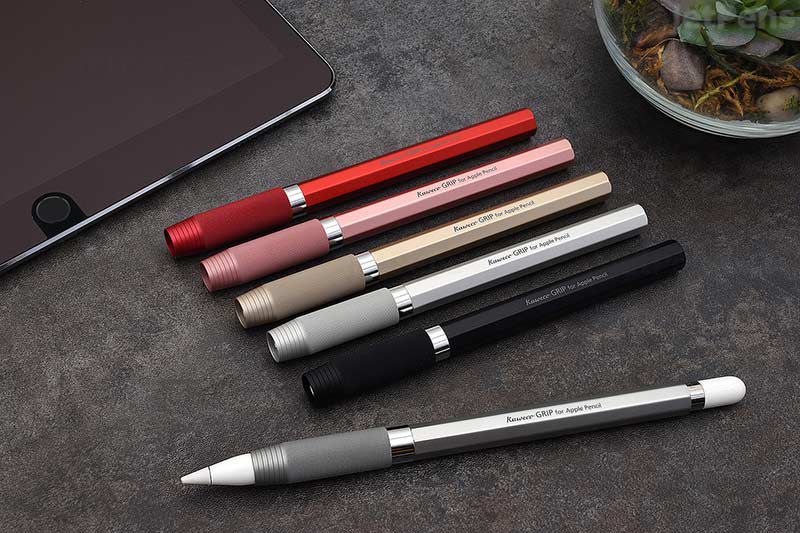
The Grip is made of aluminum and is available in 5 colors. It is basically an exterior shell for the existing Apple Pencil and features an octagonal barrel design and a knurled section that gives the Grip its name.

The Kaweco Grip for Apple Pencil is priced at $45 and is available from JetPens.com

Filed in categories: News

Tagged:

Upgrade your first gen Apple Pencil with this grip from Kaweco originally appeared on The Gadgeteer on April 29, 2019 at 9:00 am.

Note: If you are subscribed to this feed through FeedBurner, please switch to our native feed URL http://the-gadgeteer.com/feed/ in order to ensure continuous delivery.
Declutter Gmail’s web interface by using the Simplify Gmail Chrome extension

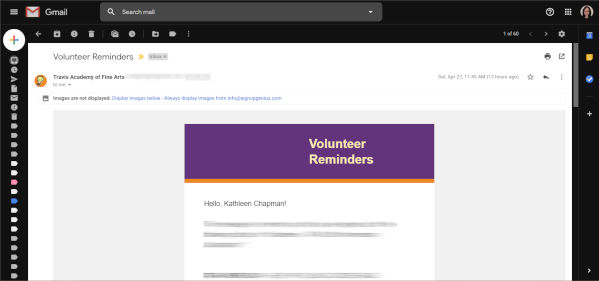
ARTICLE – In the past, my Gmail web interface looked a bit cluttered (shown in the above screenshot). I was curious about streamlining this look and stumbled upon several tech news articles that pointed me toward the Simplify Gmail Chrome extension. This extension was written by a former lead designer of Gmail, Michael Leggett, with the help of some of his friends.

Ta-da! This is what my Gmail looks like after using the Simplify Gmail extension. You can see that the Gmail logo located in the upper left-hand corner of the screen has been removed completely and the Compose “+” button has been moved from the upper left to the lower right corner of the screen.

The “Search mail” box has also been moved from the top center of the screen to the upper right side of the screen. Google’s Calendar, Keep, and Tasks has also been moved from the right sidebar to the Overflow menu (the ellipsis) located just above the Compose “+” button in the lower right corner of the screen.

To see your “Inbox”, “Snoozed”, “Sent”, “Drafts”, “Labels”, etc. menu items in the right sidebar, you just click on the Menu icon located in the upper left corner of the screen. I left these hidden to obtain an even cleaner look.

When I opened my emails before using the Simplify Gmail extension, this is what my screen looked like (above screenshot).

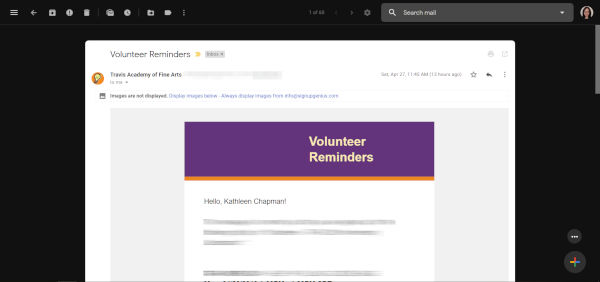
And here is what my opened-email screen looks like after using the extension. Again, the Gmail logo is gone and has been replaced with several icon buttons all located on a single line (the “Main Menu”, “Back to Inbox”, “Archive”,  “Report Spam”, “Delete”, “Mark as Unread”, “Snooze”, “Moved to”, “Labels”, and the “Overflow menu” buttons). The “Search email” box has also been moved off to the upper right corner of the screen.

NOTE: Depending on your Gmail settings, this extension may not work for you. For example, it didn’t work well for me when using the “Multiple Inbox” setting in Gmail as shown in the screenshot above. Using Multiple Inboxes with this extension, I could no longer see the distinct inboxes that I set up. And because the list of emails expanded side-to-side to fit the screen, the Compose “+” button overlayed the email list. In addition, the number of emails being displayed (e.g. 1-60 of 60 located at the top center of the screen) was overwritten by that of another inbox. But, once I got rid of Multiple Inboxes, the extension worked well for me.

Just in case you are curious about whether or not it is safe to use his extension, Mr. Legget posted the Simplify Gmail code in GitHub for those of you who wish to examine it.

The Simplify Gmail Chrome extension is available from the Chrome Web Store for those of you who like a cleaner, less cluttered Gmail web interface.

Filed in categories: Articles

Tagged: ,

Declutter Gmail’s web interface by using the Simplify Gmail Chrome extension originally appeared on The Gadgeteer on April 29, 2019 at 8:00 am.

Note: If you are subscribed to this feed through FeedBurner, please switch to our native feed URL http://the-gadgeteer.com/feed/ in order to ensure continuous delivery.

Windows 10 Will Soon Stop Forcing Updates

One of Windows 10’s most reviled “features” since its release is its update schedule. People frequently reported that the operating system would restart itself during sensitive actions with no easy way to stop it. There are unofficial methods, but Microsoft was always adamant that automatic updates were for the best. This move was to help users keep their systems secure, offering better protection against zero-day viruses and exploits as they were found. If users were given the choice to delay updates, they may have put it off to the point their PCs got infected by the malware – such was the idea. Related: Latest Windows… Read more