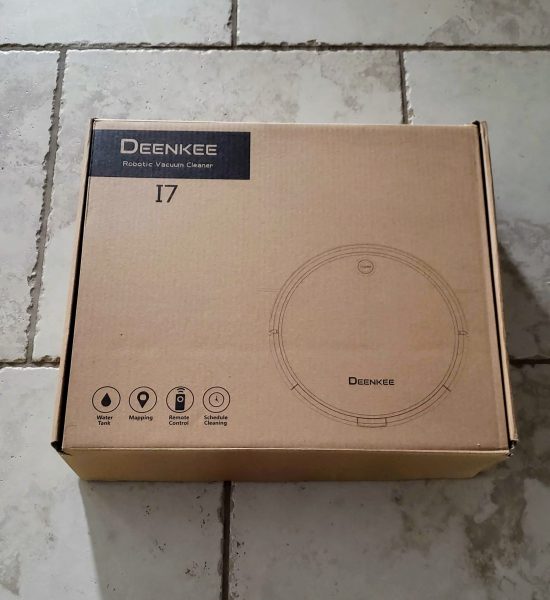
Deenkee I7 robotic vacuum cleaner review

There are literally a plethora of robotic type vacuum cleaners out on the market.   The price ranges from a couple hundred to right at a thousand dollars for one.  We have all heard that quote ‘You get what you pay for’, and that has usually been my experience.  However, I was recently offered the opportunity to try out one of the lower priced vacuums by Deenkee.  I have never had a robotic vacuum and figured out I would give it a try.  Let’s see if the low price still gave good results.

What is it?

The Deenkee Intelligent Vacuum Cleaner is exactly what you think it is.  It is an automatic vacuum cleaner that roams around your house vacuuming carpets and hard floors.  This vacuum has the additional special feature of having a wet mop option along with the regular vacuum functionality.
What’s in the box?

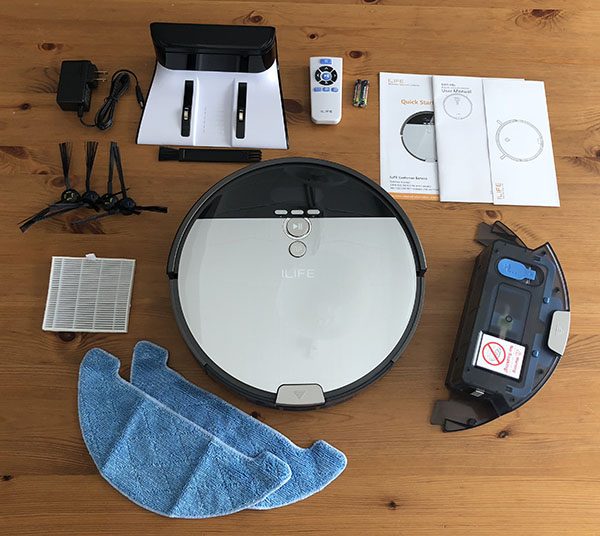
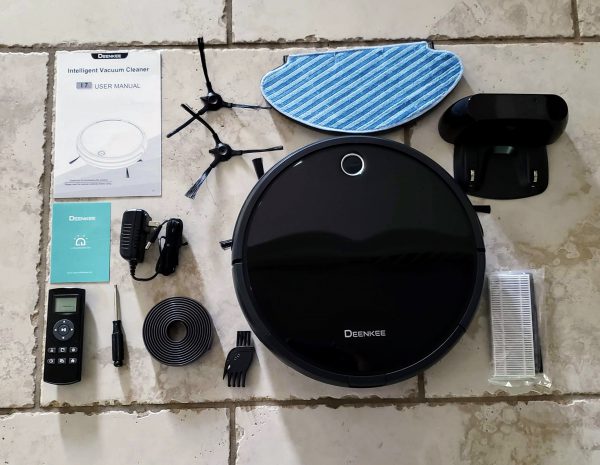
Deenkee included a lot of extra items in their budget-friendly vacuum.  Working our way around the picture from the top left to the right the following items were in the box.

  • User Manual
  • Two extra sweeper brushes to replace the 2 that are already mounted underneath the vacuum for when they wear out.
  • The wet mop pad and water holder underneath it.
  • Charging base station
  • Blue warranty card
  • Power adapter for the charging station
  • The vacuum itself with 2 brushes and filter system already installed.
  • An extra packet of HEPA filter and thinner foam filter
  • Remote control
  • Philips head screwdriver
  • A strip of heavy magnetized rubber
  • Small brush used to clean out the filters
Design and features

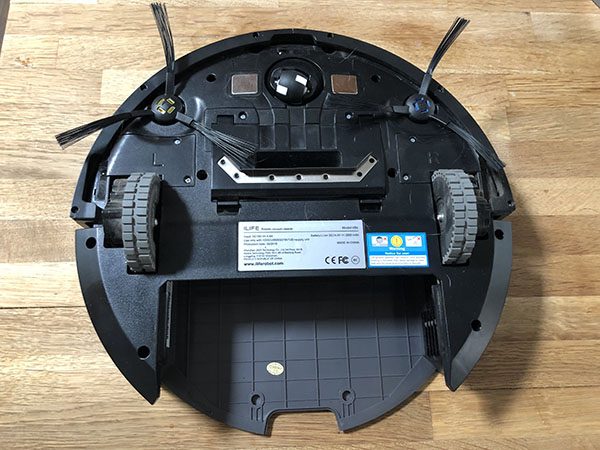
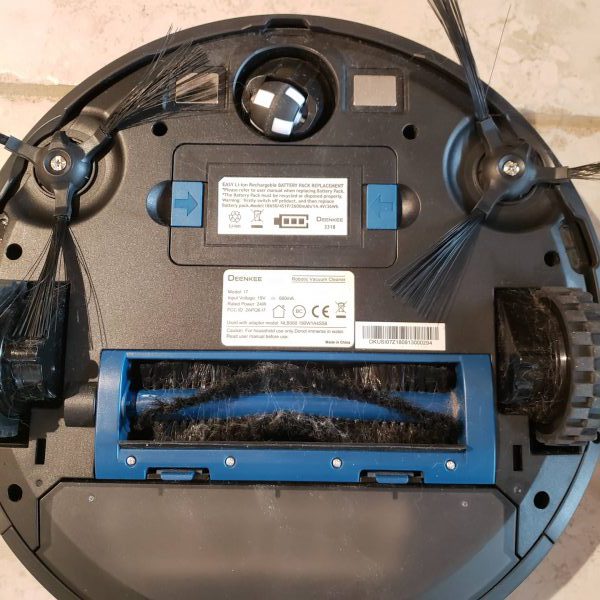
First off let me apologize.  The rest of the pictures in this review were taken after the vacuum had already gone around the first floor of my house a couple of times.  I was so excited to use the thing I totally forgot to take pictures until after it ran!  The picture above shows the bottom of the unit.  The first thing that caught my eye was the fact that the unit has two horizontal rotating brushes with one on either side of the front wheel.  This is one more than will see on other vacuum cleaners like the Roomba brand.  At the top of the picture, you can see the front wheel which is a freewheeling in any direction ball-type wheel.  Right below the front wheel is the battery compartment where the rechargeable battery sits.  This is replaceable so I assume in the future I can order another battery if and when the one I have now wears out.  Let me say that this battery is AWESOME.  The machine ran vacuuming the whole time for a solid 120 minutes.  The manual says it will run 90 – 120 minutes and I have had it run a full 120 minutes consistently.  It has then run an additional 30 minutes winding its way from one side of my house to the other finding its charging station.  That last 30 minutes the vacuum part was turned off and it just freewheeled around looking for the charging base.

Behind the battery, you will see the 2 rear wheels and the main middle brush.  Note the 4 tiny Philips screw heads below the brush.  You can use the included screwdriver to remove those screws and the brush will pop right out for easier cleaning.  We own a Shetland sheepdog and he sheds quite a bit of long hair.  I find I have to clean that brush about once a month to keep it effective.

Also, notice the two vertical oblong holes on either side of the middle brush?  That is where the water reservoir and mop pad would install.
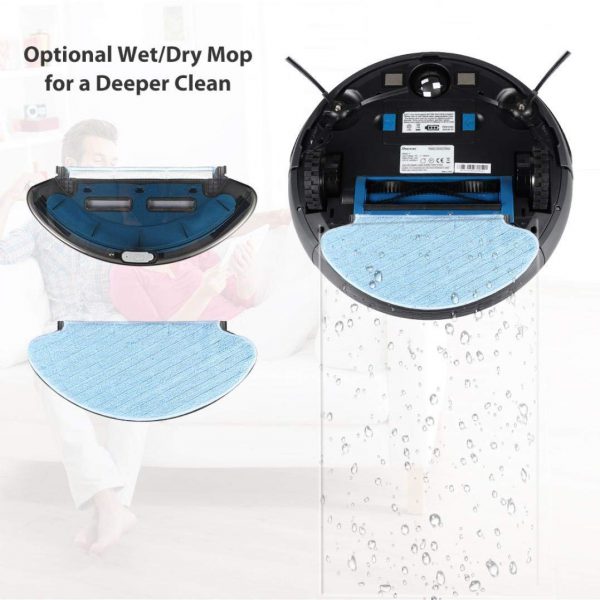
The picture above shows how it mounts to the vacuum cleaner.  I personally never used the feature myself because I felt my downstairs area was just too large for the amount of water in the reservoir.  I am sure if you had just a small area to use this in it would work just fine.
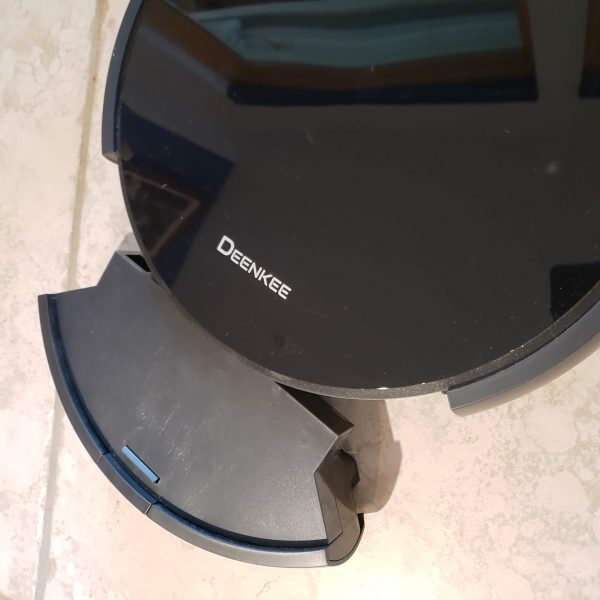
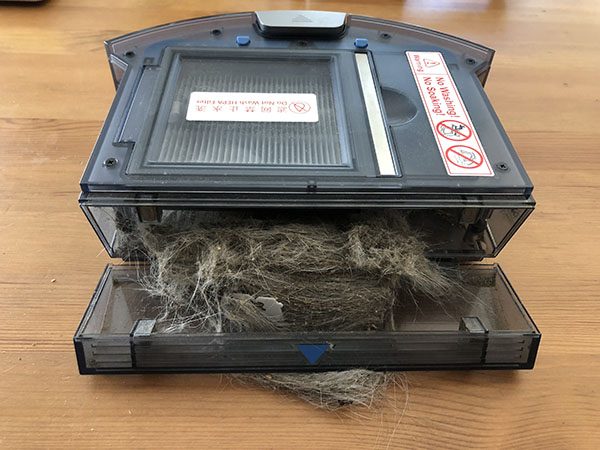
The next picture shows the top of the vacuum with the dirt canister pulled out.  There is a small button in the middle just to the left of the blue strip that is easy to press that releases the canister from the vacuum.
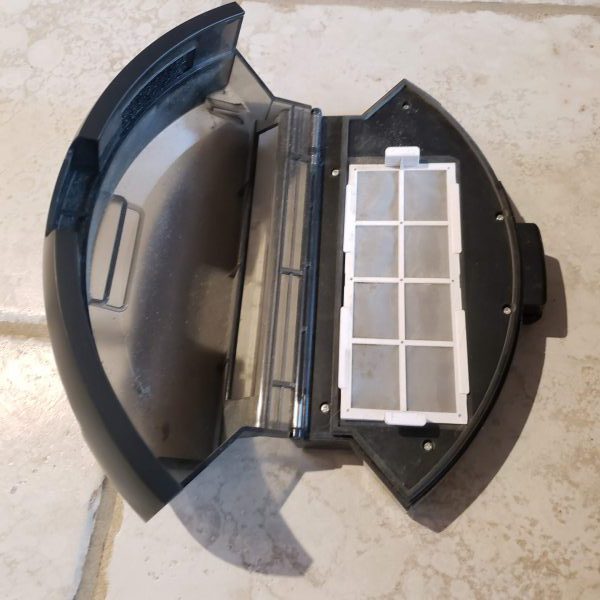
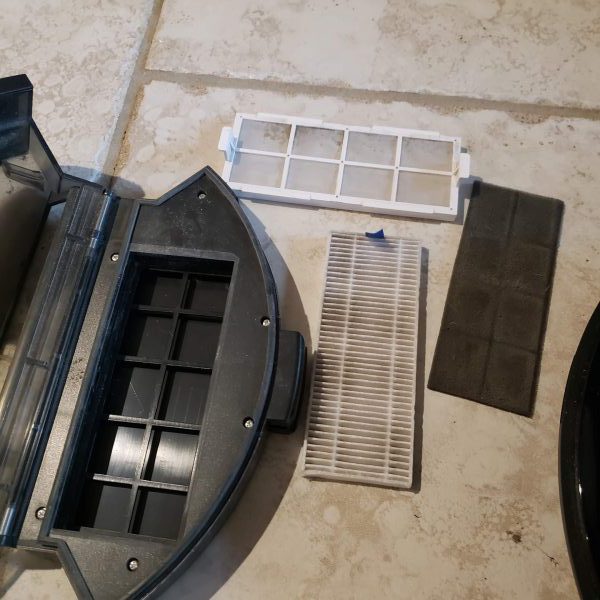
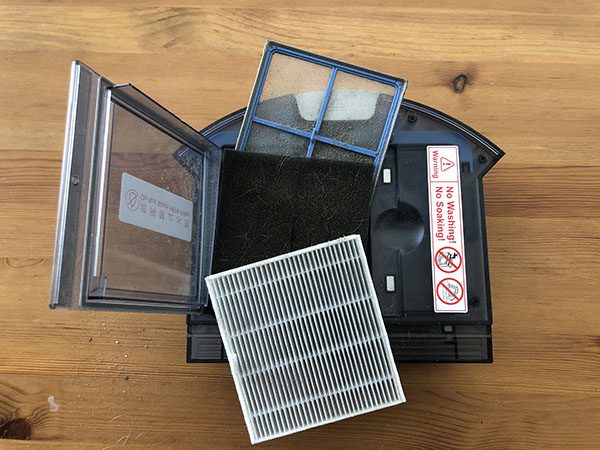
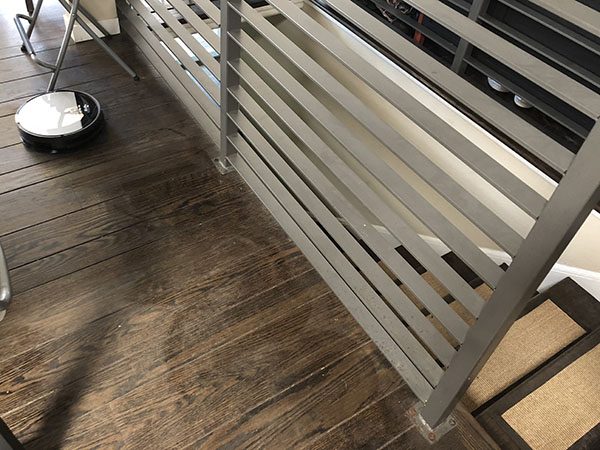
The next two pictures show the dirt canister opened and then with all of the filter material out.  This vacuum has quite an intensive filter system.  I never saw any dust coming out of the vacuum while it was working.  It even had the ultimate test at my house.  We had our stair railing replaced.  This meant that the entire first floor was coated in a fine layer of sawdust.  I ran my big Dyson vacuum over the entire floor and then manually dusted the house.  Then I kicked off the Deenkee to see if it would pick up any additional dirt.  That canister area was filled with very fine sawdust.  It did an awesome job of picking up additional sawdust.  The white screen filter in the left picture can be pried out using the two tabs on either side.  Below that was a black foam strip followed by a heaver HEPA media filter.  So you essentially get 3 layers of filter.  As noted earlier they give you an additional foam filter and HEPA filter in the box.

It should be noted that Deenkee sells a replacement packet including 2 filter sets, 2 mop pads, 4 horizontal brushes and 1 rotating middle brush for $25.99 at Amazon.
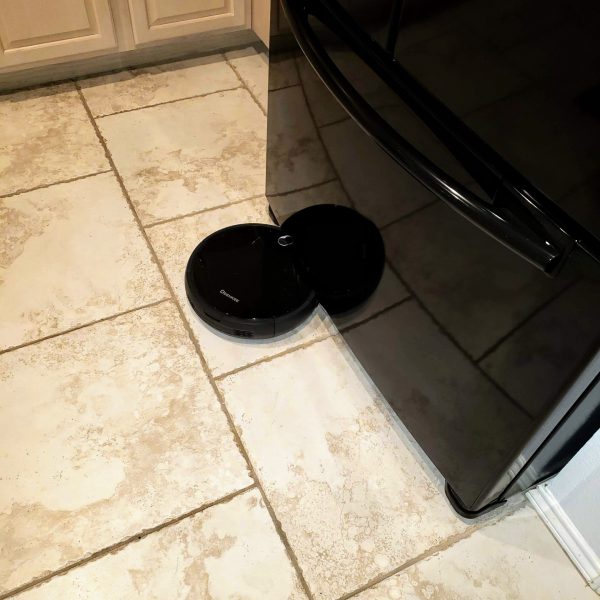
Overall, I was really happy with the Deenkee.  It did an excellent job of vacuuming.  I have a pretty large downstairs area that includes the kitchen, breakfast area, main living space, entryway and formal dining room.  There are tons of obstacles and of course, there was my dog.  I only encountered a few issues with the vacuum.  The picture above shows it stuck under my refrigerator.  That has only happened twice in about the 10 times it has run in my home.  I know more expensive robot vacuums have an actual camera on top to prevent this.  The other issue I had was it ignoring the magnetic strip I placed in front of my bedroom door.  I don’t like closing the door and wanted to try to keep it out of the room with the included magnetic strip.  I put it on top of the threshold, in front of the threshold and even a few feet in front of it and the vacuum still rolled right over it.  We have a bunch of power cables under our bed from the Sleep Number mattress and the vacuum would get stuck on those.   The nice thing, however, is when it did get stuck, it would stop vacuuming and start beeping loudly.  Eventually, it would just shut itself off if we were not home to get to it in time.

It’s not advanced as some others in that I don’t think it makes a map of your rooms.  It seemed to learn over time where some stuff was as it stopped bumping into some things and just turning around right before it would hit some things.  I often saw it sweeping over the same areas multiple times during the full 120 minutes.  Like I said our room is really complicated.
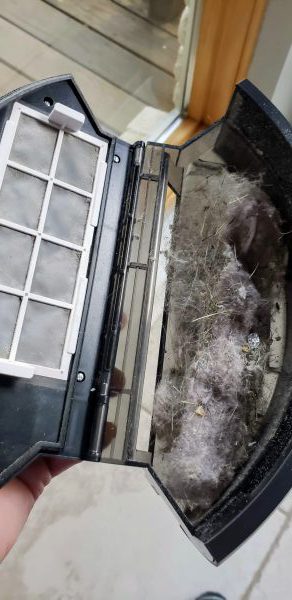
This last picture shows the ‘stuff’ it picked up on its first run around the floor.  Here I thought the floor was pretty clean.  YUCK!

What I like

This vacuum gives some really good bang for the buck.  Even in my complicated first-floor layout, the vacuum seemed to get every area clean.  It may not have been as efficient about it as some of the more expensive ones, but it did get the job done.  I love that it came with extra media filters, and as a bonus, I noticed they now seem to be shipping with 4 extra brushes and 2 extra media filters.  There is even a newer version of this vacuum out that costs an extra $20 that is supposed to be a bit quieter and have even more suction power.  It rolled over and vacuumed an extremely thick and fluffy doormat I have by my back door with no problems at all.

What can be improved

If some kind of mapping technology could be built in for just a bit more cost I think that would make the device a winner.  Then I would not have to remember to close doors to rooms I don’t want it to go to.  The magnetic strips just did not seem to work like they should.  Also making it quieter would be beneficial (which they did with a slightly more expensive version now available).  Putting some kind of sensor on the top of the front would also be great to keep it from getting stuck under objects.

Price: $209.99 – Get $70 off with code HRJD3G3F which expires on 10/30/18
Where to buy: Amazon
Source: The sample for this review was provided by Deeknee.

Filed in categories: Reviews

Tagged:

Deenkee I7 robotic vacuum cleaner review originally appeared on The Gadgeteer on October 22, 2018 at 11:00 am.

Note: If you are subscribed to this feed through FeedBurner, please switch to our native feed URL http://the-gadgeteer.com/feed/ in order to ensure continuous delivery.

Neato Botvac D7 robot vacuum review

REVIEW – I haven’t vacuumed the floors in my home for almost 3 years. Before you think I live in squalor, I said that I haven’t vacuumed. That doesn’t mean that my floors haven’t been cleaned. They have, just not by me. I have a robot that does that for me. Since my review of the Neato Botvac 80 back in 2015, I’ve been completely spoiled by the fact that I don’t have to push a vacuum cleaner around my 2 story home. A few years after reviewing the Botvac 80, I was sent the Neato Botvac Connected WiFi and have been using both units. One on the first floor and one on the 2nd floor of my home. And now I have been given the opportunity to review Neato’s latest robot vac, the D7. Let’s see if it sucks but in a good way.

What is it?

The Neato Botvac Connected D7 is a robot vacuum that maps out your home and cleans the floors while you do something more fun and productive.

What’s in the box?

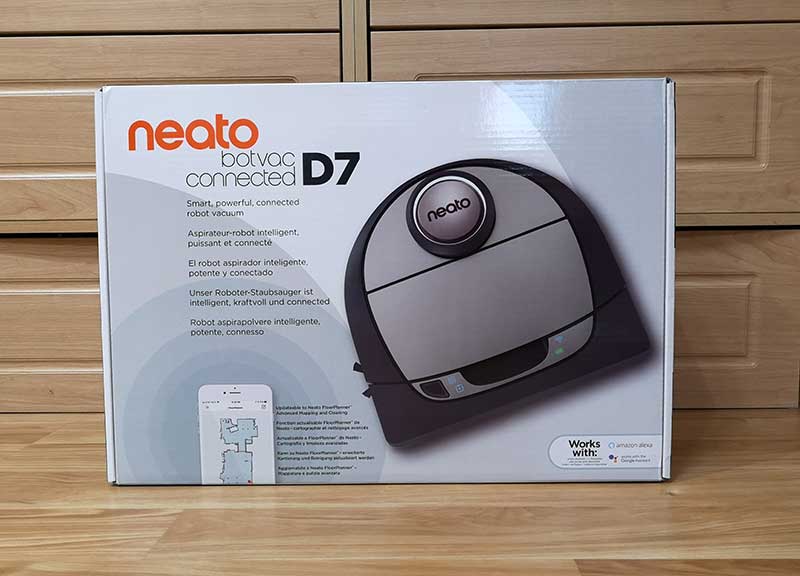
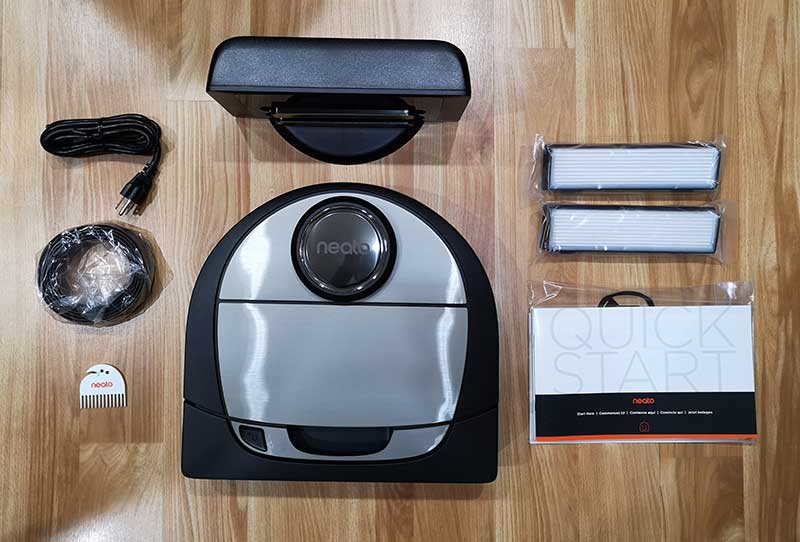
Neato Botvac D7 Connected robot vacuum
Charge Base
Power Cord
Spiral Combo Brush
Ultra Performance Filter
Brush and Filter Cleaning Tool
Boundary Markers (2M)
Manual

Hardware specs

Connectivity – Wifi 2.4Ghz + 5Ghz
Dimension – 13.21 inch x 12.56 inch x 3.92 inch
Weight – 7.5lbs
Dustbin Capacity – 0.7 liters
Cleaning Path – 12 inch
Battery – Lithium Ion
Run Time – Up to 120 minutes
Charge Time – Up to 150 minutes

Design and features

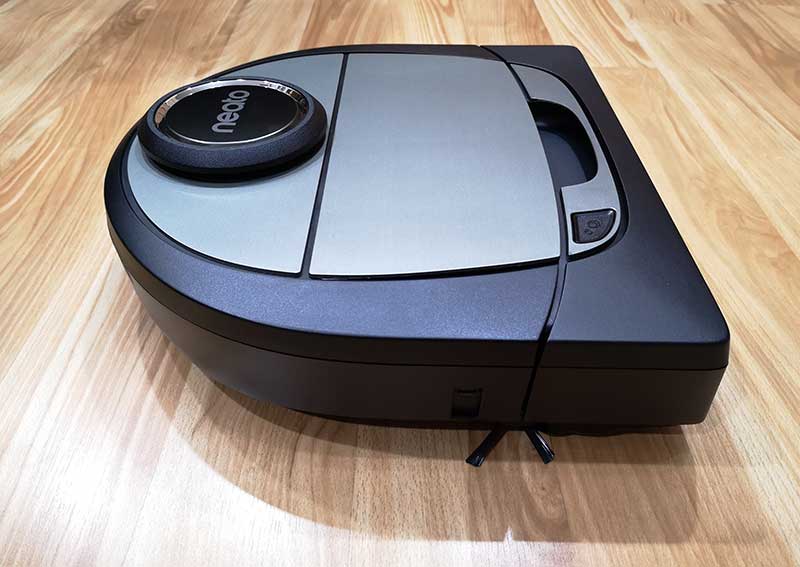
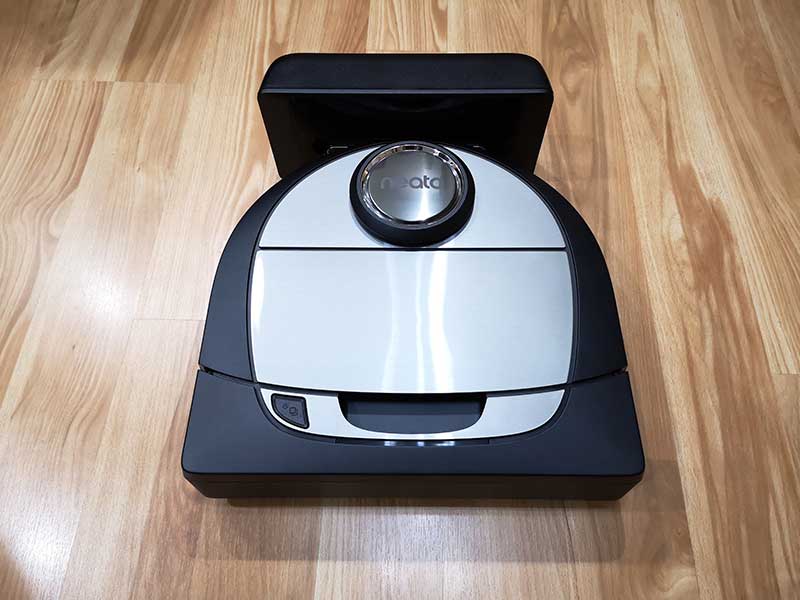
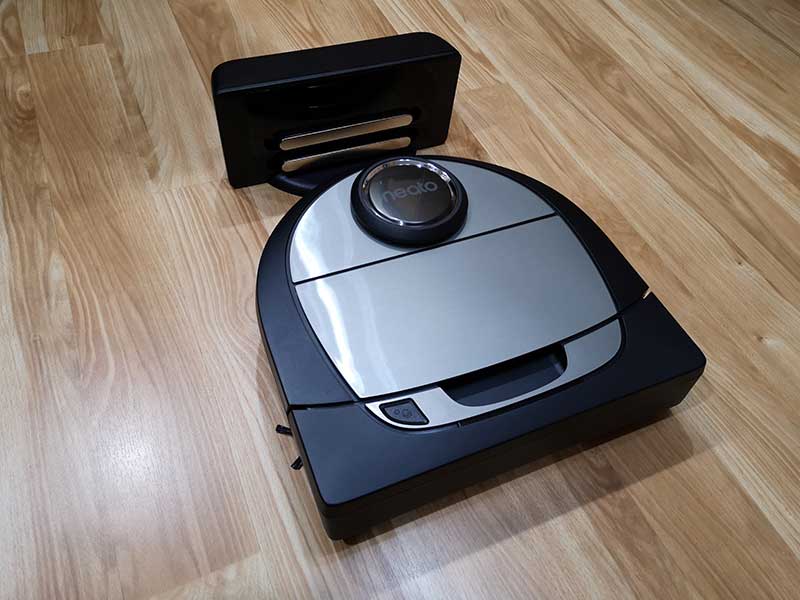
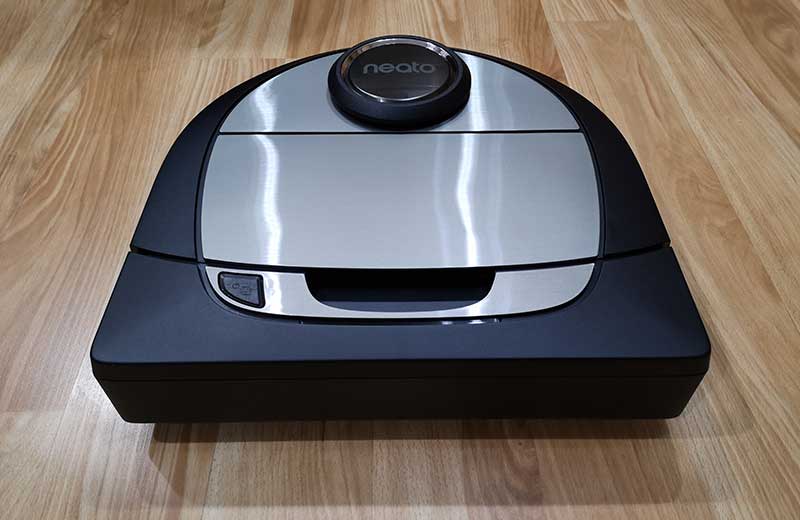
Like the other two Neato Botvacs that I have reviewed, the D7 has the same D shape body that helps it clean close to walls and corners, unlike other brands of circular robot vacuums that can’t get into tight corners.

The D7 has a dark gray/black body with brushed silver accents. The front bumper has a handle cutout so you can carry the vacuum with one hand.

The other Neato Botvacs had a small display and touch buttons for navigating the menus that were used for setting the time and configuring the cleaning schedule. The newer D7 doesn’t have a display because the settings are all done using the Neato app.

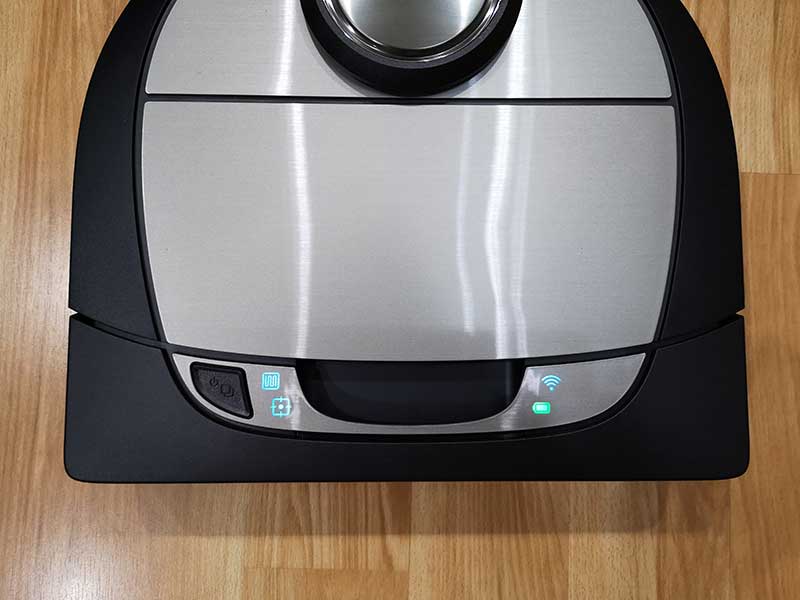
There is one button and four status LEDs on the top of the D7. The start button turns the vacuum on and can be used to manually initiate a whole house cleaning session when pressed once or a 7ft x 7ft spot cleaning session when pressed twice. Pressing the button while the vacuum is in a cleaning session will pause cleaning and pressing and holding the start button will cancel the cleaning session.

The two icons next to the start button show the whole house clean status and the spot clean status. On the other side of the handle cutout are two more LED status icons for the WiFi connection and the battery charge status. The battery status icon glows green when the battery is full, yellow when low, and red when empty.

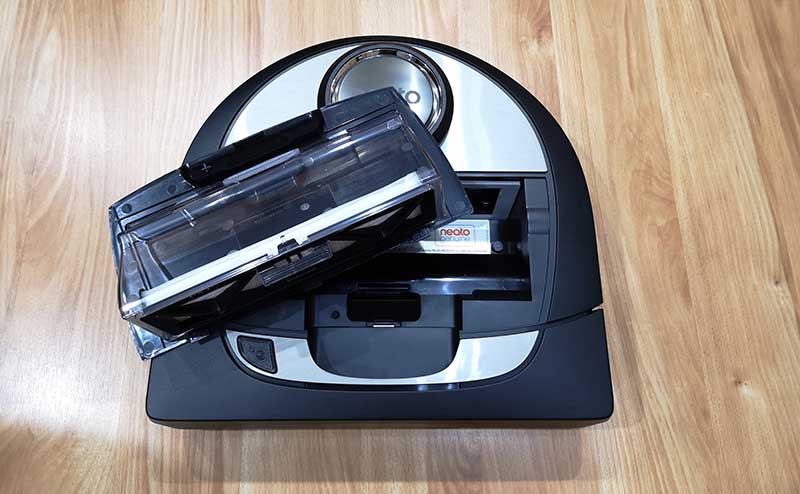
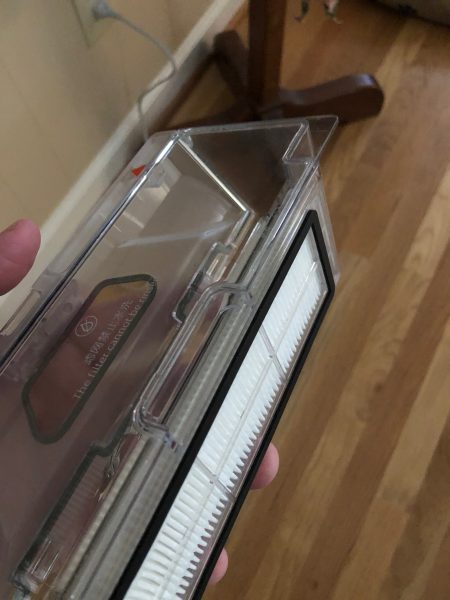
The lid on the top of the vacuum lifts off to reveal the dirt bin and filter holder which is built into the lid.


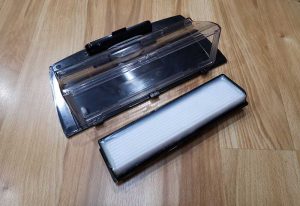
The D7 ships with one filter already installed and two extras in the box. The filter is easy to remove from the dirt bin by just pinching the clip between two fingers and lifting it off the bin. The bin’s contents can then be dumped in a trash can.

The Neato Botvac has a built-in laser which helps the vacuum navigate around the room to build a map and not run into things. The disc-shaped protrusion on top of the vacuum covers the laser and helps protect it from dirt and dust.

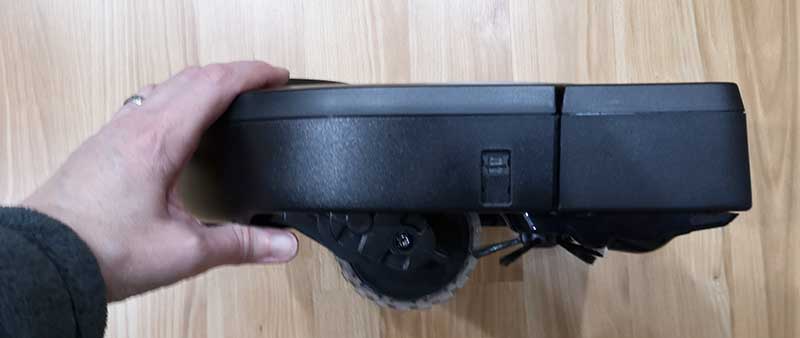
Here’s a side view of the Botvac D7. It shows the large wheels in the back and the side brush along with the front bumper.

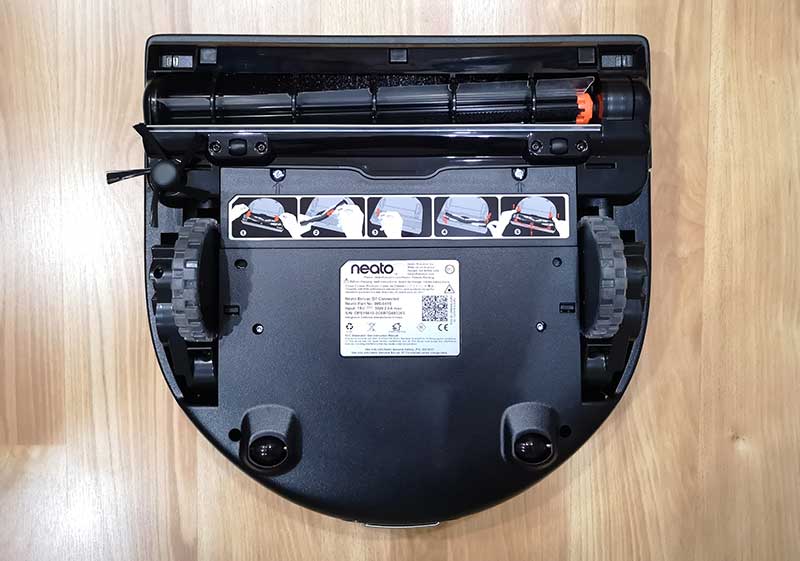
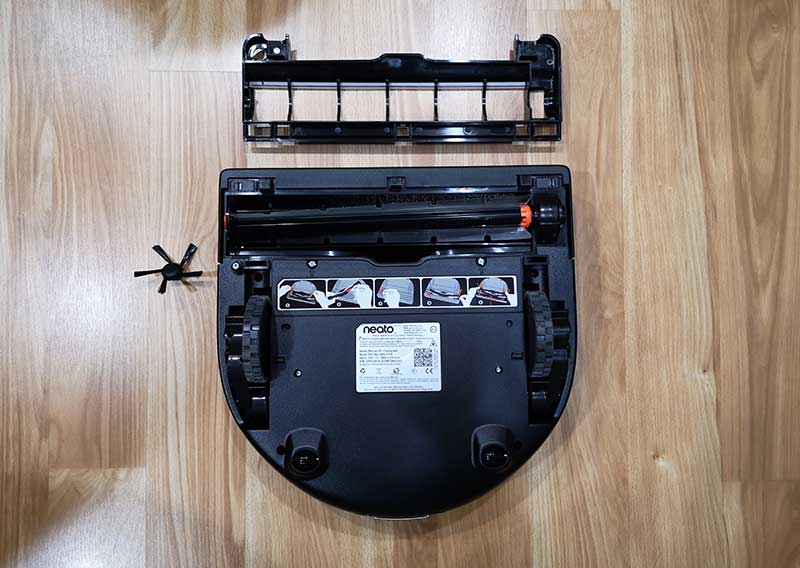
A view of the bottom of the vacuum lets you see the main wheels and smaller back wheels. You can also see the brush and in the upper corners of the front bumper, you can see two rectangular windows that cover the drop sensors so the vacuum doesn’t take a tumble down stairs.

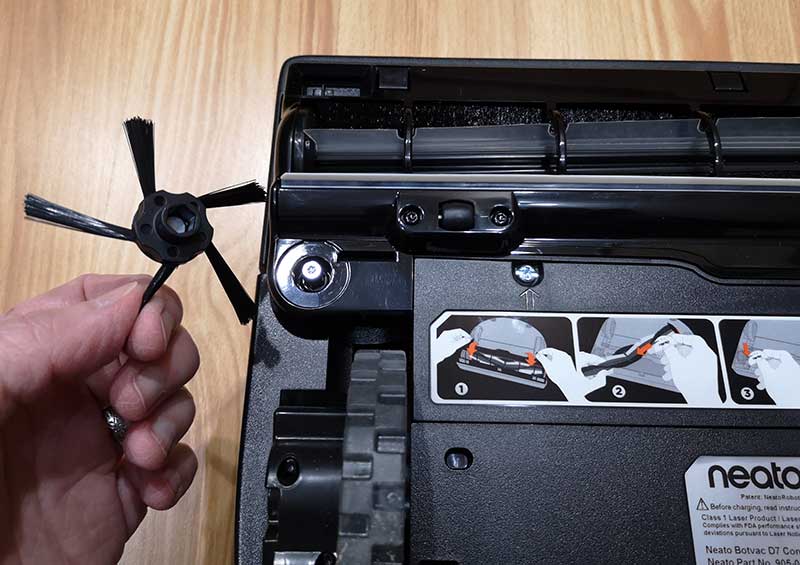
The side brush is held in place with a magnet. This small brush is used to clean dirt and dust from edges as the vacuum travels around the room.

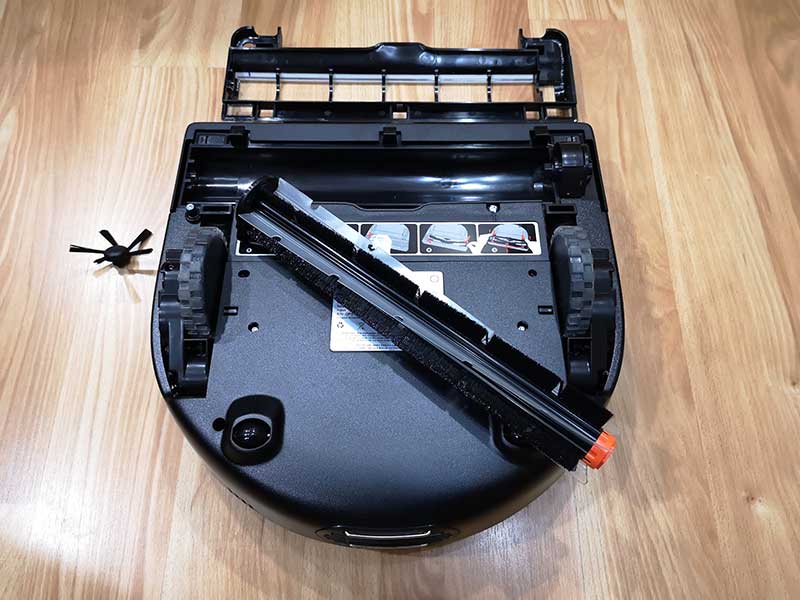
The plastic brush guard lifts off to provide access to the brush.

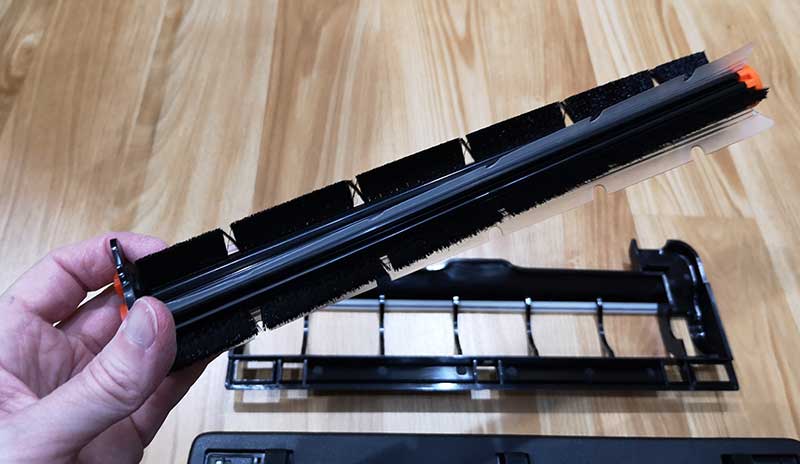
The brush lifts out so that you can easily clean it when needed.

The D7’s brush has bristles for cleaning carpet and flat flexible plastic flaps that clean up dirt from surfaces like wood, vinyl, and tile.

Like the other Botvacs that I’ve reviewed, the D7 ships with a charging dock. This dock has a cord that plugs into a wall outlet and is where your Botvac “lives” when it’s not cleaning your floors. The vacuum automatically goes back to the dock after each cleaning session to recharge and get ready to clean the next time you need it.

The Neato App


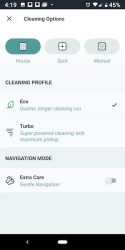
Although you can use the Neato Botvac D7 without using the mobile app, you’ll want to use the app in order to take advantage of the extra features that it provides, like scheduling cleanings and setting up no-go lines.


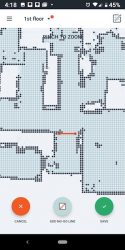
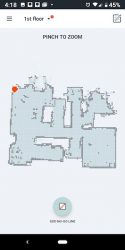
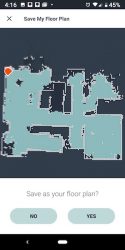
When the D7 cleans a floor, it will create a map which you can then add no-go lines to keep the vacuum from going into certain areas or rooms. I used the no-go lines to prevent the vac from going into our bathroom when it cleans because we have a fuzzy rug in there that we sometimes forget to roll up on cleaning days. If we forget and the vac cleans that room, it will usually suck up the corner of the rug and get stuck there until someone comes home and rescues it.


The app will let you scheduled days and cleaning times and will show you when the vac is cleaning and the status of the session.


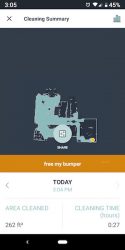
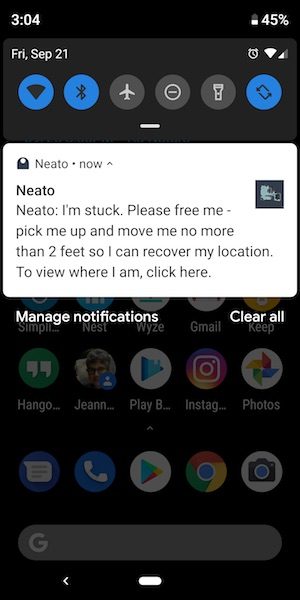
The app will also send notifications to your device if there are problems.

I wasn’t sure that I was going to like the fact that Neato removed the display on the vacs, but in all honesty, using the app is a lot easier than stooping over the vac trying to see the small display and navigate using the touch buttons.

See it in action

NOTE: The video has been sped up, but you can see the time in the right corner.

As far as how the Neato Botvac D7 performs compared to my other two Botvacs, I would say that it seems to be similar to the Neato Botvac Connected WiFi model as far as how well it does navigating around obstacles.

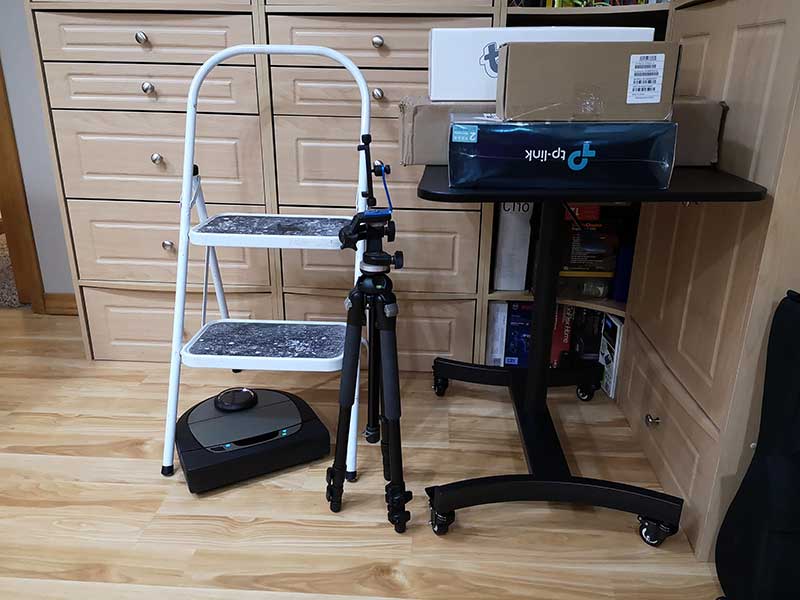
I even set up a complicated “web” of objects in my office and the D7 was able to sweep around the stool and table legs and was able to keep from getting stuck under the low bar on the rolling desk. I was impressed.

As far as how well it does at vacuuming, it does an awesome job of picking up all the dirt and dust on our carpeted floors and hard surface floors. We have a cat who has a litter box, and the D7 is able to pick up the little litter granules that end up getting scattered on the bathroom floor where we keep his litter box. It also picks up his long cat hair. It just does an all-around excellent job of keeping our floors clean without us having to do any of the work.

What I like

  • Easy to set up using the app or manually
  • Very good suction
  • Long run time per charge
  • Only consumable is the filter, but they can be cleaned and reused over and over again

What needs to be improved

  • Expensive

Final thoughts

I’ve been impressed with Neato Botvacs from the first day I started using them back in 2015. I know that statement sort of sounds like something a shill might say, but I can’t say enough good things about this particular brand of robot vacuum. I’ve tried several other robot vacs that are nowhere near as good as far as cleaning up dirt and navigating obstacles.

Price: $799.99
Where to buy: Amazon
Source: The sample for this review was provided by Neato.

Filed in categories: Reviews

Tagged:

Neato Botvac D7 robot vacuum review originally appeared on The Gadgeteer on September 25, 2018 at 11:00 am.

Note: If you are subscribed to this feed through FeedBurner, please switch to our native feed URL http://the-gadgeteer.com/feed/ in order to ensure continuous delivery.
Xiaowa Xiaomi Lite robotic vacuum review

REVIEW – Robotic vacuum cleaners have been around for at least the last quarter-century, but the idea goes back much further. While they don’t look like Rosie from The Jetsons, the idea of a machine to pilot itself around your home, rather than you having to guide the nozzle of a machine around is home automation gadget dreaming at it’s finest. Xiaowa has released a new entrant into this category, the Xiaomi Lite, and sent one to The Gadgeteer for testing. Despite protests from Jack, our Sheltie, we’ve been giving this thing the run of the house for a few weeks now. Read on for the results.

Note: Photos may be tapped or clicked for a larger image.

What is it?

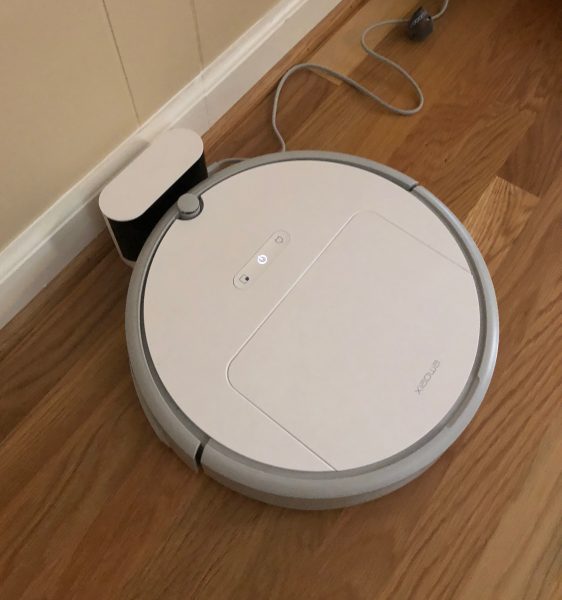
The Xiaomi Lite is a white disc 13.5” x 3.5”. It roams the floors randomly, sweeping dirt and debris into an inner dustbin. There is an IR sensor across the front that it uses to home in on the charging dock and to slow it down as it approaches walls. There are also two physical bumpers that tell it when it’s run into something. One is the entire front of the disc, and the other sticks up from the center front to measure the height of overhangs.

What’s in the box?

  • Assembled vacuum unit
  • Charger
  • Power cord for charger
  • Cleaning brush (with hair remover pick)
  • Instruction sheet with no Roman characters whatsoever

Design and features

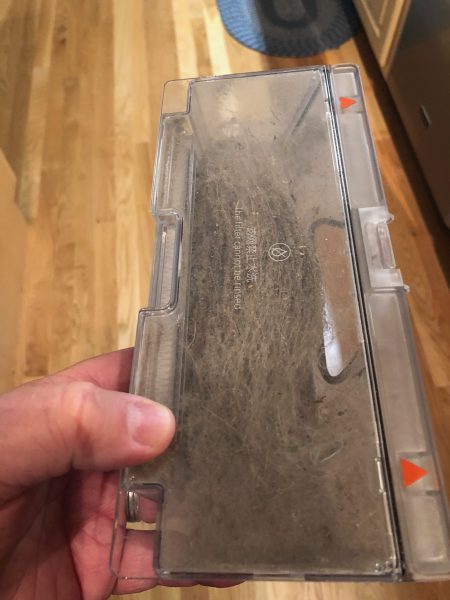
The Xiaomi Lite (or Rosie, as we nicknamed it) is not programmable, as some units are. That said, there are some internally programmed obstacle avoidance actions, which may or may not be included in the instruction sheet. There are instructions given in very clear English when certain things happen: “Charging” “Starting with the cleanup” “Dustbin removed” “Dustbin replaced”. There are three buttons on the top center area and a flap door that can be lifted to reveal a containment box. This can be removed and easily shaken out into a trash can. It holds maybe a cup or more of debris. There are clear English warning labels to not rinse or remove the filter. I did clean the filter out with some canned air out in the yard since it gets a coating of fine dust after a few loads of dog hair and other debris.


To start the cleaning process, you simply press the illuminated power button, and she announces “Starting with the cleanup.” From there, it just ricochets around the room until the battery runs down when it returns to the charger and announces “Charging.” I only had it get stuck once under a piece of furniture where it stalled out and said some warning. (I was in another room and heard it dimly through the headphones I was listening to.) It had turned off the motor and was wedged under the decorative scrollwork under our hall tree. The only other times I’ve seen it get confused is around the chairs in our dining room. When all 5 chairs are under the table, that’s 24 legs with some truly random clearances. Rosie manages it well, but I think it is a drain on her batteries since there is so much hacking and backing involved.

There is another button to the left of the power button. When this is pressed, the Xiaomi Lite says “spot cleanup” (I think), and starts cleaning in concentric circles. This continues until the circle is about 4’ across, then reverses and going back to the center. (In an unplanned accident just before I posted this, the dog’s food bowl was kicked over, and the area needed a spot cleaning. Here’s the video.)

If you have a spill or especially dirty area, this would handle it well. I used this in the center of the sewing room, and it got almost a full canister of dog hair, loose threads, and tiny snips of fabric the color of the rug. This is a very nice feature.

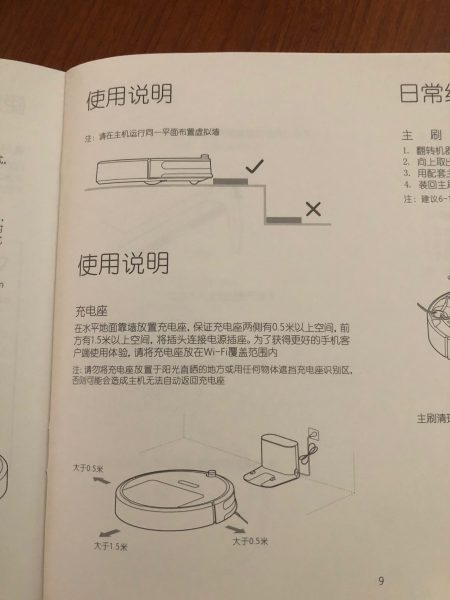
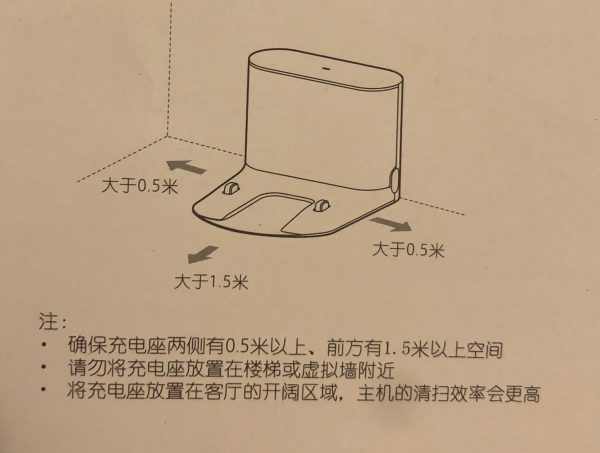
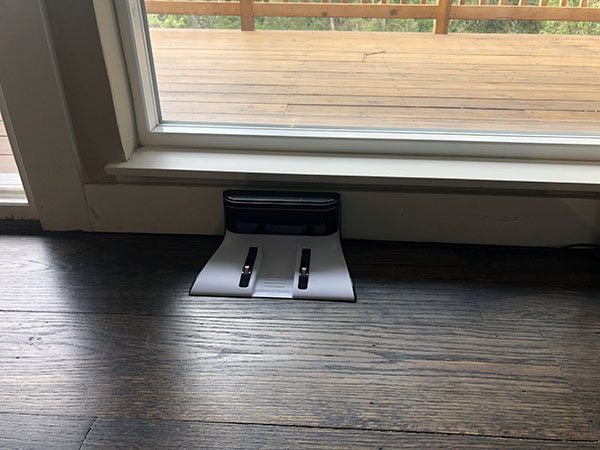
The charger has a black window with some sort of homing beacon inside. It’s a 4” high x 5” x 2” tower with a 4” charging apron in front. There was never a time when the Xiaomi Lite ran low on battery and didn’t know how to get back to it, which is not the case for some, according to friends who have used other brands. We’re supposed to leave half of some distance to each side and 1.5 of the same distance in front to allow it to enter. (See photo below) We have it set about 14” from a hat rack and open in front and to the other side, and as I said, never had an issue. (see video of self-docking)

Setup

Setup is pretty minimal – unless you have stairs or wires running over the floor. If it’s safe for your toddler or your 90-year-old mother, the Xiaomi Lite can probably navigate it. If not, you’ll need to block off areas you don’t want it to get lost in. We close off the hall bath (two loose rugs), my office (too many wires), The Lovely Bride’s sewing room (fabric, pattern papers, and sewing machine pedals), and the master bedroom (cords under the bed for chargers and the Sleep Number pump.) Other than surprising Jack on more than one occasion (he won’t believe that just getting on the couch will keep him safe!), we really didn’t have any issues.
According to the website, you can use it with an Alexa-powered device. (We are the only household in the US that has held off from buying into this use of our Prime account.) There is also an app, but I could not get it to pair to my Wifi router. It’s not compatible with 5GB wifi.

Performance

The Xiaomi Lite runs fairly quietly and reliably. Obviously, it’s louder on hardwood floors than on carpet or rugs, but it makes the transition between the two without issue. (We have no shag, fringed, or loose throw rugs, which may be part of this. All of our rugs are straight-edged and short napped.) The Xiaomi Lite speeds up across open floors but slows when approaching a solid wall or furniture. If the obstacle is solid, it will just tap it, but if it’s light enough (like my Grandmama’s antique rocker), it may push it a bit. Sometimes, this results in trapping itself into a corner, which is irritating, but it’s rare.

What I Like

  • Picks up trash well
  • Returns to base to recharge reliably
  • Avoids most obstacles
  • Gets under furniture

What needs to be improved

  • No automatic start (without an Alexa device)
  • No known programmability
  • Seems very random in coverage

Final thoughts

I’ve been talking with friends since getting this unit, and have been surprised how many have one and use them constantly. During a visit to my doctor, for instance, she was having an issue with her chair being stuck under the table leg and I laughed and commented that it was similar to this robotic vacuum I’ve been testing out. This launched us into how they clean and different models, etc. She’s had them for years, and we talked about it for several minutes. I also read up on how some models map the home and can clean systemically, rather than randomly. While this is not part of the feature set of the Xiaomi Lite, the ones that offer this are also selling at much higher price points! If you want a basic automatic vacuum that will spot clean or get the greater part of the random household mess, this could be just the thing. If I didn’t have this, I’m not sure I would go out and buy it, because the carpet in the three rooms we block off still require dragging out the manual vacuum. If I could have it reliably run while I was at work, and know it wouldn’t get caught under a chair or caught up in one of Jack’s beds, it might make a difference.

Price: $149.99, normally $241.64
Where to buy: GeekBuying
Source: The sample of this product was provided by GeekBuying.

Filed in categories: Reviews

Tagged:

Xiaowa Xiaomi Lite robotic vacuum review originally appeared on The Gadgeteer on July 27, 2018 at 11:00 am.

Note: If you are subscribed to this feed through FeedBurner, please switch to our native feed URL http://the-gadgeteer.com/feed/ in order to ensure continuous delivery.
Tsumbay car vacuum cleaner review

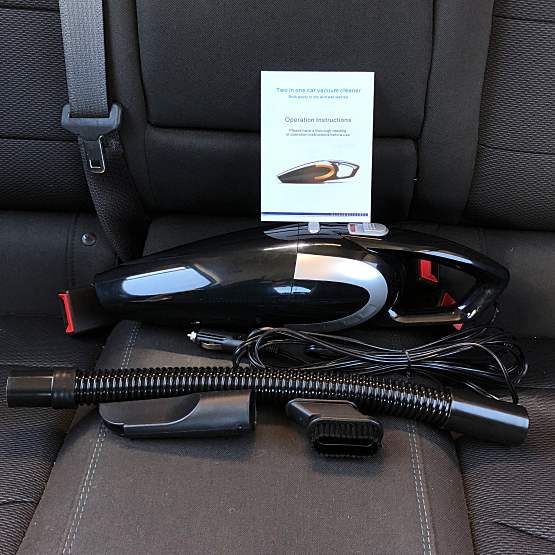
Cleaning the inside of my car usually involves two choices, one, pay a couple dollars at the local car wash or, two, drag out my old Dirt Devil hand vac. The Dirt Devil usually wins out (because its free). However, because it requires a power outlet that means dragging out my 50-foot electrical cord. As you can imagine it’s not very convenient, so I jumped at the chance to review the Tsumbay car vacuum cleaner. Hoping it might make my life just a little bit easier.

What is it?

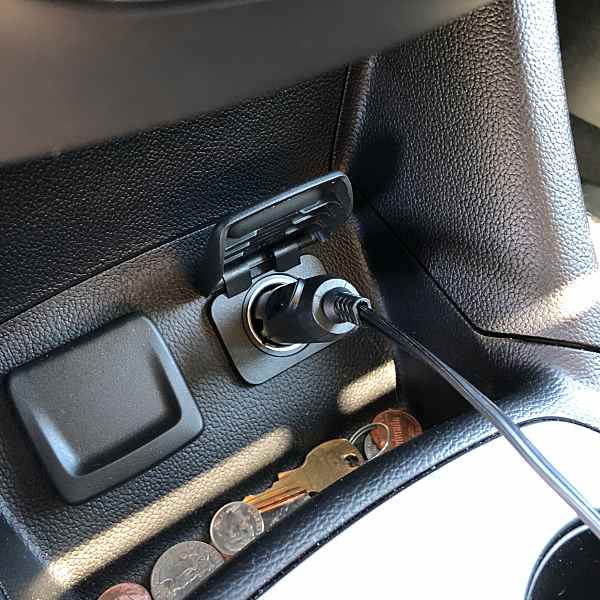
The Tsumbay car vacuum cleaner is a lightweight portable vacuum cleaner that’s designed to plug into your cars 12V outlet (or cigarette lighter).

Hardware specs

  • Suction: 5000PA
  • Voltage: DC 12V
  • Power: 120W
  • Power cord length: 14.8ft
  • Weight: 2.2lbs
  • Size: 16” x 4” x 4.5”

What’s in the box?

  • 1 x Vacuum
  • 1 x  17-inch EVA extended suction pipe
  • 1 x Vacuuming flat nose attachment
  • 1 x Brush attachment
  • 1 x Manual

Design and features

Constructed of a very lightweight plastic the car vac has a sleek design. I received the black version, but it’s also available in white.

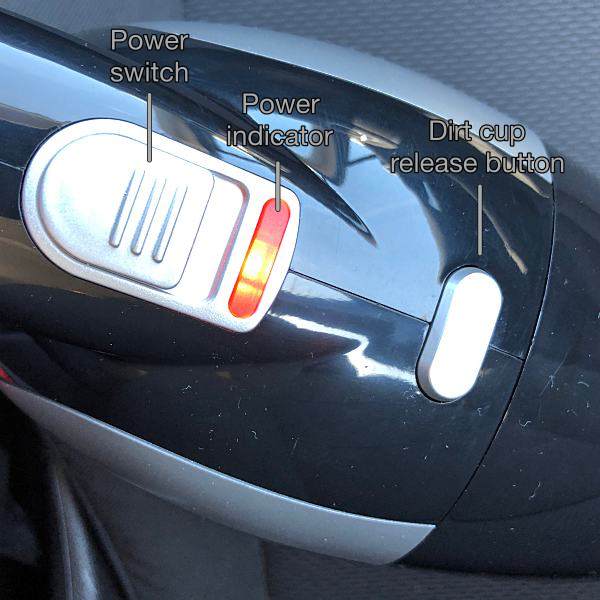
The vacuums power switch and power indicator light are located at the top rear of the vacuum, near the handle.

The Tsumbay is a 2 in 1 vacuum meaning it’s both a dry and wet vac (more on that in the performance section).

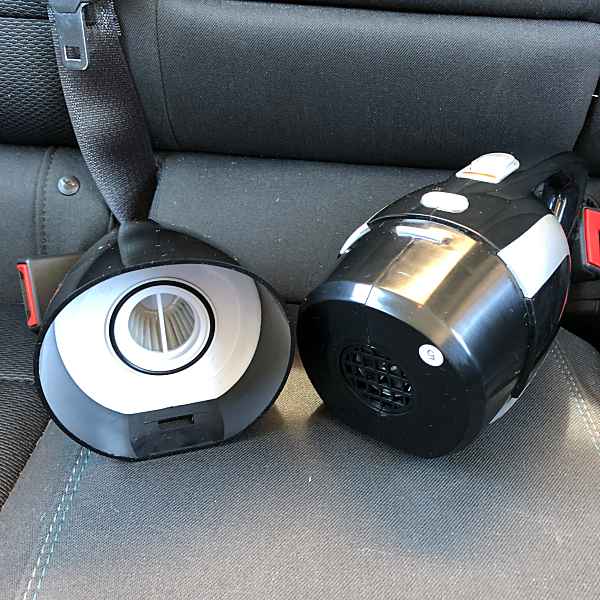
Dirt cup and washable filter

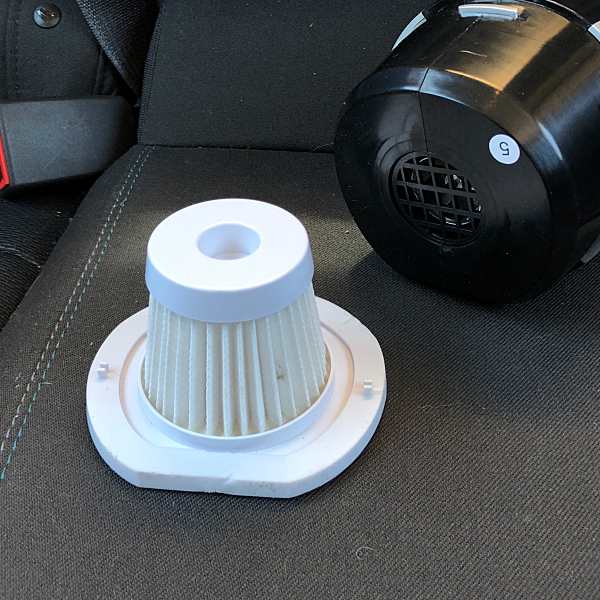
The front of the vacuum doubles as the dirt cup. Emptying it is done by pressing the latch release button located just in front of the power indicator light. Pull out the small filter and dump out the contents.

A few taps on the ground does a good job of clearing debris from the filter.

The filter is washable, and Tsumbay recommends washing it after every use to maintain performance.

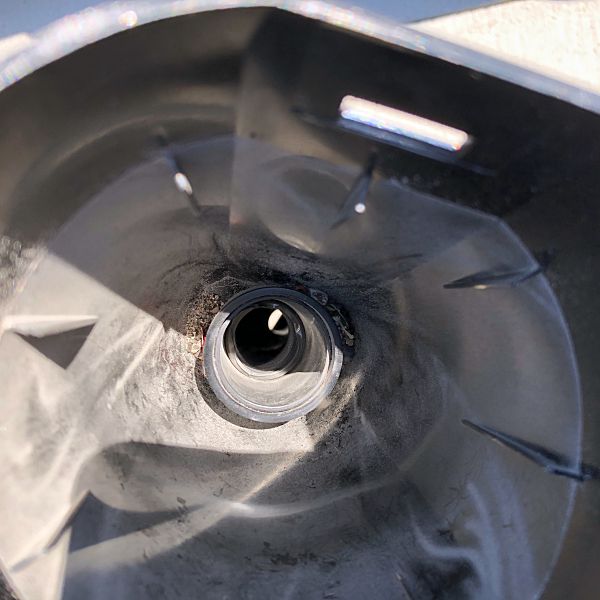
Note: The filter is small and gets clogged up quickly. For max performance, I recommend clearing it out multiple times while vacuuming.

Performance

After plugging the vac into my cars 12V outlet, I fired it up. 

The first thing I noticed was the sound or lack of it. It was surprisingly quiet especially compared to my Dirt Devil or one of those car wash vacuums. Tsumbay lists the vacs decibel level at 65db. For comparison that falls between an air conditioner and a dishwasher on the decibel scale.

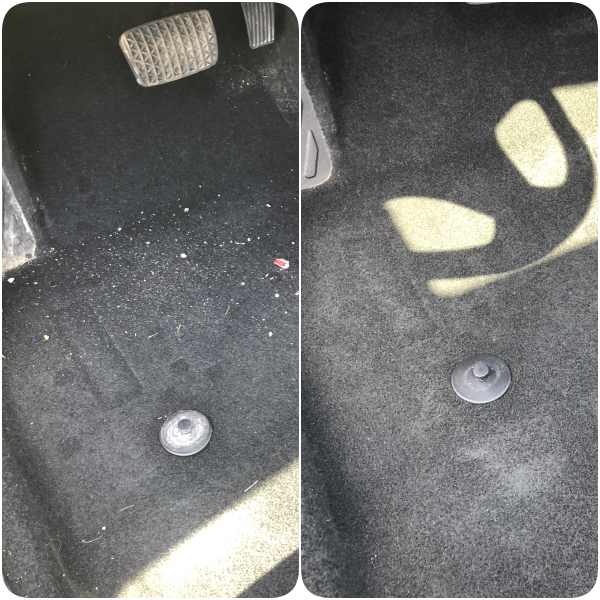
I used the extension tube and crevice tool to vacuum the floor of my car. I was pleasantly surprised by the suction power. The vacuum did a good job of picking up small pebbles, grass, and dog hair.

Check out the short video and before/after pics below to see the results.

Another thing I liked was the length of the power cord. Measuring 15-feet It allowed me to reach every corner of my Chevy Cruze, including the trunk.

Picking up dog hair

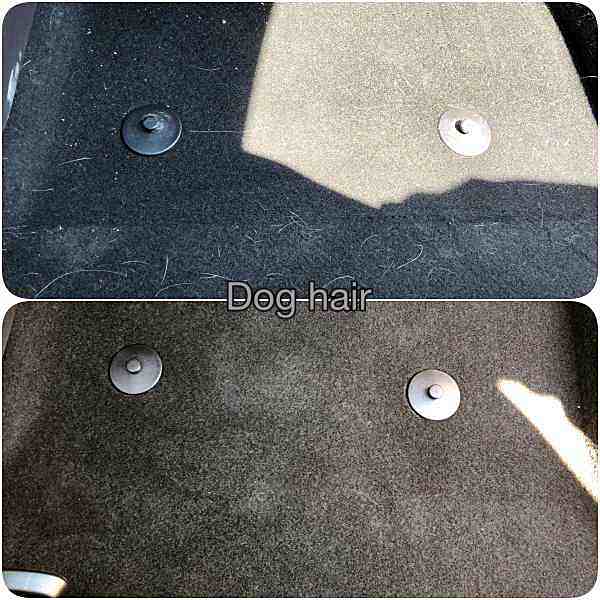
I have a puggle named Zoey, I love her to death but, she sheds like it’s her job. And even though I use a cover on the front seat, her hair ends up everywhere, the back seat, driver’s seat, even the dash. I often refrain from taking her places because the cleanup afterward is such a pain. Her hair was one of the biggest reasons why I chose to review the car vac.

I used the brush attachment to vacuum her hair from the floor and seats. I was happy with the results. The brush did a great job of loosening the hair from the seats fabric and carpet allowing it to be sucked up.

Finally, a quick and easy way to clean up after a trip to the vet or dog park!

Wet Vac

As I mentioned the car vac also doubles as a wet vac, I tested this by pouring water onto one of the car mats and vacuuming it up. Once again the vacuum performed well. You can see the results in the video below.

One note, the vacuum is only meant to vacuum up small amounts of liquid. In my testing I found anything over 1/4 cup tends to spill back out of the dirt cup.

I also noticed that once the filter is saturated, the vacuum loses most of its suction. Remove the filter and allow it to dry before using it again.

What I like

  • Plugs into cars 12V outlet (cigarette lighter)
  • Lightweight
  • Low noise
  • 15-foot power cord
  • Good suction power
  • Wet vac ability

What needs improvement

  • Extension tube could be a little longer and more flexible.
  • No storage bag

Final thoughts

I love this little car vac. I like the convenience of being able to plug it directly into my car. No more dragging out my 50-foot extension cord, and it’s perfect for spot cleaning. It’s also nice to know that if I spill something, it can be used for that as well.

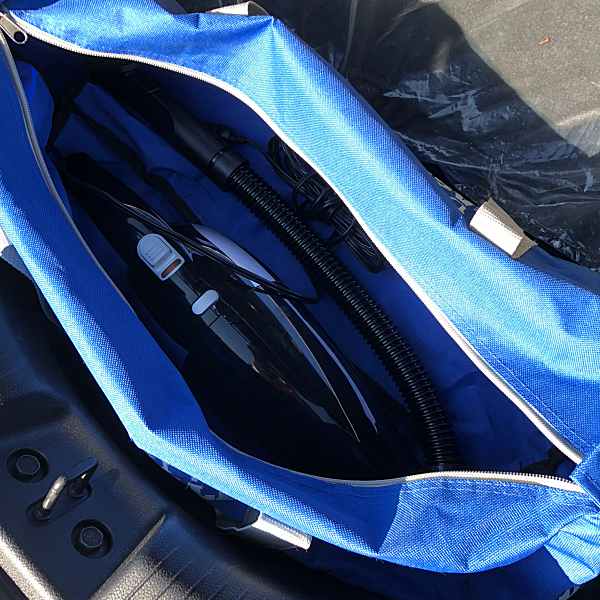
I used an old duffle bag to store the vacuum and accessories, and it now has a permanent home in the trunk of my car.

If you have kids, pets, or just like keeping the inside of your car clean the Tsumbay car vacuum is the perfect car cleaning accessory.

 Price: $28.99
Where to buy: Amazon

Source: The sample for this review was provided by Tsumbay.

The post Tsumbay car vacuum cleaner review appeared first on The Gadgeteer.

Filed in categories: Reviews

Tagged: ,

Tsumbay car vacuum cleaner review originally appeared on The Gadgeteer on June 25, 2018 at 11:25 am.

Note: If you are subscribed to this feed through FeedBurner, please switch to our native feed URL http://the-gadgeteer.com/feed/ in order to ensure continuous delivery.
iLife V8s Robot vacuum cleaner review

What is it?

The V8s is a autonomous vacuum and mopping robot with scheduling functions aimed at keeping your house tidy with less effort on your part.

Hardware specs

Dimensions: 330mm x 320mm x 81mm
Weight: 2.7kg (~6lbs)
Capacity: Dustbin: 0.75L | Water tank: 0.3L
Charging type: Auto and manual charging
Cleaning modes: Auto, Point, Border, Max, Path
Battery: 2600mAh
Charging time: 200-350 min
Cleaning time: up to 100min
Grade-ability:15°
Ability to cross obstacles: ≤ 12mm
Applicable ground: Tile, wood floor, carpet
Power: 100-240VAC  50/60HZ  22W
Working voltage(V):14.4

What’s in the box?

  • V8s robot vacuum
  • Charging station/dock/power supply
  • Water tank
  • Mop cloths
  • Sweepers (2 sets)
  • Replacement filter
  • Remote (and batteries)
  • Instruction manuals

Design and features

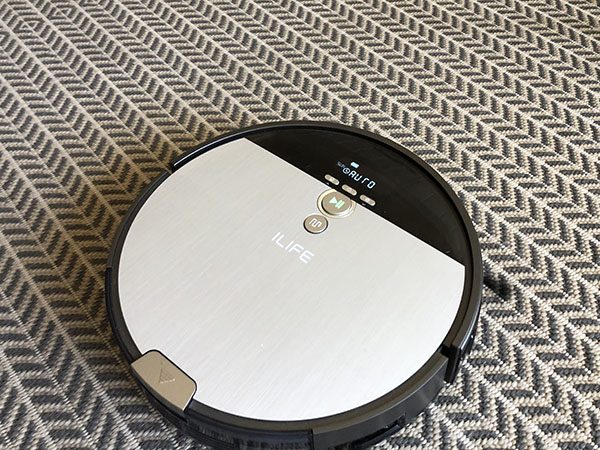
At first glance the V8s looks very similar to other robot vacuums on the market. It’s round, has some function buttons and a display. However, iLife has made some design choices that provide a good bit more functionality when you look a bit closer.

First, this is not just a dry vacuum. It’s also a mopping robot when you install the included water tank and one of the mopping cloths.

The large wheels on the underside make sure that traction is maintained and some pivoting suspension helps avoid getting stuck, perched on obstacles.

The dustbin or the water tanks are interchangeable and easily removed by pressing the eject button at the back of the robot and pulling backwards.

The front bumper gracefully senses objects without a large thud and it covers almost 50% of the circumference of the robot, so it navigates around obstacles really well.

Setup

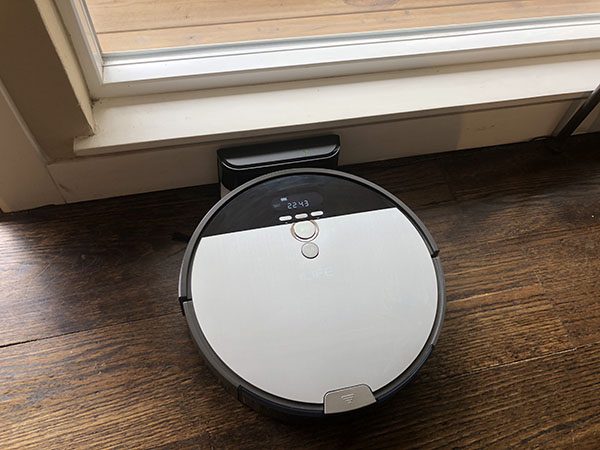
Setting the V8s for use is as simple as plugging in the included dock and then setting the robot down facing forward so the charging pads make a connection. You can also plug the wall adapter directly into the V8s to charge if needed. Regarding dock placement, iLife does recommend that the dock should have almost 3 feet of clearance on either side and 6 feet of clearance from the front, meaning that it should sit against a relatively open wall.

Of note, after about a week, I moved the dock to a less visible place under a bench by our dining room table. It only has about 3 feet before some chair legs, but the V8s hasn’t had any trouble. Ok, next step. After charging it up, the next step is setting the clock. Press and hold the clock icon for about 2 seconds and it will walk you through setting the time. A quick press of the clock icon will let you set up a cleaning schedule. Click through the days and set a time for each day and you’ll be good to go. I have this one set for 10am each morning.

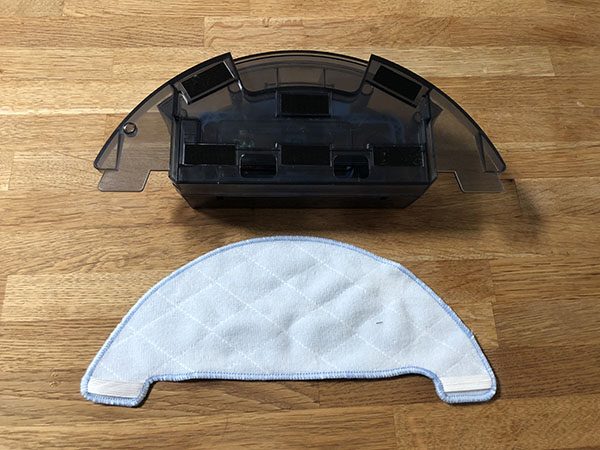
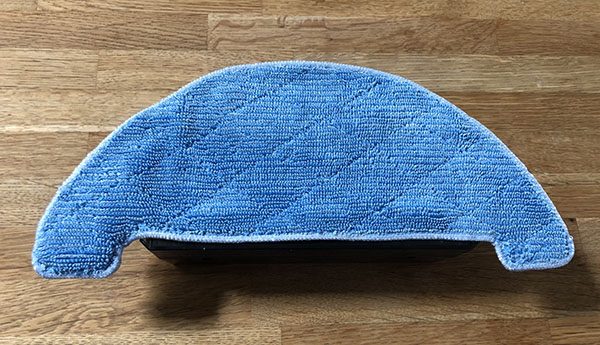
If you’d like the V8s to mop your floors, you’ll need to swap the dustbin for the water tank. To set that up, you need to place the mop cloth on the bottom of the tank, locating the two elastic straps over the outside wings, and then the rest of the cloth secures to the velcro that’s permanently on the underside of the tank. Fill the water tank up, and swap it out for the dustbin in the robot using the ejection button at the back of the robot.

Starting either a dry or a wet cleaning operation is a quick press of the “play/pause” button on either the robot or the remote. Auto Mode is the default and it will just go about its business. It automatically returns to its base when finished or when low on battery. There are a couple of other useful cleaning modes that may work better depending on the particular room you want to be cleaned. Point Mode (swirl icon) is helpful when there’s a specific mess to clean up. It will basically spiral outward from your starting point until the area is clean. Border mode (squarish icon) will do what it sounds like it should; clean the border of your room. Max Mode (fan icon) will tackle heavier dust and dirt by turning up the suction power. Path Mode (squared arrow icon) starts the robot on a more back and forth, logical lawnmower-type path.
Performance

I purchased an iLife V5 about 2 years ago that has been in steady service until the opportunity to review this unit popped up. The V8s definitely outperforms my old iLife in every aspect. Between navigation, climbing up and over edges and obstacles, dealing with a lot of pet hair and the ability to mop, it’s hard not to recommend the V8s out of the gate. Let’s look at some more specifics though because there are a few scenarios that you may want to be aware of.

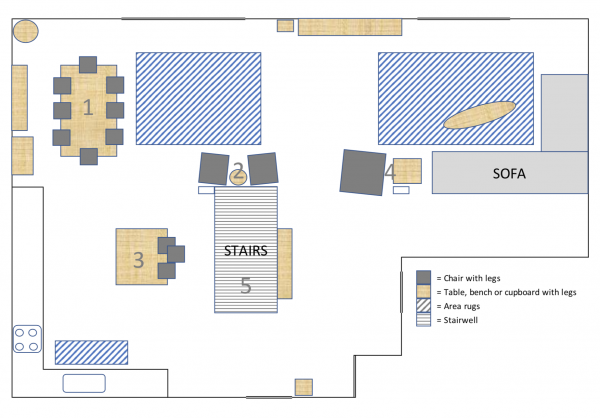
I set up the V8s in our main room which is basically the main living area of our house. It’s one big open room that’s part living room, part dining room, part kitchen and entry from the front door. The floor is dark hardwood with two large area rugs. As far as the layout, I almost feel bad for this robot. Here’s a quick diagram of the room.

As you can see, there are a couple of trouble spots. There are three “forests” of table/chair legs (1, 2, 3), an armchair/side table “prison of solitude” (4) and a mysterious stairwell near the center (5). The V8s does pretty well with the forests although it can waste a good chunk of time under the main table with the combined 28 legs. Definitely helps to flip the chairs upside down on the table if I remember to do that. The armchair/side table combo will also trap it for a while as there’s only one entry to the side table and two to the armchair since the front is too low and the right side is next to the table. There’s also usually some cables in this area which put up a pretty good fight and occasionally win. Lastly is the stairwell which is surrounded on 3 sides by a metal railing that the V8s has no problem detecting. The first step down is actually before the start of the railing so it’s a true cliff on three sides (and possibly not to building code). The V8s has yet to fall into the step that regularly took out the v5. The first time I ran the V8s it spent almost an hour going around the perimeter of the stairwell looking for a way into that square footage. I finally turned it off and haven’t caught it doing the same thing again.

The dustbin is easier to clean than the V5 I had as the door just flips down and you can either manually extract the debris or tap it out if your trashcan is larger than the opening (mine isn’t). (Warning alert: pretty gross pet hair shot here. Nasty things lay under the chairs where you can’t see.)

The filter area is a bit funky though. There’s a hinged lid which exposes the multiple filters. A high-effective filter, a foam layer and a primary filter (mesh screen).

All 3 of these trap dust, dirt and pet hair, which makes cleaning them out a bit messy. It feels like this could be a single part or a cartridge to be removed and cleaned, but at least it is trapping and filtering so it’s working.
The mopping function is great. Unlike vacuuming, it’s very easy to see where it has been as the wet floor is a dead giveaway (especially on this dark hardwood).

It has a built-in feature that will mop a 7m x 7m directly in front of where you set the V8s down, so 3.5m to the left and right of the robot and 7m ahead. iLife recommends that you fold over the edge of rugs to deter the V8s as it will just start mopping the rug too. My rugs are too thick to do that. For my scenario (needing to avoid area rugs) if I set it down in front of the oven, about 3.5m to the right of the area rug leaving about 2.5m to the sink it does the trick. It works pretty well, but I find myself wishing for a couple small beacons or reflectors that I could place at a threshold I want it to stay within.

Here are a couple of additional detail photos.

The bottom shows the sweepers, charging contact pads, front ball-wheel, drive wheels and the vacuum intake.

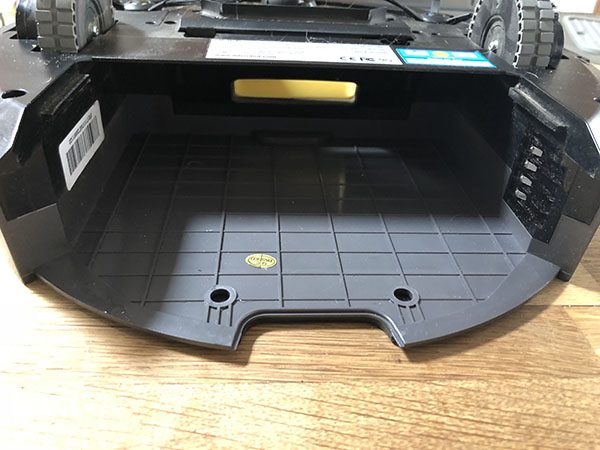
The receiving area for the dustbin or water tank.

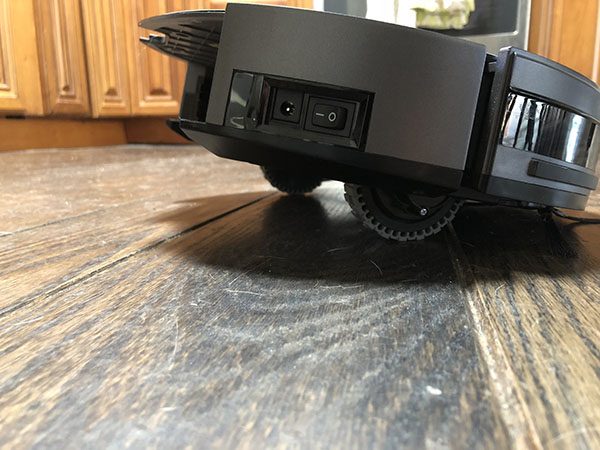
A good shot of just how much lift the grippy, drive-wheels have to keep the V8s moving. You can also see the manual charging port and the power switch (which basically stays on).

There are really only a few things to watch out for. On stiff area rugs, the edge of the rug can get trapped between the sweeper brushes and the underside of the robot which results in it kind of limping sideways until it finally clears the end of the rug. Another is that there’s no alert when the dustbin is full. It’ll just keep trying to suck debris into a completely full bin. Best practice is just to grab the dustbin when it’s done and empty it out in preparation for its next mission.

It’s also fun to watch it work and wonder what it’s thinking. I find myself contemplating if it thinks all obstacles are non-moveable so that it’s thoroughly confused when it runs into things that slide or roll a bit and then stick. Or, when I hit the home button why it will sometimes head directly away from the base for about 5 minutes before eventually making its way back to the dock. I also may be starting to possibly understand why people might put costumes on these and give them pet names. (Again, possibly…)

One final word of caution (for any robot vacuum…) to my knowledge none of them are sophisticated enough to avoid pet “messes” and I’ve heard some horror stories that I’ll save for another time.

What I like

  • Scheduling function / daily cleaning
  • Relatively quiet
  • Dry and wet/mopping functions
  • Handles pet hair very well

What needs to be improved

  • Area rug edges can get stuck in the vertical space between the sweepers and robot floor
  • No alert for being too full
  • No real solution for creating boundaries when mopping
  • Filter area is unnecessarily complicated
  • Remote doesn’t look like it belongs to this robot (very different aesthetic)

Final thoughts

The iLife V8s is a really good vacuum, but for a different reason than might be implied. The traditional vacuum cleaner we have is going to do a better job if measured head to head against the V8s. In my book, the V8s wins because at 10am every day it’s going to kick on and clean the floor. If I’m sitting here when it starts, it’s a quick reminder to pick up quickly so it can do its job. Without it, I’d go back to just vacuuming on the weekends. When it comes to mopping, I’m more likely to fill up the tank and hit start than I am to get a mop and bucket out, so that’s win number two. Autonomous cars may still be a few years out for the general public, but robot vacuums like the V8s are ready to go to work for you today.

Price: $249-$279
Where to buy: Amazon
Source: The sample of this product was provided by iLife.

The post iLife V8s Robot vacuum cleaner review appeared first on The Gadgeteer.

Filed in categories: Reviews

Tagged:

iLife V8s Robot vacuum cleaner review originally appeared on The Gadgeteer on June 12, 2018 at 10:00 am.

Note: If you are subscribed to this feed through FeedBurner, please switch to our native feed URL http://the-gadgeteer.com/feed/ in order to ensure continuous delivery.