Suaoki 14W portable solar charge panel review

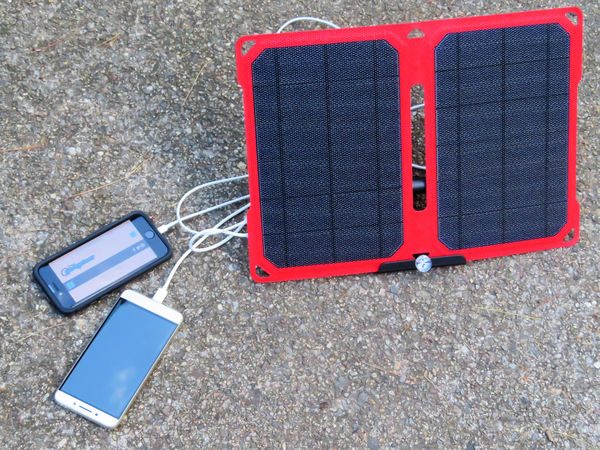
REVIEW – The Suaoki 14W portable solar charge panel can keep your rechargeable items fully powered even when you’re off the grid. The lightweight, thin, water-resistant design features two USB charging ports with optimized power output. Read on to see what I think!

What is it?

The Suaoki 14W portable solar charge panel is a gadget that you can use to charge rechargeable devices by converting solar energy into electricity. The solar panel generates power when it is exposed to direct sunlight. The circuitry in the panel ensures that the power delivered to each USB port is optimized to minimize the charging time required. The panel features an ETFE coating to protect the solar cells from the elements and rubber caps to protect the USP ports from water and debris. The panel comes with carabiners and nylon ties to support the panel from trees and equipment, as well as an easel with sun finder to point the panel directly at the sun.

What’s in the box?
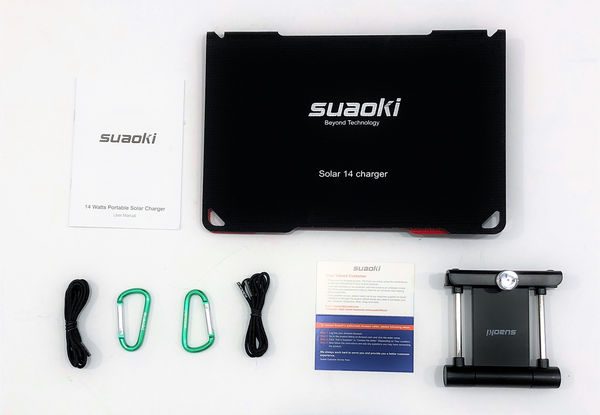

Suaoki 14W portable solar charge panel
User Manual
2 carabiners
2 1 meter long nylon ties
solar finder stand

Design and features

Specifications
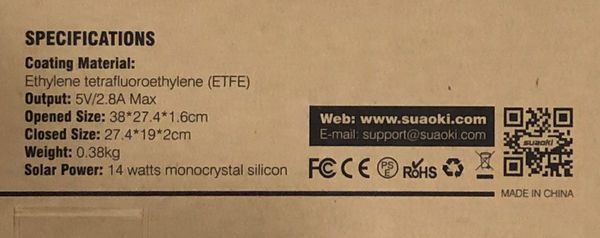
solar cells – 14 watt monocrystalline silicone
cell coating – ethylene tetrafluoroethylene (ETFE)
output – 5V/2.8A (14W) max
open size – 38 x 27.4  x 1.6 cm
folded size – 29.4 x 19 x 2 cm
weight – 0.38 kg

Unboxing
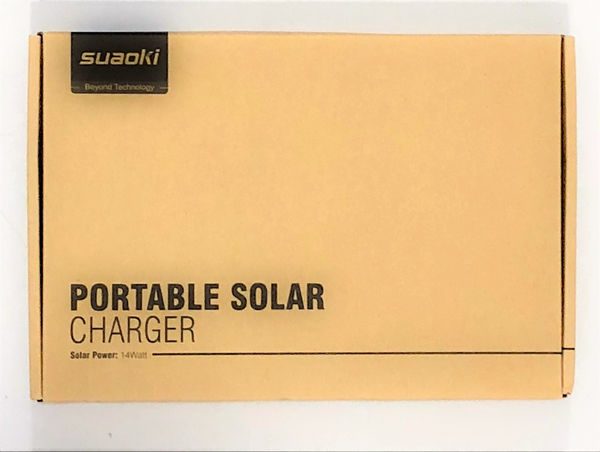
The Suaoki 14W portable solar charge panel comes in a no-frills cardboard box. The front, back and sides are printed with the product, specifications, suggested applications (tablet, mobile, 90’s iPod, a camera – with viewfinder, and a Sony PSP).

Design of the Suaoki 14W portable solar charge panel

The Suaoki 14W portable solar charge panel is a folding solar panel design that resembles a restaurant menu: a roughly 7.5″ by 11″ folded design opens to a roughly 11″ by 15″ surface when being used.
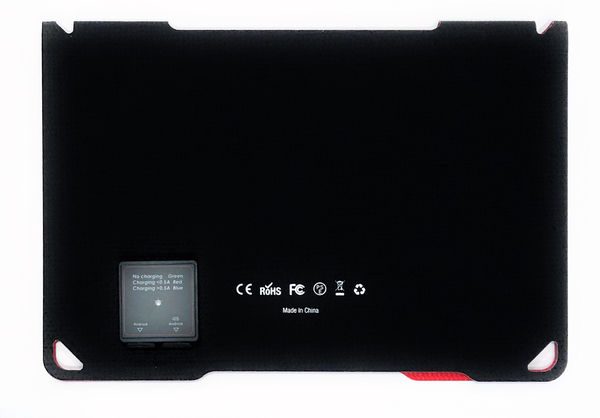
The outside back appears to be nylon coated. On one side of the panel’s rear is a small interface box with the USB ports on it and an LED indicator light. The area adjacent to the interface box is labeled with various compliance markings including the CE, RoHS FCC, WEEE, and recycling directives. Below the symbols, the device is marked that the country of origin is China.
On the front of the unit, the Suaoki brand label is centered above the product name: “Solar 14 charger”

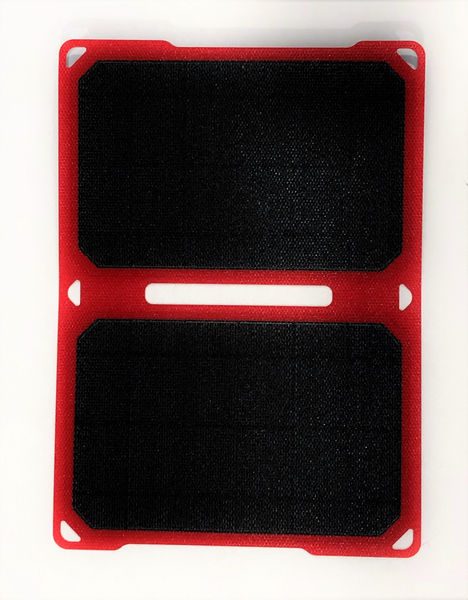
When the unit is opened, the inside appears to be coated with fiberglass; the surface has the texture of a cast woven mat.
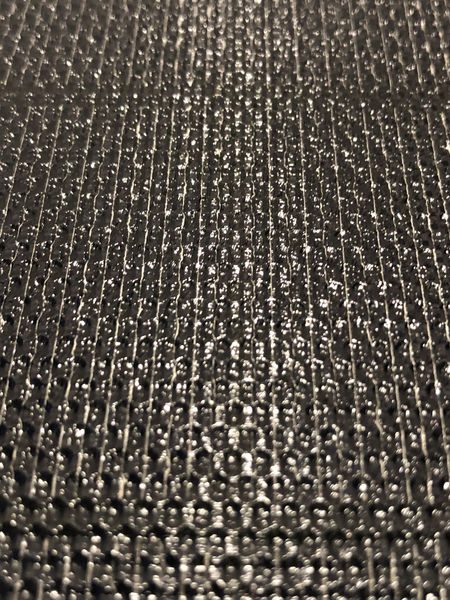
However, the inside is coated with ETFE. This material has superior tolerance, compared with PET, to high temperatures that solar cells are exposed to and will outlast PET when exposed to salts, acids and bases. The cells are encapsulated within the coating. The corners of the cells have been mitered to provide more resistance to cracking. Even though the outer rim and hinge is flexible fabric, the cells are made of silicon crystal. This gadget is designed for outdoor use, but it is still fragile and must be treated with care. It would be beneficial to include a warning on the unit, such as: “caution, handle with care!”

The manufacturer states that the plastic coating and rubber boots for the ports give this gadget an IPx4 rating. Per the International Protection Marking this corresponds to protection against splashing and is tested to verify that water splashing against the enclosure from any direction shall have no harmful effect, utilizing either: a) an oscillating fixture for 10 minutes or b) A spray nozzle with no shield for 5 minutes.
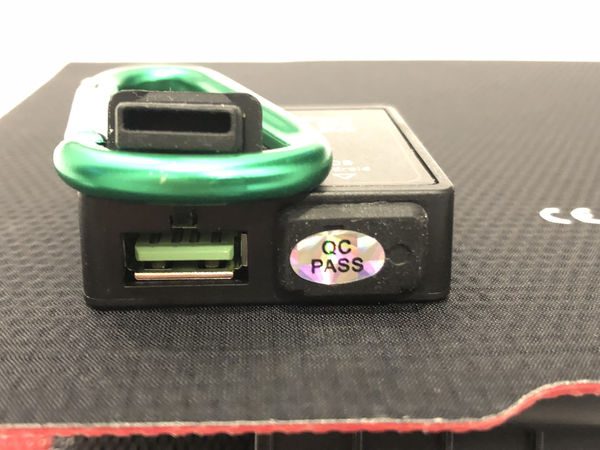
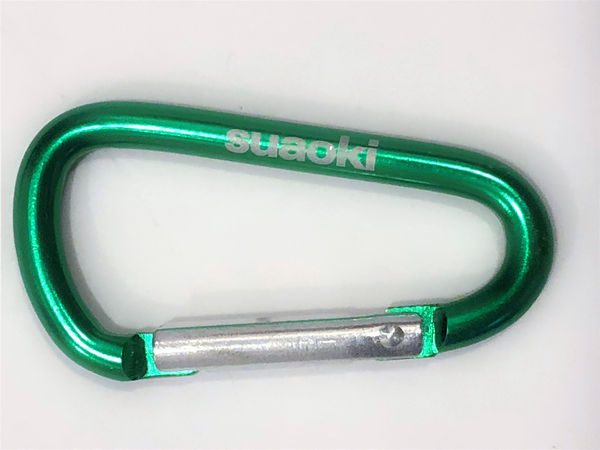
There are six eyeholes around the perimeter of the unit: one in each corner and two along the center. These can be used along with the ropes and carabiners to mount the gadget just about anywhere the sun will hit it. The ropes are really shoelaces but will do the trick.
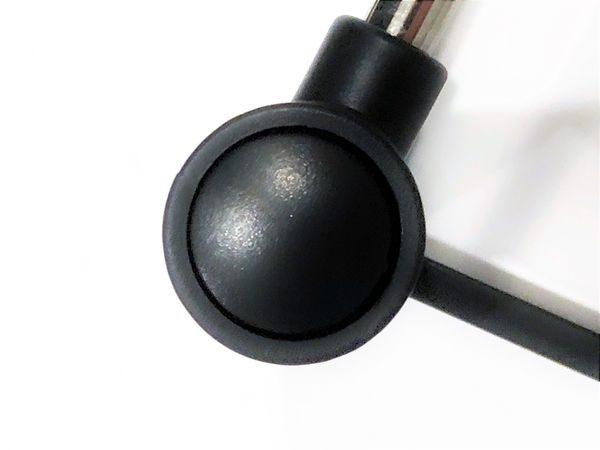
The supplied stand has a locking hinge that can be used to set the angle of the unit. The sun finder is located at the lower front of the easel. A clear plastic window with a small painted dot in its center sits about a quarter inch above a white target with black crosshairs. When the shadow of the painted dot is in the center of the crosshairs the solar panels are perpendicular to the sun. This is an important consideration since the power efficiency drops as the angle the panel makes with the sun changes from perpendicular to parallel.  the stand may be stored against the unhinged side of the panel when not in use. I did find that the label on the push button which releases the stand lock was easily removed.

The manufacturer states that the conversion rate for the panel is up to 20%, which is below the expected maximum conversion of 26.7%, but around the maximum conversion for compting technologies. This means that based on a cross-section of all technologies currently available, this panel is one of the most efficient.

Operation

The Suaoki 14W portable solar charge panel has two USB ports. One is optimized for iPhone but may also charge Android devices and the other port is optimized for Android only. The directions give no indication of which port is best for charging a battery pack. The charging circuit starts as soon as the panels are exposed to sufficient light to power the unit.  The circuit will automatically regulate the current supplied based on the available sunlight. A LED mounted on the interface box will illuminate green if there is insufficient current available for charging, red if there is less than 0.5 A available and blue if there is more than 0.5 A available.

Performance

I used the Suaoki 14W portable solar charge panel with an iPhone, Android (LeEco Le Pro3), J7-t safety tester and a Drok USB intelligent electronic load.
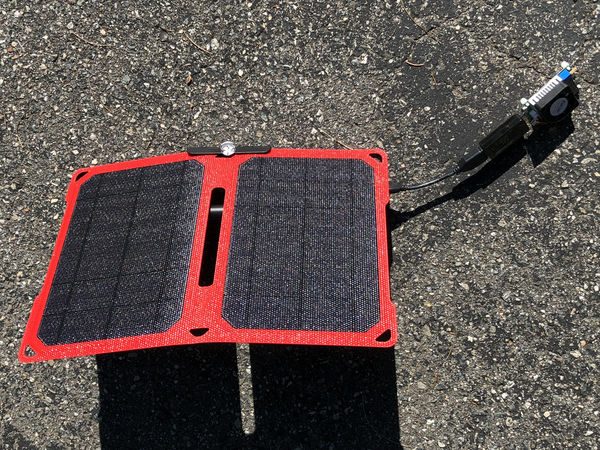
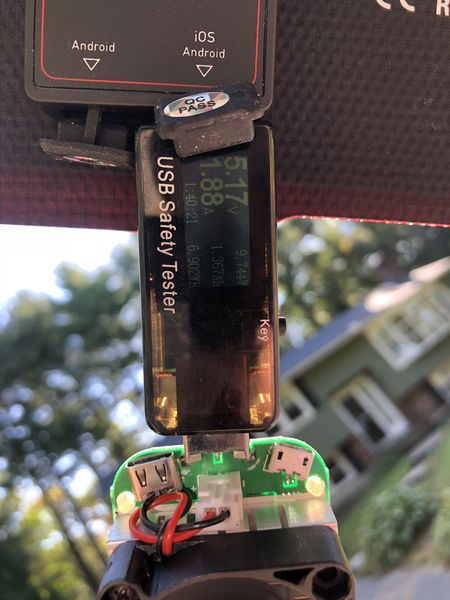
I tried charging each device with the safety tester in line and I could not achieve a continuous power greater than 9.8 W indicated on either the Drok or the J7-t. When charging two devices the most I could get was 8.3 W combined.
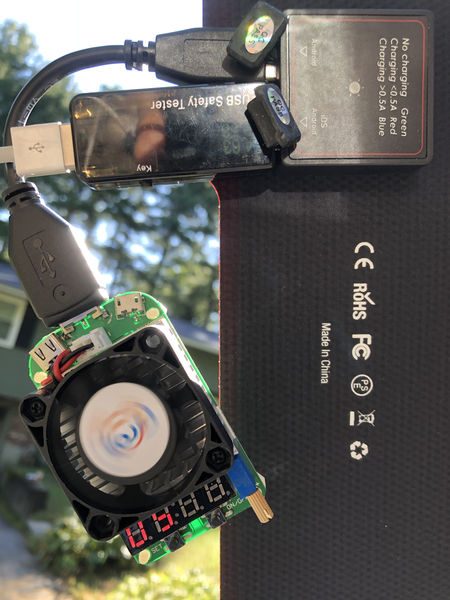
These measurements were made on a bright, sunny, cloudless, haze-free day so conditions could not be more optimal. I used the stand with the solar panel so that the orientation was perfectly aligned.

It seems that getting 14 W in the field isn’t something I was able to do. Maybe I’ll try in the summer on the equator, but for now its more of a “Solar 10” than a “Solar 14”,

What I like

  • Easy to use
  • Many mounting options
  • Efficient
  • Built-in current indicator

What needs to be improved

  • power output
  • fragility warning

Final thoughts

The Suaoki 14W portable solar charge panel is a great option to keep your gear going in the outdoors. Using this along with a well-performing USB power pack will permit you to always make sure your power reserves are topped off.

Price: $59.99
Where to buySuaoki and Amazon
Source: The sample for this review was provided by Suaoki.

Filed in categories: Reviews

Tagged:

Suaoki 14W portable solar charge panel review originally appeared on The Gadgeteer on October 4, 2018 at 1:21 pm.

Note: If you are subscribed to this feed through FeedBurner, please switch to our native feed URL http://the-gadgeteer.com/feed/ in order to ensure continuous delivery.

Renogy 10,000mAh Solar Panel Water Resistant Power Bank review

REVIEW – Voice in your Head: Here we go again, another portable charging solution.  Me: Ah, but this one has a bit of a twist.  The Renogy 10,000mAh Solar Panel Water Resistant Power Bank has not only a solar panel for backup charging, but is also water-resistant.  Other products may offer one or the other of those features, but how well did Renogy combine them?  Let’s check it out!  Gadget on!

What is it?

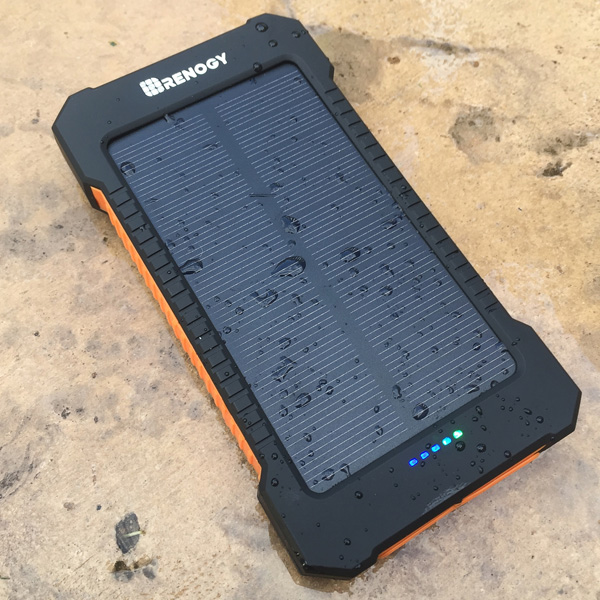
The Renogy 10000mAh Solar Panel Water Resistant Power Bank is a water-resistant, shock-resistant and dustproof portable phone charger with a solar panel backup.

Hardware specs

  • Battery = 10,000mAh lithium battery
  • Dual USB output ports, 2.1A for tablets, 1.0A for phones
  • Micro USB input port
  • Water- and shock-resistant
  • Solar panel for backup charging
  • Dimensions = 5.4 x 2.9 x 0.6 inches
  • Weight = 8 ounces

What’s in the package?

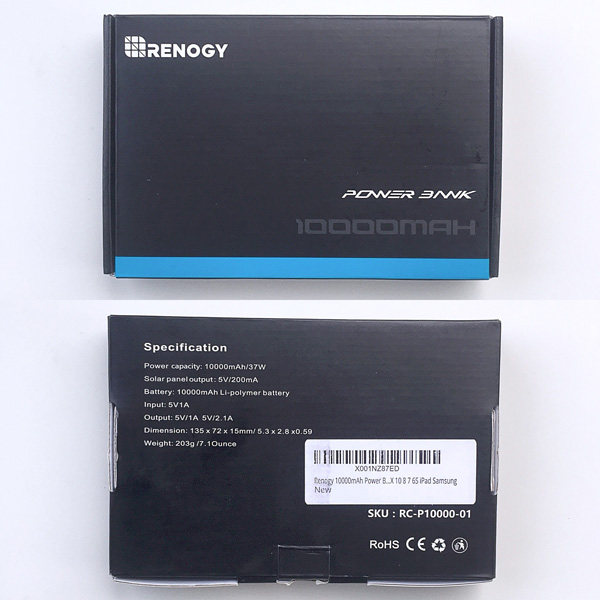
The product packaging is shown in the photo above.

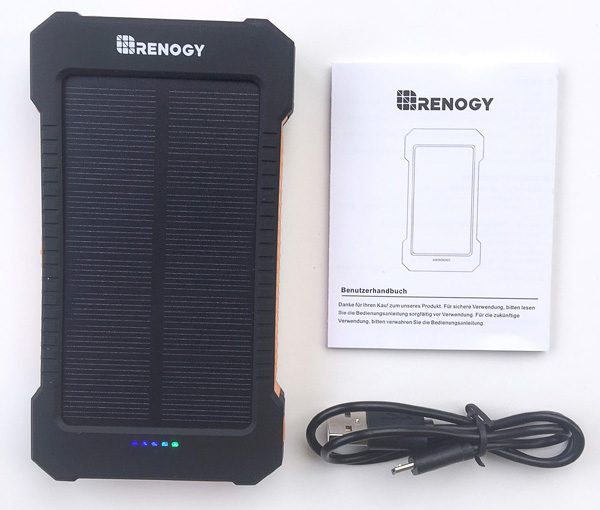
The photo above shows the contents of the package, which are as follows:

  • Renogy 10000mAh Solar Panel Water Resistant Power Bank
  • USB to Micro USB cable
  • Instruction booklet

Design and features

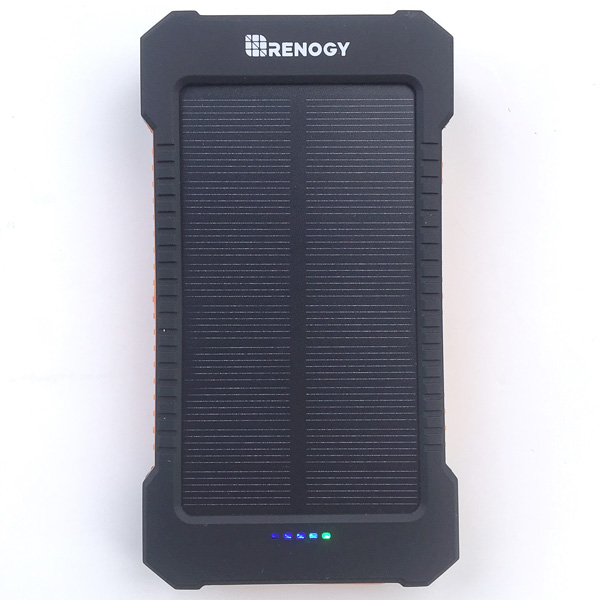
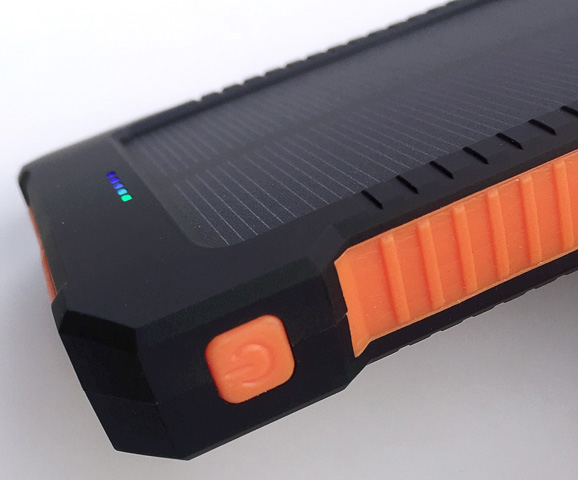
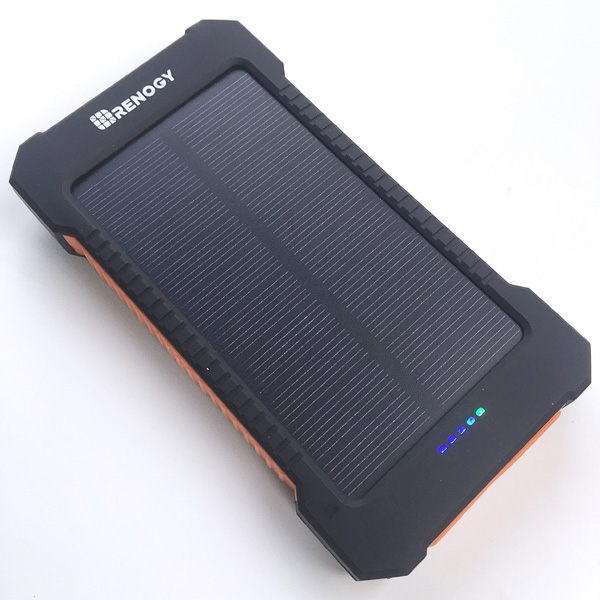
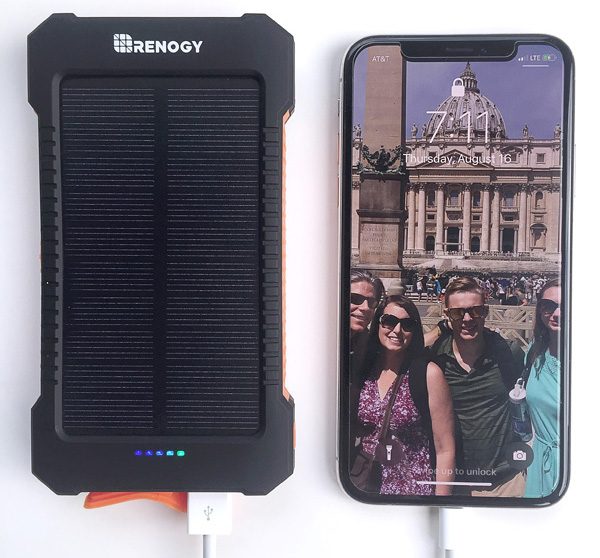
The very first thing I noticed above the device was its soft, matte finish, which felt very comfortable to the touch.   Additionally, a solar panel covers most of the top of the device, as seen in the photo above.

Also, despite it having a water-, shock- and dust-resistant case, the device had a nice size and relatively slim profile, and looked rugged.  In addition, each of the corners is built-up to provide additional shock- or drop-resistance.

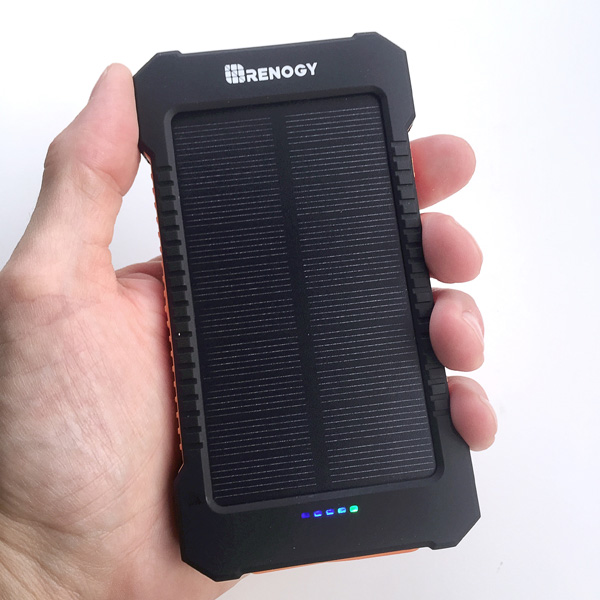
The device is a nice size and fits well in my hand.  I also like the side notches as well as the scallops on the front and back.  All of these contribute to providing a bit more grip on the device.

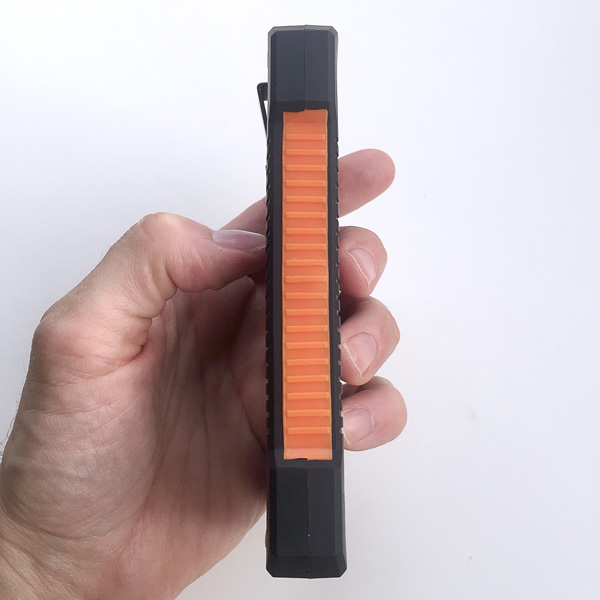
The sides of the device have orange silicon panels which not only aid in grip, but also give it a bit of visibility.  Why is this useful?  Because I found myself digging around in the bottom of my EDC bag for this device on a couple of occasions when the lighting was sub-par, and the various orange silicon panels held me locate it.

There is a single push button-style power button along the side corner of the device.  It has the same orange silicone coating as described above, which contributes to the device’s water- and dust-resistance.  This button can be pressed to activate charging if it does not begin automatically when something is plugged into it, as I found occasionally happens.

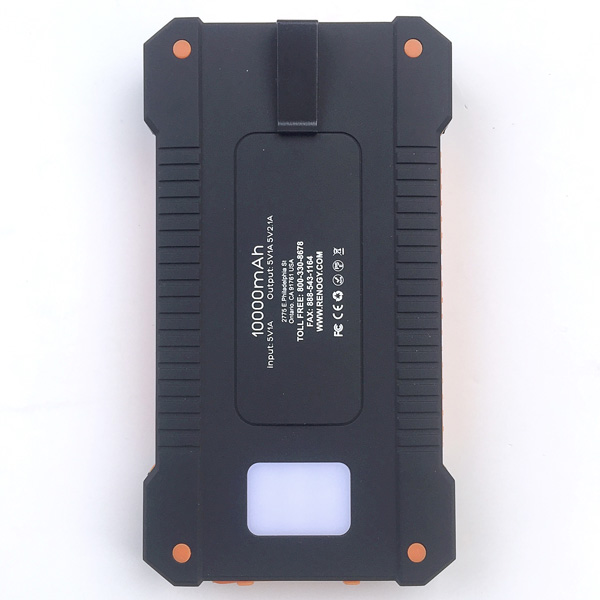
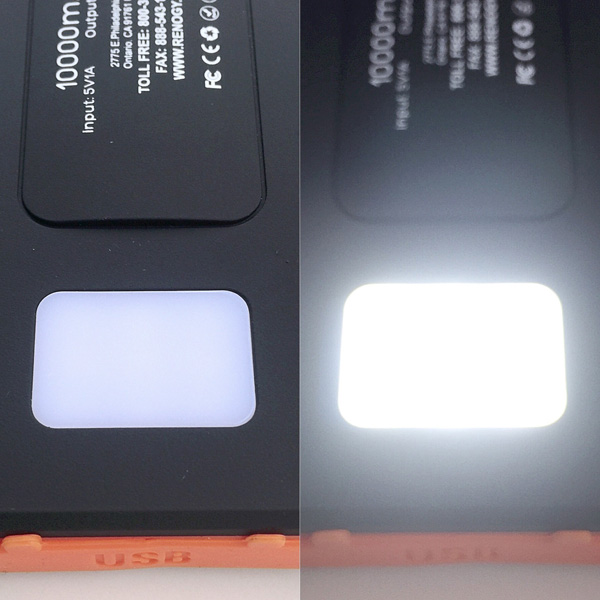
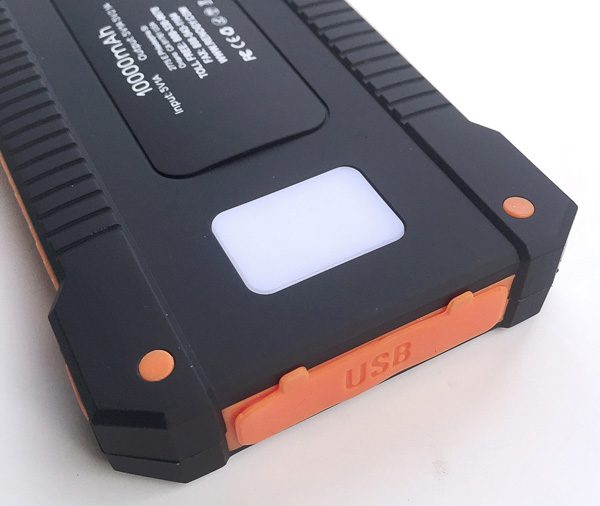
The device is equipped with a light on the back, which is activated by holding down the Power button for a few seconds (see photo above).  Once illuminated, the light can be made to flash in an emergency strobe mode by holding down the button for another xx seconds.  Another press deactivates the light.  The light is bright enough for nearby, but not bright to light your way through a dark woods on a moonless night (it doesn’t throw light very far).

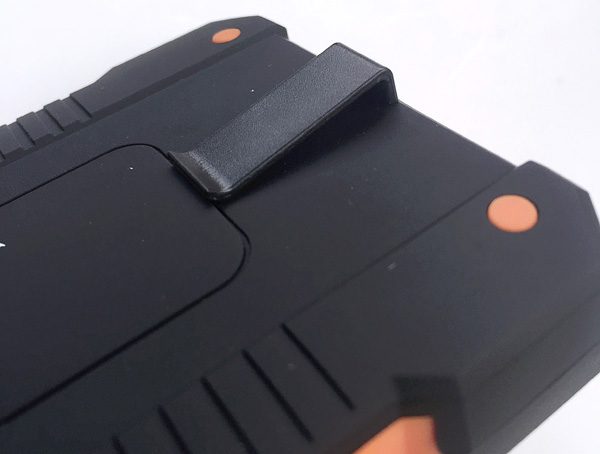
There is a small plastic clip on the back of the device.  Because it’s plastic, it looks and feels a bit flimsy.  I haven’t broken it (yet), but it feels as if it were flexed too far it would simply snap off.

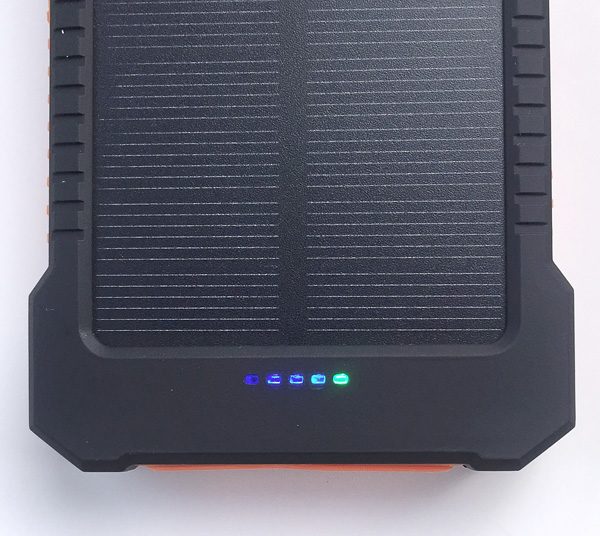
The device’s power level indicator consists of a row of five tiny LEDs.  During charging, the LEDs illuminate to indicate charging status; when the LEDs turn off, the device is fully charged.

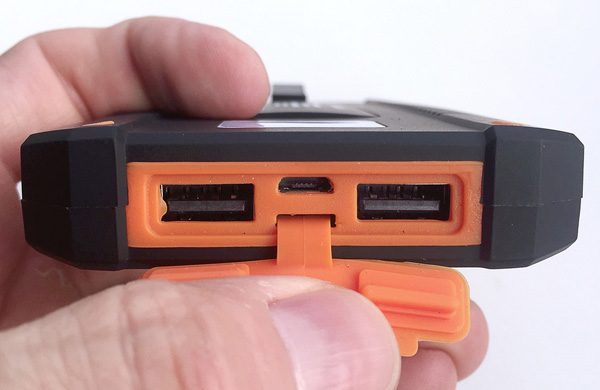
The device has a cover made from the same flexible orange silicone material as described above.  This cover protects all of the ports (see photo below) from dust, water splashes or perhaps even a light rain, but I have my doubts that it would protect the ports against a heavy rain and certainly not against full submersion, at least for very long.

As seen in the photo above, the device has two (2) USB output ports positioned to the left and right a single Micro USB input port. One of the USB output ports provides 2.1A for charging tablets while the other provides 1.0A for charging phones.  I like that it has two output ports to allow charging of two devices simultaneously, but there is no indicator as to which is the 2.1A and which is the 1.0A.  Frustrating.

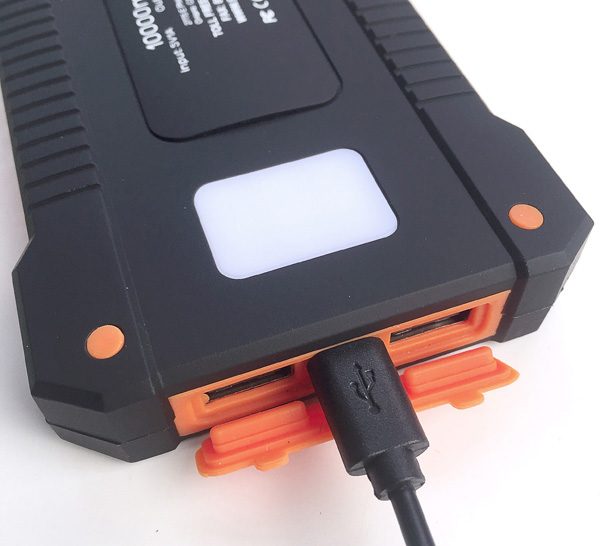
The instruction booklet recommends that the devices primary charging method is via the micro USB input port (see included cable plugged into the input port in the photo above), which does charge the device faster than the solar panel.

The device’s instruction manual recommends solar charging as a backup/emergency charging method only, because it is slower than wall charging via the micro USB port.  However, I noted that the device basically charges any time the solar panel is exposed to a light source, whether it be direct sunlight or artificial light.  As with USB cable charging, when the device is turned toward a light source, the bank of LED lights illuminate to indicate charging status.

I used the device to charge both my wife’s iPhone X (pictured above) and my iPhone 6 Plus, and it charged both phones at a reasonable rate.  It also charged my Garmin Fenix 3 HR GPS watch without an issue.  However, this device does not include pass-through charging, meaning it cannot be used to charge a device while being charged itself.  This is a big minus for me as when I travel I often take a single portable power bank that has multiple USB ports and use it to charge multiple devices while I charge the power bank itself, rather than take several individual chargers.

What I like

  • Backup solar charging
  • Water-resistant
  • Light with emergency flash mode

What needs to be improved

  • No pass-through charging
  • No way to identify the 2.1A vs. 1.0A USB output ports

Final thoughts

The Renogy 10,000mAh Solar Panel Water Resistant Power Bank is overall a well-built and useful piece of gear.  I like that I can toss it into my EDC ruck and have not only a backup power source for my devices, but the solar panel means I have an emergency source if necessary and also I don’t have to be as concerned about getting it wet or dropping it as I would be with devices that are less rugged. Overall, for its fairly unique feature set, its price of $20.99 seems like a pretty good deal.

Price: $20.99
Where to buy: Amazon
Source: The product sample for this review was provided by Renogy.

Filed in categories: Reviews

Tagged: ,

Renogy 10,000mAh Solar Panel Water Resistant Power Bank review originally appeared on The Gadgeteer on August 26, 2018 at 10:57 am.

Note: If you are subscribed to this feed through FeedBurner, please switch to our native feed URL http://the-gadgeteer.com/feed/ in order to ensure continuous delivery.
Use the power of the sun to charge your gadgets with this ultra thin solar charger

Paying your electric bill every month is a real drag when you can get as much power as you want from the sun – for free. Ok, it’s not totally free because you need a solar panel to collect the power and they aren’t free. But if you are interested in going green, consider starting out with a small solar charger like Solar Paper from Yolk Station.

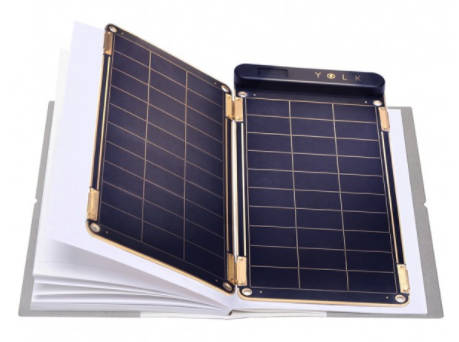
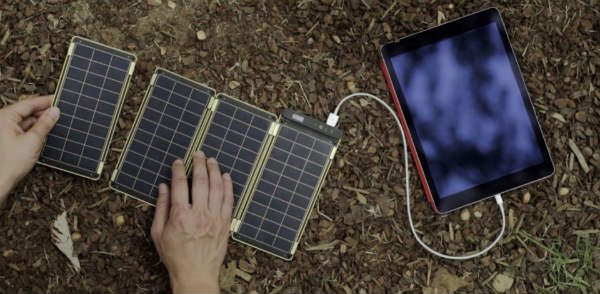
No, the Yolk Solar Paper doesn’t use eggs or chickens and it’s not made from paper. Solar Paper is a thin lightweight dual solar panel that will charge all of your USB gadgets.

It’s 3.5 x 7.5 x .43 inches when it’s folded and outputs 5V, 500mA per panel. Need more power? No problem, you can add additional solar panels which connect to the array using magnets.

The only downside to this product is the price. It starts at $148 for a 5W Solar Paper and goes up to $348 for the 15W version. Want more info? Head over to yolkstation.com and be sure to check Amazon where you can order a Solar Paper at a discounted price.

Filed in categories: News

Tagged: , ,

Use the power of the sun to charge your gadgets with this ultra thin solar charger originally appeared on The Gadgeteer on October 10, 2017 at 12:44 pm.

Note: If you are subscribed to this feed through FeedBurner, please switch to our native feed URL http://the-gadgeteer.com/feed/ in order to ensure continuous delivery.
Harness the power of the sun to charge your gear while you drive, fly, or just sit around at home

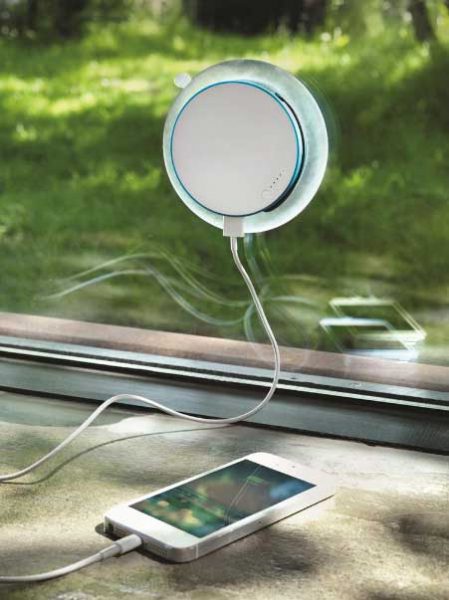
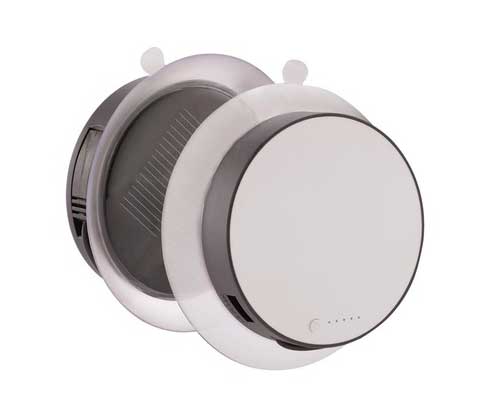
The Port Solar Charger from XD Design is designed to stick to a window and use the sun’s rays to power your gadgets.

This solar charger has a built-in battery that can be charged with a USB cable which will take about 2 hours or by sunlight which can take up to 20 hours. Yeah, you can’t be in a hurry 🙂

The Port Solar Charger’s built-in battery has a capacity of 1000mAh, so it won’t fully charge your phone. But it’s better than nothing and it’s free power.

I am not sure how well a solar charger like this works, as it depends on how much sunlight is hitting the window it’s attached to. But it would be a cool way to power your devices for free if you frequently travel by train, plane, or automobile, or if you have a nice big window that gets a lot of sunlight.

The price of the Port Solar Charger, on the other hand, isn’t free. It is priced at $49.99. For more info head over to www.xd-design.com and you can buy one from Amazon.

Filed in categories: News

Tagged: ,

Harness the power of the sun to charge your gear while you drive, fly, or just sit around at home originally appeared on The Gadgeteer on September 21, 2017 at 6:00 pm.

Note: If you are subscribed to this feed through FeedBurner, please switch to our native feed URL http://the-gadgeteer.com/feed/ in order to ensure continuous delivery.