ANNKE 1080P lite security system DVR review

I think I’ve indicated before that I’m a bit paranoid when it comes to home security. I have several cameras in and outside my house, and I’m always considering adding more. Not only are the cameras great for deterring burglars, but they often help find toys my children lost.

Recently I volunteered to review a DVR security system by Annke. It’s a four camera indoor/outdoor system with a multitude of features.

In the box

  • Annke DVR
  • 4 x 720P indoor/outdoor cameras – wired
  • 4 x video cables (60 ft)
  • 2 x power adapters
  • Power adapter “splitter” for cameras
  • USB mouse
  • 4 x anchors for mounting cameras
  • Quick user manual
  • Software CD
  • 2 x door/window stickers

Specifications

  • Analog video input – 8-ch;BNC interface (1.0Vp-p, 75 Ω)
  • HD TVI input – 720P, 1080P
  • AHD input – Support
  • CVBS input – Support
  • IP video input – 2-ch;Up to 960p resolution
  • Audio input/Two-way audio input – 1-ch;RCA (2.0 Vp-p, 1 KΩ)
  • HDMI/VGA output – 1-ch, 1920 × 1080/60Hz,1280 × 1024/60Hz, 1280 × 720/60Hz, 1024 × 768/60Hz
  • Audio output – 1-ch, RCA (Linear, 1 KΩ)
  • Video compression standard – H.264+/H.264
  • Encoding resolution & Frame rate – 1080p lite/720p: 12 fps;960H:25fps(P)/30fps(N)
  • Video bitrate – 32 Kbps to 4 Mbps
  • Stream type – Video & Audio/Video
  • Dual-stream – Support
  • Audio compression standard – G.711u
  • Audio bitrate – 64 Kbps
  • Synchronous playback – 2-ch
  • Remote connections – 128
  • Network protocols – TCP/IP, PPPoE, DHCP, Hik-connect Cloud P2P, DNS, DDNS, NTP, SADP, SMTP, NFS, iSCSI, UPnP™, HTTPS
  • SATA – 1 SATA interface
  • Capacity – Up to 6 TB capacity for each disk
  • Network interface – 1; RJ-45 10 M/100 Mbps self-adaptive Ethernet interface
  • USB interface – Rear panel: 2 × USB 2.0
  • Power supply – 12 VDC
  • Consumption(without hard disks) – ≤ 12W
  • Working temperature – 14ºF to 131ºF
  • Working humidity – 5V DC±10%
  • Power Consumption – 10% to 90%
  • Chassis – 1U chassis
  • Dimensions(W × D × H) – 10.2 × 8.7 × 1.8 inch
  • Weight(without hard disks) – ≤ 2.2 lb

Design

The DVR looks a bit like a cable set-top box without an LCD display.


The front of the DVR has LED indicators for power status, hard drive activity, and network activity. The rear of the DVR contains all of its ports. The top of the DVR is plain while the bottom contains the model number, serial number, and external access code.

The system also includes four 720p cameras.


Each camera is equipped with infrared LEDs, providing 66 feet of night vision.

Additionally, the cameras have an IP66 ingress rating, meaning they are rain and dustproof.

The remainder of the system is primarily composed of cables and power adapters.


I can’t imagine any DVR system being completely inconspicuous; however, this system does a fine job blending into the background. The DVR would blend in with any entertainment center containing your everyday media devices, and the cameras could be tucked away into just about any corner.

Setup

The system isn’t particularly difficult to set up; however, the included user manual is of no help. The manual immediately skips from describing the LEDs and ports on the DVR, to explaining how to install a hard drive; there is absolutely no mention of how to connect the cameras or power adapters. Fortunately, if you’re somewhat tech-literate, the process is pretty easy to figure out.


First you attach the plugs from “cable end A” into the plugs at the end of the camera. You then plug the blue end of “cable end B” into one of the video ports on the rear of the DVR. Next you plug the red end of “cable end B” into one of the power adapter splitters. You then plug the splitter into one of the power adapters.

Once you’ve installed the cameras you can plug the DVR into a HDTV or computer monitor. You then attach the system to your router, plug in the remaining power adapter, and plug the mouse into the USB port.

Once all the hardware is set up, you can begin the on-screen setup; this is a pretty simple process.


The first time you turn on the system you will be asked to activate it. This requires nothing more than choosing an administrative password for the system. You next choose an unlock pattern in order to avoid having to reenter a password repeatedly. Finally, you go through the setup wizard.

Once you’ve completed the wizard, the DVR system is ready to operate. For the most basic use, this is all you need to do. I’ll discuss more advanced use later.

Performance

Although I’ve never had a DVR system for my home, I’ve utilized and interacted with them countless times at work. I was very pleased with how well the Annke system worked compared to others I’ve seen.

The system was easy to use and the picture quality was generally very good; although, in low light situations the image was a bit darker than I would like.

Truthfully, the basic use of the DVR system is so simple there isn’t a lot to write about. You install it, go through the setup wizard, and it immediately starts streaming a live view of things.

It works wonderfully, and that’s really all there is to say.

Annke App

Not only can the system be viewed through your TV or computer monitor, but you can also access it through Annke’s app.

The app is available for Android and iOS.


After you download and install the app, you’ll go through an easy setup wizard where you’ll choose your location, set up your mobile account, and connect your system.

After you’ve completed the wizard, you should have access to your live view.


As with the basic use of the DVR, the mobile app is wonderfully simple to use.

Advanced Use

So here’s the thing, this DVR would be great for a basic home surveillance system, but it also has a ton of features that would make it great for protecting a business or any other institution. In fact, it has so many features that I couldn’t have possibly gotten around to trying them all.

In order to take advantage of all the extra features, you’re going to want to install a hard drive in the DVR. (according to its Amazon listing, the system does not include a hard drive; however, the sample they sent me included a 1 TB hard drive.)

Once a hard drive is installed you can choose from several different recording features.

You can set the DVR to record continuously or only record during specific hours on specific days.

You can choose to have it record when motion is detected or when specific types of motion, AKA “events”, occur.

Examples of events are as follows: face detection/face capture, line crossing detection, people gathering detection, fast moving detection, parking detection, unattended baggage detection, etc.

Admittedly, I didn’t come close to testing all the different triggers; however, I did set a motion alarm and it appeared to work well, consistently.

As with recording, there are a handful of different ways to playback events.

You can choose to playback an event by time period, by event type, by user created tags, by using smart search to analyze video footage, and by going through system logs.

If the DVR is connected to a network there are another dozen options to consider, including connecting to a Network Time Protocol sever, configuring email settings for email alerts, monitoring network traffic, etc.

This is just scratching the surface; you can set on-screen labels, place a black privacy box over certain areas, run hard drive diagnostics, and create backup files.

The amount of features available is borderline overwhelming, but in a good way.

My only issue with all the features was the lack of instruction in the included user manual. While some features were covered, most didn’t appear to be. I was able to locate a 110 page advanced user manual on Annke’s website; however, based on the diagrams inside, it wasn’t the manual for the exact model I was reviewing.

Conclusion

I’m impressed with the Annke DVR; it can function as a basic home surveillance system or work as a full featured security DVR.

The system provides good video quality and an abundance of features.

Everything is fairly easy to use and set up, but you have to do some digging on Annke’s website to get the correct information.

All in all, for $109.99, I’m not sure you’re going to find a better deal.

Source: The sample for this review was provided by Annke. Please visit their site for more information and Amazon to order.


Product Information

Price: $109.99
Manufacturer: Annke
Retailer: Amazon
Requirements:
  • An extra computer monitor or TV with HDMI to display video footage
  • Android, iOS, or Windows device for certain features
Pros:
  • Simple set up despite lack of directions
  • Good video quality
  • Tons of features
Cons:
  • Included user manual not always useful
  • Footage can be dark in low light

Filed in categories: Reviews

Tagged: ,

ANNKE 1080P lite security system DVR review originally appeared on The Gadgeteer on July 17, 2017 at 3:20 pm.

Note: If you are subscribed to this feed through FeedBurner, please switch to our native feed URL http://the-gadgeteer.com/feed/ in order to ensure continuous delivery.

Foscam FI9961EP IP security camera review

Over the past year or so, I’ve gradually been adding to my home automation and security system. Being a Gadgeteer, I’ve enjoyed implementing different cameras into my system and jumped at the chance to review Foscam’s FI996EP Security Camera. 

The camera arrived in its own nest of closed-cell foam, accompanied by an Ethernet cable and power adapter. The power adapter is somewhat redundant because this camera can be powered by PoE, or Power over Ethernet if your switch is so equipped. Power supply current is 1 Amp.  I used the power supply to configure the camera but set it aside, preferring the streamlined convenience of PoE.

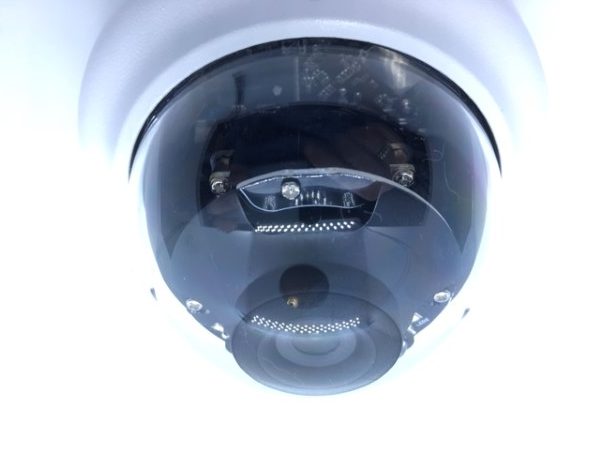
Foscam has a reputation for making sturdy, reliable cameras. The FI996EP is no exception. The housing on this camera is virtually bulletproof. It’s quite heavy, and entirely metal, with a clear plastic dome to protect the camera, SD card, and infrared electronics from the elements. I’m not exaggerating when I say this camera is built like a tank.

Triple hex-head screws hold the cover in place. It’s not included, so you may have to rummage around your tool box to crack open this egg. Once opened, the camera can be pivoted from straight down to about 70° inclination. Clearly, designed to be mounted on a ceiling and aimed in the direction of naughtiness, um… interest.

I downloaded the Foscam App using the instructions from the installation manual, applied for an account, plugged the camera into an Ethernet port, applied power, and scanned the QR code on the camera base to add the camera to the app. All took less than five minutes. With very little lag, the first images popped onto my screen. Images were clear and crisp. Switching from full color to black-and-white infrared “night vision” was virtually instantaneous.  The FI996EP sports an SD card slot to capture images, or you can opt for paid cloud storage. The camera can also be accessed through web browsers using Foscam’s “Equipment Browser” software, but I will primarily use the iOS app.

A five-headed cord sprouts from the camera’s base allowing access to the Ethernet port, reset switch, power jack, and composite video, should there be a need to connect to an existing security system or DVR.

I found this camera to be a capable addition to my home security system and I had no trouble with setup or use, but it should be noted, this camera does not have wireless capabilities and requires wired Ethernet for IP connectivity.  This may be a deal-breaker for some, but the ruggedness, ease of use and image quality shouldn’t be overlooked.

Source: The sample for this review was provided by Foscam. Please visit their site for more info and Amazon to order.


Product Information

Price: $119.99
Manufacturer: Foscam
Retailer: Amazon
Pros:
  • Sturdy, Sturdy, Sturdy
  • SD card slot
  • Automatic infrared "night vision"
Cons:
  • Expensive
  • Requires wired Ethernet for IP connectivity

Filed in categories: Reviews

Tagged:

Foscam FI9961EP IP security camera review originally appeared on on July 7, 2017 at 8:44 am.

Note: If you are subscribed to this feed through FeedBurner, please switch to our native feed URL http://the-gadgeteer.com/feed/ in order to ensure continuous delivery.

Momentum Wi-Fi Video Camera review

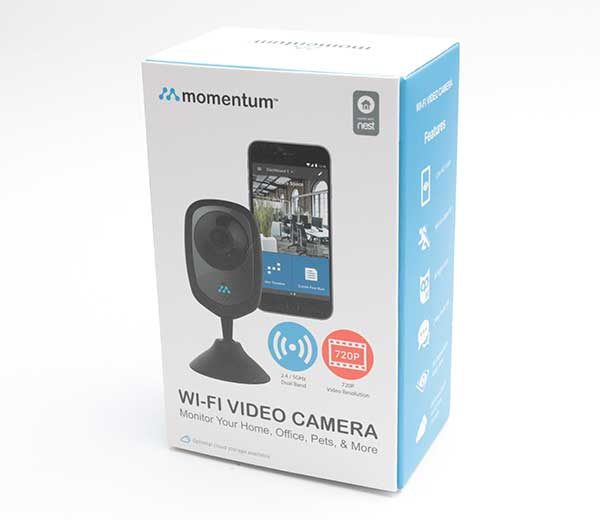
There are so many home security cameras on the market, that it can be frustrating to figure out which one to choose. Do you go with a tried and true brand like Nest or DLink, or do you try a less expensive brand like the Momentum Wi-Fi Video Camera which I’m going to tell you about today? Let’s find out.

What is it?

Momentum is a WiFi home security camera with the following features:

Two-way talk through the mobile app
720p HD resolution (720×1280)
110-degree viewing angle
Built-in night vision
Dual band Wi-Fi support (2.4GHz and 5.0GHz)
Integration with NEST and future home security products from Momentum *

*This is according to the Momentum site. At this time I can’t find any way to implement this integration.

What’s in the box?

Momentum 720P wireless camera
AC adapter
micro USB charging cable
Mounting hardware
Manual
Quick start guide

Design and features

The Momentum WiFi Video Camera has a black and brushed silver plastic case.

On the front is the 720P camera lens, a status LED, and a microphone for two-way communication.

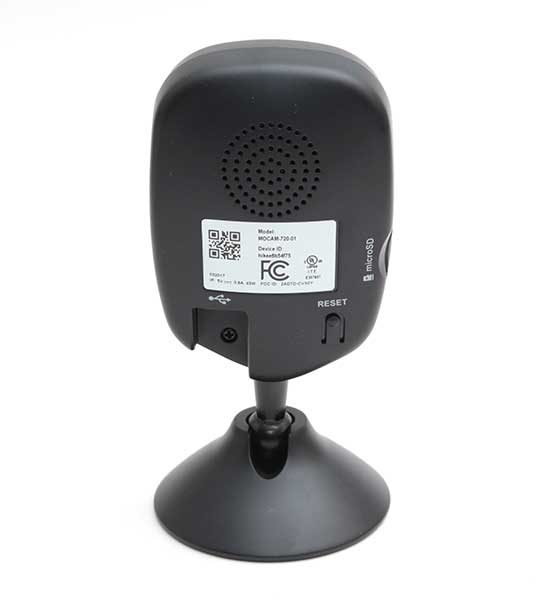
On the back of the camera is a speaker, a micro USB connection for the included power cable, and a reset button.

On one side of the camera is a micro SD card slot. A memory card is not included with the camera, but it will work with cards that have up to 128GB capacity.

The camera’s base is magnetic. It will stick to any flat steel surface or you can use the included steel plate to attach the camera to a wall or ceiling.

The angle of the camera can be adjusted by pivoting it in the base.

Setup

To setup the Momentum camera, you install the iOS or Android app on your mobile device. I did my testing with an LG G6 and an iPhone 7 Plus.

The application then guides you step by step to add the camera. Basically, you just plug in the camera, point the phone’s camera at the QR code on the back and it detects your WiFi network. Then you just wait for it to complete the setup.

I had a few glitches during the initial setup where the app detected the camera but never finished setting it up. Note that I was setting up the Momentum camera within 3.5 feet from my wireless rounder and phone. After a couple of reboots, it finally worked.

Usage


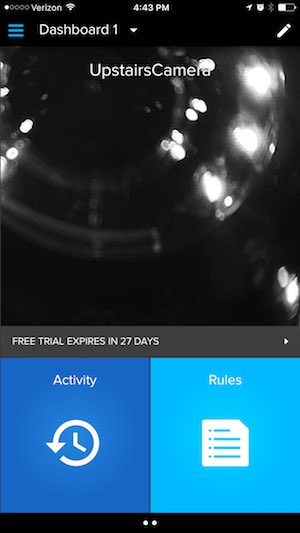
The user interface for the Momentum app has a tiled layout that is easy enough to navigate. There’s a large tile for the camera (it’s not a live view though), a tile/button to go into the activity list and a tile/button to go into the rules setup.

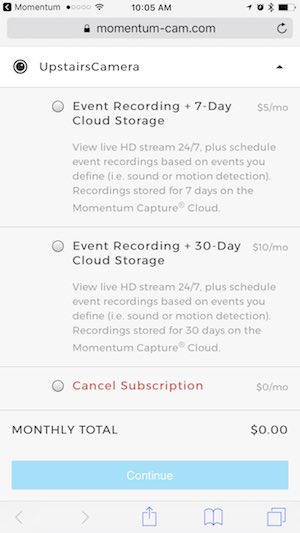
Note that the camera comes with a 30 day free trial of the Momentum cloud service, but the service is not mandatory. Without the service, the camera can save photos and manually captured videos to the micro SD card. The camera will not (as far as I can tell) record ALL footage to the micro SD card.

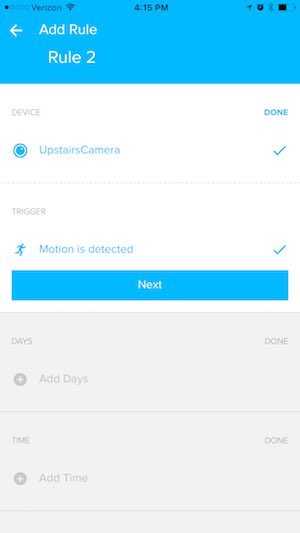
The rules setup is very basic. All you can do is set it to trigger on motion and set the days/times when the triggers will be active. There isn’t a way to set zones or other advanced features that some home security cameras offer.


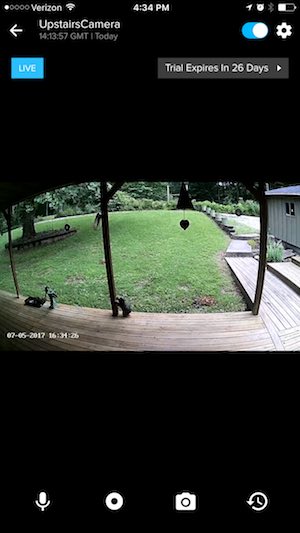
Tapping the camera tile on the app’s dashboard will take you into the live view of the camera which you see above on the left. Below the live view are icons for two-way communication, video recording, camera snapshot, and the activity list. The slider switch at the top of the screen turns the camera on/off.

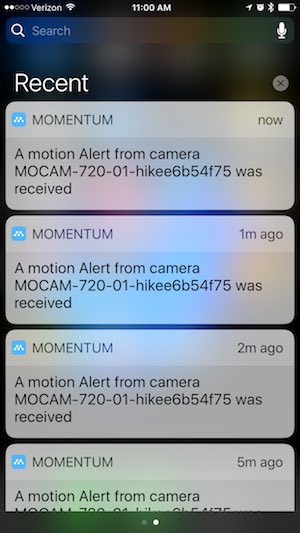
When motion is triggered, you’ll receive a notice on your phone like you see in the image in the middle. This notification does not include a thumbnail of the motion. To see what triggered the notification, you have to go to the activities page which shows a list of all the triggered events (above on the right).

The activities screen is not accurate or updated correctly. It will list some events that happened yesterday under the heading for today. And as you can see, each entry does not always show a thumbnail.

But even worse is the fact that very often, I’ll click on one of the notifications in the list and it will act like it’s going to play the recorded video clip but it’s completely blank. This is one of the most frustrating problems with the Momentum camera, but it’s not the only problem.

Another problem is with the night vision IR. See the image above? That was taken around 8 AM in the morning. It’s a little gloomy outside, but it’s not that dark right?

During the same time, the live view through the Momentum app looks like this. As far as I can tell, there’s no way to deactivate the IR feature or schedule it for only certain times of the day.

Final thoughts

For $49.99 I was hoping that the Momentum Wi-Fi Video Camera would be a good deal, but it turned out to be a dud. It’s fine if all you want to use it for is a live viewer, but if you want to depend on it for motion alerts, you’ll be very disappointed. My advice is to skip this one.

Source: The sample for this review was provided by Momentum. Please visit their site for more info.


Product Information

Price: $49.99
Manufacturer: Momentum
Pros:
  • Inexpensive
  • Built-in micro SD card slot for local video storage
  • Magnetic base
Cons:
  • Notification video is sometimes blank
  • Can't turn of IR night vision
  • Manual image and video capture doesn't show up in the app
  • Activity screen does not show current info

Filed in categories: Reviews

Tagged:

Momentum Wi-Fi Video Camera review originally appeared on on July 6, 2017 at 9:48 am.

Note: If you are subscribed to this feed through FeedBurner, please switch to our native feed URL http://the-gadgeteer.com/feed/ in order to ensure continuous delivery.

Tend’s Minion Cam is a home security camera designed to do your bidding


Home security cameras are a gadget category that has exploded in the last year or two. Everything week a new one is released with more features, better optics, and lower prices. But the Minion Cam HD Wi-Fi Camera from Tend is the first security camera that I’ve seen that’s been designed to look like a popular movie character.

Now you can have your very own Minion from Despicable Me 3 literally keep an eye on your home and loved ones. See what I did there? 😉

The WiFi camera features 1280×720 (720P) resolution video streaming with night vision, and two-way audio.

Special features include motion sensor triggers that send a notification to your mobile device when movement is detected, a personalized pet highlight reel of customized music videos of their pets, and the ability to talk like a Minion via its two-way audio feature.

Children will love the Minion Cam and parents will like the price. At only $49.99, it won’t break the bank, and each camera comes with 24 hours of free secure cloud storage on the Tend servers that allow users to review recorded footage from any mobile device.

For more info visit tendinsights.com and order one from Amazon.

Filed in categories: News

Tagged:

Tend’s Minion Cam is a home security camera designed to do your bidding originally appeared on on June 25, 2017 at 8:00 am.

Note: If you are subscribed to this feed through FeedBurner, please switch to our native feed URL http://the-gadgeteer.com/feed/ in order to ensure continuous delivery.

D-Link OMNA 180 security camera review


Security cameras and nanny cams have become a huge market. Even baby monitors have added night vision capabilities, so you can just grab your phone from your pocket, desk, or nightstand and check on anything you’ve decided to secure at a moment’s notice. D-Link, a longtime maker of routers and wireless equipment, recently sent The Gadgeteer one of their OMNA 180 CAM HD’s for review. I’ve been working with it for a few weeks now.

Note: Photos may be tapped or clicked for a larger image.

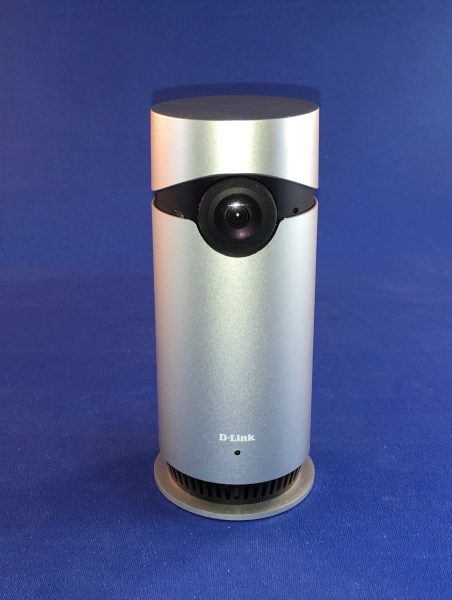
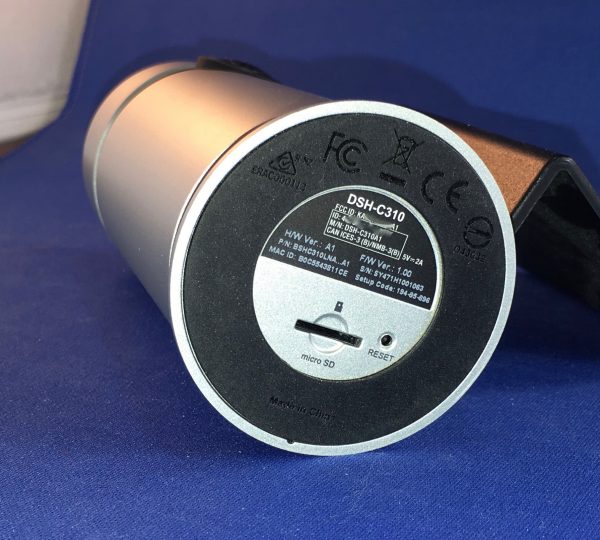
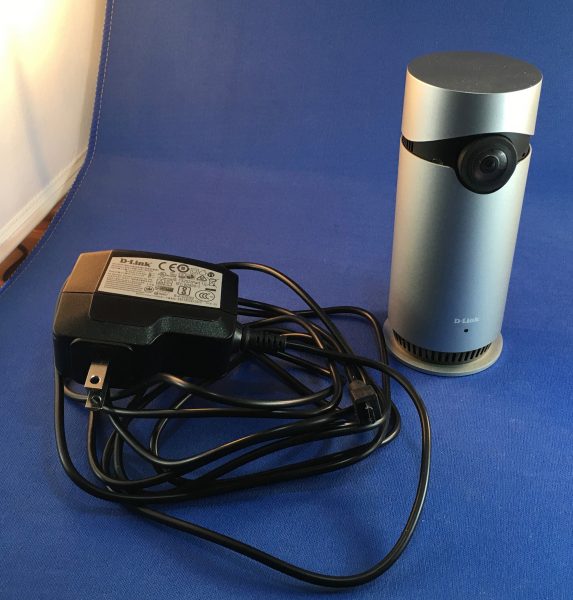
The unit itself is a smooth column 5.125″ high and just over 2″ in diameter. It weighs 8.1 oz (230 g). There is a lens near the top and a microphone opening just to the side of that. Around the bottom, there are openings for the speaker. The single port is a fitted microUSB connection. On the bottom, there is a micro SD card slot and a reset button. At a half-pound, the whole unit feels hefty and doesn’t slide on the table, due to a rubberized gasket around the bottom.

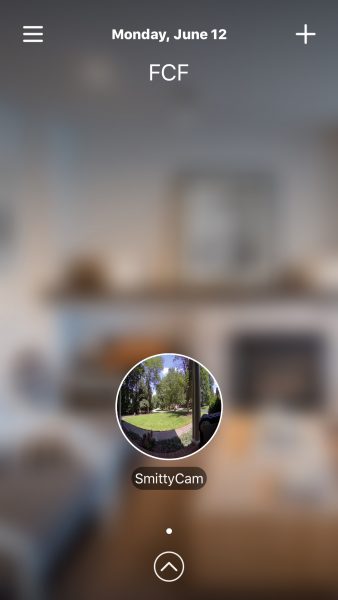
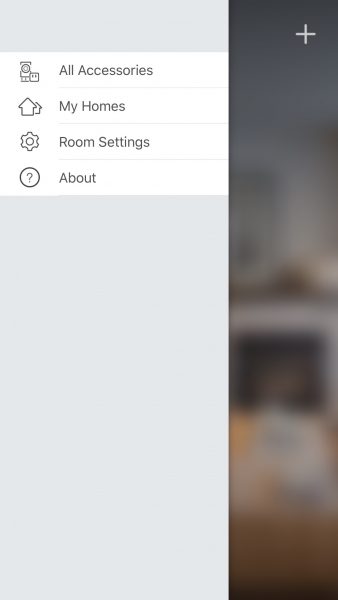
Setup was pretty straightforward. I downloaded the Omna app, created a “Home” (you can have multiple) by connecting to my wifi network.

Once you have a home, you add an accessory by plugging the device in and waiting for the blinking orange LED. When you click “Next”, you’ll see your device’s ID number, which is also printed on a sticker on the back of the device. (Sorry, didn’t capture this screen.) Save the settings, and you’re done.

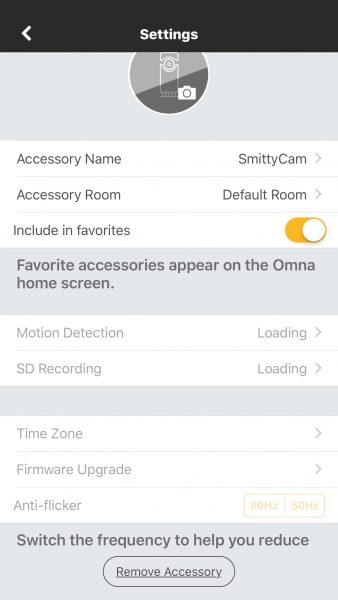
You can easily go back and edit any names you’d like to. As long as you keep power to the camera, it will save video and stills to a micro SD card. Through the app, you can get a live view of the camera, set up motion activation, and the frequency of micro SD card writes. You can also change the time zone and update the camera’s firmware (which I had to do soon after receiving it.)

You can activate the mic on the camera and listen in through the app, too. This worked quite well. This, of course, adds to the size of the files being sent to your storage card. You can also speak to the camera, which is a great way to absolutely freak your dog out. (Sorry, Jack!)

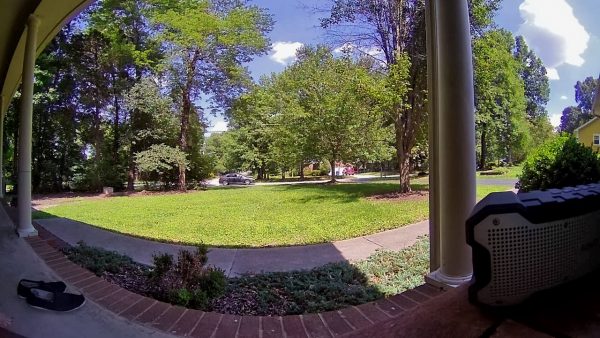
Given enough light, the images that you get from this camera are fairly clear, but the 180º fisheye effect takes some getting used to. I was able to run it easily off of a power bank, out on the porch, which was pretty nice. It would be nice if they added an internal battery, in the case of power outage.

When I first was setting it up, I took a few shots in my office, with nothing but a desk lamp and my computer screens on. The results, while usable, look more like something from an earlier episode of a police procedural than a cutting edge HomeKit device.

I did notice that the device ran pretty warm during testing. I rarely ran it longer than an hour or so, and it was always very warm to the touch afterward. Not sure what a 24/7 session would do.

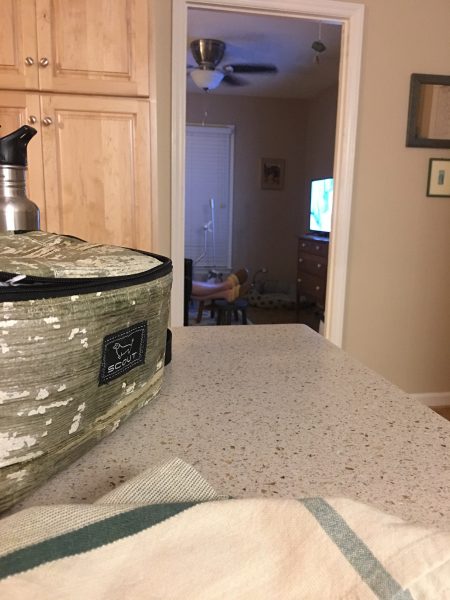
The three kitchen shots I included because 1) they are being shot with just the LED over the sink and another light on the other end of the family room, and 2) they show the quality of photos you get with decent lighting. The last one, sitting on the island, shows my Lovely Bride’s fuzzy slippers as she watches yet another British Crime Drama. There is no other light in that room except the TV screen. Not too shabby!

I was sent a first unit that got bricked almost out of the box. Took a bit of time to get it replaced since it was a review unit, but the help desk folks were very friendly and helpful, as far as they could go. There is no “replacement” for a defective unit through the Dlink site – it’s done through the place of purchase. Right now, that’s Apple. From my time in Apple Retail, I know that 2 weeks after purchase, you had to contact the manufacturer, even if the product was in warranty. (All Apple-branded products have a one-year warranty that is honored in-store. Almost all third-party products sold there have at least a one-year warranty, but that’s handled through the manufacturer.) I called support several times and was consistently told there is no way to swap it out except at the place of purchase.
There isn’t a way that I found to get the camera connected to a network or service for archival storage. It’s the onboard micro SD or nothing. This may limit recording in some locations, where it may be difficult to replace the card. (Think: your vacation home three states away.) But for a daily nanny cam or pet sitter, it is nothing to swap it out or slip it into a computer to copy files, then erase and reinsert.

I am not a fan of the photos in this format. Everything is warped – my front porch and walk are perfectly straight in reality, but you can’t prove it by those photos above! If there was a way to easily force the camera (or the software) to post-process the image into something that looks less like a 1960’s movie LSD scene, I’d probably be more of a fan. But at this stage, I’m not.

Source: The sample for this review was provided by D-Link. Please visit D-link for more info, or Apple to purchase.


Product Information

Price: $199.95
Manufacturer: D-Link
Retailer: Apple
Requirements:
  • Wireless network, Apple device with HomeKit, microSD (TFT) card
Pros:
  • Sleek look.
  • Easy setup.
  • Good software.
Cons:
  • Odd photo output.
  • No online storage.
  • Unable to have camera replaced by customer service.

Filed in categories: Reviews

Tagged:

D-Link OMNA 180 security camera review originally appeared on on June 21, 2017 at 9:00 am.

Note: If you are subscribed to this feed through FeedBurner, please switch to our native feed URL http://the-gadgeteer.com/feed/ in order to ensure continuous delivery.