The availability of low-cost high-resolution cameras, robust internet networks, sophisticated video compression and 128-bit encryption make modern IP cameras a possibility, yet it is the ever growing desire for video monitoring and automated security that drives innovation in this market. A prime example of this growing trend is the SpotCam Sense. Announced in February 2017, the SpotCam Sense camera combines technologies that enable daylight and 0-lux recording, in addition to temperature, humidity, light level, motion, and audio trending. These features can be leveraged by IFTTT, in which the camera is both a trigger and action, to permit novel automation. Of course, as automation and technology become more prevalent in our daily lives, security becomes a greater concern. This review will also consider some security measures taken by SpotCam. Read on to see what I think!
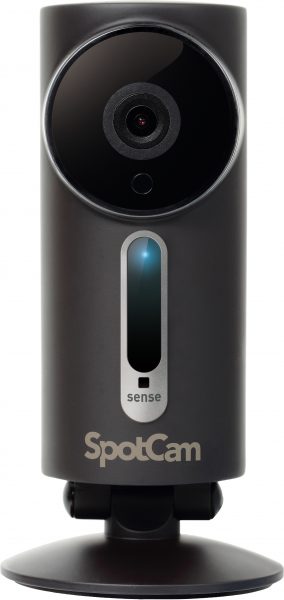
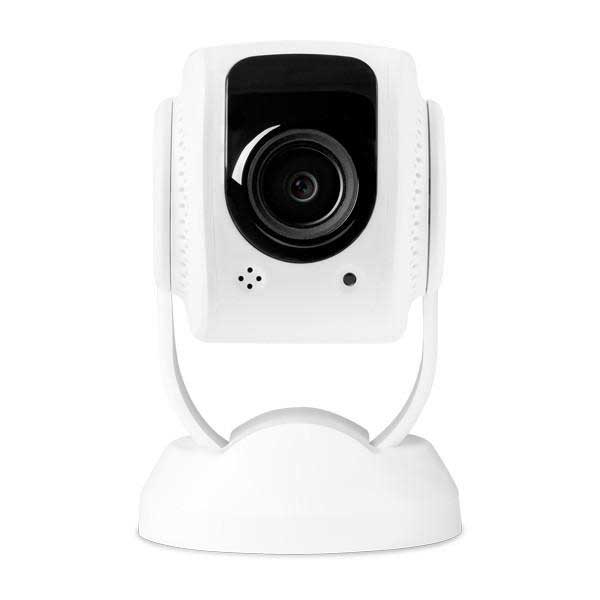
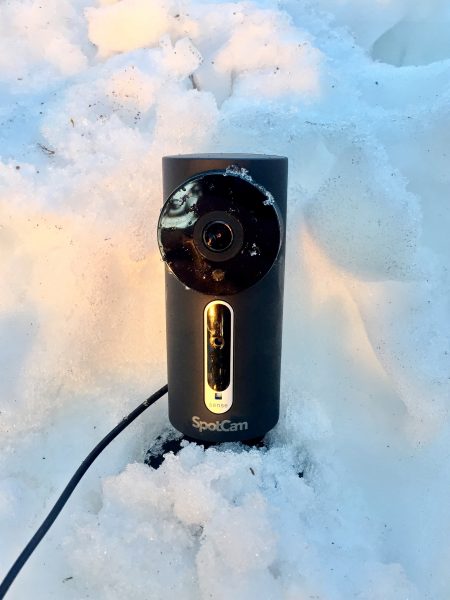
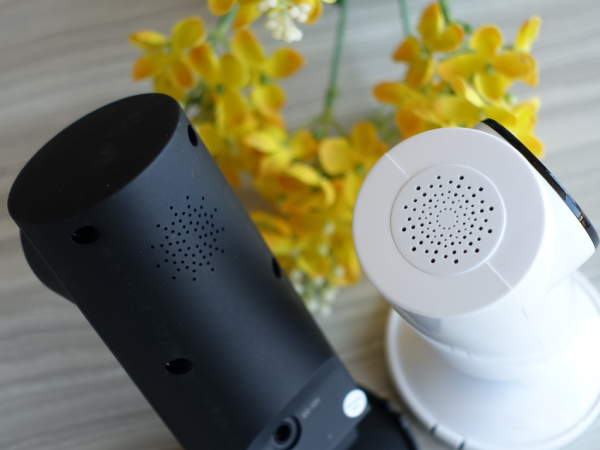
The SpotCam sense comes in two flavors: The Sense is a glossy white unit designed for indoor use and the Sense Pro is a matte black unit designed for indoor/outdoor use. Besides the color difference, the Sense has a speaker mounted to the top of the unit while the Sense Pro has a speaker mounted to the backside. Also, in order to prevent intrusion from moisture, the DC plug on the Sense Pro is gasketed and the switch to change the Wi-Fi operation from Access Point (AP) to Client is rubber booted. The premium for the weatherproofing is only $20-$30, so it’s not too much to spend if you’re only interested in the aesthetics of the SpotCam Sense Pro. (People will undoubtedly pay more for something that is “Batman Matte Black” – Apple charged $200 more for a black MacBook in 2006, but you also got a 20 GB bigger hard drive, and I’ve just demonstrated I’ve been a tech geek for at least 11 years.)
I was provided the SpotCam Sense Pro indoor/outdoor smart cloud camera. Inside the box is the camera, a wall mounting bracket with 3 screws and anchors, a power adapter with a 10 ft cord, instructions in 5 languages, an FCC interference/Wi-Fi connection guidance, and a window sticker for SpotCam Cloud Video Surveillance.
The camera is cylindrical in shape, with a nearly 3″ base and a nearly 2″ body. The camera base is on a hinge and can rotate up to about 70-degrees back (so the camera is angled 20-degrees down if mounted on a wall) or about 40-degrees forward. Note that in each of these cases the base is not heavy enough to keep the camera from falling over. If the camera base is perpendicular to the lens then the camera is about 5-7/8″ tall.

The camera has a rubberized foot for installation on most flat surfaces and comes with a plastic clip mount that can be screwed into a wall or ceiling for mounting in other orientations. Neither the camera nor the recording software has a way to correct video shot at an angle, so if you don’t mount the camera in alignment with the hinge the resulting shot will be askew. I’d prefer to see something threaded into or through the base of the camera to provide a more secure fixture.
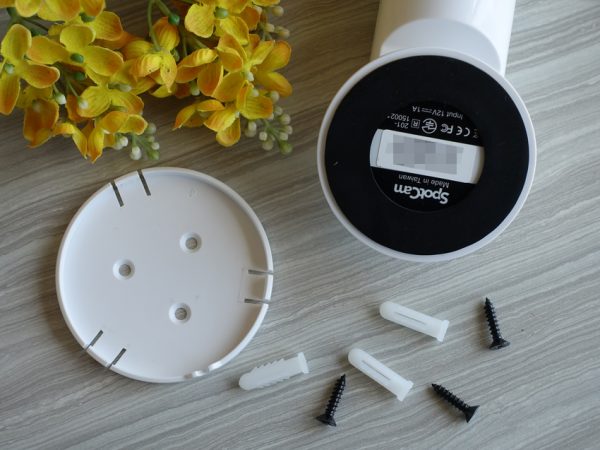
The 10′ power cord is generous and useful if you plan on mounting the camera remotely. However, if this is to be installed in a hard to reach location you’ll want to power it on to set up the camera with your wireless network before permanently mounting it. Several other devices that use my Wi-Fi network, including my Honeywell thermostats, WeMo switches, and LEDVANCE hub will automatically transmit a wireless Access Point when not connected to a Wi-Fi network. The SpotCam is different in that it has a physical switch on the rear of the camera to toggle between AP (access point) and Client.
Setting up the camera is quite easy and can be done on a PC, Mac, Android device or iPhone. It involves setting up an account if you don’t already have a camera, adding the camera to the account, and providing your login information. Going from powering on the camera to previewing a picture from the device can take less than 5 minutes. This is much simpler than having to specify the IP address, gateway, DNS, and network type. Before completing the setup I ran the NMAP port scanner on the access point site and discovered the following activity:
PORT     STATE SERVICE         VERSION

23/tcp   open  telnet          security DVR telnetd (many brands)

3000/tcp open  ppp?

5501/tcp open  fcp-addr-srvr2?

5503/tcp open  fcp-srvr-inst2?

5552/tcp open  unknown

MAC Address: IM:NO:TT:EL:LI:NG (Shenzhen Bilian Electronicltd)

Device type: general purpose

Running: Linux 2.6.X|3.X
I tried to log into the telnet server with a selection of common default passwords without any luck. Once the camera was switched to client mode I ran NMAP again and got a different set of ports:
PORT     STATE SERVICE         VERSION

23/tcp   open  telnet          BusyBox telnetd

3000/tcp open  ppp?

5503/tcp open  fcp-srvr-inst2?

5552/tcp open  unknown

MAC Address: IM:NO:TT:EL:LI:NG (Shenzhen Bilian Electronicltd)

Device type: firewall

Running (JUST GUESSING): Fortinet embedded (87%)
The device type and running OS are just conjecture from the NMAP program. At least the output is significantly different than the results published here by Pen Test Partners LLP in July 2016. Most importantly, the camera doesn’t seem to be running a web server any longer, so I would say that the security issues that have to do with that vulnerability are resolved. I also tried several obvious American login and password combinations to telnet once the camera was in client mode and didn’t have any success logging in.
Once the camera is set up the iOS and Android user experiences are fairly similar but the web interface provides slightly more capabilities. Julie reviewed the SpotCam HD here in 2014 and had some difficulty accessing the web interface. I didn’t have any problems using Microsoft Edge 38.14393.0.0, Internet Explorer 11.953.14393.0, and Safari 11602.1.20.0.10. Flash plugin is required to view the video, which may explain the difficulties that Julie encountered.
Upon logging into the www.myspotcam.com website you are presented with a screen that displays all of your matched cameras and options for upgrading the NVR service provided by SpotCam. As of April 2017, SpotCam is the only provider of free 1-day continuous CVR (Cloud Video Recorder) service. This feature will save the user about $100 per year over competitive device services. A preview picture of each of the connected SpotCams is shown on this page. The unsecured preview image identified in the Pen Test Partners is now password protected and only stored for a limited time. 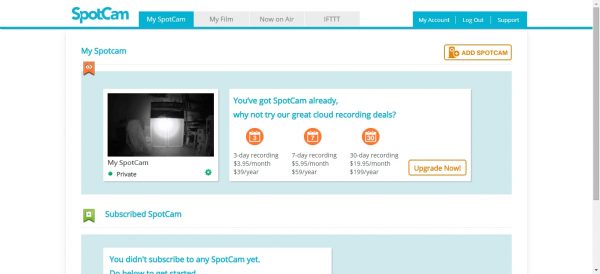
The gear settings icon below the preview picture brings up the same settings window that is available in the main viewing window of each SpotCam but the web interface has more settings than what is available on the iPhone or Android devices. The first two settings windows available on the web are several screens long so I’ve pasted them together here for your review. The UI has a lot of capabilities but it is heavily dependent on Flash and JavaScript, which means sometimes it lags. Also, some of the UI isn’t entirely localized:
Under the general tab, there are settings to rename your camera. (I have mine as the default “My SpotCam”.) The Camera sleep is an interesting feature that will only stream video when a motion event and/or audio event is detected by the onboard computer. 180° rotation is useful if the camera is ceiling mounted. Flicker reduction adjusts the camera to avoid rolling frequency bands in the recorded video and will work with either 50Hz or 60Hz.
There are a number of settings here that a user can take advantage of to limit the chances that the camera will capture undesirable moments. The camera schedule option allows the camera to be turned off for specific periods during the day or for an entire day and allows a different schedule on each day of the week. The status LED determines if the bring blue LED on the camera front is energized while the camera is recording. Audio can turn on or off the audio monitoring and adjust it’s sensitivity.
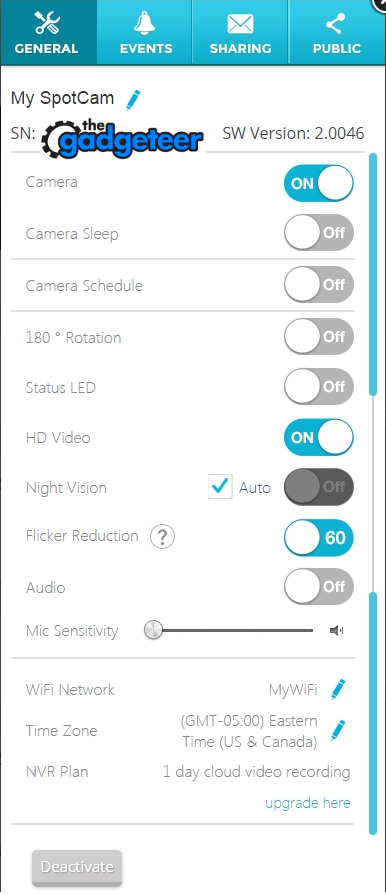
The night vision capability of this camera is superb thanks to a mechanical IR-Cut filter switch and 12 IR LEDs to permit 0-lux recording. Because the night vision is IR illuminated there is no color – only B&W. One complaint about the cut filter is that it is rather loud when its position is moved in front of or away from the lens.
The events tab has some of the same settings that is called “alerts” on the iPhone and android apps. This tab allows the user to define the types of alerts that the camera will generate a message for, either on the device by app, through email, or both. The SpotCam Sense and Sense Pro includes a built-in lux meter, hygrometer, microphone and thermometer to detect changes in illumination, humidity, sound and temperature. The camera is used to detect motion, and interruption of the camera feed to the server is used to determine if the camera is offline. These settings are the same settings the trigger IFTTT alerts.

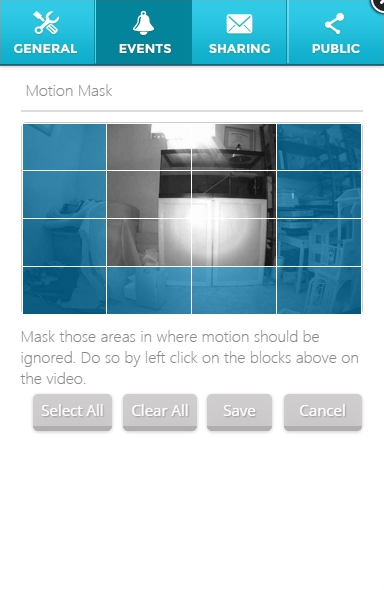
The motion masking is only set using the web interface and is accomplished by selecting what combination of 16 blocks are used to detect motion on a preview of the camera image. I would think that a more sophisticated method would be available, such as a larger number of regions or drawing polygons on the screen.
The siren volume is not loud at all and sounds more like a child’s toy than an intrusion deterrent. Also, calling attention to the camera used for surveillance is counter-intuitive. The volume of the speaker used for two-way communication is much louder than the siren, and dismisses the possibility that the weatherproofing of the Sense Pro has muted the volume. If you’re looking for a loud siren, the SpotCam Sense Pro will disappoint.
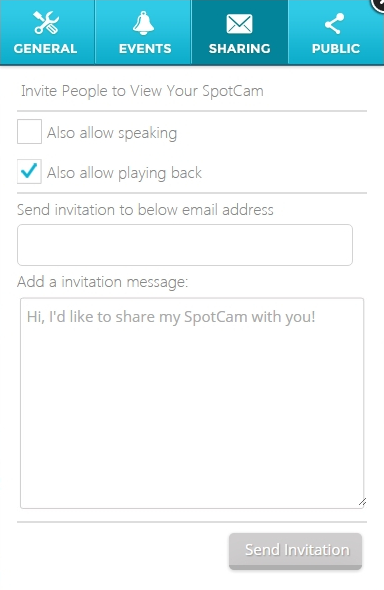
The sharing screen allows additional users to view the same SpotCam. After granting additional users permission, the rights to view can be revoked on the same screen. As far as I can tell the person to whom access s granted can’t make movies, but can look at all of the sensory data, can take pictures, zoom in to the picture and look at NVR and sense data since before the access was granted. So sharing pretty much grants full access to your camera.
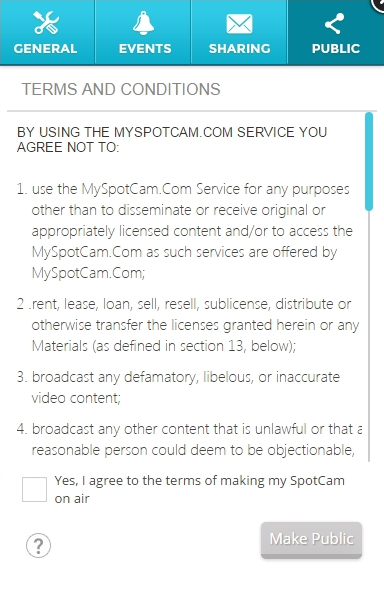
You can also set up the SpotCam for public, uncontrolled viewing. There is a lengthy T&C policy that surrounds this option.
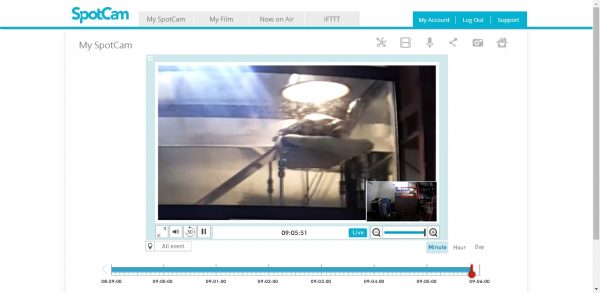
The settings are a lot to take in, and the video screen has addition features and options. The main video screen shows the camera image front and center. When the image is zoomed the main window can be dragged to change the area within the zoom window. A red square on the preview window illustrates the zoomed area viewed in the main window and the preview window itself can be relocated around the screen. The video shown here is of my pet turtle while we are on vacation. The video recording conditions are awful and the lens is probably not clean from the glare on the image. Yet, that’s unmistakably a turtle and if there was an intruder the turtle wouldn’t bark but thanks to the SpotCam I’d sure know about it. I recommend going to https://www.myspotcam.com/en/onair and reviewing some of the public SpotCam footage to get an idea of the image quality. The 1 Day NVR is accessible on public cameras too so you can see the same image in different lighting conditions.
The top of the page has a tab for my film, which is where the time lapse and recorded video shorts are stored. The videos produced for time-lapse and record are in the FLV format, so you’ll need to run them through VLC or similar program to convert them to MP4.
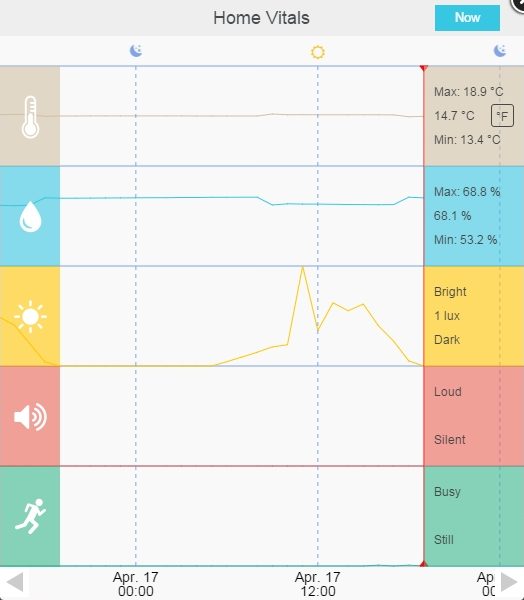
The icon at the top right, with the heart in the house, is the location of all of the sensor data. It provides a strip-chart graphic of the conditions where the camera is located. One thing that would improve this display is the recorded time and date at the red line to the right. Without this, you need to guess where you are based on the date and time at the bottom of the display.
One last item is the IFTTT integration. The following is the complete list of SpotCam Sense triggers and actions. There are a lot of opportunities for automation here. From energizing connected devices based on sensor data to logging the conditions based on time or threshold value, IFTTT has you covered. Now that IFTTT works with SmartThings the capabilities of using sensor data and image data are virtually endless.
In conclusion, the SpotCam Sense Pro is a novel entry into the world of video monitoring. SpotCam has dramatically increased the automation capabilities of the camera by bundling several environmental sensors within the device. Of course, the camera wouldn’t be useful if its image wasn’t sharp and detailed. Although my camera is positioned poorly and doesn’t capture the best image the cameras available for public viewing on SpotCam demonstrate the true potential of this device. The 1-day free NVR/CVR provides real savings compared to other devices. Lastly, the integration with IFTTT brings powerful automation to this device. If you are looking to step into the world of IP cameras or you have an established automation environment that you want to incorporate a host of sensors into you won’t go wrong with the SpotCam Sense or Sense Pro.
Source: The sample for this review was provided by SpotCam. Please visit their site for more info and Amazon to order.
Product Information
| Price: |
$169.99 / $189.99 |
| Manufacturer: |
SpotCam Sense / SootCam Sense Pro |
| Retailer: |
Amazon |
| Requirements: |
- 2.4Ghz frequency bands and 802.11 b/g/n Wi-Fi
- AC outlet within 10 ft.
|
| Pros: |
- Full HD 1080P video streaming and recording up to 30FPS
- 155-degree ultra-wide viewing angle
- Monitors temperature, humidity, and lux levels
- Free 24/7 continuous cloud recording
- Two-way audio recording
- Free timelapse function
- Configurable temperature, humidity, light level, motion, audio, disconnection alerts
- Built-in siren for intruder deterrence
- IP65-rated weatherproof SpotCam Sense Pro
|
| Cons: |
- Siren is low volume
- IR Cut Filter movement is loud
- Mounting plate could be more substantial
- Web Software can be laggy.
|
Filed in categories: Reviews
Tagged: security camera
SpotCam Sense Pro review originally appeared on on April 24, 2017 at 8:12 am.
Note: If you are subscribed to this feed through FeedBurner, please switch to our native feed URL http://the-gadgeteer.com/feed/ in order to ensure continuous delivery.


