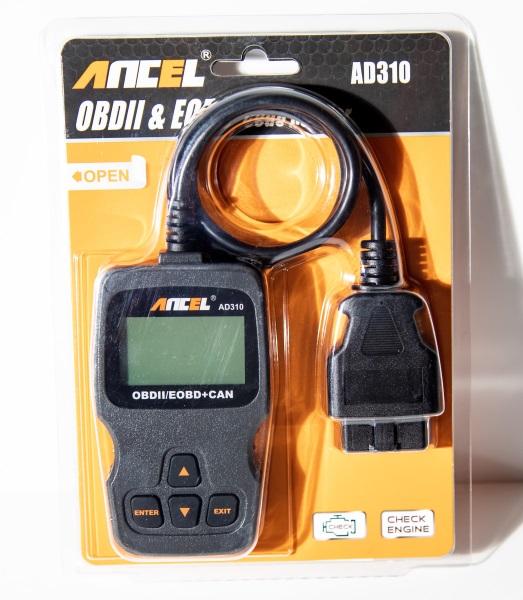
ANCEL AD310 Classic Enhanced Universal OBD II Scanner Car Engine Fault Code Reader review


REVIEW – While I am not a mechanic, I am quite handy as a jack of all trades, and over the years I have tinkered with many of the used vehicles that I owned before I started to lease new vehicles. I was always interested in the devices that I would see at the mechanic shop and when I first heard about the incorporation of the ODB Connector in newer vehicles, I was intrigued about its function and capability. Although my current vehicle is new, I was excited to see what insight I can gain via the ANCEL AD310 Classic Enhanced Universal OBD II Scanner Car Engine Fault Code Reader when I connect it to my vehicle. Here is how it turned out!

What is it?

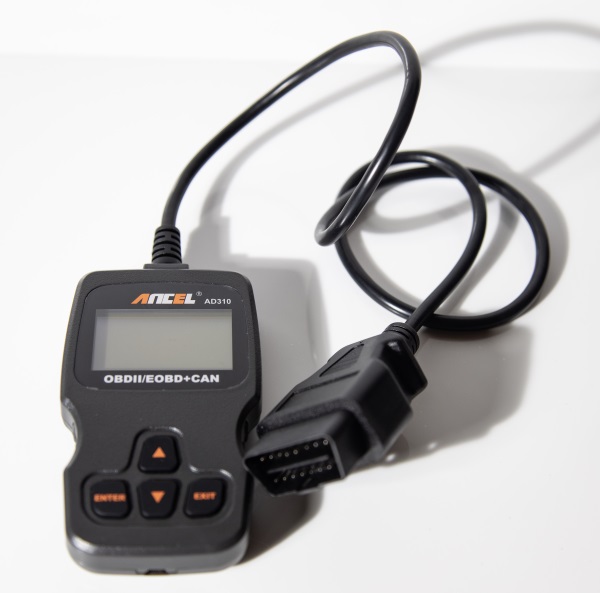
The Ancel AD310 scanner is a well-built device with a nice size LCD display (128 x 64 pixels) that has a white backlight and contrast adjustment. It is able to display the test results directly on the screen which makes it a very mobile all-in-one package. This is also true because it gets the power directly from the OBDII Data Link Connector in your vehicle, so there is no need for batteries or an external power supply.

What’s in the box
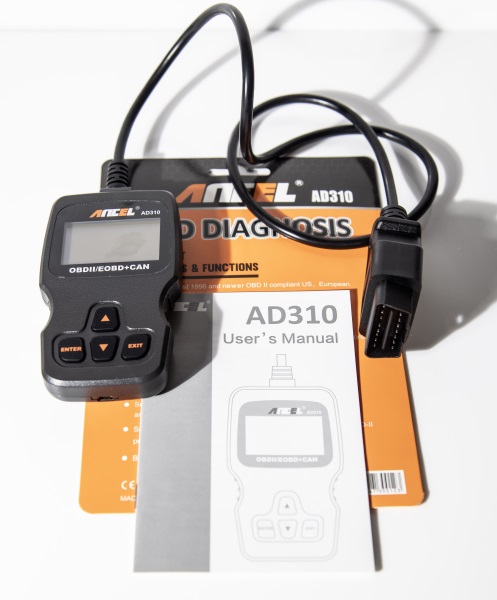

1 x ANCEL AD310 Classic Enhanced Universal OBD II Scanner Car Engine Fault Code Reader
1 x User Manual

Design and features

Specifications
Display: Backlit, 128 x 64 pixels display with contrast adjustment
Operating temperature: 0 to 60 °C (32 to 140 °F)
Storage temperature: -20 to 70 °C (-4 to 158 °F)
External power: 8.0 to 18.0 V power provided via vehicle battery
Product weight: 300g

Features

  • Works on all 1996 and newer OBD II compliant US, 2000 and newer OBD II
    European, 2005 and newer OBDII Asian vehicles
  • Reads hard (memory) / pending (intermittent) and historic codes and shows definitions
  • Turns off Check Engine light, clear codes and resets monitors
  • Reads live data stream
  • View freeze frame data
  • I/M monitor readiness test
  • Retrieves vehicle information
  • Supports CAN (Controller Area Network) and all other current OBD II protocols Built-in OBD II Fault code lookup library

The Ancel Scanner comes with a built-in 2. 5’ long cable that is well insulated. There are 4 buttons on the scanner that include the Up and Down buttons for scrolling the menu, and the Enter and Exit buttons for accessing and exiting menus and settings.
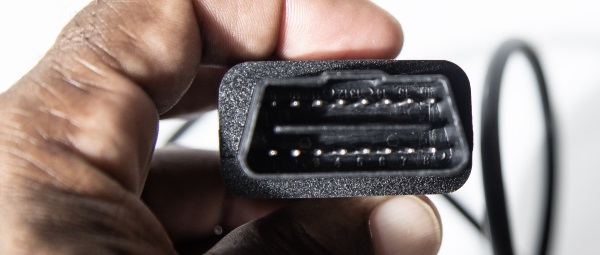
On the other end of the cable, there is the OBD Connector.
Performance

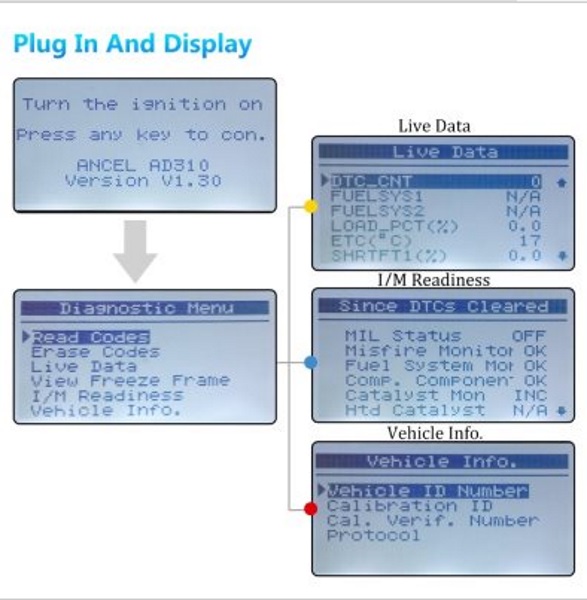
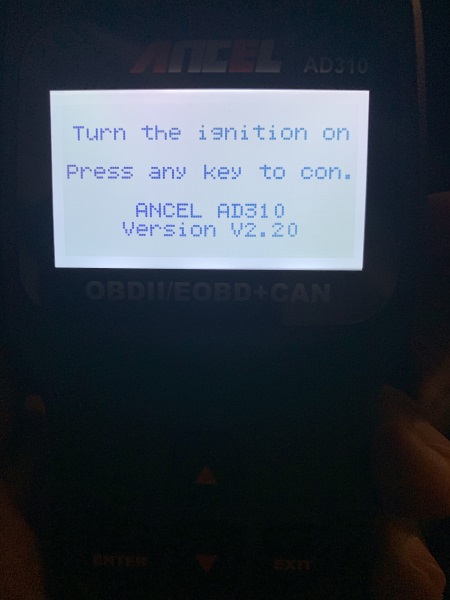
When I plugged in the Ancel AD310 to the OBD Connector in my truck the screen lit up immediately and the logo ANCEL appeared on the screen. After a couple of seconds, and just as indicated in the manual, the following screen appeared. This just required me to turn the ignigiton to the on position and not to actually start the vehicle. (Please Note: all of the following pictures in this section were taken with a cell phone camera in the dark underneath my dashboard):
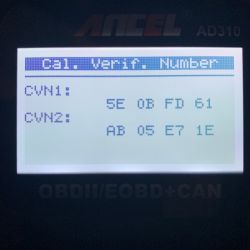
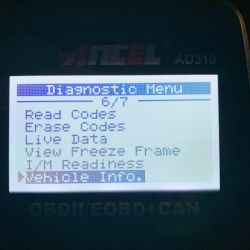
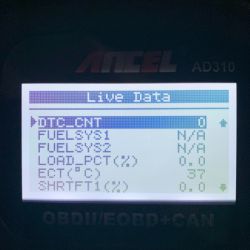
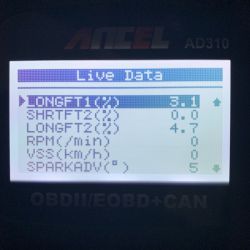
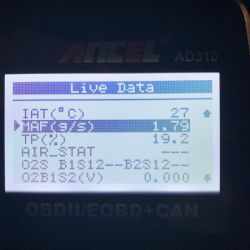
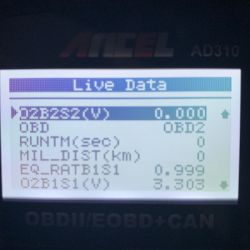
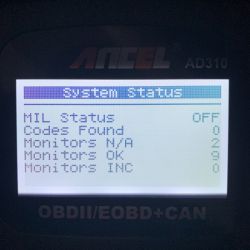
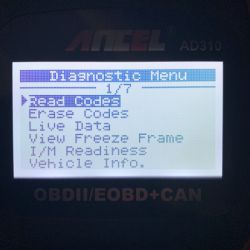
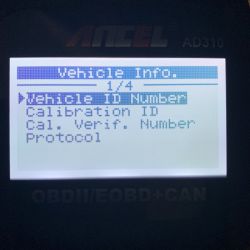
I am no expert on this type of device, but what I like is the amount of information it provides and its ability to erase codes, clear the check engine light and diagnose system issues which I am assuming includes faulty sensors, etc. Since my vehicle is new, it is not a good test subject to truly validate the capabilities of this device. However, as soon as I hear from one of my friends that their check engine light is on or that their vehicle is not performing properly, I will be on my way to them with this device and will post an update after should my visit yield any relevant information. The following are screenshots of some of the screens/options that are available:


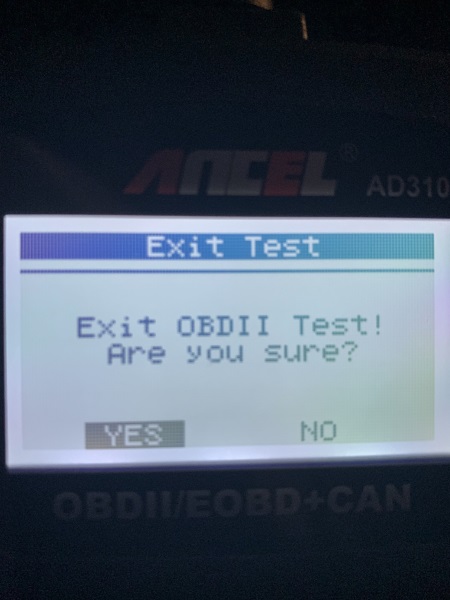
Once I was done playing around with the options and screens, I selected exit and the folloing screen appeared:
Of course I started my truck afterwards to make sure that I did not create an issue with all of my playing around. LOL.

What I like

  • Its build quality
  • The display
  • The ease of use
  • No need for external power

What can be improved

  • The User Manual print is too small (At least for my naked eyes)

Final thoughts

The ANCEL AD310 is a very handy tool that simplifies much of what we see mechanics do when we take our cars to the shop. Years ago, it seemed like such a device was too technical for the average person and required a qualified mechanics with a complicated tool to clear a check engine light or to diagnose a faulty sensor. Paying for a part to be replaced was one thing, but paying expensive shop rates for simple diagnosis was hurtful. Now, with a device like this, you can have a bit of change left in your pocket to purchase the over-priced replacement part. This device is reasonably priced and in my opinion, is a great bang for the buck. (Disclaimer: my opinion is subject to change if it does not actually perform as advertised once I get to check the next faulty vehicle that I get my hands on)

Price: $34.99
Where to buy: Amazon
Sample: The sample for this review was provided by Ancel

Filed in categories: Reviews

Tagged:

ANCEL AD310 Classic Enhanced Universal OBD II Scanner Car Engine Fault Code Reader review originally appeared on The Gadgeteer on April 11, 2019 at 11:00 am.

Note: If you are subscribed to this feed through FeedBurner, please switch to our native feed URL http://the-gadgeteer.com/feed/ in order to ensure continuous delivery.

Hairmax LaserBand 82 hair growth laser light device review

REVIEW – As a man starting to hit middle age a lot faster than I would like, one of the biggest realities I’ve had to face is the onset of male pattern baldness. In all reality, I could think of much worse fates to be honest, but around Christmas, I had a picture taken from behind and it was an eye-opener as I realized the spot on the back of my head was thinning much faster than I had thought. I have naturally thin hair as well, so any additional thinning just isn’t a good thing for me. So, when the call was sent out for a review of the Hairmax LaserBand 82, I jumped at the chance. Worse case scenario in my mind was that I’d be no worse off in the end.

Now, this review is going to be a bit different from most reviews here at the Gadgeteer. While most products we look at are pretty straight forward and can be reviewed in a day or two, this product recommends a full 26-week usage cycle to see full results, with continued usage beyond that time period to maintain results. Thus, I will have this initial post with my first 4 weeks of usage and then updates monthly until I reach the full 26 week period. Before I get into the meat of the article, let’s get the basics out of the way.

What is it?

The Hairmax LaserBand 82 is a laser therapy device intended to reverse the hair miniaturization process by stimulating and energizing hair follicles using a crescent-shaped laser band that you move across your head in 30 second or 4 second intervals. Three treatments a week for about 90-120 seconds per treatment is sufficient to provide results according to their documentation.

What’s in the box?

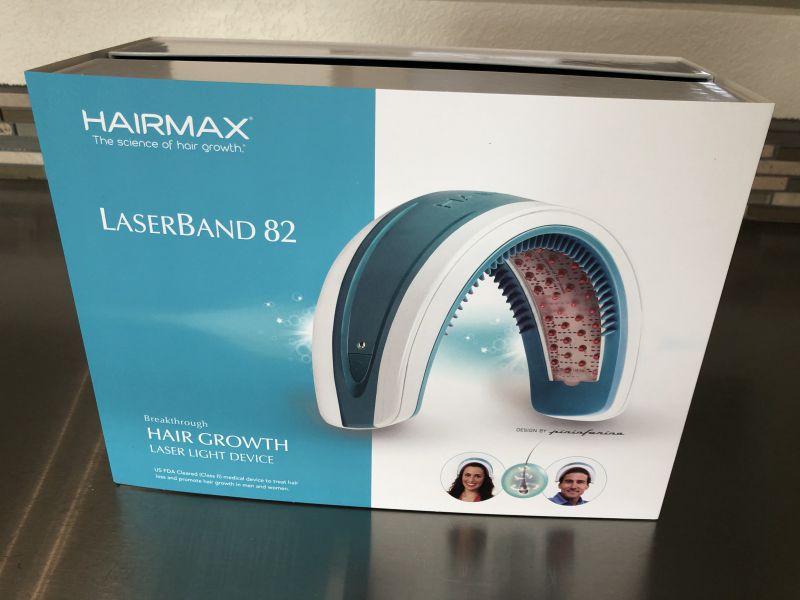
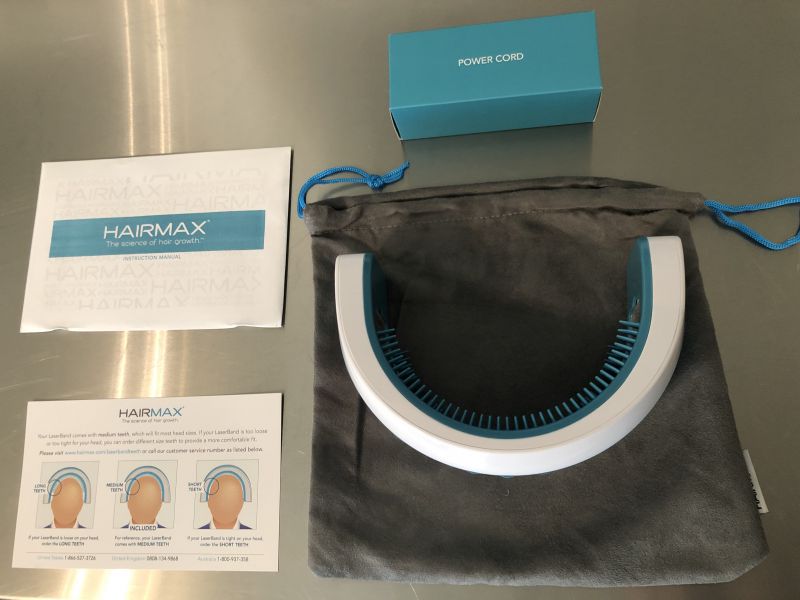
  • HairMax LaserBand 82
  • Charging Cord
  • Product Instructions and Usage Guide
  • Storage Bag

Design and features

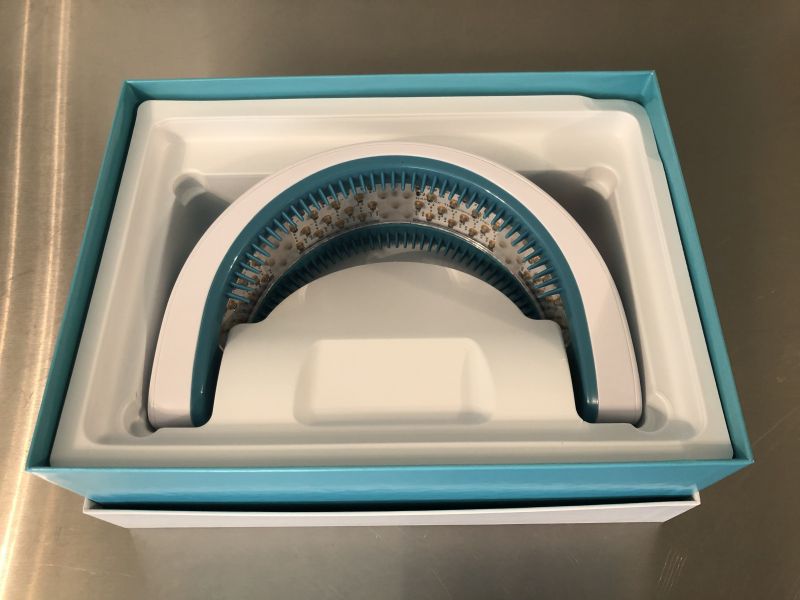
The LaserBand is rather lightweight at 15 ounces. The 82 in the product name refers to the 82 laser heads within the band that provide the laser therapy. There are removable teeth on the front and back of the unit that help part and move hair out of the way to expose your scalp to the lasers throughout the treatment. I note that these are removable because you can order different size teeth based on your head size to adjust the fit of the band. Turning the unit on is very simple, there is a power button on the right side of the unit that you press once for 30-second treatments or twice for the 4-second treatments. At each interval, it vibrates to let you know when to move it back to the next section of your scalp. If using 30-seconds, you go through one full movement front-to-back through your hair, if you use the 4-second interval then you do 6 cycles front-to-back to complete a treatment.

Also, it has a pretty cool Sci-fi look to it during treatments!

Setup

Other than providing a 4-5 hour charging period before your first treatment, there isn’t much set-up to this device unless you find you need to change out the teeth for head size adjustment – instructions for doing so are included but you’ll need to buy the teeth separately.

There are guidelines on who this treatment is optimal for, as well as results for patients who have been subject to clinical trials.

From the chart above, you can see there are varying hair types that have proven to be successful. I fit within the category III for men. Unfortunately, this product hasn’t been clinically tested for Type 5 or 6 skin types, which is listed as dark brown and black skin tones. Now this doesn’t mean it won’t work, just that it hasn’t been clinically tested on those skin types. I fit in Type 1 skin tone.

Performance

The documentation included within the package indicates that weeks 0-12 will most likely not produce noticeable results. But I took a picture each week to keep track. Upper left is week 1, upper right is week 2, lower left is week 3 and lower right is week 4.

So, as you can see, there isn’t much as far as visible results thus far, but that is to be expected. This will provide a good basis for comparison as the weeks go along.

As far as the actual device, it is not uncomfortable to use at all. The teeth feel just like a heavy comb or brush as I push the unit back through my hair. It’s recommended to keep it as tight to the scalp as possible as you move it, so it kind of massages the scalp along the way as well. There are several warnings to refrain from looking directly into the lights, which isn’t always the easiest to do when taking the unit off your head. Turning the unit off takes a long press of the power button, but you have to be looking at it to know whether it turned off or not. Maybe having an additional distinct vibration when powering off would be helpful to avoid the risk.

What I like

  • Ready to go out of the box, no assembly, simply charge it.
  • Easy to use, 3 times a week in 90-120 treatments.
  • Comfortable – I was really afraid the band wouldn’t feel comfortable sitting on my head.

What needs to be improved

  • Power button isn’t easy to use while also avoiding eye exposure on some level when removing the device
  • I’ll hold off on any other “needs improvement” until I’m further into the treatments.

Not-Quite-Final thoughts

Thus far, the Hairmax LaserBand 82 has been a breeze to use. I’m hopeful that in another 8-12 weeks, I’ll see some significant changes start to take place. At the $799.00 price point, I would expect that it does produce some recognizable results.

Until my next update, thanks for stopping by.

Price: $799.00
Where to buy: Hairmax Website or Amazon for $10 less.
Source: The sample of this product was provided by Hairmax.

Filed in categories: Reviews

Tagged:

Hairmax LaserBand 82 hair growth laser light device review originally appeared on The Gadgeteer on April 11, 2019 at 9:00 am.

Note: If you are subscribed to this feed through FeedBurner, please switch to our native feed URL http://the-gadgeteer.com/feed/ in order to ensure continuous delivery.
Reborn Wetsuit Wallet review

REVIEW – I know what you’re thinking… why would I need a wallet for my wetsuit? But the Reborn Rubber Wetsuit Wallet isn’t for diving, but is a durable, upcycled card carrier with an eco-friendly mission.

What is it?

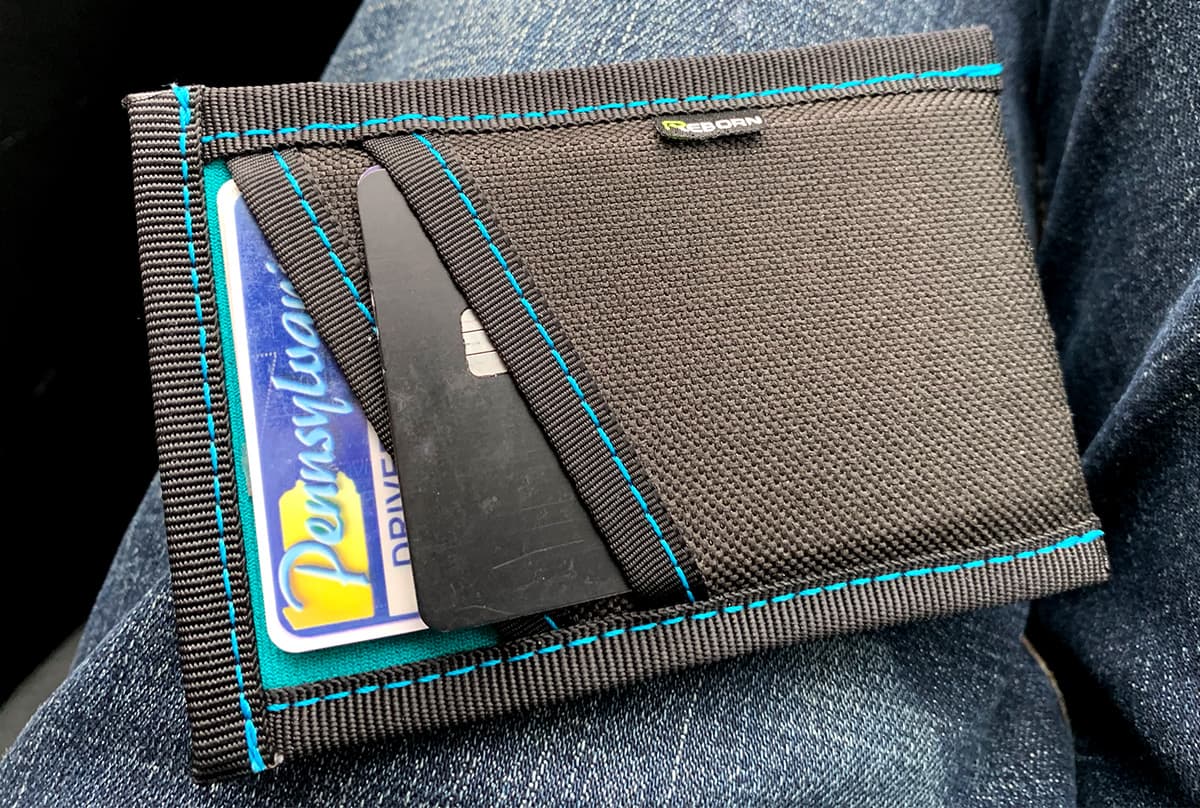
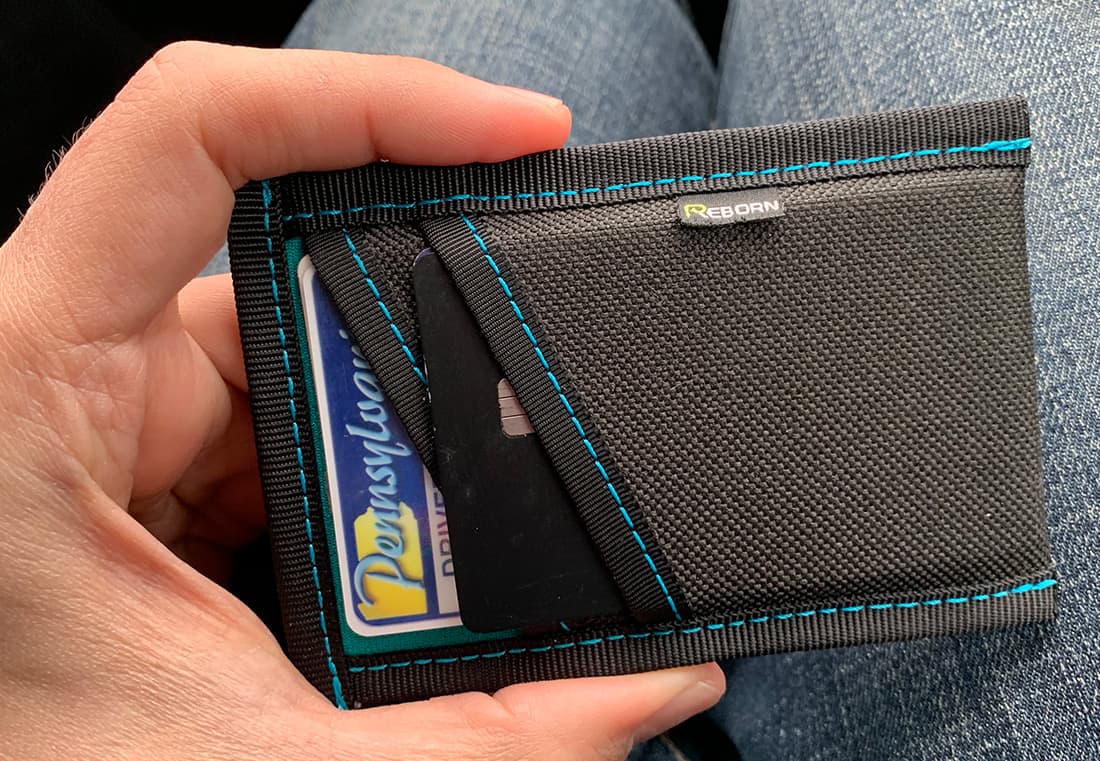
Reborn Rubber’s Wetsuit Wallet is a slim, front pocket style wallet made from “upcycled” wetsuit neoprene and polyester.

What’s in the box?

  • Just the wallet.

Hardware specs

  • Made from 3MM wetsuit neoprene and polyester spun from recycled plastic bottles
  • Measures 4 1/2″ x 3″ and about 1/4″ thick
  • Floats in fresh or salt water even when fully loaded with cards
  • Two front pockets hold 5 cards each, rear pocket holds cash, receipts or a primary card
  • 10% of your purchase will be donated to an ocean cleanup organization

Design and features

I’ve been a big fan of recycled or repurposed items for wallets and bags ever since I saw someone selling duct tape wallets at a craft fair some years ago. There are just so many things that get thrown away instead of reused, and apparently, diving wetsuit neoprene is a great material to use for wallets.

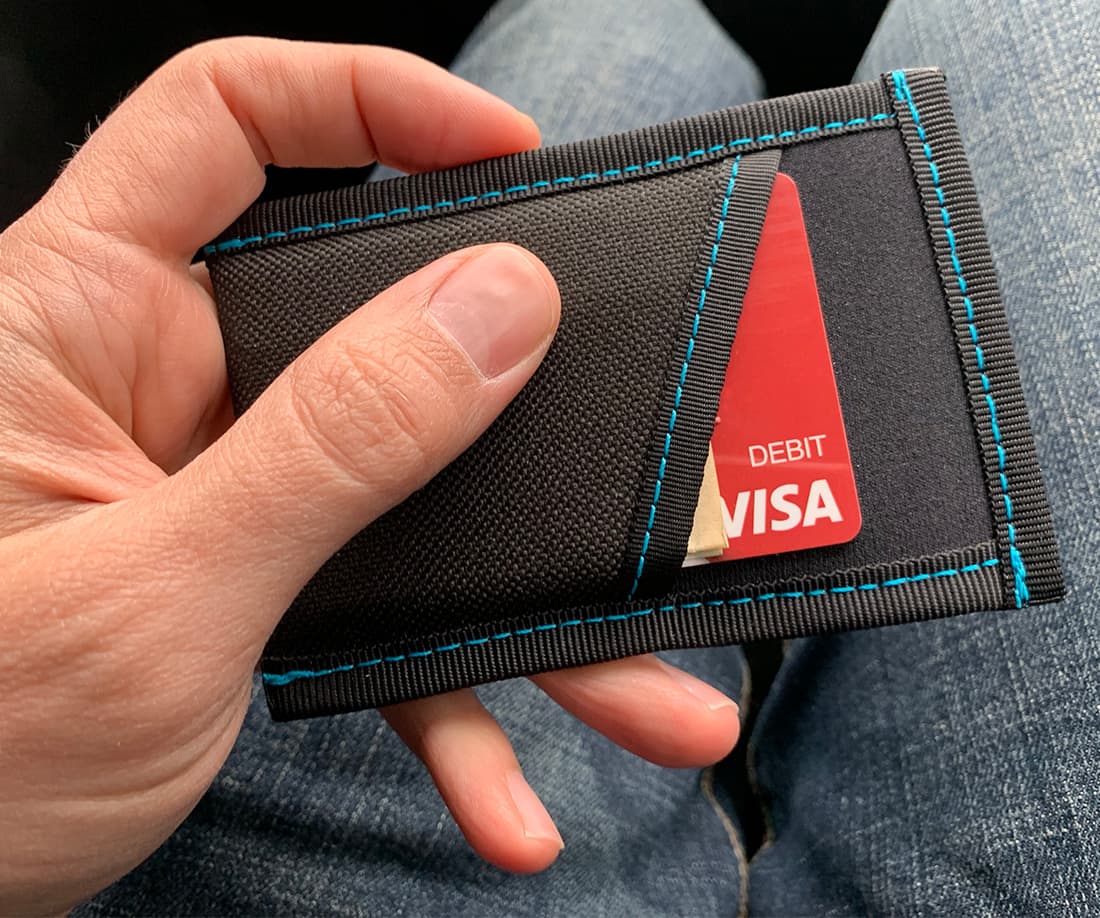
Slim, front pocket wallets are absolutely my jam.

The Reborn Wetsuit Wallet’s construction is simple and durable, as well as inexpensive. $20 gets you a slender wallet that easily fits right alongside your phone in a front or back pocket. Nearly every material used in the manufacturing of this wallet is recycled.

Since the center of the wallet is made from neoprene, it can float in fresh or salt water, even fully loaded. So it’s great for those trips to the lake or dock. And obviously, it’s waterproof.

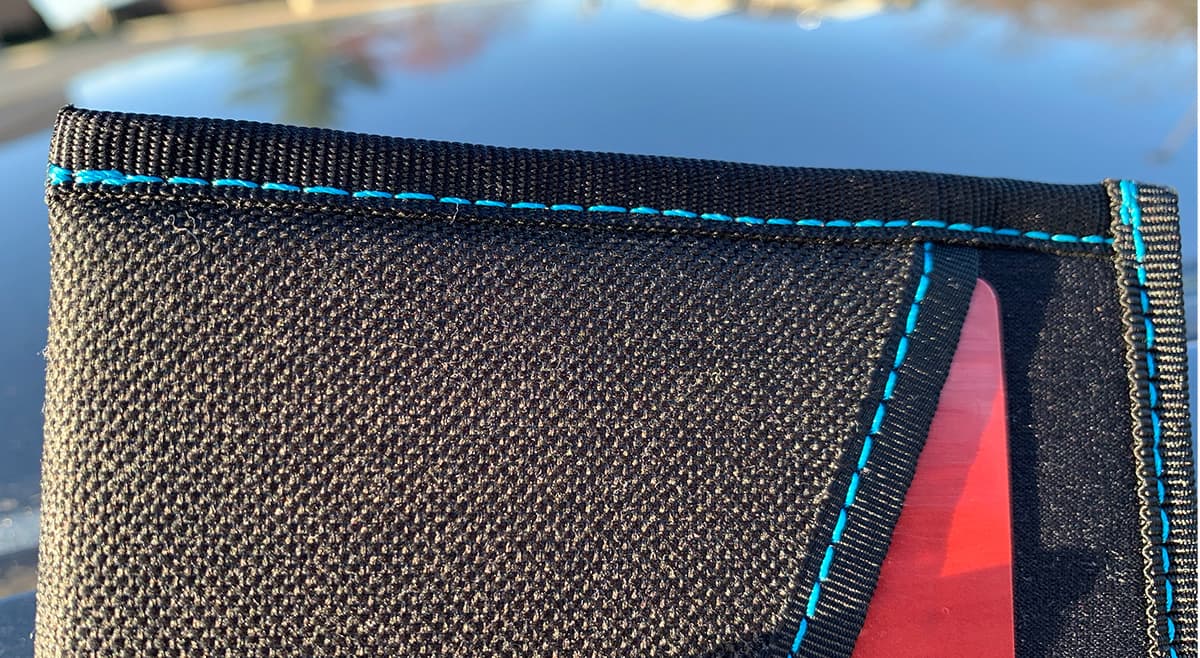
The stitching looks to be rock solid, however, there is not a lot of flex in the top openings of the card pockets.

A detailed shot of that stitching.

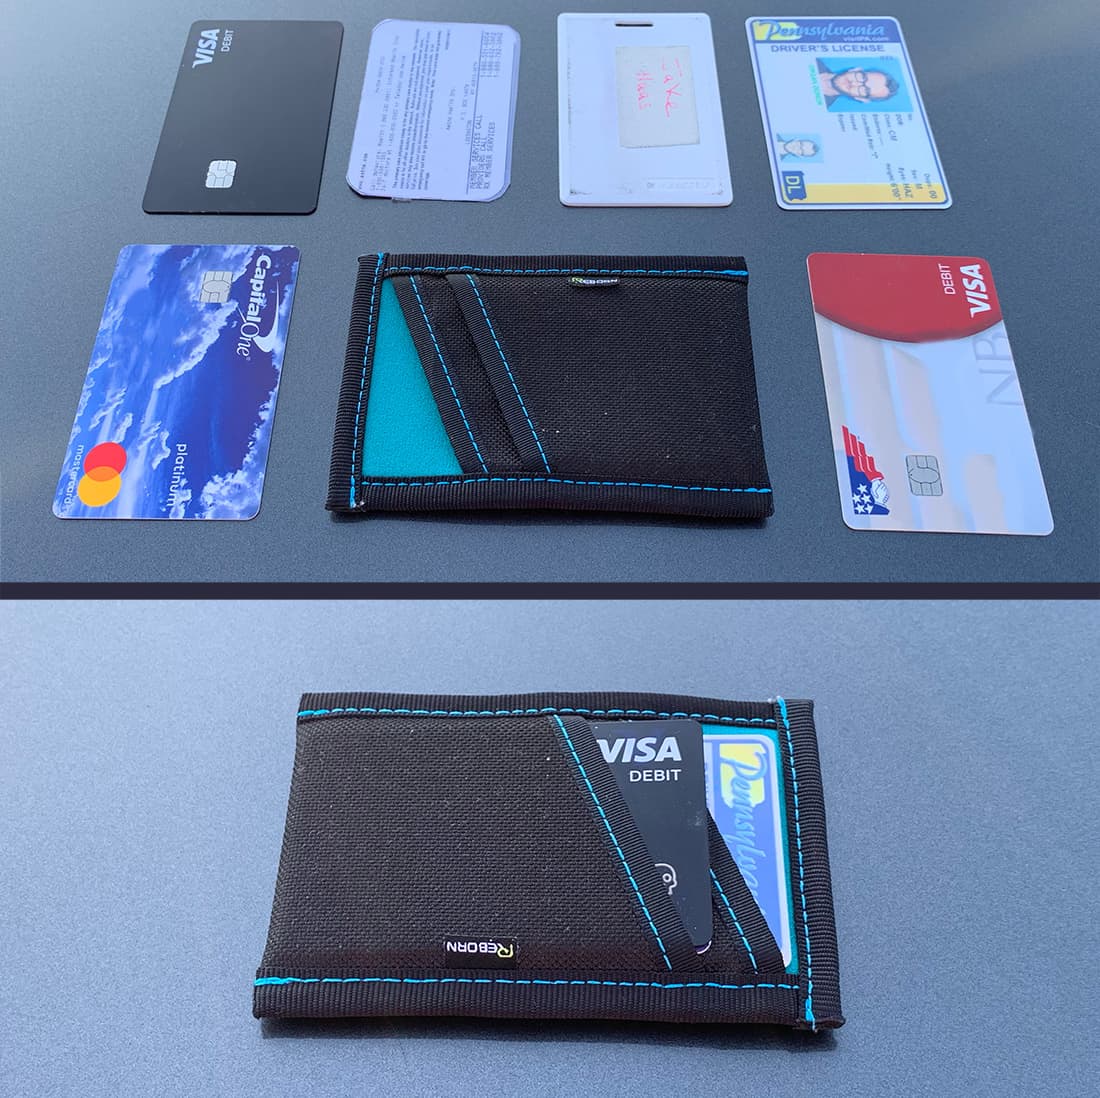
I’m a bit dubious about their claim of fitting 5 cards in each pocket, plus one in the back. I think you could cram them in there (I didn’t have 10 cards laying around to test this out) but the stitching and material at the top of the pockets doesn’t have much give. Perhaps after a couple months of breaking in, they loosen up, but even then, any more than 3 cards in each pocket would be my max carry.

I’d say 5-8 cards is just about a perfect fit.

It’s difficult to remove any but the top card on the pockets because of this. You can easily slide all of the cards in a pocket out as a group. To me, the point of many slim wallets like this is to actively carry fewer cards, just the basics. For me, it’s my license, office door keycard, and three other cards. So I love wallets like this one. Actually, the only negative thing I could find to write about is their card-fitting claim. You could carry 11 cards, but I personally don’t think you should.

I really like the color-match stitching. Nice touch.

One of my favorite features of this wallet isn’t even the wallet itself. Reborn Rubber is a part of a growing group of companies who use upcycled materials in their products. Not only that, but they give back a portion of their profits toward cleaning up the oceans.

Plus, if you’ve got a used wetsuit laying around, you can donate it to Reborn Rubber to convert into wallets and provide up to $110 in ocean cleanup efforts, and they’ll even send you a free wallet for donating.

What I like

  • Slim, simple front-pocket style
  • Supports ocean cleanup
  • Wallet floats even when loaded

What needs to be improved

  • Cards can be a little hard to remove when it’s packed full

Final thoughts

If you’re looking for an inexpensive, slim, waterproof, floating, super durable wallet that gives back to the planet, the Wetsuit Wallet is just lovely.

Price: $19.99
Where to buy: You can get your own Wetsuit Wallet in a multitude of colors directly from Reborn Rubber’s website.
Source: The sample of this product was provided by Reborn Rubber.

Filed in categories: Reviews

Tagged:

Reborn Wetsuit Wallet review originally appeared on The Gadgeteer on April 10, 2019 at 10:00 am.

Note: If you are subscribed to this feed through FeedBurner, please switch to our native feed URL http://the-gadgeteer.com/feed/ in order to ensure continuous delivery.
Xcentz xWingman 10000mAh powerbank review

REVIEW – No real Gadgeteer has only one power bank in 2019. There are high-capacity ones for long-term travel, lighter ones for your EDC top-ups, and mid-range ones that you can share with a friend and still have some juice for your own devices. The Xcentz xWingman 10000mAh fits perfectly into this third category.

What is it?

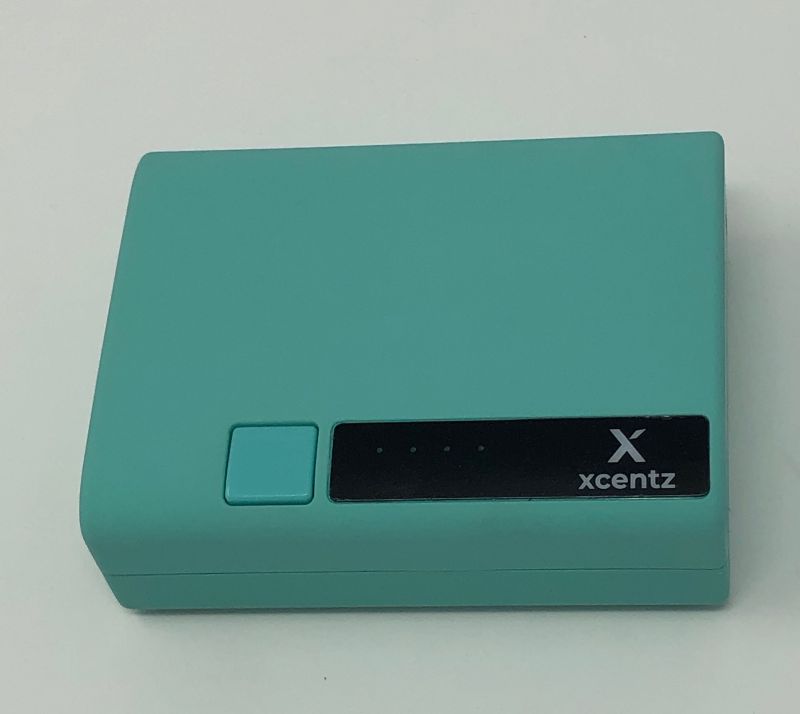
The xWingman is a small powerbank about the size of a deck of cards, with a USB-A port on one short side, and a USB-C port on the other. It can charge at up to 18W output.

What’s in the box?

  • 10000mAh PD Portable Charger (Model: PB-34011)
  • 30 cm / 1ft USB-C Cable
  • Paperwork

Hardware specs

  • Power for All – With USB-C power delivery port (18W) and quick charge 3.0, high-speed charging for both USB devices and USB-C devices. Power iPhone X to 50% battery in 35 minutes with USB-C to lightning. (USB-C to lightning charging cable not included)
  • Recharge 2x faster – With USB-C power delivery input, time for a full recharge is reduced to 3.5 hours, save up to 3 hours than a standard micro charger. USB-A to USB-C charging cable is included but USB-C wall charger is not included.
  • Huge Charging Power – 10000mAh of power charge iPhone 8 up to 3.5 times, iPhone X up to 2.5 times, Galaxy S9 up to 2.3 times, Galaxy S8 up to 2.3 times, iPad Air2 up to 1 time.
  • Safety First – LG 21700 battery for over 500 charge/recharge cycles and still holds over 90% juice. UL certified and Xcentz’s exclusive xSmart technology to protect your devices against overcharge, short circuit, and overheat. Last 3x longer for use.
  • Astonishing Size – Xcentz xWingMan Dual 10000 is small as 1/2 iPhone 7 and lightweight as a baseball. Incredibly smallest portable charger slides easily next to your phone in any pocket or purse. Best choice for traveler and those who don’t like bulky battery charger.

Design and features

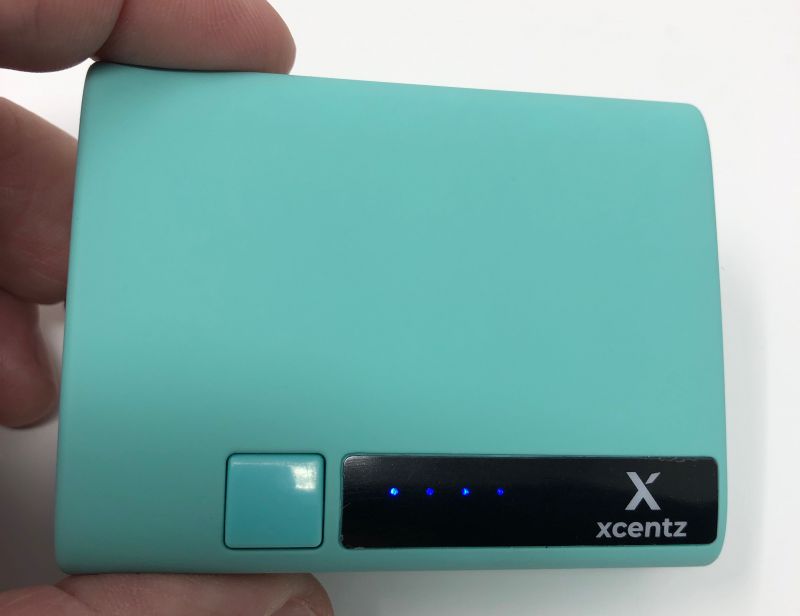
This tiny box is almost too thin for a USB port to fit on the side. It’s also available in Black (sort of shiny looking), blue (really Aqua, which is the one I was sent), Pink, Sandstone Black, and Sandstone Grey. The sandstone colors look to have a bit more texture. The xWingman is only 3.125″ x 2.375″ x 1.125″, so it will fit into many small spaces where more traditional 10000mAh battery packs will not. And at 6.5 ounces, you’ll barely know it’s there.
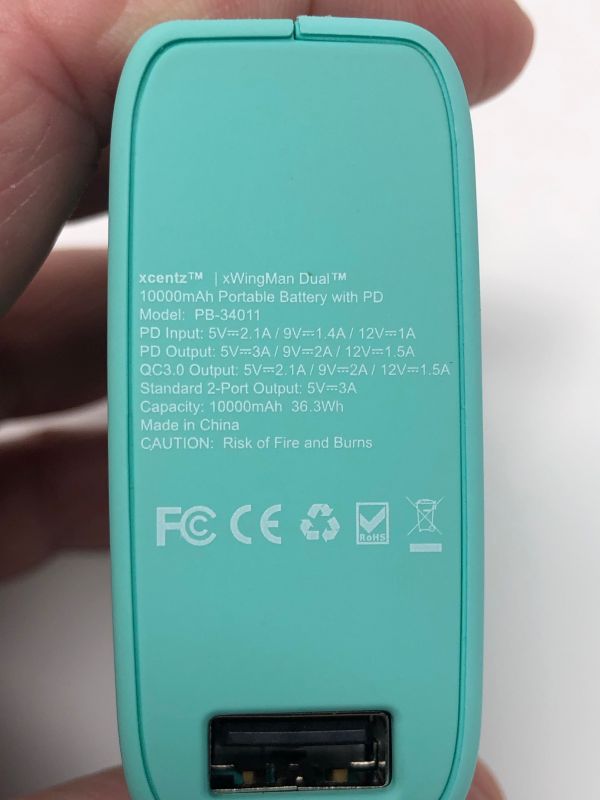
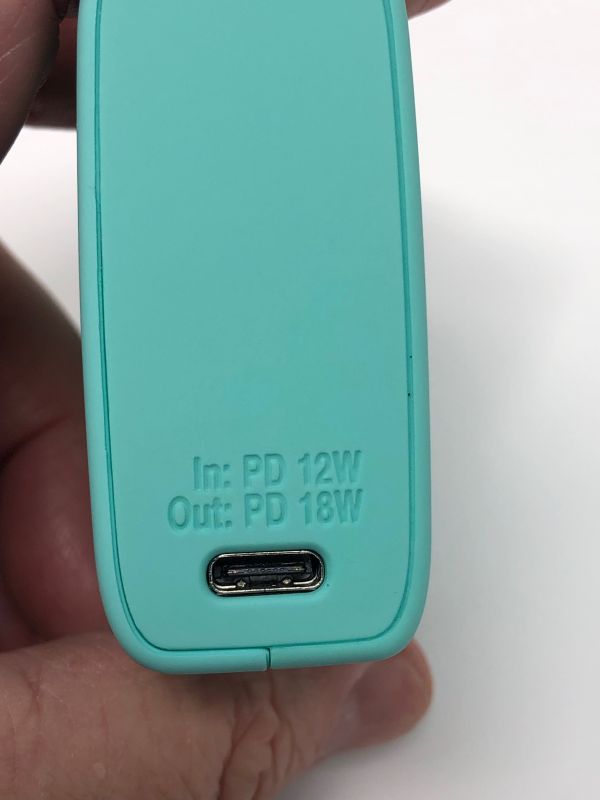
On one end is a traditional USB-A port that delivers PD charging to devices that have that feature. The other end has a USB-C port for power in (with the included USB-A to USB-C cable) and as high as 18W output.
On one of the large surfaces, there is a black window with the Xcentz logo and a power meter, alongside a single button, which will show you the amount of power remaining.

Performance

The xWingman takes a charge quickly and holds it a good long while if you don’t use it. I treat it like it’s a regular USB outlet plug since it so rarely needs to be recharged. I never had it go beyond 2 dots on the “gas gauge.”

What I like

  • USB-C!
  • Fast recharge and slow discharge
  • Really tiny for a 10Ah battery

What needs to be improved

  • Can’t think of a thing

Final thoughts

We’re still in the state of battery technology where you’re constantly fighting to keep the devices you want to use powered up. This can only be done by stashing reserve power elsewhere. The xWingman is a great way to house a wealth of potential energy in a small space for a long time. And it’s at a great price.

Price: $49.99
Where to buy: Amazon
Source: The sample of this product was provided by Xcentz.

Filed in categories: Reviews

Tagged:

Xcentz xWingman 10000mAh powerbank review originally appeared on The Gadgeteer on April 10, 2019 at 9:00 am.

Note: If you are subscribed to this feed through FeedBurner, please switch to our native feed URL http://the-gadgeteer.com/feed/ in order to ensure continuous delivery.
Outdoor Vitals Dominion 1-person tent review

REVIEW – The Outdoor Vitals Dominion 1-person tent is light, compact and easy to set up, but beware if you’re not a smaller person, have a sizeable canine companion or you want your gear inside the tent with you.

What is it?

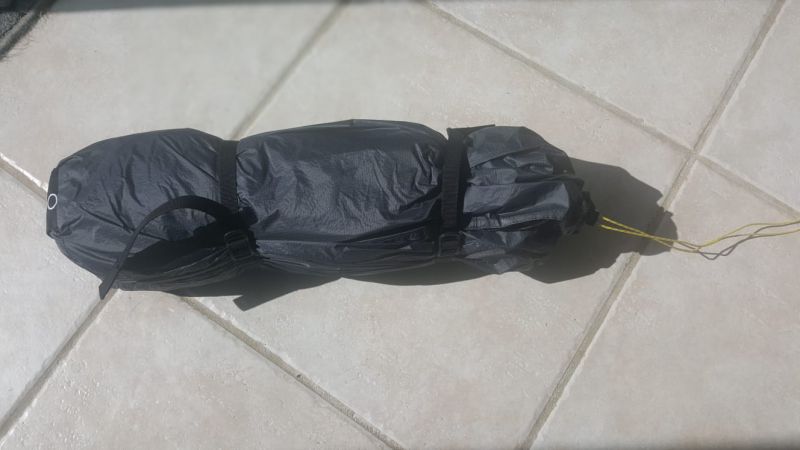
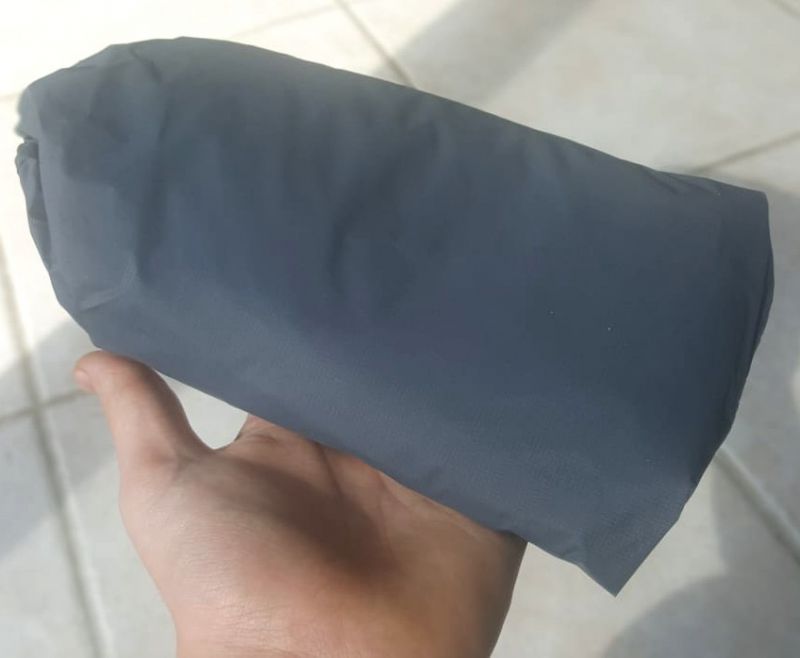
In a hair under 3 pounds, this tent package includes everything you need for a solo overnight in the elements, including your footprint and rainfly. It packs and unpacks easily, with adjustable ties.

What’s in the box?

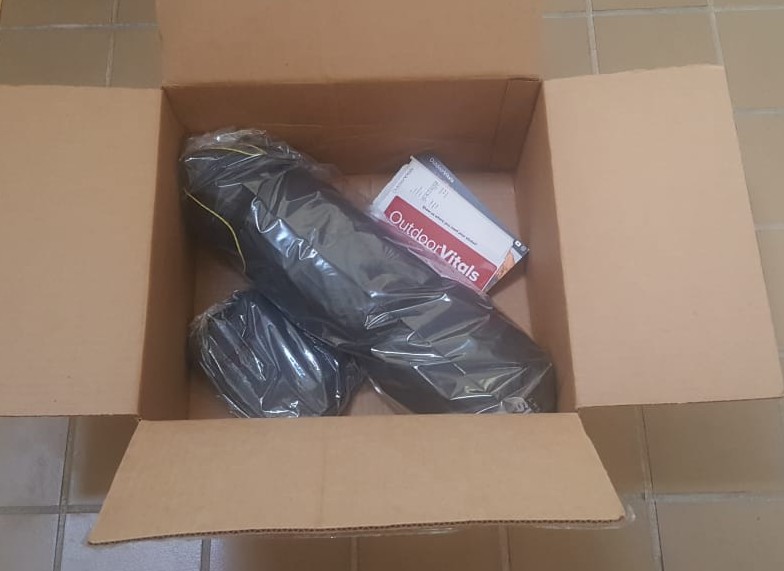
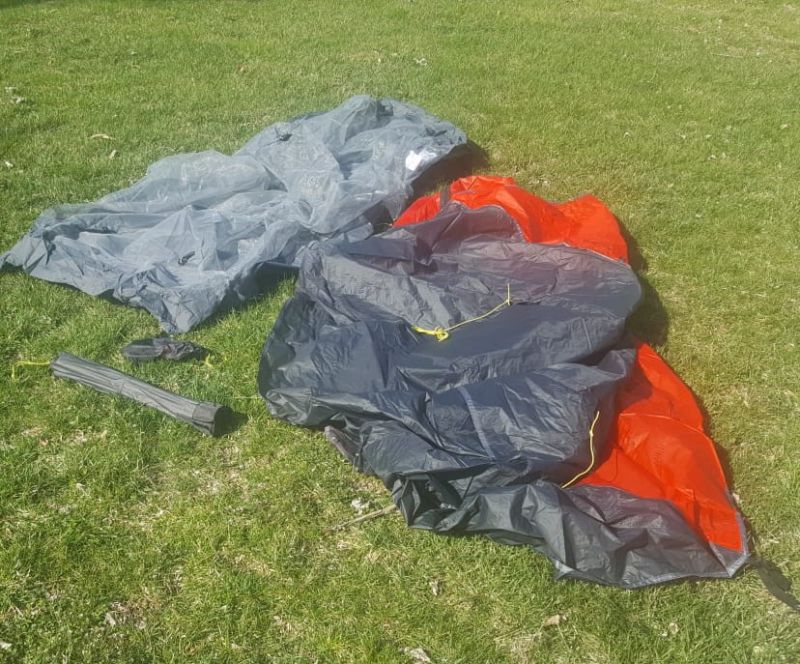
  • Tent bag packed with tent body, rainfly, pole and stakes
  • Small sack with footprint
  • Packing slip and marketing materials

Hardware specs

Packed Weight: 2 lb 14 oz

  • Fly: 15.8 oz
  • Tent Body: 13.4 oz
  • Foot Print:  4.3 oz
  • Poles: 12.2 oz
  • Stakes:  2.1

Ultralight Mode:  2 lbs (rainfly, poles, footprint)

Poles: 9mm aluminum

Peak Height: 35″

Floor Dimensions: 85″ x 32″ x 28″

Pack Size: 5″ x 5″ x 20″

Design and features

My son, Mason, is gearing up for his two weeks at camp this June. He’s more of a hammock-under-the-stars kind of guy (or bunk-under-a-roof if it’s raining) but his camp also does spontaneous overnights to go rock climbing, caving and other adventures. Last year, he did a two-day, 20-mile canoe trip and camped on a sandbar midway through. For excursions like that, he’s been in the market for a 1-person tent.

It was immediately clear that this tent is super lightweight. If you’re backpacking or need to haul your gear for any length of time, this is certainly a tent to consider. We also found it convenient that everything you needed was right there: the tent, rainfly, pole and stakes in one bag, plus a smaller bag with the footprint that could easily fit inside the larger bag.

Setup

Admittedly, I’m not a big camper but I’ve had some outdoor experience. When we emptied the contents of this tent, we thought we could just wing it … but when we realized there was only ONE pole, we retreated back to the house to look up instructions on YouTube. (Our tent didn’t include instructions.)

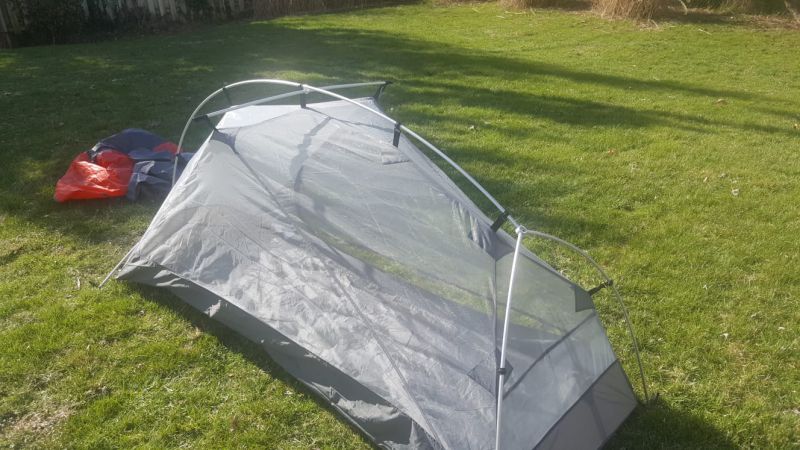
After watching a video of the 2-person Outdoor Vitals Dominion tent, we learned that you just lie out the footprint with the mesh body of the tent on top, and set the pole up over it, then clip the pole into place. That might seem obvious to more experienced campers or anyone who’s used a single-pole system before! Of course, once we did it, it did seem pretty simple.

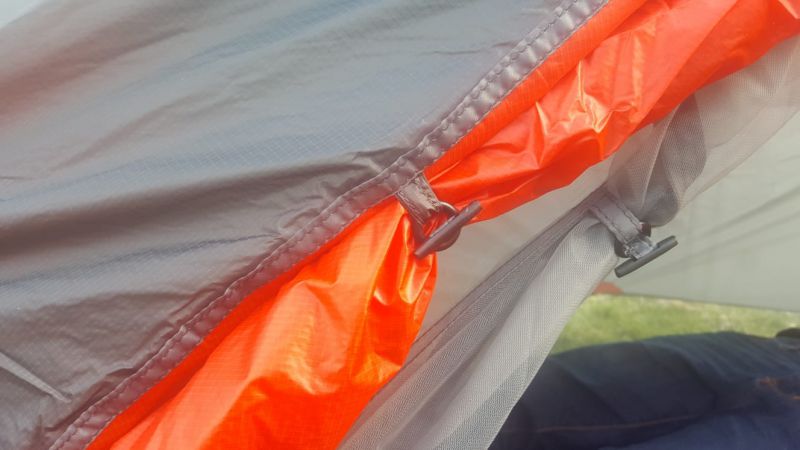
The rain-fly fit right over, just make sure to line up the doors. Then you just stake it up. Unzip the doors and toggle them up if you like. And voila! Shelter for the night.

The whole setup took less than 10 minutes. Granted we had three people working on it. But it was also our very first time, and we’d never used a tent like this. Same for taking it down, 10 minutes flat.

I suspect an expert outdoors person could crush our time with very little practice.

Performance

The tent was comfortable height-wise for sitting up and having some breathing room. And the airflow was very good.

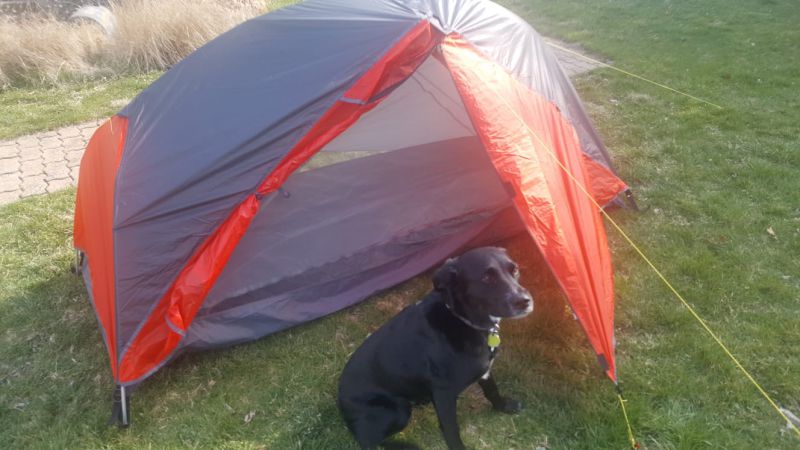
But lengthwise, it would be extremely tight for a taller, larger (or maybe even average) size person. Mason is 5’9” and our dog, Maya, is 40 pounds. Together they fit snugly. At only 13-years-old, I question if he will be able to use it for camp in 2020. In fact, at the rate he’s growing, even using it in June is questionable.

Due to the space constraints, Mason might have to put his gear outside the mesh. It could probably still fit under the rainfly, but that’s only because he packs very light. For those who want their gear inside the proper tent with them, I’m not sure it would work.

Then again, Mason doesn’t mind the small space and said he could use his gear for a pillow. For me, it’s claustrophobic. So your tolerance for tight quarters is a major factor here. My younger son also tested it. At 5-feet tall and 100 pounds, he was quite comfortable, and with his pillow, blanket and backpack at his feet, he even had a couple of inches to spare.

We didn’t soak it with water, but the ground was wet from a rainstorm the previous day, and you couldn’t feel any dampness inside.

As a side note, I had planned to complain about a lack of pockets or any type of storage spot for your keys, phone and bear spray. Our prior tents had little pockets that zipped into the inside of the door or hung down near the upper seams. However, when I went back and read the specs online, it said there were two pockets in this tent?! I had to set it up a second time before I discovered two sizeable pockets on the inside just about your head, only they’re mesh-on-mesh, therefore see-thru. Once I finally found them, I could fit two books and a water bottle inside, so plenty of room, just keep on searching until you discover them!

What I like

  • Very lightweight
  • Includes everything you need

What needs to be improved

  • A bit more space
  • Another pocket on the door would be handy

Final thoughts

A light, cleverly designed little tent for those who don’t mind smaller spaces.

Price: $199.97
Where to buy: Outdoor Vitals
Source: The sample of this product was provided by Outdoor Vitals.

Filed in categories: Reviews

Tagged:

Outdoor Vitals Dominion 1-person tent review originally appeared on The Gadgeteer on April 9, 2019 at 1:05 pm.

Note: If you are subscribed to this feed through FeedBurner, please switch to our native feed URL http://the-gadgeteer.com/feed/ in order to ensure continuous delivery.