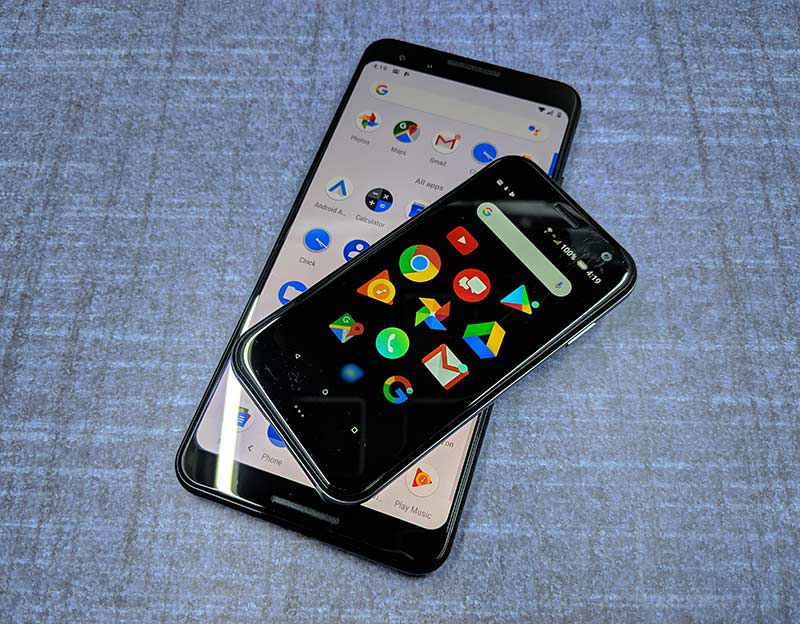
Palm Companion review

REVIEW – When I first heard the news that Palm was coming out with a new phone, I was super excited because I’ve been a big fan of Palm devices since they started the PDA revolution with the PalmPilot eleventy million years ago. But then I read that the small credit card-sized Palm Companion was not designed to be a stand-alone smartphone, but a type of sidekick to your existing main smartphone.

The Palm Companion is meant to be a lightweight small phone that you can take with you that won’t demand your attention all the time like your primary phone. It’s supposed to help you stay present and not keep your eyes on your phone when you’re with your friends and family.

As displays get larger and more cameras are added to our smartphones, it means the overall dimensions of the phone expand until you need cargo pockets to carry it. If you’ve ever wanted to leave your bulky phone at home and carry a much smaller phone but don’t want to hassle with switching out SIM cards, the Palm Companion phone is a possible option… maybe. Let’s take a look.

What is it?

The Palm Companion is a small smartphone that uses Verizon’s Numbershare service to share the same phone number as your primary iPhone or Android smartphone. The idea is that you can take this smaller pocket-friendly phone with you when you don’t want to carry your bulkier larger smartphone. You’ll still receive texts, alerts and phone calls on the smaller device which will sync between the two phones even if the primary phone is turned off.

What’s in the box?

Palm Companion
Pre-installed SIM Card (4FF)
Wall Adapter/USB Cable/USB Connector
Quick Start Guide

Hardware Specs

Processor MSM8940, Octa-core 4 x 1.4GHz + 4 x 1.1GHz
Display 720 x 1280 pixels
Memory 3 GB RAM
LTE Advanced With 50% faster peak speeds in more than 450 cities from coast to coast
World Device Works in over 200 countries depending on your plan
Camera 12 MP
Usage Time – Up to 7.5 hrs
Height 3.8 in Width 1.99 in
Battery 800mAh

Design and features
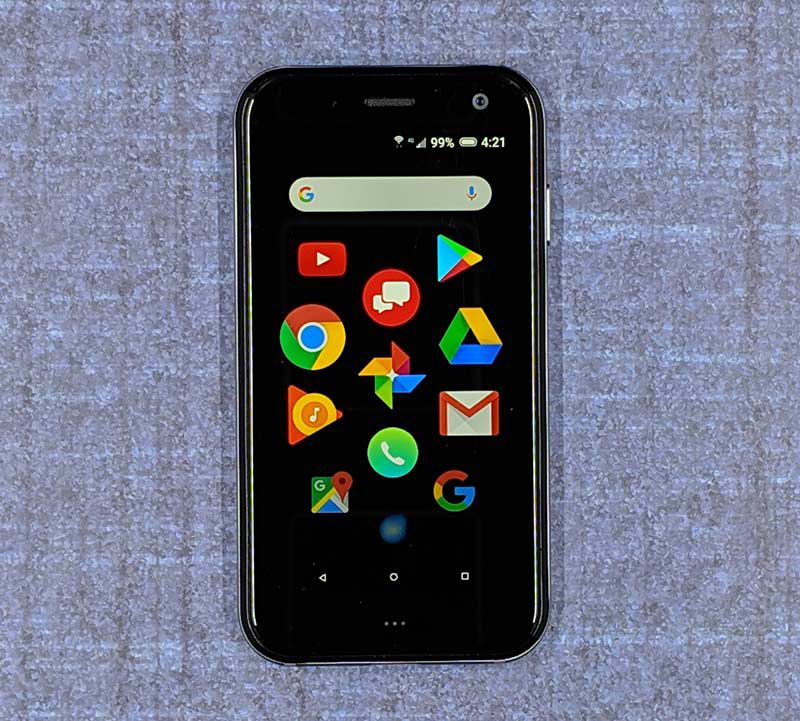
To me, the Palm Companion looks like a miniature version of the iPhone X. It has two pieces of black glass with curved corners and a brushed metal filling sandwiched between them. The only difference is that it’s itty bitty, and runs the Android operating system instead of iOS. That said, you can use the Palm with an iOS device. But there is a caveat. You won’t be able to use iMessage for your text messages. You’ll have to use Verizon’s Messages+ app on the Palm companion if you want to receive a copy of the messages sent to the primary phone too. Google Messages works for sending messages through the Palm, but incoming messages only seem to come through the Verizon Messages+ app. For most die-hard iOS lovers, that will be a big problem. Because iPhone users shun the green bubble.
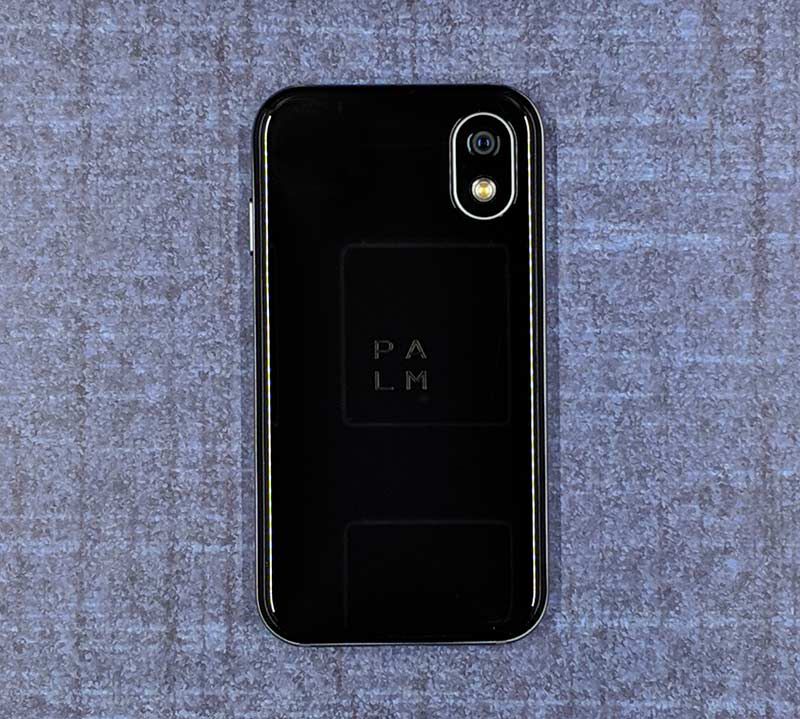
Look at that camera lens with the LED flash. Even that looks like the iPhone X.
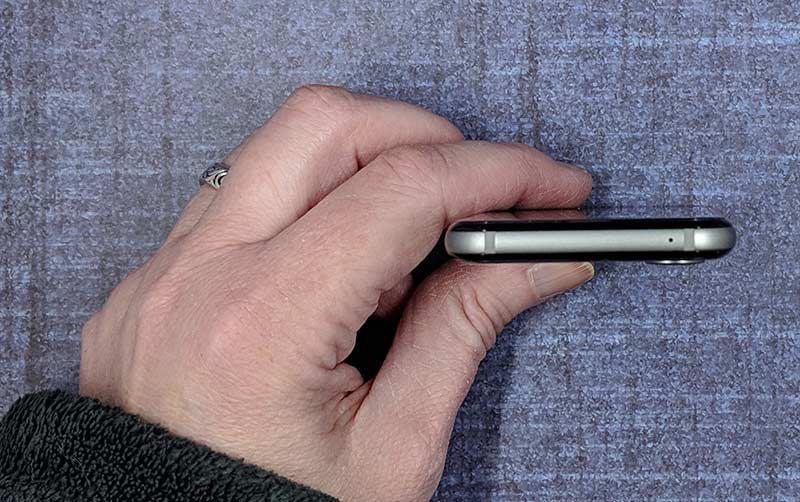
The top edge of the device has a microphone.
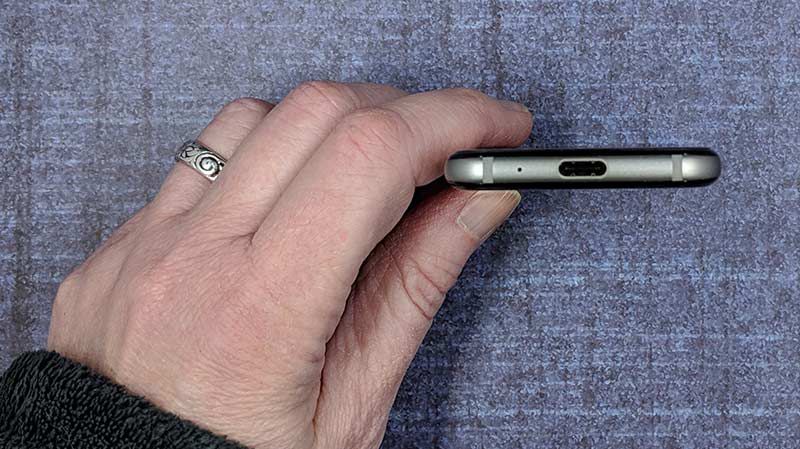
The opposite end has another microphone and a USB-C charging port.
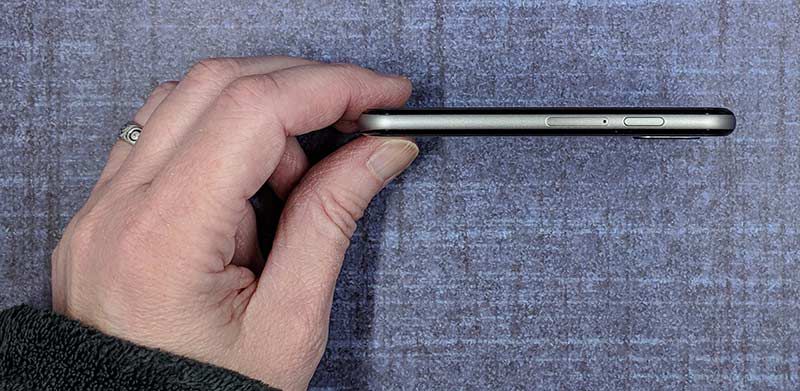
Then on the right side, you’ll find the SIM card slot. The Palm Companion has it’s own SIM card, but it uses the same phone number as your primary phone.

On this side of the phone is the power/wake button which also lets you summon the Google assistant if you double press it.

Yes, there are a couple of things missing. There isn’t a physical volume button or a headphone jack. There’s also no fingerprint reader and no home button. The Palm Companion actually uses facial recognition, PIN, or a pattern to unlock the phone.

Display
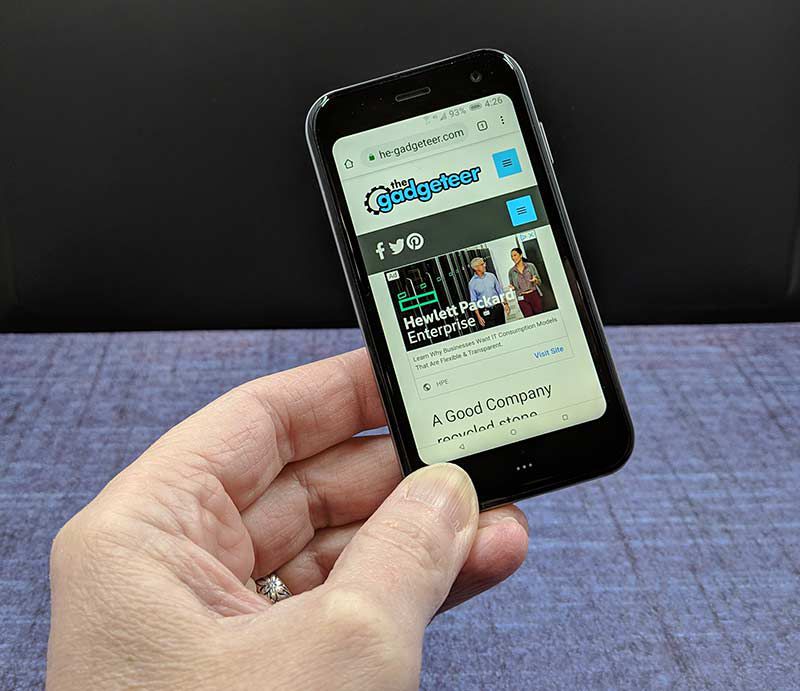
The display is bright, vivid, and crisp. But it’s only 3.3 inches, which means it’s tiny and might be too small for older eyes to read text and larger fingers to press icons and send text messages.

Camera


What can I say here? It has a camera on the front and on the back. You can take pictures with it but the pictures will not impress anyone. They are soft, blurry, and yeah.

Software and user interface
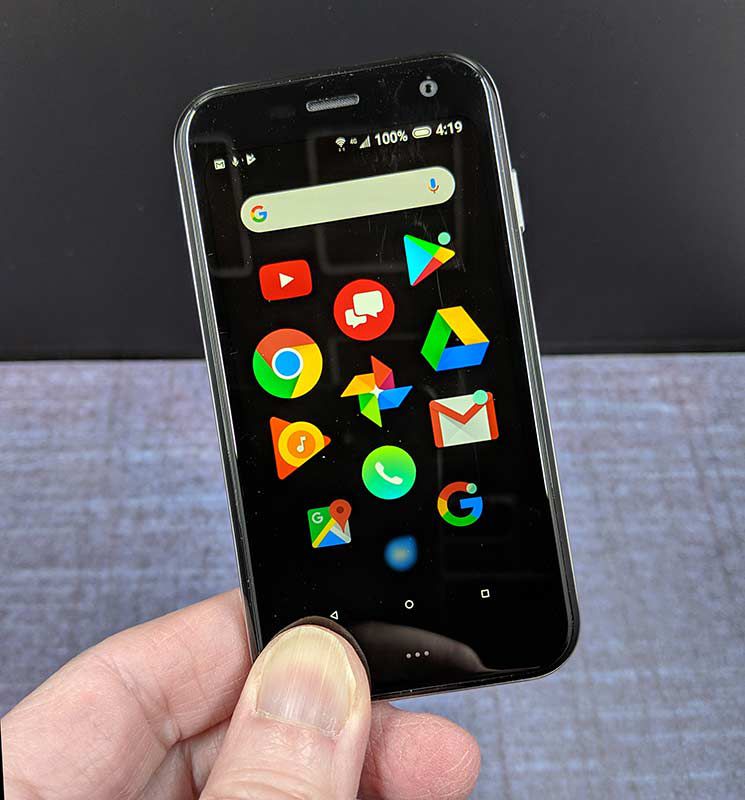
The Palm Companion runs Android version 8.1.0 but the interface is different than other Android smartphones. The Palm has a scrolling list of icons that are full sized and shink as you scroll through them. The interface reminds me of the Apple watch. But other than that difference, you have access to the Play store and can install other Android apps that you like.

Special features

Life Mode is a special Palm feature that lets you decide what will get your attention. Think of it as a more powerful do not disturb feature. It turns on Airplane Mode every time the screen is off, unless you’re on a call, streaming music or using GPS. When you wake your screen, your Palm becomes fully connected again and you can control which apps notify you when you wake up the device.
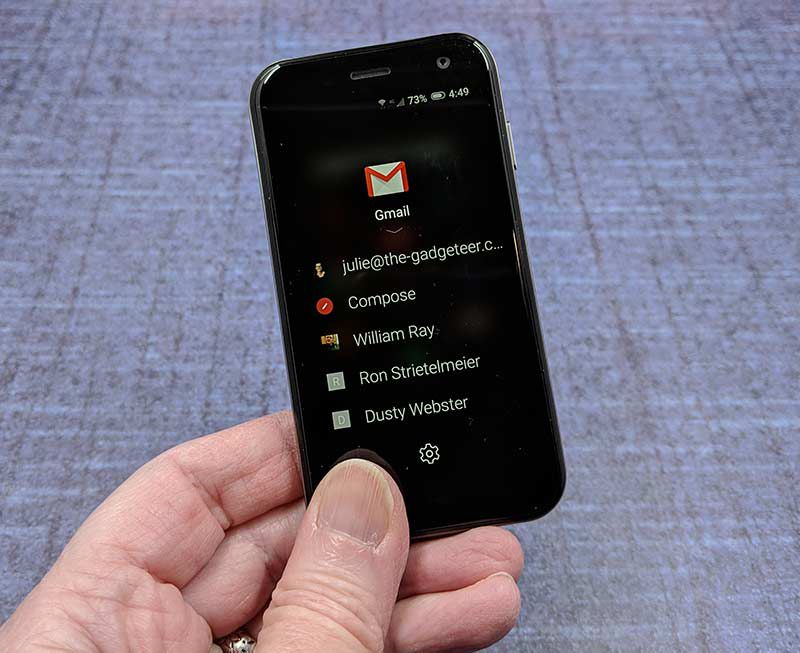
Quick Action menus provide easy access to popular actions by holding down on an icon from the home screen. In the image above, you see the quick action menu when pressing and holding the Gmail icon. Not all apps have a useful quick action menu, but most of the popular apps like Gmail, Twitter, Spotify, and others do.
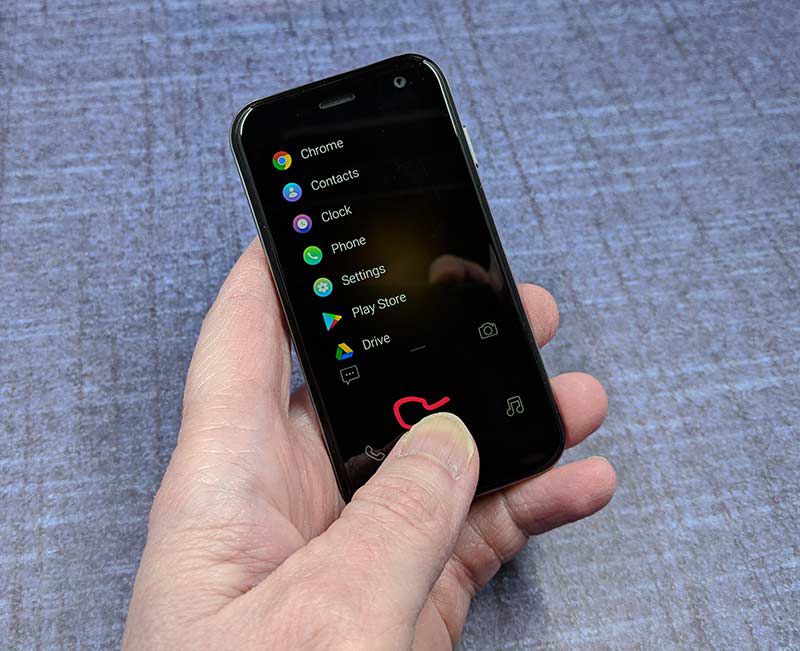
Gesture pad is sort of a throwback to Palm’s Graffiti feature from days gone by. With this option, you can search and launch apps by drawing the first letter of the app. To use it, you have to swipe up on the left side of the screen from the lock screen.

Missing features

Although the Palm Companion is meant to be a mini-me to your primary phone, it is missing an important feature – mobile hotspot. That’s right, you can’t use this little phone as a hotspot.

Audio quality

If you’re in a quiet room, the audio quality is fine. But I find it really inconvenient not to have physical volume buttons. This is especially true while in a phone call because to change volume you have to take the phone from your ear to adjust the volume slider on the phone’s screen. Bah!

Using the Palm Companion for phone calls

What can I say, it looks like a phone and it works like a phone. Just be aware that if you have both the primary phone and the Palm Companion with you and you don’t have the Palm set to not respond to calls or texts when the screen is off if you get calls or text, both devices will ring and or ping.

Overall performance and battery life using the Palm Companion for day to day tasks

I found that the Palm Companion felt slow and sluggish performing most tasks from launching apps, to updating apps, and even unlocking with Face ID.

Battery life wasn’t impressive either. It’s actually worse than that, it’s awful You’ll definitely need a charge cord handy for this little phone because the battery capacity matches the phone’s size. The loaner I had barely lasted a 4 hrs before the battery was depleted. I guess if you don’t actually use the phone for anything then the battery will last longer… Ummm… yeah.

What I like

  • Pocket friendly
  • Shares primary phone number
  • Cute

What needs to be improved

  • The screen is too small for texting
  • Cameras aren’t stellar
  • Mobile hotspot feature is missing
  • iPhone users can’t use iMessage
  • The phone feels sluggish and battery life is short if you actually use the phone

Final thoughts

I understand the idea behind the Palm Companion, which is to offer a smaller sidekick to your primary phone that you can take with you when you don’t want to carry your heavier phone and you don’t want to be as bothered by notifications and calls. The problem is that the Palm Companion runs Android and it has all (most) of the same features as your main smartphone. You can take calls, send text, watch YouTube, read news, etc. So where is the advantage as far as not having a device that will demand your attention? Sure, you can turn on the Lifemode feature, but I’m still not convinced that this little phone is all that useful. The battery life is horrible and it’s just too small if you actually do want to read and/or text people. In my opinion, a better option would be a totally dumb phone that only receives calls and texts.

Price: $349.99 + $10/month for the Verizon NumberShare service
Where to buy: Verizon Wireless
Source: The sample for this review was provided by Verizon Wireless.

Filed in categories: Featured Items, Reviews

Tagged: ,

Palm Companion review originally appeared on The Gadgeteer on April 17, 2019 at 11:00 am.

Note: If you are subscribed to this feed through FeedBurner, please switch to our native feed URL http://the-gadgeteer.com/feed/ in order to ensure continuous delivery.

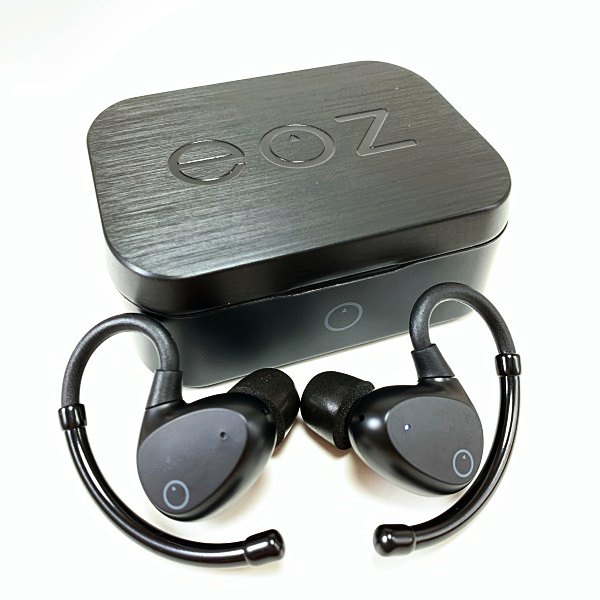
EOZ AIR Truely Wireless earphones review

REVIEW – I’m not a big fan of earbuds, I prefer over the ear headphones. But, with Truly Wireless earbuds being all the rage these days I decided to give them another shot. I received a pair of EOZ AIR Truly Wireless earphones to review. Let’s see if they can change the way I feel about earbuds.

What is it?

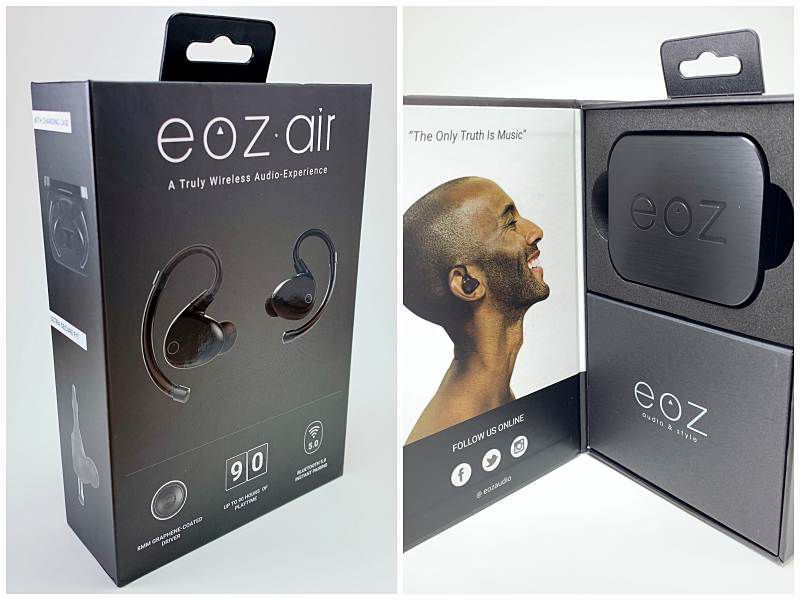
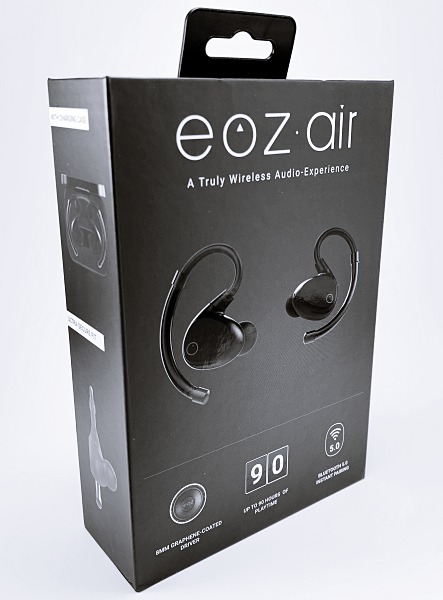
The EOZ AIR earphones are Truely Wireless earphones that feature an around-the-ear design, auto-pairing Bluetooth 5, and up to 90 hours of playtime. 

Hardware specs

  • Materials: Nano-coated ABS, Aluminum
  • Microphone: Two beam forming microphones with intelligent ambient noise reduction 
  • Speakers: Electro-dynamic, 8mm diameter graphene-coated driver
  • Frequency: 20 – 20,000 Hz
  • Battery: Earphones: 2x 50 mAh – 6 Hours of Playtime –  Charging case:  2200 mAh – 90 hours of Playtime 
  • Connectivity: Bluetooth 5.0
  • Charging type: USB Type-C
  • Charging time: 80 – 90 minutes
  • Sweat & water resistant: IPX5 Rating

What’s in the box?

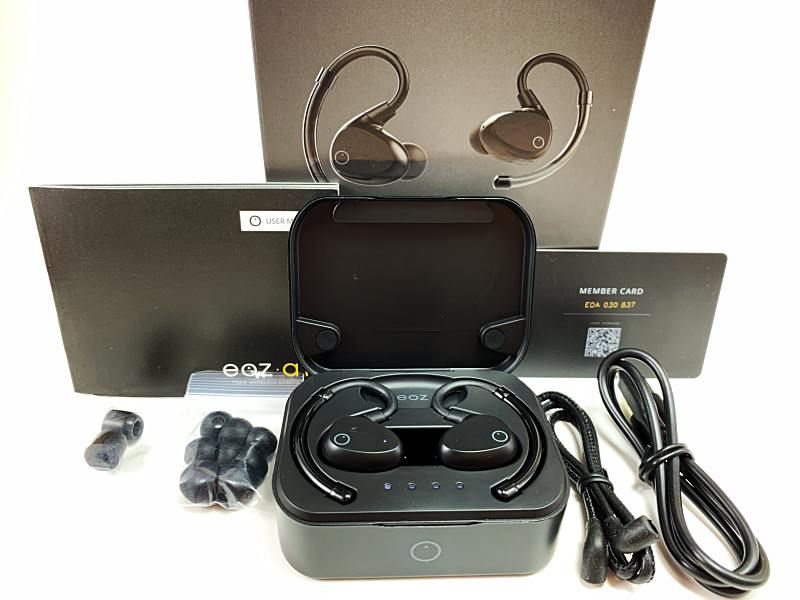
  • EOZ AIR earphones
  • Charging case
  • 3 pair of silicon ear tips & 2 pair of memory foam ear tips
  • USB-C charging cable
  • Vegan leather secure leash
  • Membership card
  • User manual

Design and features

Everything about the EOZ AIR earphones screams modern elegance. From the packaging to the earphones and charging case. You really feel like you’re getting something special from the moment you open the box.

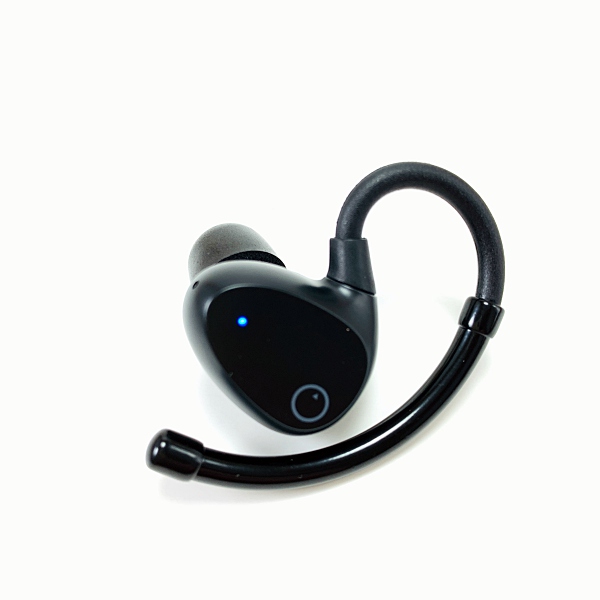
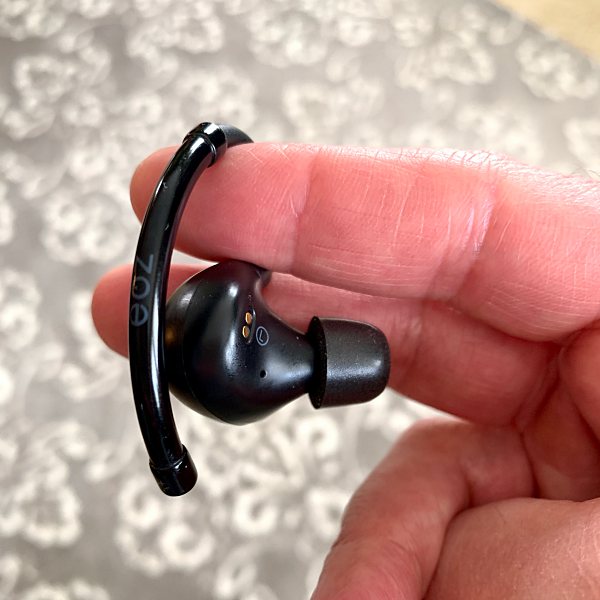
The earphones feature a nano-coated ABS housing and glossy-black PVDed aluminum secure-fit tubes (the things that keep them from falling off your ears).

I chose to review the all-black version, but they’re also available in black & silver, black & gold, white & rose gold, and black & green.

The earphones don’t have any physical buttons which adds to their sleek look. All basic control functions are performed using the Touch Control Pad or TCP located on the outside of either bud. Functions are as follows:

  • Play/pause: Single tap on either bud.
  • Next song: Two taps on the right bud.
  • Previous song: Two taps on the left bud.
  • Answer call / End call: Single tap on either bud.
  • Reject call: A 2-second-long-press on either bud.
  • Siri / Google assistant: Three taps on either bud.

I found the TCP responsive and easy to use once I got used to it.

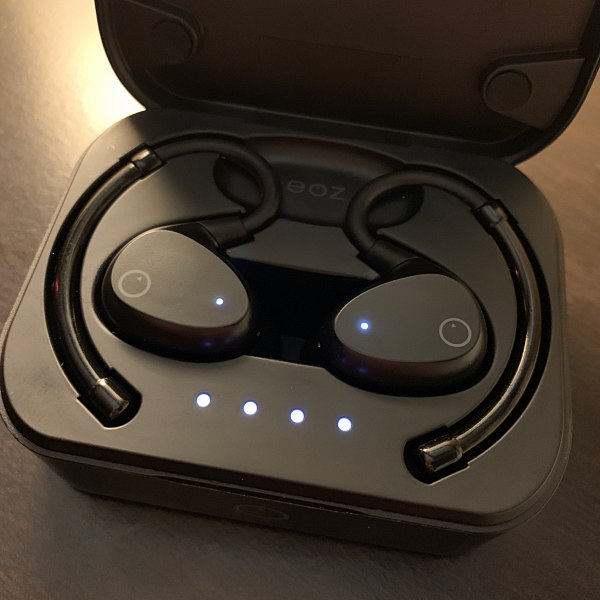
Small indicator lights on both buds show charging status, white = charging and no light/blue = fully charged.

Both buds have beam-forming microphones with intelligent ambient noise reduction used for phone calls and Siri / Google Assistant.

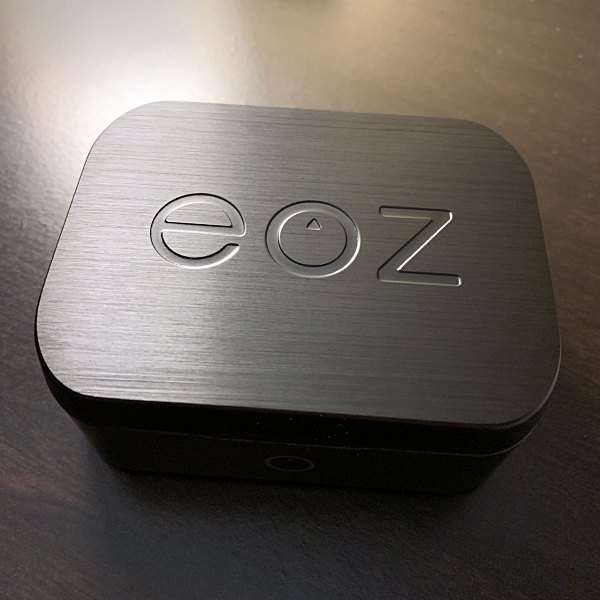
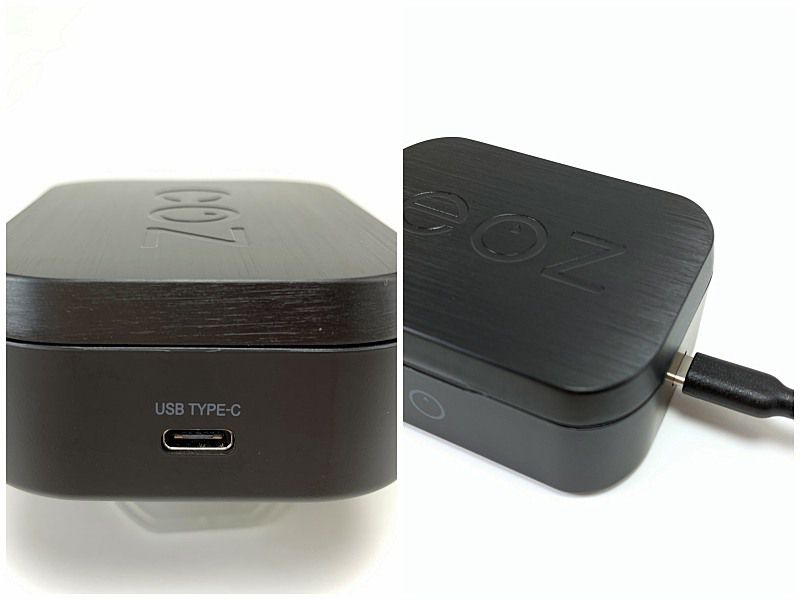
The charging case is all black, and the top has a brushed metal look with the EOZ logo embossed on it.

Inside the case, there are four LED battery level indicators that light up when the case is opened. Each LED represents the cases built-in battery level by 25% increments.

When fully charged the case provides 18 additional recharge cycles or 90 hours of additional playtime, and it charges using USB-C.

Pairing / Charging

The first time you take the buds out of the charging case, they automatically power on and go into pairing mode. Go to the Bluetooth settings on your device and select “EOZ AIR” to pair them. Each subsequent time you take them out of the case, they’ll power on and connect to the last paired device. When you place the buds into the case, they automatically shut off and start to charge. 

You can manually turn them on and off with a single press on either bud for 3 seconds.

If you want you can even pair and use just the right earbud on its own.

The earphones take 80-90 minutes to fully charge and have an impressive 5.5 hours of playback time out of the case.

Fit and feel

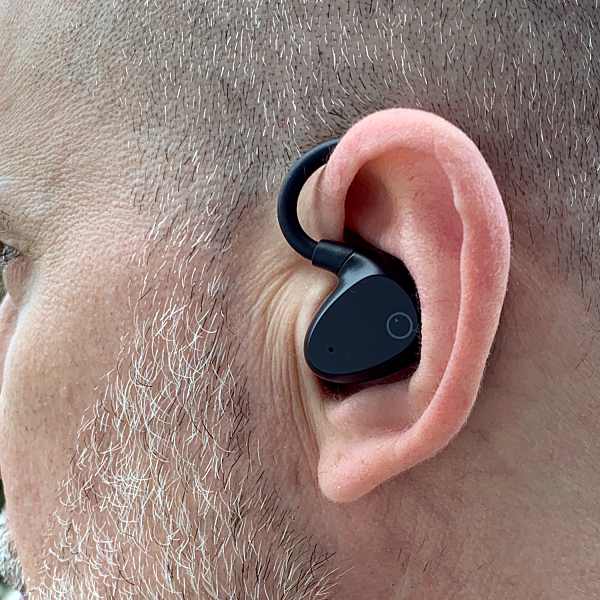
The thing that initially attracted me to these earphones was their around-the-ear design. I can’t use typical earbuds because for some reason they just fall out of my ears. I was a little concerned that the aluminum secure fit tubes that keep the buds on your ears would be uncomfortable, they weren’t. I could hardly feel them on the backs of my ears. The best part was that they kept the buds securely on my ears, even while working out at the gym. They stayed in place during all my exercises, never feeling in danger of falling out.

As far as in-ear fit goes EOZ provides several options here. I chose to go with the larger of the two sizes of memory foam ear tips (there are also 3 sizes of silicon ear tips). I found them to be a perfect fit and they were very comfortable. The memory foam created a good seal, keeping out an ample amount of ambient noise even when the music was off.

Once inside your ears, the buds have a low profile, so they don’t stick out like some of the other earbuds I’ve seen.

The EOZ AIR’s are the most comfortable earbuds I’ve ever worn. But, keep in mind ears are as unique as fingerprints so your experience with fit and feel may be different.

Sound quality

The sound quality of these earphones isn’t going to blow you away. However, the sound is well balanced with just enough bass. So if you like a ton of bass, these aren’t for you.

The EOZ also paired flawlessly with my Apple TV, and the sound quality was very good without any lip sync issues.

Overall the listening experience was pleasant and as good as I’ve gotten from a pair of earbuds.

Call feature

I rarely use the call feature on headphones or earbuds, but the call quality on the EOZ AIR was good. Voices on both ends were very clear and audible, I’m assuming this had something to do with the intelligent ambient noise reduction and the dual beamforming microphones.

What I like

  • Easy to use touch controls
  • Around-the-ear design
  • Extremely comfortable
  • Quality balanced sound
  • 5.5 hours playtime with an additional 90 hours from the charging case

What needs to be improved

  • No on-board volume controls

Final thoughts

Just when I thought I was done with earbuds, the EOZ AIR Truly Wireless earphones pulled me back in.

Price: $109
Where to buy: EOZ website and Amazon
Source: The sample of this product was provided by EOZ.

Filed in categories: Reviews

Tagged:

EOZ AIR Truely Wireless earphones review originally appeared on The Gadgeteer on April 17, 2019 at 10:00 am.

Note: If you are subscribed to this feed through FeedBurner, please switch to our native feed URL http://the-gadgeteer.com/feed/ in order to ensure continuous delivery.

KontrolFreek FPS Freek Battle Royale Performance Thumbsticks review

REVIEW – Online gaming is a red-hot commodity, especially with the emergence of the popular “battle royale” last-man-standing genre of shooters. KontrolFreek is here to boost your killstreak with their FPS Freek Battle Royale performance thumbsticks. How do they stack up? Read on to find out!

What is it?

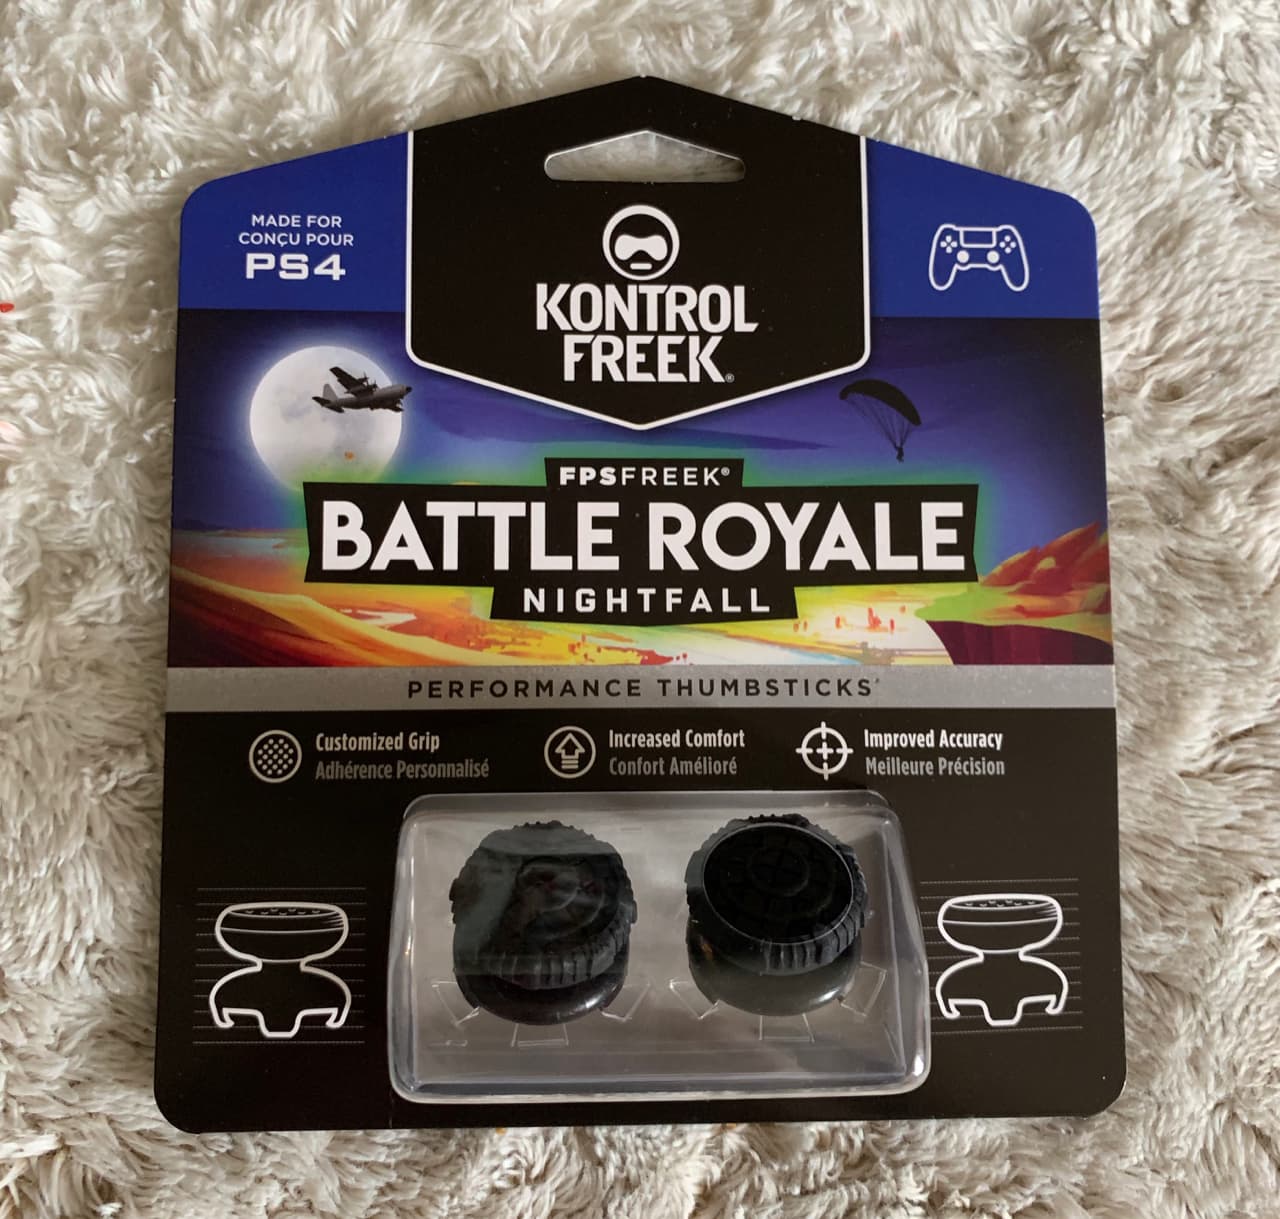
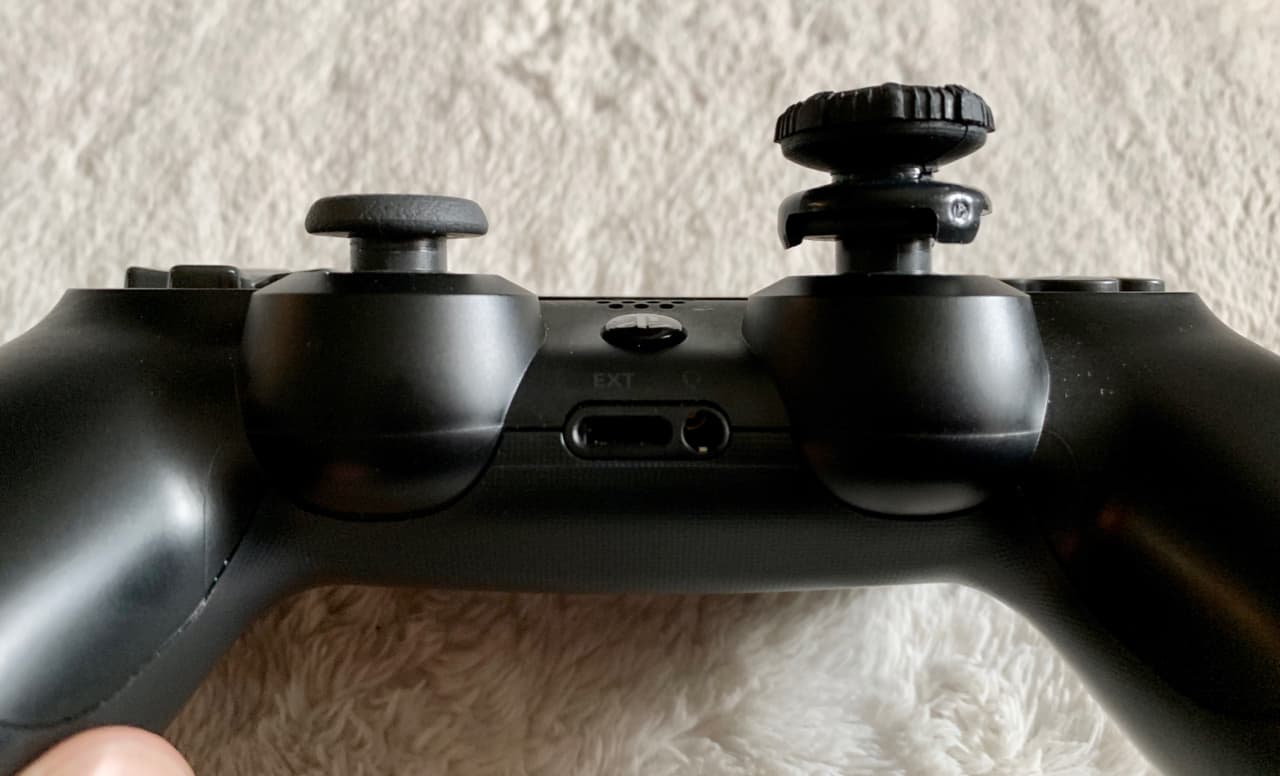
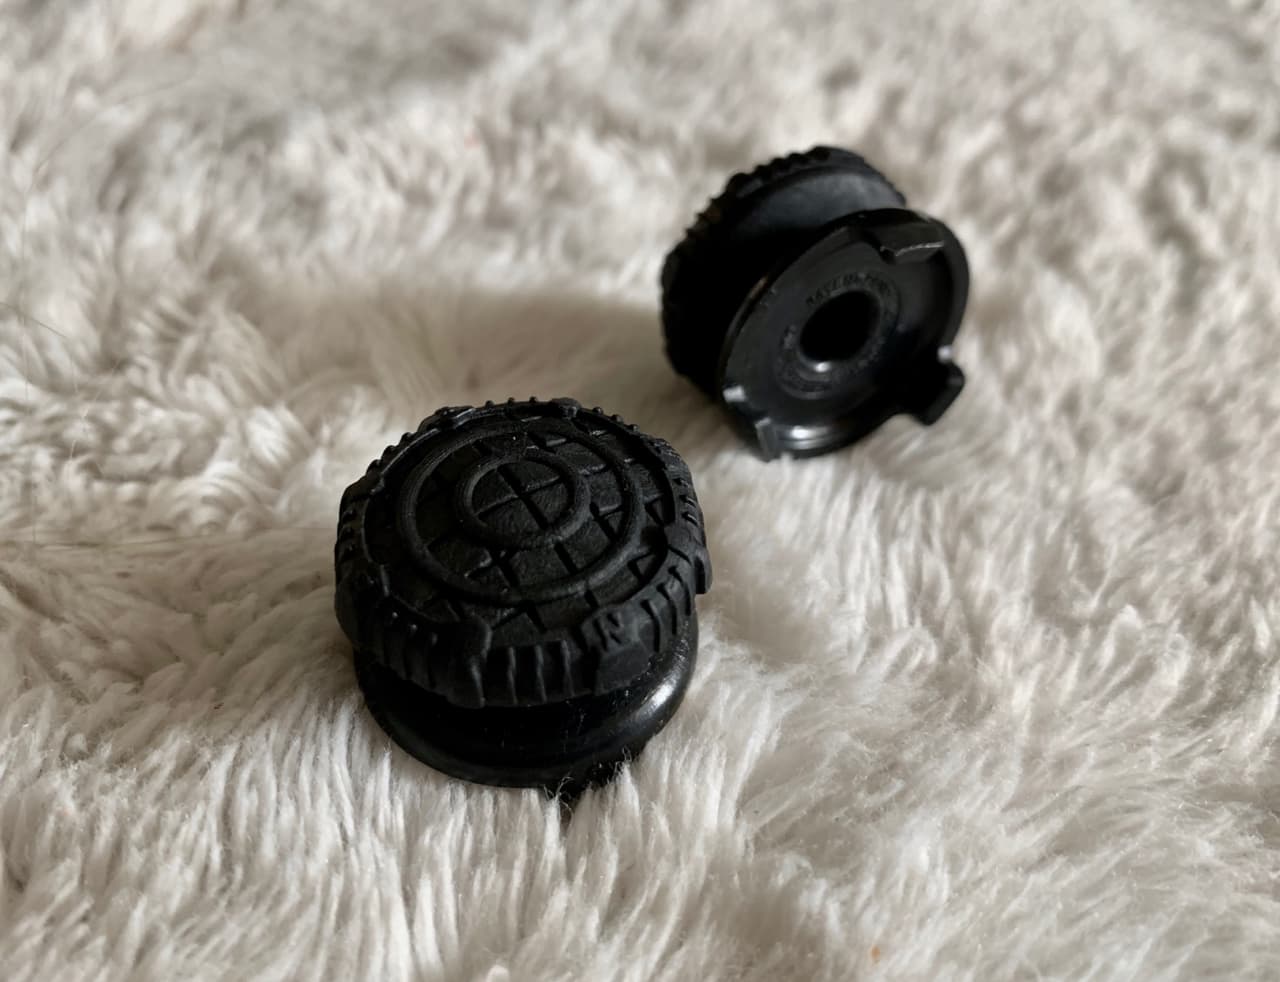
KontrolFreek’s FPS Freek Battle Royale Nightfall Thumbsticks (whew) are small, rubber grips that attach to the top of your Playstation or Xbox controller’s analog sticks, extending the height of them by nearly double. They are meant to offer more range of motion and better shooting accuracy for “battle royale” type games like Fortnite, Apex Legends and PUBG.

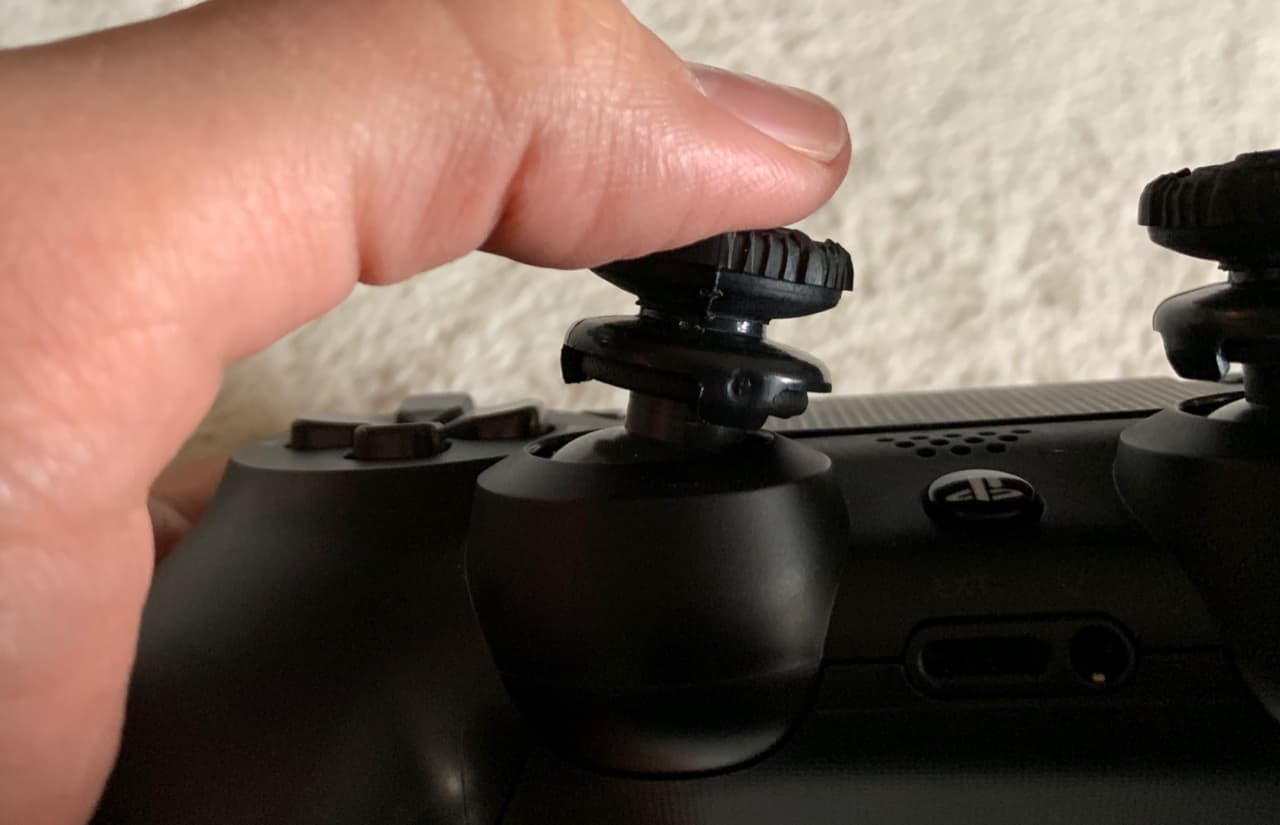
The FPS Freek Battle Royale thumbsticks double the height of the PS4 controller joysticks.

What’s in the box?

  • One pair of thumbsticks

Hardware specs

  • 11.7mm height
  • convex rubber tops
  • laser-etched design for comfort and grip

Design and features

I’ve been playing video games since the old Atari days, and they’ve sure come a long way since Pac-Man and Pole Position. The latest trend is the “battle royale” genre of last-man-standing shooters. It seems as though nearly every major publisher is hopping on this multiplayer online bandwagon.

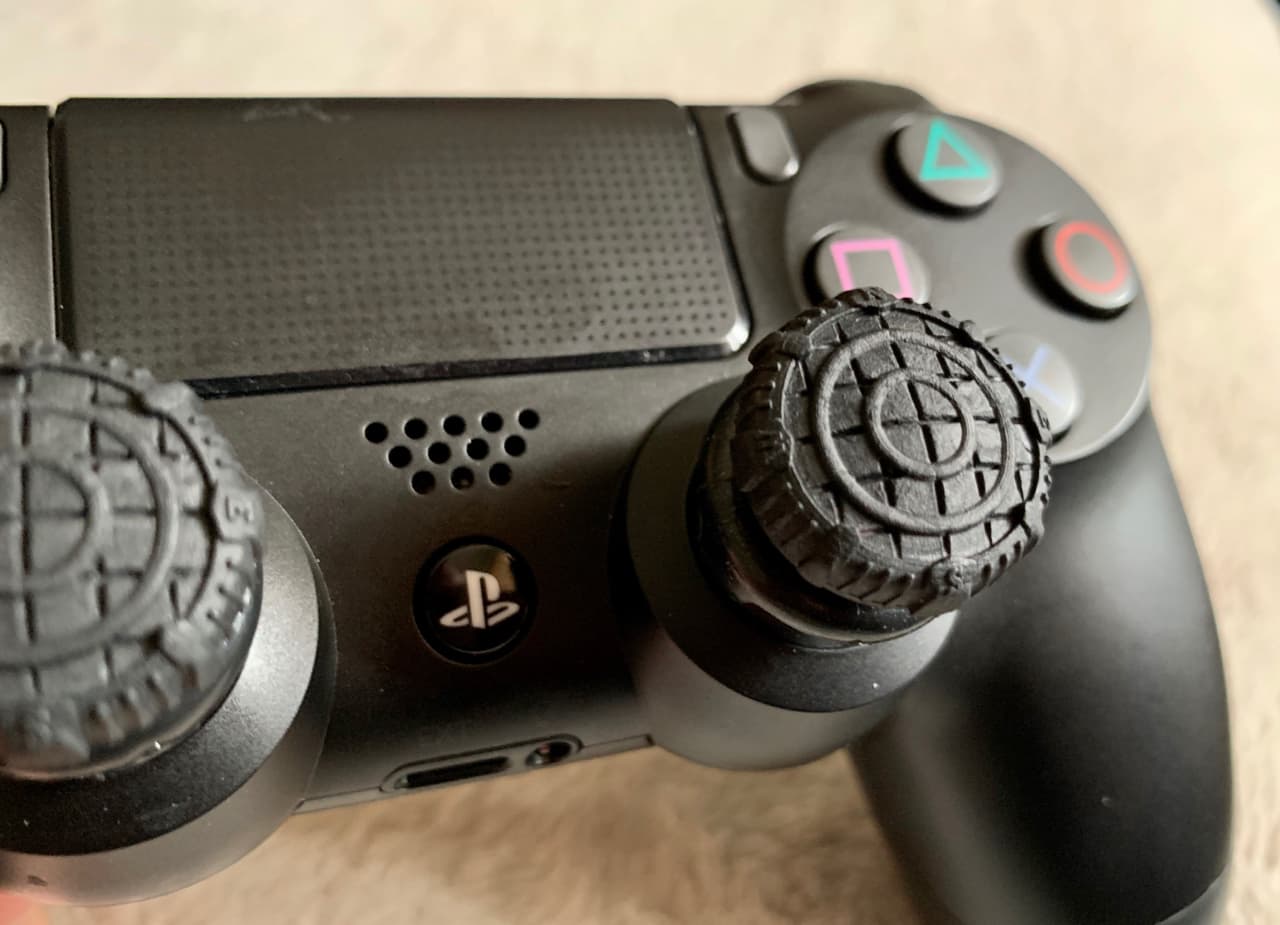
The rubber caps are rather comfortable, and if you look closely, they’re tiny compasses.

For a skilled player, battle royale matches can last up to 25 minutes, requiring stamina and accurate, high-sensitivity controls. That’s precisely the type of action that the FPS Freek Battle Royale thumbsticks were designed for.

Basically, these thumbsticks, which are the tallest offered by KontrolFreek, attach to the existing analog joysticks, acting as extension caps. They offer extended height and grip, allowing for better control and comfort in extended play sessions.

They have a very basic construction. Easy to place and remove.

In many modern first person shooters, you can set the controller sensitivity to very high levels, allowing your character to turn and look around the screen very quickly. This is useful for fast aiming and split-second decisions, but it makes fine aiming at long and middle distance targets relatively difficult. With the thumbsticks installed, the range of motion is increased due to the extra leverage.

The extra height allows for better leverage and fine-tuned accuracy.

I found it much easier for accurate aiming at faraway targets, whether looking down the sights of an assault rifle or through a sniper scope.

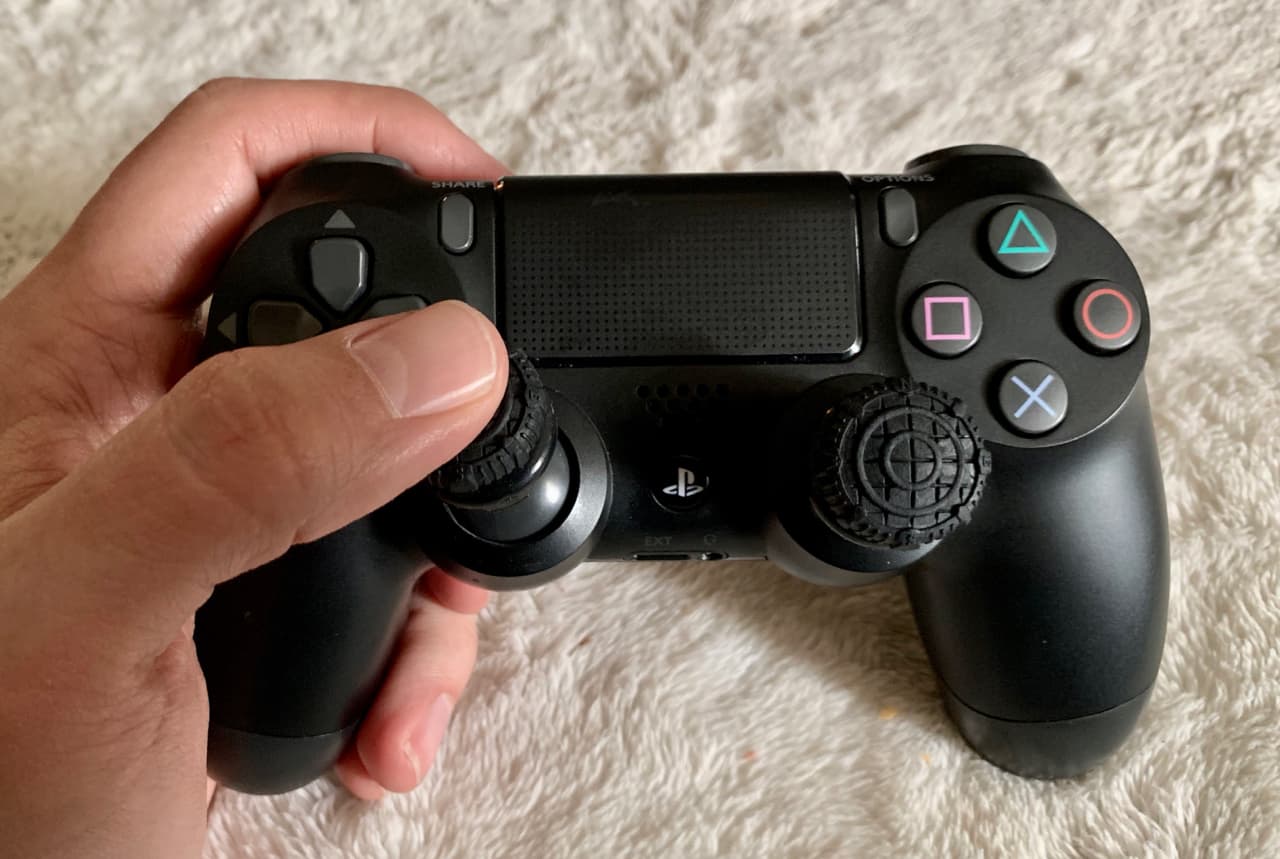
And while I don’t find the Playstation controller uncomfortable, I very much like the position of my thumbs on these thumbstick extensions. It feels more natural to me, for some reason. It felt stranger going back to the default height than it did when I had first installed the extensions.

I also liked the added texture of the thumbsticks vs. the roughened rubber feel of the regular Playstation controller. If you look close, the design is actually little compasses. Cute.

I’ve got to admit, being 39 and not having loads of time to practice, I’m not sure if these thumbsticks actually did very much for my bottom line, so to speak. No Victory Royales or Apex Champion screens for me, today. But I definitely liked how the FPS Freek thumbsticks felt, and my accuracy was much better. I’d say that alone is worth the investment.

After several hours, my thumbs felt just fine.

Speaking of which, the price is about the only thing I could knock… $15 for a couple plastic and rubber caps is about $5 more than I’d expect. Very minor quibble.

I think I’ll keep the FPS Freek thumbsticks installed, and I’ll keep practicing. And with luck, perhaps someday I’ll not be such an embarrassment to my squad!

What I like

  • much more comfortable to play for extended time
  • easier for fine controls on high sensitivity settings

What needs to be improved

  • maybe a bit overpriced, for what they are

Final thoughts

After an initial brief adjustment period, I very much enjoyed the improved control these thumbsticks offered. They felt more natural than the default controller thumbsticks and boosted accuracy as promised. I would consider them a worthy investment.

Price: $14.99
Where to buy: You can pick up a pair of KontrolFreek thumb sticks in various heights for specific types of games on their website and Amazon
Source: The sample of this product was provided by KontrolFreek.

Filed in categories: Reviews

Tagged: ,

KontrolFreek FPS Freek Battle Royale Performance Thumbsticks review originally appeared on The Gadgeteer on April 17, 2019 at 9:00 am.

Note: If you are subscribed to this feed through FeedBurner, please switch to our native feed URL http://the-gadgeteer.com/feed/ in order to ensure continuous delivery.

Holy Stone HS120D drone review

REVIEW – The brand name that most people who are interested in drones think of starts with a D and comes with a wallet stinging price tag. Finding a drone that has an impressive set of features but a price tag of less than $200 can be a big challenge. Holy Stone was up to that challenge when they created their HS120D drone. Let’s take a look AND take it for a spin.

What is it?

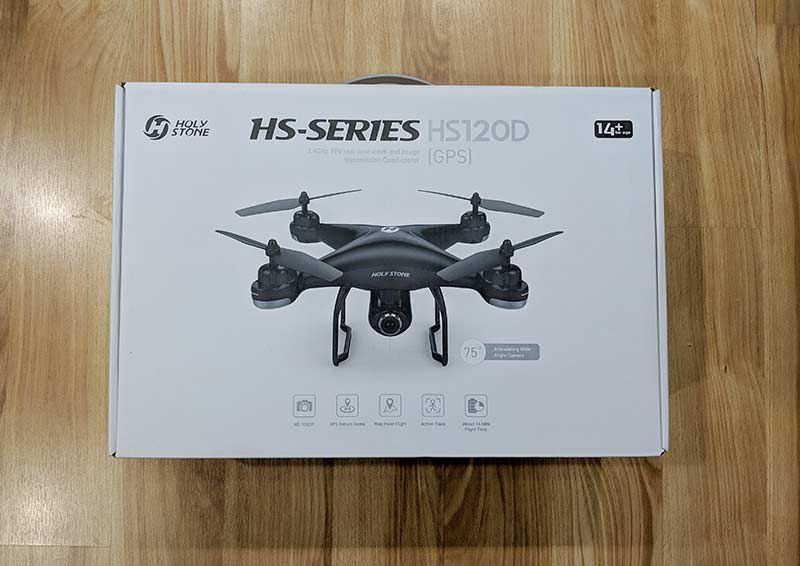
The HS120D is a quad-copter/drone from Holy Stone that has a set of features that you would normally expect from higher-end drones. Features like a 1080p camera, GPS hold, follow me object tracking, and one button lift and land.

Specification

Drone MODEL No. : HS120D
FAA registration : Not required
Weight : 221 g / 7.8 oz
Flight time : 18 minutes
Control range : 300M
Dimensions: 270*270*120 mm
Camera: 1920*1080p 120° FOV
Drone Battery Capacity:1200 mAh
micro SD storage: up to 32GB
Voltage:7.4V Charging Power: 5~10 W
Max Charging Time:120 Mins (Depend on Charging Power)
USB Cable Voltage:5V

What’s in the box?

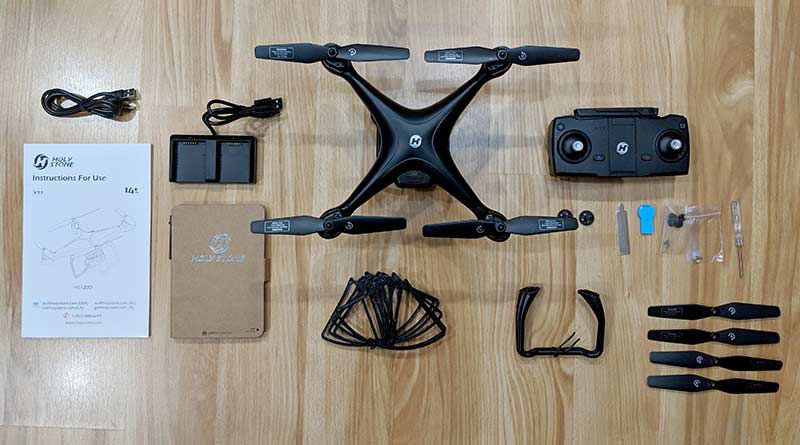
1 x HS120D Drone
1 x Remote Controller
1 x 1200 mAh Battery
1 x USB Charging Cable
4 x Extra Propellers
4 x Propeller Guards
2 x Landing Gears
1 x Screwdriver
1 x Manual

Design and features

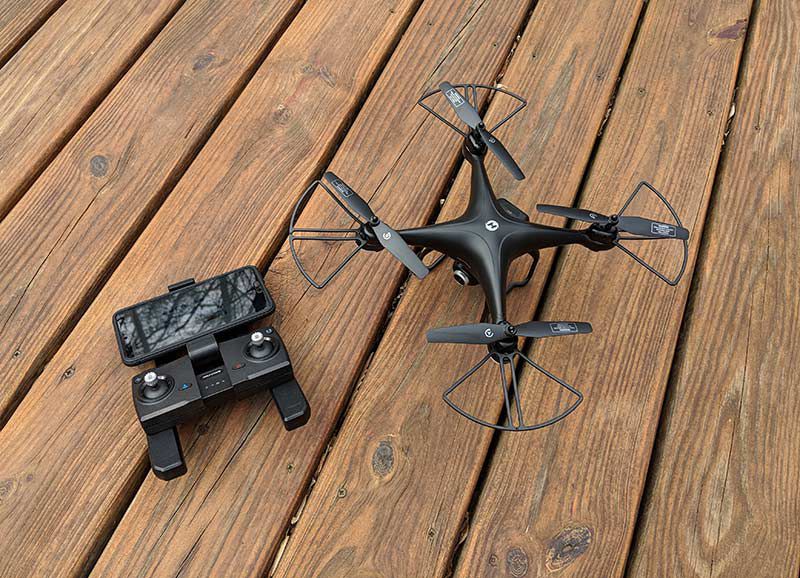
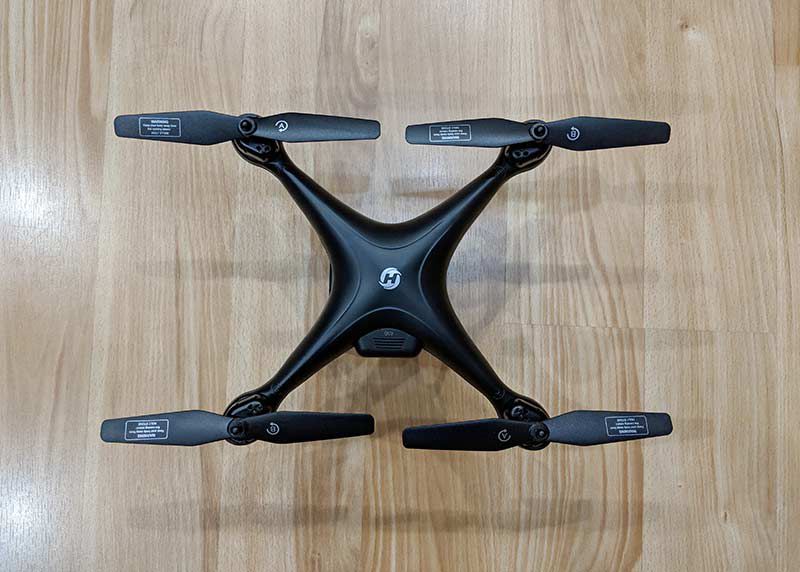
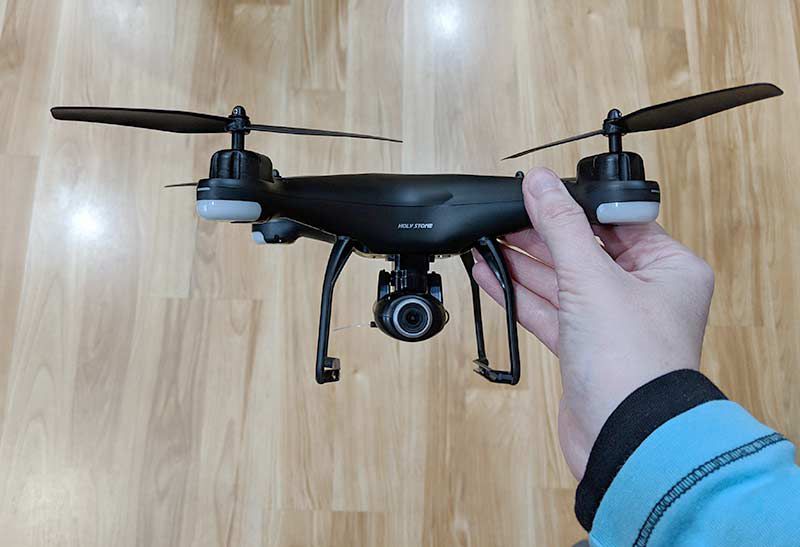
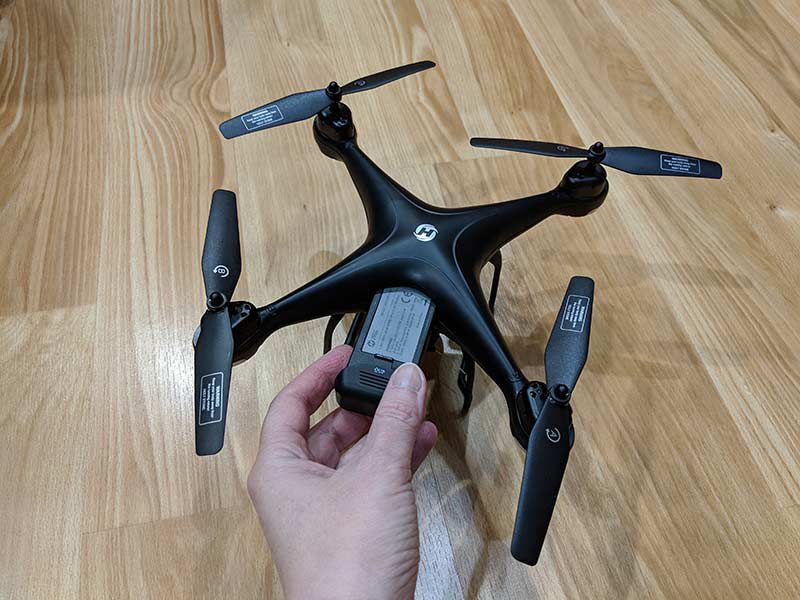
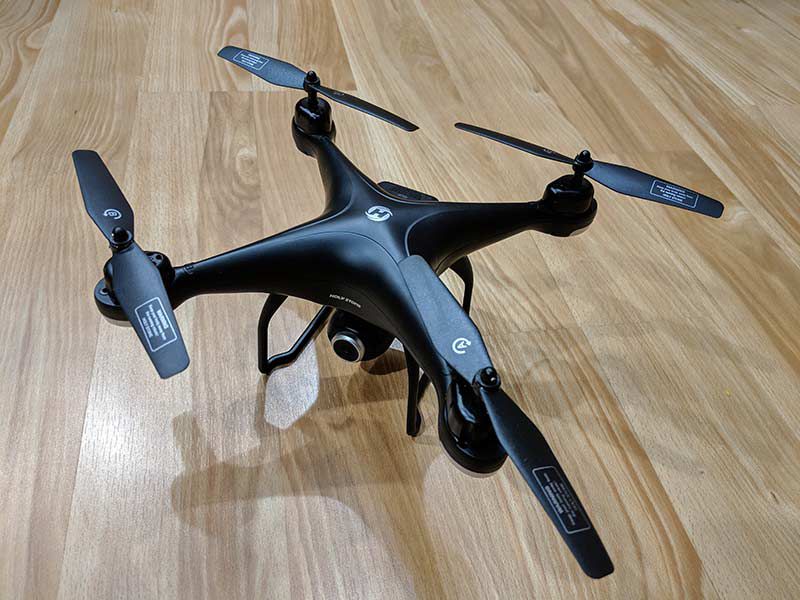
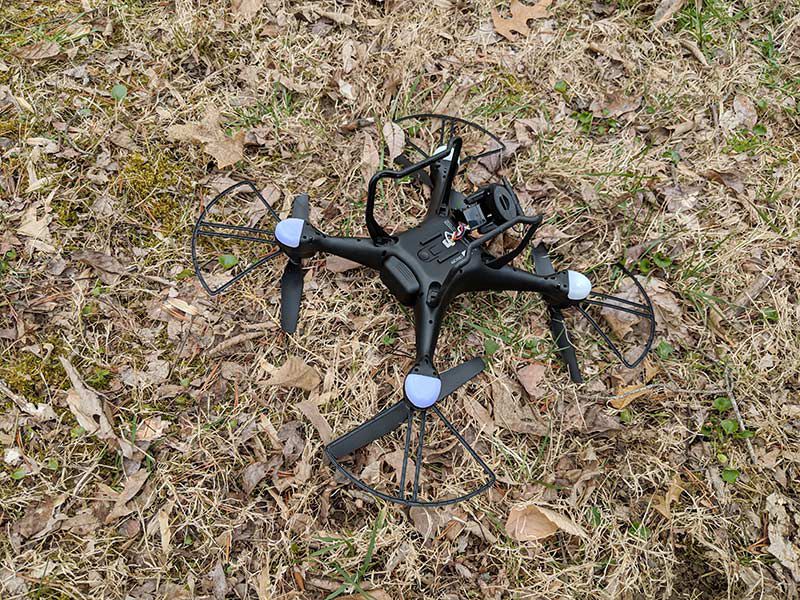
The HS120D is made of lightweight black plastic with an X-shaped quadcopter design. Although this drone is small, the wings do not fold, and it does not come with a carrying case, so it’s not as convenient to transport as some pricier and fancier folding drones can be.

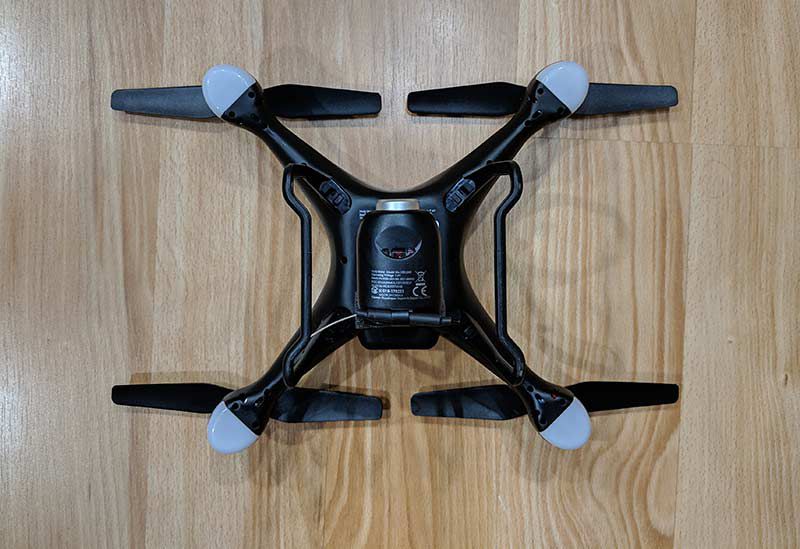
Each of the rotors has a status LED built into the tip which helps you see the status while calibrating the drone and while it’s in flight.

Below the center of the drone is the camera assembly. You’ll also notice the two landing gears that are attached to the bottom of the drone. Holy Stone was nice enough to include 2 extras in the box just in case you lose or break them during your flying adventures.

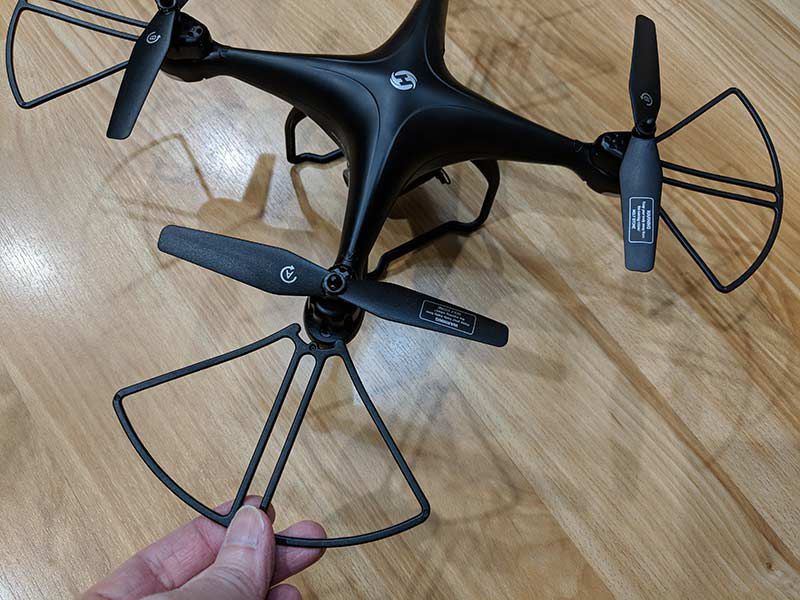
Also included are propeller guards which snap into the ends of the rotors to protect the propellers from tree limbs and other obstacles. Extras are great because you’ll go through them pretty quickly as you’ll find that they just disappear. But, once you get comfortable flying the HS120D, you shouldn’t really need them.

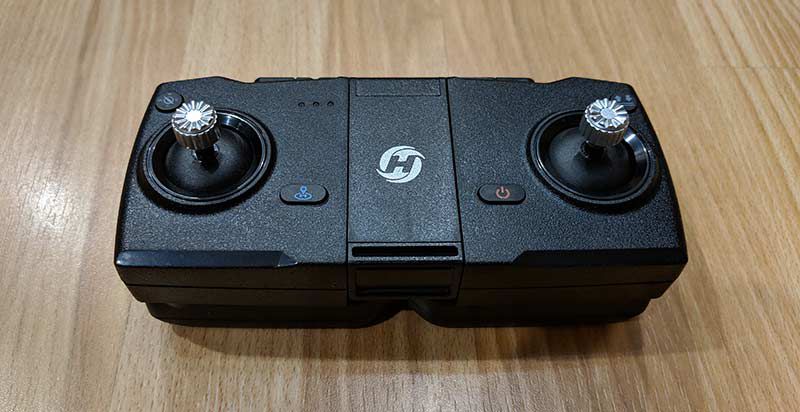
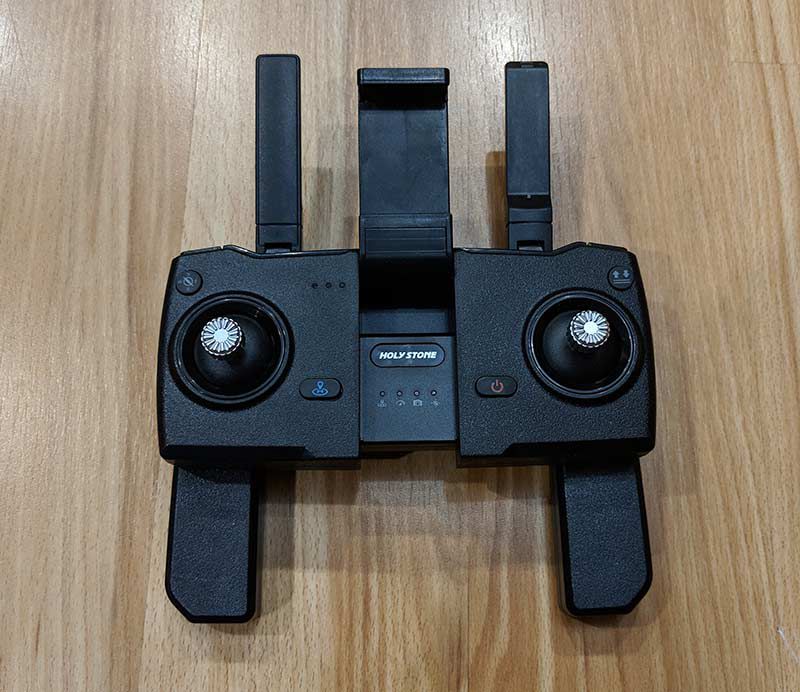
Unlike the drone itself, the remote controller does fold up for easy carry. The controller has two joysticks on top as well as buttons for power, GPS toggle, auto lift off and land, and a returned to a home button.

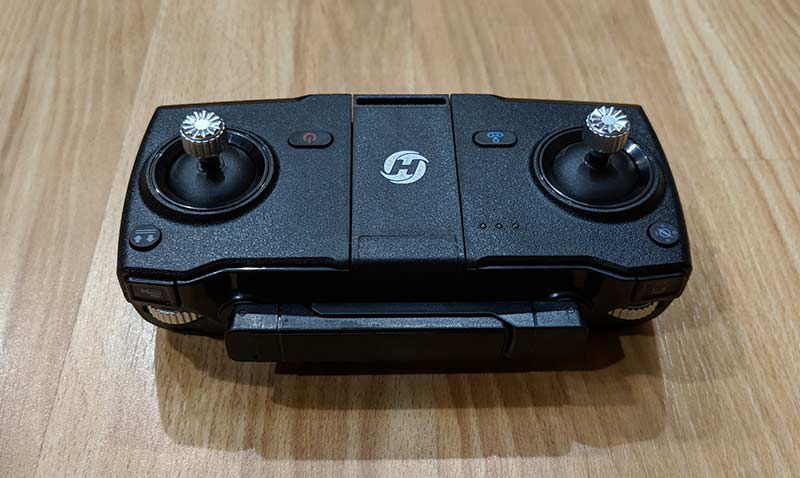
On the back edge/shoulders of the controller, you’ll find buttons to toggle video and image capture and dials that control the angle of the camera and flight speed. Two antennas are also located on the back of the device.

The antennas, two handles under the controller, and a phone holder fold out when it’s time to fly. Under the phone holder is a panel of indicator LEDs for that let you see the status of return to home, speed, video capture, and headless mode.

The controller has a built-in rechargeable battery that you can charge with the included micro USB cable.

Getting ready for flight

The steps you’ll need to do before your first flight includes charging the drone’s battery using the included charger. The drone only comes with one battery which can take up to 2hrs to recharge. That will feel like a very long time considering that the flight time per charge is only about 15 minutes.

The next step you need to do is charge the controller which will take about an hour. Luckily, the controller has a much longer battery life and should last several days per charge.

You’ll also want to install the Holy Drone app for your iOS or Android phone. The app is not required, but it does allow you to have an FPV (first person view) from the camera when the drone is paired.

Using the app

Having a first-person view helps you navigate and position the camera while capturing video. The app also has onscreen buttons that match the physical buttons on the controller.

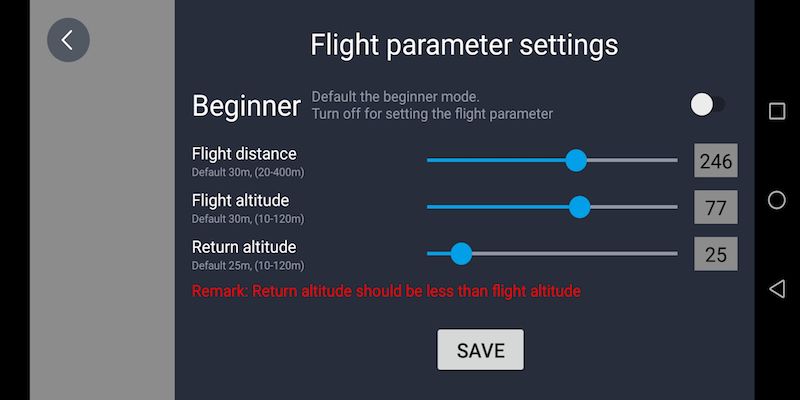
You can also use the app to take the drone out of beginner mode and adjust settings so you can fly the drone higher and farther.

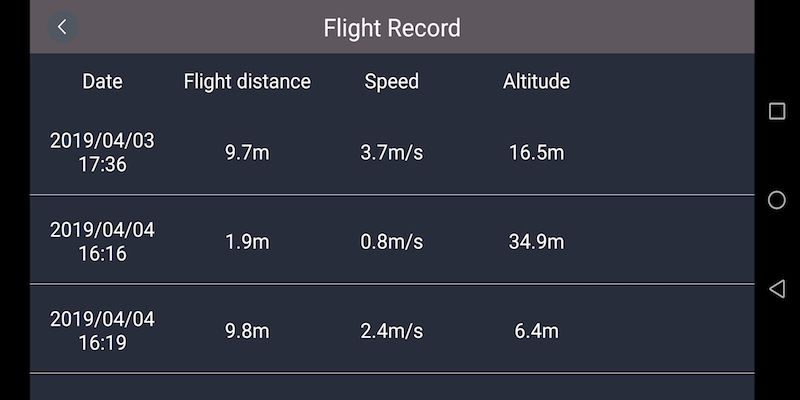
The app keeps a log of your flights so you can see info on distance flown, speed, and altitude.

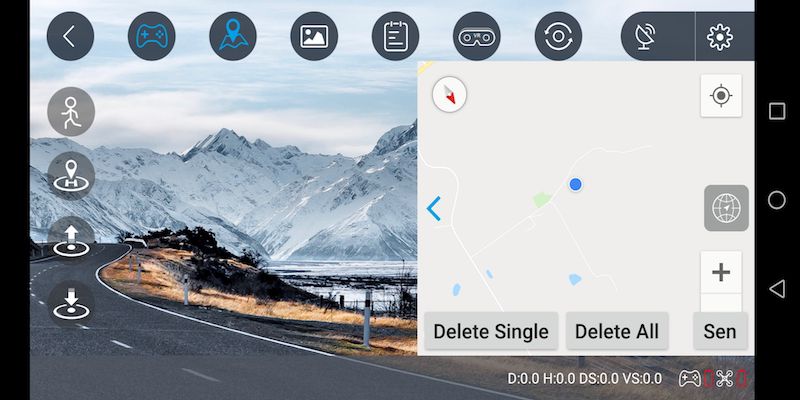
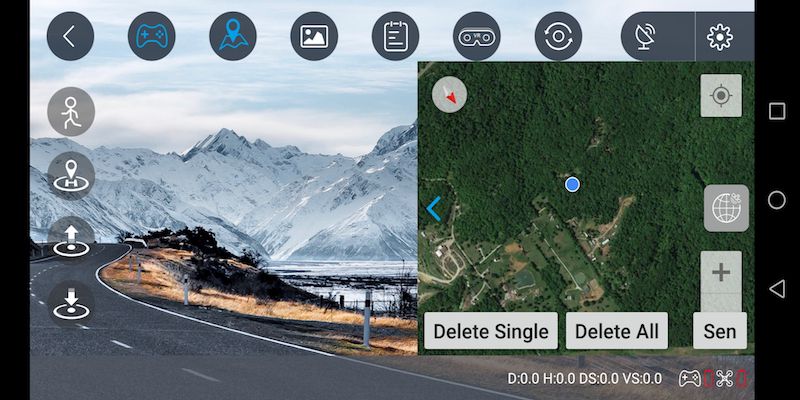
There’s also a mapping feature that will let you see where you’re flying on a map.


If you have VR goggles you can toggle them on using the app and you can toggle the follow me features which will cause the drone to follow you either by flying as you move or just moving the camera to follow you while the drone stays stationary.

Up, up, and away!

Once the drone and controller’s batteries are charged, the app is installed, and the drone is paired with the controller and the phone. You’re almost ready to take your first flight. The only step left to do go through the calibration sequence which you should do each time the drone is powered up.

The sequence involves rotating the drone horizontally and vertically while paying attention to the status LEDs on each rotor. The sequence only takes a minute and then you’re ready for take off.

Pressing the dedicated take off button will raise the drone a few feet off the ground and will use the GPS to record the spot so that you can press the return to home button so that it will automatically land in that same spot or pretty close to it.

I found that flying the Holy Stone HS120D drone to be very easy and fun. The built-in GPS makes a big difference as it prevents the drone from drifting off in various directions when it’s supposed to be hovering in one spot. The HS120D is almost rock solid when it comes to hovering.

I like the one key take off and land button as well as the return to home button. Return to home (RTH) – Brings the drone back to the last recorded take-off point after you’ve used the one key takeoff/land button.

But after flying the drone for a couple of days, it decided to take a nose dive – literally.

I had it hovering overhead about 60 – 80 feet in the air and was looking down at the controller. I wasn’t pressing any buttons on the physical controller or tapping the screen. I was just looking at live camera view when I heard some buzzing and looked up to see the drone falling out of the sky. I do not know what caused it to crash like that because the battery was not low on juice and even if it was, it has a built-in feature to return to home and land when the battery is low. It was almost like the emergency land feature was triggered. To do that, you have to hold and press the one key liftoff/land button. I’m 99% positive that I did not do that.

Lucky for me that the drone crashed into the ground – instead of my head but it did suffer some damage.

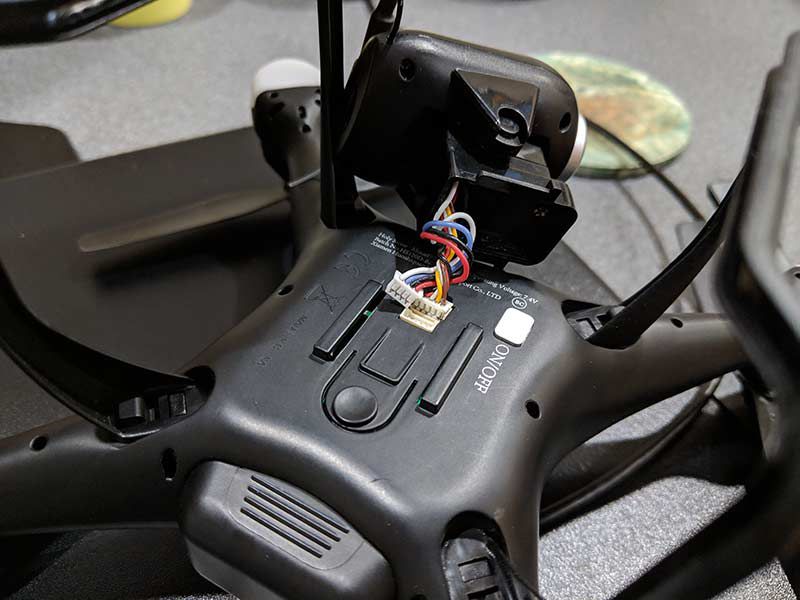
I first noticed that the camera had popped off which was an easy fix. And I also noticed a small crack in one of the quad arms. But the biggest issue came the next day when I tried to fly it again and noticed that my phone couldn’t see the drone’s WiFi SSID. That meant I couldn’t use the app and the live view. I was still able to fly it just fine. I was also able to control the camera’s tilt. And I thought I was able to record video as the controller beeped continously just like it did while previously recording video. But when I went to look for the new video clips they were not on the microSD card.

I uninstalled the app and reinstalled it but no joy. I thought the crash had damaged the internal WiFi radio and the camera. I was bummed because I had planned to capture some more video clips to string together for this review. I was about to give up and then I went to Holy Stone’s website and used their live chat to tell the support person about the problem. They said that the WiFi was in the camera and to check to make sure the cables were still connected.

And what do you know, that was the problem. I plugged the disconnected cable back into the base of the drone and presto, everything started working again. WHEW!

Capturing pics and video

Here is an image that I captured with the drone. For taking static snapshots, it’s not that impressive. The images are blurry and bland.

As for capturing video, the HS120D does a good job but it’s not without issues. Check out the video below and see if you can spot the problem.

Did you notice anything? Go back and watch again and pay attention at the following times :54, 1:32, 2:22, and 3:15. See it now? The video is dropping frames. At first, I thought this problem was due to the damage that the drone had sustained in the 2 crashes. So Holy Stone sent me a 2nd brand new drone. Unfortunately, it had the same issue so it’s some type of glitch in their software or hardware.

You’ll also notice that footage can look a little jerky when you start to fly or stop. The drone has a lot of power and when you press the joystick to go forward, it does just that and it can dip the whole drone forward. Then when you stop it tips the drone up sort of like what happens when you slam on the brakes of your car.

What I like

  • Easy to fly
  • GPS feature allows great hovering in place
  • One touch fly/land buttons and return to home buttons

What needs to be improved

  • Would be nice to include 2 batteries
  • Fix video frame drop problem

Final thoughts

I’ve reviewed or tested several drones now and the Holy Stone HS120D is my favorite inexpensive drone. It’s easy to fly and has a great altitude hold feature. As long as it doesn’t decide to plummet from the sky for no reason like mine did, it’s fun as heck to fly. It doesn’t have a 4K camera and it has a strange frame drop issue, but at only $170, you can’t it to be as good as that other brand. As is, the Holy Drone HS120D is at the top of my list for an affordable drone that’s easy and fun to fly.

Price: $169.99
Where to buy: Amazon
Source: The sample for this review was provided by Holy Stone.

Filed in categories: Reviews

Tagged:

Holy Stone HS120D drone review originally appeared on The Gadgeteer on April 16, 2019 at 2:34 pm.

Note: If you are subscribed to this feed through FeedBurner, please switch to our native feed URL http://the-gadgeteer.com/feed/ in order to ensure continuous delivery.
Plugable USB-C mini docking station review

REVIEW – One of the drawbacks to laptops is connecting external devices and monitors. The Plugable USB-C mini docking station aims to make that easier by adding a little bit of just about everything.

What is it?

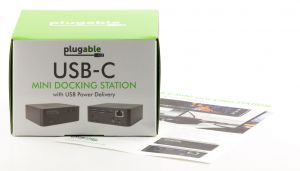
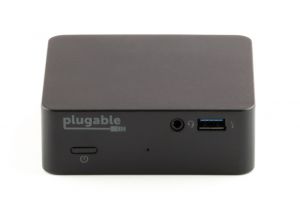
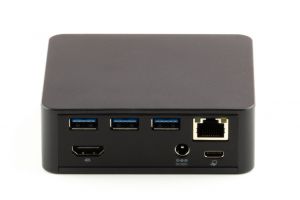
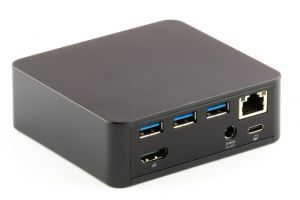
The Plugable USB-C mini docking station is a small USB-C docking station that includes a USB hub with 4 USB-A 3.0 ports, HDMI output, a gigabit ethernet port, and 3.5mm TRRS Headphone/Mic Combo Jack along with a USB-C port with charging functionality.

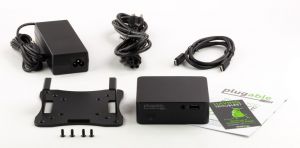
What’s in the box?

  • USB-C Docking station
  • 100W (20V, 5A) power supply
  • 1m USB-C to USB-C cable
  • VESA mounting bracket
  • Quick Start Guide


Hardware specs

  • HDMI 1.4 output for mirroring or extending your desktop to an external monitor. Supports 4K@30Hz, 2560×1440@60Hz & 1920×1080/1080P@60Hz
  • USB-C port with 85W Power Delivery functionality to charge compatible host computers (not all USB-C computers are able to charge through their USB-C port
  • Gigabit Ethernet port – The UD-CAM has a dedicated Realtek RTL8153 Ethernet controller
  • 3.5mm TRRS Headphone/Mic Combo Jack
  • Four total USB (Type-A) ports; One USB 3.0 port on the front and three USB 3.0 ports on the rear


Design and features

There’s an idiom that says “The more things change, the more they stay the same”. It seems like everything is going wireless nowadays, but even though wireless is everywhere, there are some things that just work better wired. External drives, monitors, and various hardware often works better wired.

Portable devices such as laptops and tablets seem to have fewer and fewer ports, but we still seem to have the same or more devices to plug into them.

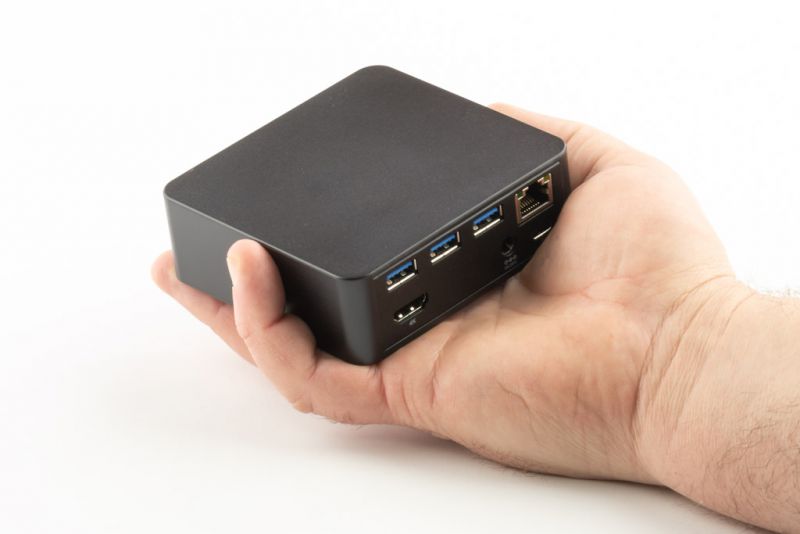
The Plugable USB-C mini docking station addresses this problem with a small, yet powerful, hub.

Not only does the Plugable USB-C mini docking station add USB ports for your device, but it also adds functionality to devices. Most notably is the ability to add an HDMI 1.4 output that supports 4K resolution – all through one USB-C connection from your device.

The mini docking station also adds a gigabit ethernet port. In all my experience, a wired network connection always seems to have better stability and speed.

To use the Plugable mini docking station, you will need to have a supported USB-C system like the 2015 and later 12″ MacBook Retina with USB-C, late 2016/2017 MacBook Pro with Thunderbolt 3, Dell XPS, Precision, and Latitude systems with Thunderbolt 3, and the Microsoft Surface Book 2. See Plugable’s compatibility chart on the product page. https://plugable.com/products/ud-cam/

The Plugable mini docking station can also provide all of these features while simultaneously providing up to 85W of power to charge your system via the USB-C connection, so even though you’re adding a cable to connect the dock, you might be able to remove the original charging cable – depending on your device.

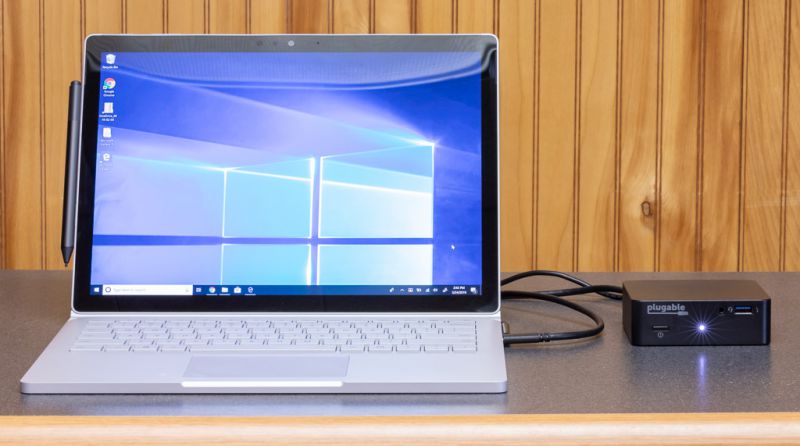
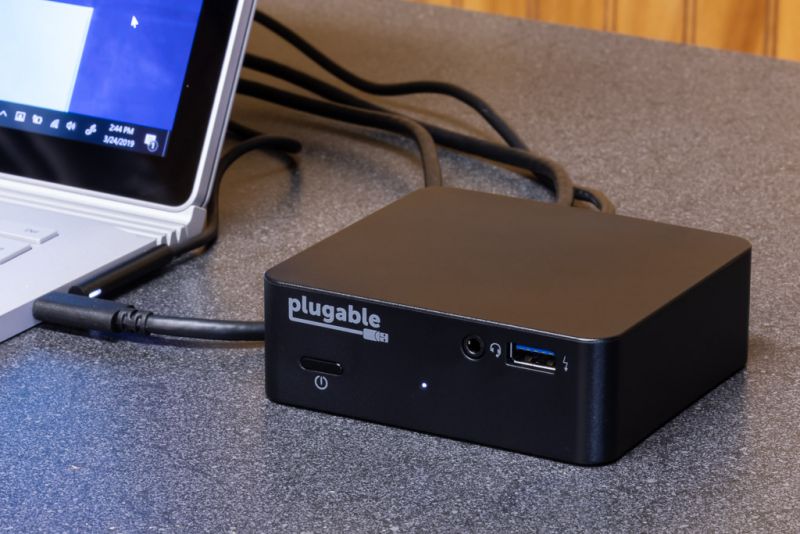
I set up the Plugable USB-C mini docking station with a Microsoft Surface Book 2. Windows automatically recognized it and installed the appropriate USB hub drivers. There wasn’t anything to manually install, it was just plug and play!

The first thing I did was check that it was charging from the docking station. Next was the one thing that really excited me about this device, it’s 4K HDMI connection. So I connected it to my 40″ AOC 4K monitor and I was up and running without a hitch. It performed just as well as my desktop machine for the tasks I performed such as 4K videos, photo editing, and a little bit of CAD design for 3D printing. I was quite happy with it. It is limited to 4K@30Hz, which may be a hindrance if you’re a gamer, but for normal computer tasks, it will work just fine.

I did not test it with any Apple devices as all of my Mac computers are older devices. I also did not test the VESA mount because all of my monitors are currently using their mounts on their stands, however, I’ve been using and abusing VESA mounts for over 20 years, so I can say that the included mount should work just fine.

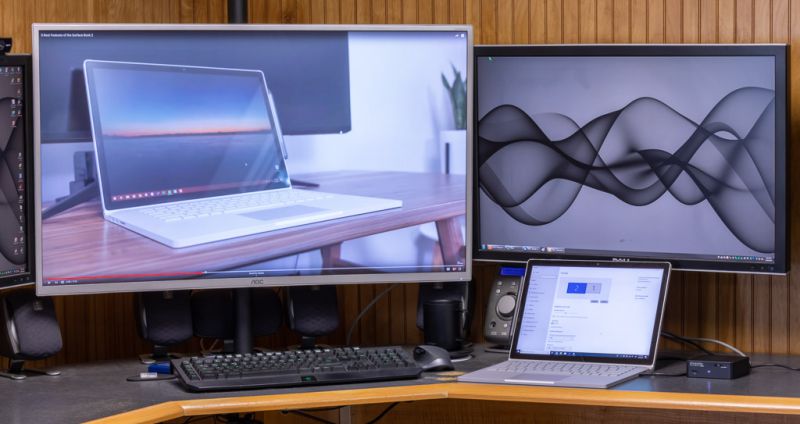
Although the Surface Book 2 power connector is connected in this photo, it’s technically not required when using the Plugable USB dock.

The Plugable USB-C mini docking station also features a VESA mount so that it can be attached to the back of a monitor that has the standard 100mm VESA mounting holes. This allows you to place it out of sight unless you need to plug and unplug devices regularly, then you might just opt to use the mounting bracket to mount the docking station under the edge of your desk. It really is a nice little feature that could save a lot of time over making your own bracket. Theoretically, one mounted out of sight you would still only have one cable running to your computer (laptop).

The device also has four rubber feet on the bottom. It may not sound like much of a feature, but if you’ve ever had a hub that didn’t you would know that the cables can make the device turn. These little rubber feet help it stay in place.

The Plugable USB dock driving a 4K monitor via HDMI, playing a 4K Youtube video full screen.

What I like

  • The VESA mount is a nice touch
  • The 4K video output is splendid
  • The rubber feet are nice

What needs to be improved

  • I could not think of anything that could be improved.

Final thoughts

The Plugable USB-C mini docking station is a great device that provides a lot of functionality in a small package. The additional ports provide functionality, usability, and speed increases (wired ethernet vs wireless).

Price: $129.00
Where to buy: Plugable and Amazon
Source: The sample of this product was provided by Plugable.

Filed in categories: Reviews

Tagged:

Plugable USB-C mini docking station review originally appeared on The Gadgeteer on April 16, 2019 at 9:00 am.

Note: If you are subscribed to this feed through FeedBurner, please switch to our native feed URL http://the-gadgeteer.com/feed/ in order to ensure continuous delivery.