Mousetrapper keyboard, Huawei P30 Pro, and more – Review updates

REVIEW – Have you wondered what happens after we review a product? Do we immediately stop using the product because it breaks? Do we continue to use the product for years and even decades after we post the review? To answer those questions, we post long-term review update posts, so we can take a look back at past reviews and comment on how well the product has stood the test of time. Check out these latest review updates by clicking on the review links below and then scrolling to the bottom of the page to read the latest dated updates.

Mousetrapper 2.0 alternative mouse review By Julian Perry

moshi Symbus Q USB-C docking station with wireless charger review By Julie Strietelmeier

Julie’s gadget diary – I ordered the Huawei P30 Pro By Julie Strietelmeier

ClipDifferent Pro automatic fingernail clipper review By Julie Strietelmeier

Filed in categories: Reviews

Tagged:

Mousetrapper keyboard, Huawei P30 Pro, and more – Review updates originally appeared on The Gadgeteer on April 25, 2019 at 10:01 am.

Note: If you are subscribed to this feed through FeedBurner, please switch to our native feed URL http://the-gadgeteer.com/feed/ in order to ensure continuous delivery.

Ninja Foodi pressure cooker review

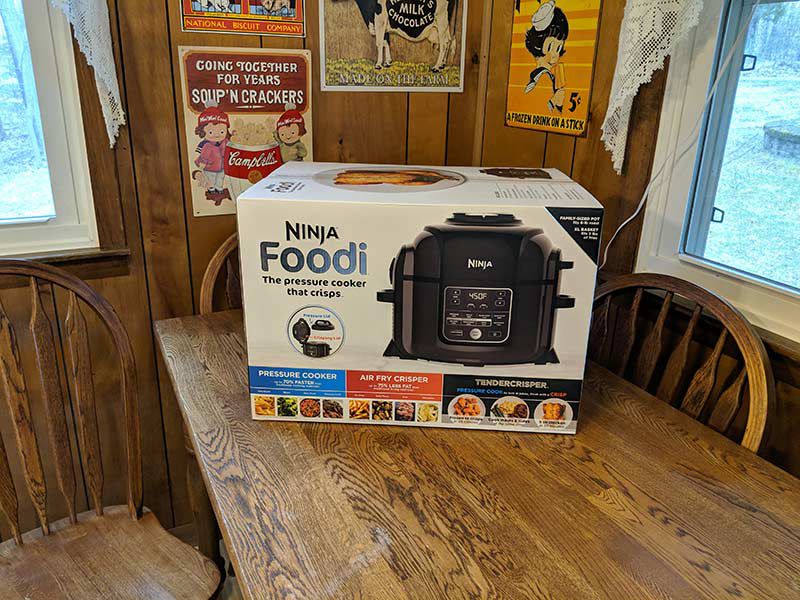
REVIEW – It might seem like pressure cookers are the latest cooking gadget fad, but pressure cookers have been around for decades – just not with fancy displays and features like the ones we’re seeing today. The traditional pressure cookers just had an analog gauge on top to show the pressure level and I thought they were scary as heck with their sputtering and spinning valves. Today’s pressure cookers have come a long way and they rank as my number one favorite kitchen gadget. Today I want to tell you about the Ninja Foodi pressure cooker which raises the bar when it comes to this category of cookers. Let’s take a look!

This post was created in partnership with Ninja and I received a complimentary product but all opinions within are my own.

What is it?

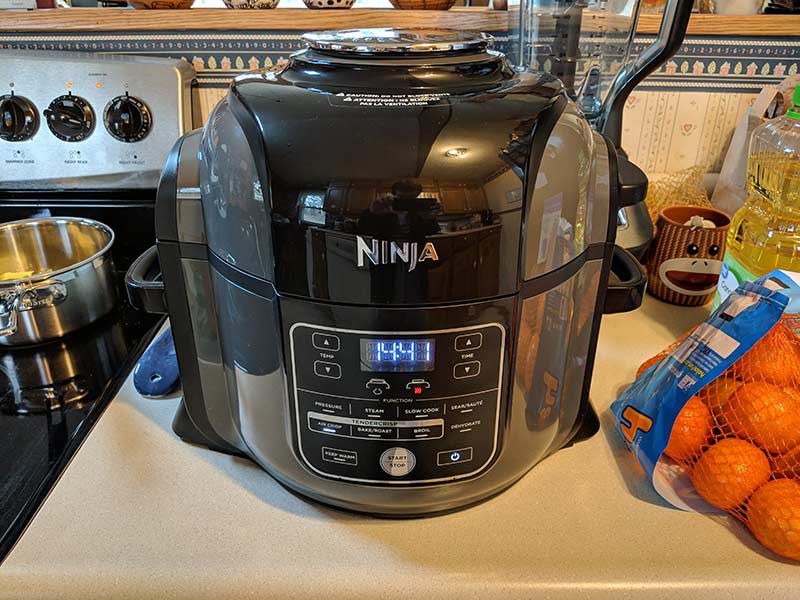
The Ninja Foodi is a modern pressure cooker with a set of feature that includes a digital display, multi-pressure levels, timer, and a keep warm feature. But the feature that really sets this pressure cooker apart from other brands is that it doubles as an air fryer that not only pressure cooks your food super fast, it can make it crispy too.

What’s in the box?

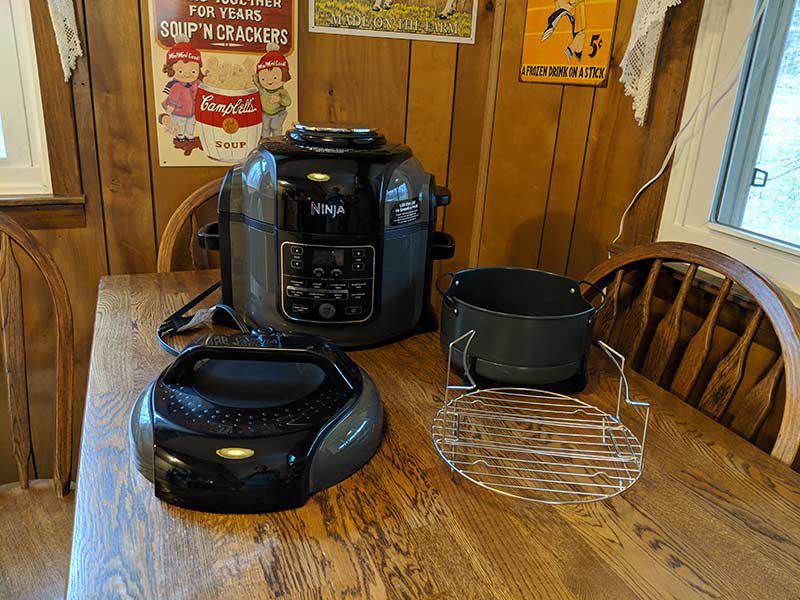
  • Ninja Foodi pressure cooker
  • Crisping lid
  • Pressure lid
  • 6.5 qt. Removable cooking pot
  • 4 qt. Cook & Crisp basket
  • Reversible rack
  • Detachable diffuser
  • Silicone ring
  • Anti-clog cap
  • Condensation collector
  • Recipe book with 45 recipes
  • User manual

Design and features

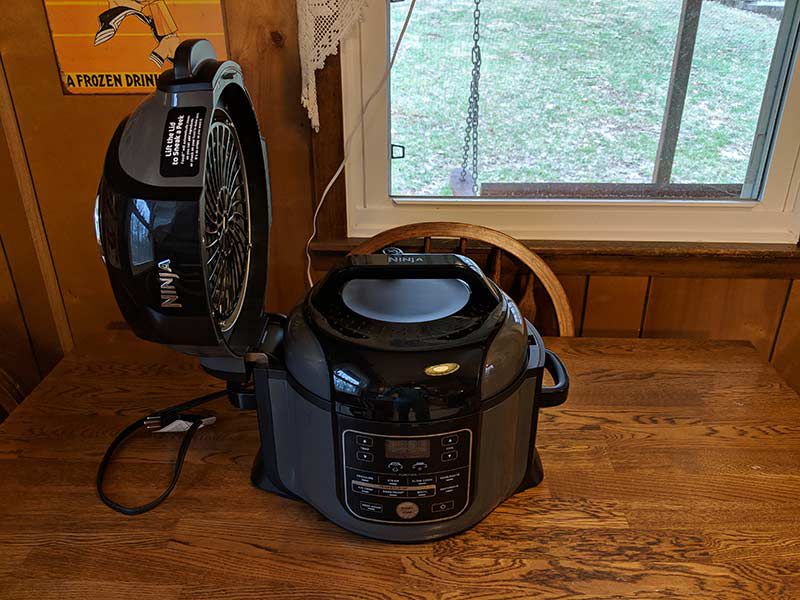
The Ninja Foodi is larger than other popular pressure cookers on the market, but that’s because it can do a lot more than those cookers.

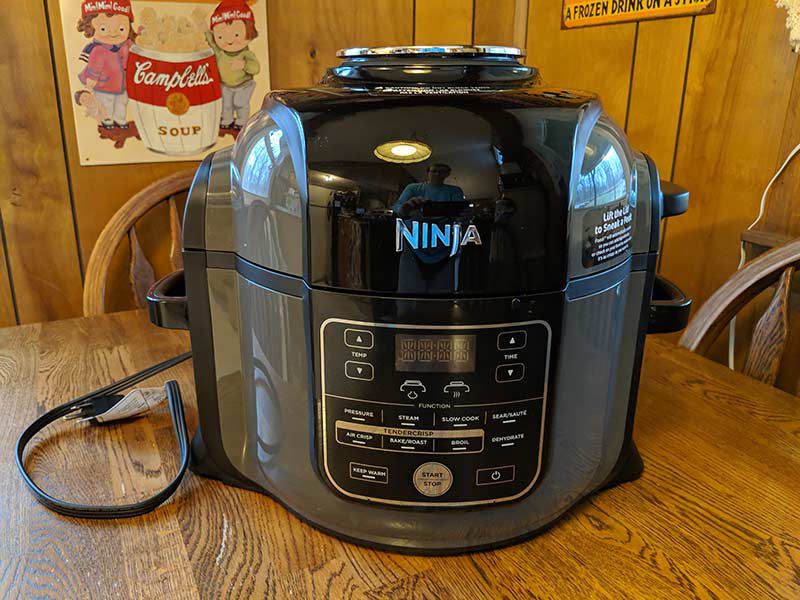
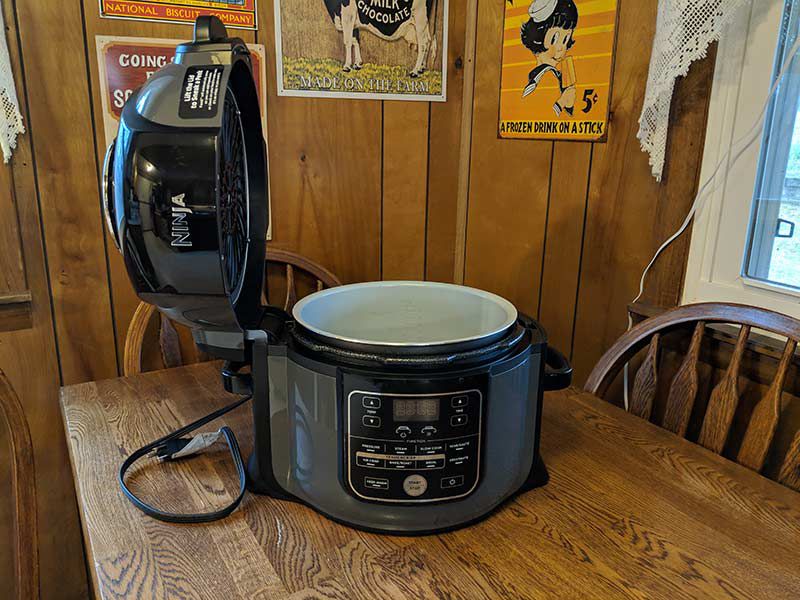
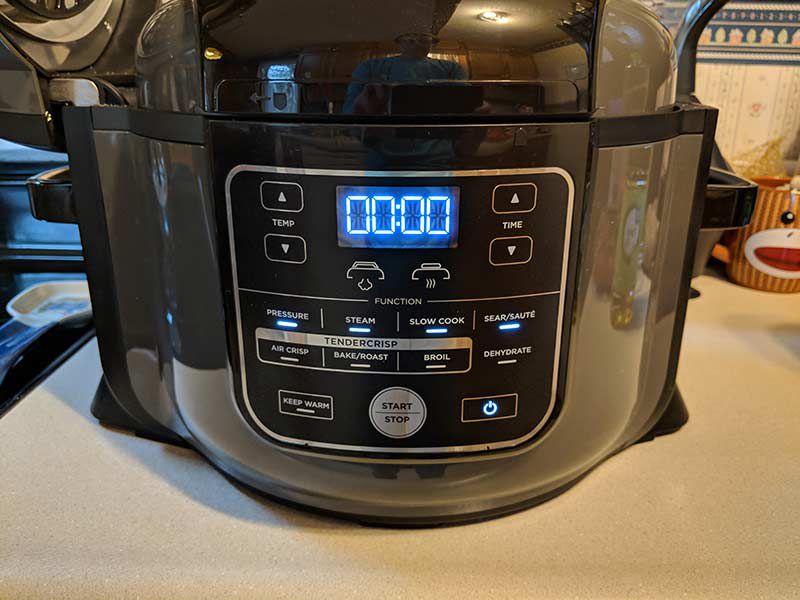
The front of the Foodi has easy to understand display and touch panel that will let you set the timed cooking sessions and adjust the pressure setting from LO to HI. You can also choose which style of cooking to use: pressure, steam, slow cook, sear/saute, air crisp, bake, broil, and dehydrate.

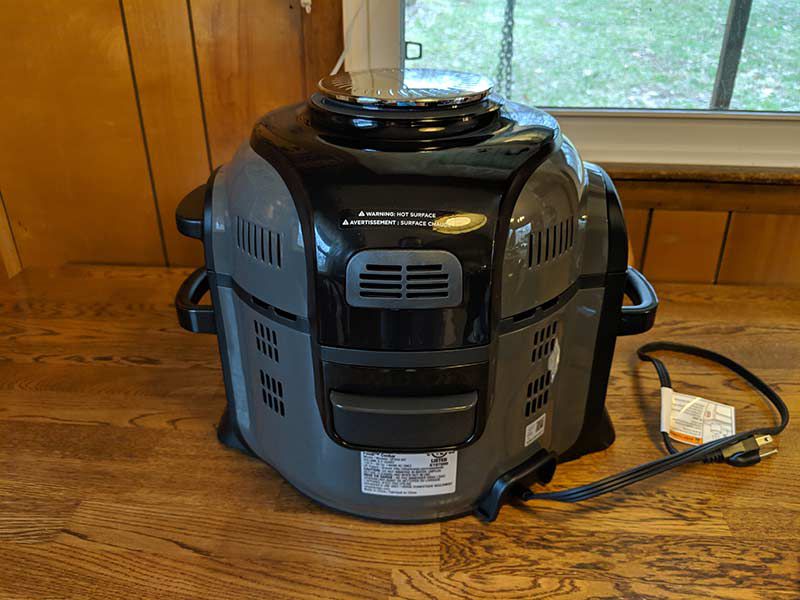
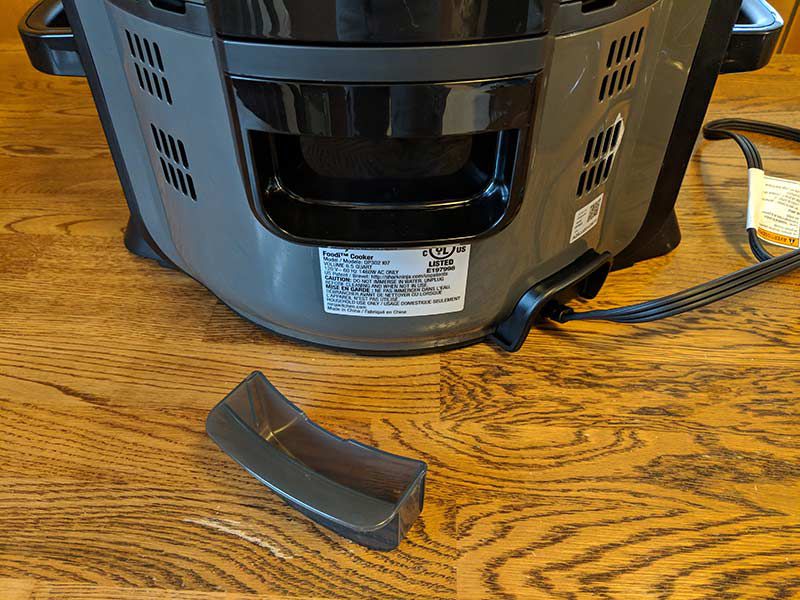
The back of the Foodi has several vents and a drip cup.

The plastic drip cup pulls out for easy cleanup.

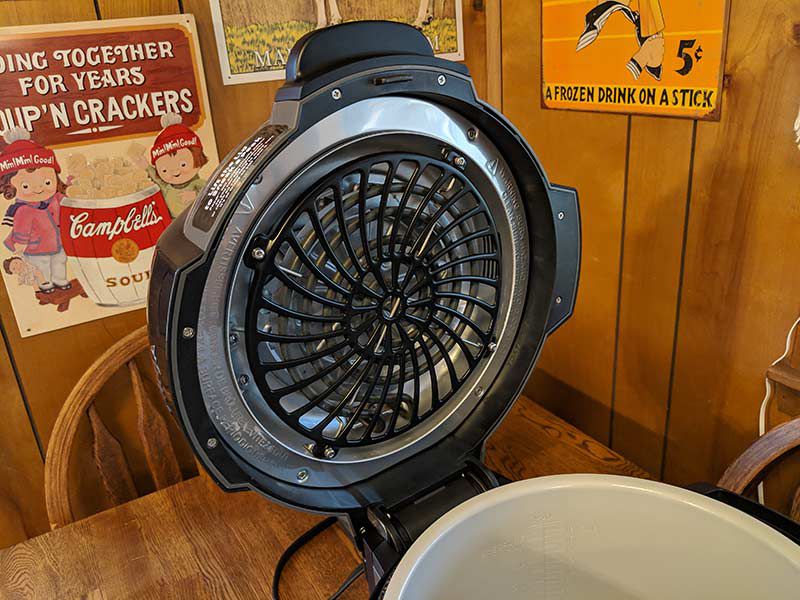
Where the Ninja Foodi differs from other pressure cookers is the 2-lid system. The lid attached to the cooker is actually the air crisper / air fryer lid.

The lid has a built-in fan that circulates air around the cooking food to crisp skin and outer food surfaces without needing to use a deep fryer.

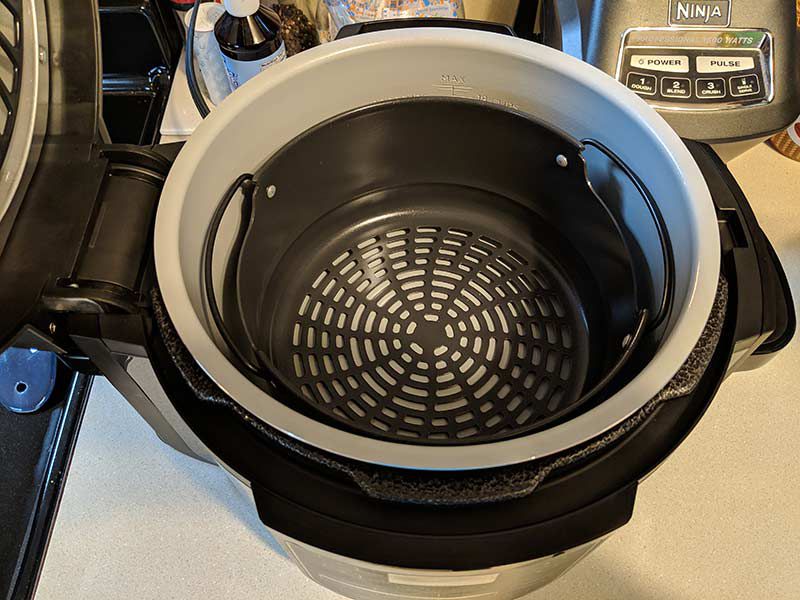
Included with the Foodi is a metal air crisper basket that is perfect for using the Foodie to make french fries and other foods. The slots on the bottom of the basic allow the air to circulate and any oils to drip into the main 6.5qt. cook pot below it.


When you want to use the pressure cooker feature, you use the pressure lid with the air crisp lid in the open position.

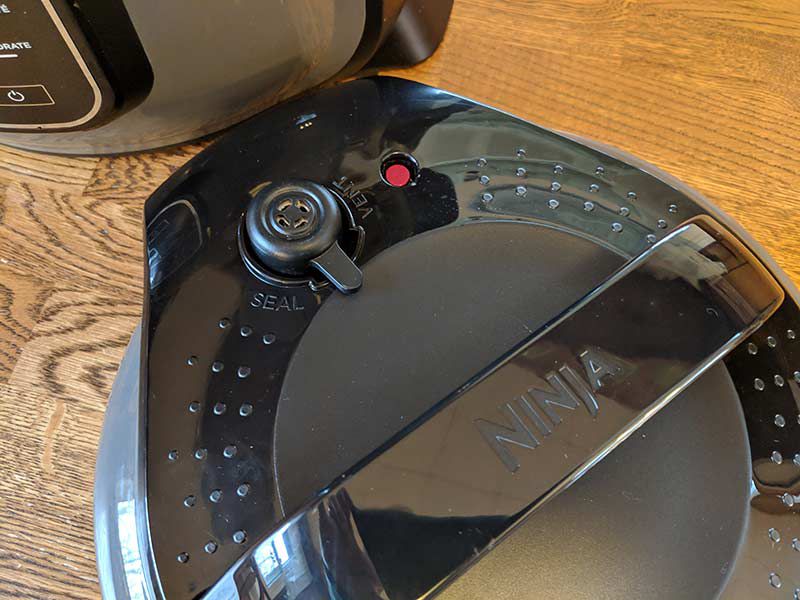
If you’re already familiar with using a pressure cooker, the Ninja Foodi pressure lid has a seal/vent valve on top and a large handle that makes it easy to secure and remove the lid.

I’m hungry, let’s cook like a Ninja!

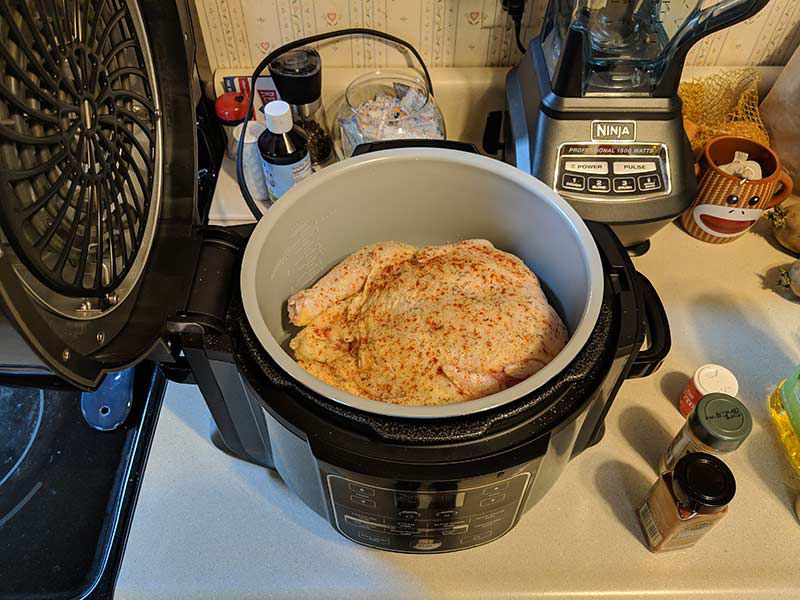
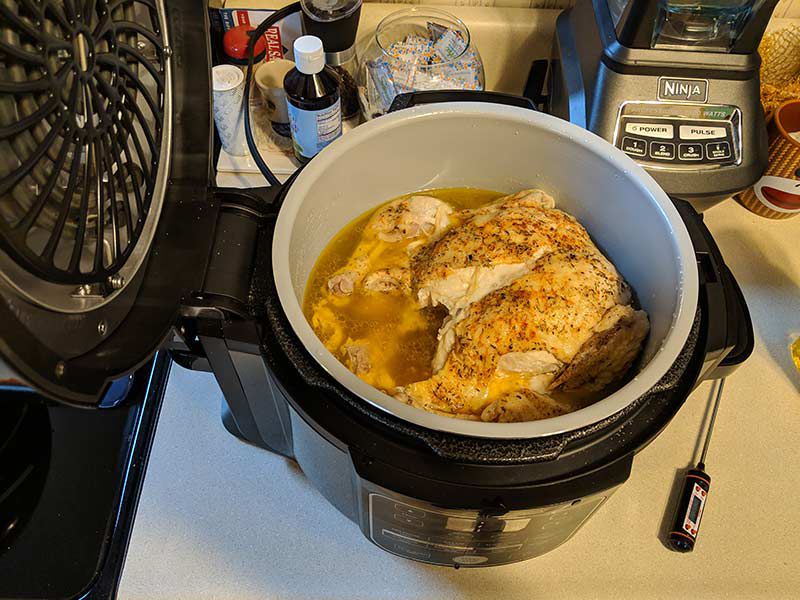
The first food that I cooked in the Ninja Foodi was a 6 lb. chicken which went from raw to perfectly cooked in about 30 minutes vs. the usual 20 minutes per pound formula that I use when I cook a chicken in the oven. Talk about saving time.

It was so easy to cook the chicken. I just added a cup of water to the pot, put the chicken in the pot, added some salt, pepper, paprika, and tyme. Then the pressure lid went on top, the valve was set to seal, I pressed the power button, pressed the pressure cook button, set the time to 30 minutes, and pressed start. The display showed an animated cursor rotating around the display until the pressure in the pot reached the right level. Then the timer counted down until it finished with a tone.

I let the pressure release naturally for a few minutes and then rotated the valve to the vent position until the pressure pin dropped which meant that it was then safe to remove the lid. Look at that bird! It was perfectly cooked and tasted amazing.

In the bottom of the pot was several cups of golden chicken broth that I used later to make chicken and noodles with the leftover chicken – in the Ninja Foodi! The noodles only took about 20 minutes and YUM!

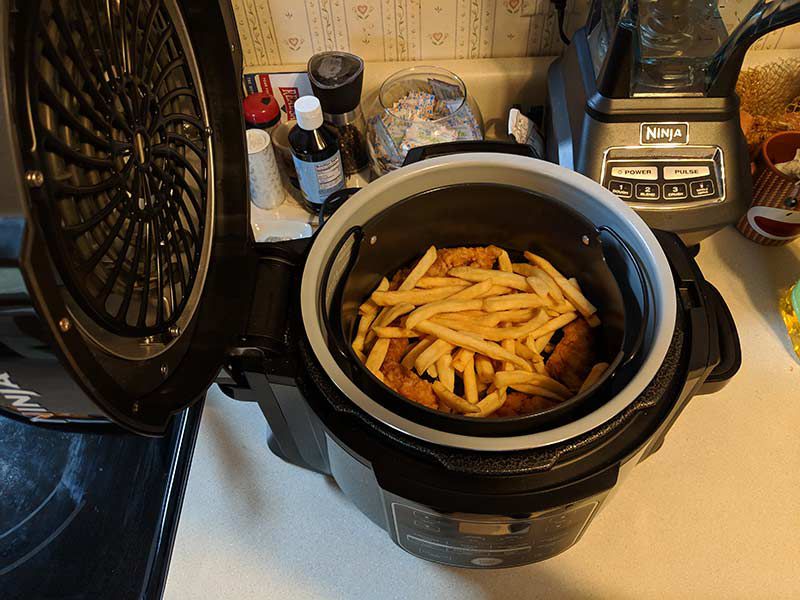
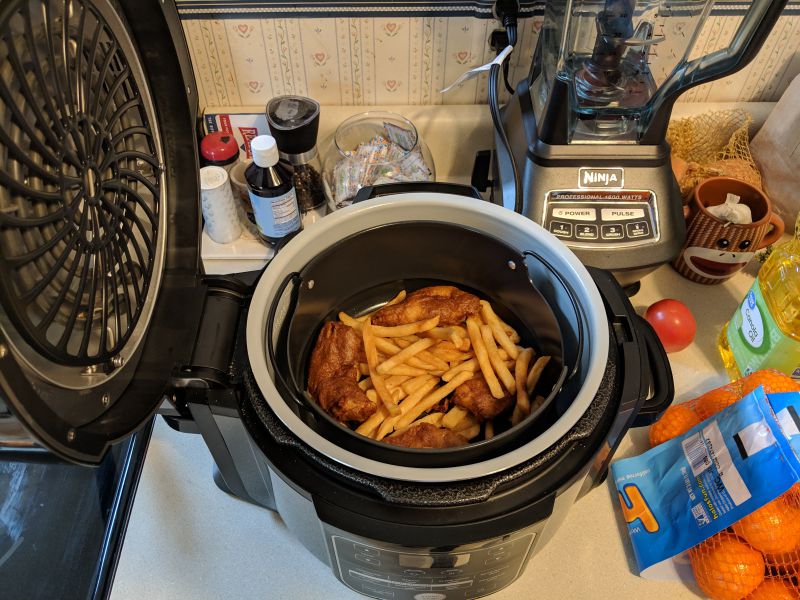
What about the air crisp lid? I used it to revive some leftover fish and fries from a trip to Cheesecake Factory. I like to eat out but almost never eat my entire meal. Trying to heat up leftover fried foods usually results in a soggy rubbery mess but the air crisp lid perked up the food to taste almost as good as it did in the restaurant. All I did was arrange it in the air crisp out which was then placed inside the main 6.5qt cooking pot.

Then I set the air crisp to 350 degrees for 15 minutes.

With the air crisper lid, you can lift it anytime you like without having to wait for the cooker’s pressure to bleed off because the pressure isn’t used in this cooking mode. It worked great.

Clean up is fast too!

One of my favorite things about using the Foodi other than eating the delicious food that I cook with it, is that clean up is as fast as cooking with it. The inner cooking pot can go in the dishwasher. The pressure lid has to be hand washed but it really doesn’t get that dirty because the pressure keeps food from splattering on it.

What I like

  • Versatile: pressure cooker, air fryer, and more
  • Easy to use
  • FAST cooking made simple

What needs to be improved

  • Need a way to store the air pressure lid when not being used

Final thoughts

I’ve been a huge fan of modern pressure cookers after trying my first one a year or so ago. Since then I use it to cook foods that would normally take an hour or more in a fraction of the time. You might think that cooking faster could mean that the foods wouldn’t taste as good but it’s the opposite with the Ninja Foodi. Pressure cooking makes the flavors better because they are infused into the foods.

Price: $199.80
Where to buy: Ninja
Source: The sample for this review was provided by Ninja.

Filed in categories: Reviews

Tagged: , ,

Ninja Foodi pressure cooker review originally appeared on The Gadgeteer on April 25, 2019 at 8:00 am.

Note: If you are subscribed to this feed through FeedBurner, please switch to our native feed URL http://the-gadgeteer.com/feed/ in order to ensure continuous delivery.

Solo New York Region backpack review

REVIEW – What can a backpack add to the general market these days? How about padded compartments for both your 11-15″ laptop as well as your 10-13″ tablet, plus a few other generous pockets? The Solo New York Region backpack offers these features, plus others to arrive at a sweet spot that may just meet your backpack Nirvana. Let’s take a deeper dive.

What is it?

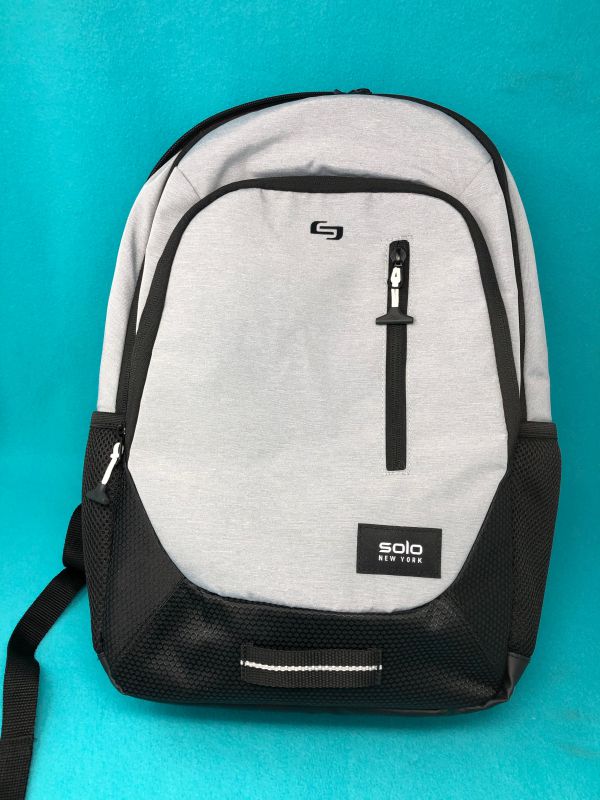
A light-medium weight backpack with three main pockets, a front stash pocket, and two side mesh pockets for quick access. It’s available in Black or Grey with Burgundy interior, or with the Burgundy color outside and Grey interior. I was sent the Grey model for review.

Specs

  • Fully padded 15.6″ laptop compartment
  • Quick access pocket
  • Interior organizer section
  • Side mesh pockets
  • Back strap slide over luggage handle
  • Padded back and backpack straps for added comfort
  • Lightweight
  • Smooth nylon fabric

Design and features

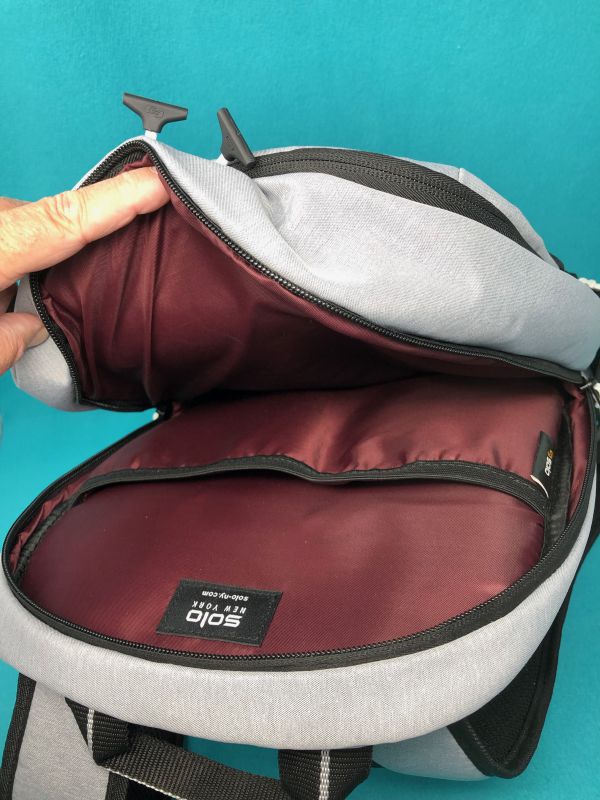
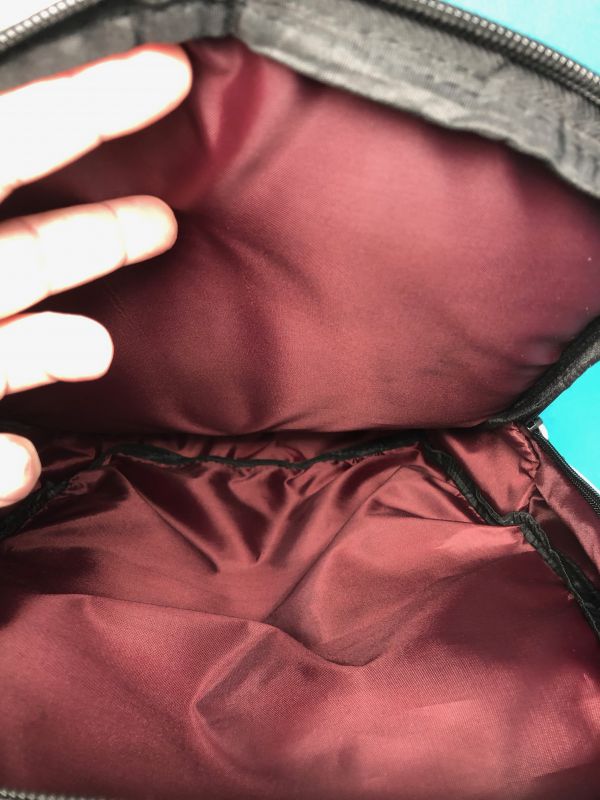
This backpack has three main compartments, moving from the closest to your back to the outside. In the rear-most compartment, there is a pocket for your laptop or largest screen, as well as more room for a second slab of glass. Neither has a huge amount of padding, but the separation allows you to have these items in two spaces. I don’t think I’d pack this into a place where it would get banged onto the floor or anything like that, but for your general commute or a carry-on, it’s fine.

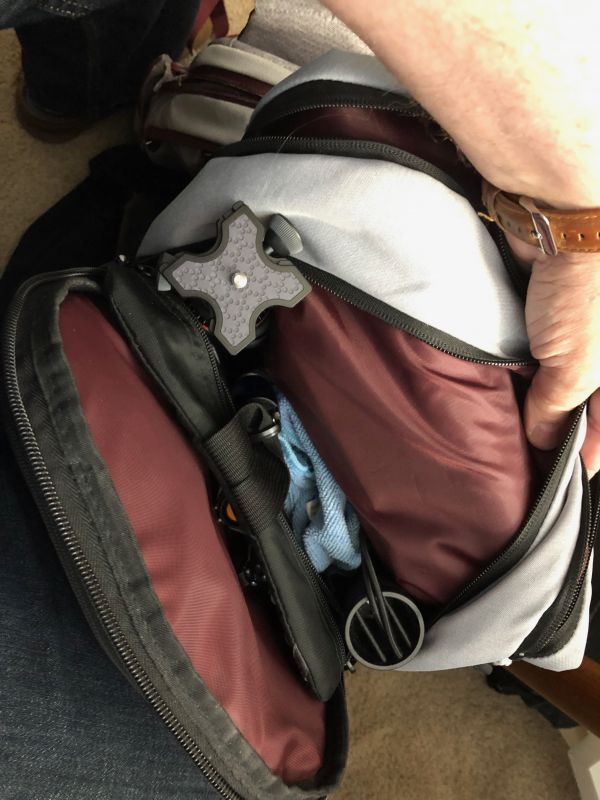
The middle section gives you about four inches of space with no organization. Good for a jacket, some books or files, or an organizer like my Freudian Slip with pockets to hold smaller items at various levels. Below, note I’ve got a Joby Gorilla tripod and a Hedgehog umbrella in there as well.

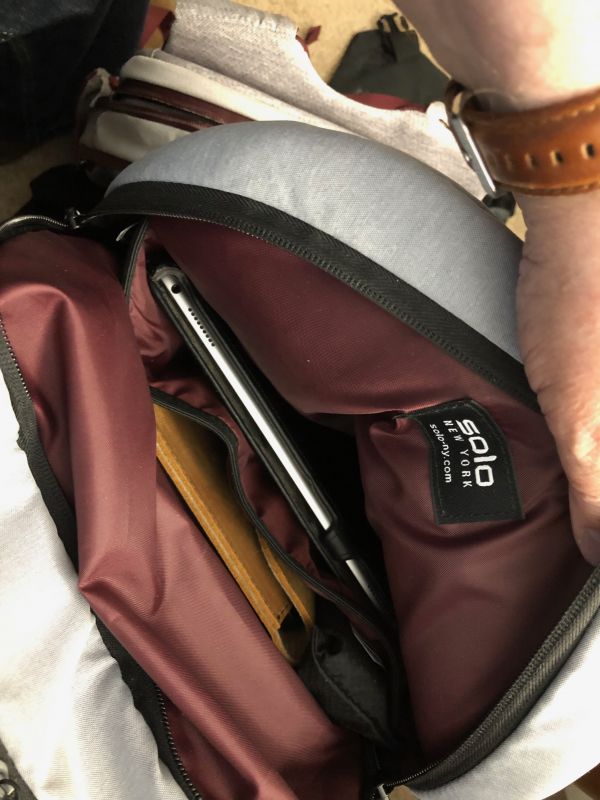
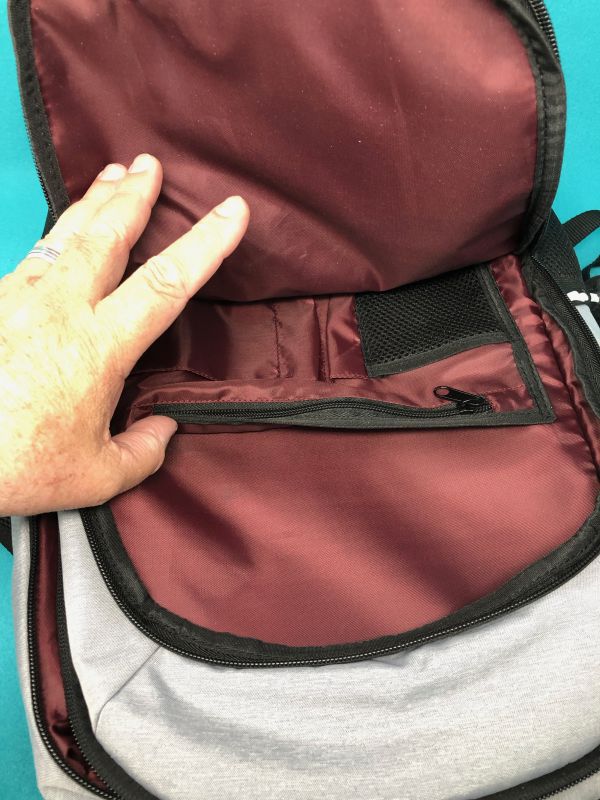
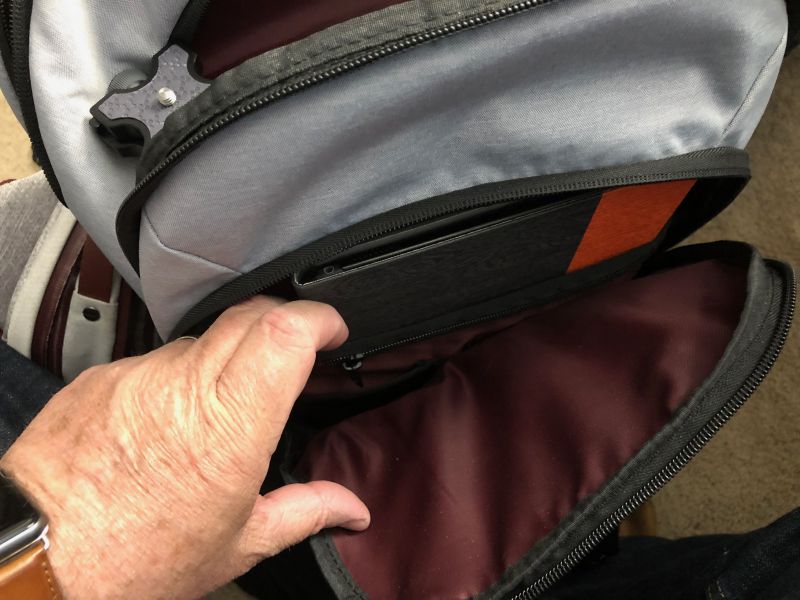
The next main compartment only has a single zipper, rather than the double zips on the other two, but there is great organization for your Kindle, pens, cards, keys, or your need-to-access meds and dongles. I fit my iPad Pro 10.5 here with plenty of room.


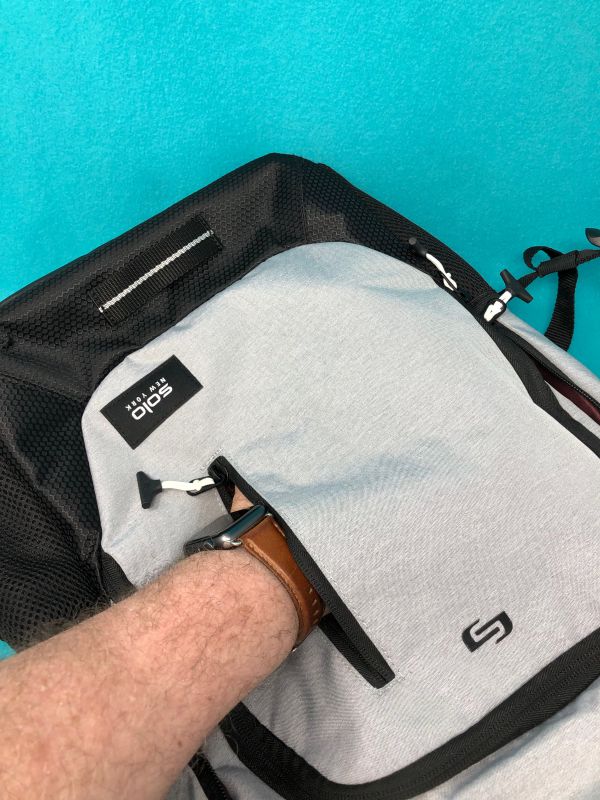
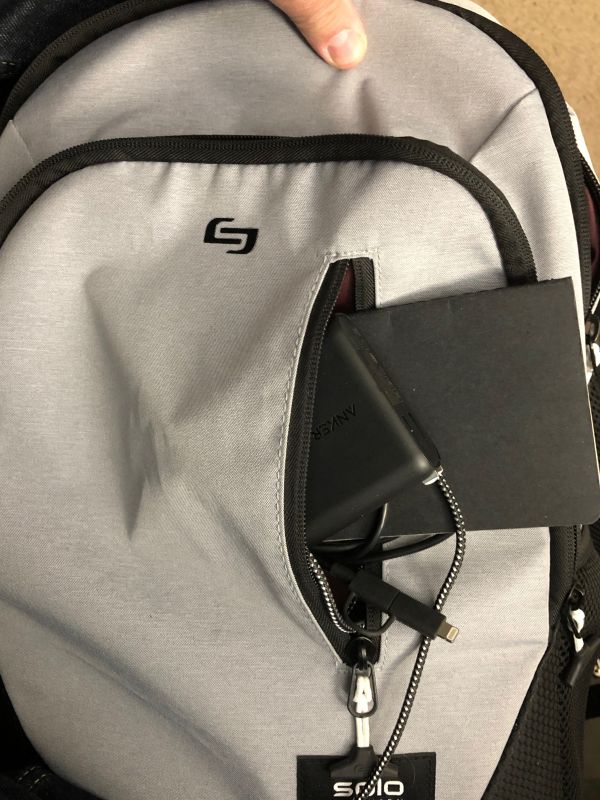
On the outermost face, with a single vertical zipper, there is a pocket that can hold two hands-full of anything you need. I use this for my phone, gloves, boarding passes, and other travel items that I need to be separated from the rest of my stuff. Moleskine, passport, charger, cables, etc. fit fine.


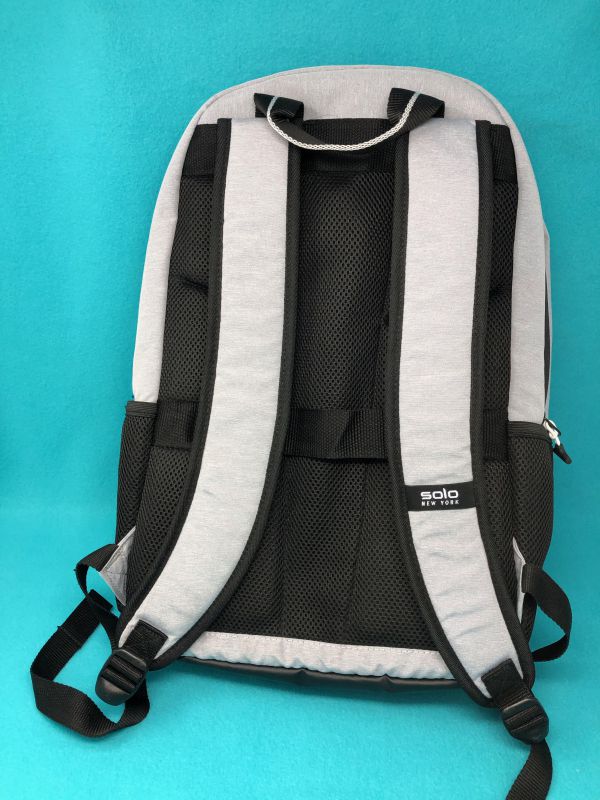
On the back under the padded straps, there is a padded mesh covering that allows your back to breathe during long times of carrying the bag, as well as a strap that allows you to pass it over your roll-aboard luggage handle for moving more easily going to and from your gate.
There are stretchy mesh pockets on each lower corner for drinks, earbuds, or anything else you want to be able to grab quickly. A full hand-width grab handle and a lower-center rear loop for your cycle light or a second handle for moving the bag rounds out the feature set.

What I like

  • Good organization throughout
  • Quality Materials and workmanship
  • Nothing I didn’t need

What needs to be improved

  • For a medium-weight backpack, this is just about perfection

Final thoughts

Comfortable straps and good distribution of pockets within the various compartments provide enough organization without making the available space seem too small to use. Double zippers on all of the main compartments allow ease of access to whatever you have stored there.

Price: $64.99
Where to buy: Solo NY site and Amazon
Source: The sample of this product was provided by Solo.

Filed in categories: Reviews

Tagged:

Solo New York Region backpack review originally appeared on The Gadgeteer on April 24, 2019 at 11:05 am.

Note: If you are subscribed to this feed through FeedBurner, please switch to our native feed URL http://the-gadgeteer.com/feed/ in order to ensure continuous delivery.

BunkTrunk PhD footlocker review

REVIEW – This fall my daughter will be heading off to Liberty University—go Flames!— for her first year of college.  I know her dorm room will have a bed and desk, but when BunkTrunk offered a chance to review their signature product, a desk for your bed, my daughter and I jumped at the opportunity to take a look.

What is it?

A BunkTrunk is a footlocker that allows college students to securely lock up their laptops and phones while recharging them.  It’s designed to be used either over the foot of the bed, which provides an extra place to study or watch movies, or underneath the bed.

What’s in the box?
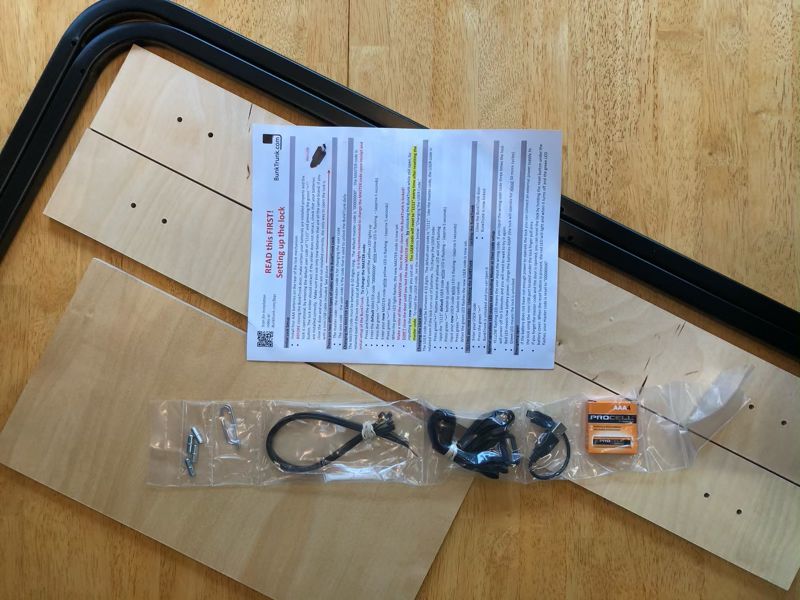
  • The footlocker
  • The legs (2 metal bars, 2 wooden slats, 2 pins, 4 zip ties, 2 velcro ties)
  • A shelf (with 4 shelf pins)
  • Mini USB for emergency lock power
  • 4 AAA batteries
  • 1 instruction manual in English

The default model is called The Bachelors, and it includes the bulleted items listed above.  The next model up is called The Masters, and it adds a power strip.  The high-end model is called The PhD, and it adds a power strip, a Bluetooth speaker, and an LED light.

Hardware specs

The footlocker by itself is 36” wide, 12” tall, and 11.5” deep.  When the legs are attached, it is 31” tall and weighs approximately 31 lbs.

Setup

BunkTrunk did a nice job with the packaging of their product.  Everything had plenty of padding and protection, helping to ensure that nothing was damaged during transit.  The first thing I really noticed was the manual; three and half full-sized pages of English instructions.  Now I know that as an engineer, I’m not supposed to be the kind of person who bothers with a manual, but given that “some assembly is required,” I was glad for the help.

The manual begins with instructions for setting the master code and the user code on the locking mechanism.  The master code is a longer code and is only used for setting the user code.  The user code is a short code and is used regularly for unlocking the footlocker.  The manual doesn’t state why there are two types of code, but if I had to guess, I’d say that if your user code is compromised—your roommate looks over your shoulder and sees you enter it in—it can’t be used to change to a new user code, thus permanently locking you out of your BunkTrunk.  Only the master code can do that, and it should be stored somewhere safe and secure and never used near prying eyes.
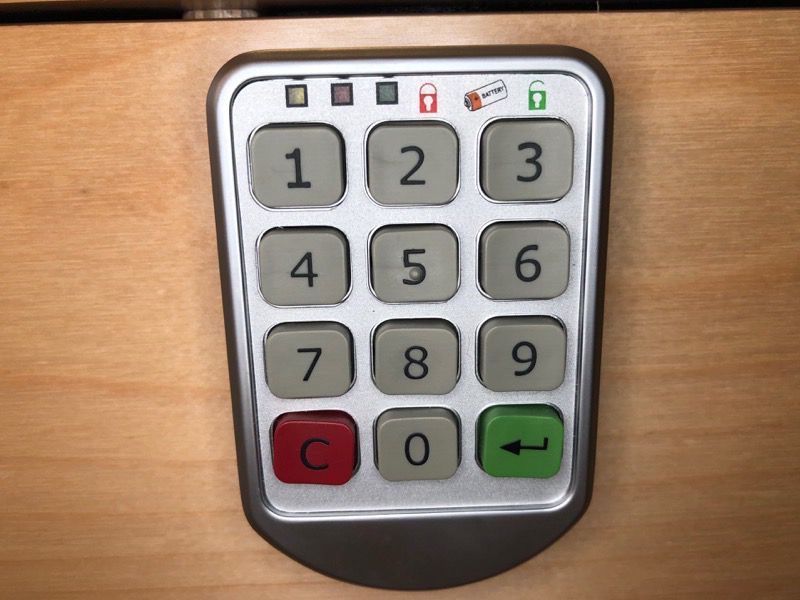
The manual then goes on to describe how to add the legs.  They are a pair of metal bars that are used to hold the footlocker above the mattress.  The top side slides into pre-cut holes in the bottom of the footlocker and are held in place by cotter pins.  The bottom side are held together with a pair of wooden slats that are attached to the bars with zip ties.  The legs also come with 2 Velcro ties, which can be used to secure the back of the legs (the vertical part of the bars) to the bed.  If my daughter were on the bottom bunk of a bunk bed, this would be perfect.  In her dorm, however, there are no bunk beds, so there’s nothing on which to use these ties.  I’m a bit concerned that the BunkTrunk will be wobbly.

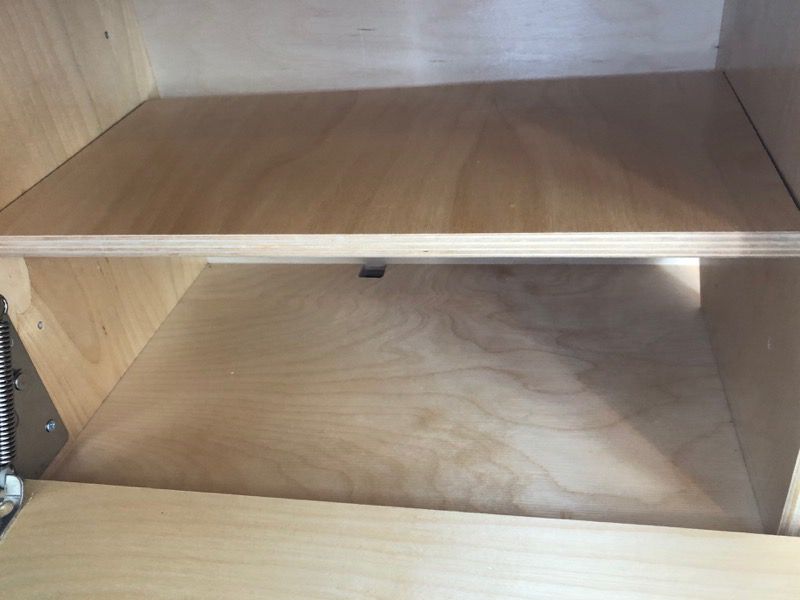
The manual doesn’t have any instructions on how to set up the shelf on the left side, but it’s not very difficult.  Just push the shelf pins into the sides—ours required a little extra persuasion with a mallet—and put the shelf on top of them.  You can pay extra to add another shelf on the right side.
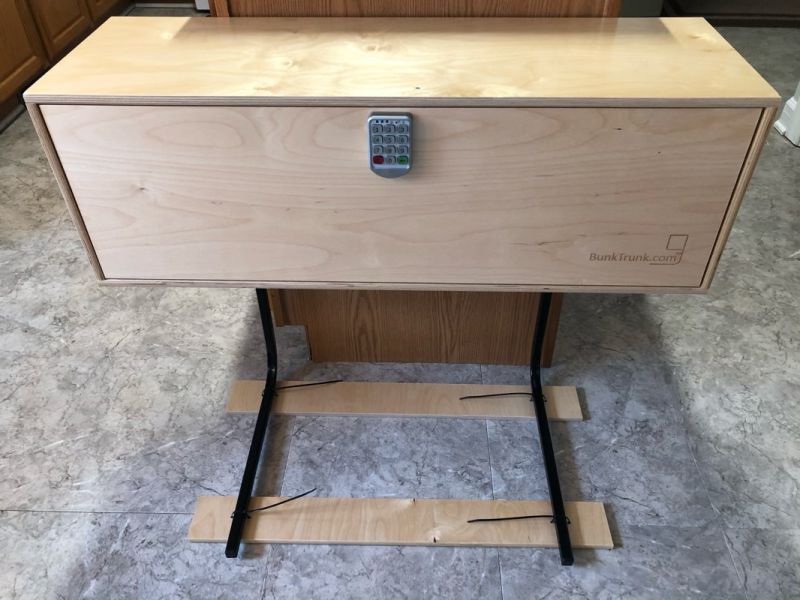
When it’s all assembled, the bunktrunk looks like a wooden box with legs.  Once in her dorm, my daughter will lift up the end of her mattress and slide the legs and slats under the mattress, which should hold it in place.
Design and features

The BunkTrunk will be a useful place for charging up all my daughter’s electronic devices.  While in college, she’ll have a phone, a tablet, and a laptop, so they can all come to one place at night for charging.  As BunkTrunk will be over the foot of her bed, it will also function as a night stand.  She’ll keep an alarm clock here, a cup of water, her glasses, and anything else that she wants to keep nearby while sleeping.

It will also be a wonderful help when she’s ready to kick back, relax, and watch a game of Dota on Twitch, a Brave Wilderness video on YouTube, or an episode of Knighfall on Netflix.  She’ll just need to prop up her tablet on a Humixx stand, crank up her fav Bluetooth speaker, lean back on a comfy pillow, and enjoy the show!
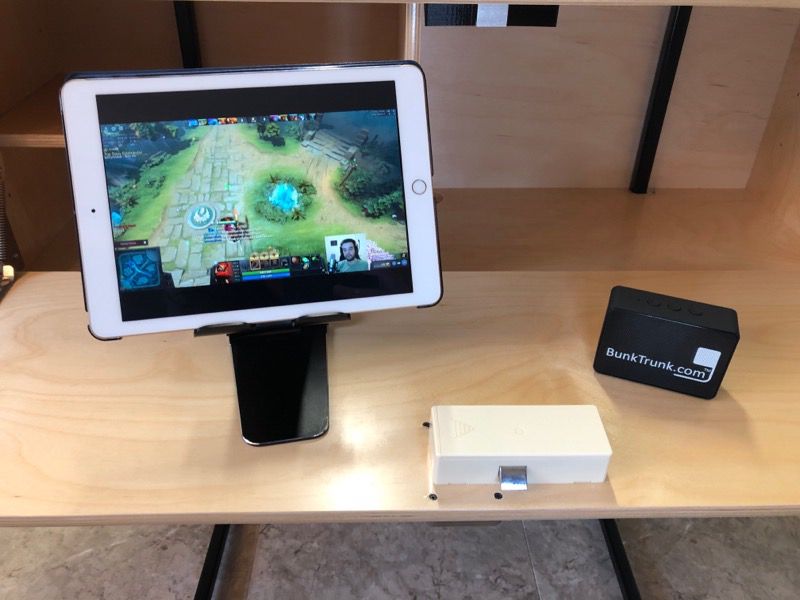
Although BunkTrunk bills their gadget a secure storage solution, they are also quick to note it’s not a replacement for a safe.  The footlocker itself is very sturdy, and it has a nice locking mechanism, but it won’t stop a determined thief.  A small crowbar and a bit of brute force are all that is necessary to break in, assuming that the noise didn’t attract too much attention.  Is the secure solution really secure?  Sure it is!  It’s secure in the same sense that the locks on the doors and windows of your house are secure.  They won’t prevent a determined, professional thief from breaking in, but they will stop the casual opportunist.  The BunkTrunk is just like that.  It’s perfect for stopping the unscrupulous girl on the hall who sticks her head into an empty room and looks for something easy to make off with.  When my daughter’s electronics are locked in the BunkTrunk, the thief will have to move on to easier prey.
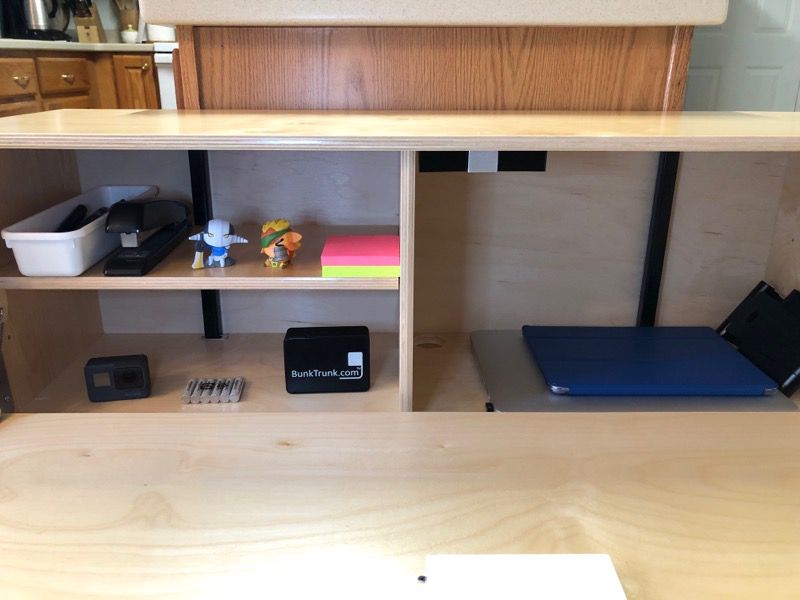
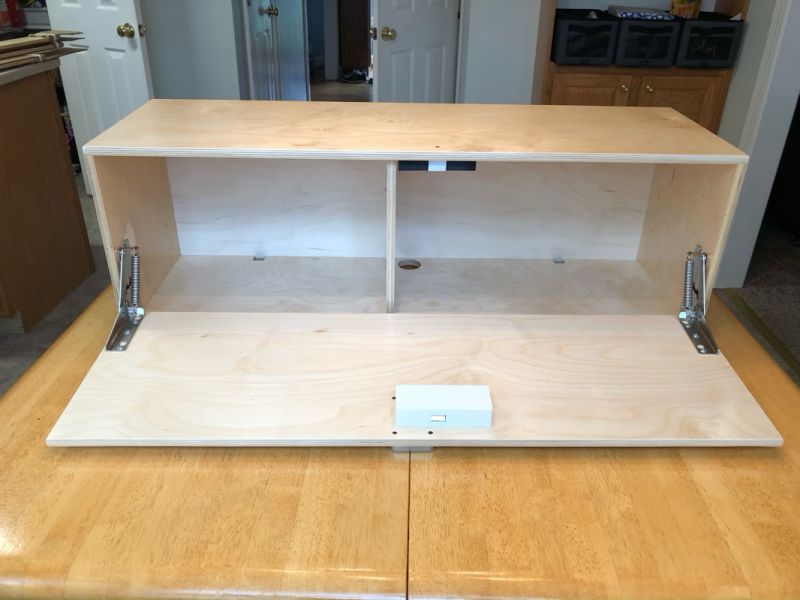
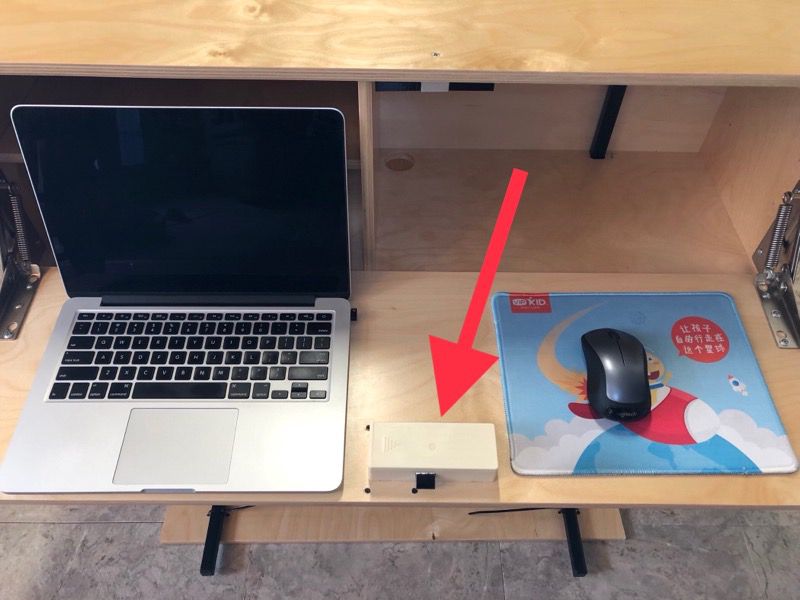
BunkTrunk is described as “a private place to study.”  It allows my daughter to sit on her bed and do some school work, maybe working on her Accounting class using her laptop or maybe doing some College Algebra problems in a notebook.  It supposed to be like having a second desk in the room, which sounds great, except that there are two problems.  The first problem is that the locking mechanism is bolted to the middle of the desk in the worst place possible!  I understand why it is where it is: it’s perfectly placed for locking.  But a 4.5 x 2 x 1-inch chunk of plastic that is right where my daughter is trying to work is a terrible idea.  BunkTrunk’s engineers need to head back to the drawing board and design a better locking mechanism, one that still securely locks but doesn’t get in the way of the desk.
The second problem is that the BunkTrunk is not sturdy enough to use as a desk.  The footlocker itself is super sturdy; it’s made from half-inch plywood whose ends are beautifully dovetailed together.  The hinges that hold the front door in place are heavy duty; it’s not going to sag on anyone.  The weak link is the metal legs.  Once they are attached to the rather heavy footlocker, they bend when any pressure is applied to the work area, and this makes the whole thing rather bouncy.  I don’t think there is any risk of it breaking or falling into my daughter’s lap, but a desk needs to be a solid, steady, sturdy place to work, and these legs don’t accomplish that.  It might be fine for touch-typing on a Chromebook or an iMac Air, but it’s not really suitable for leaning on or resting on while doing work.  The bottom line is that the BunkTrunk is not a good replacement for a solid desk.

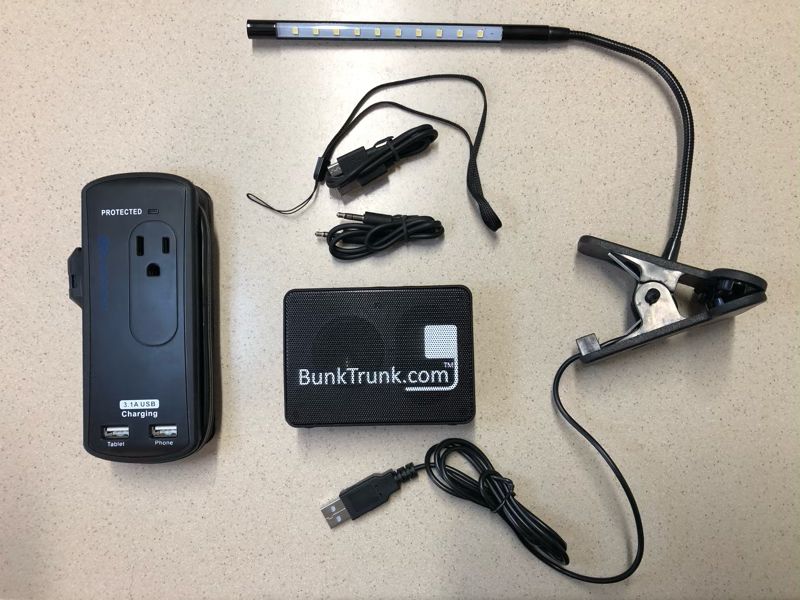
BunkTrunk was gracious enough to send us the PhD trunk for review, so we got 3 extra items.  The USB power strip is the perfect little device for powering my daughter’s various gadgets.  It’s only 5.5 inches long and comes with 3 power outlets and 2 USB charging ports.  The cord is very short, only 11 inches long, which is just long enough to poke through the hole in the bottom of the BunkTrunk.  You’ll want to purchase a 3-prong extension cord to get power to this strip.

The LED light is perfect for working or studying at night when my daughter is trying not to disturb her roommate.  It’s a clip-on, which allows maximum placement flexibility, and BunkTrunk has a lot of places for clipping.  It’s also kind of cool that you turn the light on and off simply by touching it; there’s no switch.

The wireless, Bluetooth speaker is the BoxAnne by Origaudio.  While it’s not very big, only 4 inches wide, it has much better sound than my daughter’s iPhone or iPad.  It may not be loud enough to fill my house with sound, but it will be plenty loud in a dorm room.  As we listened to music together one Saturday morning, we appreciated the punch it provided.  Pairing it to her iPad was a cinch; she didn’t even have to read the manual.
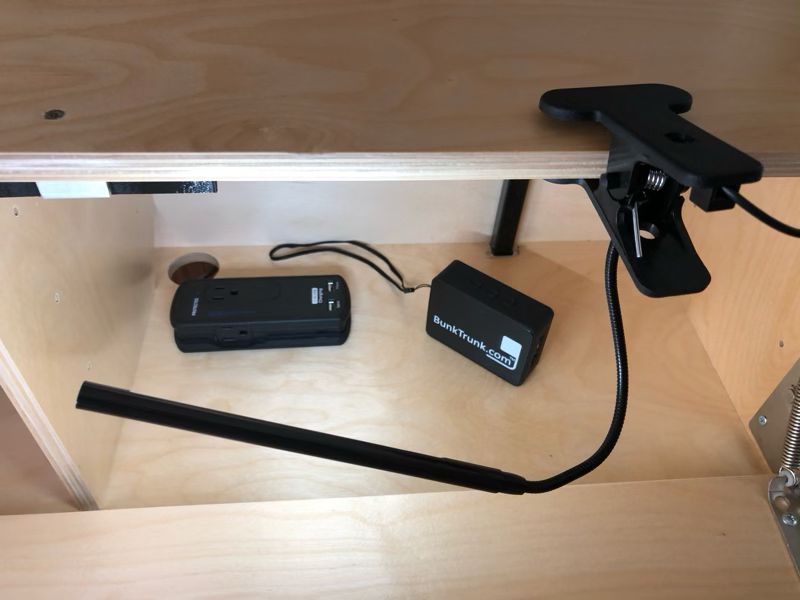
Are these 3 items worth the extra $80 that it costs to go from the Bachelors to the PhD?  Maybe.  If you already have some of these items around the house, then probably not, but if you don’t, then probably so.  They will certainly be handy for my daughter to have.  I know she’ll use all 3 them, so I’m glad BunkTrunk included them.

What I like

  • Beautiful wooden design
  • Solid construction
  • Secure place for storing and charging electronics
  • Efficient utilization of space over the foot of the bed

What needs to be improved

  • Redesign so that locking mechanism is somewhere else
  • Beef up the legs to make them more rigid

Final thoughts

Will my daughter be taking this BunkTrunk to college with her?  You bet she will!  She’s most excited about having the extra space over her bed.  I’m most excited that she’ll have someplace safe to store her gadgets.  Should you buy the TrunkTrunk for your college student?  If your primary goal is to provide a desk, then probably not, for the reasons I’ve stated above.  For all the other great reasons (secure storage, a nightstand, entertainment, charging gadgets), yes, you should definitely buy a BunkTrunk dorm room storage system!  It will be a welcome addition to almost every college dorm room.

Price:  $219 for The Bachelors, $249 for The Masters, and $279 for the PhD
Where to buyBunkTrunk’s Shop
Source: The sample for this review was provided by BunkTrunk.

Filed in categories: Reviews

Tagged:

BunkTrunk PhD footlocker review originally appeared on The Gadgeteer on April 24, 2019 at 8:00 am.

Note: If you are subscribed to this feed through FeedBurner, please switch to our native feed URL http://the-gadgeteer.com/feed/ in order to ensure continuous delivery.

MyCharge Unplugged10K wired/wireless charging pad review

REVIEW – We all count on our phones.  We count on them for different reasons, calls, texts, social media, calendars, cat videos, games, and so on. No matter what your particular reason is, the underlying common denominator is that all those activities drain your battery. The MyCharge Unplugged10K can help alleviate dead-battery anxiety by giving you 10,000mAh of portable wired or wireless charging goodness.

What is it?

The MyCharge Unplugged10K is a portable battery pack. It is Qi-certified, meaning it can wirelessly charge any Qi-certified device.  In addition, you get two USB-A ports to attach your micro-USB, USB-C, lightning or other charging cable. This will allow you to charge just about any mobile device.

What’s in the box?

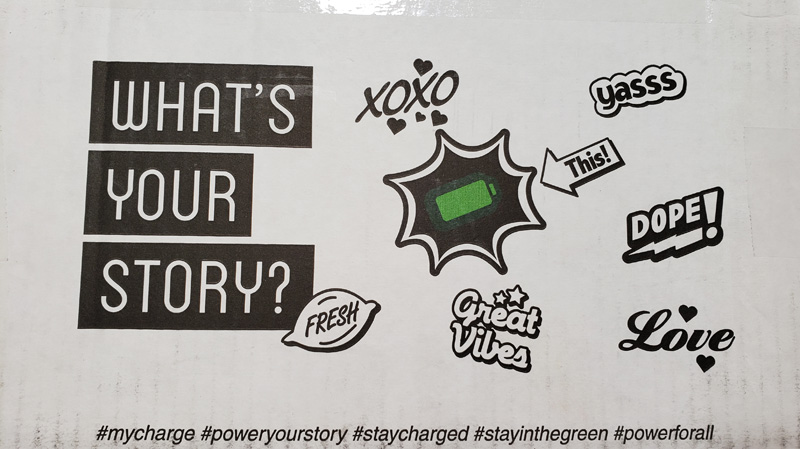
MyCharge identifies themselves as a hip, funky bunch, as evidenced by their fun shipping box.

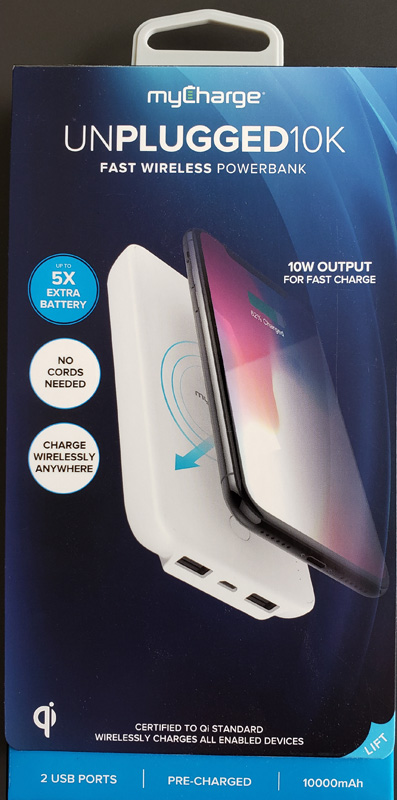
The actual box is a little more standard. The box comes with a lift cover.  Lifting it uncovered the unit in a plastic carrier.

Inside, we find:

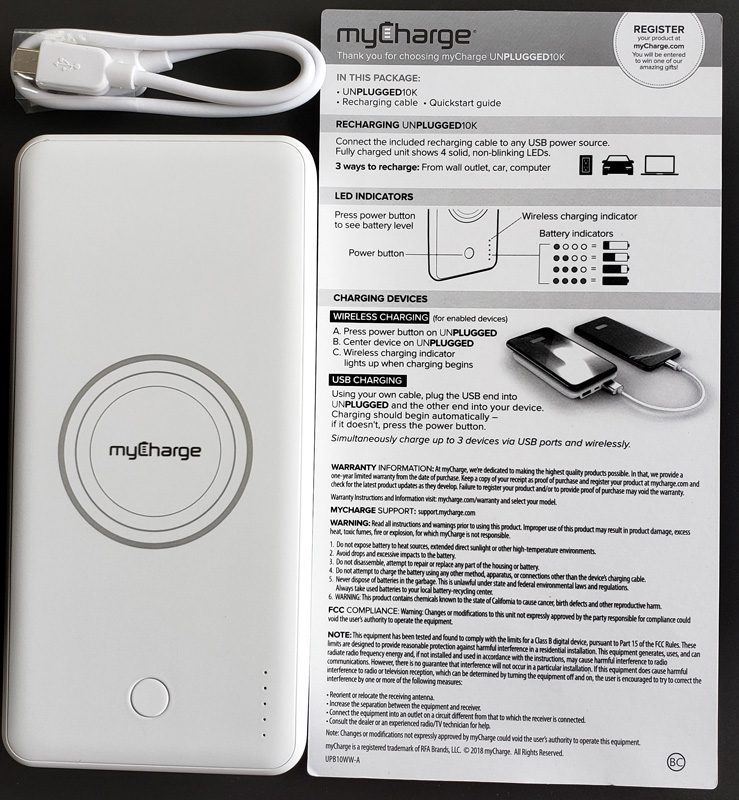
  • MyCharge Unplugged10K battery pack
  • USB-A to micro-USB charging cable
  • Quick start card

Hardware specs

  • Dimensions: 5-7/8″ l x 2-3/4″ w x  3/4″ h
  • Weight: 8.9 ounces
  • Capacity: 10,000 mAh
  • Input: 2.4A micro-USB
  • Output: Wireless 10W; 2 x USB-A 2.4A
  • Soft touch finish

Design and features

Setup

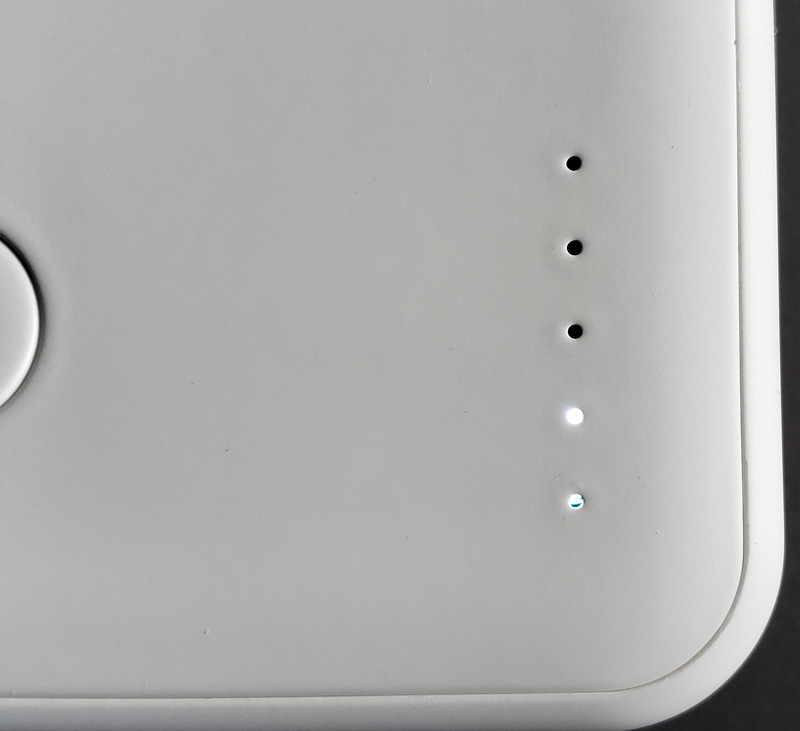
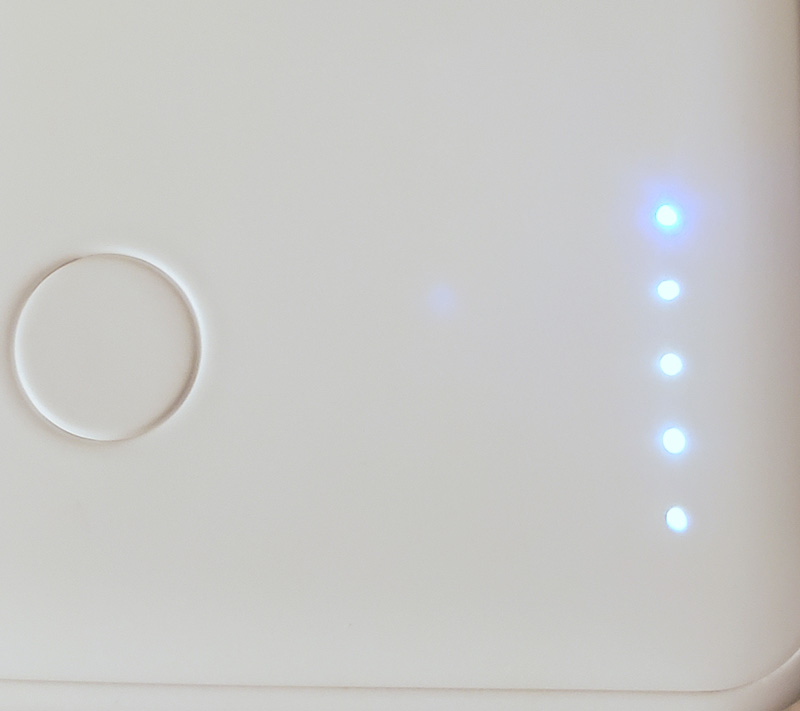
I expected no setup since the box says that it shipped pre-charged. When I hit the power button, the battery indicator only showed two dots out of four (the top one is a power light).

So, I plugged in the charging cable and let it charge.

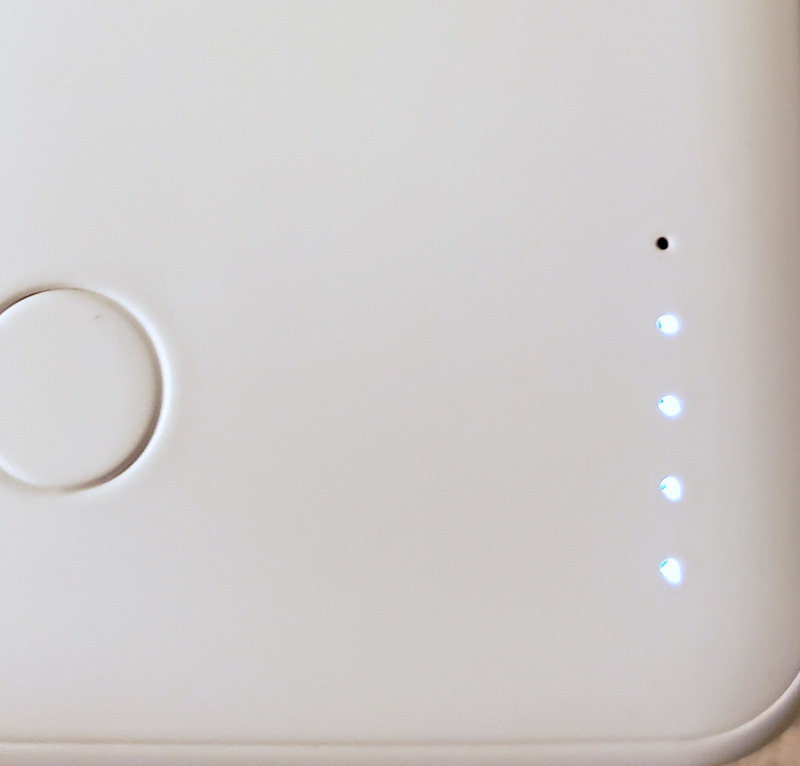
Each light flashes during charging and then goes solid as it hits 25/50/75/100% charge levels. At full charge, all four lights glow solid.

Hitting the power button turns the top light blue, indicating that the unit is on and ready to deliver power to your device(s).

Performance

Once we were charged and ready, it was time to try charging something.

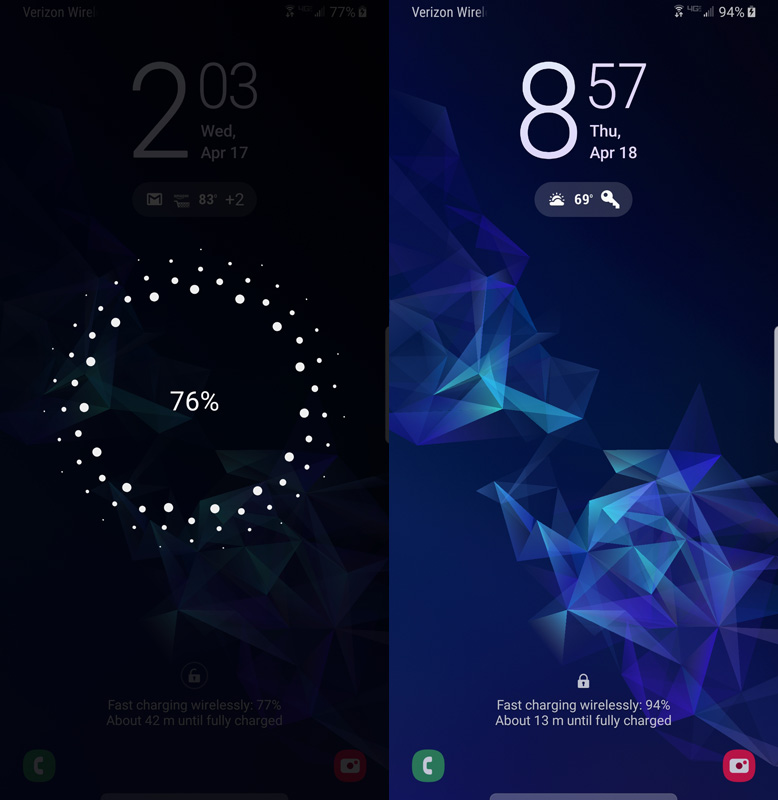
I dropped my Galaxy S9+ still in Samsung’s LED flip case onto the Qi pad.  Much to my delight, it immediately started charging.

As you can see, if your device can handle fast wireless charging, this pad will do the trick. Also, these photos were taken at different times.  It didn’t take a day and a half to charge from 78% to 94%. 🙂

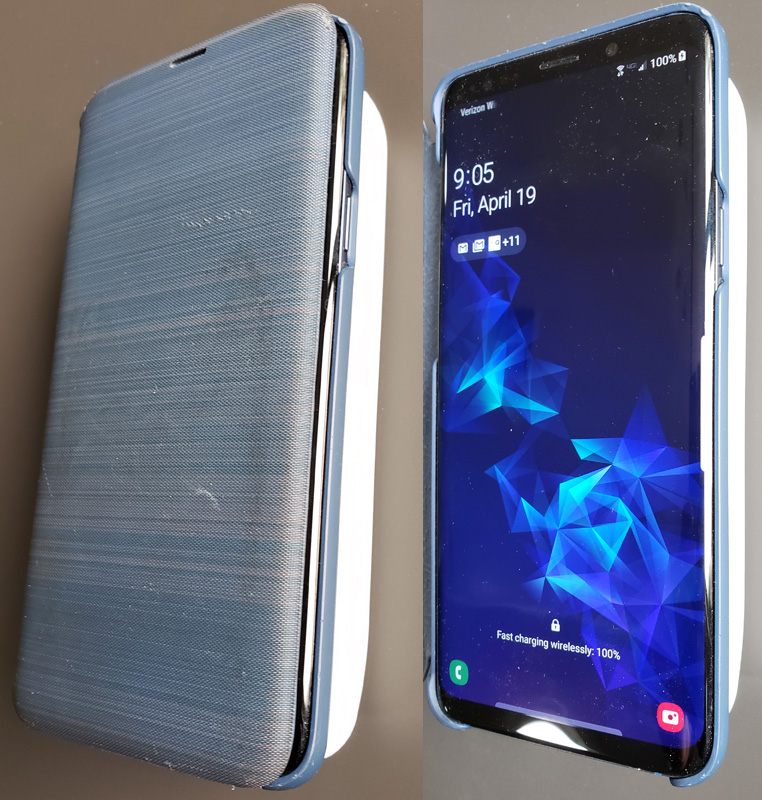
This is a side-by-side of my wife’s Galaxy S9+ in Samsung’s LED flip case.

The pad is just about a half-inch shorter than the S9+ and just about the same width and thickness. The S9+ with the LED case weighs in at 9.5 ounces.  Bottom line is that if you carry a new iPhone, Galaxy, Pixel or another large phone, this pad will essentially double your carry weight and size.  Not too bad considering that it will be able to recharge your phone at least twice without needing a wall plug.

About that…at 10,000 mAh, and my S9+ with a 3,500 mAh battery, simple math says I should be able to get nearly three charges from dead.  In the real world, however, there are losses during charging, so it will be more like two full charges and a little more wiggle room. How many charges you get will depend on how big your battery is.

A big attraction with this device is flexibility. Along with the Qi charging pad, you get two, count ’em, two USB ports.
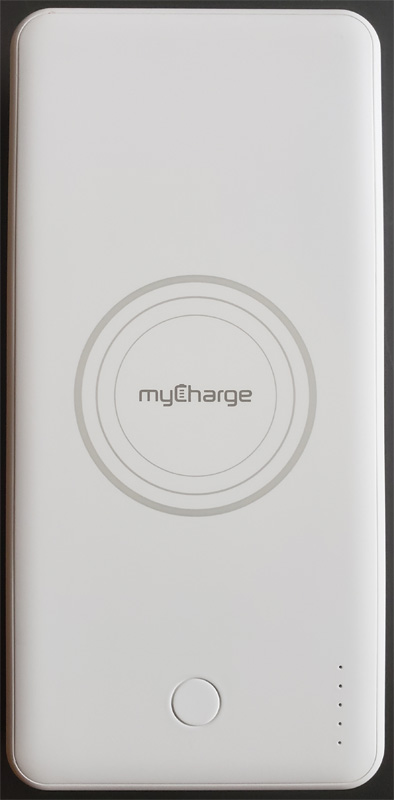
You can actually use all three methods at the same time – two wired USB connections plus a Qi charge. That’s a pretty cool thing. The wired charging is 2.4A but doesn’t trigger wired fast charging as a dedicated fast charger does. Still, at 2.4A, the charge will be pretty quick.

What I like

  • Big battery capacity
  • Fast Qi wireless charging
  • Can charge three devices simultaneously
  • Soft touch feel

What needs to be improved

  • The package said “pre-charged” but it was only 50% – OK, perhaps I’m just whining

Final thoughts

The MyCharge Unplugged10K is a great portable charging solution.  You can be the cell phone battery hero among your group of friends and provide most of a full charge for three phones all at the same time.

Price: $69.99
Where to buy: MyCharge and Amazon
Source: The sample of this product was provided by MyCharge.

Filed in categories: Reviews

Tagged: ,

MyCharge Unplugged10K wired/wireless charging pad review originally appeared on The Gadgeteer on April 23, 2019 at 9:00 am.

Note: If you are subscribed to this feed through FeedBurner, please switch to our native feed URL http://the-gadgeteer.com/feed/ in order to ensure continuous delivery.