Solo New York Lead Slim Brief review

REVIEW – Screens being what they are these days (thin slabs of glass of varying sizes), how we carry them around is changing. I’ve moved from a huge backpack to a smaller one, and then to a sling, and I’m still trying to find the sweet spot. Solo offered the team their new Lead Slim Brief bag, and I’ve been using it for a few weeks now, so I’m ready to report.

What is it?

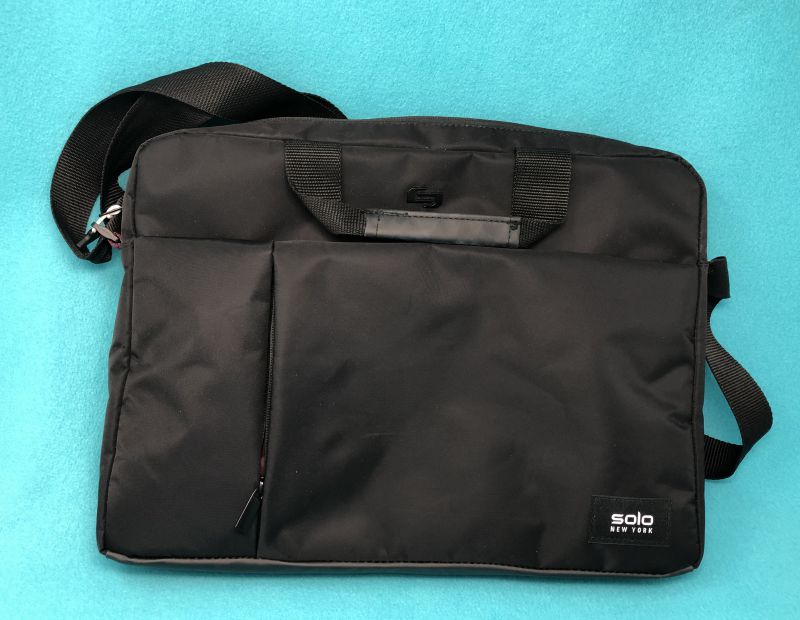
A standard sized briefcase with a permanently attached strap doesn’t sound that unique. Even with Solo’s signature t-bar zipper pulls, it’s still understated. But there are a few surprises inside.

Design and features

While the basics of a briefcase haven’t changed much in the past dozen decades, the materials and interior layouts have gotten smarter.

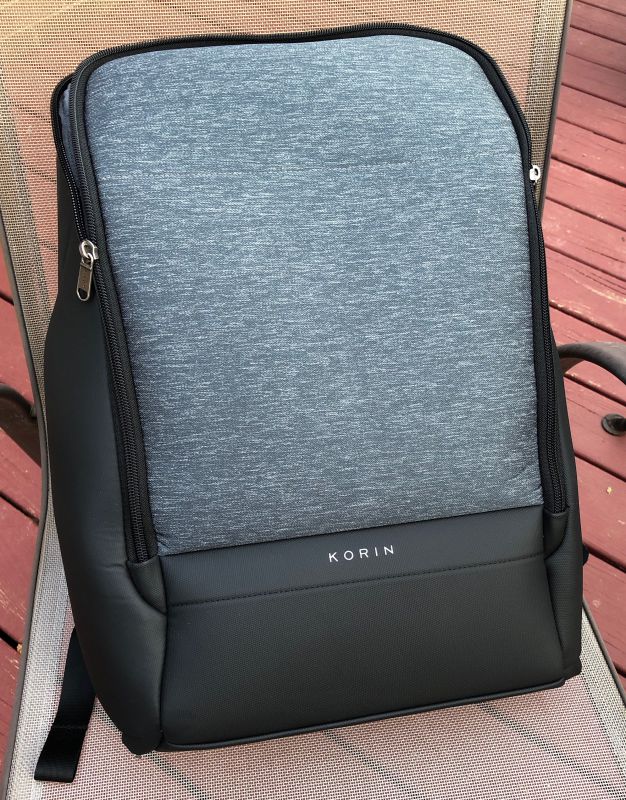
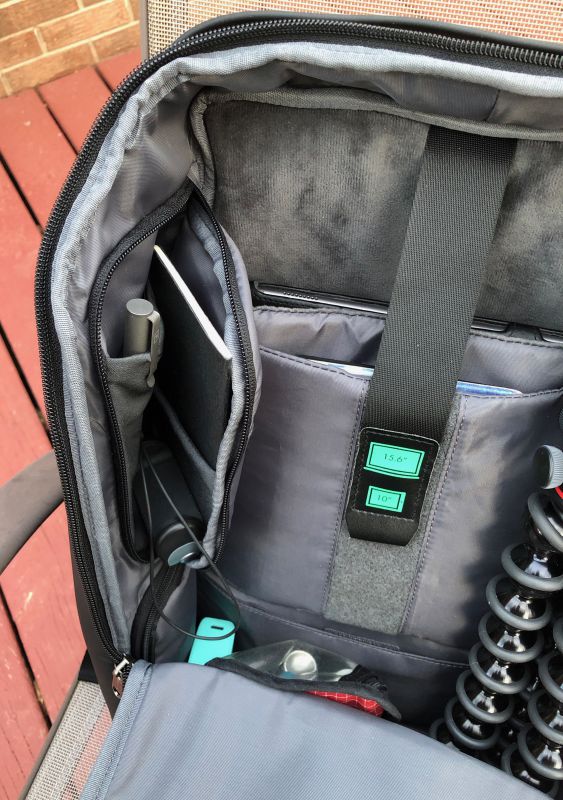
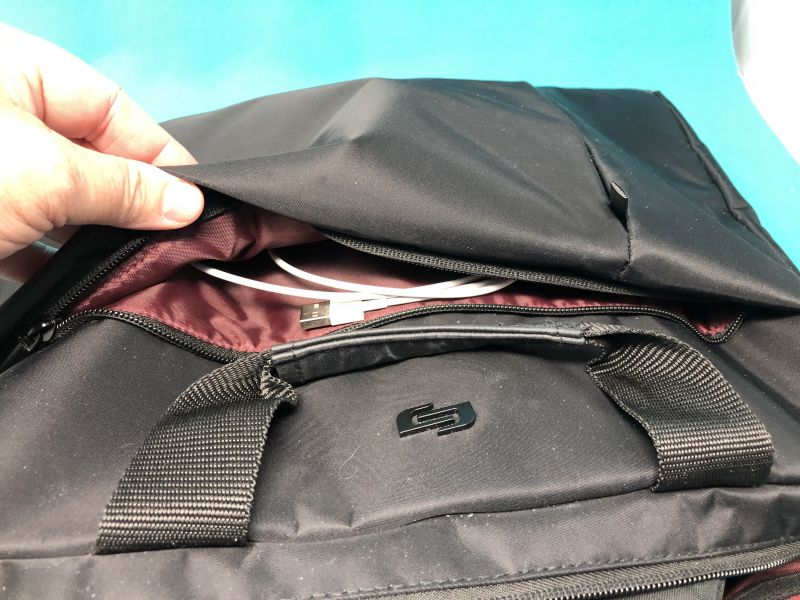
On the front, Solo added a full-length pocket tucked into a pleat of material that also includes another overlapping pocket. This outer area is secured with a vertical zipper. Inside the full-length compartment, there are a few tight pen loops and card slots. You’re not going to be able to store thick materials in here, but travel documents and pens for filling out the customs declaration will fit with ease. The rest of the pocket has enough space for chargers and cables.


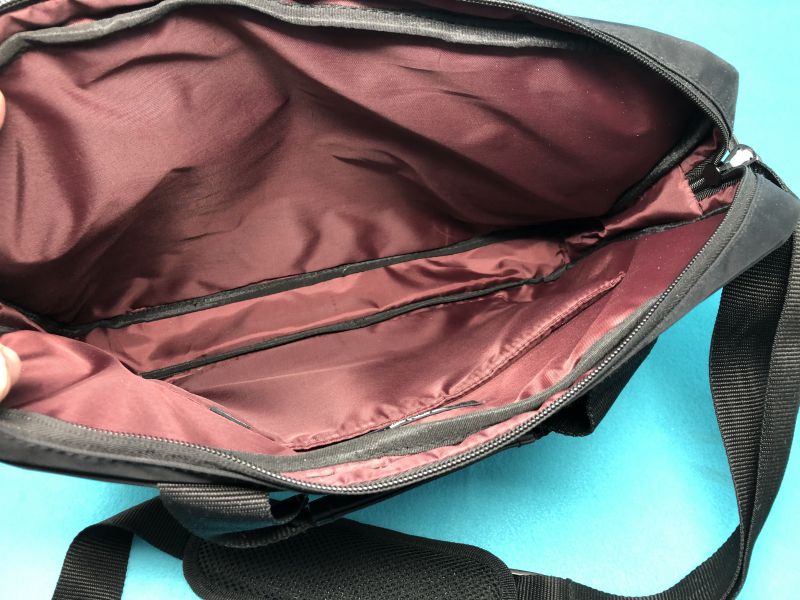
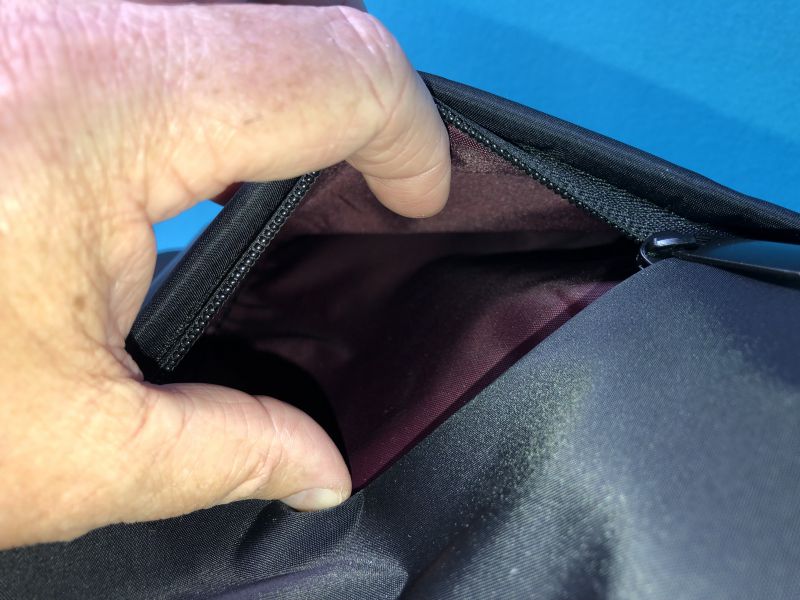
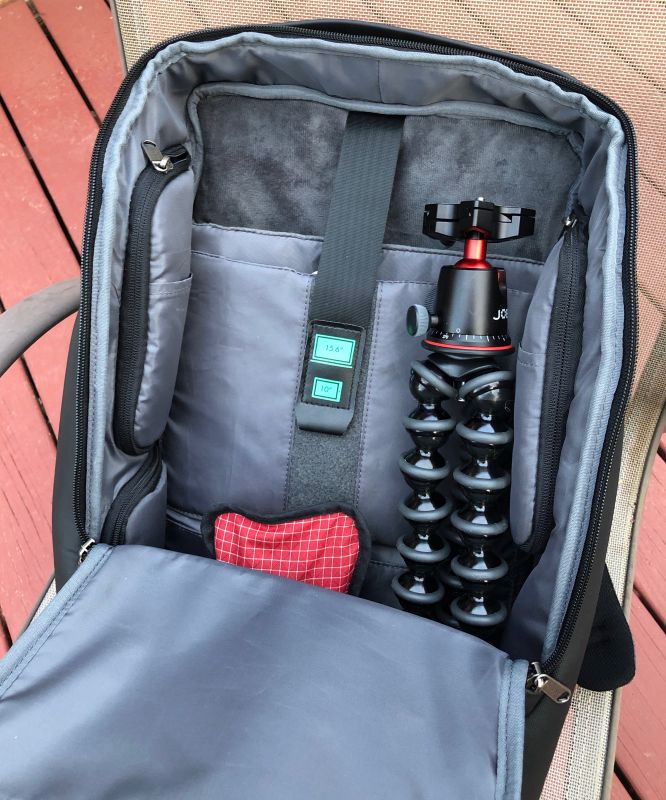
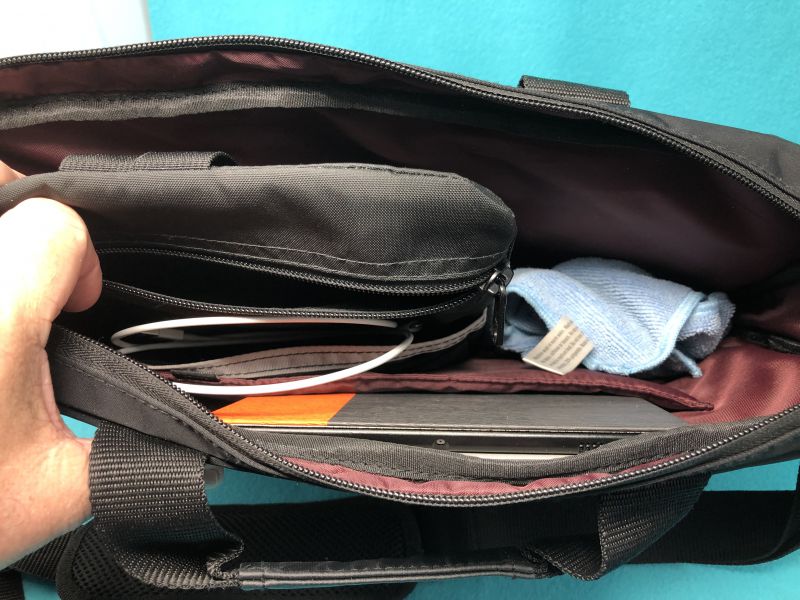
The main interior is one large compartment, with an 8” x 10” patch of padded material sewn onto the back wall, suspended just a little from the bottom of the case. At 16” x 13” x 2” outer dimensions, you’re easily able to fit all but the most daunting gamer laptop into the main pocket. Depending on what else you need to carry, this may be enough. The tablet pocket is not large enough for me to fit my iPad Pro 10.5” device laterally. It’ll just fit vertically, and still not block the zipper, but it’s close. Naked, the device fits with room to spare, but not enough for a two-sided folio case.


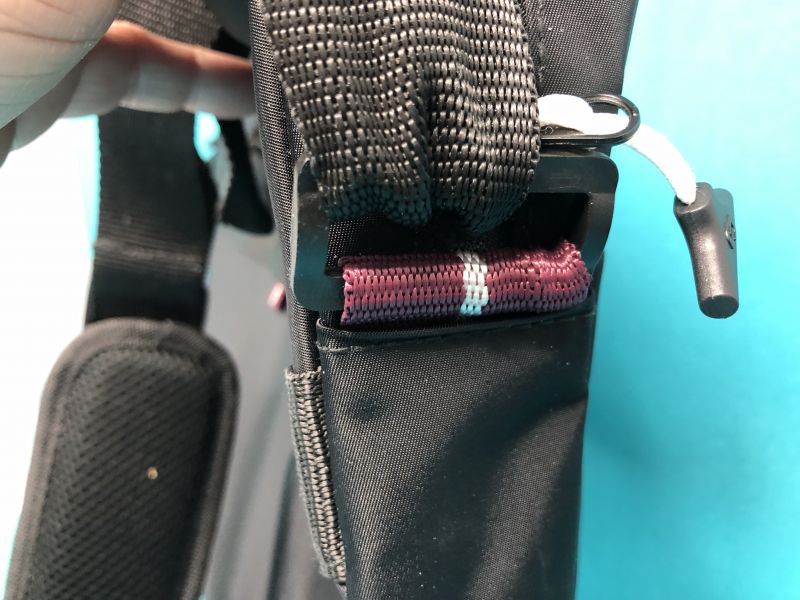
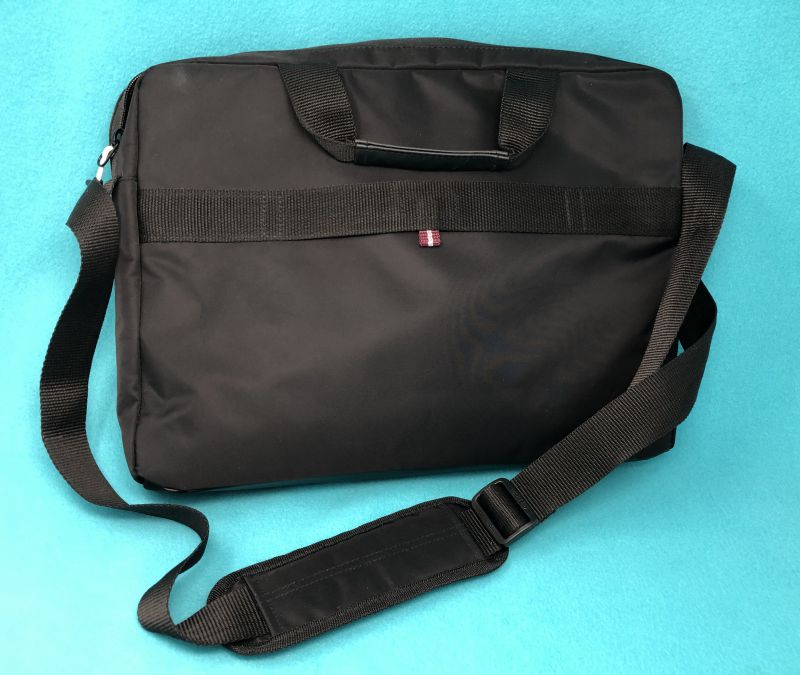
Across the back is a 1.75” strap of nylon webbing, sewn in to allow your roll-aboard’s handle to fit through. There’s a patch of Velcro to hold it down as well.


The outer materials of this brief are a black slick, tight nylon fabric. It is abrasion resistant, and probably somewhat water resistant. The very bottom piece is a rubberized fabric. Seams are all hidden, but there are a few hits of color to hint at the interior.


Inside, the seams are all covered and double-stitched. The lining material is a similar feel, but lighter weight of the outer material, but in a deep maroon, rather than basic black.
While the zippers are all covered, the material doesn’t feel water-resistant. I’m sure a sprinkle won’t soak you, but I’d avoid heavy downpours.

What I like

  • Professional look and feel in all materials and design
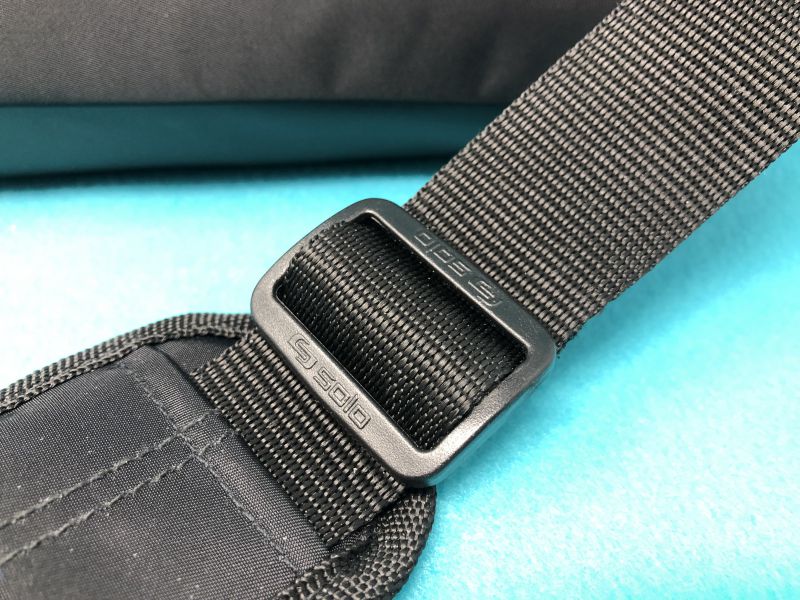
  • Long adjustable strap with sliding shoulder pad
  • Material is easy to keep clean
  • 5 year limited warranty

What needs to be improved

  • If you’re going to put in pen slots and card slots, put in enough fabric to actually get something into them.
  • Tablet pocket is also a bit skimpy. No one carries a bare tablet around.

Final thoughts

When I first saw the inside of this bag, I was a bit skeptical. But after using it, I’ve grown to like the sleek minimalism of having just this bit of kit. I can carry my meds, iPad, keyboard, and a few bulkier items with ease, and this bag makes me look like an expert.

Price: $49.99
Where to buy: Solo New York webstore
Source: The sample of this product was provided by Solo New York.

Filed in categories: Reviews

Tagged:

Solo New York Lead Slim Brief review originally appeared on The Gadgeteer on May 4, 2019 at 10:00 am.

Note: If you are subscribed to this feed through FeedBurner, please switch to our native feed URL http://the-gadgeteer.com/feed/ in order to ensure continuous delivery.

Nitecore MH12GTS flashlight review


REVIEW – I have no clue how many flashlights I currently own and how many I have purchased over the years. What I do know is that many of them have advertised as being tough enough to handle daily abuse and to have adequate light settings and options for every need. Any flashlight that hangs out in the gear bag of a photographer/videographer will go through its share of abuse. I need a flashlight that can “take a licking and keep on ticking”. The Nitecore MH12GTS flashlight promises to do just that. Let’s see what first impression it leaves me with.

What is it?

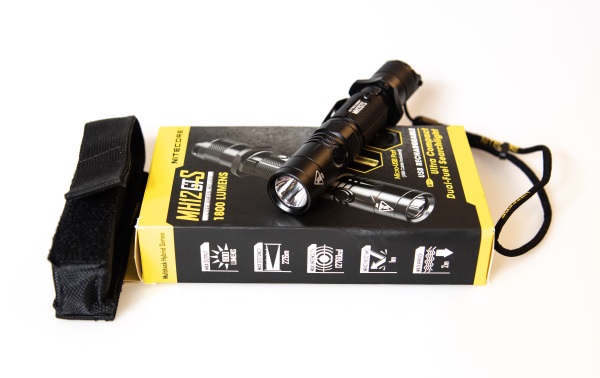
The Nitecore MH12GTS flashlight is an 1800 lumen long throw beam rechargeable flashlight. Its features include 5 brightness levels and 3 special modes, and it is waterproof and submersible to be compatible with both indoor and outdoor applications.

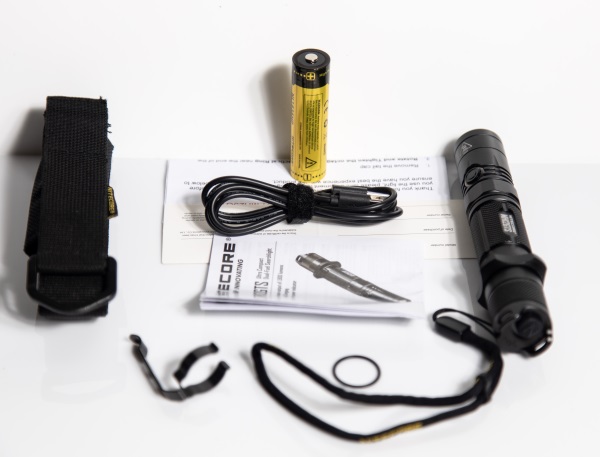
What’s in the box


1 x Nitecore MH12GTS Flashlight
1 x NL1835HP 3500mAh Rechargeable Li-ion Battery
1 x Micro USB Charging Cable
1 x Belt Holster
1 x Pocket Clip
1 x Tactical Ring
1 x Lanyard
1 x Spare O-ring
1 x Instruction Manual
1 x Warranty Card

Design and features

Features:

  • Maximum output of 1800 lumens with 247 yards of throw
  • 5 brightness levels and 3 special modes (strobe, SOS, Beacon)
  • Direct access to Turbo and Ultralow mode
  • Tactical tail switch and metal side switch allow for easy one-hand operation
  • Built-in charging via micro-USB port
  • NL 1835HP 3500mAh 18650 rechargeable battery included

Specifications:
LED: CREE XHP35 HD
Maximum Brightness: 1800 lumens
Peak Beam Distance: 247 yards
Peak Beam Intensity: 12760 cd
IP Rating: IPX8 – 2m waterproof and submersible
Impact Resistance: 1m
Weight: 3.51oz

Brightness Outputs

MODE OUTPUT RUNTIME
Turbo 1800 lumens 30 min
High 900 lumens 2 hr 15 min
Mid 240 lumens 5 hr 45 min
Low 70 lumens 19 hr
Ultralow 1 lumen 250 hr

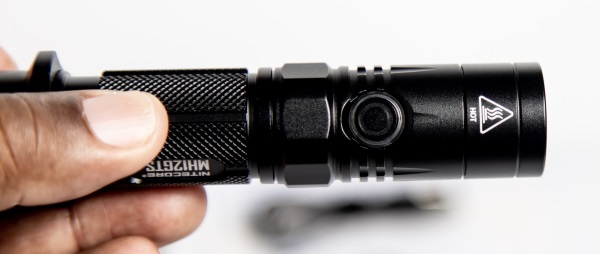
This Nitecore flashlight is all metal and ruggedly built. On the side, there is a selector switch that is used to select the light intensity and modes.

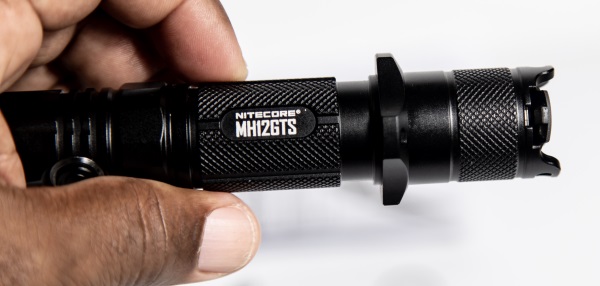
Also around the side of the flashlight, there is the brand and model number. In the photo below above the brand, you can see the installed tactical ring.

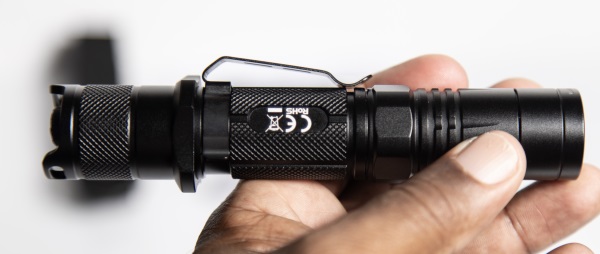
The photo below shows the pocket clip attached to the flashlight.

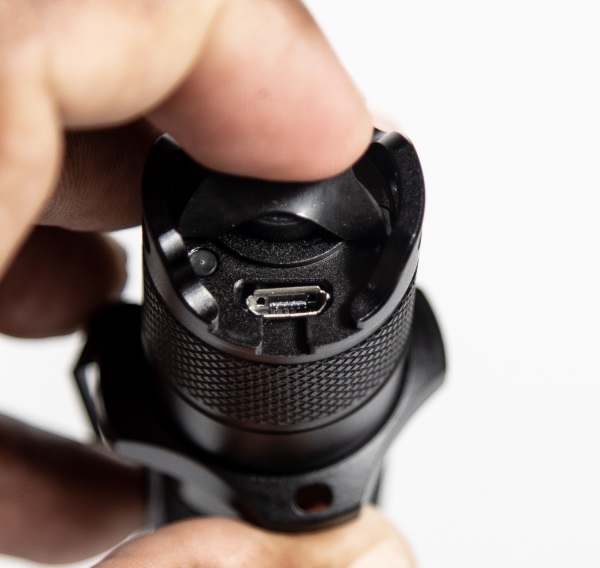
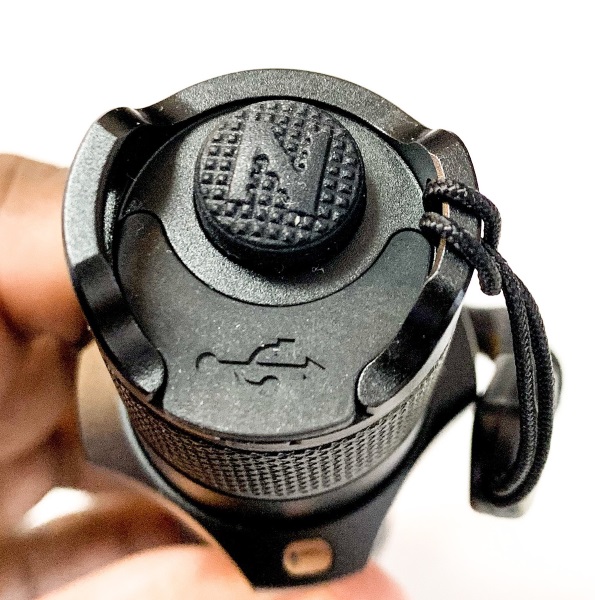
On the bottom of the flashlight, there is the micro USB charging port with a waterproof cover. The is also the on/off switch next to the charging port.


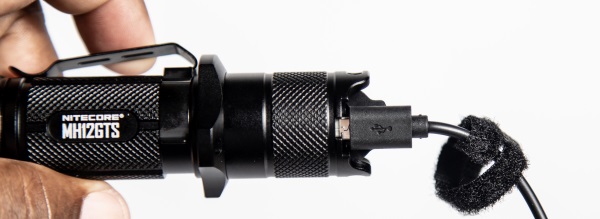
For recharging, you simply plug the micro USB cable into the charging port and the other end of the cable to a compatible power supply.

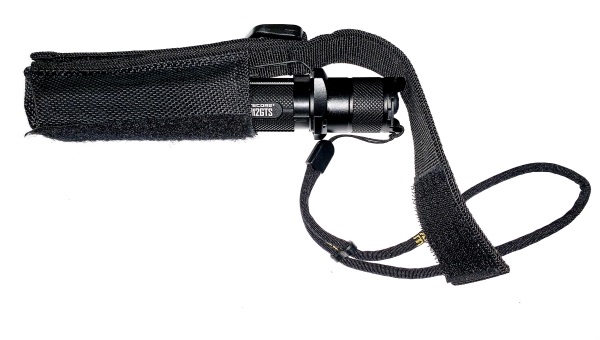
The flashlight fits neatly and securely into the belt holster so that you can include it with your EDC devices.

Performance

Right out of the box, this flashlight feels well built and of good quality. Charging it is very easy by simply removing the waterproof charging port cover and plugging the micro USB charging cable in and the other end of the cable to a power source. There is a blue LED on the back that blinks until the flashlight it charged and then it stays solid blue once fully charged. It is that simple and then it is ready for use. The light intensity selection is great and at the highest intensity, the light throw is incredible. Having the option to choose from multiple levels of intensity is great. For example, double pressing the selection button puts it in strobe mode and results in a blinding strobe light. Here is a quick demo fo the light intensity levels and the strobe:

What I like

  • The built quality
  • The light selection options
  • The rechargeable option
  • The included belt holder/case

What can be improved

  • So far it does exactly what it is supposed to do

Final thoughts

The Nitecore MH12GTS flashlight is well built, and so far I am very pleased with it. It provides more than enough light for various applications and seems like it will withstand the abuse that is an inherent part of being a resident of my gear bag. The belt pouch is strong and will serve that purpose well, albeit not the way I will carry the flashlight. I give Nitecore two thumbs up for this one!!

Price: $99.95
Where to buy: Nitecore
Sample: The sample for his review was provided by Nitecore

Filed in categories: Reviews

Tagged:

Nitecore MH12GTS flashlight review originally appeared on The Gadgeteer on May 4, 2019 at 8:51 am.

Note: If you are subscribed to this feed through FeedBurner, please switch to our native feed URL http://the-gadgeteer.com/feed/ in order to ensure continuous delivery.

Lucyd LOUD Bluetooth speaker glasses review

REVIEW – What if you could listen to your music, but still hear everything around you? Would you listen more, or listen in situations where you couldn’t before? It’s an intriguing proposition, and one I was eager to find out how I’d use such a solution. Lucyd seems to offer just that with their LOUD glasses.

What is it?

Lucyd LOUD is a Bluetooth audio device hiding within a sturdy pair of sport eyeglass frames. The lenses can be customized with a multitude of choices including coatings and prescriptions which look to be Lucyd’s primary business.

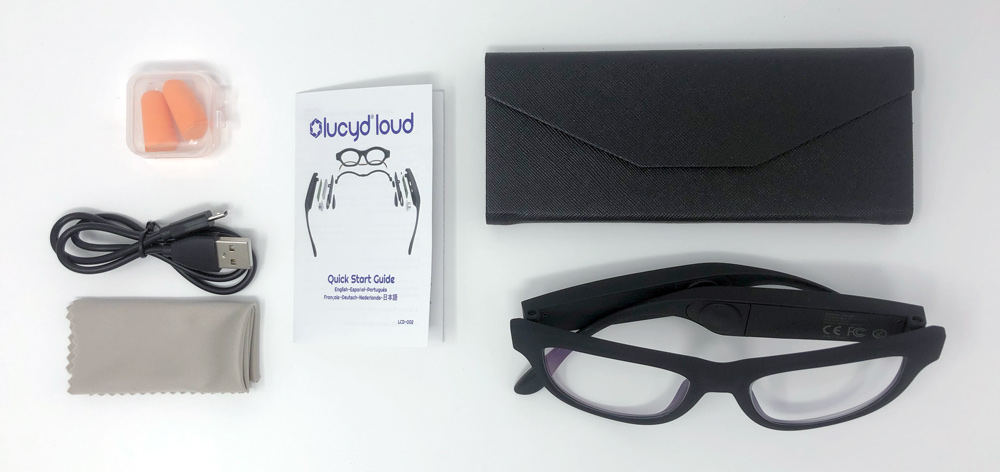
What’s in the box?
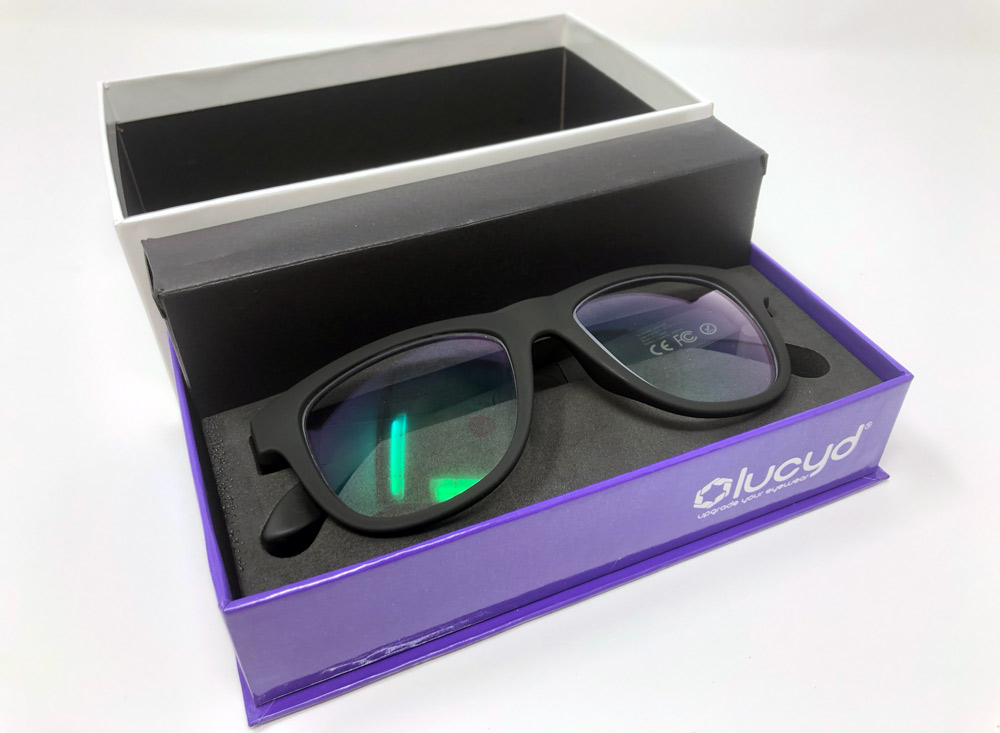
  • 1 pair Lucyd LOUD glasses
  • 1 USB-A to USB Micro charging cable
  • 1 case that folds into a triangle for storage
  • Cleaning cloth
  • Ear plugs
  • Instruction manual

Hardware specs

A specification section is nowhere to be found in/on the box or on Lucyd’s website, but there is some really hard to read print on the inside arm of the glasses themselves with the following info…
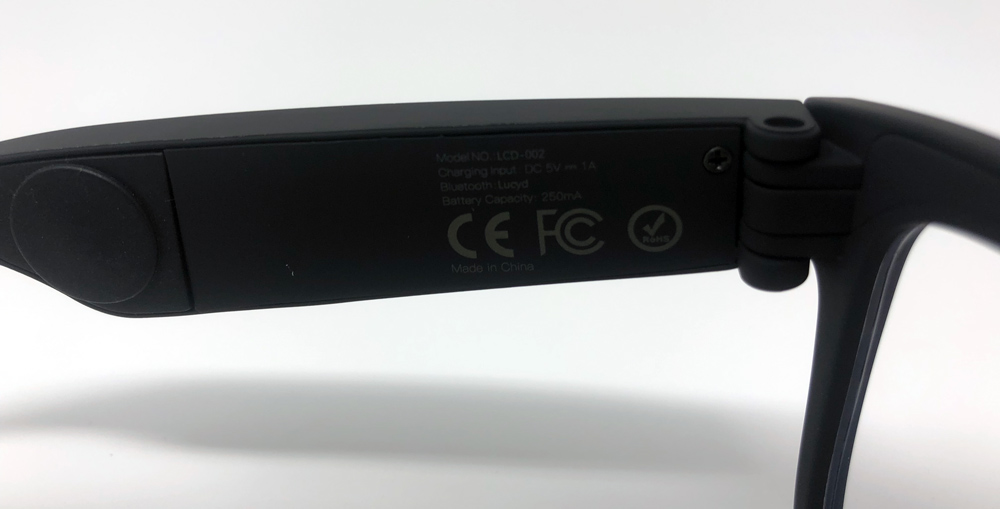
  • Model No: LCD-002
  • Charging Input: DC 5V ~ 1A
  • Bluetooth: Lucyd
  • Battery Capacity: 250mA
  • Certifications: CE, FCC and RoHS

These specs were hiding in a couple different places on the website…

  • Lens Width: 52
  • Bridge: 17
  • Temple: 143
  • Weight: 46g
  • BT V4.1

Design and features

The LOUDs look like a cross between sunglass frames and protective eyewear in that they’re generally good looking with kinda chunky arms hiding the technology.
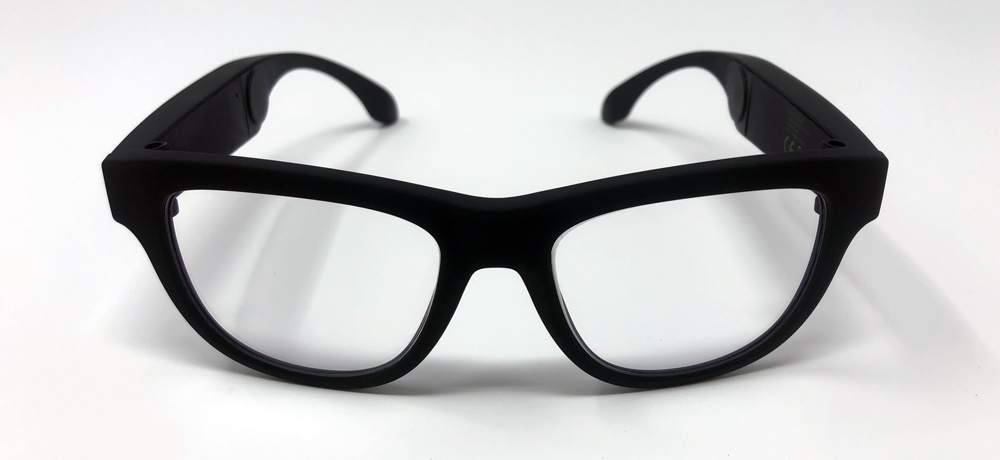
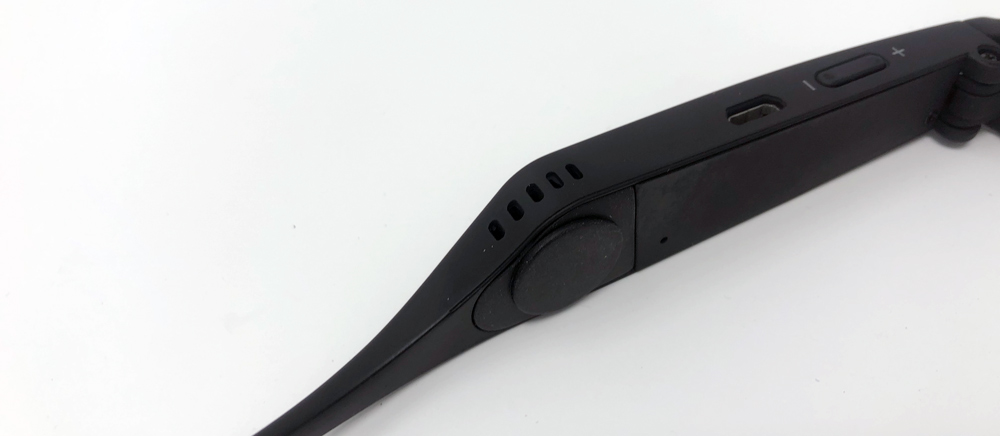
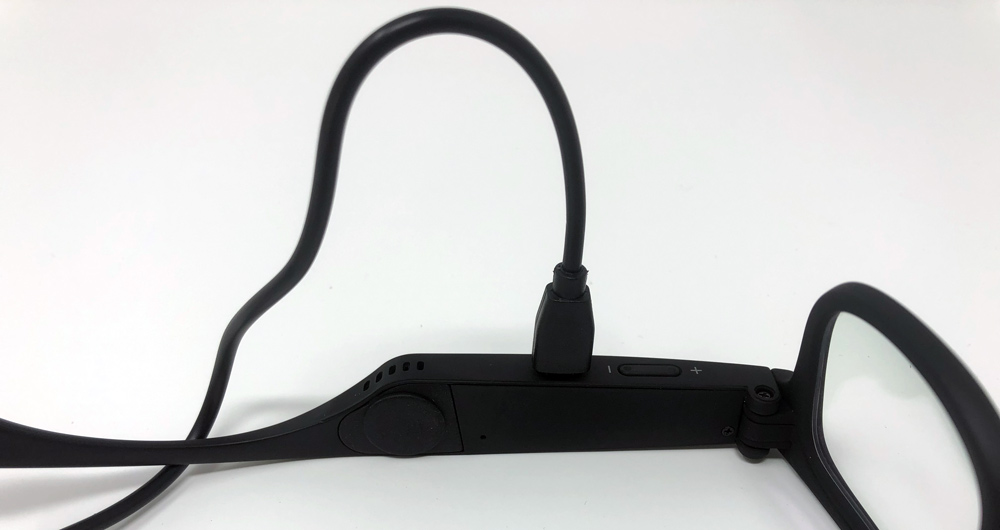
There are two input areas. On the underside of the right arm is the charging port and a +/- rocker switch. This is used for on/off, pairing and volume control.
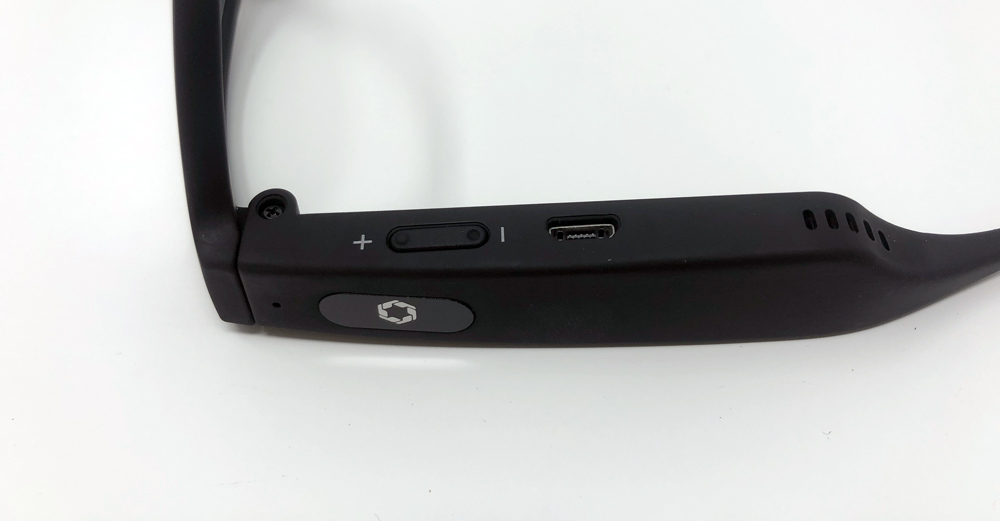
On the outside of the left arm is a touch panel that allows for track controls, using a voice assistant and play/pause or answer/hangup. It looks just like the above without the Lucyd logo and is barren enough that I actually forgot to take that photo because there’s no reason to look at it twice. No defined area, just the same soft touch coating over the full arm.

The bone conduction drivers are towards the back of the temples just before the ear stems. They’re made of a silicone type material which allow for the drivers to move. These should rest against your head for proper sound transfer. Adjacent to those on each arm are 5 small openings for aiming a large amount of the sound at your ears and for facilitating some air displacement of the drivers.
As for the lenses, there are a lot of options at time of purchase. Here’s a list of those for each of the three Rx options.
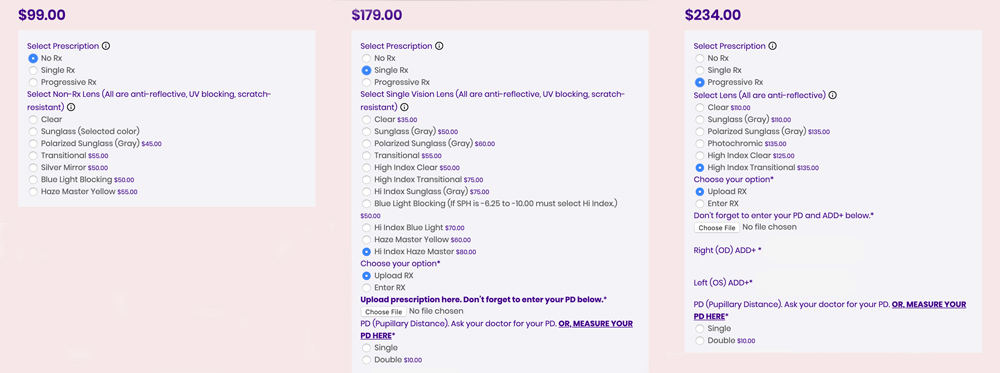
I opted for the standard clear lenses as SF happened to be pretty wet and overcast at the time and I planned to use them commuting on my bike. They arrived crazy quick (just two days) and custom Rx versions look to take a week to 10 days which is to be expected.

Setup

Here are the instructions Lucyd provides:

  1. Fully charge Lucyd LOUD with included cable. The LED will turn off when charging is complete.
  2. Turn on Bluetooth on device you wish to connect to.
  3. Hold the “+” button on the LOUD for three seconds to turn it on. Then hold the “-” button for three seconds to enable pairing. Then select “Lucyd” in the available Bluetooth devices on phone or computer. (It will automatically pair when in range from then on).
  4. Your LOUD is now connected! You can select music and make calls on your connected device or by giving voice commands to the virtual assistant.
  5. Tap the touchpad lightly to play or pause music. Swipe backward to play the next track and swipe forward to go back a track. Similarly, swipe backward to answer a call and forward to decline it or hang up.
  6. Long-tap the touchpad to open the virtual assistant, wait for a tone then speak. Long-tap again to close the virtual assistant.
  7. Be sure to turn off your LOUD when not in use. Hold the “+” button for three seconds to power down. It will automatically power down in 15 minutes when the Bluetooth link is broken.
  8. To loosen fit, very gently bend the thin ends of the arms.
  9. Email info@Lucyd.co if you need support!

Performance

First and foremost, if you’re interested in a product like LOUD, it’s because you want to listen to music or take phone calls without actively blocking your hearing with earbuds or the like. As a result, the sunglass functionality gets demoted to a functional requirement checklist… Do they look good enough for me to wear around? Do they fit well enough to stay on securely? Answering these questions, unfortunately, requires trying them on which is hard to do web-order-style.
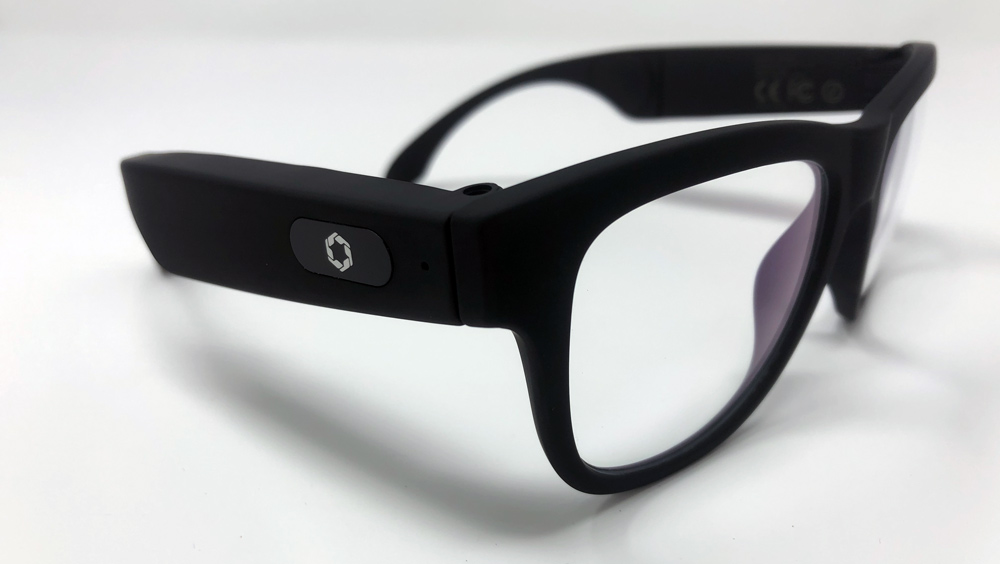
On receipt, the answer for me on both of those was yes. I’m partial to bold black frame glasses anyway and they hugged my head very well. Additionally, the clear lenses were crisp with no distortion peripherally. The ends of the arms are flexible and will hold a new shape if you need to adjust for a tighter fit, but don’t expect them to adjust for a looser fit as the thick arms won’t budge.

That leaves the primary reason for looking at LOUDs; listening. Lucyd opted for bone conduction drivers which also seem to provide a good amount of sound without the “conduction” effect. The experience is unique and completely dependent on the volume, your selection of music and your environment. It can range from a somewhat immersive listening session in a quiet environment to percussive head massage on your nose bridge and sides of your head.

It’s very cool to be able to listen to music without your hearing being obstructed. I commute by bike daily and as much as I want to use earbuds, it’s not something one should do. LOUD’s let me listen to music while still being able to hear everything around me. Actually, let me rephrase that. LOUD’s let me hear everything around me and occasionally my music gets through in an enjoyable way. Considering my safety, that’s a better option than no music.

Powering them up is a three second hold on the “+” button which results in a rising 4-tone sound to let you know they’re on. A tap on the left touchpad will start your music or answer your call. Another will pause music or end your call. A swipe forward or backward starts your track over or skips to the next one. Turning them off is a descending 4-tone sound after a three second hold on the “+” again.

Charging them is the standard Micro-USB affair, with a solid red light while charging, and a green light when finished that I’m assuming times out at some point per their instructions. I did not have an issue with running out of charge over successive days of wearing without charging.
How does it sound? Overall it’s underwhelming. I wouldn’t try listening to something I’ve never heard before as I’m unlikely to really listen to what the artist wanted me to hear. It’s better than ambient music as it does sound close, even at low volume levels, but it’s just missing presence. On my bike, I pretty much need to have it at full volume and listen to things I’m super familiar with or want to sing along to.

While the glasses fit my head well, the conduction driver does not make contact. Unfortunately, there’s no adjustment to the depth of the driver itself so what I hear is all the sound I’m going to get. Pressing on the right arm until it makes contact does help and starts to provide a more immersive sound, but I lose some left side sound as that side gets further away.

Pressing on the left side activates Siri with the touchpad, so that’s a non-starter. Speaking of the touchpad; it adds a reason to get frustrated. The touch to play or pause is okay but gets activated accidentally all the time as you’re taking them on and off or adjusting position on your face. The swipe controls work 1 out of 4 times at best, and it’s usually when you swipe forward to forward to the next track (except that a forward swipe on LOUDs is to go back a track… hmmm).

I’m imagining that if those drivers make contact on both sides the sound quality could improve a good bit, but since I can’t experience that I cannot say definitively. The closest I could get was putting them on the back of my head in which case there are other options out there.

The “+” button has a raised bump which makes it easy to find with your right thumb. The “-” button is recessed and you go right past it until you feel the open charging port letting you know you missed it. Between the open charging port and speaker holes, I’m not sure how these would fair in a downpour or very sweaty scenarios. I did wear them for about a week straight in rainy weather without incident though.

Can other people hear it? Again depends on your music selection, but yes and it can be loud enough to annoy your coworker.

How about taking a phone call? I took a few calls and in general felt like I had to work too hard to hear whomever I was talking to. They were able to hear me okay but heard more of my surrounding than they would if I was using more traditional headphones or AirPods.

What I like

  • Overall good integration of audio into eyewear frames
  • Solid and sturdy construction
  • Decent starting price

What needs to be improved

  • Touchpad is frustrating and physical buttons could be larger
  • Needs more adjustment different head sizes to make driver contact
  • Charging port and speaker holes need water-resistant coverage

Final thoughts

The Lucyd LOUD glasses are that perfect hit/miss combination. The promise could meet your expectations if they fit your head well and you’re okay with some interaction issues. Once the weather got nicer I started to wish that I had picked the sunglass lenses as that would have increased the reasons for wearing, but for me, the non-fit issues are the biggest factor. That’s something you won’t know until you try them and their return policy for electronic eyewear is within 14 days for exchange or credit only which makes that a very risky proposition.

Price: $99 – $244 depending on Rx customization
Where to buy: Lucyd
Source: The sample of this product was provided by Lucyd.

Filed in categories: Reviews

Tagged:

Lucyd LOUD Bluetooth speaker glasses review originally appeared on The Gadgeteer on May 3, 2019 at 1:00 pm.

Note: If you are subscribed to this feed through FeedBurner, please switch to our native feed URL http://the-gadgeteer.com/feed/ in order to ensure continuous delivery.
TravelFusion Anti-Theft backpack review

REVIEW – Travel. Just the word can conjure up images of past adventures, or dreams of those events yet to come. These days, however, technology needs to be considered when planning your travels, whether for your daily commute or your global wanderings. I was recently sent the TravelFusion Anti-Theft backpack, and want to show you how it can help ease this possible stressor on your next outing.

What is it?

The TravelFusion Anti-Theft backpack is a single large opening pack with dedicated screen sleeves, internal wiring for on-the-go charging, accommodations for wet or soiled items apart from the rest of your items, and a few ways to secure your goods while on the move.

Hardware specs

  • ANTI-THEFT DESIGN – Retractable high strength metal coil and TSA approved combination lock.
  • EXTERNAL USB CHARGING PORTS – Easily access your power bank with external USB (type A and C) charging ports.
  • INSULATED LEAK PROOF INTERNAL POUCH for hot and cold storage. Also ideal to store wet clothing or umbrella. (10 in x 4.3 in x 5.5 in)
  • DURABLE RUBBER CARRY STRAP
  • SUPERIOR COMFORT AND DESIGN – Premium padding and breathability in shoulder straps with horizontal chest strap to reduce load and stress.
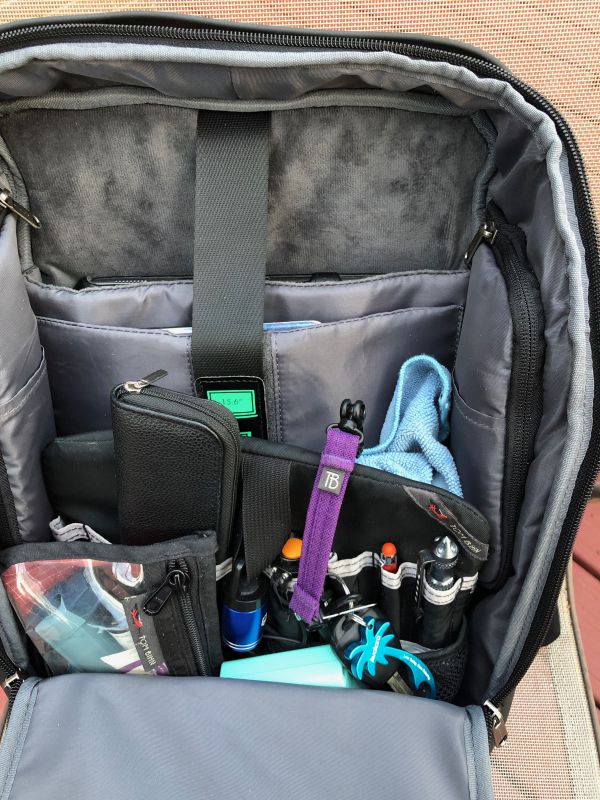
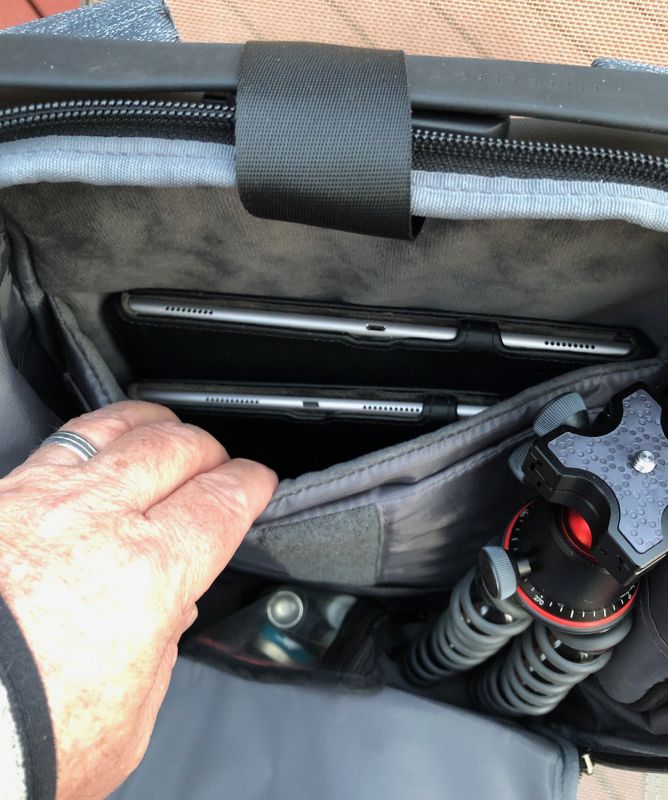
  • PADDED INTERNAL POCKET for 15.6 inch laptop. Water resistant polyester exterior and burst proof zippers
  • 18 LITER STORAGE CAPACITY with secure pockets for electronics, important documents, clothing, and more.
  • FULL ACCESS BACK PANEL for easy packing
  • SATISFACTION GUARANTEED. If you’re not satisfied for any reason, we’ll refund your order within 6 months of purchase.

Design and features

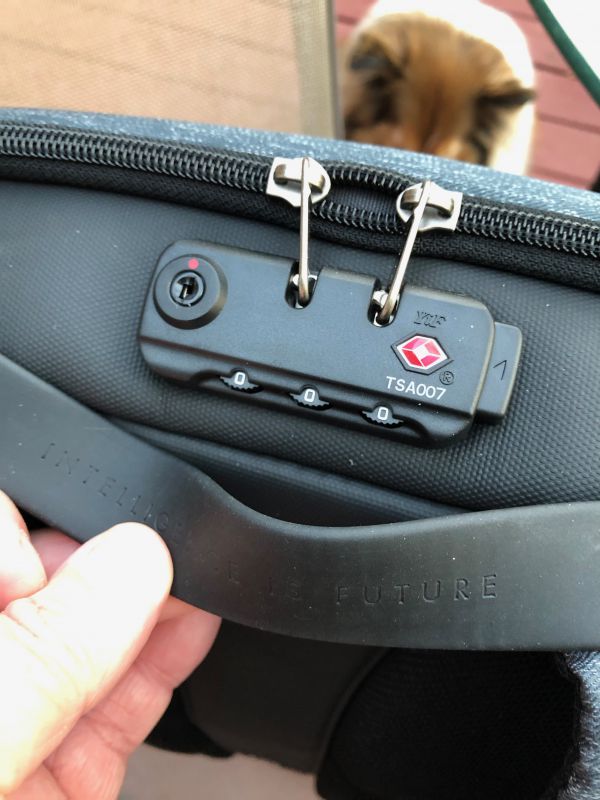
The TravelFusion Anti-Theft bag is mostly a single large pocket, sealed by a double-pull zipper. At the top center, there is a 3-digit TSA-compliant combination lock that you click the metal zipper pulls into with a satisfying click.

Overall, the bag measures about 17″ x 6″ x 13″. The two straps meet near the combination lock at the top center and are sewn into tabs at each lower corner. There’s a 1″ wide silicone hand grip that goes from each top corner across the lock area. It has enough play to allow unencumbered access to the lock and zipper without being too loose.


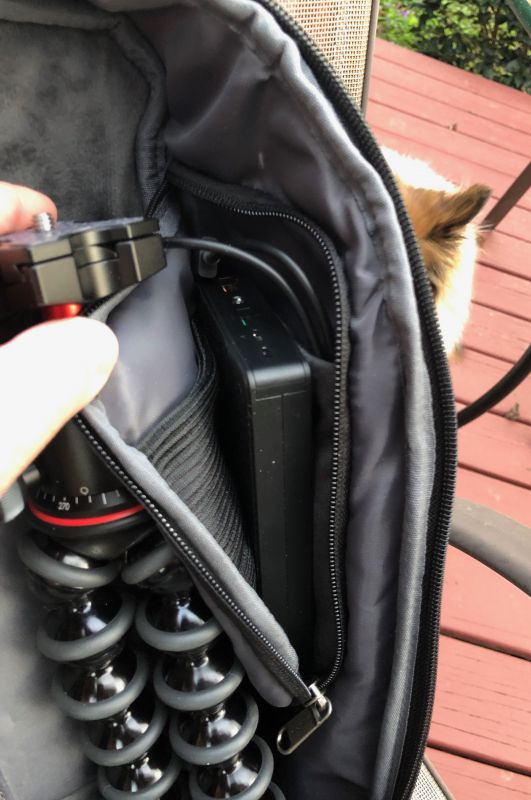
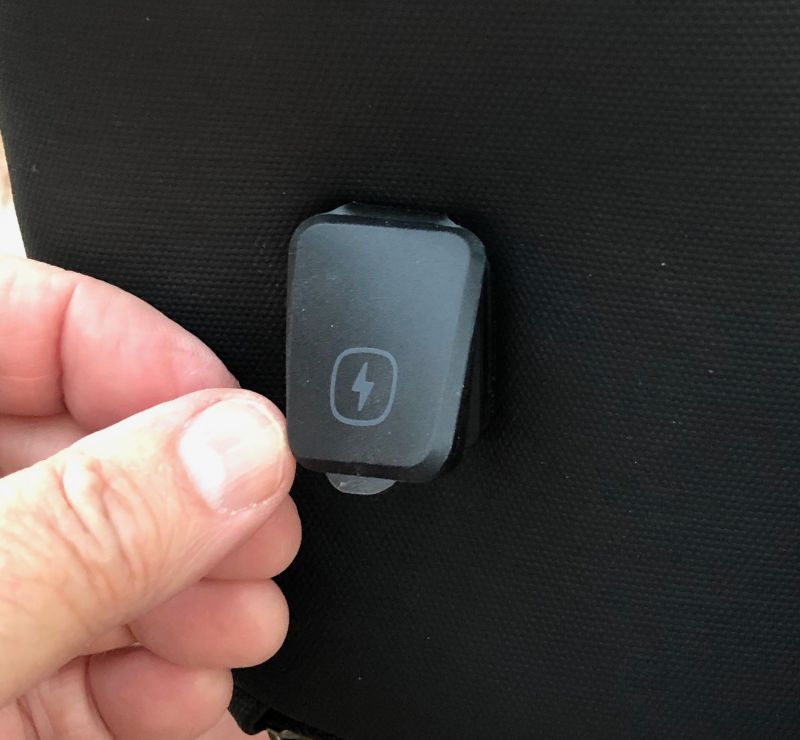
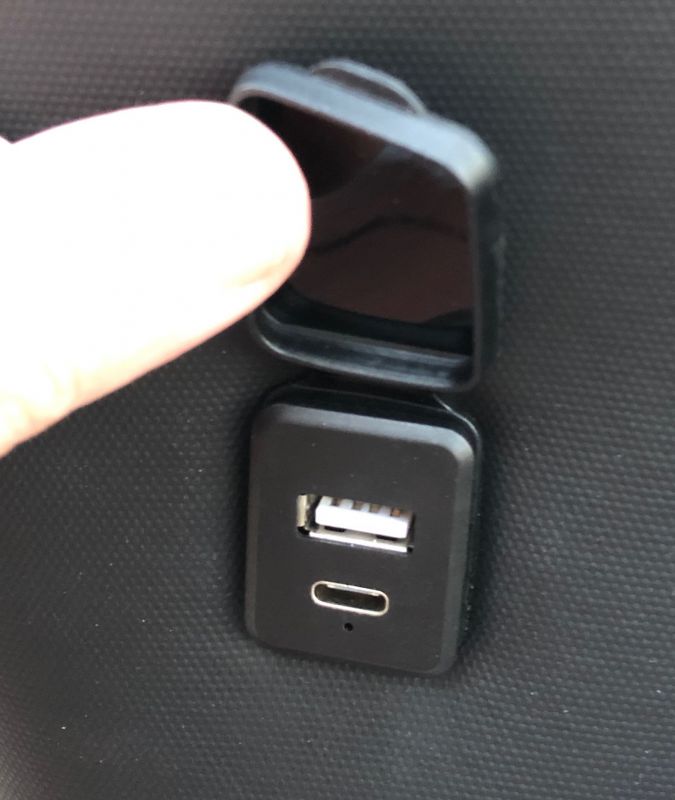
On either lower small side, there is a double-zipped 10″ x 6″ pocket. On the right (when you’re wearing it) is a weather-sealed power port with a USB-C and a USB-A jack.

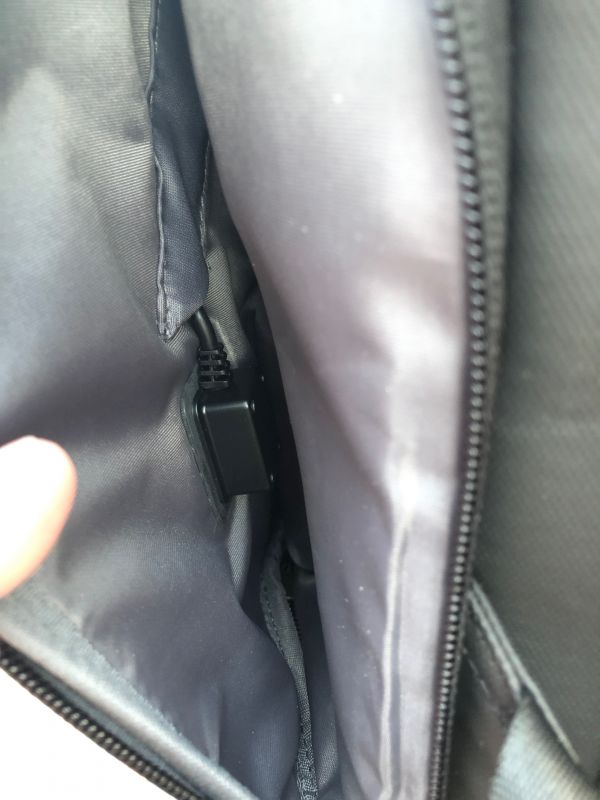
This feeds through the side of the pack into the interior, where you can insert a battery pack (or two!) to power them. There is enough room inside for a phone, gloves, or a passport, but it’s not secured. You could easily store coiled cables here as well.


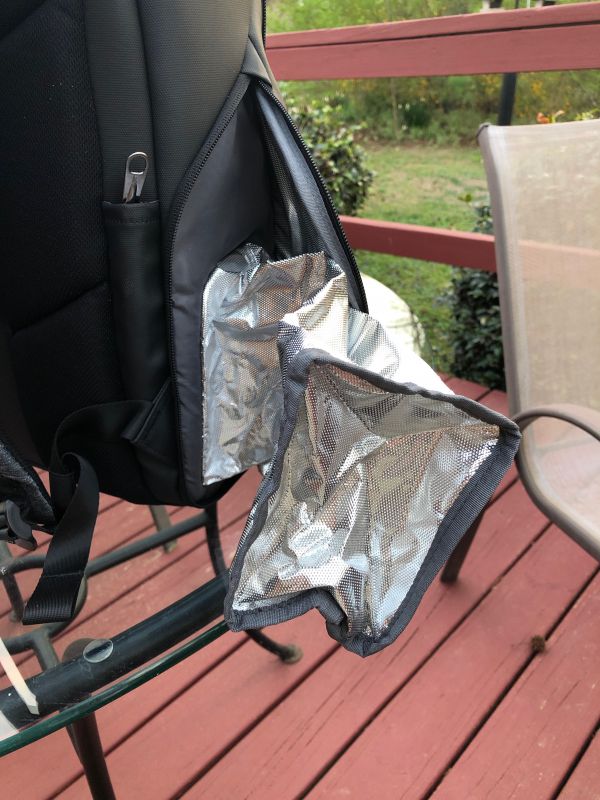
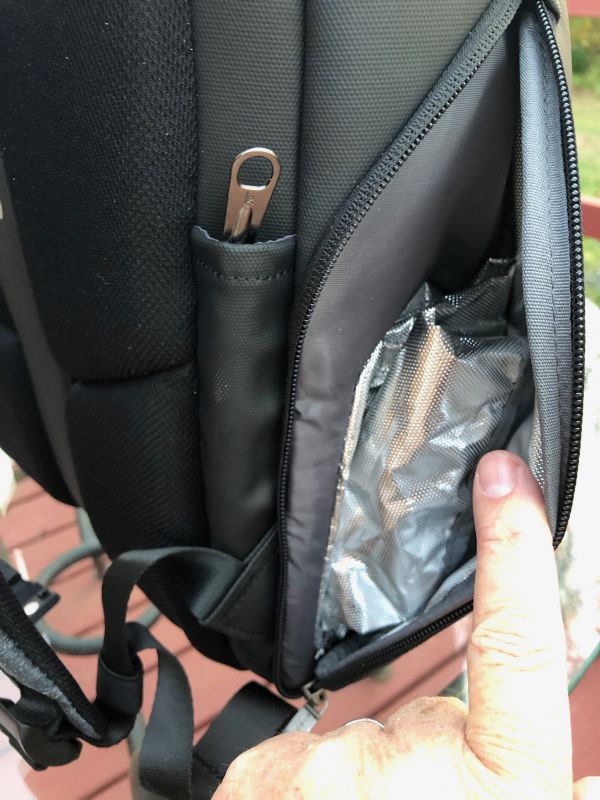
The other side pocket opens to reveal a folded up 8″ x 4.5″ x 4.5″ pocket that can be pushed inside-out into the interior of the pack through an internal zippered access portal.

It’s made of foil-lined material, so would keep your lunch cool, or prevent your water bottle from leaking into the main compartment.


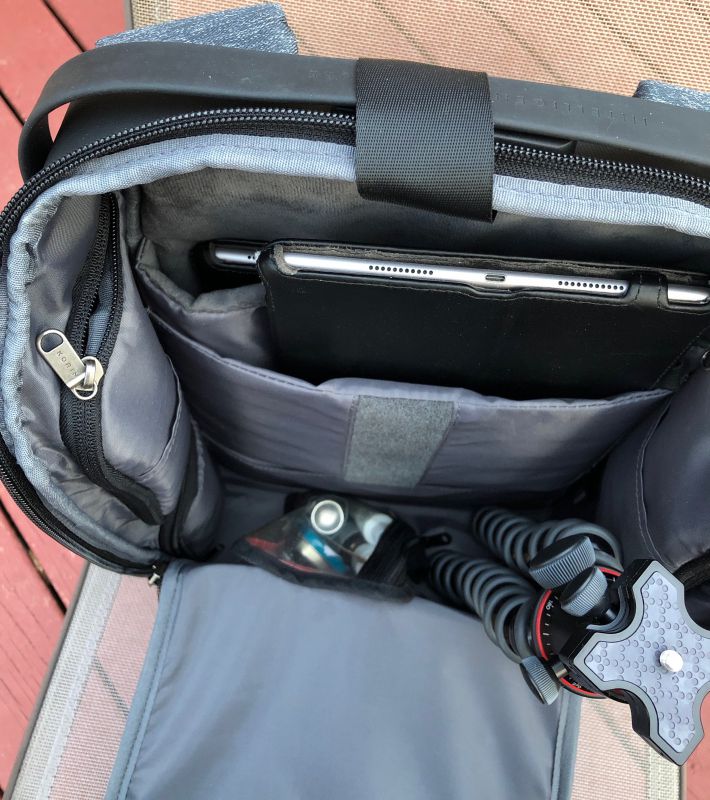
Opening the main zippered area reveals the entire interior in a single compartment. There are two rear flaps against your back, and two on the upper part of the small sides, but these are all very flat.

There are a few zipped and mesh flat pockets in the inside cover, so you could unzip and reach into the top of the inner sanctum for items fairly easily, but the mesh isn’t very stretchy, so anything with more dimension than a wad of keys, your cables, or earbuds are going to be too bulky. Field glasses, cameras, or over-the-ear headphones will need to be stored elsewhere.


The top side pockets will be good for your computer power supply, power banks for your USB charging needs, and a mouse, if you need one. The rest of the space is totally open (unless you have the foil pocket pushed through). I packed it out in several different configurations and never wanted for space.

The outside of the flap is a grey tight woven-feeling fabric that the company says is water resistant. The lower back, sides, and bottom are all a rubbery-feeling material. It seems very water resistant, but the main zipper isn’t weather-proofed.


The back and the inner part of the straps is covered in breathable mesh and is nicely padded for comfort and breathability. There is no luggage pass-over strap for your roll aboard.


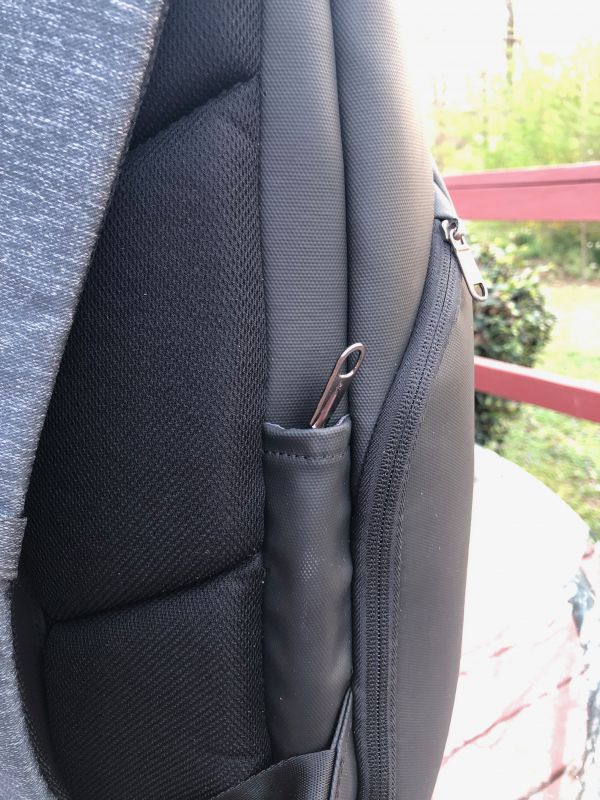
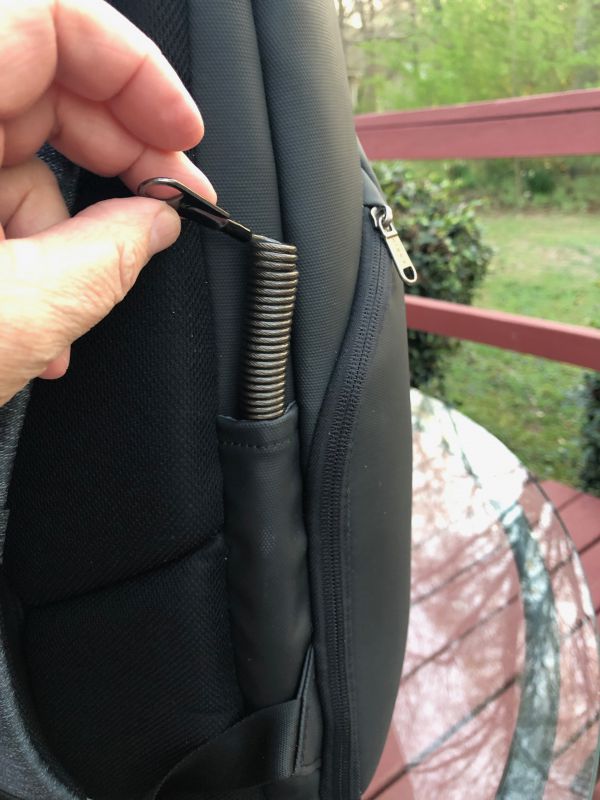
The final superpower of this bag is a coiled plastic-covered steel cable in a sleeve where the left strap attaches. You can quickly pull this out, pass it around something immovable, and snap it into the combination lock. At first, this bothered me, thinking you couldn’t use both slots for zippers, and add the tether to the mix. Then I found you could fit in the tether. This makes the bag much more secure if you’re in a crowded or notorious zone for snatch-and-grab crimes. Be careful out there, folks!

What I like

  • Plush laptop compartment will easily hold large laptops or two full-sixed tablets
  • Foil-lined leak-proof pouch is a great place for your lunch or your sweaty running shoes
  • Locking zippers and steel coil prevent thefts of opportunity

What needs to be improved

  • The lock has two places to place zipper pulls/hooks. If you lock the cable tether there, it’s a tight fit to add the tether to the zipper.
  • It would be nice to remove the waterproof inner pouch for cleaning.
  • The Sternum strap pulled out of the adjustment ridge whenever it got a little tight. I finally removed it.
  • There is no luggage pass-over strap for your roll aboard.

Final thoughts

The look-and-feel of this bag is top-notch. The single large opening made getting to items easy, and the many smaller pockets were large enough for actual use. Having a side power port that sports both USB-C and USB-A is quite handy for on-the-go charging. Being able to remove the battery from the bag is mandatory for some TSA checkpoints. And sometimes, a day takes more than one power bank.

Price: regular price $199.99, on sale for $139.99
Where to buy: Amazon
Source: The sample of this product was provided by Travel Fusion.

Filed in categories: Reviews

Tagged: ,

TravelFusion Anti-Theft backpack review originally appeared on The Gadgeteer on May 3, 2019 at 10:25 am.

Note: If you are subscribed to this feed through FeedBurner, please switch to our native feed URL http://the-gadgeteer.com/feed/ in order to ensure continuous delivery.
Eve Flare review

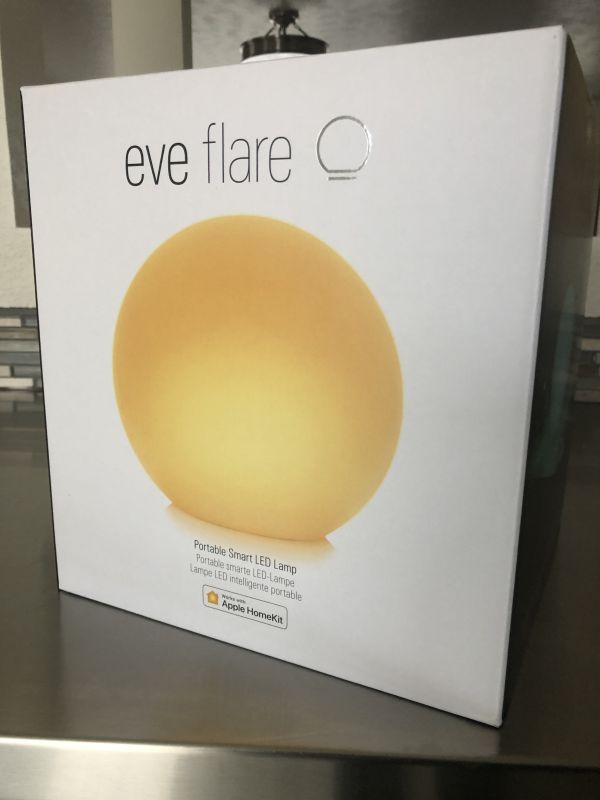
REVIEW – I have recently been made aware of the Eve brand home accessory line, as this will be the first of two Eve products that I’ll be reviewing. This is the Eve Flare portable smart LED lamp. This product lets you create ambient lighting pretty much anywhere you desire and has already proven to be quite useful here at the house in a variety of settings.

What is it?

The Eve Flare is a portable 25cm diameter globe LED light with smart functionality and a variety of colors controlled via an iPhone app.

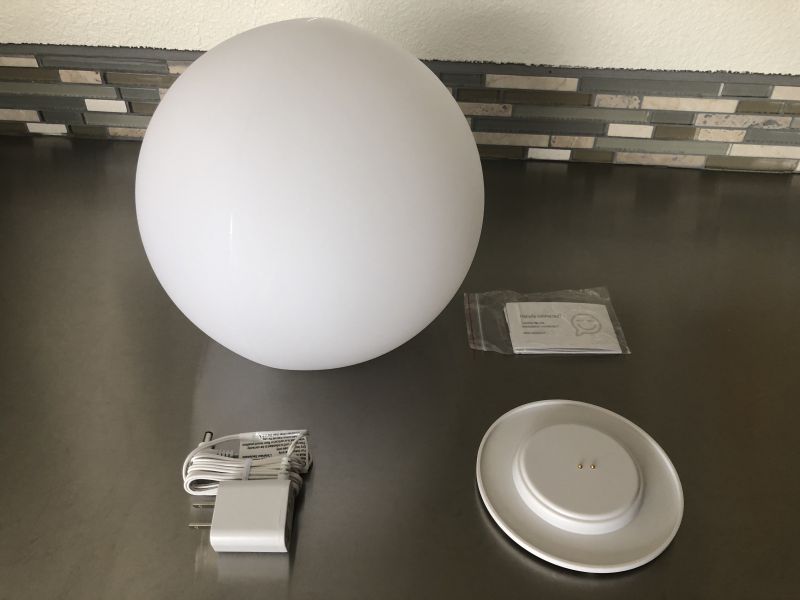
What’s in the box?

  • Globe Lamp
  • Charging cord
  • Charging base
  • Instruction booklet

Design and features

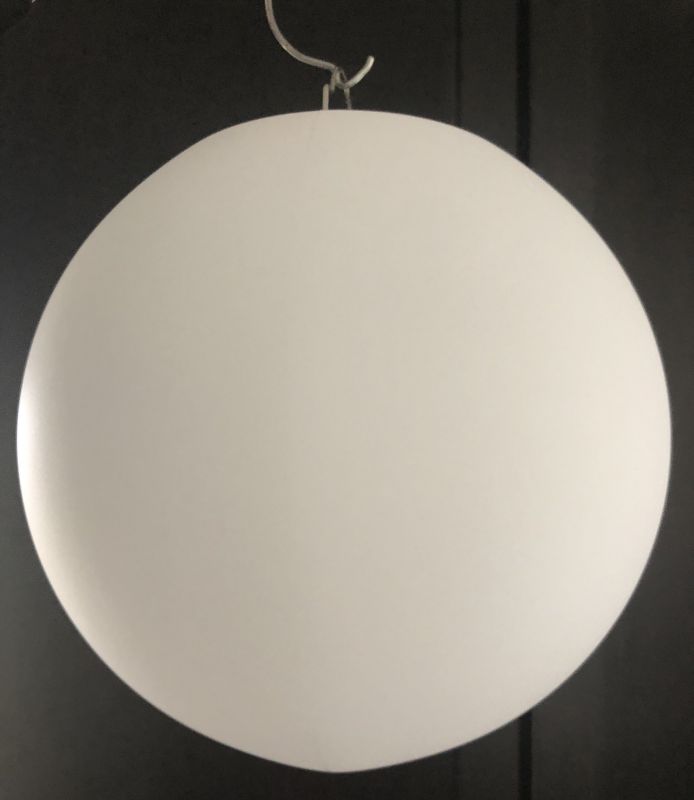
The Flare has a very simple design. It’s a spherical dome with a flatten base that contains the power button and a hanging hook.

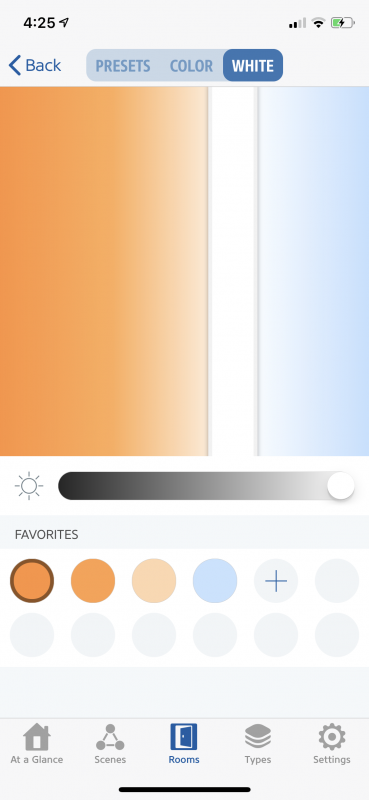
Once you get it charged up, simply download the iPhone Eve Flare app and connect the Flare to your app via the step by step instructions. You can then modify the colors or brightness – as well as control the on/off function from your phone and/or use Siri to change the settings using verbal commands.

Here you can adjust the white light settings.

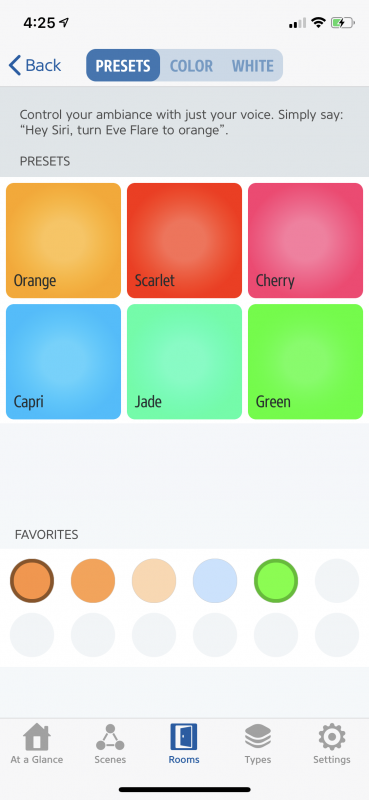
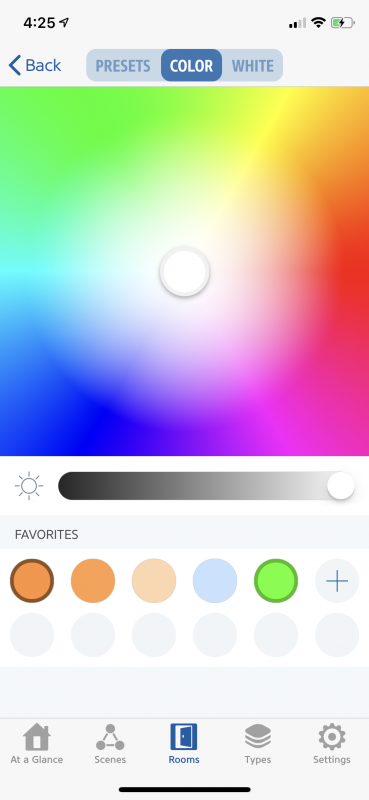
There are several preset color settings loaded into the app.If you have a specific color in mind, you have complete control to change the color via the color wheel shown above.

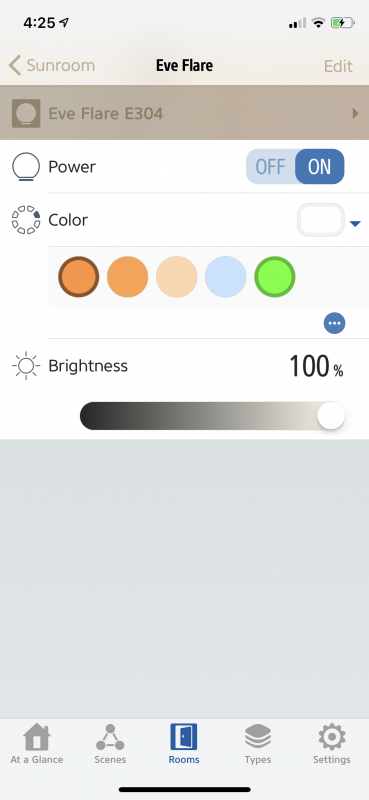
Finally, your base screen gives you the power option, color option and brightness level.

Setup

Downloading the app, then following the step-by-step instructions within the app will get you connected and ready for use. Additionally, it’s compatible with the AppleHomekit, so if you already utilize this function then you can simply add this device.

Performance

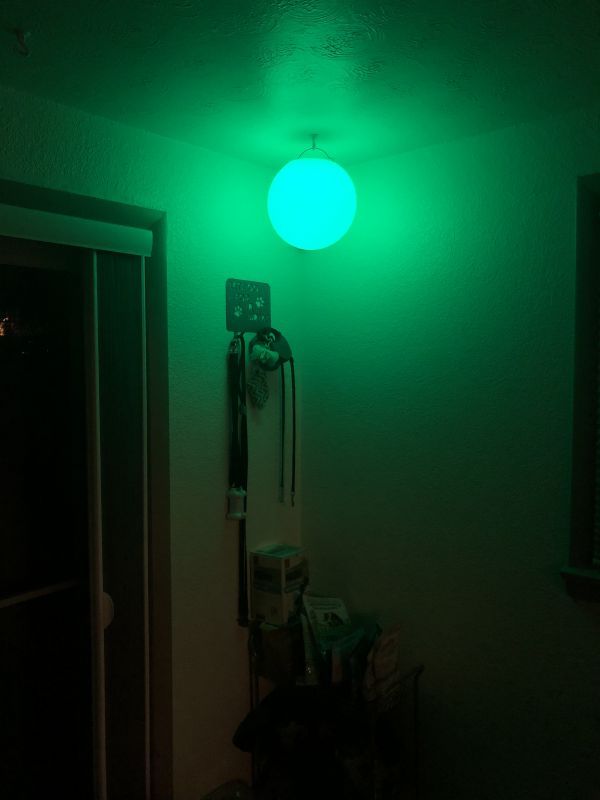
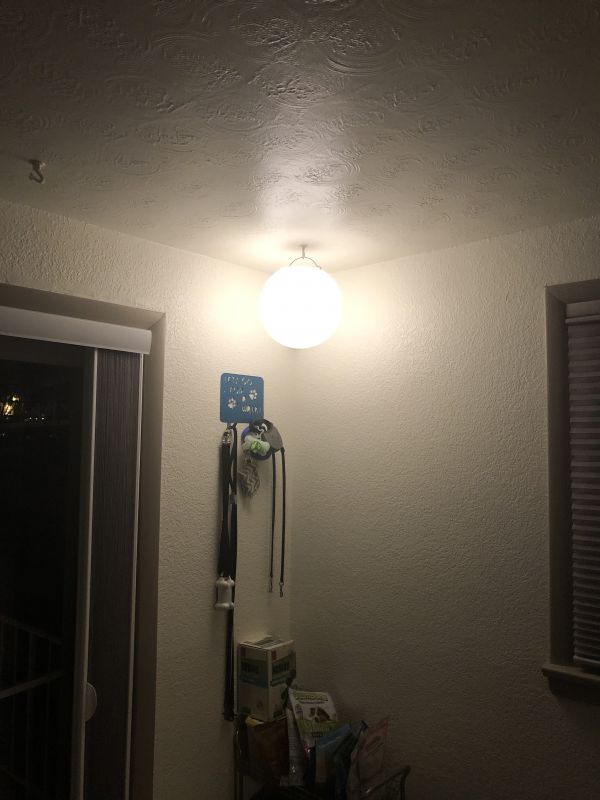
Here is the green setting, with the Flare hanging from its hook in the corner of our kitchen. We have used this product in the kitchen as a bit of romantic mood lighting during dinner, in the game room to provide soft ambient light to the room while watching TV and on the back deck at night while enjoying some wine. Each time we simply found the color that worked best and adjusted the brightness. When we were watching TV in the game room, we always have a problem with the ceiling lights causing a bad reflection in the TV and blocking our views. With the Flare, we were able to set it behind an ottoman and it provided enough ambient light that my wife could weave on her loom while not causing any glare or reflection on the TV screen. It features a 6 hour stand alone battery life but in most cases we just kept it on the charging stand while using, so it could stay on indefinitely. Additionally, it’s rated for indoor/outdoor use, with a IP65 rated water resistance.
This is at 100% brightness in a room at night with no other lights on. Generally, the phone was the easiest and best way to control the Flare, however at times, as seems to be the case with most wifi controlled devices, connectivity would be an issue and we’d have to turn it on or off manually. At least this device has a manual on/off, as I’ve run across some that don’t and it causes some issues.

What I like

  • Portable ambient light
  • 6 hour battery life
  • LED lighting, so no heat and can be adjusted to a variety of colors
  • Hanger hook on the base increases mobility and usefulness
  • Indoor/outdoor functionality

What needs to be improved

  • Connectivity at times is an issue, the range is limited to about 10-20 feet from the unit for control with the phone and even then at times it can get a bit stubborn and refuse to connect.

Final thoughts

We love the Eve Flare, it has come in handy on so many occasions already. At about 1.75 lbs, it’s light weight and extremely portable. I’m always looking for more items to incorporate into my Apple HomeKit and being able to adjust the color and brightness on my phone without having to get up is a plus as well. It charges easily and quickly on the provided base and while there is a slight connectivity issue at times, I can’t rule out that it could just be indicative of wifi issues in my home. The Eve Flare will be used quite a bit in our house for years to come. At $99.99, I really think this is a great deal, and currently there is a coupon on Amazon for $10 off.

Price: $99.99
Where to buy: Eve Flare can be bought at the EveHome website or Amazon
Source: The sample of this product was provided by EveHome.

Filed in categories: Reviews

Tagged:

Eve Flare review originally appeared on The Gadgeteer on May 3, 2019 at 9:00 am.

Note: If you are subscribed to this feed through FeedBurner, please switch to our native feed URL http://the-gadgeteer.com/feed/ in order to ensure continuous delivery.