Arboleaf body composition smart scale review

REVIEW – We need to address the elephant in the room.  And when I refer to the elephant, that is a thinly disguised reference to me.  May 1, my loving wife said that we are going on the Keto diet.  In one day, I found out that by “we”, she really meant “you”, as she’s been cheating since day #1.  But I haven’t, and as of this writing, this is the start of day #3 for me.  So far, I have been 100% faithful (seriously) to the program and plan to continue for a month to see my results.  I will reevaluate from there.  To really see what is happening, a plain old scale just doesn’t cut it.  The Arboleaf scale also measures a bunch of other factors to help you see what changes are happening as your body changes.  Let’s get into the embarrassing body composition details that are prompting my weight loss journey.

Just a bit more history here.  I was in IT  for 35 years.  That means I sat behind a desk nine to ten hours a day and ate horrible fast food for lunch all the time.  With two active kids, after work meant running them around at night and essentially gave me the excuse to do nothing much physically.  That lead to packing on the pounds.  We retired in January 2018 and moved to an extremely active retirement community in Florida.  Pickleball, golf, and water volleyball 5+ days a week helped me drop 40 pounds fairly quickly.  Then came the dreaded plateau, and I’ve been holding there for several months.  That was the impetus for Keto.  Around that time, the opportunity to review the Arboleaf scale popped up and it was like Karma was telling me to lose weight and use tools to track it, so…here we go!

What is it?

The Arboleaf body composition smart scale, hereinafter called “the scale”, is a digital, Bluetooth-enabled scale that measures weight, plus:

  • Body fat %
  • Body type
  • Visceral fat (fat stored in the abdominal area)
  • Body water %
  • Muscle mass
  • Bone mass
  • BMR (basal metabolic rate – essentially, how much energy you burn when resting)
  • BMI (body mass index)
  • Metabolic age

The scale connects via Bluetooth to the Arboleaf app, available for IOS and Android.

What’s in the box?
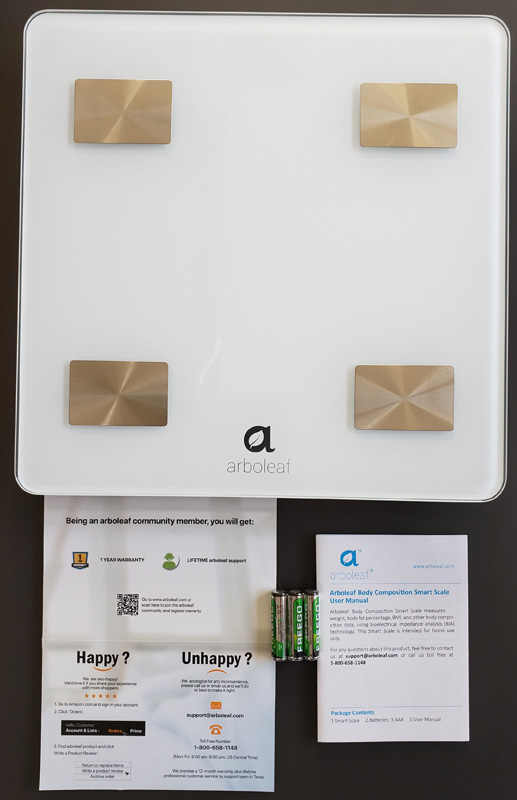
  • Arboleaf body composition smart scale
  • User guide
  • Three AAA batteries
  • Warranty and user satisfaction card

Hardware specs

  • Dimensions: 11.8″ x 11.8″ x 1″
  • Weight: 3.53 pounds
  • Power: Three AAA batteries
  • Measurement range: 0.4 – 396 pounds
  • Measurement resolution: 0.4 pounds

Design and features

There are some cautions with this scale.  Since it uses electricity to measure the various body factors, you should not use this scale, or any scale like this, if you have a pacemaker, artificial lung, ECG or any other internal medical device, or if you are pregnant.  The manual also cautions that infants and toddlers should not use this scale and that some of the measurements may not be accurate for users under 18 years of age.

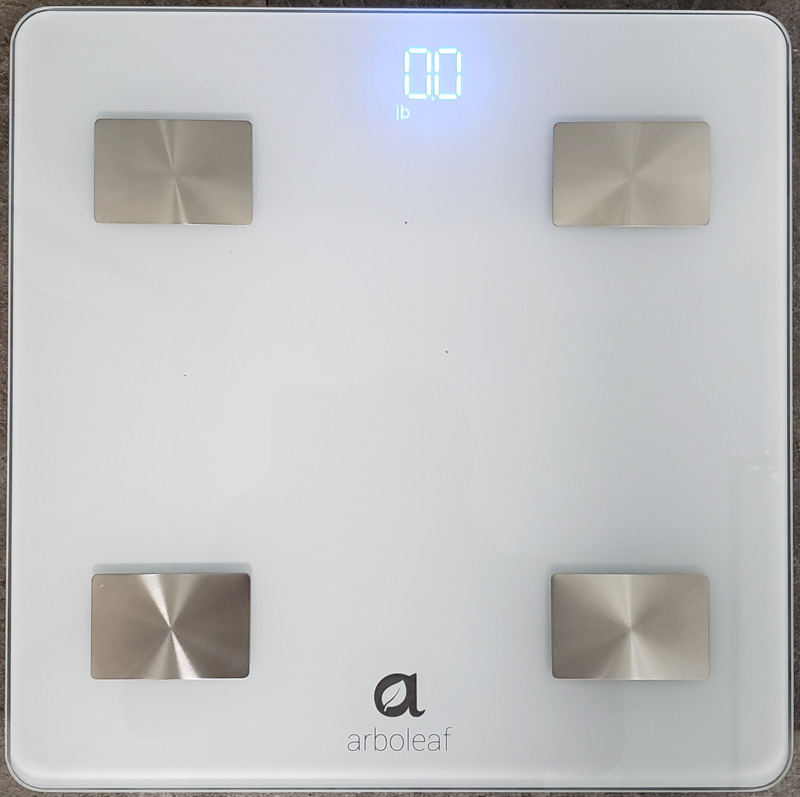
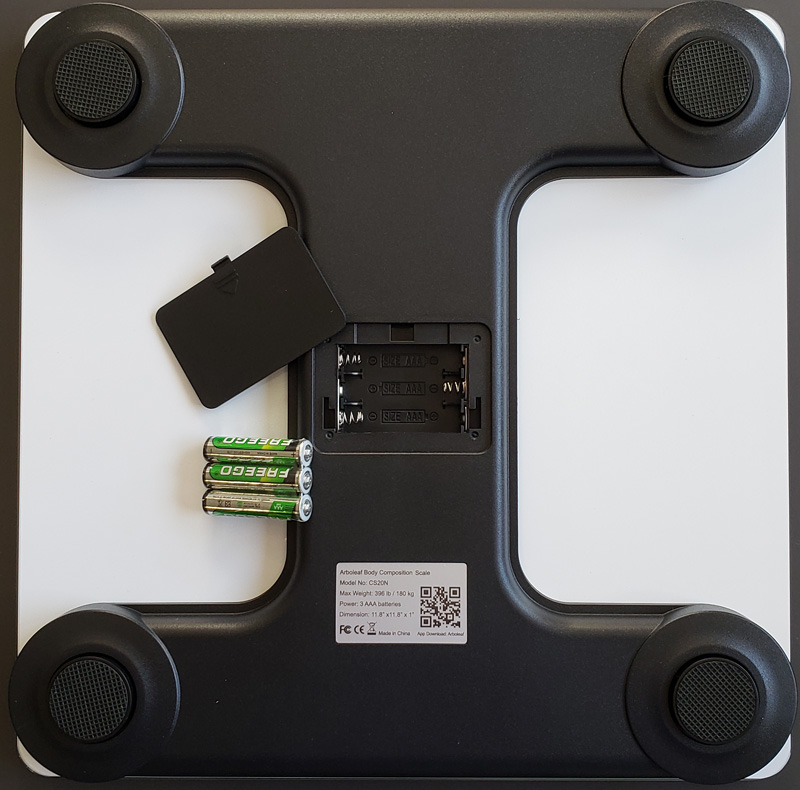
The scale is nicely designed. The glass top has four silver metal pads (in some photos, they look gold, but that was due to lighting) where you place the heals and balls of your feet. The digital reading shows up in crisp blue digits under the center top of the scale. The underside of the scale has four rubberized feet that prevent the scale from sliding around. We also find the battery compartment there as well as the product label.

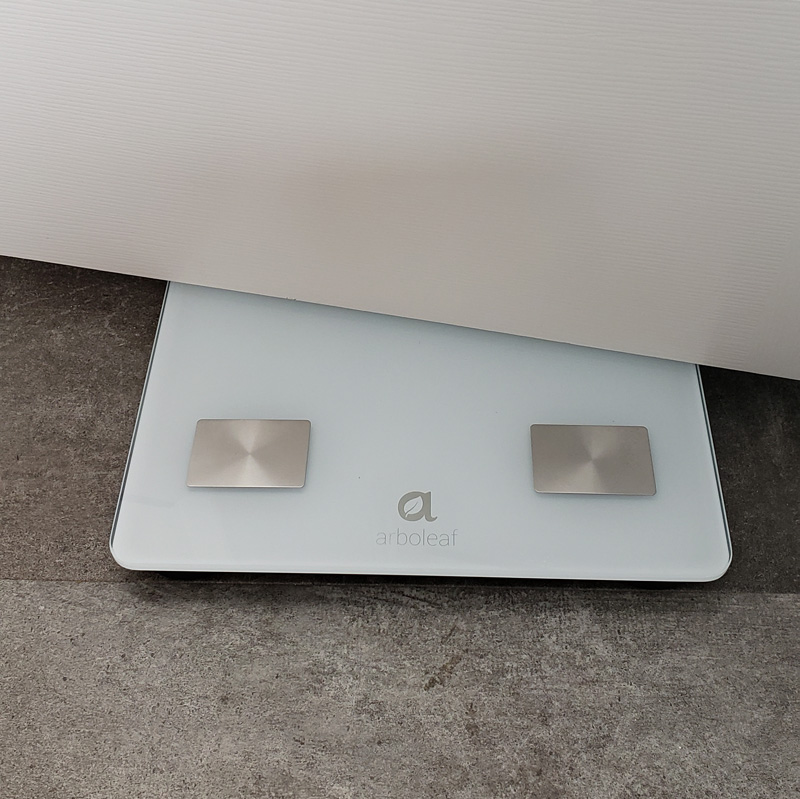
The scale is quite thin at only an inch.  This worked great as it allowed me to place it in the separate toilet room in our master bath.  It was thin enough that I put it up against the wall and the door went right over the top.
Setup

The first step is getting the scale powered up. All that takes is flipping the scale over, popping off the battery door, inserting the included three AAA batteries, and closing it back up.
The next step is installing the Arboleaf app, setting up an account with a username and password and providing your specific parameters.
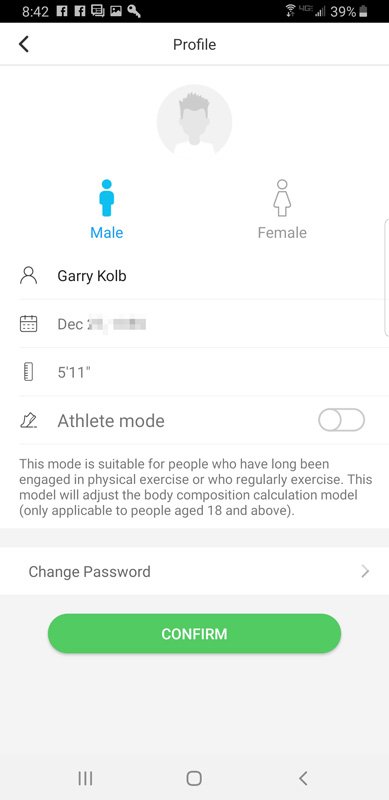
Arboleaf uses your height and age in their calculations for the various body parameters.

You can also set up unlimited other users.  There are two options – scale users and friends.  Scale users are users on the same scale and app.  You can optionally set up an Arboleaf account for them, but it isn’t necessary. Friends are other Arboleaf users with their own scales and accounts.  This is kind of a cool feature, as you can have a weight loss buddy across the country.  You can both keep track of each other’s progress in your own apps.

The app automatically connects to the scale, so there was no Bluetooth pairing required.

Performance

I set up an account for me and added a user for my wife.  For reasons of marital bliss, while my massive weight is displayed, my wife’s is blurred out.

Clicking on any of the users brings up the measurement window. With this window open, the instructions say to tap the scale with your foot to wake it up. I was never able to get this to work. I tapped, pushed, stepped, wiggled, and basically did any move I could think of to produce a tap on the scale.  Nada.  Nothing.  But…just stepping on it fully woke it up and it weighed me and produced the rest of the measurements.

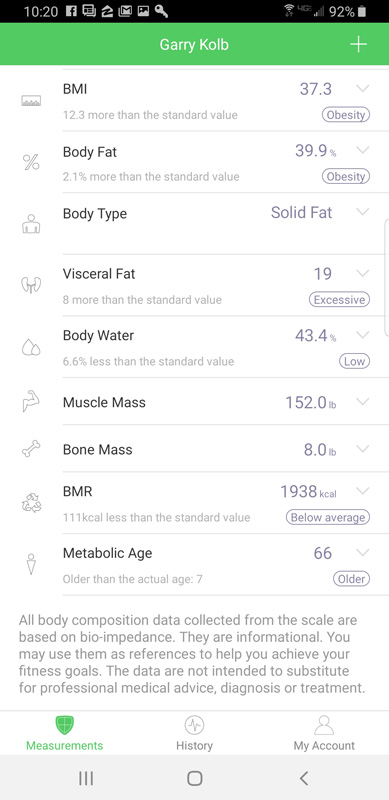
This window shows your most recent weight and all nine other factors that the scale measures. Below are a couple of screenshots of this long screen.  I scrolled down so there is some overlap, but you can see all the parameters.
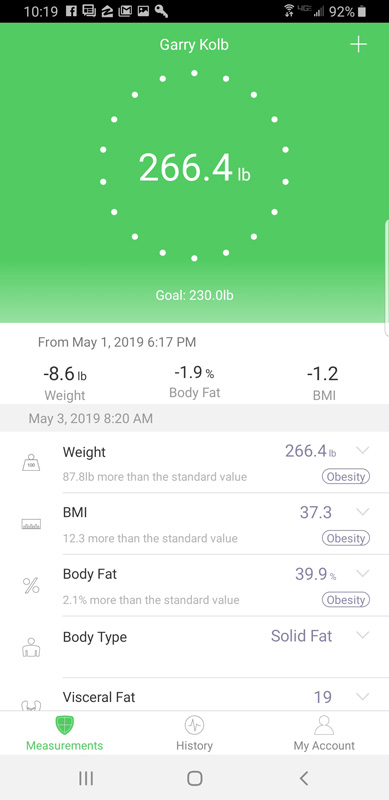
As you can see, and to nobody’s surprise, it shows that I’m fat.  My metabolic age puts me seven years older than my chronological age.  My body type is shown as “solid fat”. Contrast that with my wife’s which is shown as “normal”. Kind of sobering. All my parameters are out of whack in a bad way – but oddly enough, I show above average muscle mass. Go figure. Perhaps the titanium hip I have is skewing that.

To the right to each of the values, you can see a gray down-arrow.  Clicking on this brings up information about that specific measurement, and includes ranges for that parameter showing what “normal” is for your age/height and all the over/under ranges.
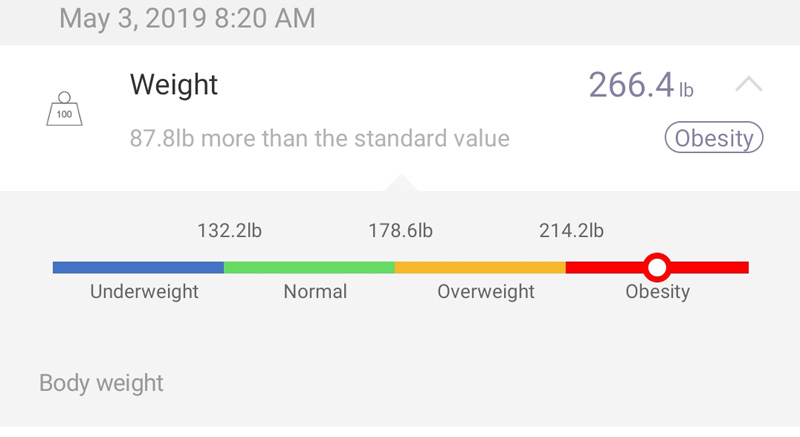
Personally, I think the ranges are a bit laughable. At 5’11”, if I weighed 132.2 pounds, the low end of “normal”, I’d be skin and bones. When I graduated high school, was playing tennis for several hours each day, and in the best shape of my life, I weighed 185 pounds.  According to this, I was still overweight at that point. But, there is no arguing that 266.4 is more than on the high side.

Clicking on the History button at the bottom brings up a historical view of all recorded measurements. This graphs your progress for all of the available measurement parameters. Here are the weight and body water history views.
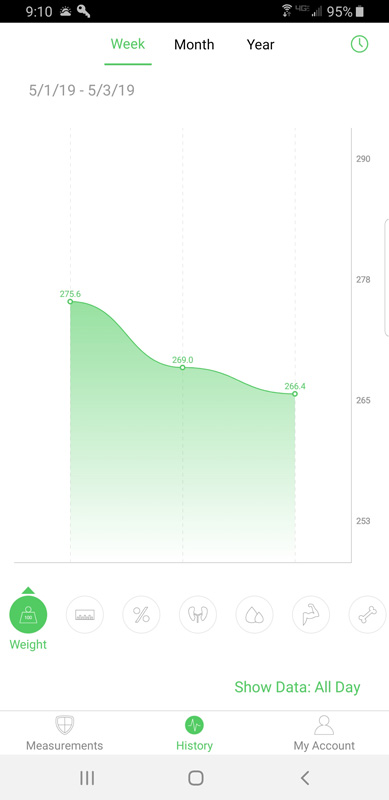
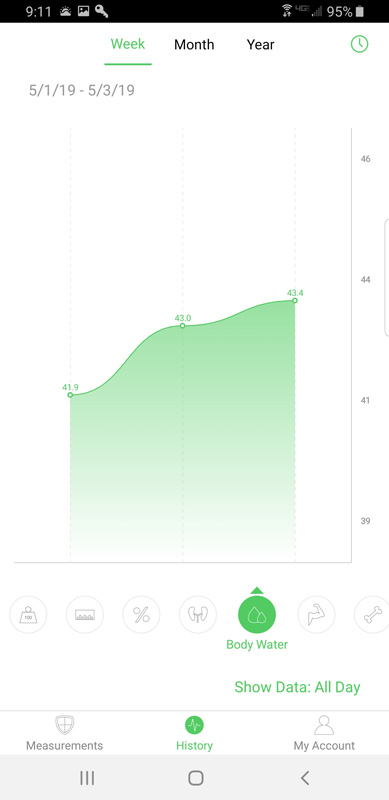
As you can see, I have shown dramatic weight loss in just two days!  Now, for the real story…the first measurement was late at night, fully clothed and holding my cell phone.  The second and third were done first thing in the morning, after the requisite bathroom visit and before putting on clothes.  The key to accurate tracking is to weigh in at around the same time each day and wearing the same thing (or preferably nothing). Most of my initial weight loss can probably be attributed to water weight.

The instructions also recommend not using the scale:

  • immediately after strenuous exercise
  • immediately after a shower, bath, or sauna
  • after heavy alcohol consumption
  • during or immediately after engorgement (for nursing mothers)
  • when you have a fever

Other features

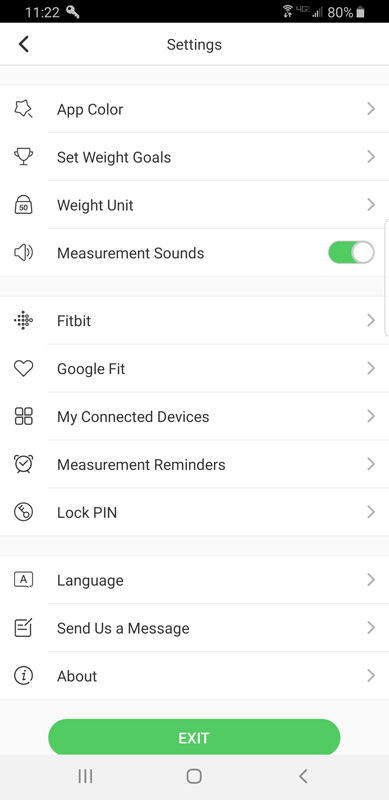
The app lets you change app colors, set weight goals, switch between pounds and kilograms, share data automatically with Google Fit and Fitbit, and set measurement reminders to help make sure you weigh in on time.
What I like

  • Aesthetically pleasing design
  • Excellent list of measurement parameters
  • Ability for multiple users and ongoing tracking
  • Easy linking of the app and scale

What needs to be improved

  • Tap to wake up simply didn’t work
  • Some of the supplied ranges seem a bit unrealistic

Final thoughts

I like this scale and how it works.  I wish it woke up a bit more reliably, but so far, just stepping on it has worked fine. It will be interesting watching the various parameters and how they change as I go on this weight loss journey.

Price: $39.99
Where to buy: Amazon
Source: The sample of this product was provided by Arboleaf.

Filed in categories: Reviews

Tagged:

Arboleaf body composition smart scale review originally appeared on The Gadgeteer on May 11, 2019 at 9:00 am.

Note: If you are subscribed to this feed through FeedBurner, please switch to our native feed URL http://the-gadgeteer.com/feed/ in order to ensure continuous delivery.

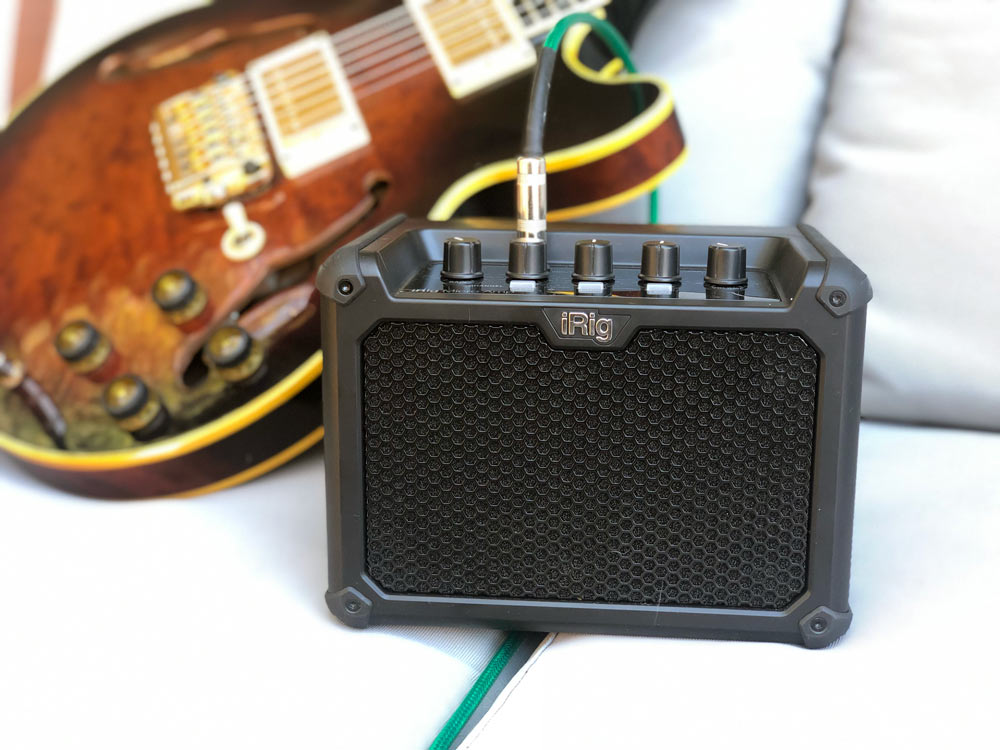
IK Multimedia iRig Micro Amp review

REVIEW – iRig’s new Micro Amp looks to pack a lot of power into a small package without many sacrifices. Guitar amps can be very subjective. Can this one fit your sound and portability needs all in one small package? Read on…

What is it?

iRig’s Micro Amp is a 7.5-15w battery-powered guitar amplifier with and iOS/USB interface.

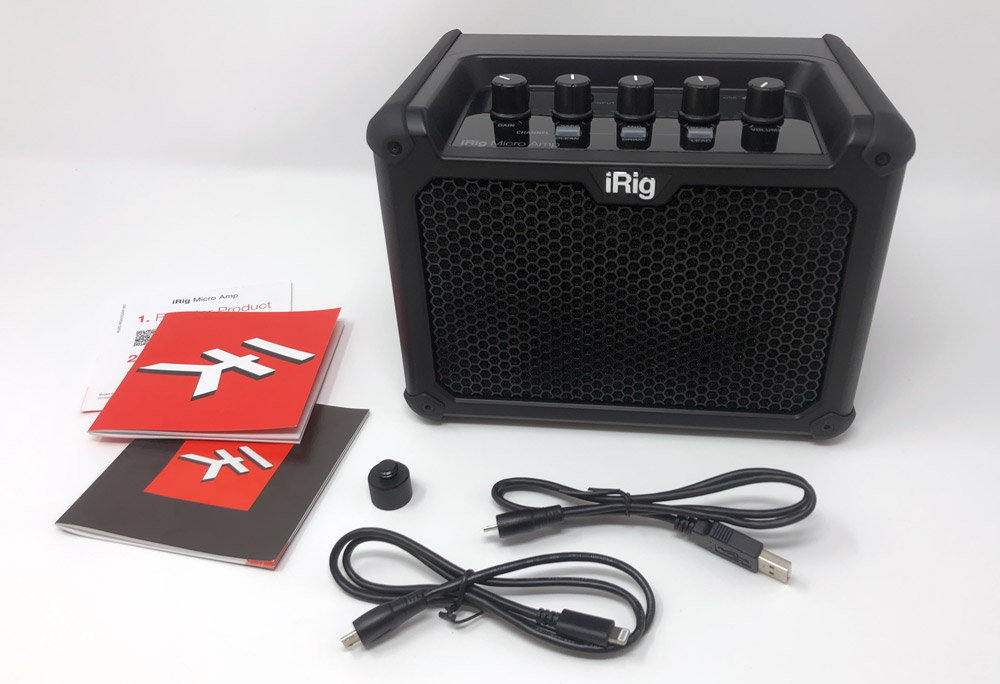
What’s in the box?

  • iRig Micro Amp
  • Lightning to Micro-USB cable
  • USB-A to Micro-USB cable
  • 6 AA batteries (not shown)
  • 3/8″-16 male to 5/8″-27 female mic stand thread adapter
  • Instruction and catalog pamphlets and a registration card

Hardware specs

  • Conversion: 24-bit A/D and D/A
  • Sampling Rate: 44.1, 48kHz, 88.2 and 96kHz rates
  • Operating Power: Battery-powered (6AA for ~ 15 hours use) or DC in 9V-15V (-)+
  • Device Connection: Micro-USB
  • Inputs: 1/4″ instrument and 1/8″ auxiliary
  • Outputs: 1/8″ headphone and 1/4″ speaker output (4-16 Ohm cabinet out connects to larger speakers)
  • Output Power: 15w (7.5w when powered by batteries)
  • Dimension/Weight: 210 x 155 x 125mm / 1.26kg
  • Speaker Size: 1×4″ full range
  • Channels: Clean, Drive and Lead with low, mid and high EQ and gain controls
  • Connectivity: Connects to iPhone, iPad and Mac/PC with all cables included, no adapters needed
  • Included Software: Amplitube for powerful tone and features

Design and features

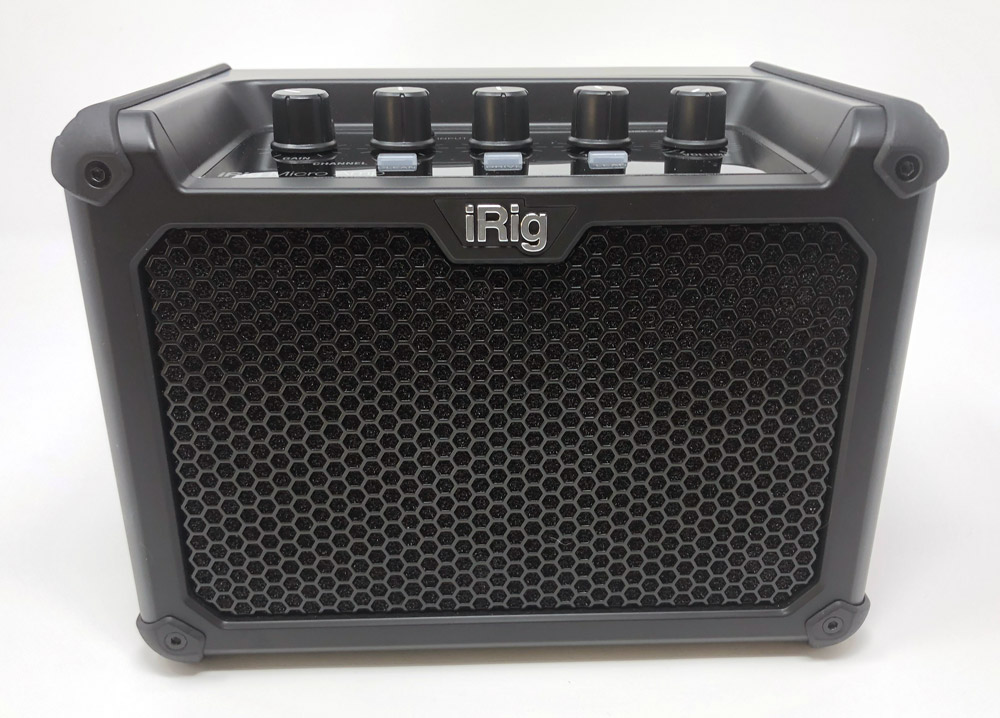
Out of the gate, the Micro Amp looks like a miniature amp which feels familiar and makes it super easy to jump in and use immediately. The entire thing is only slightly thicker than an old school lunchbox and is just over 3lbs with batteries installed, so really easy to throw in a backpack to take with you. The construction is rugged plastic with heavy-duty bumpers to protect against drops. All of the controls are recessed so they won’t get knocked in a tumble either.

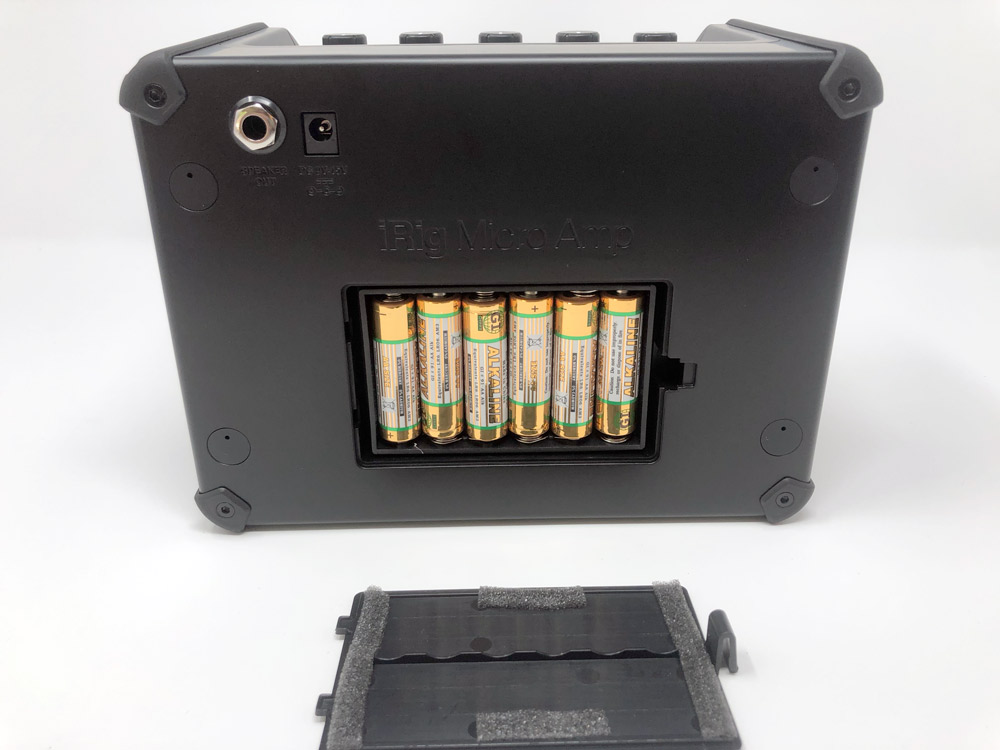
The back of the unit is where you’ll find the battery compartment (iRig has included the 6AAs for you) as well as a DC in port and a 1/4″ output for connecting another cabinet… wait… What?! You read that correctly, you can connect this little guy to a larger speaker cabinet. Crazy cool.

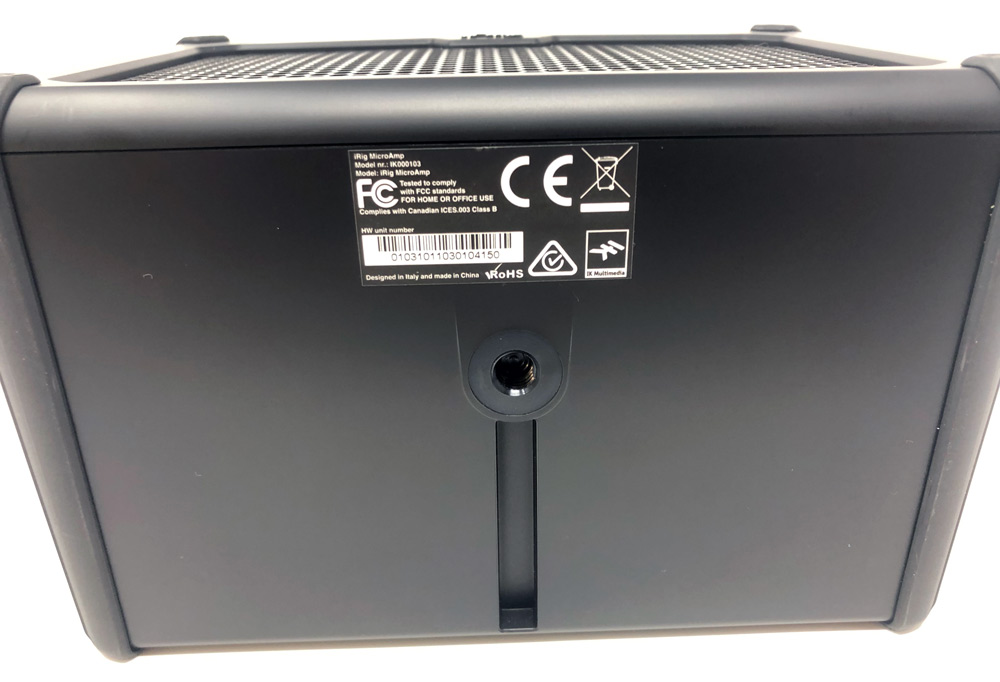
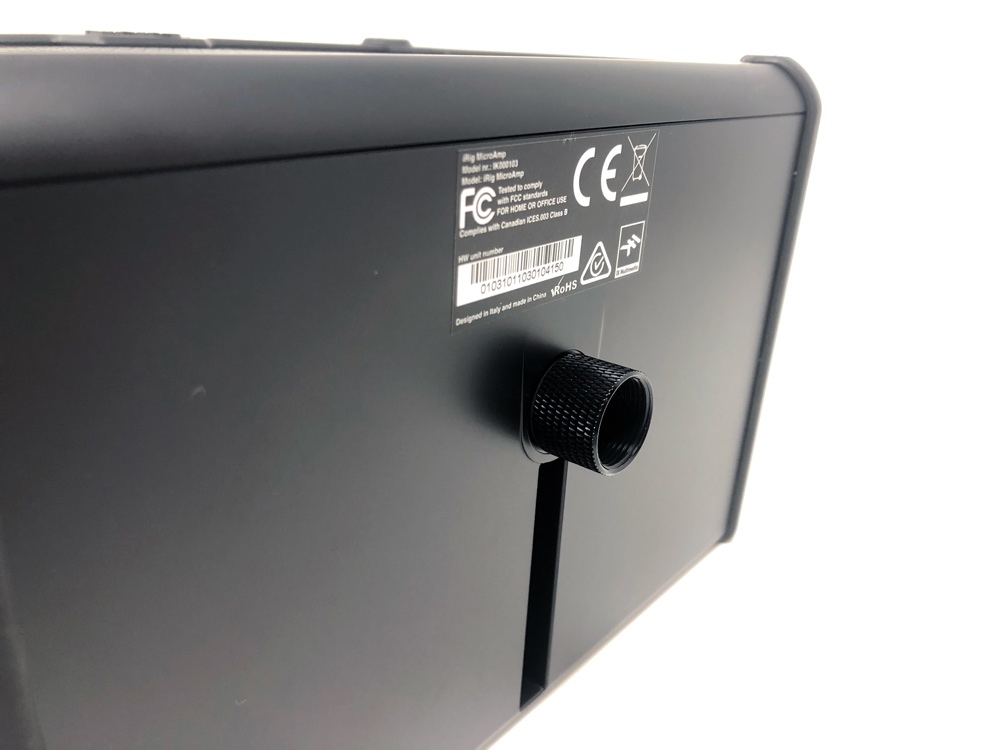
On the bottom is serial and certification info as well as a threaded receiver for attaching the amp to a stand.

They also included an adapter for use with the larger mic stand threads.

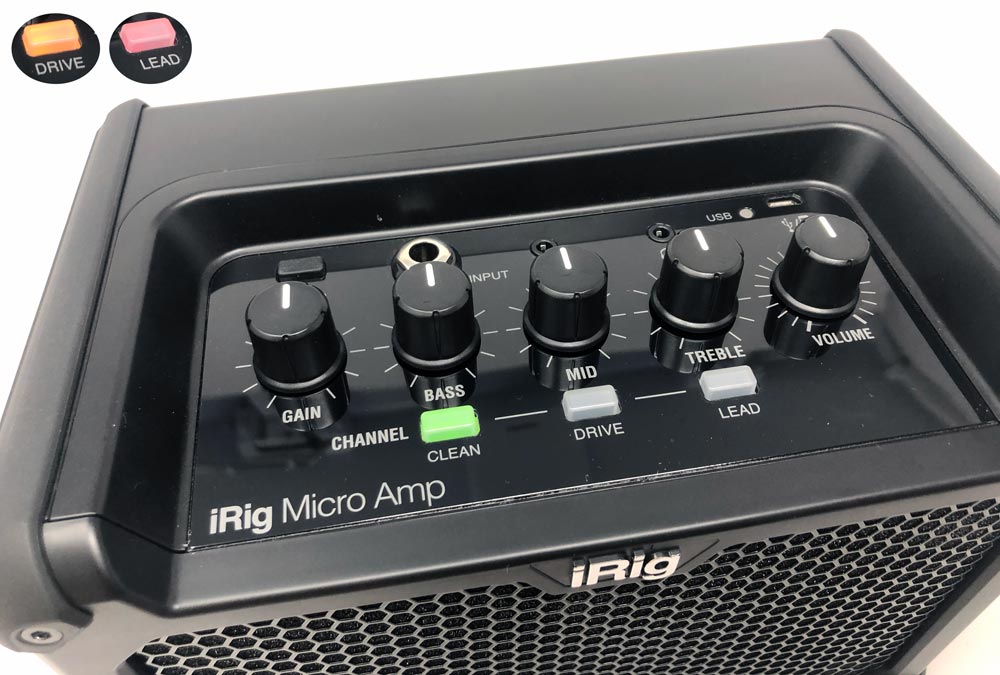
On the top panel are your main controls. Power button, 1/4″ instrument input, 1/8″ aux input, 1/8″ headphone out and Micro USB port for connecting your phone or Mac/PC. The Bass, Mid, Treble knobs are flanked by Gain on the left and Volume on the right. Your channel controls are front and center; Clean, Drive and Lead, each light with their own color when active for clear communication to the player in darker environments.

Setup

If you’ve used any kind of battery powered guitar amp before then you’ll have no issues here. Pop open the back and install the 6AAs iRig included (maybe switch to some rechargeable AAs after that), plug in your guitar, turn it on and start exploring.

If you want to connect it to a bigger cabinet, you’ll need a 1/4″ cable to connect the two and a power supply for the Micro Amp. iRig doesn’t include one in the box, but almost any standard stomp-box power adapter will work (just make sure it’s negative center on the barrel).

You’ll want to use one of the two included cables to connect the amp to your iOS device or a Mac/PC to use IK’s apps.

Performance

The Micro Amp is super convenient, really easy and fun to use. On battery power alone, the volume gets loud enough that halfway up is more than good for bedroom practice. On the clean channel, the sound is indeed clean and smooth. Drive and Lead increase the fuzz and the presence respectively. On first listen, this does not sound like a microamp. It’s got presence, there’s no hum in the background and lets you focus on your guitar. Easily bests the Yamaha THR5 at half the cost if you like clean sounds without a lot of overdrive.

Both my son and are able to pick up and carry the amp with a single hand, but it does feel like it’s missing a dedicated handle. Anyone with smaller hands or just carrying multiple things might have trouble. Similarly, the mic adapter should have a home in the battery compartment or somewhere so it doesn’t get lost.

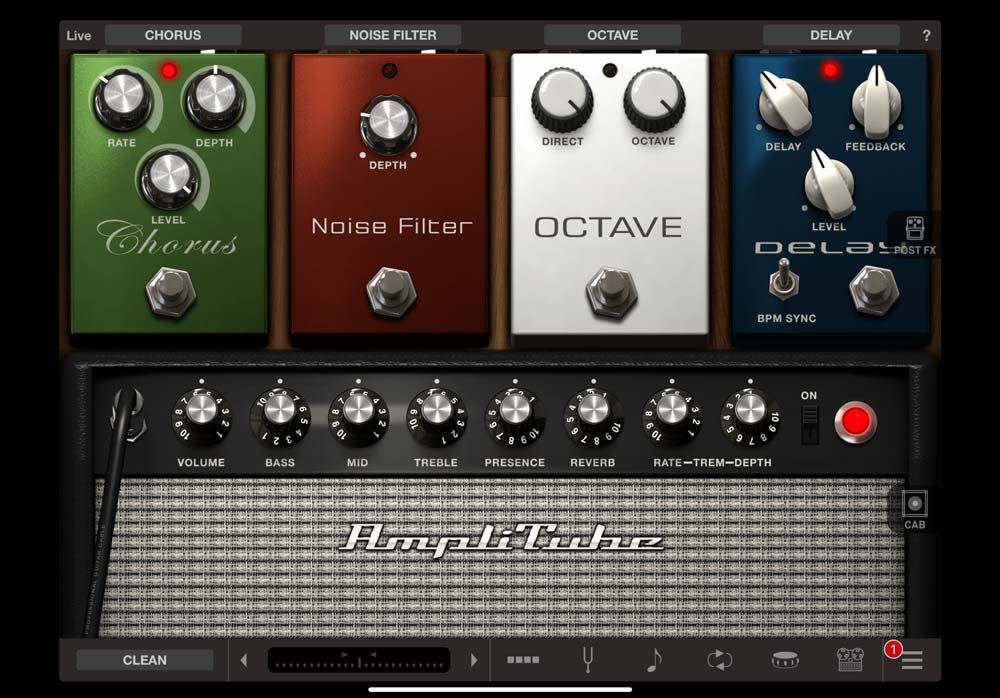
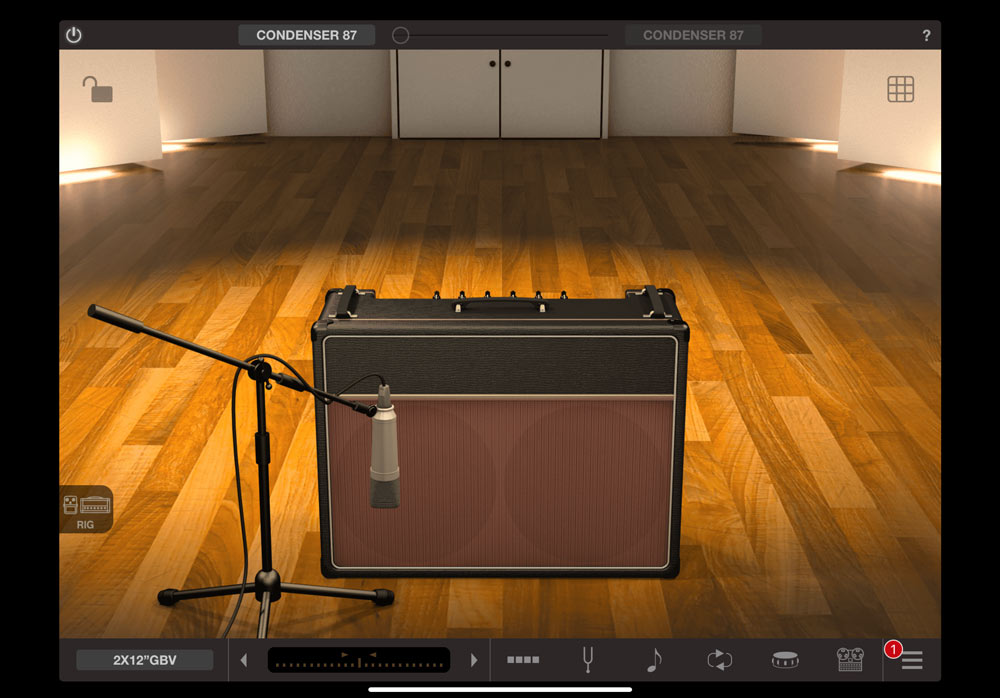
So what if you’re not into clean guitar and want crunch, or blistering metal or want to find a sound all your own? Any sounds that you may feel are missing are likely available by connecting your phone or computer and downloading the Amplitube app. It’s funny, but downloading the app I realized that it’s been around a while. I actually originally installed it on an iPad back in November of 2012 and it’s improved a lot since then.

26 of 32 of their own effects pedals are included with the app as you fill out a virtual pedal board. You can choose from pedals like delays, Chorus, Wah, Flangers, Overdrive and more as well as different head units that are sure to have what you’re looking for.

Connecting to Amplitube does override your channel settings so everything other than the physical knobs is now controlled by the app.

An additional 6 of their premium pedals and lots of effects pedals from brands like Fender, Orange and others are available to purchase as are amps and mics. The in-app purchasing feels a little bit like death by 1,000 paper cuts, but it is significantly cheaper than buying physical pedals outright by a long shot. Tip: look at the different bundles as they may save you some money over individual purchases.

Considering that Amplitube lets you add drum tracks, vocals, amps and then record your session, there’s a lot to like. For a new guitarist, there’s a lot of value and just as much for someone wanting to experiment with different pedals before buying real ones.

As I’m typing, Satchel is lost in a riff playing with the Octave pedal bouncing between something he’s laying down on the spot and the Mario underground theme song. Pretty sure he’d sit there for the full estimated 16 hour battery life if we left him alone.

Here’s a quick vid of the riff he shot with my iPhone.

View this post on Instagram

octaves dogtaves

A post shared by Satchel Birch (@satchriffs) on

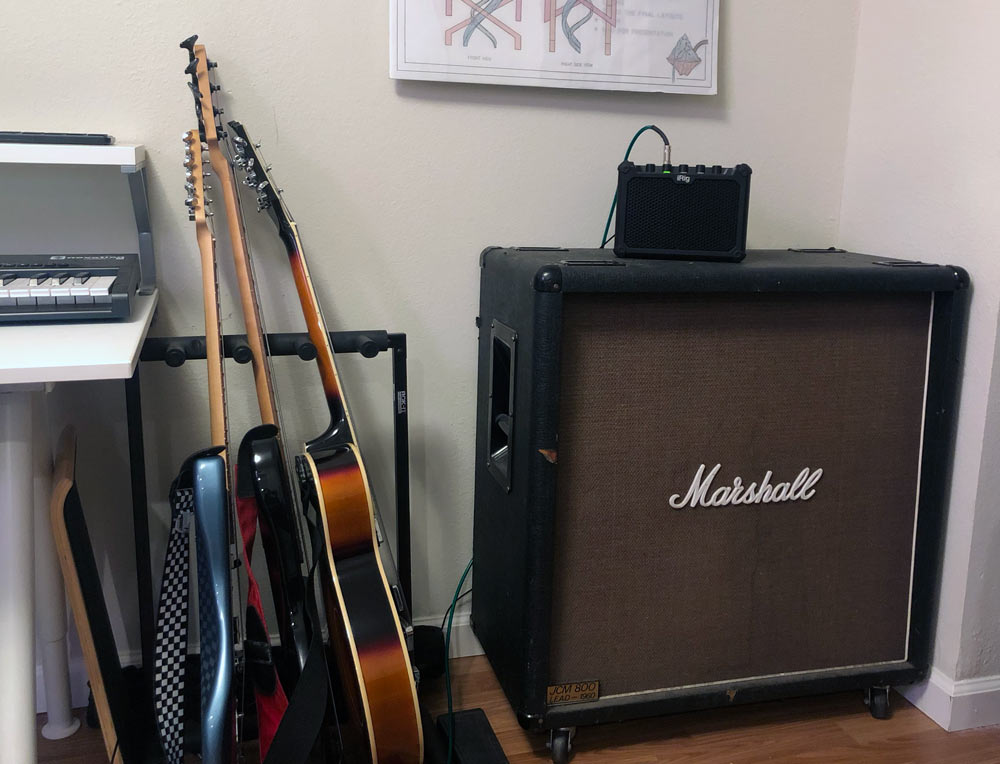
Maybe the coolest feature for me is that you can connect an external cabinet with its 1/4″ output connection. We have a 4×12 Marshall cabinet without a head unit that’s been collecting dust for a while. The Micro Amp plugged right in and was able to drive this 16 Ohm cabinet well enough that we were both smiling and nodding our heads. It’s worth noting that the output doubles from 7.5w to 15w when you use the DC port on the back of the Micro Amp instead of batteries. It’s not going to out-power a real system, but our cabinet will now see some use.

What I like

  • Size and weight is awesome
  • Sound is great with good controls
  • Amplitube app is fantastic sound exploration, and practice sessions in a box
  • Able to output and drive an external cabinet

What needs to be improved

  • It could use a handle or strap
  • Storage spot for mic adapter

Final thoughts

There’s not much to complain about here and the value outshines all of it. Satch is heading off to college this fall and this is the perfect size for the dorm room without sacrificing sound. It’s got me itching to pick up the guitar again myself.

Price: $149.00
Where to buy: IK Multimedia and Amazon
Source: The sample of this product was provided by IK Multimedia.

Filed in categories: Reviews

Tagged: ,

IK Multimedia iRig Micro Amp review originally appeared on The Gadgeteer on May 10, 2019 at 11:00 am.

Note: If you are subscribed to this feed through FeedBurner, please switch to our native feed URL http://the-gadgeteer.com/feed/ in order to ensure continuous delivery.
JackyLed Tower Power Strip review

REVIEW – As the number of devices that need to be charged and then recharged grows, so does the number of power strips I have lying around my house. Most of these power strips are just that: strips. The JACKYLED vertical power stip mixes things up by changing the form factor from a strip to a tower.

What is it?

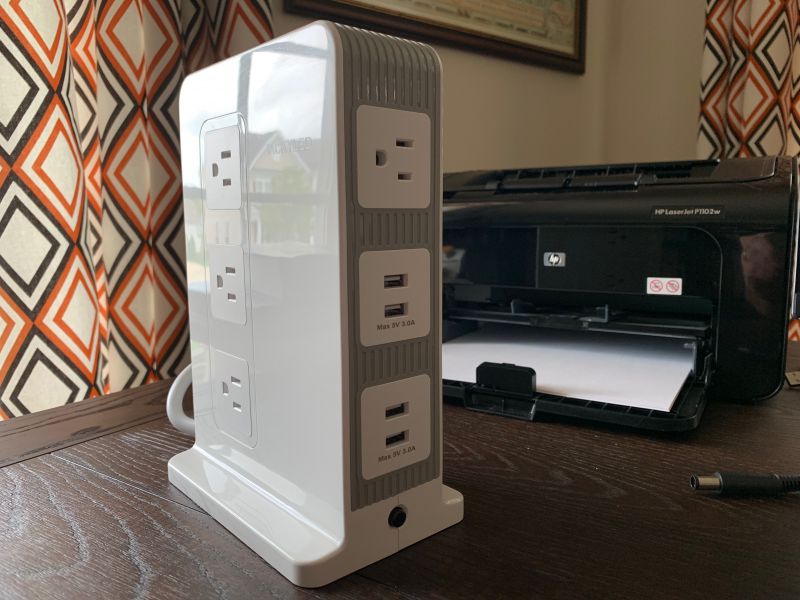
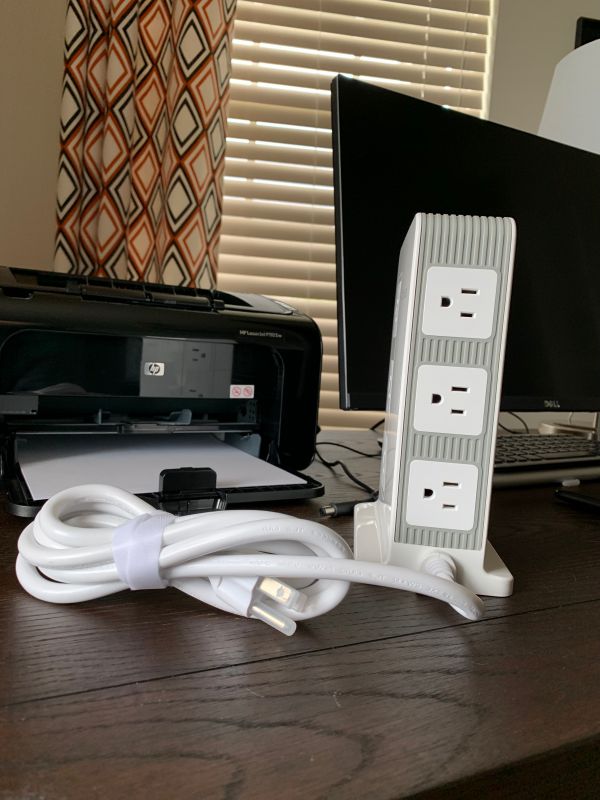
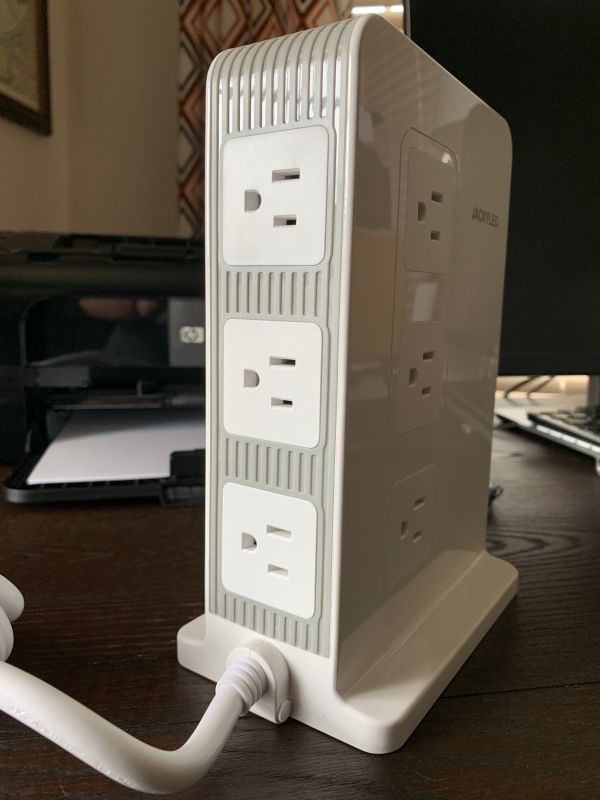
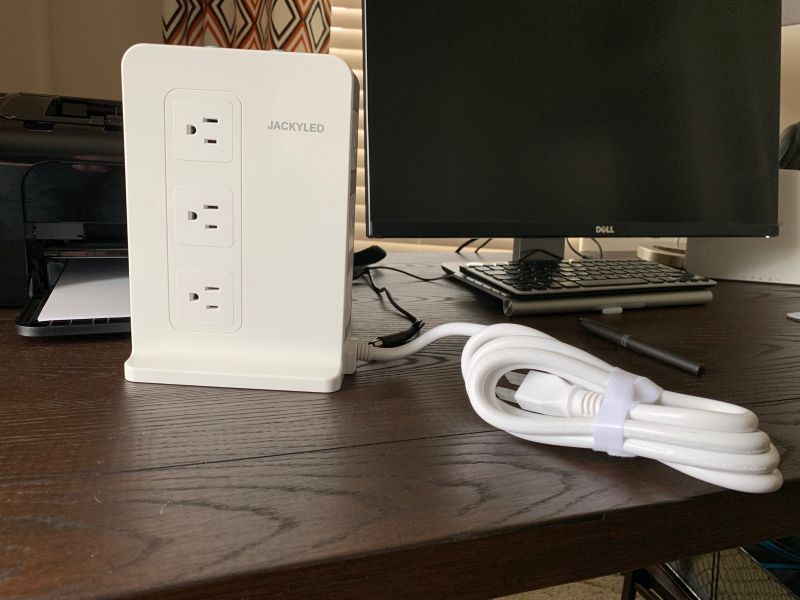
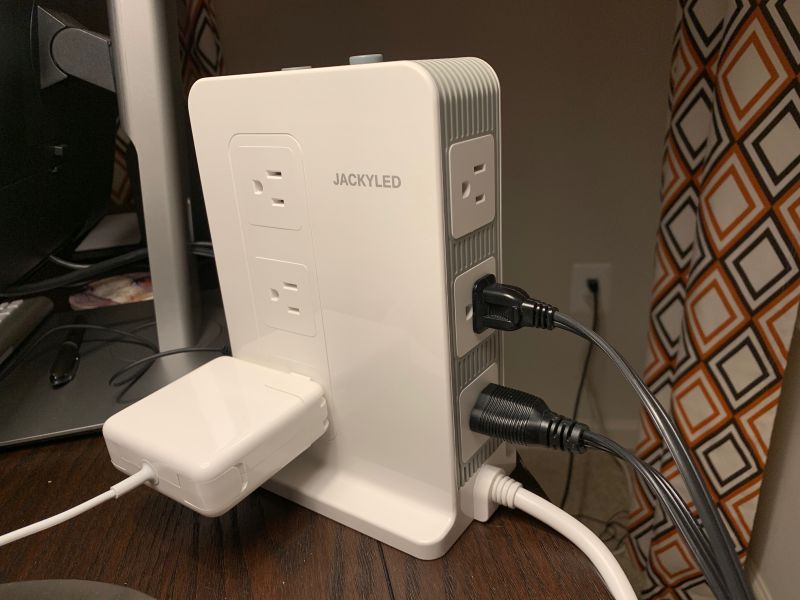
The JACKYLED vertical power tower is a rectangular power strip. It has a total of 10 outlets with three on the left and right side and on the back of the unit. It has a single outlet on the front with four USB charging ports along with a non-detachable 6.5-foot power cable. The outlets are spaced far apart such that most non-standard sized plugs can be used next to each other without being blocked.


What’s in the box?

  • JACKYLED Vertical Tower Power Strip
  • A tiny sheet of instructions

Hardware specs

  • 5.6 inches deep by 3.7 inches wide by 8.7inches tall
  • 10 outlets
  • 4,  3.0A USB ports
  • 1080J of overload protection
  • 6.56 foot 14 gauge non-detachable power cable
  • Case made of fire retardant PVC material

Design and features

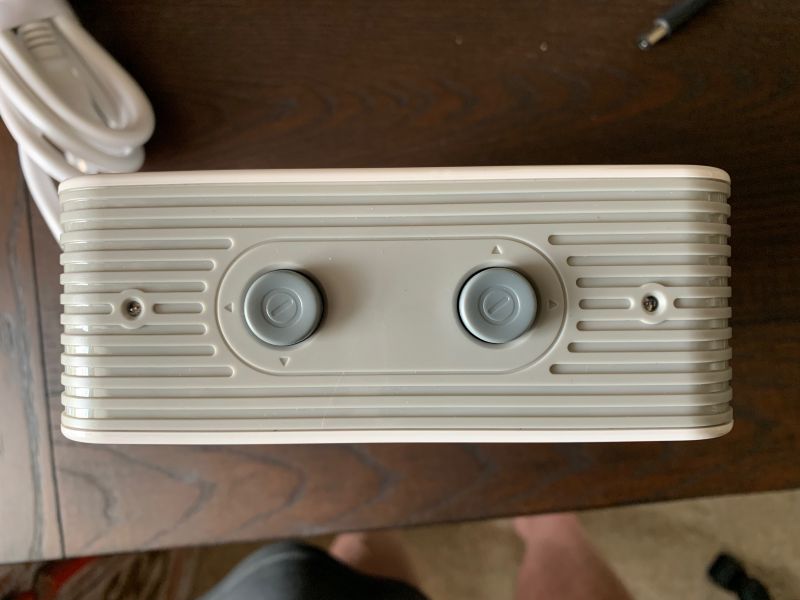
The JACKYLED power strip is more at home on your desk then on the floor behind it. It’s rectangular shape houses 10 outlets that I’ve not been able to block no matter how oddly shaped the power adapter I’ve plugged into it. The top of the unit has two power buttons. These allow you to turn off power to either of the side outlets. The is a useful feature when you want to leave items plugged in but don’t want to trickle charge things such as monitors and printers.

There are three outlets on the left that are mirrored on the right side. The back has three more. The front only has one outlet and four USB charging ports. The power cord is nicely built and has strain relief both at the box and the plug. The plug itself is somewhat ordinary and inserts straight into the wall. I’d prefer one that comes out of the wall at 45 degrees or drops down, but this one gets the job done.

I set the JACKYLED up behind my monitor on my desk. I transferred everything I’d plugged into two strips on the floor to it. While it started to look a little octopus-like, with cords jutting out from all sides, it allowed me to get rid of two strips and clean up the floor around my desk. Additionally, the fact that it was on my desk allowed me to unplug things without having to lie down on the floor.

What I like

  • A form factor that allows all outlet to be used without blocking adjacent outlets
  • On/Off switches for alternate side outlets
  • 10 outlets mean you can plug in a whole bunch of stuff.

What needs to be improved

  • It’s rather light, so when you have a lot of things plugged in, it tends to shift around a bit.

Final thoughts

the JACKYLED Tower Power Strip is a great unit with loads of outlets and tons of space to use them. The addition of 4 USB charging ports on the front and the ability to turn on and off power to the outlets only increases its value. The only negative thing I can offer is that it is a bit light and can be pulled around a bit if you plug in devices with a bit of heft behind them.

Price: $38.99
Where to buy: Amazon or ARACKY
Source: The sample of this product was provided by Amazon

Filed in categories: Reviews

Tagged:

JackyLed Tower Power Strip review originally appeared on The Gadgeteer on May 10, 2019 at 9:00 am.

Note: If you are subscribed to this feed through FeedBurner, please switch to our native feed URL http://the-gadgeteer.com/feed/ in order to ensure continuous delivery.
Trustech Fan review


REVIEW – I live in NYC, and with the spring season beginning to emerge from the dark and cold winter, I am looking to replace my old and broken floor standing fan with a new fan that will provide effective and efficient cooling for that period of time before the air conditioner is a must. I recently got my hands on the Trustech Oscillating Tower Fan. Here is a summary of my experience with it.

What is it?

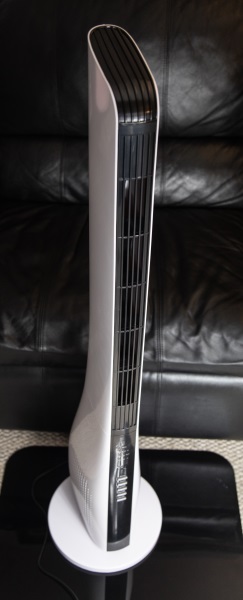
The Trustech fan is an oscillating tower pedestal Remote Control fan that is bladeless and quiet.

What’s in the box


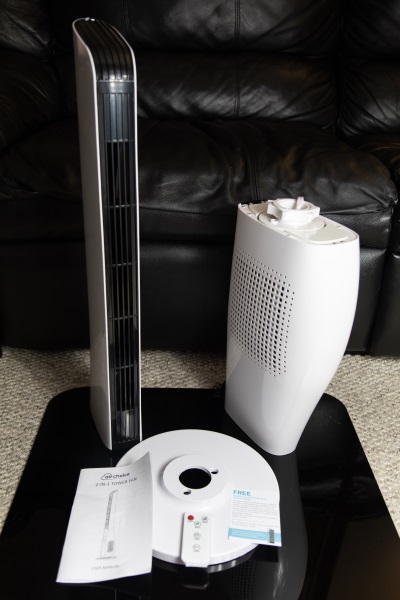
1 x Trustech Fan (In 3 parts that require simple assembly)
1 x Remote Control
1 x User Guide

Design and features

Features

  • Air Multiplier Technology
  • Ultra Quiet
  • Custom Cooling Time with Timer
  • Remote Control
  • 70 Degree Oscillating
  • Bladeless

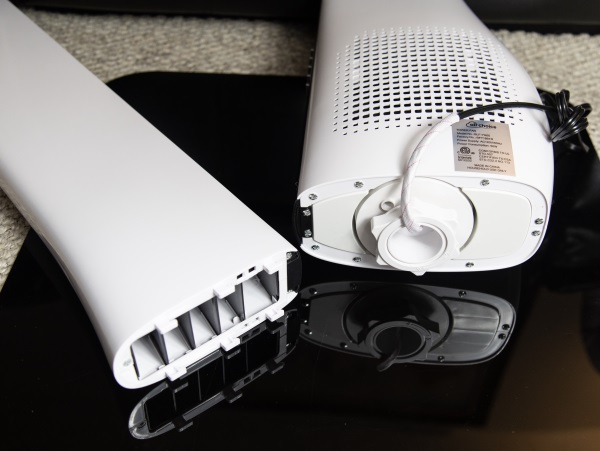
The Trustech Fan is a 3.6-foot standing fan. It arrives in 3 main pieces that are the base, the bottom portion that houses the electronics and the top portion that houses the output design including the fins.


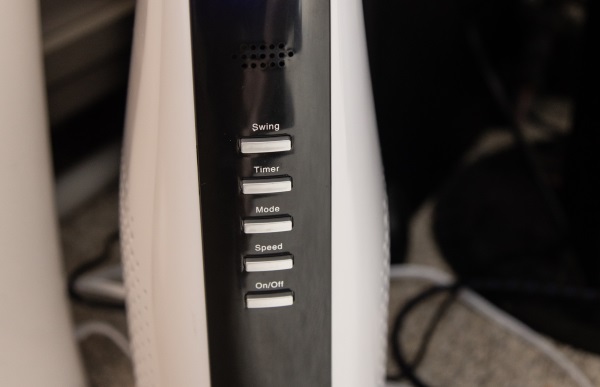
On the front of the fan, there are manual button controls that include, the swing on/off, the timer settings, the mode the speed and the power on/off.

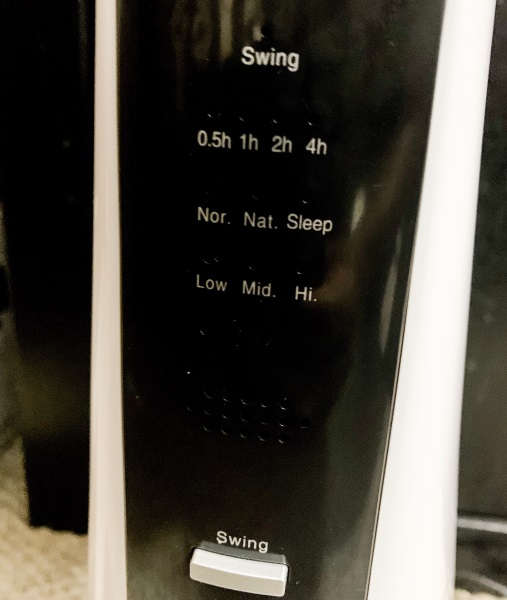
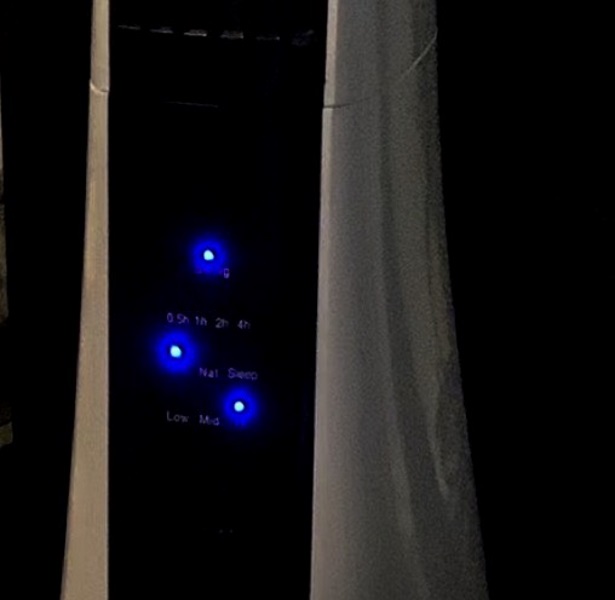
Above the control buttons, there are the LED indicators for the swing on/off, the timer setting, the air flow mode, and the air volume setting. The LEDs that are next to the labeled indicators light blue when selected.

Performance

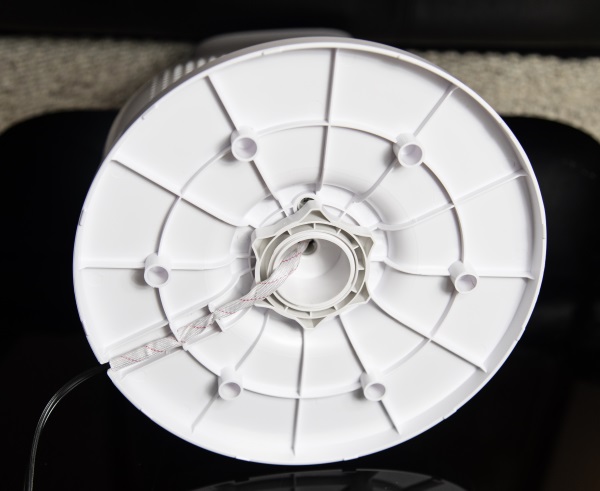
The fan arrives as 3 main parts in the box. Assembly is very simple. The bottom portion of the fan has a threaded base that fits into the fan base and can only fit one way. There is a plastic nut that then screws on to the threaded base to connect the two. The fan base has notches to neatly pass the power cable through. The top portion of the fan simply clicks into place on the bottom portion. The fan is made mostly of plastic but does not feel poorly made or really cheap. Once standing, the fan is also quite steady on its base. The remote control is small but functional. All that is left to do is to plug the fan into an AC power outlet and turn it on.

All of the functions are simple and work as expected including the timer functions, the swing mode, and the airflow modes. However, no matter what airflow mode you choose, the airflow pressure of this fan leaves much to be desired, and you can only get a proper cooling effect if you are quite close to the front of it.

What I like

  • The sleek design
  • The Oscillating capability
  • The sleep timer

What can be improved

  • The volume of air that it produces
  • A dimmer option for the bright LEDs that are on the front

Final thoughts

To be totally honest, this fan has been very disappointing for me. When I first received it I was quite pleased about the design, the features and the simplicity of the assembly. However, the most important task it is designed to perform is to blow an adequate volume of air to provide cooling. This fan cannot cool anything more than a tiny room. If you stand more than 5 feet in front of it, the effect is minimal at best. For my use, this inability is a deal breaker and even more so considering the price. Great design but a failing grade for performance.

Price: $122.99
Where to buy: Amazon
Sample: The sample for this review was provided by Trustech.

Filed in categories: Reviews

Tagged:

Trustech Fan review originally appeared on The Gadgeteer on May 9, 2019 at 10:03 am.

Note: If you are subscribed to this feed through FeedBurner, please switch to our native feed URL http://the-gadgeteer.com/feed/ in order to ensure continuous delivery.
Lockly Secure Pro Deadbolt Edition smart lock review

REVIEW – I love smart home gadgets. But I have yet to review any type of smart lock. That is up until now. Today I’ll be reviewing the Lockly Secure Pro Deadbolt Edition. This lock is loaded with a lot of unique security features, including a secure digital keypad and  3D fingerprint sensor.  Let’s take a look at the Lockly Secure Pro.

What is it?

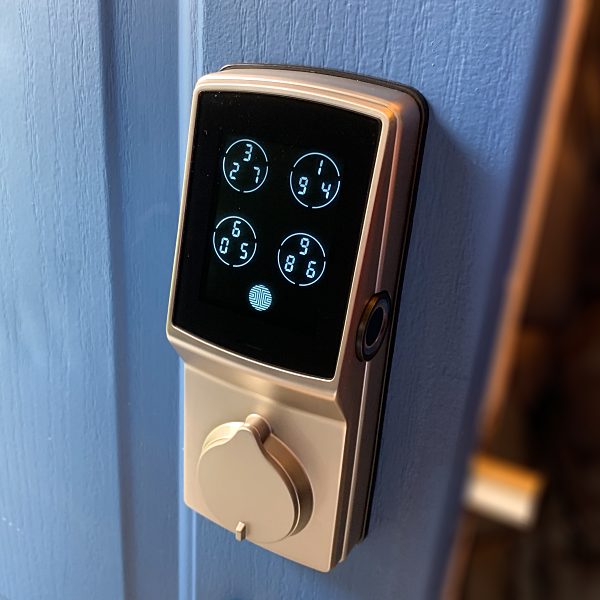
The Lockly Secure Pro Deadbolt Edition smart lock is a smart lock that features a digital touch screen keypad, a 3D fingerprint sensor and compatibility with Alexa and Google Assistant.

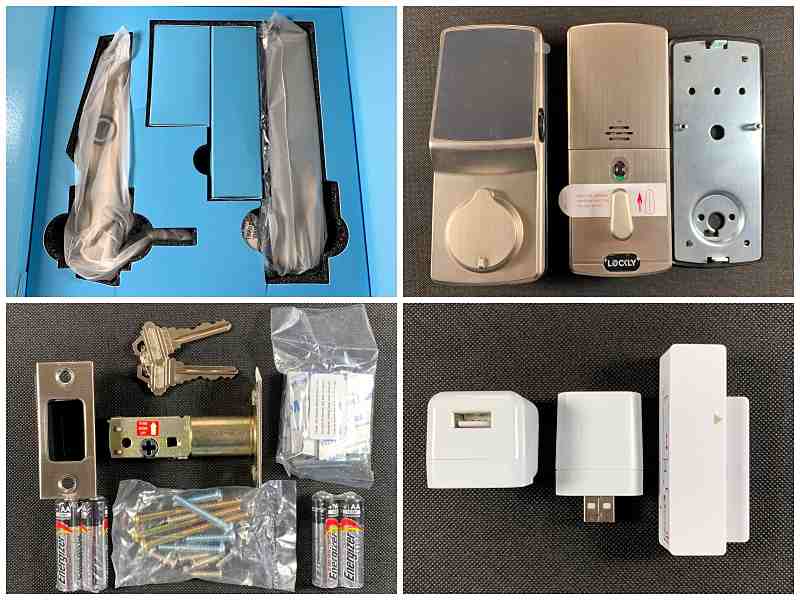
What’s in the box?

  • Secure Pro smart lock
  • Bolt assembly
  • Screws
  • Strike plate
  • Strike plate housing
  • Backplate
  • 2 x physical keys
  • 4 x AA alkaline batteries
  • Secure Link – Wi-Fi hub
  • Secure Link – Power adaptor
  • Secure Link – Door sensor
  • Quick start guide
  • Installation manual
  • User manual

Design and features

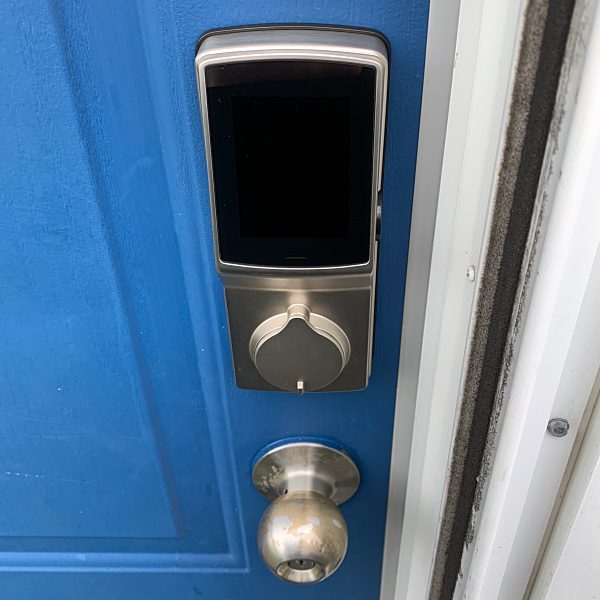
The Lockly Secure Pro has a modern, clean design. The lock is available in two colors, Satin Nickel and Venetian Bronze. I chose to go with the Satin Nickel because it was a close match to my door’s existing hardware.

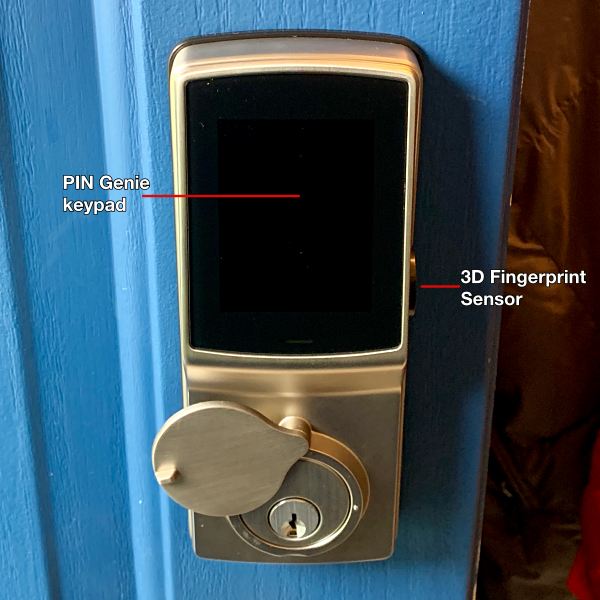
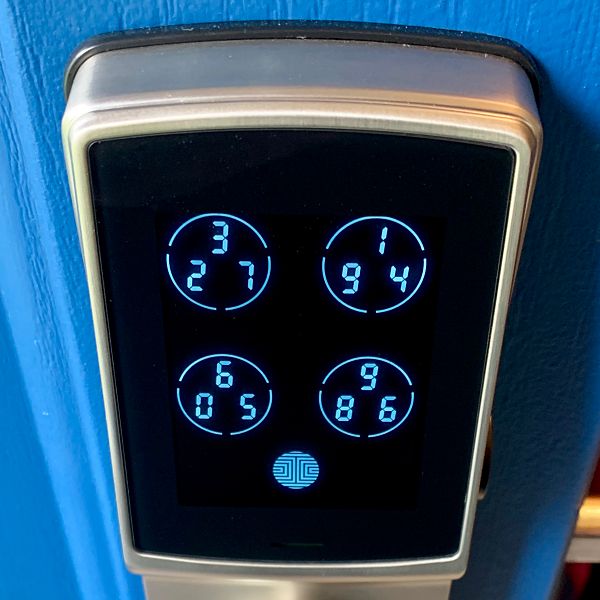
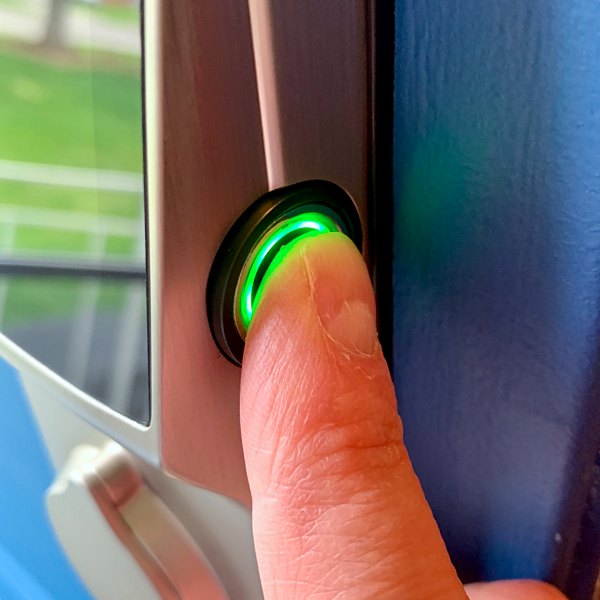
The front of the outer assembly features a digital keypad and keyhole w/keyhole cover. The fingerprint sensor is located on the right side of the assembly. On the bottom, there’s a reboot button and a 9V battery emergency charging socket.
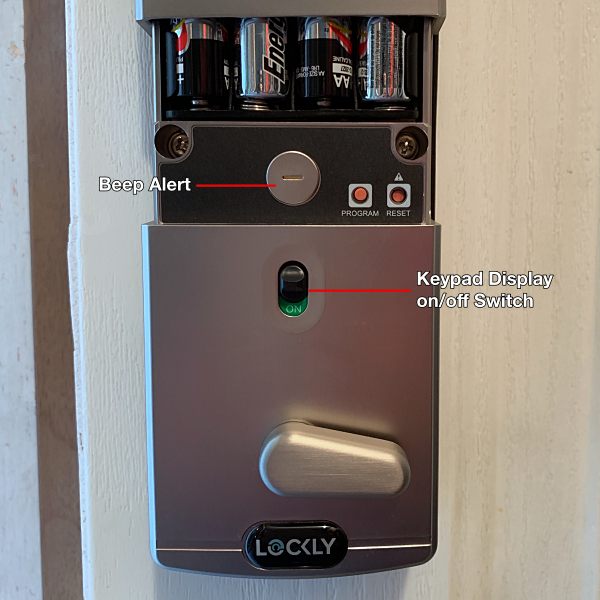
The inside assembly has the Battery Compartment (Operated by 4 x AA Batteries), Battery Cover, Display Keypad on/off Switch (switches off and locks the keypad), and Thumb-turn. Inside the battery compartment, there’s a reset button, Program Button and Beep Alert.

With Secure Pro, you can choose from five unique methods of entry, which include: the PIN Genie keypad, 3D fingerprint sensor, Lockly app, virtual assistant and traditional key.

The PIN Genie keypad allows you to unlock the door using a 6-8 digit access code.

Lockly’s patented PIN Genie Technology makes it virtually impossible for someone to use your access code unwillingly. The video below explains Lockly’s PIN Genie Algorithm and how it works.

The Lockly keypad has 3 different modes Standard, PIN Genie mode, and Random mode. The video below explains how each mode works.

The Secure Pro comes equipped with a capacitive fingerprint reader. Secure Pro uses capacitors and electrical current to form an image of the fingerprint, meaning only physical fingers will be accepted, preventing the use of lifted prints.

With the Lockly app, you can monitor and control your lock using either Bluetooth or Wi-Fi.

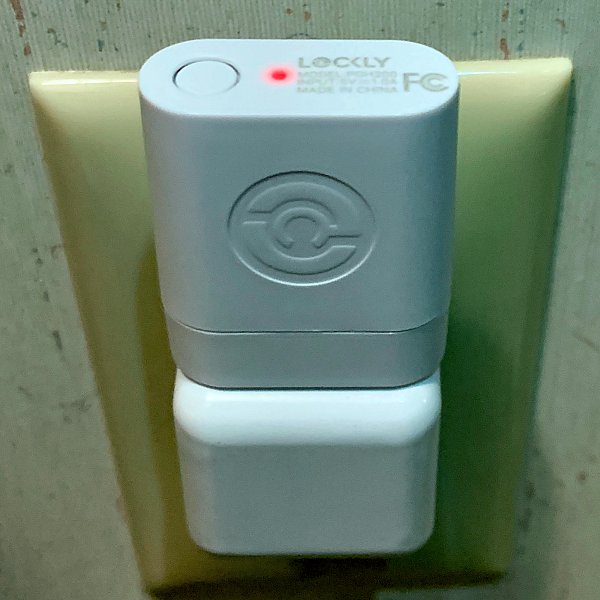
Using Wi-Fi requires the use of the included Secure Link WiFi Hub. The hub allows you to lock, unlock, and monitor your smart lock remotely wherever you have a Wi-Fi connection. Setting up the Hub is easy using the Lockly app.

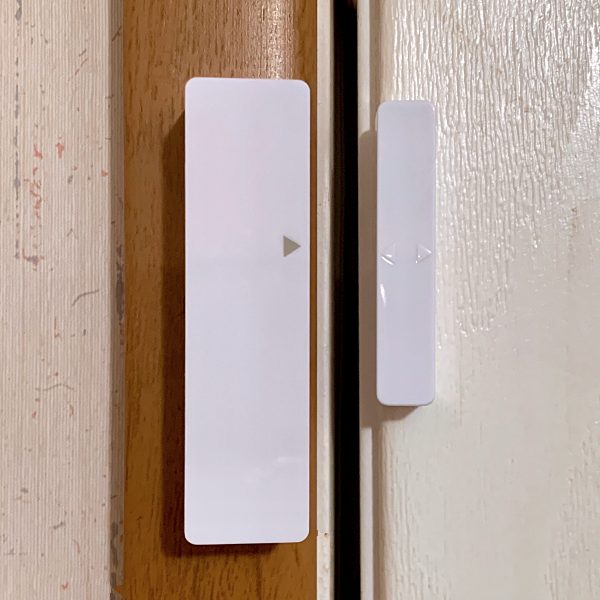
The Hub comes with a door sensor.

The sensor provides the ability to verify that your door is securely closed and not ajar and also send push notifications to your phone on the status of your door when someone opens and closes the door.

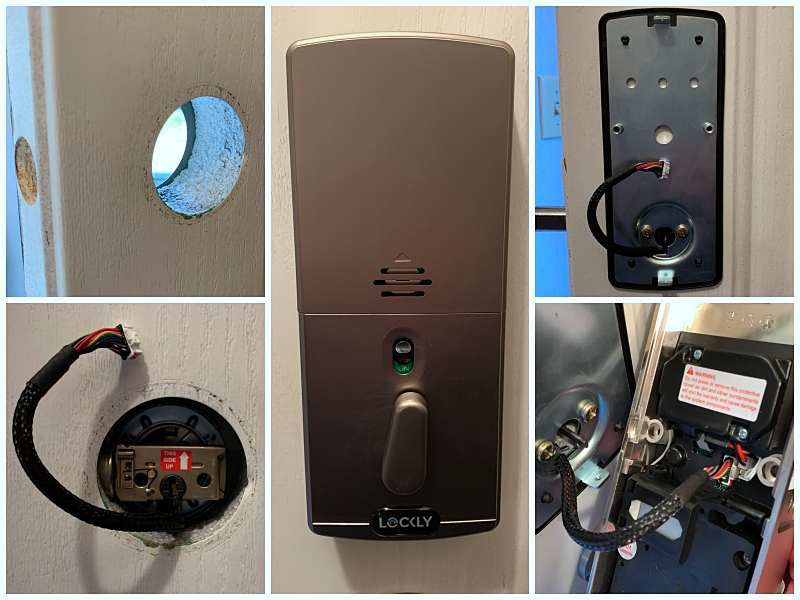
Installation

Installing the lock is pretty easy, especially if you’re replacing an existing deadbolt. If you’re not Lockly provides templates to help you out.

The only tools you’ll need are a Phillips head screwdriver and a little patience.

The installation instructions are easy to follow and very detailed. Take it from someone that usually doesn’t bother reading instruction, read these carefully before you get started.

Setup

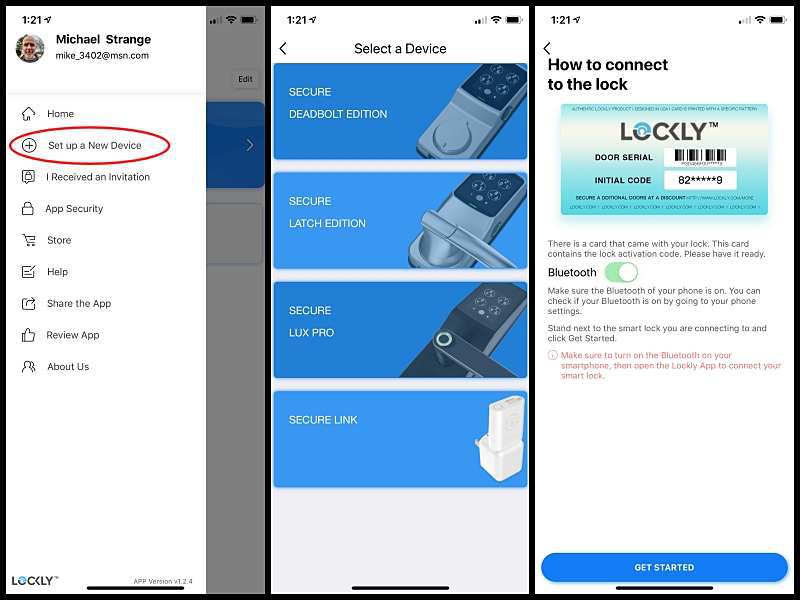
The lock can be set up with or without the Lockly app, but using the app is recommended and much easier.

After downloading and launching the app choose Setup a New Device from the slide over menu and follow the instructions.

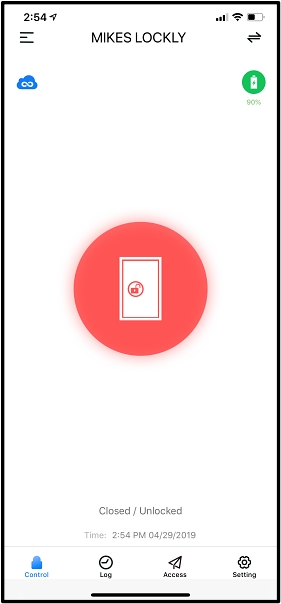
The Lockly app not only allows you to monitor and control your lock, but it also gives you access to the locks key functions.

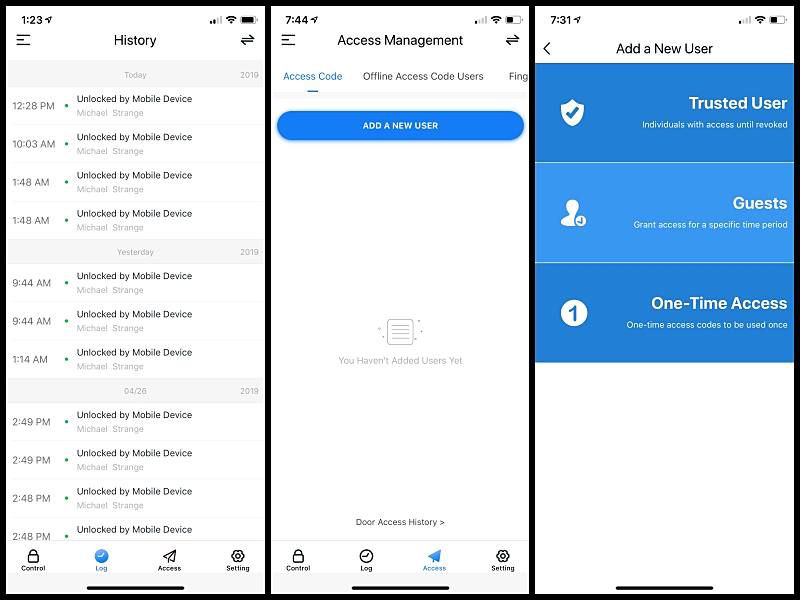
You can check the access log, grant, monitor, and revoke user access. Issue temporary eKeys, one-time use codes, and set custom durations.

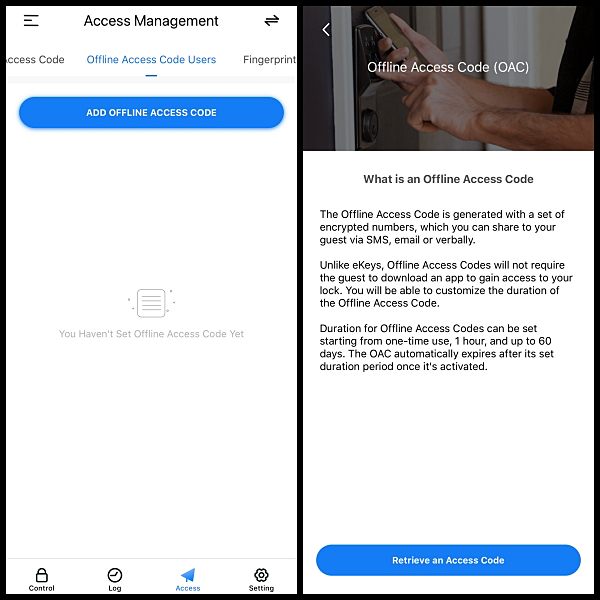
One of the codes you can issue is the Offline Access Code. This unique code allows you to grant access to guests remotely without guests needing to download the app.

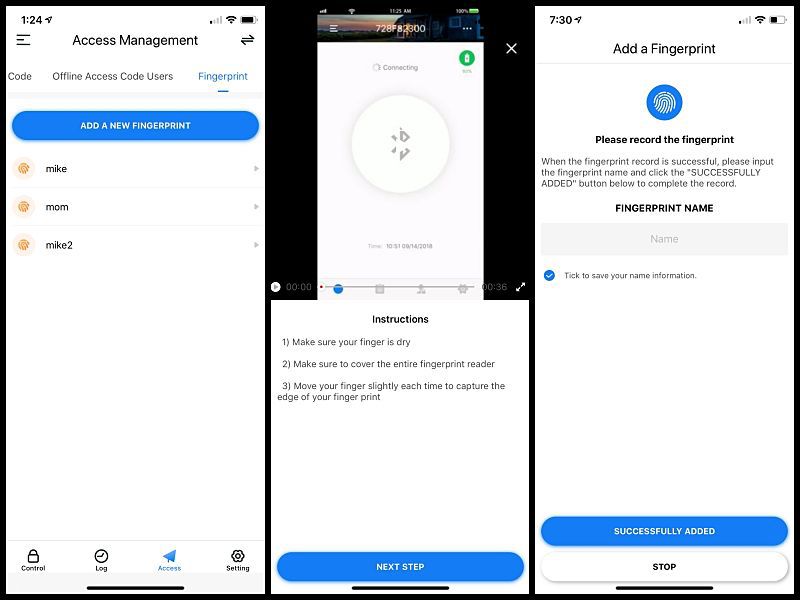
The app is also where you can add and manage Fingerprints. To add a Fingerprint your phone must be connected to the lock via Bluetooth. Select Add a New Fingerprint and watch the brief video. The Secure Pro can store up to 99 different fingerprints.

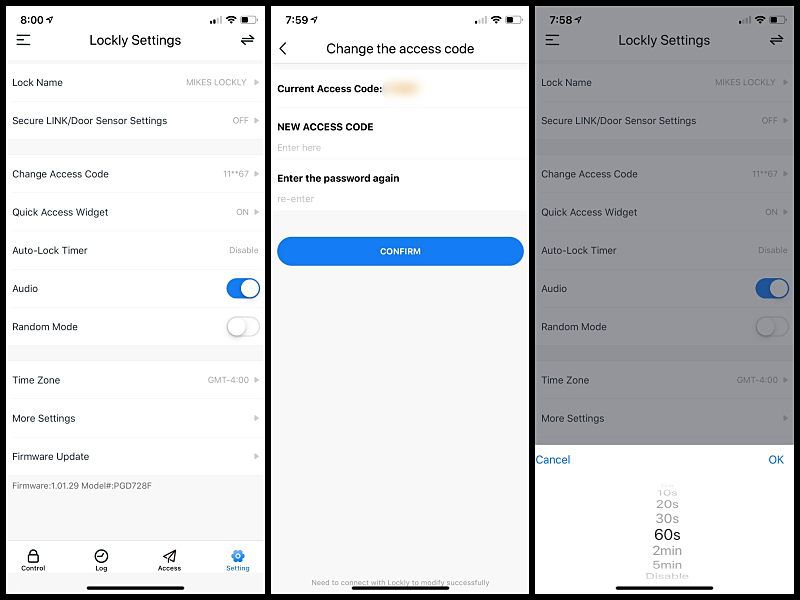
In the app’s Settings, you can change your Access code and enable the Auto-Lock Timer. With Auto Lock enabled, Lockly will automatically auto-lock the door based on your customized timing set between 5 seconds and 5 minutes.

Using Lockly couldn’t be easier. When leaving the house, all I have to do to lock the door is slide my hand across the keypad.

Unlocking the door is just as easy using my access code, the fingerprint sensor, or the Lockly app on my phone.

The Secure Pro also comes Alexa and Google Assistant enabled.

I love this feature. I have a bad habit of not locking my door at night and asking Alexa if the door is locked beats getting out of bed and trudging to the front door to check. And if I do forget to lock it, I can just tell Alexa to lock it for me.

In order to use Alexa, you’ll need to enable the “Lockly” skill in the Amazon Alexa app.

What I like

  • Easy to install
  • Five different ways to unlock
  • PIN Genie digital keypad
  • 3D fingerprint sensor
  • Easy to share secure access codes
  • Alexa compatibility  
  • Long battery life
  • Bluetooth and WiFi connectivity

What needs to be improved

  • Nothing

Final thoughts

I like everything about the Lockly Secure Pro Deadbolt Edition smart lock. From being able to monitor and control my door through my phone. To easy and secure access via the secure digital keypad or fingerprint sensor. And the added bonus of easily being able to share access codes with family and friends. This is my first smart lock, and after using it over the past couple of weeks, I’m convinced it’s the last one that I’ll ever need.

Price: $299
Where to buy: Lockly and Amazon
Source: The sample of this product was provided by Lockly.

Filed in categories: Reviews

Tagged: ,

Lockly Secure Pro Deadbolt Edition smart lock review originally appeared on The Gadgeteer on May 9, 2019 at 9:00 am.

Note: If you are subscribed to this feed through FeedBurner, please switch to our native feed URL http://the-gadgeteer.com/feed/ in order to ensure continuous delivery.