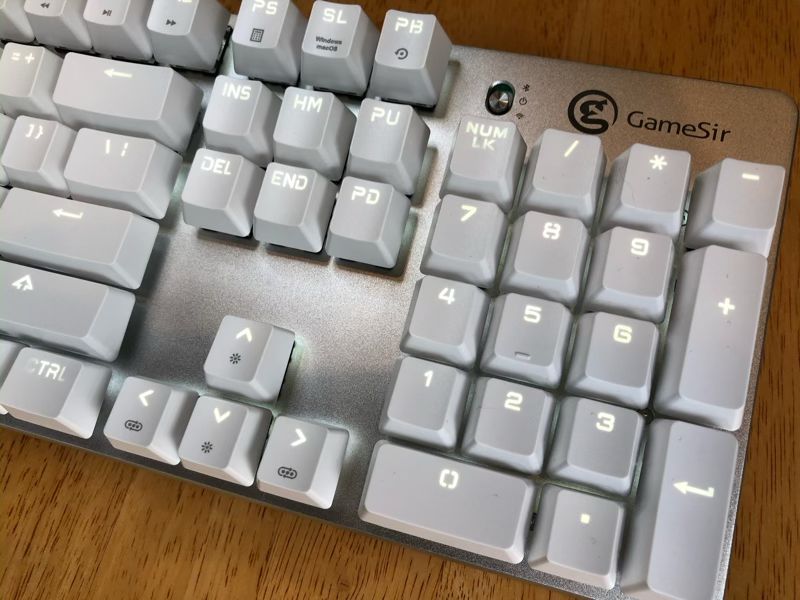
GameSir GK300 Wireless Mechanical Gaming Keyboard review

 REVIEW – Most of my leisure time these days is spent playing Dota 2, so to support my keyboard-mashing habit, last year I bought a really nice keyboard, a Razer BlackWidow Ultimate.  It’s a super study mechanical keyboard that can take a lot of abuse.  It is, however, a wired keyboard.  As a gamer, I am generally skeptical of wireless keyboards, worried about getting lag and running low on battery, so I was excited to test out GameSir’s GK300 wireless keyboard to see how it stacks up against my Razer.

What is it?

The GK300 is a wireless keyboard that is designed for gaming.  It’s a full-sized keyboard with 104 mechanical keys and has a built-in, rechargeable, lithium battery.

What’s in the box?
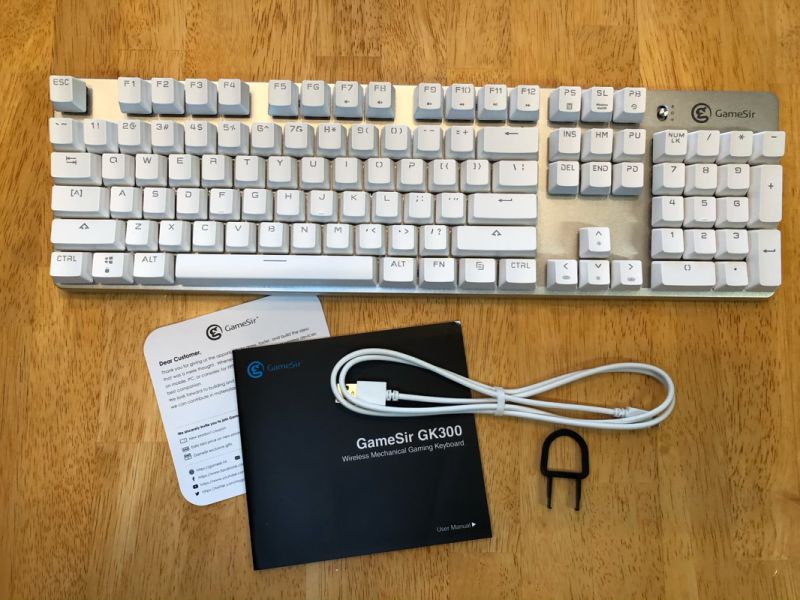
  • The keyboard and a wrist rest
  • A wireless dongle
  • A micro USB cable
  • A user manual with 6 pages of English instructions

Hardware specs

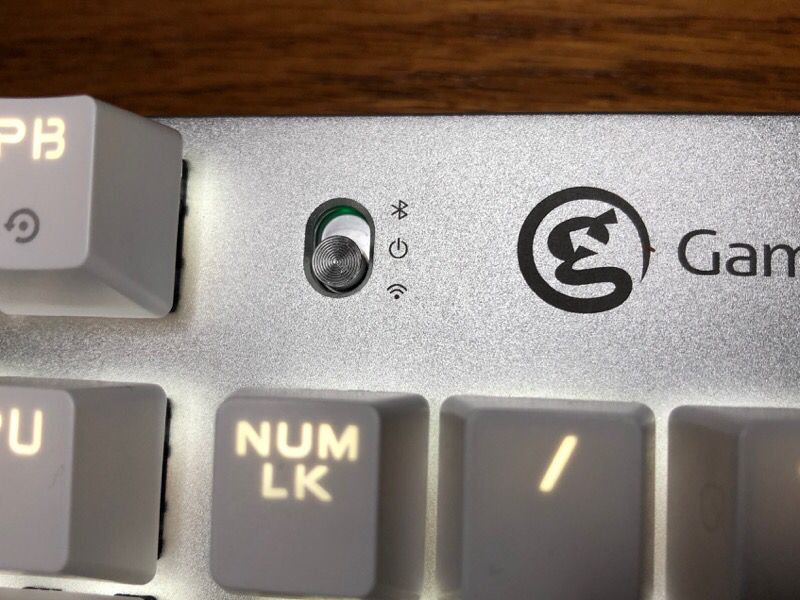
The keyboard can connect to a computer using either 2.4 GHz wireless or Bluetooth 4.1.  There’s a small switch on the keyboard that allows me to choose my preference.
The keyboard is compatible with both PC and Mac.  I tested it on my Windows 10 gaming computer and my MacBook Pro.  Unlike my Razer keyboard, it lacks a USB port and a headphones jack, but this is not surprising, as it’s battery-powered.   Speaking of the battery, the GK300 has an internal, 3600 mAh lithium-ion battery.  GameSir’s website says that it should last 300 hours if you don’t turn on the backlighting, and only 30 hours if you do.  Keep in mind that the battery is not replaceable.

Design and features

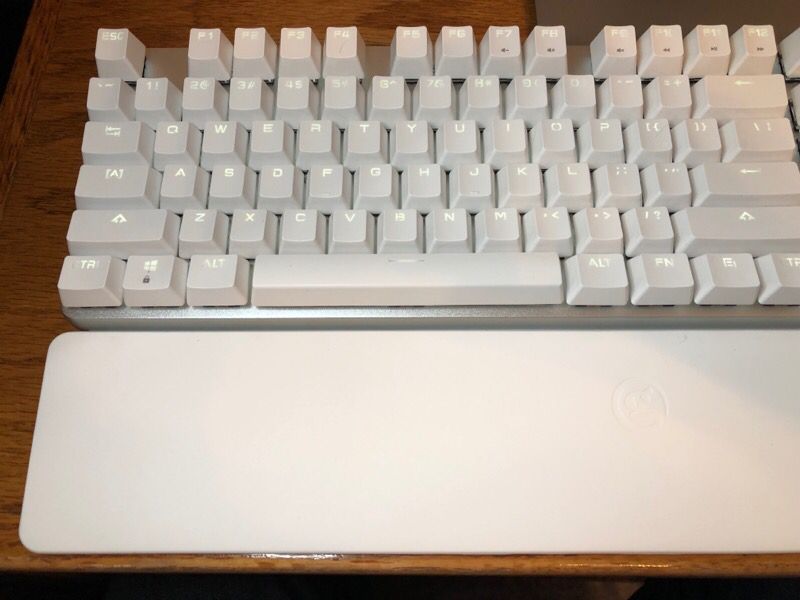
The keyboard is a standard, full-sized keyboard.  The unit I tested has white, plastic keys and a white wrist rest.  I can’t say that I’m a fan of white, and I anticipate that it will show dirt too easily.  GameSir also sells this keyboard in space gray, which is probably a better choice for most gamers, as we don’t have the reputation of being the neatest, cleanest people on the planet.

The keyboard is angled at 7.5 degrees and comes with a wrist rest; it’s an ergonomic design that should help to minimize carpal tunnel syndrome.  The wrist rest has 3 notches embedded in, which have corresponding stubs under the keyboard.  The keyboard fits perfectly in them, and this keeps the wrist rest in place.
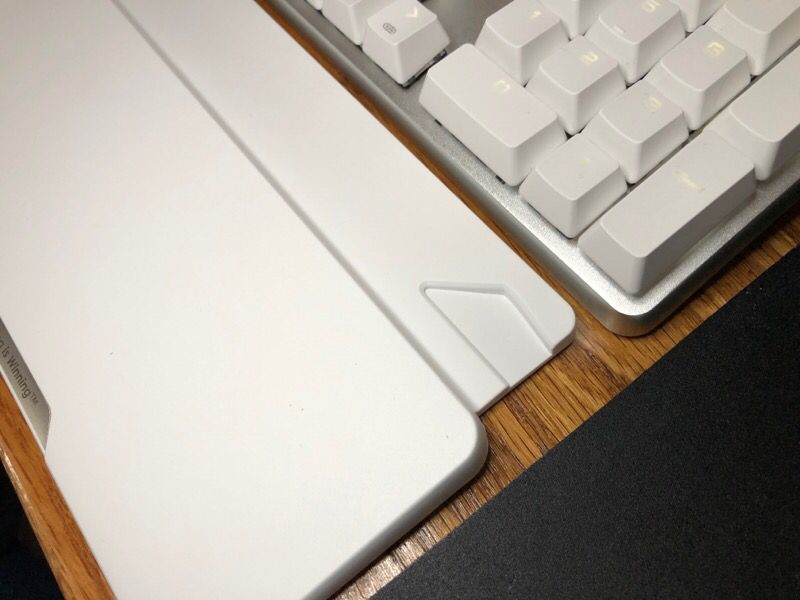
Additionally, there 6 rubber feet on the bottom of the keyboard and 5 more on the wrist rest; together they did a good job of preventing them from sliding around on my desk.

The top cover of the keyboard is made from an aluminum alloy, while the underside is made from white plastic.  The keyboard is solid and fairly heavy; when I grabbed the ends and twisted, it didn’t flex.  From all appearances, it’s a well-made gadget.

Installation and setup

The keyboard comes with an internal, rechargeable battery, and the first thing I had to do was charge it.  I plugged the micro USB connector into the side of the keyboard and the other end into a USB port on my PC.  GameSir’s website says that it needs 3 hours to charge and recommends that I let it charge fully before playing, so I did.
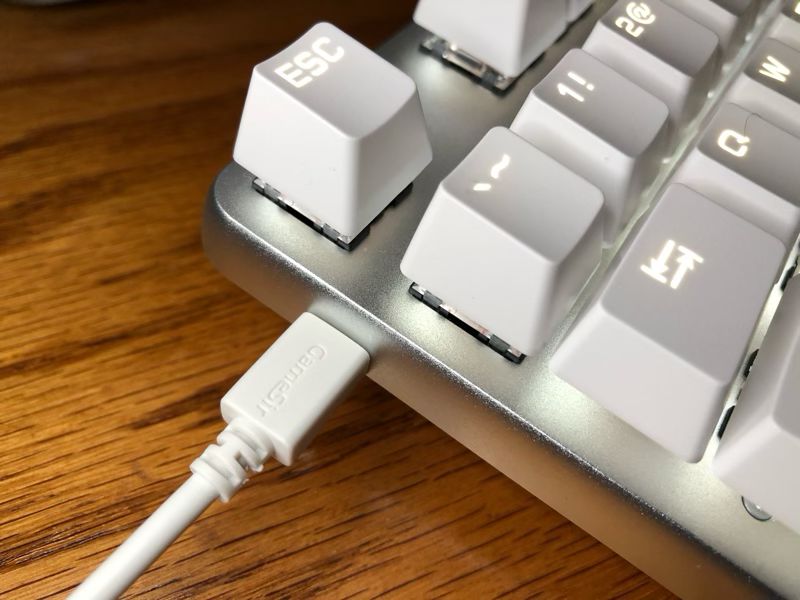
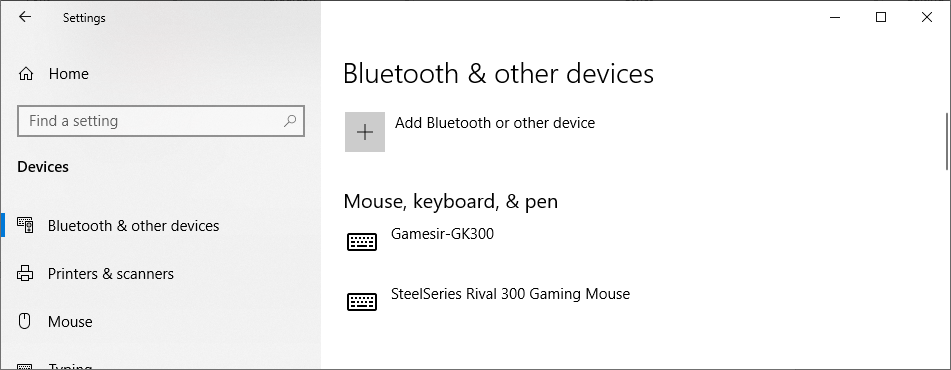
The keyboard supports both 2.4 GHz wireless and Bluetooth 4.1, but as my motherboard doesn’t support Bluetooth, the only thing I tested was the wireless.  On the bottom of the keyboard is a small slot that stores the wireless dongle.  I pulled it out and connected to a USB port on my PC, and Windows 10 promptly found and installed the driver.  When I tested it on my MacBook Pro, it did the same.
Performance

When it comes to the performance of a wireless keyboard, I admit that I have concerns.  My first concern is obviously, “Is there any lag?”  When playing online, competitive games, there’s no room any amount of lag.  The good news is that I could not discern any lag at all.  I jumped right into my favorite game and began playing.  No lag detected!

My second concern is the feel of the keys.  When pounding away, I want them to be very tactile and give strong feedback letting me know that each key was successfully pressed.  This is why all good gaming keyboards use mechanical keys.  I’m happy to report that the GK300 performed as expected.  In fact, once my game got going, I forgot that I wasn’t using my trusty Razer.

My third concern is battery life.  What happens when the battery gets low in the middle of a game?  The manual says the LED under the wireless/Bluetooth switch will flash red when battery life drops below 15%, but this is not what actually happened.  After several days of playing, about when the battery should have been getting low, the switch started flashing green and red.  This left me a bit confused, because it’s not what the manual says.  Assuming that this was still a battery problem, I plugged in the USB cable, and it charged while playing.  I’ll always need to keep the cable handy because I can’t afford to have my keyboard die during a game.

After many hours of gaming, I can say with confidence that the GK300 plays very similar to my Razer keyboard, and that’s a compliment!

Extras

These days all gaming peripherals come with some sort of extra lighting, and the GK300 is no exception.  Using the function key, I can set the lights to roll across the keys like a wave, to light keys as I touch them, to pulse out in wave from each key I touch, to light all the keys, etc.  Personally, I prefer to leave all the lights on, as the room I game in is a bit dim, but it’s nice to have these choices.  The lights on this keyboard only come in one color, white, and I can control how bright they get.  What I really appreciate is that I don’t have to install any extra software in order to set the lighting, something that I have to do for my Razer keyboard.

I’m not normally a fan of wrist rests, but as this keyboard comes with one, I decided to test it out.  After playing with it for several days, I can say that it’s not bad.  It doesn’t squirm around, and the support it provides is comfortable.  It does push the keyboard a bit further away from the edge of the desk than I prefer, but it needs to have some room.  If having a wrist rest is important to you, you’ll probably like this one.
The GK300 manual notes that the keyboard can use Bluetooth and connect to an Android or iOS device.  While I don’t really have a need to connect my iPad to a keyboard, I decided to test it out anyway.  I followed the instructions in the manual, and while the iPad was able to detect the keyboard, it was not able to pair with it.  I kept getting a “the pairing took too long” error. Just to make sure there wasn’t some problem with my iPad, I tried it on my daughter’s as well but got the same error.  The manual notes that if pairing fails, I should hit the function and reset keys simultaneously; that’s great, but there is no reset button on this keyboard, so I don’t know what the manual was trying to tell me.  I tried to use other keys instead of the mythical reset key, but nothing worked.  If connecting to your phone or tablet is important, you’ll want to look elsewhere, but honestly, if you that’s what you need, there are better keyboards for the job.

Tech Support

GameSir’s GM300 wireless mouse comes with utility software, G-Core, that provides some extra configuration options.  I couldn’t find anything similar in the GK300 manual for their keyboard, so I decided to test GameSir’s tech support.  Their “Ask for Help” page has a form that I filled out with my question.  Although their website guaranteed a reply within 1 day, I never got one.  It appears that GameSir doesn’t actually offer any tech support.

What I like

  • Solid, responsive keys
  • Sturdy construction
  • Good wireless performance

What needs to be improved

  • Bluetooth connection to iOS devices
  • Inaccuracies in the manual
  • AWOL tech support

Final thoughts

I played a lot of games using GameSir’s keyboard, and I must say that I like it; in fact, I am surprised by how much I like it.  As I was comparing it to my Razer, I was expecting it to fall short, but that didn’t really happen.

Do I plan to replace my Razer with GameSir’s keyboard?  No, I don’t.  With a wired keyboard, I have the peace of mind knowing that lag and battery problems just aren’t a thing.  If was I looking to buy a wireless, mechanical keyboard for gaming, would I consider the GK300?  This is tough, but probably not.  If I were only comparing the keyboard to other keyboards, I would consider the GK300; however, when I consider the entire package (the poor manual, the problems with Bluetooth, and the lack of tech support), I think I would look elsewhere.  If GameSir wants to compete with top-tier providers of gaming peripherals, like Razer, Logitech, and Sennheiser, then they are going to have to step up their game.  And I hope they do because the GK300 is a solid product.

Price: $69.99
Where to buyGameSir’s store or Amazon
Source: The sample for this review was provided by GameSir.

Filed in categories: Reviews

Tagged:

GameSir GK300 Wireless Mechanical Gaming Keyboard review originally appeared on The Gadgeteer on May 21, 2019 at 9:00 am.

Note: If you are subscribed to this feed through FeedBurner, please switch to our native feed URL http://the-gadgeteer.com/feed/ in order to ensure continuous delivery.

myGEKOgear OwlScout dual dash cam review

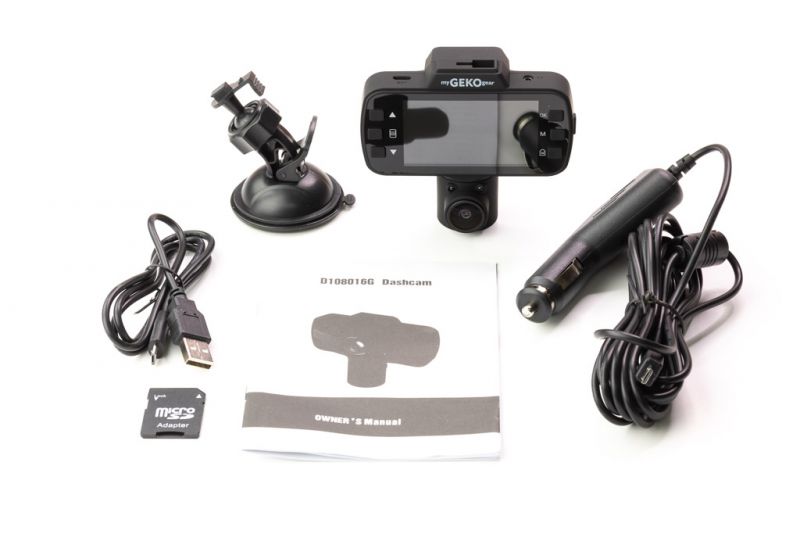
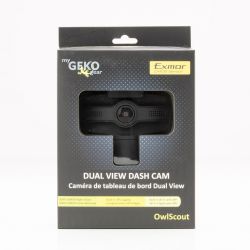
REVIEW – I’ve reviewed a few dash cams in the past, but this time I tried out the myGEKOgear OwlScout dual dash cam. I’ve reviewed a few dash cams from this company, but none with dual built-in cameras. Let’s see how this one performs.

What is it?

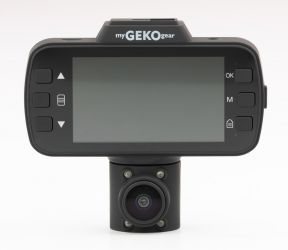
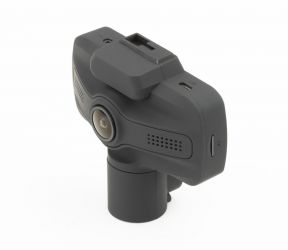
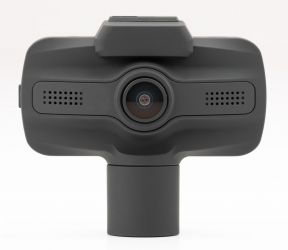
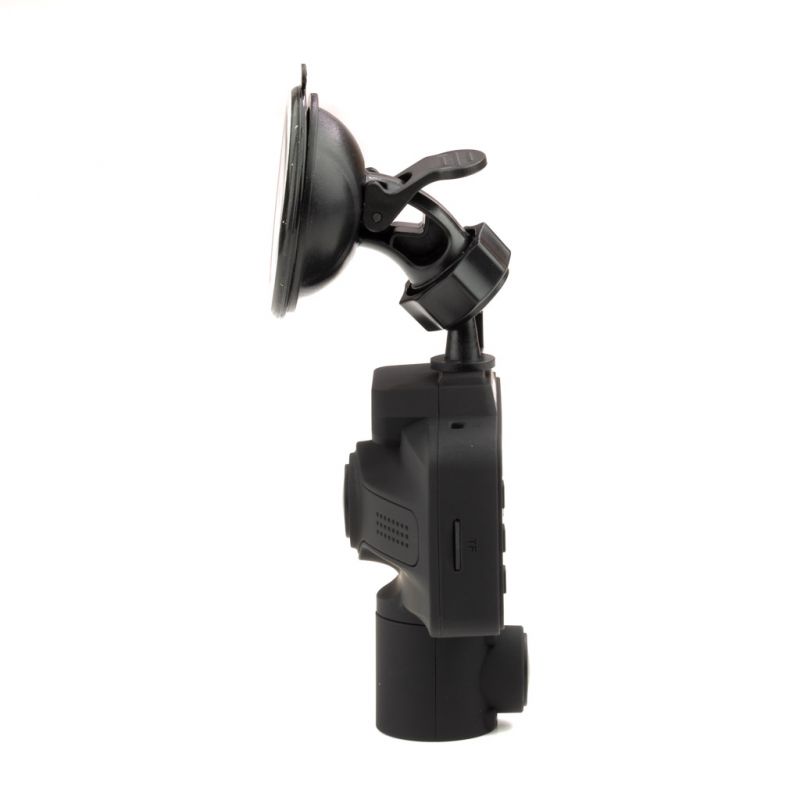
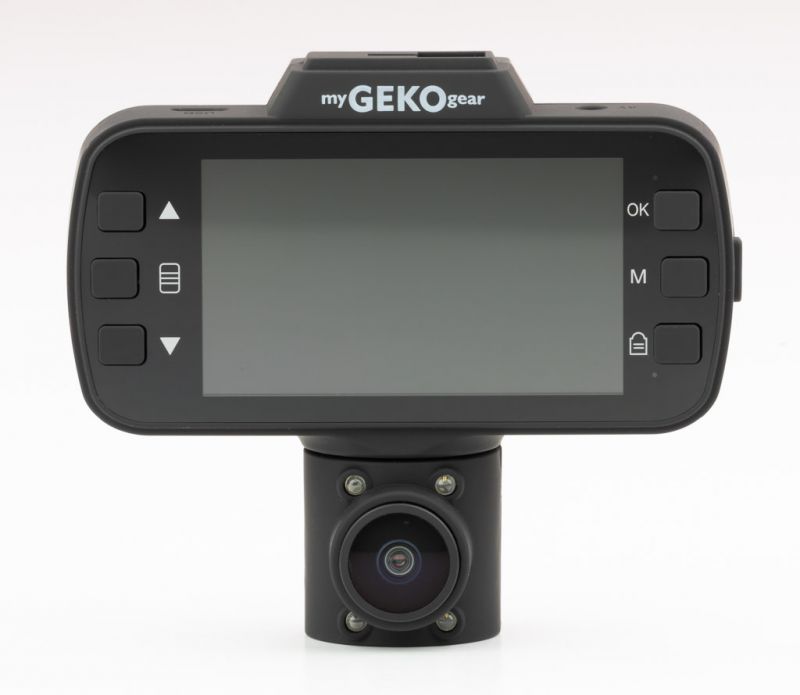
The myGEKOgear OwlScout dual dash cam is a dual camera dash cam designed to record video of both the inside and outside of your vehicle simultaneously.

What’s in the box?

  • OwlScount Camera
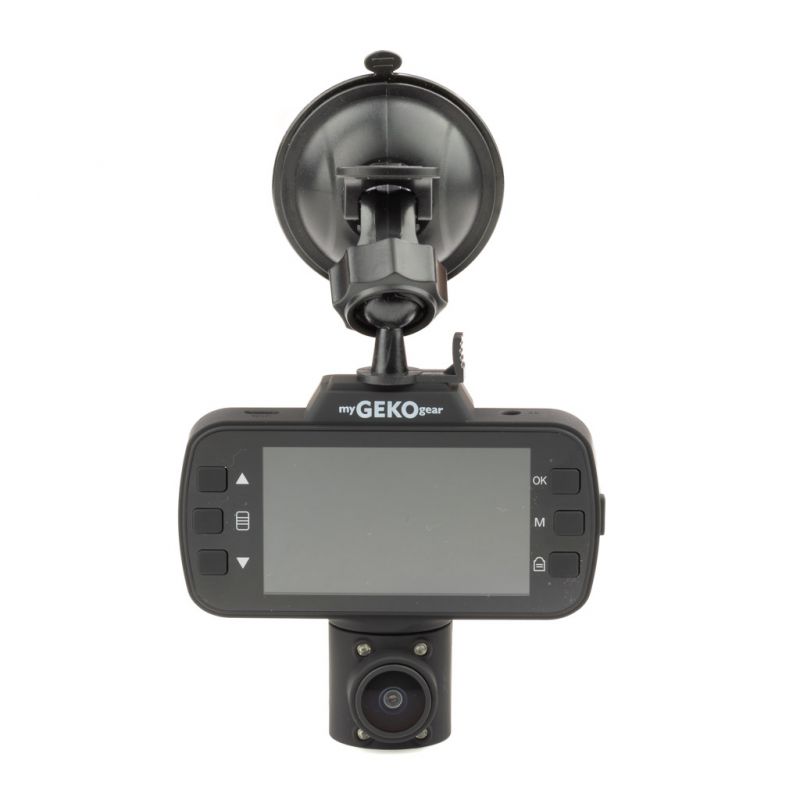
  • Suction cup mount
  • Car charger plug and cord
  • Micro-USB Cable
  • 16GB Micro-SD card
  • Quick Start Manual


Hardware specs

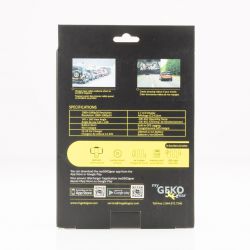
Recording Resolution: 1080P + 1080P 30FPS
Imaging Sensor: Sony Exmor, Infrared Night Vision
Display Size: 2.7″ LCD
View Angle (F.O.V.): 145°+145° (F+V)
Max. Capacity of microSD card: 16GB microSD included
Batteries Included: 170mAh Li-ion battery embedded
Automatic Incident Detection (G-Sensor): Yes
Loop-Cycle Recording: Yes
Built-in Wi-Fi: Yes
Integrated Microphone: Yes
File Format: .mp4
Dimensions: (H x W x D) 3” x 3.7” x 1.3”

Design and features

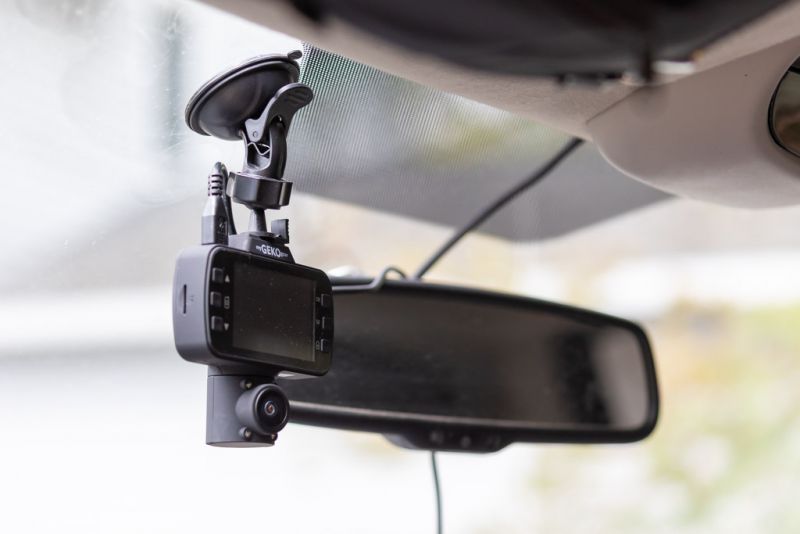
The myGEKOgear OwlScout dual dash cam is a suction cup mounted dash cam that features a large 2.7″ LCD screen and both front facing and rear facing cameras. At the heart of each camera is a Sony Exmor imaging sensor that provides great video in both day and night conditions. The rear facing camera features infrared illumination. Both cameras feature a 145 degree field of view. Each camera’s video is saved to separate files on the memory card.


When recording video the rear facing video is displayed in the upper left quarter of the screen, allowing for easy positioning of the camera without having to press any buttons.

Screen capture from smartphone app

The micro-USB power cord is a welcome feature that allows you to use the provided car charger plug, or your own cable as you desire. A 170mAh embedded battery provides enough power to save video files when the camera is powered off via the ignition, or during a power loss in the event of a crash. In the event of a crash, the G-Sensor will detect the impact and automatically save the video so that it is not overwritten.

The OwlScout comes with a 16GB micro-sd card and features the ability to loop-record. Loop recording will save the video in 3, 5, or 10-minute clips, overwriting the oldest clips when the card is full.


I found the integrated microphone to be surprisingly good. The audio in my sample footage (below) is directly from the camera. I think the microphone should work great for capturing all conversations in the vehicle.

The camera has three modes: Video (dash cam), Photo, and Album. Photo mode takes up to 12MP images, and the Album mode is to view and playback photos and videos.

The OwlScout also has built-in Wi-Fi for connecting to the camera via an iPhone or Android smartphone. I found the app to be a bit limited, but sufficient to view and transfer videos or view live video. I did find though that the settings in the app would not correspond to settings that were already set in the camera, and the camera would revert some settings after the app was used. For example, I had the recording loop set for 3 minutes, and after going into the app and then disconnecting, the camera then showed a 10-minute loop interval.

There is a parking monitor feature that can be turned on which will start recording when an impact on the vehicle is detected.

I do like how the videos that are either automatically saved by the G-Sensor or by manually pressing the lock button are saved to a separate folder on the SD card, as well as accessible from the “Emergency” tab of the album view in the app.


The GPS logging feature mentioned on the website feature list was nowhere to be found in the camera or the app despite there being a GPS icon on the screen.

I did find that the playback operation was a bit confusing as to which button did what, such as play, fast forward, etc. I also found that after switching from video to photo to the album (playback) and then back to video, the dash cam video did not automatically start recording until I clicked the OK button. I lost quite a bit of video because of that. I think it should always revert to recording after a certain period of time when you are in video mode.

Here’s some sample video from the OwlScout camera, along with a few comments as I was driving. The video is unprocessed except that I overlayed one video on the other and spliced the 3-minute clips together. Other than that no video or audio editing was done.

What I like

  • Simple to use menus
  • Easy to see buttons
  • Great microphone
  • Wi-Fi connection with a smartphone
  • Dual Cameras
  • Range of motion for mount
  • Micro USB connection
  • Well named file names in the following format: yyyy_mmdd_hhmmss_001A

What needs to be improved

  • Price – a little high for the feature set
  • Confusing playback controls
  • GPS logging feature missing from app

Final thoughts

Overall the I really liked the video display and its size, and the video quality from this camera was pretty good. The audio captured was fantastic. I think the price might be a little high for the feature set, as some cameras have more features, but may not have video as good as this one.

Price: $199.99
Where to buy: myGEKOgear
Source: The sample of this product was provided by myGEKOgear.

Filed in categories: Reviews

Tagged: ,

myGEKOgear OwlScout dual dash cam review originally appeared on The Gadgeteer on May 20, 2019 at 11:00 am.

Note: If you are subscribed to this feed through FeedBurner, please switch to our native feed URL http://the-gadgeteer.com/feed/ in order to ensure continuous delivery.
IFrogz Sound Hub Tone Wireless Earbuds

REVIEW – All I want is a great pair of earbuds for the gym. You’d think that would be easy… but there are a lot of little things in earbud design that make a difference. Today I’m reviewing the iFrogz Sound Hub Tone Wireless Earbuds. How did they do? To the review!

What is it?

It’s a set of clip-on, sweat-resistant, workout-friendly wireless earbuds.

What’s in the box?

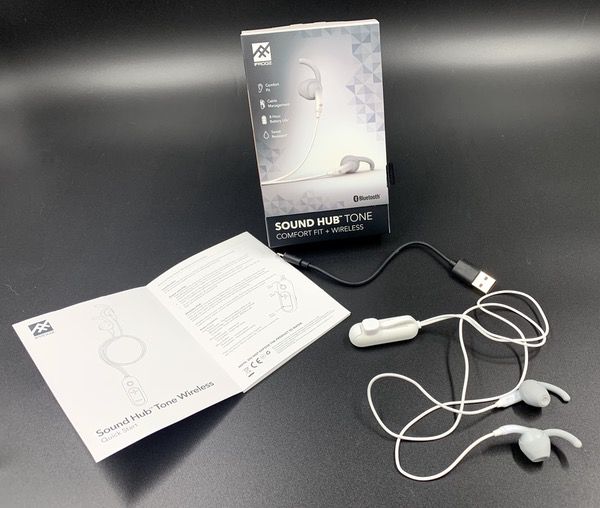
Your package comes with the headphones, a USB charging cable, and a user manual.

Hardware specs

  • IPX-2 water resistance
  • Bluetooth range of 30 feet
  • 8 hour battery life
  • 12mm audio drivers

Design and features

There’s a lot of nice detail in the iFrogz Sound Hub Tone Wireless Earbuds that demonstrates the focus of the design team. It’s all about great usability when you’re hitting the gym.

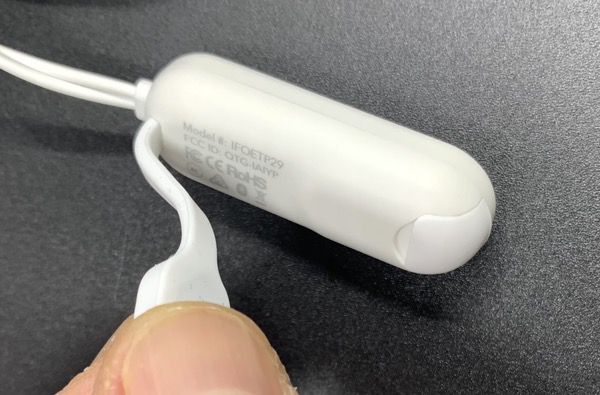
The earbuds are a one-piece unit, with a control pod that clips to your shirt. They are IPX-2 sweat resistant, so I wouldn’t take them on runs in a downpour… but the build feel solid and substantial for such tiny little things. The front clip design also means that they stay put if you’re doing more dynamic body movements. 18″ chords allow some flexibility for positioning the clip relative to the earbuds.

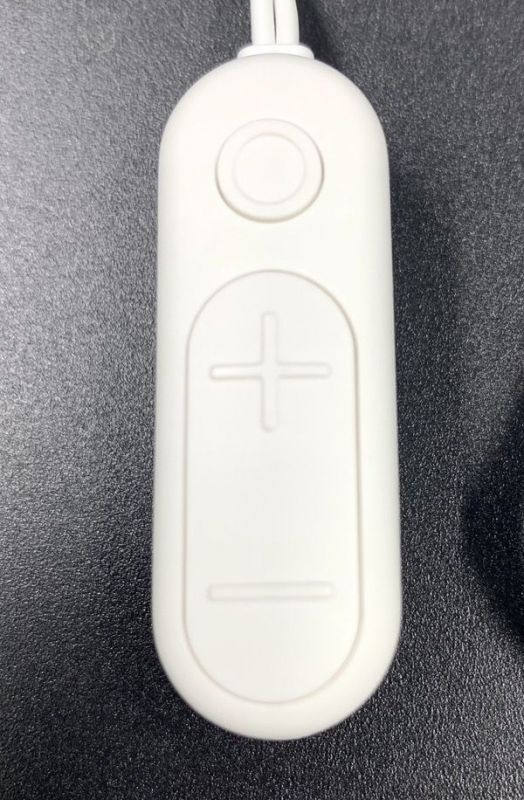
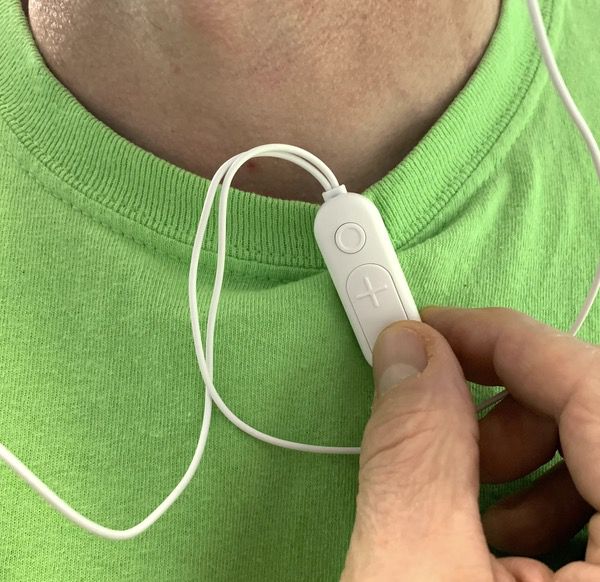
The control pod features only three buttons on the face: a multifunction/power button and your mandatory volume up/down toggles. You’ll activate all the functions through some combination of these buttons, which we’ll talk about shortly.

The clip on the back of the pod is made of flexible rubber with a magnetic weight on the end. This makes it easy to attach to whatever workout gear you may be wearing. No fumbling with snaps or slide-on clips!

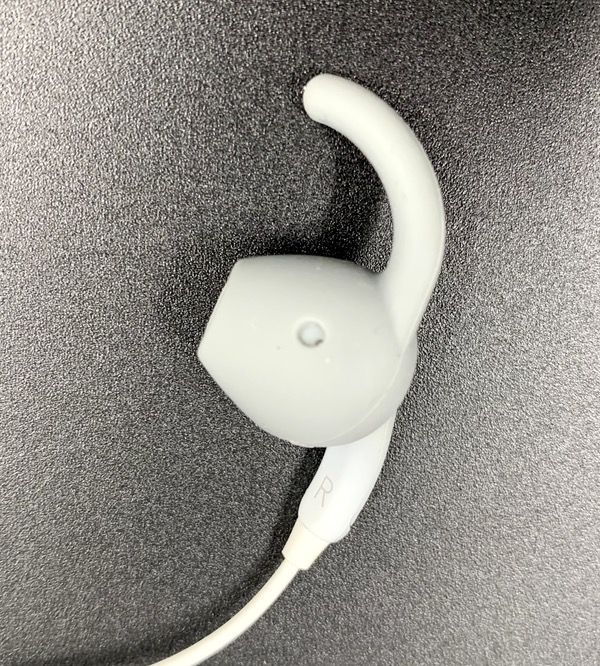
The earbuds come with a silicone sleeve that includes a “wing” that secures in the whorl of your ear. Here’s a picture of the bud, followed by how it sets when in place. I found that this setup is extremely comfortable, and has yet to pop out during a workout.

If you don’t like that style of fit, then you can remove the wing. It has no impact on sound quality. Here’s how it looks and sets without the wing cover.

To be honest, I did find that the bud felt a little chunky in my tiny ears when I first used it with the wing cover in place. But I got used to that after a few days.

Here’s another neat little design trick: the earbuds are also magnetic and loosely connect with each other when not in use. Couple that with the flexible magnetic clip, and the whole unit wraps up nicely for storage.

Performance

There’s a lot that iFrogz gets right about the design of the Sound Hub Tone Wireless Earbuds. If you go to the gym on a regular basis like I do, I think you’ll be a fan.

I have some nice yoke-style earbuds that are great for running or the treadmill, but they flop all over the place if I am hitting the weights or doing exercises that involve different horizontal/vertical movements (like Yoga). The front-clip style design solves that problem right away. Clip the control pod anywhere on your shirt, and it stays put no matter what activity you’re into.

The buttons on the pod raised and nicely spaced, which means easy control management if you’re not looking at them. Everything is *just* big enough to manage without the pod being so big and clunky that it feels like it is dragging you down.

You’ve got your usual array of functions (play, pause, next track, previous track), but there are some bonus features here. These earbuds are voice-compatible with Siri and Android for voice commands. All of this is activated by some combination of buttons and/or short, medium, and long holds. It’s pretty straightforward stuff.

Sound quality is also excellent. I tested making and receiving calls, and got reports of clear sound on both ends. There is also an equalizer feature that enables a podcast and movie mode. I did notice a difference in the bass, treble, and overall tone in each setting. For relatively inexpensive ear buds, the audio drivers are really good.

My quibbles with the iFrogz Sound Hub Tone Wireless Earbuds are very minor. A heavier water resistance rating would be nice for outdoor activities. And while I really like the magnetic clip, just a wee bit more length and a heavier magnet would be nice to adapt to thicker clothes. But these are minor items in my opinion that don’t take away from an overall well-executed design.

What I like

  • Water- and sweat- resistant
  • Super lightweight and comfortable
  • Simple touch-friendly button design
  • Excellent sound quality
  • Rolls up and packs away nicely

What needs to be improved

  • Magnetic clip could be stronger
  • Higher water resistance would be desirable for outdoor activities

Final thoughts

I have been on a continual quest for the perfect headphones for the gym, and the iFrogz Sound Hub Tone Wireless Earbuds tick all my boxes. Simple usability, excellent sound quality, and some extra features that add flexibility. It’s a dialed in design that doesn’t get in the way when you’re working out. I think I’ll be using these for quite a while.

Price: $34.99
Where to buy: Zagg.com.
Source: The sample of this product was provided by iFrogz.

Filed in categories: Reviews

Tagged:

IFrogz Sound Hub Tone Wireless Earbuds originally appeared on The Gadgeteer on May 20, 2019 at 9:00 am.

Note: If you are subscribed to this feed through FeedBurner, please switch to our native feed URL http://the-gadgeteer.com/feed/ in order to ensure continuous delivery.
Leatherman Free P2 multi-tool review

REVIEW – The Leatherman Free P2 is the smaller of the two initial multi-tools in Leatherman’s new “Free” series of tools an knives. It is designed for simplified tool and pliers access. The P2 and it’s larger sibling the P4 are aimed at the same market as their cousin, the long heralded Wave series of multi-tools. Let’s see if the Free P2 can convince me to replace my EDC tools: Leatherman’s Skeletool, Wave, and Micra.

What is it?

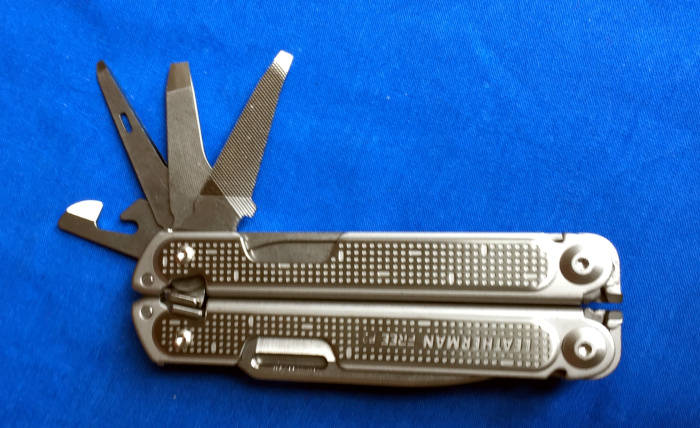
The Leatherman Free P2 is a large multi-tool that is slightly smaller as the original Leatherman Wave multitool. Physically in my hands, I would consider the P2 a medium sized multi-tool, but then not everyone has L/XL hands.  It differs from previous generations of Leatherman multi-tools in the way the tool is kept closed, how the tools are deployed, and how the blade and tools are locked in place.

What’s in the box?

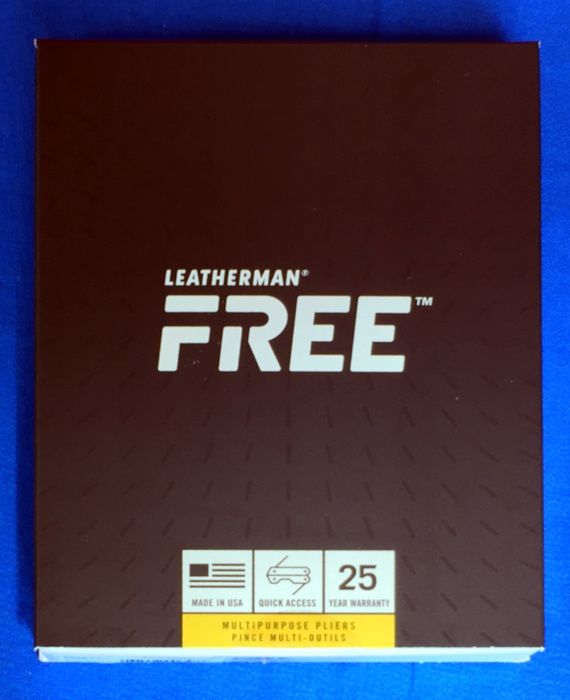
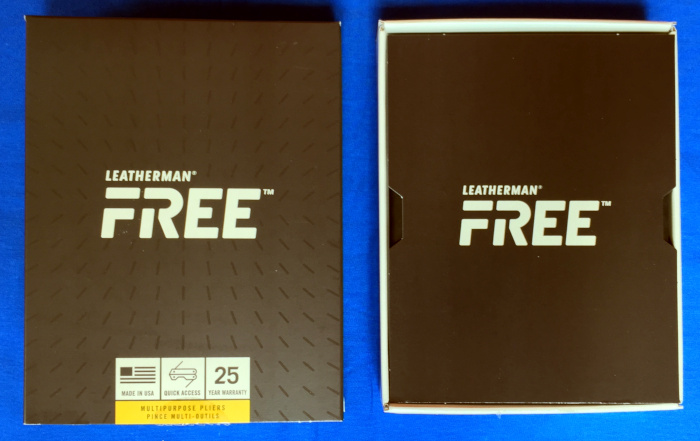
The Free P2 arrived in a striking black and white themed sleeved tray. There is a single seal holding the tray in the box which must be cut and the tray may then be slid out.

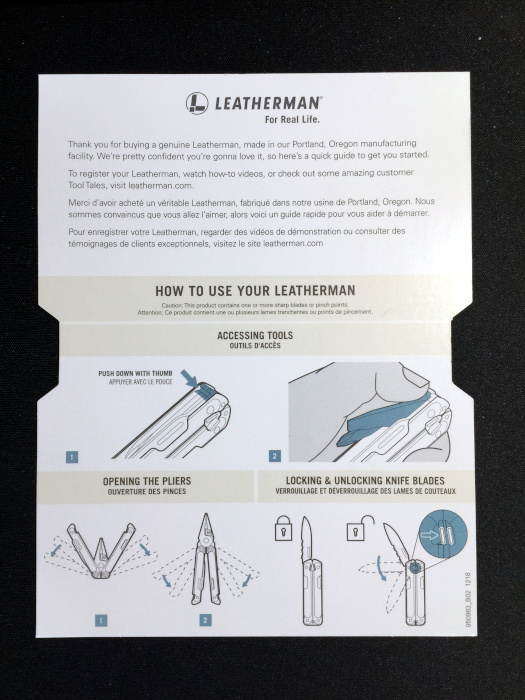
The tray is covered by a black cover card, that when turned over, highlights the new features of the Free line. These are the only instructions that came with my P2. Considering the straight-forward nature of the tool, this is much better than the tightly folded thin-papered instructions that have come with most of the previous generations of Leather multi-tools.

Inside the box are only two items

  • Leatherman Free P2 multi-tool (made in the USA)
  • Gray nylon sheath with Leatherman branding (made in China)

Hardware specs

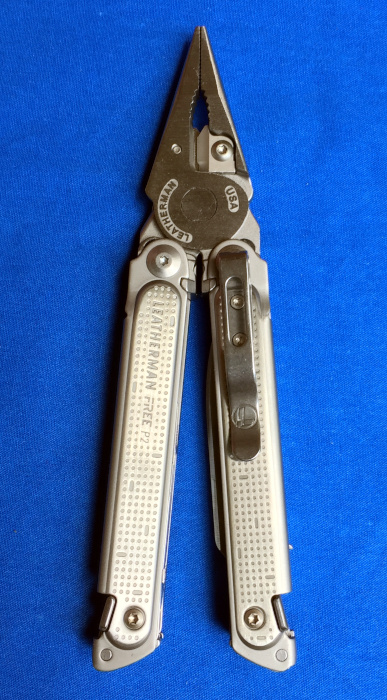
The Free P2 weighs 220 grams out of the sheath. It is 107.41 mm long, by 34 mm wide, by 23.15 mm thick (measured at the highest point on the clip) Without the clip, it is 19.8 mm thick.

The Free P2 has the following tools

  • Pocket clip (potentially removable)
  • Pliers with needle nose and regular grip, replaceable wire cutters, hard wire cutters, and on the opposite side of the pivot terminal crimps
  • Large combination straight / serrated blade
  • Large scissors
  • Large philips screwdriver with bottle openner
  • Large straight blade screwdriver
  • Small straight screwdriver / awl
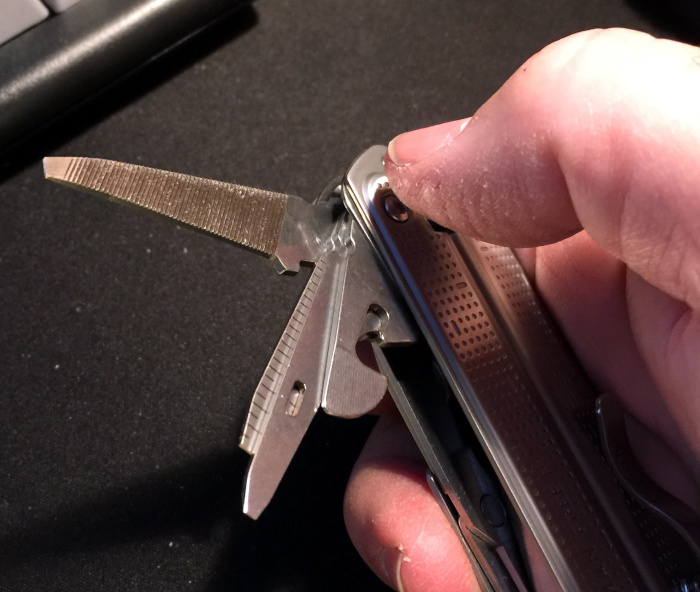
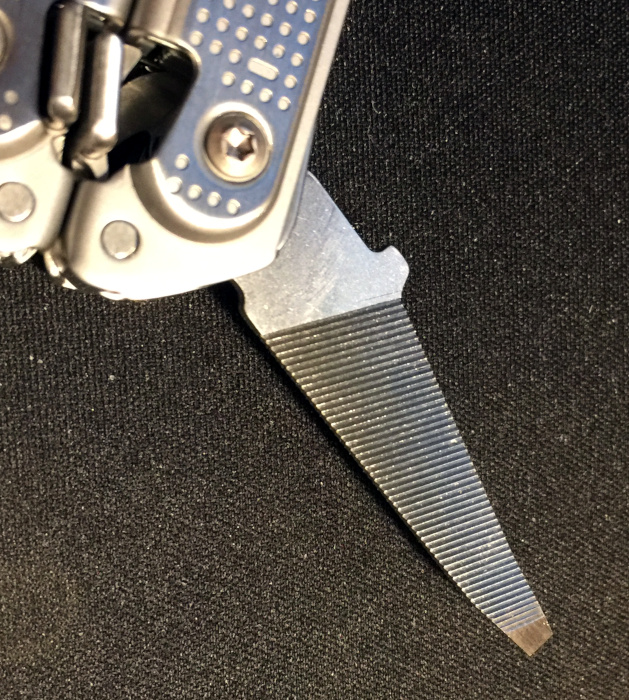
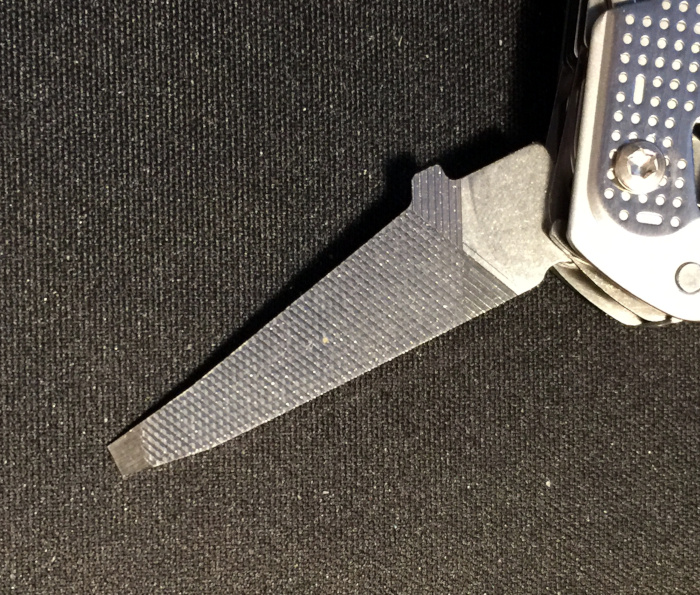
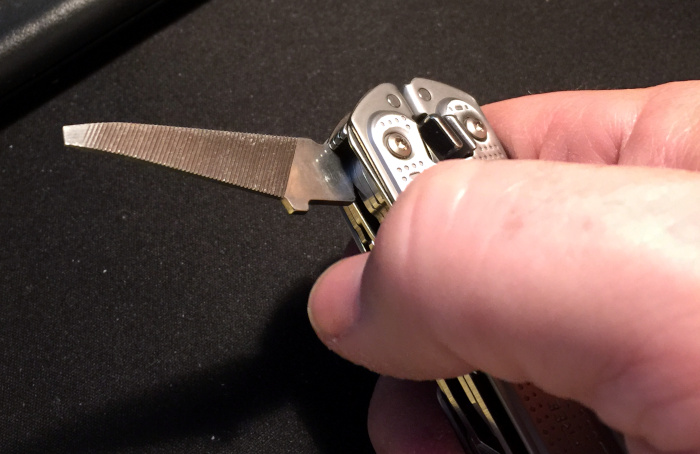
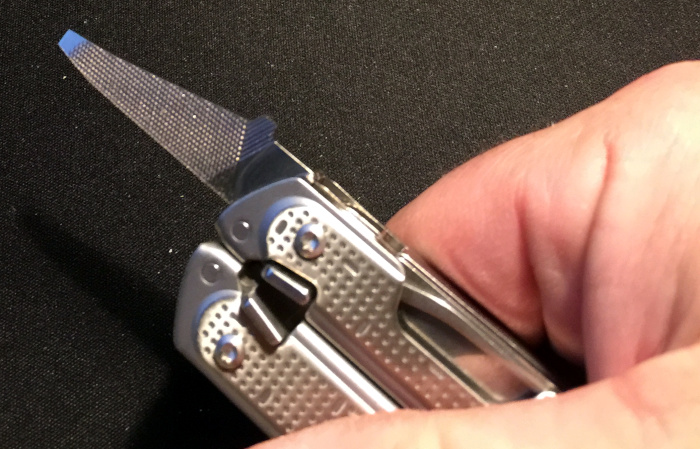
  • Slightly less small straight screwdriver / two sided file
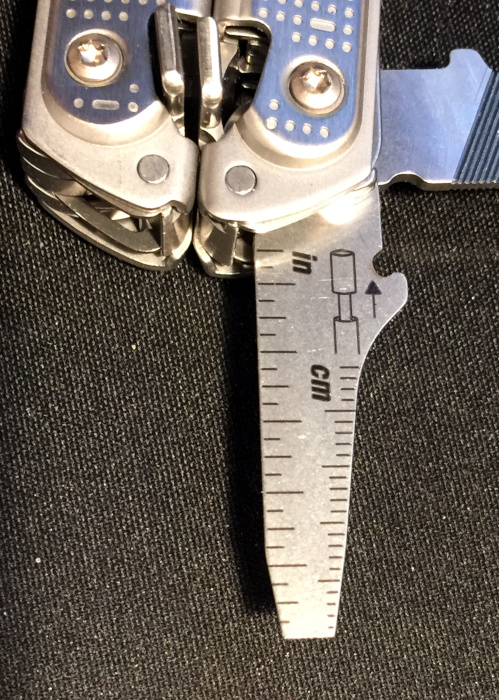
  • Medium sized straight screwdriver with integrated wire stripper and a 25 mm / 1 inch rule
  • Can opener / box cutter

The P2 is assembled with T8 Torx / lobe headed screws / caps and the clip is held on with T6 sized screws.

Design and features

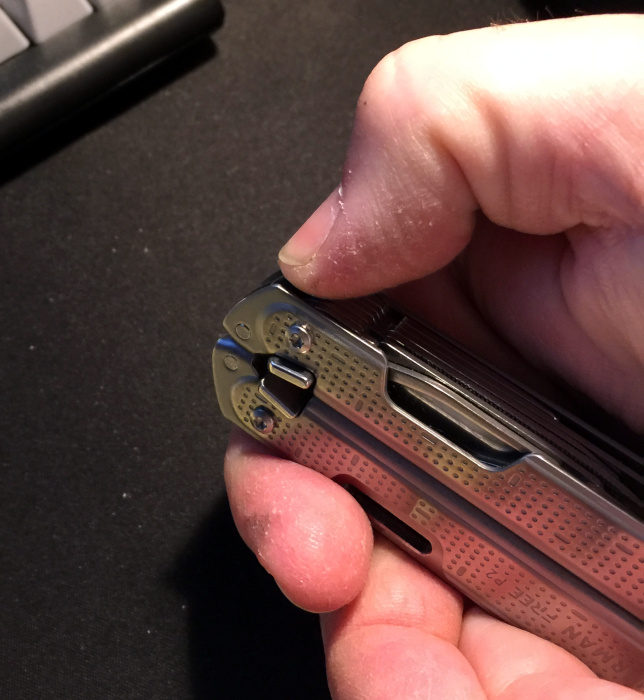
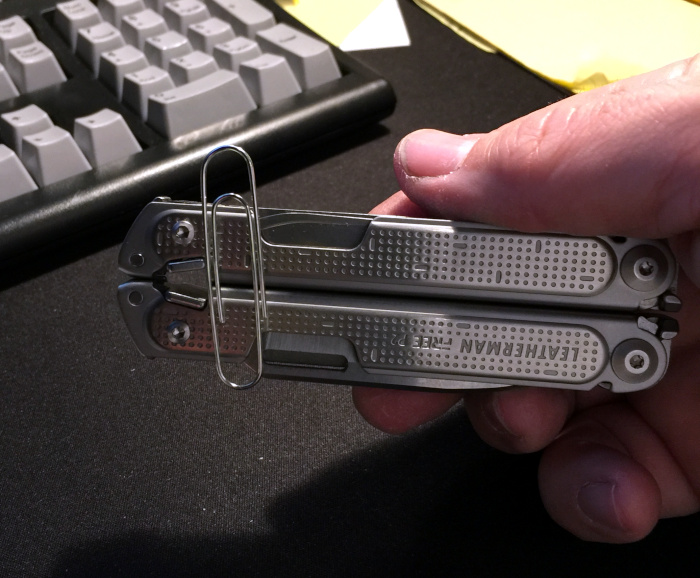
The principal novel feature of the Free P2 / P4 is the mechanism by which the tool is held closed. This is a pair of magnets, one in each handle that meet when the tool is closed. These magnets are located just inboard of the locking mechanism for the tools (described below).

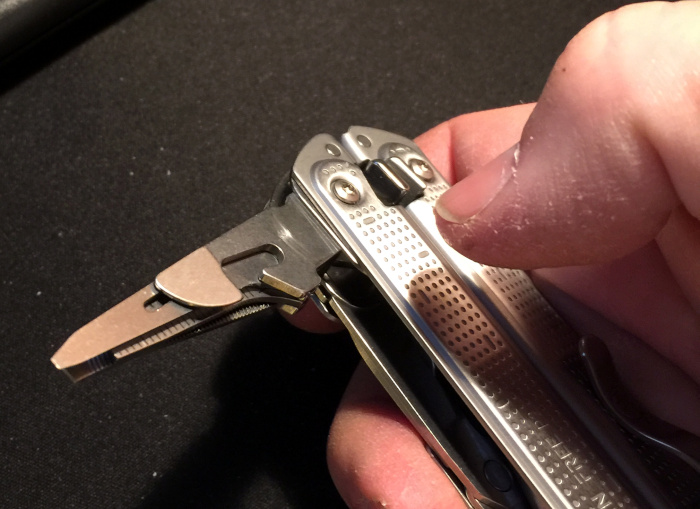
The pliers are deployed by separating the latch end of the tools with moderate pressure from a finger and then flipping the tool like a butterfly knife. For those readers coming of age in the 1980s and who have attempted to use butterfly knives you know that this takes some skill. A skill that I didn’t master then and still haven’t mastered. I can get the magnetic latch to release, but I can’t reliably get both handles to lock into place on the pliers head without smashing my fingertips. Still, I have lost any digits, so we’ll call it a win. I usually resort to simply unlatching the handles and getting them around and then locking them into place by pressing the free handle against my hip/thigh.

Closing the multitool is simply a matter of pulling to release the handles from the detents in pliers head and closing as you would any other similar Leatherman multi-tool. Just be careful as there is very little resistance to movement when the handles are free.

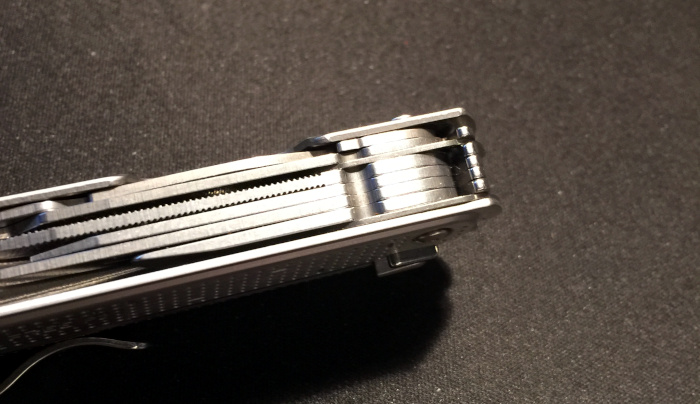
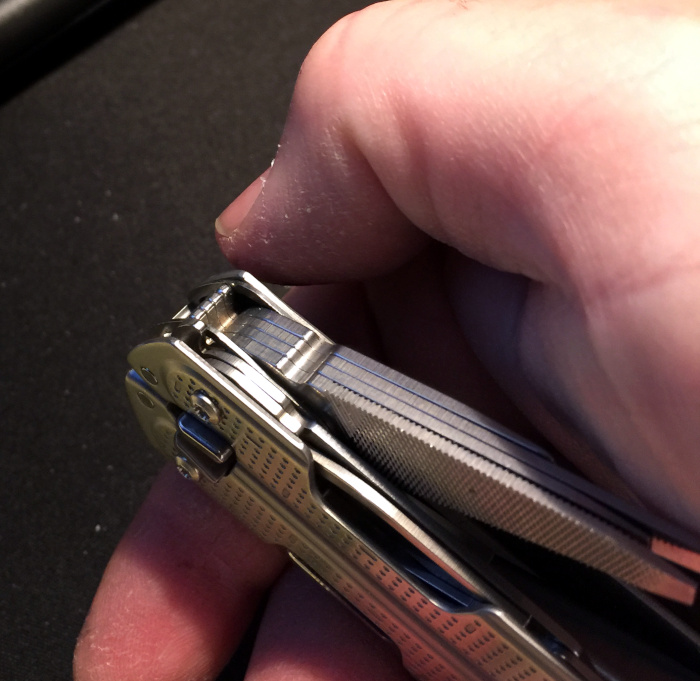
The individual tools (which are all on the outside) are accessed by pressing on the raised lip on the end of the tools and rotating all of the tools on the same pivot part way up at once fully opening the desired tool, and then closing the remaining tools which activates the spring lock holding the tool open (see below). This is similar, but different from, the tool locking mechanism on the Wave 2.0 / Wave + tools. Relocating all of the tools to the outside makes the handles much more comfortable when using the pliers. I hadn’t realized how uncomfortable my Skeletool was to use until I started using the P2.

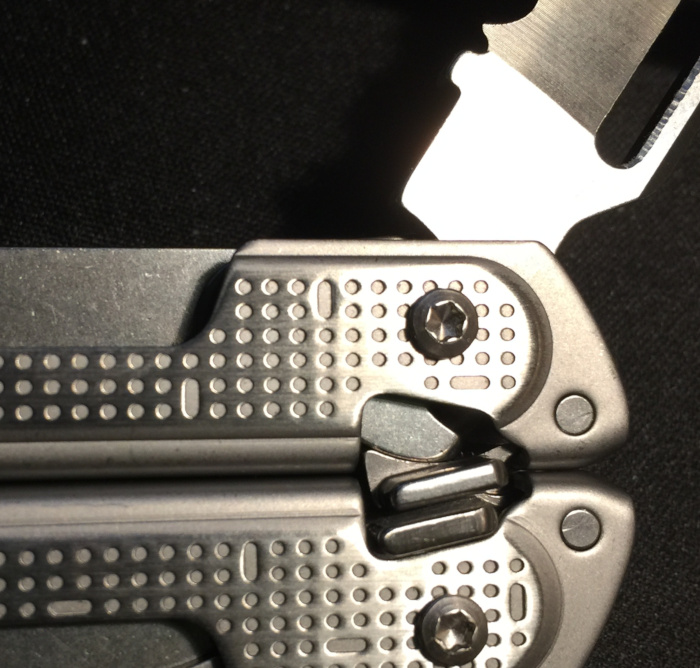
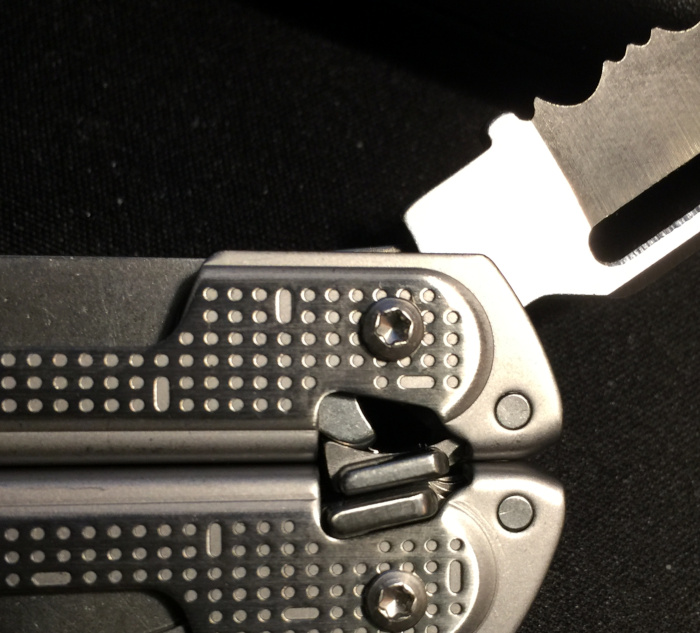
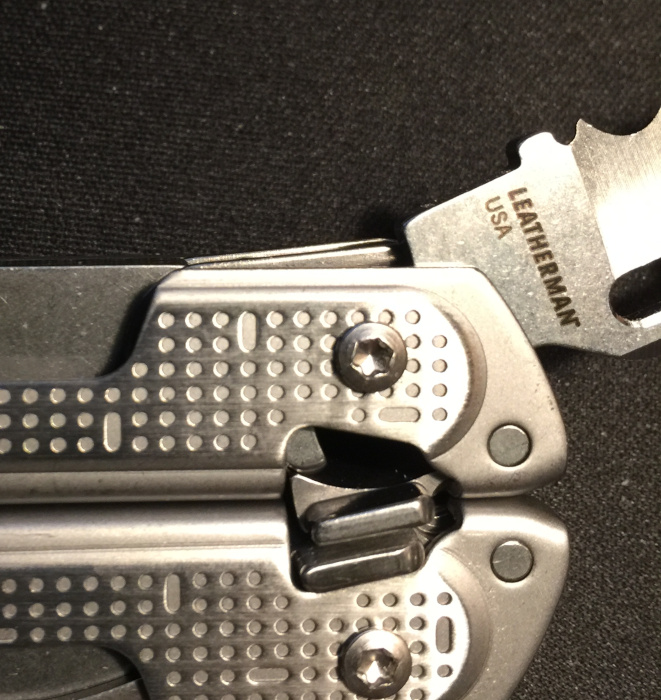
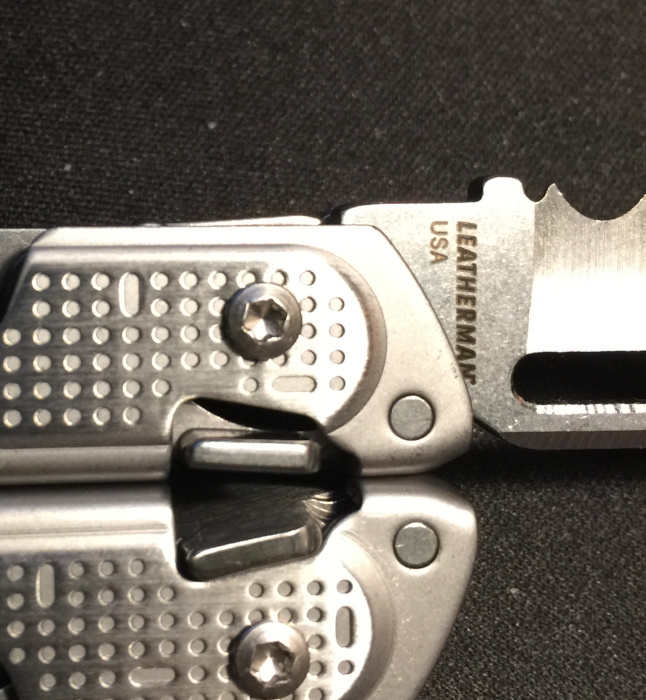
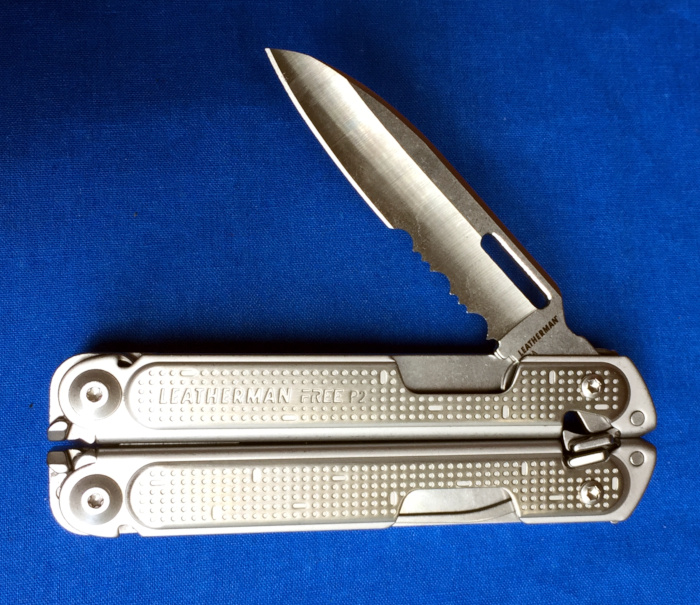
A big change, and one to which I am still adapting is the location of the main blade / large tool pivot. Unlike in previous generations, the knife blade does not share a pivot with the pliers head, but instead is on the far end sharing a pivot (separated by a gate / spring) with the other tools. This allows the knife to be secured by the same improved locking mechanism as the other tools rather than relying on a simple, but failure-prone liner-lock mechanism. This is something that I have been complaining about since I learned (the hard way) about the inherent design / performance trade offs between liner lock knives and more robust blade locking mechanisms.

I am happy to see the more robust mechanism which utilizes a small notch in the back of the blade “tangette” which is locked by a spring-loaded lever. This mechanism appears to be strong and reliable. However, I’m still training myself to rotate the tool to open the blade. This is an operator training issue that I am happy to deal with to get a better locking mechanism.

The blade / tools are released by pressing the lever toward the opposite lever which releases the lever from the notch.

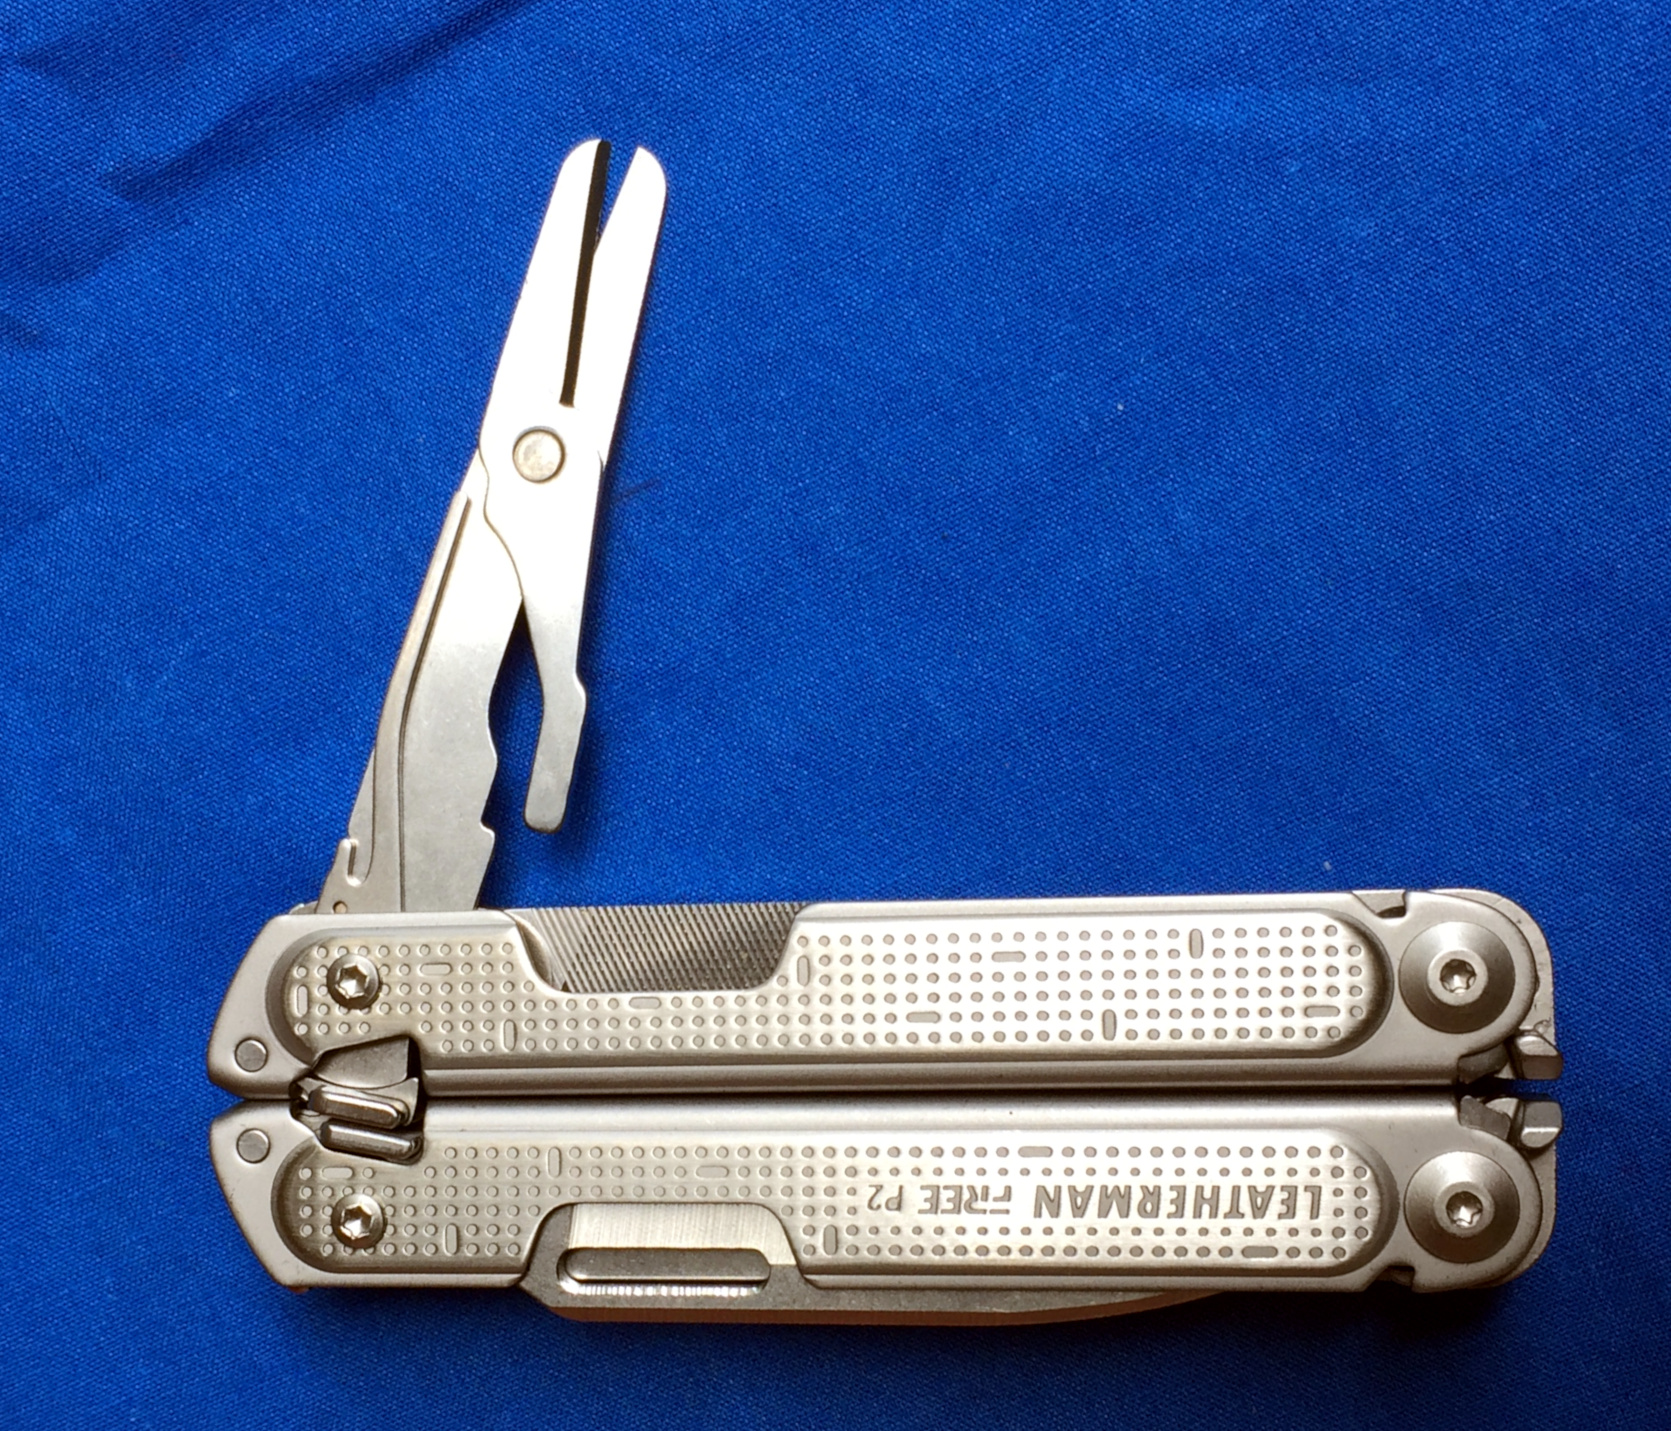
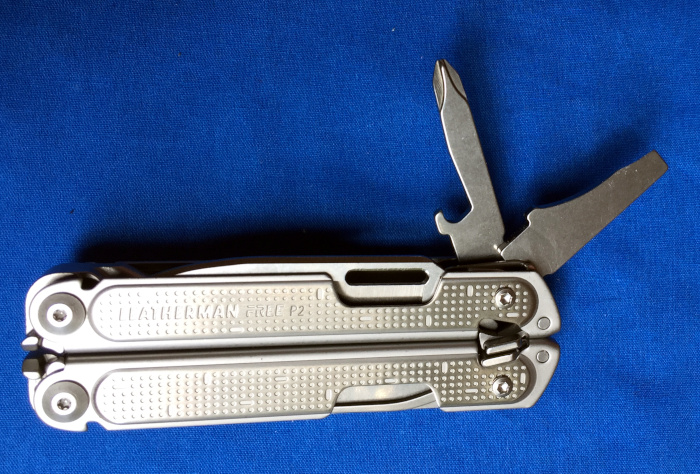
The scissors deploy from the opposite handle from the knife blade. The Philips and large straight screwdriver share a handle with the knife and the rest of the tools are on the opposite handle. The pocket clip is on the far side of the same handle as the knife blade.

Comparison to other Leatherman Multi-tools

Since the Free P2 is aimed at the Wave and similar sized tool market, let’s compare the weight of the Free P2 to other Leatherman products. Most of the tools to which the P2 is being compared have more individual tools / features, with the exception of the Skeletool which only has a blade, pliers, and a bit holder and bit carrier. Included in the table is the larger and specialized OHT (One-Handed Tool) which is designed for tactical / military use and is one of Leatherman’s other rapid / easy deployment models.

  • Skeletool             142.5  grams
  • Free P2                22o     grams
  • Wave                    225     grams
  • Wave 2.0             241.5  grams
  • Wave +                242.5  grams
  • Wave + w/ clip  246.5  grams
  • OHT                     268     grams

From the list above, it is easy to see that the P2 falls closer to the weight of the Wave family than to the Skeletool which reinforces my initial impressions.

Performance

I have been using the P2 for the past week as my EDC knife / pocket multi-tool. I have used it for everything from opening bottles to pruning vines to restoring antique lamps. I have several observations about the reliability of the P2 and its suitability as an EDC tool carried using the clip. I have not, to date, carried it using the sheath.

  • The pliers are more versatile, but larger than those on my Skeletool. This has resulting in having to go find smaller pliers on a couple of occasions.
  • The wire cutters (both soft and hard wire) are excellent at their jobs. They also make short work of greenbriar vines.
  • The scissor are a good size for multiple tasks from trimming finger nails to actually cutting paper. I have had an intermittent problem with the spring for the scissors not popping up into position which requires manual realignment. This seems to be related to the use of the spring as the finger catch for deploying the scissors.
  • I haven’t gotten used to the combination blade. I prefer straight knife blades, but this is a personal preference and not a knock on the P2.
  • The presence of individual screwdrivers rather than having a bit holder is both a blessing and a curse. I don’t have to worry about losing a bit, but I am limited to what tools I can carry.
  • With the free opening handles, the pliers should really be spring-loaded to make the tool more useful for one-handed use.
  • The pocket clip is well designed and keeps the P3 in the pocket securely, but easily accessible.
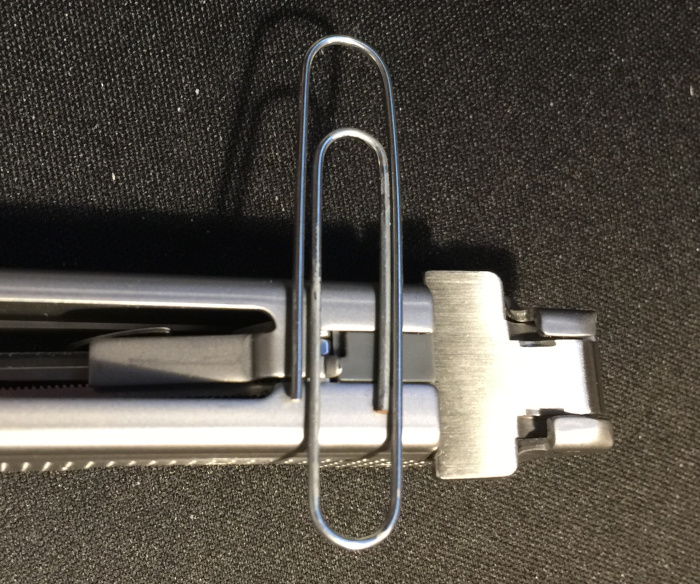
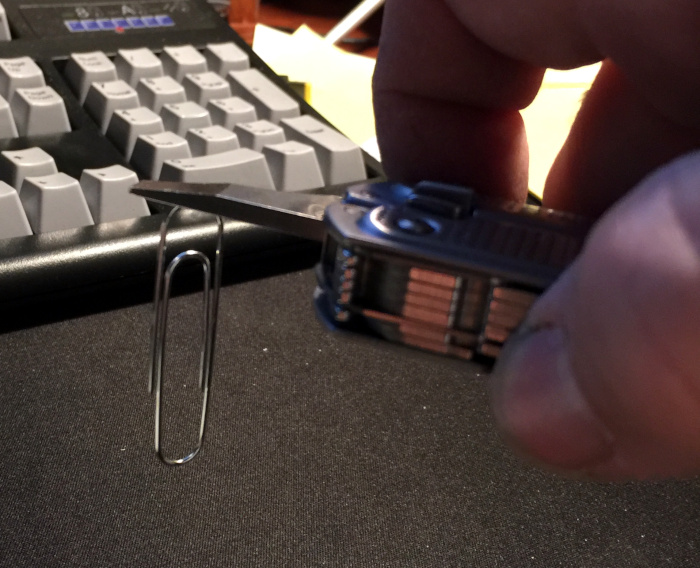
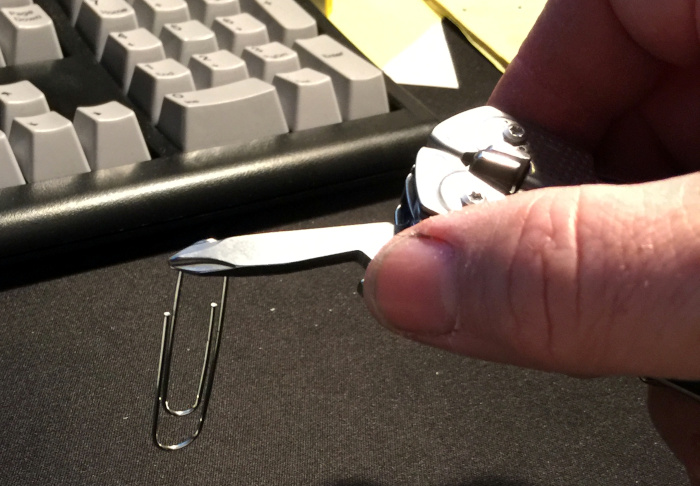
  • The tools are slightly magnetic when deployed and small magnetic field also surround the P2 when closed. The field is strong enough to pick up 0.75 gram paperclips.

What I like

  • BLADE AND TOOL LOCKING MECHANISM
  • Selection of tools
  • Replaceable wire cutters
  • Much more comfortable handle when using the pliers
  • All of the tools (except the pliers) are accessible from the outside

What needs to be improved

  • Adding a spring to the pliers to assist with opening them
  • Improve the positioning of the spring on the scissors
  • Make a straight blade an option on the P2

Final thoughts

After just a week, the Leatherman Free P2 multi-tool has made such an impression that the P2 will replace my trusty Skeletool for EDC in my pocket. I am very pleased with the improved locking mechanism for the blade and this just may be the tipping point for me.

I have decided that the P2 is not a replacement for the Wave 2.0 that I keep in my day bag, but I hope to compare the P2’s big brother (the P4) to my Wave before I head out to summer camp with my scouts. For bag carry, I think the extra tools on the Wave outweighs the 25 grams of extra carry weight.

In closing, the Free range of multi-tools with their new locking mechanism are a big hit with me and greatly improve the safety of the main blades on these multi-tools.

Price: $ 119.95
Where to buy: Leatherman Tool Group, Inc., Amazon, and many others.
Source: The sample of this product was provided by Leatherman Tool Group, Inc.

Filed in categories: Reviews

Tagged: ,

Leatherman Free P2 multi-tool review originally appeared on The Gadgeteer on May 19, 2019 at 9:30 am.

Note: If you are subscribed to this feed through FeedBurner, please switch to our native feed URL http://the-gadgeteer.com/feed/ in order to ensure continuous delivery.
OBDLink MX+ review

REVIEW – You know how a dealer will tell you what needs to be fixed on your car, and you find yourself scratching your head wondering if any or all of it was really necessary? This little gizmo claims to be able to help you know what’s wrong with your car before you get to the dealer or shop. Sounds like a good thing right? I agree and had the chance to test one out.

What is it?

The MX+ is a bluetooth adapter for the OBD port on your car that in combination with your phone and a free app creates a  powerful diagnostic tool and real-time performance monitor.

What’s in the box?

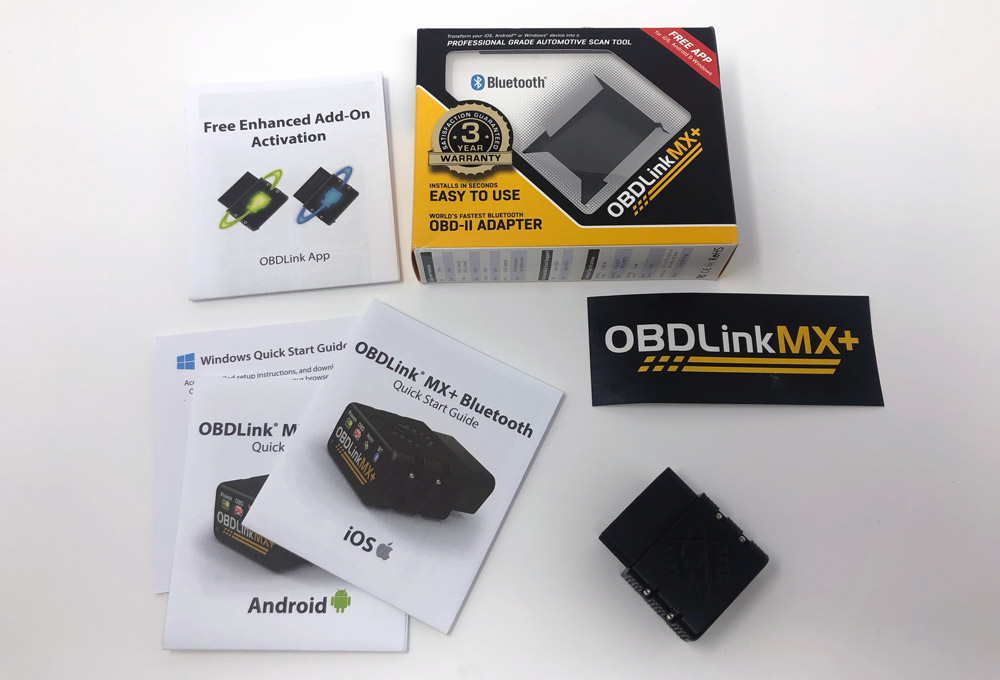
  • OBDLink MX+ adapter
  • Quick start guide
  • Item

Hardware specs

Bluetooth: Secure 128-bit data encryption, Class 2 BT v3.0 transmission (262′ max range)
Dimensions/Weight: 50 x 45 x 23mm / 85g
Supports: All OBDII protocols, Single wire CAN (GMLAN), Ford medium speed CAN (MS-CAN)
Power: 8-18v DC, 62mA operating current, 2mA battery saver mode
Thresholds: -4º to 131ºF operating temperature, 10-85% humidity (non-condensing)
Max Parameter ID: ~100 PIDs/sec for PC and Android
Certifications: International: Rohs, REACH | N. America: FCC Part 15B, IC ICES-003, ETSI EN 301 489-1 V1.9.2 & -3 V1.6.1

Design and features

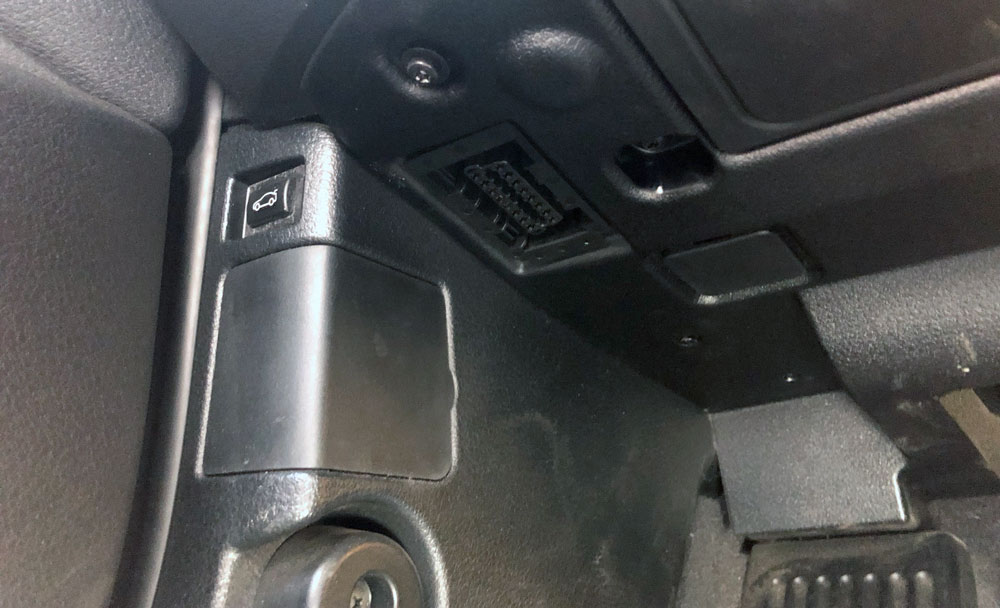
The OBD port is usually found below the steering wheel in an accessible location, either immediately accessible or behind an easy to open panel. It’s been included on all US cars since 1996 and is primarily used for diagnostics by dealers and repair shops.

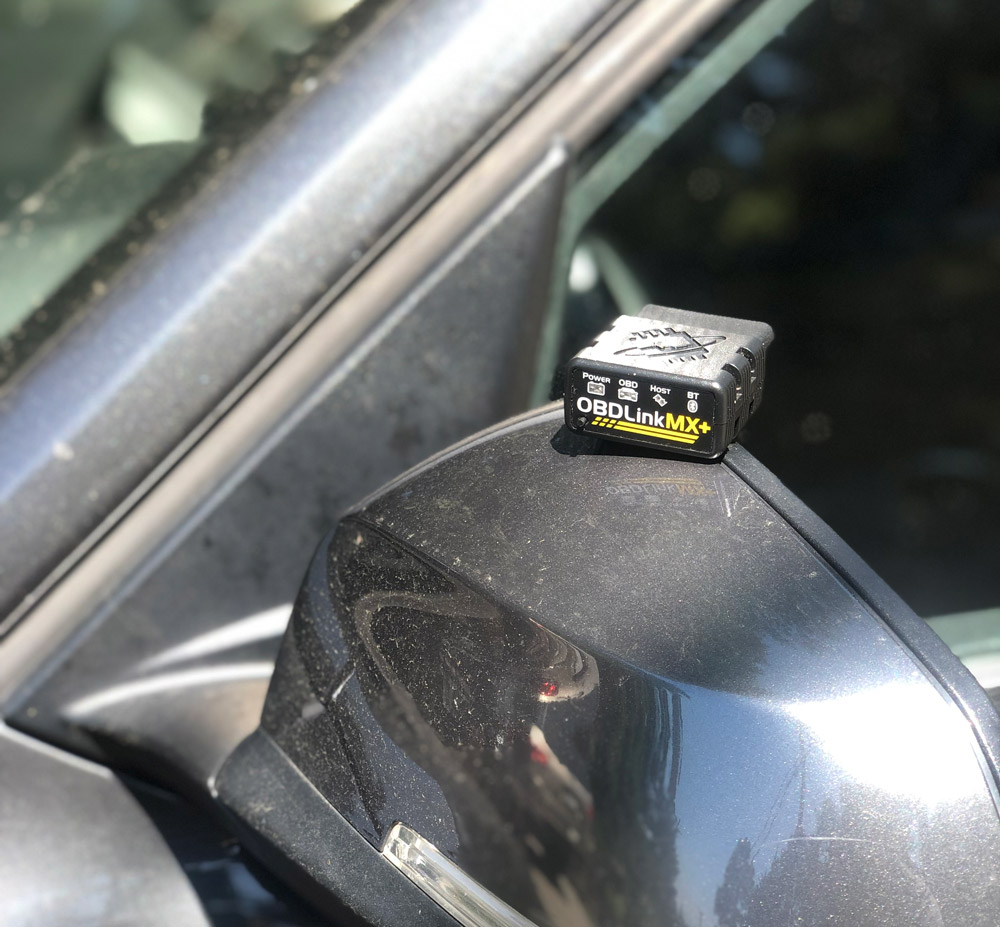
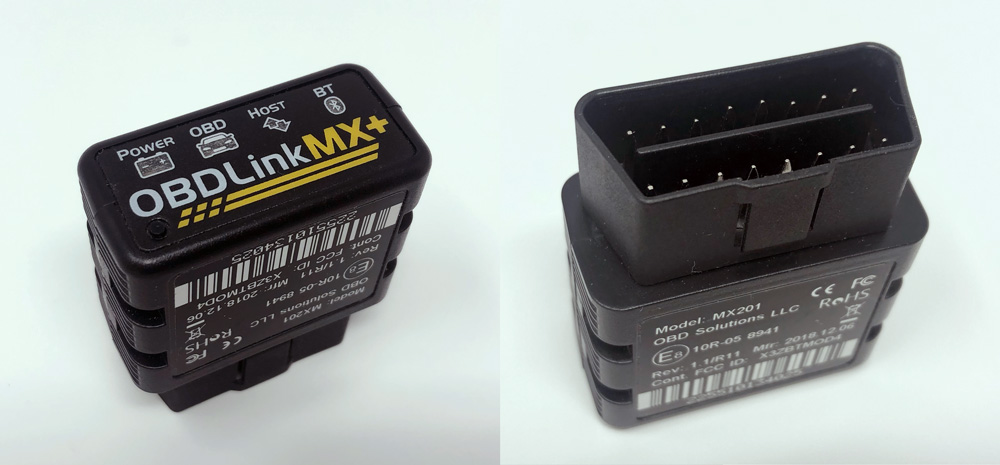
OBDLink designed the MX+ into a small form factor so that it can be inserted and left in that port for continual information flow over bluetooth. Part of that design choice was enabling a low power mode with auto-wake so you don’t need to do anything different when getting in and starting your car. LEDs sit behind the 4 logos on the front of the device; Power, OBD, Host and BT. There’s a small raised button under the O in OBDLink that you’ll need to press for pairing.

Setup

The hardest part about getting started is locating the port in your car, and more specifically determining the orientation. The camera on your phone can be handy here to avoid getting on your back in the driver’s footwell. Here’s the process for iOS.

In our car, the port is directly above the left footrest and is visible without opening or removing any kind of panel. Once you’ve made the determination for your car, go ahead and plug it in.

Next step is to put your car in the ON position without starting the car. You may need to press the ‘start’ button without your foot on the pedal if you have and electronic ignition and don’t have a standard key.
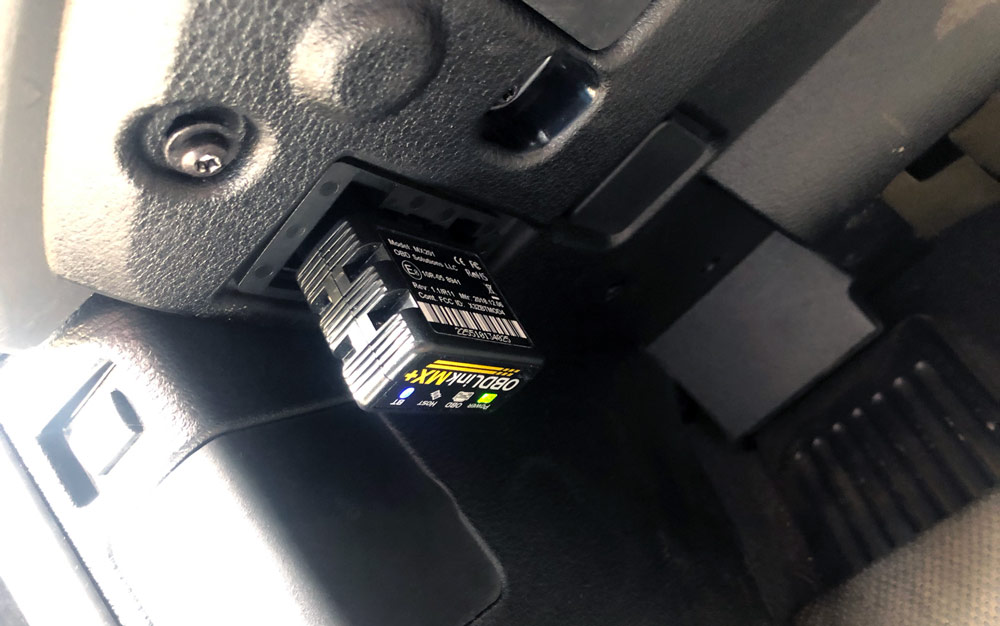
The above photo shows the MX+ installed and connected to my phone, indicated by the green Power and solid blue BT LEDS. The only tricky part here is that you may not be in a position to see those lights.
On your iPhone make sure bluetooth is on, then press the raised button on the MX+. Select OBDLink MX+ when it appears in the bluetooth menu on your iPhone.

Now you can launch the OBDLink app. In settings/preferences/communications choose Bluetooth, then go back to the main menu of the app and click connect at the bottom.

The app will auto-detect your car’s OBD protocol and then connect. The BT light on the MX+ will turn solid when complete.

Performance

I was able to install and connect the MX+ pretty quickly. I have an electric ignition, so I did have to turn the car back off and turn on again without my foot on the pedal to get to the ‘on with engine off’ scenario.

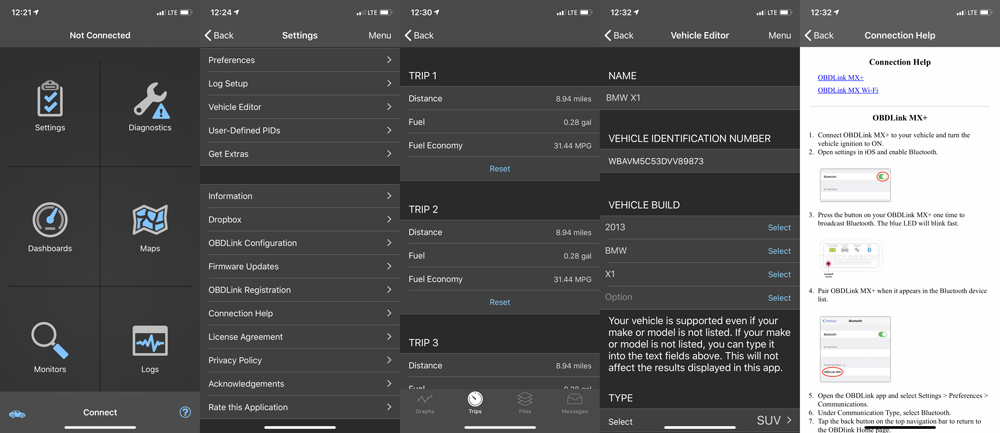
There’s a lot to digest when first opening the app. The first screen is pretty straightforward with 6 buttons; Settings, Diagnostics, Dashboards, Maps, Monitors and Logs. The blue Car and (?) icons in the bottom left and right are also buttons, but the ‘Connect’ in the bottom center is too. I get that it’s an action word, but it’s not very intuitive.

The Settings button takes you to the 2nd screen above. Each of those selections takes you to another myriad of selections which I’m not showing here. The app does an okay job of letting you know if you’re jumping into settings that you shouldn’t be messing around with.

Diagnostics and Maps are what they sound like. I’m not quite sure why you’d use maps here over a real map program. Maybe just to stay within the app?

Logs takes you to graphs, files, messages and trips (shown above middle) for your vehicle.

The Car icon takes you to a settings page specific to your car which you can also access through settings (4th screen above)

(?) will help you with connection issues (far right) which we’ll talk about at the end.

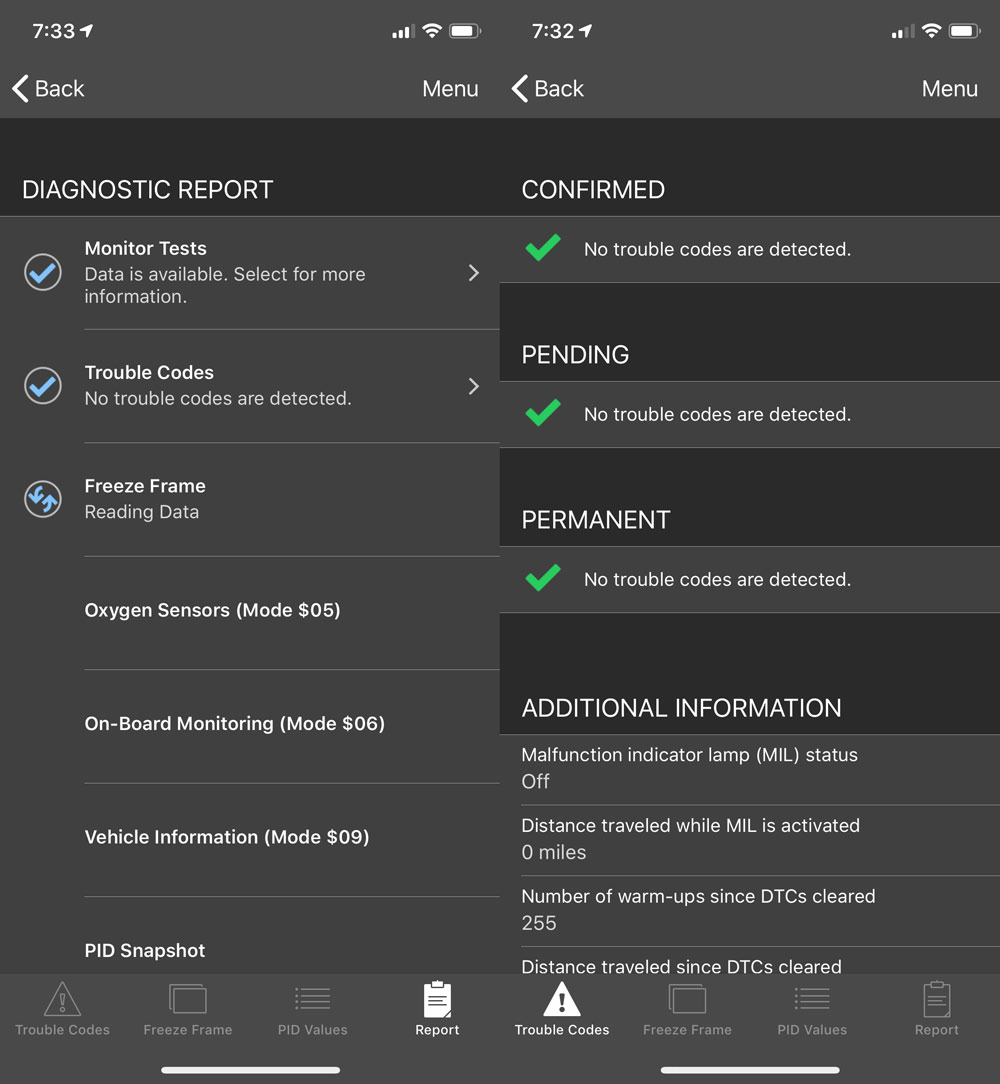
Let’s talk about diagnosing. Our car was overdue for service and had error messages on the instrument panel. We had a chronically low right rear tire and I knew that our coolant was low. I figured great, I’ll connect the MX+ and it’s guaranteed to show me some errors that I can dig into, so I connected and ran the diagnosis.

On the left is the in-process screenshot as the MX+ was gathering data. On the right was the outcome. No trouble codes. Hmm.

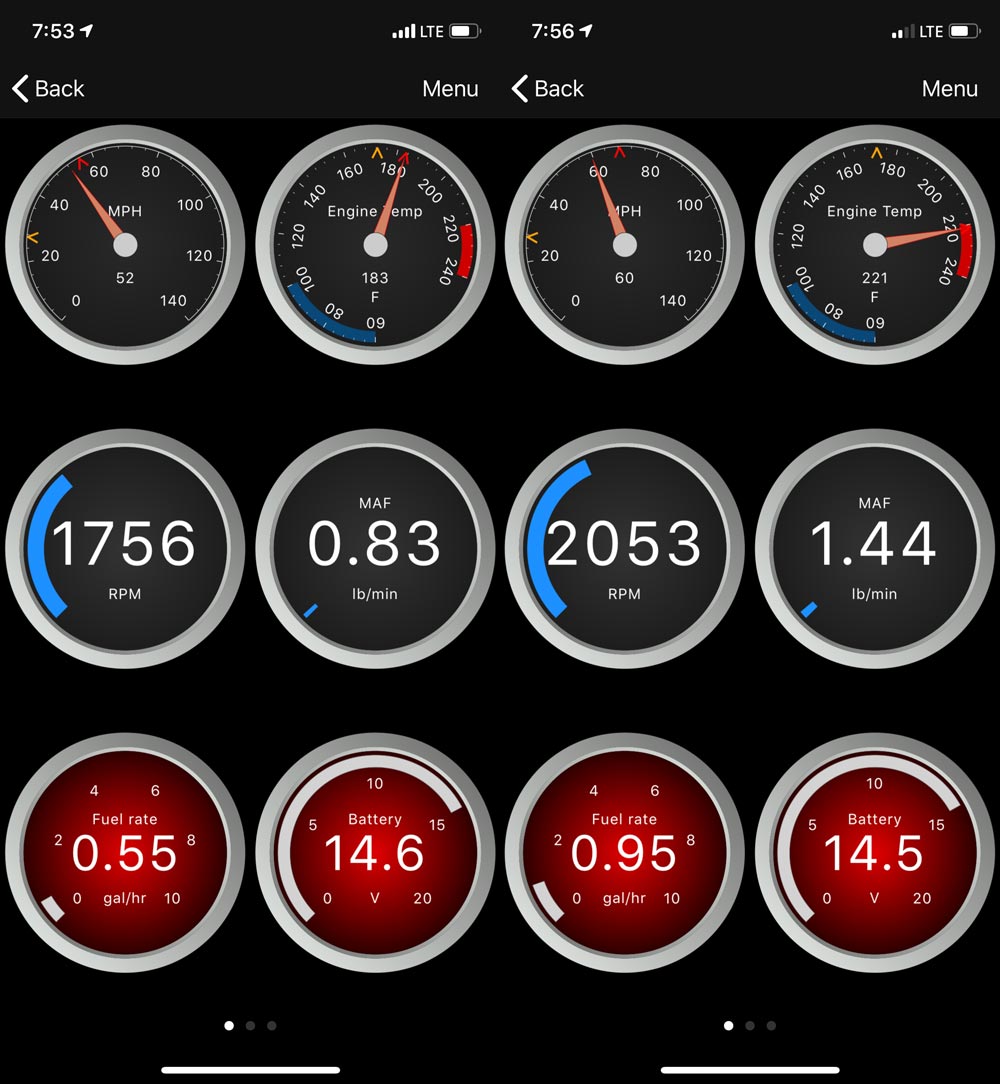
As this was the morning of my appointment, I put my iPhone in the dash mount, launched the app and drove to the dealer with the Dashboards screen up. This is probably the coolest and definitely most active screen in the app.

It’s about a 15 minute drive so I took a screenshot pretty quick (about 3 minutes in) and the second about 10 minutes later. All the gauges (except battery) jump a bit, the most interesting of which is the temperature gauge moving into the red. This completely makes sense as again, I knew I was low on coolant.

The dealer found a nail in the rear tire, both rear tires were in need of replacement and that I was a 1/4 low on coolant, but no leaks after a pressure test. Sounded about right, but not something that the MX+ helped me to diagnose or decide on.

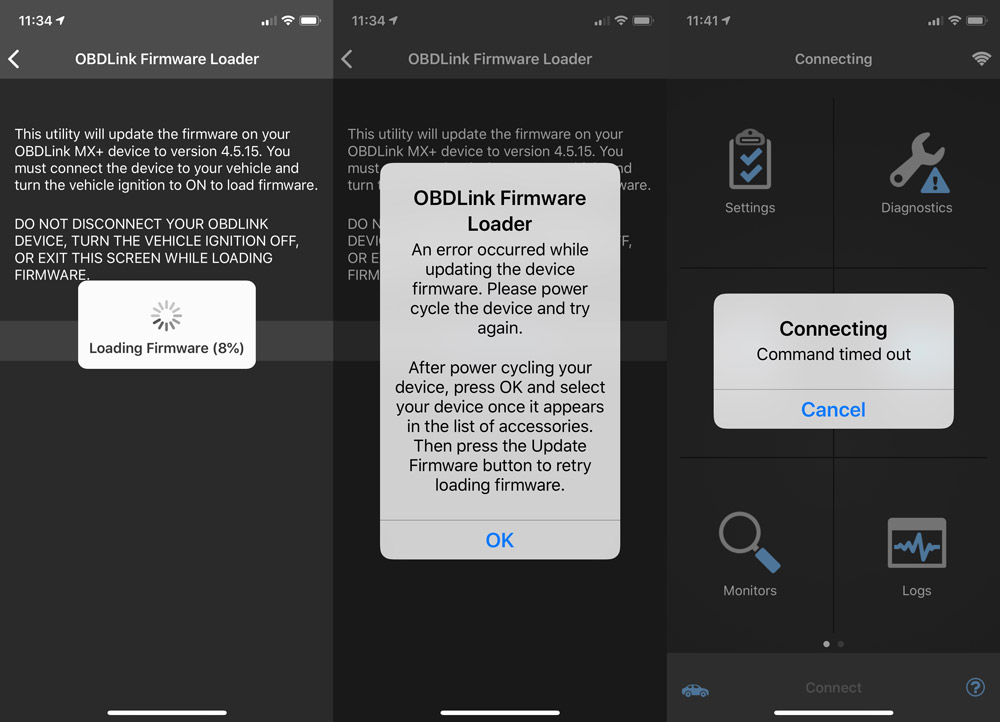
Jumping forward to today, I thought I would look into diagnostics again and re-run them. I noticed that there was a firmware update when I was in the settings panel. With the car in the on (not running) not running position. I followed the prompts to get the update started, but it then threw a firmware loader error. I followed those instructions and then continually hit a command time out error.

A quick visit to the support page showed 413 views on a ‘firmware update failure’ subject that isn’t taking comments. One troubleshooting tip says “Do not hit the OBDLink app CONNECT button at any time during this procedure” which I find ironic considering that it’s the first thing you’ll do if the app tells you it timed out. Needless to say I hit a wall here and have opted to take a break for now and finish up this review for the time being.

What I like

  • Price. It potentially pays for itself if it can avoid even one shop visit
  • Easy to use compact tool that you can connect and forget
  • Broad vehicle compatibility

What needs to be improved

  • May not be able to read all error codes for your vehicle
  • Better process instructions for how to use each screen
  • Better firmware update process, like a test that confirms connection is stable

Final thoughts

I really want to like this product. The dashboard feature is great and the diagnostic function is a feature many car types have a need for. I get that it’s hard to build any product for universality and that each car make and model creates scenarios that complicate issues. The Amazon reviews are positive overall so I’m clearly having issues that aren’t completely normal, but the fact that I know I had errors and the MX+ scan said no error codes bothers me. If you’ve used this and had good luck, let me know in the comments. I’ll give it another crack on an upcoming free weekend to see if I can turn this around.

Price: $79.95
Where to buy: Amazon.com
Source: The sample of this product was provided by OBDLink.

Filed in categories: Reviews

Tagged:

OBDLink MX+ review originally appeared on The Gadgeteer on May 18, 2019 at 9:30 am.

Note: If you are subscribed to this feed through FeedBurner, please switch to our native feed URL http://the-gadgeteer.com/feed/ in order to ensure continuous delivery.