Allett Nylon Original Wallet, RFID Slim Original Wallet, Slim ID Wallet, and Slim Sport Wallet review

REVIEW – A few years ago, I reviewed a wallet from Allett and I was quite impressed with its durability and slim, minimalist style.  Recently, Allett sent us a handful of their latest wallet designs to try out.  In a wallet, I typically consider three factors: appearance, slimness, and organization features.  How did this latest crop of Allett wallets fare?  Let’s check them out!

What is it?

Allett makes some of the slimmest yet more attractive-looking and affordable wallets on the market today.

What’s in the box?

The Allett folks sent a variety of some of their latest and most popular wallet styles.   Included in the box were the following:

  • Nylon Original Wallet
  • RFID Slim Original Wallet
  • Slim ID Wallet
  • Slim Sport Wallet

Nylon Original Wallet

  • Material =  Nylon fabric (interior and exterior)
  • Options = Black (pictured), Pebble, or Red color
  • Capacity =  4 to  24+ cards
  • Dimensions =  5″ x 3.8″x 0.19”/ 127mm x 92mm
  • Weight = 0.6 oz.
  • Price = $30
  • Location of Manufacture = USA

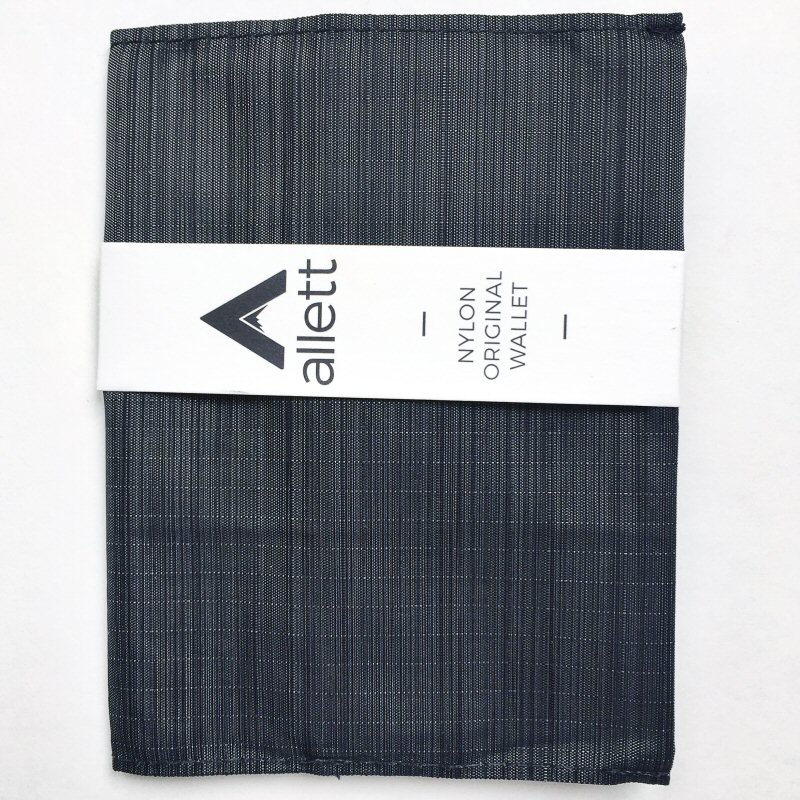
The Nylon Original Wallet (called the Nylon Original Slim Wallet on the Allett site), is one of their original designs.  
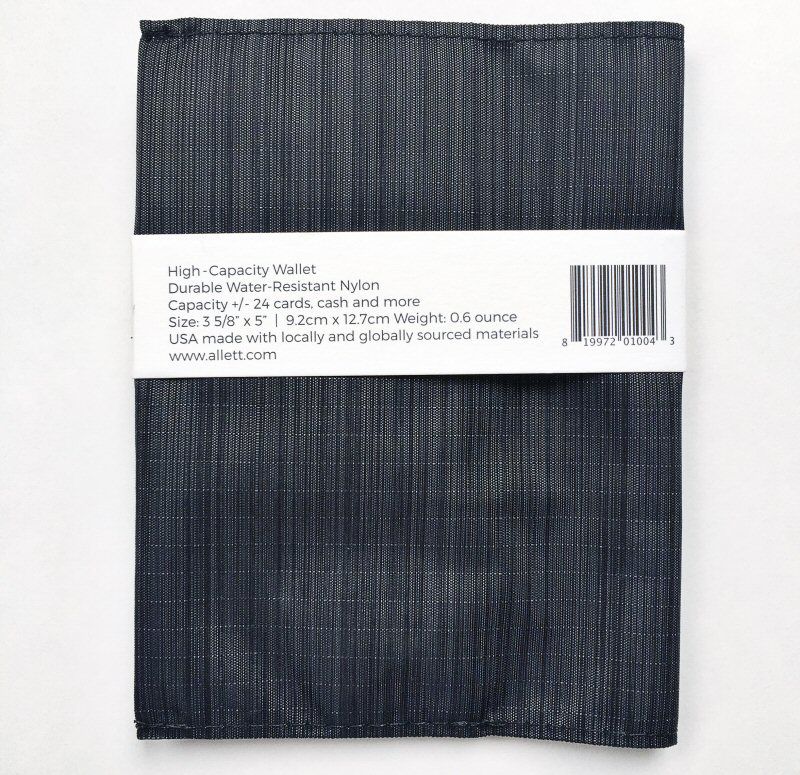
Like all Allett wallets, this one is made in the USA.
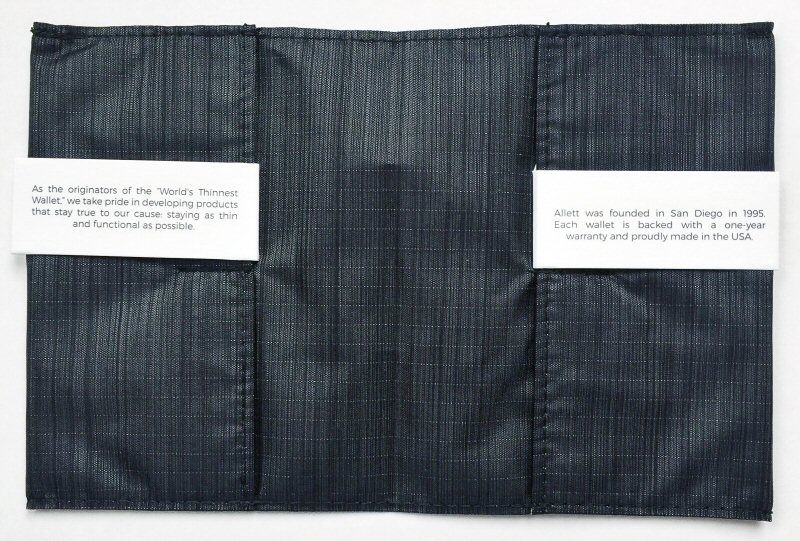
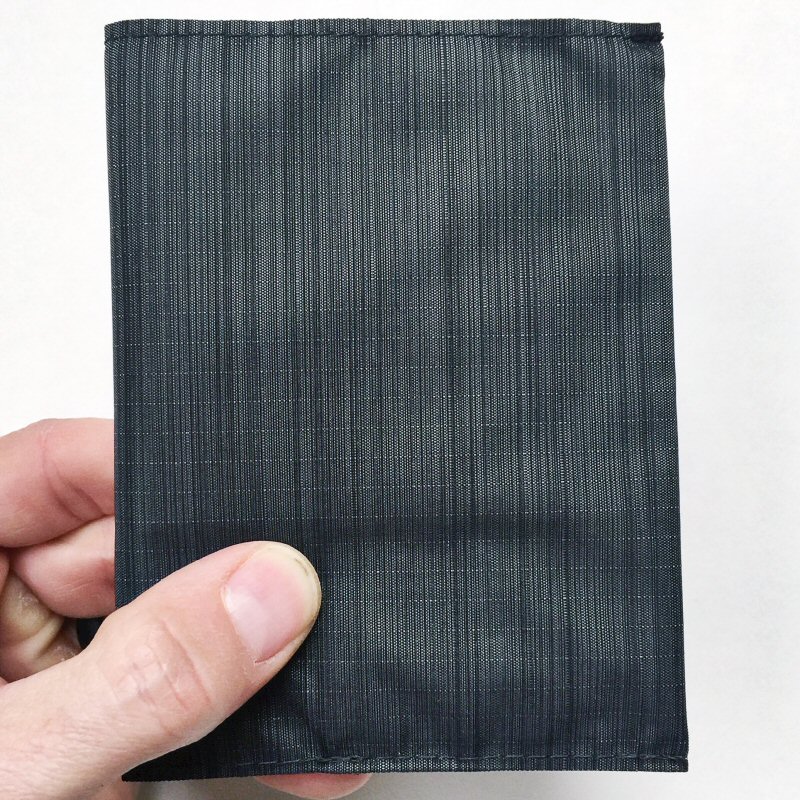
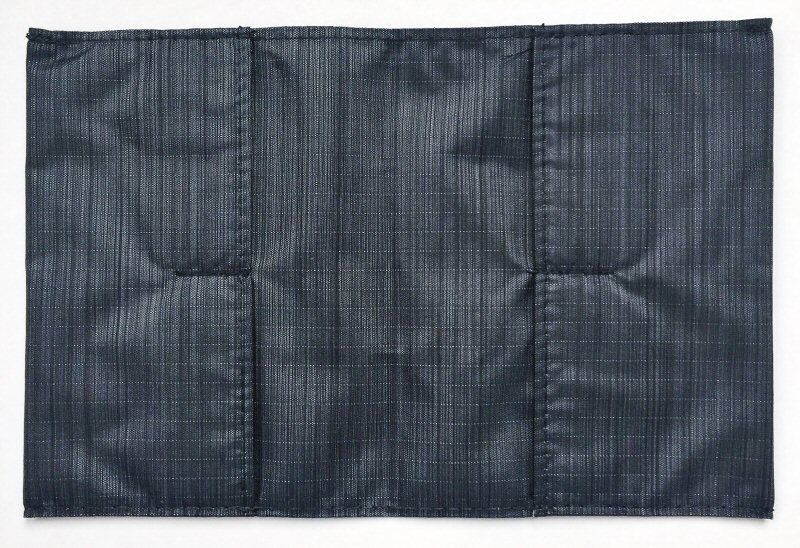
The nylon fabric used on the exterior is also used on the interior, as seen above.  Also, note that this wallet appears to have a one-year warranty.
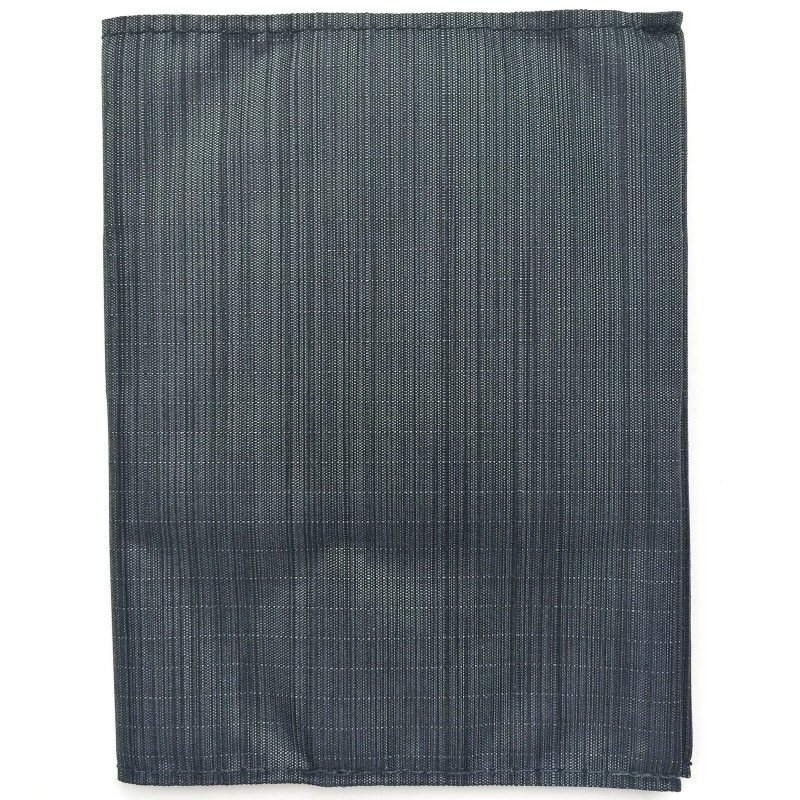
This wallet’s design is very clean, with no external logos on it, front or back, which I really like–companies that feel the need to splash large, gaudy logos all over their products always seem a bit pathetic.  Allett goes the sleek, minimalist route and pulls it off nicely.

Opening the wallet, the main four pockets are visible immediately, but the bill pocket behind them is not quite so visible.  More on these features below.
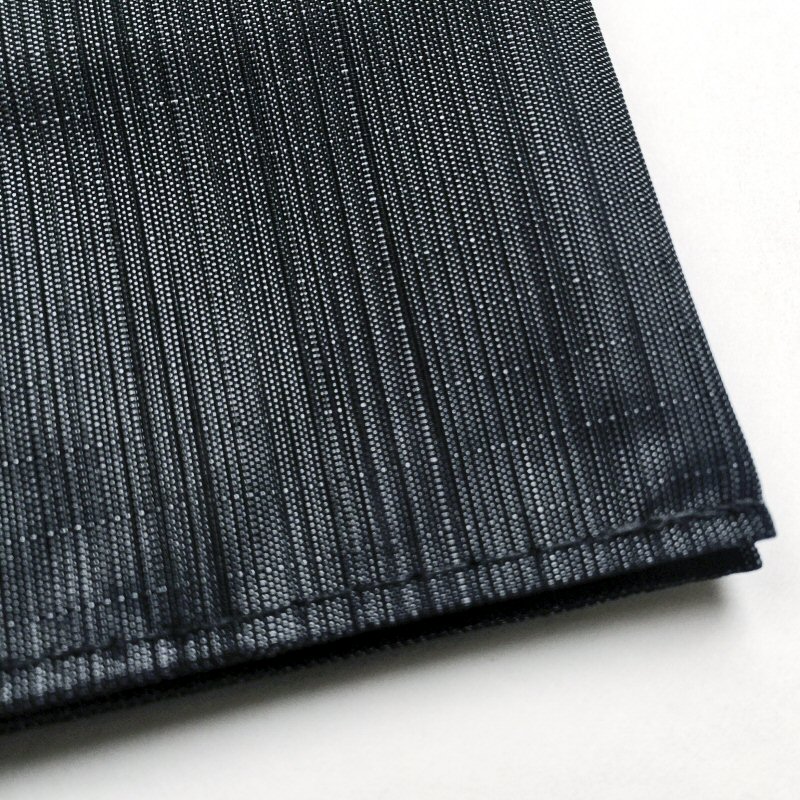
The nylon fabric is rip-resistant and moisture wicking.  It is really amazing how thin yet durable this material is, and its texture gives it just a bit of increased grip, so it is less likely to slip out of your hand.  Additionally, although Allett calls this color black, I found it to be a combination of mostly dark grey of fibers that gives it an overall dark gray look.

At only 0.6 ounces, this wallet is almost ridiculously lightweight, owing to the material properties and thinness of the fabric.  Additionally, although it does have a somewhat large “footprint,” this helps minimize its thickness.  More on this below.

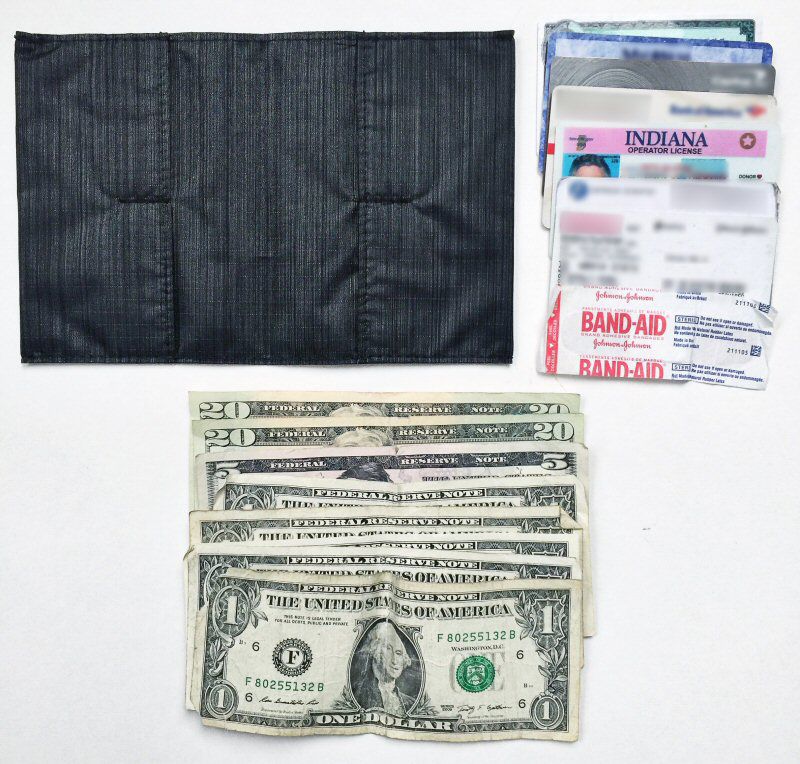
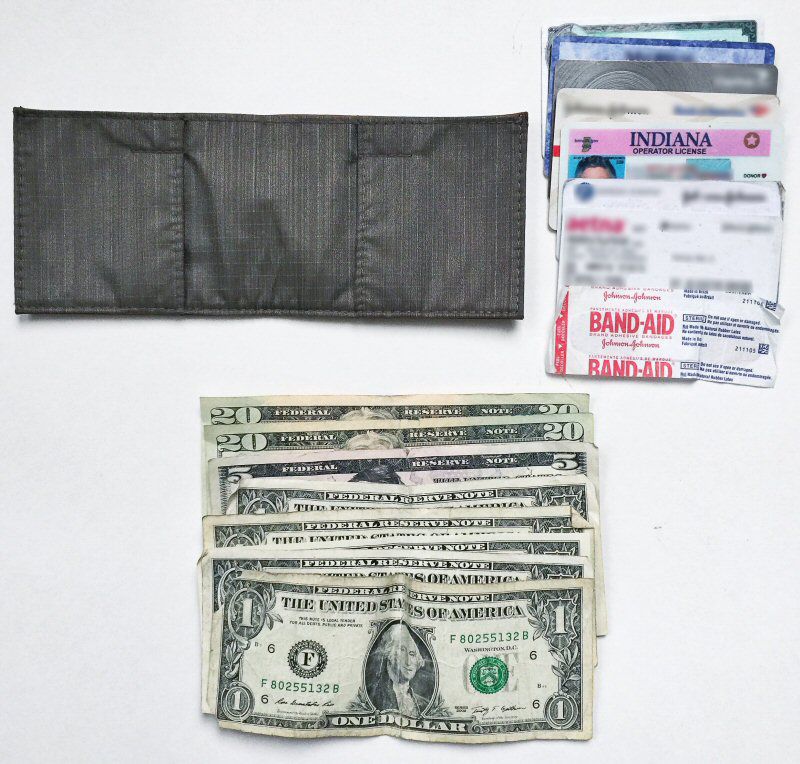
The above items are what I actually had in my wallet when I took the photos for this review, so this represents fairly close to my wallet EDC items (I already carry a pretty slim wallet, so I try to keep my wallet contents minimalist).  It’s a total of seven cards, 8 bills and a Band-Aid (a “just in case” holdover from when my kids were younger).

Although extremely thin, this wallet includes not only a generously-sized (wide and deep) bill pocket but also includes a divider inside the bill pocket.  I really like this because I often end up with receipts from purchases and I can slide them into one side of this pocket, and keep my bills in the other.  It should also be noted that the outer portion of this pocket is a bit shallower than the inner portion, the depth of which runs the full length of the wallet.

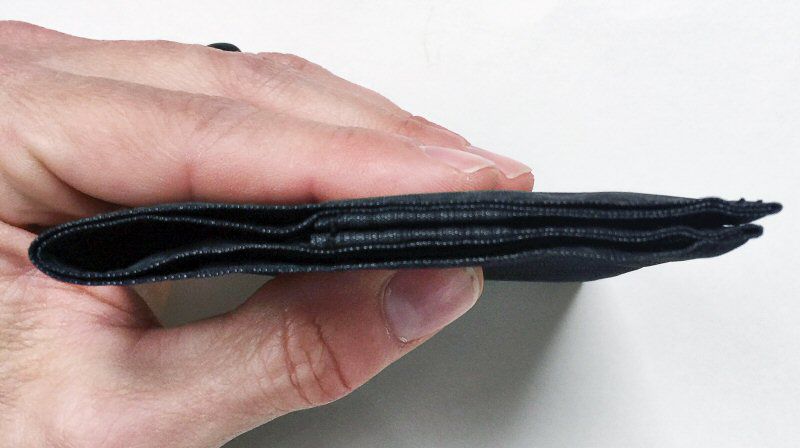
The above view shows the wallet without the content inside, and although you can see that it is indeed truly thin, I had some difficulty in depicting just how thin it actually is.

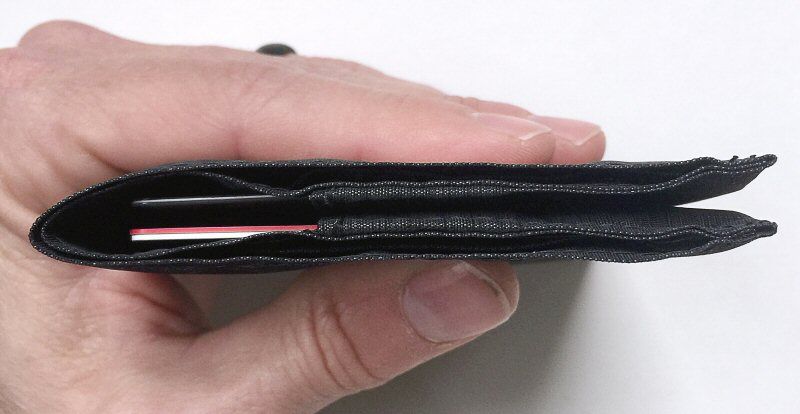
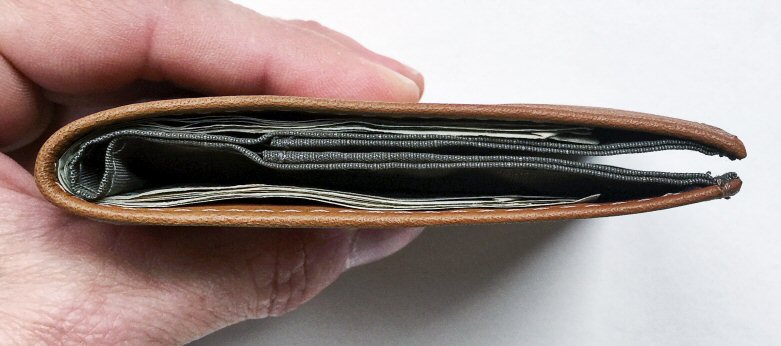
The photo above shows the wallet with the contents inside.  It’s still pretty darn slim, only a bit thicker than its contents, owing to the thinness of the material.
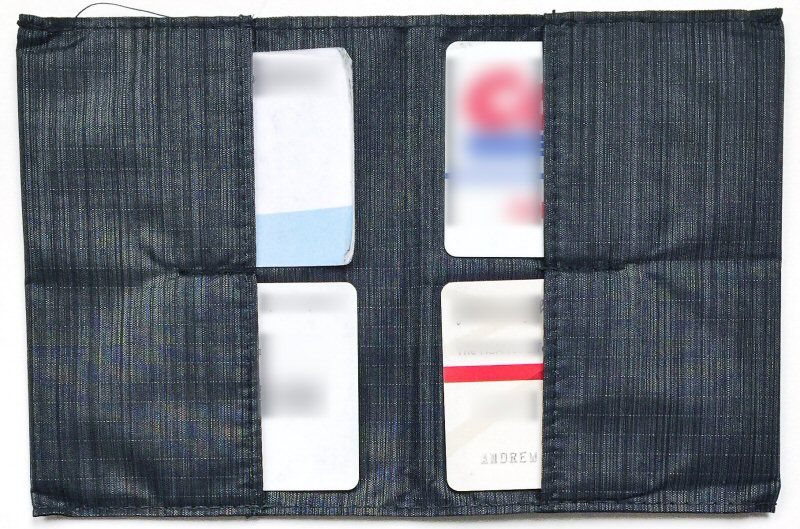
I like the layout of this wallet for two reasons, and dislike it for one reason.  First, I like it because it spreads the cards out so that they are not all stacking on top of each other.  This results in a thinner wallet overall, though it does mean a larger “footprint” size in your pocket.  Additionally, I like that this card placement results in a sort of “hinge” effect when placing the wallet in your back pocket, which helps a wallet with a footprint of this size to better conform to your…anatomical curvature.  Second, I like that Allett made the pocket openings all point inward, toward the center of the wallet, which secures them better than having the openings pointing upward or outward.  Now for the dislike: the pockets all need to be just a bit deeper because they tended to fall out, especially if I only had 1-2 cards in each pocket.  However, I think Allett may have solved this problem; more on this below.

RFID Slim Original Wallet

  • Material =  Napa leather exterior, Nylon fabric interior
  • Options = The RFID version of this wallet is available in Black only (pictured)
  • Capacity =  4 to  24+ cards
  • Dimensions =  5″ x 3.9″x 0.22”/ 127mm x 98mm x 5.59mm
  • Weight = 1.1 oz.
  • Price = $55
  • Location of Manufacture = USA

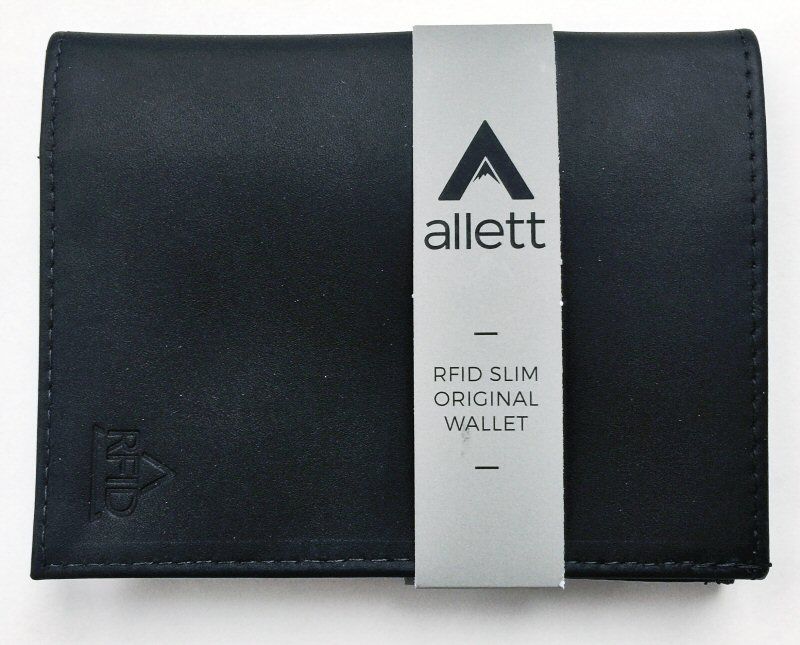
The RFID Slim Original Wallet is a bit of a variant of the Nylon Original Wallet reviewed above.  It has basically the same dimensions, but as shown below, its interior and exterior materials are different from each other.

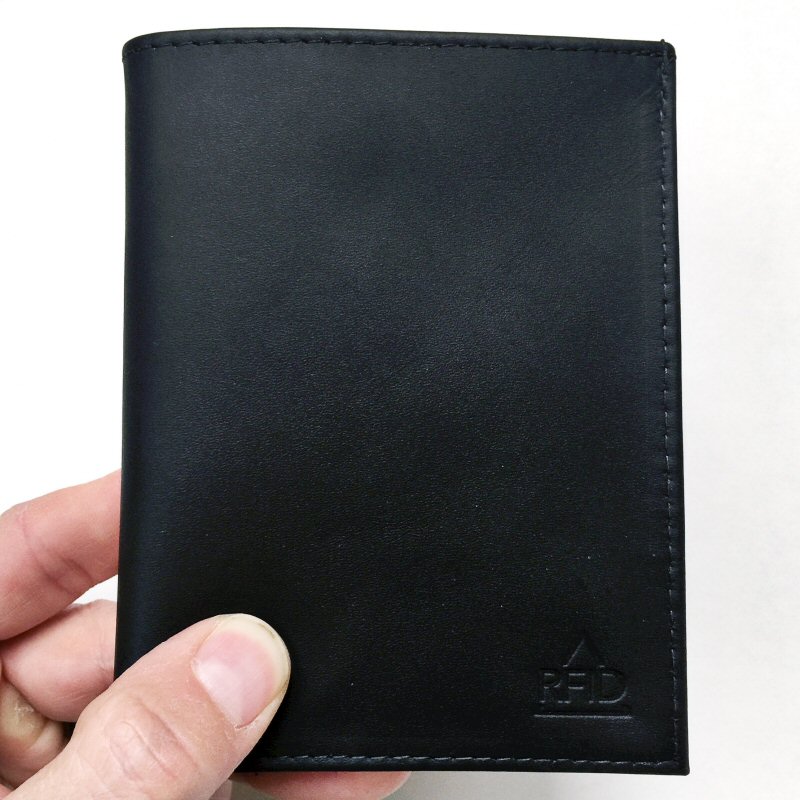
This wallet’s exterior is Napa leather with a very attractive look and soft feel.  It is not too thick such that it adds dramatically to the wallet’s overall thickness.  More on this below.

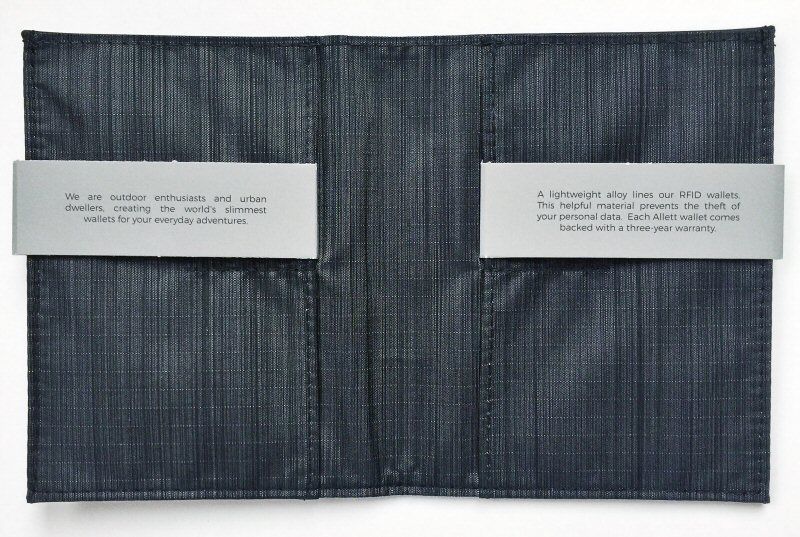
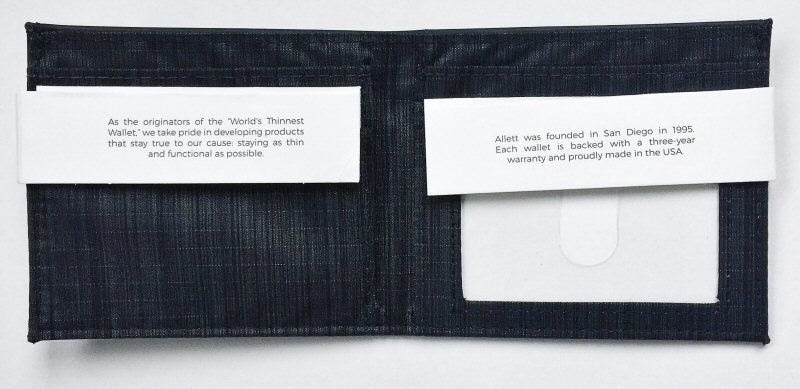
Opening the RFID Slim Original Wallet, you can see that the interior is the same nylon material as the Nylon Original Wallet above.  This wallet appears to have a three-year warranty.

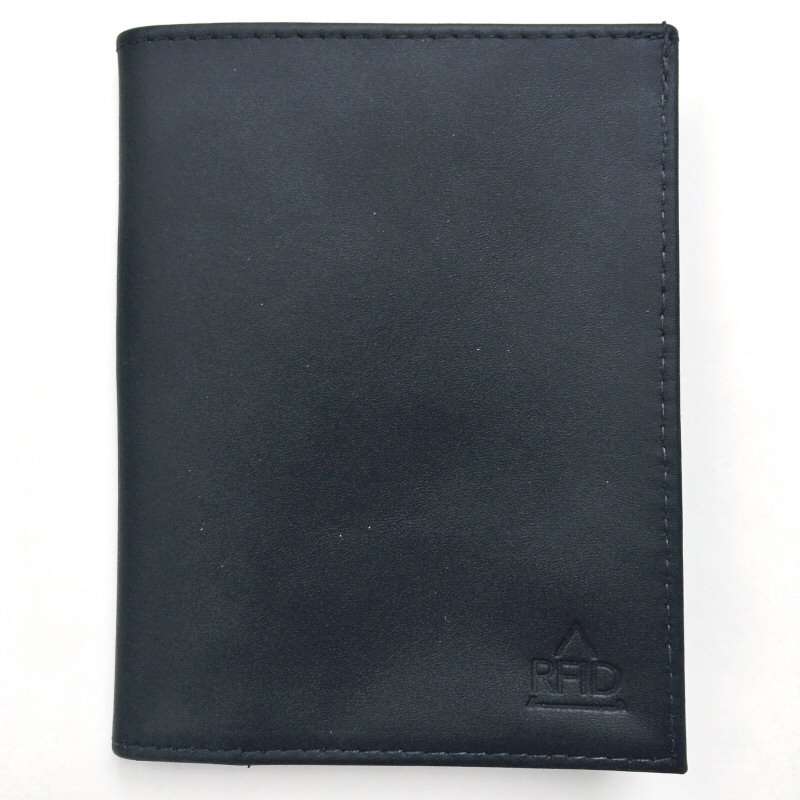
The RFID Original Slim Wallet has a handsome, minimalist style.  I really like its look.  It’s a bit more of a classic look as opposed to the Nylon version’s more casual look.

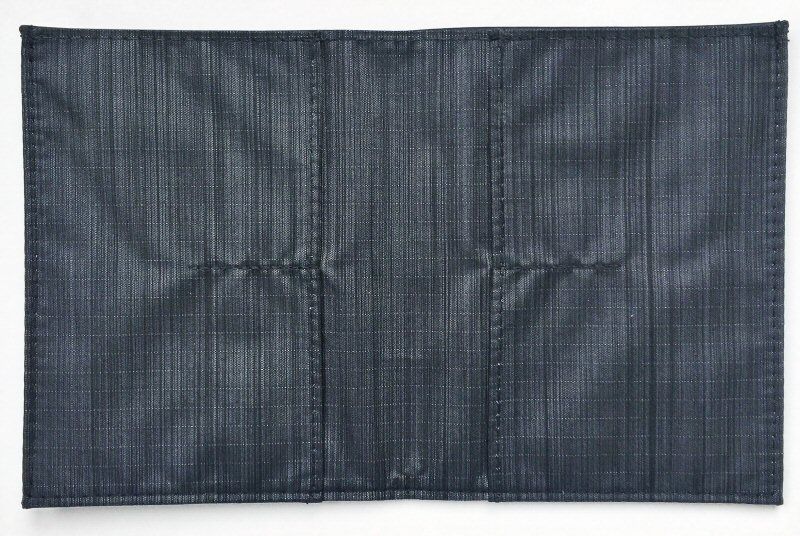
To help keep this wallet thin, as mentioned above, its interior is made from Allett’s Nylon material, which is not only thin but durable and moisture-wicking.

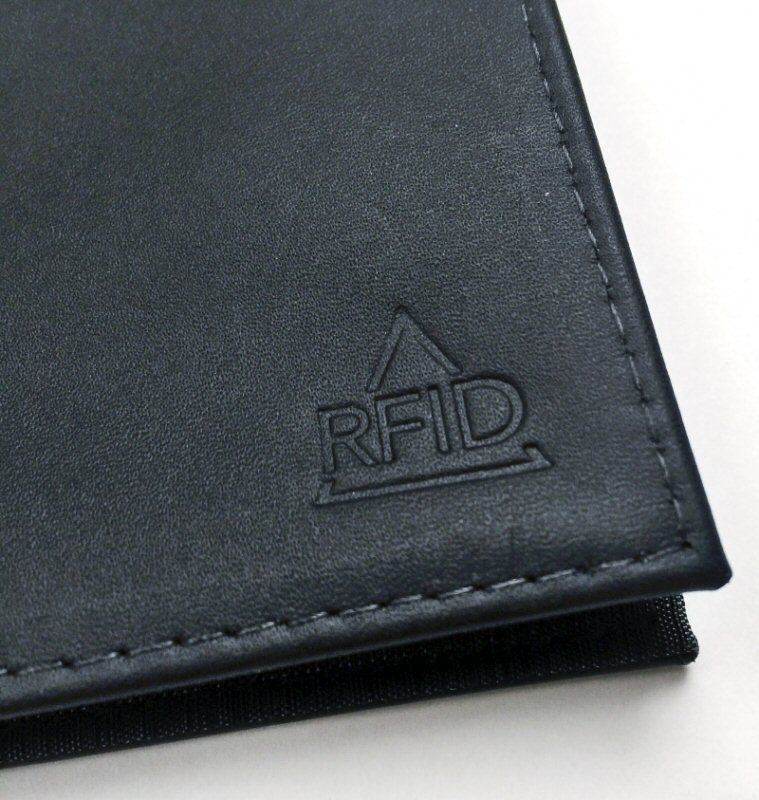
The only logo on the exterior of this wallet is the above “RFID” emblem that is embossed into the front of the wallet’s lower right corner.  Additionally, the stitching throughout, as with all of the wallets in this review, is impeccable.

The best way that I could think to confirm this wallet’s RFID functionality was to keep my credit card in the wallet and attempt to use the card at a “tap to pay” device at a retail store.  The wallet did indeed block transmissions from inside the wallet and prevented my “tap to pay”-enabled card (and everything else in my wallet) from completing a transaction.

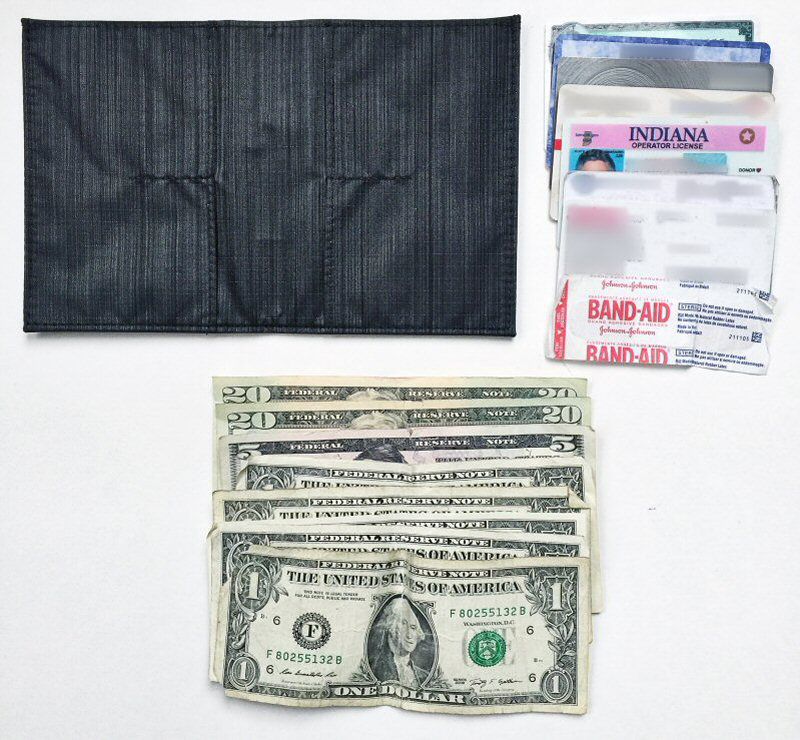
As with the first wallet reviewed, the above photo shows the items I actually had in my wallet when I took the photos for this review, so this represents fairly close to my wallet EDC items.

And as with the Nylon Original Wallet, this one has a generous bill pocket, which has conveniently been divided in half, with the innermost section being deeper and the outermost section being shallower.

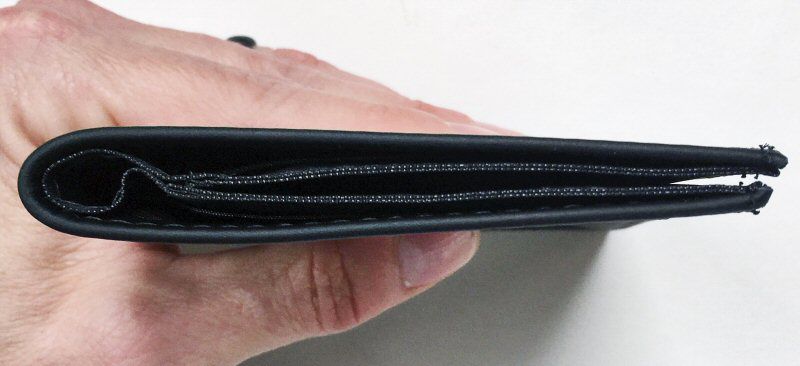
The RFID Slim Original Wallet is indeed slim, but not quite as slim as its all-Nylon counterpart.  The Napa leather on the exterior adds just a bit of extra thickness, but the Nylon interior still keeps it slim.

However, Napa leather exterior notwithstanding, it is still a thinner wallet than many that I’ve evaluated, even with contents inside.

The interior of the RFID Slim Original Wallet has a very similar layout to the Nylon Original Wallet, with its 4 card pockets laid out flat, helping give the wallet an even flatter profile.
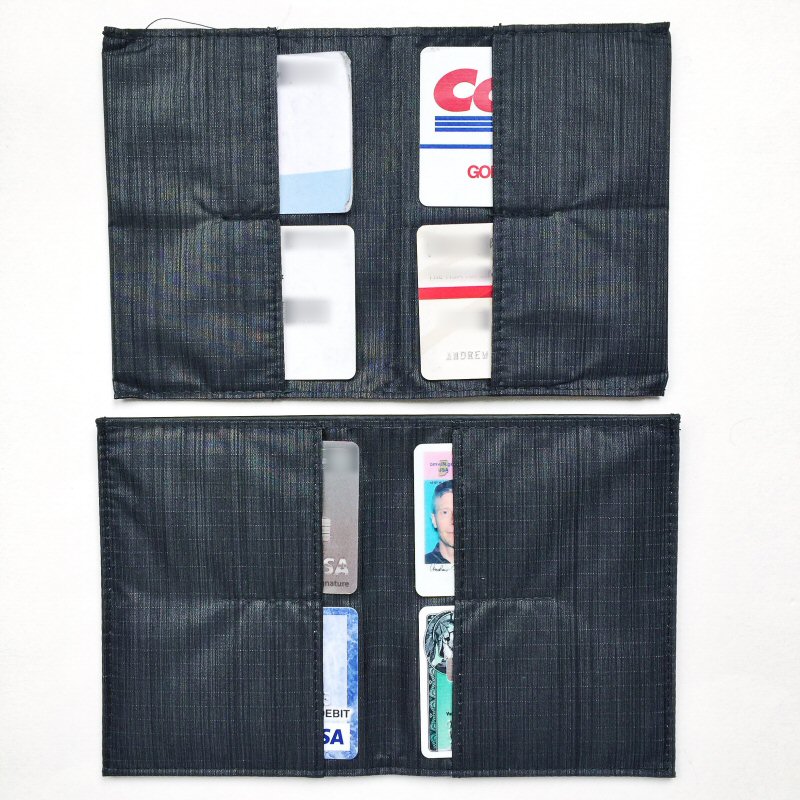
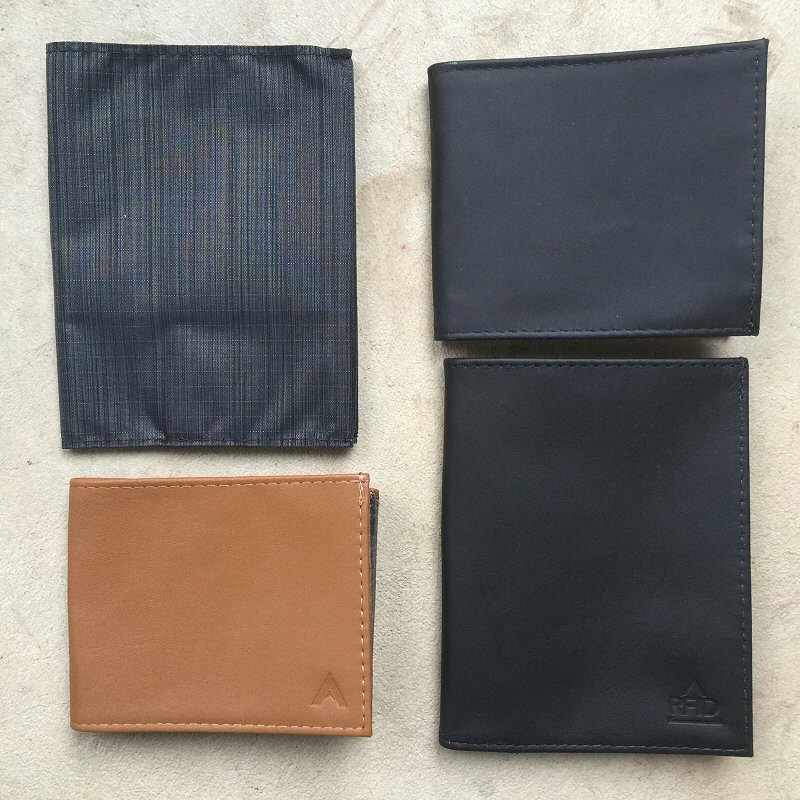
One area in which I think the RFID Slim Original Wallet has improved upon the Nylon Original Wallet’s is the interior card pocket depth.  The RFID Slim Original Wallet’s pockets are a bit deeper, perhaps a quarter of an inch, as seen in the comparison photo above.  It may not seem like much, but it’s enough the prevent cards from falling out just that much better.

Slim ID Wallet

  • Material =  Napa leather exterior, Nylon fabric interior
  • Options = Black (reviewed here), Brown, Blue color
  • Capacity =  3 to  10+ cards
  • Dimensions =  4.125” x 3.5″ / 105mm x 89mm
  • Weight = 0.9 oz.
  • Price = $45
  • Location of Manufacture = USA

The Slim ID Wallet (called the Leather ID Wallet on the Allett site) is a basic bi-fold wallet, but with several upgrades.  It’s very similar to their Nylon ID Wallet, but with a Napa leather exterior that is identical to the Napa leather on the exterior of the RFID Slim Original Wallet.

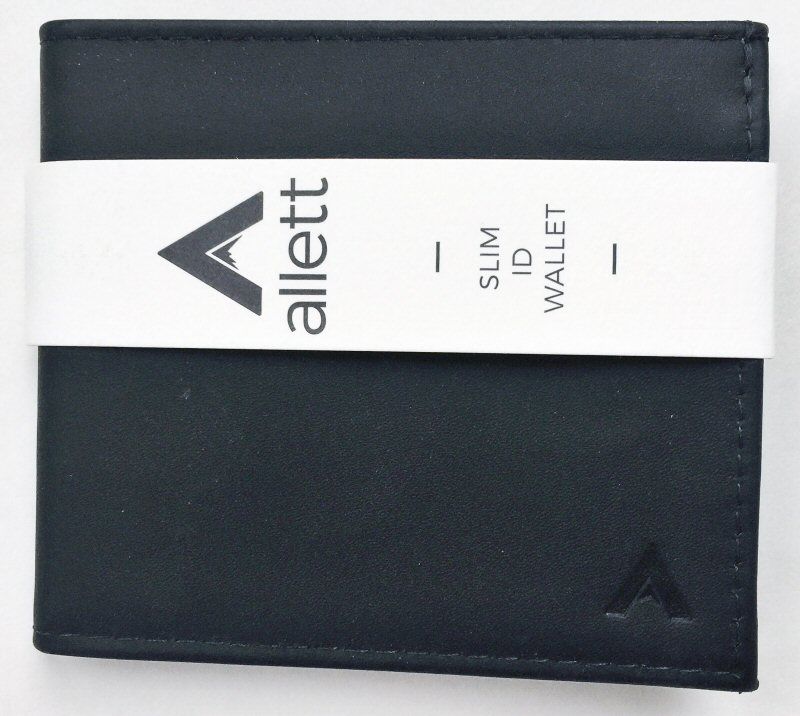
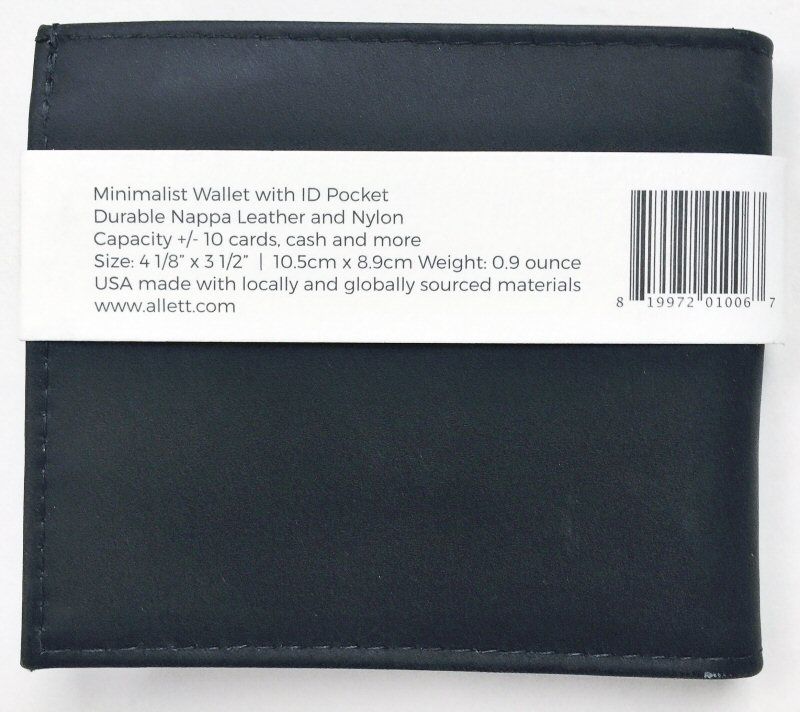
Allet even calls this wallet “minimalist” on its packaging wrapper.  And it is.

The interior material of the Slim ID Wallet is made from the same thin, durable, moisture-wicking Nylon material as the interior of both the Nylon Original Wallet and the RFID Slim Original Wallet.  Additionally, this wallet also appears to have a three-year warranty.
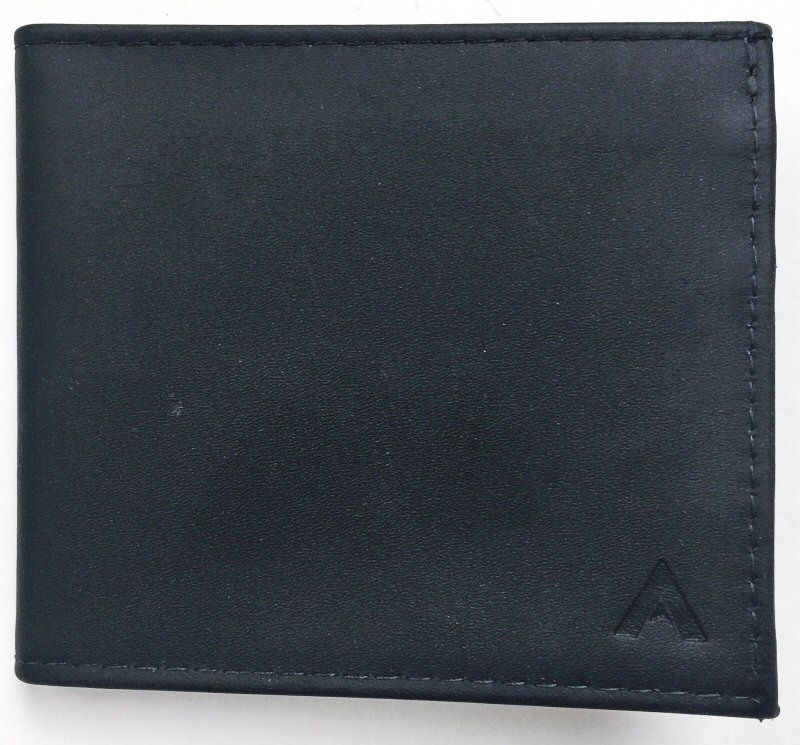
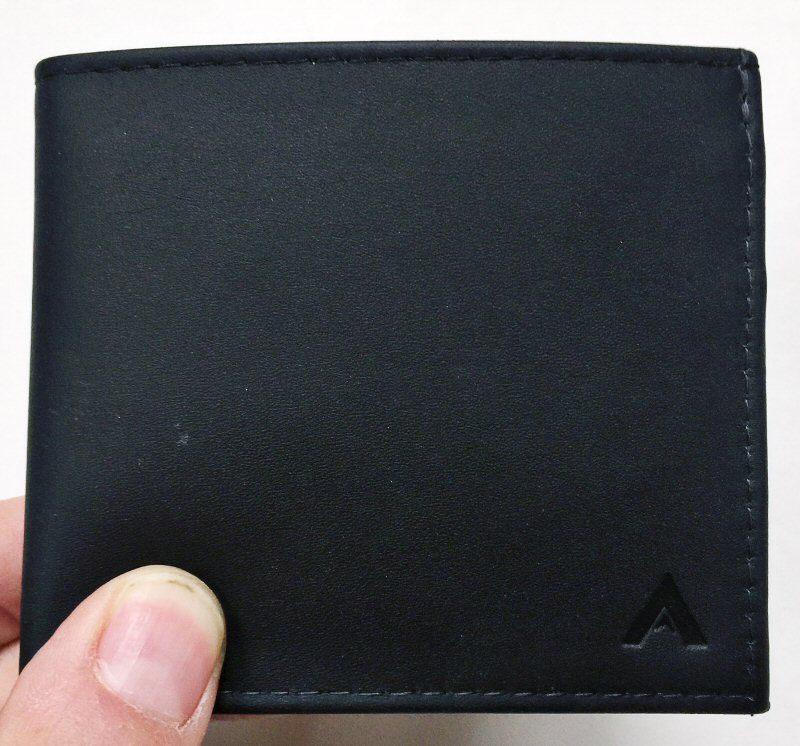
This wallet has an understand, classic exterior, as seen above.
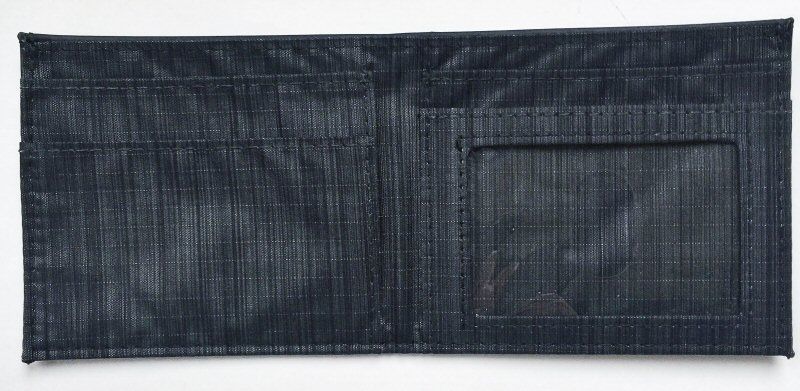
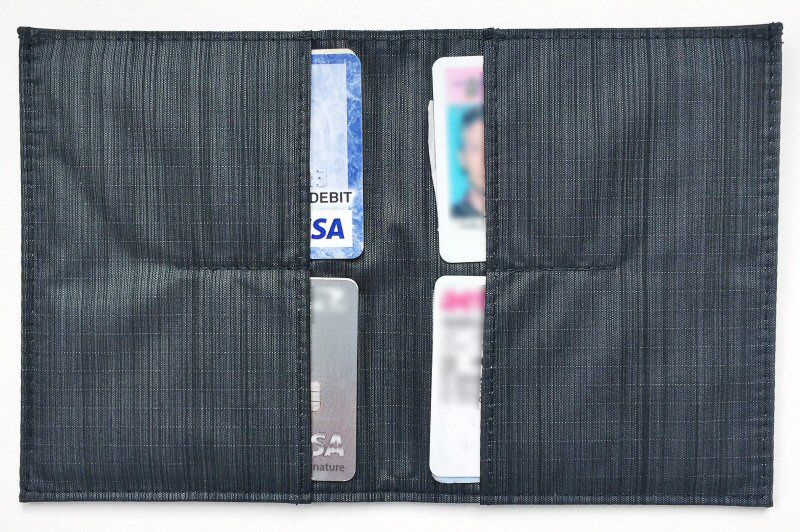
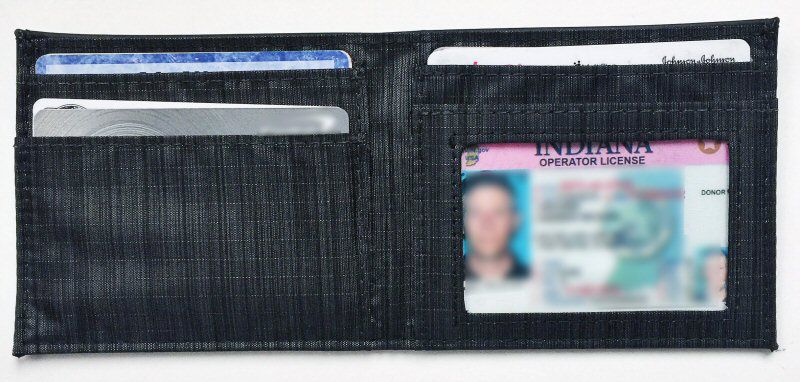
As mentioned above, this wallet’s interior wallet is essentially a classic bi-fold style.  It has two card pockets on the left, and on the right is one card pocket and a transparent ID pocket that also includes a thumb slot for helping to quickly deploy your ID.

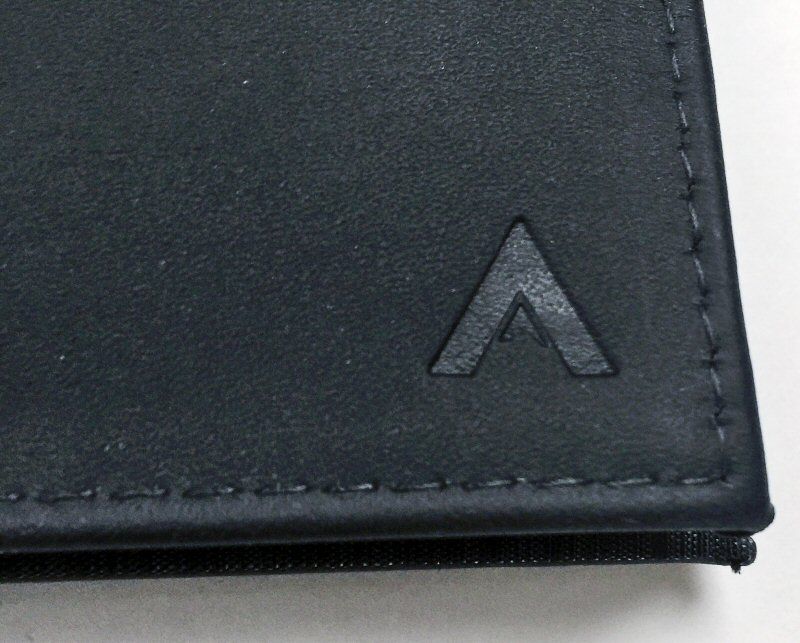
The Slim ID Wallet has but one emblem embossed into its front bottom right corner, which is the Allett “A” logo.  Although I typically eschew logos on the exterior of products, I can appreciate subtle ones like this one.  Well done, Allett.  Again, the stitching is precise and not a threat out of place.

True to form with Allett’s wallet’s, The Slim ID Wallet has a small footprint and classic, handsome styling.
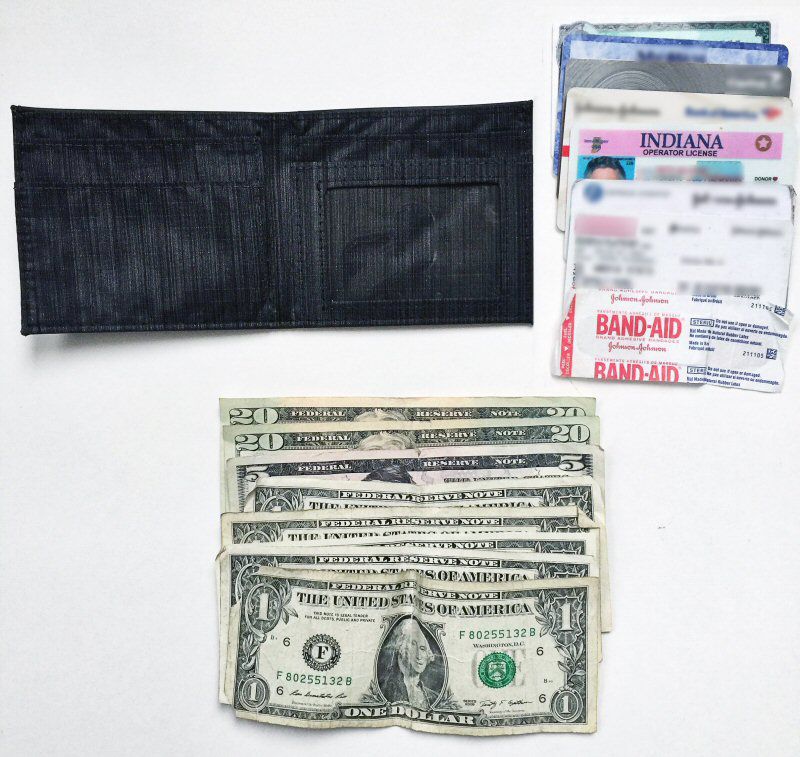
As with the two wallets reviewed, the above photo shows the items I actually had in my wallet when I took the photos for this review, so again this represents fairly close to my wallet EDC items.

The Slim ID Wallet has a long, generously-sized bill pocket that runs the length of the wallet and is divided into two compartments, which can be used to separate bills, receipts, or other items.

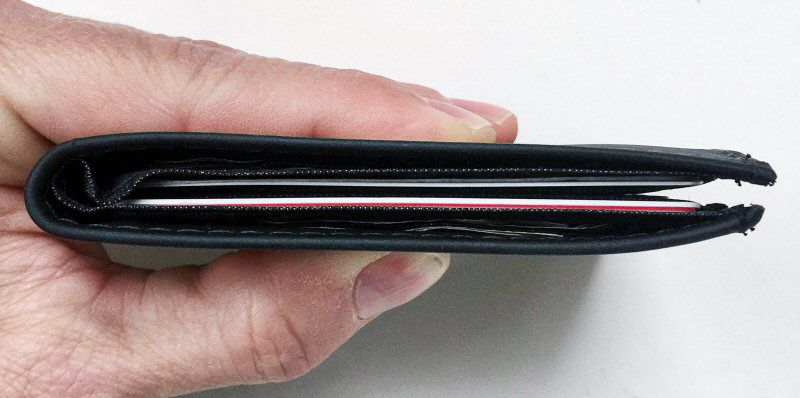
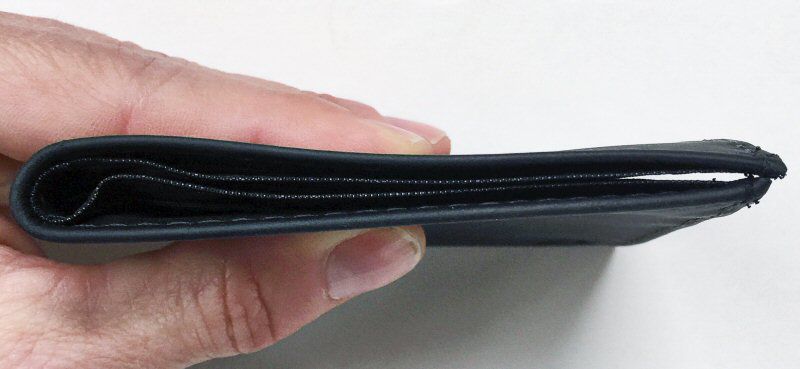
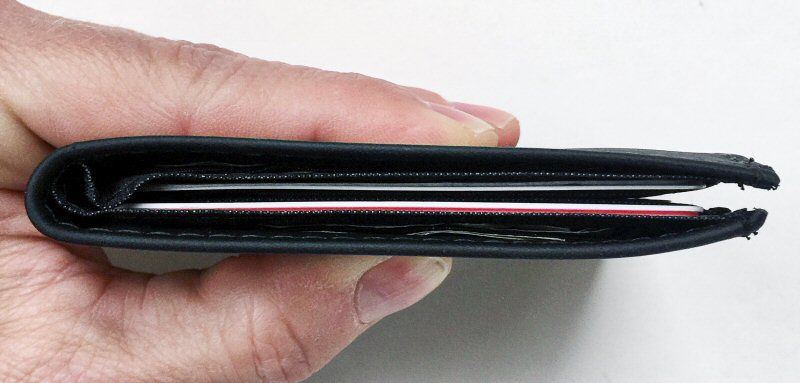
When empty, the Slim ID Wallet is indeed quite slim, as seen above.

However, even when loaded with several items, the Slim ID Wallet remains quite slim, which I believe is the whole goal with this wallet.

The Slim ID Wallet is essentially Allett’s take on a classic bi-fold wallet.  It is very minimalist, which helps keep it slim and also has a small footprint, which helps make it ideal for front-pocket carry if desired.

Slim Sport Wallet

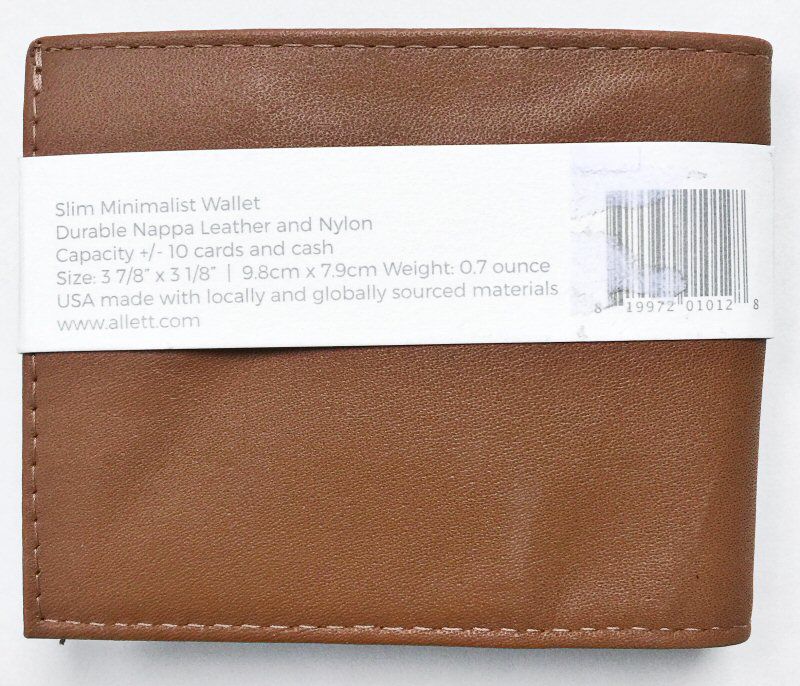
  • Material =  Napa leather exterior, Nylon fabric interior
  • Options = Blue, Black, Darl Brown, Dark Red, Tan (reviewed here), Bright Red, Purple color
  • Capacity =  2 to  10+ cards
  • Dimensions = 3″ x 3.9″ x  0.2″ / 78mm x 99mm x  5.08mm
  • Weight = 0.7 oz.
  • Price = $40
  • Location of Manufacture = USA

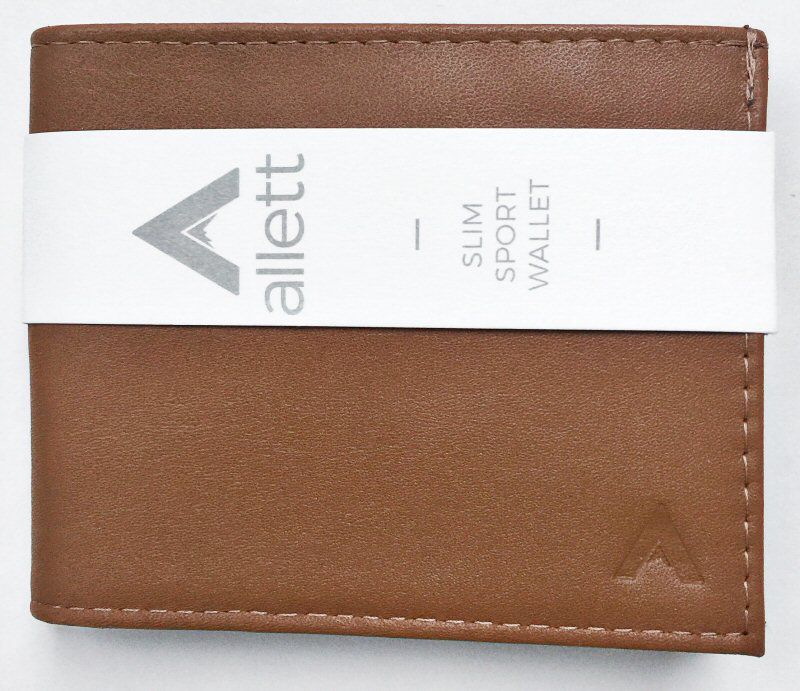
The Slim Sport Wallet is similar to a classic bi-fold, but with Allett’s own spin on some features, as seen below.

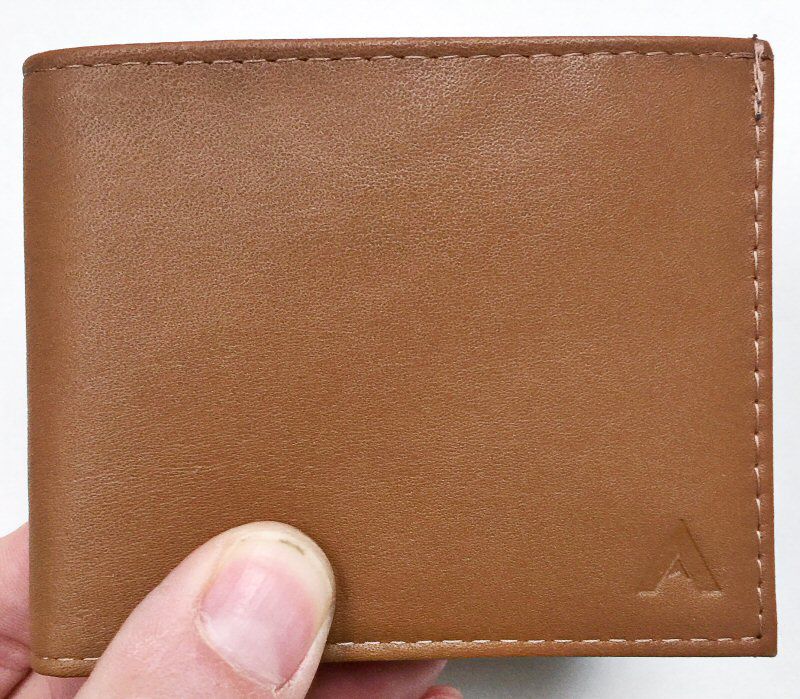
You can really see the richness of Allett’s Napa leather in the photo above.  It has a very fine, soft appearance and feel.
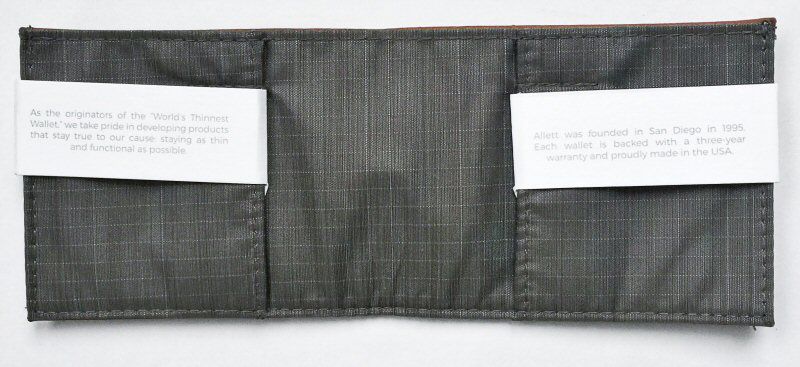
The Slim Sport Wallet’s interior has that same ripstop Nylon as the previous three wallets reviewed here, which is thin yet lightweight, durable and moisture-wicking.  This wallet also has a three-year warranty.
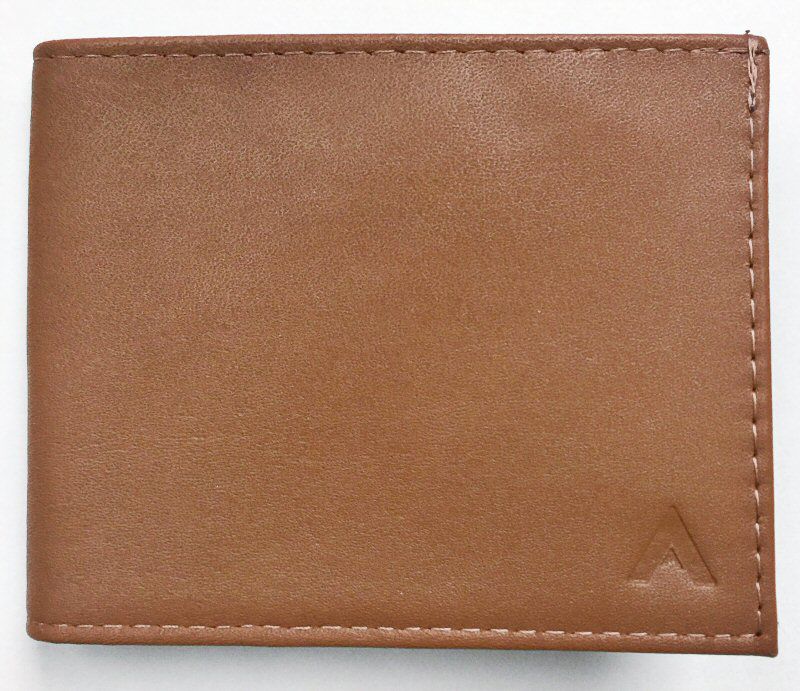
The above photo showcases the Slim Sport Wallet’s classic styling.
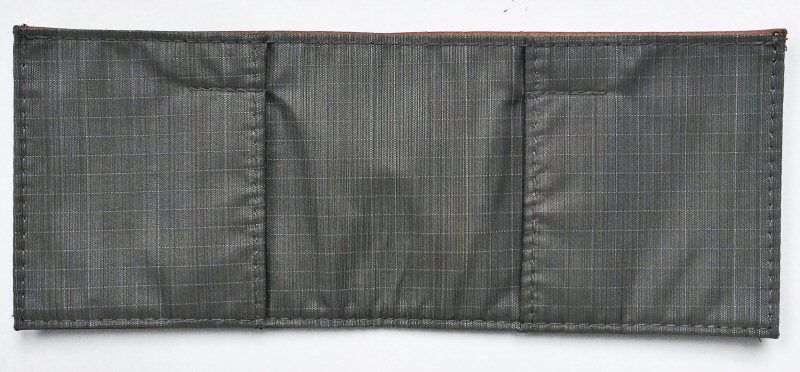
As mentioned above, the Slim Sport Wallet’s interior layout resembled a bi-fold but has some changes from that classic layout.  While it does indeed fold in the middle, it only has two card pockets which are facing inward toward the wallet’s center.  Additionally, it has two very slim pockets above the card pockets.  More on each of these below.
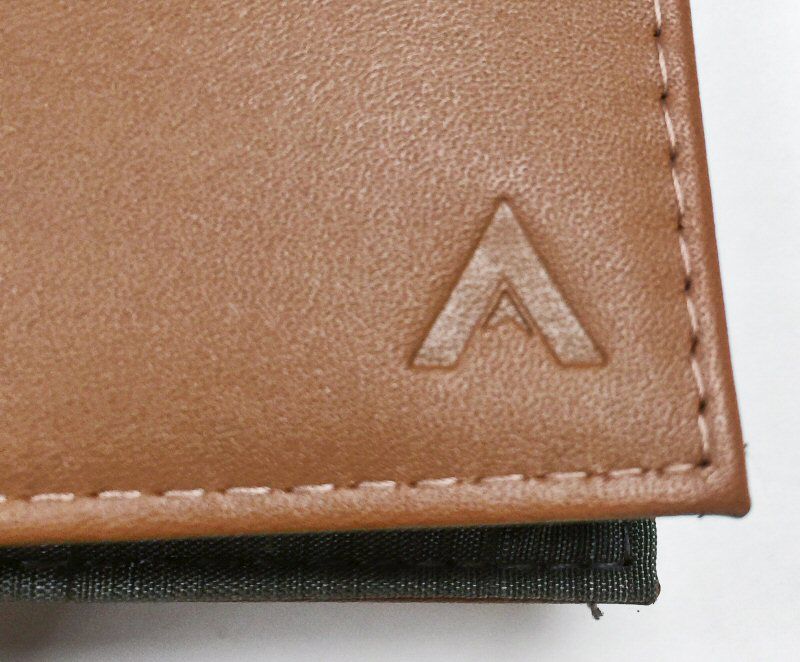
Like the Slim ID Wallet, the Slim Sport Wallet has but a single Allett “A” logo embossed into its front lower right corner, which is a nice touch (not a huge, gaudy logo).  Again, Allett’s stitching on this wallet is impeccable.

The Slim Sport Wallet is not only slim, but it also has a small footprint as well.

To keep the comparison similar, I again used the same contents that I’d used for the previous wallets, as seen in the photo above.

Like the previous three wallets, the Slim Sport Wallet includes a wide bill pocket that runs the length of the wallet.  However, this one does not have a divider as the other three wallets do.  While lack of this divider will eliminate this wallet’s ability to separate bills and receipts, it will help reduce the wallet’s thickness.
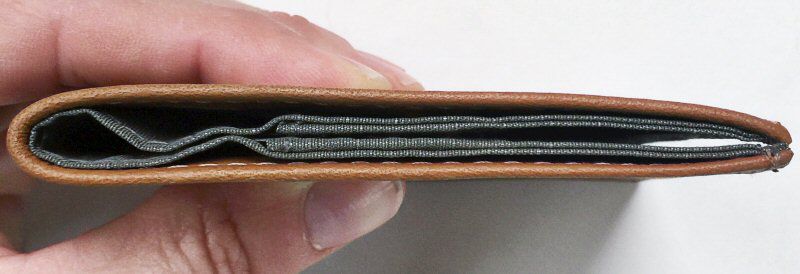
The Slim Sport Wallet is indeed slim—the thinnest of the leather-exterior wallets in this review.

Even loaded up, the Slim Sport Wallet is definitely thin, owing to its lack of a divider for one thing, but also because of its generally thin design.
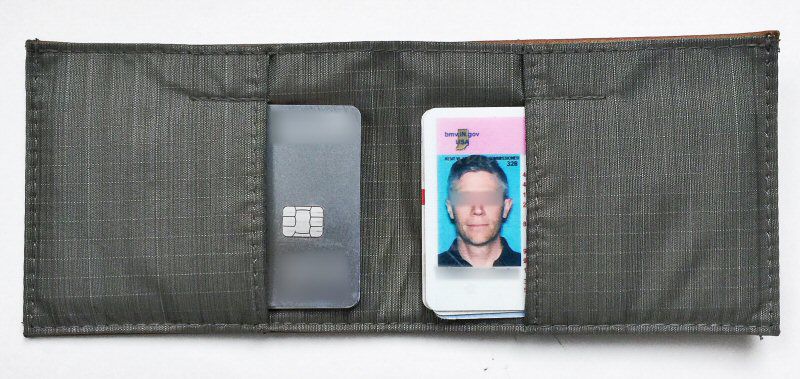
The other feature that keeps the Slim Sport Wallet slim is that cards are simply stacked atop one another, without layers of fabric between them.  While this does greatly reduce the ability to separate and organize cards, if this isn’t as important to you, it will keep the wallet more minimalist and help keep the wallet slim.  Additionally, note the two very slim pockets just above each of the card pockets.  I think these are intended to hold one of Allett’s tiny Micro Pens—however, as of this writing, the Micro Pen does not appear to be available on Allett’s site (however, its refills are available).

Final Thoughts

What I like

  • These wallets range from very slim to SUPER slim
  • Each wallet has a classy, understated, and minimalist style
  • Very affordable pricing

What needs to be improved

  • The card pockets on the Nylon Original Wallet could be a bit deeper (more like the card pockets on the RFID Slim Original Wallet)

Final thoughts

I am every bit as impressed with each of these wallets as I was with the first Allett wallet I reviewed.  They all have very classy looks, have thoughtful features for storage and separation, and the materials are very handsome and durable.  If you are looking for a slim, stylish, affordable wallet, definitely check out Allett’s selection.

Price:

  • Nylon Original Wallet,  $30
  • RFID Slim Original Wallet $55
  • Slim ID Wallet $45
  • Slim Sport Wallet $40

Where to buy: Allett.com
Source: Allett.com

Filed in categories: Reviews

Tagged:

Allett Nylon Original Wallet, RFID Slim Original Wallet, Slim ID Wallet, and Slim Sport Wallet review originally appeared on The Gadgeteer on June 4, 2019 at 10:00 am.

Note: If you are subscribed to this feed through FeedBurner, please switch to our native feed URL http://the-gadgeteer.com/feed/ in order to ensure continuous delivery.

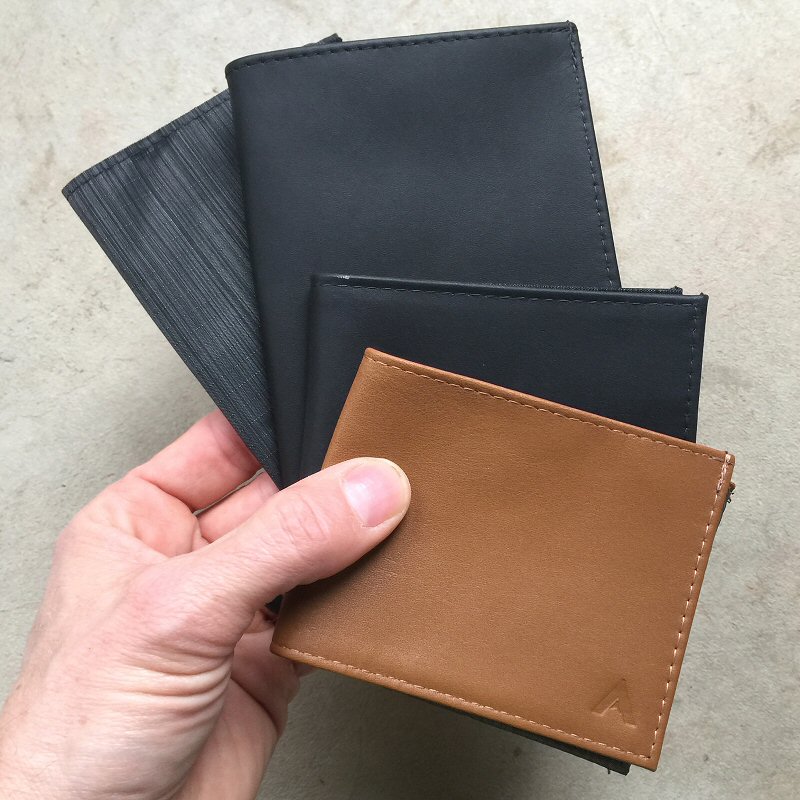
Zhiyun 4 3-Axis Handheld Smartphone Gimbal Stabilizer review


REVIEW – As a Videographer, I am always looking for ways to add versatility and enhancements to my video shoots, including ways to be totally mobile and lightweight when on the go. Sometimes, I find myself in situations where I use my smartphone to get unplanned video, but when holding it in my hands, the footage shows signs of instability and there is the lack of the benefit of creative angles. Enter the Zhiyun 4 3-Axis Handheld iPhone Gimbal Stabilizer as a possible perfect solution. So, here we go!

What is it?

The Zhiyun 4 3-Axis Handheld Smartphone Gimbal Stabilizer is a versatile device that features overall diverse functions. It can also sync with camera settings to control the zoom and focus. It has 4 built-in operating modes that can capture more advanced footage.

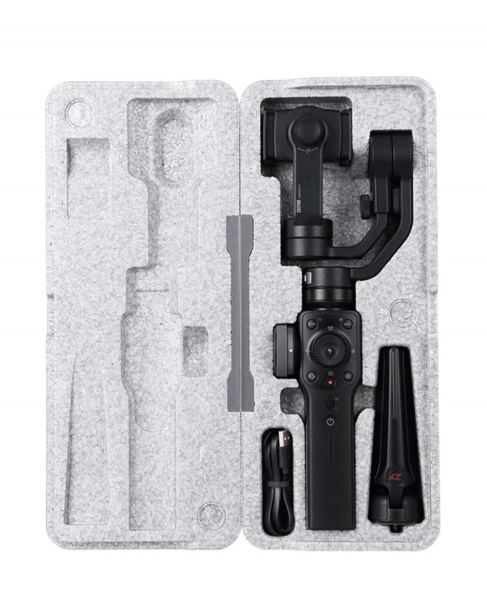
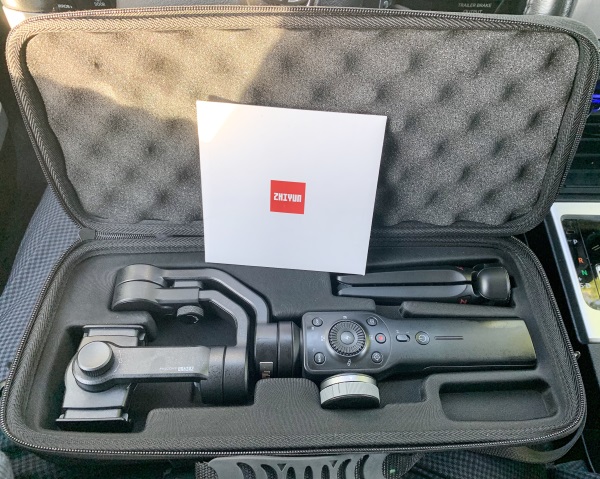
What’s in the box


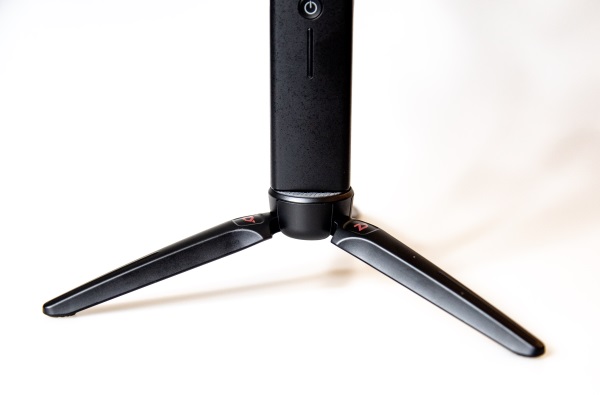
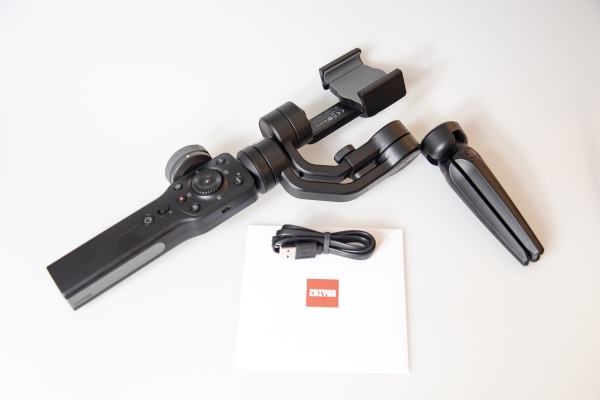
1 x Zhiyun 4 3-Axis Handheld iPhone Gimbal Stabilizer
1 x Carrying Case
1 x Tripod
1 x USB-C Charging Cable
1 x User Guide

Design and features

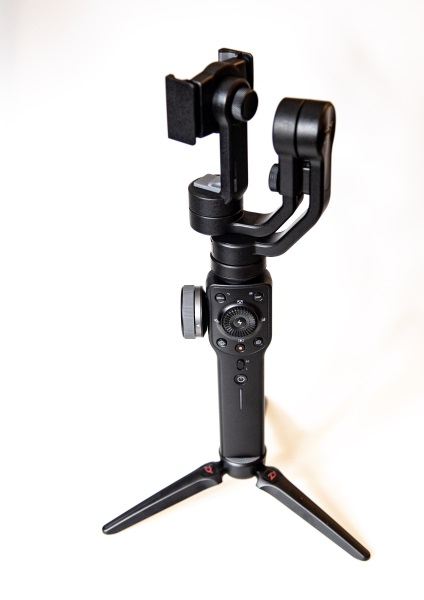
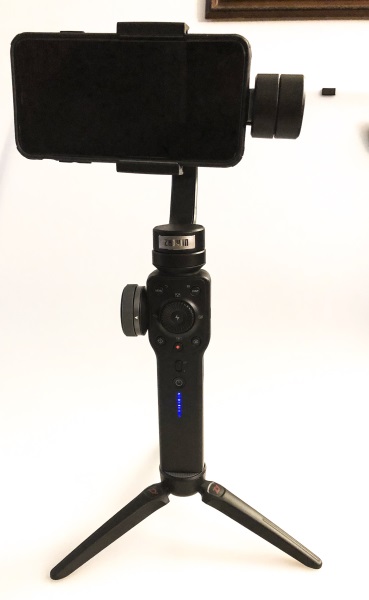
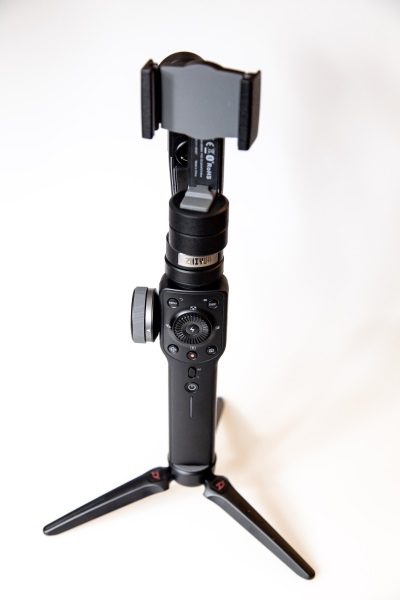
The Zhiyun 4 3-Axis Handheld Smartphone Gimbal Stabilizer is designed to allow the user to shoot smooth video and to take pictures with a smartphone inserted in the holder and connected to the gimbal via Bluetooth.

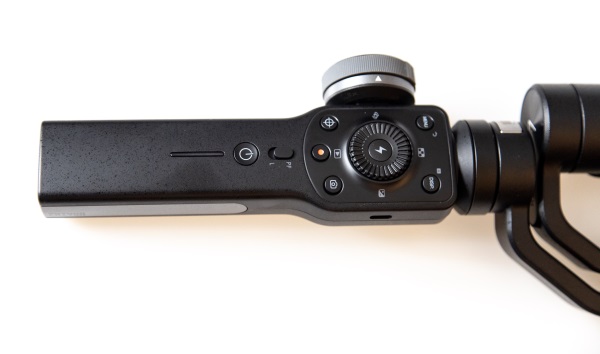
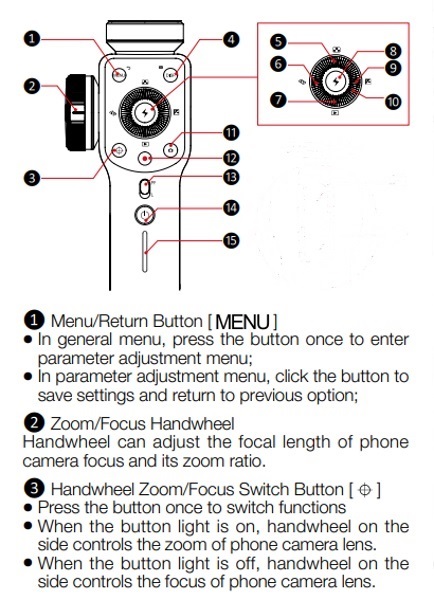
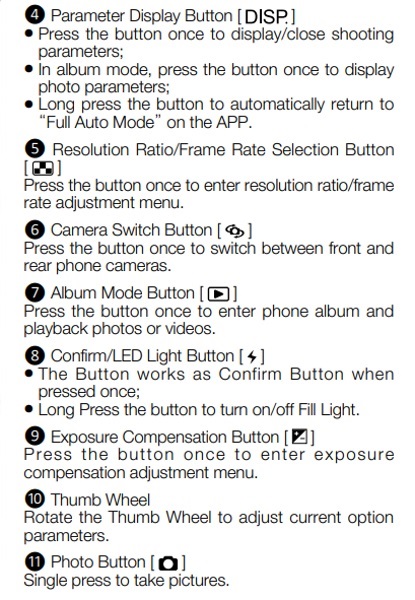
On one surface of the handle of the gimbal, there are the main controls that include the power on/off, menus, camera/video switching, and several other functions. (See the illustration and function list below the picture)


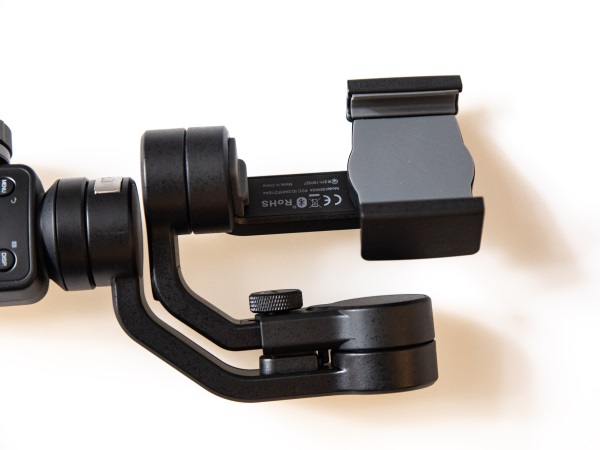
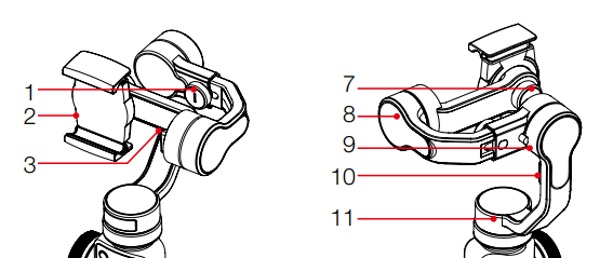
The picture below shows the “head” of the gimbal that includes the cell phone holder and the rotation mechanism. Below the picture is the related illustration of the parts and functions.


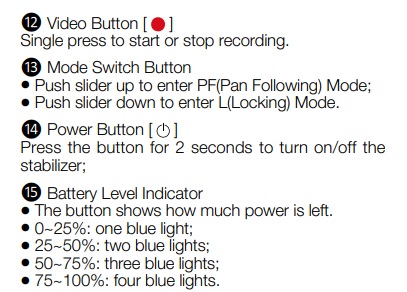
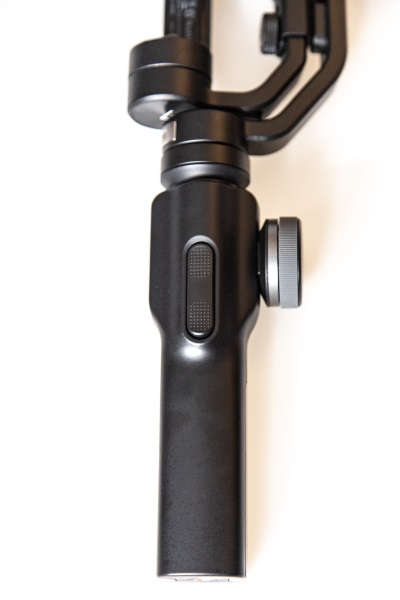
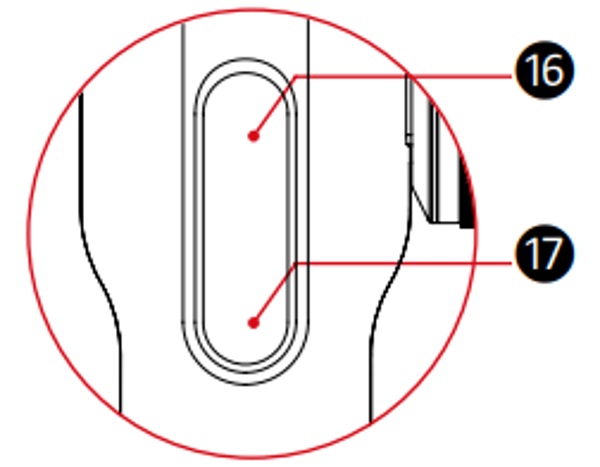
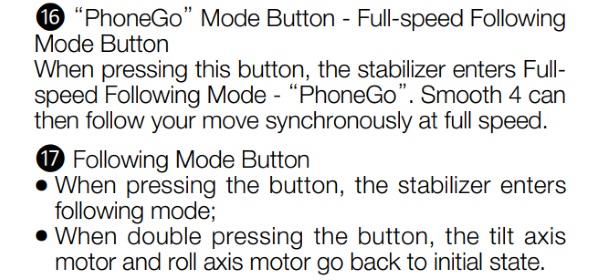
On the handle of the gimbal on the side opposite the main controls, there is an up/down toggle switch that controls the “phone go” and “Following” modes. See the illustration and related function list and description below.


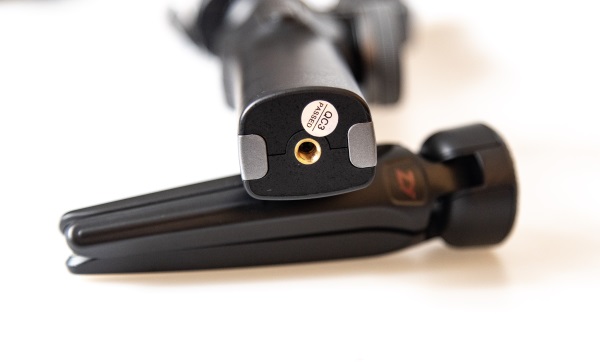
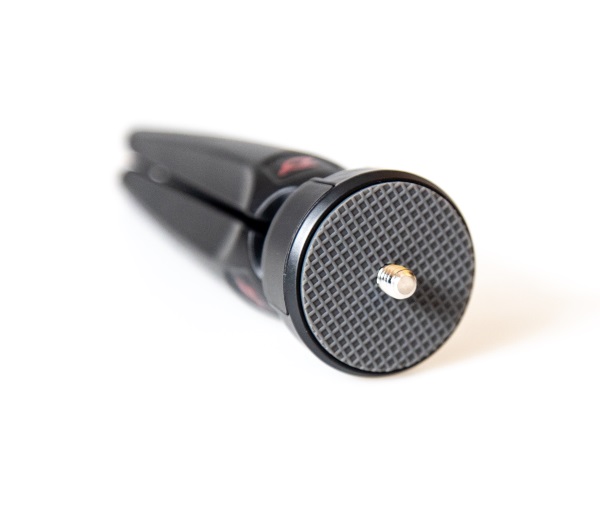
At the bottom of the gimbal, there is a female 1/4-20″ tripod mount.

Performance

The gimbal comes well packaged in a molded case that is described as a carry case but it does not have any handles or real way of keeping it securely closed while transporting. So, one of the first things that I did was to buy an aftermarket hard case that comes with a zipper and carrying strap.

Once the gimbal was charged, I read the instructions and placed my iPhone into the holder. The sides of the holder are spring loaded so that it can accommodate size differences of phones and case types, etc. The spring is quite strong and holds the phone quite well. I immediately noticed that despite using the adjustment knob to center my phone, it would not center partially because of the phone case, and I was reluctant to use my phone without the case. The instructions indicated that once powered on depending on the weight/size of the phone, that the gimbal should be able to accommodate for the off-center issue and it absolutely did. The phone became perfectly balanced when I turned it on. Important note: The instructions say not to turn on the gimbal until the phone is in the holder. When I first took the gimbal out of the box to charge it, I did what many would do and turned it on without reading any instructions. Luckily, there does not seem to be any damage done.

The second part of this operation is to download the app and connect to the gimbal via Bluetooth from within the app. Here are some screenshots from the app:


Connecting via Bluetooth is very simple and straightforward and soon I was on my way to recording. The easy access to the record button along with the camera button to take pictures and switch back to video mode as well as to the menu button to set up preferences is great and right at your fingertips.

While shooting the following video, I moved the gimbal abruptly several times both vertically and horizontally to see how it would affect the video. I also walked normally allowing my body to make deliberate movements while shooting. You can also seem some focus adjustments:


I was also able to just press the camera button to take photos while shooting the video.

The gimbal is capable of many modes of shooting video including follow mode, panoramic, subject switching, etc. You can click here to read the manual and to learn a lot more about it.

What I like

  • Build quality
  • Features
  • Battery life
  • Overall performance
  • The secure way that it holds the phone

What can be improved

  • It does exactly what it is supposed to do. I do wonder if it is possible to have videos stored on an SD card that is housed on the gimbal. This way it would not take up any memory on the phone for long video. The videos and photos are currently stored in the app.

Final thoughts

This gimbal exceeded my expectations, especially since I have tried earlier models from different manufacturers and in many cases was unsatisfied with the basic movement that was at times jerky and hesitant. This gimbal moves smoothly and even when I thought I was challenging it with excessive jerky movements, the resulting video was smooth and really good. I have not yet tried all of the features it offers, but I can definitely say that I really like this gimbal, and the accompanying app works well for me on IOS. I will be trying it with the Android version soon and I will provide an update if things go sideways. For now, I give it a well done and two thumbs up!!

Price: $119
Where to buy: Amazon
Sample: The sample for this review was provided by Zhiyun

Filed in categories: Reviews

Tagged: ,

Zhiyun 4 3-Axis Handheld Smartphone Gimbal Stabilizer review originally appeared on The Gadgeteer on June 4, 2019 at 9:00 am.

Note: If you are subscribed to this feed through FeedBurner, please switch to our native feed URL http://the-gadgeteer.com/feed/ in order to ensure continuous delivery.
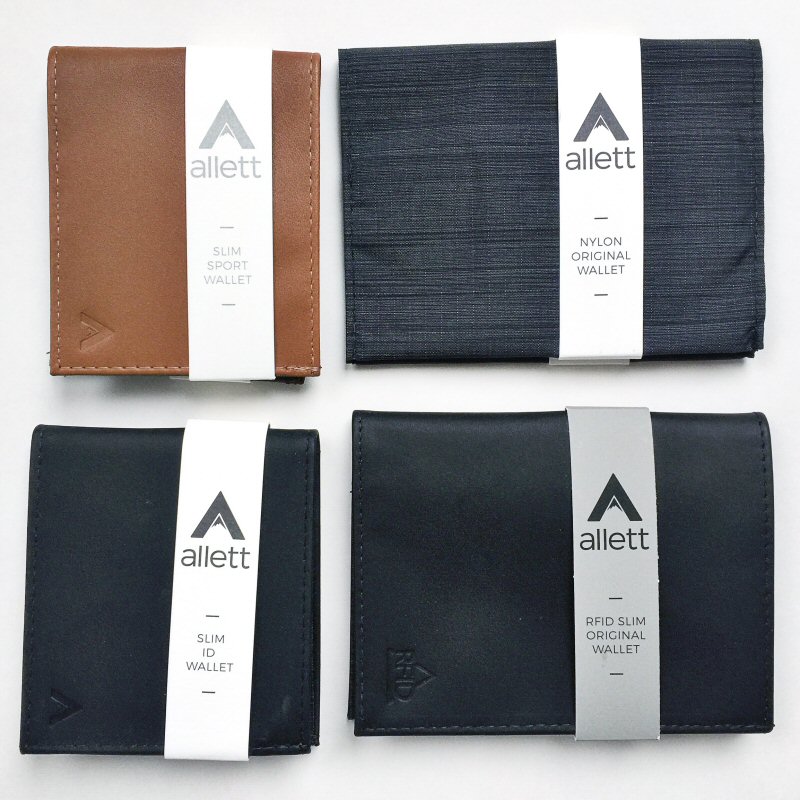
Living DNA Kit review

REVIEW – My aunt is big into family ancestry and has been researching our lineage for many years. When the Living DNA kit became available, I wanted to take the opportunity to further substantiate or refute her findings.

What is it?

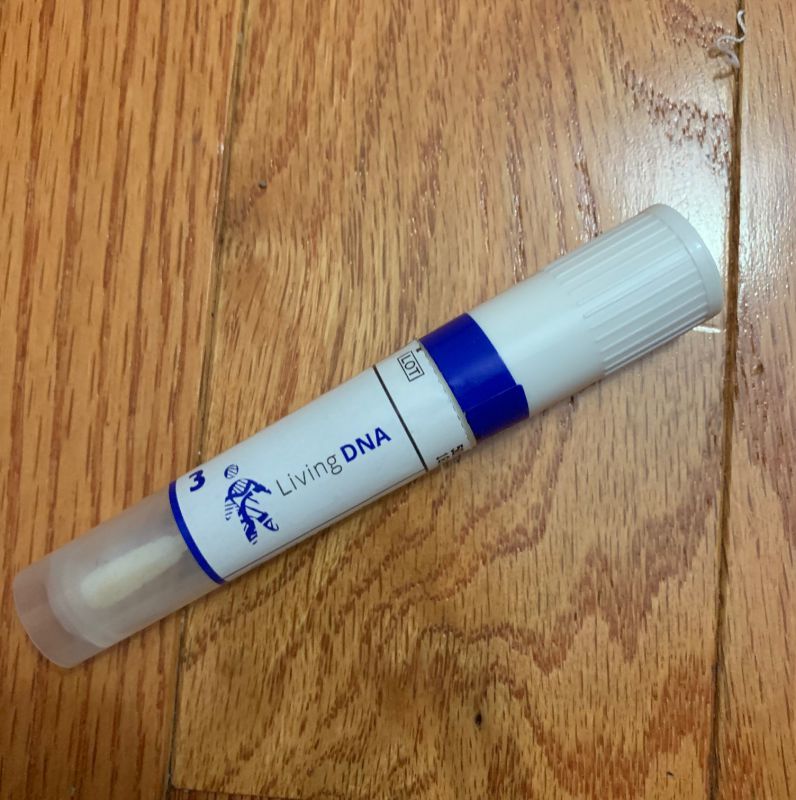
The Living DNA Kit is a service that analyzes a person’s DNA results. A cheek-swab is sent through the mail and the results are available via the subject’s online account.

What’s in the box?

  • Cheek swab tube
  • Prepaid mailing envelope
  • Instructions

Design and features: 

The materials arrived in a small, unassuming box. Inside was a sheet with instructions for opening an account. After receiving the confirmation e-mail, accessing the site directed me through the simple process of gathering my genetic material. It’s important not to eat or drink anything one hour prior to collecting the sample. Heaven knows I wouldn’t want my DNA to be determined to de descended from the PB&J I had for lunch.

The sample was as simple as it gets – open the container, swab the inside of the cheek for 60 seconds, put the swab back in its holding tube, drop it into the prepaid envelope, seal, and throw it in the mail.

A few days later I received a confirmation e-mail that my sample had been received and I would be informed if another sample would be needed (it wasn’t). Fast forward a few more days and another message graced my inbox stating all was in order and I should expect results in six to eight weeks. About a month later, another email followed declaring my results were complete.

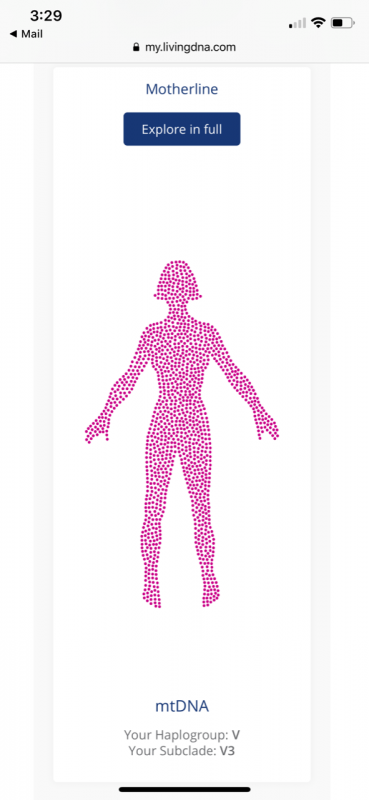
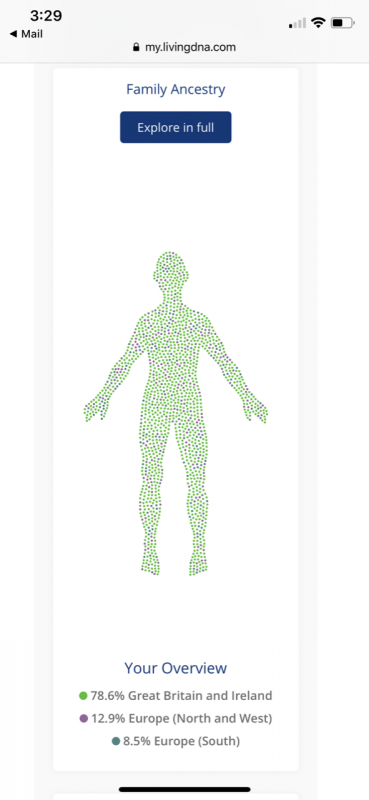
Accessing my account again, I was able to access my family ancestry through both paternal and maternal lines.

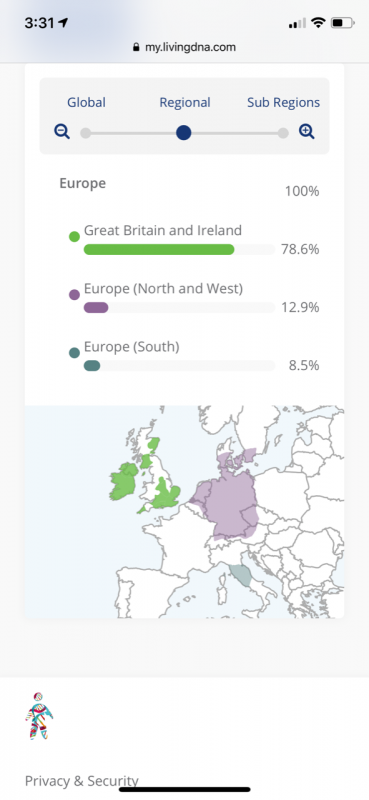
It was fascinating to see my aunt’s “motherline” ancestry studies fall spot-on with the findings of Living DNA’s results, but with a few surprises. My DNA indicated small portions of family history that have yet to be discovered.

Interestingly, some of my father’s DNA lineage was unexpected. Much of the data makes sense, but based on known family history, we expected somewhat different results. To me, it’s not a big deal, but it was enjoyable to see nonetheless.

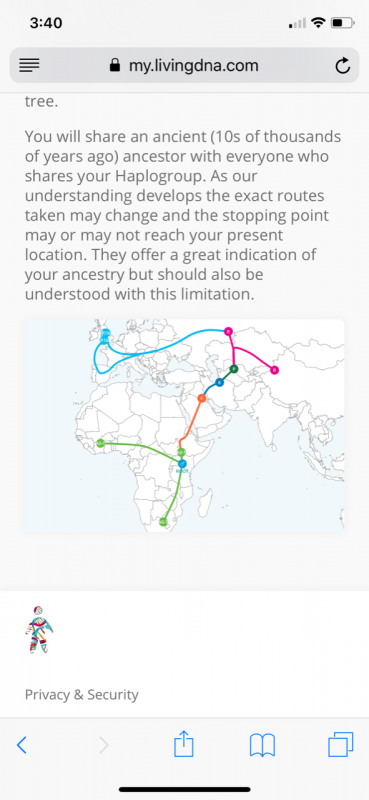
The data and maps are intriguing and informative. I was particularly interested in the migration maps showing the progression of my family from as far back as 180,000 years.

There are numerous articles that made entertaining reading and fascinating history.

Now definitely I can see the sources of my family’s ginger hair!

What I like:

  • Great communications
  • Easy to use on-line instructions and results
  • Reasonably priced

What needs to be improved:

  • It’s my understanding that the more people use these services, the more accurate testing becomes as the pool of information grows larger. 

I think many of us wonder who we are and where we came from. Taking Living DNA’s test helped me reconnect with my ancestors and learn about sources of the blood that courses through my veins. I loved the feeling of connection with our common ancestors from Africa millennia ago and the knowledge that we are all made of the same stuff.

Price: $99.00 ($79.00 special)
Where to buy: Living DNA
Source: The sample of this product was provided by Living DNA.

Filed in categories: Reviews

Tagged:

Living DNA Kit review originally appeared on The Gadgeteer on June 3, 2019 at 10:00 am.

Note: If you are subscribed to this feed through FeedBurner, please switch to our native feed URL http://the-gadgeteer.com/feed/ in order to ensure continuous delivery.
Trackimo 3G Guardian GPS Tracker review

REVIEW – As GPS technology advances, the devices utilizing this technology continue to shrink in size and as that happens their functionality and usefulness increases. These newer devices are incredibly versatile and adept at keeping track of our loved ones and loved objects. Small GPS units can show you the real-time location of your pets, elderly family members, kids, vehicles, luggage, drones, and pretty much any item big enough to carry the weight of the device. The Trackimo 3G Guardian GPS Tracker is one of the smallest GPS trackers on the market that also utilizes 3G cellular technology. At $198.90, the Trackimo is competitively priced and includes a free year of its cellular tracking service.

What is it?

The Trackimo 3G Guardian GPS Tracker is a personal GPS unit that provides precise location tracking via the Trackimo app or website. The Trackimo is particularly useful because it utilizes WiFi, GPS, and 3G GSM Cellular technology to acquire very accurate and consistent positioning data. The downside to this increased functionality is that after the one year complimentary cellular location service subscription expires, Trackimo charges for access. But, at only $60 for a full year ($5 per month), the service is quite a bargain for everything the Trackimo provides.

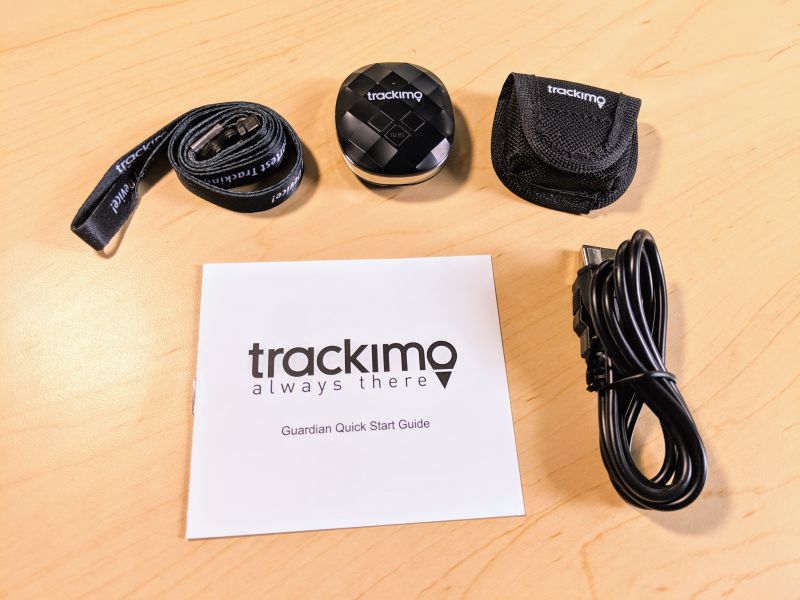
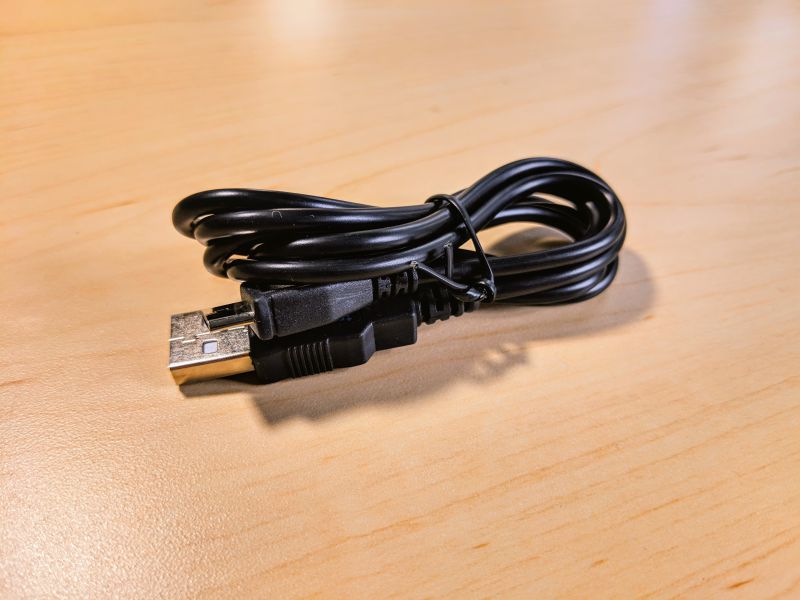
The Trackimo arrives in a plain branded white box with everything you’ll need to get up and running, except, oddly enough, a USB power block.

What’s in the box?

  • 1 Trackimo 3G Guardian GPS Tracker
  • 1 Lanyard
  • 1 Carrying pouch
  • 1 Micro USB to USB A charging cable
  • 1 Trackimo Quick Start Guide

Hardware specs

  • GSM Platform: MTK6276
  • GPS Platform: MTK3337
  • Bands: GSM GSM 850/ GSM900/ DCS1800/ PCS1900 WCDMA850/900/1900/2100
  • Sim Card: Included in unit
  • App Interface: iOS and Android
  • Dimensions: 47 mm (1.85 in) x 41 mm (1.61 in) x 17 mm (.67 in)
  • Weight: 30 grams (1.06 ounces)
  • Active battery life: 48-72 hours
  • Stand-by time: > 144 hours
  • Battery Type: Rechargeable Li-ion 520mAh
  • Functioning temperatures: -20°C (-4°F) / 60°C (140°F)
  • Attachment Options: Included lanyard and soft case
  • Power Consumption: Acquisition 24 mv /  Track 17mv
  • GPS Antenna: Ids-passive antenna
  • Channels: 22 tracking / 66 acquisition
  • Accuracy: < 5 meters open sky
  • Acquisition mode: Hot start < 2 seconds / Cold start < 24 seconds
  • Hosted Storage: On board capacity for 1000 tracking points

Design and features

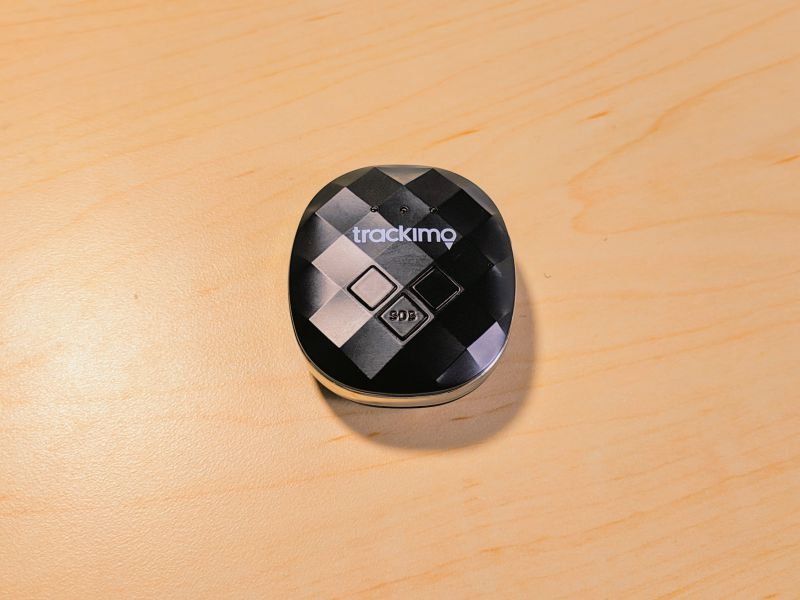
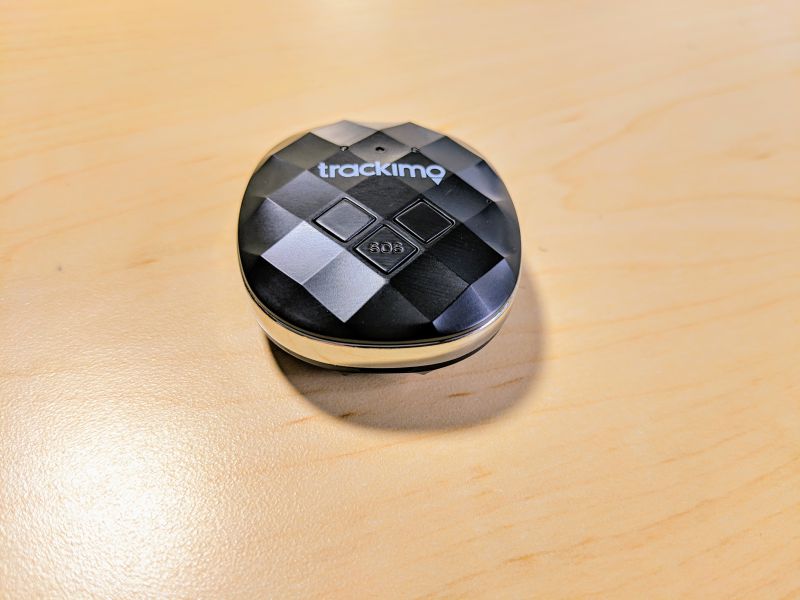
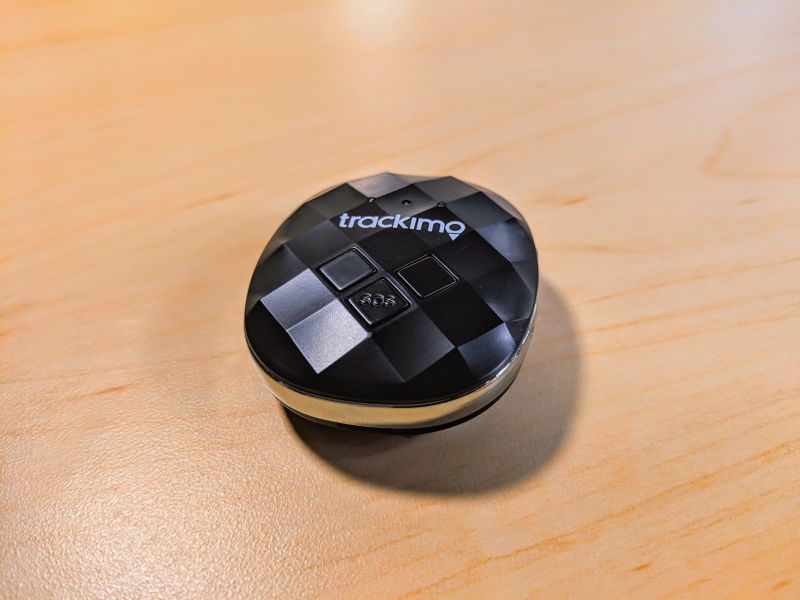
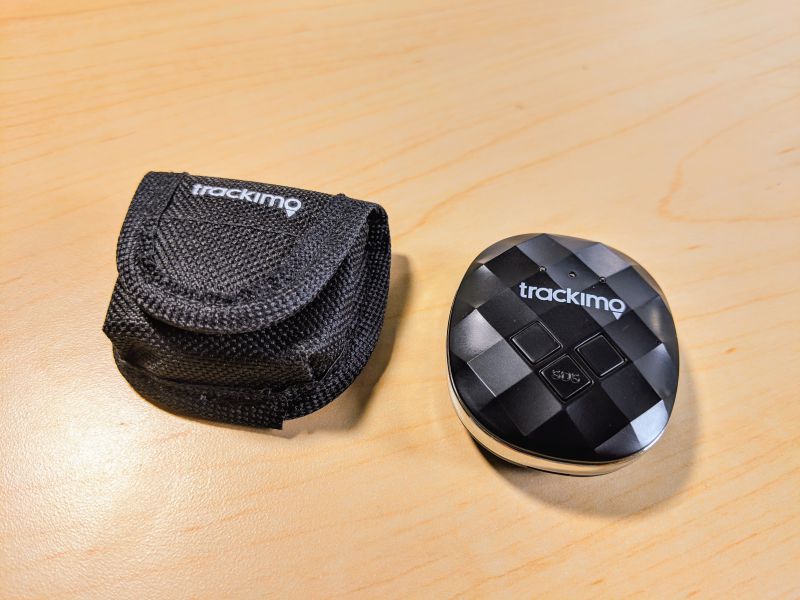
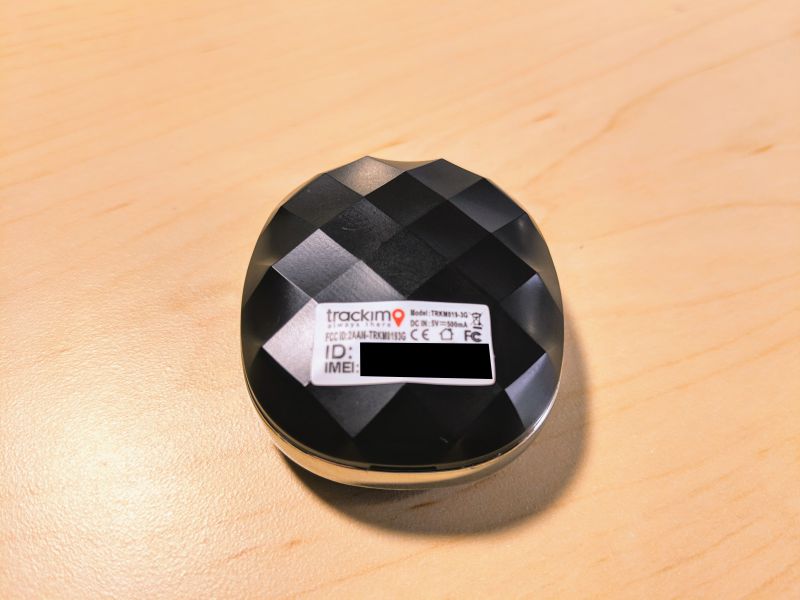
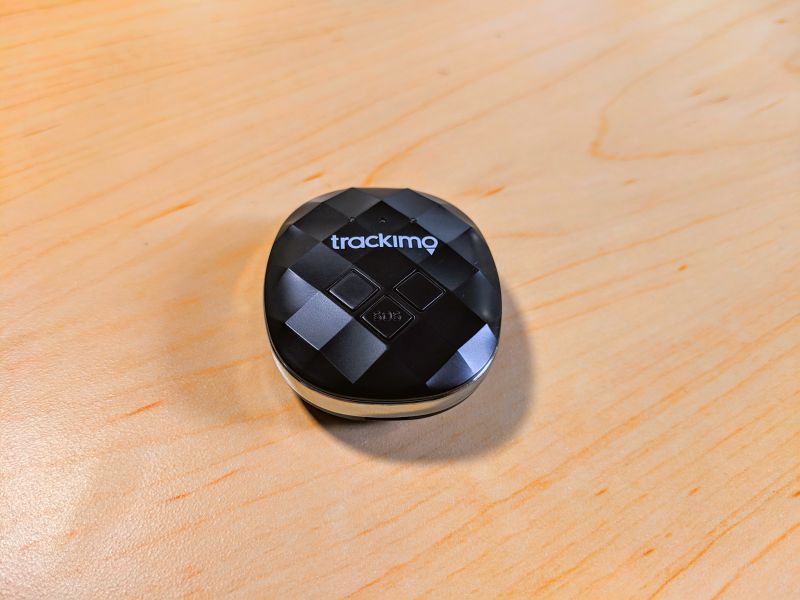
The Trackimo 3G Guardian is very well-designed, featuring a black plastic housing with a diamond shaped pattern. The unit’s three diamond buttons sit unobtrusively on the face just below three green, red, and blue status indicator LEDs.

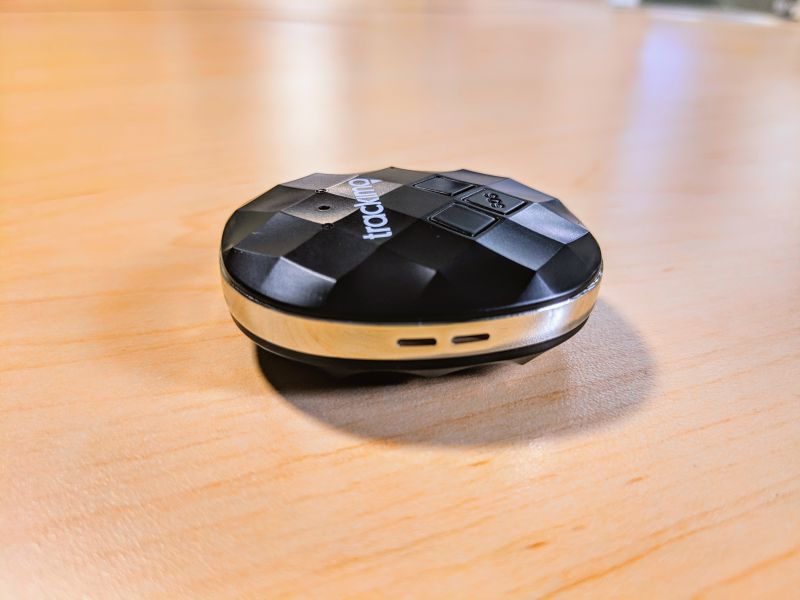
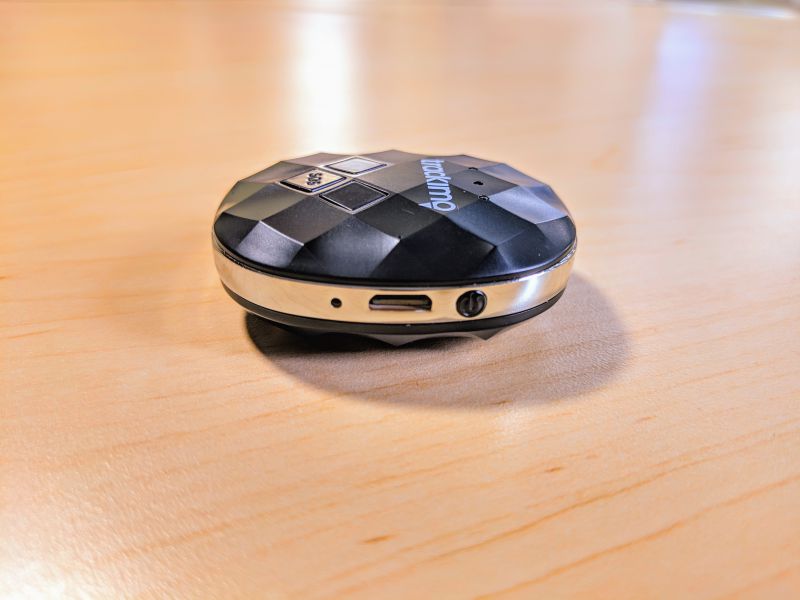
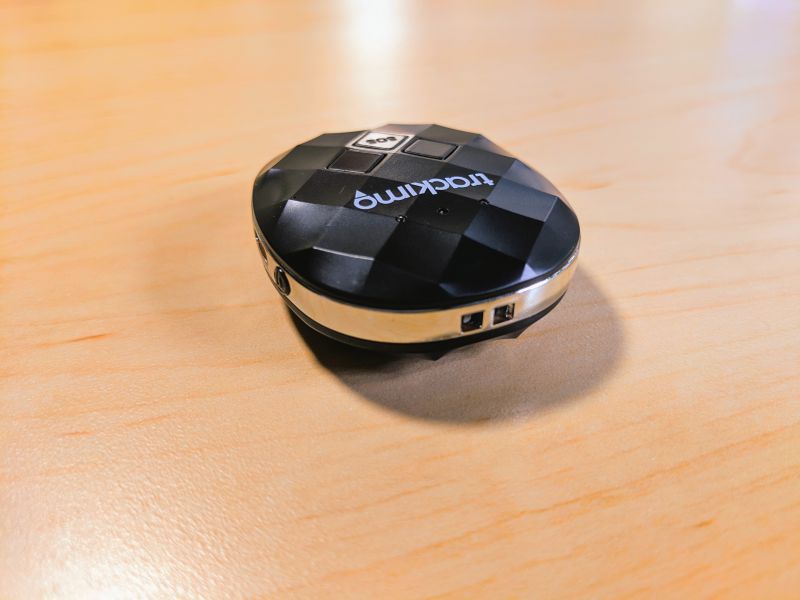
One side of the Trackimo features two small slots for the speaker, the other side has a hard reset port, a Micro USB charging port, and the main power button.

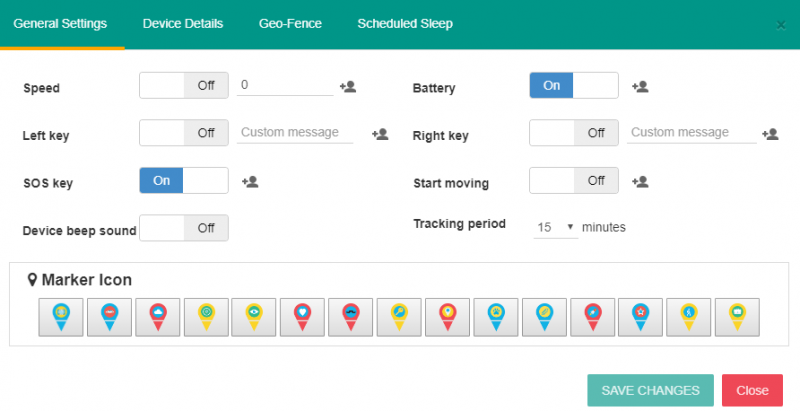
The left and right buttons on the face of the Trackimo are assignable to send custom alerts to contacts you’ve chosen beforehand.

The SOS button is used to send an alert and your precise location to other contacts you predetermine in the case of an emergency.

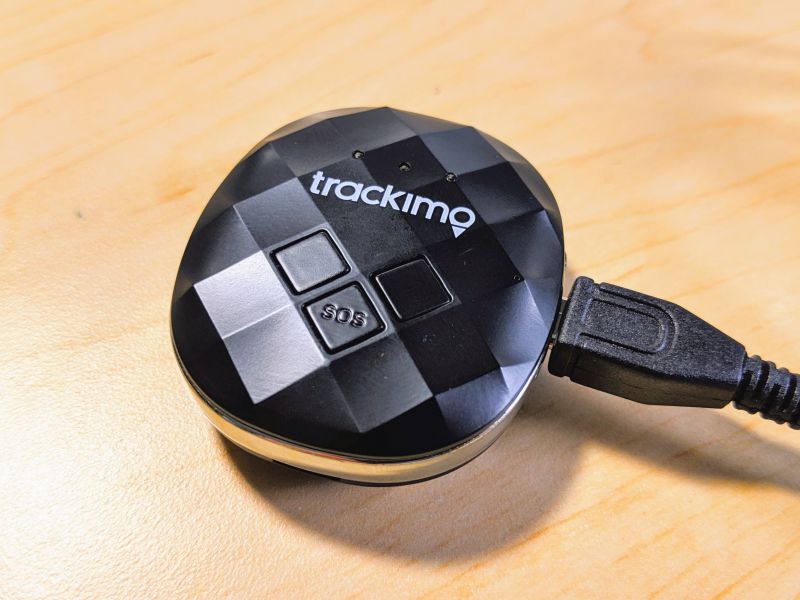
The Trackimo needs to be charged before its first use and this is done via an included Micro USB to USB A cable. I was a bit disappointed to find that the Trackimo doesn’t ship with a USB power block. For a price close to $200, a power block should definitely be included.

Once connected to a power source, the device needs to be charged for 12 hours before using. When charging, the red light blinks and when full, the red light will remain on while it is connected to power. One great bonus of the Trackimo is that it works while being charged, so it’s easy to set it up in a configuration, like in a vehicle, where it has constant power.

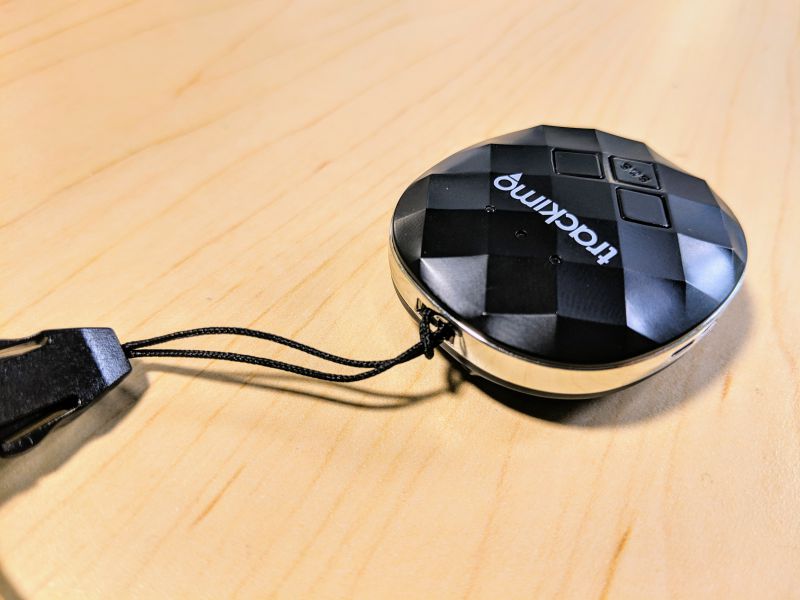
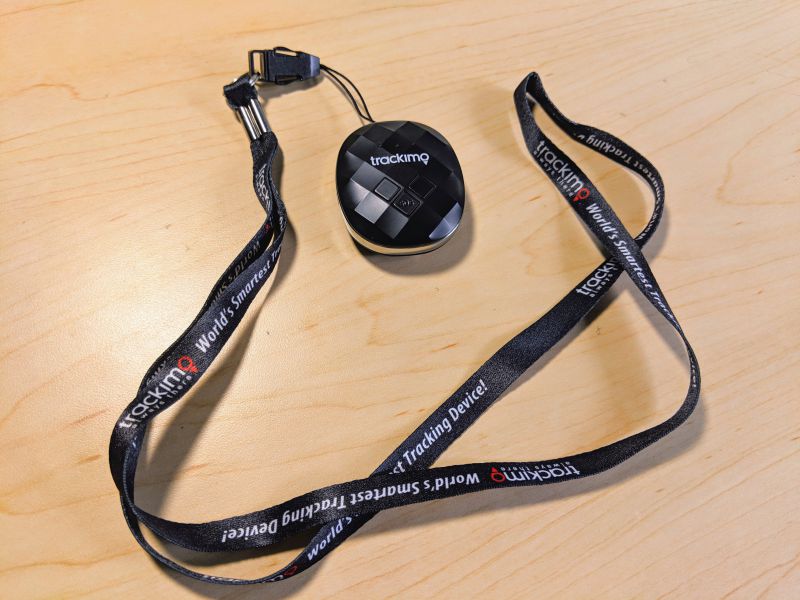
Two small holes located at the top of the Trackimo unit are for attaching an included lanyard.

The thin end of the lanyard loops around itself and secures to the unit.

With the lanyard, the Trackimo can be worn around the neck by someone you need to keep track of like a child or elderly person.

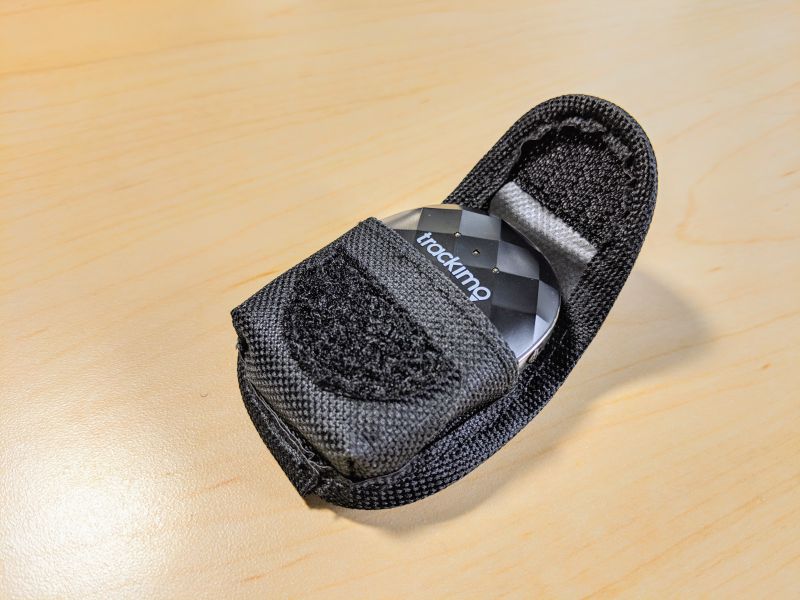
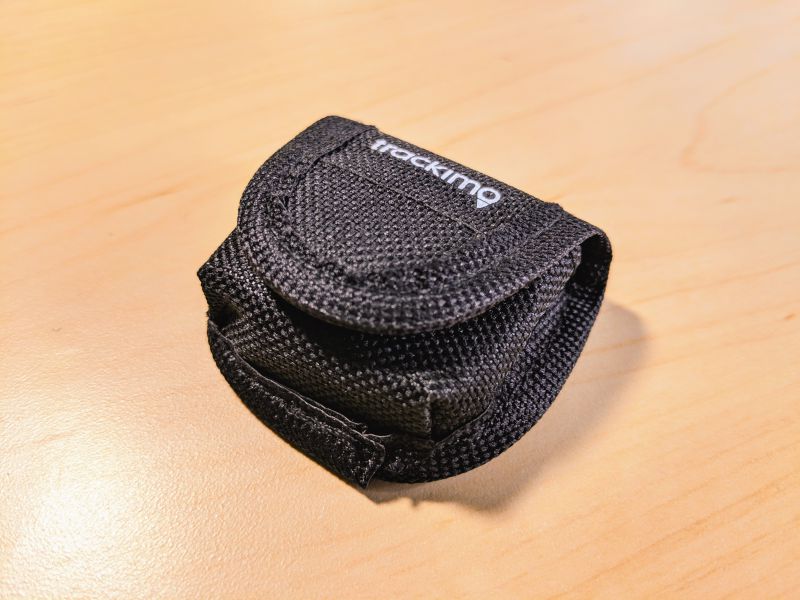
For another carrying option, the Trackimo also ships with a small soft case.

The Trackimo fits snugly into the small case and it secures with a velcro flap.

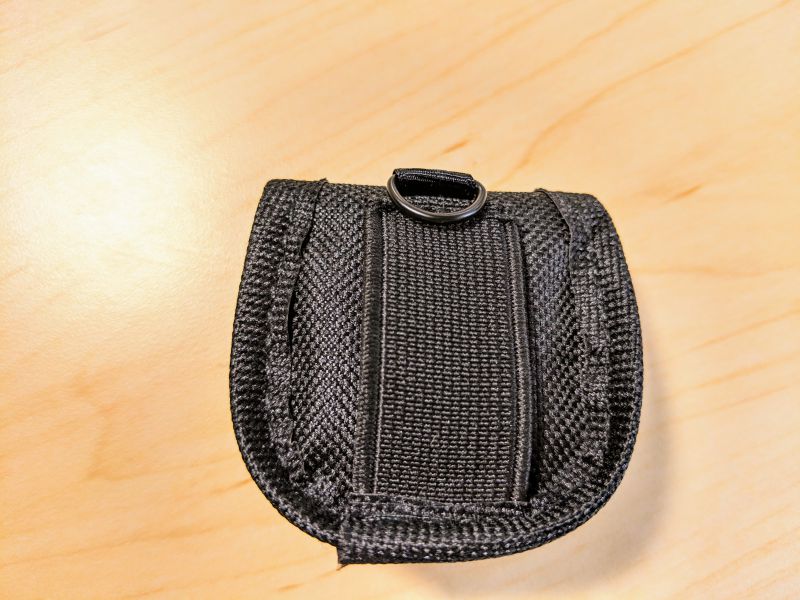
There’s both a small metal loop and an elastic belt loop on the back of the soft case for attaching the Trackimo to a person, item, or pet.

Setup

After unpacking and charging the Trackimo, you’re required to set up a Trackimo account and link it to your device. Registration of the unit is done via the Trackimo website or the Trackimo app, which is available for both IoS and Android devices.

Once you set up a Trackimo account, you can link it to your device using the device’s unique ID number, found on the back on the unit.

Performance

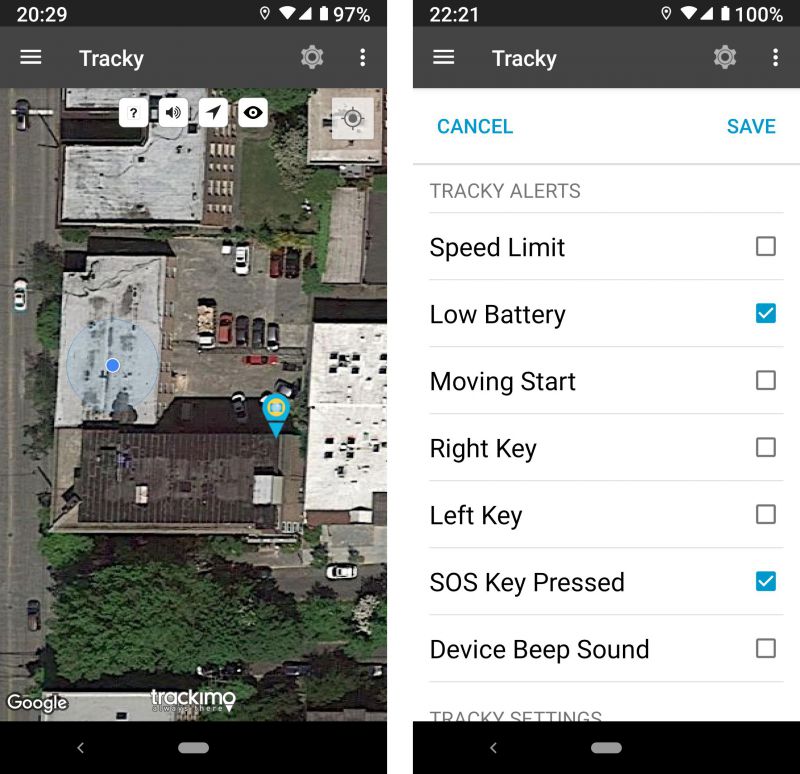
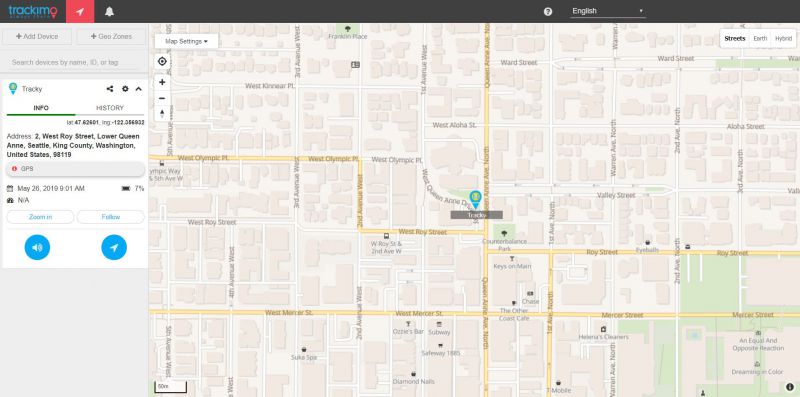
After your Trackimo account is activated and linked to your device, the fun begins. The Trackimo app gives you a ton of options, from naming your device (mine is named “Tracky”) to setting up a Geofence which alerts you whenever your device moves out of an area you designate.

The app is very well thought out, the features are clearly labelled and easily accessible. Along with setting up options and alerts, you can also see the location of your device at any time via Google Maps right in the app.

The functionality of the app is mirrored on the Trackimo website. All of the options of the app are available via the website and there are some expanded options as well.

I’ve been using the Trackimo for a few weeks now to keep tabs on my beloved FJ Cruiser as sort of a low cost Lo-Jack system. Every time I’ve signed into the Trackimo app or website I’ve been given an accurate location of my truck. I keep my Trackimo charged constantly while I’m driving and the battery life has been impressive, but I did have to experiment a bit with the update intervals. The shorter the update interval, the shorter the battery life. The Trackimo saves battery alerts along with location data and other alert histories.

The Trackimo has worked consistently and without fail since I’ve registered the unit. I like this device so much, I plan on paying for the location service after my complimentary year is up.

What I like

  • Very easy setup
  • Consistently acquires accurate location
  • Full-featured well-designed companion app and website

What needs to be improved

  • Requires paid subscription after one year complimentary access
  • Battery life dependent on update interval
  • Doesn’t include a USB power block

Final thoughts

The Trackimo 3G Guardian GPS Tracker is an effective, well-built, and reasonably priced GPS tracker with a ton of different uses. The only real drawback of the unit is that the cellular location service is only free for one year. But, without that service, which is quite affordable, the unit loses its main advantages over other GPS trackers in its class. In my opinion, the Trackimo is a great option to use for keeping track of anything and everything you’re concerned about losing.

Price: $198.90
Where to buy: Trackimo or Amazon
Source: The sample of this product was provided by Trackimo.

Filed in categories: Reviews

Tagged:

Trackimo 3G Guardian GPS Tracker review originally appeared on The Gadgeteer on June 3, 2019 at 9:00 am.

Note: If you are subscribed to this feed through FeedBurner, please switch to our native feed URL http://the-gadgeteer.com/feed/ in order to ensure continuous delivery.
Rock Jaw Audio T5 Ultra Connect Bluetooth wireless earbuds review


REVIEW – With apologies to William Shakespeare…

To ear, or not to ear, that is the question:
Whether ’tis nobler in the mind to suffer
The pains and aches of outrageous ear tips,
Or to take arms with compliant materials
And by opposing listen to them all day.
Rock Jaw Audio introduced an updated version of their T5 Ultra Connect wireless earbuds. Let’s see if they’re worth a listen.
What is it?

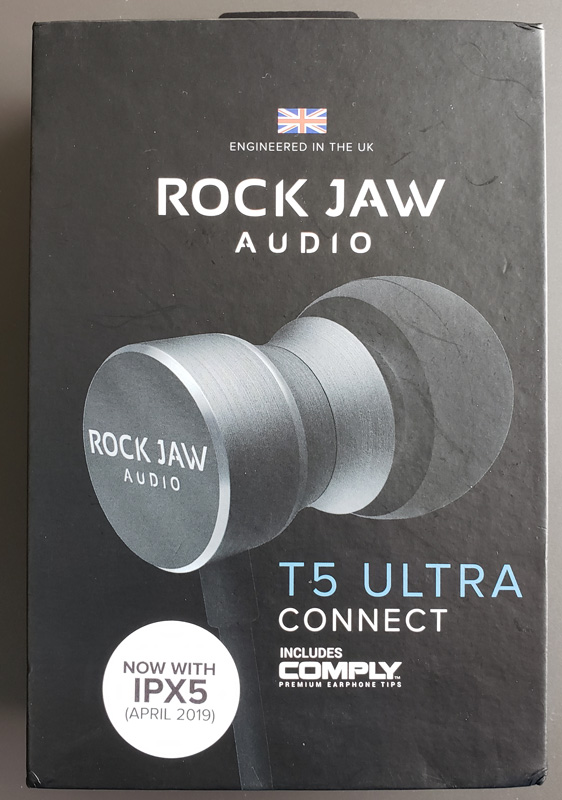
The T5 Ultra Connect wireless earbuds (T5) are the latest iteration of Rock Jaw Audio’s wireless earbud line.  They have been updated with Bluetooth 5 and IPX5 water resistance.

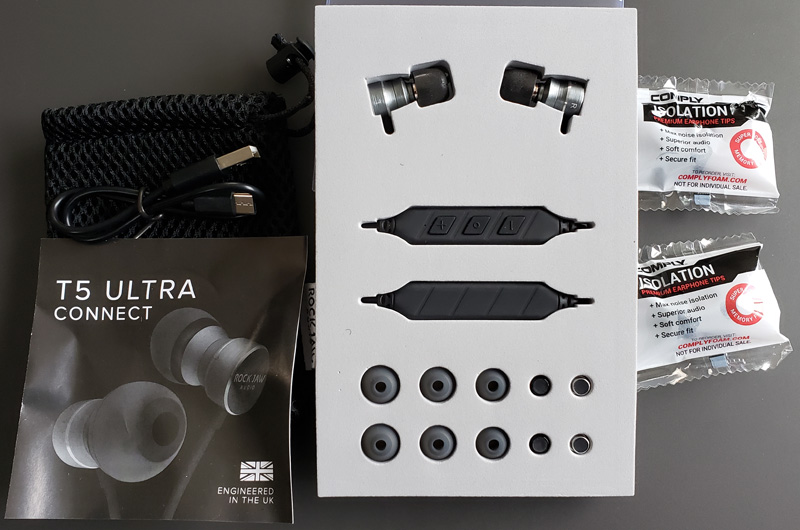
What’s in the box?

  • T5 Ultra Connect earbuds
  • Large, medium, and small silicone ear tips
  • Large, medium (attached), and small Comply isolation ear tips
  • Neutral (attached), extra base, and extra treble tuning filters
  • USB-A to USC-C charging cable
  • Mesh carrying bag
  • Instructions

Hardware specs

  • Drivers: Titanium-coated diaphragm, CCAW voice coil
  • Frequency response: 15 – 25,000Hz
  • Impedance: 24 ohms (+/-15%) @1KHz
  • Bluetooth range (unobstructed): 12M
  • Chipset: aptX & AAC
  • Microphone: MEMS professional
  • Water resistance: (IPX) Water Resistance: IPX5 – Sweatproof & water resistant, in the gym or outside
  • Battery life: 11 hours

Design and features

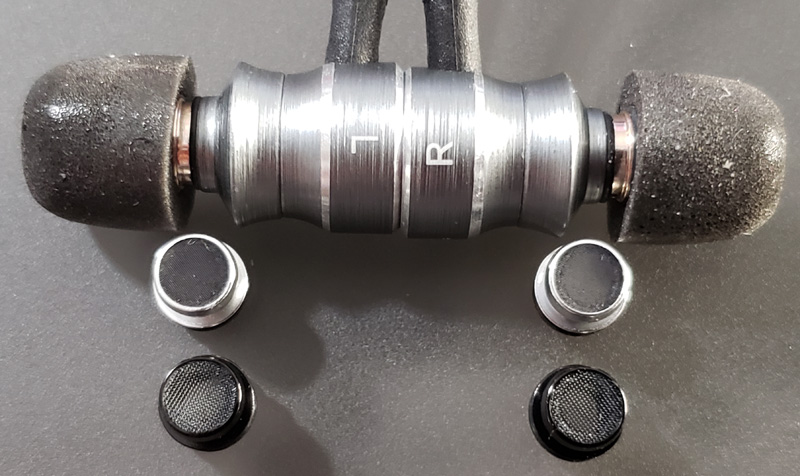
The T5s are pretty typical for wireless earbuds.  They have a thin wire connecting the two buds.  Along the wire are a battery and a control pad. The buds themselves are nicely finished in aircraft-grade aluminum. The buds have a small “L: and “R” on them to identify the left and right bud.  They also have a magnet in them so they snap together when not in use.  This is handy if you need to take them out for a few minutes as it prevents the earbuds from falling off your neck.

Setup

Setup is pretty simple.  First, use the included USB cable and your power supply to charge the earbuds.

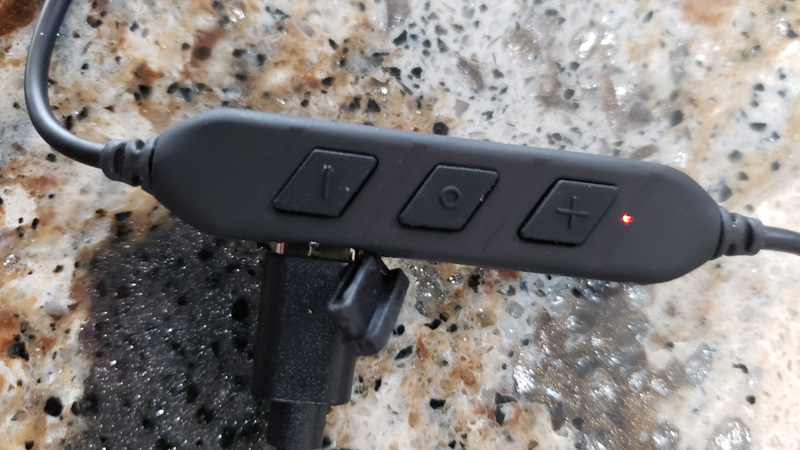
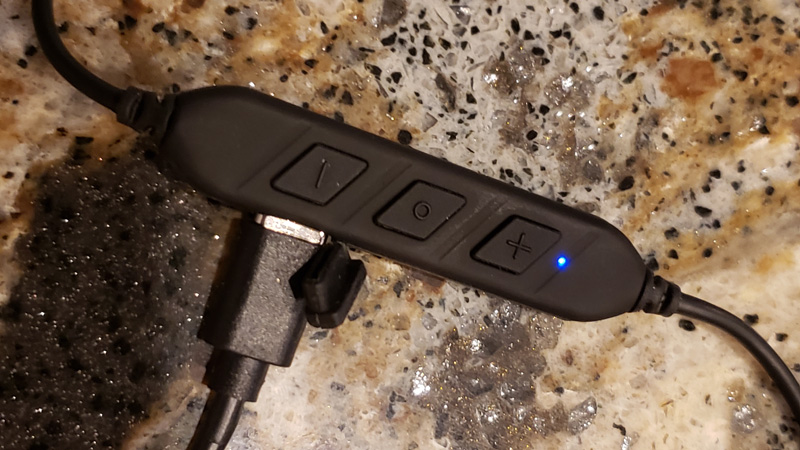
There is a small LED indicator that lights red during charging.  It turns blue when charged.

The LED doubles as the Bluetooth pairing indicator, flashing blue/red during pairing. Press the power button for 5-6 seconds and the T5 enters pairing mode.  Run a scan from your audio device and choose T5 Connect to pair.

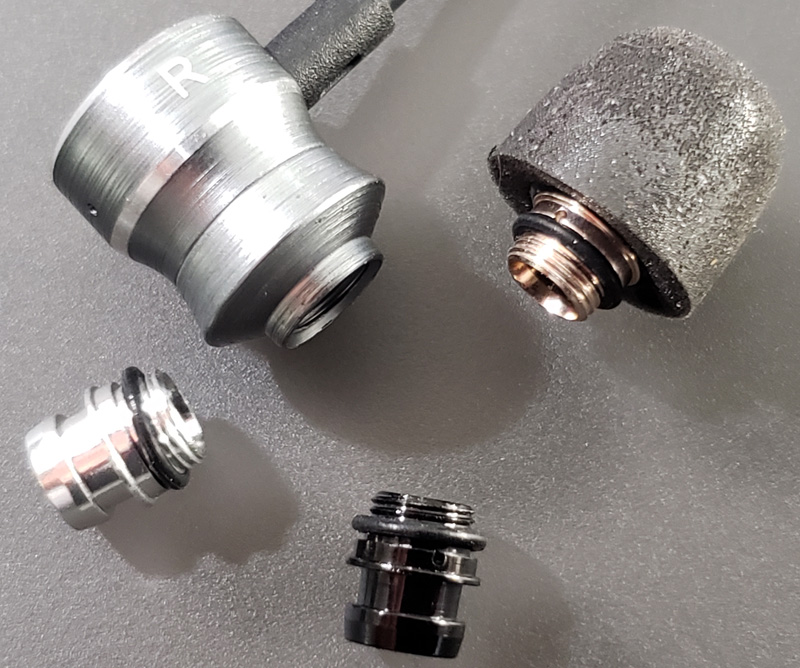
After pairing, you need to decide two things: what type and size of ear tip to use, and what tuning filter to use for your music.

There are three included pair of silicone ear tips in small, medium and large sizes. Since these are standard items, I didn’t test these tips.  I was more interested in the Comply isolation ear tips.  These also came in three sizes.  The tips are made of a soft, pliable, memory foam material. For my mismatched ears, I chose the medium tip for my left ear and large for my right.

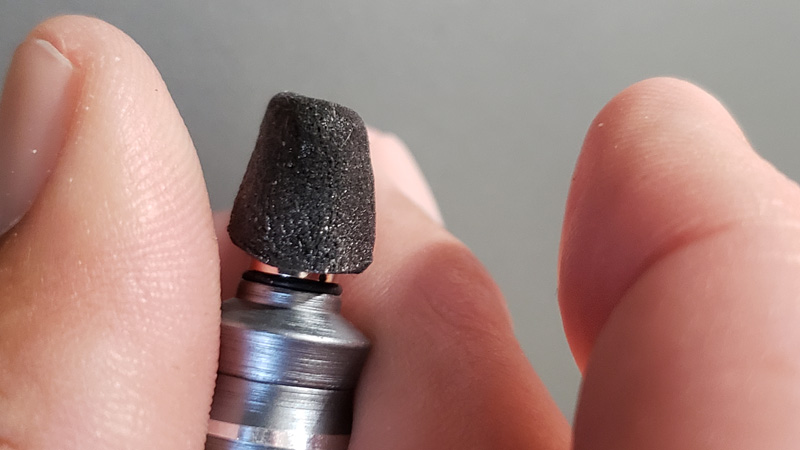
After attaching to your chosen tuning filter (more on that later), pinch/roll the material between your fingers to form the tip into a pointed shape.

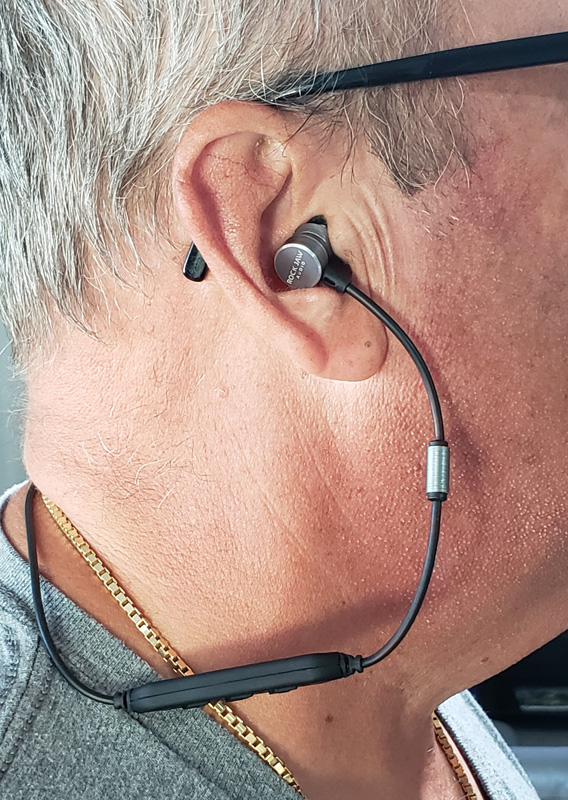
Place the bud into your ear, holding it as the Comply material molds to the shape of your ear canal.  Once in place, the material does a very good job providing isolation from outside sounds and holds in place very firmly, while still being comfortable.

Performance

After pairing I took a listen and found the music sounded pretty darn good.  I wandered around my metal-stud built home and found the Bluetooth connectivity to be impressive. It was only after I was perhaps 50 feet away and behind walls that the sound faltered.

The next step was to try the tuning filters.  To me, it sounded like marketing fluff.  Could these little screw-in filters really make a difference in the sound?

Here’s what the tips are supposed to do:

  • Silver: This is mainly for genres such as rock, Hip-pop, R&B, and electronic music.
  • Gold: The natural tuning filters are engineered to offer a well-balanced, natural sound signature, suitable for all music genres.
  • Black: Emphasise the higher audible frequencies for enhanced audio in genres including classical, acoustic and jazz.

The gold tips come installed, and they sounded good.  I put the silver tips in place, snapped the ear tips on and took a listen.  Much to my surprise, there was a noticeable increase in bass response.  Wow!  I then replaced them with the black tips and sure enough, the bass was reduced and the treble range was noticeably sharper.  I was suitably impressed.

The T5’s controls are simple.  Press the center “0” button to turn on/off.  You get a British-accented “Power on”/”Power off” audible prompt in the buds. and a “Paired” prompt when connected to your audio source. The “0” button also doubles and the call answer and call hang-up button.

Pressing the “+” and “-” buttons raise and lower the volume.  Holding them briefly skips forward or back one track.  Per the instructions, holding the “0” power button for one second should summon Siri or Android Assistant. This never worked with connected to my Samsung Galaxy S9+ with Android Assistant installed.

What I like

  • Comply tips are extremely comfortable, isolate you from outside sounds, and hold firm
  • Variety of ear tips to provide a comfortable fit
  • The listening experience can be tuned to fit your liking and music style
  • Great sound
  • Great battery life

What needs to be improved

  • The claimed Android Assistant functionality should work, but didn’t

Final thoughts

To come back full circle to the beginning of this review, there is nothing either good or bad, but thinking makes it so.  According to my thinking, these T5 earbuds are indeed good and are worth a look.

Price: $95.28 direct; $89.95 on Amazon
Where to buy: Rock Jaw Audio and Amazon
Source: The sample of this product was provided by Rock Jaw Audio.

Filed in categories: Reviews

Tagged:

Rock Jaw Audio T5 Ultra Connect Bluetooth wireless earbuds review originally appeared on The Gadgeteer on June 3, 2019 at 8:00 am.

Note: If you are subscribed to this feed through FeedBurner, please switch to our native feed URL http://the-gadgeteer.com/feed/ in order to ensure continuous delivery.