Gamma+ Italia Absolute Zero USB rechargeable shaver review

REVIEW – Shaving – the bane of most men’s existence.  Every morning, and for some poor dudes, twice a day, we drag razors over our faces, hacking the whiskers off to give us that smooth, professional look. In my case, as a retired guy, I do it so I am not all hairy and scratchy and my wife will still kiss me.

Truth be told, I have never used a regular razor.  When I started shaving, somewhere in the late 1970s, I inherited my grandfather’s plug-in electric shaver. To be clear, my grandfather died in 1968, so when I got it, it was well over ten years old and was a little rough.  From there, I graduated to a variety of foil and rotary electric shavers over the years.  I kept switching back and forth, looking for a close, comfortable, and fast shave. Foils tend to give me a closer shave, but are slow and miss hairs on my face. Rotaries are faster, and do a better job for me getting all the tricky hairs, but aren’t as close.  I currently use a triple-head rotary shaver that gives me a fairly close shave and does it pretty quickly. When I was offered the opportunity to test out a new foil shaver with a spiffy Italian design, it sounded like a great idea.  Let’s see if it makes the cut.

What is it?

The Absolute Zero is a foil-style electric shaver with a pop-up trimmer.  It is powered by a rechargeable lithium-ion internal battery.  A novel feature is that it recharges via USB, eliminating a dedicated charging power adapter.

What’s in the box?
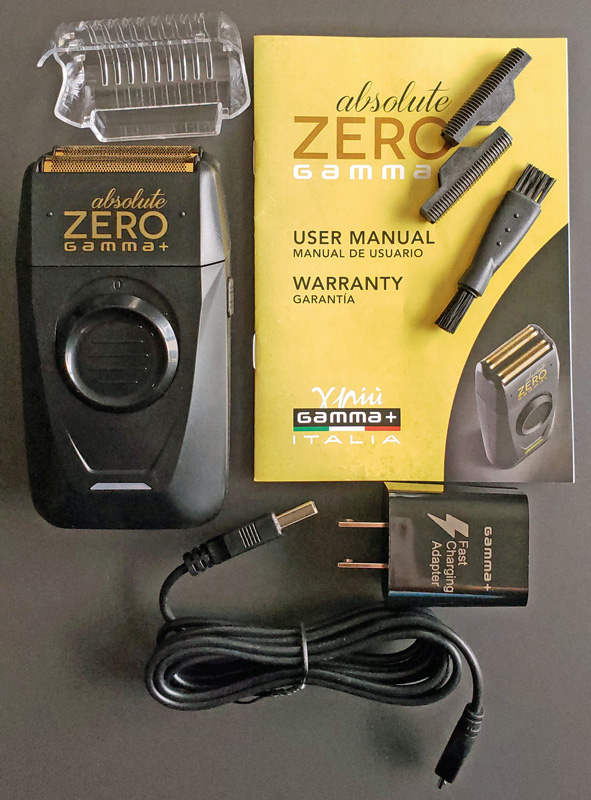
  • Shaver
  • Foil protective cover
  • Two replacement cutters
  • Cleaning brush
  • USB charging adapter
  • USB-A to micro USB cable
  • User manual

Hardware specs

  • Weight: 4.6 ounces
  • Cutters: 2
  • Trimmer: pop-up
  • Battery life: 120 minutes
  • Battery type: lithium-ion
  • Recharge time: roughly 30 minutes
  • Foil composition: gold and titanium

Design and features

Setup

There really isn’t any setup, other than charging the shaver. It only takes about a half-hour to recharge.  The manual cautions to not overcharge as it can damage the battery.  To me, this is a bit of a problem, since most folks won’t sit and watch it for 30 minutes, or set a timer to unplug the shaver.  I usually plug mine in and unplug it the next time I’m in the bathroom, assuming it catches my eye.

The micro-USB port is located on the bottom of the shaver. Note that this is micro-USB. Why can’t everyone just get on the USB-C train?  It would simplify so many things.  Just sayin’.
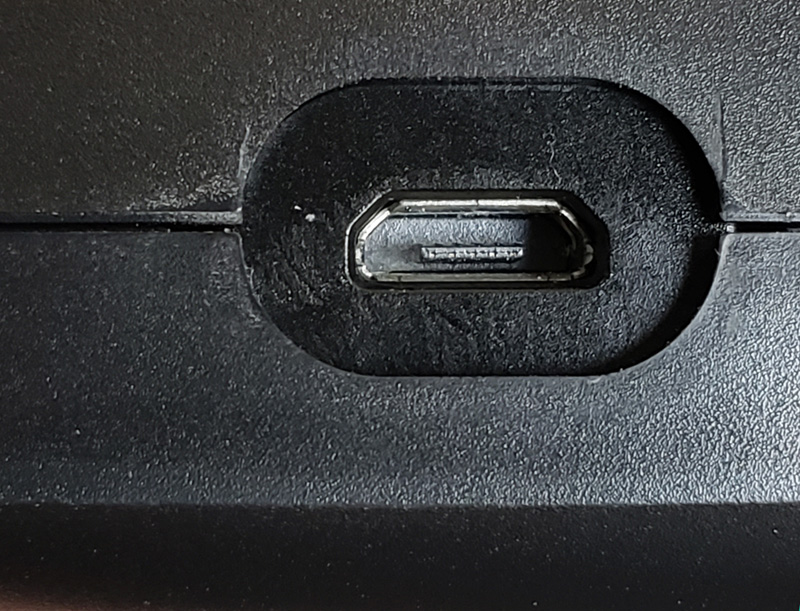
Plugging in the shaver turns the status LED red.
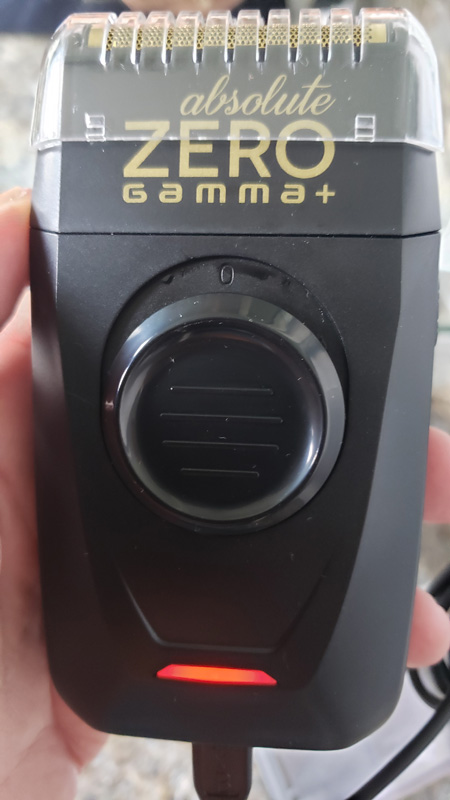
The LED turns green when the charging is complete. With a two-hour runtime, assuming a five-minute daily shave, you should be able to go nearly four weeks between charges.

One nice touch is that as long as the shaver has at least a basic charge, you can use the shaver while plugged in.  That means that even if the battery is really low and needs a charge, you can still get a shave in before you walk out the door.  Of course, that brings us back to the issue of not leaving the shaver plugged in all day.

Like most rechargeable shavers, toothbrushes and such, the battery is not user-replaceable, so once the battery reaches its end of life, you won’t be able to charge it anymore.  With this shaver, you could potentially still use it as a plug-in shaver.

Features

There is a single switch on the front of the shaver.  Pushing it up turns on the shaver.
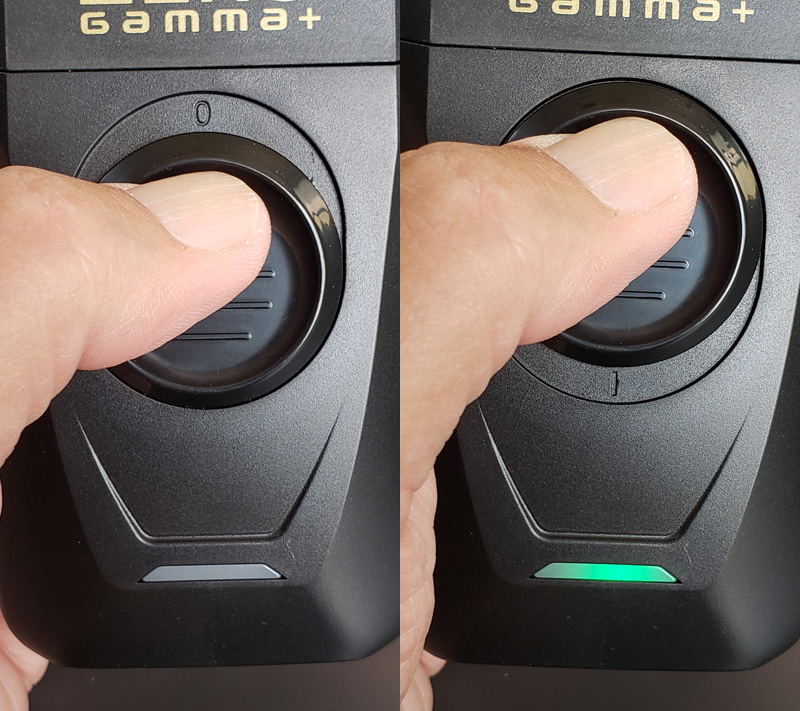
The status LED glows green when the shaver is running.

The trimmer is on the back of the shaver.  Pushing it up turns it on, provided that the shaver is already running.
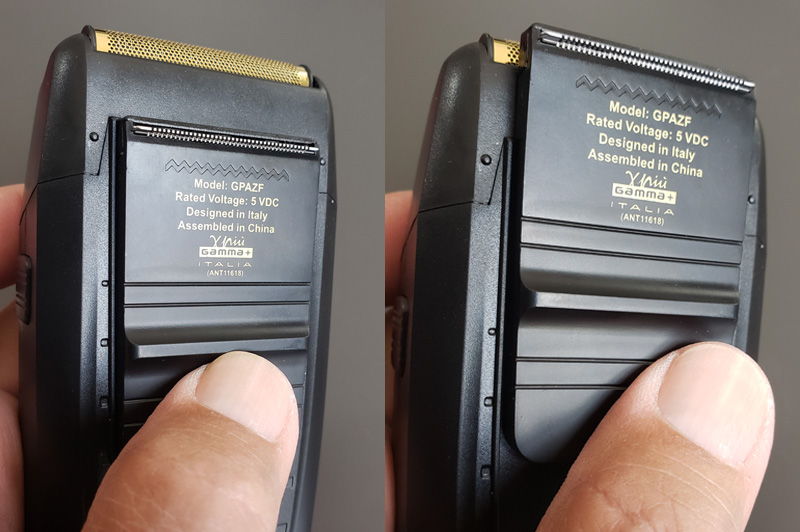
On the right side of the shaver, we find the foil release button.
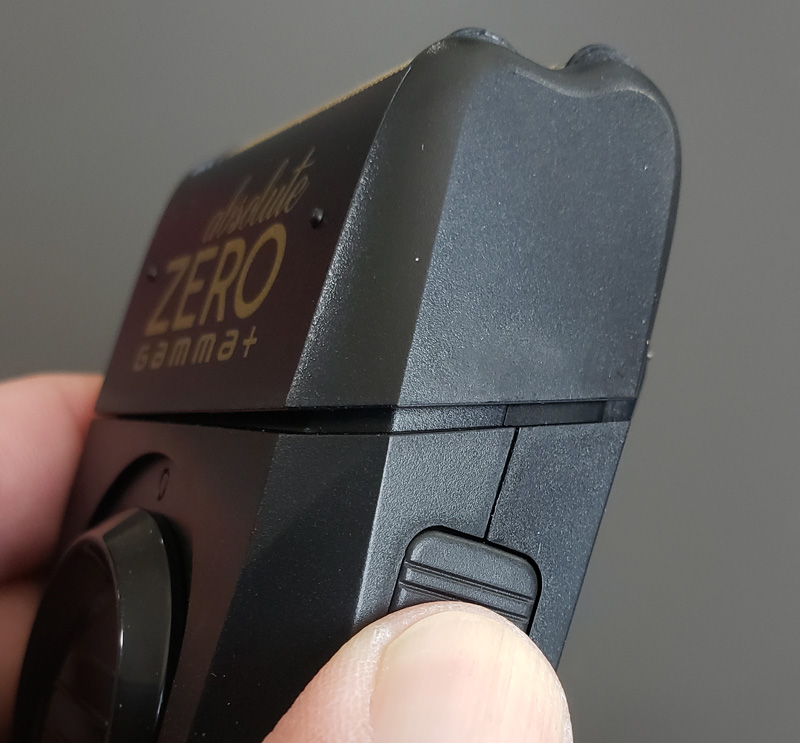
Pressing that button releases the foil assembly so we can access the cutters.
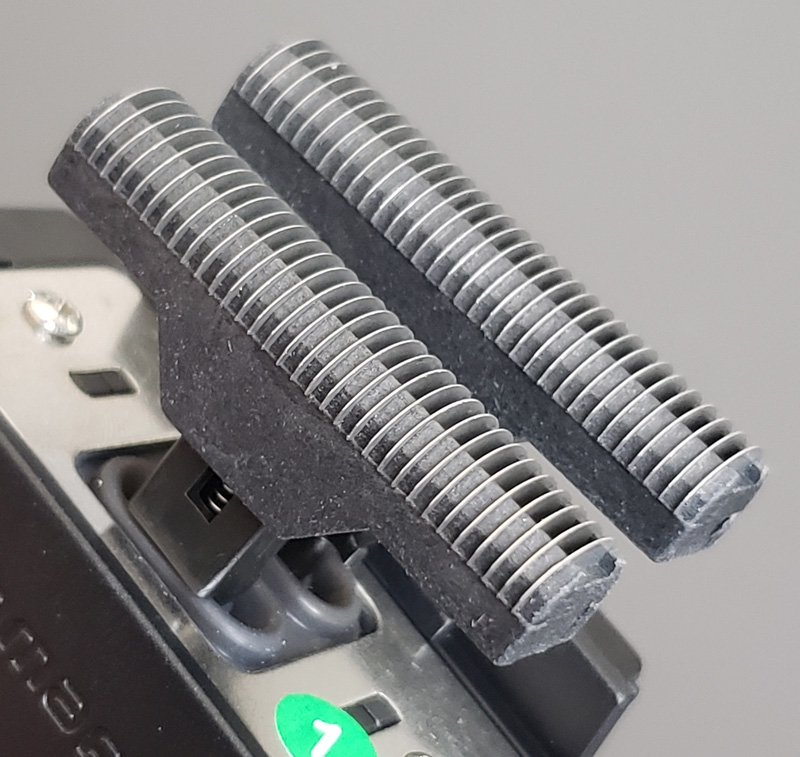
The cutters vibrate rapidly back and forth, just underneath the foil, immediately cutting any hair they encounter. The cutters are replaceable.  Grasp a cutter on the sides and pull up to release.  Then, snap a new cutter back in place.  The shaver ships with two replacement cutters.

The foils themselves are a gold and titanium mixture, allowing for a very thin and flexible surface.
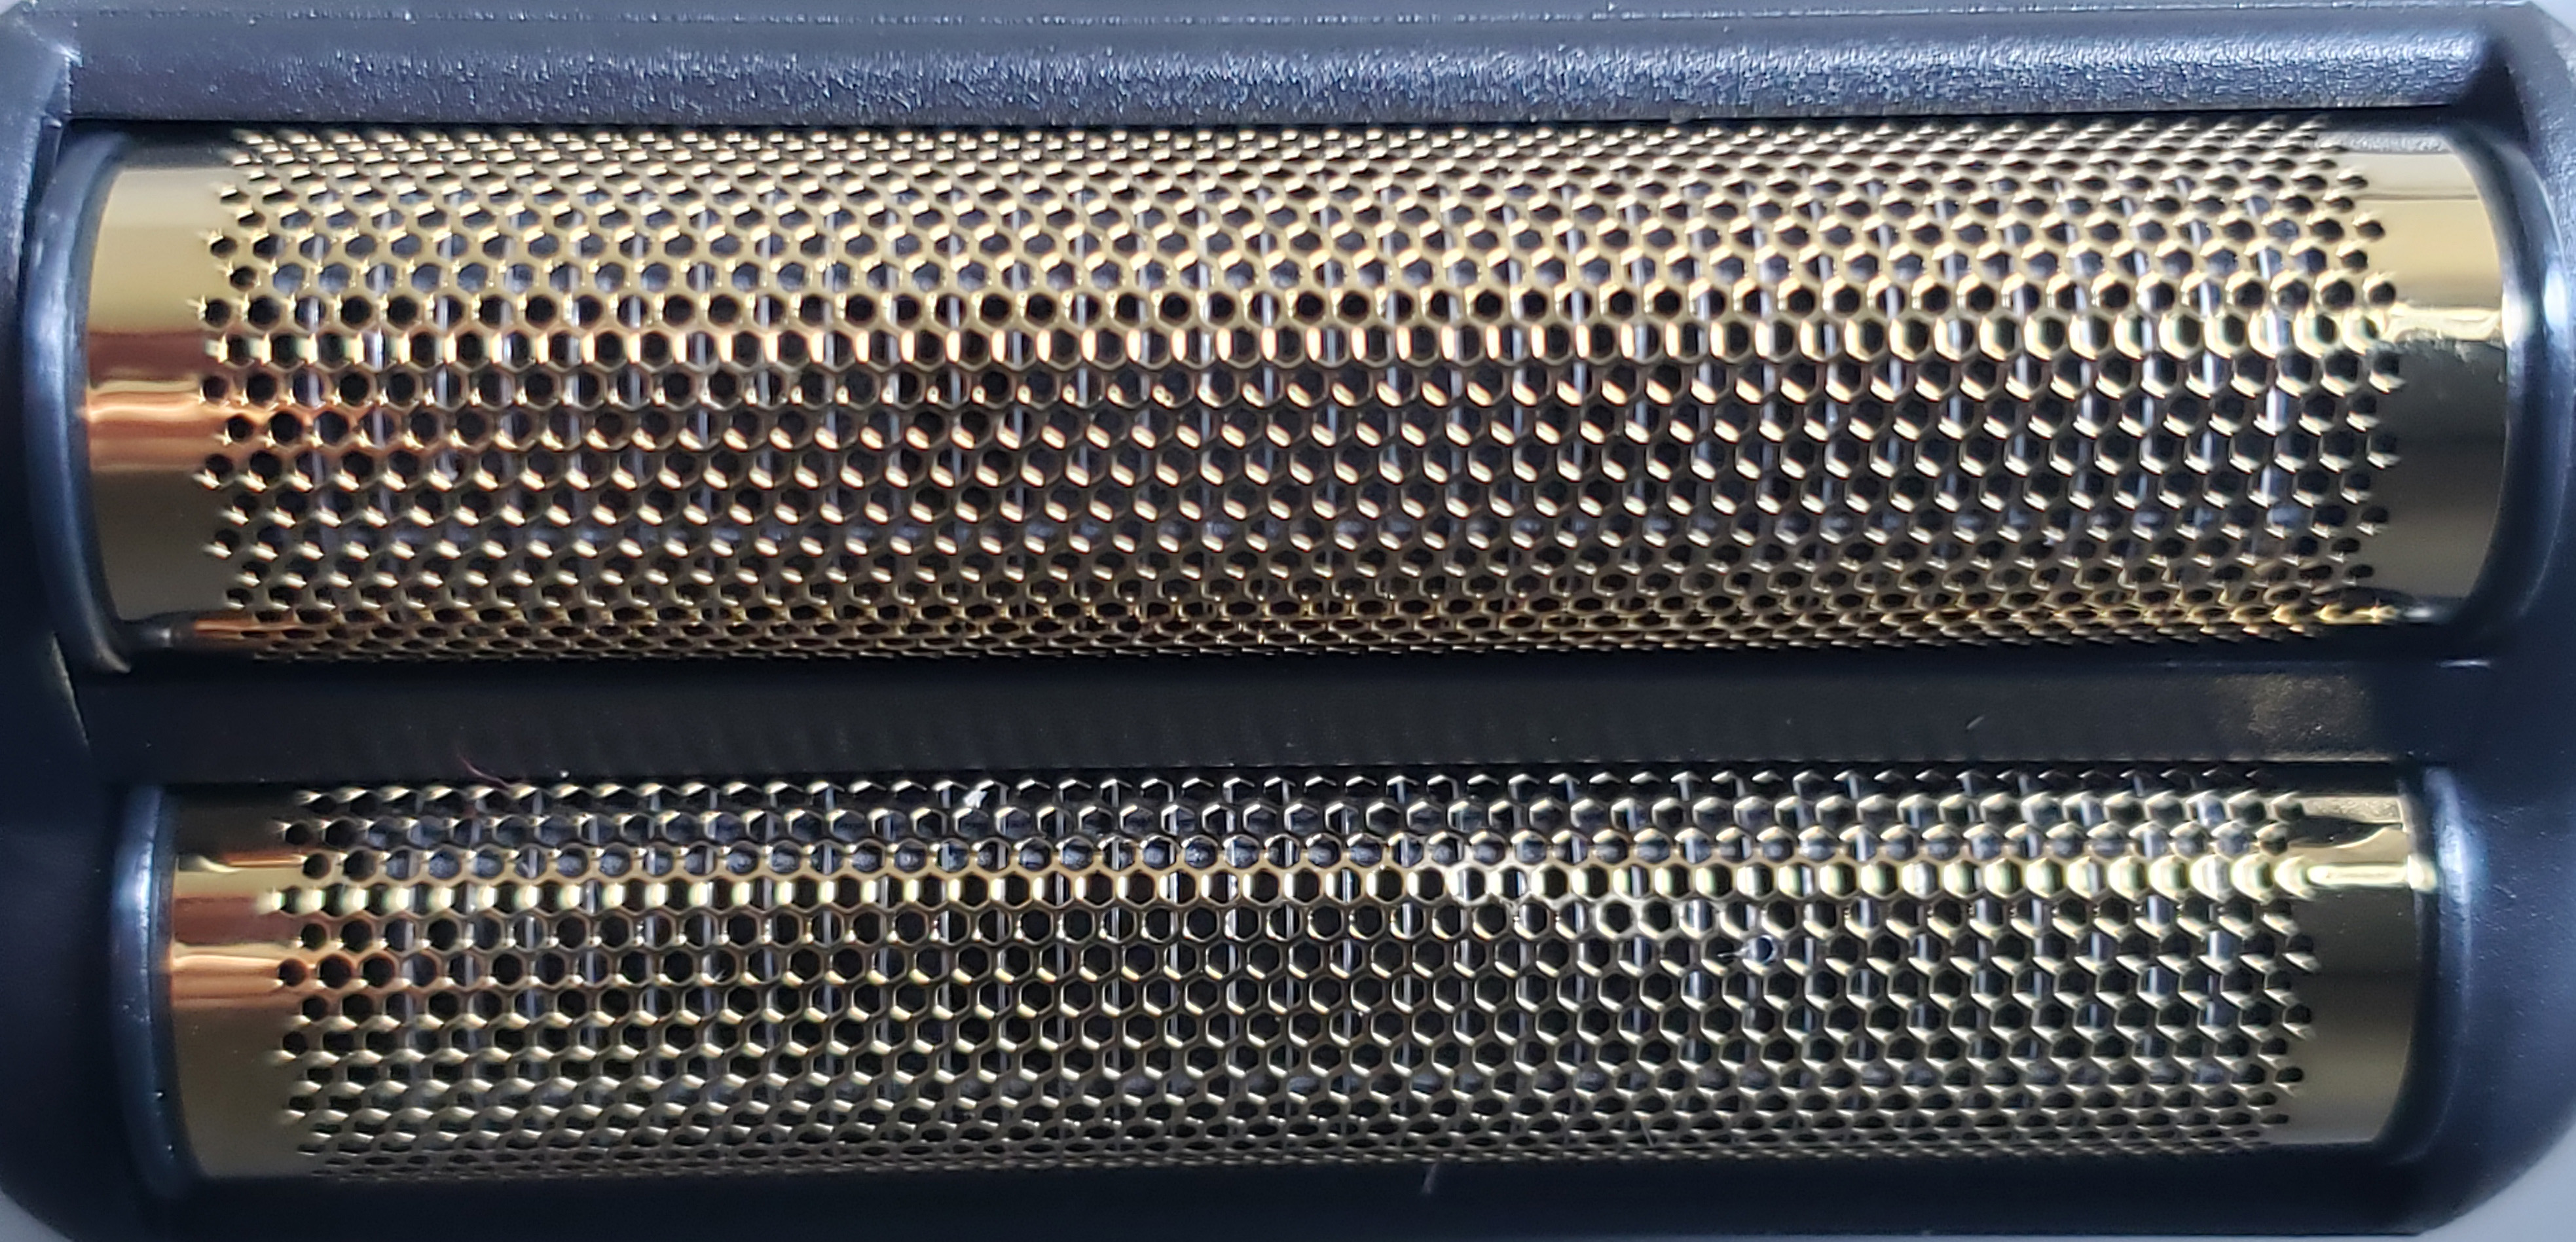
They feel very smooth to the touch and should reduce potential irritation.  The thin foils should provide a close shave. The foils are also hypoallergenic.

Let’s get shaving and see how the shaver does.

Performance

The shaver is very light at 4.6 ounces.  It fits well in my hand and is easy to glide over the shaving area. I have a couple of areas that have proven tricky for foil shavers – the area right beneath my nose and the lower area of my neck.  For some reason, foil shavers never seem to capture some hair in those areas.  This shaver seemed more adept at trapping those tricky hairs and did a good job cutting everything.

One issue I had was where my fingers fell on the shaver. If you look at the photo above, my index finger falls right on the trimmer.  At one point, I inadvertently pushed the trimmer up, activating it.  Not a big deal, but the design does lend itself to doing that.

The first thing I noticed was that the Absolute Zero shaver was noticeably louder than my rotary shaver.  That isn’t surprising given the different mechanisms in play when they are running.  The rotary is spinning three small cutters in a circle.  That’s a fairly quiet operation as there is no change in direction.  A foil shaver rapidly vibrates the cutters back and forth.

The second thing was the difference in comfort. The rotary gives a fairly comfortable shave.  A foil shaver, in my experience, always generates a little more irritation, at least initially. I think that is partly due to the nature of how they cut and the relative thinness of the foil.  This isn’t a slam on the Absolute Zero, as for me, this has been true for every foil shaver I have ever used.  The irritation is short-lived as your face adjusts to the new shaving method.  In the past, with other foil shavers, the initial irritation manifested itself with some red marks on my face.  I didn’t experience any of that with the Absolute Zero, so kudos for that.

The third thing was that shaving was fast.  With previous foil shavers, it seemed I had to go over areas, particularly on my upper cheek and lower neck, multiple times to ensure I got everything.  With this shaver, a couple of quick passes took care of business.

The trimmer did a nice job of trimming sideburns.  It is nice and long, so it easily covers longer areas quickly and efficiently.

As a means to compare this shaver to my rotary, I shaved one side of my face with the new shaver and the other side with my trusty triple-head rotary shaver. The real proof in how close a shave you get is how the area feels.  I enlisted the expert opinion of my lovely wife.

Without knowing which side was done with which shaver, she struggled to determine which was which. Ultimately, she thought the rotary side was slightly smoother than the foil side.  I was surprised by this, as to my fingers, I thought the foil side was a bit smoother. We tried the touch-test again later in the day. If a shave is closer, it should manifest itself later in the day as whiskers grow.  That after-dinner touch-test was still pretty much inconclusive.  Both sides felt very similar to my wife’s touch. If I pressed her, she reluctantly gave a very, very slight edge to the Absolute Zero side, but she repeatedly stated that it was a statistical dead heat.

What I like

  • USB charging – no need to travel with a specific power adapter
  • I was able to shave as quickly as I do with a rotary shaver
  • Pretty close shave, all things considered

What needs to be improved

  • USB charging port should be USB-C
  • No overcharge protection
  • It is a little noisy
  • The pop-up trimmer can be activated too easily during regular shaving

Final thoughts

With its sharp Italian design and overall good functionality, this is a capable little shaver.  It is priced reasonably and certainly gets the job done.  If you’re looking for a new foil shaver with good battery life and simple USB charging, the Gamma+ Italia Absolute Zero is worth a look. With its small size, light weight and no need for a specific charging adapter, this is a terrific travel shaver.

Price: $69.95
Where to buy: Direct at Gamma+ and Amazon
Source: The sample of this product was provided by Gamma+ Italia.

Filed in categories: Reviews

Tagged:

Gamma+ Italia Absolute Zero USB rechargeable shaver review originally appeared on The Gadgeteer on June 6, 2019 at 11:00 am.

Note: If you are subscribed to this feed through FeedBurner, please switch to our native feed URL http://the-gadgeteer.com/feed/ in order to ensure continuous delivery.

Plugable HS53 Gaming Headset review

REVIEW – I have a confession to make:  Although I have a nice gaming rig and a set of quality peripherals, I’m still using a Logitech H570e for my headset.  While this $35 device might be fine in the office for making the occasional Slack call, it’s not exactly a high-quality gaming headset.  It’s time for an upgrade, so I’m checking out Plugable’s HS53 gaming headset to see how it compares.

What is it?

The HS53 is a budget, wired, gaming headset from Plugable.

What’s in the box?

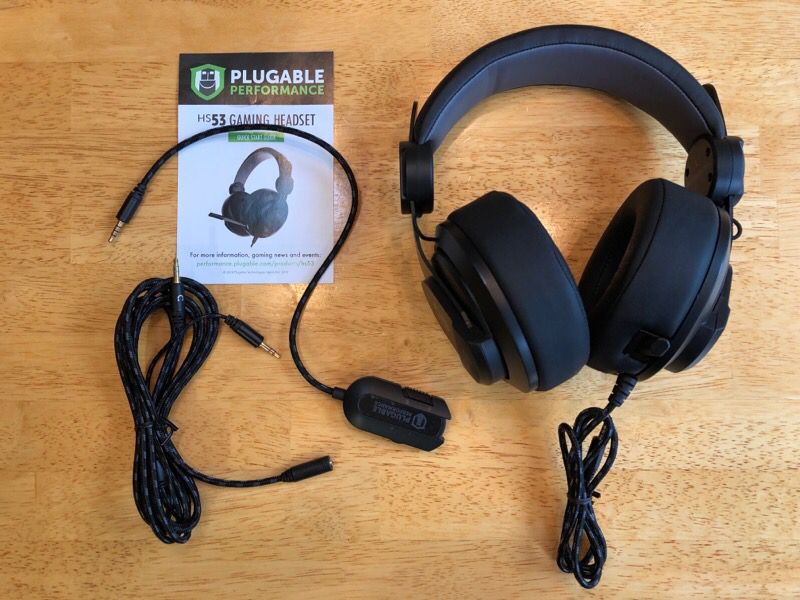
  • The headset with microphone
  • In-line remote
  • TRRS-to-TRS Y cable
  • Quick start guide with 1 page of English instructions

Hardware specs

  • Compatible with PC (Windows, Linux, and macOS), PlayStation 4, and Xbox One.
  • 53 mm drivers
  • 3.5mm TRRS connection for the microphone and headphones channels

Design and features

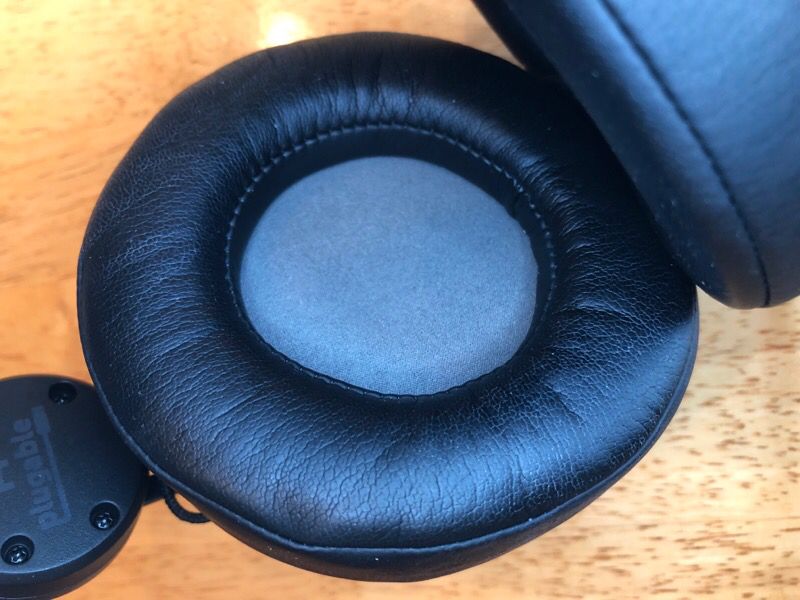
When I pulled the HS53 from the box, the first thing I noticed was the earcups.  On gaming headsets, most earcups are oval, roughly in the shape of an ear.  Those on the HS53, by contrast, are round.  They still fit over my ears, which they can do as they are rather large.  This size is what allows Plugable to include speakers with 53mm drivers, which are larger than most headsets.

The second thing that I noticed is that the TRRS-to-TRS Y cable is really, really long; in fact, it’s almost 15 feet long.  This cable is obviously intended to be used with a PlayStation or an Xbox, and thus makes perfect sense.  The cables that come with just the headset and the remote together are only 4 feet 4 inches long; personally, I wish they were 2 feet longer to give me a bit more flexibility.  If your PC is really close to where you sit, you’ll be fine, but if it’s further away, or if you like to move around, you’ll either need to use the very long cable (and deal with cable management) or buy a different cable.  The cable on the headset is not detachable.

Installation and setup

Installation was simple.  I plugged the audio cable from the headset into the remote and then plugged the cable on the remote—although Plugable calls this a remote, it’s really just an inline volume control—into the green audio jack on my soundcard.  On the remote, one side has a switch that mutes the mic, and I had to look closely to see which way was muted and which way was not.  The other side has a volume wheel, which was equally difficult to see which way was loud and which was soft; I set it to the middle to start.  If Plugable would make the symbols on here white instead of grey, they would be a lot easier to see.

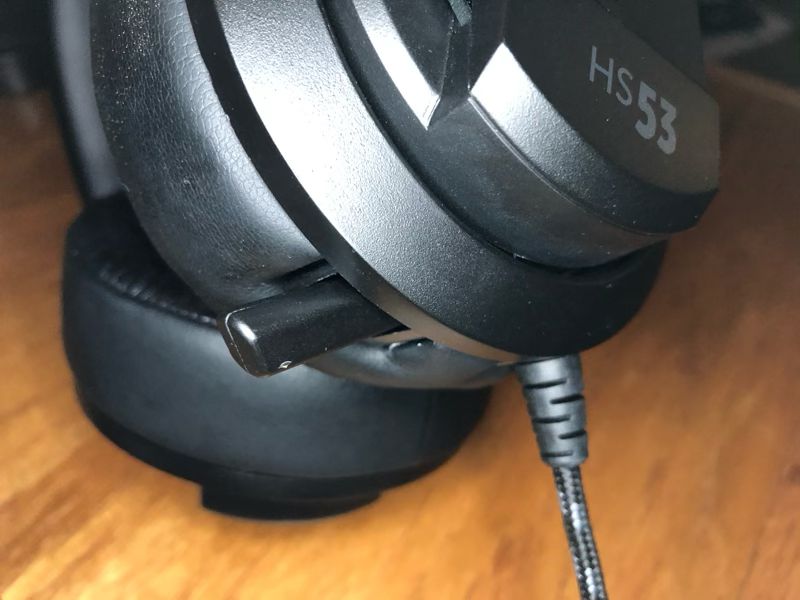
The mic is connected to the left earcup and extends out about 4 inches.  If you choose not to use the mic, it can retract into the earcup.

Performance

The earcups are certainly soft and comfortable to wear.  They tend to be a bit loose on the head and not fit very well, at least at first.  After wearing them for a couple of hours, however, they seem to tighten up a bit.  I’m not sure if this the memory foam, which is in the earcups and on the headband, kicking into gear or what, but they definitely feel better over time.

The headset has good sound.  The music, the game sounds, and the voices of other players are all very clear, and they are certainly richer than my old Logitech.  There isn’t a notably deep bass sound, but that was fine with me, as too much bass tends to create a mushy sound.

Although the HS53 does not have any noise canceling capabilities, the earcups completely cover my ears and do a decent job blocking external sounds.  Plugable’s website says that the earcup pads create a seal that will keep my ears cool and comfortable.  While I agree with the comfortable part, I found that the lack of airflow left my ears on the warm side.

Features

Most gaming peripherals, including headsets, come with some sort of ambient lighting.  The HS53 does not.  This doesn’t detract from the actual game play, but it does lower the “cool factor” of this gadget.  I suppose the lack of lighting is a way to keep costs down, but even a simple lighting scheme would be welcome.

The cables are braided and feel like they are of a decent quality.  The remote, on the other hand, feels cheap and plastic.

What I like

  • Good sound
  • Soft and comfortable

What needs to be improved

  • Longer cable attached to remote

Final thoughts

This is a solid headset from Plugable.  It’s not a fancy headset, but it’s comfortable and has good sound, which are the two most important features.  If you’re looking for an entry-level headset, the HS53 is worthy of your consideration.  It’s certainly a huge step up from my Logitech headset.

Price: $44.95
Where to buyAmazon
Source: The sample for this review was provided by Plugable.

Filed in categories: Reviews

Tagged: ,

Plugable HS53 Gaming Headset review originally appeared on The Gadgeteer on June 6, 2019 at 9:00 am.

Note: If you are subscribed to this feed through FeedBurner, please switch to our native feed URL http://the-gadgeteer.com/feed/ in order to ensure continuous delivery.
IOGear Ultra-Fast 60GHz Wireless 4K UHD Video Extender review


REVIEW – My wife constantly complains about the number of wires I have running in our home. From her perspective, they seem to be everywhere. I have about 7 network switches and connected CAT5 cables running everywhere. I recently decided that I wanted to add projectors to a couple of rooms and she cringed at the thought of additional HDMI cables running everywhere. I believe in “Happy wife happy life”, so the opportunity to test and review the IOGear Ultra-Fast 60GHz Wireless 4K UHD Video Extender was a much-welcomed opportunity.

What is it?

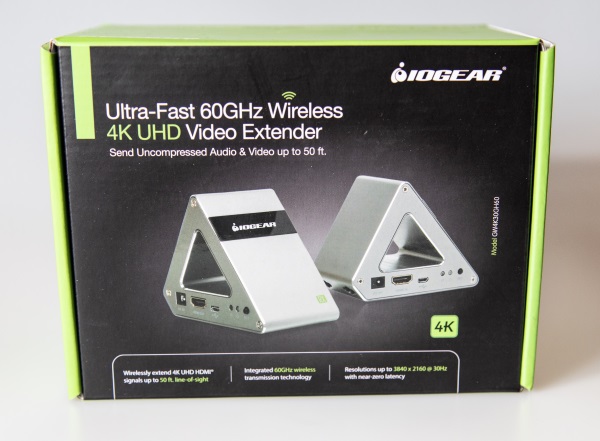
The IOGear Ultra-Fast 60GHz Wireless 4K UHD Video Extender enables you to transmit 60GHz Wireless 4K Ultra High Definition UHD) Video with digital 7.1 surround sound audio from an HDMI source from the Transmitter to the Receiver up to 60 feet away with near-zero latency.

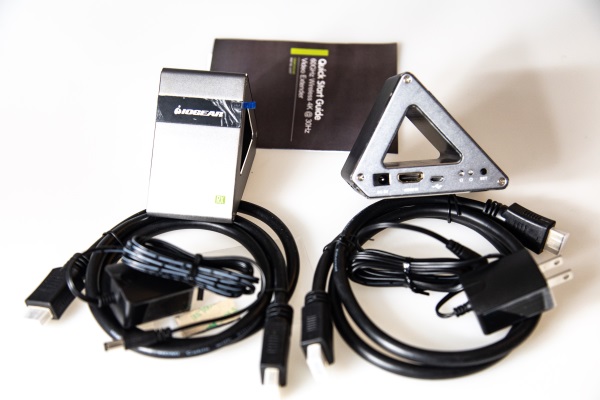
What’s in the box


1 x HDMI Extender Transmitter
1 x HDMI Extender Receiver
2 x 5VDC/2A Switching Power Supply
2 x HDMI Cable
1 x Quick Start Guide
1 x Warranty Card

Design and features

Specifications
Video Input: HDMI 2.0/ HDCP 2.2
Video Output: HDMI 2.0/ HDCP 2.2
Power: 5V/1A
Video Resolution: 3840 x 2160 @ 30Hz
Video Streaming: Uncompressed
Audio Output: Dolby TrueHD, DTS-HD Master Audio and LPCM digital audio streaming up to 7.1 channels HBR lossless audio
Frequency Band: 60 GHz
Antenna Type: Printed Circuit Board
Operation Temperature: 32~122ºF (0~50ºC)
Storage Temperature: 14~158ºF (-10~70ºC)
Humidity: 10 – 90%
Power Adapter: 5 VDC/1A
Height: 3″
Depth: 4″
Length: 1.125″

Features:

  • Wirelessly send 4K UHD video from one HDMI source to one HDMI TV/Projector
  • Extends signals up to 60 Ft. line-of-sight
  • Uncompressed audio and video at near-zero latency – ideal for gaming and streaming
  • Resolutions up to 3840 x 2160 @30Hz
  • Minimal interference with existing Wi-Fi devices via 60GHz wireless frequency
  • Support 7.1 surround sound audio, Dolby® True HD and DTS-HD® Master audio format
  • Plug-n-Play – Transmitter, and receiver come pre-paired from the factory
  • Dedicated closed wireless system – Requires no Wi-Fi network
  • Advanced wireless technology speeds to 18 Gbps
  • LED status lights for source/display connections and wireless link
  • Supports dual power option via USB or included AC adapter
  • Compact mountable design for easy placement
  • HDMI 2.0 & HDCP 2.2 compliant
  • Supports 4K UHD High Dynamic Range (HDR) TVs and content

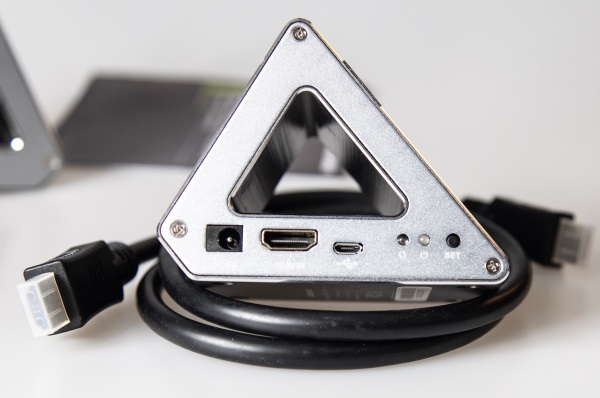
The IOGear extender kit consists of two main components that are the Transmitter and Receiver. They both have identical ports on one side. As shown below from left to right they are the power port, the HDMI port (Input on Transmitter and output on Receiver), the USB optional power input port, the Data Transmission Indicator, the Power Indicator, and the SET button.


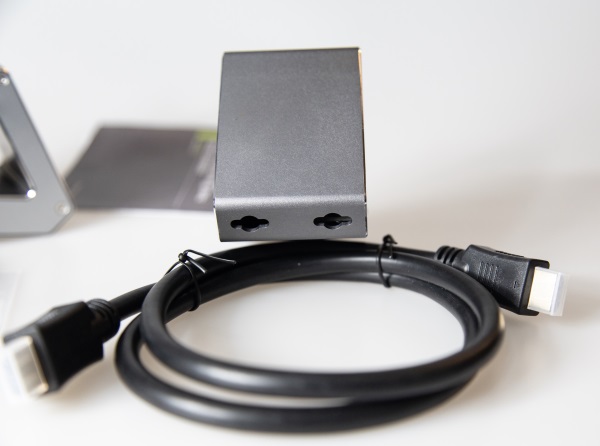
The back of both the Transmitter and Receiver has mounting holes.

Performance

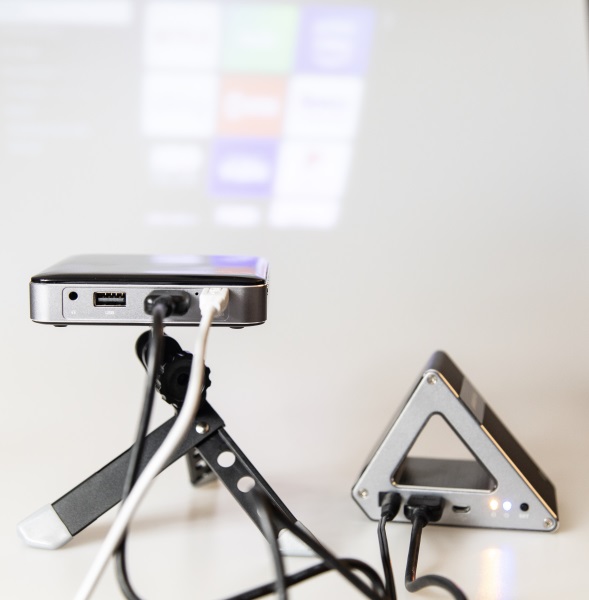
The Video Extender kit is very simple and straightforward to use right out of the box. For my testing, I connected my 4K Roku streaming stick to the Transmitter as well as the power supply. On the opposite end, I connected one of my portable projectors to the Receiver via an HDMI cable and the power adapter to the Receiver.

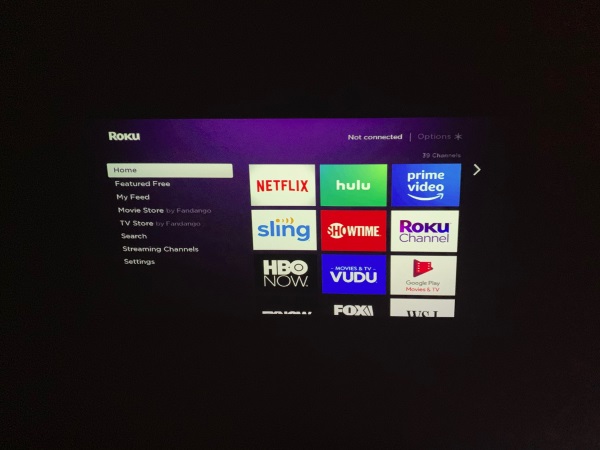
And voila!! As shown below, the Roku menu was immediately displayed via the projector.

Here is a better visual of some shots of the picture when I displayed it on the ceiling in the dark:


I also tested full 4K all the way through with my BenQ HT2550 4K projector and I did not notice any discernable latency or dropped signal in any of my tests.

What I like

  • The build quality
  • The simplicity of the design and the ease of use
  • While I was only able to test at a distance of about 20 feet, the quality of the video produced

What can be improved

  • Nothing as of yet

Final thoughts

While I am a fan of many things wireless, I am only a fan if the resulting service is close to or equal to that of wired service. In many cases, this is not so, and there is often noticeable degradation and latency when opting for the convenience that wireless provides. After reading several online reviews, I was expecting mediocre results at best when I tested this IOGear extender, but much to my joyful surprise, the performance was great and there was not any noticeable impact on the video output. I have read many reviews that indicate connectivity problems between the Transmitter and Receiver and the dropping of the signal. I also read reviews that stated that the extender simply stopped working after a few months. I can honestly say that I have not experienced any connectivity issues or quality of video issues, albeit that I only had limited 4K content to test with. It works flawlessly with 1080P and also with my current mini projectors that either downscale the output to 720P or accept a 1080P input signal irrespective of their output resolution. It also worked well with my 4K projector. I do understand that I have only had this device for a few weeks and that my testing distance is shorter than the claimed limits of the device. Many reviews indicated that there were connectivity problems from even just 10 feet away, so time will tell. If I experience any issues in the weeks or months ahead I will certainly submit an update. But until then, I am giving the IOGear 4K Extender two thumbs up!!.

Price: $245.35
Where to buy: Amazon
Source: The sample for this review was provided by IOGear.

Filed in categories: Reviews

Tagged: , ,

IOGear Ultra-Fast 60GHz Wireless 4K UHD Video Extender review originally appeared on The Gadgeteer on June 5, 2019 at 11:00 am.

Note: If you are subscribed to this feed through FeedBurner, please switch to our native feed URL http://the-gadgeteer.com/feed/ in order to ensure continuous delivery.
70Mai Dash Cam Pro review

REVIEW – Dashcams are used to record outrageous occurrences on the road or provide evidence of collision, vandalism, or corruption. However, only Tesla has a built-in dashcam; in other cars, the dashcam is purchased separately. The 70Mai Dash Cam Pro is one of the newest models to hit the market. Read on to see what I think!

What is it?

A dashcam is a small digital video camera that mounts to the dashboard and records the point of view of the driver. Each country and jurisdiction within the country has rules about the use of dashcams and the distribution of the videos that they record, so users must ensure their legal right to operate the camera.  These legal restrictions are one of the reasons that automakers generally do not incorporate them. The benefit to these restrictions is that dashcam manufacturers can rapidly develop features outside of the snail’s pace of evolution that automakers are restricted to.  As a result, consumers and manufacturers are no longer satisfied with a dashcam as merely a windshield mounted HD wide-angle camera that can store video to a microSD card. As part of this trend, the 70Mai Dash Cam Pro has some very innovative design and features and is an example of the rapid evolution of the dashcam.

What’s in the box?

  • 70mai Smart Dash Cam Pro
  • Car Charger
  • USB Cable
  • Two Electrostatic stickers
  • Wiring tool
  • mounting bracket with heat resistant adhesive
  • manual

Hardware specs

  • Model: Midrive D02
  • Image sensor: SONY IMX335
  • Resolution: 2592 x 1944
  • Camera: FOV 140° , F1.8, 6 glass
  • Wireless connection: Wi-Fi IEEE 802.11 b/g/n/ 2.4GHz
  • G-sensor: Acceleration sensor
  • Expandable memory: MicroSD card with a capacity of 16-64GB and read/write speed of Class10 and above
  • Supported OS: Android4.4/iOS8.0 and above
  • Power supply: car cigarette lighter
  • Battery type: li-polymer battery
  • Battery capacity: 500mAh
  • Input: 5V 2A
  • Operating temperature:-10C 60C
  • Dimensions: 82 x 58.2 x 40.5mm

Design and features

first thoughts

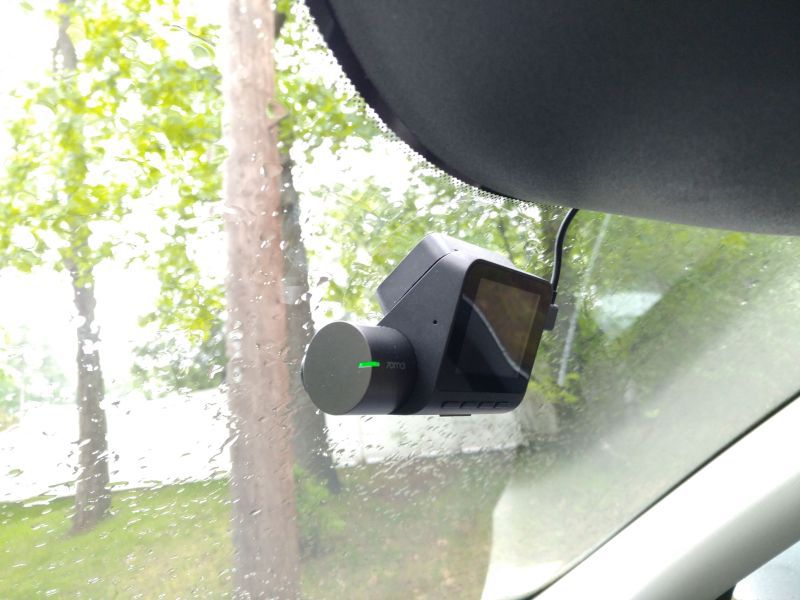
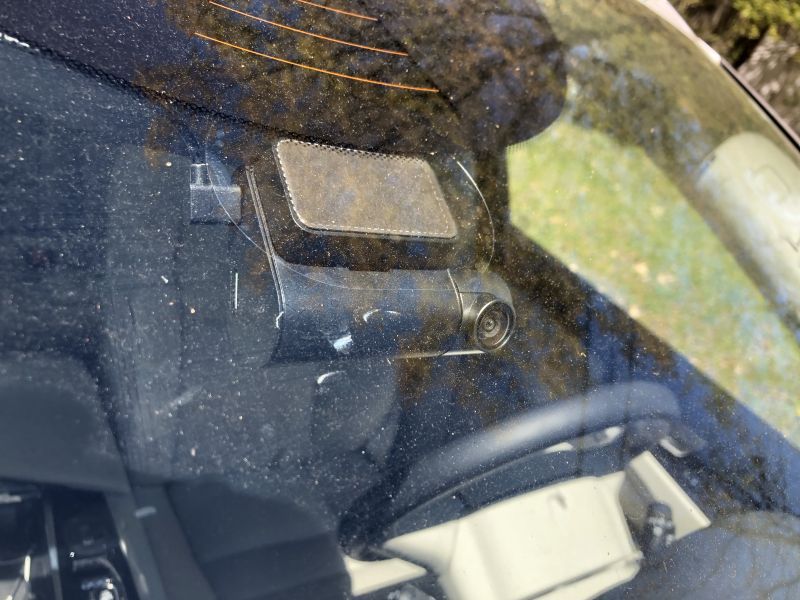
The physical design of the dash cam is very sleek and unobtrusive. This is the first camera that I have seen that supports mounting using an electrostatic film. This is similar to that film that is applied to glass phone screen protectors. Once the film has bonded to the windshield it is held securely in place but may be removed by peeling back one edge without leaving any residue. or film. This design allows the film to be freely repositioned without leaving traces of adhesive. This also permits the camera to be used on rented or other short term vehicle and then returned to the main vehicle. You can see the oval film in the photo below.

The camera mounts to the windshield so that the LCD display and buttons for the user interface are mounted in a fixed position against the windshield. This is a great option for a vast majority of vehicles but may be difficult to access for some vans or cars that have large windshields mounted at a low angle.

Setup

The camera is on the left-hand side and the USB cord is on the right-hand side. I would expect that since more cars are left side drive that the camera would be on the right-hand side so that the camera could be mounted center with the screen and buttons closer to the driver. The camera mount has an indicator light designed to alert the driver so a left side drive was definitely the target platform when the camera was designed. The camera is mounted on a rotating bezel so that the most use of the field of view can be obtained. The camera does not have any left to right adjustment, so the unit must be mounted in the center of the windshield to obtain the best results.

The review sample of the dashcam was provided with an accessory GPS mount holder that has an adhesive on it and is used to mount the camera to the electrostatic sticker. If the GPS mount is not purchased then a standard mount is provided. The mount allows quick connection and disconnection from the windshield without removing the electrostatic sticker. It also has small rubber feet so that it acts as a shock absorber for recording. The camera doesn’t have any built-in image stabilization so a little help from these rubber feet goes a long way.

Once the camera is mounted it looks very sharp and more like a built-in piece of the car versus an accessory stuck on the windshield. The USB power cable is very long, about 10.5 feet, and should allow inconspicuous mounting of the camera cable in a variety of cars. Owners should be careful to not block the operation of airbags. If you are able to remove the A-pillar faring and tie the wire to the other cables running in this area then that is best.

Operation

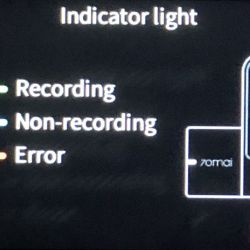
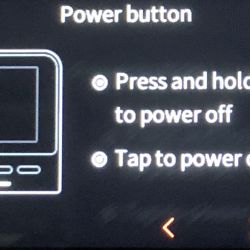
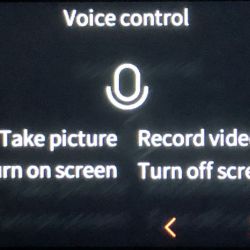
The instruction booklet is in the English language and gives a brief overview of the use. In addition, the camera and electrostatic mounts each come with screen protectors printed with instructive text. The camera screen protector indicates the function buttons and that the unit may be reset by holding the power button for 15 seconds. The electrostatic film protector describes the instructions for mounting the film and camera. The camera also provides some information upon the first use, but there is no way to revisit this information from a help submenu. The gallery below shows what it is like.


The website at the beginning of the book,  https://help.70mai.asia/278.html, is quite helpful and provides much more information than the booklet shipped with the camera.  Specifically, the website describes the voice control capabilities, the P vs N setting (PAL vs NTSC), the limited number of photos (100), and other items not mentioned in the booklet. (I suddenly long for the hundreds of pages that Microsoft Ofice included in the early ’90s.) One thing I couldn’t find any info on was what the 12V adapter said. The text is very hard to read amber on black and it is in Chinese. Good thing Google translate knows that this says “Dedicated power supply port.”

You will need to supply your own microSD card for the camera. The manual recommends a card that is 16 to 64 GB but I used a 128 GB card without issue and it was able to access the whole capacity. The camera records video in one-minute intervals and will delete the oldest video when the capacity of the memory card is nearly exhausted. The card capacity relates to how many minutes of driving record you wish to keep.  The card must be formatted in the camera and will have four directories of video storage: Normal video which is the looped record of the drive, Emergency video which is triggered by a hard acceleration during driving, Parking video which is triggered by the movement of the accelerometer after power is cut off, and photo storage. I was surprised to read that the emergency video is also looped. I would think that these videos should be persistent until the storage of the card is full.  The recordings are constant bit rate and each video has an audio track even when the audio is not recorded. The audio on silent clips is 1 minute of constant bit rate mono 44kHz 24bit sample.

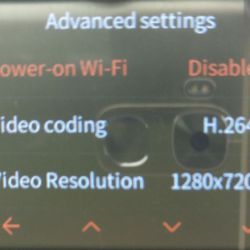
The camera is able to record video in 4 different resolutions. The higher resolutions are recorded in H.265, which may not be supported natively on all devices and the lower resolutions are recorded in H.264. Each video segment also has a preview video in 640×360 that is downloaded to the mobile app for preview. The total capacity for each video is identified in the table below.

resolution (pixels) codec Frame rate (1/sec) file size (KB)
2592×1944 H.265 30 163840
2560×1440 H.265 30 163840
1920×1080 H.265 30 122880
1920×1080 H.264 30 122880
1280×720 H.264 30 122880
640×360 H.264 30 20480

Photos are taken at the resolution that the camera is operating at. Each photo was stored in a 5 MB file. Even the highest resolution photo shouldn’t be more than 2 MB.

It seems based on this table that the incremental difference in the capacity required for higher resolutions is small based on the compression used and the way that video is stored on the card.  Apparently, the 128GB card I used was formatted with a 5120 MB cluster size.  I also tried a 32 GB card and it was formatted in the same way. The card is readable by a PC or Mac using an adapter.

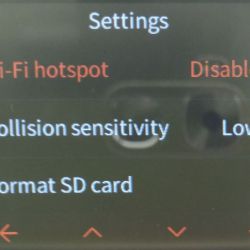
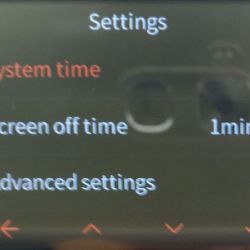
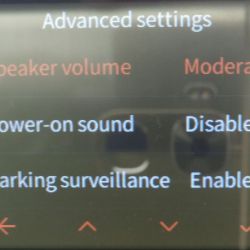
The operation of the camera is menu driven. I think that some menu items are in the wrong place, but here is the layout.


The camera app allows you to manage all of the 70mai gadgets. The app has a local album of videos and photos that you download to the app. The app also has the same info presented on the web page above. The app settings allow you to clear the app cache and provide feedback to 70mai. The main screen of the app is a preview window of the camera feed and allows the user to take a photo using a button on the app. The app pairs with the camera using a WI-FI access point.

Once the power is cut to the camera the camera will remain on standby. if there is any movement detected by the camera in this state it will record a video. The camera also records a video while the car is moving if there is sudden acceleration.

A de-fog algorithm sharpens video taken in snow, smoke or haze but without a way to turn it off, I was unsure how well it works.

There is an optional GPS module that replaces the camera’s mount. The GPS mount enables a feature called Advanced Driver Assistance System, which gives real-time alerts when your car is leaving its lane or rapidly approaching a vehicle ahead. This feature didn’t work as well as my car’s built-in system. What I find frustrating is that the GPS isn’t used to EXIF tag the photos, label the files of the video or set the camera’s time. These should be minor programming changes that could have a profound benefit to understanding what happened on the road and when. One other item is that the operation is restricted to between 14 and 140 degF. Car’s interiors often reach conditions outside of this range and I’m not sure that the parking monitor will work in these extreme conditions.

Performance

I’ve included a few videos of the performance at the links below. Overall the videos are clear. I think that the enhancement that the advertisement shows is more like CSI than reality, but license plates are visible and readable.

This is the manufacturer’s video:

This is my video taken during the day at the highest resolution. The sun is setting to the left of the video but the glare doesn’t wash out the rest of the scene. I bet the couple who got in a collision had one of these cameras.

Here is another video that I captured taken at night. It is impressive how the sensor compensates when the headlights are turned off. It is actually brighter on the video display than it is through the windshield.

The images of my garage below show the different resolutions available. I added the resolution text but everything else is standard and not configurable.


What I like

  • Design
  • User interface (both verbal and button based)
  • App

What needs to be improved

  • ADAS implementation
  • GPS integration
  • Extreme weather operation
  • It is a bit difficult to get the microSD card in and out

Final thoughts

Ideally, the dashcam is the gadget that you won’t know you have until you really need it. This unit’s small size, easy function, and affordable price mean it won’t take up room in your car or burn a hole in your wallet.

Price: $75.97
Where to buy: Amazon
Source: The sample of this product was provided by 70mai.

Filed in categories: Reviews

Tagged: ,

70Mai Dash Cam Pro review originally appeared on The Gadgeteer on June 5, 2019 at 9:00 am.

Note: If you are subscribed to this feed through FeedBurner, please switch to our native feed URL http://the-gadgeteer.com/feed/ in order to ensure continuous delivery.

Skullcandy Indy Truly Wireless Earbuds review

REVIEW – Every time I think I’m done looking for the perfect pair of wireless earbuds, someone offers me a new pair to try and I just can’t help but accept because Gadgeteers always be questing for greatness! This time I’ve been testing driving the Skullcandy Indy TWS earbuds. Let’s see if they end up being my new favorites.

What is it?

The Skullcandy Indy TWS earbuds are truly wireless earbuds that feature touch controls (yay, no annoying buttons!).

Hardware specs

Headphone Type: True Wireless In-Ear
Connection Type: Bluetooth® 5.0
Impedance: 16 Ohms ±15%
Driver Diameter: 6mm
THD: <3% @1khz
Sound Pressure Level: 95±3dB
Frequency Response: 20Hz – 20KHz
Weight: 10.5g (earbuds); 59.5g (case)

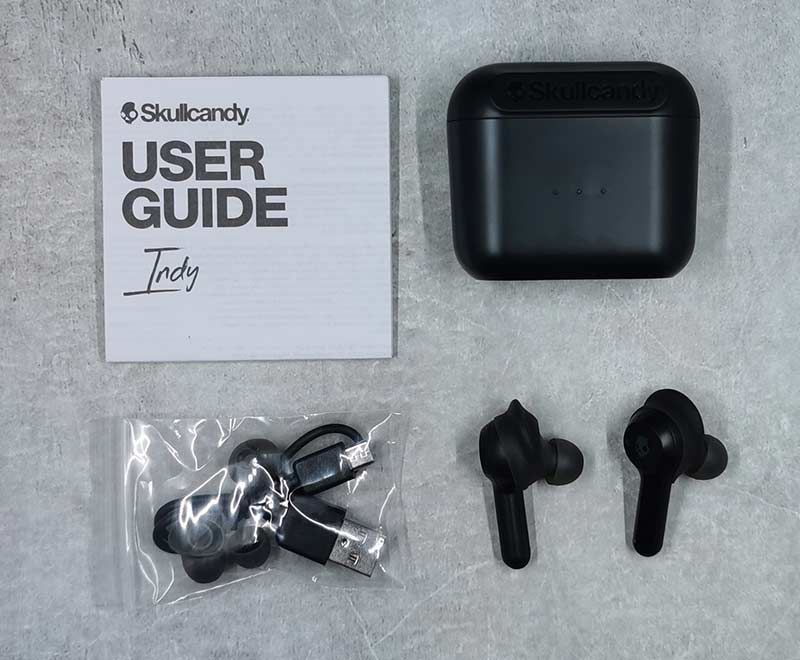
What’s in the box?

  • Skullcandy Indy earbuds
  • Charging case
  • micro USB charging cable
  • 3 sizes of ear gels
  • 1 stability gel
  • User guide

Design and features

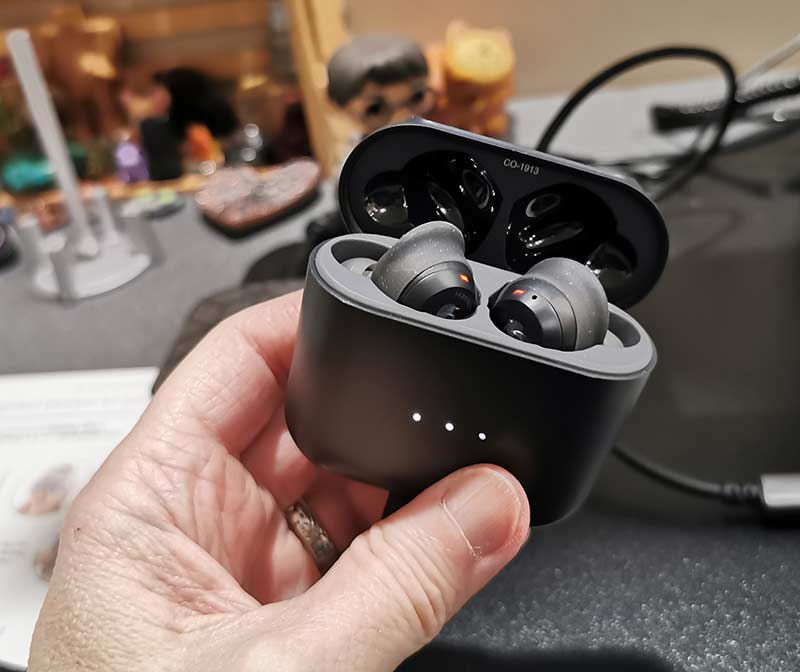
The Skullcandy Indy TWS earbuds look somewhat similar to Apple Airpods since they have the dangling plastic piece.

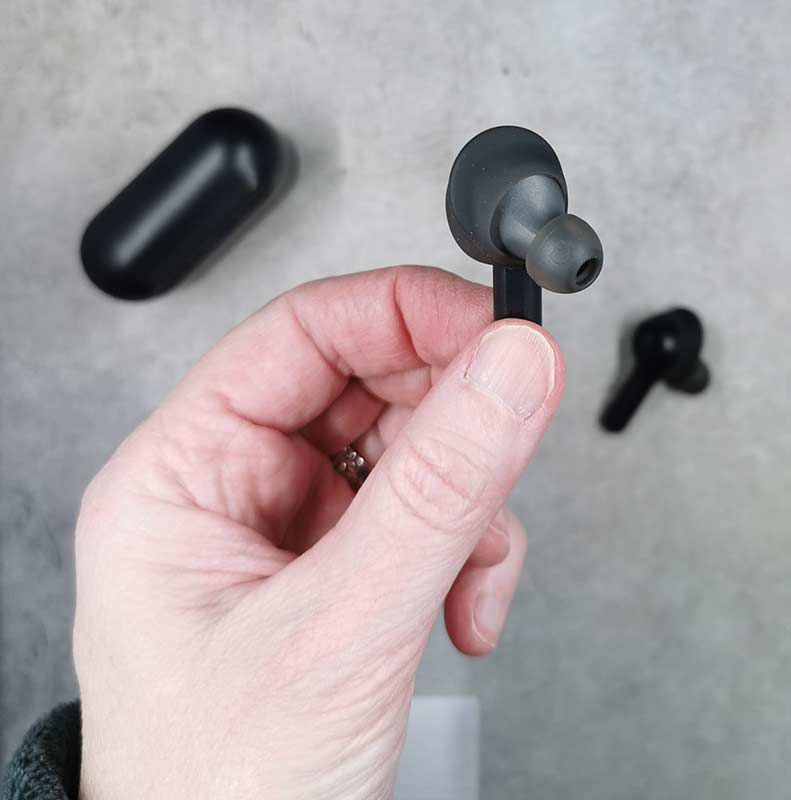
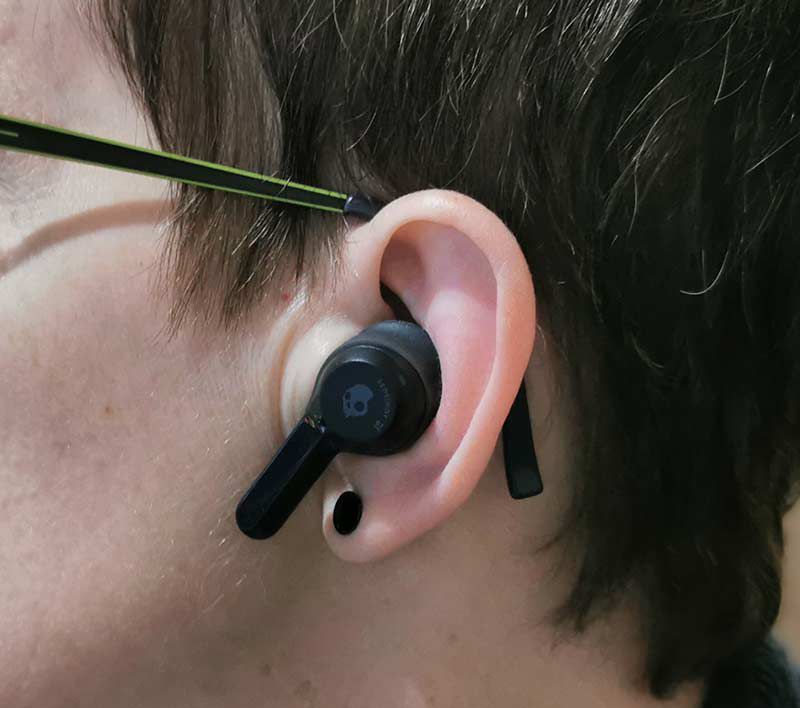
The Indy earbuds have what Skullcandy calls ear gels and stability gels which are basically eartips and an ear wing that gives the buds a secure fit in your ears even if you’re running.

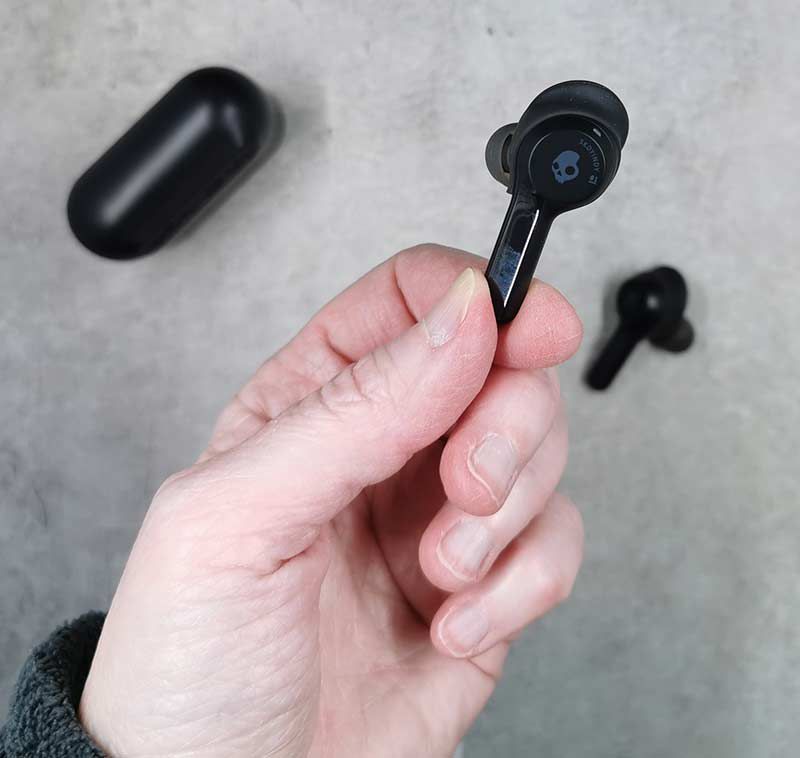
These earbuds do not have any physical buttons (YAY!). Instead, they have touch controls on the round part of the outside casing. You’ll just have to learn the gestures which include tapping the left bud to turn down the volume, tapping the right earbud to turn up the volume. You can also tap and hold the left earbud to go back a track and tap and hold the right earbud to go forward a track. Double tap the right side to play/pause or answer/end a call.

The battery charging storage case is easy to open and easy to insert/remove the earbuds. The battery contacts are on the dangling end of each earbud so you have to properly seat each earbud in its individual silo where it is held in place with a magnet.

Three LEDs on the front of the case provide a visual indicator of the juice left in the case and red LEDs on the earbuds glow red while charging.

Unfortunately, the case uses micro USB to charge. Someone, please remind me how long USB-C has been out now?

As mentioned before, these earbuds fit securely in your ears and I had no worries that they would fall out during my workouts. Everyone’s ears are different, so I can’t promise that they will fit you. But they did for me and I found them to be comfortable enough to wear for an hour or two at a time.

Pairing and functionality

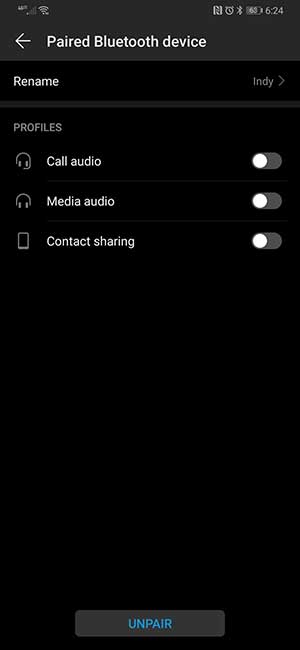
Pairing the Skullcandy Indy earbuds with my Huawei P30 Pro was quick and easy. When I opened the charging case lid, the LED on each bud started flashing white to let me know that they were in pairing mode. From there I just chose “Indy” from Bluetooth devices list and paired them.

Unlike other TWS earbuds that I have reviewed in the past, like the Mavin Air-X earbuds, you can’t just take out one Indy earbud from the charging case and start using it by itself. You have to remove both earbuds before they connect to the paired device. From there you can return the left earbud back to the case and just use the right earbud. But, you can’t return the right earbud to the case and only use the left earbud because as soon you return the right one, you’ll hear an Asian female voice say “disconnected” in the left bud and game over.

Sound quality for music, video, and calls

I tested the Skullcandy Indy earbuds with my Huawei P30 Pro smartphone, and with a Dell laptop at my day job. I tested by using Amazon Prime streaming music, Spotify, YouTube, and Netflix. The earbuds sounded good with all types of music that I tried and I was impressed with the sound quality. Of course, it depends on the source of your music. I found listening to music with Spotify was really disappointing, but Amazon Prime Music sounded great with excellent bass, highs, and mids. If I would have only tested with Spotify, I would have rated the Indy earbuds much lower than what they are capable of so just keep that in mind.

I am happy to say that I could use these earbuds while watching streaming video on YouTube and Netflix. The audio and video synced very well with no noticeable delay which is something I can’t say about all earbuds I test.

For calls, I could clearly hear the person on the other end of the call and they could ear me as well. But since these earbuds fit tightly in your ears, you will hear yourself talking in your head which may or may not bother you.

I do want to mention that I experience random connection drops with these earbuds using various apps like Amazon Music and Spotify. These dropouts were not consistent as far as only happening with a specific app but happened with all the apps that I used during my tests. The drops didn’t happen frequently which was good but happened about once an hour where the audio would just go dead for a second. This would happen regardless if I was sitting at a desk or walking around. I can’t be 100% sure that the problem wasn’t with my phone dropping a connection to the streaming service instead of the earbuds losing connection with the the phone, but I don’t think that was what was happening.

What I like

  • Secure and comfortable fit
  • Touch controls
  • Great sound quality

What needs to be improved

  • Can’t use the left earbud by itself without leaving the right earbud out of the charging case
  • Infrequent random connection dropouts

Final thoughts

At the $80 price level of the Skullcandy Indy TWS earbuds, I have to say that they are impressive with fit and comfort and of course with sound quality. The only dings I can give them are that you have to take them both out of the case even if you just want to listen with one earbud and the infrequent audio drops. But other than those two minimal gripes, I’m happy to report that the Skullcandy Indy earbuds are now my faves!

Price: $79.99
Where to buy: Amazon
Source: The sample for this review was provided by Skullcandy.

Filed in categories: Reviews

Tagged:

Skullcandy Indy Truly Wireless Earbuds review originally appeared on The Gadgeteer on June 4, 2019 at 2:01 pm.

Note: If you are subscribed to this feed through FeedBurner, please switch to our native feed URL http://the-gadgeteer.com/feed/ in order to ensure continuous delivery.