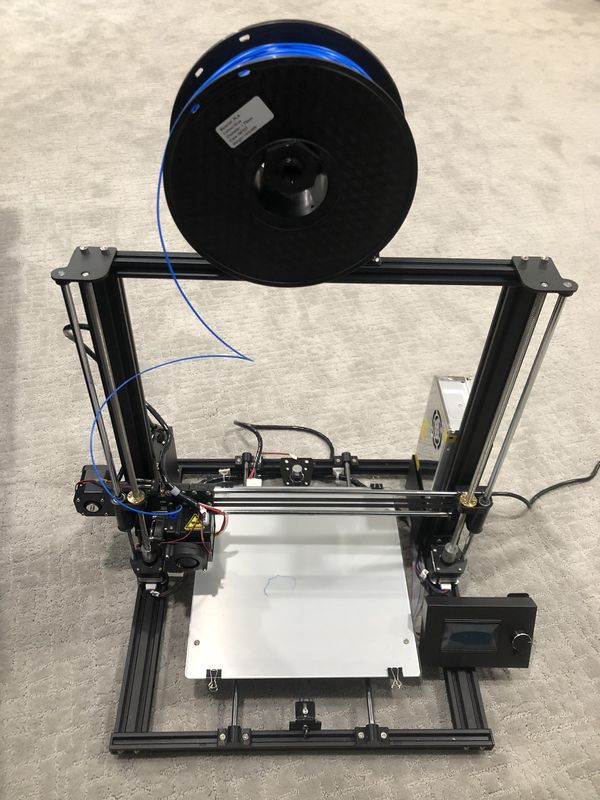
Anet A8 Plus 3D printer review

REVIEW – The Anet A8 3D printer was introduced in 2017 and quickly gained a following because of its affordability, capability, and adaptability to modification. On the downside, however, the printer had poor documentation, a relatively steep learning curve, a shaky frame, and a potential safety issue. The Anet A8 Plus is the successor to this product. Read on to see what I think!

What is it?

The Anet A8 Plus is a fused deposition modeling (FDM) 3d printer. The printer creates a flat pattern of a material which can be fused to the next layer. The printer then raises the print head the thickness of the material and creates the next layer of the model, fusing it to the previous layer. The material is also cooled as it is extruded so that bridging and overhangs of the material on the previous layer is possible. The printer has a large 300 x 300 x 350mm build area supported by a channel aluminum frame and steel guide rods. This is an improvement over the acrylic frame used on the A8. The bed is a heated glass panel for anchoring the model to the bed while printing. This is an improvement over the bed used on the A8. Most importantly, the motherboard has been redesigned to improve the safety of the circuitry. The components used on the motherboard are now more substantial than on the A8 and are now protected by a glass fuse. The extruder feed design and belt tensioning have also been improved over the previous model. One final feature is that the user interface is now anchored to the unit with magnets, which means that it can be removed or repositioned on the extruded aluminum more easily.

What’s in the box?

Each of the following items is shipped disassembled in the box.

  • Chassis kit
  • Vertical frame kit
  • T nuts, M4 8 screws, M5*20 cylindrical head screw
  • Limit switches
  • Power supply
  • Mainboard
  • Display screen
  • Display screen holder
  • 3D printed Filament holder
  • Line bag (Heating bed line \ X, Y Z1, Z2 motor line X, Y, Z limit switch line)
  • Black winding pipe
  • Extra fuses
  • Rubber finger cot (I guess so that the machine oil doesn’t get on your fingers?)
  • Wind mouth Tool
  • Hexagon wrench bag, transparent ruler, plier, screwdriver
  • A8 Plus application and manual on TF card, USB adapter
  • 10 meters of white PLA filament
  • Power line
  • Instruction manual
  • Warranty Card

Hardware specs

  • Model:A8 PLUS
  • Filament Diameter: 175mm
  • Printing Size: 300x300x350mm
  • Recommended Filament: PLA Extruder
  • Operating software language: English
  • Printing Precision: +/-0.1mm
  • Data Input Format: STL, OBJ, JPG
  • Layer Thickness Precision: adjustable from 0.1 to 0.4mm
  • Data Output Format: Gco, Gcode
  • Printing Method: Online Printing/Offline Printing
  • Machine Net Weight: 10KG
  • Printing Speed: up to 120 mm/s
  • Recommended Printing Speed: 30-60mm/s
  • Power Supply/ Max. Power-consumption: 110 to 220V, 360W
  • Operating System: Windows MAC
  • Nozzle Diameter: Standard 0.4mm
  • Supported Printing Materials ABS, PLA, HIPS WOOD TPU, etc

Design and features

As indicated above, the design of the Anet A8 Plus is significantly advanced over the Anet A8. The design is still consistent with a “maker” aesthetic – the finished product still has exposed electronics, wiring, and mechanical components. Compare this with the Monoprice MP Select Mini 3D Printer V2 and you can see that the Anet looks much more functional. For what its worth, even though the Monoprice unit is more refined looking, I prefer the gantry extruder of the Anet over the cantilevered design of the Monoprice.

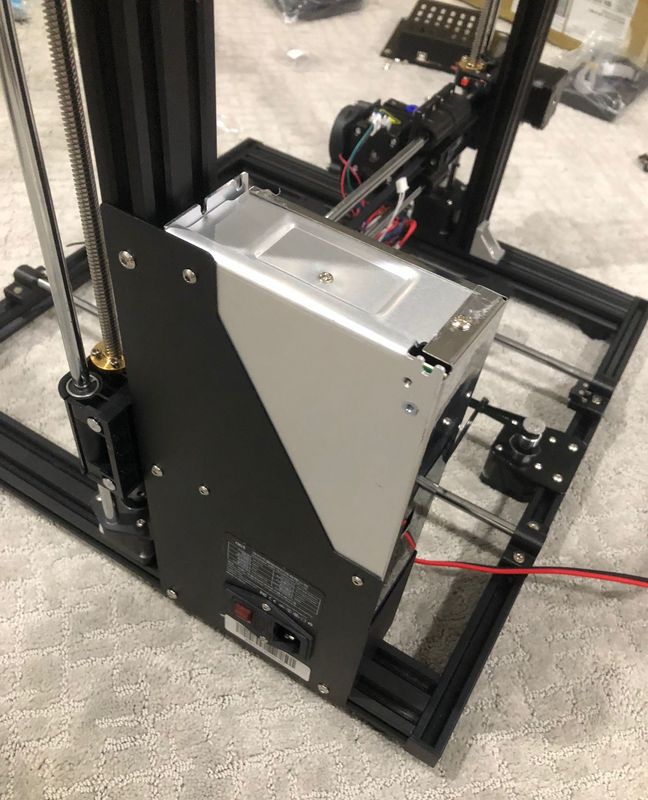
From the ground up this is a well-built printer. There are four large rubber feet to absorb momentum and vibration while printing. The aluminum frame is a quality design and much more resilient than an acrylic substitute. The printing platform is glass for smooth results that are designed to stay put while hot but are easy to separate later and is easy to clean. The platform rides on two guideposts and the belts for the Y-axis motor, which moves the platform can be tensioned with a wingnut. I wish that the platform could be leveled by adjusting a screw on top of the platform and not a thumb screw below. I did have a bit of a challenge getting this true to the print head, and I suggest that you do this and recheck it while it is warm to hot. The thumb screws are likely to move as time goes on I may try to set it up again with some Loctite purple threadlocker.

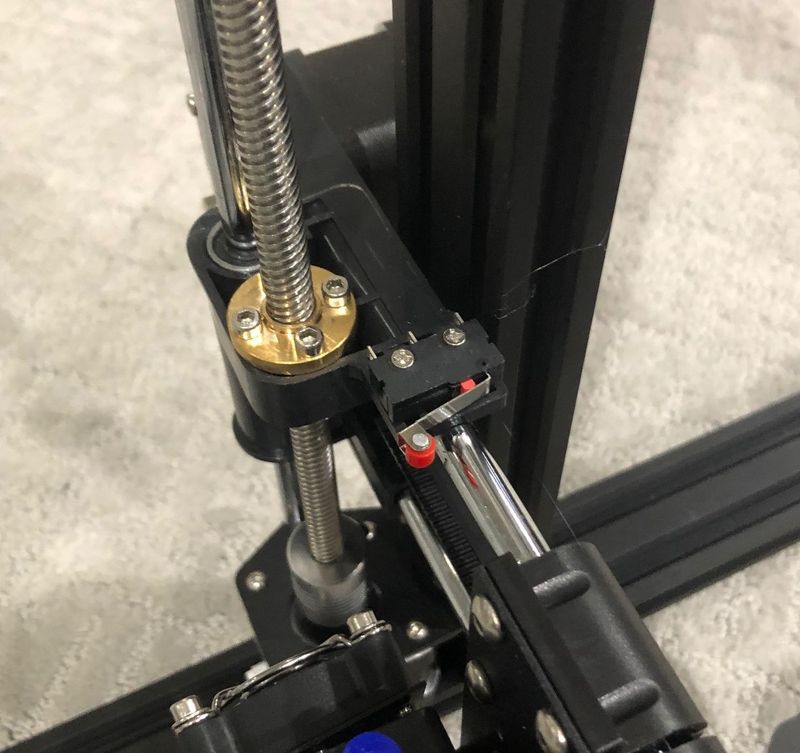
The vertical frame is secured with corner braces to ensure that it stays true and upright. the X-axis chassis is securely mounted to the threaded rod. There is not observable play in the mechanism which helps to provide the 0.1 mm layer thickness precision. I did have to readjust the location of the Z-axis limit switch and it would be helpful if this could be screw adjustable from the factory. There is a modification to create this on Thingiverse however and I suppose that the most enduring quality of this system is the modifications that may be made to it and the community that supports them. 
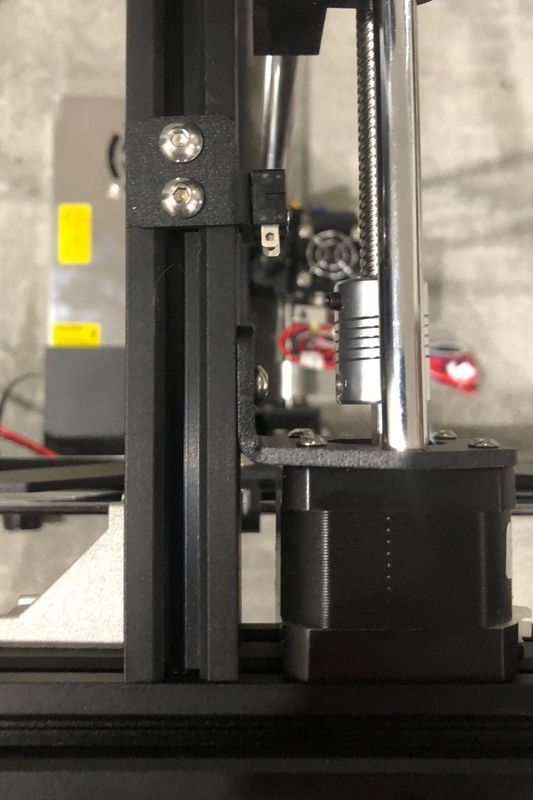
Getting the extruder loaded was also a bit challenging. The PLA they provided tends to feed entirely around the capstan and shoot out to the rear of the extruder head. Removing the spring arm and pivot screw that tensions the PLA in the head is easy enough, and once this is out it is simple enough to manually feed the PLA, but it is not a perfect scenario. I didn’t notice any operational problems with the feed system once the printer was operational. That is, the feeding and retracting of the printing material worked without a hitch.

Setup

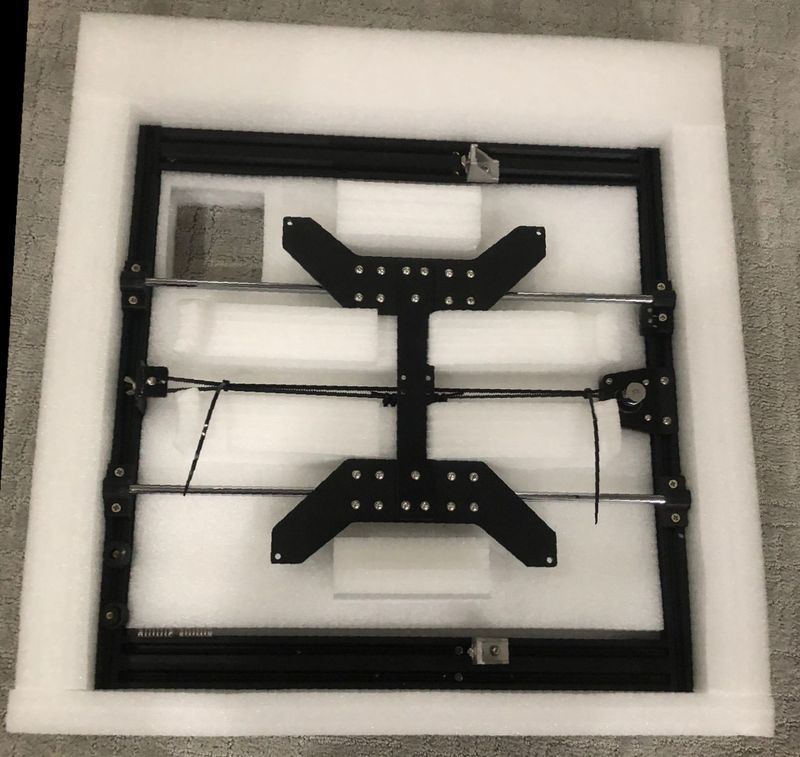
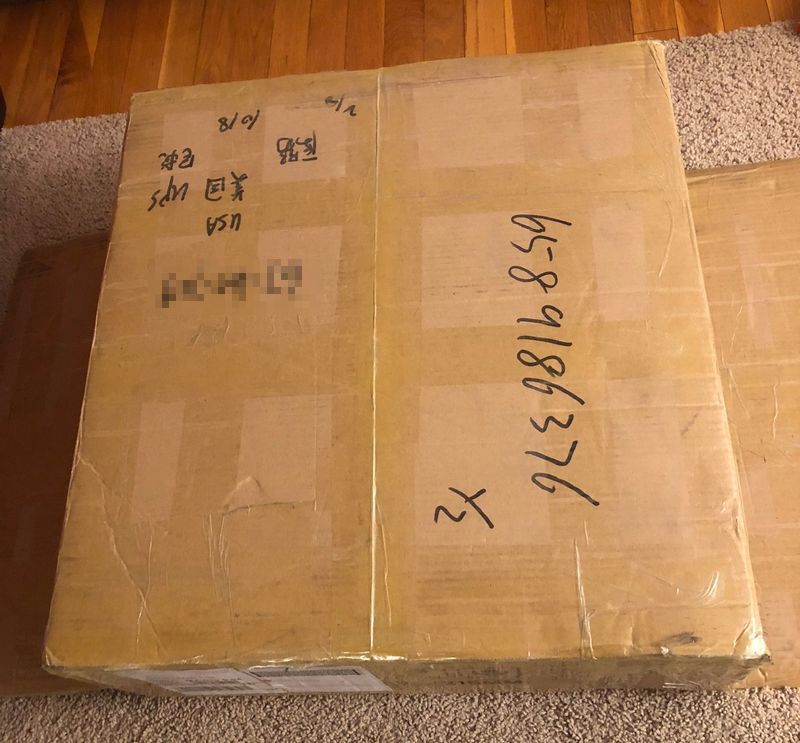
One of the first things you will notice is that this unit comes in a big box.
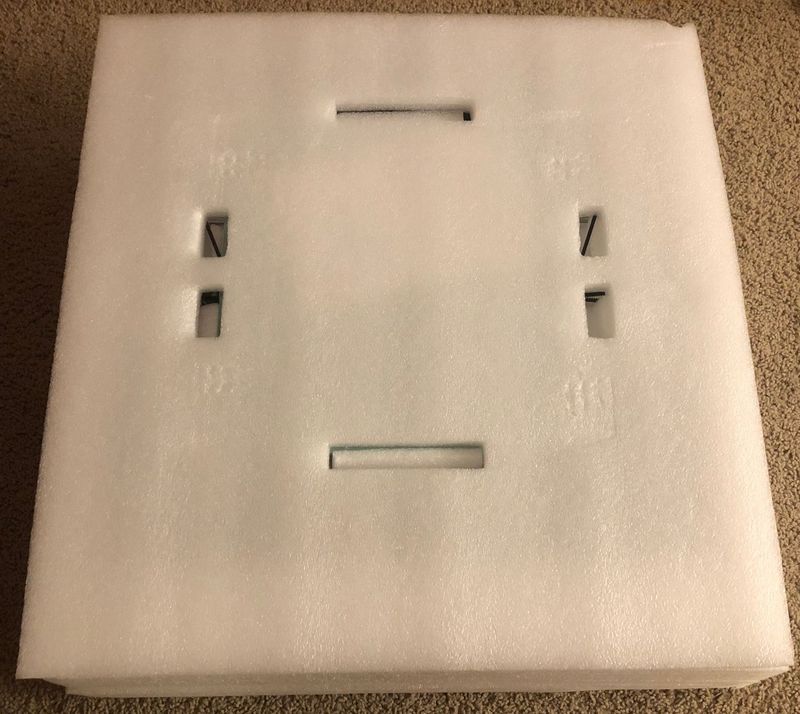
It is nicely packed with styrofoam to ensure that after the journey from China the items arrive safely.
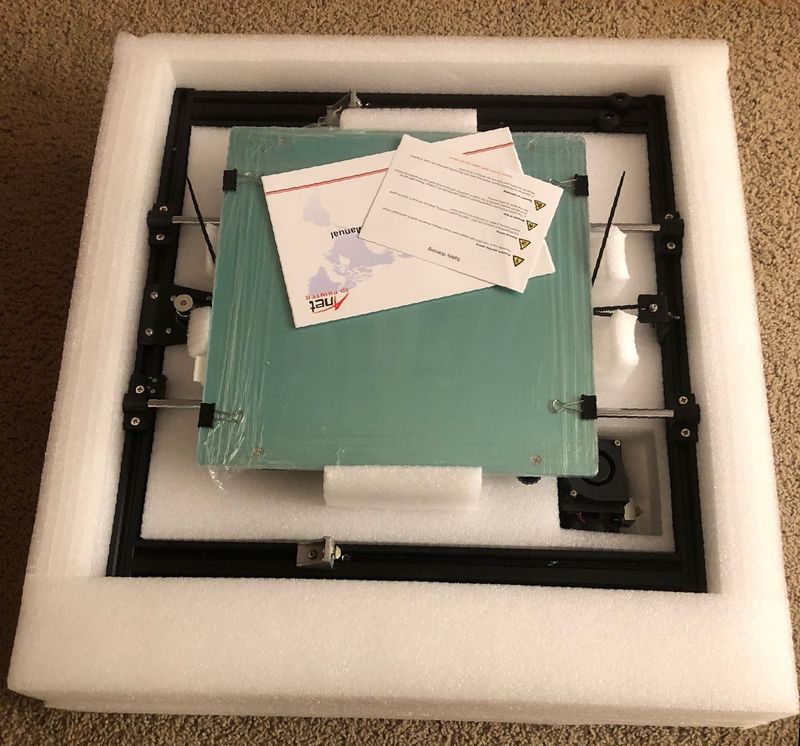
 

The box contains a long list of parts that must be assembled before an operation begins. Fortunately, Anet has preassembled some of the most complicated parts. The chassis and vertical frame already have the motors,  polished rods, threaded rods, and belts assembled. The extruder is pre-mounted on the vertical frame X axis. The Anet website claims that assembly is easy and only requires 10 minutes, but even their own how to video is 20 minutes long and uses camera cuts and time-lapse recording.  Overall, the assembly took a bit over 2 hours. The breakdown of the assembly process is illustrated below:

  • Assembly of the vertical frame on the chassis is straightforward. The mounting is pre-drilled which means alignment is easy. After assembly, it is important to verify the trueness of the vertical frame to make sure it is not leaning one direction or another, otherwise, the output will look like a bell tower in Pisa, but the directions did not explicitly require this.
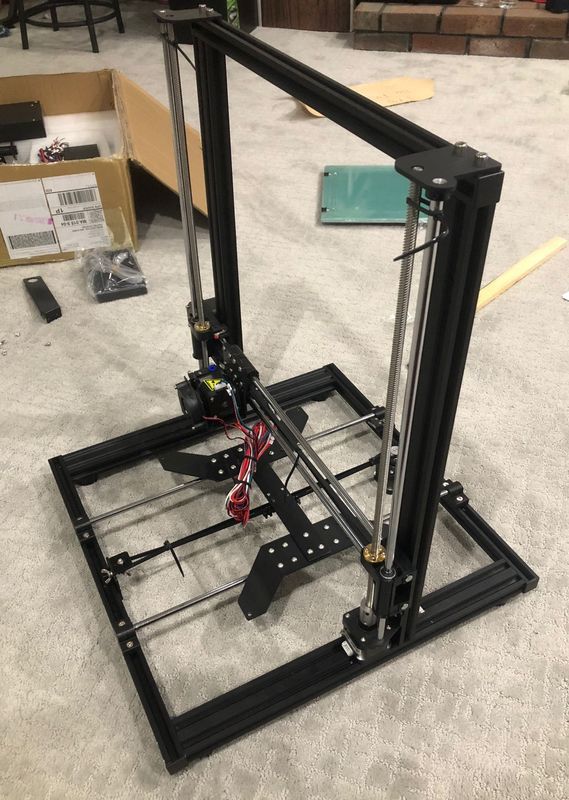
  • Installing limit switch on the X-axis (which moves the extruder on the vertical frame) was easy but seemed like this could have also been completed at the factory.
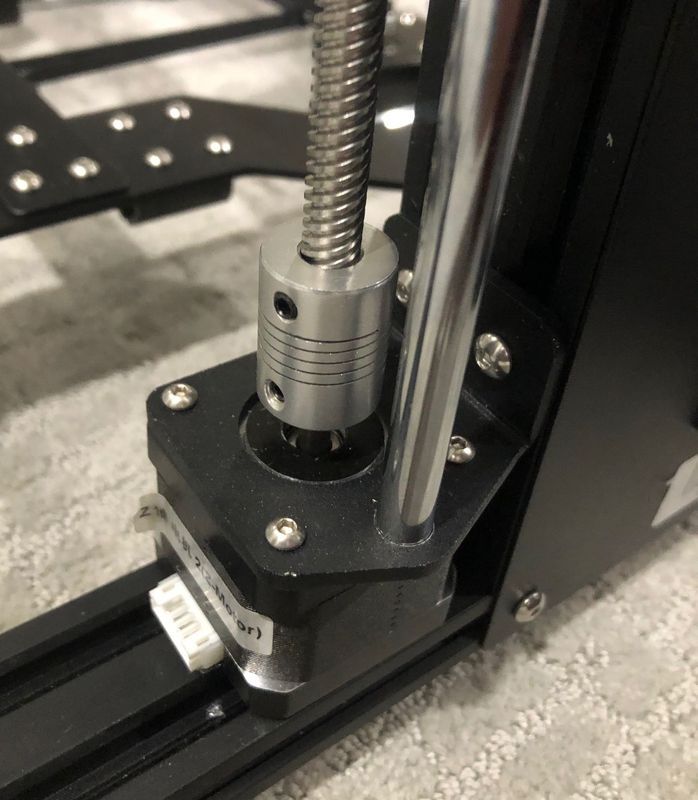
  • Securing the threaded rod only requires tightening the shaft coupling according to the assembly directions, but considering that X-axis (which is moved by the Z-axis) is only positioned by cable ties, I used a cut length of MDF and advanced the Z-axis against it until the Z-axis was completely parallel to the top of the frame. Then the couplings were tightened. This step ensured that both ends of the X-axis were at the same level.
  • Installing the windpipe is straightforward. it is a 3D printed component itself. Many sites online recommend printing a 360-degree diffuser but I haven’t done this yet.
  • The motherboard is shipped in an enclosure. The enclosure must be opened to install all of the wiring. Installing the wiring is the most time-consuming part of the build. The amount of time that is spent on this step can vary considerably based on how neat you want the final product to look. There is also improvement in the robustness of the printer if the neatly organized wiring is less likely to be disconnected or snagged on the moving parts. There are 18 connections to make. the wiring was all well labeled and the connector design took all the guesswork out of the correct wiring. The only item I needed to figure out on my own was that the X-axis limit switch is a normally open/normally closed design and the wiring needs to go to the correct pin.
  • A guide of the optimal wiring layout would be immensely helpful. The manual also failed to emphasize that some wiring needs some slack so that the components can move. One modification I made to the recommended setup was to wire the items on the extruded to the guide rod bushing screw.
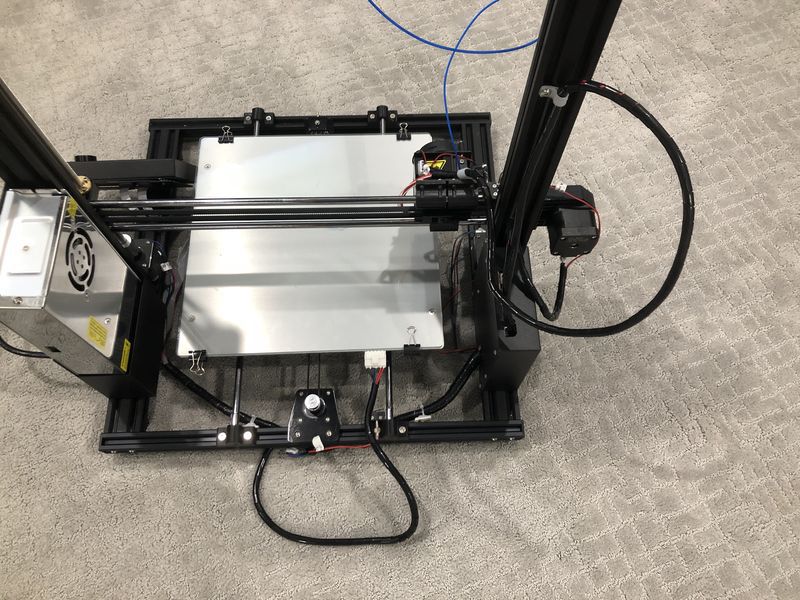
  • When testing the motors the extruder needs to be hot before the feed motor will activate.  I didn’t get a positive response that the motor is wired correctly until after I tried heating the extruder block.
  •  The display screen is prewired and enclosed in a metal case. It is mounted on a magnetic frame. I don’t really see the benefit of the removable screen. I have not really moved it at all in my interactions with the printer.
  • Mounting the spool holder is the last step. I mounted it on top of the frame because that way the printer is not as wide. The spool may also be mounted on the side of the chassis, opposite the control panel.

Operation

The controls of the machine show the extruder set point and present value, the bed set point and present value, the percent of full speed of the cooling fan, the location of the extruder in x,y,z space, the speed adjustment as a function of percent, the elapsed time and a status bar showing the percent of the model complete (in length of filament, not percent of layers). The control is menu based and is navigated by the control wheel to select menu position or value and pressing the wheel, which indicates selection. The menus are well organized and the operation is straightforward.  One issue I found is that there is a buffer on the knob movement, so caution should be taken when using this to move the extruder to the bed so as not to crash it. The screen also has a reset button mounted on the front. I would prefer that this was located on the motherboard so it is not pressed accidentally.
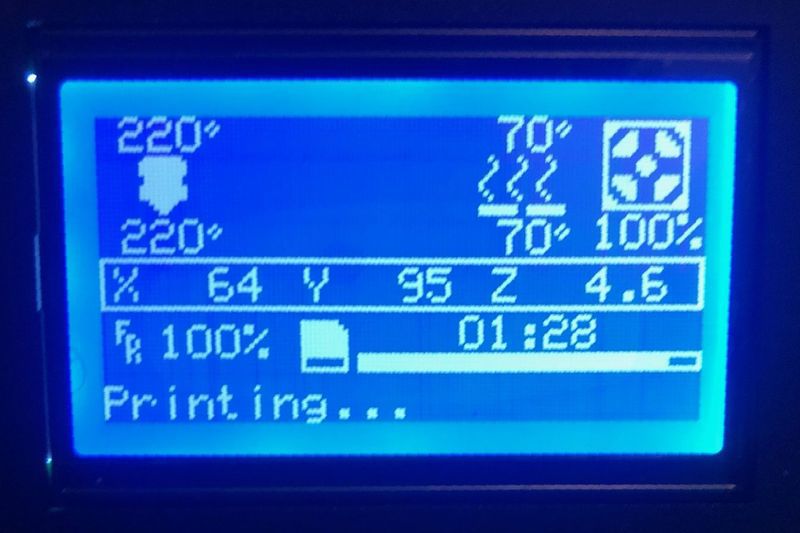
The unit ships with the Cura version 14.07 slicer, Cura user manual, The user manual for the Anet printer, Repetier Host and the CH340G USB to UART driver. I have done all my printing with the microSD and have not used the USB cable. The card also comes with a bunch of test prints: a giant Baymax figure, a change box, a brush barrel with a bear on the front, a Chinese Chess piece, a figure (a statue of Shia LaBeouf), a decoration of FU (Good Luck Character) and the English word love, and a Mayan Temple.

Cura has a lot of variables that can be adjusted to obtain the model or printer’s best output. I have not investigated all of the parameters or come up with any guidance on what settings are best. This is another area where having a strong user base is very useful for debugging and incremental improvement.

Performance

I did not run any popular benchmarks of this printer because as a project 3D printer, the results that I achieve may not be representative of other people’s build, but I did run a couple of models to test the operation. The first model I attempted, one of the bed nuts fell off and tilted the model. The extruder hit the model and I ended up with a bird’s nest.

I wanted to see if I could print the images I captured with the Structure Scanner a couple of years ago. I dropped the OBJ into Cura and a full-scale model was displayed. I scaled it to 10% and it generated a gcode model. About 90 minutes later I had a scale model of my daughter. The test turned out to be a good demonstration of the intricacy that the printer is capable of.

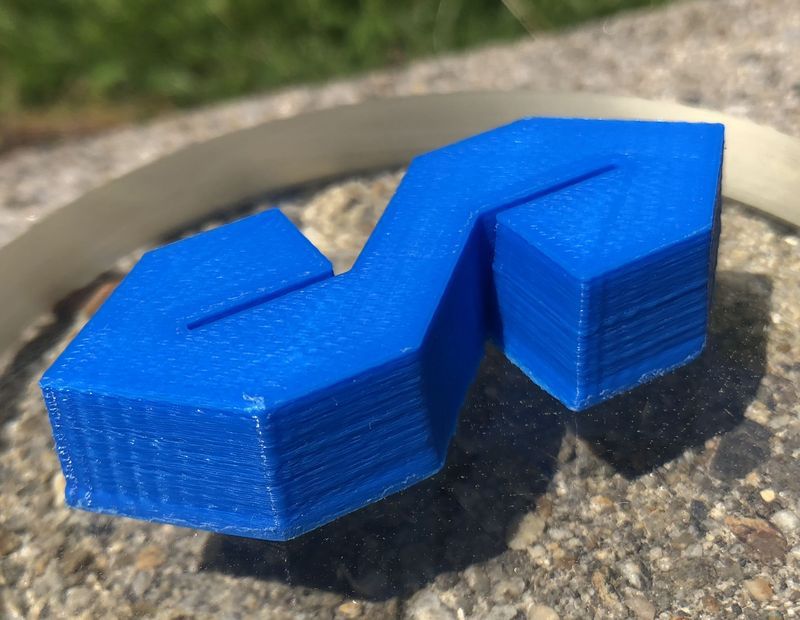
I printed a stylized ‘S’ on the x,y axis to see what the 45-degree sides would look like. I did have an issue on the bed leveling heigh and ended up with a bit of an elephant’s foot on the model, but the sides look ok. There is some waviness to the side of the ‘S’ and that is when the x and y motors are each operating at the same speed.  Maybe some print speed modification is needed but overall there is not that much noise for a prototype build.
I also wanted to see how easy it is to print my own design. I printed a 3D version of the gadgeteer logo. I uploaded the logo into Tinkercad and created the Z-axis extrusion in the Tinkercad UI on the web.

It is very interesting to be able to design and print something without expensive custom 3D software. Of course, my first attempt didn’t go as planned.
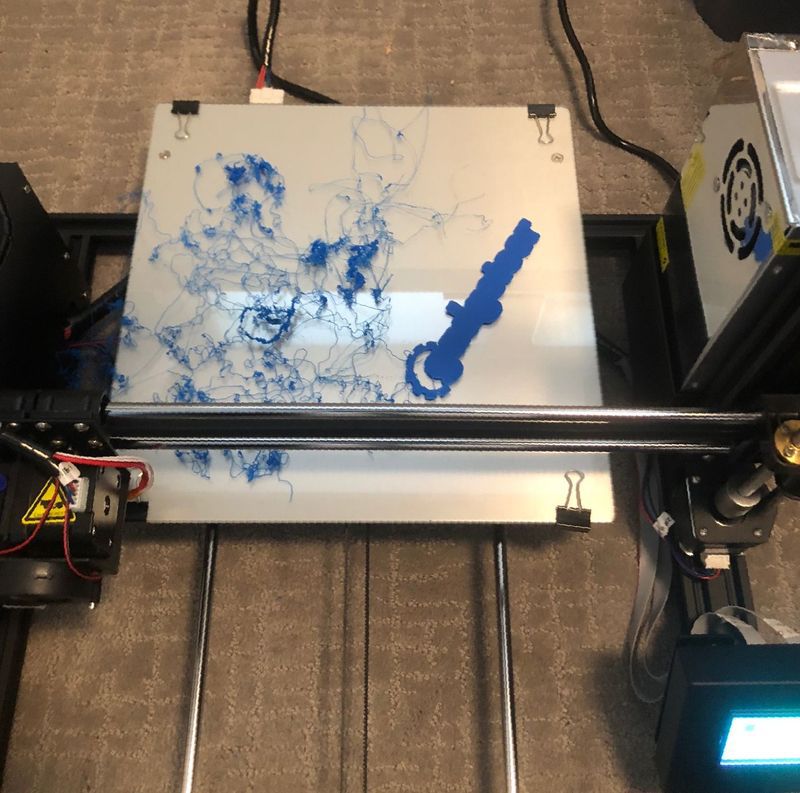
But trying again
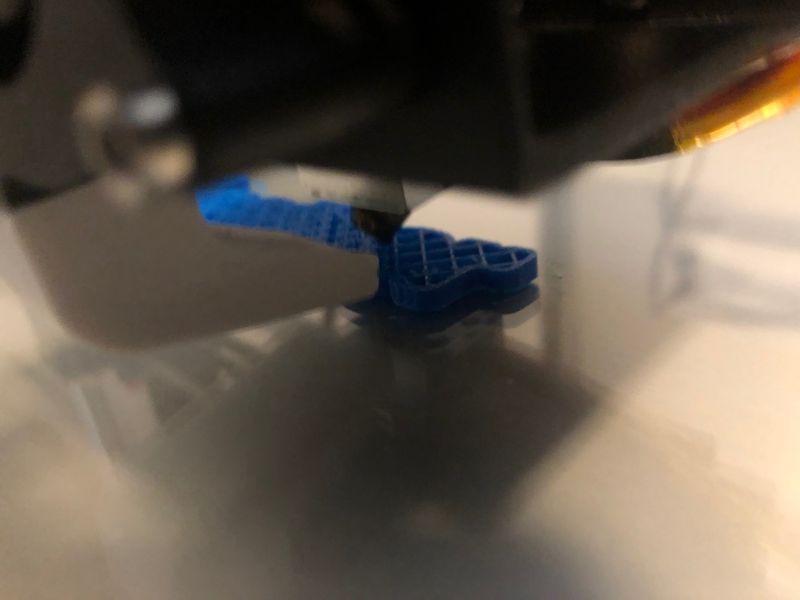
and a little patience during the 1:33 printing time –
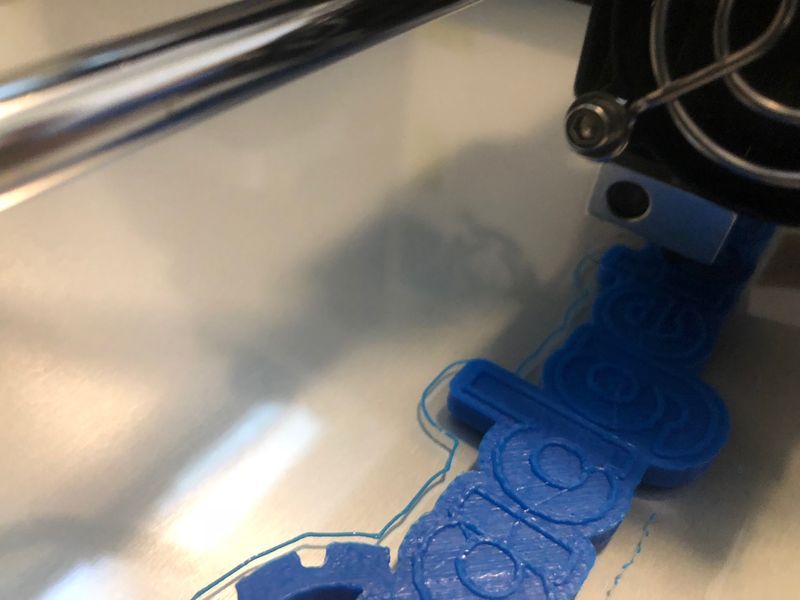
results in a great 3D model.
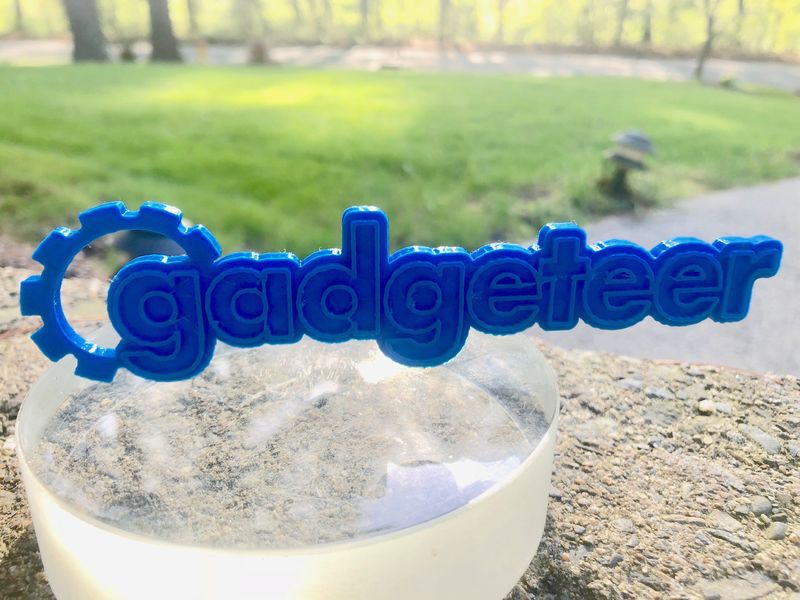
What I like

  • Solid build
  • Good quality model output
  • a strong user support base
  • modifiable

What needs to be improved

  • wiring guide
  • bed leveling nuts

Final thoughts

The Anet A8 Plus offers many enhancements over the Anet A8 but still maintains the low price point, do-it-yourself kit feel, and decent part output that made the Anet A8 so popular. If you’re a professional, novice, or completely inexperienced and you are looking for an affordable 3D printer kit, the Anet A8 Plus may be a great starting point for modification, experiment or learning about FDM 3D printing.

Price: $288.00
Where to buy: Anet, Amazon, or AliExpress
Source: The sample of this product was provided by Anet.

Filed in categories: Reviews

Tagged:

Anet A8 Plus 3D printer review originally appeared on The Gadgeteer on June 10, 2019 at 10:00 am.

Note: If you are subscribed to this feed through FeedBurner, please switch to our native feed URL http://the-gadgeteer.com/feed/ in order to ensure continuous delivery.

Bellroy Sling Shoulder Bag review

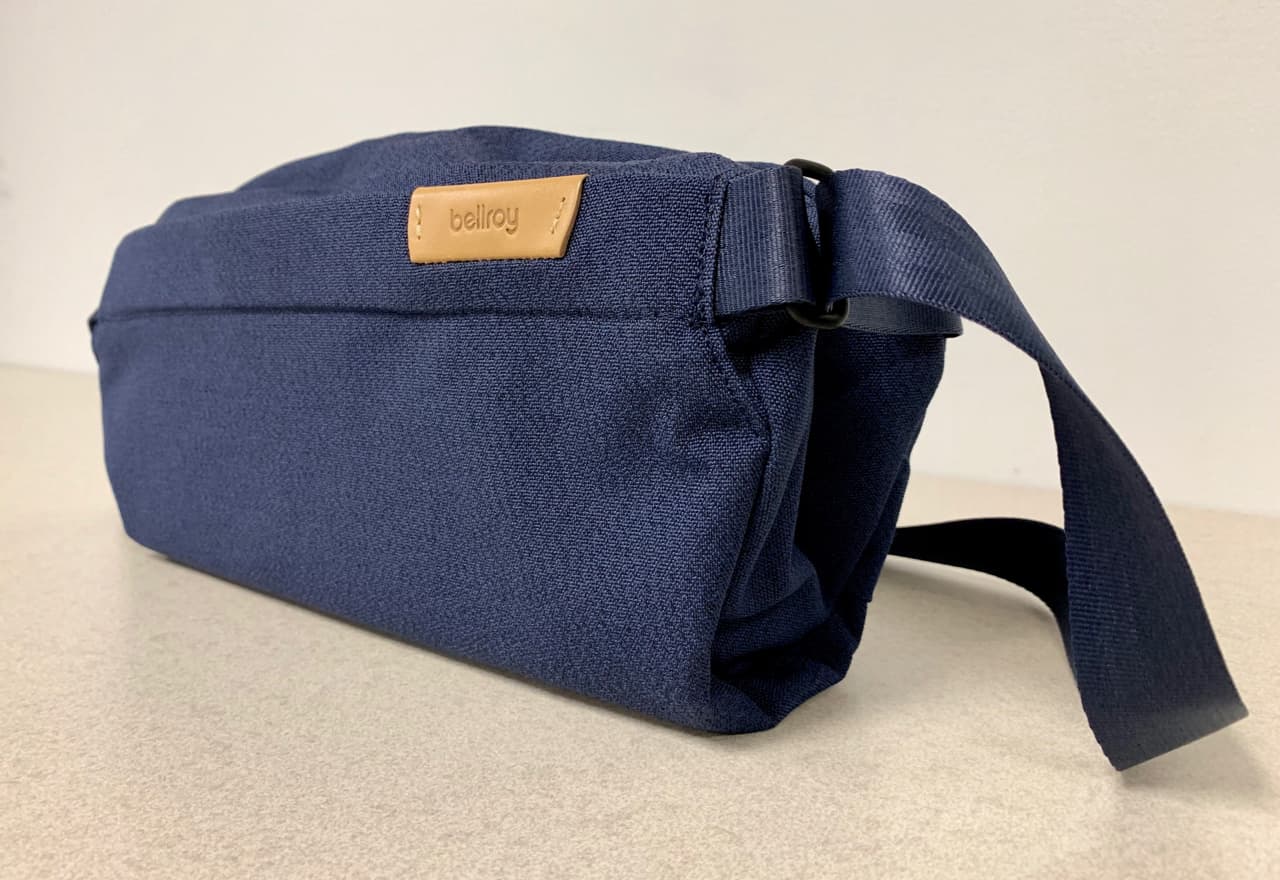
REVIEW – More often than not, we have to tote around a bunch of daily-carry items that don’t fit in our pockets, but feel like overkill to put into a big backpack. Legendary wallet maker Bellroy looks to do away with your bulky shoulder bags and heavy packs with their diminutive Sling satchel. Is it up to the task? Read on!

What is it?

The Sling is a small shoulder satchel with two soft-lined, zipper pockets, an expandable main compartment. It’s appropriately sized for when you need to carry more than your pockets would hold, but less than a messenger bag or backpack.

What’s in the box?

  • just the Sling and a warranty card

Specs

  • 23 x 34 x 10cm
  • Holds up to 7 Liters
  • 350g (12.3oz)
  • Front compartment with key clip
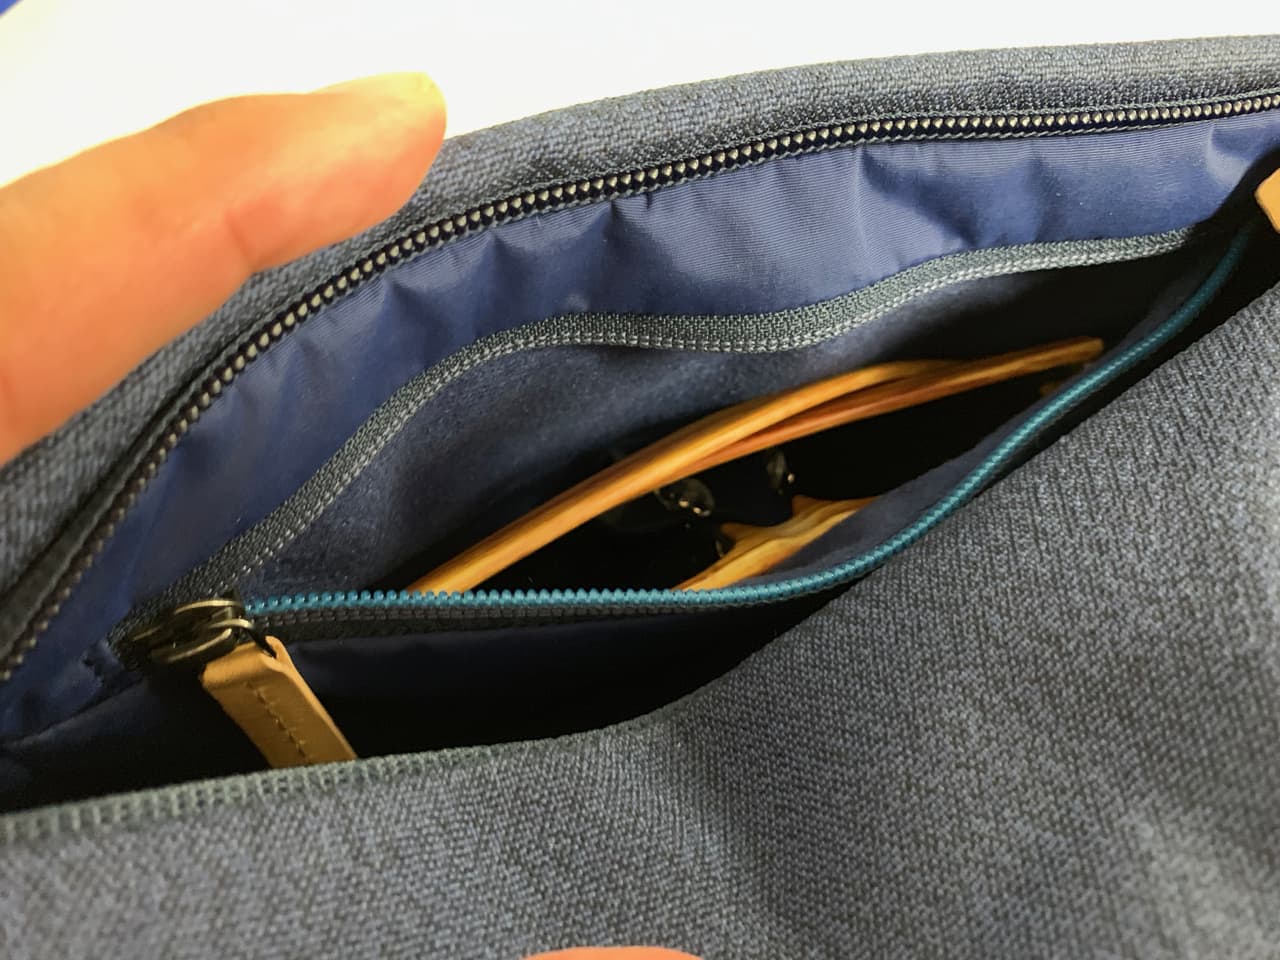
  • Main compartment with soft-lined, zippered glasses pouch
  • Magnetic clasp on strap for easy removal
  • Self-compressing, expandable gusset
  • Padded paneling on the back for comfort
  • Soft Nylon webbing straps
  • Water-resistant materials
  • 3 year warranty
The Sling is one of those things that, with time, you can get used to wearing.

Design and features

You may be familiar with the name Bellroy from their wallet ads, whose revolutionary design claims to reduce the thick billfold in your back pocket down to a sleek, svelte and downright sexy size.

The Sling takes the concept of trimming down that extra thick wallet and applies to the standard shoulder bag, asking “What if you just carried what you needed, and that’s it?”

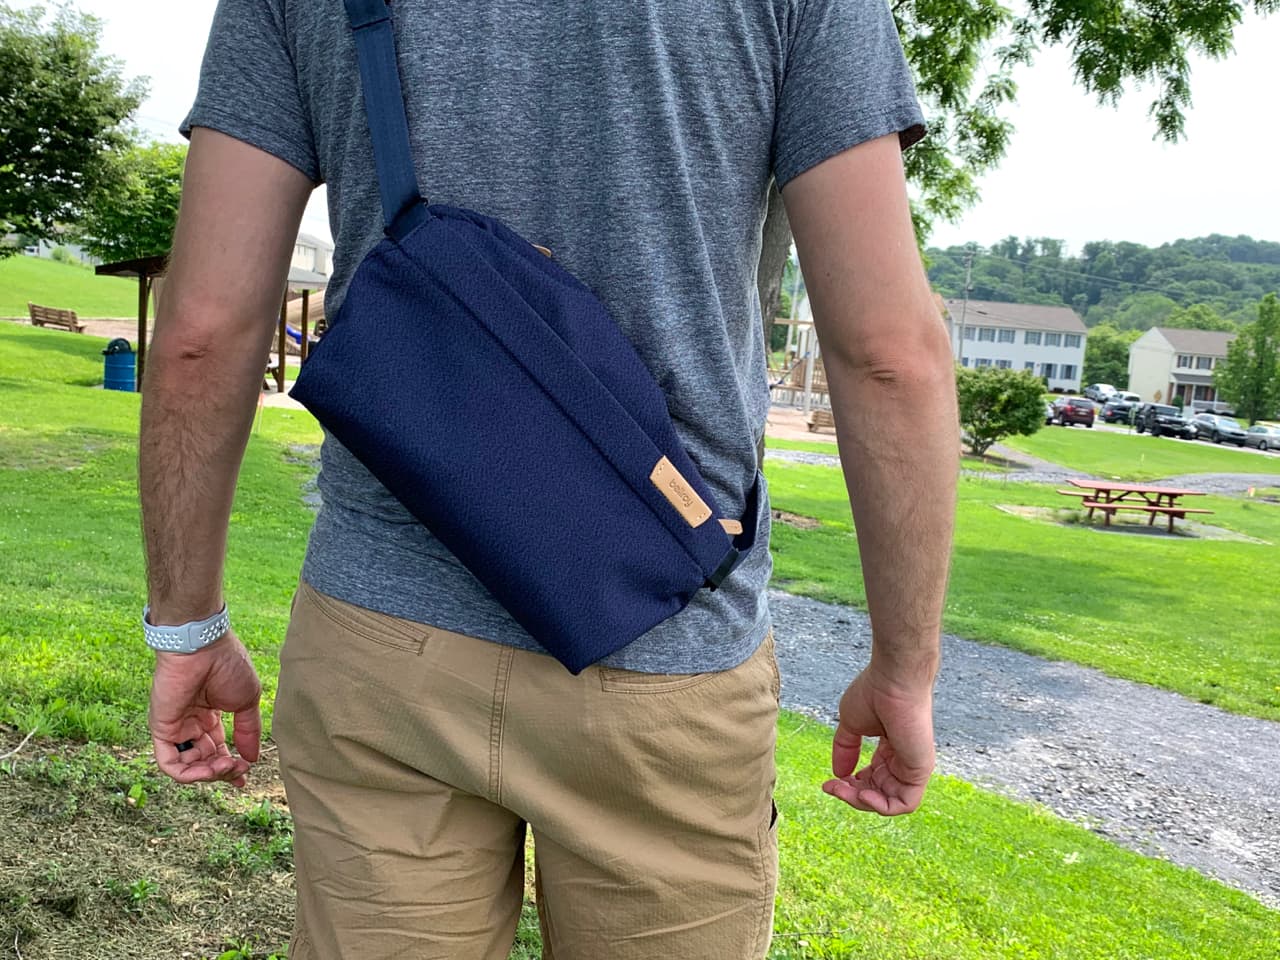
When I first got my hands on the Sling, it very much reminded me of the classic fanny pack, only with a longer strap. At its shortest strap length, the Sling could be used in a typical hip bag fashion, but it’s intended to be placed on the body in a cross-chest configuration, the bag resting comfortably in front or in back.

Special thanks to my daughter for getting some good action shots!

Organization freaks might be turned off by the fact that there are only 3 pockets. I, myself, like lots of smaller pockets for pens, chapstick, change … the small things I like to carry in a bag instead of sloshing around in my pockets. There is one front zipper pocket, one expandable, gusseted main compartment, and a soft-lined smaller zipper pocket inside that main section meant primarily for sunglasses.

Also included in the main compartment is a keyring hook. I don’t think I’ve ever used one, but I suppose it’s handy to stick a spare key on, or keep your keys in one corner of the compartment.

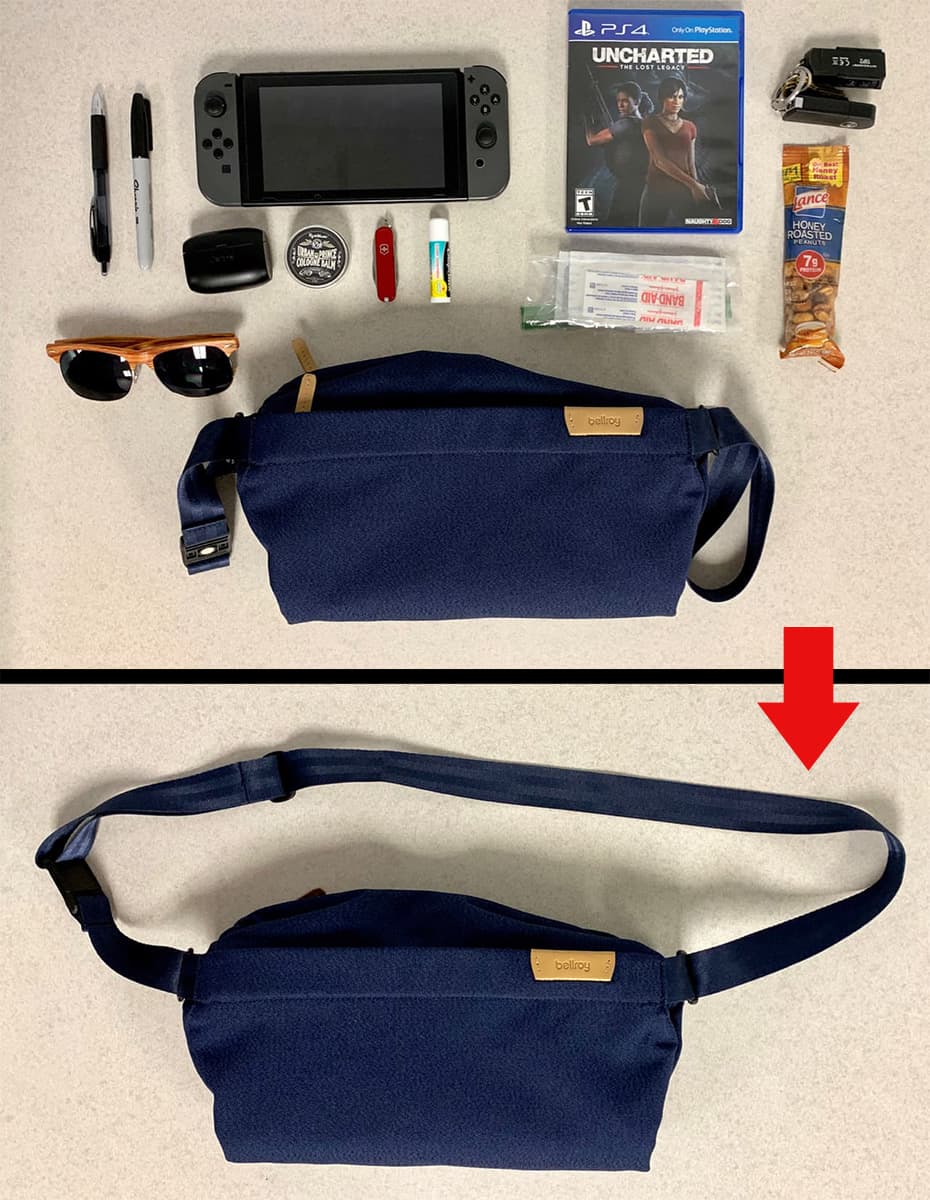
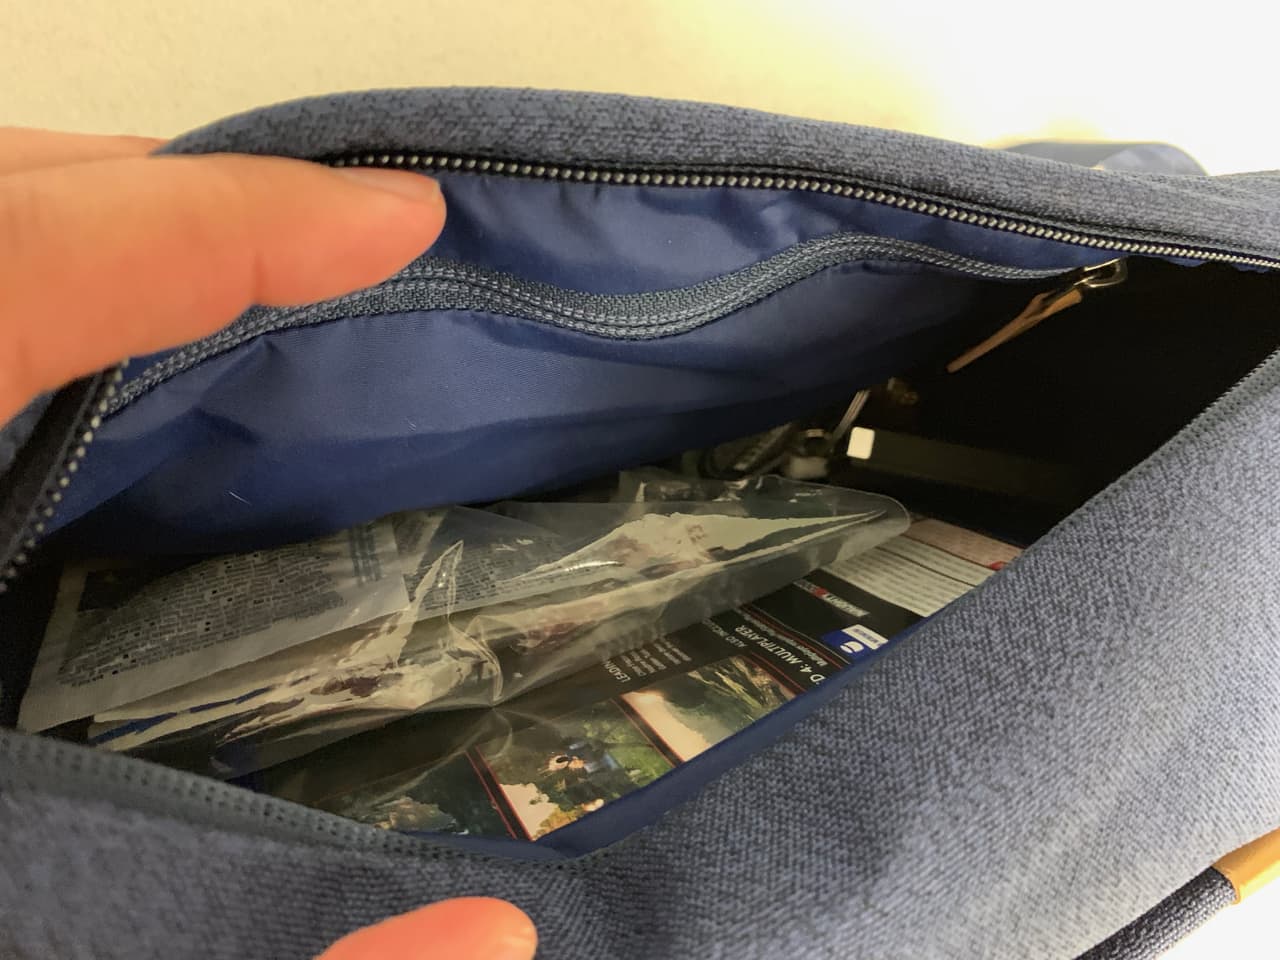
The expandable main pocket holds a lot of stuff!

I would have liked maybe one more zippered bag to hold some of my smaller items. I like to carry around some minor first aid stuff like bandages and Tylenol, and I simply put all that stuff in a sandwich baggie. I’ll probably get a more durable small bag at some point for exactly this purpose.

As you can see from the picture, the expandability of the main pocket is very helpful in being able to secure an unexpectedly large payload.

Here’s everything I carried with me when I was taking photos, including a surprise Playstation game that my co-worker brought in… it still all fit in the Sling.

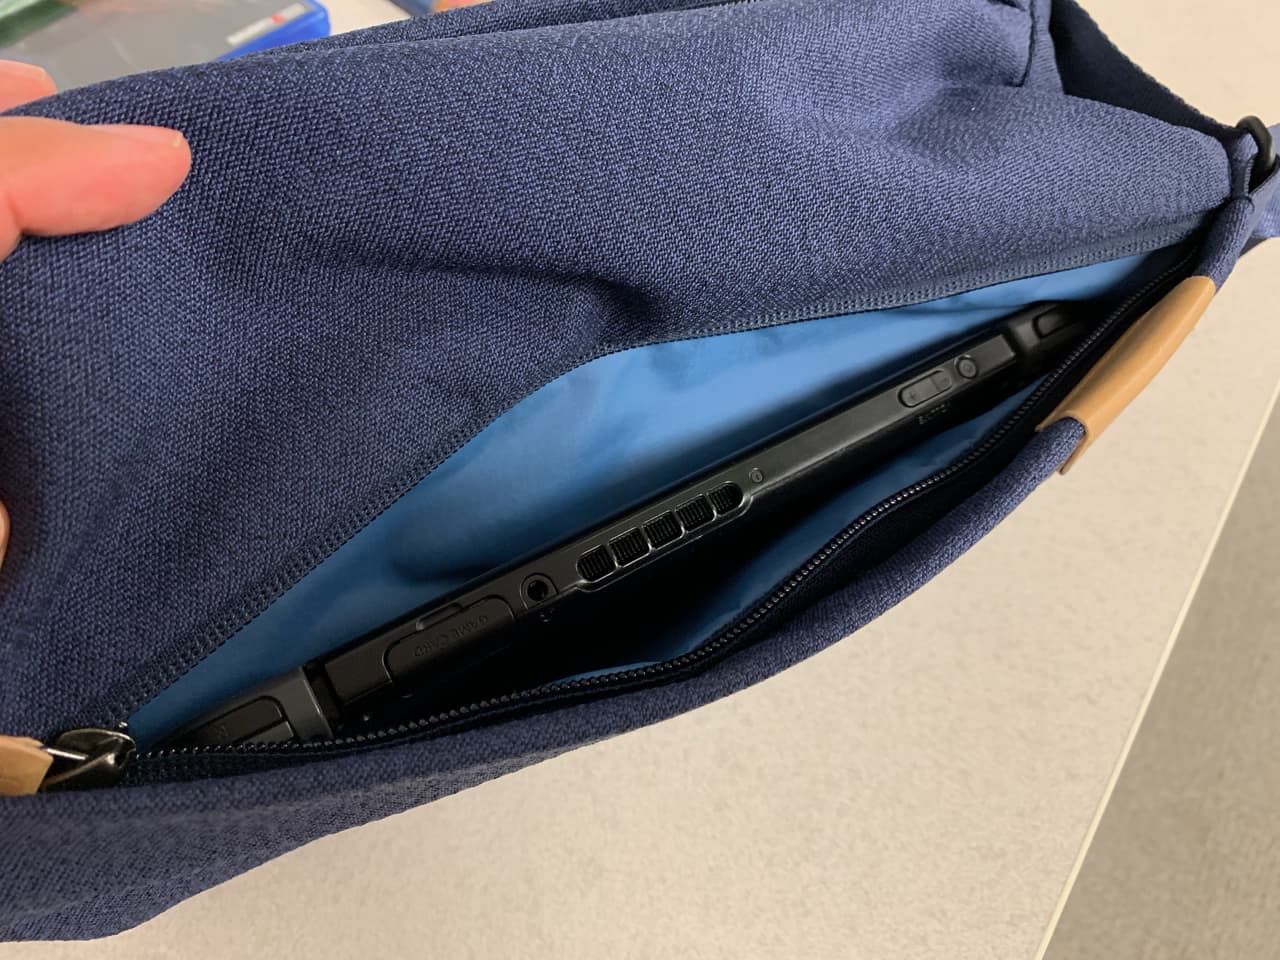
The front pocket is wide and tall enough to accommodate my Switch, which is personally my go-to test in seeing if a bag is too small to be worth carrying. The Sling just passes, in my eyes.

One key feature worth mentioning is the extra loop that the strap passes through. When being worn, the weight and tension compresses the gusset and keeps the bag as thin as it can be, which is quite smart.

Secret sunglasses pouch!

Another unique addition to the Sling is the magnetic clasp. At first, I was concerned that it would continually come undone, but I didn’t experience that even once. It is easy to undo, but it requires force to be exerted in the opposite direction of how the strap would pull when being worn. This makes the Sling easy to don. Admittedly, I didn’t use this feature often. It’s just as easy to slide the strap over my head rather than unclasp it, hold the bag in place on my chest, and fish around my back to pull the other end over my shoulder. Maybe I just didn’t “get” it and there is an easier way.

The front pocket is just large enough for a Switch.

It would certainly be useful when, say, wearing a motorcycle helmet, prohibiting the strap from going over your head. Most of the time I just carried the Sling over one shoulder like a purse, which is just fine.

Slipping the bag from back to front to access the contents is quick and easy. It’s meant to be ambidextrous by design, so it can be worn over your left or right shoulder and still be accessible. It’s very comfortable carried on your back or your chest. Although I have to admit, it’s a unique look. It sort of reminds me of those tiny little backpack purses that girls carried around in the ‘90s. I still get a little self-conscious about wearing smaller bags like this.

Aside from the lack of smaller pockets, which really just speaks to the simplicity of the Sling, I really like this little satchel. It might be too small for some, or even most. And it’s not cheap, weighing in at nearly $100. It’s quality, through and through. At least it feels expensive. For the commuters and EDC enthusiasts out there, it’s a nice little bag aimed at paring down your larger bags to just the essentials, if you can get past the look of strapping such a tiny satchel to your back.

What I like

  • super durable and lightweight
  • discreet glasses pocket
  • magnetic clasp is a unique addition

What needs to be improved

  • strap takes a bit of fiddling to lay straight
  • pretty expensive for such a small bag

Final thoughts

Bellroy’s diminutive Sling satchel is up to the task of carrying your essential items in any setting, helping you leave your large, bulky backpack at home. However, it could be a little too small and little too expensive for some.

Price: $99 with free shipping
Where to buy: You can pick up your own Bellroy Sling in four different colors on their website.
Source: The sample of this product was provided by Bellroy.

Filed in categories: Reviews

Tagged:

Bellroy Sling Shoulder Bag review originally appeared on The Gadgeteer on June 10, 2019 at 9:00 am.

Note: If you are subscribed to this feed through FeedBurner, please switch to our native feed URL http://the-gadgeteer.com/feed/ in order to ensure continuous delivery.
Cheerble Wicked Ball pet toy review

REVIEW – Cheerble Wicked Ball is a “smart toy” aimed at keeping your pet active and engaged, especially when you’re not home.

What is it?

With three different activity level settings and a spot to stash treats, this pet toy alternates between play and rest mode to entertain your dog or cat for hours with built-in breaks.

What’s in the box?

Mine arrived only with the ball itself in heavy-duty bubble wrap. However, the web site says it should have come with:

  • The ball
  • An instruction manual
  • USB charger

My instruction manual and charger may have been missing because I received a review sample. However, it wasn’t a problem because the Wicked Ball Web site has extensive instructions, including videos.

And I was able to easily charge it with my Kindle charger.

Hardware specs

  • Sensor: 6-axis MEMS
  • Processor: ARM Cortex-MO
  • Material: Polycarbonate and TPU
  • Motor: High-Torque DC
  • Charging time: 1 hour
  • Battery Life: Up to 8 hours, depending on mode/activity level
  • Model: C1801
  • Weight: 200 grams
  • Dimensions: 77mm/3 inches across
  • Battery: 3.7v 300mAh
  • Operating Temperature: 0-40 C / 32-104 F

Design and features

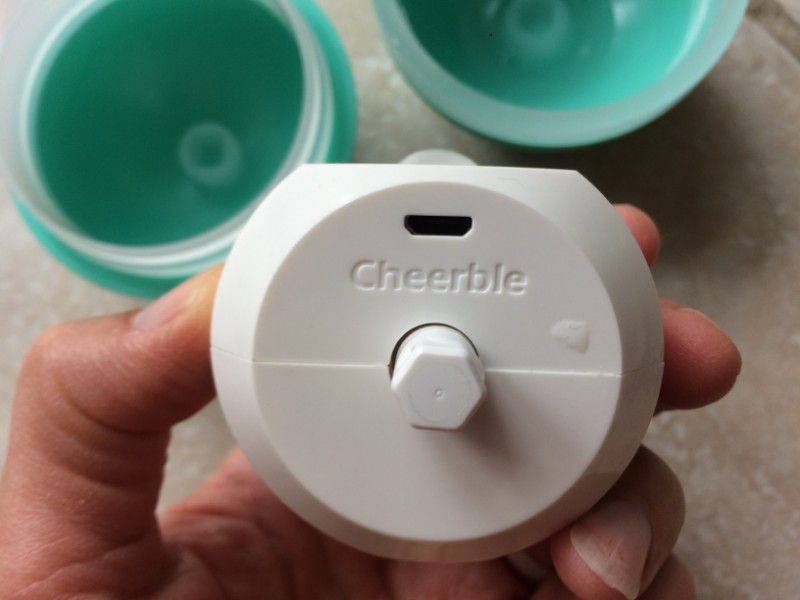
First, you need to unscrew the outer shell in order to reach the power center that controls the toy. This is also where you find the charging port.

Setup

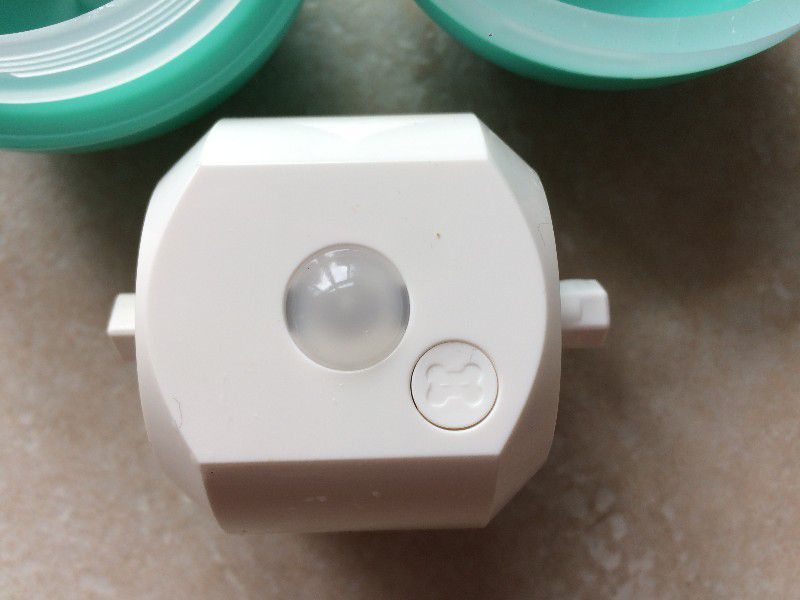
It’s pretty simple to set up. To turn it on, you press the little dog-bone button for 3 seconds. Then you hold down the button to select your mode. As you press it, it will switch from green (gentle) to blue (normal) to purple (active). Just leave it on your preferred color/mode selection.

Also, rest assured that it won’t start twitching and vibrating until you’ve safely screwed the outer shell back together.

Performance

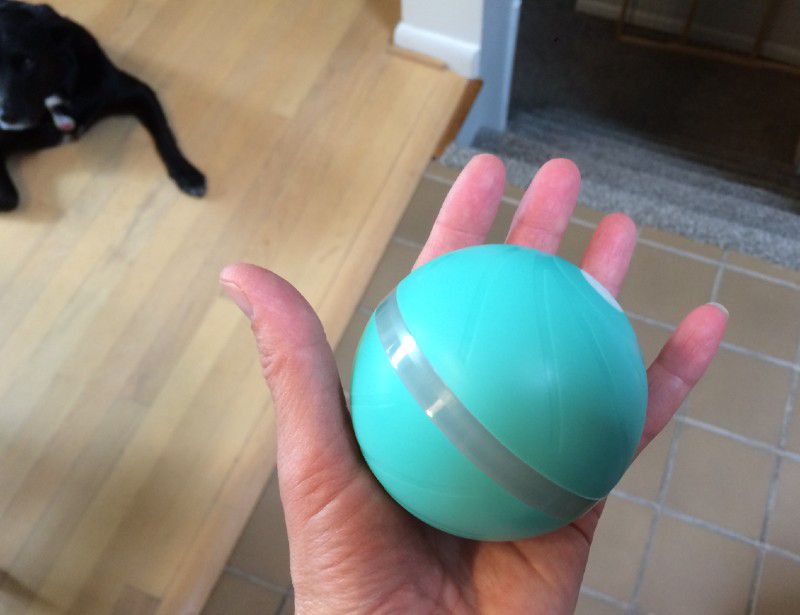
I was surprised at how turbulent even the most gentle mode was. Because of this, I’d suggest starting on green and then deciding if your dog wants more. With its wild movements, I wasn’t comfortable with the Wicked Ball gyrating across my new bamboo floors or around my antique furniture. I know it has sensors, but even so, I’m very protective of our family heirlooms, and it just wasn’t worth the risk. For my own piece of mind, I kept it in our carpeted lower-level.

The sensors did a good job of preventing the ball from getting wedged in tight spaces. My dog has a different (non-motorized) ball that releases treats but it’s forever getting jammed in awkward corners and under the couch.

I love the concept of entertaining a lonely dog, but in all honesty, my own canine companion didn’t much care for it as a toy. (We found another valuable use for it, but more on that later). My dog isn’t afraid of the ball. She just has no interest. Maybe my house full of boys and their friends has desensitized her to lights and motion. Maybe it’s her robot-vacuum pal, Rosie. But sadly, the Wicked Ball simply didn’t engage my own pup. Chasing chipmunks and bunnies in the backyard is more her jam.

The Web site claims “lazy dogs” could be lured by sticking treats in the inner-shell. My dog isn’t lazy, in fact, she’s very active. Regardless, even stuffing it with her favorite goodies wasn’t enough to entice her.

Since my dog wasn’t cooperating, I had a friend test the Wicked Ball on her Jack Russell Terrier. He had the same reaction: Not interested.

As I mentioned earlier, we did find another important use for the Wicked Ball that turned out to be just as valuable to us as entertaining our puppy girl. It helped distract her when she was having an episode of separation anxiety. We’re working through her anxiety with several treatments and vet supervision. However, at her worst moments, my pup fixates on our backdoor, where she’s scratched the heck out of the doorframe, hurt her teeth by repeatedly biting the door handle, and has even dug up the carpet and metal doorframe. And that’s where the Wicked Ball saved us! We keep it by the backdoor when we leave, and we’ve seen on our security camera that when puppy starts to approach the door (where we now keep the Wicked Ball), the toy’s jerking motion is just enough to break her focus, which prevents total panic mode from taking over.

What I like

  • Easy to us
  • Keeps my dog distracted

What needs to be improved

  • Suggest a lower setting option
  • Perhaps a treat-release feature or something similar to entice uninterested pets

Final thoughts

The Wicked Ball is easy to use and a sound concept. How your pet will react and engage with it is very much dependent on your individual dog or cat.

Price: $34 for one Wicked Ball/ $89 for a three-ball set (Cat-specific version and cat/dog combo packs are also available)
Where to buy: Indiegogo Indemand
Source: The sample of this product was provided by Cheerble.

Filed in categories: Reviews

Tagged:

Cheerble Wicked Ball pet toy review originally appeared on The Gadgeteer on June 9, 2019 at 11:00 am.

Note: If you are subscribed to this feed through FeedBurner, please switch to our native feed URL http://the-gadgeteer.com/feed/ in order to ensure continuous delivery.

Soundcast VG5 weather resistant Bluetooth speaker review

REVIEW – Recently I reviewed the Bunktrunk footlocker for my daughter.  It came with a cute, little Bluetooth speaker about which I wrote, “It may not be loud enough to fill my house with sound, but it will be plenty loud in a dorm room.”  Looking back, I think this is how I thought about all Bluetooth speakers.  They are nice, and they are cute, but there’s nothing earth-shattering about their sound.  And then a box from Soundcast arrived, and my perspective has changed.

What is it?

The VG5 is a large, portable Bluetooth speaker intended for outdoor use.  It’s very little about quiet, introspective moments alone, but very much about thumping, rocking parties with your friends!

What’s in the box?

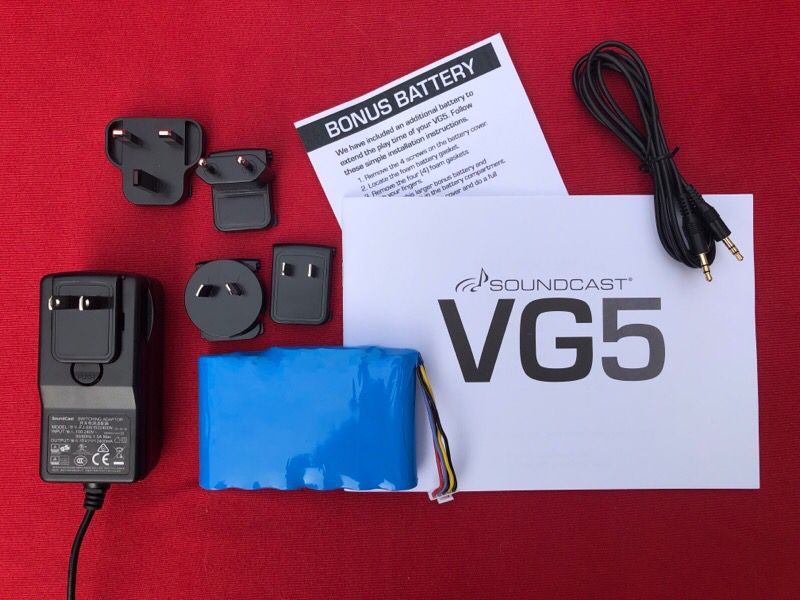
  • The speaker
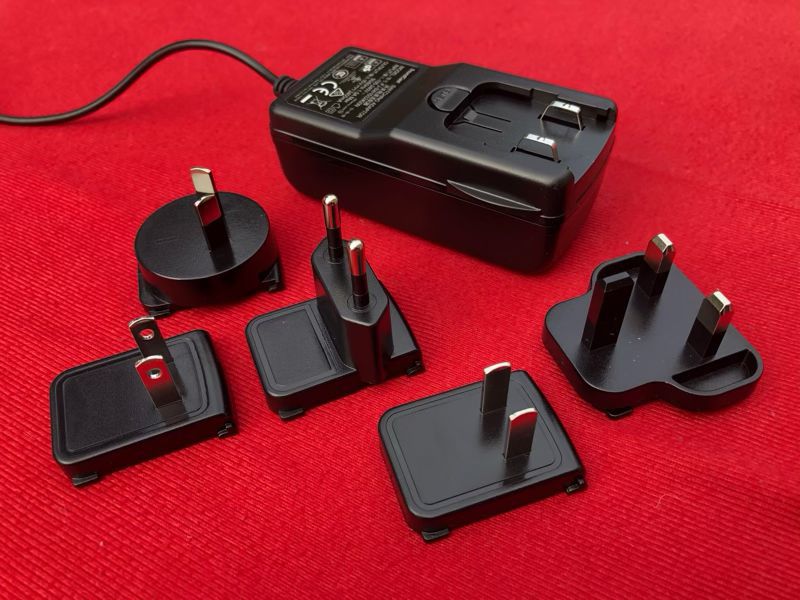
  • A wall charger with 5 outlet adapters
  • Two battery packs, one smaller and one larger
  • 3.5 mm audio cable
  • An instruction manual with 3 pages of English instructions

Hardware specs

  • One 6″ long-throw woofer, two 3″ full-range drivers
  • 50-watt bi-amp amplifier
  • Rechargeable internal battery pack
  • Bluetooth 4.2 and Qualcomm® TrueWireless™ Stereo
  • Capacitive touch keypad

Design and features

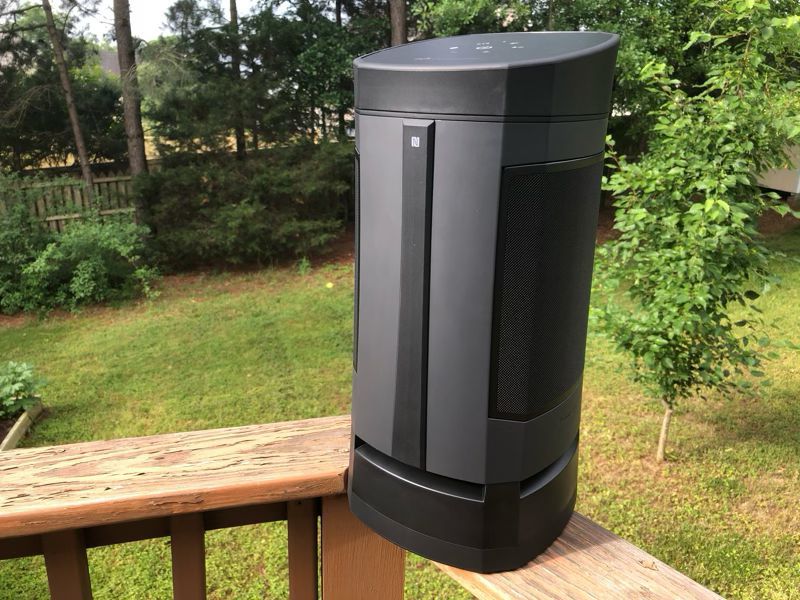
When the box first arrived, I didn’t know what it was.  It was so huge!  It took me a second to realize that this was a Bluetooth speaker.  Pulling it out of the box did nothing to diminish its massive size.  The VG5 is 17 inches tall and weighs over 11 pounds; it even comes with a built-in handle for carrying, a feature that is very much needed.

Installation and setup

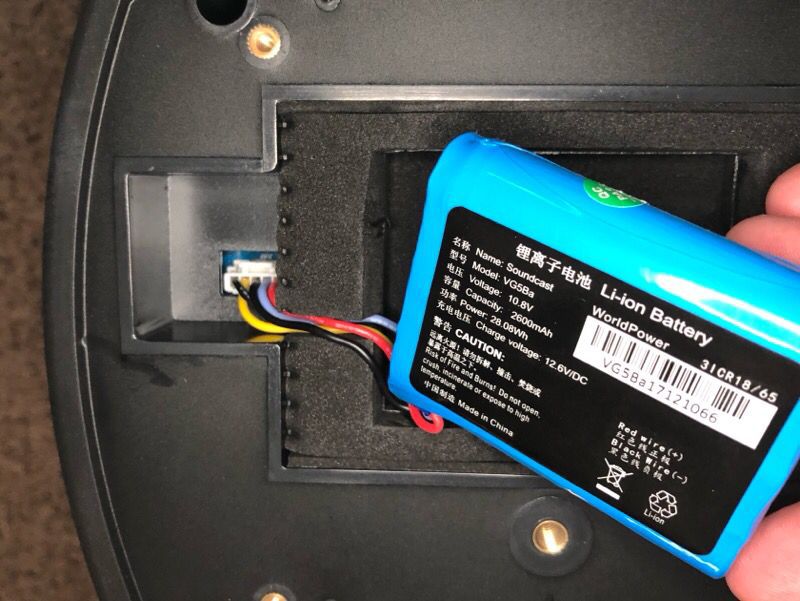
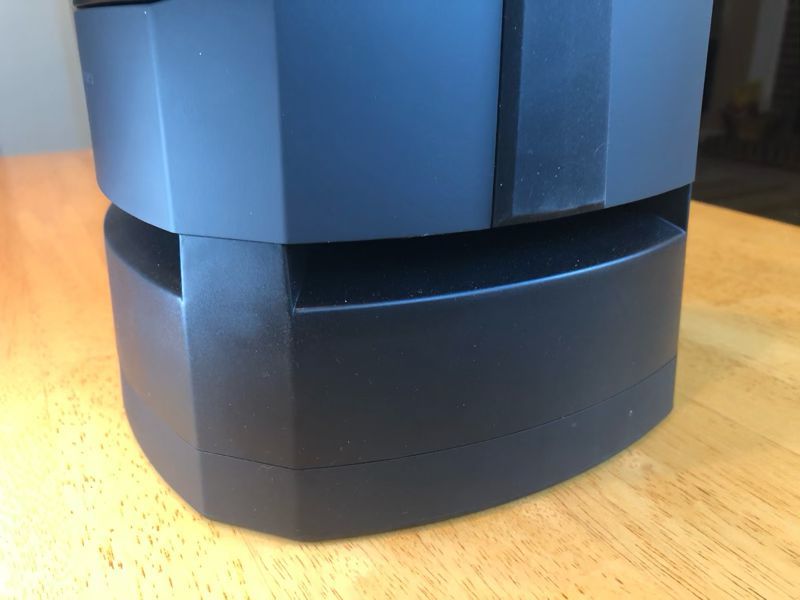
The first step in the setup process was to install a battery.  I unscrewed a panel on the base—this requires a medium-sized Philips screwdriver, which is not included—plugged in one of the battery packs, and then tucked in the wires.

The second step was to select the appropriate wall adapter and put in into the wall charger.  I used the typical North America adapter, but it’s pretty cool that the VG5 is ready for wherever you want to take it, whether nationally or internationally.

The third step was to plug it into the wall and just let it charge.  The manual recommends that you give it 5 hours, so I let it charge for the full duration.

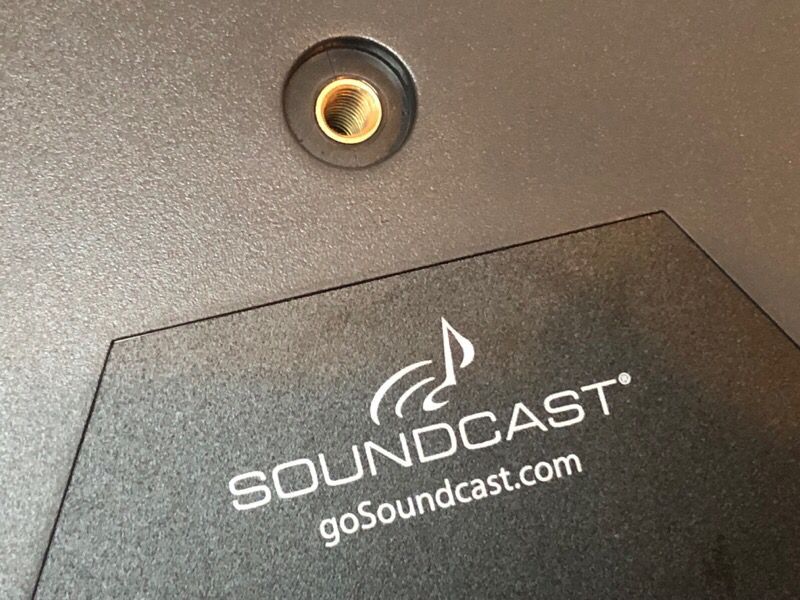
One interesting item of note is this threaded hole in the bottom of the speaker.  I couldn’t find any explanation for it on the manual or Soundcast’s website.  It looks a lot like the mount point on the bottom of my DSLR camera, so I’m going to assume that this is for mounting the speaker onto a tripod.  If you plan to do this, make sure you get a hefty tripod.

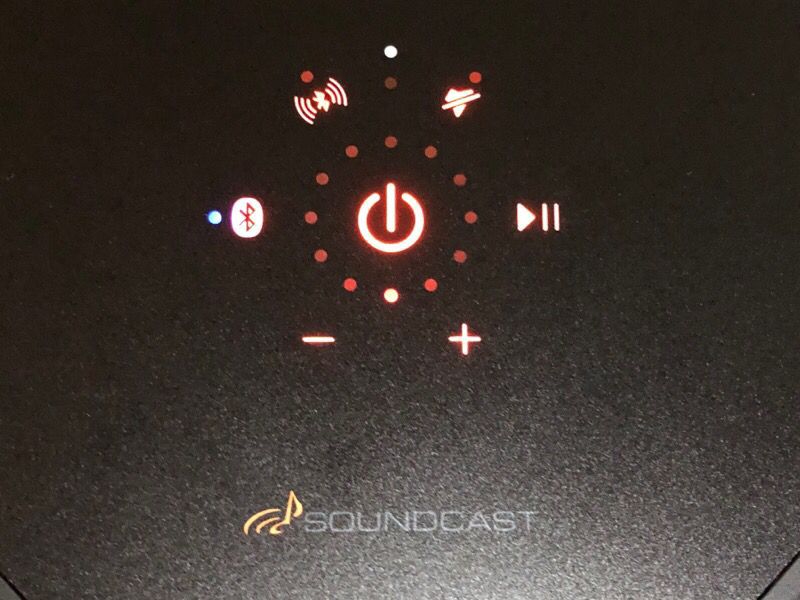
The final setup step was to connect the VG5 to a music source.  Although it comes with an audio cable for a wired connection, I chose to use Bluetooth and pair it to my iPhone, which was easy to do.  I simply turned the speaker on, pressed the Bluetooth icon, enabled Bluetooth on my phone, and then selected “VG5 by SoundCast” from the menu.

Performance

The main question is certainly, “How does it sound?”  Unsurprisingly, it sounds loud!  The VG5 can put out a lot of volume.  When I first turned it on and played a rocking song, it shook the kitchen table!  When I took it outside, it shook the porch!  When I put it out in the garage, I could still hear the bass thumping from my living room.  Much of this can be attributed to its 6″ long-throw woofer that can really move some air.  When I put my hands in front of the 4 openings along the bottom, I can feel the air it’s pushing.

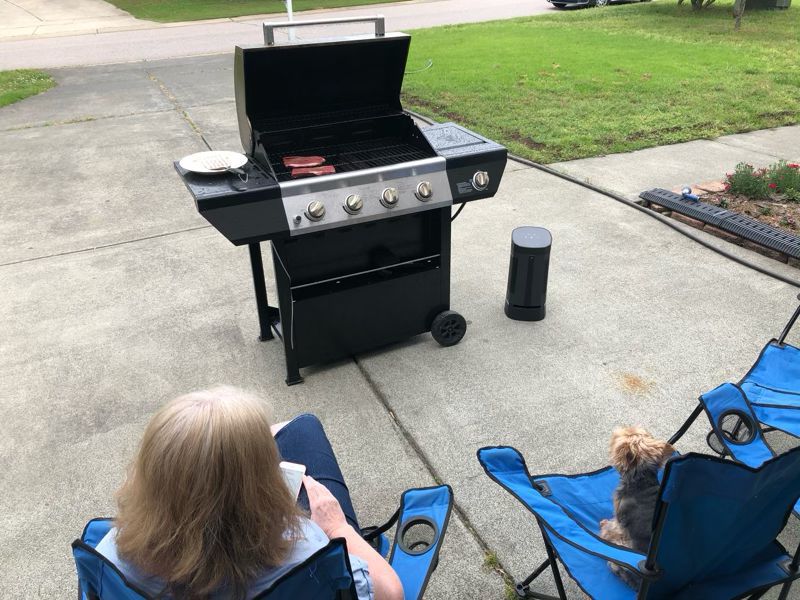
As this is an outdoor speaker, I took it outside every chance I got, washing the car, grilling steaks for dinner, woodworking in the garage, and enjoying homemade ice cream on the back porch.  I was never disappointed by the amount of sound.

The quality of the sound is, perhaps, a little bit of a different story.  Overall, the sound is very good.  The mids are solid, and the highs are clear; however, as one might expect for an outdoor, party speaker, Soundcast has cranked the bass on the VG5 way up.  This results in a sound that “thumps you good” but tends to be muddy and distorted.  I listened to a variety of music genres, and the distortion is most noticeable with techno/electronica, pop, rock, or anything with a pulsing beat and a heavy bass.  Just to make sure that I wasn’t imagining the excessive bass, I listened to the same music in my Mustang, cranked up to ear-splitting levels.  It sounded very different; the bass was present, but not overpowering.  There’s no doubt that the VG5 significantly alters the sound of your music.  Whether or not you consider this to be a good thing is largely dependent upon your personal tastes.  If you’re an audiophile or a musical purist, you probably won’t care for this speaker.  If, however, you just want to party, I think you will absolutely love this design choice.  Go ahead and drop the beat!  Personally, I wish that Soundcast had added an equalizer or a few presets for various music genres; this would make it more flexible by accommodating a variety of musical tastes.

The VG5 comes with a pair of rechargeable, lithium-ion battery packs.  At first glance, it’s not obvious why there are two packs.  The manual only mentions the smaller one, and the larger one comes with a slip of paper saying that it’s a bonus battery.  The Gadgeteer did confirm that everyone gets two batteries; it’s not a perk for reviewers.  The manual says that the play time varies depending upon the volume, so I ran a couple of tests to see how long the battery packs last.  On one-fourth volume, the smaller pack lasted 5.5 hours with continuous play over Bluetooth and the larger pack lasted 10 hours.  The Amazon website says it should last 10 hours, so my guess is that Soundcast added the larger pack because the smaller one wasn’t lasting long enough.  Whatever the reason, hey, it’s a free battery and a welcome addition!  If you’re going to spend all day at the beach, start with the larger battery and bring the smaller one (and a screwdriver) for a spare.

I’m really glad that Soundcast designed the VG5’s battery pack to be replaced; however, this feature is only helpful if you can procure another pack once you wear out the ones that come with it.  Unfortunately, Soundcast does not appear to sell spare packs for the VG5; there’s no mention of them on the Soundcast website (though they do sell them for the VG7) or on Amazon.  I sent a request to Soundcast via their contact page, asking where I could purchase a spare battery pack.  The replies that I got were prompt and courteous but didn’t actually answer my question.  Unless Soundcast clarifies, I can only assume that there’s no way to purchase a replacement battery pack; that’s a tough pill to swallow for a speaker that costs $400.  Hopefully, Soundcast will fix this soon by offering the larger size battery packs on their website.

Extra Features

Soundcast’s website notes that the VG5 has a “weather-resistant exterior.”  Looking on the bottom of the speaker, I found that it has an IP64 rating.  This means that it provides complete protection against dust and is protected from water that is splashed against it.  Feel free to take this speaker to the beach, onto your boat, or to the pool; just don’t throw it in!

The VG5 doesn’t really have any buttons in the traditional sense; instead, it has what Soundcast calls a “capacitive touch interface.”  This means that I simply have to touch the surface in order to activate a feature.  It’s a slick-looking interface and undoubtedly contributes to its IP64 rating.  It does take a bit of getting used to, as you have touch and hold the interface for a couple of seconds in order to activate each feature.

The VG5 supports NFC, so if your mobile device also supports it, you can just put it near the top of the speaker and it should instantly sync.  The good news is that NFC takes less power than Bluetooth; the bad news is that it has a very short range (about 4 inches), so you’ll need to leave your mobile device on top of the VG5.

If you want even more volume, you can buy a second VG5 and pair them together using Qualcomm’s TrueWireless Stereo (TWS) pairing.  This allows one VG5 to connect to a mobile source and to another VG5, effectively doubling the sound.  Additionally, you can configure them so that one VG5 acts as a left speaker and the other as a right, thus giving you true stereo sound.

The VG5 also has a couple of lock features that prevent “un-intended or accidental operation.”  I suppose if your party is getting a bit too crazy, or if you have mischievous friends (or little kids), this might help keep the music going without interruptions.

What I like

  • Booming sound
  • Easy Bluetooth connectivity

What needs to be improved

  • An equalizer or some presets
  • The option to purchase additional battery packs

Final thoughts

I like this speaker.  I really like it.  I listen to it all the time.  It has completely opened my eyes (or my ears?) to what is possible with a portable, Bluetooth speaker.  Summer is here; it’s the right time of year for pool parties, grilling burgers, and picnicking at the park.  Whatever your plans are, the Soundcast VG5 is a great choice for filling your event with loud, thumping music.

Price: $399.97
Where to buy: Amazon

Source: The sample for this review was provided by Soundcast.

Filed in categories: Reviews

Tagged:

Soundcast VG5 weather resistant Bluetooth speaker review originally appeared on The Gadgeteer on June 9, 2019 at 10:00 am.

Note: If you are subscribed to this feed through FeedBurner, please switch to our native feed URL http://the-gadgeteer.com/feed/ in order to ensure continuous delivery.
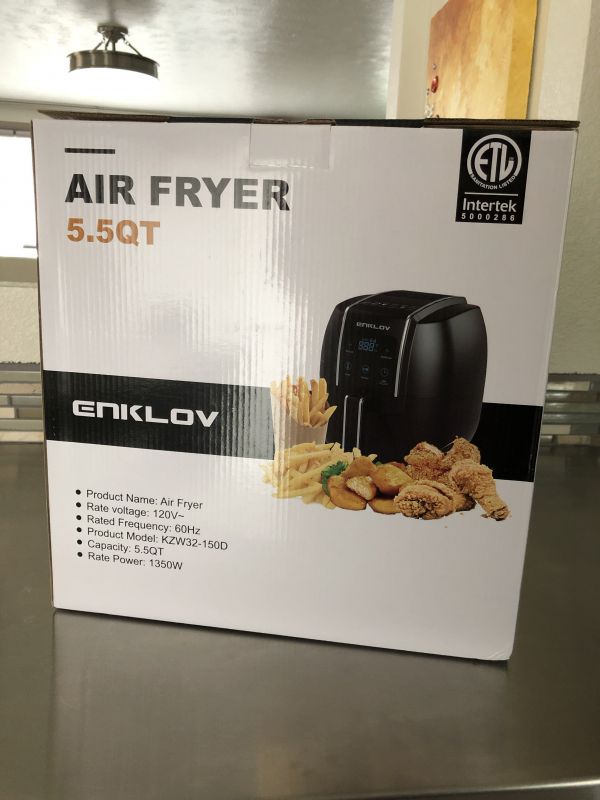
Enklov Air Fryer review

REVIEW – You’re not going to find a bigger fan of fried food than this writer. Growing up, I regularly attended the Houston Livestock Show and Rodeo, which is famous for having booths of fried food including twinkies, snickers and oreos. Needless to say I’ve consumed my fair share of fried goods. I’ve been intrigued about air fryers for a while, as I get older and my cholesterol levels require me to cut back on the deep fried goodies. So I got the chance to review the Enklov 5.5 quart XL Air Fryer and let me tell you: this one might be a life saver!

What is it?

The Enklov air fryer is a cooking device that allows you to “fry” food by using heated air instead of submersion in grease.

What’s in the box?

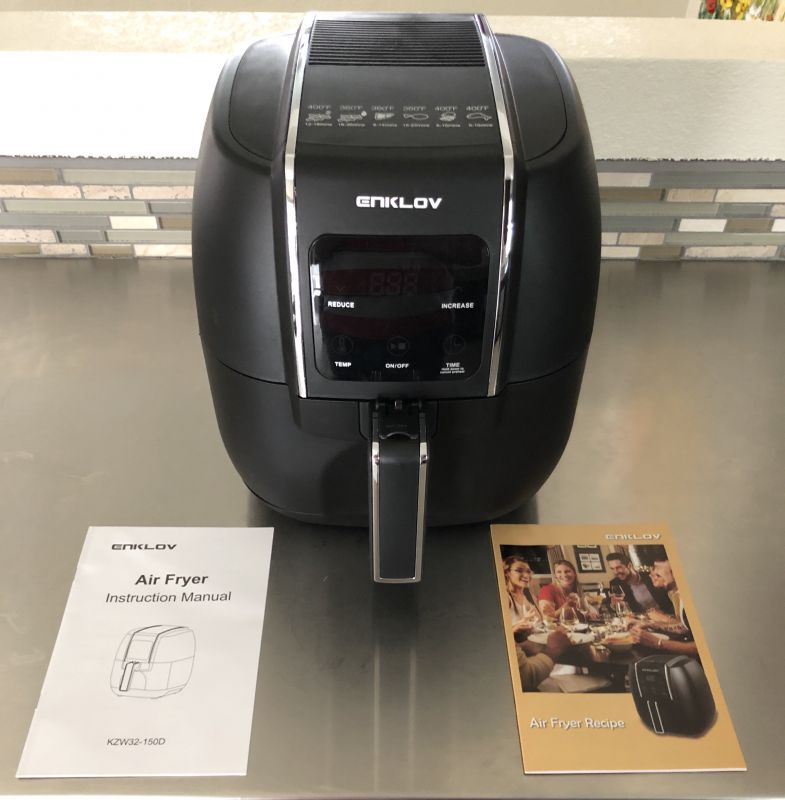
  • Air Fryer with removable basket
  • Instruction Book
  • Recipe Book

Design and features

The Enklov air fryer has a sleek black matte design, with a pull out basket that further disassembles for cleaning. Touch controls on the front panel allow you to adjust the temperature, set a timer and turn it on and off. The actual operation is fairly simple, set the temp to allow it to preheat, then put the food in the basket and set the timer. Many of the recipes and food types require you to either shake the basket, turn the food over or adjust it within the basket half way through cooking to ensure it doesn’t stick to the basket and that it cooks evenly.

Setup

Setting up the air fryer couldn’t be easier, it’s ready to go out of the box – simply plug it in, set it and start cooking.

Performance

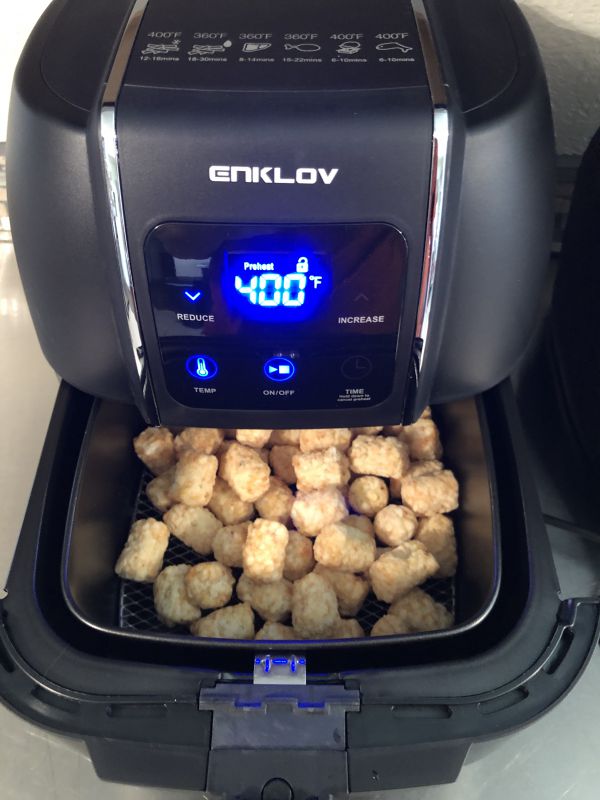
We have tried multiple recipes and cooked a variety of types of food in the fryer. Here is a before and after of your standard fare tater tots:

The tots went in frozen at 400 degrees and after a shake half way through they came out perfectly brown and crispy. In fact, we absolutely loved the way they came out. Unlike when baked, they were not mushy on the inside and they kept the crispness until eaten. Definitely our new favorite way to cook tater tots, fries, and sweet potato fries.

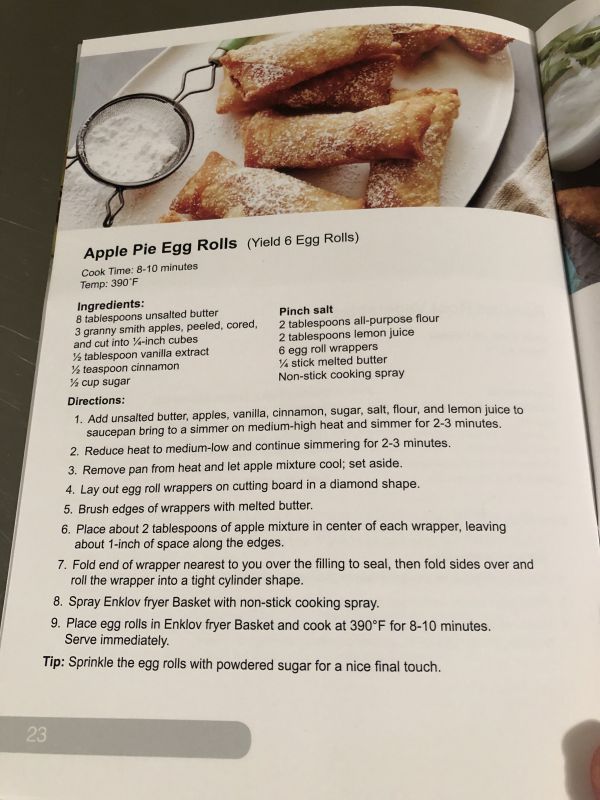
Next, we tried a recipe for apple pie egg rolls:

You may be able to tell, they didn’t quite come out as pretty as the picture in the recipe guide, however they were still very tasty and definitely a healthier option than a deep fried apple pie. In the few weeks we’ve had the fryer, we have tried the fries mentioned above, the pies, as well as fried apricot glazed chicken, fried tofu, fish sticks and surprisingly we used the fryer to reheat pizza. The pizza came out especially well and using the fryer will be the only way I reheat pizza ever again. The cheese is reheated to a perfect gooey texture while also keeping the crust with some crispness. I always hated putting pizza in the microwave to reheat and now I won’t do it again.

What I like

  • Great crispness and texture on cooking frozen food compared to other cooking methods
  • Easy to set timer and temp, cook food and prep
  • Faster to preheat than an oven or cooking oil
  • Less greasy and oily food – healthier cooking overall.

What needs to be improved

  • When the drawer is open after preheating or when adjusting the food, there is a VERY loud repetitive beeping – this could be toned down a bit.
  • In cleaning the basket the bottom grill is rather difficult to get clean during hand washing, this can be rather labor intensive depending on how messy the food is that was being cooked. For most basic frozen foods, it’s not bad but the apple pie egg rolls for instance took quite a bit of time to clean with all the gooey overrun.

Final thoughts

Overall, this unit has me wishing I had invested in an air fryer a long time ago! It’s a great cooker, easy to use and fast to cook our meals. It has a wide variety of uses, recipes and will be a highly used item in our kitchen. I think it’s a quality device at a great price. I love that it gives us a healthier option for cooking foods like french fries and tater tots as well. I definitely recommend the Enklov Air Fryer.

Price: $89.98
Where to buy: Amazon
Source: The sample of this product was provided by Enklov.

Filed in categories: Reviews

Tagged: , ,

Enklov Air Fryer review originally appeared on The Gadgeteer on June 9, 2019 at 9:00 am.

Note: If you are subscribed to this feed through FeedBurner, please switch to our native feed URL http://the-gadgeteer.com/feed/ in order to ensure continuous delivery.