Letscom Fitness Tracker (ID115PlusHR) review

REVIEW – The Centers for Disease Control and Prevention (CDC) recommend that American adults engage in at least 150 minutes of moderate exercise each week.  This roughly translates into taking 10,000 steps a day.  The Mayo Clinic, however, estimates that the average American only walks 3,000 to 4,000 steps a day, far short of what is healthy.  My wife agreed to test Letscom’s Fitness Tracker as part of her efforts to get to that 10,000-step level.  Is this the right gadget for the job?  Read on to find out.

What is it?

It is a fitness gadget worn on the wrist that tracks exercise and sleep patterns, monitors heart rate, and provides alerts and alarms.

What’s in the box?

  • The tracker with associated wrist band
  • A quick start guide
  • A manual with 18 pages of English instruction (in a very, very small font)

Hardware specs

  • IP67
  • GPS connection for tracking exercise routes and locations
  • Bluetooth 4.0 for connecting to mobile app
  • OLED screen (not a touch screen)
  • USB charging
  • Lithium battery that should run 5 to 10 days on a charge
  • Charging time is 1-2 hours

Design and features

My wife has been wearing this gadget for 3 weeks non-stop, except when she showers or when it needs charging.  She’s utilized the majority of its features and has a good appreciation of its capabilities.  Here’s what she found.

Installation and setup

The fitness tracker comes in three pieces:  The tracker itself and the 2 halves of the watch band.  The tracker is approximately 1.5 inches long and ¾ of an inch wide and has connectors for the wrist band on the top and the bottom.

When flipped over, you can see that one of the connectors is used for charging, and that there’s a monitor that will be against the skin.

The first step in the installation process is to charge the tracker for at least 2 hours, which my wife did by connecting it to our Anker USB charging station.  When you plug it in, you have to make sure that the little red light comes on, otherwise, it won’t actually charge.

The second step is to attach the watch band.  Make sure that “bottom” side, the one with the little button, connects to the band with the holes and the “top” side connects to the band with the buckle.

The third and final step is to download the mobile app.  There are a pair of QR codes in the manual, one for iOS and one for Android.  For iOS, this takes you to the VeryFitPro app, which is a free download.

Fitness Tracker Modes

The fitness tracker has 7 modes, each with its own unique screen.  You can cycle through the modes by pressing the button.  The screen is not a touch screen, so the only interaction is via the one button.

The main screen shows the time, like a watch.  It can be configured to show the date, battery status, Bluetooth status, or the steps taken today.

Step mode shows how many steps have been taken today, how many miles have been walked, how many minutes have been active (including walking), and how many calories have been consumed.

Heart rate mode measures the current beats per minute (BPM).

Alarm mode displays your next alarm and allows you to disable it.  New alarms can only be set via the mobile app.  (And yes, my wife’s next alarm is for 4:30am.  She gets up way too early to teach ESL to international students.)

Walk mode allows you to track the steps taken and time spent on a specific walk.  You use the button to tell the tracker when you stop and start your walk.  It will also monitor your heart rate while walking.  Although my wife didn’t test the run and bike modes, she assumes they offer similar capabilities to the walk mode.

The tracker’s interface is as simple as it gets.  This makes it easy to move between the modes and use them as necessary.  The more advanced functionality comes through the tracker’s interaction with the mobile app.

The only downside to the tracker is that the process of monitoring the heart rate involves the use of a rather bright green strobing light.  During the day, this is not noticeable; but if you’re a light sleeper, as I am, this can wake you up at night.

VeryFitPro mobile app

Letscom has created a mobile app that works with the fitness tracker by providing better visualization and long-term storage of the fitness data.  To use the mobile app, my wife first paired it with the tracker.  She made sure Bluetooth was enabled on her phone, then she opened the app, selected the Device button, chose Bind Device, and then selected “ID115Plus HR” from the list of devices.  Whenever she wants to sync the data in the tracker with the app, she simply has to “swipe down” on the main page when her phone is near the tracker.

The bottom of the mobile app has 5 buttons:  Mainpage, Details, Device, User, and a giant orange plus.  The Mainpage button shows the main page, which is a fairly detailed visualization of all activities that have been completed so far today.  For example, it lists the steps taken, calories burned, and time spent in an activity.

If you click on the Sleep tab, it shows how long you slept, and if you touch the number of hours, then it shows your sleep patterns for the previous night.

The Details button depicts overviews for today, this week, this month, and this year.  If you swipe to the right on any of these screens, you can see previous days, weeks, months, and years.

The Device button specifies how the mobile app interacts with the fitness tracker.  For example, it can set alerts when your phone gets a call or a text or when you’ve been stationary too long.  When your phone receives a call, it briefly displays the phone number or contact name on the trackers.  When it receives a text (or a private message from apps like Facebook, Instagram, and WeChat), it briefly displays the text on the tracker.

The User button sets a variety of information about you, the user of the tracker, such as the number of steps you hope to walk in a day, and your preferences, such as imperial vs metric units.  It’s worth noting that the Third Party Program features allows you to send information to the Apple Health app on your iPhone, if you have one.

The giant orange plus button functions like a pop-up menu that brings up three more menu choices.  The first choice is used to record runs, walks, hikes, and rides, if you don’t have your fitness tracker with you.  The second choice is used to record a variety of different activities, such as yoga, badminton, and mountain climbing.  The third choice is used to record your weight.

In general, my wife really likes the mobile app.  She finds that the main screen is helpful for getting a quick overview about how she’s progressing during the day.  She also finds the various charts and graphs to be informative.

She also discovered three problems.  One, the sedentary alert sometimes goes off right after she finishes walking.  Two, the sleep monitor doesn’t record afternoon naps as sleeping.  Three, messages from her phone are displayed too briefly, and there’s no way to go back and read them again.  In general, these are fairly minor problems that don’t detract much from the quality of the mobile app.  (Although it did leave her wondering if it’s worth paying more for a more powerful gadget, like an Apple Watch.)

Extra Features

To recharge the battery, my wife has to pull off the lower half of the band.  The first time she tried to pull it off, she couldn’t, as it was so tight.  She asked for me to help, and it still took me over 2 minutes to get it off.  Over time, however, this has become easier, as the band has loosened up.  I am concerned that if this process continues, it will eventually become so loose that it won’t stay on the tracker.  I wish that Letscom has designed an alternate mechanism for attaching and detaching the band or a completely different mechanism for charging.  Although the battery is rechargeable, the manual notes that it is not replaceable.

The tracker that my wife tested was black, but it also comes in blue, purple, red, green, and pink.

Warnings

While reading the manual, I came across several scary (and slightly humorous) statements:

  • “The device, accessories, heart rate monitor, and related data are intended only to be used for recreational purposes and not for medical purposes.”
  • “The heart rate readings are for reference only, and no responsibility is accepted for the consequences of any erroneous readings.”
  • “While the optical write heart rate monitor technology typically provides the best estimate of a user’s heart rate, there are inherent limitations with the technology that may cause some of the heart rate reading to be inaccurate.”

When considering fitness trackers, including Letscom’s, keep in mind that these devices typically are not considered to be medical devices, as they are not approved by the FDA.  They can be helpful in estimating your health, but they are not guaranteed to be accurate.  If you have a medical or heart condition, you will probably want to look at a different category of gadgets.

What I like

  • Price is right
  • Easy to use
  • Successfully keeps my wife more aware of her activities (or lack thereof)
  • Mobile app is easy to use and does a great job of keeping and displaying data

What I’d change

  • Better charging mechanism
  • More options for viewing alerts/alarms

Final thoughts

While there may be fancier fitness trackers on the market, Letscom’s Fitness Tracker is perfect for health-conscious people who are either trying out their first tracker or who don’t want to pay premium prices.  It does everything that a fitness tracker needs to do (and more), and its mobile app provides lots of extra functionality.  If you are in the market for a tracker, my wife recommends that you take a look at this one (and so do I).

Price: $28.99
Where to buy:  Amazon
Source: The sample for this review was provided by Letscom.

Filed in categories: Reviews

Tagged: ,

Letscom Fitness Tracker (ID115PlusHR) review originally appeared on The Gadgeteer on June 23, 2019 at 8:41 am.

Note: If you are subscribed to this feed through FeedBurner, please switch to our native feed URL http://the-gadgeteer.com/feed/ in order to ensure continuous delivery.

Lanmodo Car Night Vision Camera review


REVIEW – I live in the frozen tundra of Upstate New York among all manner of wildlife and long winter nights. I personally have had many close encounters of the furry kind, some of which resulted in coughing up my insurance deductible. I was eager to give Lanmodo’s Night Vision Safe Driving Assistant a try to see if it could improve my road safety.

What is it?

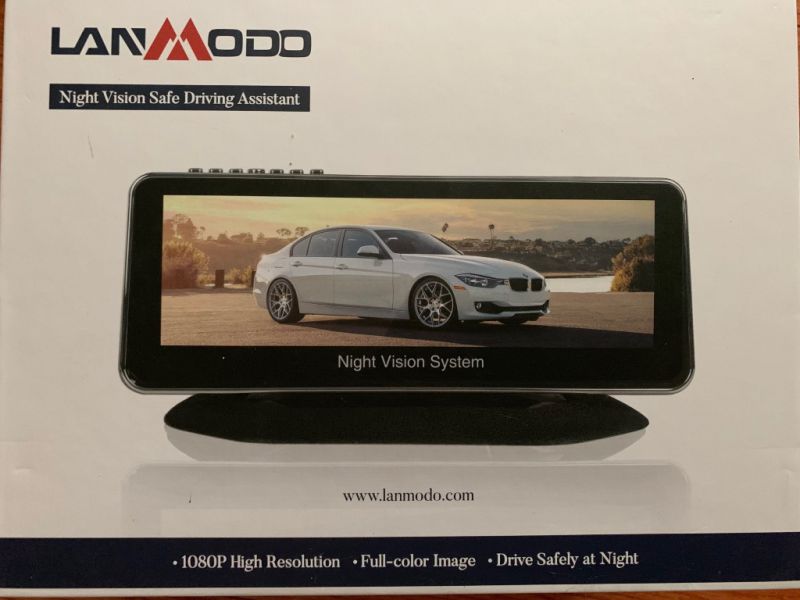
The Lanmodo Night Vision Safe Driving Assistant is a self-contained high-sensitivity night vision camera and monitor for your car that provides an enhanced visibility view of the oncoming road.

What’s in the box?

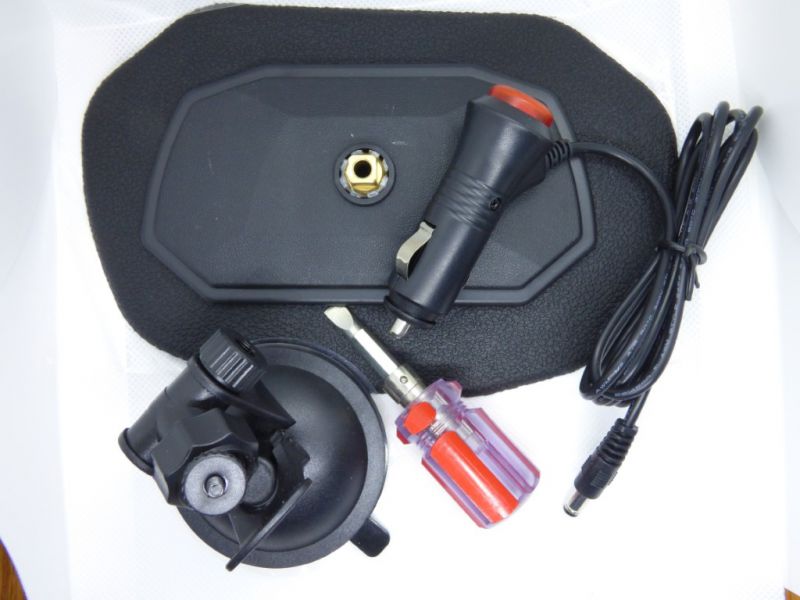
  • Camera and display unit
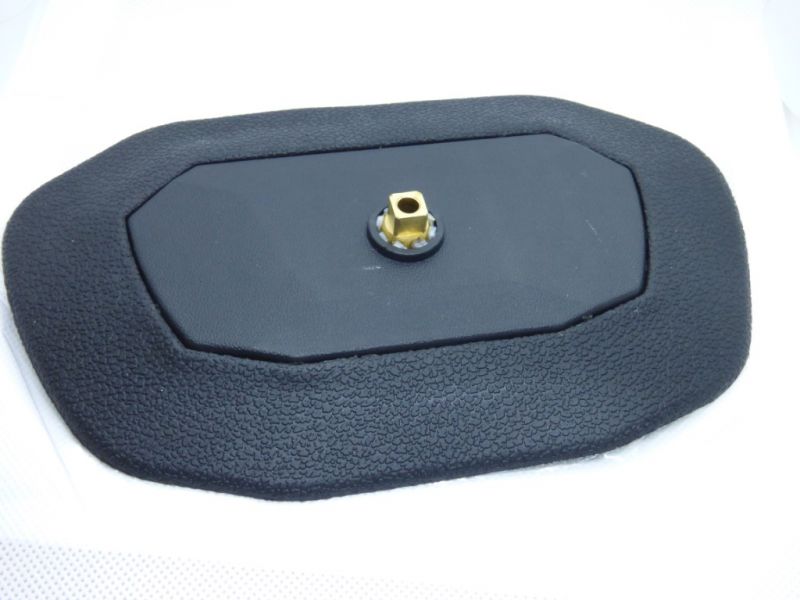
  • Weighted base
  • Suction base
  • Screwdriver
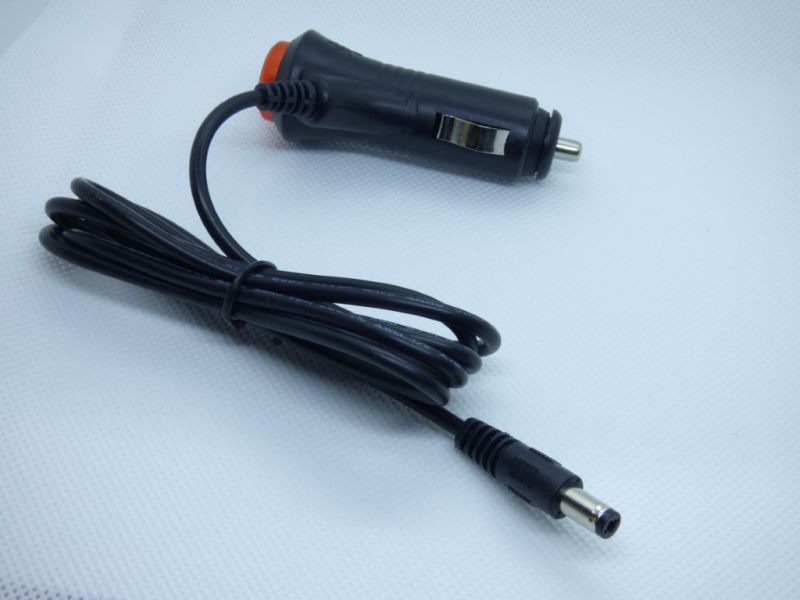
  • Lighter plug power cord
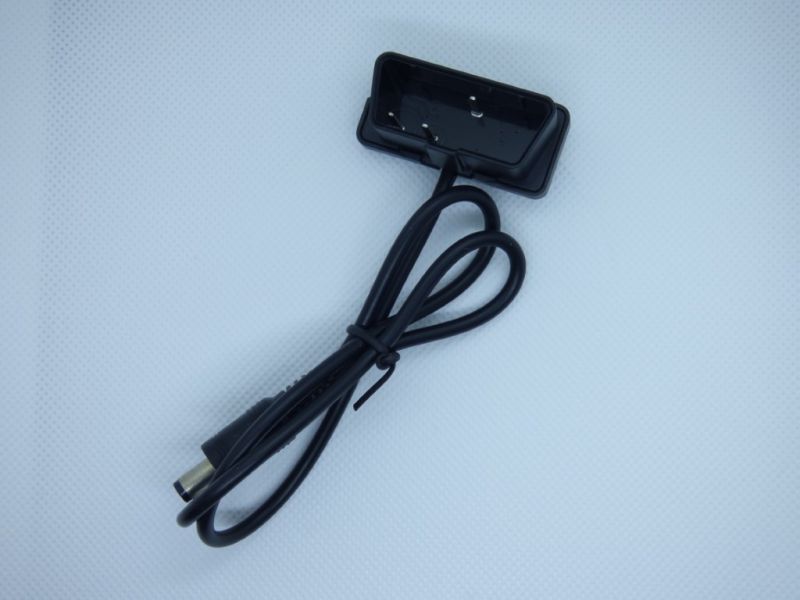
  • OBD2 port power cord
  • Instruction manual
  • Optional rear-view camera

Hardware specs

  • Original SONY MCCD photosensitive chip
  • 28MM 7G full glass HD optical lens
  • Minimum illumination 0.0001 Lux
  • Full-color HWDR processing technology
  • Near-infrared night vision imaging
  • LVDS digital HD decoding
  • IPS 8.2 inch  display’ 1920P*1080P’ 30 FPS
  • DC12-24V 1500MA
  • -20°C ~ 80°C operating temperature

Design and Features

Setup:

The equipment arrives in a very “iPhone-ish” box nested in comfy foam. The fit of the box was so tight it was a challenge to open. If the rest of the tolerances are as tight, this was going to be an interesting review.

Setup is relatively simple – choose the mounting base and attach the holding screw, fasten the base to the dashboard or windshield, plug in the power and wait for dark.

The kits arrived with the options for powering from the OBD2 car diagnostic port or cigarette lighter socket. Should your cigarette lighter be powered even when the car is off, Lanmodo integrated a pushbutton switch into the lighter plug, a welcome addition.

Performance

The first thing I noticed was the mounting bases. The non-slip mat might work on smoother surfaces, but I could not get it to stay in one position on my textured dash. I tried the suction cup glass mount, but could not find a location that would give me access to the controls, but not cause the display to obstruct too much of my view of the road. For testing, I used the non-slip mat and put the camera on the dash in front of the driver’s seat.

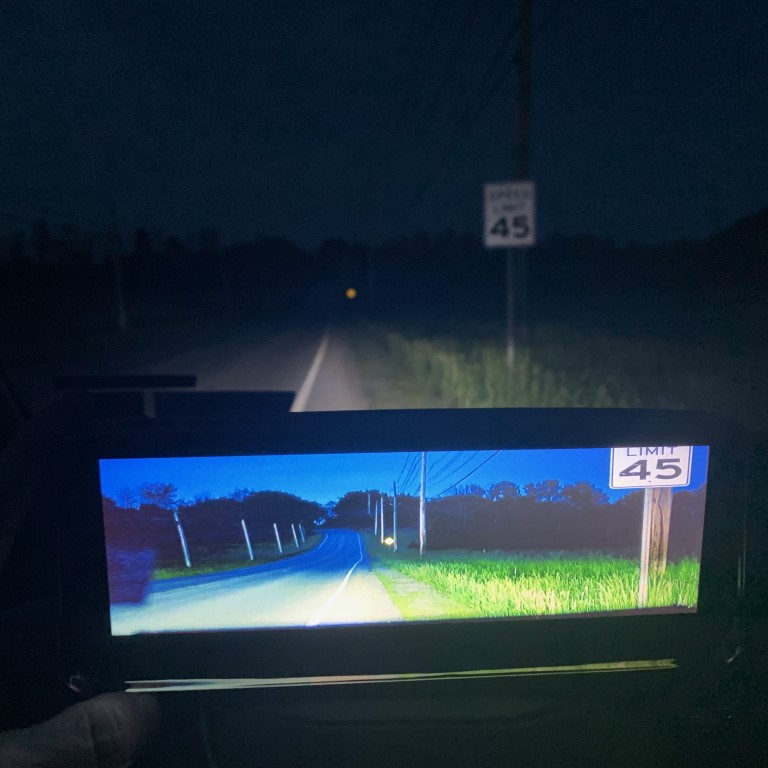
Now the fun part…In the dark…Ooooooh!

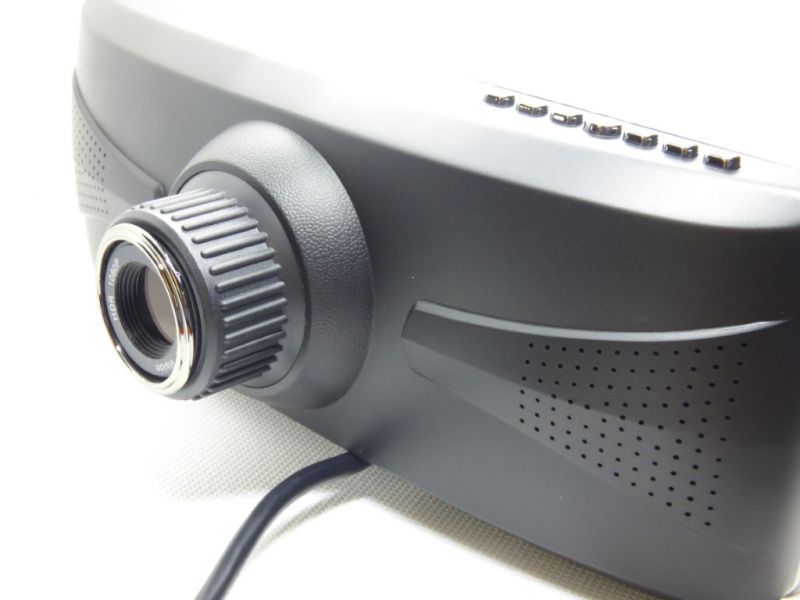
I found the display too bright for my tastes, but easily remedied with a few tweaks. I then aimed the camera for the best view of the road and began driving. Care should be taken when positioning the camera because the housing is quite large. It should be positioned where it will not inhibit the driver’s view of the road.

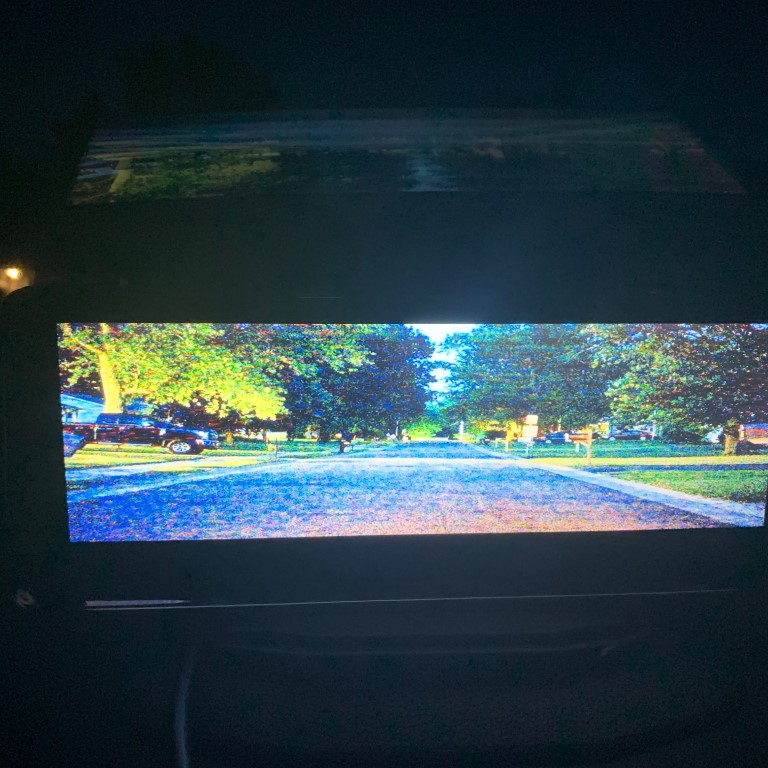
Image amplification from this camera is spectacular! I even turned off my headlights (while safely parked) and could clearly see the road for at least a few hundred yards ahead. Very impressive!

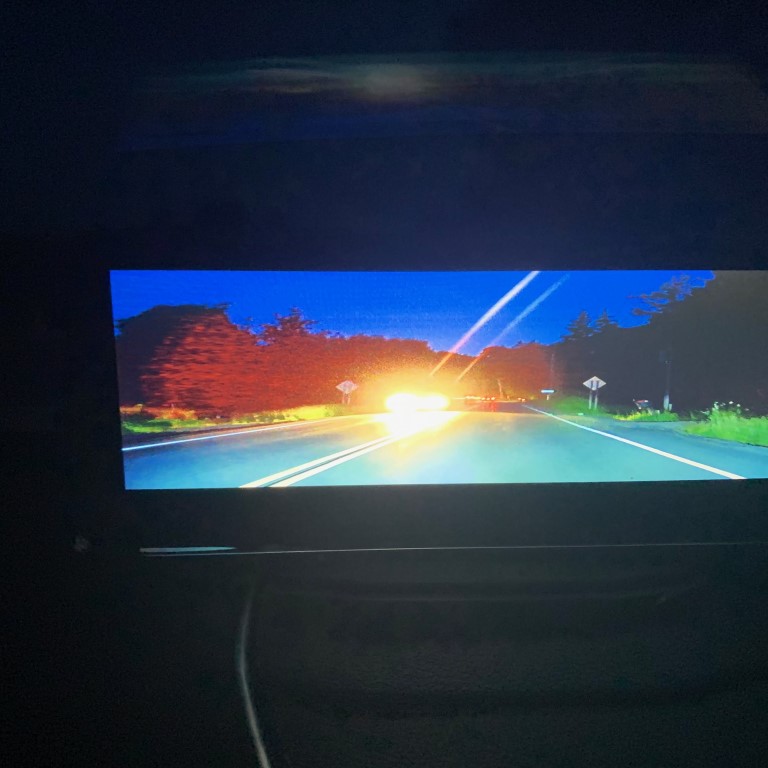
It’s worth mentioning that the image is somewhat magnified and it’s compressed from top to bottom, making everything look squished, but I can understand the need getting a more complete view of the road. Very dark images appear grainy while still pleasant to view.

Oncoming headlights or even taillights caused substantial screen glare. This didn’t bother me much as it’s not the intention of this product. If you can see a vehicle in front of you and your headlights are working, you know should where the road is.

I ran into a few issues, not with the camera’s performance, but with mounting. The connection between the non-slip base and the main unit is a bit wobbly. With the magnified image, any movement of the display while the car is moving is amplified dramatically resulting in an annoying, distracting shaking of the screen. I will look for alternate mounting methods to increase image stability.

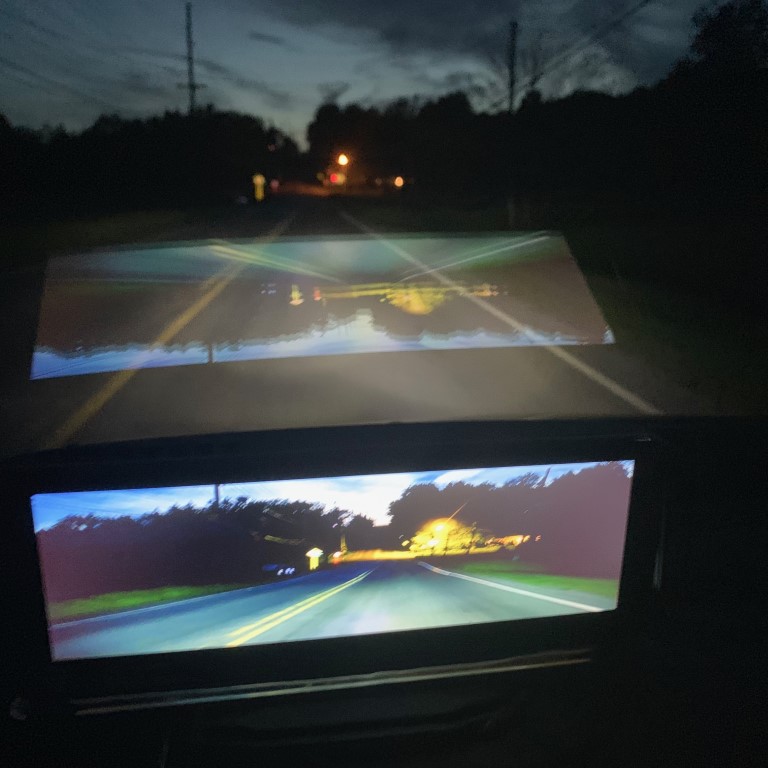
Next, depending on the angle of your windshield, there can be a considerable reflection which I found to be very distracting. I plan on experimenting with alternative mounting locations to see if I can reduce this.

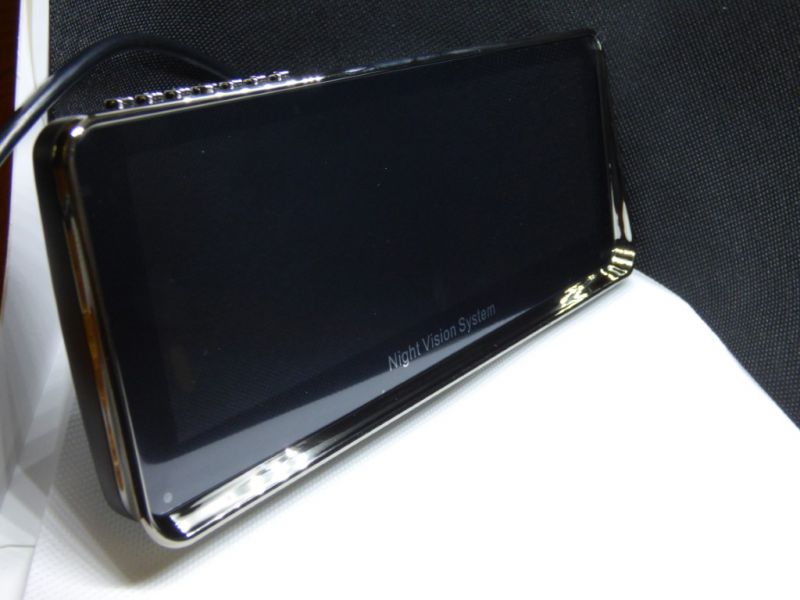
Taking my car out for a drive during the day also gave me a few unexpected surprises – the main display and chrome accents are very reflective and I had a few occasions where I was momentarily blinded by sun glare. Again, I think that relocating the camera to the top of my windshield next to my rear-view mirror will alleviate this issue. Fortunately, Lanmodo incorporates the ability to rotate and flip the display into the software for just this reason.

Interestingly, one of the features I would expect to be on this device wasn’t there – a dash cam. This is a dedicated night-vision device, but the incorporation of a dash cam would seem a logical addition.

What I like

  • Fantastic night vision!
  • Easy set-up

What I’d change

  • Mounting hardware stability should be improved.
  • The suction cup mount needs to be more versatile. Another articulation elbow would be welcomed to help with placement
  • Subdue the chrome and implement a less reflective screen to prevent sun reflections from distracting the driver.
  • Integrate a dash cam and video recording.

Final thoughts

The Lanmodo Night Vision Safe Driving Assistant is a top-notch system that’s ideal for those with vision issues (although it should not be used exclusively to pilot your car). It’s a solid performer with outstanding low-light capabilities, but care should be taken to securely mount the hardware.

Price: $499.00
Where to buy: Amazon
Source: The sample of this product was provided by Lanmodo.

Filed in categories: Reviews

Tagged:

Lanmodo Car Night Vision Camera review originally appeared on The Gadgeteer on June 22, 2019 at 9:30 am.

Note: If you are subscribed to this feed through FeedBurner, please switch to our native feed URL http://the-gadgeteer.com/feed/ in order to ensure continuous delivery.
Ekster Parliament Wallet review

REVIEW – Losing your wallet is guaranteed to wreck your day, especially if you’re absent-minded like me. Fortunately, the folks at Ekster have us covered! Not only is the Parliament Wallet a fine transporter of your cash & cards, but it has a tracking device that makes lost wallets a thing of the past. To the review!

What is it?

It’s a bifold style wallet with RFID protection and a tracking device that you can use with a mobile app, Alexa, or Google Assistant.

What’s in the box?

You’ll get the wallet and the tracking card (if you add the card to the package).

Hardware specs

The Wallet:

  • 0.4″ by 4.1″ by 0.25″
  • Stores 10+ cards
  • Integrated RFID-blocking card case which will hold up to 6 cards
  • European top-grain leather

The Tracking Card:

  • Powered by Chipolo technology
  • IOS9 or Android 4.4 (and greater) compatible
  • Worldwide Lost & Found Platform, QR Safety Net
  • 200 foot range with Bluetooth
  • Solar powered, with 2-3 month life between charges (3 hour charge time)
  • Voice activation compatible with Google Assistant, Alexa & Siri

Design and features

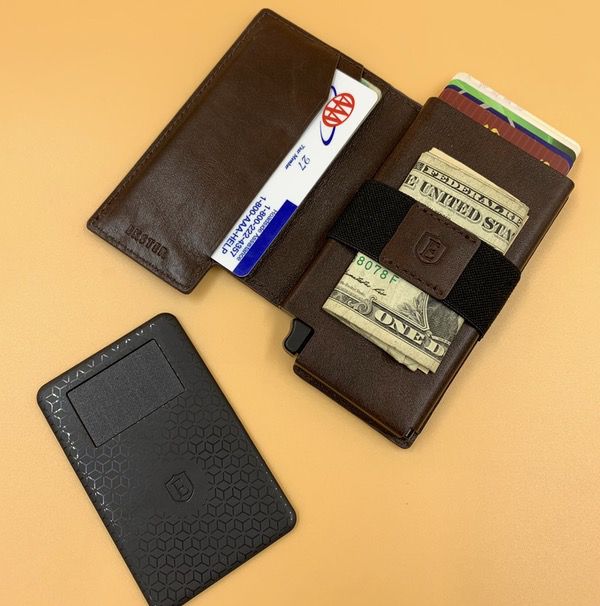
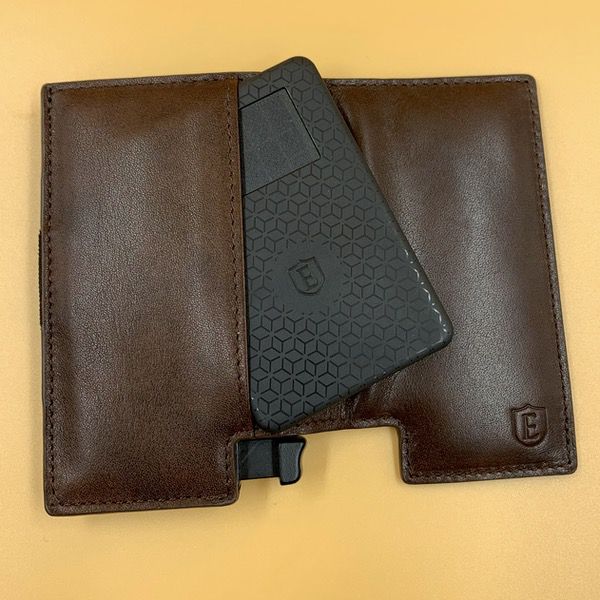
I reviewed a previous iteration of the Ekster wallet, and the newest version is identical in form factor. It’s a bifold design that’s built around and RFID-blocking case to hold your sensitive cards. Construction is excellent with top-notch fit and finish. It looks like Ekster is using a more refined leather and tighter stitching in the new model. It’s a solid build that’s available in multiple leather finishes, all of which look upscale and classy as all get-out:

The exterior pocket on the rear panel will hold the tracking card, or 2-3 regular cards if you choose not to use the tracker.

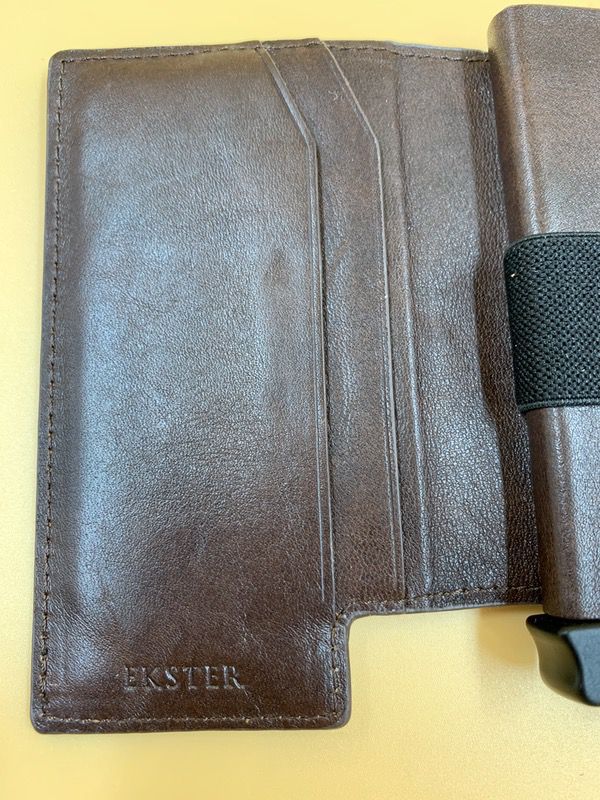
The inside of the front flap has 2 card slots. You could stretch them to hold 4 cards in all, but I think the 2-card configuration is nice and tight:

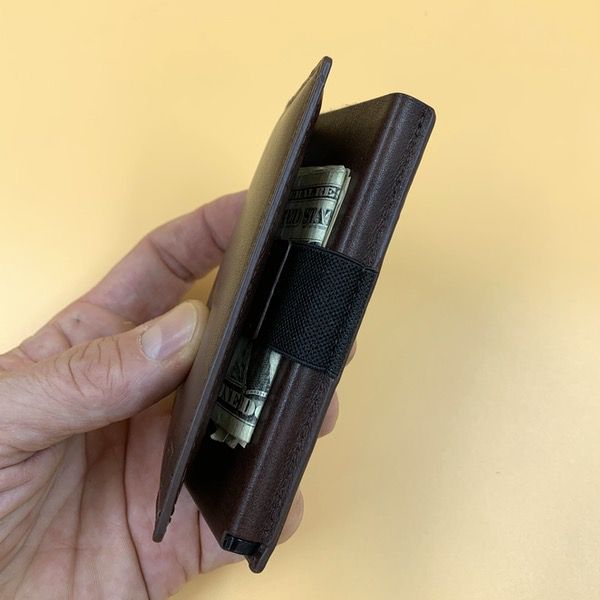
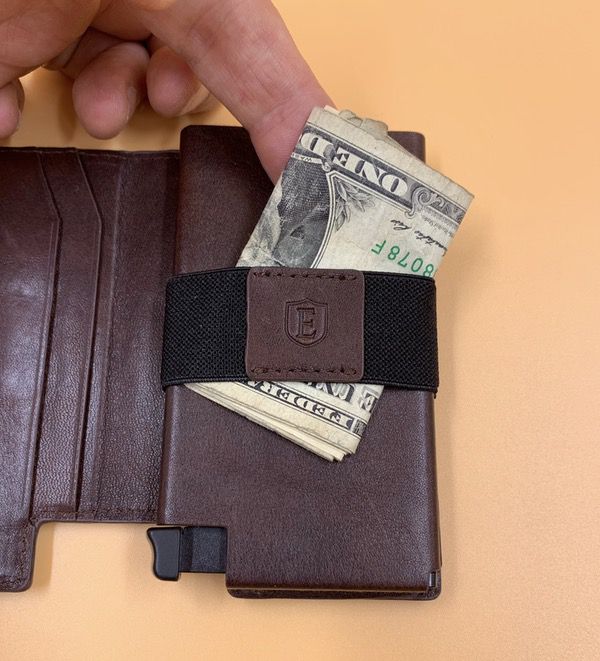
An elastic band on the body holds some cash, receipts, or a couple of extra cards:

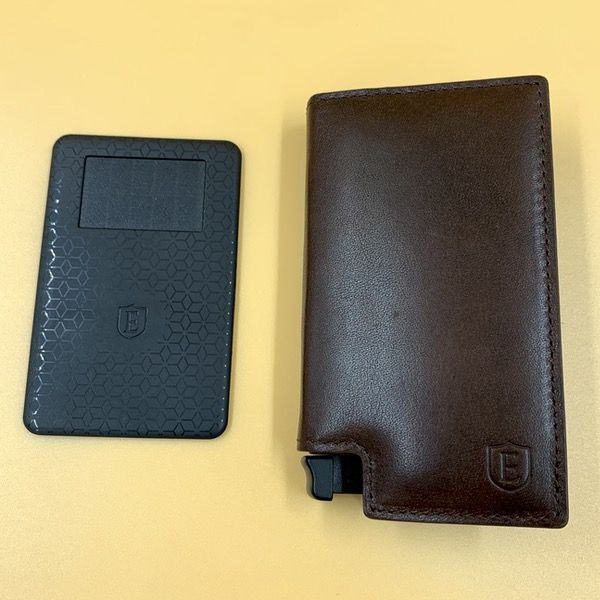
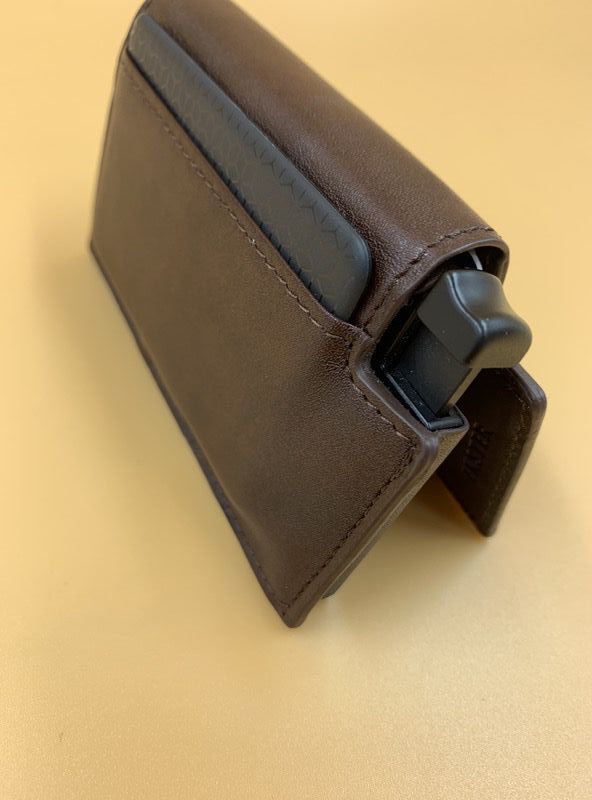
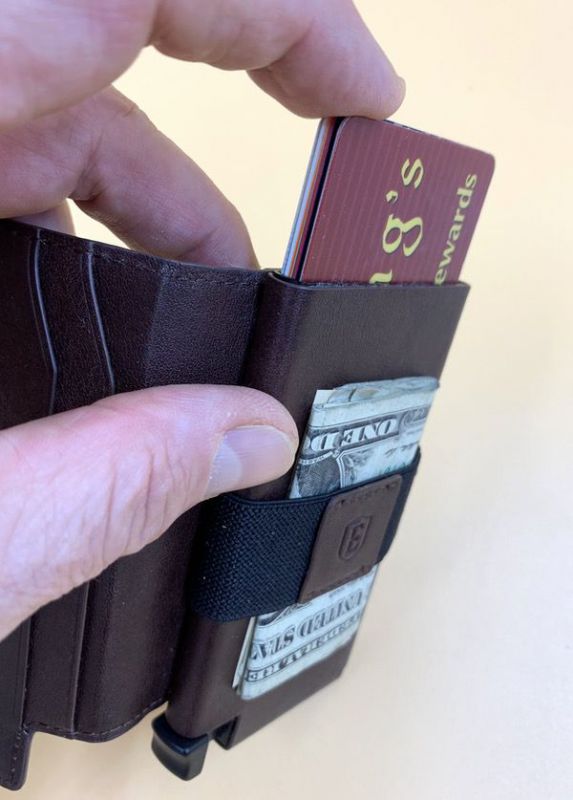
The big design element that is unique to the Ekster, however, is the RFID-blocking case that’s built into the body of the wallet. See this little thumb button on the base?

You’ll insert your cards into the RFID-blocking case. This case will hold 4-6 cards depending on their depth (embossed cards take up more room). You slide them all into the case, as seen here:

When you push that thumb button the cards pop out of the case, fanned so that you can access the desired card:

The Tracking Card

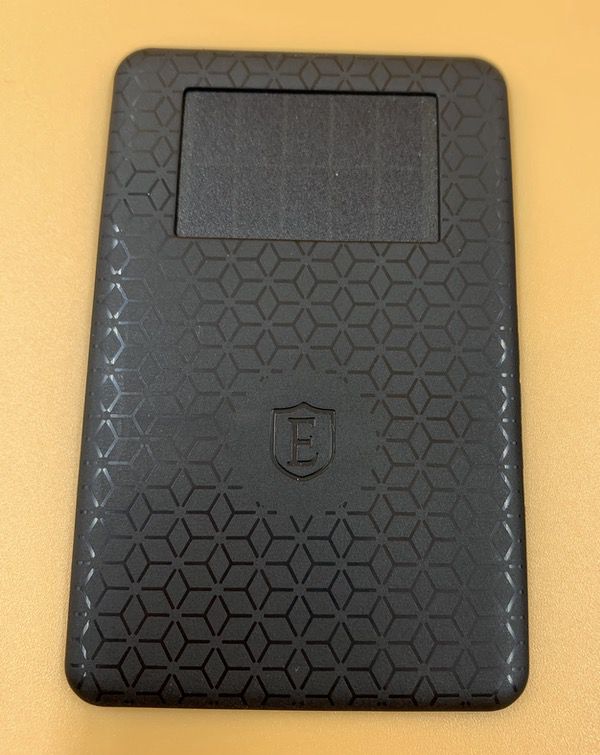
The key to locating your wallet is the tracking card. This particular card is solar powered. Leave it in direct sunlight for a couple of hours, and you’ll have enough charge to last 2-3 months.

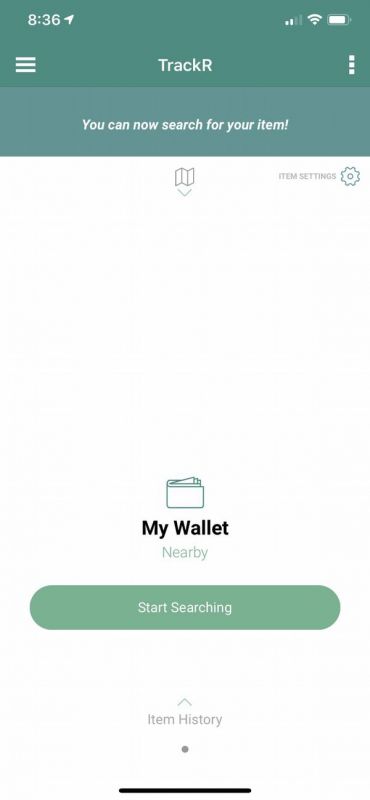
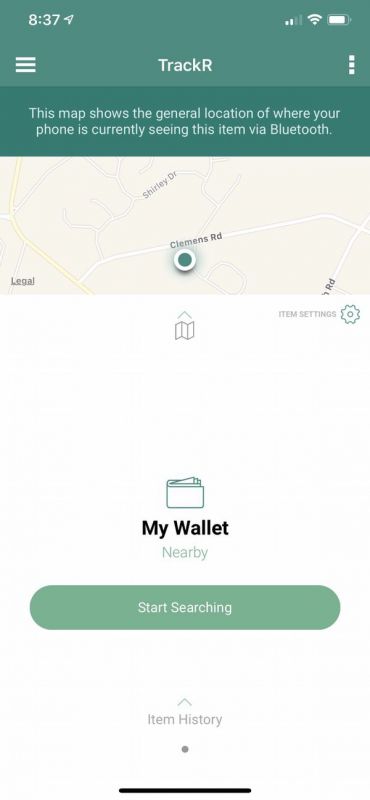
You’ll download the TrackR app to your mobile device, and pair the card to the app. Once you’re set up, you can use the app to find your wallet when it goes astray. Tap the “start searching” button on the app’s home page:

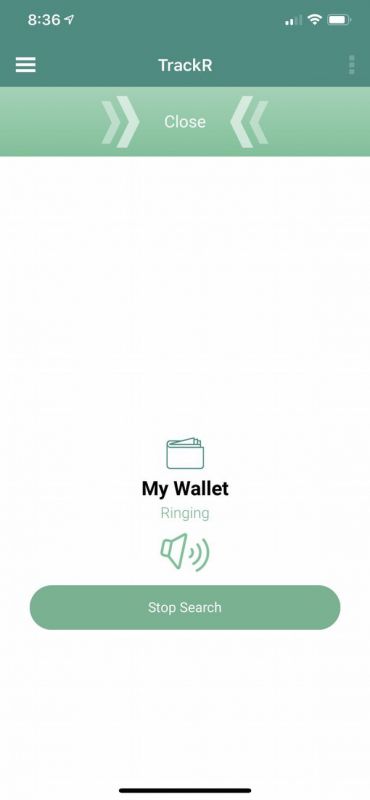
The card will now emit a tone that you can follow to track it down. The tone itself is nice and loud, and continues to ring until you stop it on the app or push the Ekster logo on the card:

The app now shows the location of your phone on a map. If the card is within Bluetooth range it will pick right up.

If it’s outside of the range, the app is connected to a crowdsourced GPS system through the Worldwide Chipolo Network. As long as another app is active within the range, the location will be picked up. The card also has a QR code printed on it that can be scanned by someone that finds your wallet, sending you a notification that it has been found.

Your tracking card can also be set up to work with Alexa, Google Assistant, or Siri for voice-activated location to trigger the tone. It’s easy to set up and use, but I prefer to use the app since my phone is always within arm’s reach.

Performance

The design for the Ekster Parliament is excellent as a day-to-day wallet. The form factor is a bit on the chunky side, but that’s the trade off you get for the RFID-blocking case. I like the ability to stash quick-access cards in the slots on the front flaps, and the elastic band is a flexible solution for securing an assortment of cash, cards, or receipts on the go.

While the whole package is a tad more refined from the previous version, there are some issues that I had mentioned in the previous iteration. Your cards slide out of the RFID box in a tight grouping, which means some fumbling if you’re trying to pick a specific card. This isn’t a big deal if you’re not getting to those cards often, but can be a pain if you’re in line at the convenience store. There’s also not a lot of flexibility in the design, so things get chunky if you have a wad of bills secured with that elastic band. If your daily carry consists of 8-10 cards and a couple of bills for emergencies, however, you won’t have a problem with this.

Beyond that, the build quality is absolutely top notch. It looks great and is very durable, with no moving parts beyond the thumb switch. I expect this wallet to last a long time.

The location service is hit-or-miss for me. It’s great if I am within Bluetooth range, but the long-range tracking requires other smartphones with the app activated to be within range of the card to work. I live on the edge of suburbia and haven’t had any luck locating my wallet a few miles away in testing. Perhaps this is more effective in urban areas where the network is more active, but I am not seeing the benefit where I live.

What I like

  • High quality, durable construction.
  • RFID blocking capability.
  • Tracking card is great for locating your wallet within Bluetooth range (about 200 feet).

What needs to be improved

  • RFID case can be difficult to use if you need to get to a specific card quickly.
  • Rigid structure does not allow for flexibility if you need to carry extra stuff.
  • Long-range tracking card location seems to be inconsistent.

Final thoughts

The Ekster Parlaiment wallet is a fine wallet on its own. There are some form factor issues that may not appeal to all users, but I think you’ll be pretty happy with it if your daily carry favors keeping 8-10 cards at the ready with minimal cash. The tracking card is great for locating your wallet within Bluetooth range if you are absent-minded, but I am not convinced that it will work consistently over greater distances due to the crowdsourced nature of the network.

Price: Currently $79 USD for the wallet, and $29 USD for the tracker card.
Where to buy: Ekster Parliament product page and Amazon
Source: The sample of this product was provided by Ekster.

Filed in categories: Reviews

Tagged:

Ekster Parliament Wallet review originally appeared on The Gadgeteer on June 21, 2019 at 11:00 am.

Note: If you are subscribed to this feed through FeedBurner, please switch to our native feed URL http://the-gadgeteer.com/feed/ in order to ensure continuous delivery.
Joovv Go red light therapy device review

REVIEW – Can light therapy that our eyes can’t see help heal wounds, reduce inflammation, and provide other health benefits? The Joovv Go is a portable Infrared device that claims to do these things. Let’s take a look.

What is it?

The Joovv Go is a handheld device that is available in 2 versions. The red light has a light wavelength of 660 nm and the near infrared light is at 850 nm. I was sent the NIR (near infrared version) to review. What’s the difference?

Both red light at 660 nm and near infrared light at 850 nm have been proven across hundreds of clinical studies to enhance cellular function. The main difference is that red light at 660 nm is readily absorbed by skin tissue, leading to improved skin health and collagen production. Near infrared light at 850 nm is invisible to the human eye and penetrates deeper into tissue, leading to benefits like increased muscle recovery and reduced joint pain.

Note: Joovv Go has been given class II clearance by the FDA.

Hardware specs

Approximate Size: 5.75″ x 3.78″
Power Input: 100 to 240V
Charger Power Output: 3A, 5V
Wavelengths: 650nm red or 850nm near infrared (there are two versions of the Go)

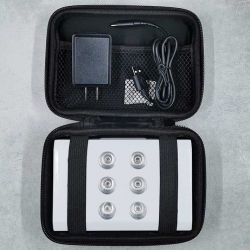
What’s in the box?


  • Joovv Go light therapy device
  • USB-C cable
  • AC adapter
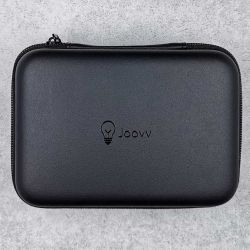
  • Carrying case

Design and features

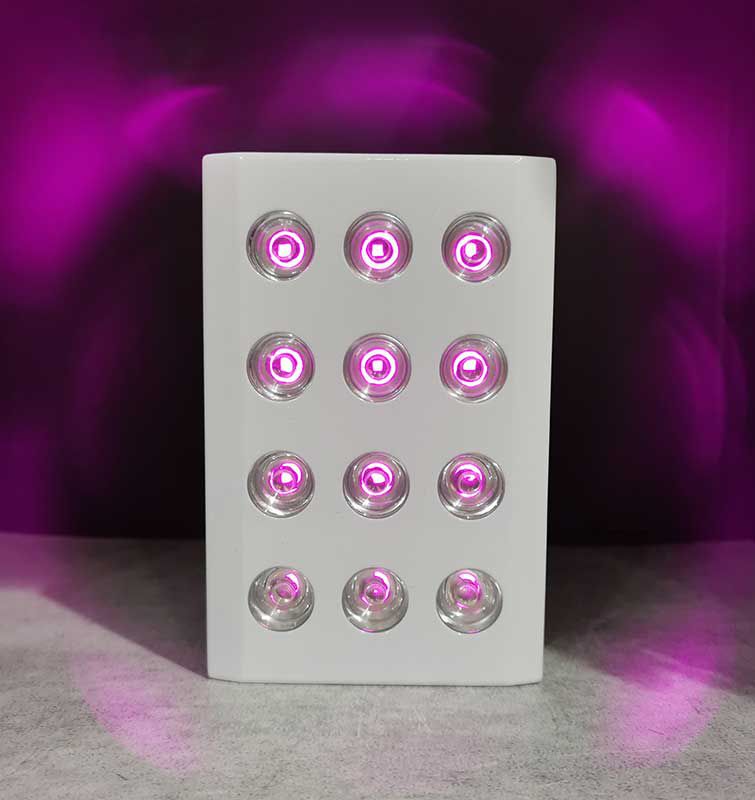
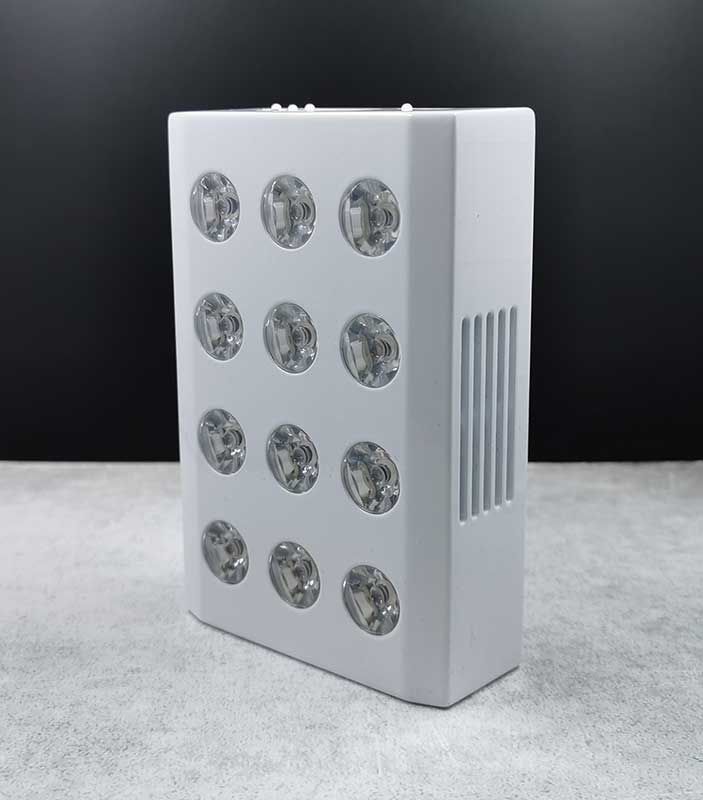
The Joovv Go is surprisingly well made. There’s no plastic here; it has a painted white metal case with 12 LEDs on the front.

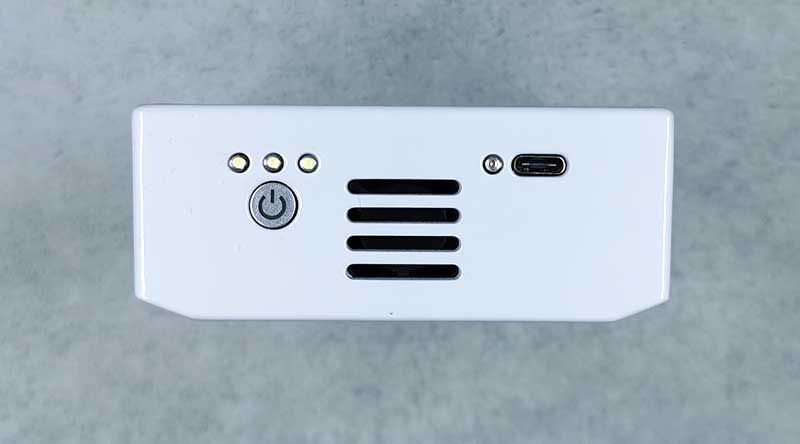
On the top are a row of air vents, the power button, and a USB-C charging port. Above the power button are three white charging status LEDs.

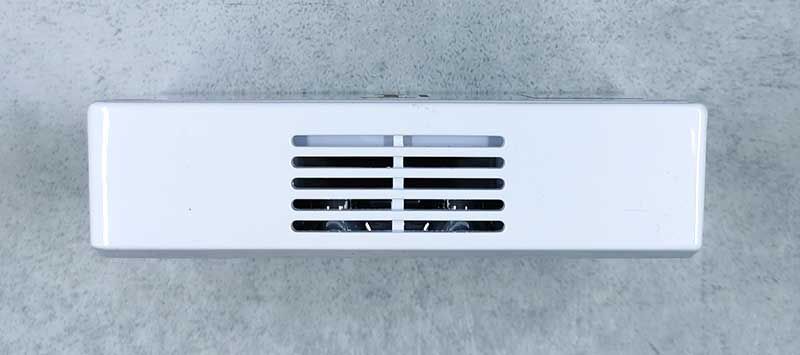
The sides also have slots for ventilation.

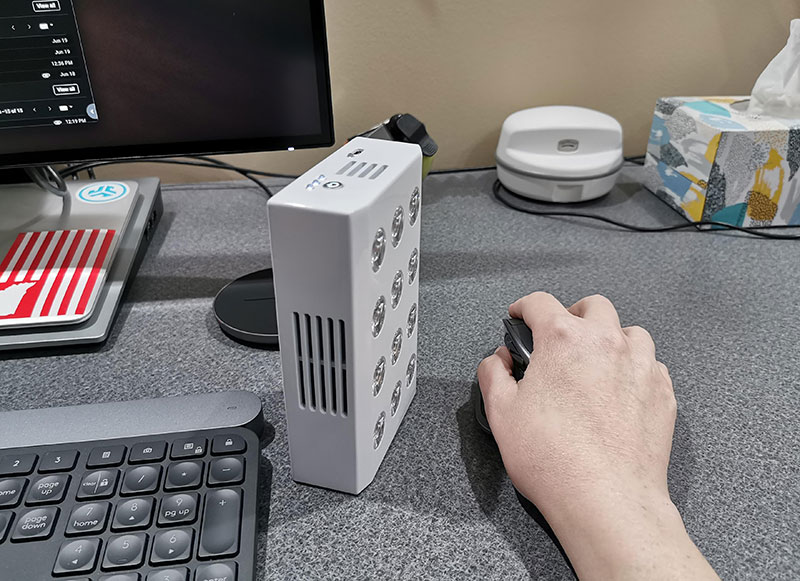
Using the device is simple. You just hold down the power button to turn it on and hold it 2-6 inches away from the body part that you want to treat with red light therapy. The default treatment time is 10 minutes at which time the Joovv Go will automatically power down. When fully charged, the Joovv Go should provide 5-6 treatment sessions before it needs to be recharged. Recharge time is about 2.5hrs.

While in operation, you will hear the internal fan, but you can’t see the light shining on your skin. However, if you look directly at the LEDs (which isn’t harmful), you can see a faint red glow.

Note that it’s a good idea to do a test on your skin for photosensitivity BEFORE your first treatment. To do this test, you can just hold the Joovv Go over a body part for a couple of minutes and then hold down the power button on the unit to manually stop the session. Then you can check for redness or irritation.

I did most of my testing like you see above with the left side of my right hand which has some beginning stages of arthritis or inflammation. I have done a 10-minute session every day for the last couple of weeks and so far I think I am noticing some improvement with flexibility and lessening of the slight swelling that I’ve noticed. I say that I think I am noticing an improvement because I’m not 100% sure. It could just be in my head as a placebo.

I also did a treatment on my left triceps to see if it would alleviate muscle soreness after a workout. I didn’t notice any improvements in the soreness.

It’s also worth mentioning that it’s awkward to hold the device over the body part that you want to treat because the Joovv Go is a little heavy. It would be great if there was some sort of holder/stand that you could use to position the device for hands-free treatments.

What I like

  • Easy to use
  • Very well made device
  • Wireless
  • 2yr warranty
  • 60 day trial

What needs to be improved

  • Only treats a small area at a time
  • Hard to test if it is actually working

Final thoughts

It’s difficult to review health products because there isn’t an easy way to figure out if it works or works for everyone. Although I can’t be 100% sure that RLT from this device has helped me, if you are already familiar with red light and near infrared light therapy and know that it works for you, the Joovv Go devices are very well made and are easy to use. The company offers a 60-day return policy, so that should be enough time to decide if one does work for you.

Price: $265.00
Where to buy: Joovv
Source: The sample for this review was provided by Joovv.

Filed in categories: Reviews

Tagged:

Joovv Go red light therapy device review originally appeared on The Gadgeteer on June 21, 2019 at 10:06 am.

Note: If you are subscribed to this feed through FeedBurner, please switch to our native feed URL http://the-gadgeteer.com/feed/ in order to ensure continuous delivery.
Adonit PhotoGrip Qi review


REVIEW – These days, everywhere you look you can easily find someone taking pictures with their smartphones. This convenience has become the norm since phone cameras have become pretty darn good for general photography, and since just about everyone has one. What I have found is that unlike my ergonomic DSLR, holding the phone just right can sometimes be a challenge, especially while having to touch the screen to activate the shutter and while making sure to keep my fingers from blocking the camera lens.  Also, taking lots of photo on my phone especially when I constantly need to use the flash really puts a dent in the charge level of my battery. The Adonit PhotoGrip QI may solve all of my issues.
What is it?

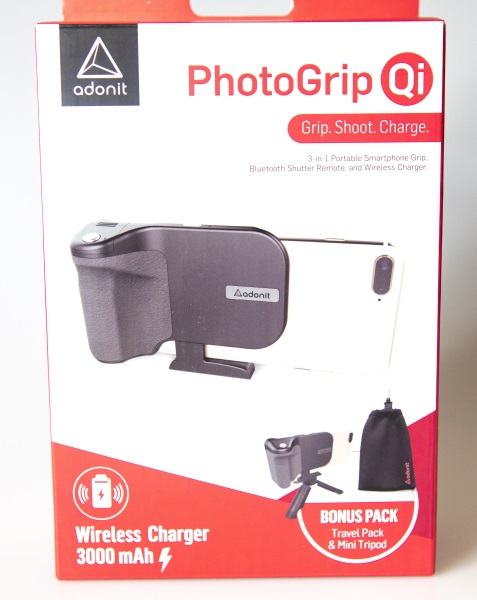
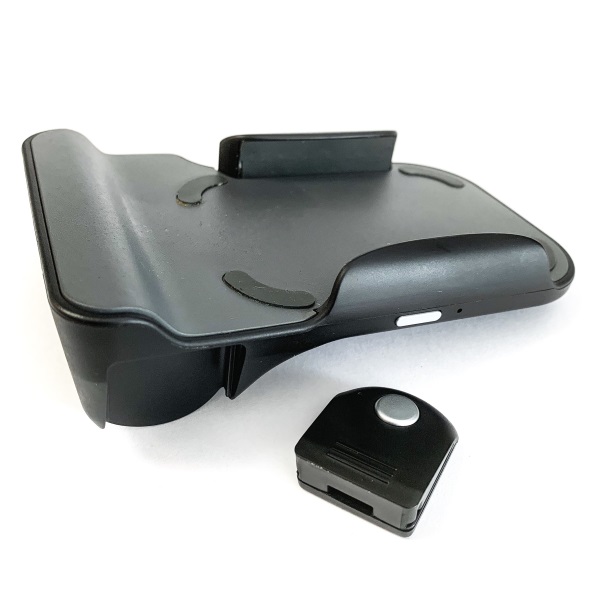
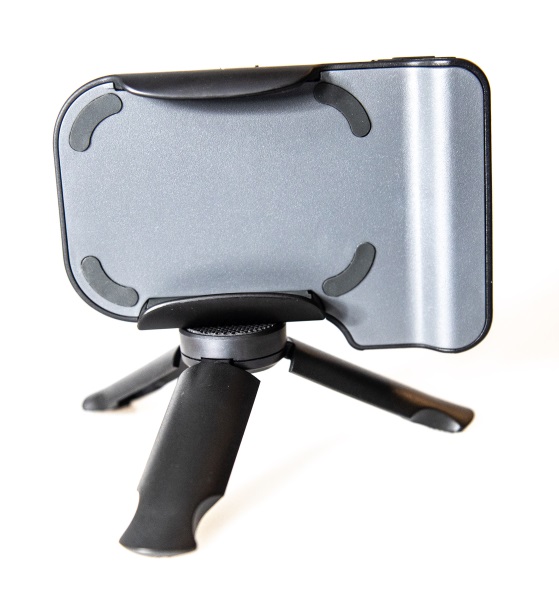
The Adonit PhotoGrip is a uniquely designed smartphone camera grip that allows you to easily take photos continuously in a very comfortable way. It also features Qi charging via its built-in 3000mAh battery and remote control via its removable Bluetooth shutter button.
What’s in the box


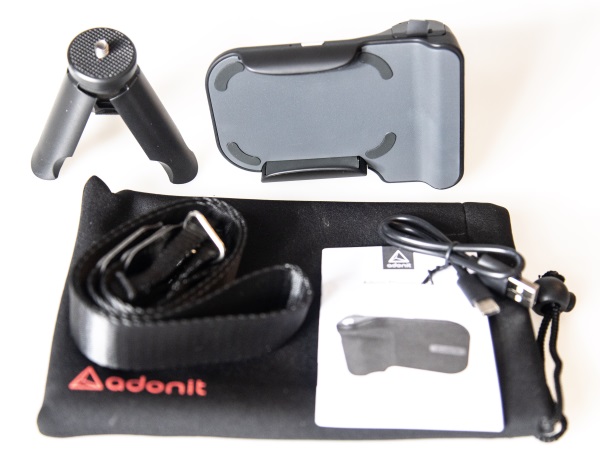
1 x Adonit PhotoGrip
1 x Mini Tripod
1 x Neck Strap
1 x Carrying Pouch
1 x USB-C Charging Cable
1 x User Guide

Design and features

Specifications
Bluetooth: 3.0 and Above
Size Compatibility: 4.5″” or larger smartphones
Width range: 58mm – 85mm
Max. Depth: 10mm
Battery for Wireless Charging Input: USB Type C
OS Compatibility: iOS 5.0 and above / Android v4.3+
Battery Capacity for Wireless Charging: 3000mAh
Battery for Shutter Remote: CR2016
Shutter Remote Continuous Use: 1000 hours
Weight: 129.6g
Dimensions: 120.6 * 82 * 43.9mm
Material: PC+ABS/Silicone Rubber
Color: Black or White/Mint

Features

  • QI Wireless Charging
  • Bluetooth Shutter Remote
  • Self-Standing Base
  • Bonus Travel Pack

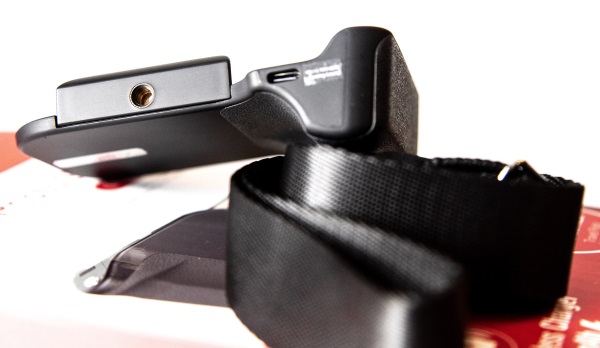
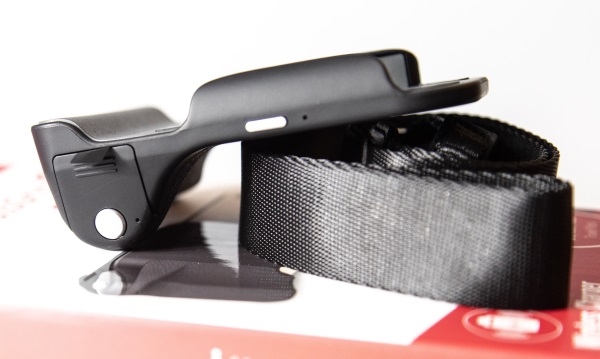
On the bottom of the PhotoGrip, there is the micro USB-C charging port to charge the internal built-in battery and the 1/4-20″ mount that will fit any tripod.

On the opposite side of the PhotoGrip, there is the removable shutter module and an on/off button. To the right of the on/off button, there is a LED indicator light that shows the following levels of battery charge:

  • White: Power levels at 70% to 100%
  • Yellow: Power levels at 30% to 69%
  • Red: Power levels under 30%
    The PhotoGrip comes with a bonus pack that includes a mini tripod.

Performance

The Adonit PhotoGrip is easy to use and works very well. Once fully charged, you power it up and then pair to your Bluetooth and it is ready to go. To pair to your Bluetooth, you first turn on the shutter remote by pressing the button on the shutter remote control, and the LED next to the Shutter button will flash green. You then go through the usual routine on your smartphone to pair.

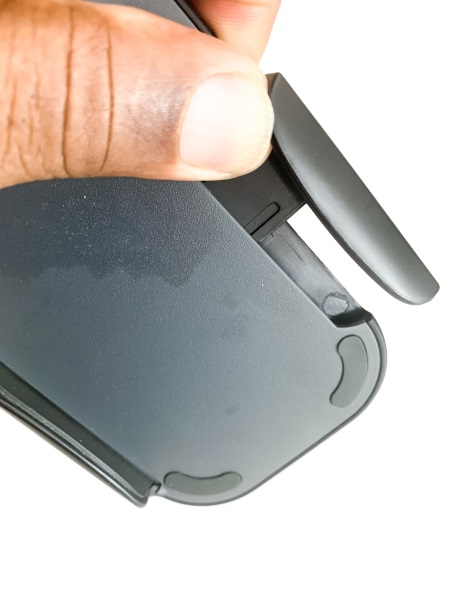
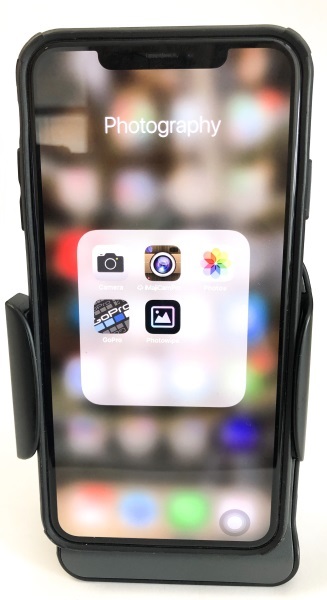
One side of the phone holder is spring loaded and expands to accommodate various sizes of phones.

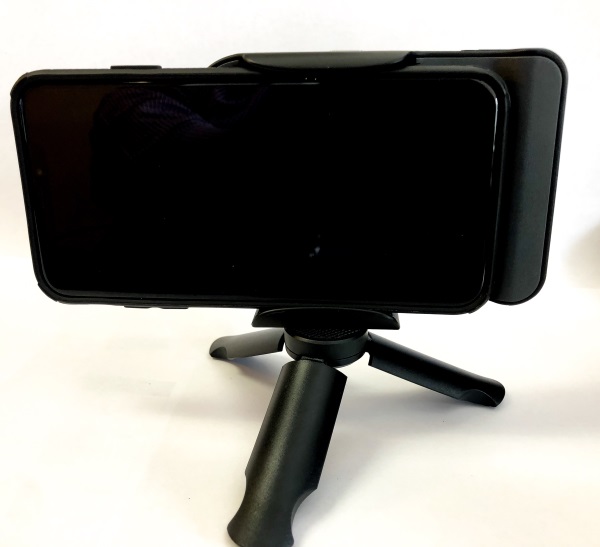
A nice small tripod is included with the bonus pack and that allows you to mount the PhotoGrip and have it stand alone and then use the removable shutter button to take pictures either of yourself, or if you want to take some  nature shots and maybe need to be a bit away from the phone so that you don’t disturb your subject. There are obviously many more scenarios where this feature can be very convenient.


In the case where you want to take handsfree portrait pictures, the PhotoGrip stands on its own.

The instruction manual states that the remote shutter will work up to about 10 meters away. I tested it up to about 6 meters away and it worked.

What I like

  • The build quality
  • The built-in battery
  • The Qi wireless charging
  • The built-in tripod Mount
  • The removable shutter button

What can be improved

  • It does exactly what it is designed to do

Final thoughts

While I hate carrying around extra “stuff”, I really like this device. It really does make it easier to take pictures when using my smartphone. There are many occasions when I know I will take pictures but I don’t want to take my DSLR. This device is small and portable and works every time. I can even place it in a “perfect” spot and take pictures remotely. And, since it has the built-in battery, neck strap, and Qi wireless charging, it takes care of every need. I am giving the Adonit PhotoGrip Qi a well done and two thumbs up!

Price: $59.99
Where to buy: Adonit website and Amazon
Sample: The sample for this review was provided by Adonit

Filed in categories: Reviews

Tagged:

Adonit PhotoGrip Qi review originally appeared on The Gadgeteer on June 21, 2019 at 8:00 am.

Note: If you are subscribed to this feed through FeedBurner, please switch to our native feed URL http://the-gadgeteer.com/feed/ in order to ensure continuous delivery.