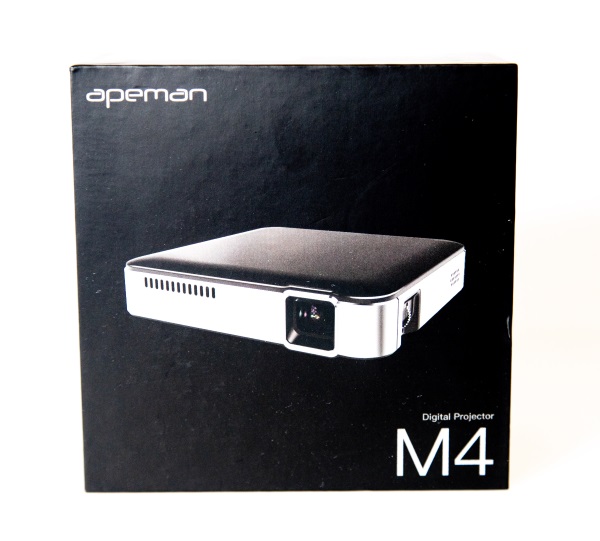
APEMAN Projector Mini Portable Video DLP Pocket Projector review

REVIEW – Lately, I have been on a quest to find 2 small and compact projectors that can produce high definition video that I can project in small rooms/areas at various events. Gone are the days when you need to walk around with a large, heavy case to transport a projector to handle your display needs. Also, many of the new compact projectors can be powered via a USB power pack, eliminating any restrictive need for AC power. These types of projectors have also added value and versatility to outdoor gatherings. For this review, I am taking a look at the Apeman Mini Portable Video DLP Pocket Projector. So, here we go!!

What is it?

The Apeman Mini Portable Video DLP Pocket Projector is designed for indoor and outdoor use. It supports 1080p HDMI Input and has a built-in rechargeable battery which makes it 100% portable. It also can be powered from a battery pack. Additional features include built-in stereo speakers and a tripod mount that allows for 360° placement.

What’s in the box
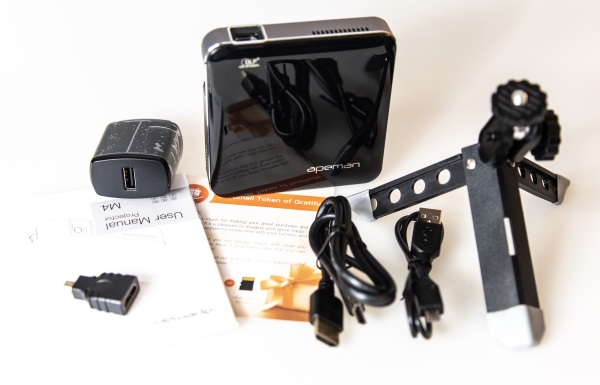

1 x APEMAN Digital Projector
1 x HDMI Cable
1 x Mini HDMI Adapter
1 x Mini Tripod
1 x AC Adapter
1 x Micro USB Charging Cable
1 x User Manual

Design and features

Specifications
Product dimensions: 3.86” x 3.86” x 0.85″
Brightness: 50~100 lumens
Projection size (recommended): 30″ ~ 100″
Projection distance (recommended): 0.8m~2.6m
Contrast: 1000~3000
Resolution: 854 x 480(WVGA)
Aspect ratio: 16:9
Charger specification: Micro USB 5V/2.4A
Power output: standard USB 5V/1A
Built-in battery: 3.7V/3400mAh
Projection time: approximately 2 hours
Built-in speaker: 2 x 1-Watt
Audio output: 3.5mm jack

Features
Compact size: Pocket size (3.86*3.86*0.85 inches) and lightweight (0.44 lbs). Easy to take and operate. The mini projector is the best and ideal gift for home cinema, parties or camping entertainment in a relatively dark environment.
HD Movie & Big Screen: Advanced DLP technology provides 70% brighter and 50% sharper image, supports full HD 1080P (1920*1080) with 1000:1 contrast ratio and 854*480 native resolution. Within the distance between 1-4m, It can achieve 30″ to 100″ big display screen size.
Low Noise & Long Lens Life: Equipped with the latest cooling system and high-quality material, the noise is almost inaudible. Built-in stereo dual speakers provide you with the best audio-visual feast. Long Lens lifetime up to 45000 hours. If you use it for 3 hours per day, that’s 40 years!
Extensive Connectivity: This mini projector can widely connect to your laptop, DVD, tablet, camera, PS3/4, smartphone and so on via HDMI port to enjoy a variety of entertaining resources from as many devices as you like.
Other Excellent Features: The 360° rotation tripod gives it a firm stand. Our mini projector covers 60 days assurance and 3-year warranty.

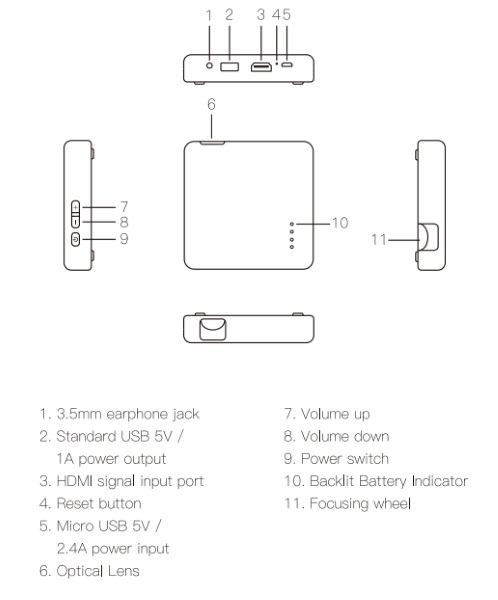
On the front of the projector, there is a vent/grille and the lens.
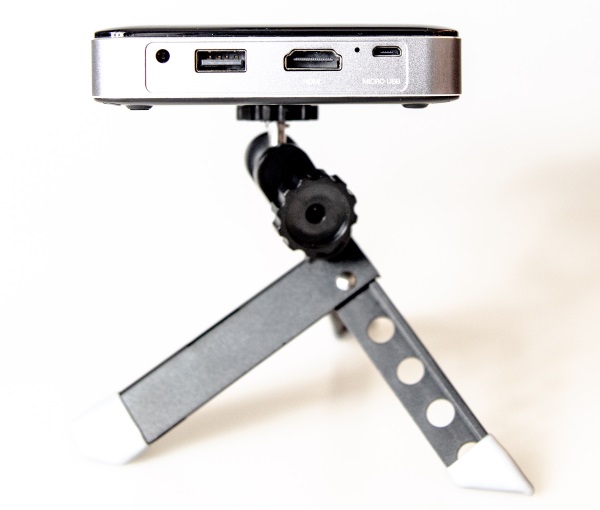
On the back of the projector from left to right as shown below there is the audio port, a USB output port (Can be used as a power bank for external devices), an HDMI port, a reset button, and a micro USB power port.
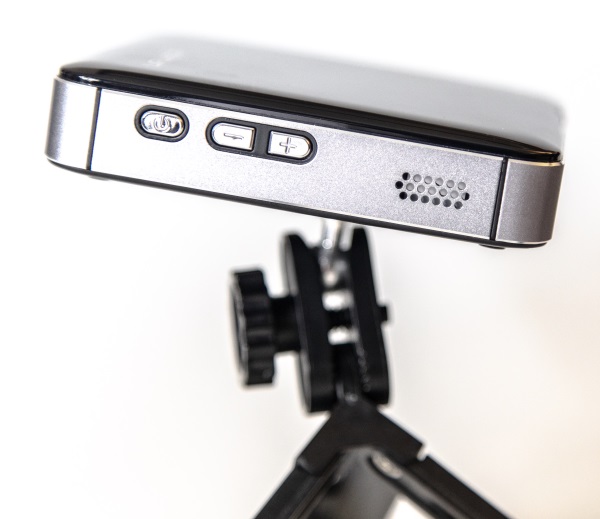
On one side of the projector, there is a power button and a volume up and volume down buttons.
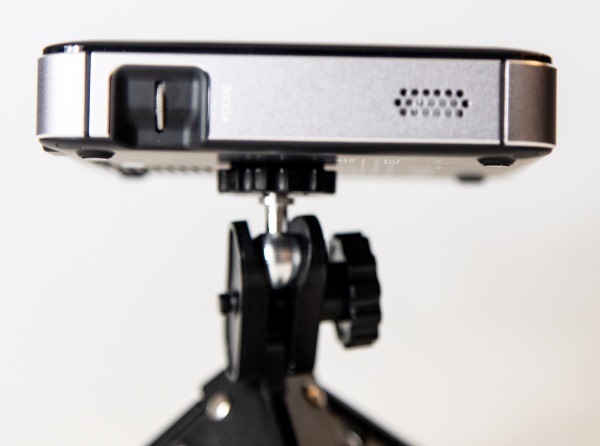
On the other side of the projector is the focus button.
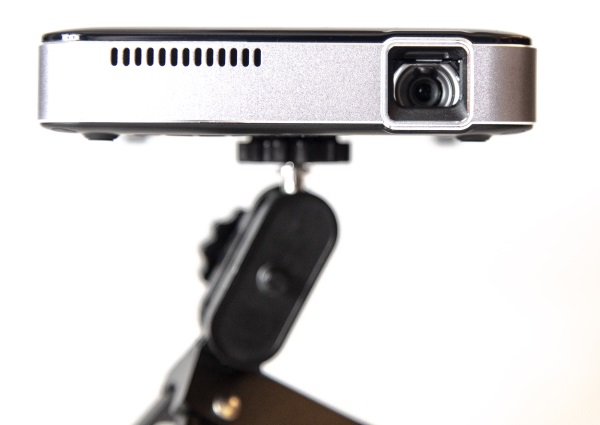
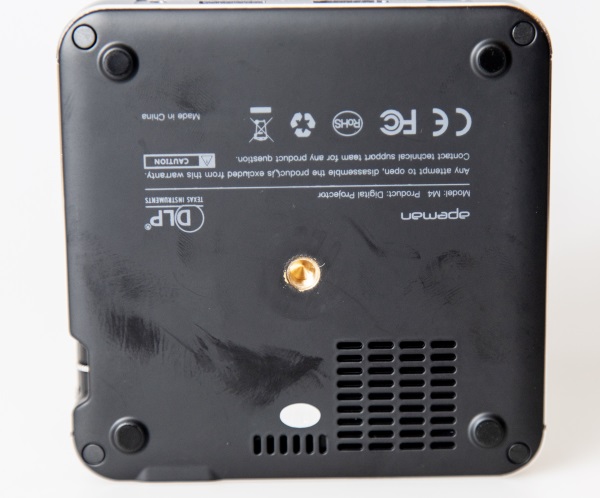
At the bottom of the projector, there is a 1/4-20″ tripod mount in the middle which allows for easy 360-degree placement.
Performance

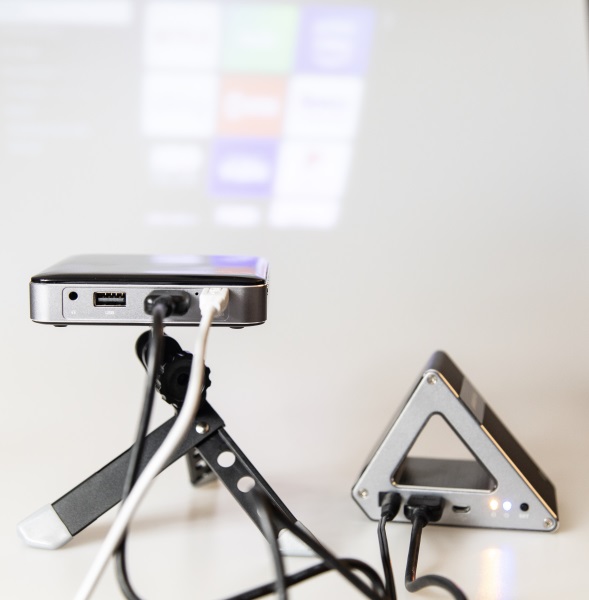
This projector is small, lightweight, compact and easy to use. For my testing, I used it with my IOGear wireless transmitter/receiver set and it worked flawlessly. I attached the mini tripod, connected my Roku 4K stack to the HDMI port and the micro USB power connector and instantly the Roku menu was displayed on the wall.
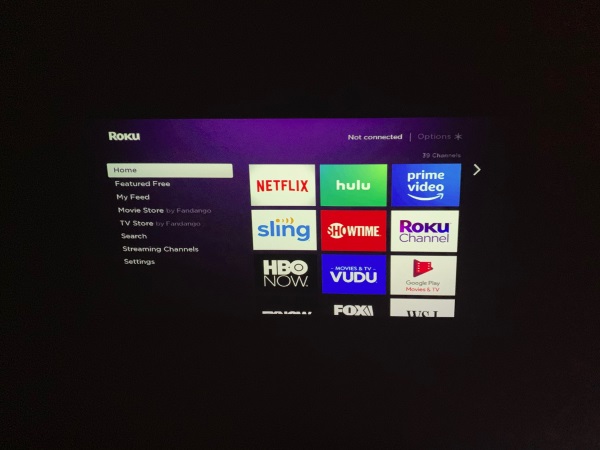
The following is a few pictures taken with my iPhone of the screens and picture produced on my ceiling from about 8 feet away.



The volume from the speakers is adequate if there is no noticeable ambient noise. Also, there are no additional input options such as for an SD card or USB input.

What I like

  • The compact size
  • The ease of use
  • The video it produces

What I’d change

  • Additional connectivity/media input options.

Final thoughts

The Apeman Projector Mini Portable Video DLP Pocket Projector is a really nice compact projector that produces really nice video and offers the versatility of also being a useful power bank for external devices. I can’t really think of a scenario where I would use it as a power bank, but one never knows what can happen. I like that it can be tripod mounted and that it has built-in speakers which while not great, can do the job once there is not too much ambient noise. Overall, this projector is a great little device and in my opinion, it deserves a job well done and two thumbs up!!

Price: $199.99
Where to buy: Amazon
Source: The sample for this review was provided by Apeman

Filed in categories: Reviews

Tagged:

APEMAN Projector Mini Portable Video DLP Pocket Projector review originally appeared on The Gadgeteer on June 26, 2019 at 10:00 am.

Note: If you are subscribed to this feed through FeedBurner, please switch to our native feed URL http://the-gadgeteer.com/feed/ in order to ensure continuous delivery.

Roborock S6 robot vacuum review

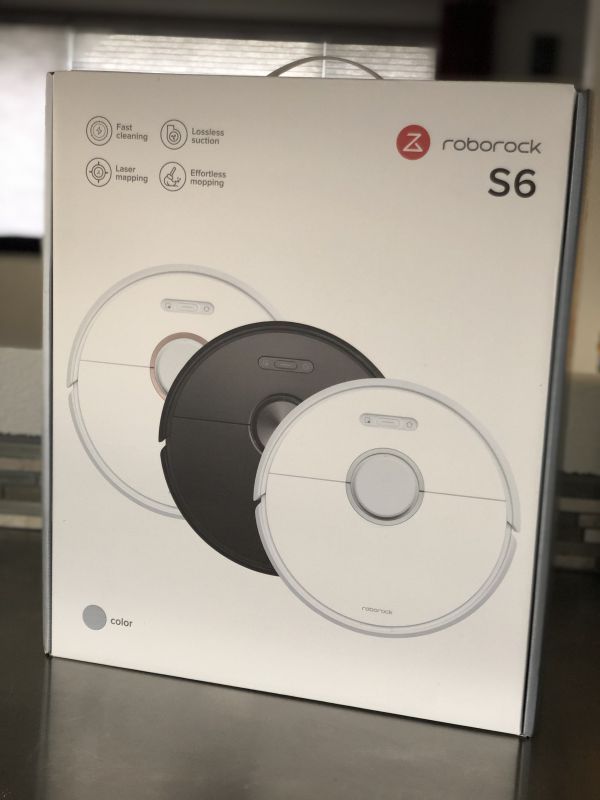
REVIEW – Robot vacuums have come a long way since I first got one of the originals over 10 years ago. With the advent of smart phones, the ability to control, monitor and even maneuver the vacuum has become easier and provided quite a bit more value to these devices. The RoboRock S6 is the newest addition from RoboRock into a crowded market as evidenced by the many types of these vacuums that we’ve reviewed on this site.

What is it?

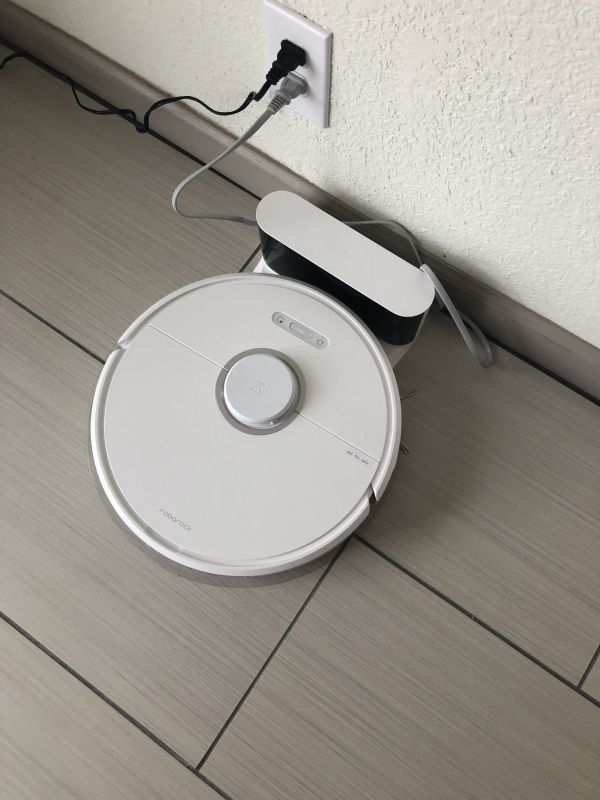
The RoboRock S6 is a smart vacuum with docking station that interacts with a smart phone app to provide customized cleaning in your home.

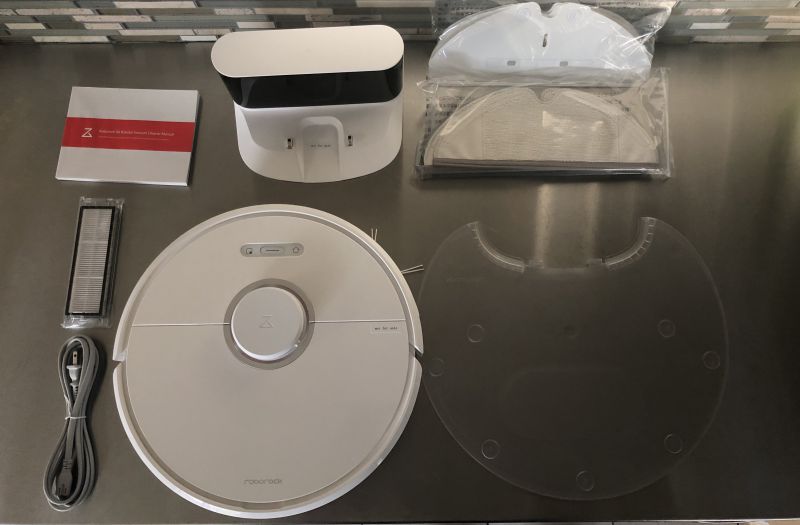
What’s in the box?

  • Robot Vacuum
  • Power Cord & Docking Station
  • Extra Filters
  • Disposable Mopping Pads
  • Cloth Mopping Pads
  • Water tank attachment for mopping
  • Mopping mat attachment for Dock
  • Instruction Booklet
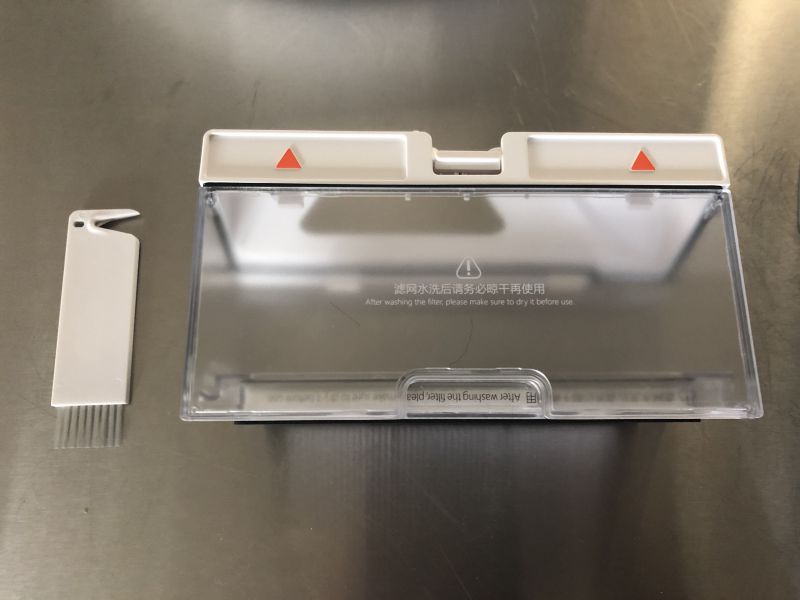
  • Removable dustbin with cleaning tool

Design and features

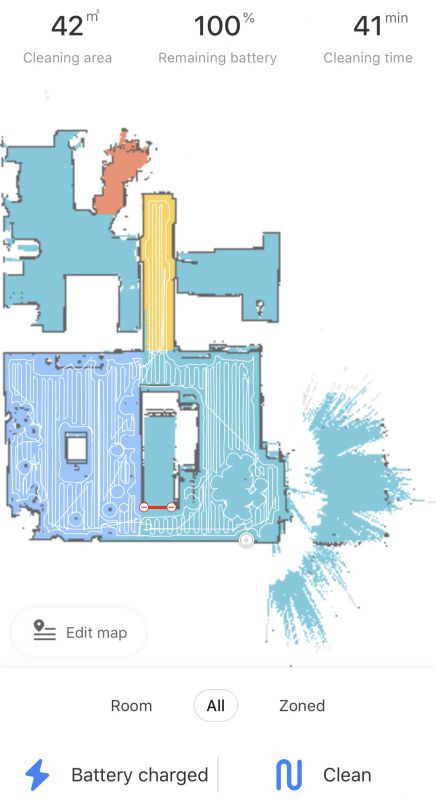
The RoboRock S6 provides both a vacuum mode and mopping function. With the accompanying app, you are able to map your home and designate different rooms and/or zones for cleaning. As you can see below, each color designates a different room and you can tell the vacuum to only clean specific rooms or the whole map. As it performs its work, it shows the track it went via the white lines you can see in the screenshot – so that you can see that all areas have been covered by that particular cleaning.

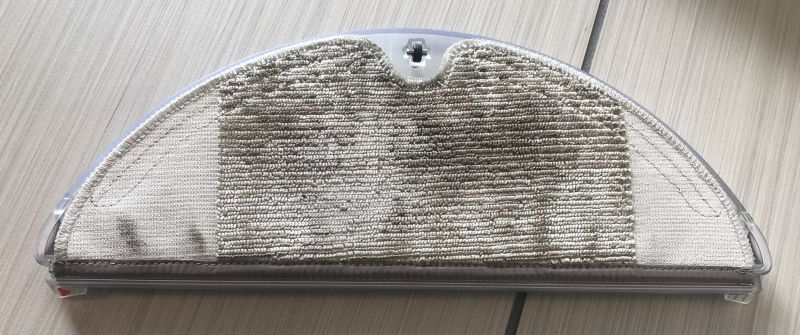
To mop, you don’t have to tell the vacuum any different directive, just simply attach the water tank to the underside of the mop with either a disposable or cloth cleaning pad attached and select “clean” from the menu. We keep a relatively clean house, so we were pretty surprised at how much the initial mopping was able to get clean.

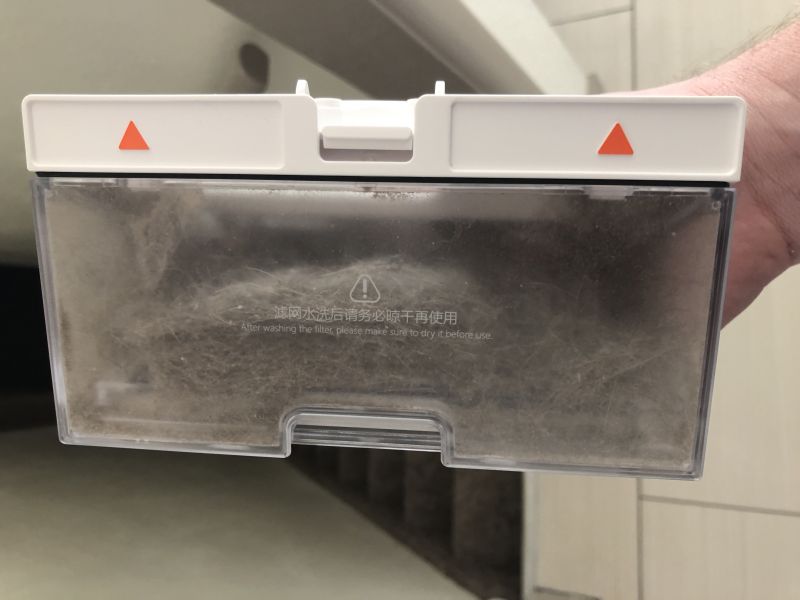
Once the device has mapped the area and cleaned it fully, it will return itself to the dock. Then simply lift the back cover and remove the dustbin to dump out the collected dirt. You can also use the cleaning tool to cut out any hair that has been wrapped around the rotating brush on the underside.  I highly recommend doing this regularly, as I have found that hair accumulation around rotating parts tends to be the downfall of a lot of vacuums in my time.

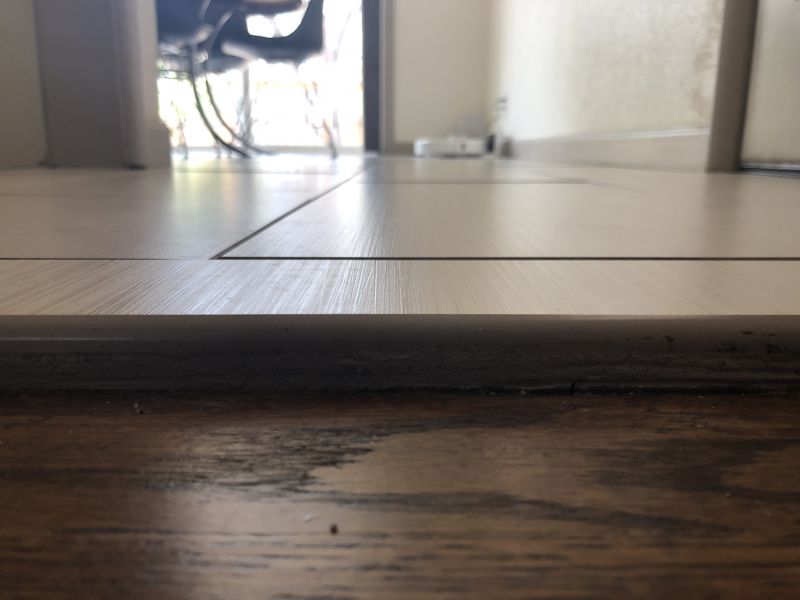
One of our bigger concerns was the ability of the vacuum to maneuver down and back up over the tile-to-hardwood ledge between our kitchen and living room shown below. It is about 3/4 of an inch and the S6 navigates this on a daily basis with absolutely no trouble. Additionally, it has sensors that detect dropoffs and hasn’t had a problem whatsoever with our open stairway down to the basement.

Additionally, in our living room, we have hardwood floors with a rug under the coffee table. The vacuum gets up onto the rug effortlessly and switches mode to higher suction while on the carpeted rug – then switches back as it goes back onto the hardwood.

Additionally, you can place the vacuum in an area and press the spot clean button on the device and it will clean a small area and then return back to the dock to charge.

Setup

Very easy to set up and get going – less than 20 minutes of actual set up to get it started charging and communicating with the app. Initially, it will need to vacuum the entire house, building its map of the area. Once this is done, it will return to the dock and communicate with the app to verify the area – you’ll then be able to go in and designate zones and or add invisible barriers if there are areas that you don’t want the vacuum to travel into.

Performance

The vacuum works great and does exactly what we wanted it to do and more. The mopping function saves us a lot of time in effort in keeping the kitchen floors clean on a daily basis. For the map I provided screenshots of, it takes about 40 minutes to vacuum completely.

What I like

  • Mopping function is highly useful and not complicated for attaching.
  • Easy to use – map building feature allows for easy and quick selection of cleaning areas
  • Very quiet, we can keep the TV on just a slightly higher than normal volume while it does its work.
  • Navigates all the obstacles of our home – tile drop off, around kitchen table legs, under furniture.
  • Side spinning brush helps grab even more dirt into the suction head.
  • Sensor for major drop offs works great (stair recognition).
  • App shows the percentage of filter use for easy look up to see when maintenance needs to be performed.
  • Easy clean up of dust bin and mopping pads.

What I’d change

  • Occasionally we get a notification on our phones in Chinese rather than the English setting – bug fix in the app would remedy this.
  • Needs a large area around the dock to have room to return – which is hard to ensure in smaller homes and limits where you can dock the device.
  • Can get stuck on table legs some times, and will give a false error code before dislodging itself.
  • Would be nice to have separate maps for mopping and vacuuming, to be able to exclude carpeted rugs from being mopped.

Final thoughts

The RoboRock S6 has become a key appliance in our house, being run on pretty much a daily basis to help clean up the cooking mess that made it to the floor, the stray hairs and the pet dander/hair that accumulates in all the hard to reach places. We love using the mop feature in the kitchen, as it’s apparent that dirt doesn’t always show itself on these floors. With two humans and four 4-legged friends, we need to work to keep the floors clean so it’s very convenient to be able to hit one button on our smartphones rather than go through the hassle of getting the stand-up vacuum out on a daily basis. I would strongly recommend this vacuum for those who need a robotic being to clean up after them from time to time!

Price: $599.99
Where to buy: eBay
Source: The sample of this product was provided by RoboRock.

Filed in categories: Reviews

Tagged: ,

Roborock S6 robot vacuum review originally appeared on The Gadgeteer on June 26, 2019 at 8:00 am.

Note: If you are subscribed to this feed through FeedBurner, please switch to our native feed URL http://the-gadgeteer.com/feed/ in order to ensure continuous delivery.
Botanium Hydroponic and Automatic Indoor Gardening Pot review

REVIEW – Farm fresh herbs and veggies can make all the difference between a good dish or a blah dish. But not everyone has the time, space, or interest to put in their own garden. Gardening is Jeanne’s hobby and we have a 50′ x 50′ fenced in garden plot on our property. Traditional gardening is a ton of work and is reliant on mother nature blessing or wrath when it comes to yield. Today I want to show you a very small gardening option that you can do indoors with little to no effort. It’s the Botanium Hydroponic and Automatic Indoor Gardening Pot. Let’s check it out.

What is it?

The Botanium is a self-contained tabletop automatic self-watering hydroponic indoor gardening pot.

What’s in the box?

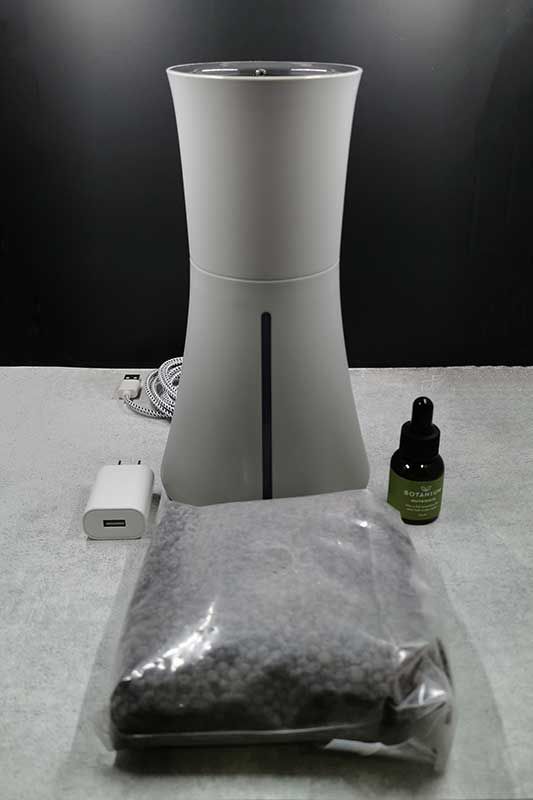
  • Botanium gardening pot
  • Gardening medium
  • Pipette bottle with liquid nutrients
  • AC adapter
  • User guide

Design and features

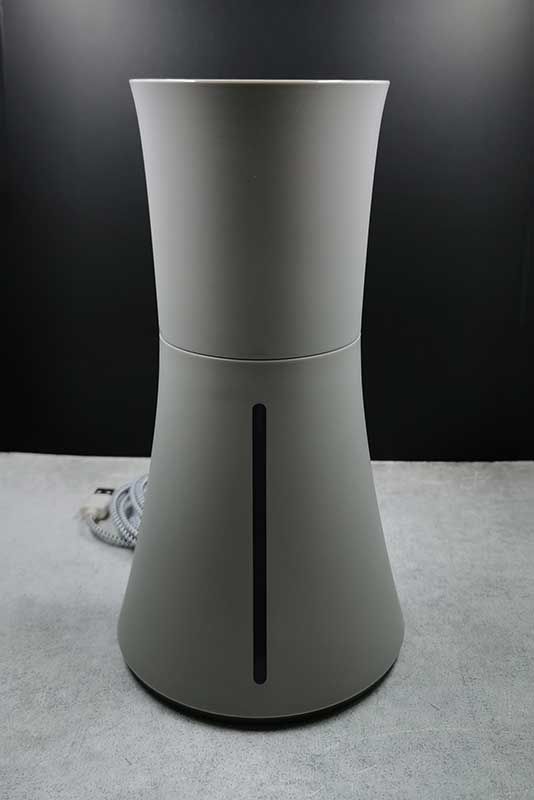
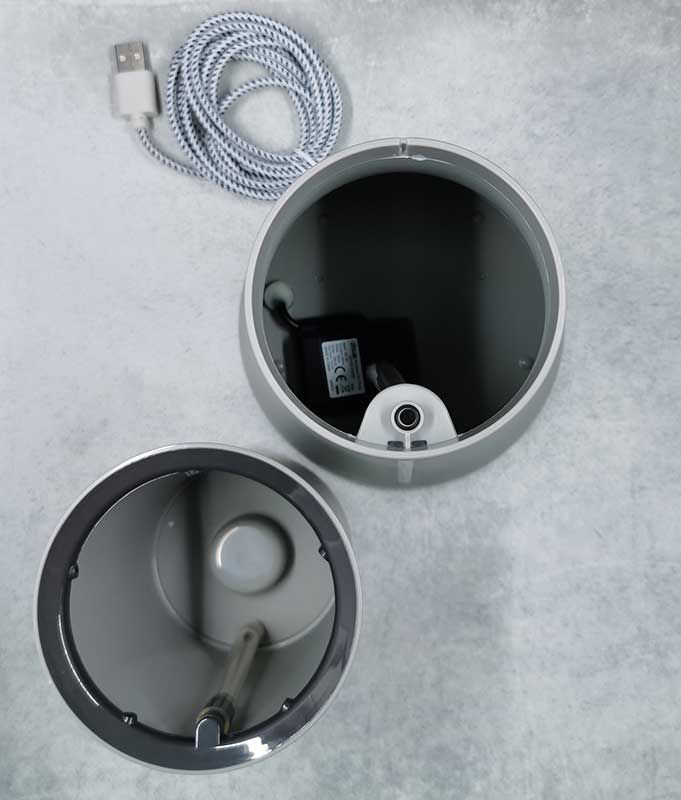
The Botanium hydroponic gardening pot is available in three colors including the grey version that was sent to me. It is made of plastic in a contemporary shape that resembles a flower vase and the pot is made up of two pieces.

There’s the bottom section which is the water reservoir and holds the pump mechanism, and the upper section where the growing medium is placed and where the plants grow.

It’s green thumb time!

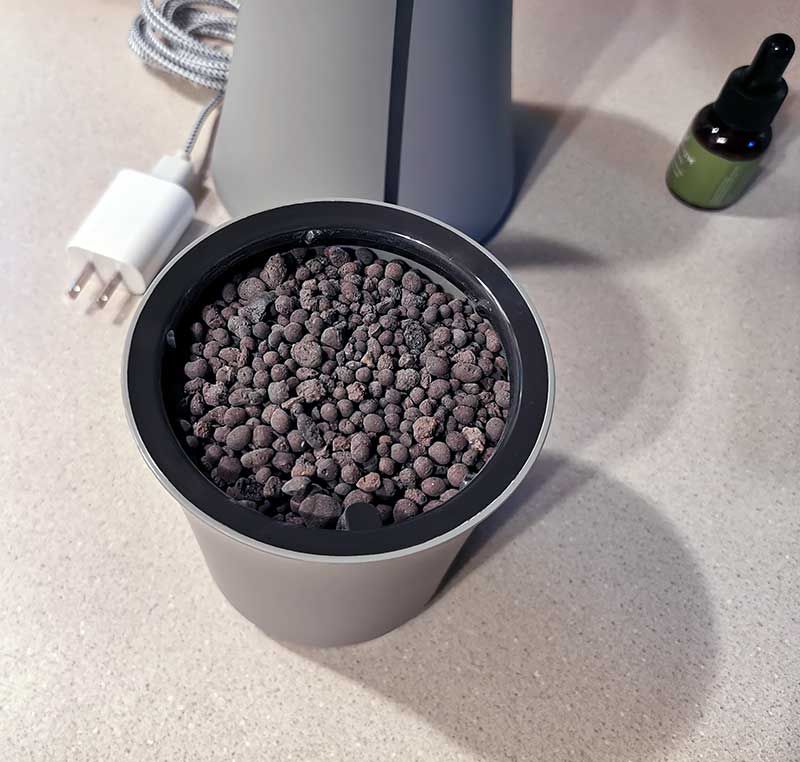
Setting up the Botanium is quick and fun. All you have to do is fill the upper section with the growing medium which looks and feels like porous brown pebbles.

Then you fill the bottom section with water, add 4 droppers of the liquid nutrients, and set the upper section on top.

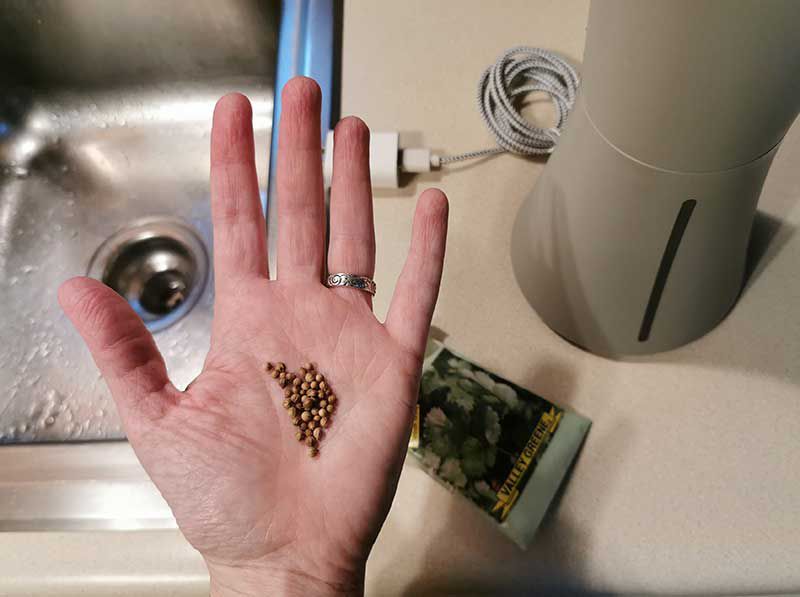
Next, you have to get some seeds. I had some coriander/cilantro seeds on hand and used those. All you have to do is poke them in the growing medium.

Then you plug in the pot and within a few seconds, the automatic watering pump will kick on to water the seeds. This happens every 6 hours. Here’s what it looks like when it’s all set up.

VIDEO

It’s up to you to keep an eye on the water level in the lower section of the pot by looking at the level window on the front. Every few weeks you’ll have to full it up with water and add more of the fertilizer drops.

Depending on the variety of seeds that you planted, they will sprout in a few days. Note that you will need to place the Botanium pot in a well-lit area since plants need sunlight just like regular ones. I really wish that some sort of light attachment was available for this pot as you can see from my pictures, the seedlings are very lanky even though I placed the pot in a window.

What I like

  • Easy to setup
  • Automatic watering
  • You can use any type of seeds that you have
  • Reusable

What I would change

  • Make a larger capacity pot
  • Include a light attachment

Final thoughts

Growing plants with the Botanium is pretty much foolproof because it takes care of the watering for you. All you need to do is make sure to put the pot in a bright area and keep the water reservoir filled.

If you’ve always wanted to grow herbs or flowers but don’t have room for a traditional garden, the Botanium is a fun and easy way to get started indoors. Just remember that this is a really small pot, so you can’t expect a huge harvest 😉

Price: $79.00
Where to buy: Amazon
Source: The sample for this review was provided by Botanium.

Filed in categories: Reviews

Tagged:

Botanium Hydroponic and Automatic Indoor Gardening Pot review originally appeared on The Gadgeteer on June 25, 2019 at 10:27 am.

Note: If you are subscribed to this feed through FeedBurner, please switch to our native feed URL http://the-gadgeteer.com/feed/ in order to ensure continuous delivery.
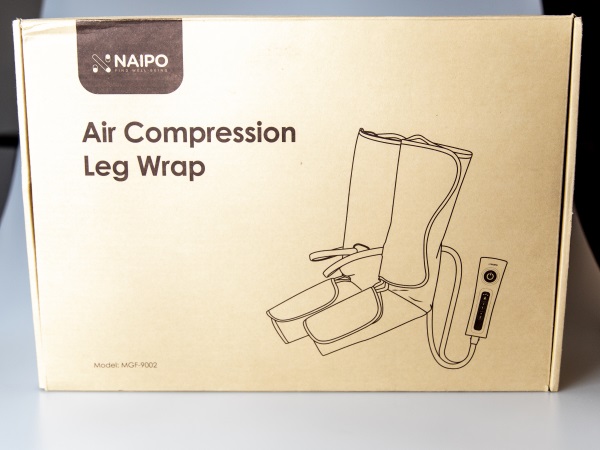
Naipo Air Compression Leg Wraps review


REVIEW – Approximately 8 years ago, my father who is now 87 years old, was diagnosed with Neuropathy as a result of aging. Diabetic Neuropathy seems to be the most common type, but the symptoms are the same with the latter being more extreme. As a result of helping him with his condition, I have learned a lot about various types of issues that contribute to the level of discomfort associated with this chronic disease. One of those issues can be poor circulation. I am very interested in testing the Naipo Air Compression Leg Wraps to see how they perform and then maybe I will have my dad try them.

What is it?

The Naipo Air Compression Leg Wraps are a pair of air compression devices that you wrap around your legs and feet and then they work via air compression to aid in the circulation in those body parts. They are made of durable material and designed to be therapeutic.

What’s in the box


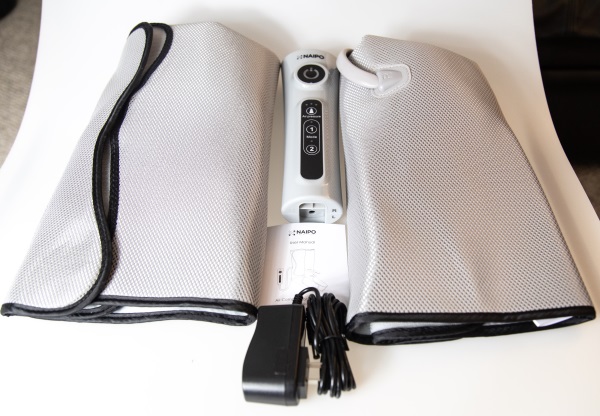
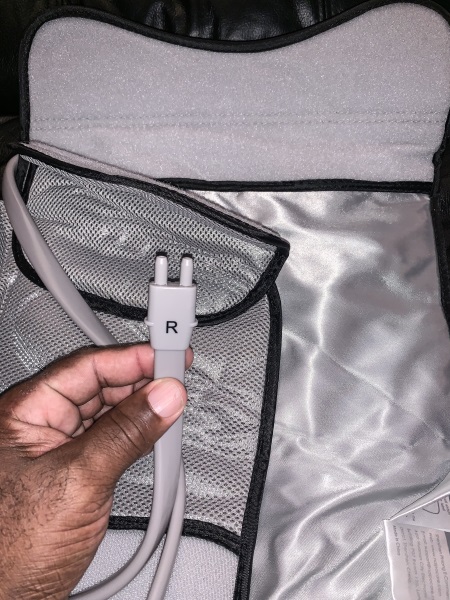
2 x Compression Leg wraps (“R” for right leg / “L” for left leg)
1 x AC Adapter
1 x User manual
1 x Handheld controller

Design and features

Specifications

Features

Stress-Relieving Massage: This air massager provides cyclical air compression for your calves and feet, allowing you to enjoy an unforgettable massage experience
Adjustable Modes and Compression Intensity: Choose a setting that works best on you for an optimal relaxation experience that helps to alleviate fatigue and pain
Ergonomic Design: The leg air massager is made from a durable and dirt-proof fabric. The design of the air compression wraps fits naturally and comfortably around your legs
Built-in Safety Features: The device shuts off automatically after 15 minutes for safer user experience. The corded design allows for consistent power all the time

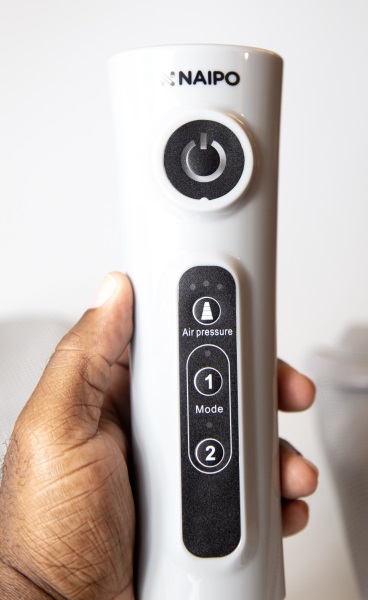
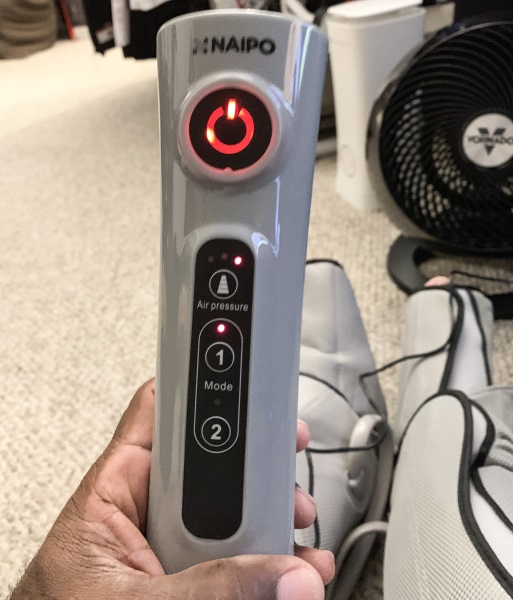
There is one main controller that has everything that you need on the surface to use the massager. The controls are the power button, an air pressure button, and the 2 mode buttons.

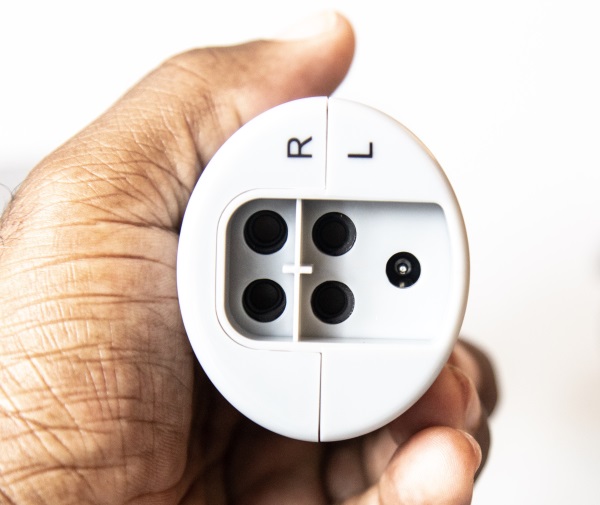
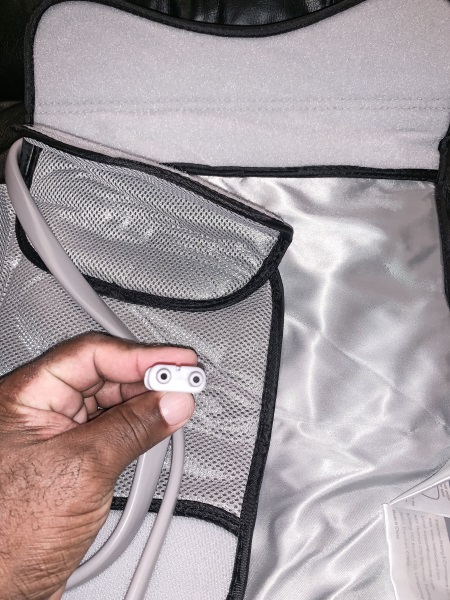
At the bottom of the controller, there are four jacks for the pair of connecting cables for each side of the massager, and the power jack for the AC adapter.


Performance

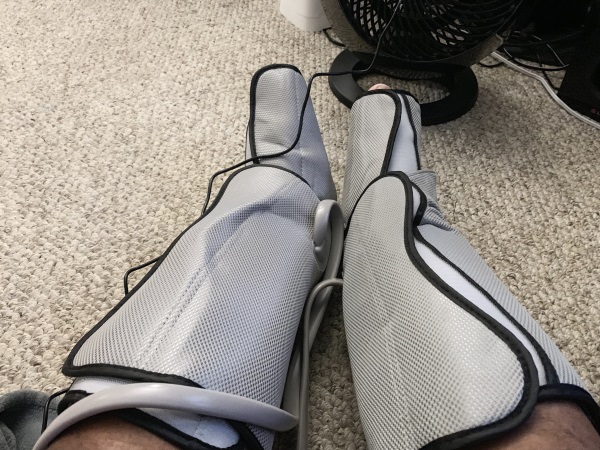
The first thing that you have to do to use these leg massagers, is to wrap them around your legs and feet. They are secured via the attached velcro and have a bending section that allows you to connect the lower part around your feet and the upper around your legs.

Once you plug in the cables to the controller and turn on the power, the power button LED lights red. As soon as you push the power button, air compression begins in both leg massagers. You have the option to increase or decrease the air compression level/intensity and to change modes which changes the way the compression moves around your legs/the rhythm.


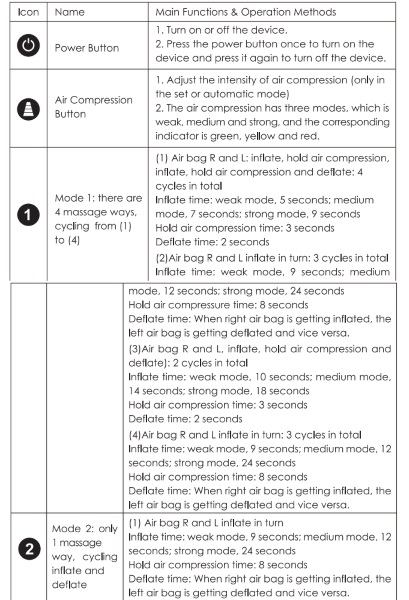
The following chart explains the control functions:

What I like

  • The quality of the device
  • The simple controller
  • The therapeutic massaging effect

What I’d change

  • The length of the AC adapter cable

Final thoughts

The Naipo leg massager is the first of its type that I have tried. It is an interesting feeling in terms of having your feet and legs wrapped in one device that can feel a bit restrictive. However, it does massage both of your legs and feet and while I hate being immobile like that, I think that this would work great for people with circulation problems. As I previously mentioned, my father suffers from Neuropathy and it specifically affects his feet. I am hoping to convince him to try them sometime soon. In terms of the compression and the massaging effect, they seem to work well, and overall, they are well constructed and should withstand daily use.

Price: $89.99
Where to buy: Naipo Website and Amazon
Sample: The sample for this review was provided by Naipo

Filed in categories: Reviews

Tagged:

Naipo Air Compression Leg Wraps review originally appeared on The Gadgeteer on June 25, 2019 at 9:00 am.

Note: If you are subscribed to this feed through FeedBurner, please switch to our native feed URL http://the-gadgeteer.com/feed/ in order to ensure continuous delivery.
Plugable USB-C Cube docking station review

REVIEW – How many times have you been somewhere with only your phone and wished you had a way to enter emails, browse the internet or work with various Microsoft applications like Word or Excel?  Better yet, how many times did you wish you did not have to lug a laptop or even your large tablet with you every time you traveled and could just use your phone as a computer?   Well if any of these have applied to you, your wishes may have been answered with the new Plugable Docking Station.   Read on to see if this device can make your life easier.

What is it?

The Plugable USB-C docking station  (UD-CUBE-15W) will take your Samsung DeX capable device and turn it into a full-fledged desktop PC.  It has multiple ports to connect an HDMI monitor, several USB devices and an ethernet port.

What’s in the box?

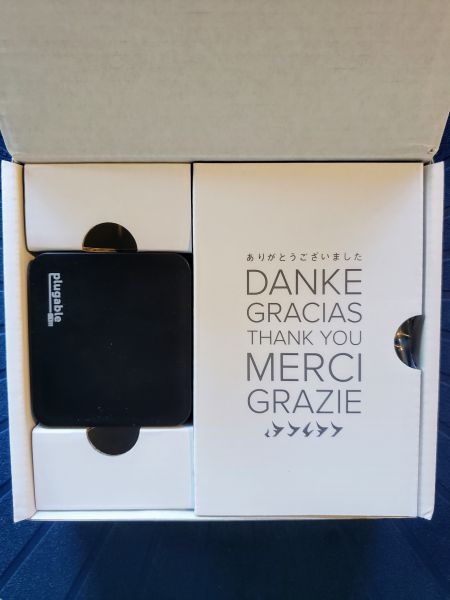
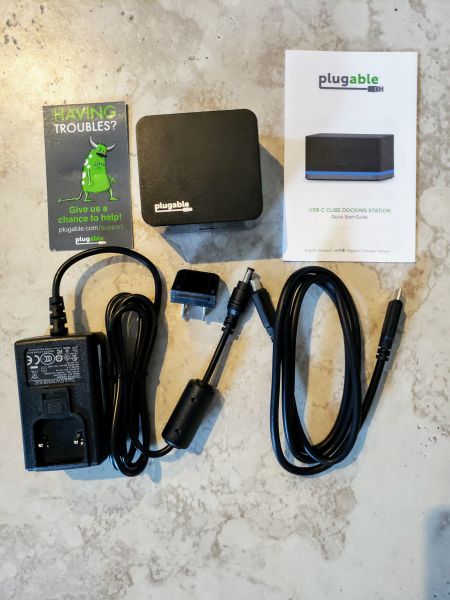
The box contents are surprisingly simple.  Inside the box you will find:

  • The cube itself.  The cube is very small.  Note the ‘Having troubles’ business card next to it.
  • A small business card with contact info if you run into any questions or problems.
  • A user manual.
  • Power adapter (20W 5V/4A)
  • Standard U.S.A. power plug which snaps into the power adapter
  • USB-C to USB-C cable to connect your phone to the cube. 36 inches long

Hardware specs

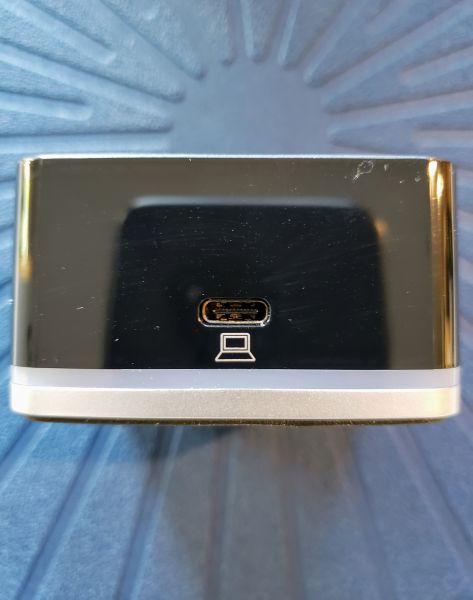
The front of the cube has a single USB-C port.  This is the port where you take the included USB-C cable and connect it to your compatible Samsung DeX device.   Your phone must have a USB-C connector.  Adapters that convert a micro USB or lighting connector to USB-C will not work with the Plugable.  Also, to work as a DeX device your phone must be running the Android 9 ‘Pie’ OS.

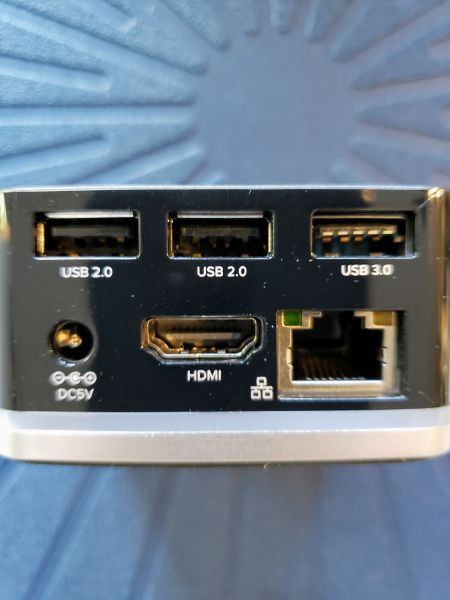
The back of the device has two USB 2.0 ports and one USB 3.0 port.  It also as the power connector, Ethernet, and HDMI port.  It should be noted that the display you use must have an actual HDMI port as DisplayPort monitors are not supported.  I also want to note that the cube supports rapid charging of your phone while it is connected to the cube.

Setup

My setup was pretty simple.   I connected the power supply and then connected my Samsung Galaxy S9 (Running Android 9) using the available cables.   I then used a standard HDMI cable and connected it to my desktop monitor.  I used the USB 2.0 port to connect my trackball mouse and then connected my wireless keyboard directly to the phone via Bluetooth.  It was all pretty painless and simple.

Performance

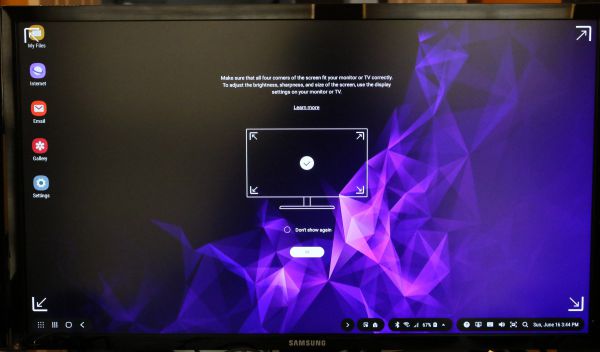
I first want to state that this is not a review of the DeX operating system, but rather of the cube itself and how well it performed displaying the DeX system.   The cube actually has two different options.   It defaults to the DeX display.  The screenshot below shows the initial screen I am presented.
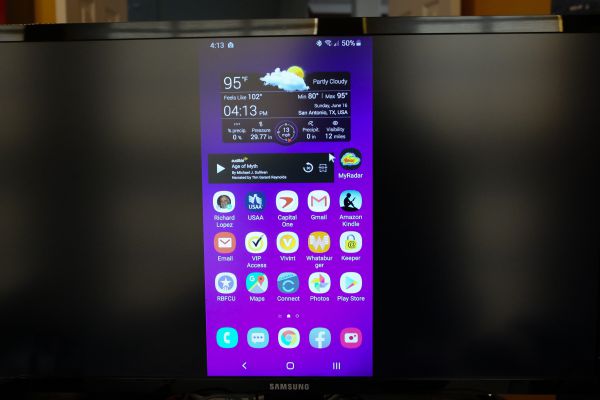
As you can see it looks like a regular desktop.   It is not displaying what is actually on the home screen of my phone.  The center display of the monitor was telling me to check the display and to make sure I could see all of the corners properly.  It went away after a few minutes.    The second option the cube has is that it can just screen mirror the phone to your monitor.  The manufacturer’s web page states that this will work with non-Samsung phones, but you have to check and see if your phone’s USB-C port allows for video output.  The screenshot below shows what the screen mirroring looks like.

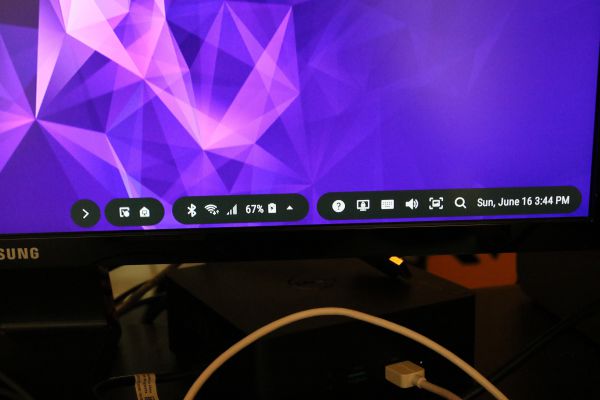
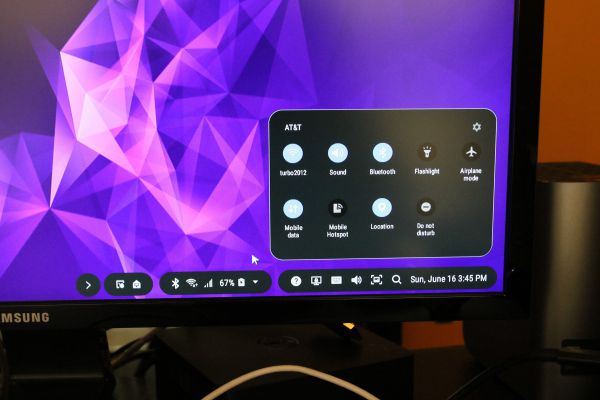
The screenshots below show the detail on the bottom of the DeX screen.  It has quick access buttons to your Bluetooth, Wifi and standard displays for cell signal and battery usage.  You also have quick and easy access to your standard setting buttons like you would have if you swipe down on your phone.

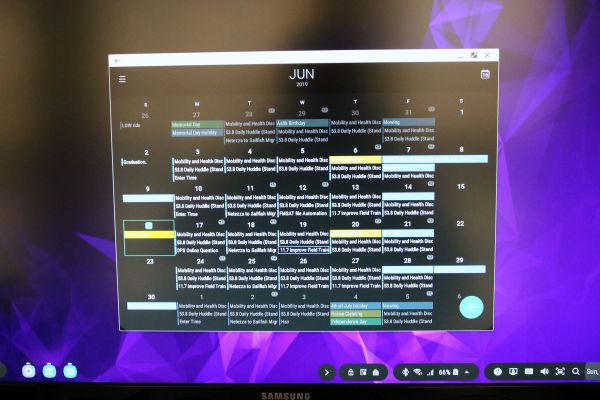
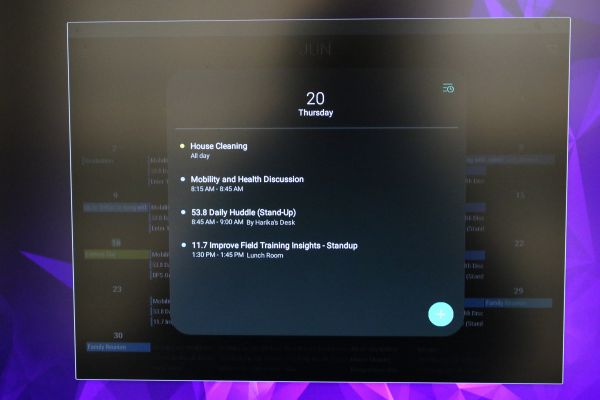
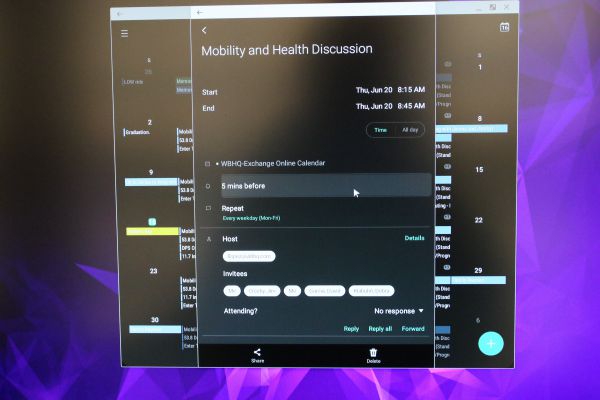
The screenshots below show the initial popup I get when clicking on the date on the far right of the taskbar.  It very nicely throws up my default calendar view.  I can then double click on a day and get the second screen.  Finally, I can click on an actual event and get the details for that event.

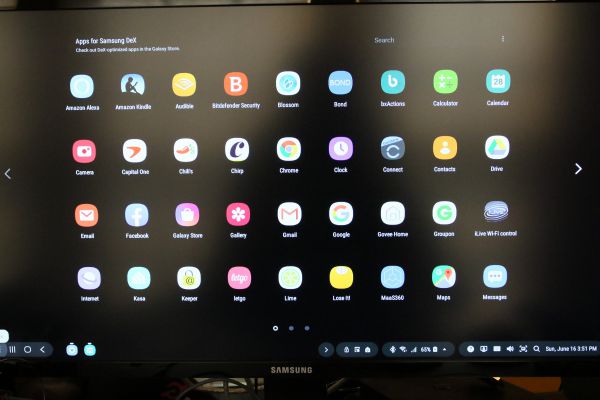
I can get full access to all of my installed app icons by clicking on the apps icon in the lower left corner of the screen.  I want to note that not all apps are DeX compatible.  For example, neither the Amazon Kindle or Audible apps will work on DeX.  You get a message saying they are not compatible.  You can switch to screen sharing and the Kindle app will then display at that time.

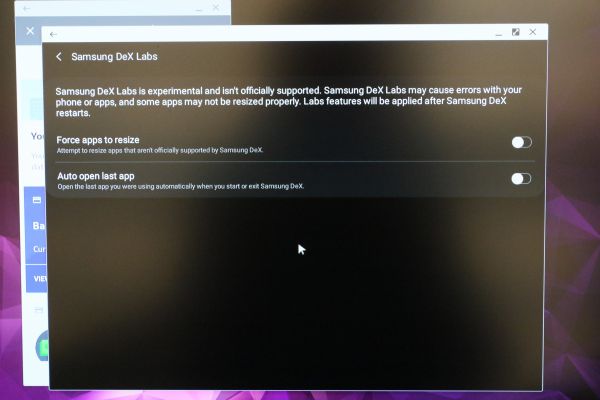
DeX does offer an option it calls Samsung DeX labs where it will let you turn the feature on and try to force noncompatible apps to display full screen.  I turned that feature on as you can see below.

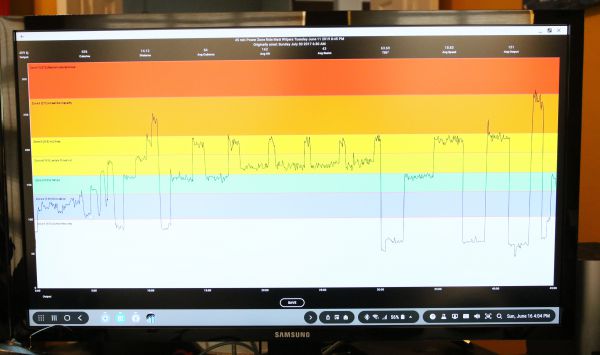
Once the feature was on I selected my PowerZone app which was originally only displaying vertically.  It said it would restart the app and try to display again and I got the following screen below.  You can see I received a nice full-screen display.

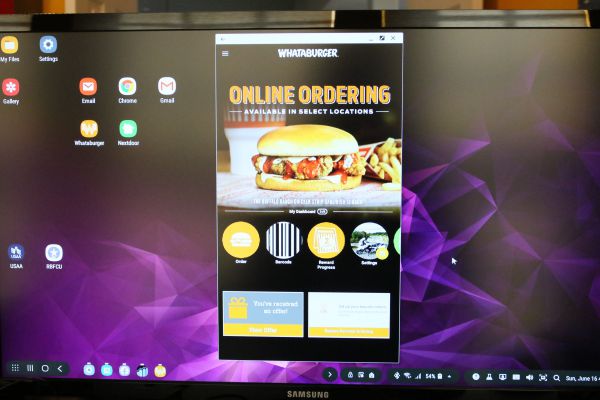
I tried the same with my Whataburger app and it still just continued to display vertically.  To be fair, this app looks pretty optimized for what it is trying to show.

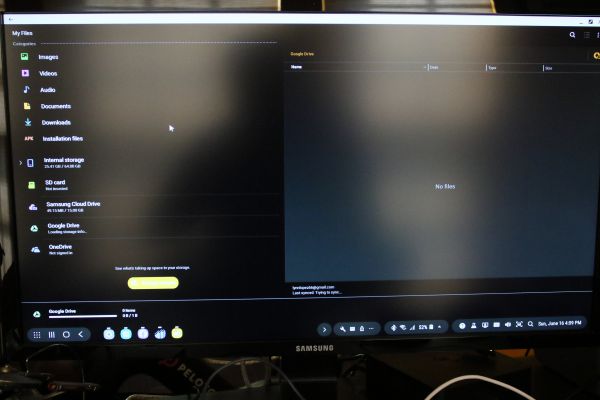
One of the last things I checked out was the My Files icon that displayed by default on the top of the screen.  I like that it tends to display like a standard Windows file explorer.  It gives you options to several cloud accounts like the Samsung, Google, and OneDrive accounts.

Finally, I wanted to show the full-screen shot of my MyRadar app which I think displays very nicely.

What I like

This was my first time using the DeX feature of a Samsung phone and I have to say I was pleasantly surprised.  I was expecting simple screen mirroring and what I received instead was almost a full PC like experience.   I was easily able to connect both Bluetooth and USB devices.  Because the cube connects using a cable, it does not matter what kind of protective case I have on my phone as long as the USB-C port is accessible.  The cube is really small.  It is certainly smaller than my phone and less tall than a business card.  It offers more USB ports than the standard Samsung DeX stations and you can keep the case on.

What I’d change

I honestly do not see much that needs to be improved.  If I had to complain about anything I think they could have included an HDMI cable with the setup.

Final thoughts

If you are looking for a DeX station for your latest model Samsung phone I really think this is the way to go.  You get more ports and can keep the case on your phone while using it.  It is very small and easy to pack.  Assuming that all you need to do on a computer is available through apps on your phone, I don’t see any reason why you would need to bring along a full-blown laptop on your travels.  The biggest thing you would have to pack would be the keyboard and hopefully, if you are going to work somewhere, they would have a keyboard, mouse, and monitor you could use while you were there.

Price: $99
Where to buy: Amazon
Source: The sample of this product was provided by Plugable

Filed in categories: Reviews

Tagged:

Plugable USB-C Cube docking station review originally appeared on The Gadgeteer on June 25, 2019 at 8:00 am.

Note: If you are subscribed to this feed through FeedBurner, please switch to our native feed URL http://the-gadgeteer.com/feed/ in order to ensure continuous delivery.