Foscam FI9961EP IP security camera review

Over the past year or so, I’ve gradually been adding to my home automation and security system. Being a Gadgeteer, I’ve enjoyed implementing different cameras into my system and jumped at the chance to review Foscam’s FI996EP Security Camera. 

The camera arrived in its own nest of closed-cell foam, accompanied by an Ethernet cable and power adapter. The power adapter is somewhat redundant because this camera can be powered by PoE, or Power over Ethernet if your switch is so equipped. Power supply current is 1 Amp.  I used the power supply to configure the camera but set it aside, preferring the streamlined convenience of PoE.

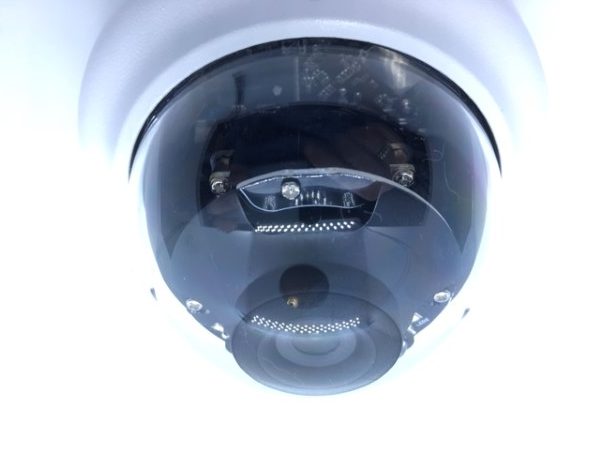
Foscam has a reputation for making sturdy, reliable cameras. The FI996EP is no exception. The housing on this camera is virtually bulletproof. It’s quite heavy, and entirely metal, with a clear plastic dome to protect the camera, SD card, and infrared electronics from the elements. I’m not exaggerating when I say this camera is built like a tank.

Triple hex-head screws hold the cover in place. It’s not included, so you may have to rummage around your tool box to crack open this egg. Once opened, the camera can be pivoted from straight down to about 70° inclination. Clearly, designed to be mounted on a ceiling and aimed in the direction of naughtiness, um… interest.

I downloaded the Foscam App using the instructions from the installation manual, applied for an account, plugged the camera into an Ethernet port, applied power, and scanned the QR code on the camera base to add the camera to the app. All took less than five minutes. With very little lag, the first images popped onto my screen. Images were clear and crisp. Switching from full color to black-and-white infrared “night vision” was virtually instantaneous.  The FI996EP sports an SD card slot to capture images, or you can opt for paid cloud storage. The camera can also be accessed through web browsers using Foscam’s “Equipment Browser” software, but I will primarily use the iOS app.

A five-headed cord sprouts from the camera’s base allowing access to the Ethernet port, reset switch, power jack, and composite video, should there be a need to connect to an existing security system or DVR.

I found this camera to be a capable addition to my home security system and I had no trouble with setup or use, but it should be noted, this camera does not have wireless capabilities and requires wired Ethernet for IP connectivity.  This may be a deal-breaker for some, but the ruggedness, ease of use and image quality shouldn’t be overlooked.

Source: The sample for this review was provided by Foscam. Please visit their site for more info and Amazon to order.


Product Information

Price: $119.99
Manufacturer: Foscam
Retailer: Amazon
Pros:
  • Sturdy, Sturdy, Sturdy
  • SD card slot
  • Automatic infrared "night vision"
Cons:
  • Expensive
  • Requires wired Ethernet for IP connectivity

Filed in categories: Reviews

Tagged:

Foscam FI9961EP IP security camera review originally appeared on on July 7, 2017 at 8:44 am.

Note: If you are subscribed to this feed through FeedBurner, please switch to our native feed URL http://the-gadgeteer.com/feed/ in order to ensure continuous delivery.

totallee $29 thin leather iPhone 7+ case review

I typically do not have a case on my iPhone, preferring the natural feel of the smartphone itself. But I do worry a bit about buggering my very expensive tech-toy due to my desire to use it naked. I sometimes use a case when I’m feeling conservative but most feel so bulky and in the way. totallee’s thin leather iPhone case tries to bridge the gap between the two extremes. This case is about as minimalist as you can find, barely changing the look, feel, and weight of the sleek and slim device. 

Note: Click the images to see a larger view.

totallee is a startup company based out of South Pasadena, CA. Their primary mission is to make thin iPhone cases that provide decent protection without adding bulk. When totallee began in 2013, they wanted to develop a line of cases that are “thin, elegant and fairly priced”. According to their website, they’re a “group of hard working, creative individuals who care about the products we sell and about the people we sell them to.”

Truth be told, when I first opened the packaging and held the totallee thin leather case my initial impression was less than positive. It felt cheap and at best, mediocrely made.  But with time, it has definitely grown on me. I’ve had it on my iPhone 7+ for several weeks and have not gotten tired of it.

The case itself is made from polypropylene and is a mere 0.02″ thick, weighing in at 0.1 oz. The thin leather iPhone case features a genuine lambskin leather backing that is inset into the plastic.

The $29 thin leather iPhone case is perfectly fitted for the iPhone 7 and 7 Plus. Here you can see it installed on my smartphone…it is a very tight fit with zero gaps whatsoever. totallee’s goal is to: keep your iPhone 7 Plus looking like an iPhone.

The lambskin leather on the back of the case adds texture and grip to your slippery device. I was surprised to find out the “leather case” only had leather on the back vs the whole case. But overall the design works very well.

This case snaps-on the smartphone and covers/protects 99% of the iPhone’s sides and back. Instead of push-throughs, the totallee case has well fitted cutouts that allow access to the iPhone’s mute, volume, and power buttons. The buttons themselves are slightly recessed but easily pressed when desired.

The totallee case has a cutout for the lighting connector and speaker holes on its base.

The case covers the entire top of the iPhone.

totallee backs their $29 thin leather iPhone case with a 2-year hassle-free warranty. It is available for the iPhone 6/6+/7/7+ in black and as the name implies costs 29 bones.

The totallee $29 thin leather iPhone 7 case is great minimalistic protection for your sleek and slim smartphone. This case adds little bulk or weight to your iPhone while providing decent protection from bumps, nicks, or scrapes. Though it wouldn’t add much drop or impact protection. An added bonus is that the totallee case enables me to sandwich a metal plate between it and my iPhone to use the magnetic mounts in my vehicles. Bottom line: the totallee thin leather iPhone case is well made/engineered from solid materials, designed to keep your iPhone looking and feeling as Apple intended while protecting it from the outside world.

Source: The sample for this review was provided by totallee. Please visit their site for more info and to order. You can also see other totallee cases on Amazon.


Product Information

Price: $29
Manufacturer: totallee
Retailer: Amazon
Requirements:
  • iPhone 6/6+/7/7+
Pros:
  • Excellent minimalistic design
  • Solid materials
  • Perfect fit
  • Protection for nicks, scrapes, bumps
  • Great value
Cons:
  • None

Filed in categories: Reviews

Tagged:

totallee $29 thin leather iPhone 7+ case review originally appeared on on July 7, 2017 at 6:24 am.

Note: If you are subscribed to this feed through FeedBurner, please switch to our native feed URL http://the-gadgeteer.com/feed/ in order to ensure continuous delivery.

Momentum Wi-Fi Video Camera review

There are so many home security cameras on the market, that it can be frustrating to figure out which one to choose. Do you go with a tried and true brand like Nest or DLink, or do you try a less expensive brand like the Momentum Wi-Fi Video Camera which I’m going to tell you about today? Let’s find out.

What is it?

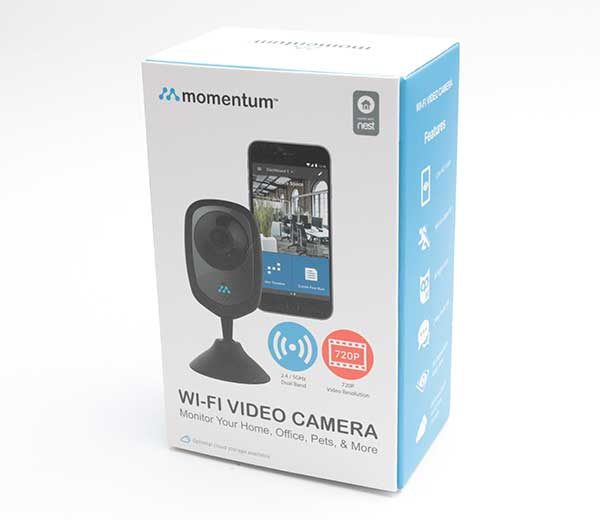
Momentum is a WiFi home security camera with the following features:

Two-way talk through the mobile app
720p HD resolution (720×1280)
110-degree viewing angle
Built-in night vision
Dual band Wi-Fi support (2.4GHz and 5.0GHz)
Integration with NEST and future home security products from Momentum *

*This is according to the Momentum site. At this time I can’t find any way to implement this integration.

What’s in the box?

Momentum 720P wireless camera
AC adapter
micro USB charging cable
Mounting hardware
Manual
Quick start guide

Design and features

The Momentum WiFi Video Camera has a black and brushed silver plastic case.

On the front is the 720P camera lens, a status LED, and a microphone for two-way communication.

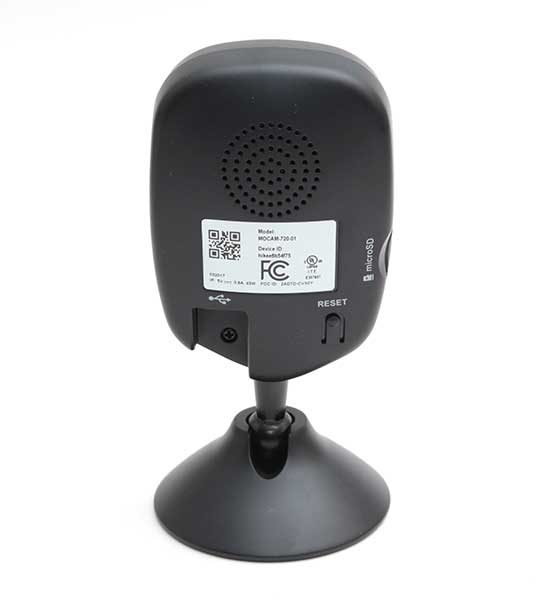
On the back of the camera is a speaker, a micro USB connection for the included power cable, and a reset button.

On one side of the camera is a micro SD card slot. A memory card is not included with the camera, but it will work with cards that have up to 128GB capacity.

The camera’s base is magnetic. It will stick to any flat steel surface or you can use the included steel plate to attach the camera to a wall or ceiling.

The angle of the camera can be adjusted by pivoting it in the base.

Setup

To setup the Momentum camera, you install the iOS or Android app on your mobile device. I did my testing with an LG G6 and an iPhone 7 Plus.

The application then guides you step by step to add the camera. Basically, you just plug in the camera, point the phone’s camera at the QR code on the back and it detects your WiFi network. Then you just wait for it to complete the setup.

I had a few glitches during the initial setup where the app detected the camera but never finished setting it up. Note that I was setting up the Momentum camera within 3.5 feet from my wireless rounder and phone. After a couple of reboots, it finally worked.

Usage


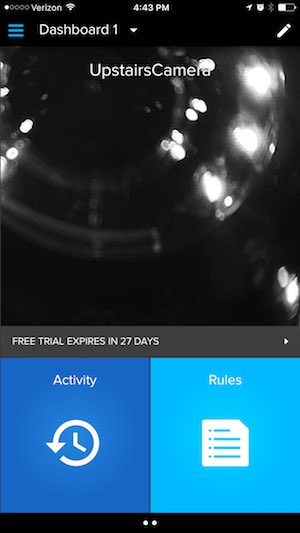
The user interface for the Momentum app has a tiled layout that is easy enough to navigate. There’s a large tile for the camera (it’s not a live view though), a tile/button to go into the activity list and a tile/button to go into the rules setup.

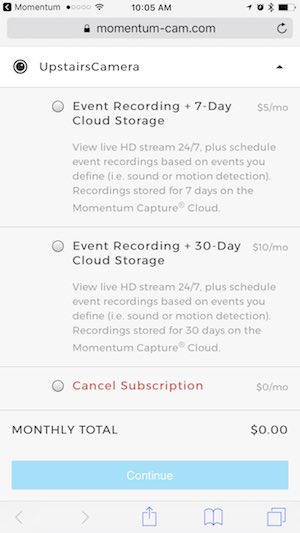
Note that the camera comes with a 30 day free trial of the Momentum cloud service, but the service is not mandatory. Without the service, the camera can save photos and manually captured videos to the micro SD card. The camera will not (as far as I can tell) record ALL footage to the micro SD card.

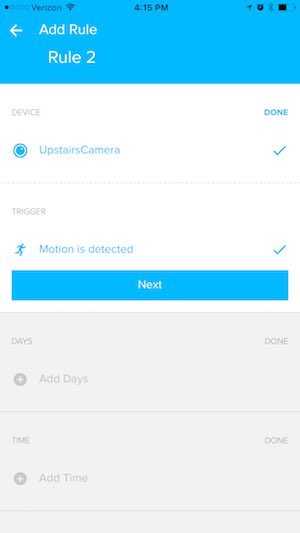
The rules setup is very basic. All you can do is set it to trigger on motion and set the days/times when the triggers will be active. There isn’t a way to set zones or other advanced features that some home security cameras offer.


Tapping the camera tile on the app’s dashboard will take you into the live view of the camera which you see above on the left. Below the live view are icons for two-way communication, video recording, camera snapshot, and the activity list. The slider switch at the top of the screen turns the camera on/off.

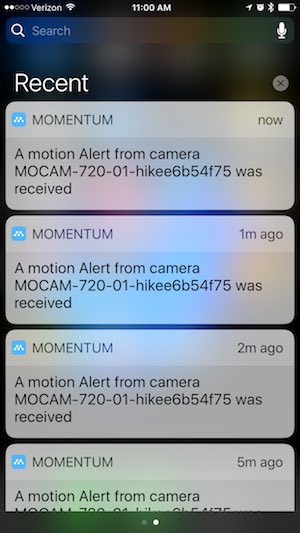
When motion is triggered, you’ll receive a notice on your phone like you see in the image in the middle. This notification does not include a thumbnail of the motion. To see what triggered the notification, you have to go to the activities page which shows a list of all the triggered events (above on the right).

The activities screen is not accurate or updated correctly. It will list some events that happened yesterday under the heading for today. And as you can see, each entry does not always show a thumbnail.

But even worse is the fact that very often, I’ll click on one of the notifications in the list and it will act like it’s going to play the recorded video clip but it’s completely blank. This is one of the most frustrating problems with the Momentum camera, but it’s not the only problem.

Another problem is with the night vision IR. See the image above? That was taken around 8 AM in the morning. It’s a little gloomy outside, but it’s not that dark right?

During the same time, the live view through the Momentum app looks like this. As far as I can tell, there’s no way to deactivate the IR feature or schedule it for only certain times of the day.

Final thoughts

For $49.99 I was hoping that the Momentum Wi-Fi Video Camera would be a good deal, but it turned out to be a dud. It’s fine if all you want to use it for is a live viewer, but if you want to depend on it for motion alerts, you’ll be very disappointed. My advice is to skip this one.

Source: The sample for this review was provided by Momentum. Please visit their site for more info.


Product Information

Price: $49.99
Manufacturer: Momentum
Pros:
  • Inexpensive
  • Built-in micro SD card slot for local video storage
  • Magnetic base
Cons:
  • Notification video is sometimes blank
  • Can't turn of IR night vision
  • Manual image and video capture doesn't show up in the app
  • Activity screen does not show current info

Filed in categories: Reviews

Tagged:

Momentum Wi-Fi Video Camera review originally appeared on on July 6, 2017 at 9:48 am.

Note: If you are subscribed to this feed through FeedBurner, please switch to our native feed URL http://the-gadgeteer.com/feed/ in order to ensure continuous delivery.

Tronsmart Presto 10,000mAh power bank review

Aside from my phone, power banks may be the most important tool in my gadget arsenal. I use my phone for everything and have the ability to drain the battery in a few short hours. If it weren’t for power banks, I would find myself lost in tech wilderness more often than I care to admit.

I recently reviewed the Tronsmart Presto 10,000mAh power bank. How will it compare to those I’ve reviewed in the past?

Measuring 5.5″ (L) x 2.67″ (W) x .62″ (H), the Presto is definitely something that can fit in your pocket; yet, it still packs an impressive 10,000mAh capacity.

The Presto has three ports on the end of the device.

The two USB A ports use Tronsmart’s VoltiQ technology to determine the maximum current a device can use. The green USB A port to the right also utilizes Qualcomm’s Quick Charge 3.0 technology. The middle port is a micro USB port used to charge the power bank.

The front of the device has four LED indicators. Each LED represents approximately 25% of battery life.

The back of the device contains branding and technical information.

The body of the Presto is smooth and feels a bit rubbery. Whatever the body is made of, it’s a dust magnet.

Perhaps the most important aspect of the Presto is it takes advantage of Qualcomm’s Quick Charge 3.0 technology.

Quick Charge 3.0 allows phones to recharge at much greater speeds than normal. The most recent version automatically optimizes the power transfer rate and works with any voltage between 3.6V to 20V, while remaining backward compatible with Quick Charge 1.0 and 2.0.

Although no iPhone is Quick Charge compatible, most major Android devices are compatible with some form of Quick Charge. Unfortunately for me, the Pixel XL is one of the Android devices that doesn’t benefit from Quick Charge.

I was hoping the combination of VoltiQ and Quick Charge would allow my Pixel XL to fast charge; alas, I was forced to watch my phone recharge at standard speeds.

Even without being able to take advantage of Quick Charge, the Presto still allowed for heavy use of my phone; I could use it to text, surf the net, and use it as a hotspot without any impairment.

Although not related to performance, the Presto also comes with a travel bag.

It’s a simple nylon bag, but it could be handy if you’re going to toss the power bank in a backpack or purse.

Overall, I really liked the Presto. It’s small but packs a powerful punch. It’s become my go-to power bank since I began reviewing it.

At $19.99, you’re getting great performance for a great price. I would definitely recommend it to anyone in the market for a power bank.

Source: The sample for this review was provided by Tronsmart. Please visit their site for more information and Amazon to order.


Product Information

Price: $19.99
Manufacturer: Tronsmart
Retailer: Amazon
Requirements:
  • Quick Charge compatible device for enhanced charging speeds
Pros:
  • Fast Charging with Quick Charge
  • Affordable
Cons:
  • None

Filed in categories: Reviews

Tagged:

Tronsmart Presto 10,000mAh power bank review originally appeared on on July 6, 2017 at 7:03 am.

Note: If you are subscribed to this feed through FeedBurner, please switch to our native feed URL http://the-gadgeteer.com/feed/ in order to ensure continuous delivery.

Wemo Wi-Fi Smart Dimmer Light Switch review


As I slowly add parts to automate my home, I’m always interested in the gadgets that are being released to make life easier or… just cooler.  The WemMo Dimmer is one of those devices that just makes sense. 

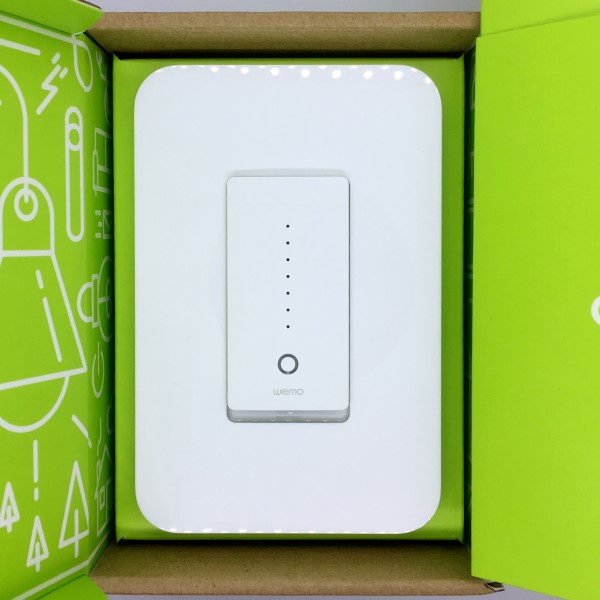
The dimmer arrived in, okay, I’m man enough to admit, sexy packaging. Outside, the box is your run-of-the-mill cardboard color with some white graphics showing the WeMo logo, a line drawing of the dimmer, and a diagram of “suggested†dimmer settings with such settings as “3 am  bathroom run.†  It made me smile. Inside, the box is an almost shocking shade of green. A green that could wake up a sleepy Gadgeteer! Lots more with graphics adorn the tri-fold enclosure.  Opening the package reveals the elegantly designed dimmer switch and a slot marked “get set.â€

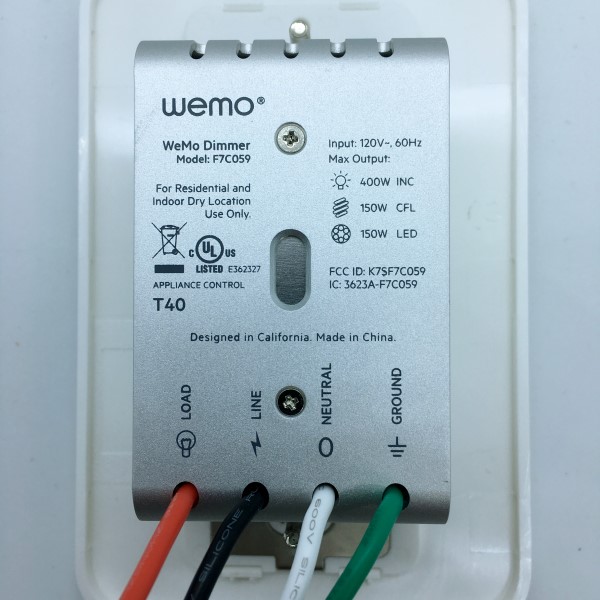
Wemo’s “Let’s go†manual is a comprehensive instruction manual for installing the dimmer. Graphics and text are easy to understand, waking an installer, even a novice, through the sometimes frightening aspects of home wiring this installation requires. The kit even includes the wire nuts and labels to make sure (no pun intended) wired don’t get crossed.

I had no trouble identifying the wiring and what needed to be done to replace a hallway ceiling lamp switch, probably the most often used switch in my home. Turning off the circuit breaker, I removed the old-style switch and wired the WeMo. One note of caution: the Wemo Dimmer is considerably more bulky that the switch it’s replacing. If there are additional wires in the back of your electrical switch box, you might have a challenge fitting everything back in. Tucking the wires back as far as they will go helps. Make sure you don’t pop the wire nuts off when you do this or you will likely get a surprise when you turn the breaker back on. Of course, if you’re uncomfortable doing this wiring yourself, ask a handy friend or hire a professional. Above all, please be careful.

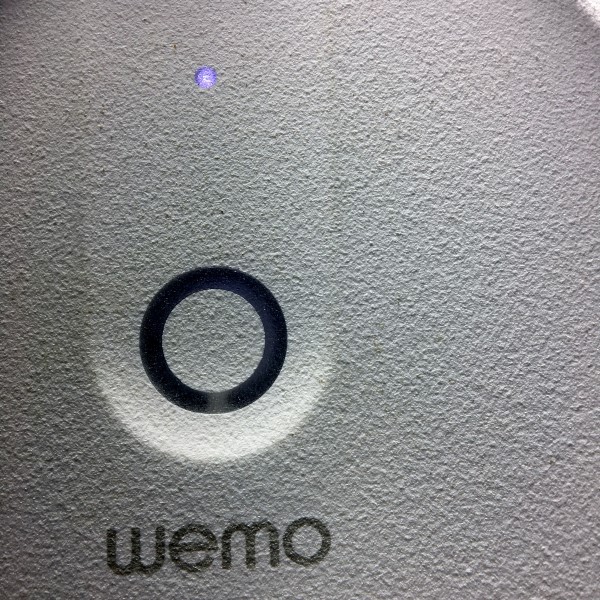
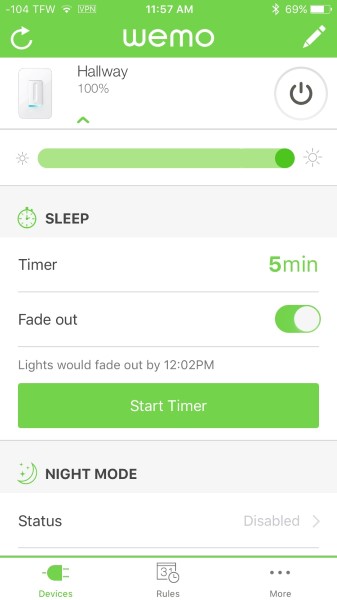
Once the switch was in and the juice turned back on, the Dimmer flashes some funky disco lights and settles into a flashing blue. I downloaded the app and followed the instructions from the manual. Similar to many typical smart devices, my phone connected to the Wemo Dimmer’s Wi-Fi and walked me through setting my bulb type, pairing with Alexa and connecting to my home network. At no point did I feel lost and the entire process progressed very smoothly.

Now the fun part… Now that the dimmer was paired with Alexa, I could issue voice commands to turn on, off or even set a brightness percentage. Pretty slick! I fiddled around with the app and found I could access any lamp function I desired on my home network and through cellular 4G with very little lag. I even connected through a VPN in Thailand and found the same, fast, results.

Moving on, I was able to set timers, set the app to turn off the light after a specific time, and put the dimmer into “Away†mode to randomize turning the light on and off for home security. The app also connects to IFTTT, but I have yet to see what goodies I can find. It seems Wemo really thought things out. Well done.

So far, I am thrilled with the ease of use, functionality, and reliability of the Wemo Wi-Fi Smart Dimmer Light Switch. Given the opportunity, I would gladly replace every switch I have with them.

Source: The sample for this review was provided by Wemo. Please visit their site for more info and Amazon to order.


Product Information

Price: $79.99
Manufacturer: Wemo
Retailer: Amazon
Pros:
  • Well written directions
  • Simple setup
  • Great connectivity
  • Lots of functionality options
Cons:
  • Expensive

Filed in categories: Reviews

Tagged: ,

Wemo Wi-Fi Smart Dimmer Light Switch review originally appeared on on July 5, 2017 at 8:46 am.

Note: If you are subscribed to this feed through FeedBurner, please switch to our native feed URL http://the-gadgeteer.com/feed/ in order to ensure continuous delivery.