Kevo Smart Deadbolt lock, Peak Design Everyday Tote bag, and more – Review updates

Today I have five updates to reviews as far back as 2013 and as new as this past April 2017. Click through to see my recently updated reviews/articles. You can find the updates at the bottom of each page.

Kwikset Kevo Smart Lock review by Julie Strietelmeier

Peak Design Everyday Tote bag review by Julie Strietelmeier

Withings Activite Pop activity and sleep tracking watch review by Julie Strietelmeier

Julie’s gadget diary – I have finally found my perfect travel computer

Julie’s Gadget Diary – Is the Samsung Galaxy Note II too big?


Product Information

Price:

Filed in categories: Reviews

Tagged:

Kevo Smart Deadbolt lock, Peak Design Everyday Tote bag, and more – Review updates originally appeared on The Gadgeteer on August 24, 2017 at 10:11 am.

Note: If you are subscribed to this feed through FeedBurner, please switch to our native feed URL http://the-gadgeteer.com/feed/ in order to ensure continuous delivery.

Paby 3G GPS Pet Tracker & Activity Monitor review

You see people wearing all types of fitness trackers that track steps, sleep, calories burned, etc., but have you ever seen a cat or dog wearing a fitness tracker? Don’t roll your eyes because they exist and I’m going to tell you about the Paby 3G GPS Pet Tracker & Activity Monitor which my cat Max has been wearing for the past week.   

What is it?

The Paby 3G GPS Pet Tracker & Activity Monitor is a tracking device that uses 3G to show in real time where your pet is on a map and it also monitors how active (or inactive) your pet might be.

What’s in the box?
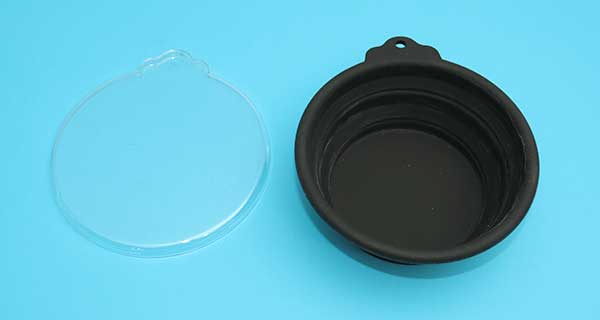
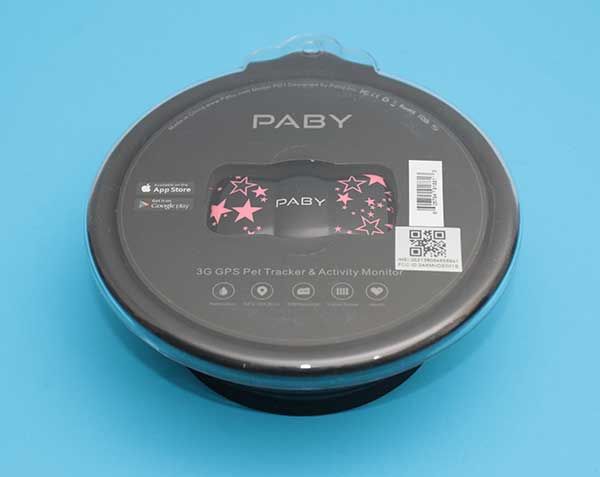
Paby comes packaged in a reusable and collapsible silicone water / food bowl with a lid.
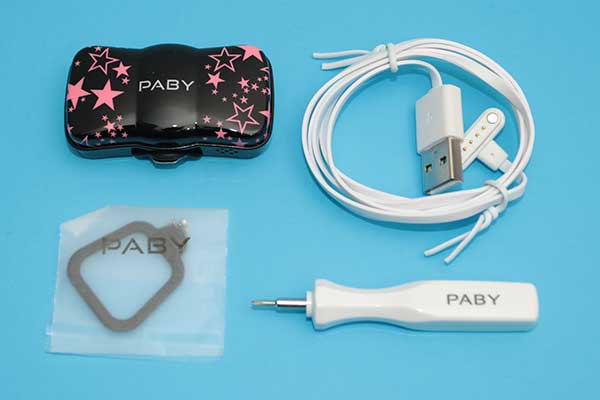
Paby 3G location and activity monitor
USB charging cable
Screw driver
Extra rubber strap
User manual

The Paby device is a plastic device that is shaped like a 2.5 x 1.25 inch bowtie. You can choose from different designs, but I was sent a black Paby with pink stars.

The Paby logo on the front of the device doubles as an LED to show charging and connection status.
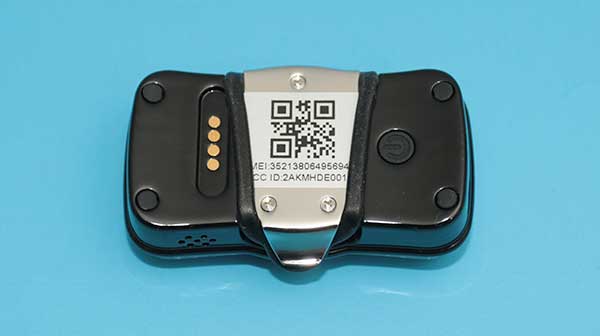
The back of the device has a row of electrical contacts for the included magnetic charging cable. There’s also a power button and a metal cover that protects the SIM card.
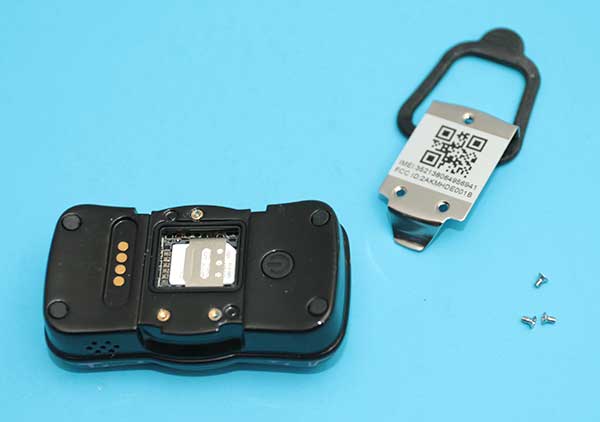
Three screws secure the cover which also holds one side of the rubber strap that is used to attach the Paby device to your pet’s collar.
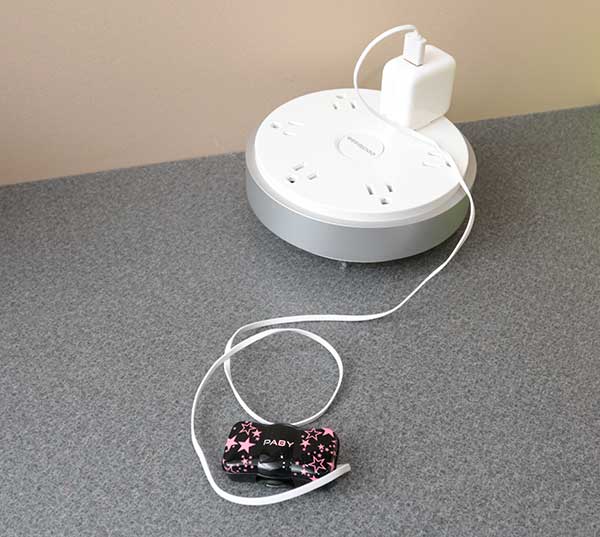
Before you and your pet can begin using the Paby Pet Tracker and Activity Monitor, you have to charge it using the proprietary cable that is included with the device. While the battery is charging, the Paby logo will glow red. About 2hrs later when charging is finished, the logo will glow green.

From my testing, I found that the battery life for the Paby is about 4-5 days. There are factors that can make this time shorter like constantly tracking your pet, using the virtual fence feature and sound features. You can extend the battery life of the tracker by using the scheduling feature which turns off the device during certain times of the day like at night when the pet is in the house and not very active.
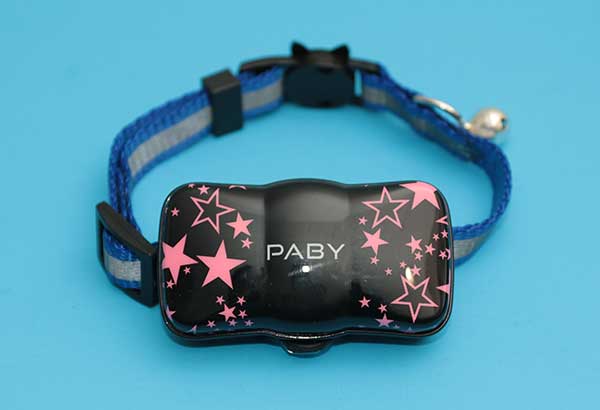
The next step is to attach Paby to your pet’s existing collar. My cat Max doesn’t wear a collar, so I had buy one, but attaching the device to the collar is as easy as pulling the rubber strap off the hook on the side of metal cover on the back of the device, laying the collar in place and then hooking the rubber strap back over the metal hook.


Then you have to put the collar on your pet. Max did not want his picture taken and did not want to wear the collar. But you can see that the Paby device is small enough for cats and small dogs.

Last but not least, you need to install the Paby app which connects the tracker to your iOS or Android device.


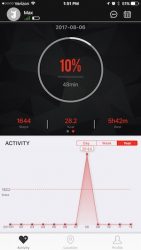
When you first launch the app, it will set up a connection to the Paby tracker and will ask you questions about your pet like if it’s a cat or dog. If it’s a dog, it will also let you search for the breed. It will also ask the age, weight, and health. It uses this info to set daily goals for how much activity the pet should get.

When you launch the app it will sync the data with the tracker to show daily, weekly, and yearly trends.

You’ll see how much your pet was resting, active, and how many steps they walked each day.


In addition to the activity info that is collected about your pet, Paby also uses a combination of advanced 3G GPS, LBS (Location Based Services) and Wi-Fi technologies to provide real-time tracking information.
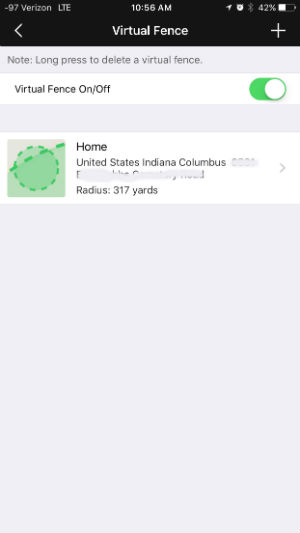
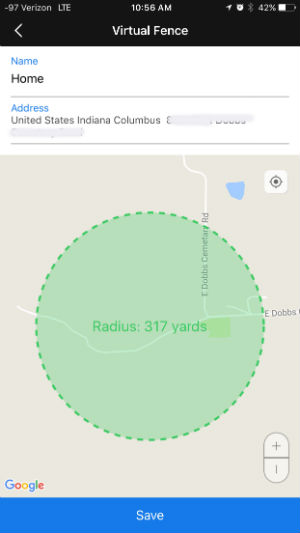
You can also set a virtual fence and receive real-time alerts when your pet leaves the designated zone that you can set around your location from 100 – 1050 yards. Setting a virtual fence will drain the tracker’s battery faster than not enabling this feature.

Other features include the ability to toggle sound and light on the tracker. If you use the tracking feature to try to find your pet but are still unable to find them, you can toggle sound and light which will cause the logo on the front to blink in blue, red, and green, and the built-in speaker will sound an audible alarm that will freak out your pet and allow you to find them if you’re within hearing distance.

The sound feature is also useful if for some reason that tracker comes off the pet’s collar and is lost in the house or yard.

Another feature of the app will let you watch a replay of where your pet has walked each day.

Paby requires a cellular network connection to track your pet and you have two options when it comes to the cellular coverage for this feature of the device.

Option 1: Paby comes with a free SIM card and offers network subscription plans starting at $4.99 per month at http://www.paby.com/plan/ (those purchasing an annual network service plan through Paby will receive 30 days of free service).

Option 2: customers with AT+T and T-Mobile have the option to use their existing wireless network.

I tested the Paby tracker with my cat Max for a couple weeks and although the advertised features worked, I’m not convinced that knowing how many steps that my cat takes a day or how many hours he sleeps is useful information. I think this info might be more helpful for dog owners since dogs tend to require more exercise than cats. I can see how this device would be a good way to keep tabs on a paid dog walker to verify that you and your dog are getting your money’s worth.

The GPS tracking and virtual fencing features are the features that I was most interested in but Max (my cat) wouldn’t cooperate and go outside the defined virtual fence area. That said, I could use the tracker to see his location on a map. But, the app would show him in the woods behind or in front of our house when he was actually sitting right next to me in my basement. Just like other consumer grade GPS devices, Paby won’t pin point the tracker’s exact location.  If you think this device will be able to help find your lost pet in a city or in the woods, you may be disappointed.

Final thoughts

I have mixed thoughts about the Paby 3G GPS Pet Tracker & Activity Monitor. As a cat owner, I’d advise you to skip it. But as a dog owner who also pays to have their pet walked, I can see that the activity features would be useful.

I’m also not too impressed with the GPS tracking features and would not want to rely on the Paby to help me find my lost pet.

Add in that you have to remember to charge it every few days and it just feels like another device that will end up in a drawer after a few weeks.

Source: The sample for this review was provided by Paby. Please visit their site for more info and Amazon to order.


Product Information

Price: $79.99
Manufacturer: Paby
Retailer: Amazon
Pros:
  • Easy to use
  • Small and light weight
  • Sound and light help you find your lost pet or the tracker in a close location
  • Has GPS tracking features
Cons:
  • 4-5 day battery life
  • GPS tracking not precise

Filed in categories: Reviews

Tagged:

Paby 3G GPS Pet Tracker & Activity Monitor review originally appeared on The Gadgeteer on August 23, 2017 at 11:55 am.

Note: If you are subscribed to this feed through FeedBurner, please switch to our native feed URL http://the-gadgeteer.com/feed/ in order to ensure continuous delivery.

iseeBell Video Doorbell Security Cam review

In all of my reviews, I try to be as fair as I can. Every product has its good and bad points and I try to point them out. No product—no matter how good it is—is perfect. At first glance, my review of the iseeBell Video Doorbell Security Cam may not seem fair—and maybe it isn’t. But that doesn’t mean I don’t like it. Let me explain.

My intended use for the iseeBell video doorbell was just that—a video doorbell. The setup is advertised as super easy: You remove your original doorbell and then use its existing wiring to connect. All you need are some minor drilling and mounting skills (iseeBell even supplies the proper tools and instructions). But I had forgotten one (not so) minor detail: About 6 years ago, we switched to a wireless battery doorbell. After removing the previous (wired) doorbell, I shoved all the wiring inside the wall and then stuccoed over the hole. It seemed like a smart idea at the time! As a result, I could not use and review the iseeBell as it was intended. However …

Even though I no longer could give the iseeBell a fair review as a video doorbell, they also advertise it as an indoor/outdoor security camera. After considering this, I realized that I still had a great use for it as a security camera. That’s fair, right?

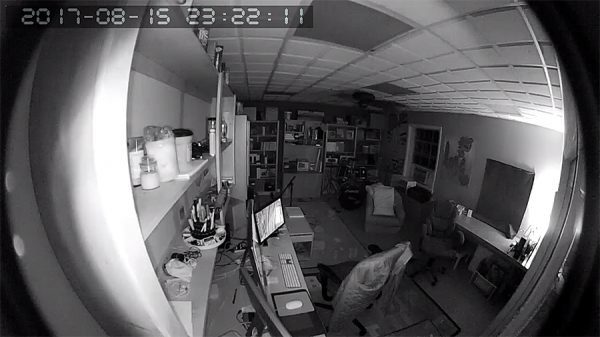
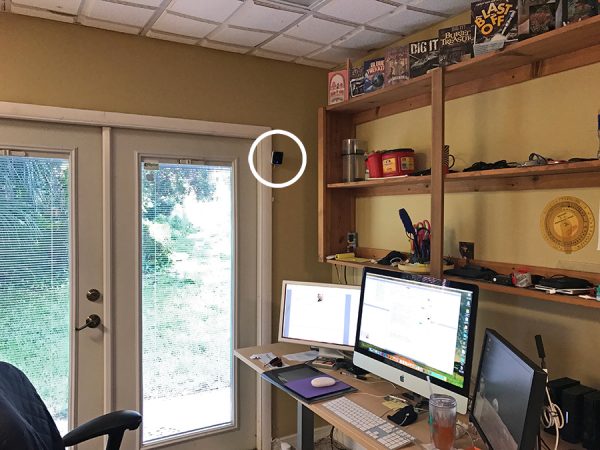
I live on 2 acres in Florida and my large backyard has a separate studio building where I do freelance graphic design and also write about and photograph the products I review. Needless to say, I have some expensive stuff in the studio. Up until now, the studio has never had any security monitoring. We have large and very protective dogs in our house, but I worried about the studio because it’s 100 feet away and out of reach of the dogs. With the iseeBell, I now have a chance to monitor the building 24/7. So how does it work? Let’s see.

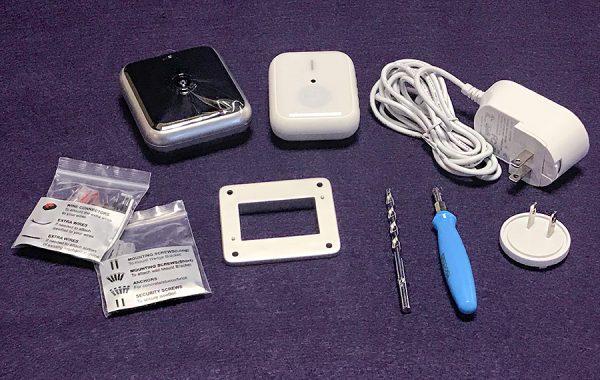
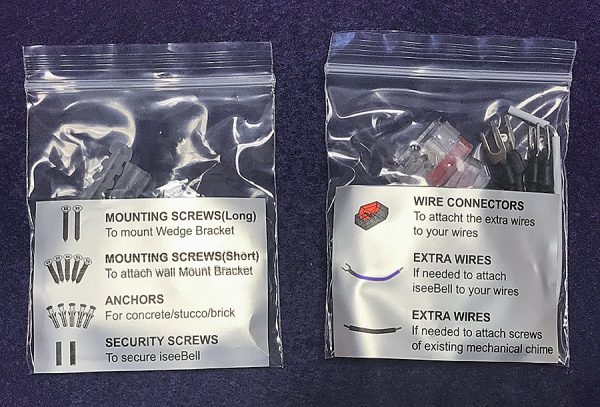
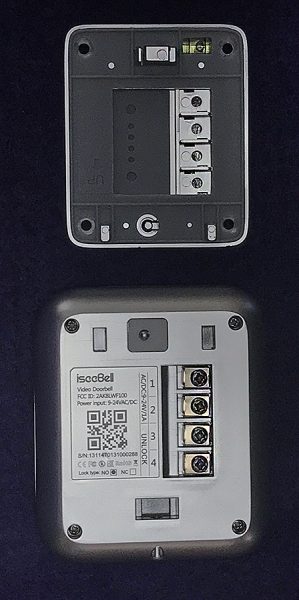
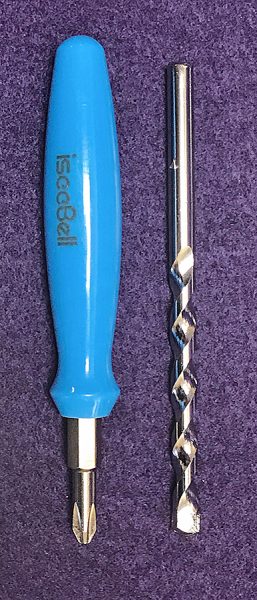
When you open the box of the iseeBell, you are presented with a lot of stuff which can seem overwhelming. However, you generally won’t need all of it. iseeBell has done a good job of accounting for different installation setups you may have. The setup & installation guide is straightforward and easy to follow with clear directions and illustrations. Granted, if you have no experience with home repair tools, you may be better off asking for help. The Guide lists everything included in the box and what kind of wifi you need. A 2.4Ghz network is required, but since I have an Apple dual-band router, I was good to go. One caveat is that your wifi router must either be strong enough or physically close enough to the iseeBell to work properly.

As I said earlier, the iseeBell will run on existing doorbell wires (if you have them). The guide uses step-by-step instructions. Yeah, I know, I didn’t actually install it as a doorbell—and that’s the unfair part of this review. But trust me, I’ve installed enough stuff to know that these are easy instructions to follow.

Also included in the box is a separate indoor wireless door chime (must be plugged in), which I haven’t decided if I’m going to use or not. Why? Because the iseeBell comes with a downloadable app (iOS and Android) that works just as well for my use.

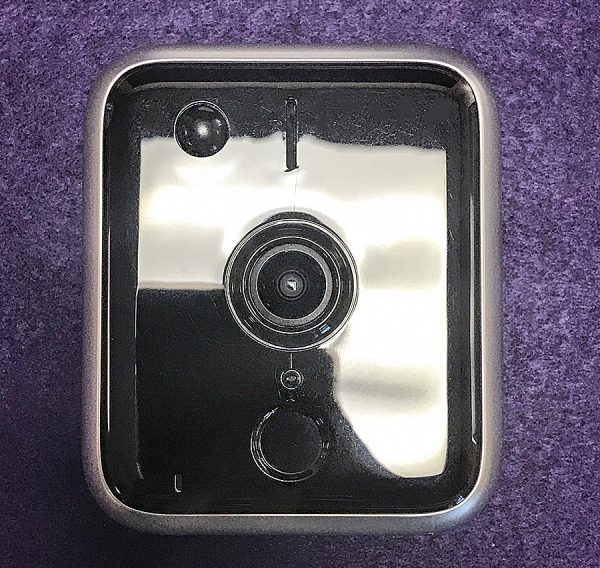
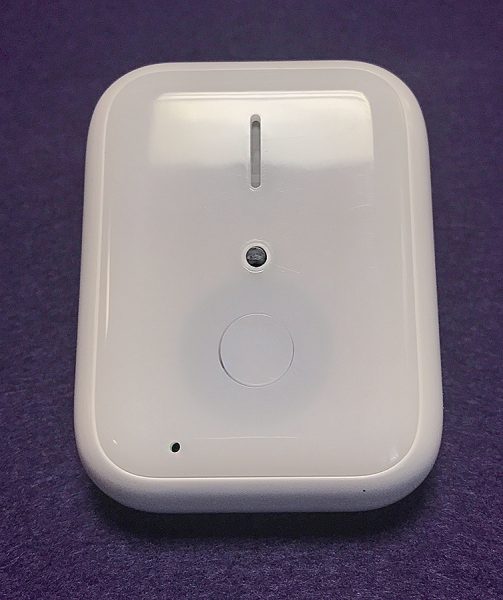
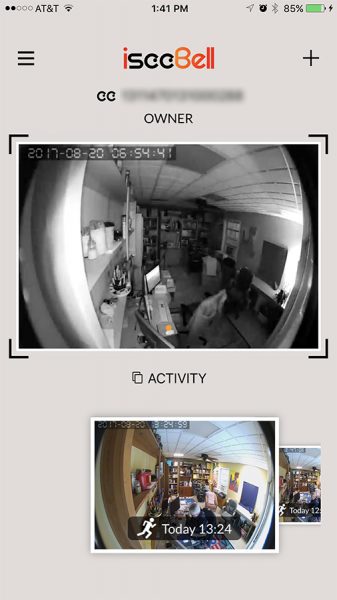
The iseeBell unit itself has a 720p HD camera that works well in low light, although the video loses some detail and becomes monochromatic. The camera is wide-angle which captures a great peripheral view. It does distort in a fish-eye effect around the edges, though. Using the app, you can you see what the iseeBell sees. It also records and stores photos and video on your phone and/or in iseeBell’s cloud. This cloud service is an extra cost option—$2/month or $20/year. While that’s not expensive, it’s worth noting. You get a free month trial with purchase. iseeBell claims your photos and videos are protected by bank-grade security. Strangely, you can only purchase the cloud service through the iseeBell app. There is no mention of it on their web site.

The iseeBell easily connects to a home’s existing wifi via the app. There’s also a motion detector that works a little too well. More on that later. The unit is weatherproof, so rain shouldn’t be a concern.

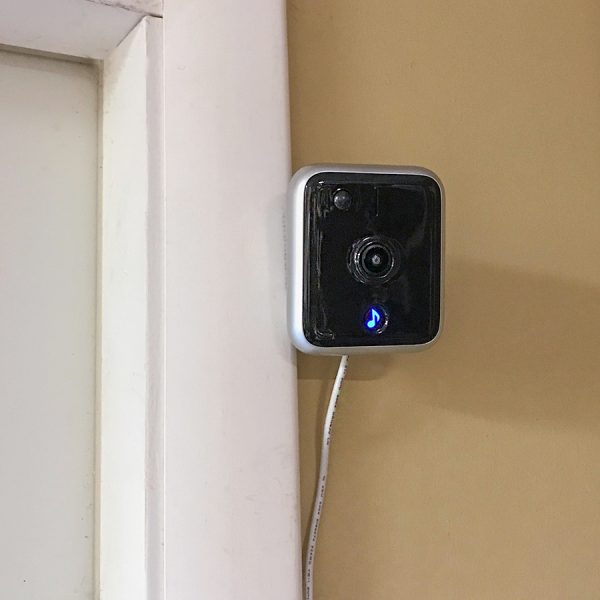
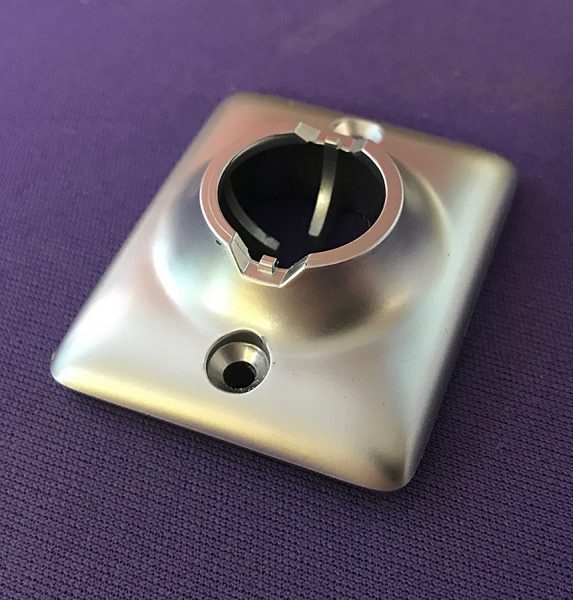
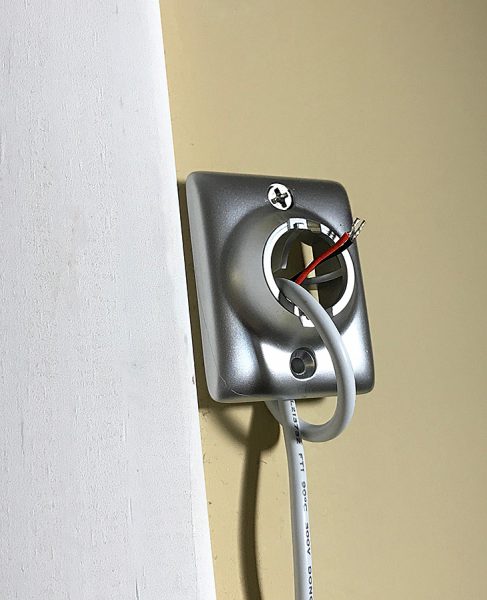
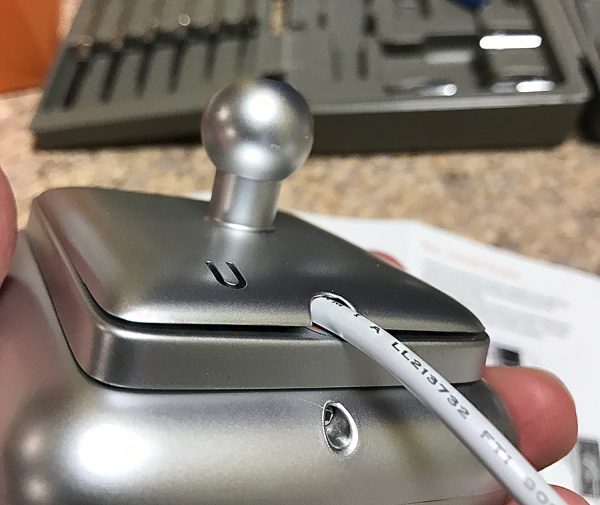
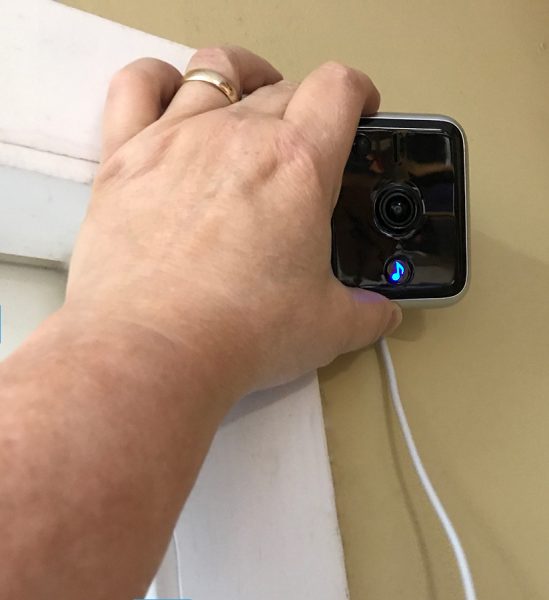
For my use, I mounted the iseeBell just inside the door of my studio a little above eye level. I used some of the supplied screws but did not need the included masonry drill bit as this was an indoor installation. All I had to do was decide where I wanted the camera placed and drill the screws into the wall. iseeBell offers an optional adjustable wall mount that allows the camera to be swiveled at various angles for a better view. I highly recommend this option—it acts as a mounting base and allows you to point the camera practically in any direction.

I ran into two issues with the wiring on the iseeBell. Since I’m using it indoors and not as a doorbell, it needs to be plugged into an outlet for power. I wanted to mount the camera up at ceiling height, but the cord was a few inches too short to do this, so it had to be lower than I preferred.

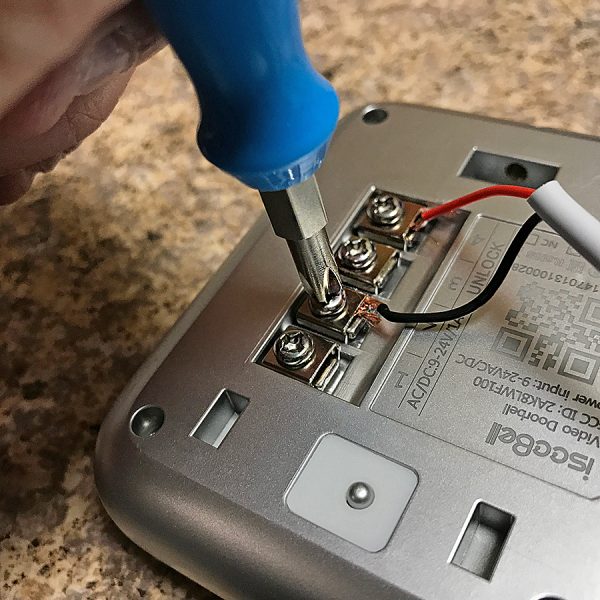
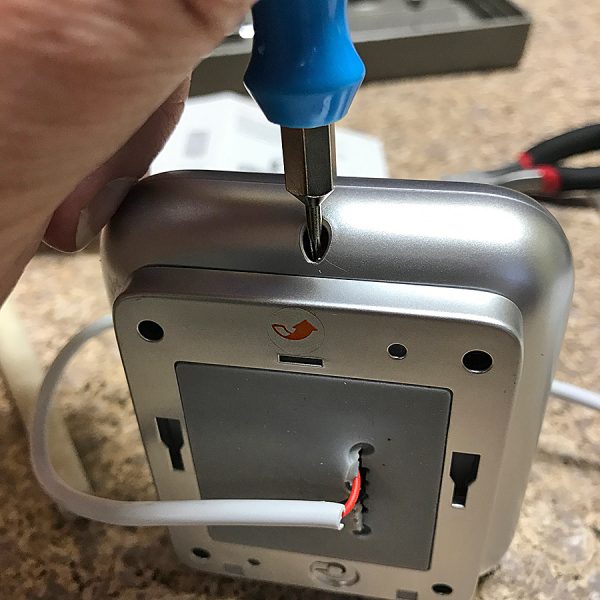
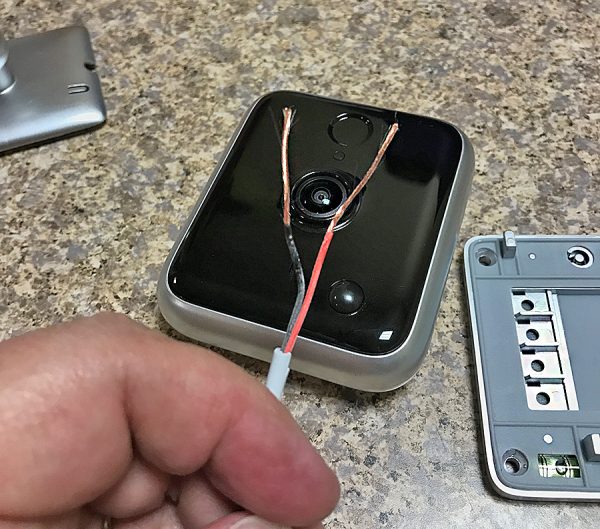
The white cord was a bit too thick to fit into the slot at the rear of the camera, so I had to strip some of the wiring to expose more of the black and red wiring from inside the cord. It was not easy, but I’ve stripped wiring before, so I knew what I was doing. However, I could picture some people pulling their hair out if they ran into a similar problem as I did. Note that doorbell users won’t have this issue since the iseeBell won’t need the power cord.

Once I got the wiring taken care of, all went well. I opened the iOS app, set up my account and linked the app to the camera via my wifi network. With that done, I could see a live image of myself in the apps video frame. There’s a bit of a lag, but not enough to matter. As I said earlier, The image is wide angle, and since the camera is above eye level, there is little opportunity for a close-up of a face. But the image can easily be zoomed in even while live.

Audio quality was so-so. it was somewhat distorted and difficult to understand when watching the video. There’s also a built-in speaker allowing you to talk to the person/intruder if necessary. The speaker volume was a bit weak and should have been louder.

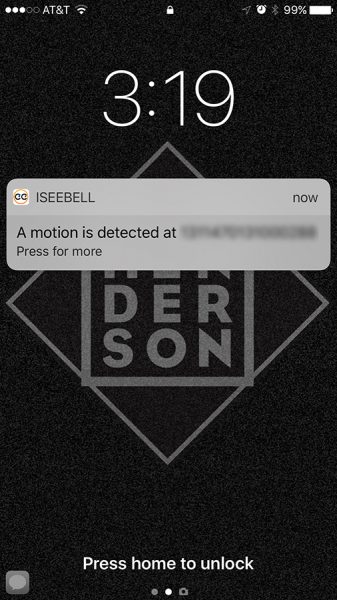
After setting up the motion detector in the app, I noticed that it works really well … as in really well. Whenever I stretch or get up from my chair I get an audible beep and a motion warning shows up on my iPhone. It’s becoming a bit comical, but at least it works! And since I’m only concerned when there should be no one in the studio, I appreciate its sensitivity. Incidentally, the warnings can be controlled through the iPhone’s Notifications or Android’s Sound and Notification settings.

All in all, I like the iseeBell Video Doorbell Security Cam, even though I’m not using it as it was intended. It does what it’s advertised to do and does it well. I now have added peace-of-mind if anyone should enter my studio (invited or not) and I will instantly know about it.

I’m now wondering if it’s time to get my doorbell rewired?

The iseeBell Video Doorbell Security Cam sells for $149.95 US.

Source: The sample for this review was provided by iseeBell. Please visit www.iseebell.com for more information and Amazon to order.


Product Information

Price: $149.95 US
Manufacturer: iseeBell
Retailer: Amazon
Pros:
  • Easy to install and setup
  • Good camera and video quality
  • Sensitive motion detector
  • Smartphone notifications
  • Cloud service available
Cons:
  • Wiring can be tricky if using supplied power cord with optional wall mount
  • Audio quality could be better

Filed in categories: Reviews

Tagged: ,

iseeBell Video Doorbell Security Cam review originally appeared on The Gadgeteer on August 22, 2017 at 10:00 am.

Note: If you are subscribed to this feed through FeedBurner, please switch to our native feed URL http://the-gadgeteer.com/feed/ in order to ensure continuous delivery.

Patchworks PureCover 2017 iPad Pro 10.5 Smart Stand Case review

I seem to have jumped head first into a vat of Apple kool-aid. First I bought an iPhone 7 Plus and then I bought an iPad Pro 10.5. New Apple devices mean new device accessories so I’ve been trying out cases for the iPhone and now I want to show you the Patchworks PureCover 2017 Smart Stand Case that MobileFun sent me to try with my new iPad Pro 10.5. 

What is it?

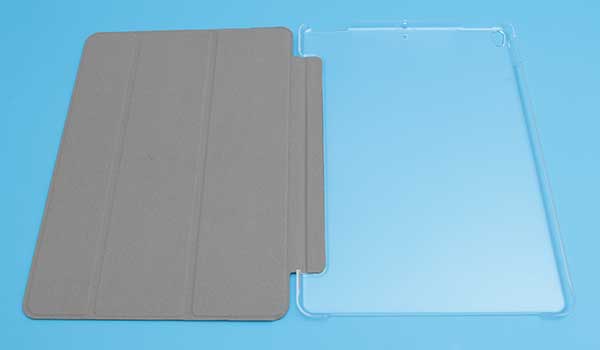
The Patchworks PureCover 2017 Smart Stand Case is a simple book-style case for the iPad Pro 10.5.

PureCover

This Smart Stand Case looks similar to Apple’s own Smart Cover and features magnets embedded in the cover that wake the iPad when you lift the cover and put it back to sleep when you close it.

The case comes in grey or black. I was sent the black version of the cover.

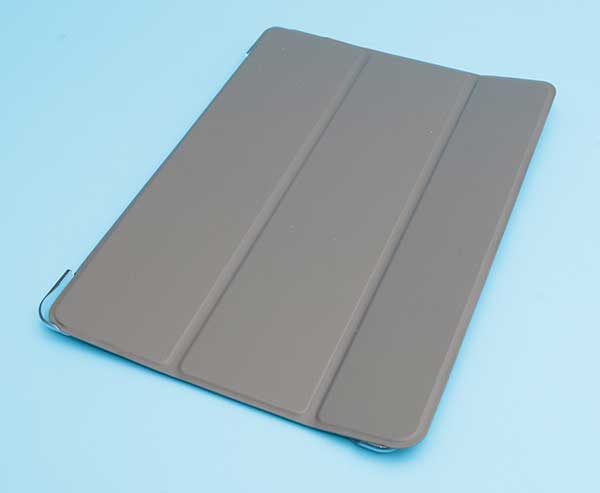
But unlike Apple’s Smart Cover, the PureCover offers protection for the back of the iPad Pro 10.5 with a tough polycarbonate snap on shell.

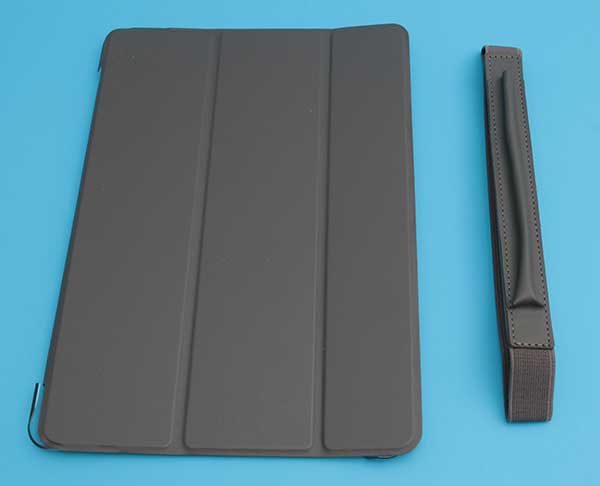
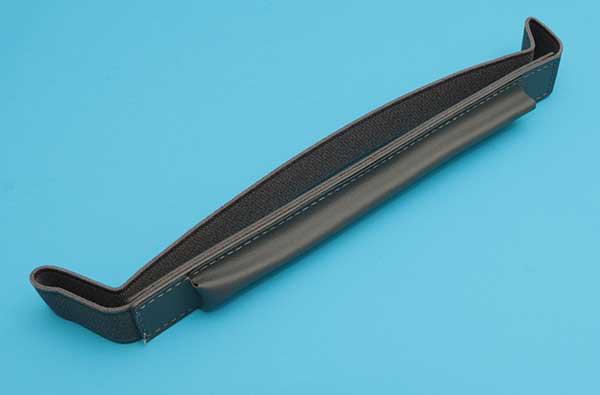
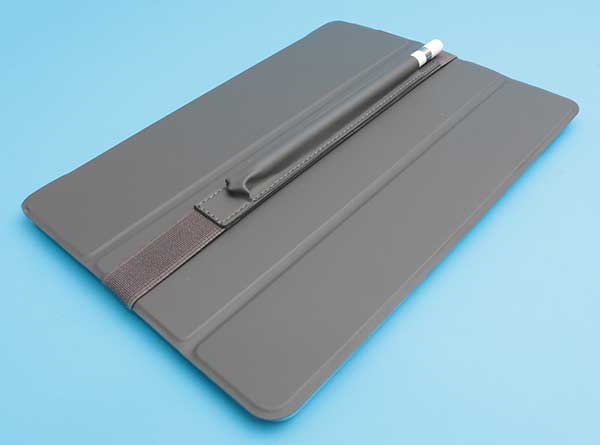
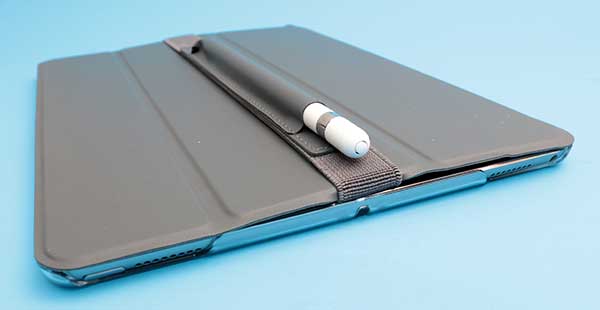
The PureCover Smart Stand Case also comes with a removable Pencil sleeve.

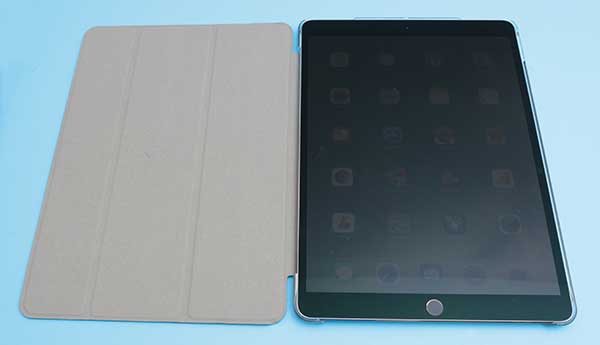
The iPad Pro easily snaps into the polycarbonate shell. The inside surface of the cover has a soft suede-like feel that protects the iPad’s display from dust, and scratches.

The back cover is clear so that you can see the Apple logo and any personalization that you might have added to the back of the iPad.

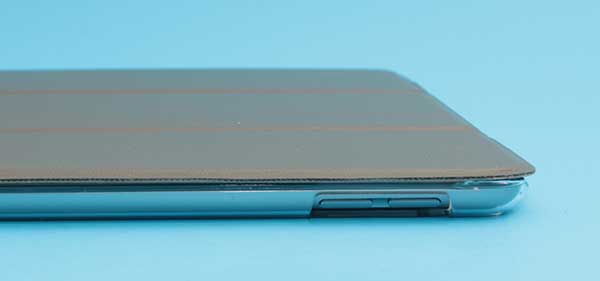
The are cutouts for the camera, flash and volume buttons.

And on the top edge, there are openings for the speakers, earphone jack, and microphone.

The bottom of the case has one large cutout for the other speakers and lightning port.

I like the fact that the back cover has a matte finish that prevents it from becoming a smudge and fingerprint magnet.

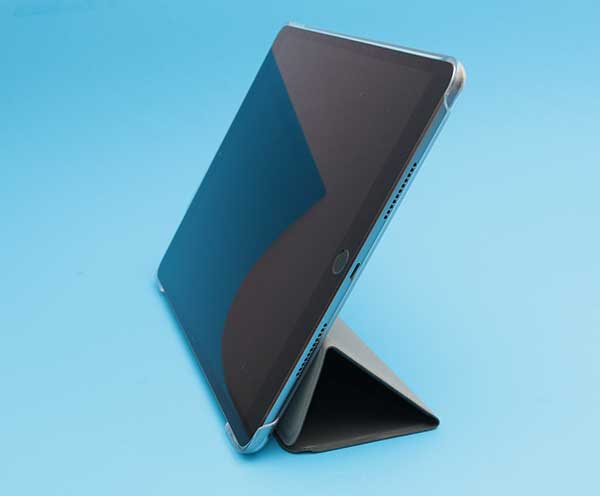
In addition to opening the cover and folding it to the back of the iPad, the cover can also fold to create a stand like you see above.

The removable sleeve that is included with the Patchworks PureCover 2017 Smart Stand Case has been designed to hold the Apple Pencil stylus.

The sleeve has an elastic loop that stretches to fit over the cover. If you look closely, you will notice that the elastic folds the edge of the cover over where the elastic presses against it. This shouldn’t be an issue unless you remove and reattach the Pencil sleeve over and over. Then that could cause the top edge of the case to crack over time.

Final thoughts

I’ve been using the Patchworks PureCover Smart Stand Case for the iPad Pro 10.5 for several weeks and have had no issues. It is a well-made case with a simple design. Every time I open the case, my iPad wakes up and every time I close the cover, it goes back to sleep. It protects my expensive tablet and looks nice while doing so. I guess you can say that it’s my favorite iPad Pro 10.5 case. It’s also the only 10.5 case I’ve tried so far, so we’ll see how long it remains a favorite. 🙂

Source: The sample for this review was provided by MobileFun. Please visit their site for more info


Product Information

Price: $45.39
Retailer: MobileFun
Pros:
  • Simple design that protects the cover and back of iPad
  • Automatic wake and sleep function
Cons:
  • Pencil sleeve elastic deforms top and bottom edges of the cover

Filed in categories: Reviews

Tagged:

Patchworks PureCover 2017 iPad Pro 10.5 Smart Stand Case review originally appeared on The Gadgeteer on August 21, 2017 at 11:00 am.

Note: If you are subscribed to this feed through FeedBurner, please switch to our native feed URL http://the-gadgeteer.com/feed/ in order to ensure continuous delivery.

Color Doctor Blood Pressure Monitor Review


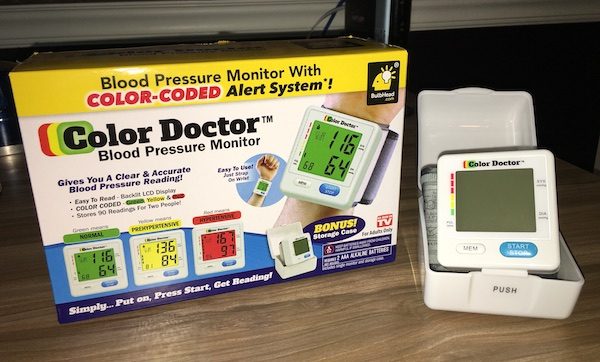
The Color Doctor is an “As Seen On TV” product that promises a better solution for quick, easy home monitoring of your heart rate and blood pressure. It’s certainly as easy to use (and read) as advertised. But is it worth purchasing? Let’s go find out!

A Caution about Wrist-Based Blood Pressure Monitors

Before we begin, we should talk a little bit about monitoring your blood pressure. High blood pressure runs in my family, so I’ve done a bit of research on this subject.

The Color Doctor is designed to wrap around your wrist, as opposed to your upper arm. For an accurate reading, you should sit with your elbow resting on a table and the unit held parallel to the level of your heart. Organizations like the Mayo Clinic and the American Heart Association do not consider wrist monitors to be as accurate as traditional upper-arm cuffs. They are much more sensitive to body position and tend to show a higher reading than an upper-arm monitor (because the arteries in your wrist are closer to the skin, affecting the measurement).

Does this mean that wrist monitors are bad? No. Some of us can’t use upper-arm monitors for a variety of reasons. You just need to be aware that the readings may be different than what you’ll see on professional equipment at the doctor’s office. As with anything health-related, be sure to check with your doctor if you’re going to do home blood pressure monitoring. Take your monitor with you on your next visit, and have your doctor show you the best way to use it. He or she can also calibrate the readings against the office equipment so that you understand how to properly interpret the readings at home. Knowledge is power, folks. Be smart and be safe.

Got it? Cool. Now back to the review!

Construction and Design

The Color Doctor is a compact, lightweight piece of equipment. The unit and cuff weigh about 4 ounces and fit nicely into the included 3″ by 3″ by 3″ plastic storage case. The size and weight make it very easy to stash in your dresser drawer or medicine cabinet, and it takes up very little room if you’re packing it for travel. 

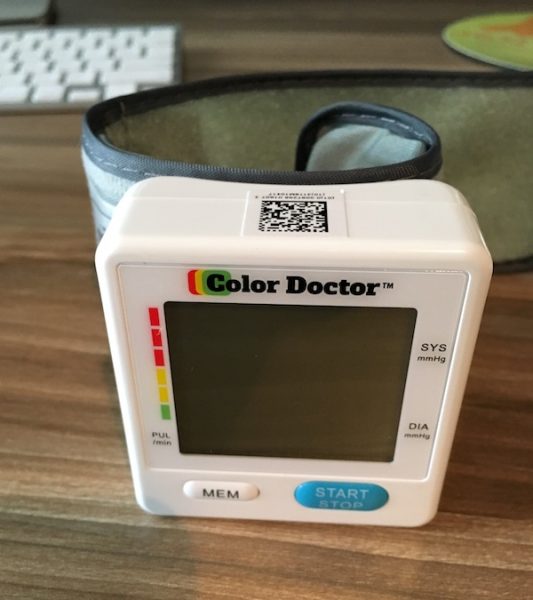
You’ll find a big digital screen on the face, below which are positioned a large blue start/stop button, and a smaller white memory button. There are some tiny labels on the sides of the screen to indicate the digital readings; while they are hard to read, you won’t need them once you start using the unit (as we’ll see below). The buttons themselves are big and friendly with a little raised surface, so they are easy to operate.

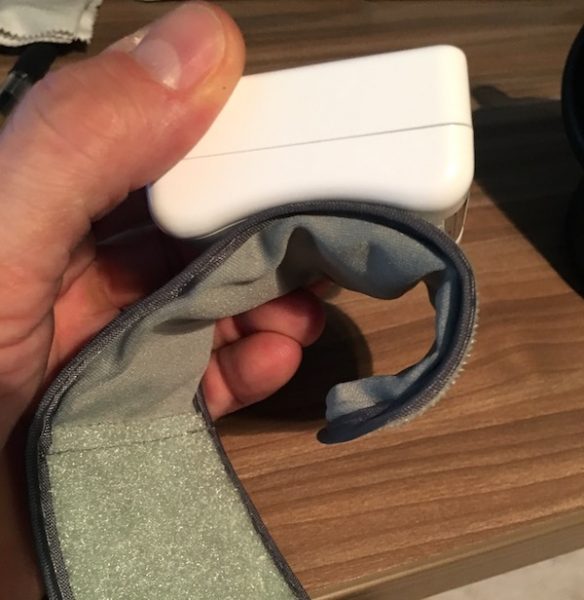
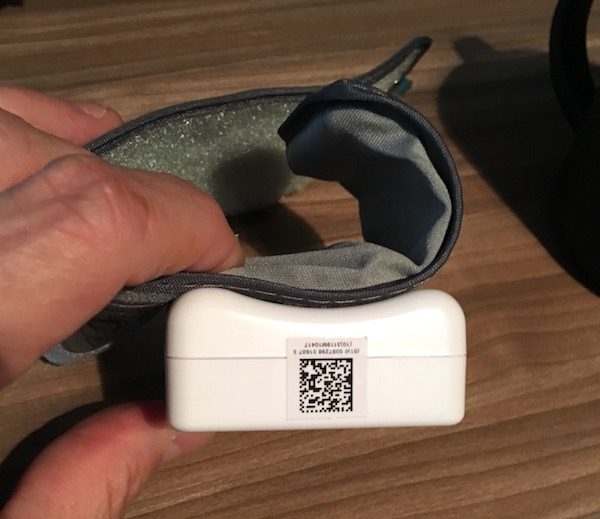
One-handed attachment is easy and drama-free. The back of the unit is contoured to fit the shape of your wrist. The short side of the cuff (to the right of the unit) is rigid and curved so that it “hooks” into the proper position on to your wrist, after which you wrap the loose side of the cuff around to the desired tightness and secure it with the velcro on the strap. This is a nice design feature, especially for those that may have issues with manual dexterity: it’s pretty much foolproof for one-handed operation.

While the Color Doctor is certainly easy to operate, the construction is pretty average. Assembly looks pretty good, with no obvious faults in seams or stitching. Materials feel like budget-grade plastics and fabrics. Given that this a light-use kind of device, this may not be a big deal… but you’ll want to keep it in its protective storage case when not in use.

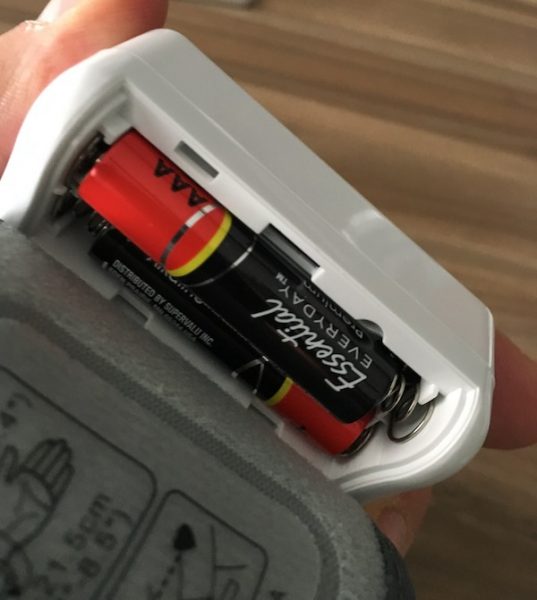
The Color Doctor uses two “AAA” alkaline batteries, which are not included in the purchase. They’re installed via a snap panel on the back of the unit.

The Color Doctor is really simple to use. Get yourself in the proper position, wrap the unit around your wrist, and press the blue start/stop button. The unit will buzz while the cuff inflates, and the readings are displayed in about a minute or so.

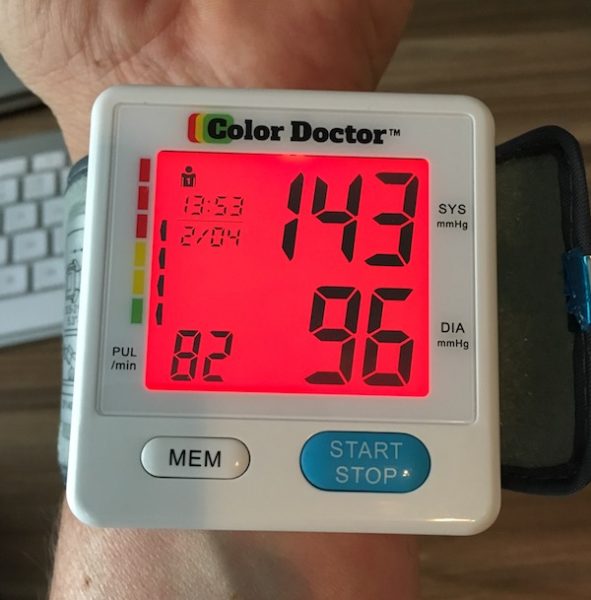
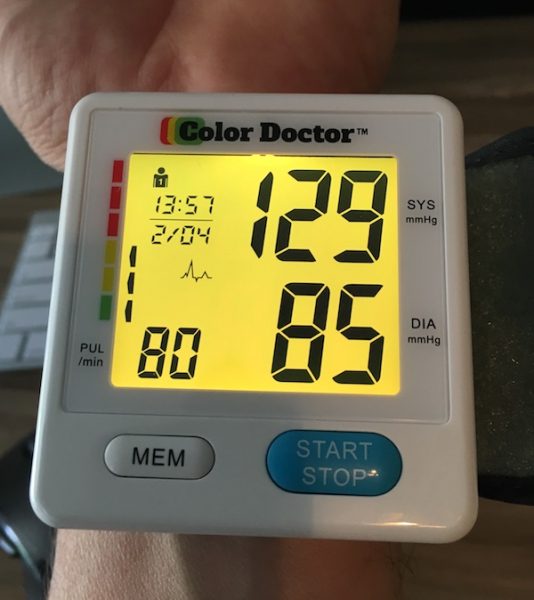
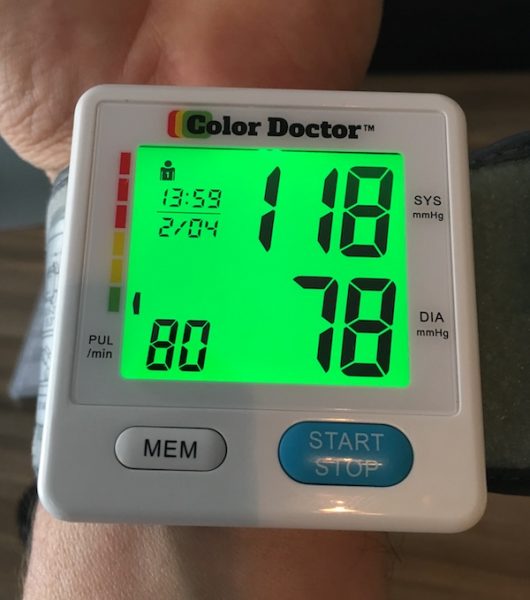
The biggest strength of the Color Doctor is its easy-to-read display. Systolic pressure is found on the upper-right quadrant of the screen, diastolic pressure on the lower right, and current heart rate on the lower left. The screen changes color based on the results: green for “normal” levels (120/80 systolic/diastolic pressures), yellow for “prehypertensive” (up to 139/89), and red for “hypertensive” (over 140/90). The screen is bright, and and the numbers are large with good contrast against the screen. After a recent workout, I took readings during my cool down period to show how the color indicator changes based on the results. You can see how easy it is to read in pictures below:
As you can see, the display is really impressive. Even in low-light conditions or for those who may have issues with their vision, the combination of color reinforcement and big numbers makes it easy to see what your reading looks like. Combined with the ease of attachment and simple button design, it’s a great tool for getting a fast blood pressure reading.

Additional Features

The Color Doctor has several additional features. You can set the date and time, and toggle between two different users. When you take a new reading, the results are automatically saved for the last user selected. It will save the last 90 readings and has a memory recall feature that allows you to review the average of the last three readings or cycle through the history of readings for the last user.

Access to these settings and features gets really clunky because there are only two buttons to work with. Do you remember those old-school two-button digital watches, with all the features that were activated by some combination of pressing or holding the buttons? It’s a lot like that. Honestly, I tried to document all of the variations for the review and gave up due to the complexity if it all. You’ll need the manual to sort it all out.

Conclusions and Pricing

In a lot of ways, the Color Doctor Blood Pressure Monitor delivers on its “As Seen on TV” promotional messaging. It’s easy to use and operate. The screen is bright, and the results are clear. The color-changing display adds a nice level of visual reinforcement that will be especially valuable for those that may have vision issues. On the down side, the additional features are difficult to work with and, in some cases, downright frustrating.

In my mind, the bigger issue with the Color Doctor is the $39.99 retail price. There are a lot of competitive products in this space; a quick search on Amazon yields a bunch of wrist monitors that range in price from $15 to $50. After spending some time looking at customer reviews for these products, I’m not sure that the Color Doctor distinguishes itself significantly against these products. If the ease of use and bold color display are important to you, you won’t be unhappy with this purchase… you may want to shop around a bit first, though.

The Color Doctor retails for $39.99 and is available for direct purchase at their web site.

Source: The sample for this review was provided by BulbHead. For more information, visit their web site.


Product Information

Price: $39.99
Manufacturer: Color Doctor
Retailer: BulbHead
Pros:
  • Blood pressure reading are quick and easy
  • Bright, easy-to-read display
  • Color indicator provides nice visual reinforcement
  • Nice compact package for storage or travel (includes storage case)
Cons:
  • Materials and construction are average
  • Additional features are difficult to use

Filed in categories: Reviews

Tagged:

Color Doctor Blood Pressure Monitor Review originally appeared on The Gadgeteer on August 21, 2017 at 9:00 am.

Note: If you are subscribed to this feed through FeedBurner, please switch to our native feed URL http://the-gadgeteer.com/feed/ in order to ensure continuous delivery.