VertDesk V3 Electric standing desk review

Those of us who spend a lot of time plugging away on the computer are learning more and more about the health benefits of standing desks. While there are lots of options out there to get up off of your chair, electric desks provide the added benefit of being adjustable at the push of a button to your desired height. They can get expensive, however, and not all electric desks are created equal. It’s an investment that requires some serious consideration

The VertDesk V3 Electric Desk, as the name implies, is a third-generation design that seeks to continually improve in the areas of stability, function, and overall good looks. It also comes in at the lower end of the price point for this style of desk. Is it worth the investment? How does it perform? Let’s stand up to review and find out!

Unboxing and Assembly

The VertDesk is a beast and requires assembly on delivery. It’s a big factor in the decision making process, so we’ll walk through the unboxing and assembly before we get into reviewing the details of the finished product.

Solid construction makes for a heavy product, so prepare for a bit of a workout when the VertDesk arrives at your doorstep. There are two large, narrow boxes: one for the desktop, and one for all the components. These boxes weigh in at a combined total of about 115 pounds. Everything is well-packed and protected for shipping, but I’d recommend getting some help to lug ‘em to their ultimate destination in the house or office.

You’ll also need some tools to get started. A power driver is required, along with #2 Phillips head and #2 square head driver bits. An adjustable wrench, a tape measure, and two Allen wrenches (4 mm and 5 mm) round out your arsenal. Given that the desktop and leg assemblies are heavy, I’d also recommend keeping that friend who helped you move the boxes around to help with assembly. Have some pizza ready when the job is complete. Bribes always help.
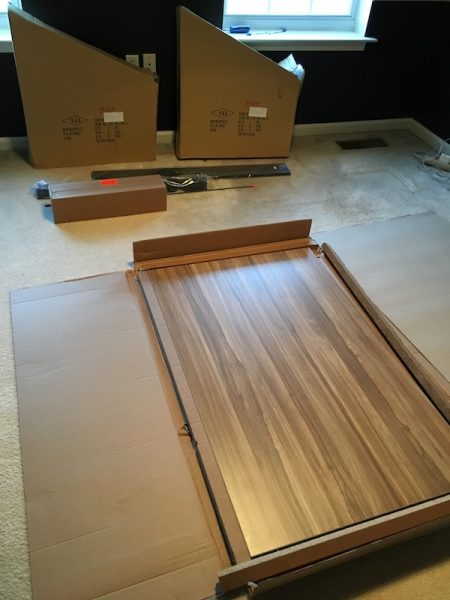
Once you’ve got things unpacked, you’ll be happy to know that all the major components are preassembled. The leg units, motor, control module, power unit, and control panel are all ready for installation. The underside of the desk has most of the installation points pre-drilled so that you can grab your tools and get down to business. Depending on the options you may have selected, there are about a dozen parts including the attachment hardware.
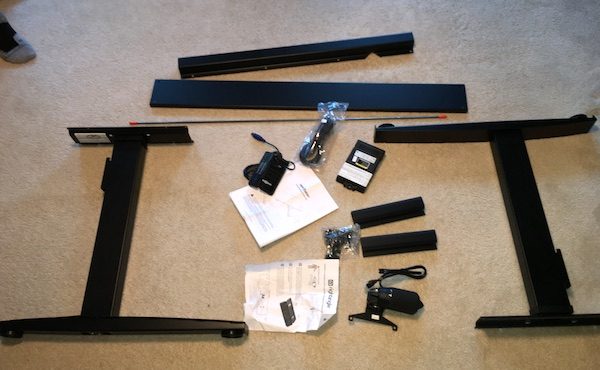
Here’s where things get a little tricky. You’ll assemble the desk upside-down, attaching all of the parts to the underside of the desktop. There’s a drive rod that runs through the drive motor and both legs; this takes some adjustment to make sure it is threaded properly. You’ll also install a cross-bar that stabilizes the legs. These components must be secured properly before you start screwing everything into the underside of the desktop. Once you have that in place, you’ll install the rest of the components which include the control unit, the power unit, the control panel, and a U-channel cover that protects the drive rod. You may also have other accessories to install before you flip the desk over and start connecting all the cables.

Got all that?

It’s actually not as bad as it sounds, if you proceed carefully. The key is to make sure all of the components are in the proper place before you start locking things down and tightening everything up. I’d HIGHLY recommend that you not only pre-read the instructions carefully, but also check out the handy installation videos on the VertDesk web site before you get started. 
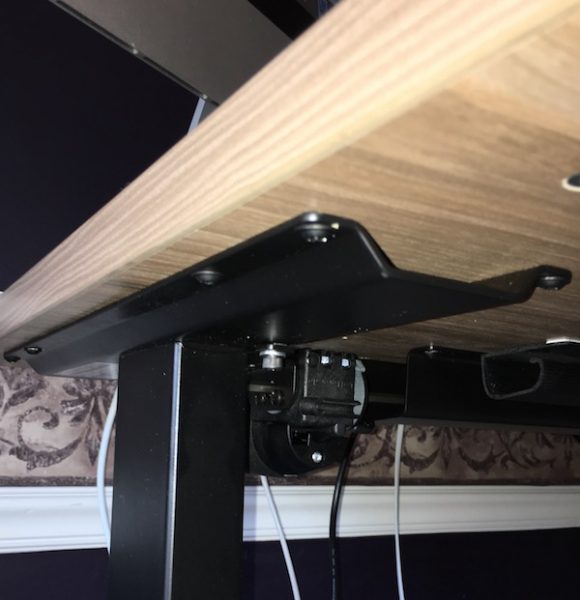
All in all, it took my son and I about an hour to assemble everything. There are some elements of the instructions that are a bit confusing, but we took our time and referred to the video several times during the process to fill in the gaps. Being handy with tools helps, and there is some measuring involved depending on what accessories you added to your purchase. There is also phone and e-mail support available through the web site if you get stuck. In my case, a teenager and YouTube were more than adequate support to get the job done. Honestly, I’be wrestled with some IKEA builds that were worse than this. If you can handle those, you’ll be good to go here.

If there was one area that was a gap in the installation, it was in positioning the control panel. My test unit came with the upgraded programmable switch, so there was a bit of extra measuring and positioning involved that wasn’t completely clear in the instructions.

The good news is that all that work pays off in a beautiful product. Let’s get into the details!

Design and Construction

As I mentioned above, the VertDesk is a beast. Materials and components are all solid, beefy, and built to last. There’s no skimping on components to be found. It’s also a simple, beautiful piece of furniture. 

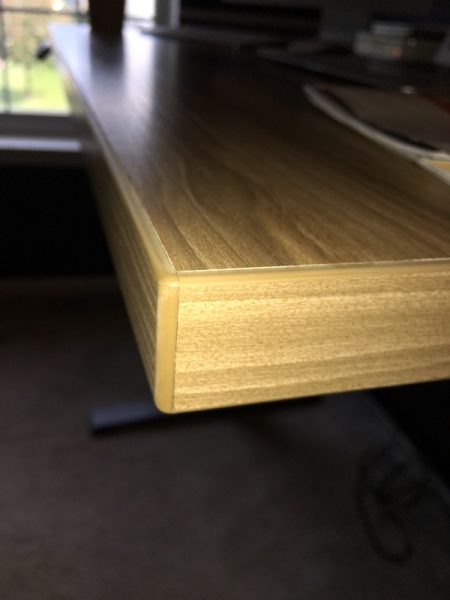
There’s really no other way to put this: the desktop is marvelous. At 48” wide by 30” deep, the 1-1/8” top is burly and feels substantial. The material is a composite, finished in what VertDesk calls a Wood Essence laminate. It’s powder coated, scratch proof and water resistant. All the corners are nicely beveled and the seams are bonded to ensure that they won’t peel or pull up to create sharp edges over time. There are 10 desktop options available including the Wood Essence, bamboo and real wood. My test model came with the Macchiatto Wood Essence, and it’s a beautiful color and finish. You can also choose from a variety of sizes ranging from 24” by 36” up to 30” by 72”.

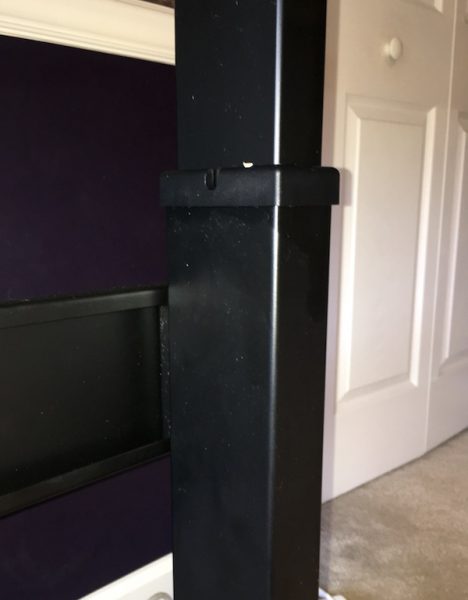
The base for the desk is made from heavy-duty recycled steel, and is built for strength and stability. Each leg is 3-1/2” by 2”, and is anchored to a base that is 3” wide and 27-1/2” long (the base is 22-1/2” long if you choose the 24” deep desktop). Coupled with a 4-1/2” steel cross beam, you’ve got excellent stability even at maximum height. VertDesk has done a really nice job with the finishing on these components as well. All the edges are rounded, welding is tight, and all the mechanicals and attachment points are capped or sealed in such a way that there are contained in the leg housings. There are also two wide, adjustable rubber feet under each base to protect your floor and to provide additional adjustments for leveling if needed. It’s a nice piece of engineering.
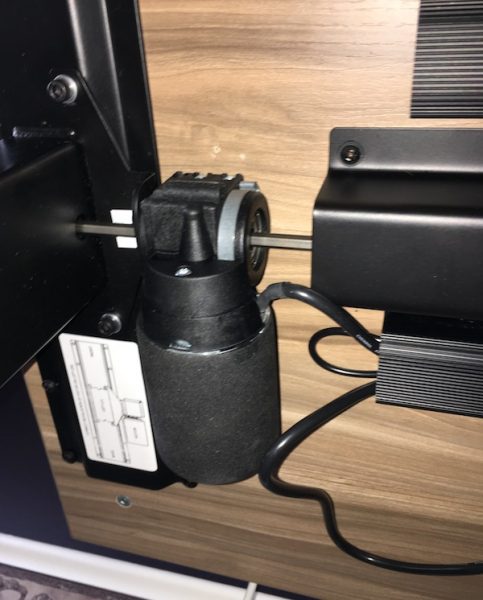
The motor, gear, and spindle systems are all German engineered; the electronic components are ISO 9001 certified and made by Logicdata. There’s a lot of detail on these components available on the web site that speak to the quality of the manufacturing that you can read at your leisure. I am not a mechanical engineer, but I can tell you that all these components look and feel substantial and in alignment with the overall design and durability of the product. They are also finished in black to match the base, so they don’t look out of place in the overall design. There are also some nice finishing features here including a black steel u-channel to protect and cover the drive shaft, and a pair of black self-adhesive j-channel covers to tidy up all the cables.
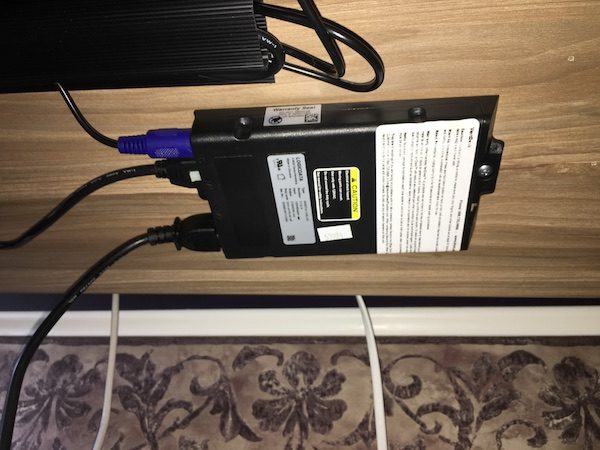
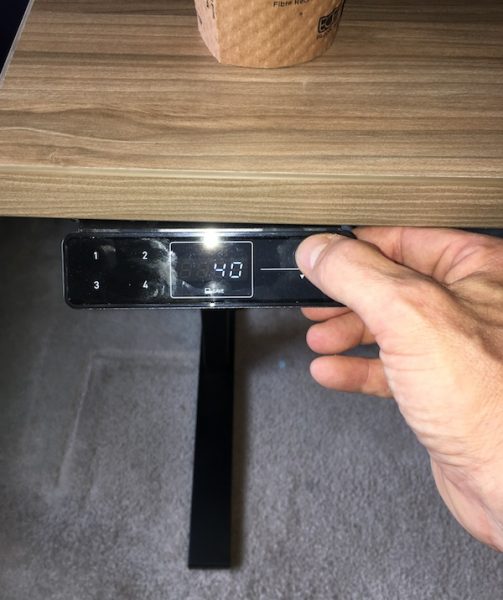
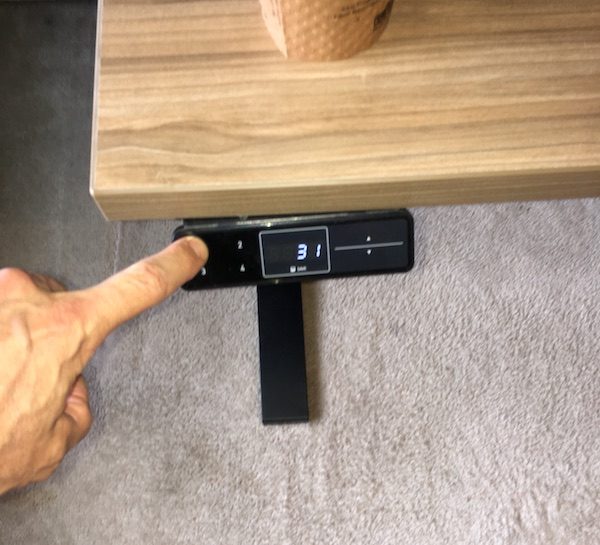
Finally, we turn our attention to the control pad itself. It’s a touch-pad style control element that, in my test model, includes the ability to pre-set up to four standard heights. You’ll find a simple up and down button, a digital readout that indicates the height of the desk, and four preset buttons that you can customize. The touch pads are wide enough that they make for easy operation, and it tucks away nicely under the corner of the desk. We’ll discuss this more in the next section.
The bottom line on all of this is that VertDesk hasn’t skipped any steps in quality. The company claims that the hardware rivals that found in competitors that cost over $1000. It’s substantial and beautifully engineered, without being so burly-looking that it dominates the workspace. It also looks great in either the home office or your professional lair.

In Use

I’m relatively new to the whole standing desk thing. When I am at the office I tend to be in constant motion. Between formal and informal meetings, I’m rarely sitting at my desk for more than an hour at a time. The need for a standing desk was never an issue. Over the past year, however, I started incorporating a work from home day into my schedule every week so that I can focus on issues that require deep concentration. This means extended time sitting at the desk, plunking away on the computer(s). And that has been playing havoc with my back.

I’m fast becoming a fan of the standing desk. I’m a believer in the health and productivity benefits based on first-hand experience. And the VertDesk makes the transition to this new work style a pleasure.

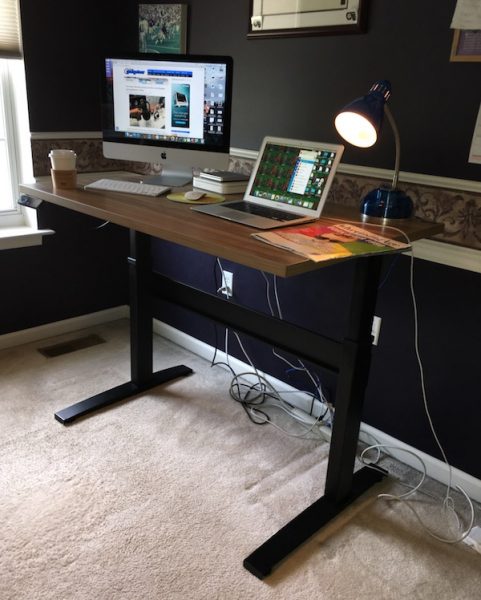
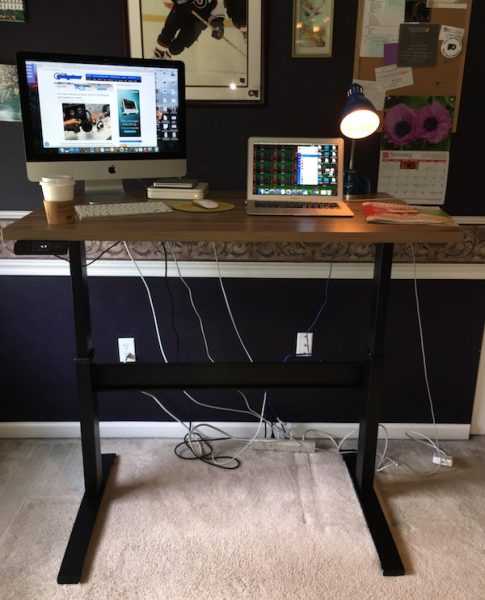
When considering a desk, size matters… especially if you like to spread out your workspace. While my iMac and its peripherals occupy a permanent place on the desk, working from home requires access to my laptop, my iPad, notebooks, papers, and all the trimmings (including the mandatory cup of coffee). At 30” by 48”, the VertDesk model I tested puts everything within easy reach without playing “desktop Jenga” to switch between devices.

You don’t want your precious electronics to be balanced on an unstable surface for obvious reasons, and stability is often a problem with standing desks. The designers of the VertDesk have clearly put a lot of time into solving for this problem, and it shows. There’s no lateral motion under any circumstances, and just a hint of front-to-back waggle at maximum height. This also may be the result of my desk sitting on carpet, and I suspect that adjusting the feet would eliminate this issue. It’s solid, and inspires confidence in the safety of your gear.

The VertDesk is motorized, and adjusts from 27” to 47.5” to accommodate your desired working height. Basic operation is simple. Press and hold the up or down button on the control pad raise or lower the desk at a rate of 1.55” per second, while a digital readout indicates the current height. Operation is smooth and controlled; you can sit a full cup of coffee on the desk during operation and not spill a drop. VertDesk has a load capacity of up to 275 pounds. I don’t know why you would ever get close to that in actual use unless you really load up with peripherals, but their web site does have some entertaining videos of stress-testing the desk that include a tester sitting on it during operation. It goes to show the quality of the overall construction.
My test sample also came with the ability to pre-set up to four heights on the control panel. Use the standard controls to set your desired height, press the “save” button, and select with position you want in one of four standard slots. When you press and hold the pre-set, the desk will then move up or down to the saved setting and stop when the saved position is reached. Automatic operation would be nicer, but it’s handy if you switch between sitting and standing heights (like I do) or have multiple office-mates using the desk.
The VertDesk also has some additional safety and protection features, in addition to an excellent warranty. Overload protection automatically stops operation if the weight on the desk exceeds the designed limits. An automatic collision avoidance system stops operation if the unit comes in contact with a solid object during operation. The frame and desktop have 10 year warranties, while the electronics have a 5 year warranty. This all leads to confidence in your investment for extended years of use.

With all of the focus on the construction and mechanics, I don’t want to overlook one of the most important aspects of the VertDesk: it’s great desk, either in standing or sitting position. It’s streamlined and elegant, has a beautiful and durable surface, and regular operation does not interfere with it’s primary purpose as a solid, functional piece of office furniture. The VertDesk folks have dialed in all aspects of this design nicely, and it performs exceptionally well without letting all of that fancy engineering interfere with day-to-day operation.

Pricing, Qualifiers, and Caveats

After doing some digging into reviews for motorized standing desks, I’ve found quite a range of opinions on the VertDesk. It seems that some of the competitive reviews were based on earlier models, which did not compare favorably to the competition. The latest version that I tested (called the VertDesk V3) seems to address a lot of concerns found in the older models and receives high marks in most reviews. It does not have the height range or weight capacity of some competitors but the overall stability, lower price point, and longer warranty gain high marks.

The major knocks on the current version of this product when compared to the competition deal specifically with the height range and weight capacity. Some competitors offer a wider range of height adjustments by a few inches. The VertDesk is designed for users up to 6’5″ tall when standing, but you may need to look at competitive products if you have to duck when you walk through door frames. Some competitors also offer desks with a weight capacity higher than 275 pounds. I honestly don’t know how one would come close to loading up a desk to that kind of weight unless you’re dealing with specialized equipment, but it may be a consideration for you.

VertDesk also makes a whole range of accessories including single and dual monitor arms, keyboard trays, and undercarriage CPU holders. These were not tested for this review.

Finally, you have to really consider your work needs before investing in a vertical desk. The basic VertDesk V3 model starts at about $520, but prices can jump quickly when you start adding options or go for natural desktop materials. The model I tested prices out at about $650 with the larger desktop and programmable control. While these prices look to be good compared to the competition, there are lots of alternative options available: fixed-height vertical desks, add-on stands to your current desk, or home-made solutions will also do the job if you’re the handy type. It’s something to consider if you’re shopping around.

Conclusion

Let’s not mince words here: an electric desk is a significant investment. At the end of the day, you have to decide if shelling out $500 or more is worth the return with a purchase like this.

I’m a firm believer in paying for long-term quality, especially for those items that you use every day. Starting at just over $500, it’s priced very favorably compared to the competition. It’s impeccably engineered for function and durability and carries warranties that speak to the manufacturer’s confidence in its long-term use. Not only does it look great in both professional and home office settings, but it functions equally well as a standing or sitting desk. If you’re in the market for this kind of item, I think the VertDesk V3 Electric Desk is well worth your consideration. Check out their web site for all the details.

Source: the test sample for this review was provided by BTOD.com. Please visit their web site for more information.


Product Information

Price: $517.99
Manufacturer: VertDesk
Retailer: BTOD
Pros:
  • High quality engineering, materials, and construction.
  • Beautiful and durable desk surface.
  • Wide range of purchase options.
  • Looks great in professional and home office environment.
  • Competitive pricing against the competition.
  • Excellent warranties.
Cons:
  • It's heavy — get a friend to help put it together.
  • Some aspects of the assembly can be tricky.
  • May not meet everyone's requirements for size & weight capacity.

Filed in categories: Reviews

Tagged: ,

VertDesk V3 Electric standing desk review originally appeared on The Gadgeteer on September 15, 2017 at 9:00 am.

Note: If you are subscribed to this feed through FeedBurner, please switch to our native feed URL http://the-gadgeteer.com/feed/ in order to ensure continuous delivery.

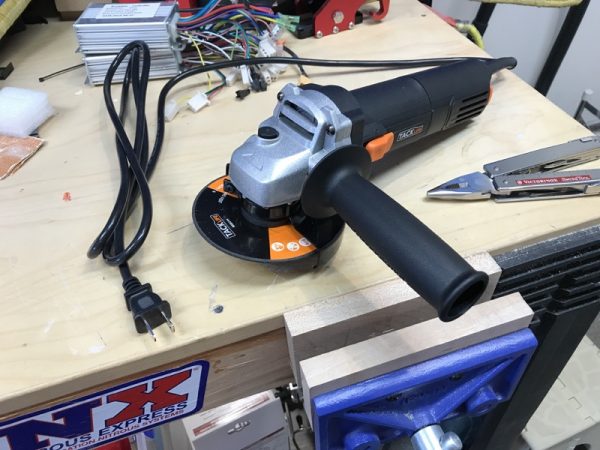
Tacklife AGK31AC Classic 6.3-Amp angle grinder review

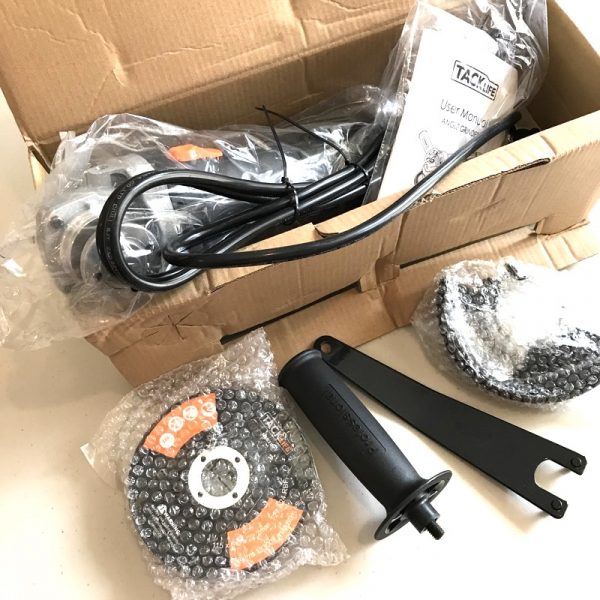
My angle grinder was stolen from my garage (it was a condo, shared space) along with some other tools. Now that I have my own garage, I had a chance to try out the Tacklife AGK31AC 6.3-amp angle grinder to see if it would make a worthy replacement.

Specifications:

Amps: 6.3 amps
Rating: 120 volts AC
No-load speed: 11,000 rpm
Grinding wheel:4-1/2 inches(115mm)
Cutoff wheel: 4-1/2 inches(115mm)
Flap Disc: 4-1/2 inches(115mm)
Wire cup brush: 3 inches(75mm)
Spindle thread: 5/8-inch-11

Package Contents:

1 * Tacklife AGK31AC Angle Grinder
1 * Cutting Wheel
1 * Grinding Wheel
1 * Flap Disc
2 * Extra Carbon Brushes
1 * Auxiliary handle
1 * Protect guard
1 * Spanner wrench for replacing
1 * User Manual
1 * Warranty Card

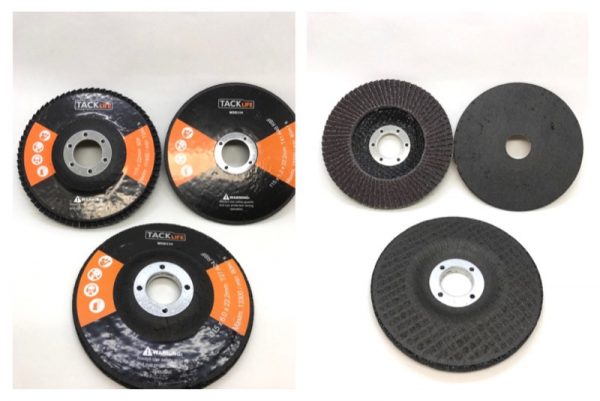
It was good to see that three 4-1/2 discs were included: a cutting wheel, grinding wheel and a flap disc.

In addition to a manual, a spare set of carbon brushes were included.  I wasn’t expecting that at all.

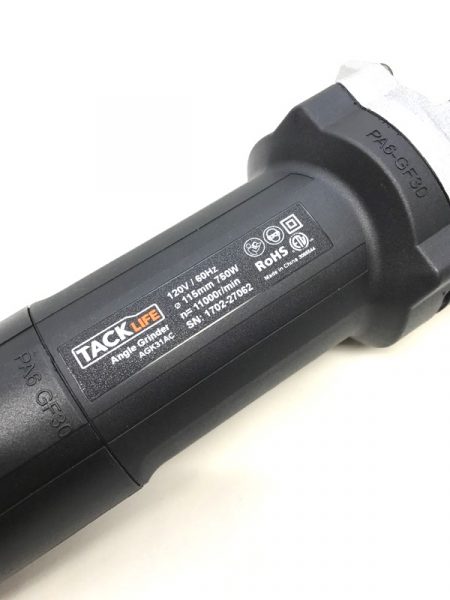
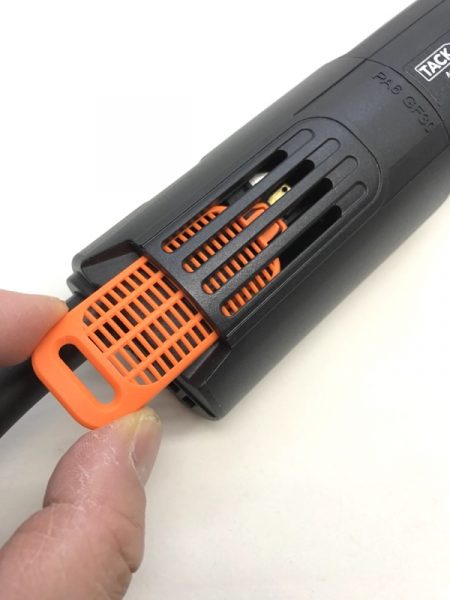
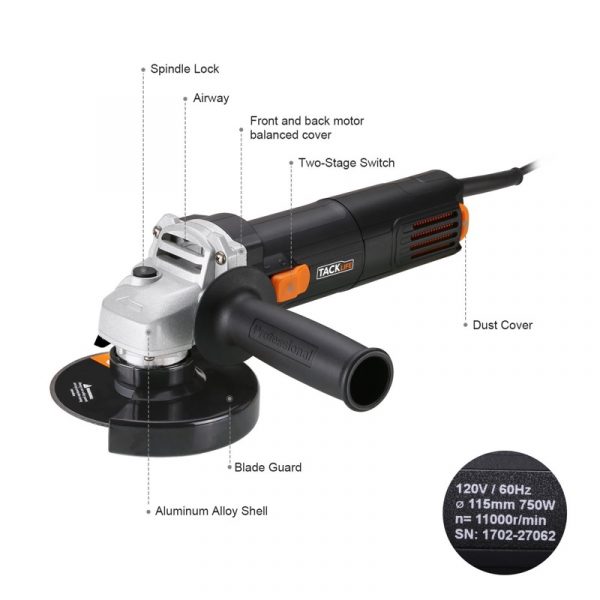
The grinder comes out of the box like this, without the grip, disc or safety shield attached. Closeup of the label. There are two removable “cooling vents” (one on each side). If you’ve ever worked in a dusty workshop, this is a nice touch. There’s a push button lock on the top side (left photo) that makes installing the wheel easier, especially when tightening with the included spanner wrench (right).

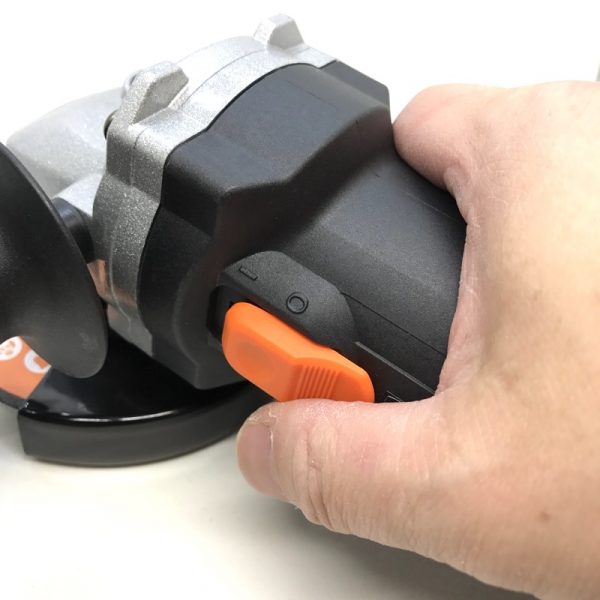
The orange power switch is located on the left side of the handle (note if you’re a lefty).

I happen to be retrofitting my son’s summer camp go-kart with electric motors, so I thought I’d use the grinder to shorten a long bolt.  No problems with the cutting wheel.

An angle grinder isn’t something I use all the time, so the Tacklife AGK31AC angle grinder is priced just right for me. Nothing fancy, and comes with everything you need to get started.

Source: The sample for this review was provided by Tacklife. Please visit their site for more info and Amazon to order one.


Product Information

Price: $32.97 (at time of writing)
Manufacturer: Tacklife Tools
Retailer: Amazon
Requirements:
  • 4-1/2 inch wheels (3 included), 120VAC
Pros:
  • Comes with everything you need to get started. Inexpensive
Cons:
  • Not for those who are into brand names.

Filed in categories: Reviews

Tagged:

Tacklife AGK31AC Classic 6.3-Amp angle grinder review originally appeared on The Gadgeteer on September 14, 2017 at 12:25 pm.

Note: If you are subscribed to this feed through FeedBurner, please switch to our native feed URL http://the-gadgeteer.com/feed/ in order to ensure continuous delivery.
Discommon Goods Thermoformed Leather Card Wallet review

The Card Wallet from Discommon Goods is about as minimal as you can get while still being able to call it a wallet, and personally, I love that about it. I have a deep appreciation for clean aesthetics and simplicity, and this feels like the distillation of what one would need from a wallet — basic function of holding a few credit cards and some folded bills while looking smooth and handsome.

This wallet is the sharply-dressed bartender in a small, upscale club who mixes you a perfect gimlet with a curl of lime balanced on the rim of the glass and slides it over to you with a nod. He gave you what you wanted, did exactly what you expected, but all the same it was really damn impressive.

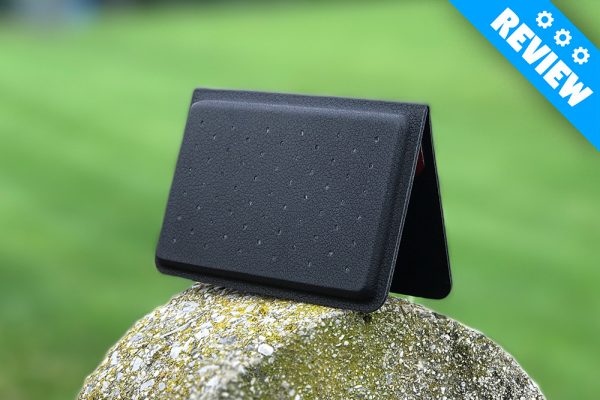
In my testing, I found I could fit about at max 4 cards in both sides and still have it close almost perfectly flush. Anything more than that is simply too much for the thermoformed pockets to handle and the wallet doesn’t quite close all the way. In fact, I wouldn’t even go as far as 3 cards in both sides. It sort of ruins the appeal of the formed shape, setting it down and seeing it propped open a bit.

That’s a handsome piece of kit.

Fortunately, I typically only carry a few cards with me, so I kept my license, a thin insurance card, a couple business cards and a debit card in one side. I left the other pocket empty in the event I had some cash I wanted to place in that side. Even with a small wad of bills, the wallet sat closed, flat and flush.

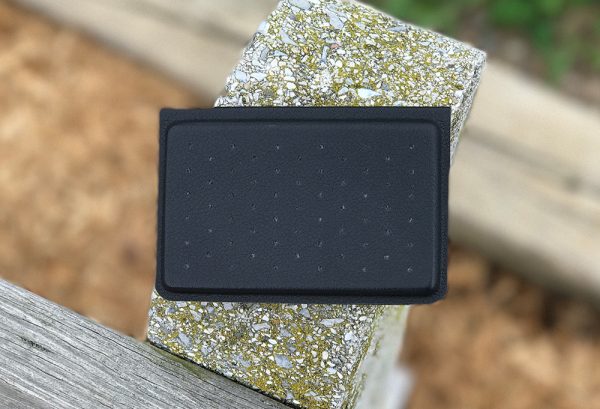
And did I mention how small it is? The area of the wallet is only a few fractions of an inch larger than a credit card. The manufacturing process forms the leather into what looks like a slim, rectangular clamshell, with v-cut pockets on the inside, revealing soft gray tweed.

This might be an introduction to con #1… the wallet is so small, scarcely larger than a credit card, that you have to fold a dollar bill twice to fit it into the pockets. I don’t mind that, personally, because I don’t often have to deal with cash, but anyone who does might get a bit annoyed at having to unfold a wad of bills twice and smooth them out to hand to the cashier. Naturally, you could carry a billfold in addition to the card wallet, but it begins to undermine the simplicity of a piece like this. Why carry two things? You’d be better off with a larger bifold wallet at that point.

The wallet’s design is impeccable. There isn’t a hint of stitching anywhere thanks to the thermoformed lamination process, seamlessly binding the soft leather and blended tweed materials. It reminds me of the seamless look of today’s modern cell phones, where different textures and materials are combined and appear unbroken and natural. It feels good in your hand, looks great, and seems plenty durable.

The only other quibble I could mention is with the top lip of the pockets. Since the card cutouts are so precise, it only leaves a tiny bit of wiggle room for the cards.

That lip above the top of the card is like a little speed bump for your plastic.

The top of the pockets running along the spine aren’t tapered and make it hard to easily slip a card out of the pocket. I found that when I tried to remove the top card, it would push against this lip until I used my other hand to push the leather down out of the way of the card. It was irritating until I got used to it. I don’t know that there could have been a way to fix this, though. Maybe by continuing the pocket cutout all the way to the center spine of the wallet? It might have weakened the fold, made it too floppy.

Outside of those couple points, the card wallet is a quality piece. It looks expensive, and feels expensive. Which is good, because it also *is* expensive. At $125, it’s definitely reserved for a certain type of individual, like someone who has high expectations in their accessories and is really into the everyday carry scene and has no problem dropping a money on watches, pocketknives, key fobs and things that you use every day that are clearly worth that *investment*.

The company offering this wallet, Discommon Goods, seems to specialize in this very thing, touting high-end items such as a $230 Damascus steel bottle opener and a $1,200 carbon straight razor. Definitely a step up from your local Target aisle.

Don’t let that stop you, though. The things you use every day are worth the extra investment if you enjoy them, and if they make you feel like a globetrotting spy every time you pull it out at a bar, all the better.

The Card Wallet is available now from Discommon Goods for $125.

Source: The sample for this review was provided by Discommon Goods. Please visit their site for more info and to order.


Product Information

Price: $125
Manufacturer: Discommon Goods
Pros:
  • – Clean, minimal design
  • – Seamless, luxurious leather material
  • – Small enough to carry in a front or shirt pocket
Cons:
  • – Limited carry capacity
  • – Card cutouts impede easy removal
  • – Expensive

Filed in categories: Reviews

Tagged:

Discommon Goods Thermoformed Leather Card Wallet review originally appeared on The Gadgeteer on September 14, 2017 at 8:00 am.

Note: If you are subscribed to this feed through FeedBurner, please switch to our native feed URL http://the-gadgeteer.com/feed/ in order to ensure continuous delivery.
FIIL Canviis Pro Wireless Noise-Cancelling Headphones review

The Fiil Canviis Pro wireless noise-canceling headphones have some unique features and great sound quality, but with a spotty app and plenty of similarly featured cheaper options on the market, you might be better off waiting until the $349 price comes down a bit.

The high price tag of the Canviis Pro is definitely reflected in the packaging and presentation of the product.

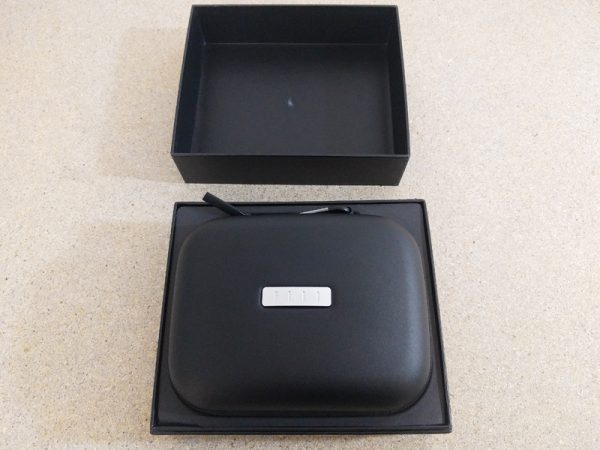
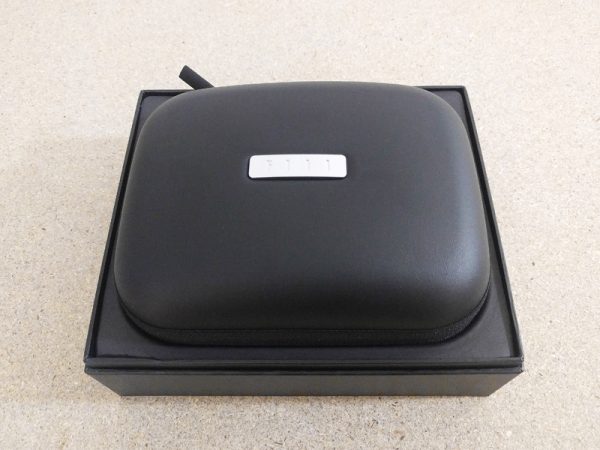
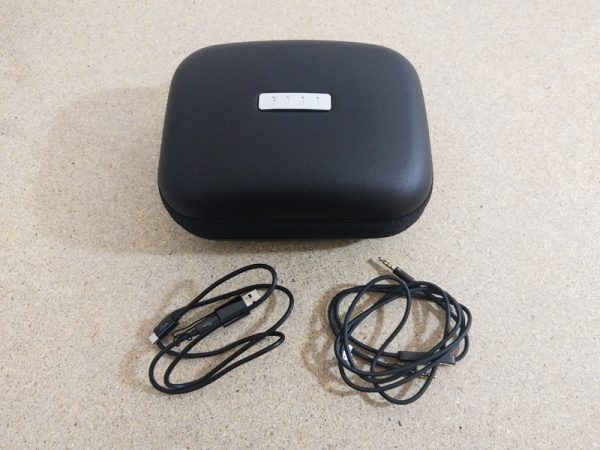
The Canviis Pro headphones arrive safely protected in a thick, well-designed box. The headphones come with a great carrying case that sets deeply into the box.

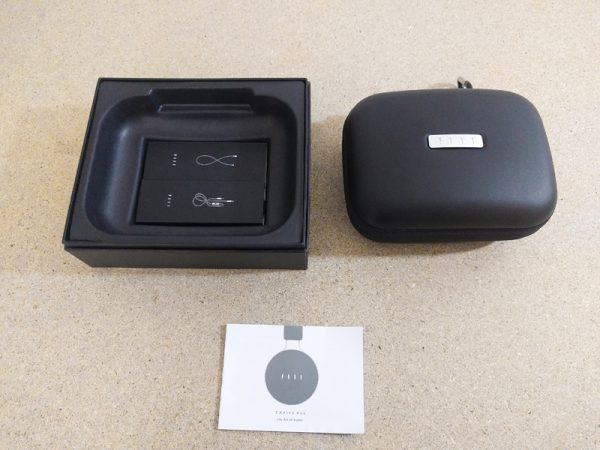
The Fiil logo is emblazoned on a metal tag on the carrying case and under the case are spaces for accessories.

Along with a very basic instruction manual, the Canviis Pro comes with two cables.

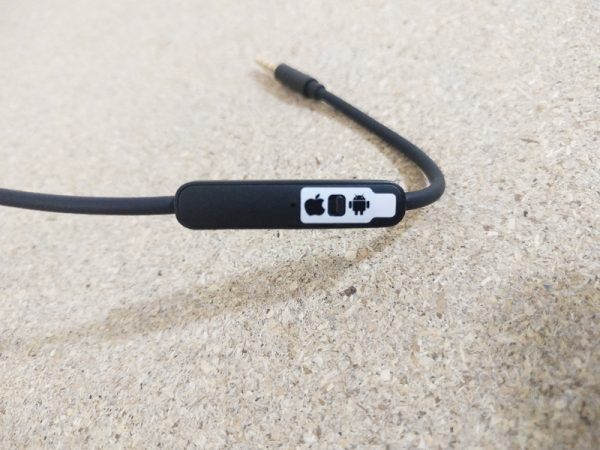
One cable is an audio cable with inline controls that work for both Android and iOS. A handy sticker is attached to the cable so you can configure it probably with a tiny switch before use. The inline controls work fine, allowing you to answer calls, adjust volume and change tracks.

This audio cable also enables you to use the headphones in a wired configuration with any audio source, which is a nice option to have.

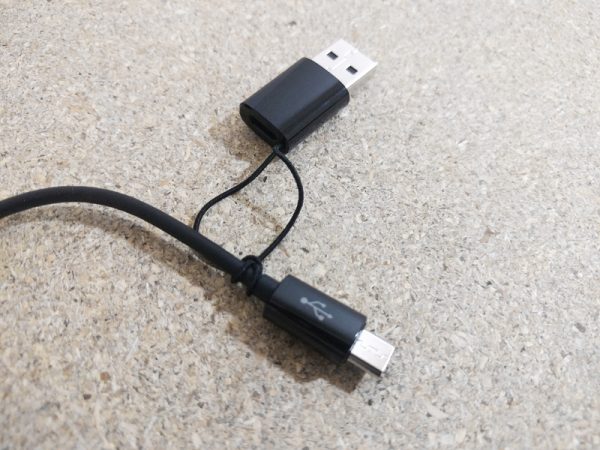
The charging/OTG cable comes with Micro-USB plugs on both ends with an attached USB-A adapter plug as well.

The USB-A adapter snaps right over the Micro-USB plug and can be used to charge your headphones from a laptop or USB power supply and to attach the headphones to your computer as storage for adding music files to the 4GB of internal memory.

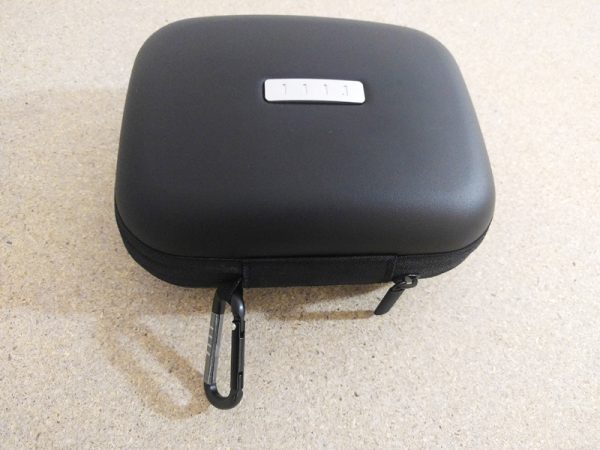
The carabiner attached to the carrying case is a nice touch and makes it easier to secure the case on a backpack.

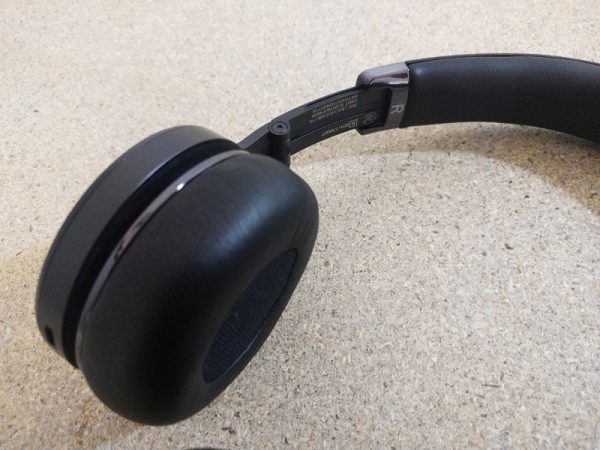
The build quality of the Canviis Pro is quite impressive. The unit has a great heft to it and the switches, buttons and ports all seem like they can handle extended daily use.

The headphones fold in on themselves to fit into the case or to make it easier to store them in a coat pocket. I was disappointed to find that the ends don’t rotate flat though, which would make it easier to wear them around your neck when you’re not listening to them.

The Canviis Pro headphones are “on-ear” so the comfort of the ear pieces are vital to long term listening enjoyment.

The ear pieces and headband are made from “smooth protein leather and memory foam” and provide a great deal of comfort during use.

I’ve worn the Canviis Pro for hour-long stretches and comfort has not been an issue at all. Actually, the pressure of the band on my ears was the first thing I noticed after prolonged use, not any issues with the ear pieces, but that’s the nature of on-ear headphones in general.

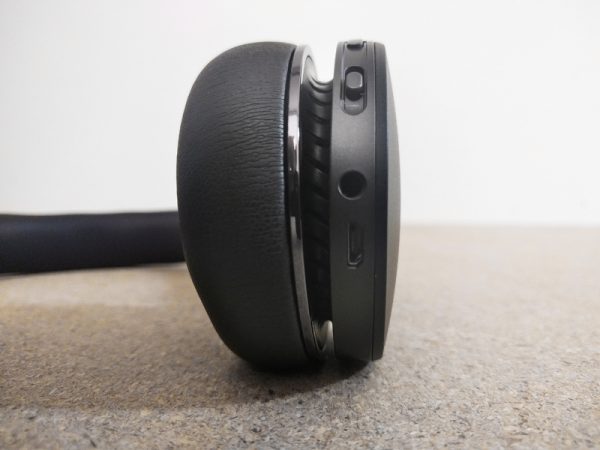
The Canviis Pro has one button and one switch/button on the unit to allow the user to control the various functions and features. While I appreciate the simplicity of design, trying to assign so many functions to just two controls is a bit counterintuitive.

For instance, one of the Canviis Pro’s many features is limited voice control, which despite repeated efforts I never got to work properly. To activate this feature via the headset control you have to hold the Multi Function Button (MFB) for exactly two seconds. I found this to be maddeningly impossible. If you held it for too long the unit would shut off, if you didn’t hold it long enough the track would pause and play. When I did hold the button for the correct amount of time, the unit would simply say “Hello” and then not respond to my commands.

And this is the major failing of the Canviis Pro, Fiil is trying to do too many things at once with the unit and, as a result, none of them are executed effectively. The features that do work well, are incredibly useful. I’ll go through the features and their effectiveness in my testing.

The touch controls are great to have. While in use, you can swipe your hand across the side of the right earpiece to advance or rewind tracks or you can move your hand up and down to control the volume. A lot of headphones at this price point have been incorporating this feature and it really is worth having.

The Canviis Pro also has a “Smart-Sensor” auto-off feature that notices when you’ve removed the headphones and automatically pauses the music and puts the unit in low-power mode. This was great when it worked. The problem was it didn’t work every time. So I’d take the headphones off and then have to check to see if the auto-off engaged, which again defeats the purpose of the feature.

Another unique feature is the 4gb of internal storage that the Canviis Pro has for use as a stand-alone music player. It’s nice I guess, but I honestly can’t think of a situation where I’d ever use this function. The paltry 4gb size makes choosing what music I store on the unit more aggravating than the feature is worth. Worse yet, the music player functionality and playlist options are, at best, barebones. It’s really just a folder of music files that will play if needed. The only way I can see this as useful is for a runner who doesn’t want to carry her phone. But, after testing the unit, I doubt these would be a good running or workout set of headphones.

The noise-canceling function is one feature that worked very well and it definitely increased the listening experience. The feature, called My Audio Filter (MAF), creates a noise-canceling wave out of phase with the ambient noise to block that noise. It works great, but is way more complicated than it needs to be. There are four different configurations for the MAF; Noise-Cancelling mode blocks out all outside noise, Monitor mode blocks just low-frequency noise but allows you to hear some ambient sounds, Open mode allows all ambient sounds, and Wind mode blocks just noise that would be created in a windy environment.

The problem is you have to cycle through all of these modes when using the headset switch and good luck remembering which switch configuration triggers which mode. Plus, in practical use, you only ever really need the Noise-Cancelling mode and the Open mode. Why would I ever just want to filter out JUST windy noise?

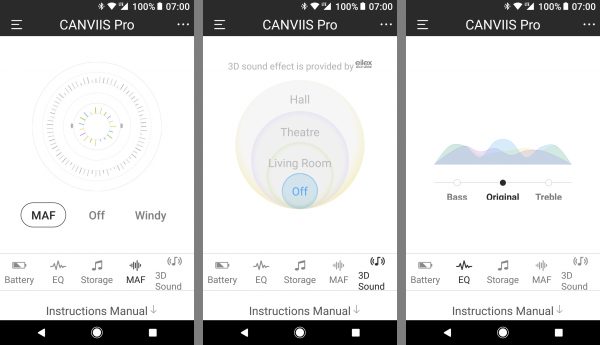
Sure, you can use the Fiil+ app to control or change the MAF, but, as is the case with so many other companion headphone apps, it’s just not a good user experience.

The app doesn’t have any instructions on how to use it properly, so you’re just fumbling around trying to make sense of all the options. It includes an EQ that isn’t adjustable and just gives you three options; Bass, Original, and Treble. There is an option to engage the onboard storage, but those functions never worked right for me and frequently had the tracks I stored on the unit misnamed. There are the frustrating MAF controls, which give you three options at first; MAF, Off and Windy, but then if you click on the MAF icon you are given three other options; Open, Monitor and Noise-Cancelling. Why not just give the user all four options up front?

The app also allows you to access the “3D Sound Effect” functionality. Which, again, is a mostly useless function that adds varying amounts of reverb to your music to make it sound like you’re listening to it in a living room, theatre, or hall. None of these options will positively add to the listening experience unless you REALLY like reverb for some reason.

The app also allows you to control a few other useless functions like turning the logo light off and on, adjusting the auto-off timing, and turning off the Smart Sensor.

The absolute WORST thing about the Fiil+ app though is that you have to have a Facebook, Twitter or WeChat account and app installed on your phone to be able to log in and get the full functionality. Any app that requires me to install another app on my phone in order to log in properly has failed me as a user.

As a Bluetooth headset, the Canviis Pro work fine. I made and answered calls with the unit and the sound quality on both ends was perfectly fine. I got pretty good battery life out of them over the course of a week with varied use.

Overall, I liked the sound quality, noise-canceling, and touch features of the Canviis Pro, but I think they’re overpriced and over-engineered in a bad way, especially the app. For the same price, you’re better off with some higher-end models from Sony or Bose.

Source: The sample for this review was provided by Fiil Audio. Please visit their website or Amazon for more info.


Product Information

Price: $349.00
Manufacturer: Fiil Audio
Retailer: Amazon
Pros:
  • Great sound quality
  • Good battery life
  • Some great features
Cons:
  • Poorly developed App
  • Expensive
  • Over-engineered

Filed in categories: Reviews

Tagged:

FIIL Canviis Pro Wireless Noise-Cancelling Headphones review originally appeared on The Gadgeteer on September 13, 2017 at 9:00 am.

Note: If you are subscribed to this feed through FeedBurner, please switch to our native feed URL http://the-gadgeteer.com/feed/ in order to ensure continuous delivery.
Geek Fuel monthly mystery box review

I know I’ve said this many times in my articles throughout the years, but I’ll say it again… my favorite part of the day is opening the mailbox or seeing packages left on my front porch when I get home. If you don’t get interesting mail that excites you, Geek Fuel monthly mystery boxes could be a solution to your mail woes. Let’s check out this subscription service.

What is it?

A Geek Fuel mystery box is an 11.5 x 7.5 x 5 inch cardboard package filled with geeky goodness that is you mailed to your door once a month.

Each monthly box comes with a different collection of geeky toys, jewelry, T-shirts, books, games, and more.

Geek Fuel sent me a box a few weeks ago and this is what I saw upon opening it.

Geek Fuel Magazine
She-Tarra Epic Enamel pen from an 80’s game or TV show called Thunder Clasp
Barrel Cooler soda can cozy
Kidrobot Street Fighter vinyl mini figure
Doctor Who Light-Up Weeping Angel figure with illustrated book
Steamroll downloadable Steam game for Windows, Mac, or Linux
Serenity T-shirt

Right away I was a little disappointed because four of the items in the box didn’t really appeal to me. I don’t drink canned beverages, so the Barrel Cooler wasn’t thrilling. I don’t know who the characters are in the Street Fighter video game so that mini fig didn’t excite me. Neither did the Epic Enamels Thunder Clasp pin. I have no idea who or what Thunder Clasp is. I’m also not a Doctor Who fan (don’t judge me!).

The only items from the Geek Fuel mystery box that I did like were the Serenity T-shirt, the Geek Fuel magazine, and the Steamroll Steam game. Because who isn’t a fan of the Serenity sci-fi series? And a free video game is always cool except when it’s a sub-par game. This one isn’t bad.

The Geek Fuel magazine was ok too. It had an article about Spiderman and Adam West who played Batman. The rest of it was just ads to buy things.

Final thoughts

I think the price for the Geek Fuel mystery box is a bit high at $24.90 (that includes shipping) per box. You can save a little bit if you if you opt for a 3, 6, or 1yr subscription. But, the most you’ll save over the $24.90 per box price is only a $4 savings per box or $48 total savings if you go for a full year subscription. You will, however, get some bonus goodies if you opt for a 6 or 1yr plan.

Would I buy the mystery box that was sent to me if I had known what was in it? No. The best item in the box was the Serenity T-shirt and I don’t pay $25 for T-shirts. That said, maybe I’m not geeky enough because someone else might have loved these particular items. The fun is in the mystery of not knowing what you get until you receive the box.

Source: The sample for this review was provided by Geek Fuel. Please visit their site for more info.


Product Information

Price: $24.90 (with shipping) for one box up to $250.80 for a 1 yr subscription
Manufacturer: Geek Fuel
Pros:
  • Fun to receive mystery goodies
  • Each box comes with a game and a T-shirt
Cons:
  • Some items may not be interesting to everyone

Filed in categories: Reviews

Tagged:

Geek Fuel monthly mystery box review originally appeared on The Gadgeteer on September 13, 2017 at 8:00 am.

Note: If you are subscribed to this feed through FeedBurner, please switch to our native feed URL http://the-gadgeteer.com/feed/ in order to ensure continuous delivery.