808 Audio EarCanz TRU Wireless Earbuds review

Wireless audio: Folks like their music, podcasts, audio books and other sonic entertainment and information, and increasingly they the delivery method to be small, lightweight and long-lasting. I’ve reviewed several models of Bluetooth earbuds here at The Gadgeteer over the past few years, and I’m still searching for that elusive set that works best for my needs. I want to wear them while I exercise, and I work out pretty hard, so my “perfect” pair would have some fairly heavy duty requirements. When Julie offered the 808 Audio EarCanz TRU Wireless Earbuds for review, they had some features that I thought might work well for me. Well, did they? Let’s find out! Gadget on!

Specs

  • Model: HPA225
  • Dimensions: 0.55″ wide x 1.23″ tall x 1.22″ deep
  • Weight: 0.03 lbs
  • NOTE: No other technical specs for this product were provide by 808 Audio, either on their site or in the documentation included with this product.

Packaging
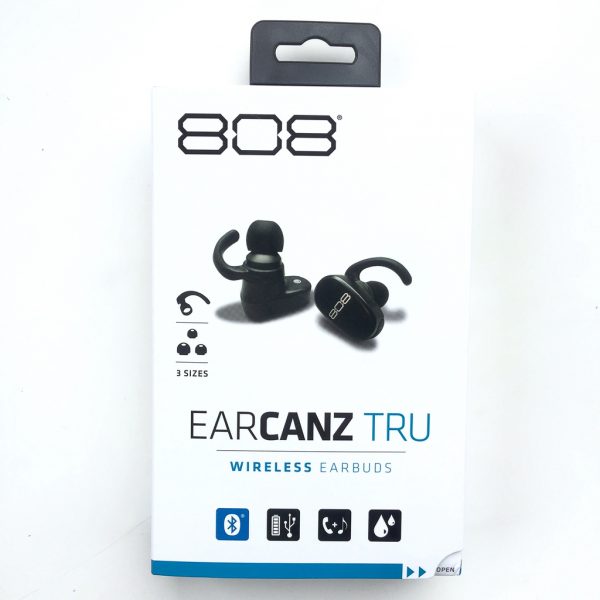
The 808 Audio Earcanz TRU Wireless Earbuds arrived in fairly standard packaging, namely a light cardboard outer box.  The front of the box included an image of the product contained inside.

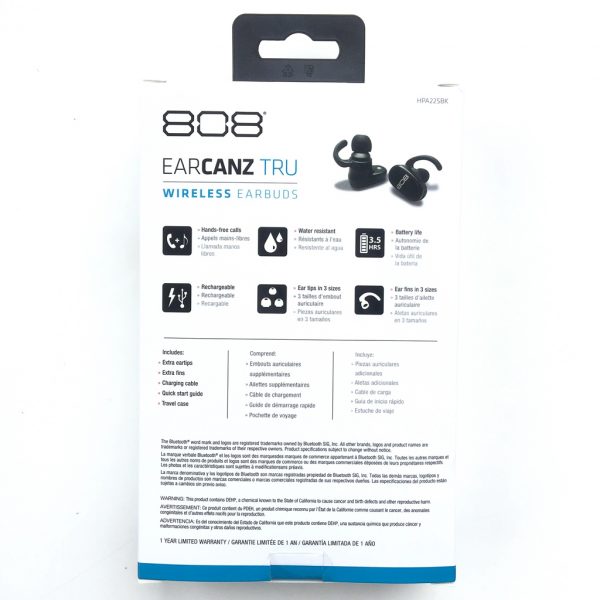
The rear of the box included a listing of features of the product.
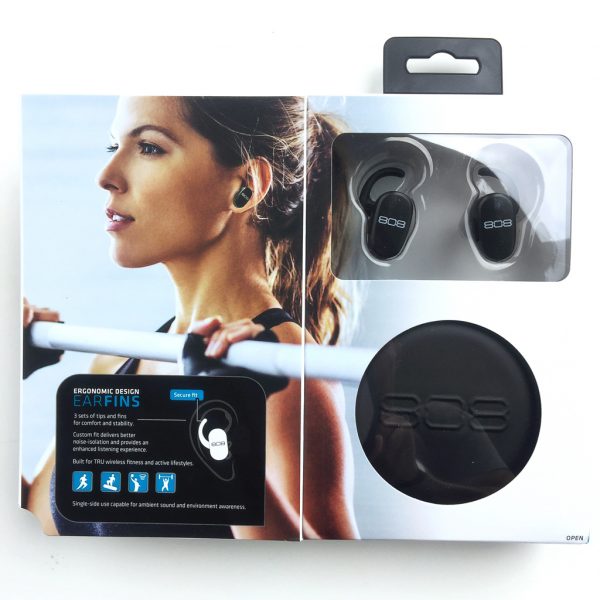
One aspect of the packaging I really appreciated was that, upon opening the front cover, there were two transparent windows that show the included earbuds themselves, as well as their carrying case.  As I’ve stated in other reviews, I like when the manufacturer includes in the packaging a method for the prospective buyer to actually see the item(s) contains inside the box.

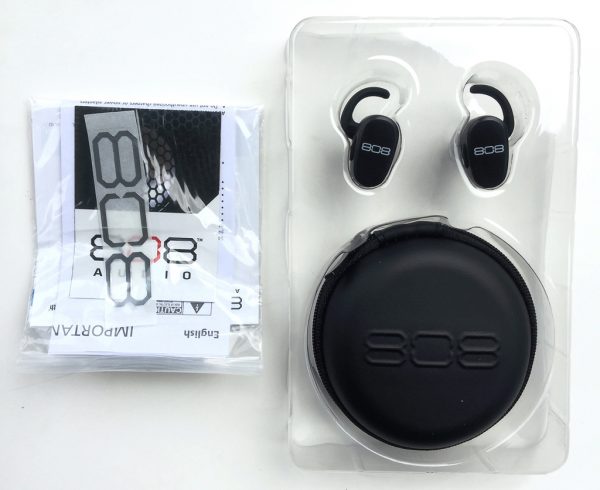
Inside the main box was a plastic tray that included cavities for the earbuds as well as their carrying case.  The additional earbud tips and other accessories were contained within the case.  More on those accessories below.

Contents
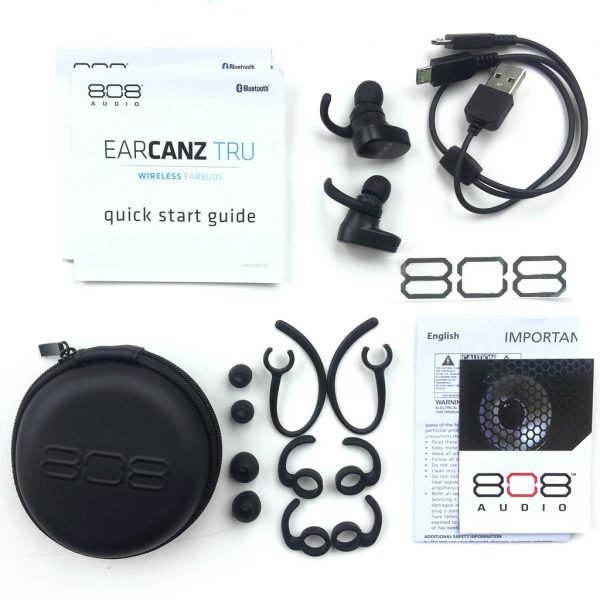
Above, you can see all of the items that were included with the 808 Audio EarCanz Tru Wireless Earbuds:

  • EarCanz TRU Wireless Earbuds
  • Eartips (in small, medium and large sizes)
  • Ear fins (in small, medium and large sizes)
  • Ear hooks (1 size)
  • Double micro-USB-to-USB Charging Cable
  • Travel Case
  • Quick Start Guides in both English and Spanish
  • 808 Audio decal
  • Safety info booklet
  • 808 Audio promotional card

Features, Functions and Performance

My first impression of the earbuds was that they seemed fairly compact and very lightweight.  I’ve discovered that both of these features are important to me in a set of wireless earbuds, because larger, heavier models tend to fall out of my ears earlier when exercising, which would be my main use for these earbuds.

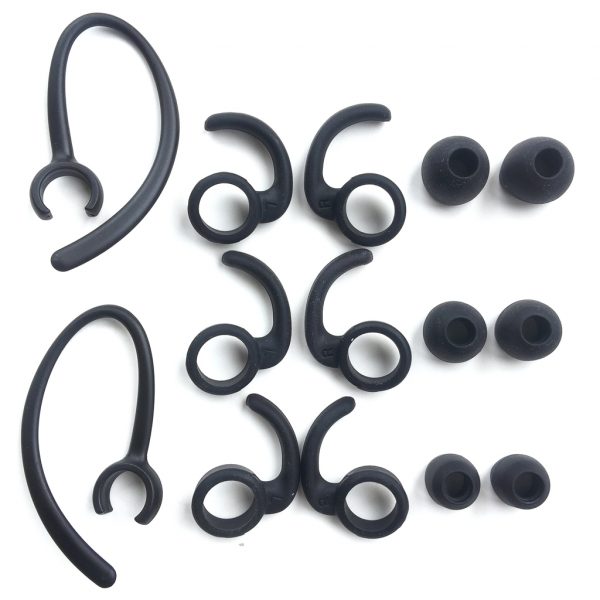
Above, I’ve laid out the earbuds’ accessories.  On the left, one set of harder plastic ear hooks.  These are mean to “hook” over your outer ear to stabilize the earbuds during activities.  In the middle, three sizes of soft silicone ear fins.  These are smaller than the ear hooks and are mean to “lock” into the curvature of your outer ear canal to help hold the earbuds in your ear.  These were actually fairly useful for me.  On the right, three sizes of silicone earbud tips.  I found that the ear “hooks” didn’t work well for me, but the combination of the largest-sized ear fins and tips did seem to work quite well.

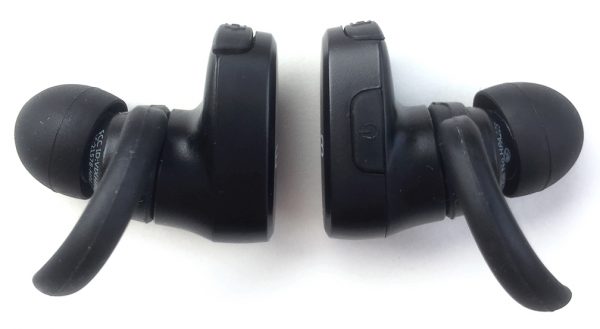
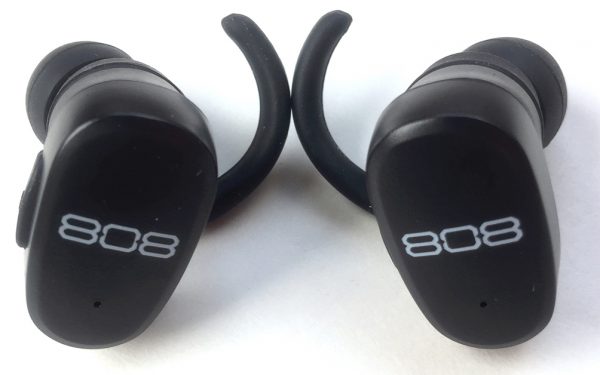
In the photo above, you can see the configuration of the buttons on the earbuds.  I found their orientation to be a bit bizarre.  As you can see, the buttons were on the rear of the right earbud and the front of the left earbud.  Not sure why this design choice was made, but it seemed very counter-intuitive from a human factors design standpoint.  In any event, these buttons control all of the essential functions of the earbuds.  While listening to music via your phone, a single press of either button will pause or play music and a quick double-press will skip a track.  There are no on-board volume controls, so volume must be controlled with your phone.  The earbuds also have phone functionality.  The right earbud rings when an incoming call occurs and it also has a tiny microphone for answering calls. A quick press of the button will either answer or end the call, while a long hold will decline an incoming call.  Additionally, the right earbud can be used individually as a Bluetooth headset.  The quality of the phone call from the caller’s end seemed poor.  I took a few calls on the earbuds and the caller had difficulty hearing me, even with relatively quiet background sound levels on my end.

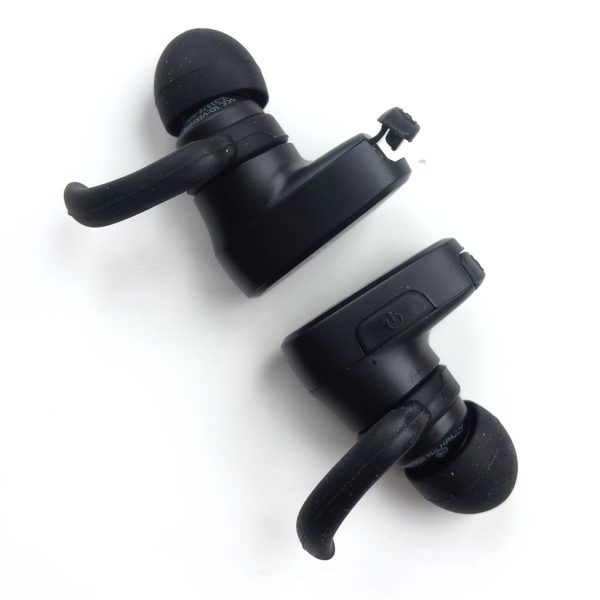
Above, you can see the charging ports on the earbuds.  On the top one, I’ve popped open the charging port’s cover.  Because these covers are made from silicone, they lock in and protect the charging ports themselves, providing a water-resistant seal.  The charging port covers are connected to the earbuds via a small silicone tether that is integrated into the cover itself.  These silicone covers are easy to pop open with a fingernail, and the tether seems very robust—I wasn’t nearly as concerned about the tethers getting torn off and losing the covers as I have done with other earbuds, unfortunately.

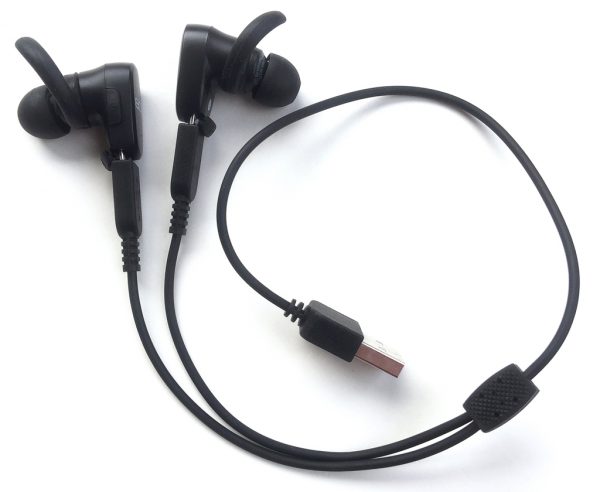
Above, I’ve connected the charging cable to the earbuds.  This cable is basically a “Y” cable, with two mini-USB connectors, one for each earbud, at one end and a single standard USB at the other end.  Just plug the standard USB end into any powered USB connection (your computer, a USB wall adapter, etc) and the earbuds will begin charging automatically.  I was actually a bit surprised that 808 Audio chose to go with this “Y” cable for charging these earbuds.  Many companies producing higher-end earbuds in a similar price range to these EarCanz TRU earbuds also provide a charging case.  I suspect that this “Y” cable is less expensive than a charging case, but if so, I would have expected these earbuds to be a bit less expensive as a result of this cost savings.
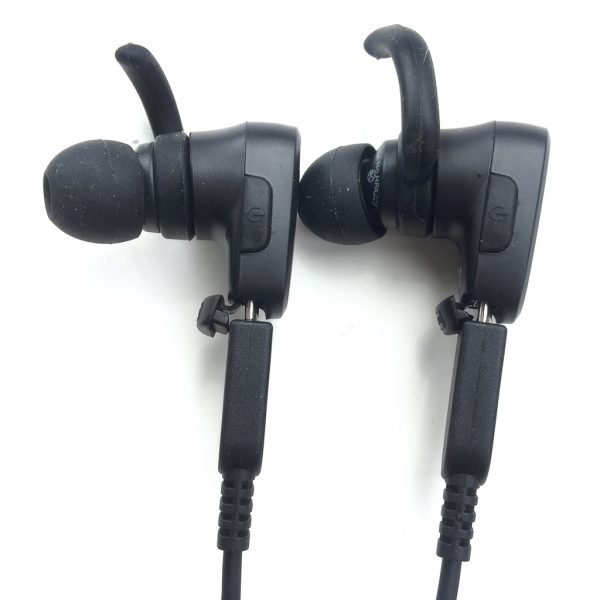
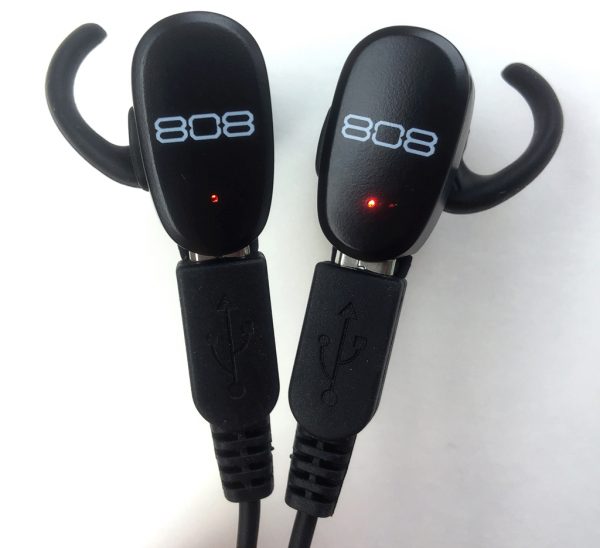
Above, the micro-USB charging cables are plugged into the charging ports on each of the earbuds.  It took about an hour to fully charge these earbuds, which I didn’t think was all that bad.  Playback time on a full charge was decent.  On one occasion, I went out for a long ruck (a fast walk wearing a weighted backpack) of over three continuous hours in duration, then came home and mowed and trimmed the lawn.  In all, it was almost four hours of continuous use, and they kept right on chugging.

During charging, a tiny LED glows read on each of the earbuds.  Once charged, the color of the LEDs changes to white.  There is a bit of a process that must be followed to turn the earbuds on, basically right first, then left.  First, a 3-second long press on the right earbud’s button will turn it on.  Once powered on, you will hear a voice prompt announce, “Power on.”  Next, a long press on the left earbud’s button to turn it on.  Shortly after that, the right and left earbuds will announce, “Right connected,” and “Left connected.”  Boom, just like that, you are ready to go.
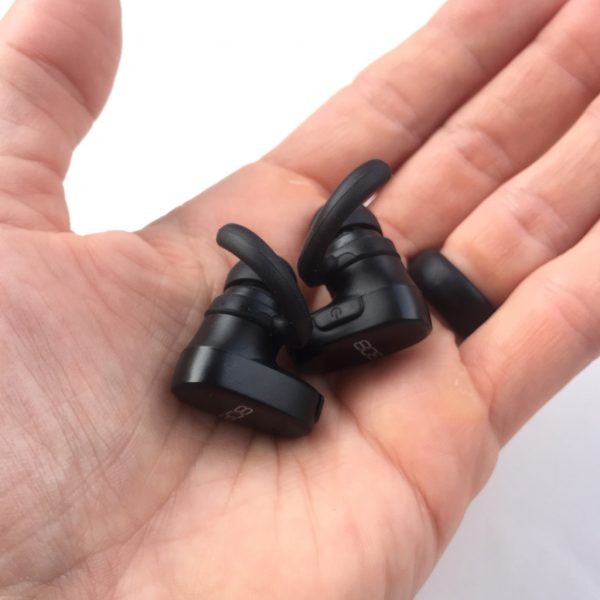
While these earbuds are not the smallest on the market, they are fairly small, and they are quite lightweight.
Pairing these earbuds was simple and quick.  I powered on the earbuds, then went to my iPhone’s “Bluetooth” settings, looked for “808 EarCanz TRU,” and selected it.  Once paired, a voice prompt announced, “Device connected.”  I never had to pair the earbuds again, as they always re-connected automatically once they were both powered on, and that’s more than I can say for some other wireless earbuds I’ve tried.
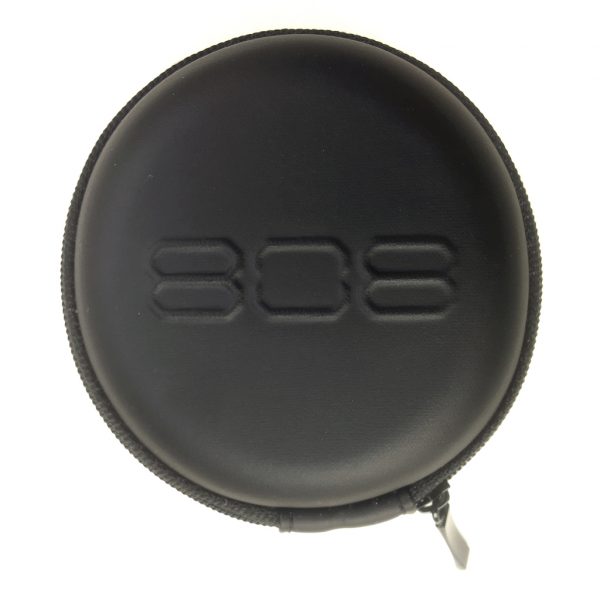
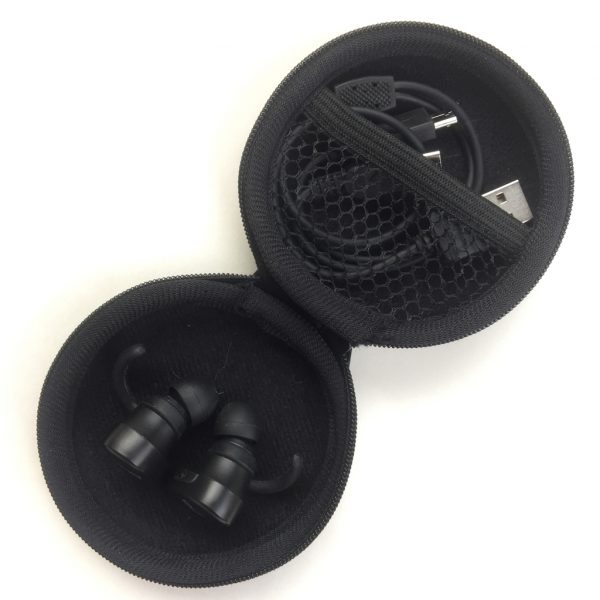
Included with these earbuds is a molded, semi-rigid case with a zipper closure.

The case has room for the earbuds, and the charging cable can be tucked into a small elastic mesh pocket in the lid.  The case is quite protective and could maybe even be a little smaller and still have plenty of space for the earbuds and the charging cable.

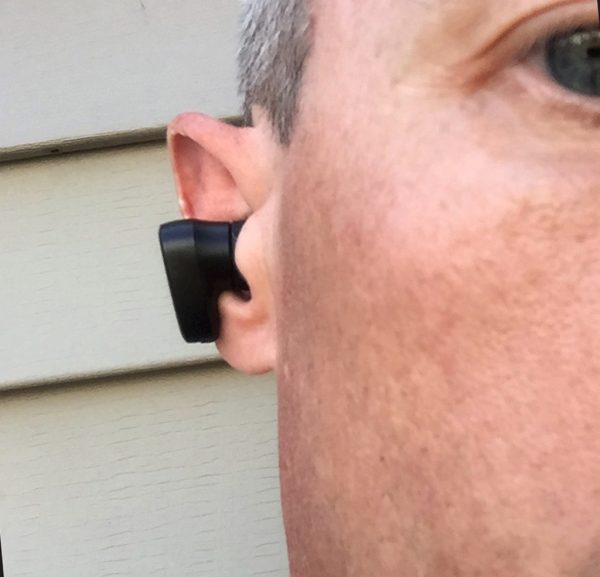
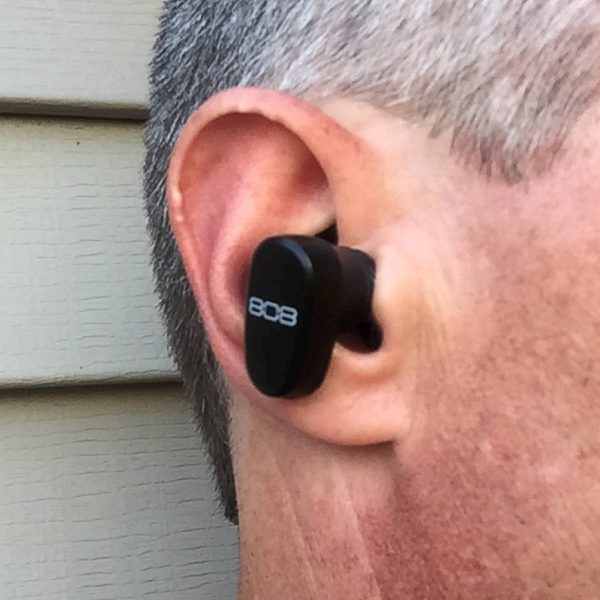
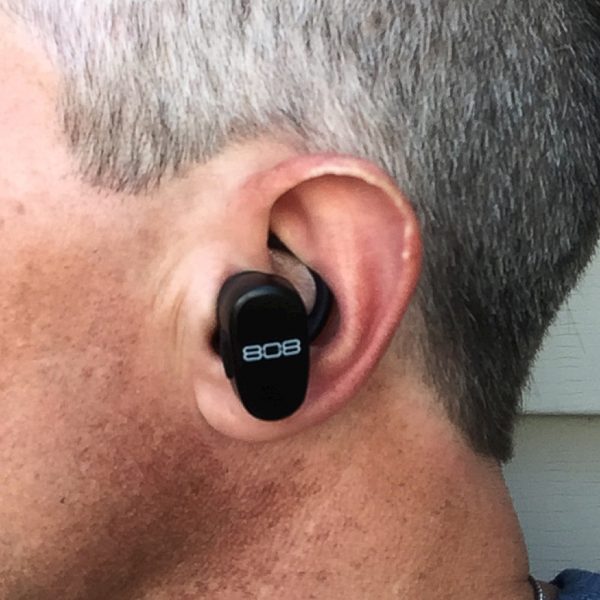
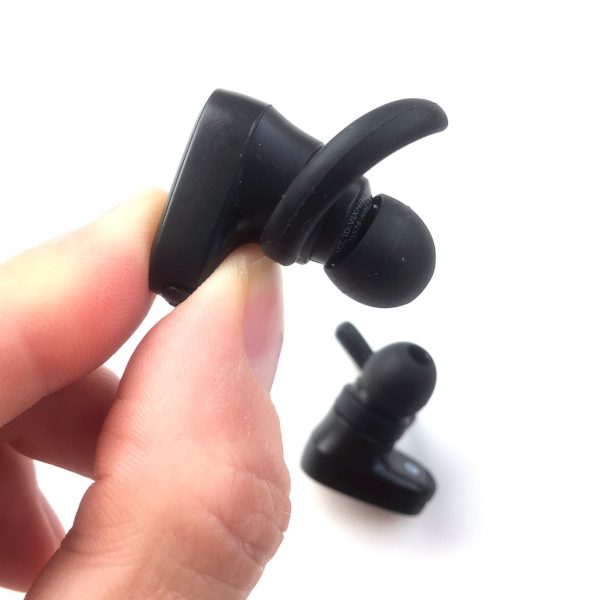
How did they fit in my ears?  Actually, they fit quite well, as long as I used the largest size of silicon tip.  As can be seen in the images above and below, these earbuds do stick out of my ears, but only a bit.  Sound quality was acceptable, but earbuds of this style typically aren’t expected to be sonically symphonic reproduction masterpieces.

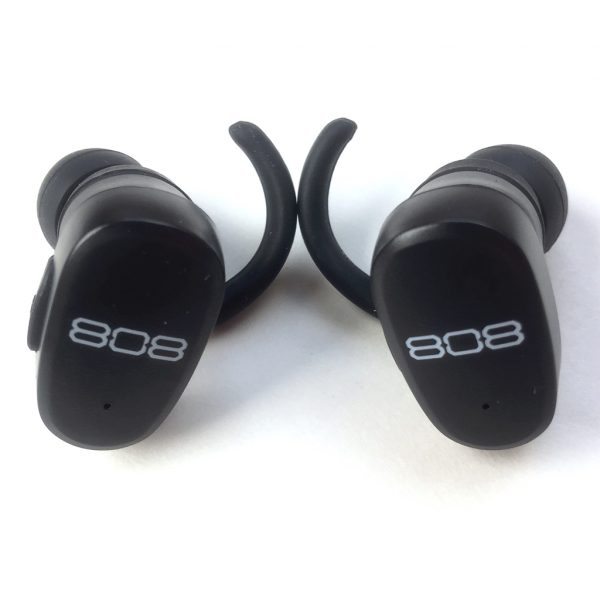
I oriented them in my ear such that the “808” logo was horizontal, and thus properly and easily readable, and in doing so, the “lobed” portion of it pointed down.  This seemed to help stabilize them in my ear a bit since gravity was generally helping them stay put.

Above, you can just see one of the large size ear “fins” curling upward in my ear.  I basically twisted these up and into the contour of my outer ear, which really helped to keep these earbuds anchored in my ear during strenuous activities.  That said, once I really started sweating, the silicone tips did tend to work themselves out of my ear canals, but the earbuds themselves never actually fell out/off, which I credit largely to these “fins” keeping them in place.  They also seemed to be fairly resistant to sweat.  I sweat buckets when I work out and it didn’t seem to affect these earbuds much at all.  Also, I did try the larger ear “hooks,” but they didn’t work for me at all—they were too big and loose and didn’t hold the earbuds in place.

Conclusion

I really like the 808 Audio EarCanz TRU Wireless Earbuds Review.  They are fairly small and very lightweight, and I think this combined with their ear “fins” helped to keep them in my ears during strenuous exercise better than any other comparable earbuds.  Their opposing button configuration is a bit confusing, but I got used to them quickly, and the audio and phone controls are fairly straightforward (though there is no on-board volume control).  They also seemed to have no issues with the high amounts of sweat produced by yours truly.  While sound quality was decent, callers did have a difficult time hearing me.  On a full charge, they lasted nearly four hours continuously.  Finally, their carrying case offers plenty of space for their Y-style, micro USB dual charging cable as well as the earbuds themselves and is very protective.  While they are not perfect and a bit on the pricey side at $79.99, to me their benefits outweighed their imperfections.  The 808 Audio EarCanz TRU Wireless Earbuds are worth a look if you are in the market for a pair of wireless earbuds for exercise or even lower-demand everyday use.

Source: The sample for this review was provided by 808 Audio. For more info or to order, visit their site.


Product Information

Price: $79.99
Manufacturer: 808 Audio
Requirements:
  • A standard USB connection for charging
Pros:
  • + Lightweight design and ear "fins" helped keep these earbuds in my ear during strenuous exercise better than many other earbud models
  • + Over 3 hours of continuous use on a single charge
  • + Pairing was simple and they actually stayed paired
Cons:
  • – "Y" USB charging cable works, but had expected a charging case for this price
  • – Phone audio quality was sub-par
  • – Ear "hooks" were not useful
  • – No on-board volume controls

Filed in categories: Reviews

Tagged:

808 Audio EarCanz TRU Wireless Earbuds review originally appeared on The Gadgeteer on September 18, 2017 at 10:00 am.

Note: If you are subscribed to this feed through FeedBurner, please switch to our native feed URL http://the-gadgeteer.com/feed/ in order to ensure continuous delivery.

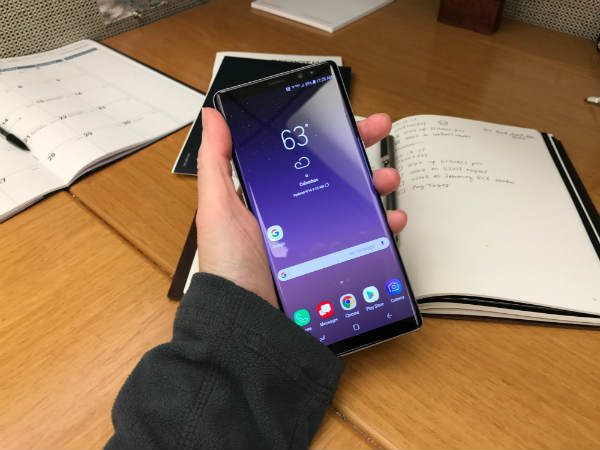
Samsung Galaxy Note8 review (day 2 & 3)

On Friday I posted my first day impressions of the Samsung Galaxy Note8 and I’m back with a few more thoughts after spending the weekend with this phone. So go check out day 1 and then come back for more. 

Day 2

The alarm on the Note8 went off bright (actually, it was still dark) and early at 5:45 am on Saturday morning. Why so early? I had to take Max to the vet for a blood sugar check and we had to feed him well ahead of the vet appointment. When the alarm sounded, I reached over and grabbed the phone off the TYLT wireless charger on my nightstand and tried to unlock the phone with my face. It wouldn’t work because the room was too dark. That’s one area where Apple’s iPhone X Face ID will shine (see what I did there?) over Samsung’s face unlock feature because it uses infrared and will work in the dark.

While I was sitting on the couch eating breakfast, I set up Samsung Pay so I could leave my wallet in the car when I took Max to the vet. In theory, Samsung Pay works in more places than Apple Pay so I planned to try it there first.

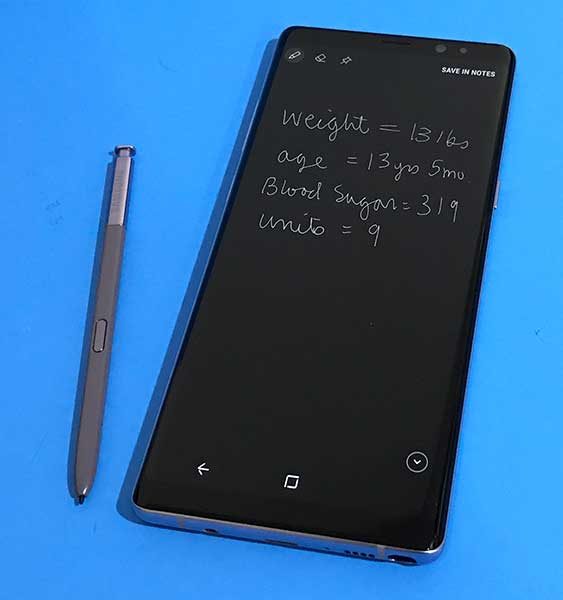
At the vet, Jeanne wanted me to ask a few questions about Max. Instead of taking a piece of paper and a pen with me, I popped the S-Pen out of the Note8 and recorded the info. As soon as inserted the S-Pen back in the phone, it showed a message on the screen that the note had automatically been saved to the Samsung Notes app.

I love this feature because you don’t have to navigate to an app to start the note capture or do anything other than reinserting the pen to save the note. I also like that the interface is white on black. So it is nice if you wake up in the middle of the night and have an idea or a dream that you want to write down. The screen shouldn’t completely wreck your night vision although it would be even nicer if there was a way to make the text red on black for those middle of the night writing sessions.

As for using Samsung Pay, I’m happy to say that it worked pretty well with the vet’s small card swipe machine. It did take several seconds to figure out where the NFC tag was located on the machine. But I finally found it and the transaction finally went through. Was paying with Samsung Pay faster than using a traditional credit card? For this transaction, I would say no. I was lucky that I was the only person at the desk trying to check out. If there would have been a line, I would have felt pretty awkward rubbing the phone all over the card swipe machine.

One the way home from the vet, I made a call and am happy to report that the call audio was crisp, clear, and with good volume.

I didn’t do much more with the Note8 the rest of the day other than updating apps and checking email. Speaking of email, for some crazy reason, the stock Gmail app started working all by itself. If you read my Day 1 post, you’ll remember that I’ve always had issues with the stock app, so we’ll see how long it behaves.

Day 3

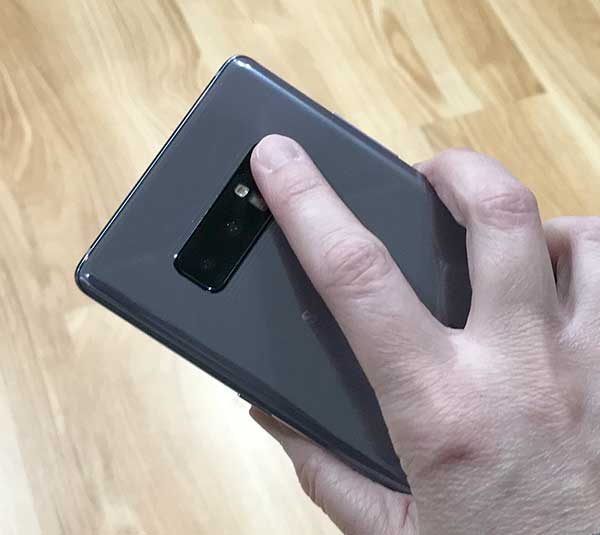
Right away today I started noticing that the face unlock wasn’t unlocking as quickly as it was the first two days after setting up the phone. Now there is a slight but noticeable delay. So I thought I’d try the iris scanner and the fingerprint reader. The iris scanner worked better than I remembered it from previous Galaxy devices even with my glasses on.

The fingerprint reader, on the other hand, is a lost cause for me. The location of the scanner is horrible and it rarely if ever successfully reads my fingerprint.

Of all three biometric phone unlocking methods, I definitely prefer the face scan most even if it is a little slow sometimes.

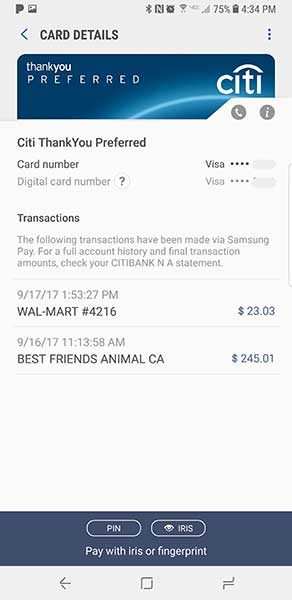
We went out for lunch today with friends and afterward, we stopped at Walmart to pick up a few groceries. I went through the self-checkout and tried using Samsung Pay again. The machine gave showed an error on the screen (I wish I would have taken a picture of it…), so I guessed that like Apple Pay, Samsung Pay won’t work at Walmart. I pulled out my credit card and paid like I normally do.

But then when I got home, I noticed that the Samsung Pay app showed that the transaction actually went through. So I logged into my Citibank account and sure enough…

Citibank shows that I have 2 pending identical charges. Grrrrrr… The Citibank website has a real-time chat feature so I was able to talk to a support person.

Although it was automatically fixed (I’ll have to make sure to verify that in a few days), it makes me nervous of trying using Samsung Pay at Walmart the next time I shop there.

That’s all for today. More tomorrow.

Also read: Samsung Galaxy Note8 review (day 1)


Product Information

Price: $960.00
Manufacturer: Samsung
Retailer: Verizon Wireless
Pros:
  • S Pen is very handy for taking notes
Cons:
  • Samsung Pay might be problematic at Walmart
  • Face scan has gotten slightly slower

Filed in categories: Reviews

Tagged: ,

Samsung Galaxy Note8 review (day 2 & 3) originally appeared on The Gadgeteer on September 17, 2017 at 5:06 pm.

Note: If you are subscribed to this feed through FeedBurner, please switch to our native feed URL http://the-gadgeteer.com/feed/ in order to ensure continuous delivery.
Nebula Mars Theater-Grade portable cinema review

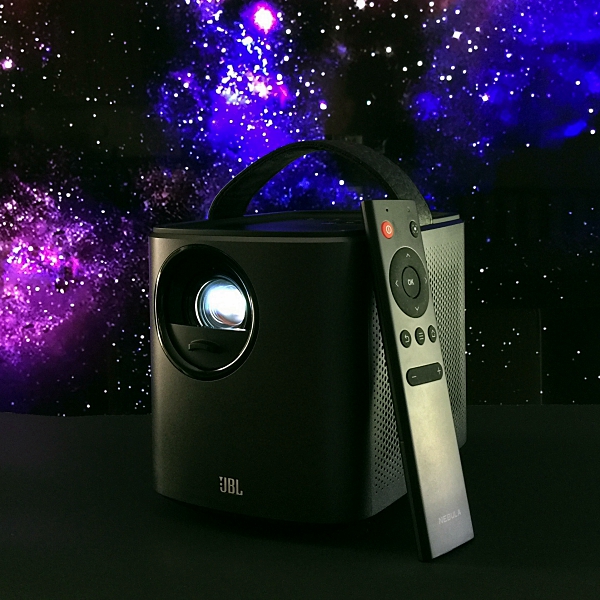
Ever since I purchased my first HDTV I’ve been fascinated with Home theater products. Over the years I’ve owned several TVs and every year they got bigger, smarter, and all with better resolution. One thing I never considered purchasing was a home theater projector. But, when I got the chance to review this incredibly compact theater-grade projector made by a company that is best known for producing quality, bargain-priced battery packs and accessories for phones, I was intrigued. Anker is the company I’m referencing and they’ve branched out to the Home Cinema market with their new sub-brand Nebula. The first product from Nebula is the Mars Theater-Grade Portable Cinema projector.

What is it?

The Nebula Mars is an Ultra-Portable Theater-Grade DLP projector, capable of producing a cinema quality image of up to 300” on virtually any flat surface. It has dual 10watt JBL speakers and a rechargeable battery that delivers up to 3 hours of battery life. It runs on Android and has built-in apps like YouTube and Netflix that can be run using the projector’s built-in Wi-Fi.

Specs

Optical

Display chip: 0.45DMD
Resolution: 1280 x 800 4K supported
Brightness: 3000 lumens
Throw ratio: 1.2:1
Contrast: 10000:1
Color gamut: 120% Rec. 709
Uniformity: 90%
Display
Screen size: 40”-300”
Keystone correction: Vertical + 40°
Focus: Automatic focusing
Hardware
CPU: Quad-core ARM chip RAM: 1GB ROM: 8GB OS: Based on Android 4.4 with Youtube/TED app content

Audio
Internal JBL speakers: 2 x 10W

Connectivity
WiFi: 2.4G/5G (802.11b/g/n/ac)
Bluetooth: BLE 4.0
Interface
HDMI 2.0: x 1
USB 3.0: x 1
AUX 3.5mm: x1
Battery
Capacity: 19500 mAh, 3.7V
Battery life: 3-hour video playtime

Dimensions
7 x 4.8 x 5.4 inches
Weight: 6 lbs.In the

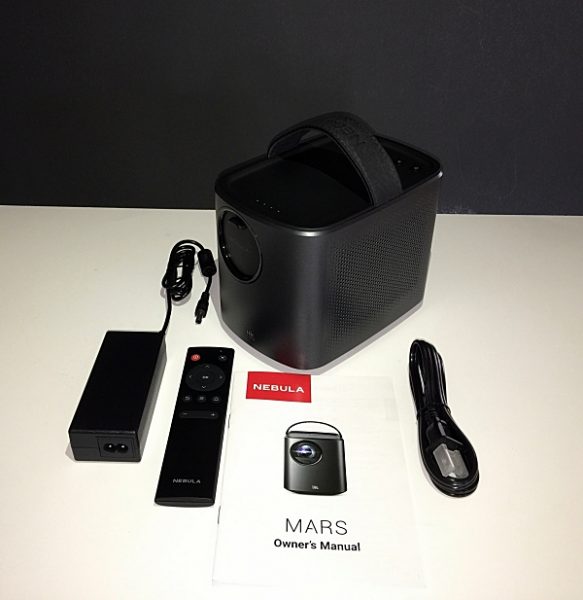
In the box 

  • Mars projector
  • Remote control w/batteries
  • Power adaptor
  • Power cord
  • Users manual

Design and hardware

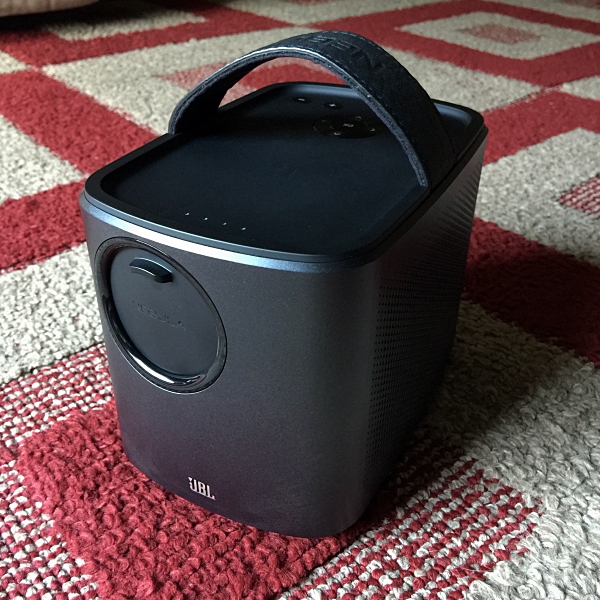
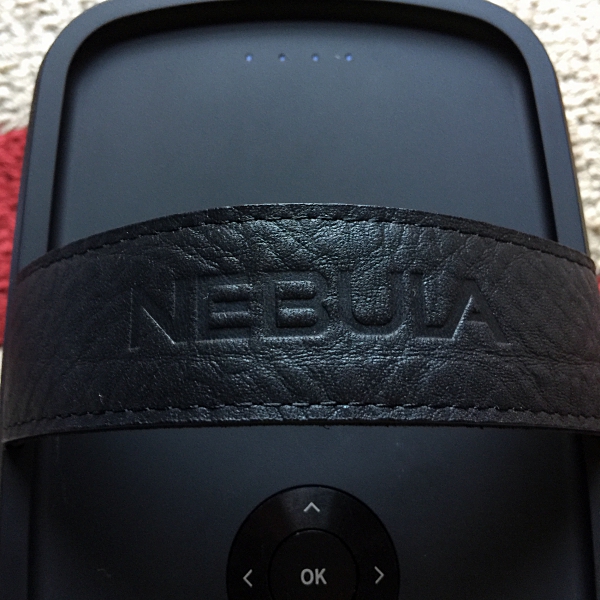
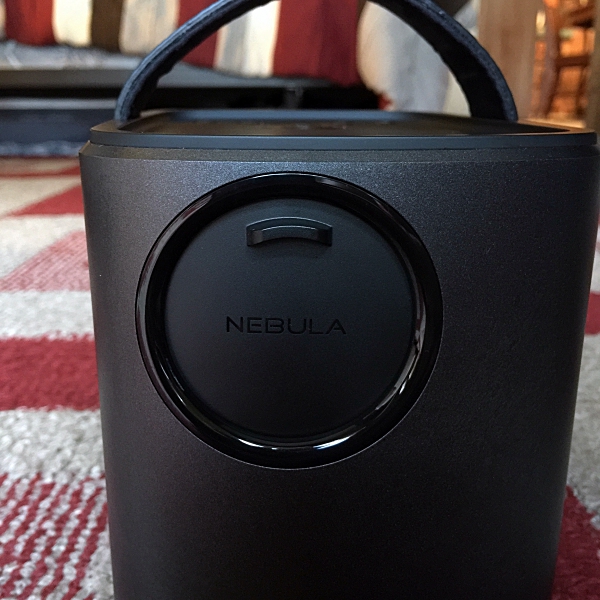
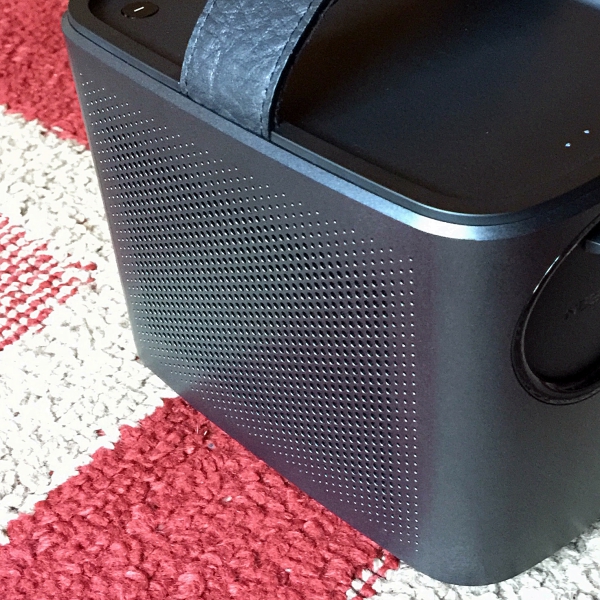
The Nebula Mars has a sleek modern appearance, with its cube shape and rounded corners. There’s even a cool leather wrapped handle that’s emblazoned with the Nebula logo for easy portability. Size wise it’s incredibly compact. Measuring 4.8 x 7.01 x 5.43 inches and weighing 4-pounds, it’s literally the size of a small lunch box.


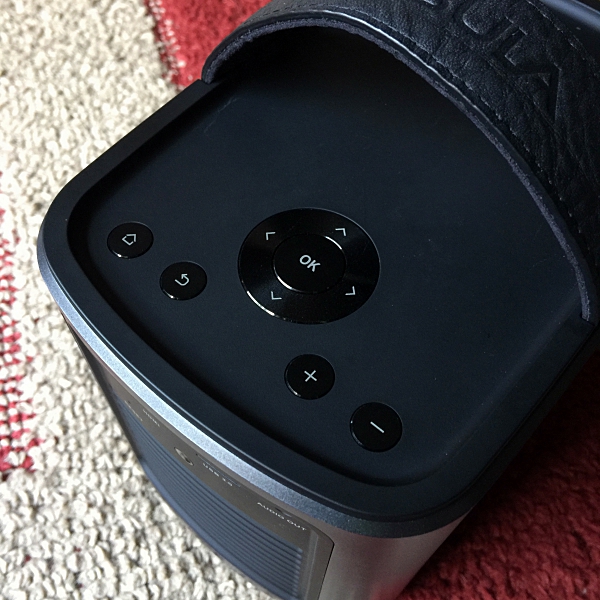
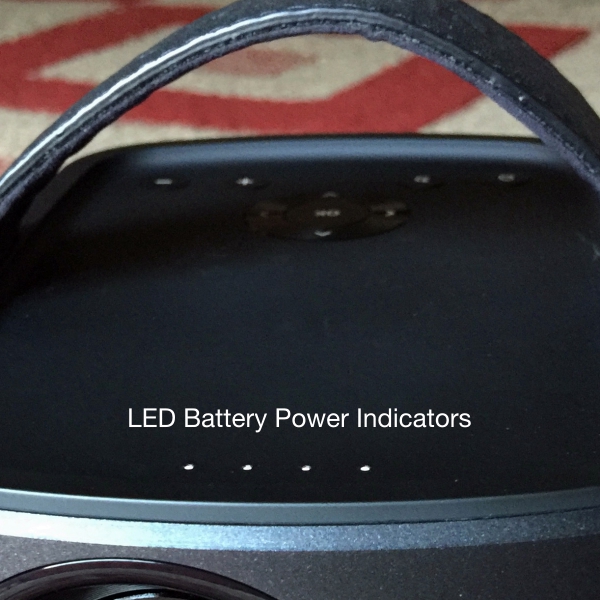
On top of the unit, there are Control buttons which you can use if you ever lose the included remote. They include the Navigation buttons, the OK button, + / – buttons for volume control, the Return to the previous menu button, and Home button. There is also 4 small battery power LED indicator lights.

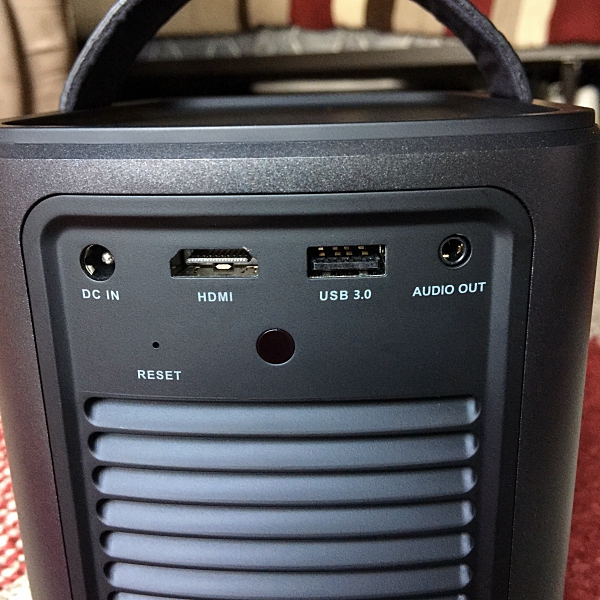
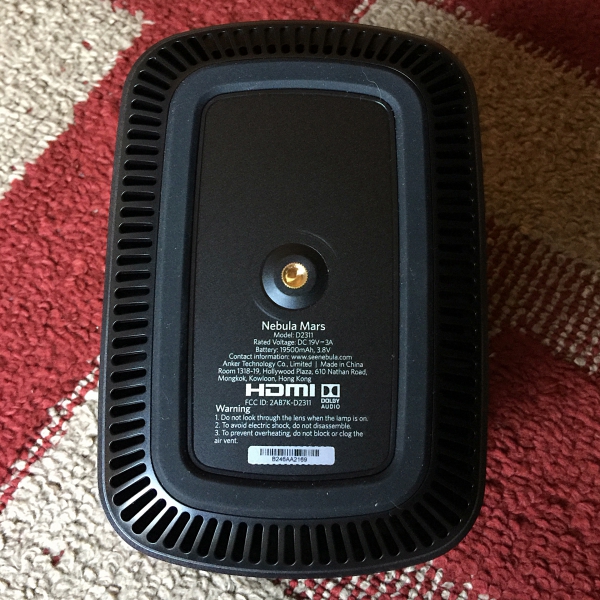
On the back of the unit are the DC IN, HDMI port, USB 3.0 port, Audio out jack, Infrared Receiver, Air Ventilation (outlet), and (inlet), and Reset button. On the bottom of the unit, there’s universal 1/4″ tripod mount socket.

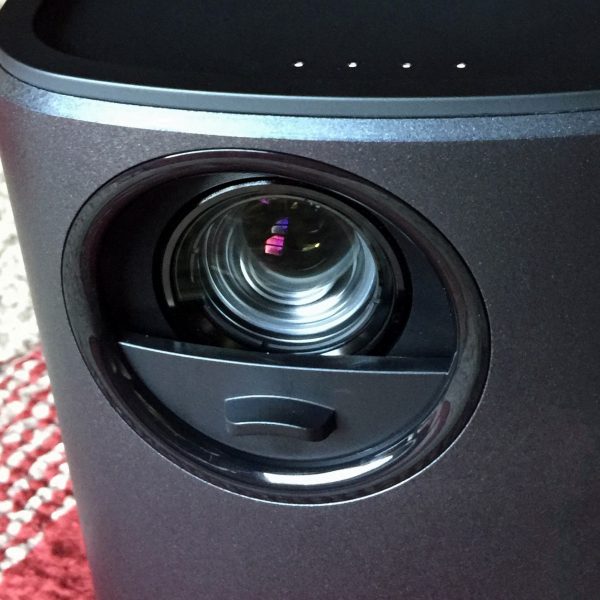
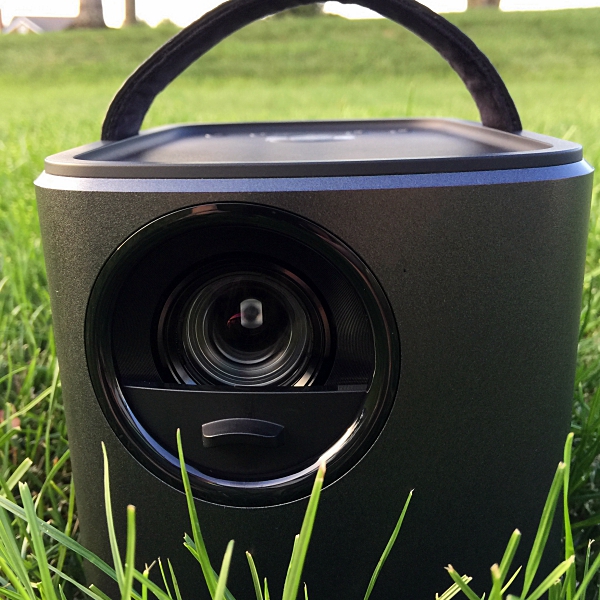
Another nice design feature is Mars’ built-in sliding lens cover. Not only does it protect the lens it also acts as an on/off switch. Sliding the lens cover down powers the unit on and sliding it up turns it off.

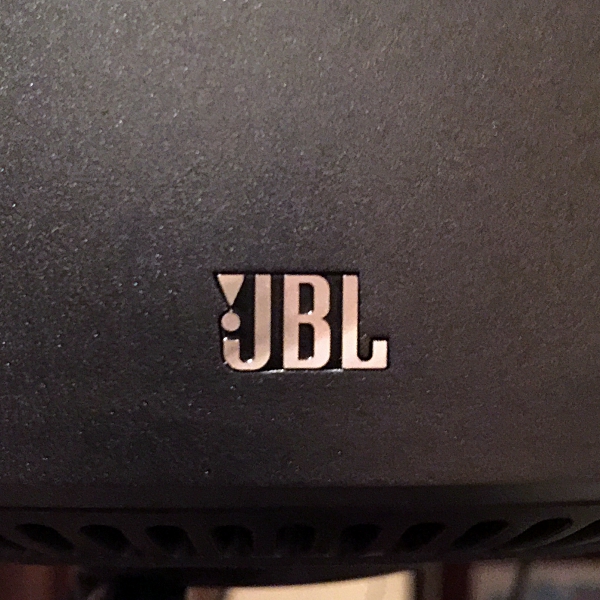
On the front of the unit, you may notice a silver raised JBL logo. That’s because the dual 10W speakers, which are located on either side of the unit are indeed made by JBL. The speakers produce a really nice sound even at a high volume. The speakers sound great but are lacking in the bass department. That being said they’re still a big upgrade over speakers that you’ll find on most portable projectors. If the built in speakers don’t do it for you, you can hook up a pair of headphones or an external speaker like a sound bar using the audio out jack. I used a 15′ 3.5mm-2RCA cable I purchased on Amazon for under $12.00 to hook up my sound bar to the projector and it worked great.

Mars built in Bluetooth 4.0 allows you to pair the unit with wireless headphones or a Bluetooth capable speaker. I was able to pair my wireless headphones without issue. My problem came while watching a video. No matter what I tried I could not get the audio and video to sync up. Pairing the unit with a Bluetooth sound bar produced the same lip sync issues. I found myself just plugging my headphones into the units audio out jack or using the built in speakers. Hopefully, Nebula can fix the lip sync issues with future software updates.

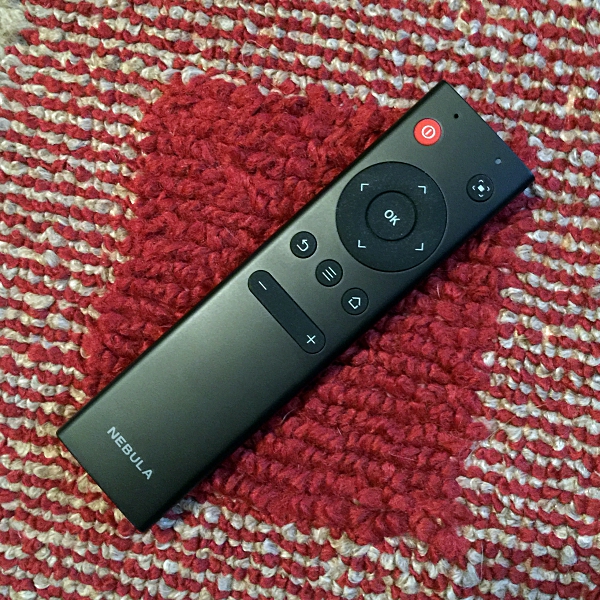
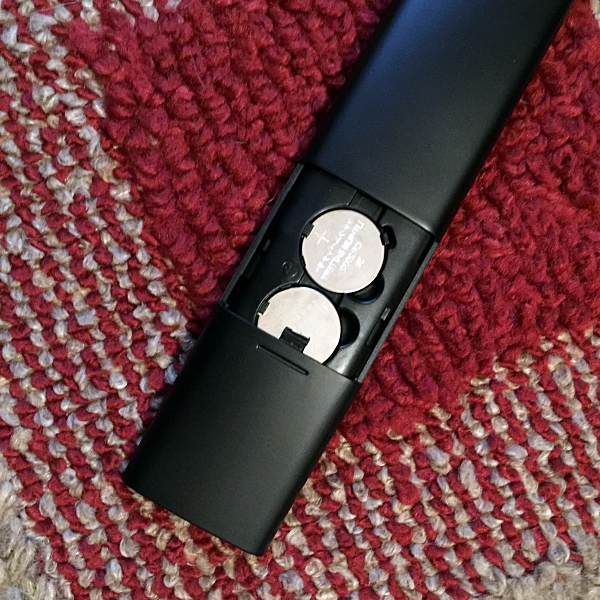
The included remote is pretty nice as far as remotes go. It’s a good size (6” long) which is just big enough so that you won’t lose it inside the couch cushions. It has all the function buttons that are located on the top of the projector as well as a power button and a button to manually adjust the focus. It’s powered by two included CR2032 batteries. I thought that these batteries might be hard to find when they needed replacing, but I was able to find a 6-pack for under $6.00 on Amazon.

Battery

Inside the Mars is a revolutionary 19500mAh battery, a first for a projector of this size. The battery boasts an unrivaled 3 hours of non-stop cinema on one charge. I found 3 hours to be slightly ambitious. In my testing, it was more like 2.5 hours, which is still fantastic. One thing I noticed was once the battery reaches 60% power left (which happens pretty quickly) the projector automatically goes into ‘battery mode‘ which lowers the overall brightness of the picture. I’m sure this is done to try and reach that 3-hour battery life but it still kinda stinks. For better image quality, I recommend plugging the unit in whenever possible. That large battery is also needed to power the projectors flame throwing 3000-lumen lamp, which is quite bright especially for a portable projector. It’s bright enough so that the Mars can be used in a room with more than a little ambient light and still produce a quality image. The native resolution on the Mars is 1280 x 800 pixels or 800p with support for 4K. I’ll have more about the image quality later on.

Setup

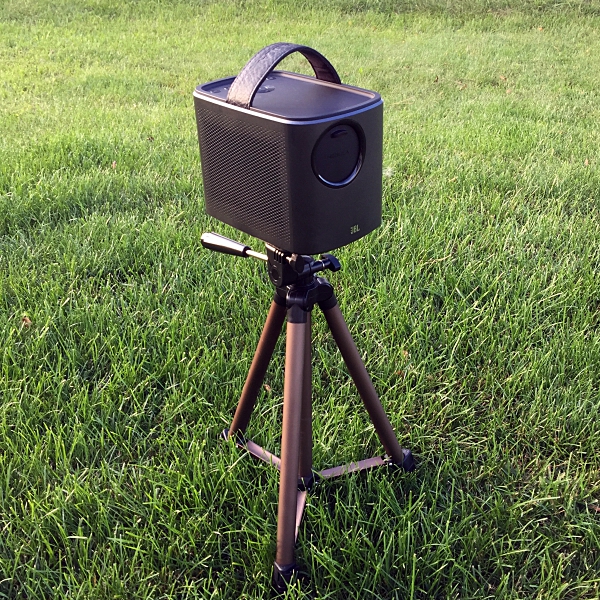
Setting up operating Mars is easy. First, make sure that you place it on a solid flat surface. I used the tripod socket on the bottom of the unit to attach it to a tripod. For the first use be sure to plug the unit into the power adaptor, this will also charge the battery. Powering the unit on is done by sliding down the lens cover. Once the unit boots up which takes about 20 seconds you’ll want to navigate to the Wi-Fi icon, choose your network and enter the password. Voila, you’re now ready to start using Mars. Another thing worth mentioning is how quiet this projector is. Once you boot it up and start viewing content you really can’t hear it at all. This just adds to the enjoyment to an already great viewing experience.

Interface and Software

The Nebula Mars 64 bit Quad-core processor with 1.5GHz CPU allows system menus and apps all to run smoothly and the interface is easy to navigate. I noticed that the load time on the built-in apps like YouTube are a little slow, but not painfully so. The Nebula Mars runs on Android 4.4 Kit Kat. The software is a little buggy and definitely, needs some more polish, but it’s not a deal breaker.

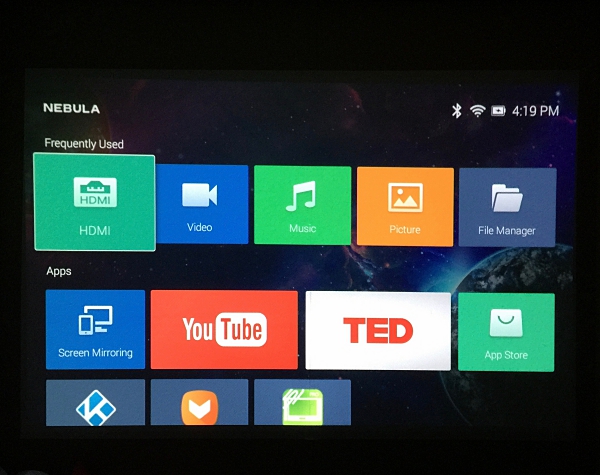
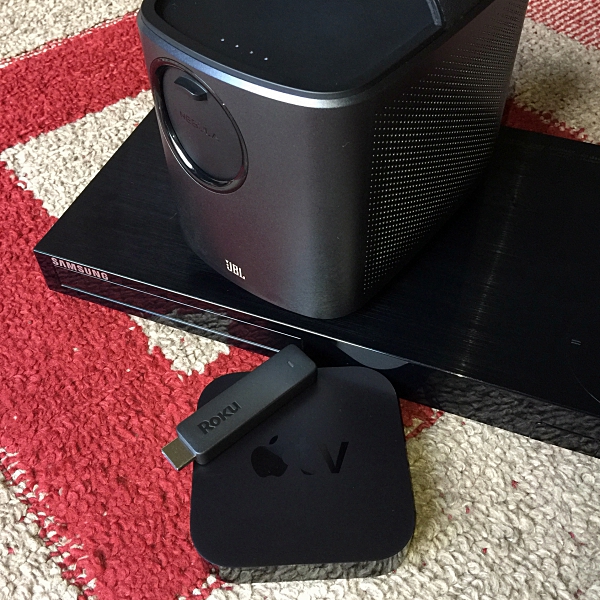
On the home page, you’ll find several icons. HDMI displays the signal for whatever is hooked up to the HDMI port. You can use this to connect things like a Roku stick, AppleTV or Blu-Ray player for example or If you’re a gamer you can hook up a Play Station or Xbox gaming system.

File Manager allows you to play files from a USB flash drive by plugging it into the USB 3.0 port located on the back of the unit. There are also shortcut Apps for Music, Picture, and Video.

Screen Mirroring allows you to display the screen of a connected Android device, like a phone or tablet. I found this to be a hit or miss experience. At times it would work but at others, I couldn’t get my Android tablet to connect to Mars. The unit also has built-in support for AirPlay. I was easily able to connect my iPhone to the unit, but when streaming video from You Tube I found it to be pretty laggy. This along with the Screen Mirroring issue may be something that can be resolved with future software upgrades.

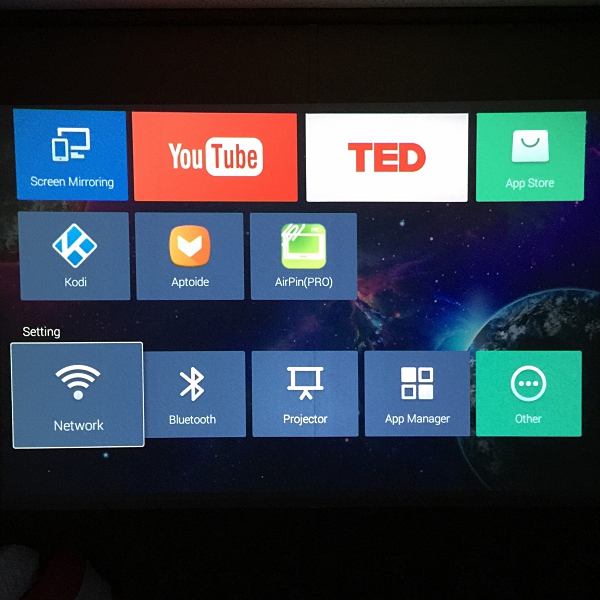
Scrolling down you will find the Settings icons. Settings include Network, Bluetooth, Projector, App Manager and Other.

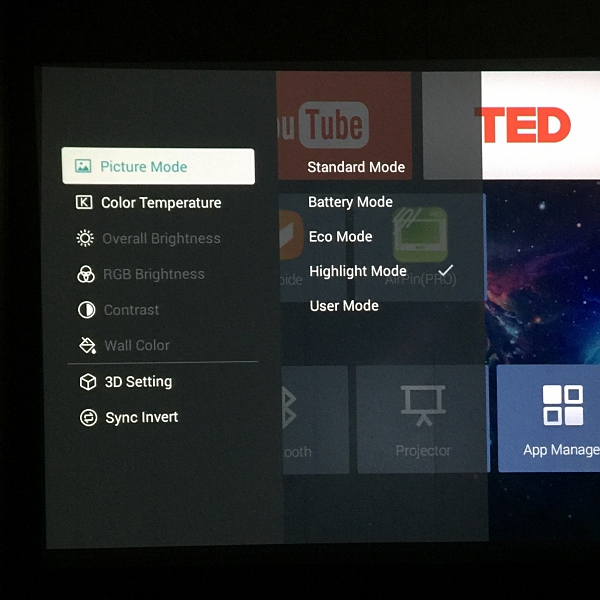
Picture Mode settings can be accessed using the Hamburger button or holding down the Home button on the remote. This is where you’ll be able to change such settings as Picture Mode, Color Temperature, Brightness, Contrast and even Wall Color.

The built-in App Store is probably the most disappointing part of this projector. The Selection of available apps is very limited and the lack of  Google Play Store is puzzling. At the time of writing this, there were only 10 apps available. They include:

– Netflix
– You Tube
– TED
– MX Player
– IMBD
– Weather Live
– IGN
– Radio Paradise
– Pandora
– Kodi

For me, this isn’t that big of a deal considering you can easily hook up a Chromecast, Roku stick or other HDMI capable device. However, if you want your apps on board the Mars and you’re tech savvy you can side load APK’s from a flash drive using the available USB 3.0 port and File Manager.  Another work around I discovered is to download and install Aptoide which is similar to Google Play Store (which for some reason you can’t side-load onto Mars.). Fair warning though, Aptoide is difficult to navigate with the remote and it’s probably not worth the effort if you don’t have a wireless mouse or keyboard with a trackpad to navigate it.

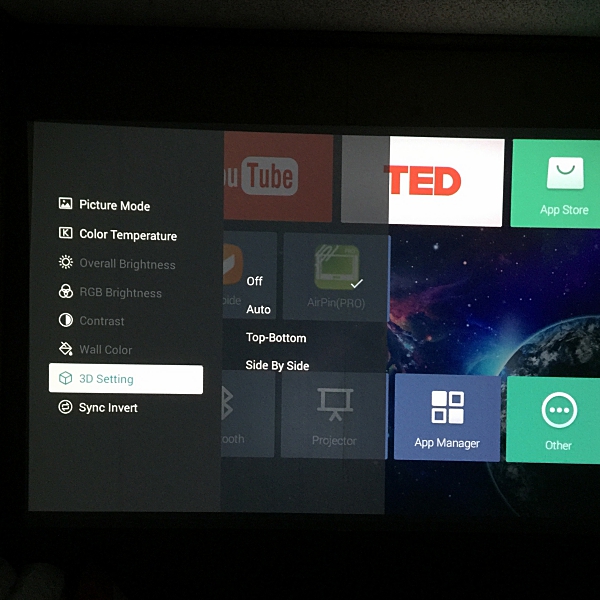
Mars also supports 3D playback. I was unable to test this feature because I didn’t have the required DLP 3D glasses. If you already own glasses you can access the 3D settings by holding down the Home button on the remote or top of the projector.

Different ways to view media

One thing I really love about the Mars is the multiple ways you can view media. With the HDMI port, you can connect any number of devices. In my 3 weeks using Mars, I wanted to test as many devices as I could just to see how each performed. I connected a Roku Stick, AppleTV, Blu-Ray player and even my Directv box. All performed great and produced fantastic picture quality. The Roku Stick will probably be my go to device simply because of its portability. However, I’m an old-school guy and really love Blu-Ray discs, so being able to hook up a Blu-Ray player to Mars is great. You can also use the USB 3.0 port to view multiple types of files from a USB flash drive. I tested a couple of MP4’s I had on a flash drive and they played without issue.

Picture quality (Indoor viewing/Outdoor viewing)

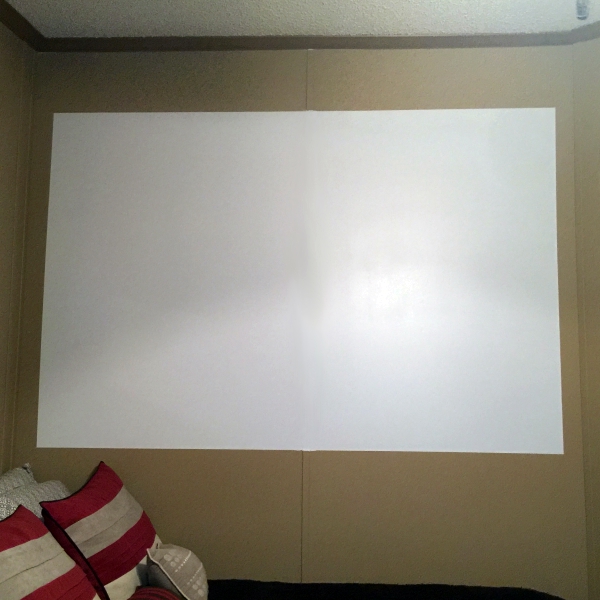
For my indoor testing with the Mars, I set it up in my Man Cave/bedroom as it’s the only room in my house with a large empty wall. I wanted to project the Mars onto a white surface to get the best picture quality possible but since my wall was a darker color I improvised by purchasing a 4’ x 6’ piece of white paper from Michael’s and tacking it up on the wall. Having never owned a projector of any kind I was skeptical that this little box could produce a high-quality image. I’m a skeptic no longer. I was so impressed by the picture quality that I ended up buying some flat-white paint and painting that 4’ x 6’ or 85″ screen right onto the wall. My only regret was not having a bigger wall. I also noticed an uptick in picture quality going from the makeshift paper screen to the flat-white painted screen.

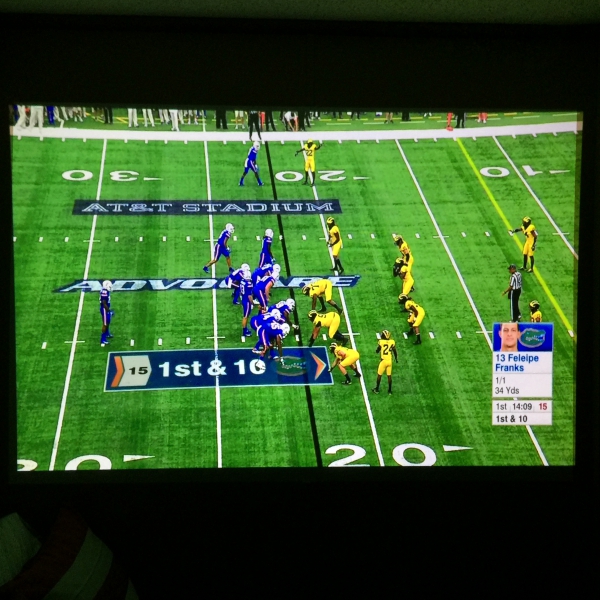
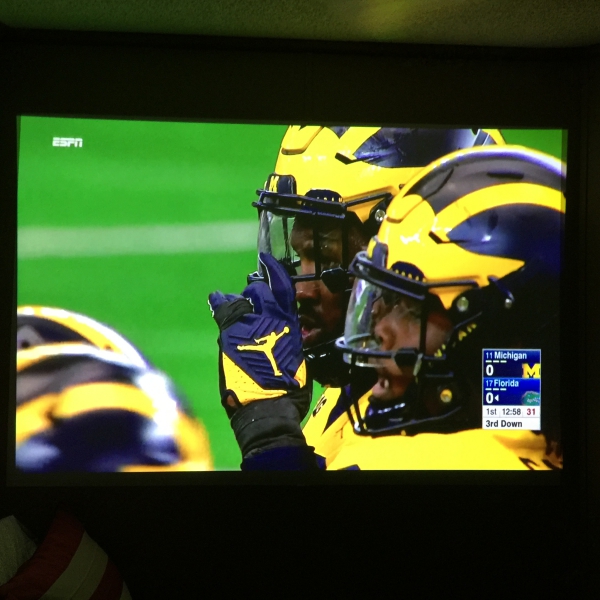
The Mars’ image quality even at this large size is impressive. The picture is crisp, colors are true to the source, and the brightness and enhanced contrast are really impressive. The image quality even holds up when the room is full of ambient light. I posted two pictures below. The first was taken during the day with the blinds open. The second taken in a completely dark room. As you can see even with ambient light the picture quality holds up pretty well. This is where the projectors 3000-lumen lamp comes into play. It’s really like having a small theater in my house and I absolutely love it.

If you’re a sports fan like me you’ll love watching them on the Nebula Mars. There are plenty of apps available that stream live sports like ESPN, FoxSportsGo, MLBTV, NBC Sports etc. I used the ESPN app on my Roku Stick to stream the Michigan/Florida football game (pics below) and it looked great. I can also hook up my Directv box which gives me access to all of my sports channels. Mars is definitely a sports fans dream. Viewing sports projected on an 85” screen is like having a sports bar in my house.

Outdoor viewing

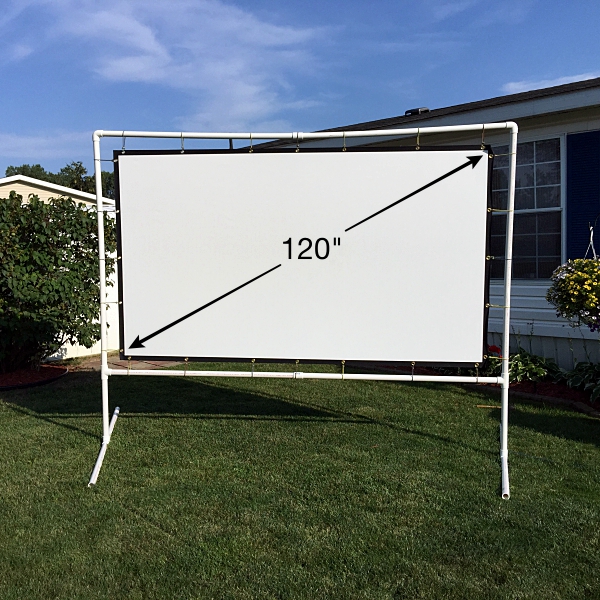
I really wanted to put the Mars to the test to see how good the picture quality would hold up on a really large screen outdoors. I purchased a 120″ portable outdoor movie screen from Amazon. I then enlisted my good friend Dave to help me build a portable frame to hold the screen. Using 1-1/4” PVC piping, grommets, and some small bungee cords we built a really nice portable movie screen (pics below). It took us about 2 hours or so and the total cost including the screen was right around $80.00. Later that night we had an outdoor movie night with his family and a few of their friends. I setup the Mars on a tripod and connected it to my blu-ray player using the HDMI port. I wanted a little boost to the sound so I connected a sound bar with a wireless subwoofer to the unit using that 15’ 3.5mm-2RCA cable I mentioned earlier. The movie we screened was “Kong: Skull Island”. We started the movie right around dusk (like they used to do at the Drive-In theaters back in the day, for those of us old enough to remember). Once the movie started all I can say is WOW! The picture was amazing, sharp with great color, brightness, and contrast. A truly immersive experience. I posted a few screen shots below, but it really needs to be seen in person. Along with the boost from the sound bar, it really was like being at the movies. Honestly, the picture quality was better than you get at most theaters, aside from IMAX or Dolby Vision Cinemas. When the movie ended everyone clapped and the kids immediately asked when I was going to come over with another movie. Everyone commented on how great the picture looked and how it was like being at the movies. Needless to say, it was a fun night, something we plan on doing again. I want to give special thanks to Dave and his family for hosting the outdoor movie night and helping me out with this part of my review.

Conclusion

I really like the Nebula Mars portable cinema. It was a lot of fun putting this projector through its paces. Using it with multiple devices and viewing it on different screen sizes. Mars is everything it claims to be. It’s portable, has great battery life, quality built-in sound, and most importantly fantastic picture quality even at larger sizes. The Nebula Mars portable cinema will set you back $599.99 which is not bad especially if Anker can iron out the software issues. This is the first product from Anker’s sub-brand Nebula and I can’t wait to see what they come up with next.

Source: The sample for this review was provided by Nebula. Please visit their site for more info and Amazon to order.


Product Information

Price: $599.99
Manufacturer: Nebula
Retailer: Amazon
Pros:
  • Portable
  • Easy to use
  • Very good sound quality(JBL speakers)
  • Multiple ways to view content
  • Great picture quality even at larger sizes
Cons:
  • Software is a little buggy
  • Lack of a real built-in App store

Filed in categories: Reviews

Tagged: ,

Nebula Mars Theater-Grade portable cinema review originally appeared on The Gadgeteer on September 17, 2017 at 8:52 am.

Note: If you are subscribed to this feed through FeedBurner, please switch to our native feed URL http://the-gadgeteer.com/feed/ in order to ensure continuous delivery.
SportRX.com prescription sunglasses review

If you require very strong prescription eyewear like I do (-9.00 and beyond for me), you know that the options for sunglasses are slim. Besides clip-ons, what else is there? SportRX.com has a wide selection of nearly every major brand of stylish frames plus knowledgeable staff to help you make your prescription sunglasses become reality.

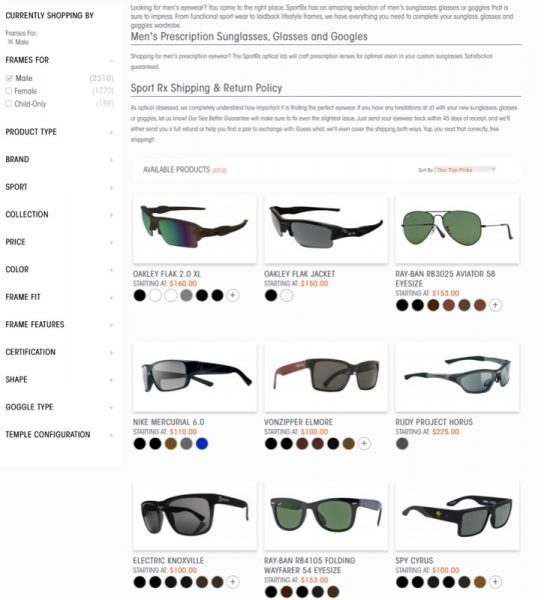
When you first visit the SportRX website, prepare to be overwhelmed.  Thankfully, you can narrow down your selection by using the handy “shop by” feature on the left column.  Sort by brand, sport, price and more.

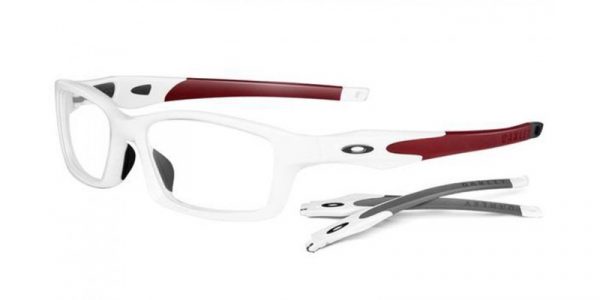
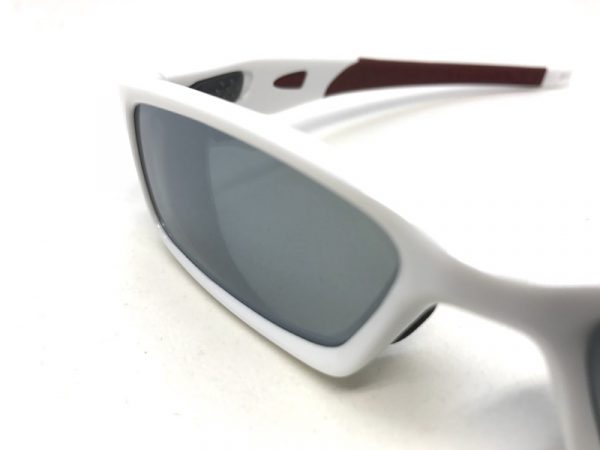
Because of my nearsightedness, I consulted with one of the experts at SportRX to help me choose. With a lot of help, I chose this pair of Oakley Crosslink frames.

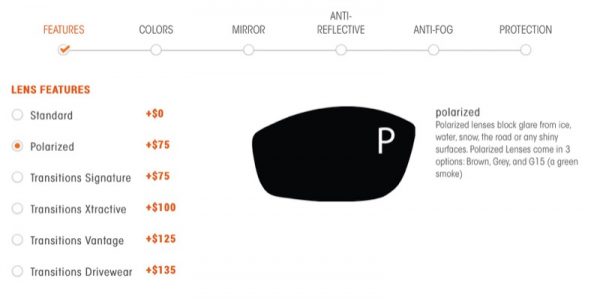
When choosing the actual lenses, you’ll find SportRX walks you through many, many options.  Here, I chose polarized lenses. Note that if you do, the ultra-thin high-index 1.7 lenses are unavailable.  As you can see, Transitions (darkens in sunlight) are an option, too.

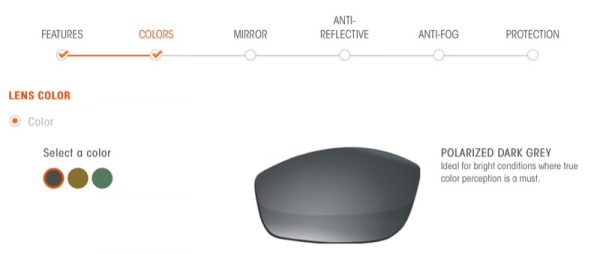
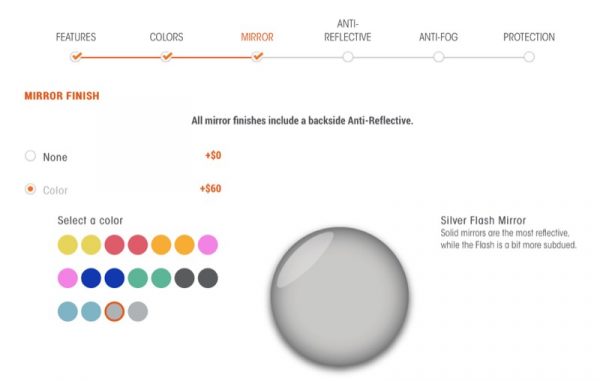
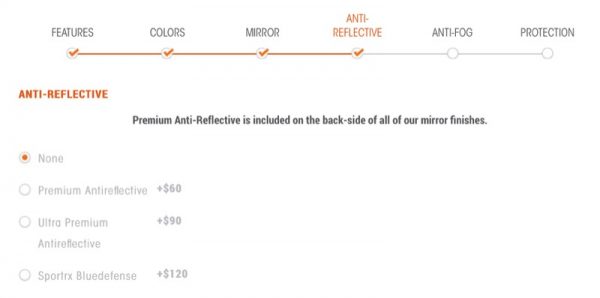
If you’re crusty like me, you can even choose bifocals or progressive focus lenses. I chose the progressive focus. Lens color is pretty straightforward: Dark Grey, amber or dark green.Mirrored finishes are really cool, and there are so many colors to choose from!  Want something less showy? The “Flash” mirror finish is a little more subtle.  I chose the Silver Flash Mirror for a hint of reflection.You can pick an anti-reflective finish, but in my case, it comes with the mirrored finish.

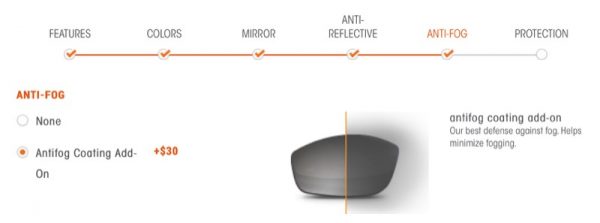
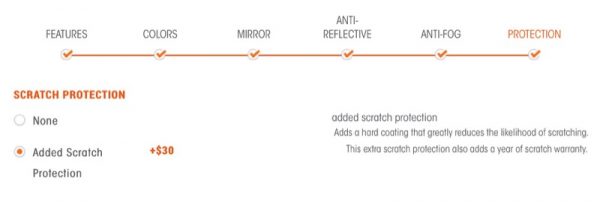
I didn’t know you could get an antifog coating but there it was.If you’ve ever scratched your lenses, you know how frustrating it can be.  Add some extra protection for $30.

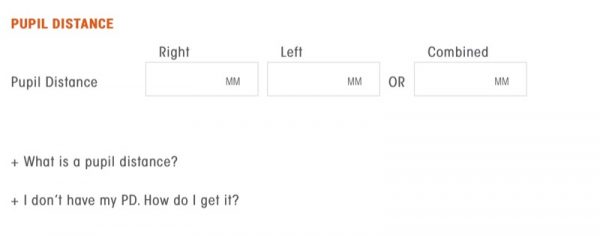
They’ll need your pupil distance or PD.  This is something your prescribing eye care specialist can get for you or a technician.


Finally, your actual prescription.  You can upload it, email, fax or send later.

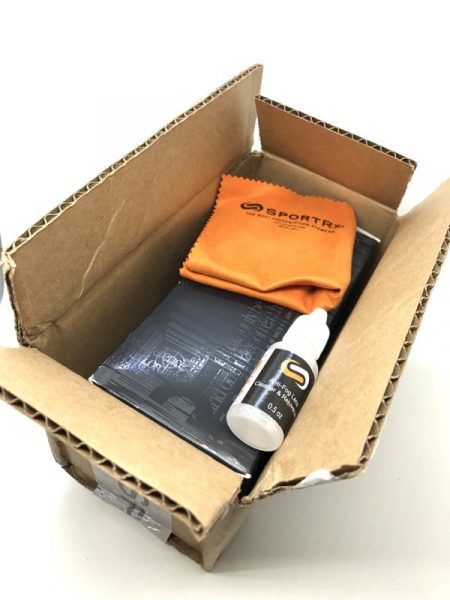
My order was completed in just over a week (there was a holiday weekend). SportRX packed in a large cleaning cloth and a small bottle of cleaning solution.

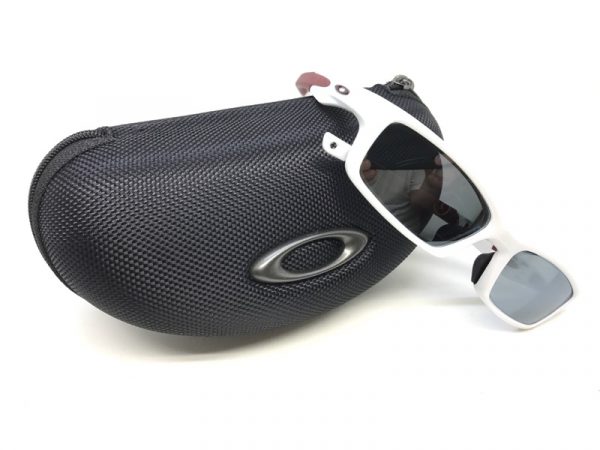
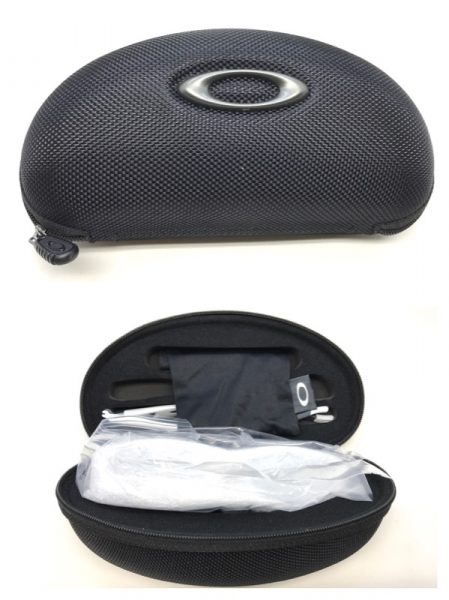
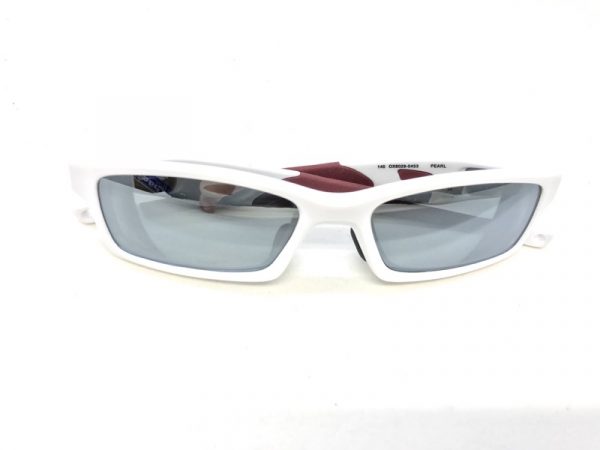
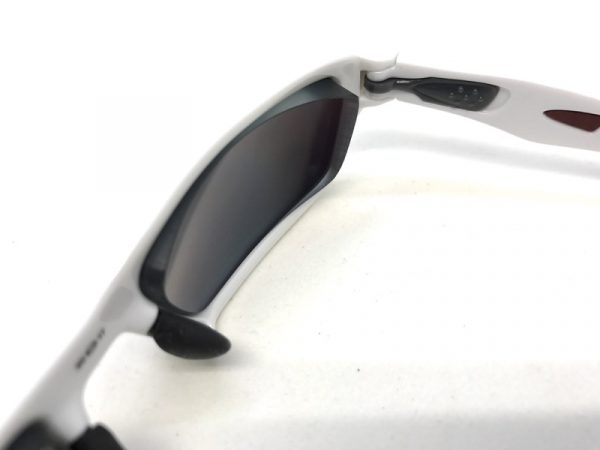
This particular brand (Oakley) comes with a large zippered case with extra temple arms in the slots. Here’s a front view of the glasses.  You can see a hint of the silver flash mirror finish.


You can see the thickness of my prescription lenses.  Yes, my eyesight is bad. However…

However, you’ll notice the lenses fit perfectly in the front.  Nice!

Here’s a dorky selfie because I couldn’t build up the courage to get someone to take a snapshot. They fit really well! The silver flash mirror finish is more apparent in this shot.

I don’t think I would have tried to attempt something new and (relatively) stylish, but the helpful people at SportRX really helped me navigate the staggering selection, and made useful suggestions that really made the difference for me.  Thank, SportRX!

Source: The sample for this review was provided by SportRX. Please visit http://www.sportrx.com for more info.


Product Information

Price: $200 (frames only), $715 total (with prescription and options – varies with each person)
Manufacturer: Oakley
Retailer: SportRX
Requirements:
  • A valid prescription
Pros:
  • Wide selection, knowledgable staff. Health Savings Account (HSA) and Flexible Spending Account (FSA) accepted
Cons:
  • Eyewear can be expensive. Options add up.

Filed in categories: Reviews

Tagged:

SportRX.com prescription sunglasses review originally appeared on The Gadgeteer on September 16, 2017 at 8:08 am.

Note: If you are subscribed to this feed through FeedBurner, please switch to our native feed URL http://the-gadgeteer.com/feed/ in order to ensure continuous delivery.
Samsung Galaxy Note8 review (day 1)

Yesterday I posted a gadget diary entry where I professed my immediate love (lust?) for the Samsung Galaxy Note8. Today I turned off my iPhone 7 Plus, set up the Note8, and started using it as my primary device. Have my feelings changed already? Let’s find out with my multi-part diary style review. 

Day 1 – Random first impressions

Setting up the Samsung Galaxy Note8 is no different than setting up other Android smartphones. You basically enter your Google account info and the rest of the setup happens under the covers and within minutes your calendar and contacts are synced.

I also installed some of my favorite apps like Instagram, Words with Friends, Spotify, Accuweather, and the main app that’s my nemesis – the stock Google Gmail app.

I’m not sure what the problem is, but with EVERY Android device that I’ve used in the past couple of years, the stock Gmail app either works sporadically or not at all. So I crossed my fingers and installed it on the Note8…

Argh, the same old screen I have seen time and time again. What the heck? I have no idea why the Gmail app will not work on Android. I thought it had to do something with my billions of labels, but the Gmail app on the iPhone works flawlessly. Often, it will even show new messages before my MacBook browser does.
After wasting time trying to get the Gmail app to work on the Note8, I did what I usually do with Android devices. I disabled it and used Chrome to make a shortcut on the home screen to the mobile web version. That works fine, but it doesn’t show notifications.

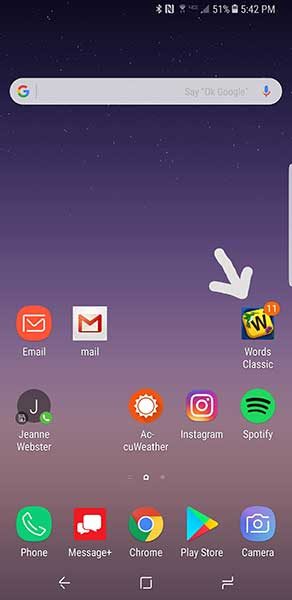
I then ran into Android annoyance #2 which is incorrect icon badges. For some reason, the Words With Friends app will either never show that I have turns waiting, or it will show that I have too many turns waiting.

The icon is currently showing that I have 11 turns when I really only have 2. Grrrrr. It’s always the little things that get under my skin.

But on a more positive note, using the face unlock feature on the Note8 has worked perfectly. I can pick up the phone in my left hand with my thumb pressing on the virtual home button and when I bring it up to my face, it instantly unlocks to where I had left off. If I pick up the phone in my right hand, I press the power button with my thumb and the same is true. It unlocks almost instantly. It even works in some dimly lit rooms. But it won’t work at all if it’s too dark.

Today was a lot of typical phone usage for me. I sent several text messages, made and received several phone calls, listened to some music on Spotify through Winnergear HERO Bluetooth earbuds, played a couple turns in Words With Friends, read and replied to a few emails, installed apps, and took a few pictures.


Speaking of pictures, so far I’m really impressed with the Note8’s camera. Check out the images above. Click to see the full-sized version.

It’s only been one full day, but so far battery life is more than adequate enough to power the phone through a full day and beyond.

That’s it for today. Check back for more updates this weekend.

Source: The sample for this review was provided by Verizon Wireless. Please visit their site for more info.


Product Information

Price: $960.00
Manufacturer: Samsung
Retailer: Verizon Wireless
Pros:
  • Gorgeous display
  • S Pen
Cons:
  • Expensive
  • Tall, sticks out of pockets

Filed in categories: Reviews

Tagged: ,

Samsung Galaxy Note8 review (day 1) originally appeared on The Gadgeteer on September 15, 2017 at 9:08 pm.

Note: If you are subscribed to this feed through FeedBurner, please switch to our native feed URL http://the-gadgeteer.com/feed/ in order to ensure continuous delivery.