Bob Ross figurine, TP-Link Deco, BBQ Dragon Chimney, and more – Review updates

This week we have a selection of review updates from Bob Patterson including a really fun one that you won’t want to miss. Click through to see this week’s list of updated reviews and then scroll to the bottom of each review to read the latest update.

This is the Bob Ross desk ornament that has been missing from your life. by Bob Patterson

TP-Link Deco M5 Whole Home Mesh WiFi System review by Bob Patterson

WTFactory SlimClip VR Steady iPhone case review by Bob Patterson

BBQ Dragon Chimney of Insanity review by Bob Patterson


Product Information

Price:

Filed in categories: Reviews

Tagged:

Bob Ross figurine, TP-Link Deco, BBQ Dragon Chimney, and more – Review updates originally appeared on The Gadgeteer on September 27, 2017 at 8:00 am.

Note: If you are subscribed to this feed through FeedBurner, please switch to our native feed URL http://the-gadgeteer.com/feed/ in order to ensure continuous delivery.

OVC H15 Noise Cancelling Earphones review

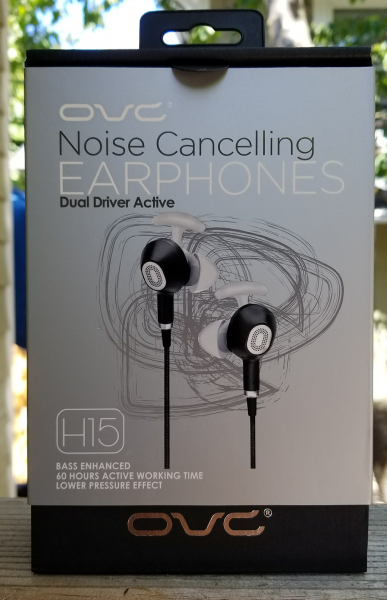
When you travel as much as I do, the ability to shut off the outside world and immerse yourself in music or a movie is not just important, it is a necessity.  And when hear about a small, lightweight product which claims up to 60 hours of battery life, active noise cancelling, and all in an affordable package, you have to investigate.  Today I am doing just that with the OVC Noise Cancelling Earphones.  How well does the real-world performance stack up against the claims?  Read on to find out…

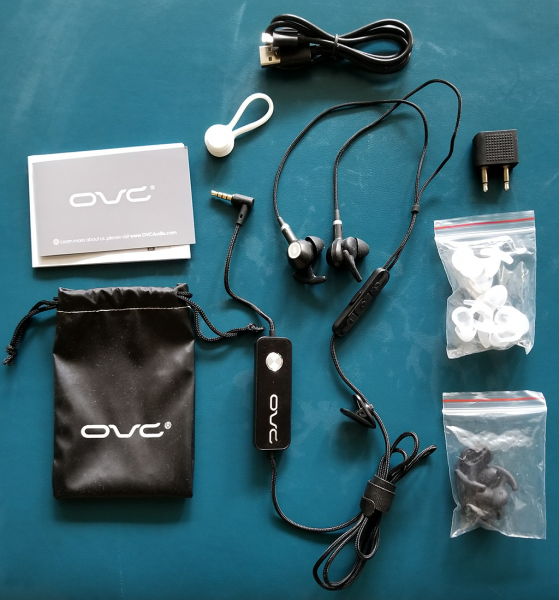
OVC packs a lot of stuff in the box.  You get a small carry pouch, two sets of earbuds (one white, one black with small, medium and large sizes in each color), a charging cable (micro USB but no wall plug so plan on using your computer to charge these), an increasingly unnecessary dual airplane plug, and a cord manager.  Pretty complete setup for such a low price point.  You can see what you get in the picture below.

So how do they stack up in the real world?  I started this journey just listening to music on my phone while at my home office desk.  The H15’s sport a bass boost mode that is activated via a switch on the volume/microphone inline control.  When turned off, the H15’s sound like the cheapest earbuds you can buy – tinny, muddied and the volume (even at maximum) feels low.  Turn on the bass boost, however, and the sound is great.  You get the bass (not Beats-level, chest-thumping style but enough to let you feel the music) plus the music clears up – you can hear the highs, vocals are clear and crisp, and the volume is much louder.

I also used the H15’s for business meetings via Skype and my computer, and once or twice to make phone calls.  The microphone works well – in both Skype and the phone others could hear me clearly and I could hear them – but, again, only with the bass boost activated.  Without it, while callers could hear me I could hardly hear or understand them.  Pretty clear that the only way you want to use these is with the bass boost on at all times, which does reduce the battery life.  More on that in a minute.

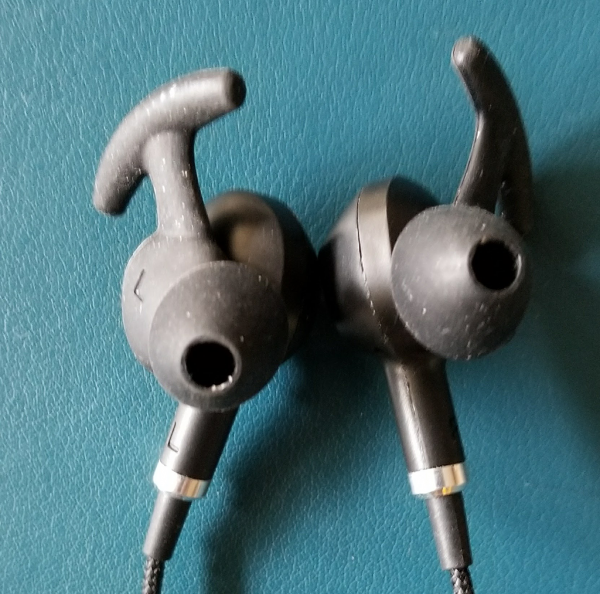
The H15’s also have active noise cancelling.  Pretty unusual to find this in a sub-$50 earbud.  On the outward facing side of each ear bud, you can see a series of small holes on an O shape – these are the microphones used to generate the anti-sound waves that active noise cancelling produces.  The feature is activated via a button on a control close to the end of the cable that plugs into your device.  Press to turn it on or off.  Noise cancelling seems to work OK, but I have a specific problem that prevents me from getting the full benefit.  Each size of the rubber earbuds comes with a “stabilizer” that you can see in the picture below.  I have unusually large ear holes (hmmm…) but small ears.  The stabilizers push the earbud slightly out of my ear canal and breaks the seal.  If I hold the earbuds in place, the intact seal gives me the full effect of both the bass boost and the noise cancelling.  I cut off the stabilizer on the large size black buds and problem solved, although I feel I am not alone in this problem and OVC should include standard earbuds in the box.

With the stabilizers out of the way, I could begin the real test of the noise cancelling feature – 4 cross-country airline flights in 8 days.  Yes, I am a glutton for punishment.  That said, the noise cancelling feature is a partial success.  With a good seal in my ears and the feature activated I could drown out the engine noise from the plane.  Weirdly, though, I could still hear snippets of conversation around me – not a constant thing, mind you, but the occasional word or phrase would come through reasonably clearly, most likely the result of the noise cancelling feature choosing to continue the suppression of the engine noise over a higher-pitched sound like human conversation.  On phone calls and in Skype while in office surroundings, the noise cancelling feature works as advertised.

One thing missing, however, is sidetone.  This is the ability to monitor your speech while listening to an active conversation.  The H15’s seemingly don’t support this, so if you use the noise cancelling while on a phone call your voice sounds like it is coming from two rooms away.  Getting this to work properly is not an easy task, and even headphones like the Logitech H800 – which are made specifically for Skype-type communications – can’t get this to work.  So just be aware that if your use case is primarily communications, these may not be the earphones you want.

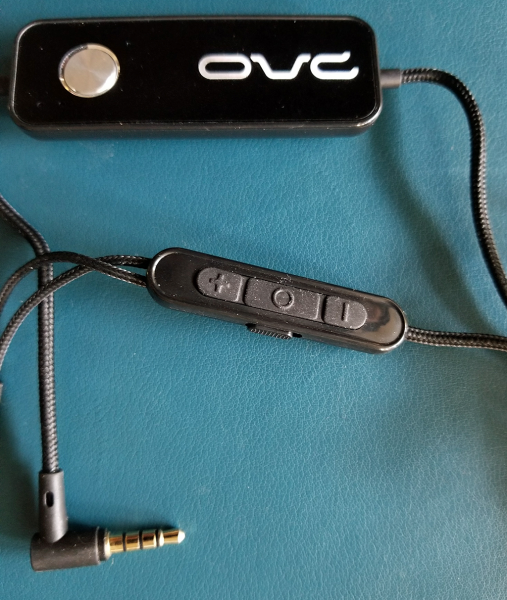
Finally the quirks.  There is the standard inline volume and call accept/end control at the place where the earphones split into the separate channels.  The bass boost switch is on the side of this control.  If you look at the picture, though, you will see the noise cancelling box (and, I assume, the larger battery this headphone supports).  The plug for your device is about 4 inches away from this control.  That means if you put this in your pocket along with your phone and are involved in pretty much any sort of activity you are constantly going to press the on-off button for noise cancelling.  Plus, given where my headphone jack on both my laptop and tablet lives this control just sort of dangles there – too close to the plug to lay on the table or desk.  Thankfully the control is not heavy or this could present problems.  A better design choice would be to have incorporated both the inline and noise cancelling controls into one and placed that higher up where the inline control lives.

Also bass boost and noise cancelling are not mutually compatible.  If noise cancelling is on, the bass boost switch does not appear to do anything.  You do get what I would consider 90% of the bass boost in noise cancelling mode, but the bass didn’t feel as deep as without noise cancelling, most likely because of the dampening sounds the earphones produce.

As far as battery life goes, I was never able to get to 60 hours active use no matter which configuration I used (noise cancelling on/off, bass boost on/off).  I was able, however, to get a very respectable 14 hours use with noise cancelling on.  That’s on par with my Bose QC-35’s so good job there.

For what they are – a sub-$50 active noise cancelling earphone – the OVC H15 delivers on most of the promises.  The places where it fails are either easily overcome or a personal choice.  These won’t replace my more expensive noise cancelling headphones, but if I were looking for earbuds for a child or were on a budget, these would be near the top of the consideration list.

Source: The sample for this review was provided by OVC.  Please visit their website for more info or Amazon to purchase.


Product Information

Price: $43.99
Manufacturer: OVC Audio
Retailer: Amazon
Pros:
  • Sounds great with bass boost and a good fit
  • Priced well with lots of extras
  • Fantastic battery life
Cons:
  • Hard to get a good fit
  • Odd control design choices
  • Not as responsive in noise cancelling as other earphones

Filed in categories: Reviews

Tagged:

OVC H15 Noise Cancelling Earphones review originally appeared on The Gadgeteer on September 26, 2017 at 9:00 am.

Note: If you are subscribed to this feed through FeedBurner, please switch to our native feed URL http://the-gadgeteer.com/feed/ in order to ensure continuous delivery.

weBoost eqo 4G cellphone signal booster review

A few months ago we finally ditched our analog phone line. Yes, I know that I’m way behind the curve, but I was required to keep a landline phone line due to my hardwired T1 broadband which I also disconnected. That means that we are now relying on our Verizon phones for contact with the outside world and although I don’t live that far from a Verizon cell tower, the signal isn’t that strong throughout my house. Especially in the basement where dropped calls are the norm. So I was happy to test the weBoost eqo cell phone signal booster when the opportunity presented itself.

What is it?

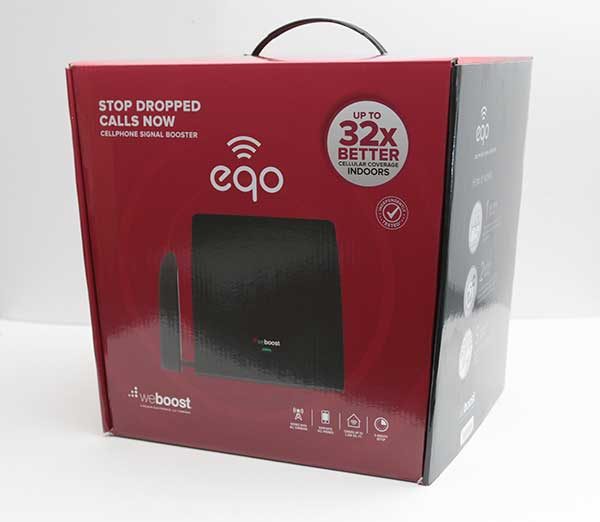
The weBoost eqo is a cell phone signal booster that is designed to be used in a home or office up to 1200sq ft and has the ability to boost cell signals for any US and Canadian carrier by as much as 32x.

What’s in the box?

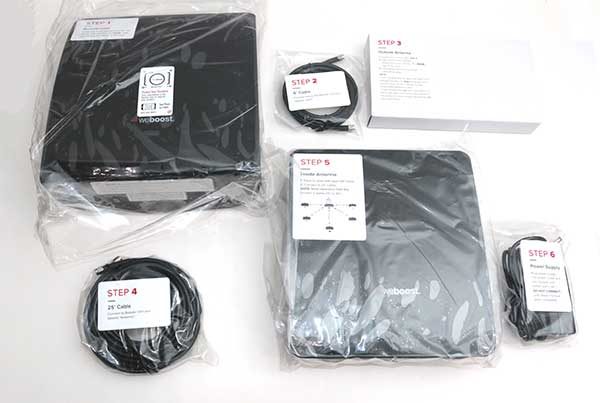
eqo Booster
eqo Inside Antenna
eqo Outside Antenna
25′ of Coax Cable
6′ of Coax Cable
Power Supply
User manual

Before we go any further, it’s important to understand that if you don’t receive any signal at all in your location, that the weBoost eqo will not boost the signal because there’s no signal to boost. So with that in mind, let’s continue.

The weBoost eqo is designed to be used indoors and does not require any type of hardware to be installed outdoors.

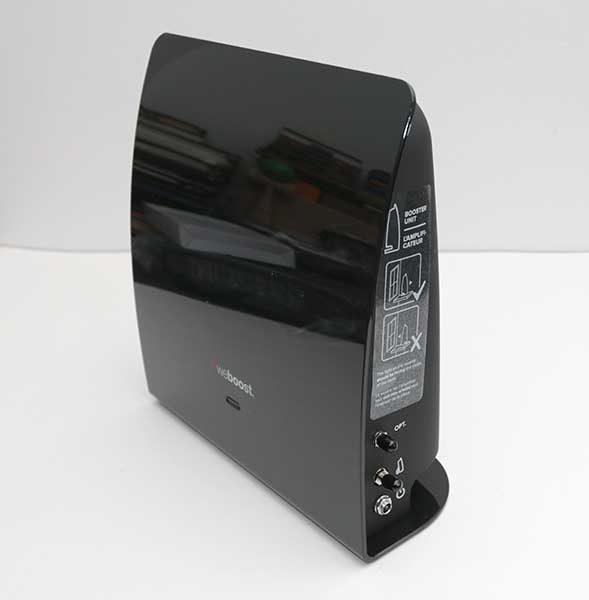
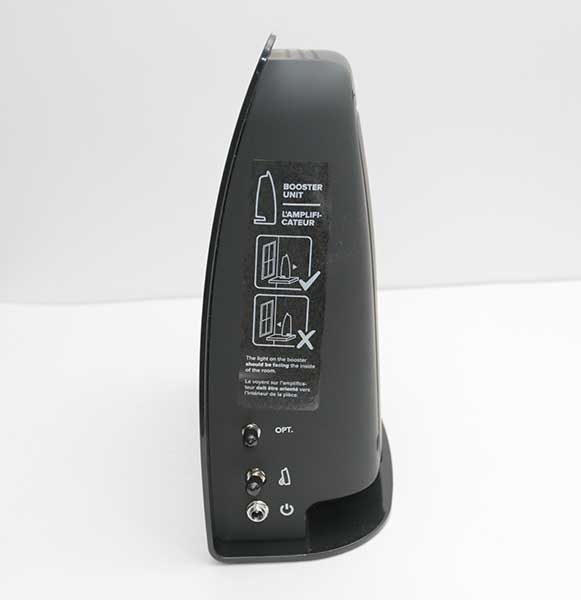
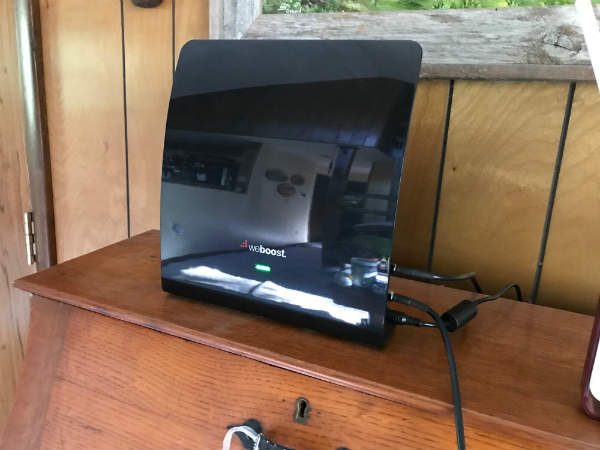
The setup includes three modules. There’s the Booster unit shown above, which needs to be placed on or near the window sill in your home where you receive the strongest cellular signal.

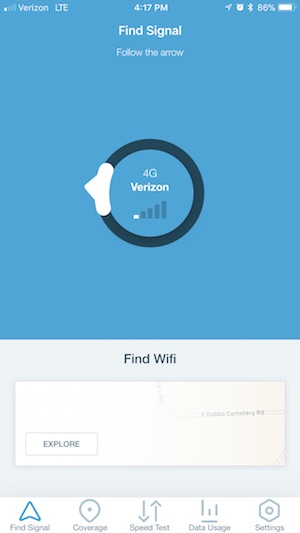
I used an app called OpenSignal which shows a compass that points to the direction where the cell signal is coming from.

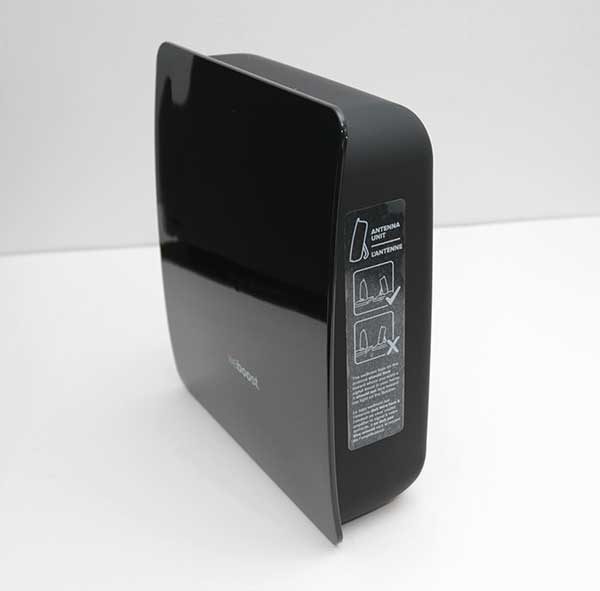
Each of the eqo modules has pictorial diagrams to help you with the setup.

The indoors booster unit has three connections on the right side. There’s one marked Optional, which is where the Outside Antenna connects and the connection below that is for the indoor antenna. At the bottom is where the AC adapter connects.

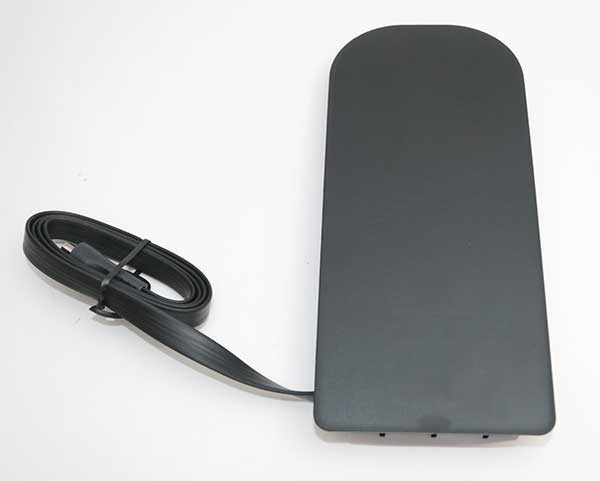
The Outside Antenna doesn’t really go outside. It goes between your window and the window screen.

The Outside Antenna has a short section of flat cable that can bend under the edge of the window so it can shut.

If you don’t have a window screen, you can use double stick tape to tape the antenna to the outside of the window and if you have a window that can’t open, you don’t have to use the Outside Antenna at all.

Once placed in the window, you connect the 6-foot coax cable to the Outside Antenna cable and then the other end connects to the Booster unit.

The last step is to place the Inside Antenna in an area in your home where the cell signal is weak.

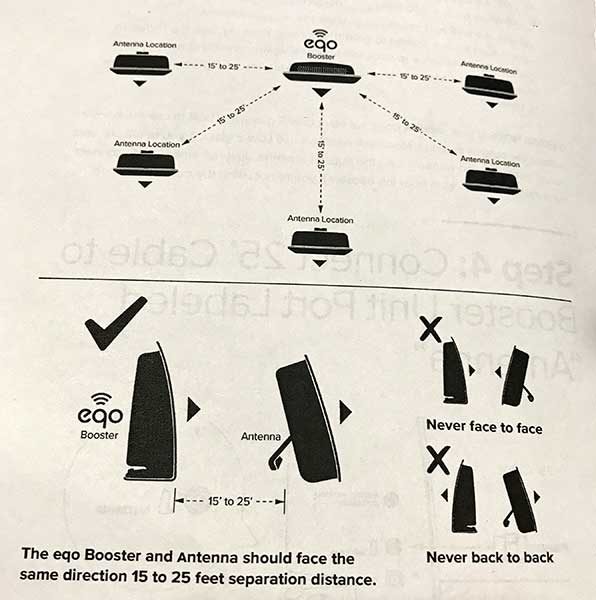
The Inside Antenna needs to be oriented so that it’s pointing in the same direction as the Booster unit as shown above.

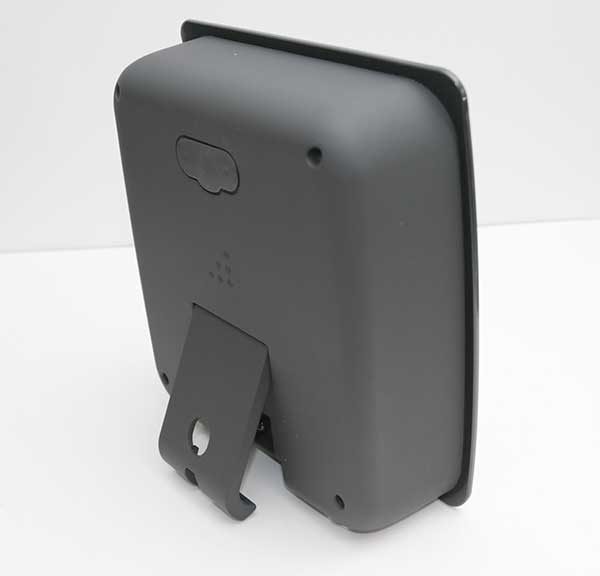
The Indoor Antenna has a popout stand so that it can sit on a shelf.

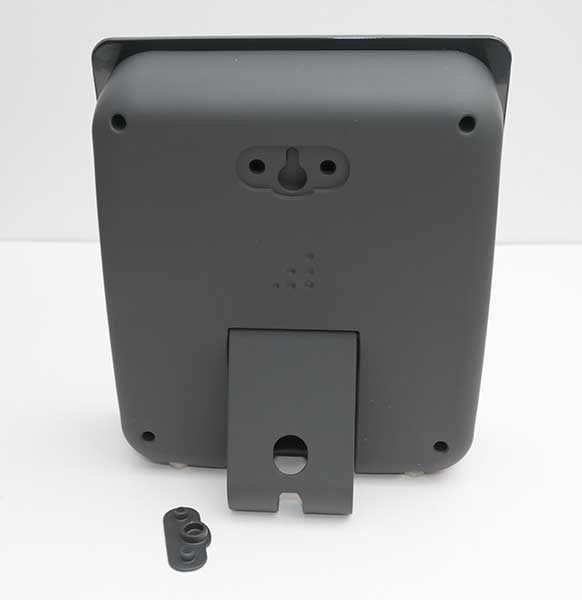
It also has a removable plug that covers slots that can be used if to mount it on a wall.

The 25-foot coax cable connects to the Indoor Antenna behind the popout stand. This is the only downside to setting up the weBoost, you have to route coax cable between each module. For my setup, I had the Booster unit upstairs and the indoor antenna downstairs. That means that I had to route the 25ft of coax from one floor to another.

After the three modules are placed, all that’s left to do before plugging in the AC adapter for the Booster unit is to check your phone’s current signal so you’ll be able to compare before and after signal strength readings.

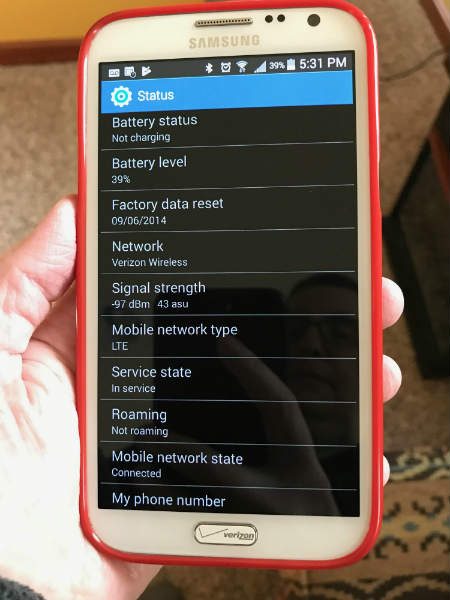
You can’t really go by how many bars that you see on your phone’s display. It’s better to see the dB signal strength reading. For iPhones, that used to be as easy as dialing *3001#12345#* , but the latest OS update to iOS 11 seems to have killed that feature. Luckily I was able to use Jeanne’s Samsung Galaxy Note 2 which runs Android. With Android you can check the dB signal strength by going to Settings > About Phone > Status or Network > Signal Strength or Network Type and Signal (it depends on the phone and what Android version it’s running).

Before turning on the weBoost eqo, I checked the signal in my basement with my iPhone 7 Plus. It consistently showed 1 bar and Jeanne’s Note 2 would show 113-117 dBm.

After the weBoost eqo was powered on, the iPhone would show 2-3 bars and the Note 2 would show 96-105 dBm. A very nice improvement. Of course, those readings didn’t remain rock steady, but they have been better than without the weBoost eqo powered on.

LEDs on the Booster unit provide a coverage status. If the light is Green, that means you should have good coverage. Orange means you’re receiving a low signal boost and a Red light means no signal boost. The manual includes troubleshooting tips for orange and red light issues.

Final thoughts

There isn’t much more to say about the weBoost eqo other than it does what it is designed to do, boost an existing cellular signal.

As long as you have some signal in your area, this product will do its job. And as long as you don’t mind having to set up 3 different modules connected by coax cable, it’s a good solution for boosting signal strength.

During my testing of the weBoost eqo 4G, we had no dropped calls in our basement, which is a testament that this product works as advertised.

Source: The sample for this review was provided by the RepeaterStore. Please visit their site for more info.


Product Information

Price: $379.99
Manufacturer: weBoost
Retailer: RepeaterStore
Pros:
  • Easy to setup
  • Does not require an outdoor installation
  • Can improve existing signal by as much as 32x
Cons:
  • Have to route coax cables

Filed in categories: Reviews

Tagged:

weBoost eqo 4G cellphone signal booster review originally appeared on The Gadgeteer on September 25, 2017 at 10:22 am.

Note: If you are subscribed to this feed through FeedBurner, please switch to our native feed URL http://the-gadgeteer.com/feed/ in order to ensure continuous delivery.

PhotoFast Call Recorder review

For years, we have had the ability to record analog phone conversations with little effort. Suction-cup mics, dual-socketed wires that sent the audio to tape or another listener, or even build-in features of corporate phone systems have been around for 30, 40, 50 years or more. But now we have digital cell phones, and end-to-end encryption that blocks or severely limits this ability. What can we do? The folks at PhotoFast have solved this for iPhone users, through a plug-in device called the Call Recorder. (Yeah, catchy name, but accurate, amirite?) They sent me one to test.

Note: Photos may be tapped or clicked for a larger image.

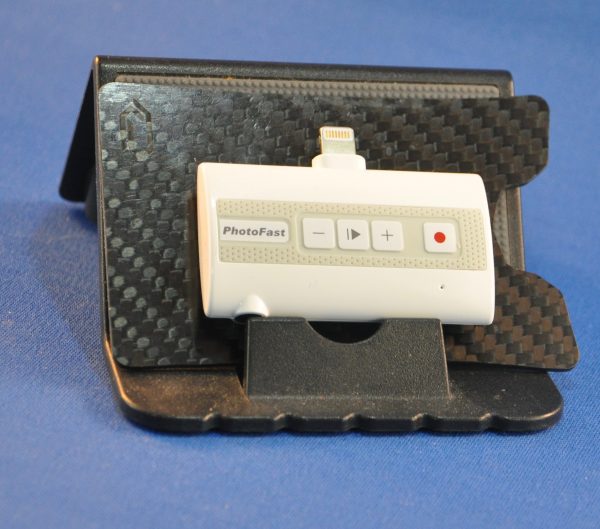
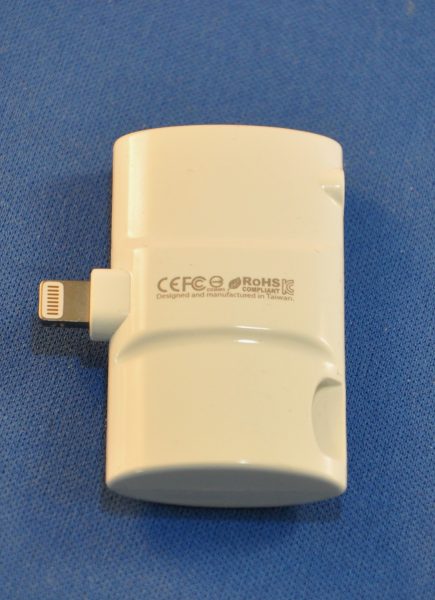
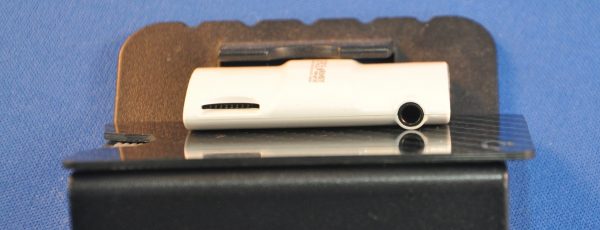
The unit arrived in a hanging package that would feel right at home in an Apple Store beside all the other cases and add-ons. Inside is an EarPod case-sized square box in White with a clear cover. Inside that is an oval tube about the width of the iPhone SE (actual measurements are 2.125″ x 1.25″ x .375″), with a Lightning connector sticking out of the top center of one edge. One one side, there are buttons for play/pause and record, plus volume adjustment. On the lower left edge, there is a .125″ earbud jack. On the back, opposite the jack is a slot for a microSD card. You can record directly to your iPhone’s internal memory, or onto the onboard storage of a card inserted into this slot.


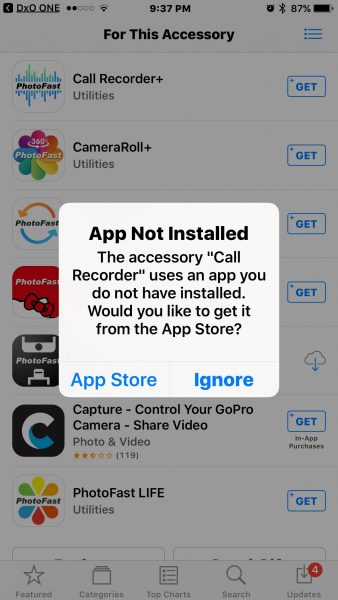
When the phone is unlocked and you first insert the Call Recorder into the Lightning port, the firmware in the device sends a link to the free app on the App Store for you to download.

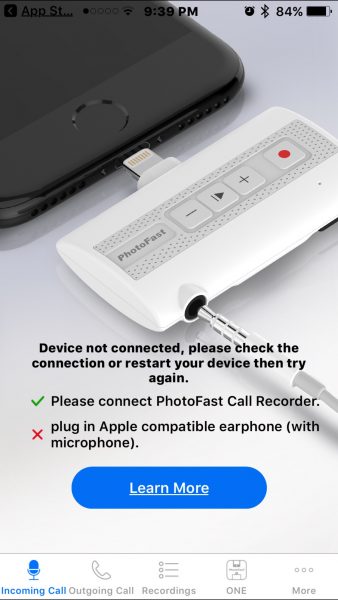
Once you install this, it will launch automatically when you insert the device. If you just tap to launch the software, there is an automatic check to make sure you have connected the Call Recorder, and that there is an approved headphone connected to the recorder. If you’ve not done this, you will get an error message.


I found this to be a little irritating since many perfectly good earbuds were rejected by this test. Reseating them and jiggling them in the socket did nothing to make them be acceptable. If they were rejected, they would never work.
I tested the Call Recorder by placing a call to my mother. I got her, but the call recorder did not record my side of the message, and she could not hear me while the recorder was attached. Then I called my wife’s phone since she was working out in the yard. Both sides of the conversation were recorded, but since her phone was close by, I think the ringing and some of the other noises associated with me juggling two phones may have interfered with getting a good recording and getting some static.

I was finally able to perfect the task of having the software up, dialing a number, and getting both parties recorded onto my phone. Even after getting good connections, there were still issues at times. I called Mom earlier today through the Call Recorder app and was immediately told she heard an echo, so we hung up. I called back through the regular phone app, with identical results. Only when I removed the device from my phone could she not hear an echo. (My mom is not very technical, being a member of the “Greatest Generation”, so explaining to her about testing a call recorder produced, I’m sure, a glazed-eyed look, and her response of “Oh, OK” revealed her amusement that I’m always playing with “some new toy.”)

Once recordings are made, they are listed in the log by date and time, but renaming to something a little more helpful is easy, as is moving them to or from the external memory, or to a connected account.


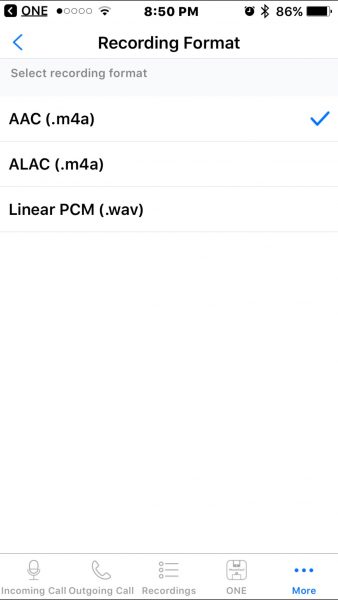
This last bit is probably the most beneficial feature of the package. The free PhotoFast ONE app offers a wealth of features for transferring all manner of files to and from your iPhone and devices that can read microSD cards. It can also transfer directly to some services (iCloud, Google Drive, and DropBox), it can gather and .zip or unzip files before and after transfer, and open photos, videos, and .mp3 files natively. (Unfortunately, the renaming is not transferred to the actual file, so when it’s moved over to, say, Dropbox, the original filename is again seen. I recommend listening on the final platform and renaming there to make sure you’re changing the correct file to a name you want.)

I rarely have cause to record both sides of a conversation. If you need calls recorded, there are many apps and utilities out there, many easier to setup and deal with than the Call Recorder. But if you’re needing to move files to and from iOS devices, you’ll find few cheaper alternatives than the free PhotoFast ONE app or the Call Recorder and a microSD card reader.

Source: The sample for this review was provided by PhotoFast. Please visit their site for more info and order through the Indiegogo Marketplace.


Product Information

Price: $125.00
Manufacturer: PhotoFast
Retailer: IndieGoGo
Requirements:
  • iOS device with phone capabilities
Pros:
  • Single piece with no battery – powered form phone
  • Launches free software on attachment
  • Software offers many options
Cons:
  • Not all headphones/earbuds are compatible
  • Attachment/Recording is intermittent
  • Small buttons on unit

Filed in categories: Reviews

Tagged:

PhotoFast Call Recorder review originally appeared on The Gadgeteer on September 25, 2017 at 9:00 am.

Note: If you are subscribed to this feed through FeedBurner, please switch to our native feed URL http://the-gadgeteer.com/feed/ in order to ensure continuous delivery.

Ecovacs Deebot R95 robot vacuum review

I’m a big fan of robot vacuums for one main reason – I’m lazy and don’t want to push a vacuum around my house when I can get a robot to do my work for me at the press of a button or automatically on a schedule that I set. The newest robot vac that I’ve had the opportunity to test is the Ecovacs Deebot R95 robot vacuum. Let’s see if it sucks… but in a good way.

What is it?

The Ecovacs Deebot R95 is a robotic vacuum and mop that you can control with your smartphone.

What’s in the package?
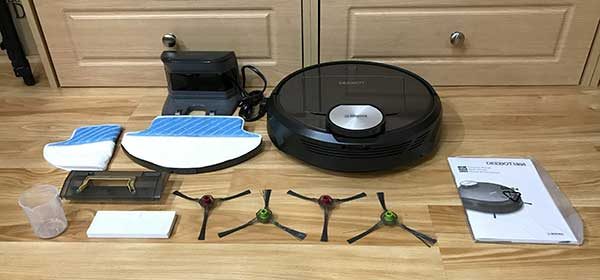
Ecovacs Deebot R95
Charging dock
Advanced wet/dry cleaning cloths (2)
Advanced wet/dry reservoir
Measuring cup
Direct suction option
Side brushes (4)
Instruction manual

Design and features
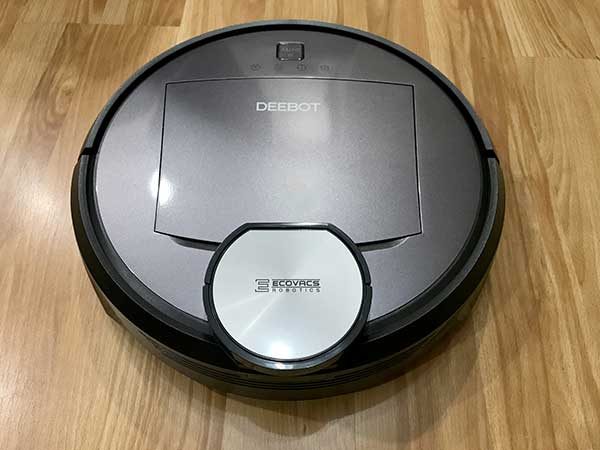
Like most robotic vacuums, the Ecovacs Deebot R95 has a circular shaped plastic housing.

The round module on the top cover of the vacuum is the laser distance sensor which the R95 uses to map the room.
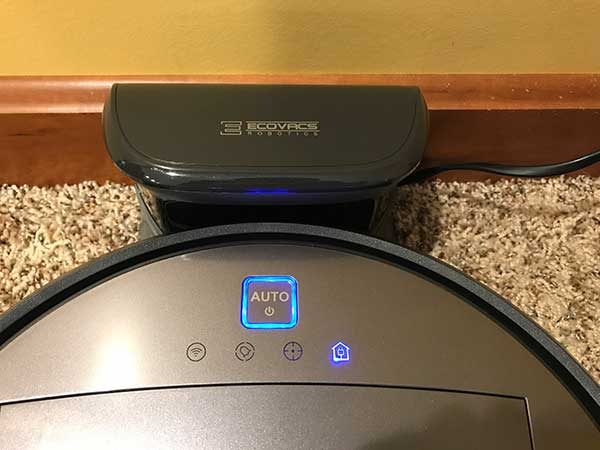
There is a button and a panel of four status LEDs on the top of the R95. The status LEDs include a WiFi indicator, a scheduled cleaning indicator, spot mode indicator, and a return to charger mode indicator LED.
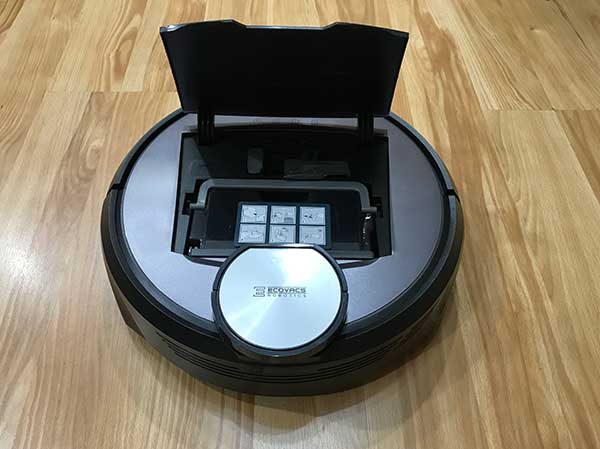
The top cover of the vacuum lifts up to provide access to the dirt bin and main power switch.
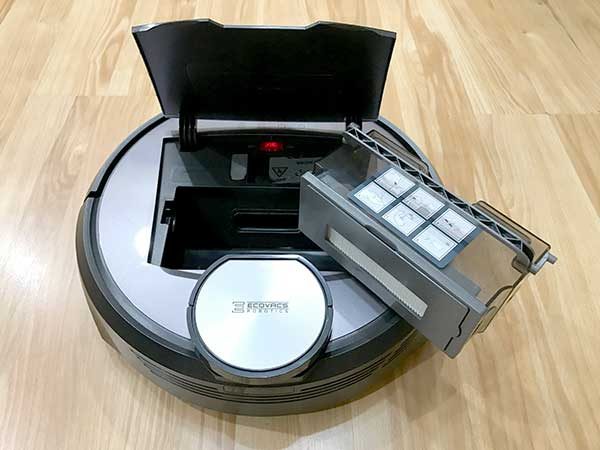
The dirt bin/filter housing has a handle that allows it to easily lift out from the vacuum for emptying.
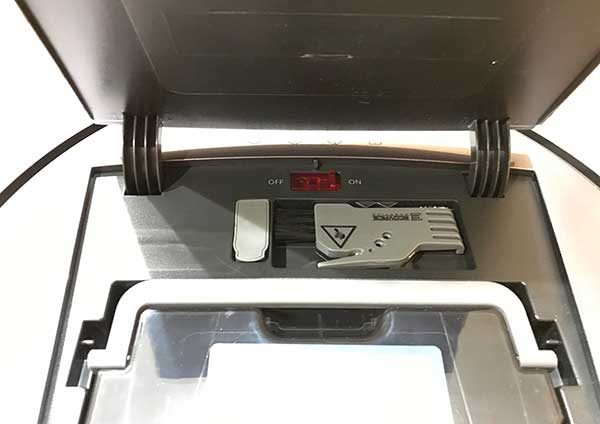
Under the lid below the power switch is the upgrade port that can be used to update the vacuum’s firmware and a small tool that can be used to cut strings, hair, or other debris that might wind itself around the brush.
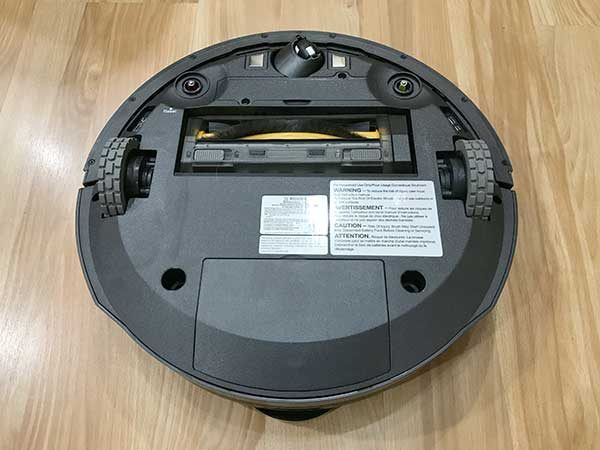
If you flip over the R95, you’ll see the three wheels that propel the vacuum. There are two driving wheels and one smaller wheel at the front that is flanked on both sides by anti-drop sensors.  Two more anti-drop sensors are located above the driving wheels. These sensors prevent the R95 from falling down steps and stairs.
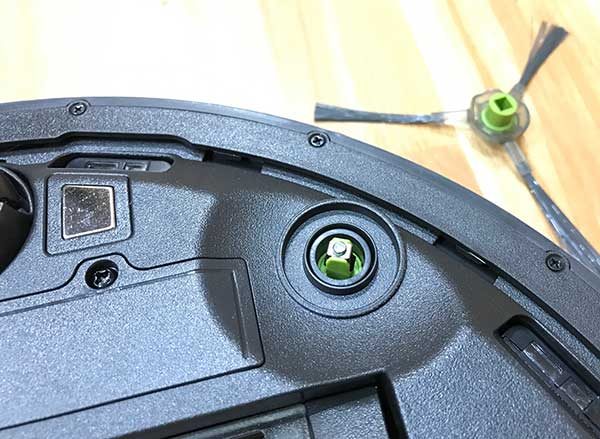
Included with the Deebot R95 are four side brushes that attach magnetically to the bottom of the vacuum. These small brushes help lift dirt from wall edges. Only two brushes are used at a time so two extras are included for use when the first two brushes wear out.
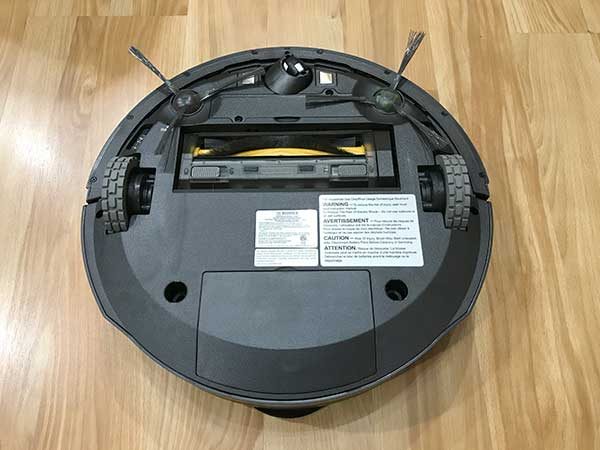
With the side brushes attached and the main brush in place, it’s time to charge the R95 to prepare for cleaning.
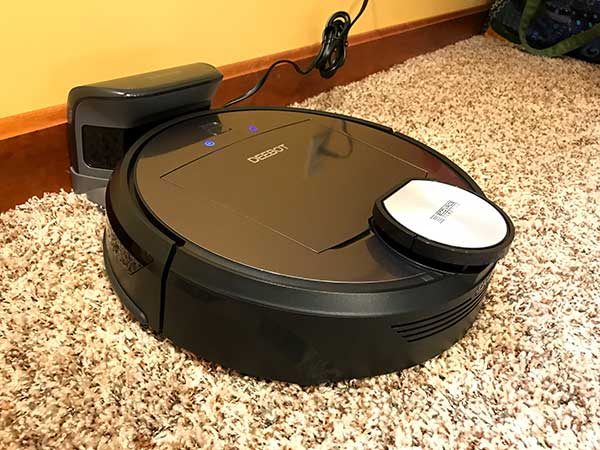
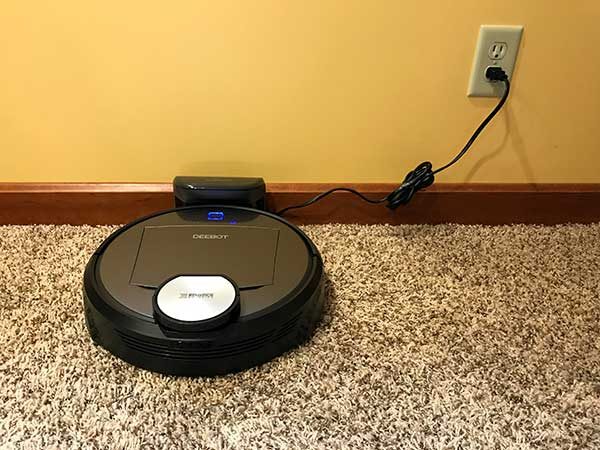
The charging dock plugs into a wall outlet and the R95 charges by sitting on two charging pins on the bottom edge of the dock.

At this point, you can install the Ecovacs app on your iOS or Android device so you can take advantage of advanced features like scheduling, do not disturb times, and more. Note that it’s not mandatory that you use an app with the vacuum. You can control the vacuum manually including a basic scheduling feature that set it to vacuum once a day at the same time each day.

Note that it’s not mandatory that you use an app with the vacuum. You can control the vacuum manually including a basic scheduling feature that set it to vacuum once a day at the same time each day just by pressing the Auto button twice.

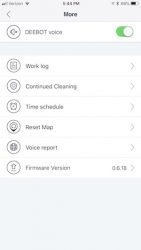
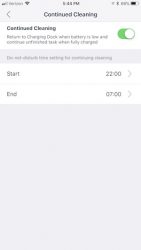

The app will allow you to set scheduled cleaning times, do not disturb times when the vacuuming will not run even if a prior cleaning was on hold due to battery recharging, and a work log where you can check to see how many hours that the D95 has vacuumed.
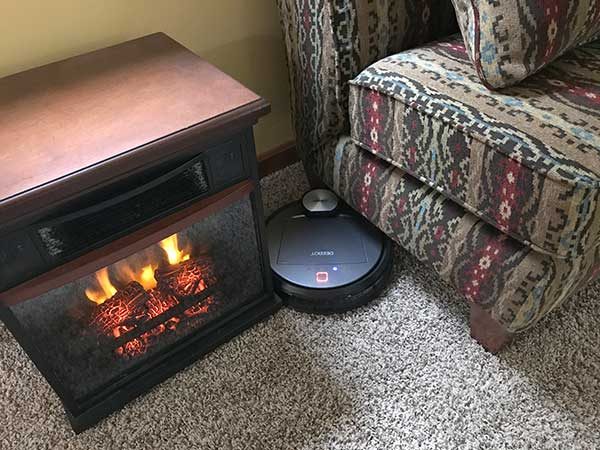
I tested the D95 in a carpeted room and in a room with wood floors and found that it did a decent job picking up large pieces of cat fluff and other dirt.

Here’s the dirt bin after vacuuming the basement floor a couple of times. Ick. You can see some Cheerios in the bin. No idea where the heck they came from. Yes, we do like to eat Cheerios, but I don’t know how they got on the floor and how we didn’t see them. I guess that’s what a vacuum is for though, right?

Unlike other robot vacuums that I’ve tested before like the Neato Botvacs, I like that the Deebot doesn’t bang roughly into objects like furniture before adjusting course. The Deebot has a more gentle touch. It’s also less noisy than Botvacs. Unfortunately, that’s the only praise I can give this robot vacuum, because it has some definite issues.
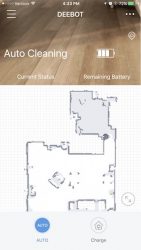
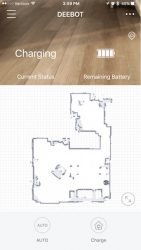

One of the main reasons why I was excited to test the Ecovacs Deebot R95 is because the app is supposed to allow you to mark areas on the map to avoid. The mapping feature is pretty cool and it’s fun to watch a live view of the robot vacuuming when you’re not there. But the problem is that the app (at least the iOS version of the app) does not have the avoidance feature. The instructions say that there should be a special icon on the screen that you can press to then set areas to avoid. I’ve yet to see that icon. But I have seen the message shown in the screenshot above on the right.

I read some reviews on Amazon for the R95 and apparently, it takes MANY hours for the avoidance feature to become available. I’ve used the R95 to clean my floors at least 10 times now and still haven’t seen the feature.

Another problem is that if you toggle power on the vacuum, or move the charging base, the map gets reset and you’ll have to start the process again.

Another problem I noticed is that there’s an option to turn on voice reports. I didn’t even realize that the vacuum talked until I started writing the review and was taking screenshots and saw the option. I had the option turned no but hadn’t heard any voices. So I did a hard reset at which point the vacuum started telling me when it finished vacuuming, or if it was stuck. A voice telling me about a problem is a lot more useful than the Neato Botvacs that just beep when there is a problem. However, the voice reports stopped soon after they started. No idea why.

The R95 also started appearing offline in the Ecovacs app and I wasn’t able to get it to come back online even after doing a hard reset multiple times which has been frustrating.

The vacuum also has a weird habit of continue to run even when you try to stop it. Most robot vacs that I’ve tested will stop running when you pick them up and manually put them on their charging dock. Sometimes the R95 will sound like the brush is still spinning or the motor is still running even when it’s sitting still. I’ve had this happen when I take it to a room and press the auto button so it will just clean that room. When it stops, a voice will say “cleaning complete” or something to that effect (if the voice reports happen to be working) and the vacuum will stop moving but it will continue to make whirring noises until I flip the power switch under the lift up cover.

Final thoughts

The Ecovacs Deebot R95 robot vacuum does a decent job picking up dirt from carpet and also does a good job wet/dry mopping hard surfaces, but app and special features like voice reports, obstacle avoidance, and WiFi connections are buggy which makes using this product frustrating. For those reasons, I’d steer clear of this particular robot vacuum until these issues have been resolved by a firmware update of both the device and the app.

Source: The sample for this review was provided by Ecovacs. Please visit their site for more info and Amazon to order.


Product Information

Price: $439.99
Manufacturer: Ecovacs
Retailer: Amazon
Pros:
  • Can be used manually or with an app
  • Doesn't damage furniture
  • Can vacuum carpet or wet/dry mop
Cons:
  • Buggy voice report feature
  • Buggy WiFi connection
  • Obstacle avoidance feature no available.

Filed in categories: Reviews

Tagged: ,

Ecovacs Deebot R95 robot vacuum review originally appeared on The Gadgeteer on September 24, 2017 at 3:39 pm.

Note: If you are subscribed to this feed through FeedBurner, please switch to our native feed URL http://the-gadgeteer.com/feed/ in order to ensure continuous delivery.