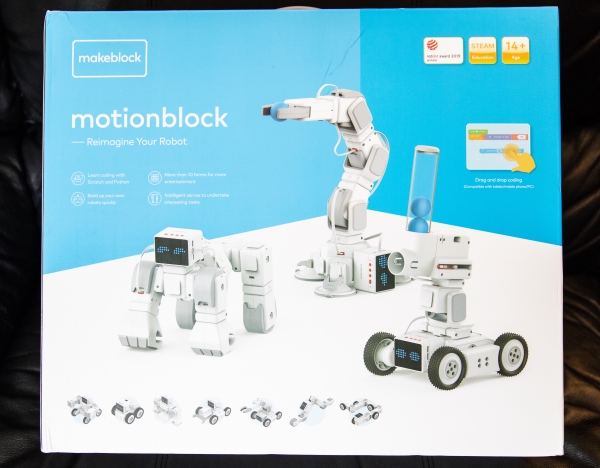
Makeblock Motionblock Robot Kit review

REVIEW – I have always been a fan of all things robotic, and it seems that my 5-year-old son has the same addiction. Over the past 2 years, I have probably purchased over a dozen robots for him. This time around, I got the chance to test and review the Makeblock Motionblock Robot Kit which is much too advanced for my son, so now daddy gets to have some fun!!

What is it?

Featuring a modular and programmable design this Motionblock kit makes robot building easy and fun, including the capability to build and design beyond the designs included in the user guide. The parts in the kit include intelligent servos for fluid and flexible movement. You can construct a Mechanical Arm Synchronizer that allows you to have the robot mimic movements and you can use the built-in motion recording function to teach your robot predetermined actions. Makeblock also provides a free app and coding software that adds to the limitless possibilities.

What’s in the box

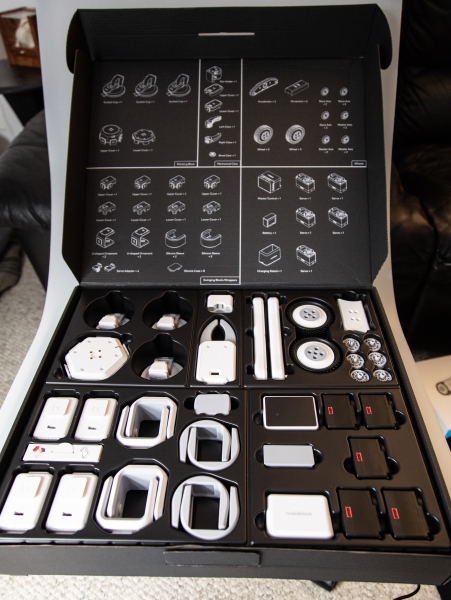
This kit comes with a main outer box that contains two inner boxes labeled Box 1 and Box 2.
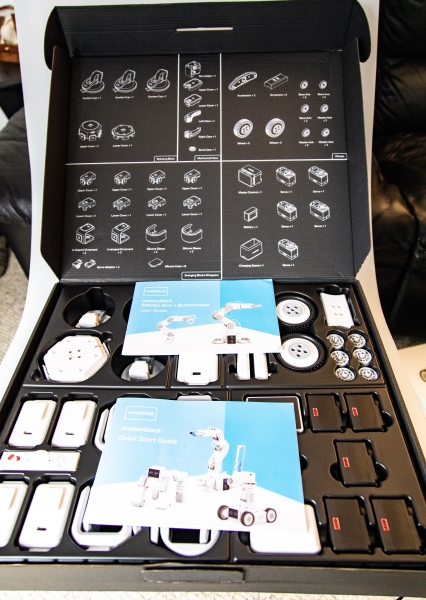

Box 1
1 x User Guide
1 x Quick Start Guide
Rotating Block
3 x Suction Cup
1 x Upper Cover
1 x Lower Cover
Mechanical Claw
1 x Pen Holder
1 x Upper Cover
1 x Lower Cover
1 x Left Claw
1 x Right Claw
1 x Bevel Clever
Wheels
2 x Accelerator
2 x Ornament
6 x Slave Axis
6 x Master Axis
6 x Wheel
Swinging Blocks Wrappers
4 x Upper Cover
4 x Lower Cover
4 x U-Shaped Ornament
4 x Silicone Sleeve
8 x Silicone Case
4 x Servo Adapter
Controls
1 x Master Control
5 x Servo
1 x Battery
1 x Charging Stand
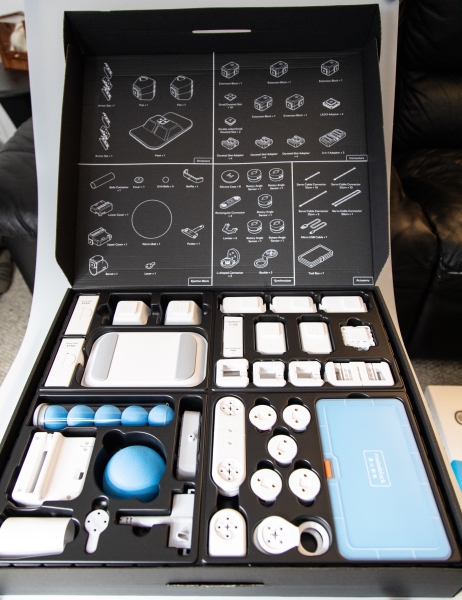

Box 2
Ornament
2 x Armor Set
2 x Fist
1 x Foot
Ejection Block
1 x Balls Container
1 x Cover
5 x EVA Balls
1 x Baffle
1 x Lower Cover
1 x Upper Cover
1 x Barrel
1 x 70MM Ball
1 x Putter
1 x Lever
Connectors
5 x Extension Block
10 x Small Dovetail Slot
2 x Double-sided Small Dovetail Slot
2 x LEGO Adapter
12 x Dovetail Slot Adapter
3 x 2-in-1 Adapter
Synchronizer
8 x Silicone case
5 x Rotary Angle Sensor
3 x Rectangular Connector
3 x Limiter
2 x L-Shaped Connector
2 x Buckle
Accessory
10 x 10cm Servo Cable Connector
10 x 20cm Servo Cable Connector
5 x 25cm Servo Cable Connector
1 x 50cm Servo Cable Connector
1 x Micro USB Cable
1 x Toolbox

Design and features

Specifications
Master Control: Bluetooth module, 12 × 16 LED dot screen, servo expansion interface × 4, micro USB port × 1
Support OS: iOS, Android, Windows, and MAC
Connection: Bluetooth, USB cable
Power: Lithium battery
Working Voltage: 5V
Battery Capacity: 7.4V 1500mAh
Number of Servos: 5
Materials and Parts: ABS+PC
Operating Temperature: 0°C~50°C
Accessories: Micro USB Cable, rubber cable, battery charger, rudder adapter plate
Package Dimension: 476 × 156 × 410 mm

The Makeblock Motionblock Robot Kit comes with two main boxes that make up the entire kit, and within those two boxes, there are a large number of parts. This kit is somewhat difficult to describe in detail since you almost have to see it to get a sense of all that can be designed/constructed, from the models in the user guide and also from your imagination. Here are some of the main features:

  • More Fun with 10+ Forms: Build one of the ten cool preset forms, such as Fighter, Gorilla, Dog, Robotic Arm, etc., or even create whatever you can imagine exploring tons of fun.
  • High-Performance Intelligent Servos: The intelligent servos geared in MotionBlock makes it easily imitate behaviors of many animals and perform task high stability of control and strong capacity of bearing.
  • Easy to Build and Transform: With dovetail groove design, kids can easily create different robot shapes or change the angles and numbers of the modules as they imagine.
  • Control Mode with Synchronizer: Robot can be manually controlled to move and act as intended with Synchronizer without using any software.
  • Free App to Control and Code: With Makeblock App and mBlock 5, programming your MotionBlock with Scratch is as simple as stacking building bricks. For the mBlock 5 on PC-end, you also convert your Scratch code to Python with just a simple click on your Devices.

All of the parts are made to fit perfectly with each other, and with the additional coding ability, innovative designs and movements can be created.

Performance

When you first open the boxes that make up this kit the view of the parts is both impressive and intimidating. The only way to approach this is to dive right in.

The first thing that I did was to download the app. I use an iPhone, and I had to search for it via the app store because my scanner had a problem reading the QR Code provided in the manual. I do think that the issue is with the printed QR Code. Once you install the app and click on it, it shows you the various initial models that you can build, and you can just click on whichever one you decide. Here are a few screenshots from the app:


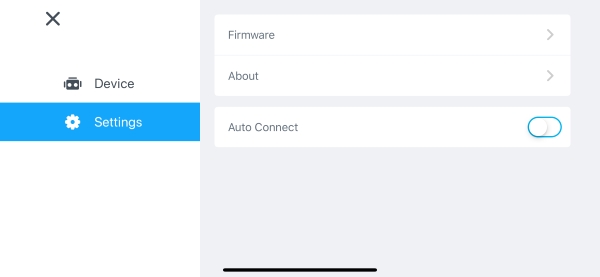
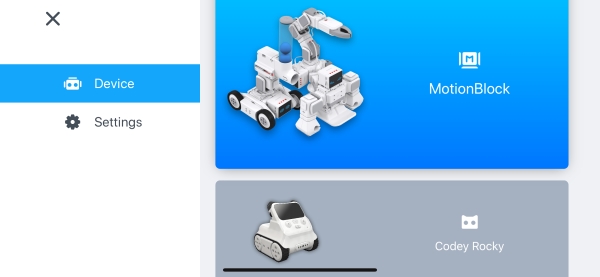
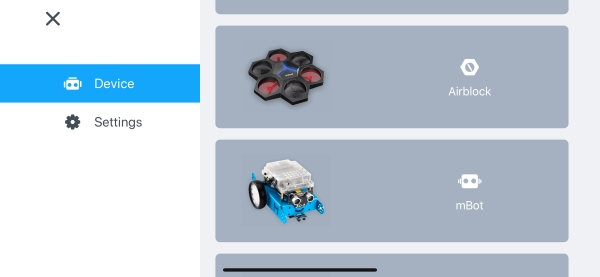
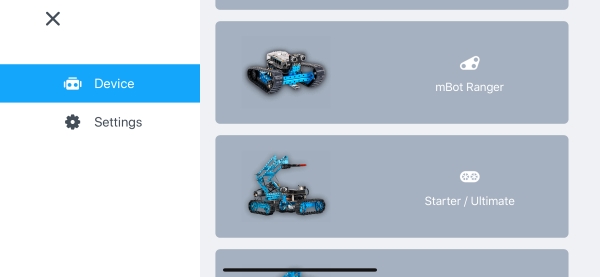
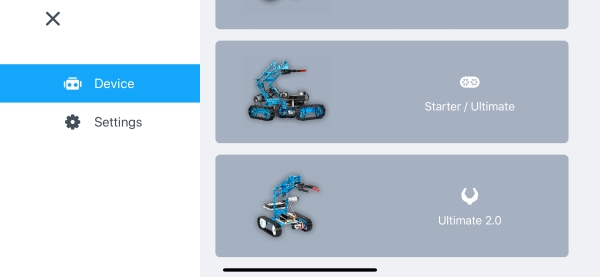
Your selection takes you through detailed steps to build your robot model. The instructions are clear and very easy to follow. There are many steps and building the robot takes some time. I think I took a bit over 2 hours to build the arm. After the final step, the app then guides you through the Bluetooth connections steps and then the operational steps. In my case of building the mechanical robot arm, there were almost 70 steps. Since it is not possible to include all of the steps in this review, I am showing a few photos below from the process:
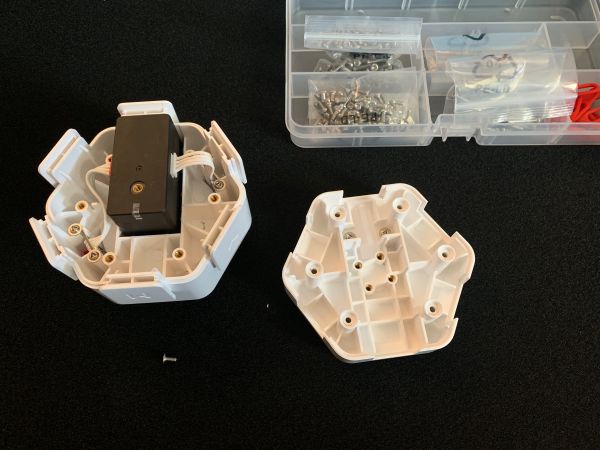
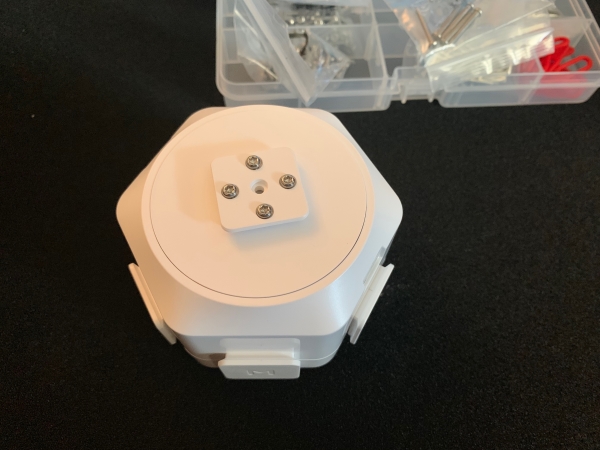
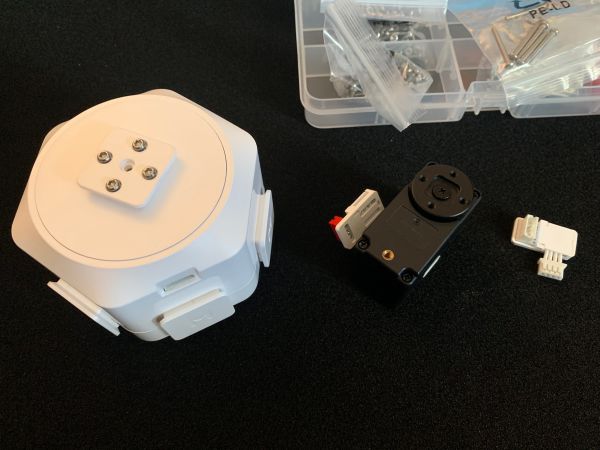
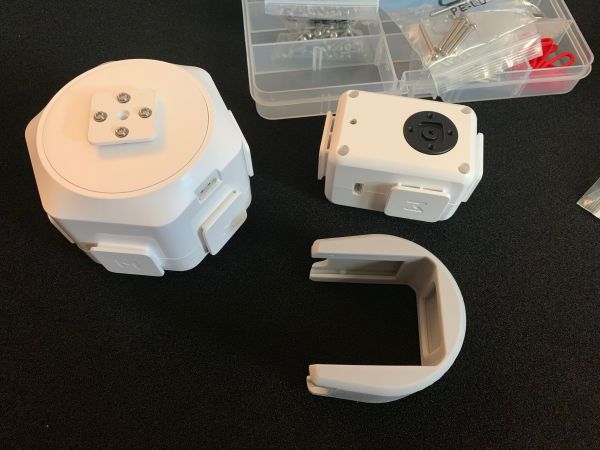
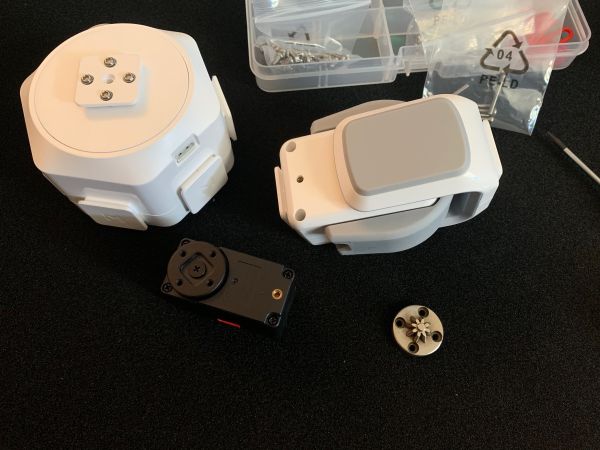

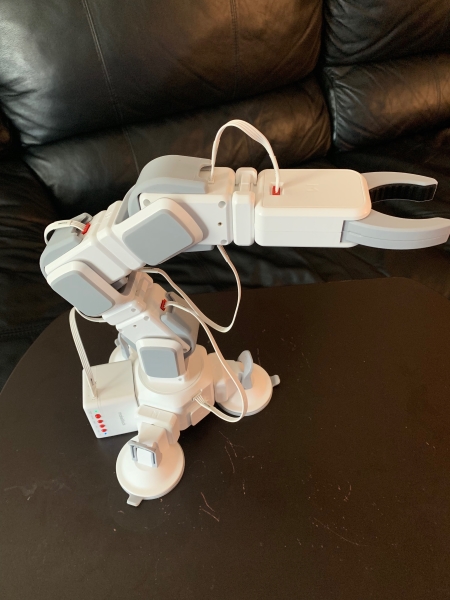
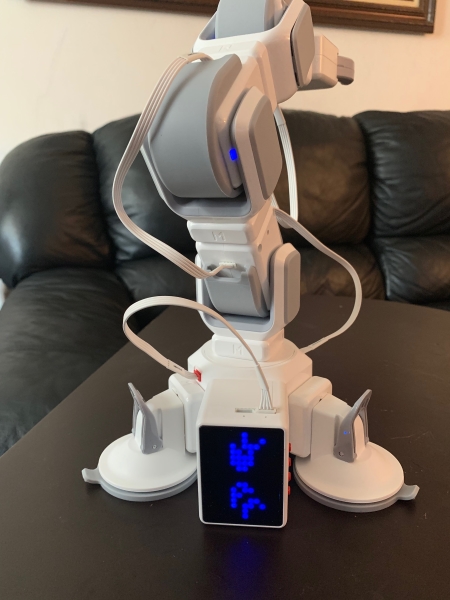
When I used the app to control the arm, it would initially work as designed, but once the arm was bent more than approximately 15 degrees past straight vertical, it would flop to the ground, in my case the lowest position was the table surface, and I would get the following error in the app:

I also built the Mechanical Arm Synchronizer to control the arm and to see some synchronized movements.
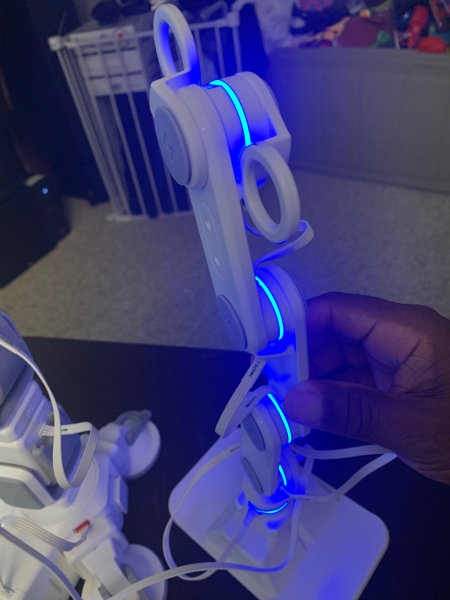
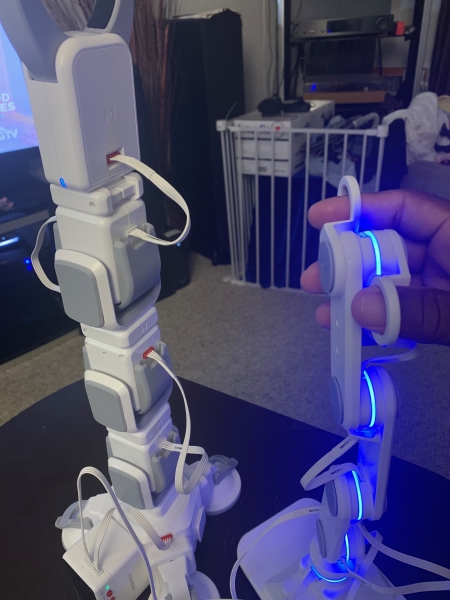
Controlling some movements worked well, but as soon as I increased the bending angle, the arm would fall. In my personal opinion, the Servo motors need more power and more resistance once powered so that they can support the weight of the arm as the gravitational force acts on it once the angle changes.

The following is a test video of the Mechanical Arm Synchronizer controlling the robotic arm:

What I like

  • The build quality
  • The creative options for robotic models
  • The functionality concept

What I’d change

  • The strength and resistance of the servo motors

Final thoughts

I love most things robotic and while I do think that this is a great kit, my first impression is mixed. I love the concept and my first builds were mostly successful except for controlling the robotic arm once gravity steps in. I am not sure if a firmware upgrade can fix this and if so if one is available. I am also not sure if I am operating it 100% correctly, but then again, this is a test and review from a regular customer like myself. This kit has tons of possibilities and I will be exploring many more build options. I have to say that the overall quality of the parts is good. The only issue I encountered with the quality of the parts was a damaged silicone cover as shown below. The one on the right is the way it is supposed to be.
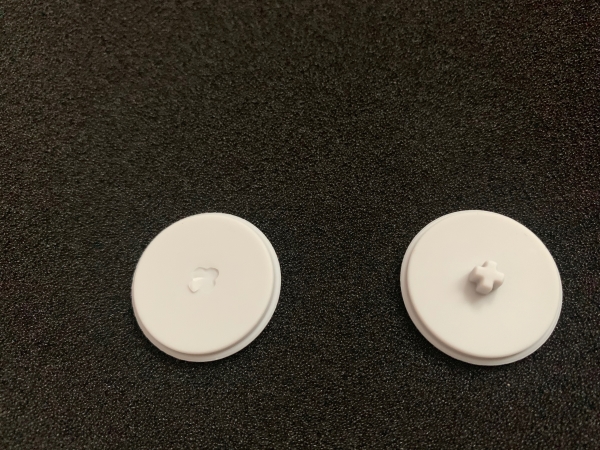
Since this is only a cover, it has no operational impact. Overall, I am enjoying this kit, and looking forward to upgrades from Makeblock.

Price: $499
Where to buy: Makeblock website
Sample: The sample for this review was provided by Makeblock

Filed in categories: Reviews

Tagged: , ,

Makeblock Motionblock Robot Kit review originally appeared on The Gadgeteer on July 25, 2019 at 9:00 am.

Note: If you are subscribed to this feed through FeedBurner, please switch to our native feed URL http://the-gadgeteer.com/feed/ in order to ensure continuous delivery.

Evo Global Travel Adapter review

REVIEW – I travel for work fairly often, and typically outside the US 2 or 3 times per year, and for those trips, it’s essential to carry electrical gadgets that can be used with the electrical outlets in countries.  I typically carry a fairly standard travel adapter for my laptop, but when I want to charge my iPhone or another device, I often need a second (or third) travel adapter to charge that device and others, which just adds to the growing amount of gear that I find myself having to carry for travel.  The Evo Global Travel Adapter presents a solution to the problem of needing multiple adapters while traveling in other countries.  Let’s check it out. Gadget on!

What is it?

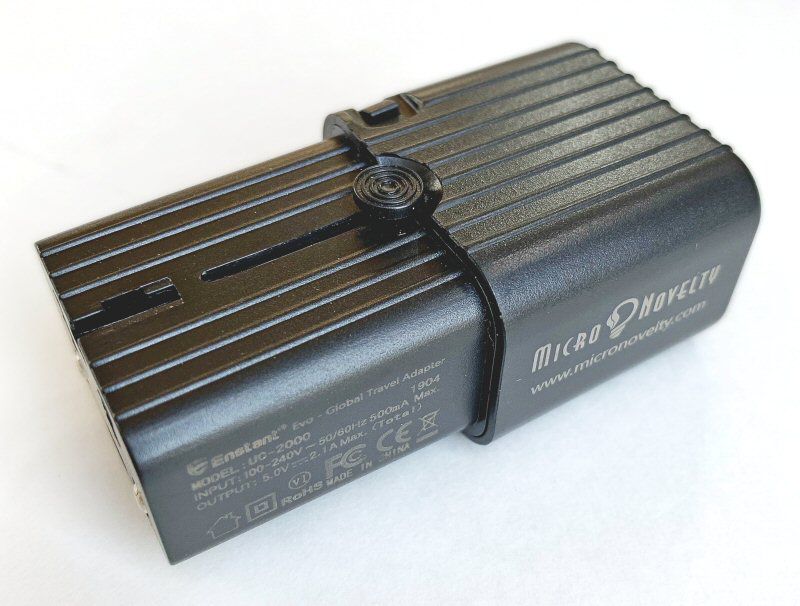
The Evo Global Travel Adapter is a double USB charger that can be used with the electrical outlets in multiple countries.

What’s in the box?

  • Evo Global Travel Adapter
  • Spec/instruction sheet

Hardware specs

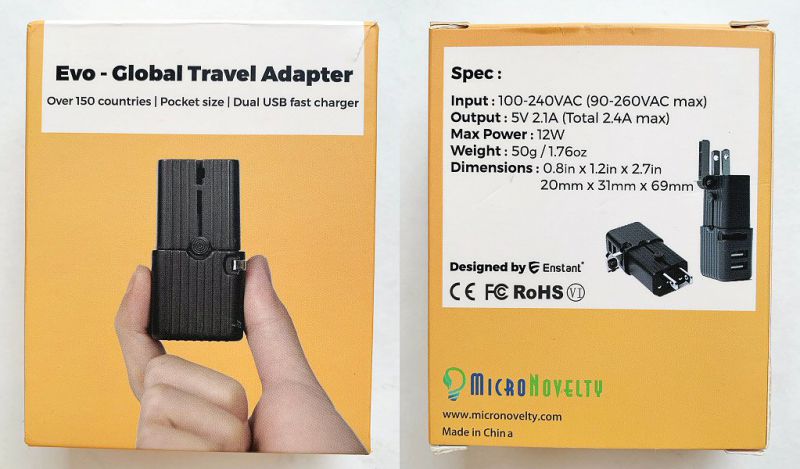
  • Dimensions: 0.8 x 1.2 x 2.7 in (20.3 x 30.5 x 69 mm)
  • Weight: 1.76 oz (50 g)
  • Input: 100-240VAC (90-260VAC max)
  • Output: 5V 2.1A (total 2.4A max)
  • Max Power: 12 W
  • Material: PC94V0 with fire-, overheat- and cold-resistance
  • Supported countries: 150

Design, setup, features, and performance

The Evo Global Travel Adapter began as a successful Indigogo campaign and is now available for sale on Amazon.

My initial impressions of the Evo were somewhat mixed.  First, I marveled at how small it was.  Second, I realized that it was not a standard travel adapter, but only a USB adapter.  This took me by surprise because I had been expecting to be able to plug my laptop into it like other travel adapters, but this is not the case.  Once I got past that initial disappointment, I shifted my evaluation to judge the Evo on its actual merits.

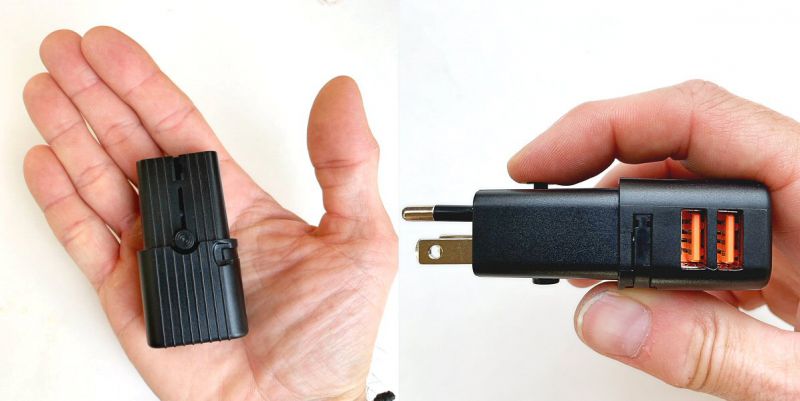
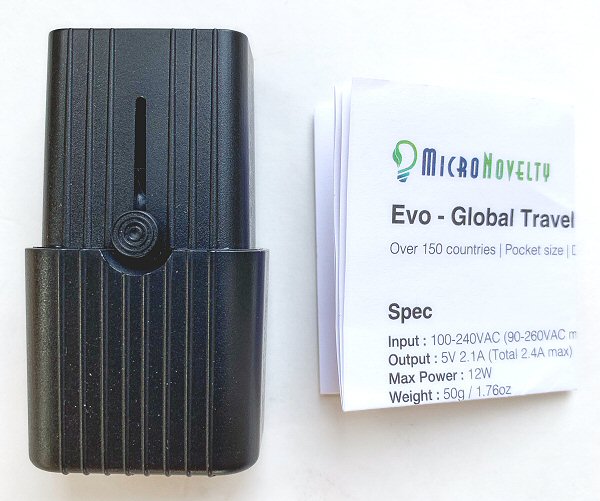
As mentioned above, the Evo is quite small; it is about the size of two iPhone charging blocks stacked atop one another.  This helps makes it a great travel companion because its small size and relatively light weight help cut down on the amount of space required to carry it as well as adding less to your overall carrying load.

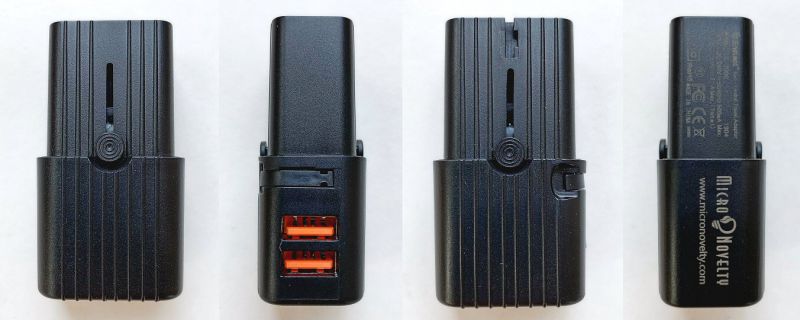
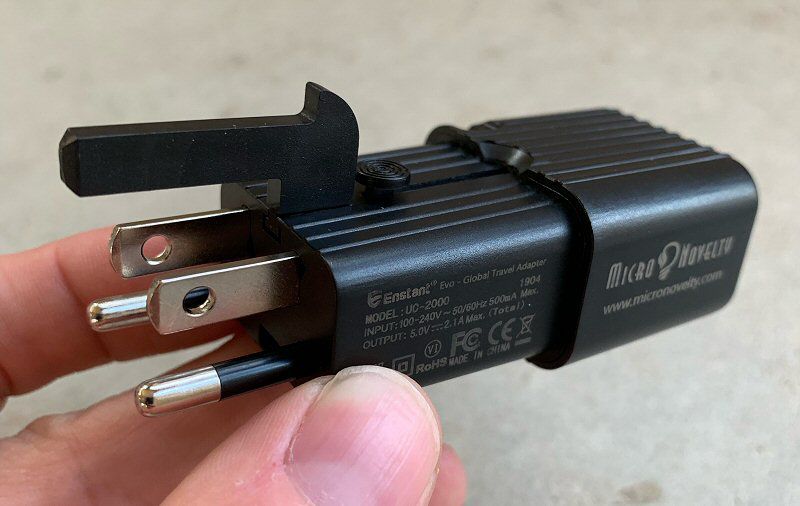
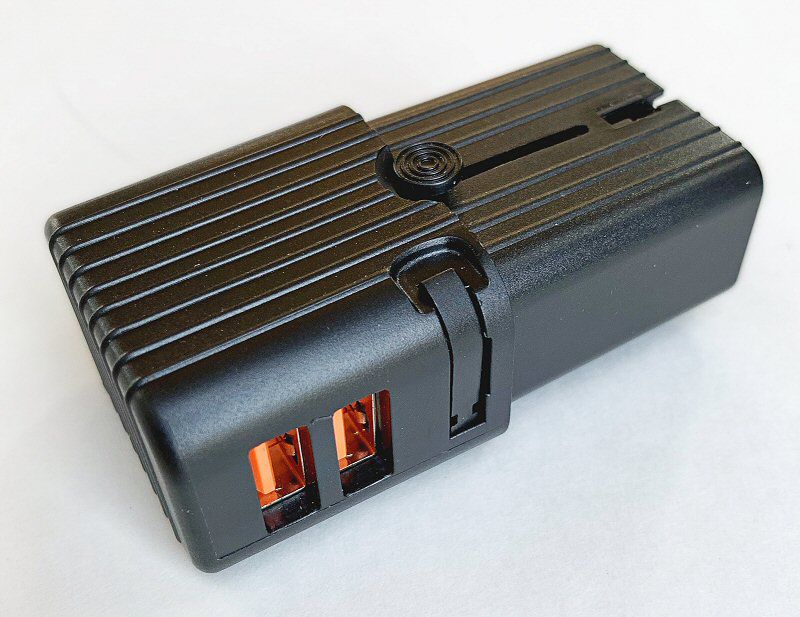
The Evo’s shape is roughly rectangular in two dimensions, and it is quite slim.  It has two USB ports situated on one side and two buttons that slide in tracks on opposite sides.  There is also a small removable component that fits into the middle that remains tucked away when not in use.

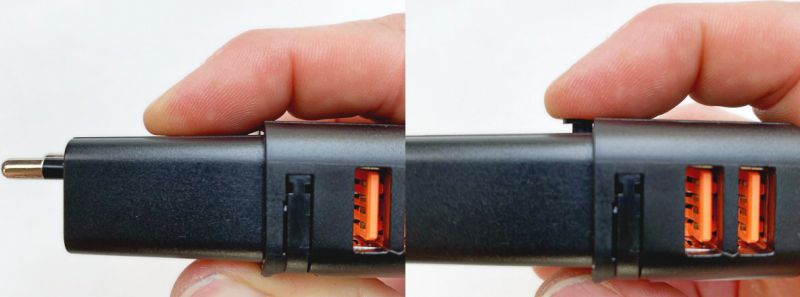
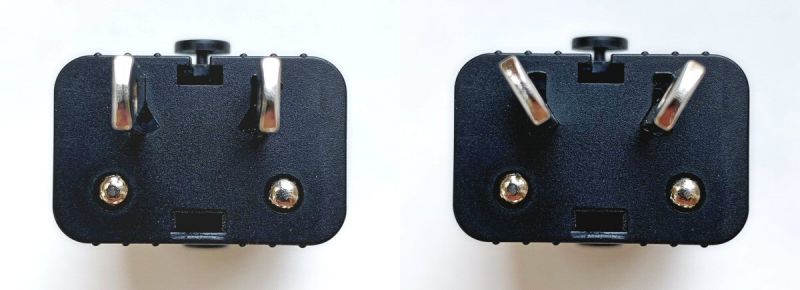
As mentioned above, the two sets of prongs are actuated via sliding motion outward from the main body of the Evo, and a small button on either side must be depressed to unlock them, as shown in the photos above.  Press down, slide out the prongs and they click into place once fully extended.  Each button must be pressed again to unlock the prongs for retraction back into the body.


The above series of photos shows the appearance of each set of prongs once full in place and locked out.  The photo on the far right also shows the Evo with its additional side component attached (more on this below).

The Evo has a small additional component that is stored in its middle and remains tucked away and locked in place until needed.  It is essentially deployable length of plastic that acts as a dummy prong for outlets in which a third prong ground is typically needed, such as in the UK.

The series of photos above illustrate the progression of the deployment of the side prong from its storage location.  If you can get a fingernail under the prong’s edge, you can begin to lift it, then a small, spring-loaded side piece must be depressed in order to release the prong from its storage location.

x

Additionally, the Evo’s sliding metal prongs can be rotated into an angled orientation for compatibility with outlets in countries such as Australia.

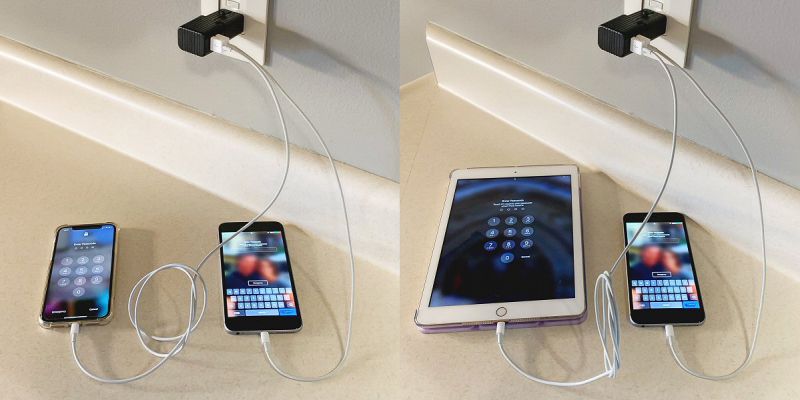
Since I did not have any imminent travel outside the US when I received the Evo to review, I did a bit of experimenting with it.  In the photo above, I’ve set its prong configuration to be compatible with North American, two-prong outlets.  In this case, it was functioning like any standard double USB charger.  It was able to charge both my wife’s iPhone X and my old iPhone 6 Plus simultaneously, as well as my wife’s iPad Air and my old iPhone 6 plus.  This was expected considering Evo’s output rating of V 2.1A  individually and a 2.4A max total but this exercise confirmed that at a minimum it could charge a higher-current iPad and lower-current iPhone in parallel.

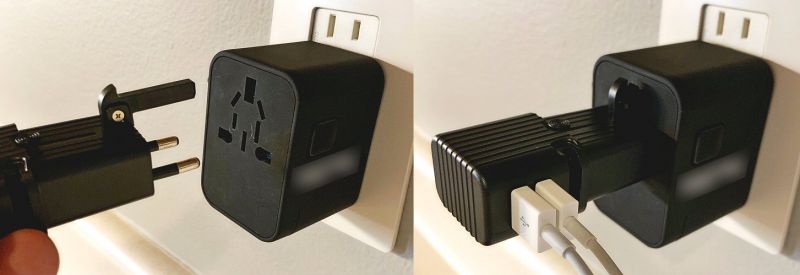
Next, I placed one of my typical travel adapters in my outlet set for standard US flat two-prong configuration.  I then set up both the Evo’s sliding and deployable ground prong configuration as if I were traveling in the UK, and plugged it into the UK outlet holes in my typical travel adapter.  The idea here was to simulate usage in the UK.  While I realize that the voltage is different in the UK, what I really wanted to test was the physical prong configuration of the Evo and determine if it would chare devices if using the UK prong setup.

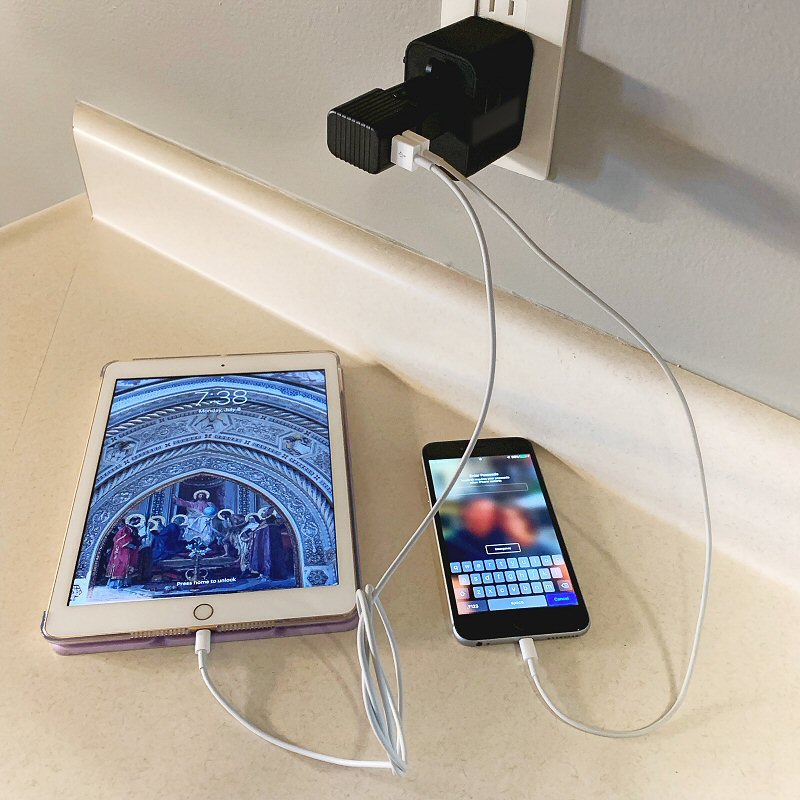
As shown above, the Evo was able to charge both my wife’s iPad Air and my old iPhone 6 Plus.  I expect that at some point, I will take another trip outside the US to a country that uses a different outlet setup and perform a full test, but for now, this was the best I could do.

What I like

  • Small, compact, lightweight
  • Can charge up to two devices (including tablets) simultaneously
  • Prong configuration should be able to be used in many countries

What I’d change

  • Add the capability of being a typical travel adapter (allowing items like laptops to be plugged into it) in addition to being a double USB adapter, but keep its small size

Final thoughts

Firstly, the Evo Global Travel Adapter is not a travel adapter in the typical sense in that only USB cables can be plugged into it.  That said, Evo can charge up to two devices at a time (including tablets),  is very compact and lightweight, and would work well as not only an adapter for USB items while traveling outside the US, but also could be domestically as a double USB adapter in its own right.

Price: $21.99
Where to buy: MicroNovelty and Amazon
Source: The sample of this product was provided by MicroNovelty.


Filed in categories: Reviews

Tagged: ,

Evo Global Travel Adapter review originally appeared on The Gadgeteer on July 24, 2019 at 2:00 pm.

Note: If you are subscribed to this feed through FeedBurner, please switch to our native feed URL http://the-gadgeteer.com/feed/ in order to ensure continuous delivery.
Akaso V50 Pro action camera review

REVIEW – Action cameras have become all the rage, now that the price has gone down for high-quality camera sensors. Is this something you should add to your Gadget Garage? The team was offered a new model from Akaso – the V50 – and I was chosen to review it. Let’s see how this can change a Gadgeteer’s life.

What is it?

Compact video and still camera with view screen and sound recording capabilities. Included in the package are a number of holders, case enclosures, and two batteries.

What’s in the box?

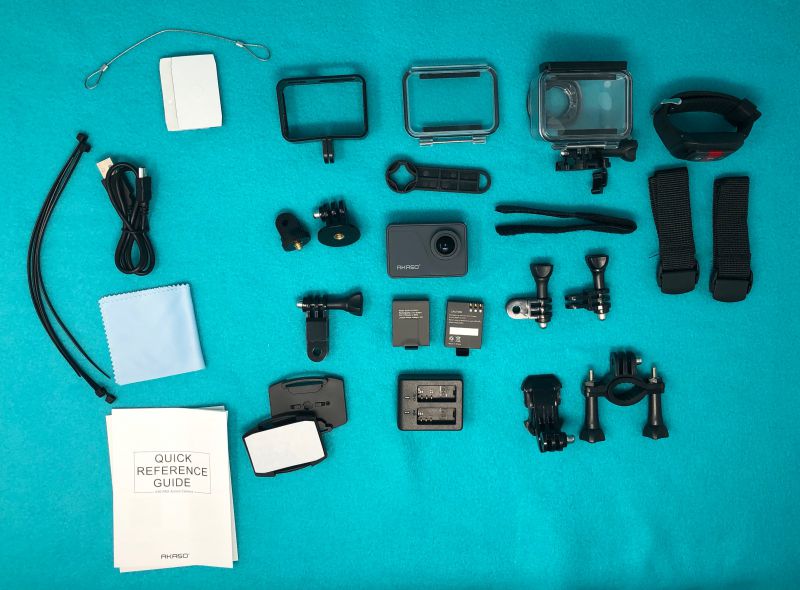
The box is a clear plastic enclosure surrounding the camera and waterproof housing attached to a flat platform. It is hermetically sealed to a pasteboard box that cannot be opened without totally destroying the entire packaging unit. The box, however, does not just serve as a holder for the camera and a few odds and ends. No, this package contains holders for helmet mounting, a fully waterproof (underwater) mounting, on-person mounting, handlebar mounting, and a bunch of flexible mounting brackets and fixtures that will allow you to attach this camera to just about anything you may want to record from. This clear presentation of the product belies the bounty below. Once it’s opened, it’s a veritable piñata of clamps, mounts, stick-ons, and straps. Look at the picture below of the whole collection. All of that was packed into the pasteboard box!

  • Waterproof enclosure with an extra backing door
  • Handlebar mount
  • Helmet mount
  • Frame for attaching to mounts
  • Wrist-worn remote
  • Lens cloth
  • Straps and bracket for body mount
  • Wires, sticky pads, and cable ties for snowboard, skateboard, or surfboard mounting
  • Wrench for mounting screws
  • 2 batteries
  • Battery charger (for 2 batteries)
  • USB2< ->miniUSB cable for charging

Hardware specs

  • Superb Image Quality – 4K/30fps and 20MP images
  • Electronic Image Stabilization – Electronic Image Stabilization (EIS) with 6-axis gyroscope.
  • Optional View Angle – adjust the view angle between Super Wide, Wide, Medium and Narrow.
  • WiFi and HDMI Output

Design and features

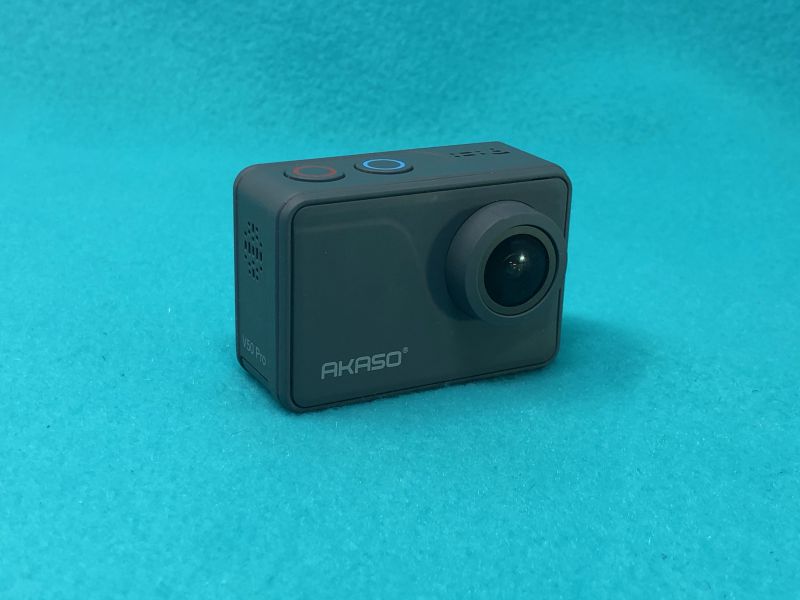
Like smartphones, action cameras have seemed to settle down into a standard size and shape. The V50 is a rounded rectangle with a soft-touch surface. Measuring just over 1″ thick by 1.5″ high and 2.25″ long, it fits nicely in the hand. The 90º angle sides also mean it can sit on any flat surface for framing. The .75″ lens sticks out of the front surface .25″, and the entire rear surface is a touch-enabled view screen that is used for framing shots or playback.


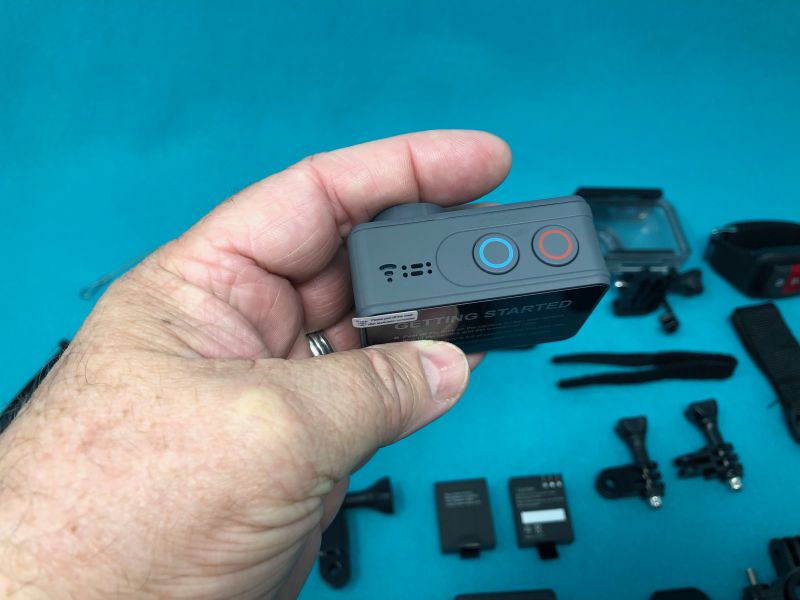
On the top are the only buttons: the red circle for power on/off and for cycling between choices, and the blue for start/stop of video or finalizing choices. All functions can be accessed through the buttons or through the touch screen. Opposite the buttons on the top are a microphone opening and a Wifi signal indicator.

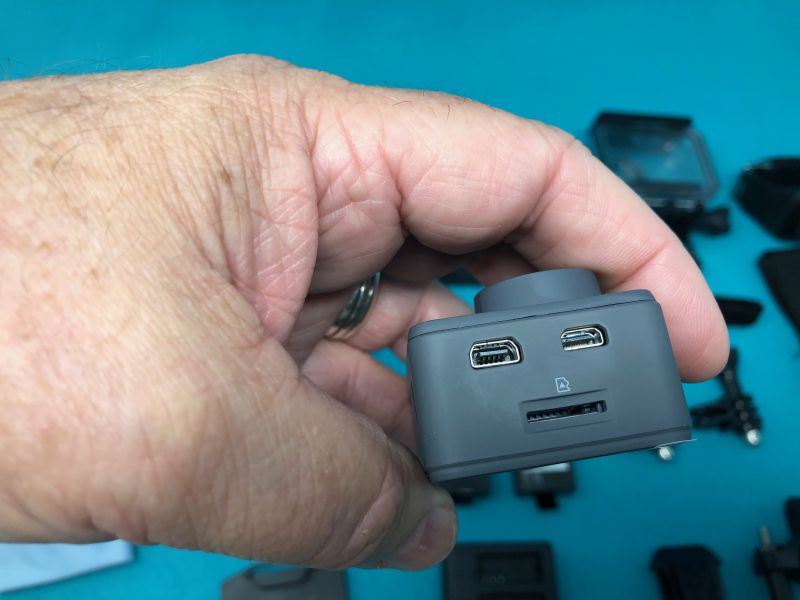
On the left side (as you’re looking at the screen) there are three ports: a microSD card slot, a miniUSB port for charging and a mini HDMI port for playback.

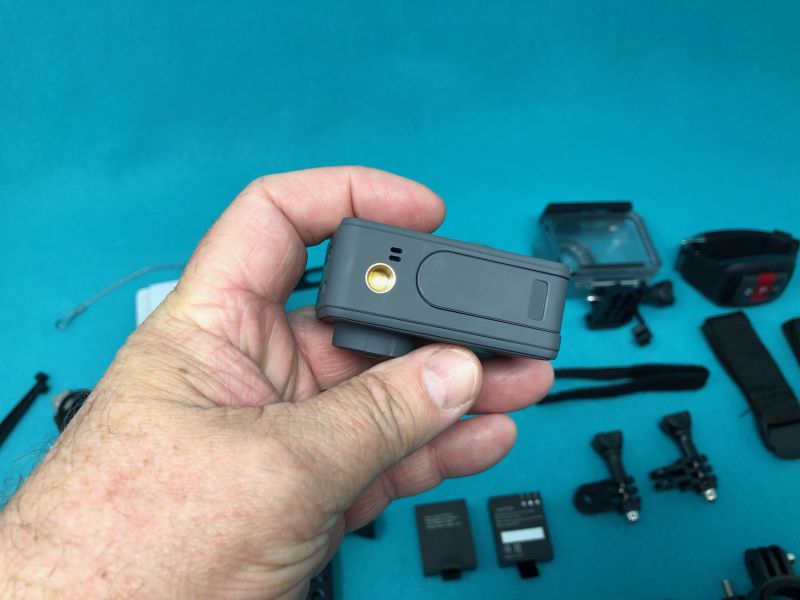
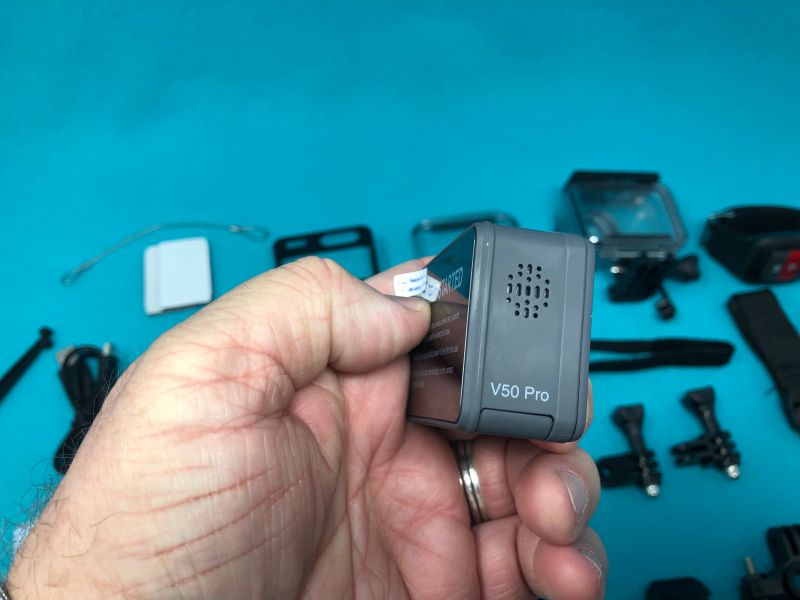
On the bottom are a standard quarter-20 tripod screw mount and the door to the battery compartment. The right side has just a speaker opening.


Once the battery is charged (either in the included charger or in-camera) and a data card put in place, you’re ready for action. You can mount it on handlebars, various surfaces or just hold it in your hand. There’s a waterproof cover to protect it during water sports or rainy rides. There are play-through buttons on the waterproof case, or you could use the remote if you’re not in the water yourself. The button passthrough pins look pretty sharp (as in damaging, not as in really cool.)

I found the camera easy to stop and start, and the flexibility of mounting hardware gives many options for most situations. For instance, with the bike shot below, I used just a tripod screw-mount on the handlebars. I could have gone for the more rigid frame that would allow me to only adjust the forward-facing angle, or even the waterproof case, in the event of a shower. Having more options means you’re going to try and get more shots.

Since this unit is all but identical to other action cameras on the market, it’s a good bet that there are other accessories that can be had. With the tripod mounting socket, you can place it anywhere with a quarter-20 screw. (Did you know this is the size screw that holds on lamp shade finials? Next time you need a tripod, keep that in mind. You’re welcome!)

Performance

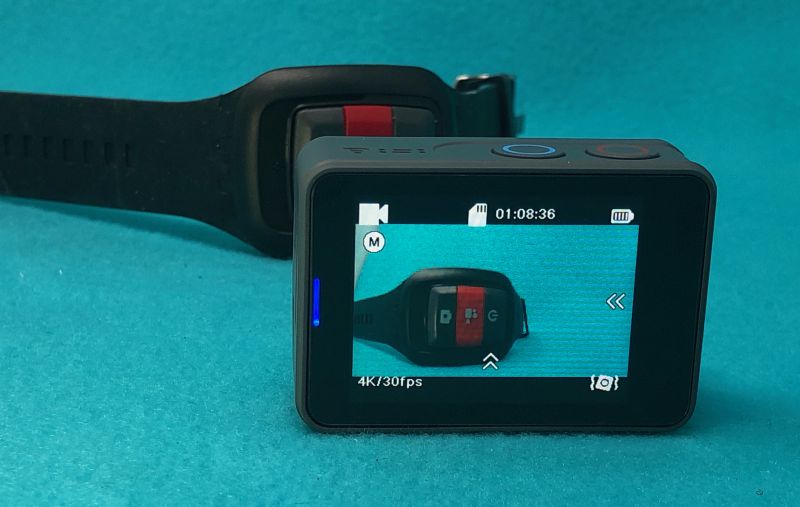
While I like the rear panel touch screen, it could sometimes balk at finger input. The remote connected without issue and was able to start or stop photos or videos reliably. The time between capture and seeing it on screen is dependent on the card inserted into the camera. I used a SanDisk Ultra 32 GB card in the camera for much of my testing, which is a fairly fast card, and was still getting “Waiting for Capture” for 2-3 seconds when taking a still shot. Maybe the larger images were giving the renderer problems.

What I like

  • Huge collection of accessories
  • Nicely compact unit with minimal inputs needed
  • Card or external storage options
  • Built-in Wifi

What I’d change

  • Faster writes to the memory card
  • less hesitancy with touch input

Final thoughts

Action cameras don’t just have to be for Extreme Sports. Tiny, easy to mount, and high-resolution, they may just beat out your pocket point-and-shoot on your next vacation. And that included waterproof housing will sure make those beach photos more interesting!

Price: $119.99
Where to buy: Amazon
Source: The sample of this product was provided by Akaso.

Filed in categories: Reviews

Tagged:

Akaso V50 Pro action camera review originally appeared on The Gadgeteer on July 24, 2019 at 11:00 am.

Note: If you are subscribed to this feed through FeedBurner, please switch to our native feed URL http://the-gadgeteer.com/feed/ in order to ensure continuous delivery.
Ooni 12″ Perforated Pizza Peel review

REVIEW – In the last year, I’ve been fortunate enough to review two great outdoor pizza ovens from Ooni, the Ooni 3 and Koda. Recently, they introduced a new pizza peel, and they were kind enough to send me one. So let’s take a look at the new Ooni 12” perforated pizza peel.

What is it?

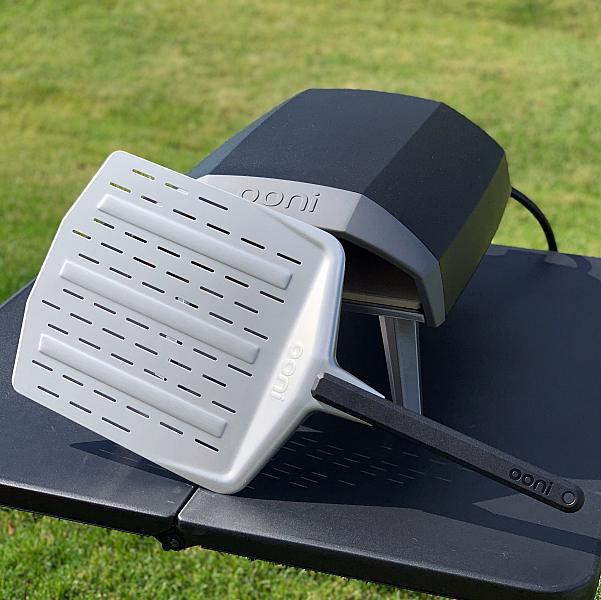
The Ooni 12” perforated pizza peel is a lightweight aluminum peel for sliding, turning and retrieving pizzas from your Ooni pizza oven.

What’s in the box?

  • 1 – Ooni 12″ Perforated Pizza Peel

Design and features

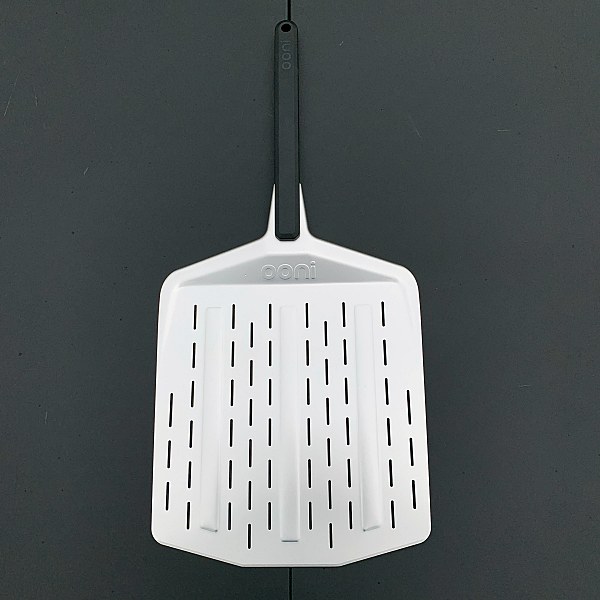
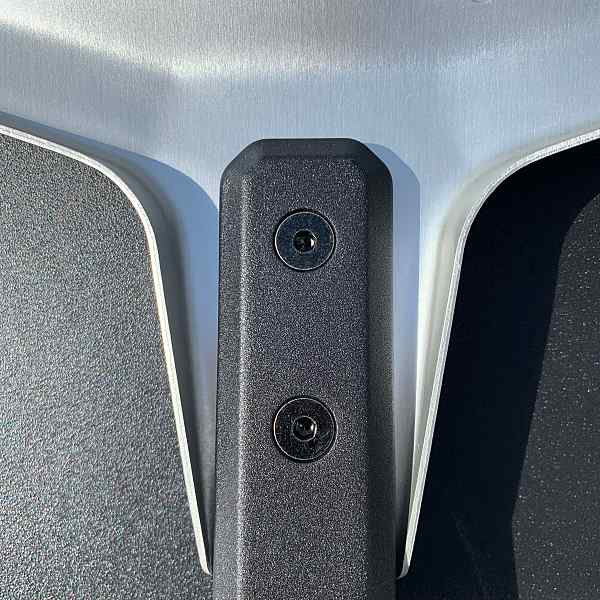
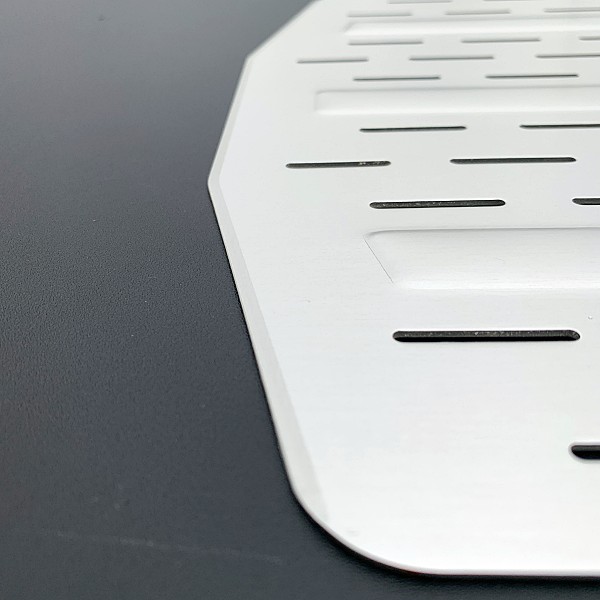
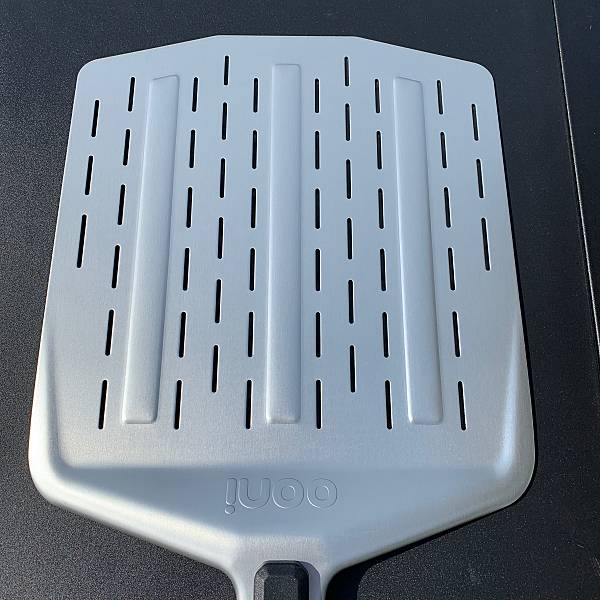
The pizza peel is made of lightweight aluminum and has a 12” long glass-reinforced nylon handle. Despite being lightweight, the peel has a very sturdy construction. So you won’t have to worry about dropping your pizza on your way out to the oven, even if you get a little generous with the toppings.

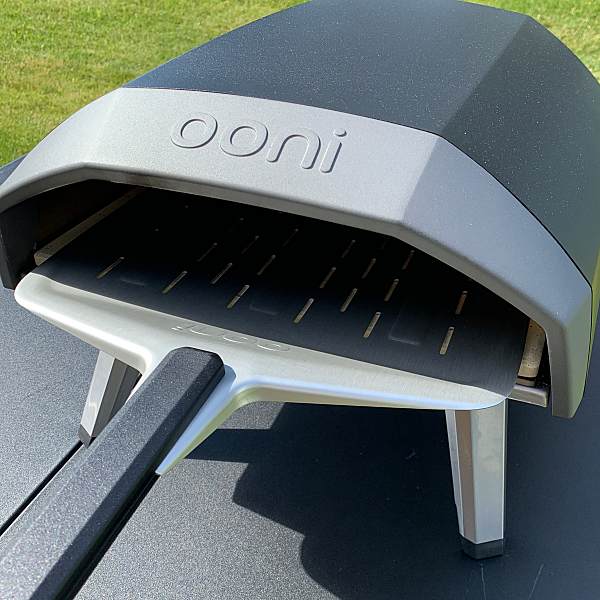
The peels anodized aluminum blade is 12-inches wide, making it perfect to use with the Ooni 3 and Koda ovens.

The peels tapered edge makes it easy to slide right under the base of the pizza without damaging it.

The hard smooth surface keeps your pizza from sticking to the peel, making it easier to launch and retrieve pizza from your oven. It also makes it easier to turn the pizza during the cooking process. The pizza literally slides right off.

The peel’s perforations allow for excess flour and semolina to fall away from the bottom of your pizza before sliding it into the oven. The perforations also keep steam from building up on the base of your pizza. Assuring the bottom of your pizza will turn out perfect every time.

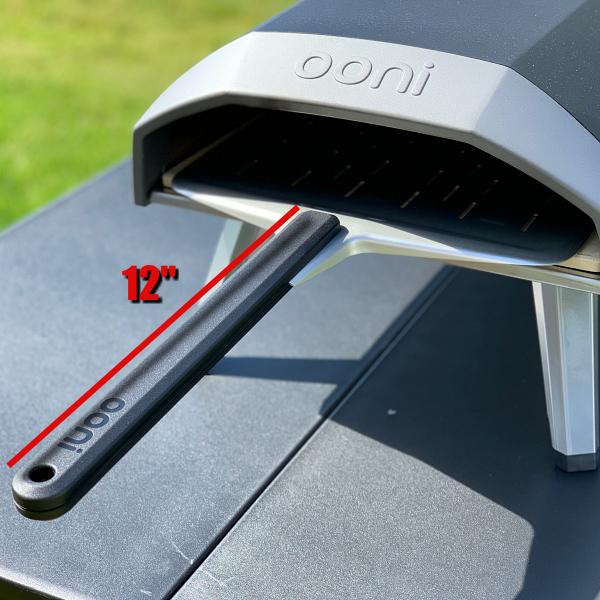
The 12” handle gives you more control when launching, turning, and retrieving your pizza. And it keeps you from getting to close to the 800° oven. 

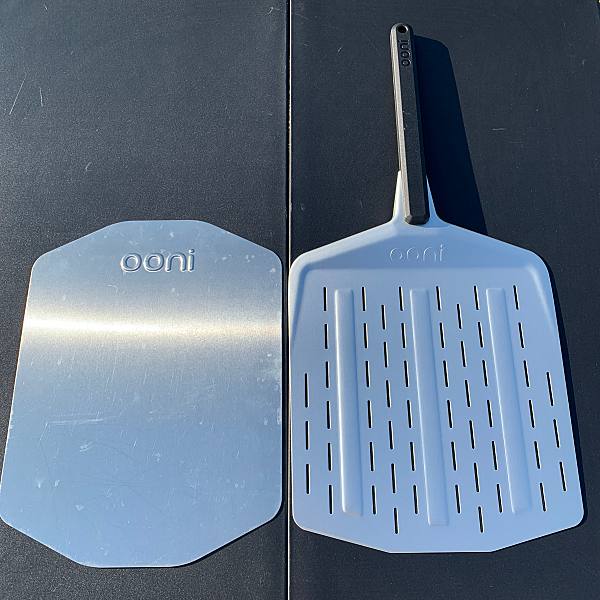
Just for a little comparison, I had been using Ooni’s Classic pizza peel ($25) prior to receiving this one. Although it did the job, it’s nowhere near as functional as the 12” perforated peel. IMO this peel is a huge upgrade. And it really adds to the overall enjoyment of using your Ooni pizza oven.

What I like

  • Lightweight
  • Sturdy construction
  • 12” handle
  • Perforated blade
  • Smooth slick surface

What I’d change

  • Nothing

Final thoughts

I feel in love with this pizza peel the first time I used it. It makes every aspect of preparing your pizza easier. If you use your Ooni pizza oven as much as I do then the Ooni 12” perforated pizza peel is definitely worth the upgrade.

Price: $60.00
Where to buy: Ooni
Source: The sample for this review was provided by Ooni.

Filed in categories: Reviews

Tagged: ,

Ooni 12″ Perforated Pizza Peel review originally appeared on The Gadgeteer on July 24, 2019 at 9:00 am.

Note: If you are subscribed to this feed through FeedBurner, please switch to our native feed URL http://the-gadgeteer.com/feed/ in order to ensure continuous delivery.
Wyze cams, Julie’s favorite gear list, Huel meal replacement shakes, and more – Review updates

REVIEW – In an effort to let our readers know how well products stand the test of wear and time, we like to post semi-regular updates to some of our favorite product reviews. Check out the latest updates to some of my past reviews by clicking each review title below and then scroll to the bottom to read the latest dated update. Are there any reviews that you would like to see us update? Let us know in the comments below.

Huel meal replacement shakes review

Julie’s favorite gear


Airdog X5 air purifier review


WyzeCam security camera review


IDENTITY Card wallet review

Filed in categories: Reviews

Tagged:

Wyze cams, Julie’s favorite gear list, Huel meal replacement shakes, and more – Review updates originally appeared on The Gadgeteer on July 23, 2019 at 5:34 pm.

Note: If you are subscribed to this feed through FeedBurner, please switch to our native feed URL http://the-gadgeteer.com/feed/ in order to ensure continuous delivery.