Versadesk Power Pro standing desk review

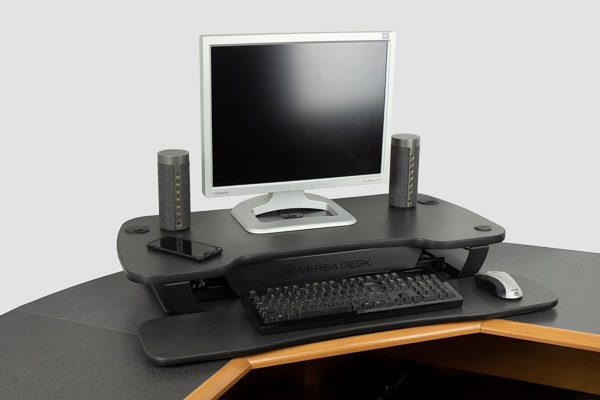
Versadesk Power Pro standing desk is possibly one of the best standing desk converters on the market right now. Excelling in both features and quality, it certainly has a lot of “bang for the buck”.

What is it?

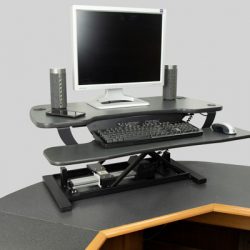
The Versadesk Power Pro standing desk is a standing desk converter that sits on top of your desk and provides a means of raising your work surface so that you can either sit or stand at your desk and work at your computer.

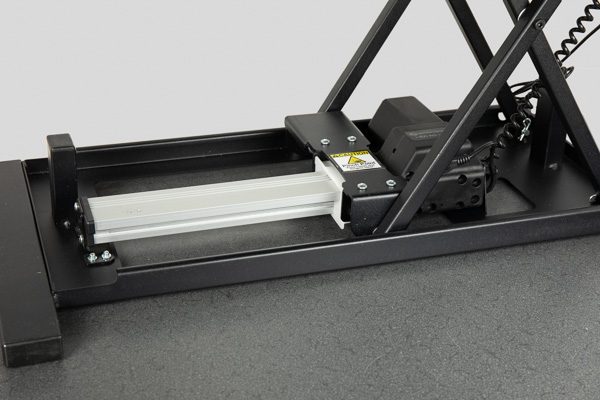
Unlike many other standing desk converters, it features an electric drive mechanism that raises and lowers it at the push of a button. This feature is slower than a manually operated desk but provides ease of use – especially for people with bad backs, such as myself.

What’s in the box?

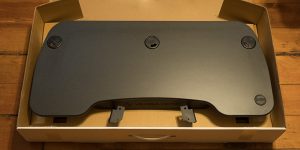
Partially assembled desk
Assembly instructions and hardware


Design and features

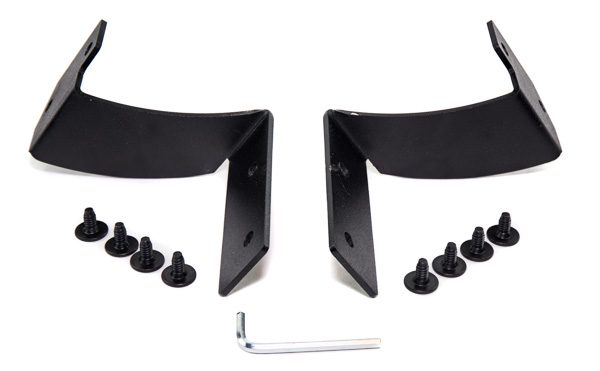
The Versadesk Power Pro comes almost fully assembled, you simply install the keyboard shelf brackets with four screws, and then the keyboard shelf with another 4 screws. The main mechanism is already assembled.

From the start, I could tell that this is a well-built product. Both the fit and finish of the product exude quality. The work surface is basically the same material as a countertop, unlike some other brands that are simply painted wood.

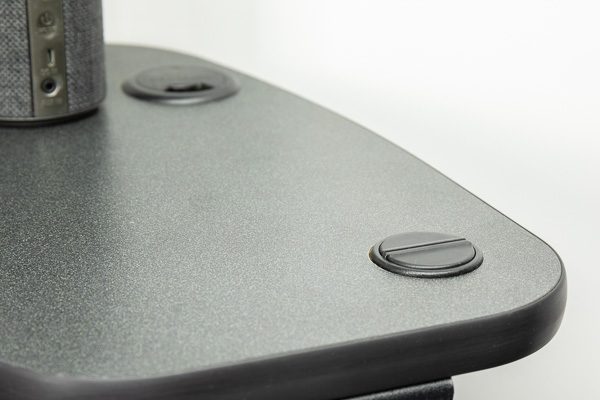
The desk has three standard 2″ grommet holes that are compatible with most universal monitor mounts, and can also be used to neatly route wiring for anything that’s on the top. The grommet holes have plugs, so things won’t fall through if you’re not utilizing them.

The first thing I noticed was how sturdy it was. I really expected it to wobble or flex more than it does. The next thing I noticed was how high it extends. Although it extends up to 20 inches, I found that I only raised it 12 to 13 inches, and I’m 5′ 11″. It can accommodate someone up to 6′ 4″ tall.

It is available in a variety of colors, I chose the “Black matrix” because it almost perfectly matched the top of my desk. It is also available in white, gray, and maple. It is available in 30″, 36″, 40″, and 48″ widths.

Although with my back I don’t stand and work for very long periods, I did find it useful for the times where I’m working around the office and going to and from the computer often. Not having to either sit down or bend over to use the mouse and keyboard was a real relief.


What I like

+ One hand operation
+ Ease of adjustment
+ 80 lb capacity
+ Excellent height range
+ Monitor grommet plugs removable
+ Ease of assembly
+ Sturdiness
+ Quiet
+ 3 year electronics warranty, Lifetime frame warranty
+ Video section of the website includes a video on how to assemble the desk.

What needs to be improved

+ Auto up and down. Although it would add to the price, it would be nice to have an auto up and down function. It would be nice for the desk to go up and down while you’re running off to get some coffee.
+ No cable routing. You’re pretty much left to yourself on figuring out where to run the cables for your computer equipment. Although a few zip ties help, it would be nice if it included some kind of cable routing solution to both make it easier and neater.

Final thoughts

The Versadesk Power Pro just seems like one of those items that will last a lifetime, it’s that well built. You know that feeling you get when you feel like you got your money’s worth when buying something? This is one of those things.

Price: $370-$499 depending on the width
Where to buy: VersaDesk
Source: The sample of this product was provided by VersaDesk

The post Versadesk Power Pro standing desk review appeared first on The Gadgeteer.

Filed in categories: Reviews

Tagged: ,

Versadesk Power Pro standing desk review originally appeared on The Gadgeteer on April 27, 2018 at 12:36 pm.

Note: If you are subscribed to this feed through FeedBurner, please switch to our native feed URL http://the-gadgeteer.com/feed/ in order to ensure continuous delivery.

KUVRD Universal Lens Cap review


What is it?

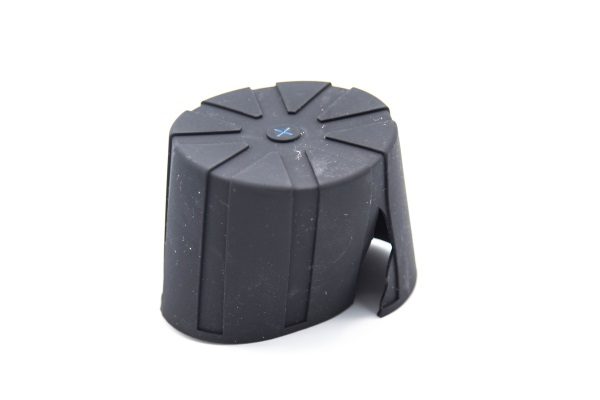
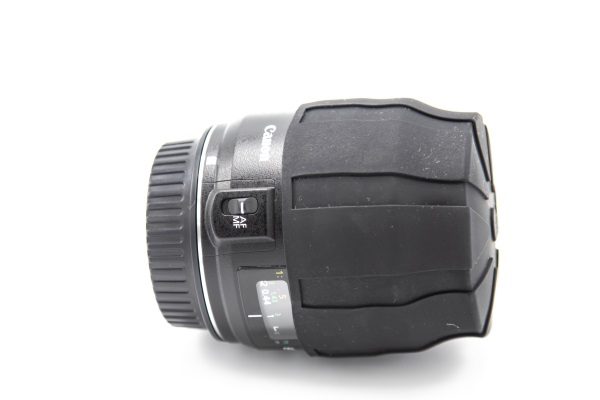
The KUVRD Universal Lens Cap is a flexible lens cover made of rubber, that stretches to fit the front or back of most camera lenses, and works in place of the traditional lens cap.

What’s in the box

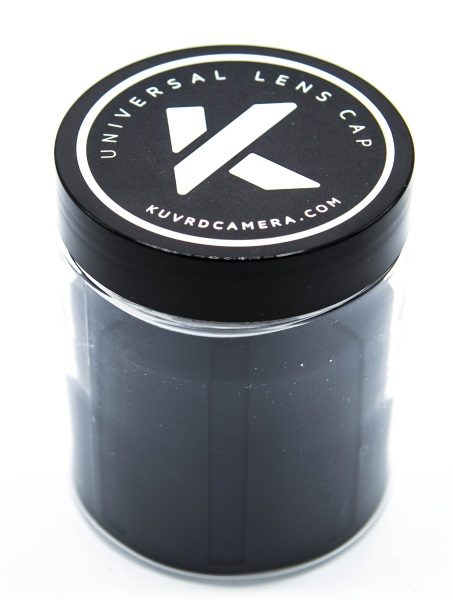
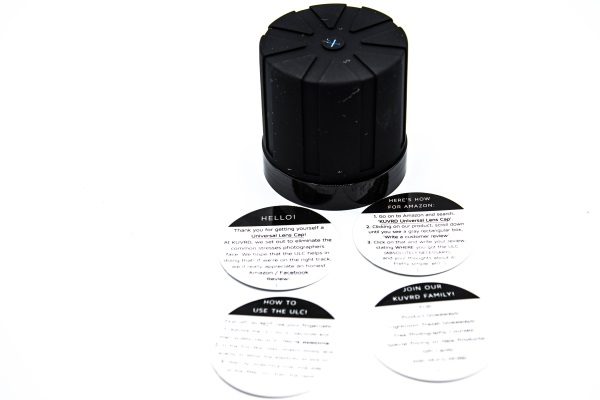
Each Lens Cap comes in its own plastic container with a screw on lid. The Lens Cap and instruction cards are included inside of the container.

Design and features

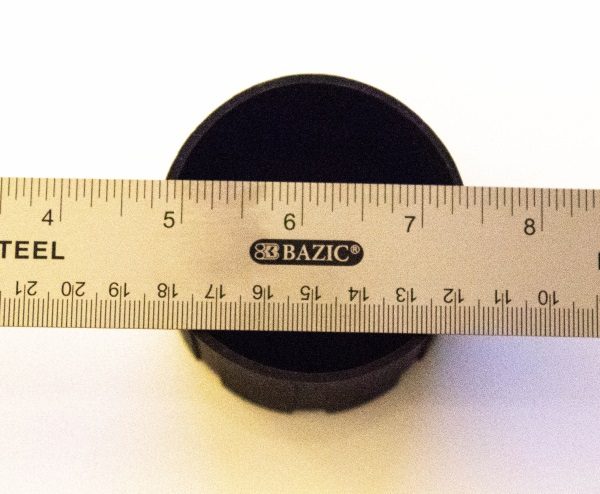
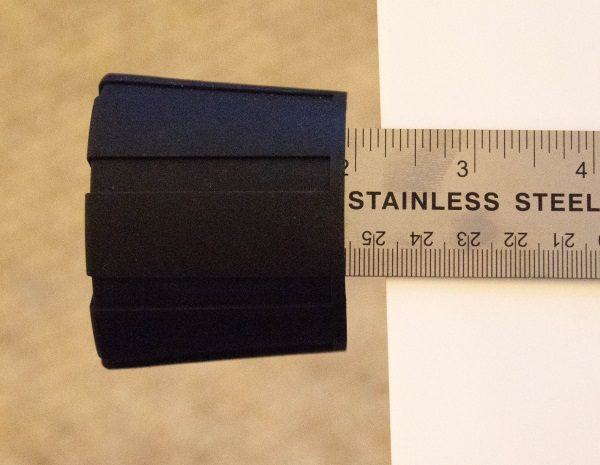
The Universal Lens Cap is made of a soft rubberized material that is very smooth and very flexible. It has a great amount of elasticity, and once handled carefully, can be stretched to fit any of the two ends of most lenses (Not for those crazy huge lenses). It is 2 inches deep, and its internal diameter is 2 1/2 inches.


While the outside of the Lens Cap seems like a magnet for lint, the inside stays quite clean and does not seem to attract any dust. It does a great job of protecting the most vulnerable parts of the lens against dust and accidental bumps. I am not sure what would happen if the lens is dropped, but I do believe that the Lens Cap would still provide additional protection. When new, and as per the instructions, care should be taken to gently stretch it over the lens from one side to the other. The included instructions clearly state this, and for good reason. Since I was testing it, I ignored the instructions and stretched it roughly over the lens, and this was the result.

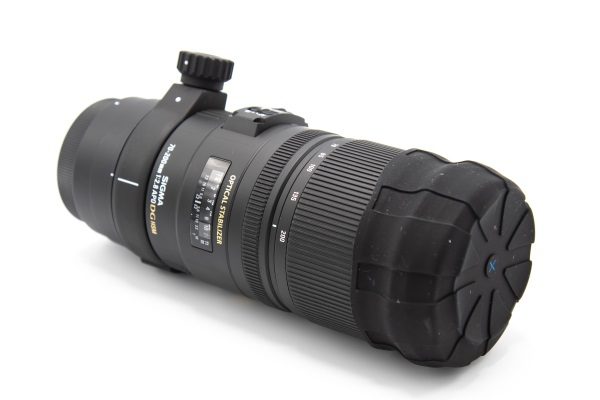
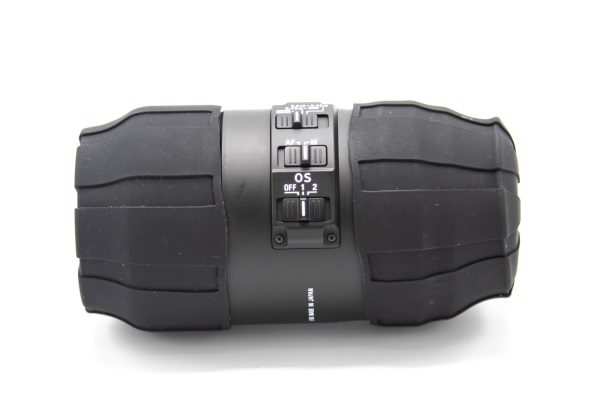
Otherwise, with care, I was able to stretch it comfortably over both the front and rear of all of my lenses, including the large 70-200mm Sigma lens, the mid-sized Sigma 105mm macro lens, as well as the smaller Canon 60mm macro lens. With the small lenses, only the front or rear may be practical to cover, with the front being the obvious choice.


When using the KUVRD Lens Cap, the standard lens cap can remain in place if that is your choice. A couple of aspects to note, are that the Lens Cap works well for packing lenses for transport, and also for field work when “speed swapping” lenses is not a requirement. It is not possible to carry the lens hood attached to the lens when using the Lens Cap. I usually have my lens hood mounted in reverse on each lens, so this has to be a consideration when deciding if and when to use these.

What I like

I love the feel of the rubber that the Lens Cap is made of. It is so soft that it will not scratch or impact the lens in any way. The elasticity is great, and its ability to fit multiple lenses makes it very useful. Also, its ability to add another layer of protection to the most critical parts of my expensive lenses is an added plus.

What can be improved

While the instructions tell you to be careful when first stretching the Lens Cap until it “breaks in”, I would like to see some type built-in reinforcement that still maintains the elasticity, but makes it much more difficult for the Lens Cap to tear when initially stretched.

Final thoughts

The KUVRD Lens Cap is a great camera gear accessory that works very well at protecting certain aspects of my lenses, including when packing them to travel or when storing them. It does a great job of protecting the lens from dust, especially since it cannot fall off as traditional caps can and do. For my use, it would not be a part of my gear when I need to use a “quick swap” scenario, or when I want to have my lenses paired with their hoods. However, it is good enough and purposeful enough to earn a permanent place in my gear bag.

Price: $30
Where to buy: Kuvrd Camera Website
Source: The sample for this review was provided by Kuvrd Camera.

The post KUVRD Universal Lens Cap review appeared first on The Gadgeteer.

Filed in categories: Reviews

Tagged: ,

KUVRD Universal Lens Cap review originally appeared on The Gadgeteer on April 27, 2018 at 9:00 am.

Note: If you are subscribed to this feed through FeedBurner, please switch to our native feed URL http://the-gadgeteer.com/feed/ in order to ensure continuous delivery.
Go Forth Goods Leather Charging Cable Tool Roll review

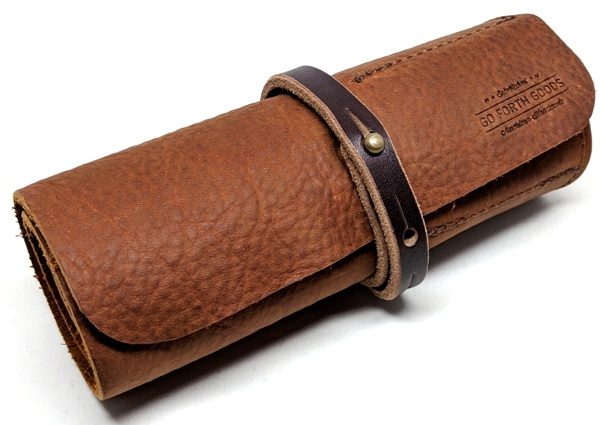
Leather products attract my attention, but it takes a really well-made leather product using high-quality materials to maintain my interest and entice me to purchase it. Recently, I received the Go Forth Goods Leather Charging Cable Tool Roll to review. Is it a high-quality leather product? Indeed, it is! But I’m not sure it will appeal to many people because the product itself is a sizeable and hefty travel organizer when empty and even more substantial when carrying your cables and chargers.

What is it?

The Leather Charging Cable Tool Roll is a leather travel organizer for your device cables, chargers, earbuds, etc. It comes in Mocha, Saddle, and Black colors.

What’s in the box?

Leather Charging Cable Tool Roll
Business card from Nathan Martin, the Founder/CEO of Go Forth Goods
Card stating who crafted my leather tool roll
Thank you card

Design and features

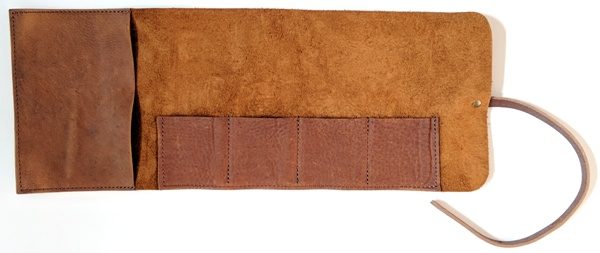
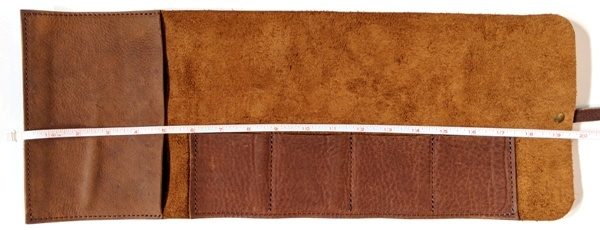
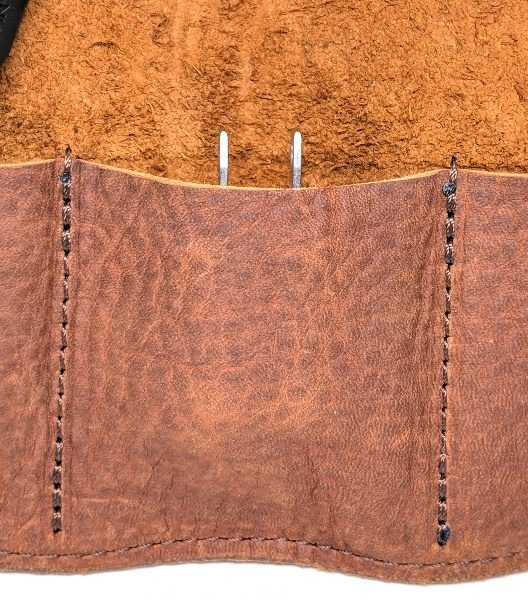
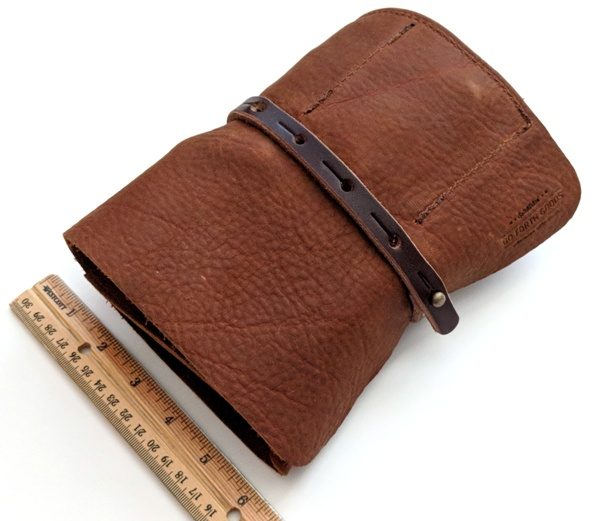
I received the Saddle colored Go Forth Goods Leather Charging Cable Tool Roll. It is made from 6 oz. (2.4 mm) full grain leather (the hides are sourced and tanned in the United States). The tool roll measures 3″ high x 7″ wide x 3″ diameter when rolled and weighs 11 oz. (311 g) when empty.It has five pockets: one larger 5″ x 7″ pocket for chargers, portable batteries, laptop cables, etc. and four 3″ x 3″ pockets for storing smaller cables or items like earbuds, etc. You’ll notice in the above photo that the four small pockets are made from one piece of leather with seams sewn in to divide the pockets.

According to their website, Go Forth Goods believes that fewer seams means fewer stress points and thus a stronger more durable product. They also use polyester thread, back stitch at least four stitches, and burnish the ends of the thread to prevent unraveling.

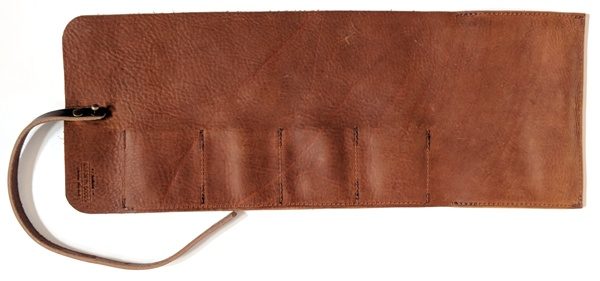
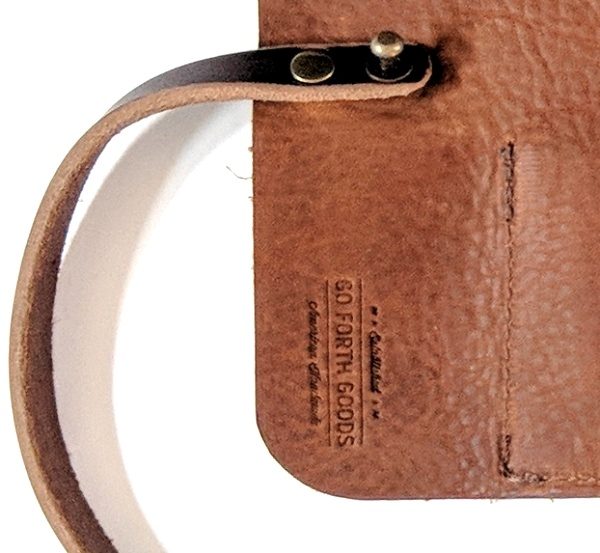
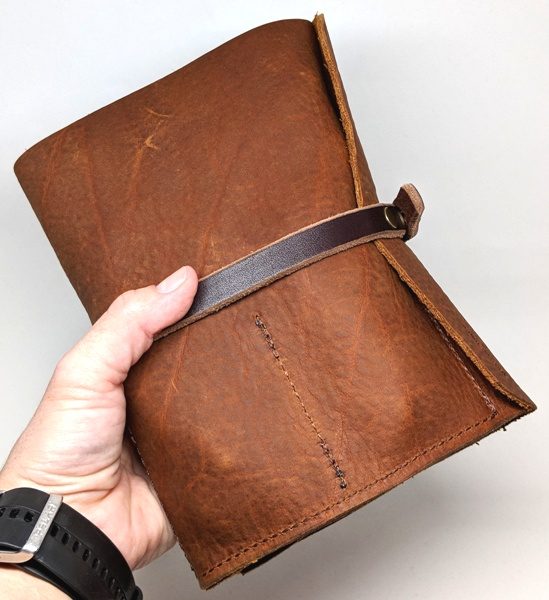
The back of the tool roll shows the Go Forth Goods embossing near the solid brass button stud end. The strap is attached to the roll with a solid brass rivet and the strap wraps around the tool roll and fastens onto the button stud.The length of the tool roll when unrolled is about 19.5″ long x 7″ wide.

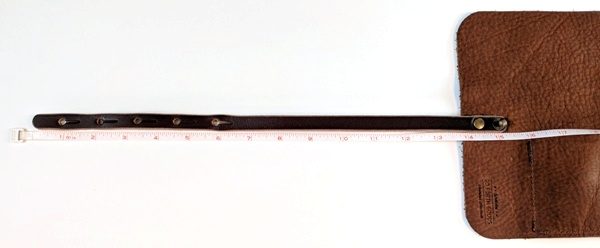
The strap used to keep the tool roll closed is about 14″ long x 0.75″ wide (from the rivet to the end of the strap). There is no lining in this leather tool roll. I like it.
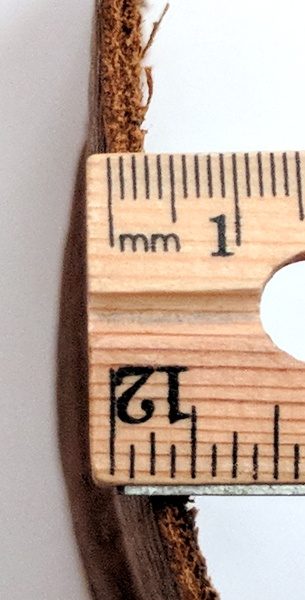
As I mentioned earlier, the tool roll is made from 6 oz. leather which is about 2.4 mm thick.

Use


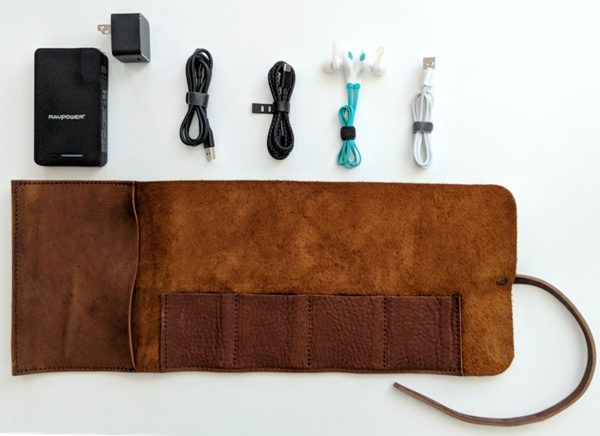
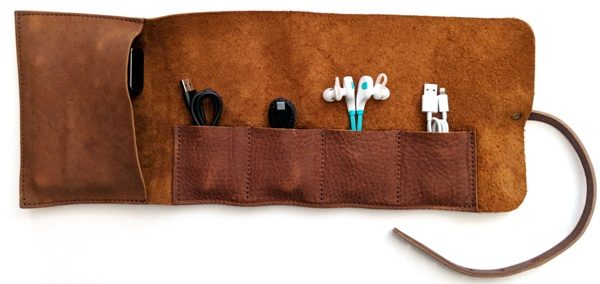
These are all of the items I inserted into the roll: my RAVPower Savior 9000 mAh External Battery Pack, my Essential PH-1 charger, a micro-USB charging cable, my USB type C charging cable for my Essential PH-1, my MPOW Swift Bluetooth 4.0 Headphones, and a Lightning cable.All of my items fit very nicely into the roll. The smaller pockets are really only good for cables or rather small items. Most of my device chargers were not able to fit into those pockets …

… with the exception of a small Apple 5 W USB power adapter which is one cubic inch in size and fits snugly as shown above.

Since this tool roll is made using very supple full grain leather, it is prone to scratches. A few of those are actually very shallow cuts into the uppermost layer of the leather as shown above. When rolled up, the tool roll is about 6″ wide x 7″ long.

And as you can see by comparing the size of the tool roll to my hand, this is a rather large travel organizer. It weighs about 1lb. 8oz
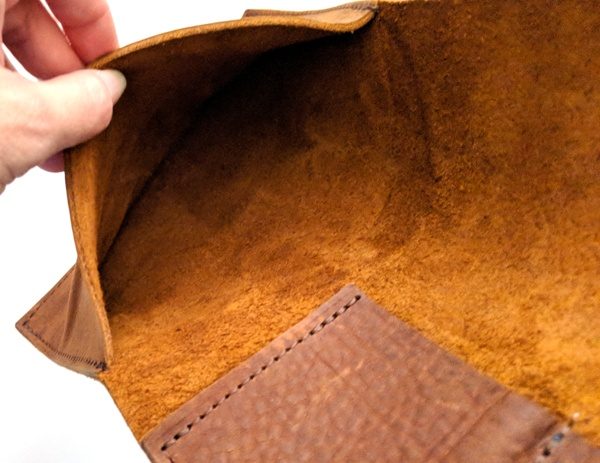
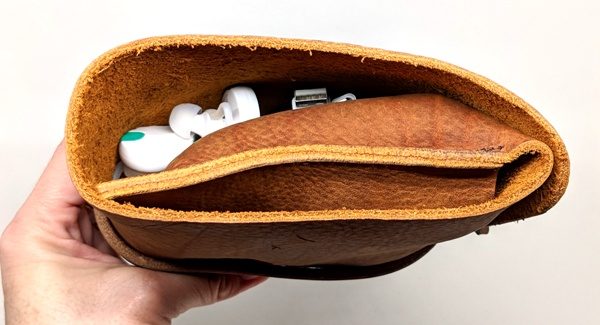
It’s also rather thick – about 2.25″.This is the view from the “open” end.

This leather tool roll is simple, well-made using high-quality materials and craftsmanship, and organizes my basic device accessories well. I also like how easy it is to roll it up (because the leather is supple and not stiff), its rugged good looks, and its smell – ahhh, yes, the wonderful smell of leather. However, it is large and heavy when full and it is prone to scratches but then all full grain leather products are.

What I like

  • Made using 6 0z. (2.4 mm) full grain American leather, polyester thread, solid brass rivet and solid brass button stud
  • Backstitched at least four stitches and burnished thread ends to prevent unraveling
  • Carries and organizes my device accessory needs
  • Lifetime warranty

What needs to be improved

  • Nothing (it is thick, but leather needs to be thick enough to be durable)

Final Thoughts

I really liked the Go Forth Goods Leather Charging Cable Tool Roll. It is really well made using soft supple 6 oz. (2.4 mm) full grain leather sourced and tanned in the U.S., polyester thread, with a solid brass rivet and a solid brass button stud. It organizes my basic accessories well, is easy to roll up, and smells good too. Everything about this simple tool roll indicates a high-quality product. However, this is a substantial travel organizer in size and weight and if you are only using it to organize your cables and chargers, then it might suit you; but if you are using it to travel, it will definitely take up a lot of space.

Price: $75.00
Where to buy: Go Forth Goods
Source: The product used in this review was provided by Go Forth Goods.

The post Go Forth Goods Leather Charging Cable Tool Roll review appeared first on The Gadgeteer.

Filed in categories: Reviews

Tagged: ,

Go Forth Goods Leather Charging Cable Tool Roll review originally appeared on The Gadgeteer on April 26, 2018 at 12:00 pm.

Note: If you are subscribed to this feed through FeedBurner, please switch to our native feed URL http://the-gadgeteer.com/feed/ in order to ensure continuous delivery.
Baseus Wireless Charging Gravity Car Mount review

Mounting your phone where you can see it while driving has become the norm. Whether you’re using it for a GPS system or entertainment, everyone wants their phone easy to get to, or at least within their visual field. I was recently sent a one-hand air vent clip from Baseus in black to test.

Note: Photos may be tapped or clicked for a larger image.

What is it?

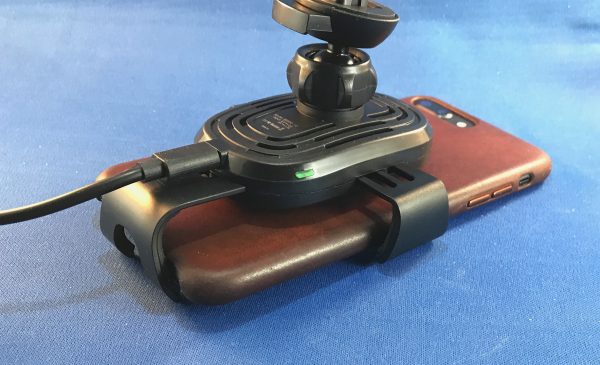
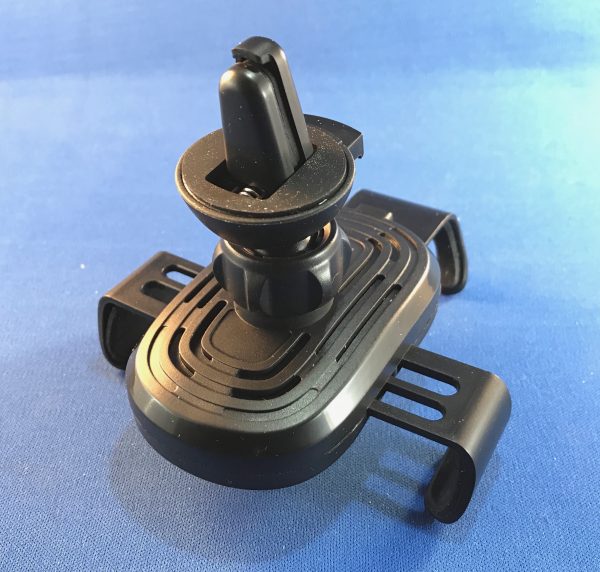
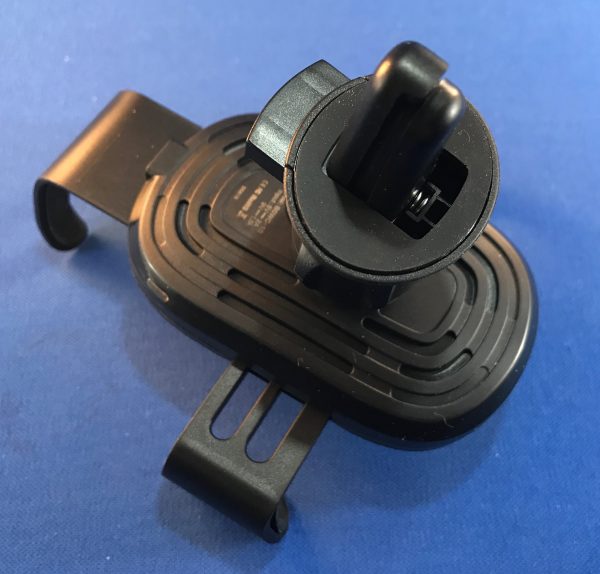
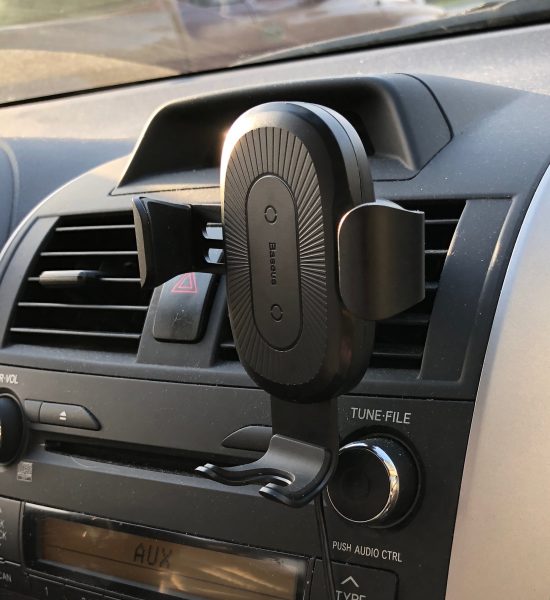
The Baseus wireless charger incorporates a clip-on air vent holder with a one-hand operation gravity holder, and then adds the secret sauce of wireless charging to the mix. The charger itself has a cable that runs to a power source, and the arms are activated by the downward pressure from the weight of the phone in the holder.

Hardware specs

  • Wireless charger
  • Gravity car mount
  • Safe and quick charging
  • One-hand operation

What’s in the box?

  • Clip-on charger
  • USB-A to microUSB cable
  • Instruction sheet

Design and features

The Baseus Wireless charger at first glance is a bit confusing. The two side arms and the bottom cradle are geared together inside somehow and don’t lock into place. While unboxing it, I moved them around, trying to find the “lock point,” but never got it to work. I plugged it into a spare microUSB cable at my desk and then placed my iPhone 8 Plus into the cradle, just to see if maybe having power would make it lock. When the phone got close to the clip, I felt and heard the familiar “ding” indicating charging. I was a bit surprised that it contacted so easily since I had read and heard on podcasts about how finicky many chargers are.


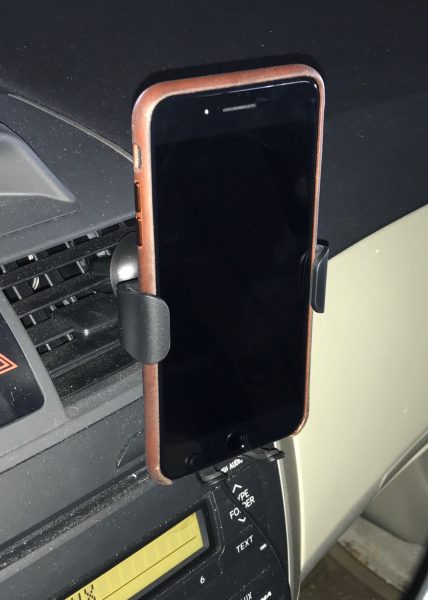
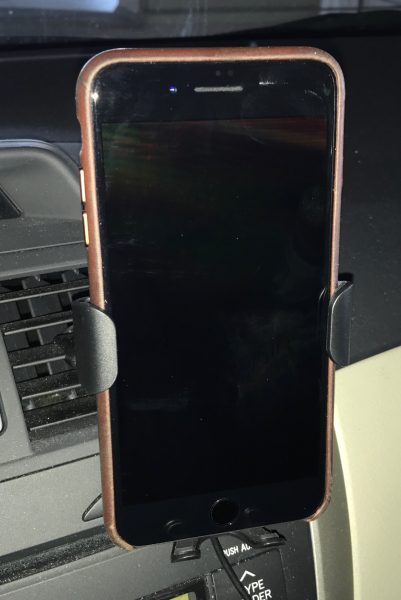
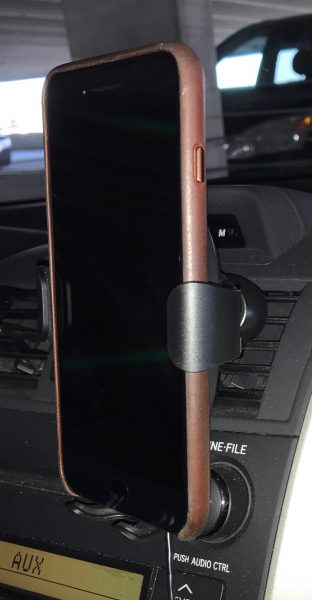
I was still a little confused on how it would lock into place until I put it in the proper orientation. The slight weight of the phone pulled the side arms around the device just enough to hold it firmly. When you grasp the top of the phone and lift it up, the base’s spring-loaded action draws it up slightly, and the arms are pushed outward, releasing the phone. I drove over some pretty bad road construction while testing, and never got large enough bumps to where the phone bounced out of the holder.


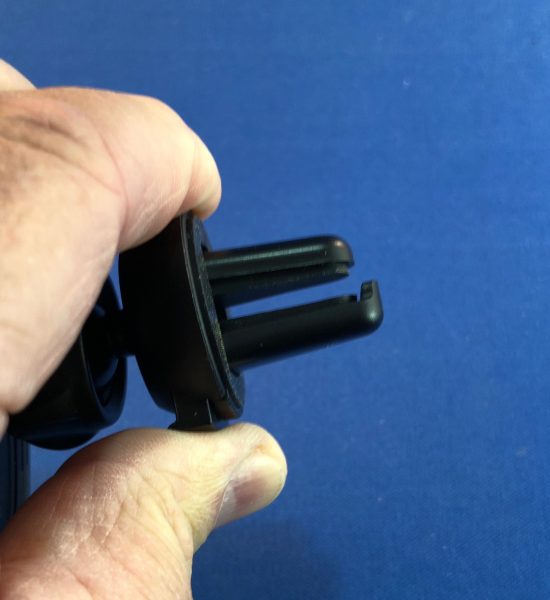
The spring on the air vent clip is quite tight. I could barely get it to open enough to get the prongs onto the vent slat. There is a slight “tooth” sticking up on the lower prong that prevents the clip from vibrating off over time, and foam glued to the inside of the jaws cushions them from scratching your dash. When it’s removed, there is no evidence it was ever there.

Setup

I recommend deciding where you’re going to place the holder first, then deciding on wiring routes. Also, connecting the wire before clipping the holder in place will make your install less stressful. It’s quite difficult to get the angle right on the wire once the clip is installed.

Performance

I cannot overstate how well this unit performed. It started charging every time my phone got within range, and never gave me a moment’s trouble when adjusting it. Once set into place, it is rock-solid, and just became part of my instrument panel, which is exactly what I want from a unit like this.

What I Like

  • One hand operation
  • Charging starts immediately and never stutters
  • Very adjustable, yet sturdy, with no vibration

What needs to be improved

  • Nothing

Final thoughts

As mentioned, I have several iPhone holders for in-car use. None were active when I was sent this unit. I’ve not taken it out since getting it, except to get a few photos of the back that I forgot to get before installing it. I use it almost every day and would buy another one if this one got broken or stolen. Much of that is because it’s so easy to put the phone into and take out. Even though I have to plug in a cable since I don’t have Bluetooth, it’s still far less hassle than any other car mount I have ever used, bar none.

Price: $27.99
Where to buy: Amazon
Source: The sample of this product was provided by Baseus.

The post Baseus Wireless Charging Gravity Car Mount review appeared first on The Gadgeteer.

Filed in categories: Reviews

Tagged: , , ,

Baseus Wireless Charging Gravity Car Mount review originally appeared on The Gadgeteer on April 26, 2018 at 9:00 am.

Note: If you are subscribed to this feed through FeedBurner, please switch to our native feed URL http://the-gadgeteer.com/feed/ in order to ensure continuous delivery.
Neo smartpen M1 review

Do you keep a journal in a paper notebook but wish it had some of the features of a digital journalling app such as search and archiving? There are lots of apps out there for your phone or tablet that will let you keep a journal and write with a stylus, but I have been on a quest to find a hybrid system where I can use an old-school paper notebook with a pen. I recently discovered the Neo Smartpen M1. Let’s check it out.
What is it?

The Neo Smartpen M1 is an ink pen with a built-in camera that digitizes your writing and works with an app on your iOS or Android device to record what you’re writing as you write it in a special paper notepad.

What’s in the box?

  • Neo Pen M1 smartpen
  • 2 D1 size ink refills
  • micro USB charging cable

Design and features

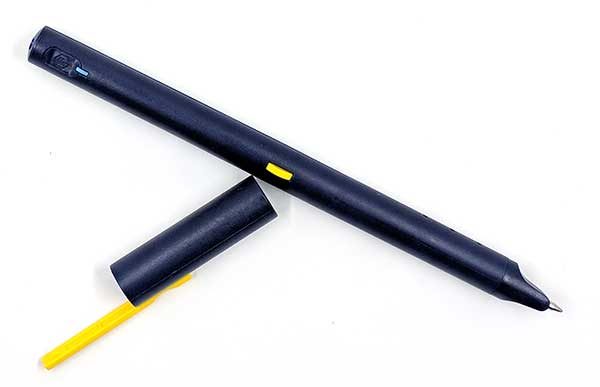
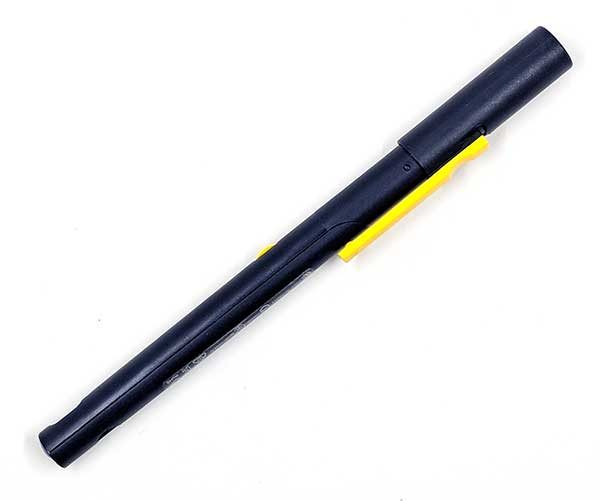
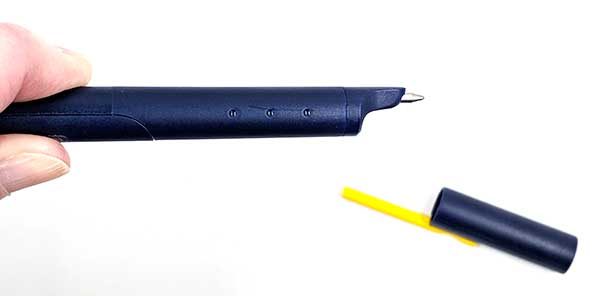
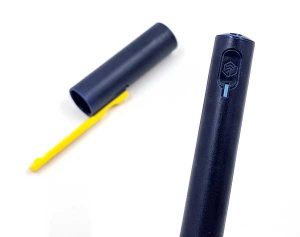
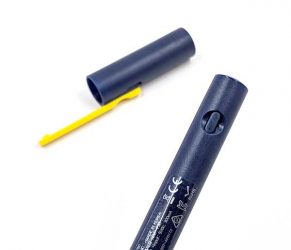
Neo is a company who has been offering smartpens for a while now. Their latest pen is the M1 and it’s a newer version of the pen that Moleskine is using with their Smart Writing Set. The M1 looks like a regular pen, with a cap and pocket clip and is available in 3 colors including the one you see above.

When you remove the cap, you will see a real pen that writes in ink on paper.

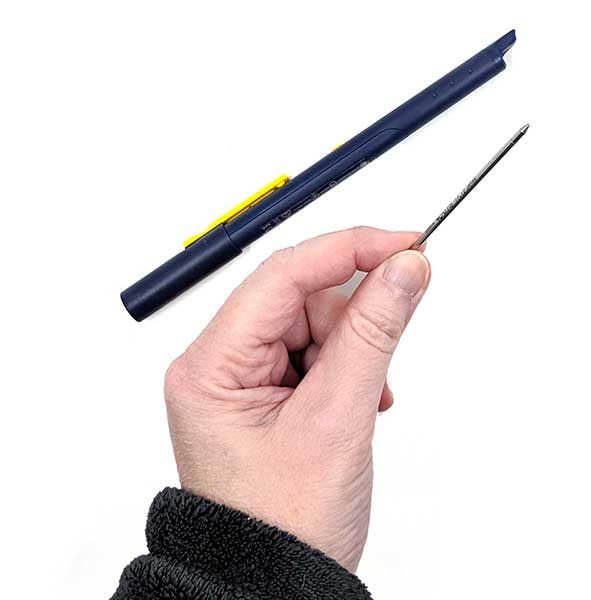
The M1 comes with 2 D1 sized refills that you can buy on Amazon and other retail sites in different colors and point widths. The refills are easy to remove and install. Basically, all you do is grab the tip and pull it out.

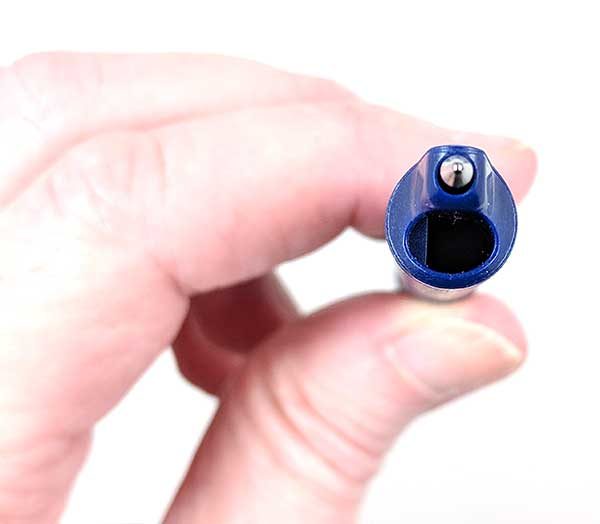
The Neo smartpen M1 has a built-in optical digitizer that is located above the ink tip. That means that you have to write so that this “camera” is pointing down toward the paper instead of turned upward.

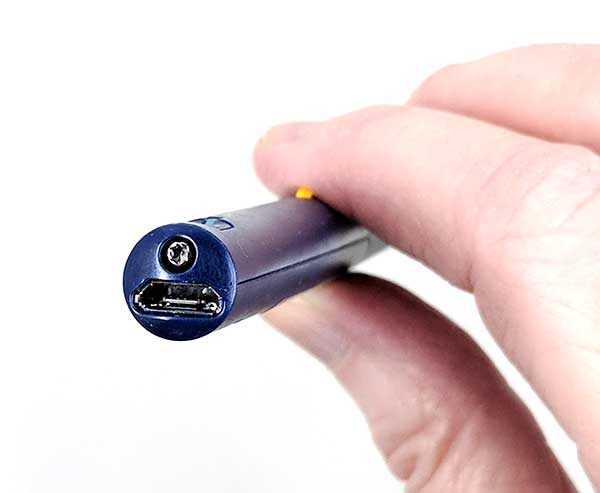
Before you can begin using the M1 smartpen, you have to charge it. There’s a standard micro USB connector on the end of the pen.


A status LED on the barrel glows red while the pen is charging, green when fully charged, and white while the pen is in use.

There’s a small power button on the barrel as well. Once you turn on the pen, you don’t need to press the power button again as the pen will turn off on its own after inactivity and will automatically power back on when you remove the cap or start writing again.

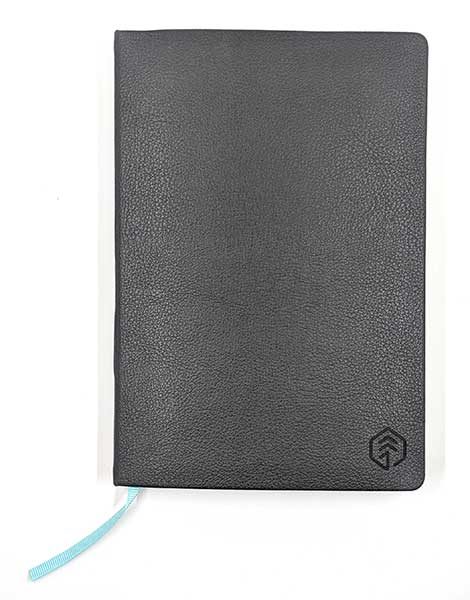
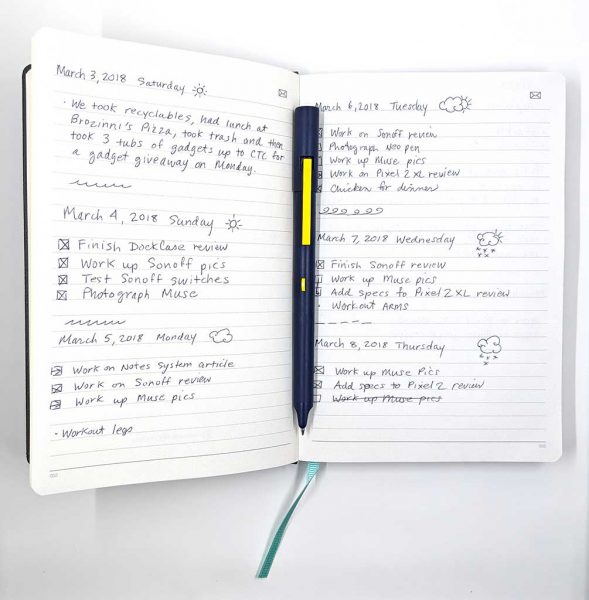
Neo smartpens have to be used with special notebooks if you want your writing digitized. At first glance, these notebooks may look no different than other paper journals. They come in different styles with hard or soft covers, spiral or hardbound, with a bookmark. Neo also offers PDFs that you can use to print your own pages for free. You can see all the pages here.

But if you look very closely at the page, you’ll see tiny grey dots which allow the pen’s digitizer to record your writing and drawings. Click the image above to see the dots.

When I bought the M1 smartpen, I also bought one of the Neo N professional notebooks. These notebooks are pretty expensive ($24.95 from Amazon), but I like hardbound books so I splurged. The N Professional reminds me a lot of my favorite notebook the Leuchtturm1917.

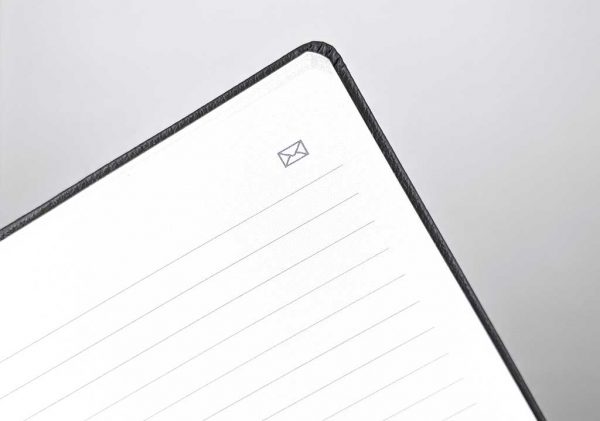
The Neo N Professional notebooks have numbered pages and an envelope icon in the upper corner of each page that instructs the Neo app to email the page.

Neo Notes app

The smartpen can record your text without any extra hardware or software, but without using the Neo app you really can’t do anything with it. The pen syncs to the app so you can view, edit, and search your pages.


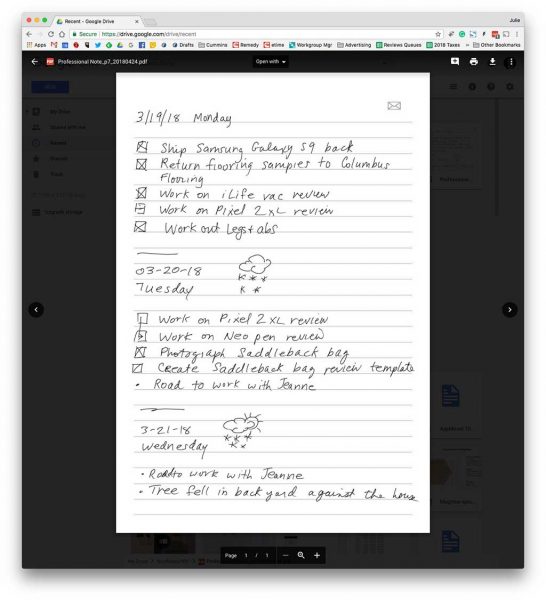
The app allows you to use multiple notebooks if you have them and gives you the option of automatically syncing pages to Evernote, Adobe, OneNote, or Google Drive.


Once a page has been imported into the app, you can edit it with some basic tools that allow you to highlight text, change the color of text, and add more notes to the text with your finger or a stylus.

You can also watch a video replay of what you wrote and when you initiate a recording, it will attach that to the page as well. Just be aware that you have to start the recording from the app AND it’s the phone that records the audio, NOT the pen.


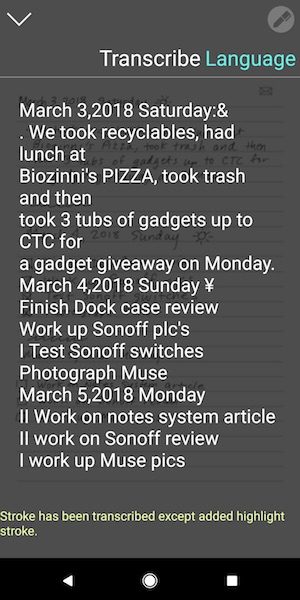
The app will also allow you to transcribe the pages into text but it doesn’t automatically share the transcribed text to Evernote, OneNote, etc.

As you can see, the transcription doesn’t do a perfect job. If you like to doodle or add check boxes, it will try to recognize them as letters and the results might not be what you would expect.


The Neo Notes app allows you to search the text for words is useful and you can also tag pages with keywords for organization/filing purposes. This works pretty well as long as your writing is clear and legible.

Writing with theNeo smartpen M1 is ok, but it’s not nearly as enjoyable as my favorite pens which have a Pilot G2 refill. I’m just spoiled 🙂 That said, the pen does an impressive job of recording your pen strokes. As long as you don’t start writing until you hear the beep after you take off the cap or press the pen to the page, you’ll be fine. If you immediately start writing, the pen might not catch 100% of that first stroke.

What I like

  • Not any larger than a regular pen
  • Easily replaceable ink refills
  • Easy to use app
  • Can automatically sync with Evernote, Google Drive, OneNote,

What needs to be improved

  • Voice recordings use the phone’s microphone and have to be initiated through the app
  • Need a setting to autosave transcribed page text to outside sites like Evernote

Final thoughts

I was excited to try the Neo smartpen M1 after it was suggested to me in the comments for a post I did about switching from analog to digital note-taking. That’s why I purchased the Neo pen. I thought it might be the perfect combo of analog and digital. So how has it worked out for me? The pen is nice. So don’t get me wrong. But, the excitement faded pretty quickly because I am not a fan of the way it feels to write with the pen. It writes fine, but it’s just not as smooth as my favorite pens. I tried a couple different ink refills without any noticeable improvement.

I also found that my weird hybrid print and cursive writing style with doodles and checkboxes doesn’t lend itself that well to transcription or text searches for words.

In the end, I found that although my notes were backing up to the cloud that I wasn’t looking at them after the fact.  I’ve finally come to the conclusion that the best note taking and task system for me is a paper notebook, my favorite pen, and my own version of the Bullet Journal system. At the end of the day or week, if I need to remember something I’ve written, I quickly type it into a note on Google Drive where it will be backed up and is searchable since it’s straight text.

While the Neo smartpen M1 didn’t quite work for me, it’s still a nice pen and I can see that it would be useful for meetings and school.

Price: $129.00
Where to buy: Neo or Amazon
Source: The sample for this review was purchased with my own funds.

The post Neo smartpen M1 review appeared first on The Gadgeteer.

Filed in categories: Reviews

Tagged: , ,

Neo smartpen M1 review originally appeared on The Gadgeteer on April 25, 2018 at 12:00 pm.

Note: If you are subscribed to this feed through FeedBurner, please switch to our native feed URL http://the-gadgeteer.com/feed/ in order to ensure continuous delivery.