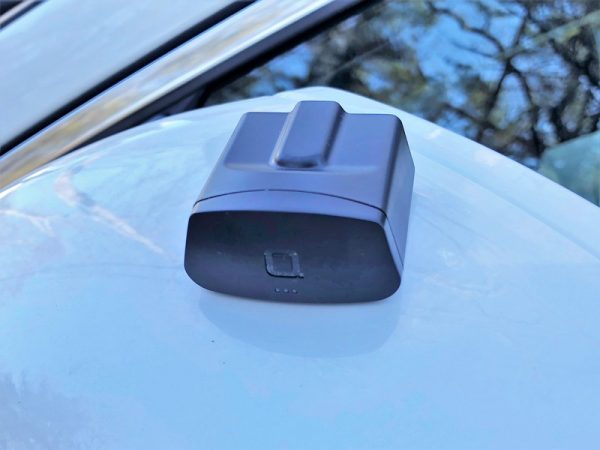
Nonda ZUS OBD-II Smart Vehicle Health Monitor review

The ZUS Smart Vehicle Health Monitor is a Bluetooth adapter for an OBD-II Data Link Connector. The adapter communicates with custom software for iPhone and Android and can debug problems, check engine data for potential problems and display real-time information. Read on to see what I think!

What is it?

The ZUS Smart Vehicle Health Monitor belongs to a class of devices known as OBD-II adapters. The adapter fits into the OBD-II Data Link Connector standard on all gasoline cars manufactured in the United States since 1996. (It is compatible with diesel cars since 2004.) The automobile’s on board computer powers the adapter and transmits coded digital information about the car’s status, features, and information to the adapter. The adapter, in turn, transmits this information to the connected Bluetooth device. The connected device can analyze the data, log the data, provide trends, as well as use the trip data in combination with other sensors, such as the phones accelerometers or GPS to provide even more information.

What’s in the box?
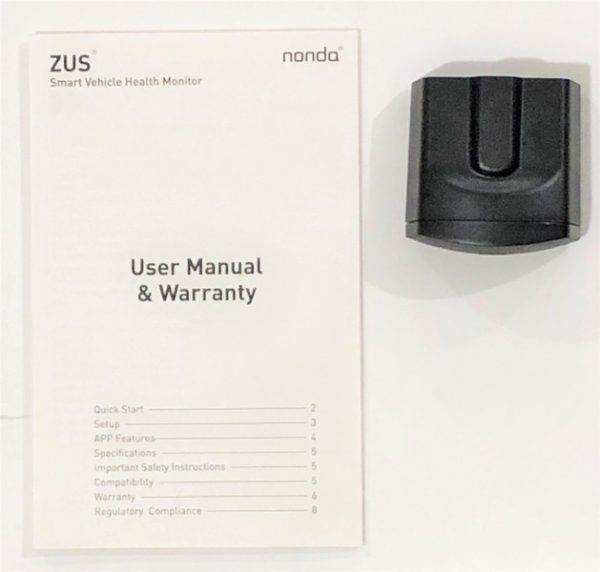
ZUS Smart Vehicle Health Monitor
User Manual

Design and features

Specifications
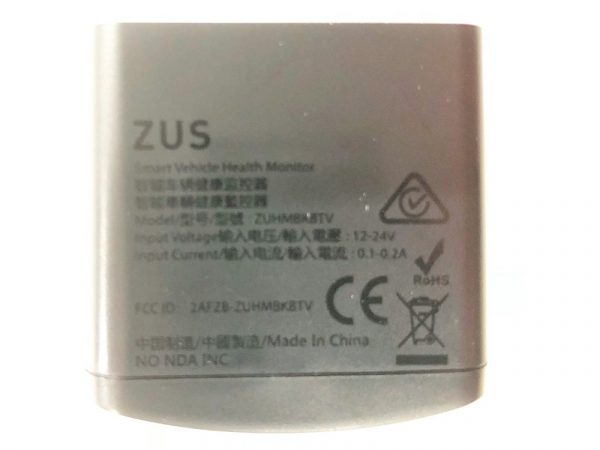
Input: 12-24V, 0.1-0.2Amp
Weight:0.88oz / 25g
Max Output Power:-9dBm
Size:1.65 x 1.63 x 0.85 in / 42 x 41.5 x 21.7 mm
Operating Frequency Range:BT2.4Ghz

Unboxing
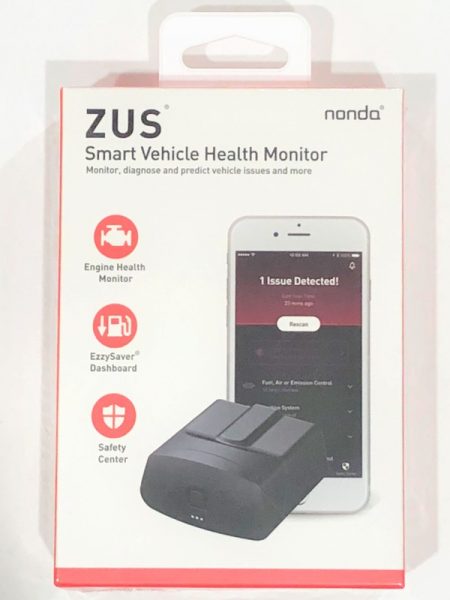
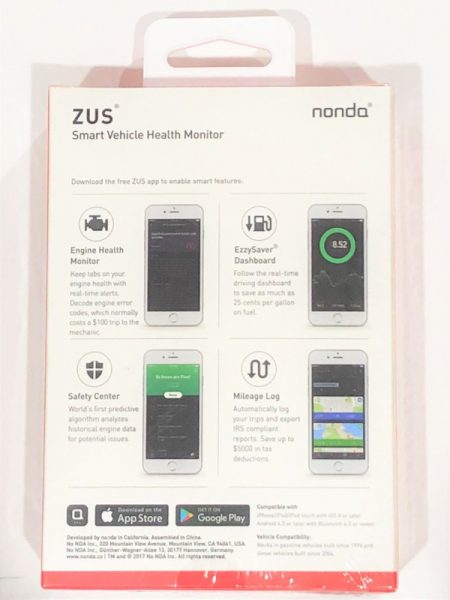
The ZUS Smart Vehicle Health Monitor (SVHM) comes in a fairly standard printed cardboard box. The front and rear of the box lists the main features of the device, which includes engine health monitor, EzzySaver Dashboard, mileage log and Safety Center.
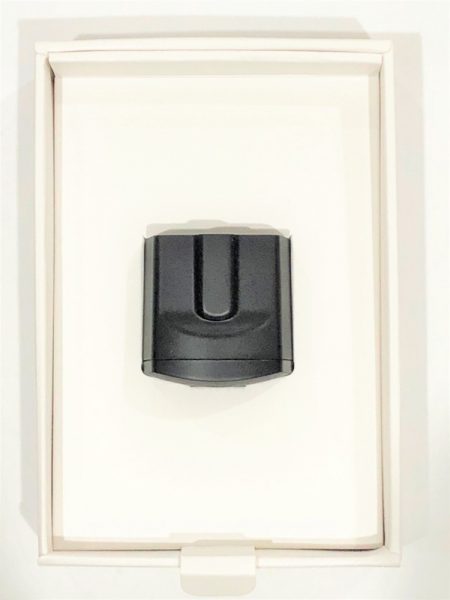
The ZUS SVHM sits inside a cardboard tray inside the box. The user manual / warranty is packaged below the cardboard tray.  The instructions and the warranty card are in the English language only.
Design of the ZUS OBD-II SVHM

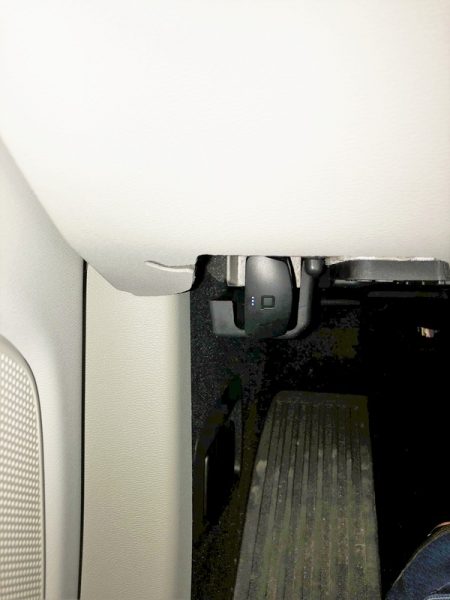
The ZUS OBD-II SVHM is an unobtrusive black plastic adapter.  Its small size is useful if the OBD-II connection is towards the front underside of the dash. The front has a gently curving face with the stylized “a”  logo of the Nonda company. Below the logo are three LED that indicate the status of the automobile and Bluetooth connections.  Honestly, the adapter is better looking than it needs to be considering it will spend most of the time plugged in underneath the driver’s front seat. Installation is easy; the adapter fits firmly into my car’s connector so that it will not fall out unintentionally. Removal only requires a simple tug.
Installation

Operation of the SVHM is straightforward assuming that you can find your OBD-II Data Link Connector. On passenger vehicles it must be within two feet of the steering wheel.

The adapter only works with the Nonda app for iPhone or Android. The app is a common control and user interface for the entire Zus Connected Car System. It not only controls the SMHV but smart car chargers,  smart tire safety monitor, smart backup camera, key finder, and car audio adapter produced and sold by Nonda.

The app requires a login for use. This functionality allows Nonda to determine if you have a mileage log subscription or are operating on the free version. A login also permits Nonda to upload your mileage to a server so that it can be viewed on the web. It doesn’t appear that the program can be used without a login, although if you prefer not to give out your information, a mailinator address will work just fine. If you don’t have one or more of these items the welcome screen also takes you to the Nonda.co website to purchase an adapter.

The software has some permission prerequisites to enable geolocation services. The explanation below implies that the Zus system will provide an option to find the car after parking. However, I found that this is not the case. The smart car finding function is only available with the smart car charger adapter.  The app does not require location awareness for the functions that the smart vehicle health monitor provides.
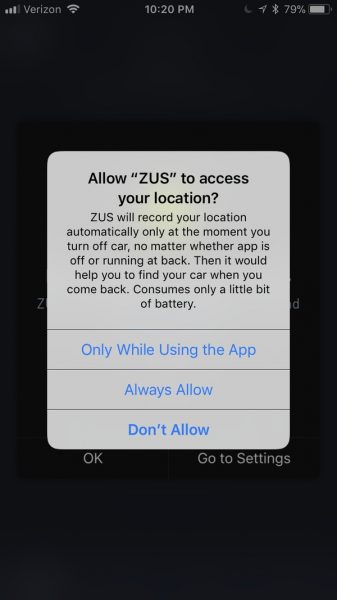
Even though the software cautions against operating without the geolocation on it will still function adequately and will not provide additional warning messages.

Operation

The dashboard screen provides some indication of the different functions that the Zus Connected Car suite provides. Each peripheral below provides a unique set of features:

  • The Smart Car Charger – Car Finder, Car battery Health Monitor, Mileage tracker, Car finder
  • Zus Smart Tire Safety Monitor – Tire Pressure monitor, Slow Leak Detection
  • Smart Vehicle Health Monitor – Safety Center, Engine Heath Monitor, Savings Dashboard*

* Upon syncing the SVHM with the app, a window informs that the EzzySaver Savings Dashboard has been “upgraded” to the PRO Dashboard.
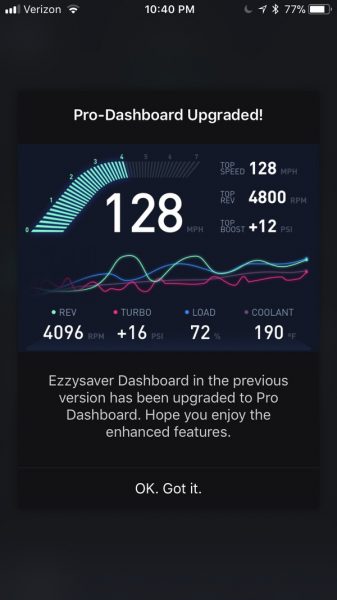
Once connected and paired the app shows the info in the image above. Despite the claims that the app includes an upgrade to the EzzySaver function, there is, in fact, no indication of the instantaneous fuel consumption.  Furthermore, the only record of the values captured are the speed, revs, turbo pressure, load and coolant temp. None of the other 235 sensor values supported by the ECU standard are available, and no logs of data are available either. Without logs, it is necessary to consult the data while driving, but it is difficult to see the small text and graph on the screen while driving.

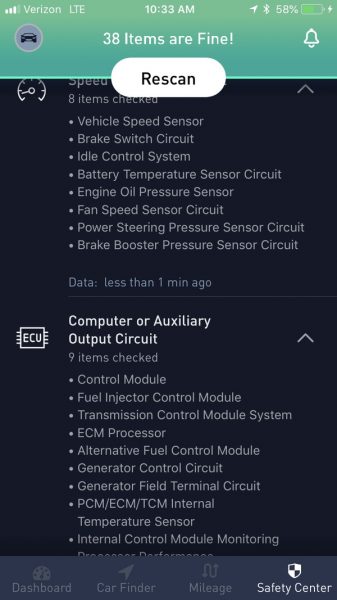
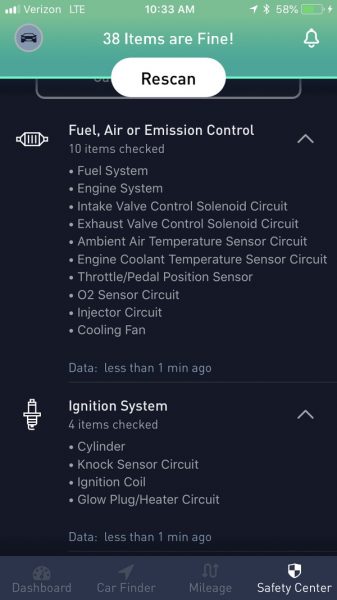
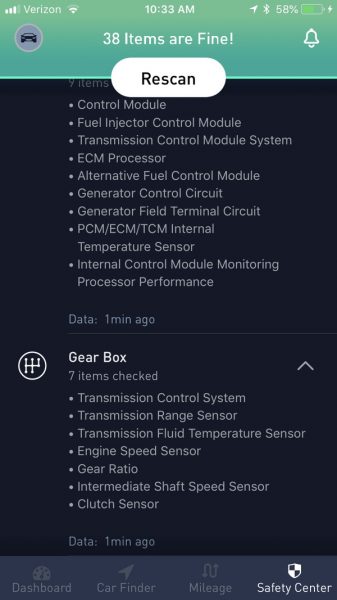
The Safety center performs a number of checks but does not provide any indication of the measured results. Many of these checks, if not all of them are either true or false. I don’t believe the SVHM can predict when an item may malfunction simply by the car’s ECU returning a working or failed indication. So, I’m not really sure what this safety check is doing. The results of the check came back fine on my car. The manufacturer’s website includes a couple of videos where the ECU returned an out of tolerance EVAP condition because the fuel cap was left off. Unfortunately, my car doesn’t include a gas cap (it has a capless gas tank fuel-filler) so I couldn’t test this feature.

All in all, I expect that the items checked vary per vehicle; the screenshots below are the results of my scan.
Performance

The screenshot below indicates that the top speed is 166 MPH, but in reality, the top speed is probably the speed pictured. If the only record of speed the app provides is the top speed, it should be accurate.

Except for the erroneous top speed, during my test drive, the speed and revs were very close to the values the car displayed on the dash.

It seems that keeping the device in the OBD-II Data connector may be convenient, but constant installation may drain the car’s battery. Also, keeping this installed precludes using other OBD-II items, like you may get from your auto insurance provider.

What I like

  • easy to pair
  • small

What needs to be improved

  • does not do what the manufacturer’s website and box indicate
  • poor logging features
  • ambiguous safety check features
  • erroneous data logging

Final thoughts

The most flagrant issue with this item is that it claims that the PRO Dashboard is an EzzySaver functionality upgrade, but in reality, the functionality is no longer a product offering. Also, while the package states that the SVHM includes mileage log functionality, in my experience this is simply not true. I believe that a safety scanner is not necessary if the car has a check engine light.  Consequently, I’d like to know what condition this can identify ahead of the car’s own ECU and check engine circuitry. If real car data is what you are looking for, this will disappoint. I’d recommend an OBD-II scanner that can log data as well as provide systems analysis.

Price: $59.99
Where to buyAmazon
Source: The sample for this review was provided by Nonda.

The post Nonda ZUS OBD-II Smart Vehicle Health Monitor review appeared first on The Gadgeteer.

Filed in categories: Reviews

Tagged:

Nonda ZUS OBD-II Smart Vehicle Health Monitor review originally appeared on The Gadgeteer on May 6, 2018 at 9:07 am.

Note: If you are subscribed to this feed through FeedBurner, please switch to our native feed URL http://the-gadgeteer.com/feed/ in order to ensure continuous delivery.

Fanstereo Studio43 Bluetooth Headphones review

When it comes to headphones, there seems to be a sliding scale of form and function. Looks, comfort, sound quality and price are all factors that fluctuate wildly. Do the Fanstereo Studio43 Bluetooth Headphones deliver on all categories?

What is it?

The Fanstereo Studio43 Headphones are premium wireless Bluetooth headphones with clean aesthetics and comfortable, sound-insulating design.

Hardware specs

  • Bluetooth V4.1 (Operation range up tp 35 feet)
  • Sensitivity 102 + 3db, Frequency Response: 20-20 kHz
  • Drivers: 40 mm
  • Impedance: 32 Ω OHM
  • Charge connector Micro USB
  • Charging time 1-2 hrs max
  • Standby time 300 hrs max
  • Playing time 13 hrs max
  • Weight: 162g
  • Battery capacity 250 MAH

What’s in the box?

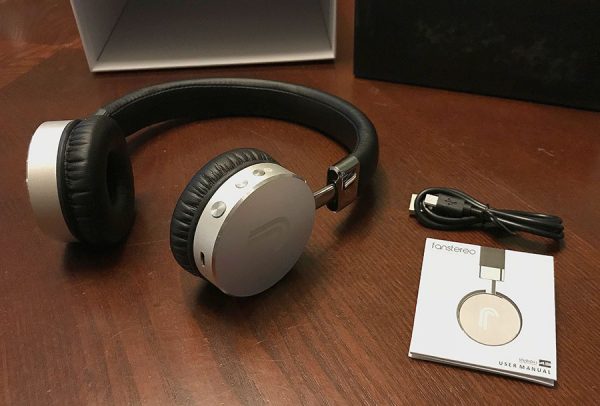
Studio43 headphones on table
Nice packaging, and you even get a charging cable.
  • Fanstereo premium aluminum headphones
  • Owners manual
  • Micro-USB cable

Design and Features

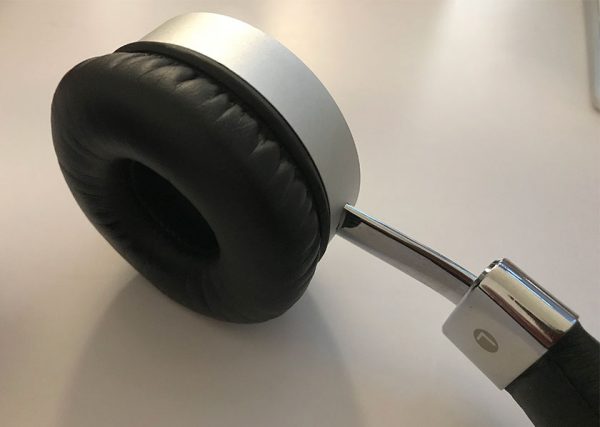
Up close photo of Studio43 ear cushion
They’re as comfortable as they look.

I like the overall aesthetic of the Studio43. They’re nice and simple and look great on my desk next to my iMac and other black and stainless steel office supplies. They also look expensive. They feel like premium headphones. The ear cushions are as soft and plush as they appear, perhaps even more so, and do a great job in forming a seal to insulate noise. They don’t leak much sound to the outside.

Fit and Feel

As mentioned, the Studio43 headphones are high quality. The headphone band is very flexible and exerts a very small amount of pressure on your ears. The band doesn’t feel like it would break very easily.

Most of the force keeping the headphones on your head comes from them resting on top of your head. I’ve never really been a fan of over the head headphones because of my thick hair… they tend to irritate my scalp after an hour or so. These were no different for me, however, that seems like it would be limited to me in particular.

side profile of Studio43 headphones
Side view.

My ears didn’t get sweaty or hot, which is another issue I run into with these type of headphones, because they rested so lightly on them and the earphones have an excellent amount of cushion. Overall, they were comfortable. I think I’d have a much better go if my hair was much shorter.

Sound Quality

I’d rate the sound quality of these headphones somewhere in between Fair and Good. The mids and treble seemed quite good, but they were a bit lacking in the bass. Some minor adjusting so as to create a better seal around my ears did help the quality a bit. I was able to coax them into a fuller sound through some equalizer in the music apps I tested them with, but out of the gate, I’d rate them as Adequate.

Functionality

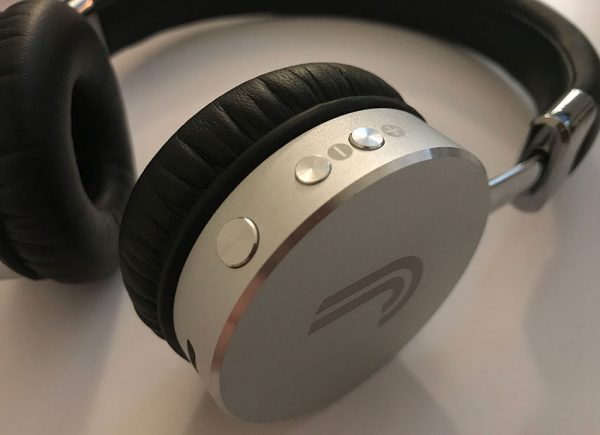
On the back of the right headphone, there are three buttons that serve multiple functions. The large button serves as the power button as well as start/pause. Holding it for about 5 seconds powers the headphones on or off.

The two smaller buttons are the volume up and volume down. Double clicking those buttons work as forward or reverse track skip.

Close up of headphone hardware buttons
The hardware buttons are easy to feel for.

There is a neat “AI” function when your phone receives a call, a voice prompt simply asks “Yes or No?” and awaits your answer. It doesn’t read the name or number of the caller, so you’d have to check your phone screen to see if you want to talk to that person or not. But the response mechanic works well. I answered “No” and the mic picked up my voice and started the music again.

Battery life seems to be close to advertised. The manufacturer claims the headphones have a 13-hour life, and I was seeing numbers closer to 12, which is pretty great.

One thing that drove me crazy about these headphones was the confirmation beep for every action. It’s fairly typical to hear a feedback tone when adjusting the volume or maybe even skipping a music track when you’re pressing a button on the headphone itself. But the Studio43’s gave the same feedback beep when adjusting things on the actual device. So when I hit the volume button on my iPhone? Beep. I dragged the volume slider on my Mac. Beep beep beep beep forever increment. I selected a new playlist. Beep. It even beeped when one track ended and went to the next song, without pressing any buttons on any device. It was just like, “BEEP just thought you’d like to know that you’re listening to a different song now!”

There was no way to disable this as far as I can tell. I noticed that it didn’t do this in Spotify, but did so in the Apple Music and Amazon Music apps, on my iPhone and my iMac. Your mileage may vary.

Front view of Studio43 headphones
Front view. Is my head too big or the phones too small? The jury’s out on that one.

It also features a small personal peeve, the Intermittent Blinking LED. It’s one of those external indicators that let you know that the headphones are on, which is unnecessary. LED on when it’s charging? Sure. That’s a good method of letting you know that it’s actively charging. I usually work in a dimly lit room, and I can’t deal with a blue strobe light illuminating any close surface every 6 seconds. The light isn’t that bright, but it’s just one of those design choices that irks me.

What I like

  • Good sound isolation
  • Looks great
  • Comfortable

What needs to be improved

  • Just okay sound
  • Beeping feedback with *literally* every action

Final thoughts

With a product like headphones whose entire purpose is to deliver sound, if they sound awesome but are uncomfortable, that’s almost as bad as comfortable headphones that sound terrible. The Fanstereo Studio43 headphones offer a good mix of high comfort, great looks, and just-good sound.

Price: $139.00
Where to buy: You can buy the Studio43 Headphones in silver or camel brown from their website or Amazon.
Source: The sample of this product was provided by Fanstereo.

The post Fanstereo Studio43 Bluetooth Headphones review appeared first on The Gadgeteer.

Filed in categories: Reviews

Tagged:

Fanstereo Studio43 Bluetooth Headphones review originally appeared on The Gadgeteer on May 5, 2018 at 11:00 am.

Note: If you are subscribed to this feed through FeedBurner, please switch to our native feed URL http://the-gadgeteer.com/feed/ in order to ensure continuous delivery.
Adonit Droid stylus review

I remember when you had to have a stylus to enter text on your PDA. Then when finger friendly touchscreens took over, styluses became an accessory that most people no longer needed or even wanted. That said, there are still many people who enjoy using styluses to draw and write on their tablets and smartphones. Through the years, Adonit has been an innovator in the stylus market and their latest offering is the Droid stylus that has been designed for Android devices. Let’s take a look.

What is it?

The Adonit Droid is a capacitive stylus just for Android devices. It doesn’t require batteries, Bluetooth, or any special software in order to use it.

Design and features

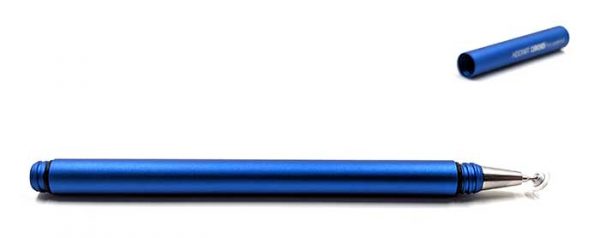
The Droid stylus is made of anodized aluminum and is available in three colors including the blue version that was sent to me. It has a smooth sandblasted type of finish that makes it comfortable to hold.

With the cap in place, the Droid stylus is 4.72 inches (120mm) in length.

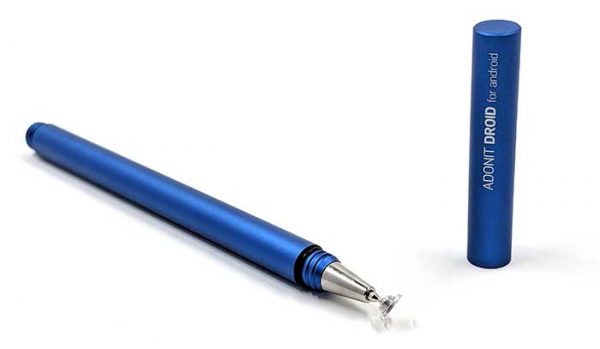
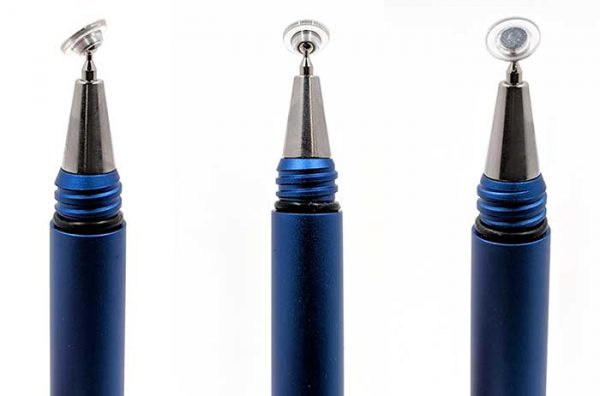
The cap unscrews to reveal the stylus tip which is a small plastic disk that Adonit calls the Precision Disc. The disc swivels on a metal ball joint tip.

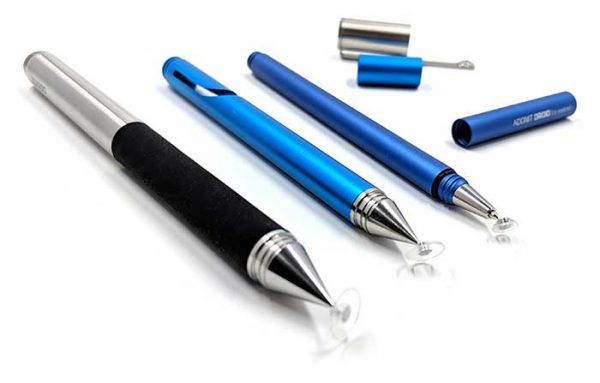
This type of stylus tip is not new. Adonit has featured this type of stylus many times over the years. In the image above, I show two other Adonit styluses with the new Droid stylus on the right. The main difference between the Droid and the other Adonit styluses shown here is the size of the disk. It’s significantly smaller at 0.19 inch (4.75mm).

As mentioned above, the Precision Disc swivels on the tip to allow for natural writing. The Adonit website states that the Droid has a non-removable tip, but it appears that Adonit actually sells disc replacements in their shop for $14.99 each. That’s pretty spendy for a tiny piece of plastic and a metal tube. It’s more than half the price of the whole stylus.

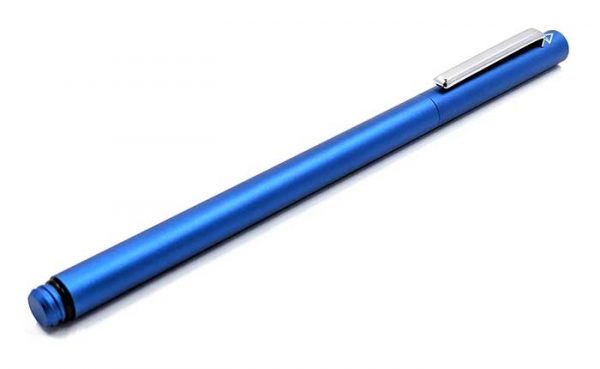
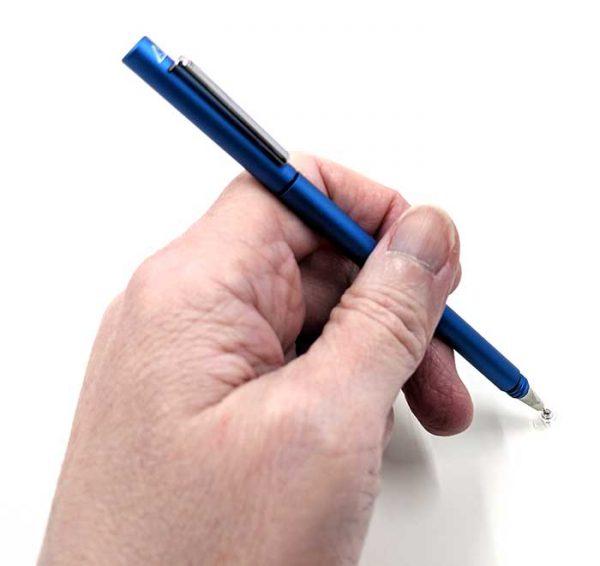
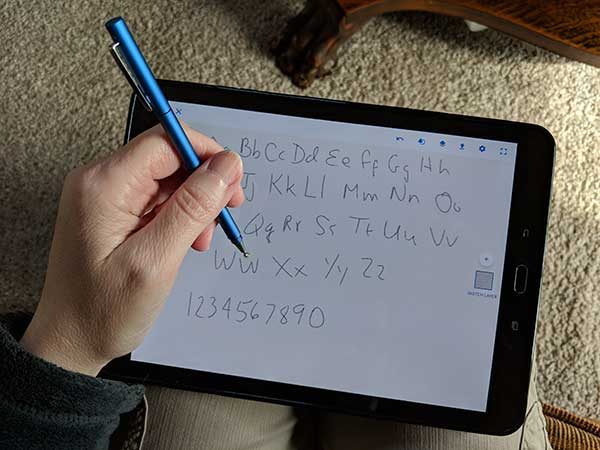
The stylus cap can post on the back of the stylus barrel which is a nice feature. The stylus itself is very slim at only 0.27 inches (7mm) wide. Although I didn’t find it uncomfortable to use, a slightly larger version of the Droid stylus might be more comfortable for people with larger hands than mine.


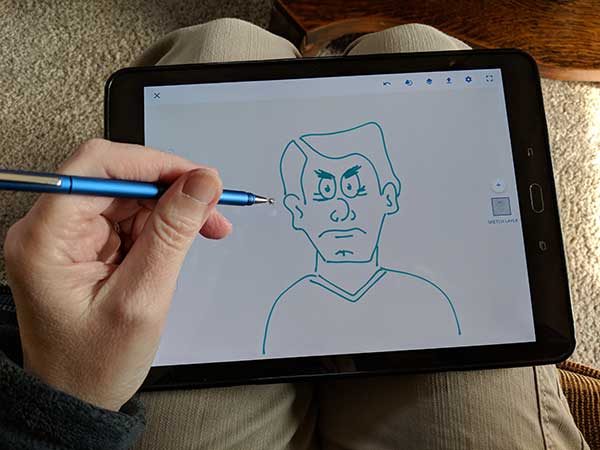
I tested the Adonit Droid stylus on my Samsung Galaxy Tab 3 and my Pixel 2 XL and found that it felt like similar capacitive styluses that I’ve used. I also tried it on an older iPad and it would not work at all which surprised me. The only thing I can think of is that the tip is just too small for iOS devices.

I had no real issues using the Droid stylus, but the experience is not even close to as nice as the Samsung S Pen which truly does feel like using a pen on paper. Granted, the S Pen is only compatible with certain Samsung devices so it’s not fair to compare them.

What I like

  • Small and slim
  • Doesn’t require batteries
  • Doesn’t require Bluetooth or special software

What needs to be improved

  • The price for a replacement disc should not be so expensive

Final thoughts

I still find styluses useful especially for doodling and sketching and occasional note taking. I find that scribbling a long note with a stylus is a lot faster for me than using the onscreen keyboard. I like that the Adonit Droid’s Precision Disc stylus tip is so small because it makes it much easier to see what I’m writing or drawing. Other capacitive styluses can have large rubber tips that block the view of the digital “ink” as you’re trying to work.

If you are an Android user and use a stylus, check out the Adonit Droid. It’s a nicely made stylus that barely takes up any space in your pocket or bag. And although it’s expensive to replace the disc tips, it is nice that the option is available.

Price: $24.99
Where to buy: Amazon
Source: The sample for this review was provided by Adonit.

The post Adonit Droid stylus review appeared first on The Gadgeteer.

Filed in categories: Reviews

Tagged:

Adonit Droid stylus review originally appeared on The Gadgeteer on May 4, 2018 at 12:00 pm.

Note: If you are subscribed to this feed through FeedBurner, please switch to our native feed URL http://the-gadgeteer.com/feed/ in order to ensure continuous delivery.
My First Lab STEM Starter Kit: Smartphone Microscope and 3D Slides review

As a child long, long, long ago, I remember longing for a microscope in order to study things that were too small for me to see and tragically, I never received one. I now have a marvelous stereo microscope but it is too large and heavy to carry around with me to investigate things while I’m outside. When the My First Lab STEM Starter Kit: Smartphone Microscope and 3D Slides came up for review, it piqued my interest. I eagerly volunteered to review this tiny microscope. After receiving it, I discovered that it is a clever little microscope that works well magnifying small objects, is easily portable, and it allows you to take pictures of your microscopic adventures using your phone’s camera. Perfect for a big kid like me.

What is it?

The My First Lab STEM Starter Kit: Smartphone Microscope and 3D Slides is a science, technology, engineering, and mathematics (STEM) kit that includes a clip-on smartphone (or other mobile devices) microscope and 3D slides. The slides are paperboard slides with small items glued to them to observe using the microscope.

What’s in the box?


  • My First Lab Smartphone Microscope (60x magnification – with the aid of your phone’s camera zoom)
  • LED light and UV light are attached to the microscope (LR1130 button cell battery is replaceable)
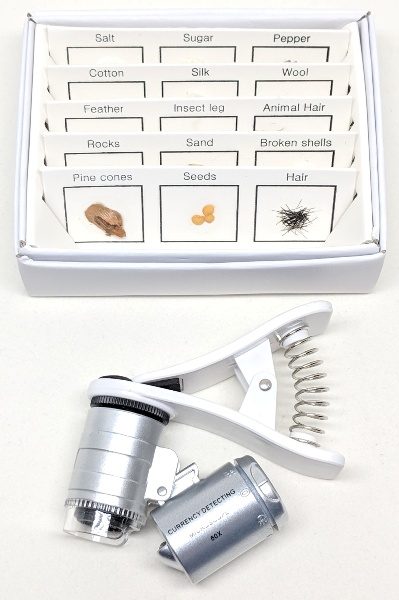
  • 3D paperboard slides which contain 15 specimens to observe

Design and features

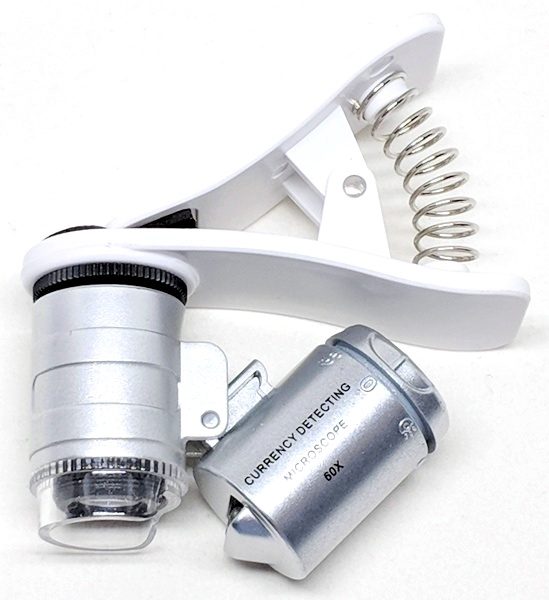
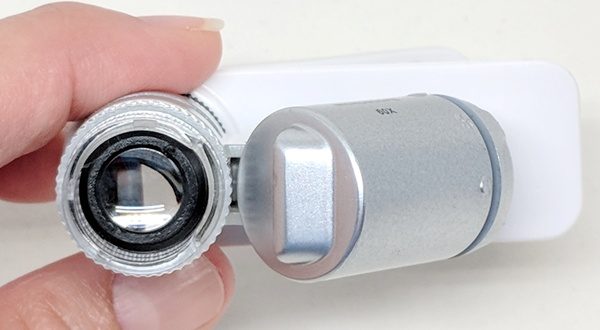
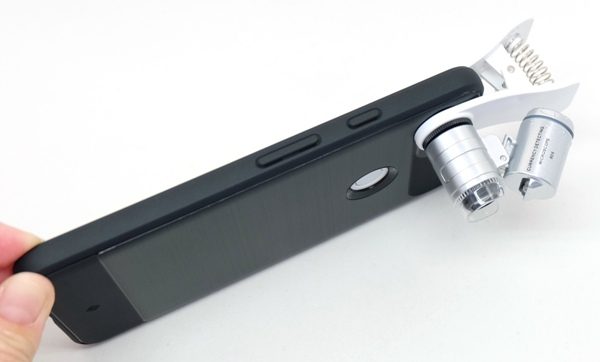
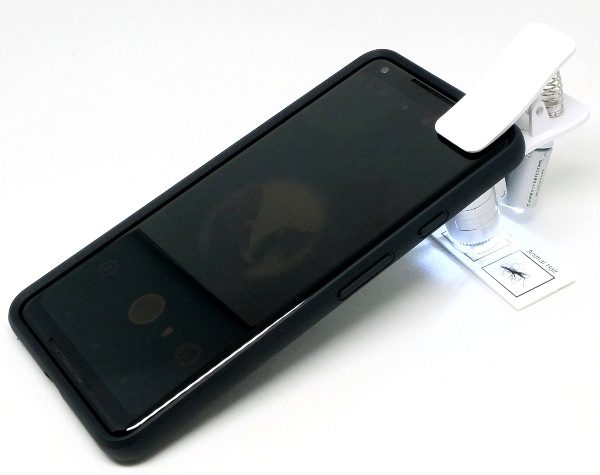
The smartphone microscope appears to be made out of silver colored hard plastic. It has a clear plastic ring over the end of the microscope to protect the lens. The smartphone microscope is mounted to a white plastic clip and rotates at this juncture. The clip that holds the microscope to the mobile device has black foam padding on both sides. This keeps the microscope from sliding around on your device and it helps to avoid damaging your phone.

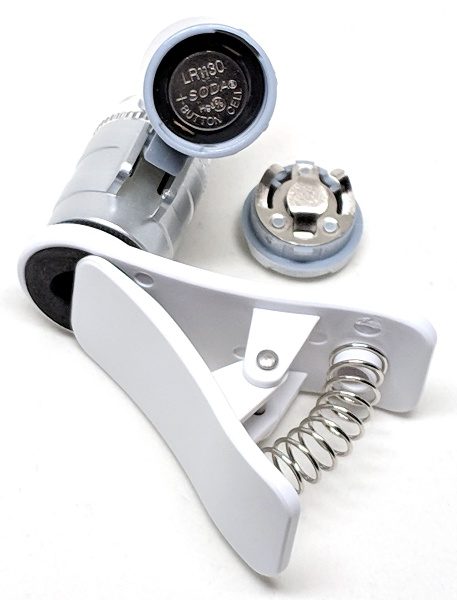
Attached to the microscope on a rocker mechanism is the LED/UV light. There is a cap/dial on the end of the light that you’ll need to twist (you might have to push in and twist) to turn on or off the lights or change the battery. To access the dial, you’ll first need to rotate the whole assembly out from under the clip.

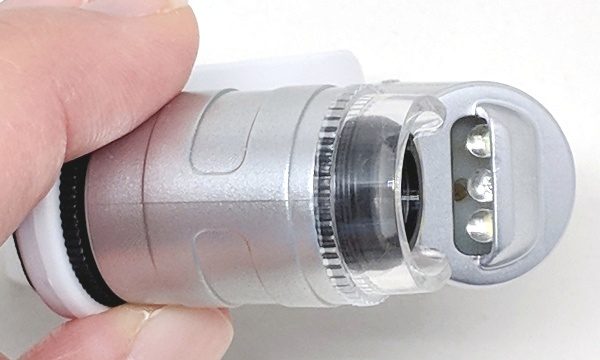
In addition to the microscope, you receive 15 specimens to study mounted on paperboard slides. They include samples of salt, sugar, pepper, cotton, silk, wool, a feather, insect leg, animal hair, rocks, sand, broken shells, pine cones (seed?), seeds, and hair.In the photo above, you can see the microscope lens used for magnification.The above photo shows that the light contains three LED bulbs.

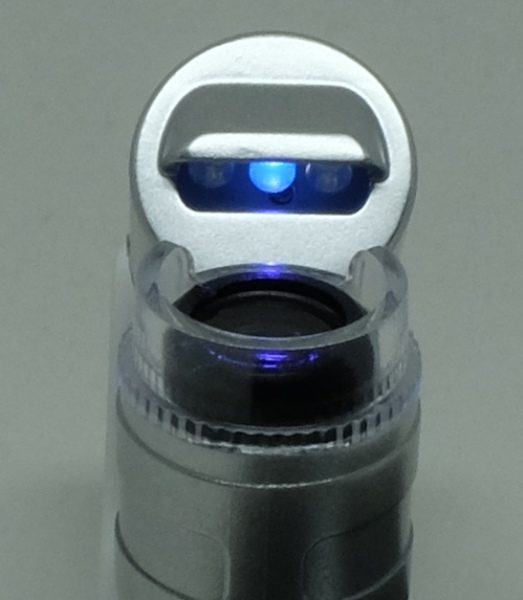
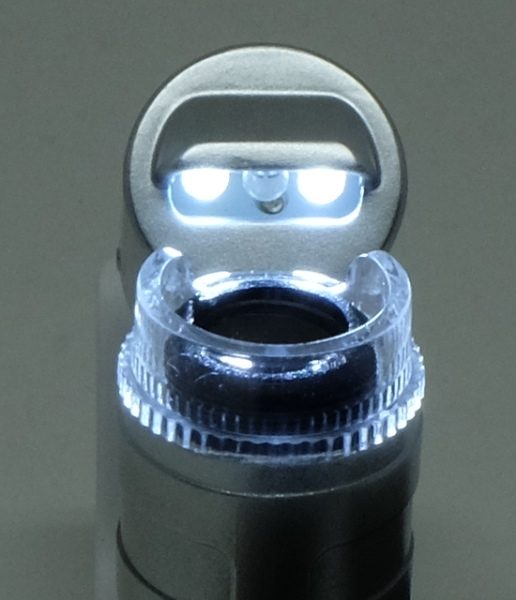
The center LED is the UV light.And the everyday use lights are the two outer LEDs.When the cap/dial is removed from the light, you can access and replace the LR1130 button cell battery when necessary.

How to use the microscope


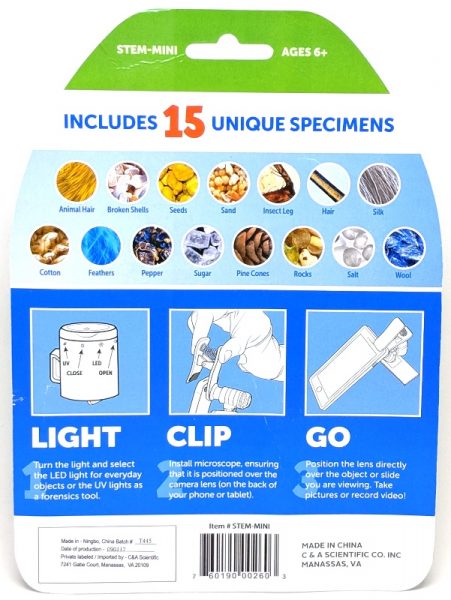
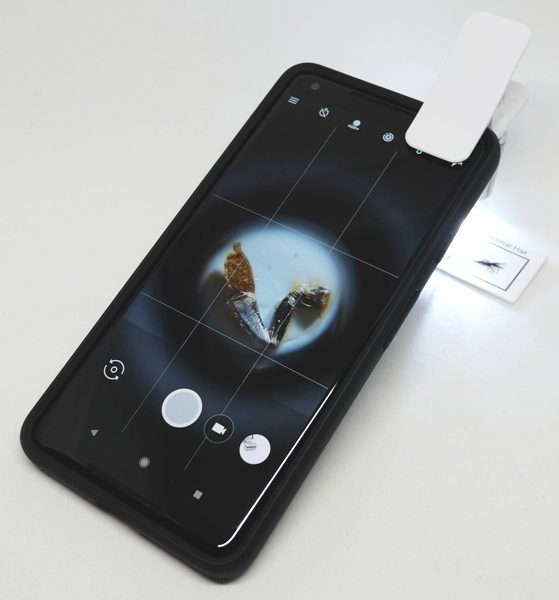
The back of the packaging contains the instructions for using the microscope and LED lights. When you clip the microscope on your mobile device, you need to make sure that the microscope covers the camera lens. NOTE: Your camera lens must be within about 2.5 cm from the edge of your phone to use this microscope. The clip will not reach farther. Moreover, my phone only has one camera, so for those of you who have more than one, you may have to experiment which lens to place the microscope over.

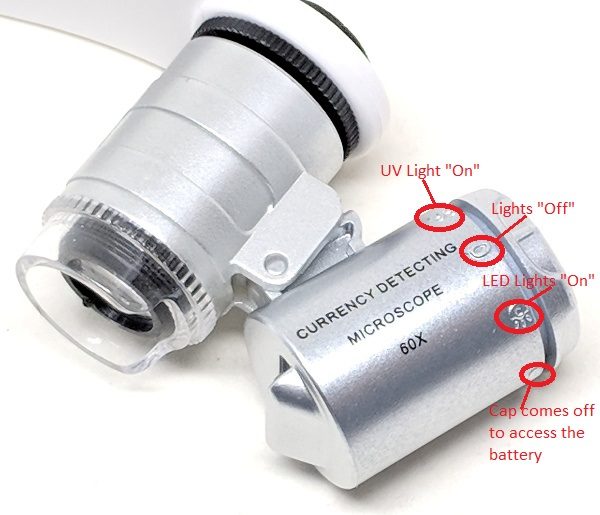
The packaging also tells you the correct positions of the dial to turn on the UV light, turn off all lights, turn on the LED lights, and open the battery compartment.

First of all, you’ll need to turn on the LED lights to observe an object. Starting at the very top of the light is the UV light “On” position, the zero represents the “Off” position, the shining icon represents the LED lights “On” position, and the last position allows the cap to come off to replace the battery. To turn on the lights you’ll need to twist the cap to the desired lights “On” position. Again, you may have to push in and twist to do this.

Next, you need to clip the microscope lens over your mobile device’s camera lens.
Finally, to view any specimen, you must place the end of the microscope’s clear plastic ring directly onto the surface containing the specimen to obtain a clearly focused subject. You may increase this distance a maximum of 1 cm by gently pulling the microscope away from the clip, though I never needed to do this. This ring not only protects the microscope lens but also helps place the specimen at the correct distance from the microscope for the clearest view.

Use

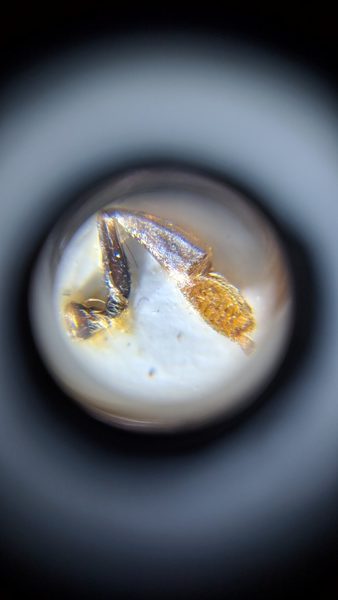
When I first used the microscope with my Pixel 2 XL, I used it to study all of the specimens on the prepared slides. The above photo illustrates the magnified view of the insect leg specimen included in the kit. The above photo does NOT include any additional magnification from my camera’s zoom. I used my phone’s camera to take a photo of the microscope’s magnified view. I think this magnification is about 10x.

Even though the microscope says it magnifies objects by 60x, I think the My First Lab company assumes that you have a camera zoom and takes that into account when calculating the total magnification of the microscope. That means if the microscope has a magnification of 10x and your phone magnifies 6x, then the total magnification is 10 x 6 = 60x. This is why I think the microscope, by itself, magnifies 10x.
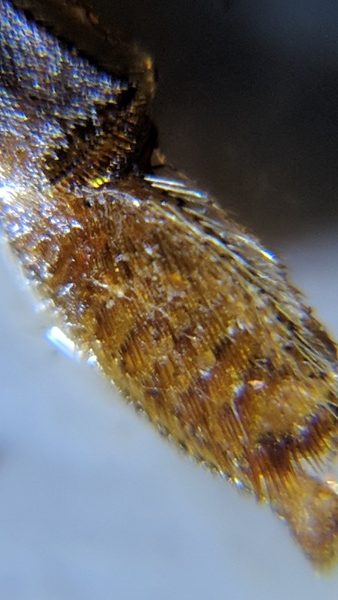
My Pixel 2 XL magnifies objects by 7x, so my total magnification may be about 70x as shown above.

The above photo is actually the pollen comb of a honey bee’s hind leg. It is also the first tarsal segment of a honey bee foot. The bee brushes all the pollen off her body and places it in the pollen basket just above this segment. Those are the clumps of yellow you see clinging to honey bees’ hind legs. Unfortunately, the rest of the foot (tarsal segments) of the bee’s leg was broken off on my specimen. But WOW, it’s fascinating being able to see the detail of the pollen comb using this tiny microscope’s full magnification!

The next few photos are of insects from an insect collection I made while in graduate school studying entomology.

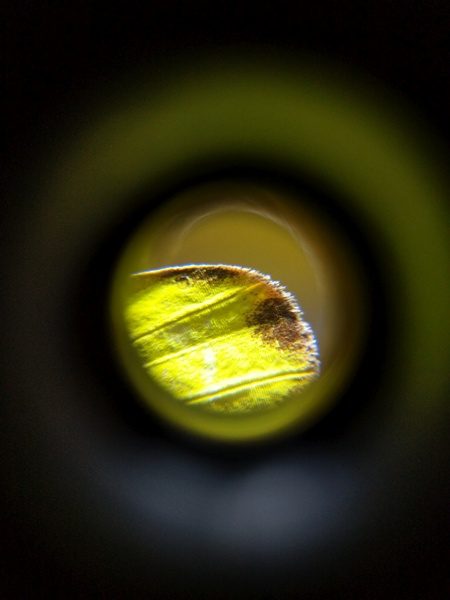
This is a normal photo taken of a sulfur butterfly (family Pieridae). My camera was about 5″ away from the subject. You can tell the butterfly’s relative size when compared to a quarter.Using just my camera’s maximum magnification (7x) without the microscope, this is what the butterfly’s wing looks like with the quarter in the background.This is the view of the wing after attaching the microscope to my phone (without camera magnification).
This is the view through the microscope with the addition of my camera’s maximum magnification. It is difficult to get a crystal clear, focused picture of any specimen using the maximum magnification of this microscope. However, it makes a great companion while you explore the outdoors because it is small and portable.

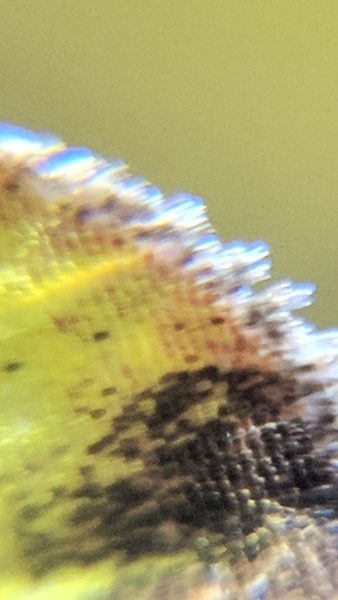
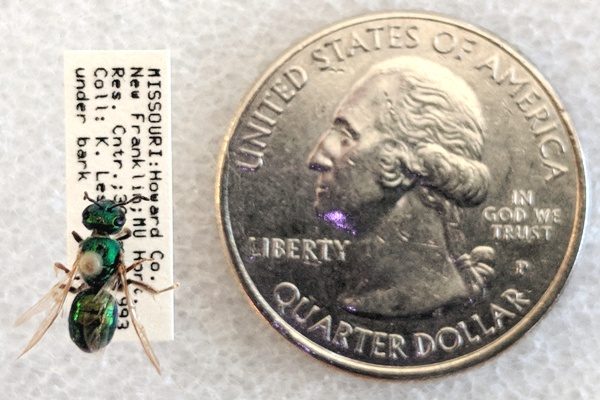
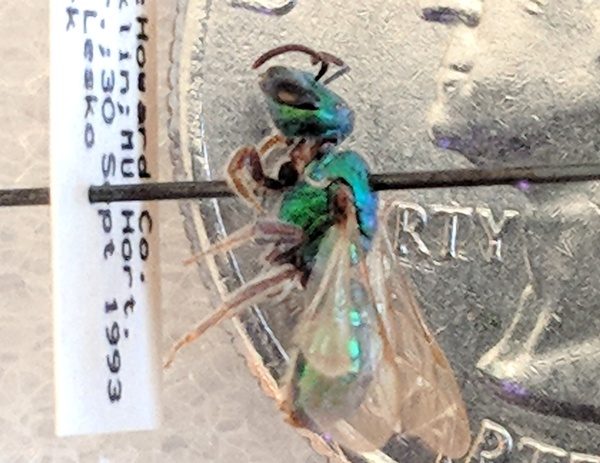
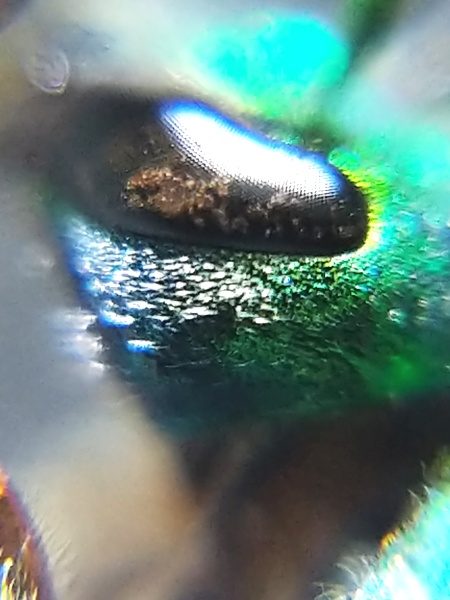
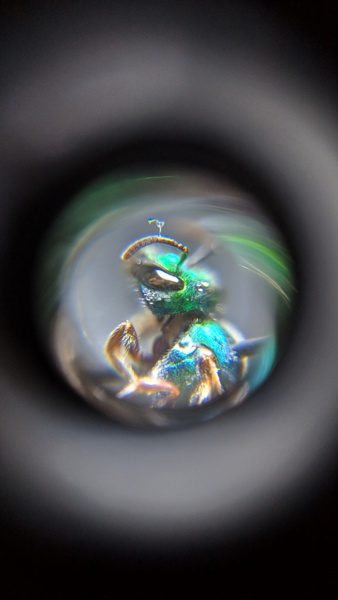
My larger, heavier microscope has infinitely better optics and provides 90x magnification to obtain a crystal clear magnified image. However, I do not have the equipment to take photos of what I see while using my larger microscope.I took a picture of another area of the wing using maximum magnification (microscope + my camera’s zoom). Look at the details of the scales and the fringes of the wings! Isn’t that magnificent?Next is a photo of an iridescent bee from the insect family Halictidae (the family of sweat bees). This photo illustrates how large this bee is in relation to a quarter. My camera was about 5″ away from the bee.This is another photo of the bee using my camera’s maximum magnification (without the microscope).I then attached the microscope to my phone and took a photo (no additional magnification from my phone’s camera).
Here is the same bee magnified to about 70x (microscope + camera magnification). I really like this little microscope! You can tell that the compound eye is made up of hundreds of ommatidia – so cool.

Overall, I found that the microscope worked really well for me as long as I placed the clear plastic ring directly on the surface containing the object I wished to see. Every now and then, the LED lights flickered but this was easily addressed by adjusting the dial on the light. I did not use the UV light, but you could use it to look at the patterns on flower petals that only show up under UV light.

What I like

  • The microscope and LED lights work well
  • Microscope magnification + phone magnification ≅ 60x total magnification
  • You may use your phone’s camera to take pictures or videos of your specimen
  • There’s foam padding on both sides of the clip to keep the microscope from sliding around and to prevents scratches
  • It seems durable
  • It’s small and portable
  • Inexpensive

What needs to be improved

  • Don’t expect crystal clear images when using the highest magnification
  • Your camera lens must be within about 2.5 cm from the edge of your phone to use this microscope

Final thoughts

I really enjoyed using the My First Lab STEM Starter Kit: Smartphone Microscope and 3D Slides. The kit includes a small microscope that is perfect for kids ages 6 and up (or big kids like me). In addition, the kit also comes with five prepared paperboard slides which have a total of 15 specimens to study. However, it is important to know that the purpose of the microscope is to magnify macroscopic objects or organisms (things that can be seen with the naked eye). It will not magnify microscopic organisms enough to for you to see (like those in pond water – you’ll need a compound microscope for that).

This microscope is easy to use; works well; is small, portable, and durable; allows you to take pictures of your microscopic adventures (YES!!); and has a replaceable battery for the LED lights. I would have LOVED receiving this as a kid!

NOTE: you may purchase just the microscope without the slides for only $11.

Price: $17.99 (kit) or $11.00 (microscope + LED light only)
Where to buy: Amazon (kit) or Amazon (microscope + LED light only)
Source: The product used in this review was provided by My First Lab.

The post My First Lab STEM Starter Kit: Smartphone Microscope and 3D Slides review appeared first on The Gadgeteer.

Filed in categories: Reviews

Tagged:

My First Lab STEM Starter Kit: Smartphone Microscope and 3D Slides review originally appeared on The Gadgeteer on May 4, 2018 at 10:00 am.

Note: If you are subscribed to this feed through FeedBurner, please switch to our native feed URL http://the-gadgeteer.com/feed/ in order to ensure continuous delivery.

TaoTronics standing desk review

The TaoTronics Height-Adjustable Standing Desk provides great value in a space-saving vertical lift design. Whether you are looking for a boost in productivity or exploring the health benefits of standing, this desk will be a great addition to your home or office workspace.
What is it?

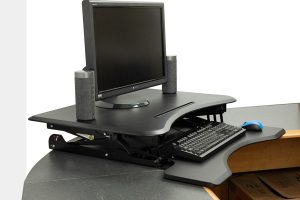
The TaoTronics Height-Adjustable Standing Desk is a pneumatic assisted standing desk converter that lifts and lowers smoothly to any position you need. Switching from sitting to standing is as easy as a press of a lever.

What’s in the box?

Standing desk
Keyboard shelf
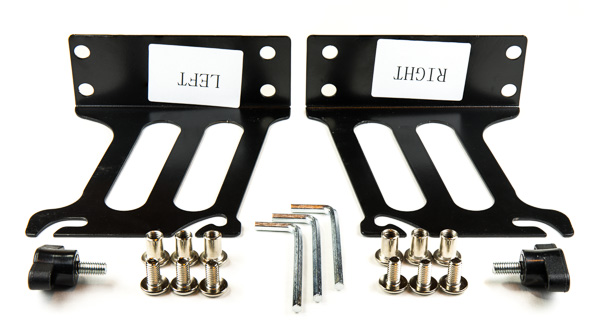
Brackets, Screws and Hex Keys
User Guide

Design and features

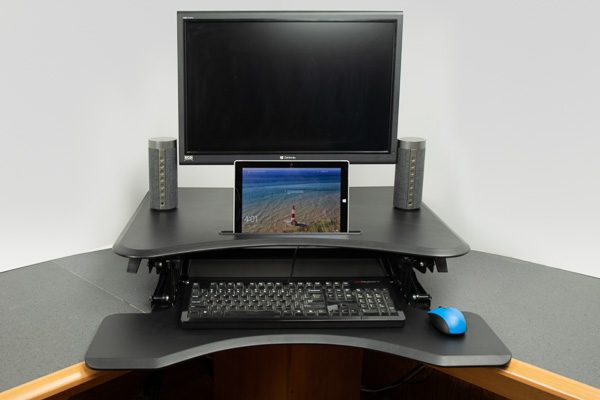
The TaoTronics standing desk features a space-saving vertical lift design which doesn’t encroach on your floor space like some other designs that move outward when raised. Raising straight up above your normal workspace, it provides a compact and ergonomic workspace.

Supporting up to 80 lbs, the standing desk is strong enough for multiple monitors, speakers, and more. The desk also has a height range of up to 12 inches above your desk surface.


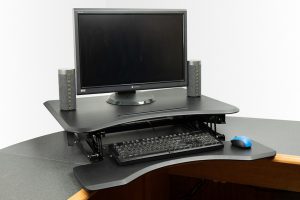
The desk’s upper surface footprint of 32 x 24 inches provides a lot of surface space for all the things you might want to have at eye level, However, this may also be a disadvantage for some people that may not have a desk that is very deep. The desk requires a 23 x 25 inch area to sit on, and the total area of the upper surface and the keyboard shelf is 32 x 33 inches.

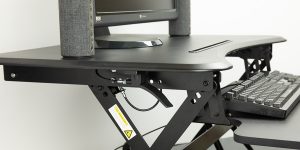
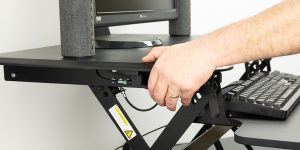
The desk is operated by squeezing the levers on each side and pulling up or pushing down. This is somewhat of a disadvantage to an electrically operated desk, as it requires both hands to operate. The upside to this type of mechanism is that it’s much faster to operate than an electrical one.


The keyboard shelf is adjustable by simply turning a knob, and is also easily removable if you wish to use your keyboard on your desk surface or on the surface of the standing desk.

There’s also a slot in the upper desk surface, it’s for tablets and phones. That’s a pretty handy feature. There are no monitor arm mounting holes, but the frame design does allow for a clamp-style monitor arm on the back edge.


What I like

  • Large footprint
  • Option to easily remove the keyboard shelf
  • Tablet and phone slot
  • Beveled edges
  • Range of adjustment
  • 80 lb capacity
  • Excellent height range
  • Ease of assembly
  • Sturdiness

What needs to be improved

  • Lift mechanism requires two hands to operate.
  • Sometimes sticks slightly when at the lowered position.
  • No monitor holes for a monitor arm.
  • No cable routing. You’re pretty much left to yourself on figuring out where to run the cables for your computer equipment. Although a few zip ties help, it would be nice if it included some kind of cable routing solution to both make it easier and neater.

Final thoughts

With the plethora of standing desks on the market today and the various designs and mechanisms they employ, you’ll probably want to do some research to see which one would best fit your needs. That being said, you’d probably be pretty happy with this one.

Price: $249.99
Where to buy: Amazon
Source: The sample of this product was provided by TaoTronics

The post TaoTronics standing desk review appeared first on The Gadgeteer.

Filed in categories: Reviews

Tagged: ,

TaoTronics standing desk review originally appeared on The Gadgeteer on May 3, 2018 at 2:00 pm.

Note: If you are subscribed to this feed through FeedBurner, please switch to our native feed URL http://the-gadgeteer.com/feed/ in order to ensure continuous delivery.