Sena Vettra Folio 360 Rotating leather iPad Pro 12.9 case review

The iPad Pro 12.9″ is a great device.  It has a beautiful screen, works beautifully with the Pencil, and could serve as a laptop replacement for many.  But it’s bigger and heavier than other iPads, as you would expect, which means you’re likely to want a stand for it sometimes.  Sena, known for their leather accessories, of course offers a beautiful leather case / stand for the iPad Pro.  They actually offer the Vettra Folio 360 Rotating leather case for the new iPad, the iPad Pro 10.5″, and both the original and the 2017 versions of the iPad Pro 12.9″.  I was lucky enough to be selected to give it a try.  I requested and received the Vettra for the new version of the iPad Pro 12.9″ in black.

Hardware specs

  • Dimensions:  12.25″ x 9″ x 0.75″
  • Weight: 1 lb, 5.2 ounces
  • Leather book-style design
  • Microfiber lining

Design and features

For some reason, the 12.9″ iPad Pros seem to be marketed as a business device, and most accessories for it seem to always be in somber colors.  Sena follows this trend by offering the Vettra for the new 12.9″ Pro only in black or tan.  I don’t use my Pro for business, but even if I did, I’d prefer a nice blue or a red case for it, because I love color.  The black case is very suited for business, and of course, it’s great for every day use, as well.

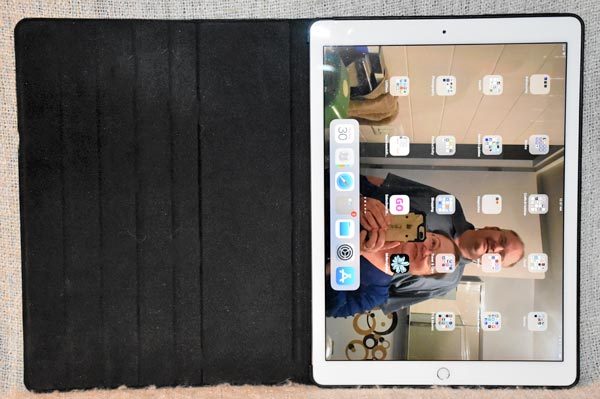
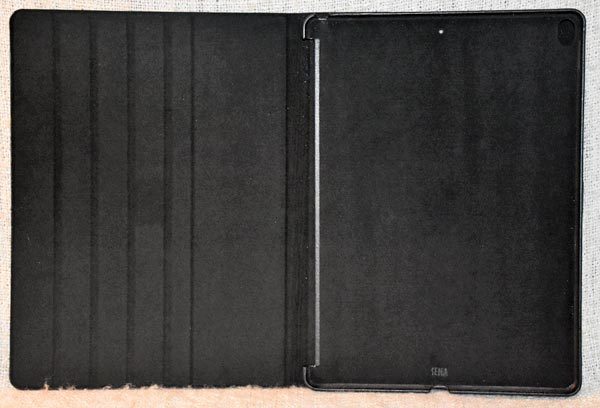
The inside of the front cover is lined with a microfiber material to protect the screen.  The other side has a slightly flexible, snap-in case for the iPad.  The snap-in case is also lined with microfiber to protect the back of the iPad, and the outside edges are covered with the same leather used on the rest of the case.

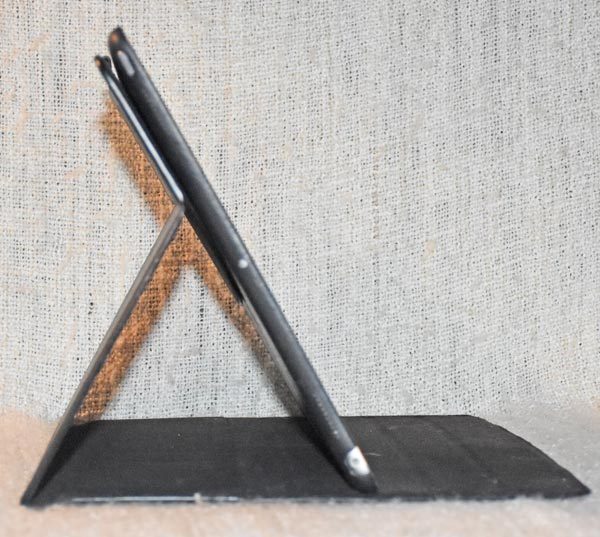
The grooves on the inside of the front cover are “stops” where the iPad rests when the case is folded into a stand.

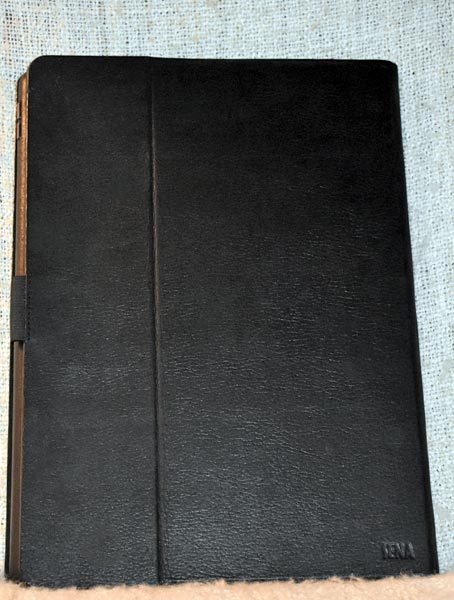
The front of the Vettra is plain, with no product branding.  The leather spine of the case is very soft and flexible, so you can fold the front cover completely to the back.  The vertical line on the front of the case is a fold line for the stand function.

The front cover has magnets that operate the iPad’s sleep/wake function.  They didn’t hold the front cover closed on my iPad Pro, though, perhaps because the front cover with its leather and stiffening was just too heavy for the magnets to hold closed.

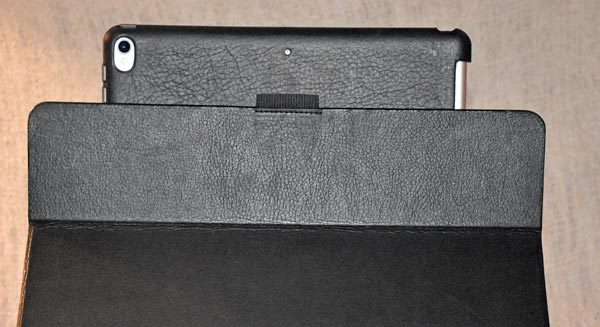
The back of the case is branded with the Sena name at the bottom right.  You can also see an elastic loop that holds your Apple Pencil.  The vertical line on the back of the Vettra is another fold line for the stand function.

The bottom has a cutout for the Lightning connector.  I had no trouble plugging in the Apple Lightning cable and charging the iPad while it was in the Vettra case.

What you can’t see in this photo, or even very well in person, are the sets of small holes on each side of the Lightning connector that open up the case over the bottom speakers.

The top of the case also has the small speaker holes, again not visible in this photo.  The sound from my iPad wasn’t muffled by the Vettra case.

You’ll also see cutouts for the headphone jack and a hole at the mid-point for the top microphone.  At the far right is a metal button that covers the iPad’s power/standby button.  You need to be sure to press in the center of this button to easily operate the iPad’s power button.

As you can tell from the name of the case, the iPad can rotate from landscape to portrait orientation in this case.  A couple of details you can see in this close up of the portrait orientation is that the back camera and its flash are left uncovered; the case doesn’t interfere with the camera’s operation.  You’ll need to turn the case into the portrait orientation to be able to use the back camera at all, though.  And this case is big and a bit cumbersome to hold while you take photos with the back camera unless you stand it on a stable surface.

The center of the back has another microphone opening.  And you’ll see two metal button covers on the left side of the image that covers the volume buttons.  Adjusting the volume was easily accomplished with these buttons.

The last thing you need to notice in this image is how the case is cut away on the side opposite the volume buttons.  This leaves the iPad Pro’s Smart Connector exposed, making the Vettra usable with the Smart Keyboard, if you use one.

Here’s the iPad Pro standing in the landscape orientation.  The stand was very stable, and it worked well for watching videos on the iPad.  You can use the grooves on the front cover to adjust the viewing angle.

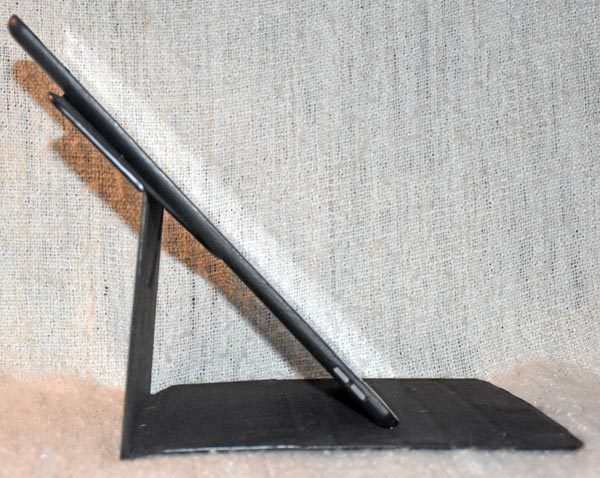
Here’s the iPad Pro in the portrait orientation.  I personally never use my iPad in this orientation, but it seemed that I couldn’t quite get the iPad as nearly vertical as I’d like.  It seems that you would always see a slanted view of the screen in portrait orientation.

I don’t know what type of material was used as the stiffening inside the front and back of the case, but you can see it started to bow after I’d been using the case for a few weeks.  That’s the back of the case you see here.  The front of the case also bowed a bit, but it’s not visible when the case is laying on its front, as it is here.

Performance

The Vettra Folio 360 Rotating leather case for the new iPad Pro 12.9 is sturdy and very protective.  I didn’t worry about the screen at all when I put the iPad in this case inside my bigger gear bag.  I liked the stand function very much, especially the landscape orientation that I primarily use.

The Vettra for the big iPad Pro is heavy, at 1.33 pounds, but that’s because of the quality and the sturdiness of the materials used for it.  However, it does make the iPad Pro 12.9 even heavier, bringing it to about 2.9 pounds.

What I like

  • Sturdy and protective
  • Well made
  • Works well as a stand for watching videos or reading
  • Magnets in front cover operate the iPad’s sleep/wake function

What needs to be improved

  • It’s a bit cumbersome to hold in your hands while using the back camera
  • It makes the already heavy iPad Pro 12.9 even heavier

Final thoughts

The Sena Vettra Folio 360 Rotating leather case for iPad Pro 12.9″ (2017 model) is a sturdy, protective case that also serves as a stable landscape or portrait stand for this big, heavy tablet.  Because of its style and quality, you’ll find it will fit into the business environment beautifully, and it works just as well for more casual environments.

Price: $89.95
Where to buy: Sena Cases and Amazon
Source: The sample of this product was provided by Sena Cases

The post Sena Vettra Folio 360 Rotating leather iPad Pro 12.9 case review appeared first on The Gadgeteer.

Filed in categories: Reviews

Tagged: ,

Sena Vettra Folio 360 Rotating leather iPad Pro 12.9 case review originally appeared on The Gadgeteer on May 23, 2018 at 10:00 am.

Note: If you are subscribed to this feed through FeedBurner, please switch to our native feed URL http://the-gadgeteer.com/feed/ in order to ensure continuous delivery.

Airthings Wave smart radon detector review

You’ve heard of smoke detectors and carbon monoxide detectors, but have you heard about an electronic radon detector? Me neither. So I was surprised and interested when the folks at Airthings offered to send me their Wave smart radon detector for a review. Let’s take a look.

What is it?

The Airthings Wave smart radon detector looks like a smoke detector, but it will let you know what level of the deadly radon gas is in your home or building. Radon is the leading cause of lung cancer among nonsmokers. What exactly is radon gas? According to the EPA:

Radon is a radioactive gas that has been found in homes all over the United States. It comes from the natural breakdown of uranium in soil, rock, and water and gets into the air you breathe. Radon typically moves up through the ground to the air above and into your home through cracks and other holes in the foundation.

Why is radon gas deadly? According to the National Radon Defense site:

Signs and symptoms of lung cancer from radon exposure can include:

  • Persistent cough.
  • Hoarseness.
  • Wheezing.
  • Shortness of breath.
  • Coughing up blood.
  • Chest pain.
  • Frequent infections like bronchitis and pneumonia.
  • Loss of appetite.

Scary right? You may have used a charcoal radon detector kit before. It comes in a small box that you leave in your house for several days before mailing it to a lab for the results. Unlike the charcoal tests, the Airthings Wave smart radon detector will let you see the level immediately anytime you want to check it and it will also tell you the humidity, and temperature level. It even supports hand gestures.

Hardware specs

Power supply: 2x AA alkaline (LR6) or Energizer L91 batteries
Dimensions: Radius: 120 mm (4.72 in)
Height: 36 mm (1.42 in)
Weight: 219 g (incl. 2x E91 batteries)
Radon sampling: Passive diffusion chamber
Detection method: Alpha spectrometry
Operational and storage environment:
Temperature: +4 °C (39 °F) to +40 °C (104 °F)
Relative humidity: < 85 %
Initial Accuracy/Precision at 100 Bq/m3 (2.7 pCi/L):
7 days < 20 %
1 month < 10 %
Measurement range: 0 Bq/m3 to 50000 Bq/m3 (0 pCi/L to 1350 pCi/L)

What’s in the box?

  • Airthings Wave smart radon detector
  • 2 AA batteries

Design and features

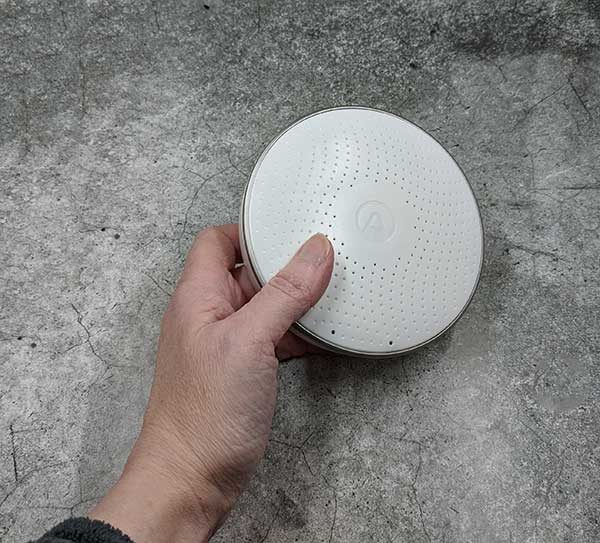
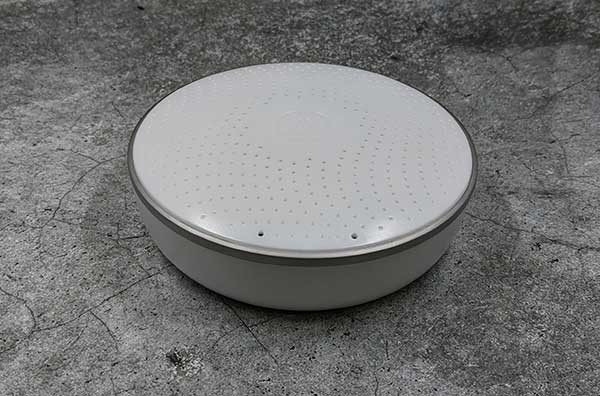
At first glance, the Wave smart radon detector looks like a traditional smoke detector. It’s made of white plastic with a sensor and a built-in color LED indicator on top.

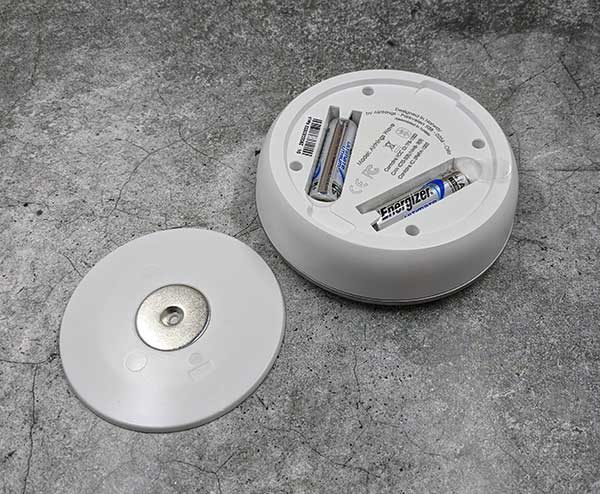
It has a magnetic cover on the base that covers 2 AA batteries which are included with the unit and which should last up to 1.5 yrs before they need to be replaced. The base plate can be attached to the wall or ceiling with a single screw.

How do you use it?

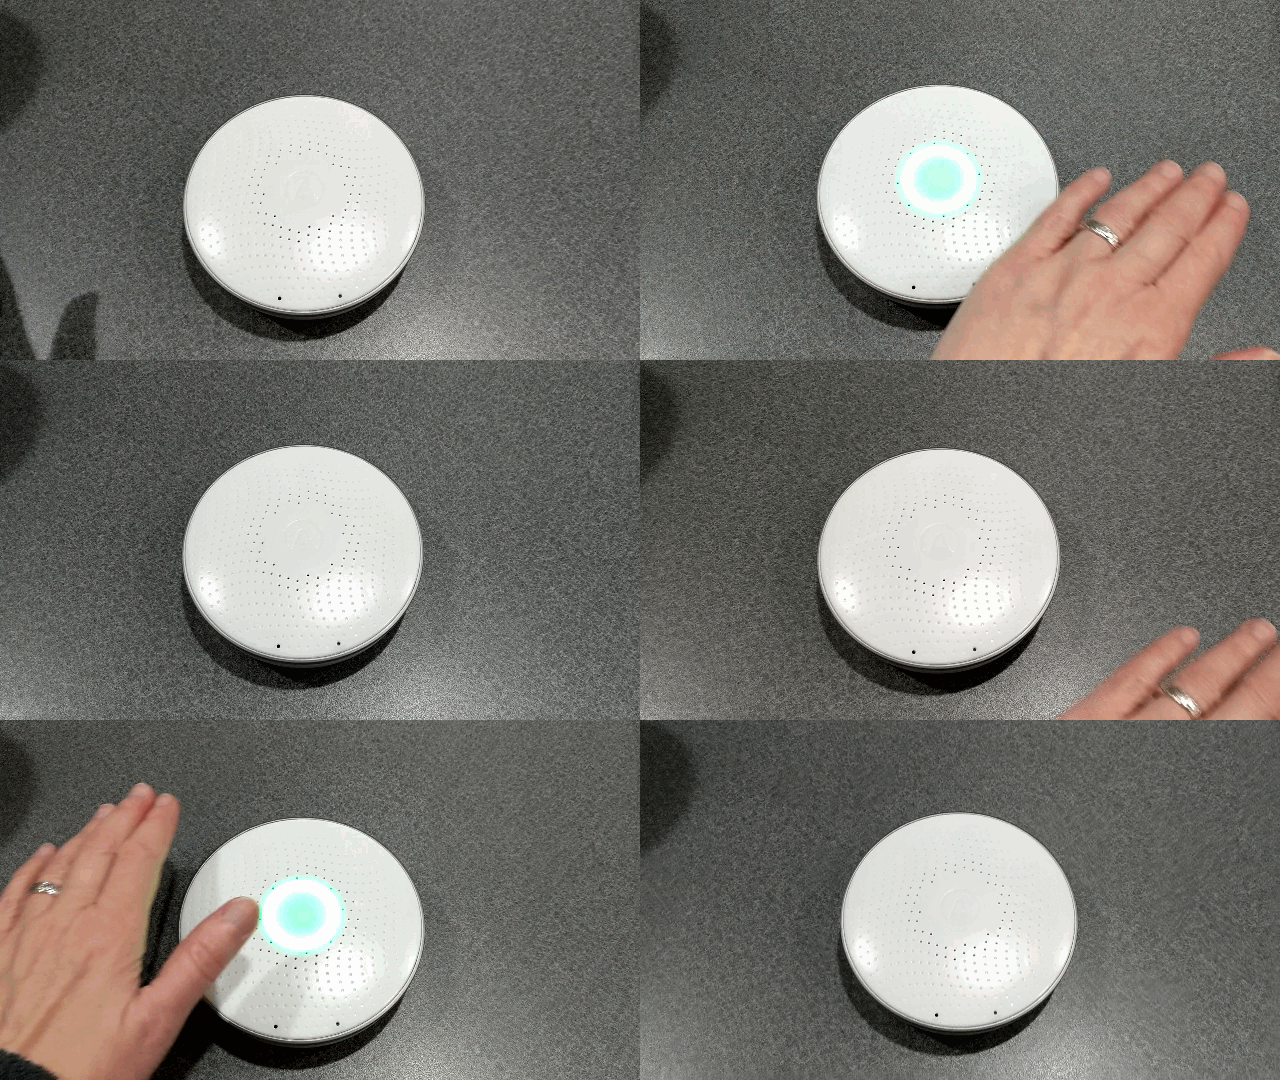
All you have to do is install the batteries, mount it on a wall or ceiling and wait an hour for it to do its initial reading. Then all you have to do is wave your hand over the unit to see if the reading is green which means good air quality (low radon levels), yellow which means the level of radon gas is above the recommended levels and red which means the levels are high and action should be taken which is usually the installation of  a Radon Mitigation fan.

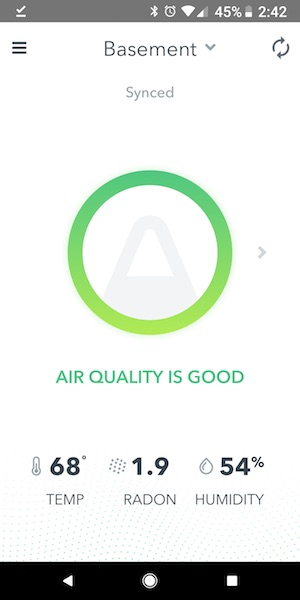
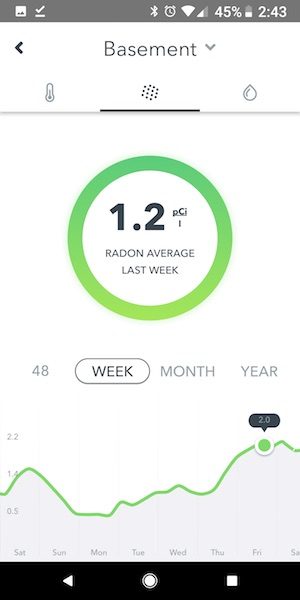
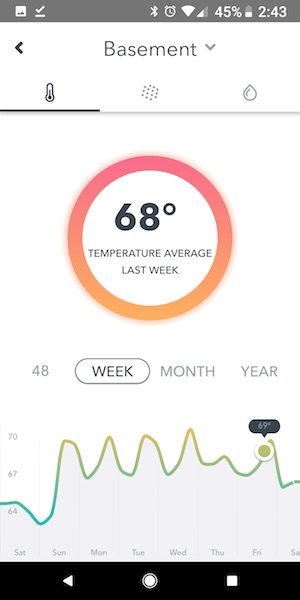
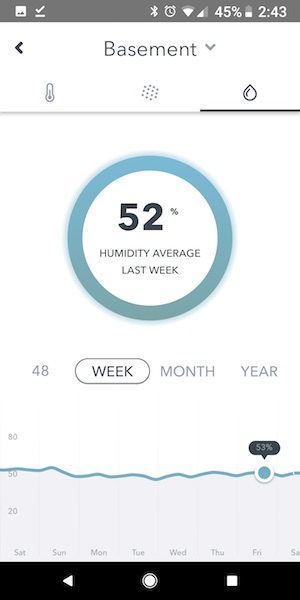
You can use the Airthings Wave smart radon detector by itself, but you can pair the detector with your Android or iOS device and use it with the free Airthings app to automatically record radon, humidity, and temperature level readings so you can see trends over time. This important because just one good reading doesn’t mean you’re home free. Radon readings fluctuate with the seasons and the location of your home.


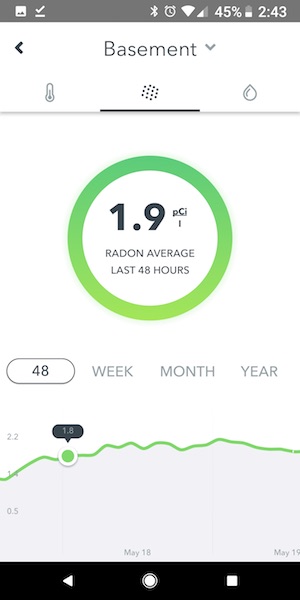
The app has an easy to understand interface that will immediately show you if there is an issue with radon gas in the area where the detector has been placed.


You can drill down into the data to see averages and trends for radon, temperature, and humidity levels. The Airthings website mentions an audible alarm that will sound if the radon gas levels are unsafe, but I couldn’t find any details about this feature in the app.

If you’d like to read more about the accuracy of the Airthings detector, check out the article below.

Charcoal Versus Airthings – Accuracy

I don’t recall having a radon test for my home when I bought it, but that’s been almost 20 years ago. So, I was a little nervous about trying the Wave detector because I didn’t want to see a bad reading and then worry that we’ve been living with high levels of radon gas for almost 20 years. Luckily that wasn’t the case. I tested the levels in my basement (levels tend to be the highest on the lowest level of your home) and was greeted with very low levels for a couple of weeks.

What I like

  • Really easy to setup
  • Runs on batteries that are included and will last up to 1.5 years
  • Portable, so you can move it from room to room to check levels
  • Can be used alone or with an app to keep a history of the levels

What needs to be improved

  • Expensive
  • Wish it also included a smoke detector, carbon monoxide detector and radon detector in one device for the same price

Final thoughts

I really like the idea of having an easy to use radon detector that can give me a reading immediately instead of having to wait weeks and send a kit in the mail for the results. I also like that the Airthings app will show trends and averages over time so you can see how the radon levels fluctuate during the spring, summer, or winter months.

I gave the detector to a friend of mine who used a radon test kit and found that his house had high levels. He had to have a special remediation fan installed in his house to bring the levels down. The Airthings Wave smart radon detector will see if the fan actually works. Too bad he didn’t have the Wave BEFORE he had the fan installed… Anyway, I will update this review in a few weeks after the detector has collected some data on his house. So stay tuned.

Price: $199
Where to buy: Amazon
Source: The sample for this review was provided by Airthings.

The post Airthings Wave smart radon detector review appeared first on The Gadgeteer.

Filed in categories: Reviews

Tagged: ,

Airthings Wave smart radon detector review originally appeared on The Gadgeteer on May 22, 2018 at 3:55 pm.

Note: If you are subscribed to this feed through FeedBurner, please switch to our native feed URL http://the-gadgeteer.com/feed/ in order to ensure continuous delivery.
PAPAGO GoSafe S780 dash cam review


I’ve only had one previous dash cam, and it was a very cheap one. While I was waiting for the PAPAGO! GoSafe S780 dash cam to arrive, I didn’t have my hopes set very high because I had never heard of the company. When it arrived I was unexpectedly surprised by this high-quality dash cam. PAPAGO! seems to have quite a variety of dash cams and accessories.

What is it?

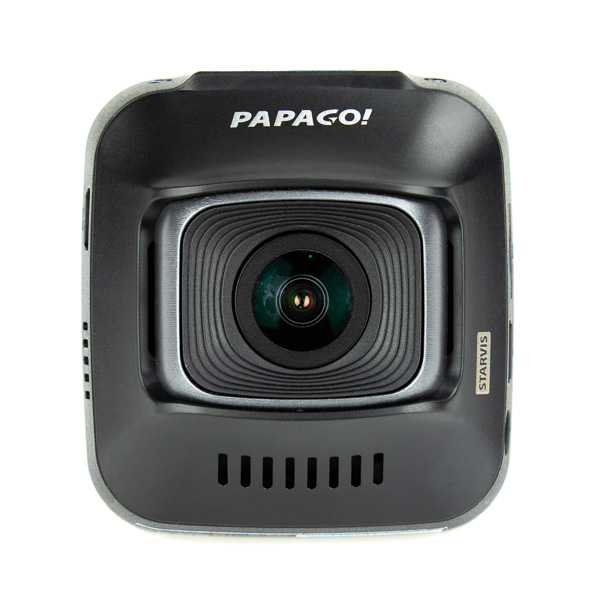
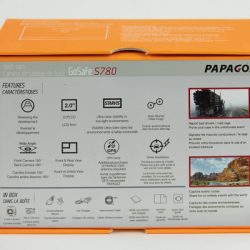
The PAPAGO! GoSafe S780 dash cam isn’t your run of the mill dash cam – it’s a high-quality dual camera, low light dash cam that is capable of great performance regardless of the time of day.

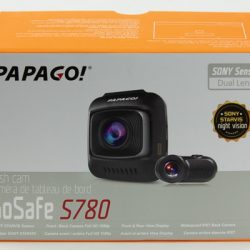
Before I received this product I knew nothing more than its name. Being a photography nerd, as soon as I opened the shipping box and saw the “Sony Sensor” on the front of the box, my hopes suddenly raised. Sony makes some of the best camera sensors on the market.


Hardware specs

Screen 2.0″ color LCD display screen
Chip Professional Sony image sensor chip
Angle View Front: 150 ° ultra- wide-angle lens F1.5. Rear 180° F1.9
GPS Supports GPS-Antenna (Sold separately)
TPMS Supports PAPAGO! TireSafe D10E TPMS (Sold separately)
Video Format 1920X1080P60, 1920X1080P30, 1280X720P30, .MP4 format
Storage Device MicroSD card (Class 10, 8GB or above. Supports up to 128GB)
Battery Built-in super capacitor
Weight .12 lbs
Dimensions 2.2″ x 1.2″ x 2.4″

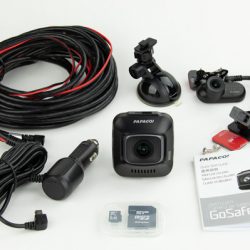
What’s in the box?

  • GoSafe S780
  • Rear Camera
  • Interconnect Cable
  • Car Charger
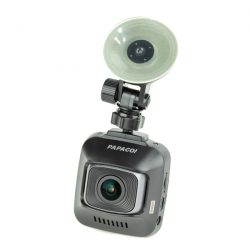
  • Suction Cup Mount
  • 3m Adhesive Mount
  • Micro SD Card
  • User Manual
  • Warranty Card


Design and features

The dual camera design allows you to place the second camera either in a rear-facing position out a rear window or facing the cabin of the vehicle to record the occupants. This is a great feature for rideshare drivers who need an extra level of protection for themselves and their passengers. I occasionally do some YouTube videos, so this will come in very handy for those moments when I don’t have my regular camera running.

You can use the far right button to quickly change which camera(s) the display shows. The modes are: Front, Rear, Front and Rear (like picture-in-picture), and off. Regardless of the mode, both cameras record to separate video files at the same time.

The S780 turns on automatically and starts recording when power is applied to the plug. The camera will record 5-minute segments of video, replacing the oldest files when the memory card is full. Embedded supercapacitors provide enough power to save the recording when power is lost, either from turning off your vehicle or in the event that a crash disrupts power to the camera. A 16gb memory card holds approximately 90 minutes of video files before the files are overwritten.

While recording you can press the down arrow button for 3 seconds to capture a picture without interrupting the video recording. These are saved to a separate “photos” folder on the memory card and are not overwritten.

There’s also an emergency mode, which is activated by pressing the far left button while the device is recording. This mode will lock the current file so that it is not overwritten when the memory card is full. The locking of the file will also occur when the g-force sensor detects a crash – something I declined to test.

The main camera has a SONY Starvis sensor with a 150-degree ultra-wide angle lens, which is not only glass but has anti-reflection coating as well to eliminate flaring when facing bright lights. The quality is really good. You can make out street signs very easily, but license plate numbers were difficult to make out, but I think that’s more a limitation due to the 1920×1080 resolution than it is the camera itself.

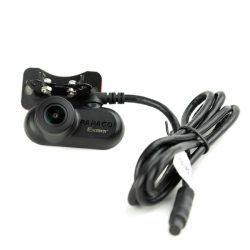
The second camera has a 180-degree view and a SONY Exmor sensor and also features a glass lens and anti-reflection coating. The camera has a wide enough angle of view that even mounted on my rearview mirror, it was wide enough to capture both driver and passenger, seeing slightly out each side window.

Also available is an optional accessory called the TireSafe D10E (sold separately), which enabled the unit to display your tire pressure and temperature in real-time. The unit also supports a GPS antenna (sold separately) to record speed and for GPS logging on your videos, to automatically correct the time, and for other related functions. However, you can only use one of these at a time.

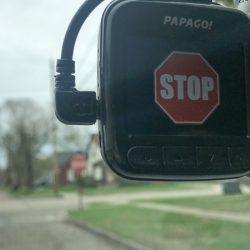
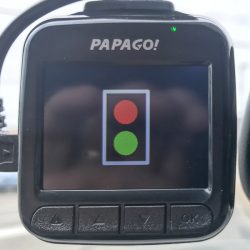
Something I never expected to see in a dash cam is the PAPAGO Driver Assist Features, which include Stop Sign Recognition, Stop and Go, Driver Fatigue Warning, and Headlight Reminder to help you stay safe on the road. For example, when the unit “sees” a stop sign, it will display a stop sign on the screen and give an audible beep. These features are able to be turned on and off in the settings. The stop sign feature worked well, picking up every stop sign, but if you’re going over 25mph you won’t stop in time. I would be nice if it could pick them up a little farther away. The stop and go feature worked well also, giving a lower toned beep when it detects the car in front of you has started moving, but you haven’t.


The S780 has three recording modes: Automatic Recording (Loop recording), Monitor Mode (1 picture per second to save storage space), and Motion Detection(motion-activated recording). The monitor mode is useful to make a hyperlapse video with, as it saves the pictures as frames of the video.

The unit also supports microSD cards up to 128GB which allows approximately 8 hours recording time before it loops over old videos at 1080p30 setting. The unit comes with a 16GB card.

Although there is an included quick start manual, there were no instructions for the wiring of the rear/second camera. After some discussion with Papago support, I found out that the cable for the rear camera has two bare wires that you must connect to ground and the 12 volt backup light signal. If you’re placing the camera at the back of the vehicle that would mean connecting to the backup light wire. If you’re placing the camera in the passenger compartment then you can just leave the wires disconnected, as it’s not really going to do anything for you.

If you don’t have any electrical knowledge this might require some installation help from an auto shop or a friend.

When you have the backup wires connected, the display automatically shifts to the rear camera and provides some on screen distance guides when you place the vehicle in reverse.

What I like

As I mentioned before, the Sony sensors really make this thing. The clarity and dynamic range for both day and night use are really superb. If you’re not into photography like I am, you might not fully appreciate the low light abilities of this dash cam.

One thing I really liked was the extensive menus and settings. This enables you to customize each of the features, and disable features you don’t want on.

The microphone is extremely good, it picked up sound clearly, and from a fair distance away, such as someone standing outside of the vehicle talking to me and the sound of my turn signal.

The primary power plug has a 13-foot cord, allowing you to run the cable behind panels and such so that it’s not in the way. It also has mini-USB connectors and instead of those tiny and fragile micro-USB connectors.

The GoSafe S780 is eligible to receive a lifetime of free upgrades as soon as they are issued, who can’t like that!

I really like the automatic camera view change when going into reverse.

What needs to be improved

  • Needs better instructions about wiring the rear camera.
  • I felt the buttons on the camera were a little too hard to push. Being that the camera is normally going to be mounted up and out of the way, I think they could have gotten by with buttons that were a little easier to push so that the unit didn’t move when pressing them.
  • Both a suction cup mount and a 3M tape mount are included for the main unit, and the rear camera has a 3M tape mount as well as holes and screws for optionally hard mounting it.

Final thoughts

Being one of the more expensive dash cams on the market, I felt as though it was a little pricey for the features it has. Sure, the video and audio it produces are fabulous, but it lacks things that other lower cost cameras have such as touch screens and fewer cords.

Price: $279.99
Where to buy: Amazon
Source: The sample of this product was provided by Papago!

The post PAPAGO GoSafe S780 dash cam review appeared first on The Gadgeteer.

Filed in categories: Reviews

Tagged: ,

PAPAGO GoSafe S780 dash cam review originally appeared on The Gadgeteer on May 22, 2018 at 10:00 am.

Note: If you are subscribed to this feed through FeedBurner, please switch to our native feed URL http://the-gadgeteer.com/feed/ in order to ensure continuous delivery.

BauBax Women’s Sweatshirt jacket review

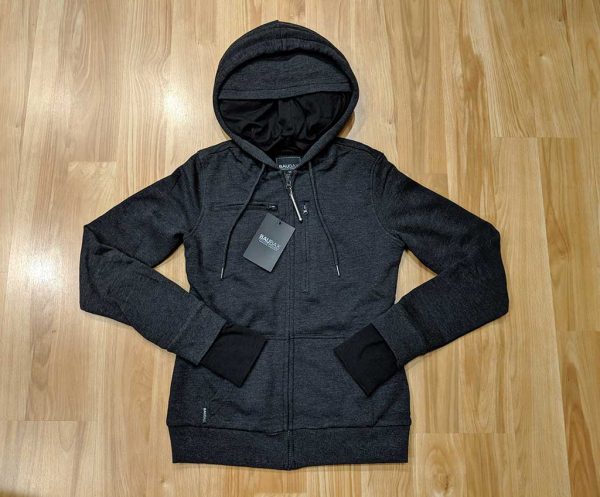
I’m a big fan of comfy clothes and that extends to my outerwear. Hoodies and other short jackets are my preferred type of jacket when the weather is cool. Of course, any old hoodie just won’t do when you’re the Gadgeteer, so I want my hoodies to have extra features over and beyond a hood and two handwarmer pockets. I heard about BauBax almost 3 years ago when we told you about their crowdfunding campaign. Recently they offered to send me one of their original women’s sweatshirt jackets which I’ve been trying out for the past few weeks. Let’s check it out.

What is it?

Designed in the USA, the BauBax Women’s Sweatshirt is a 60% cotton 40% polyester, machine washable hoodie style zippered jacket that comes in three colors (charcoal, black, and blue) and in men’s and women’s sizes XS up to XXXL for men and XS up to XXL for women.

Design and features

At first glance, the BauBax Women’s Sweatshirt looks like a traditional hoodie jacket that most of us already own. But when you take a closer look at it, you’ll discover several extra features.

First of all, the jacket has two open handwarmer pockets like most hoodies. But the jacket also has two additional zippered pockets on the front. There’s a horizontal pocket on the upper right chest and a vertical pocket on the left chest.

The right pocket is the drink pocket and it has been designed to be large enough to hold a regular sized soda can or bottle of water. The vertical pocket has been designed to be large enough to hold a passport. I was too lazy to find my passport for the photo above, so I substituted a Field Notes sized notebook which fits great.


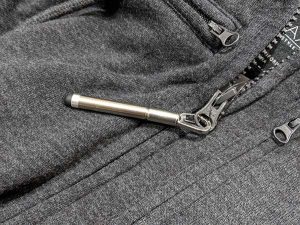
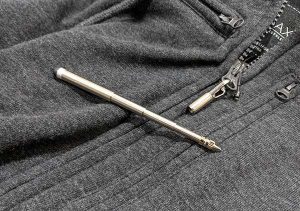
If you need something to write with or a stylus, BauBax has you covered because they include a telescoping combo pen/stylus that clips on to the jacket. They also include 3 extra ink refills for the pen.

If we flip the jacket over and look at the back, we don’t find anything special, but you can see that the cuffed sleeves look longer than is typical.

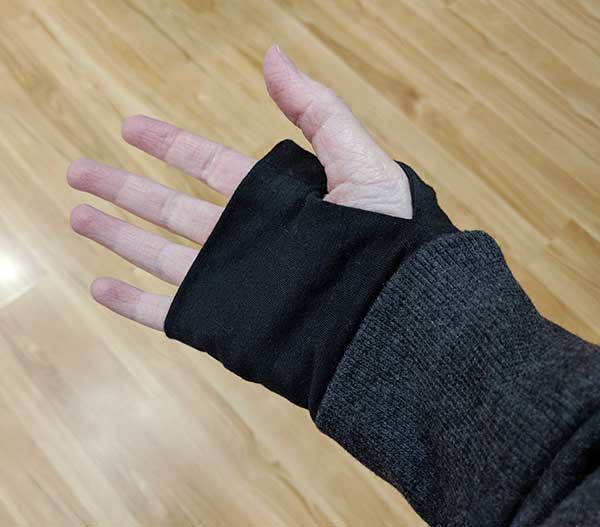
That’s because the sleeves have built-in slidegloves that you can use to keep your hands a bit warmer than with no gloves at all, and it helps to keep the sleeves from sliding up your arms.

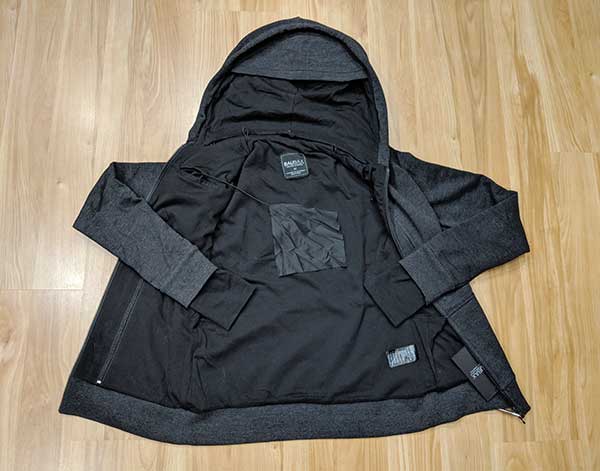
When you unzip the jacket, you’ll find a black lining and additional pockets. First about that lining. I do wish that they had used either a satin lining or regular fleece lining because the lining is a lint magnet. Since it’s black, you can see every little piece of lint, every cat hair, etc. It’s also thin and stretchy so I don’t know how it will wear over time.

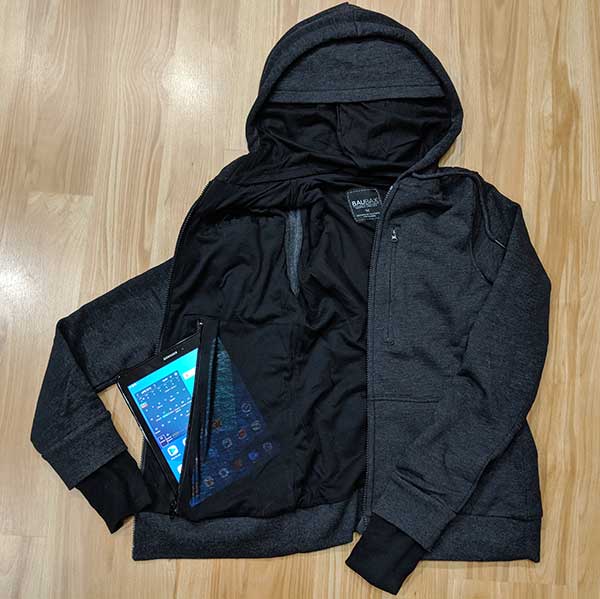
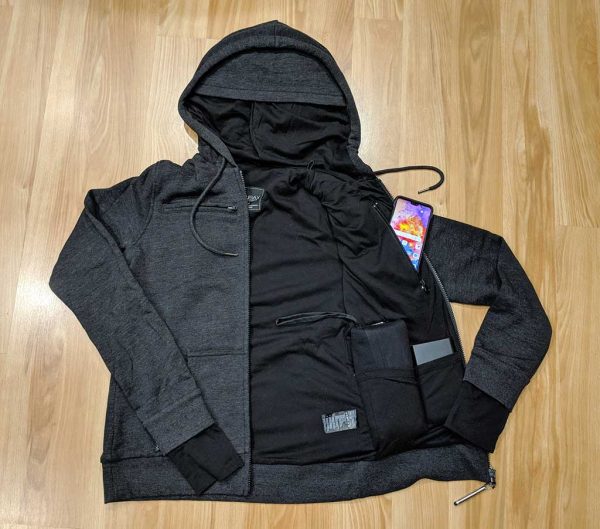
As for the pockets, there are 5 interior pockets (not including the hood, but more on that later). There’s an open-topped sunglasses pocket on the upper right lapel that holds an elastic tethered eyeglass cleaning or screen cleaning cloth.

Below the sunglasses pocket is a long vertical zipped pocket that is large enough to hold a tablet. It’s just big enough to hold a Samsung Galaxy Tab S3 shown here.

On the left inside lapel, there is a vertical zippered satin lined pocket for your phone and along the waistband area, there are two open-topped pockets. One is for the optional blanket and the other is for a power bank.

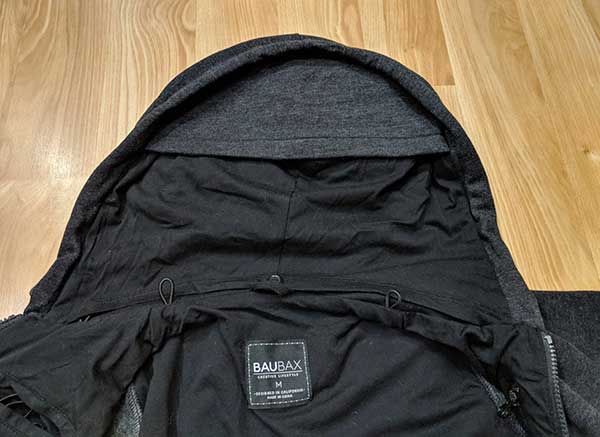
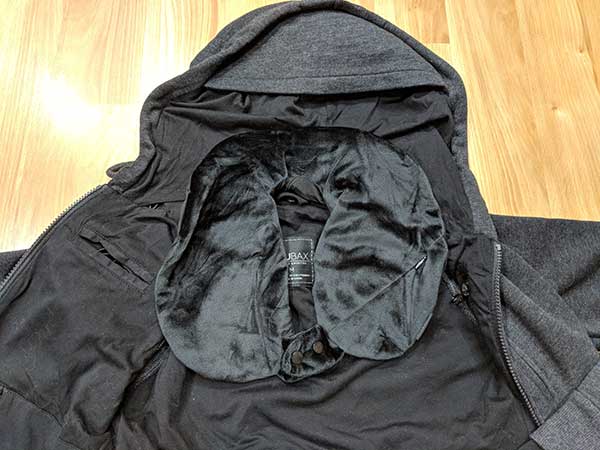
The hood of the BauBax Women’s Sweatshirt jacket had a built-in eye-mask. There’s also a built-in pocket that holds the inflatable neck pillow and you’ll notice in the image above that there are elastic loops that you can use to route your earbud wires.

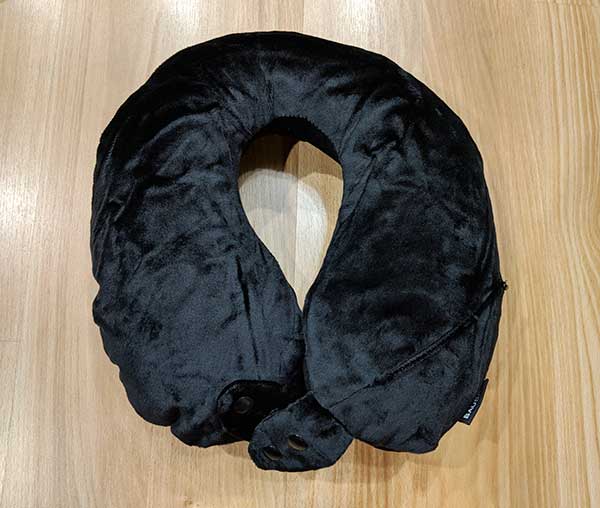
The inflatable pillow stores in the hood. To remove it you can just unbutton the hood’s pocket and pull it out.

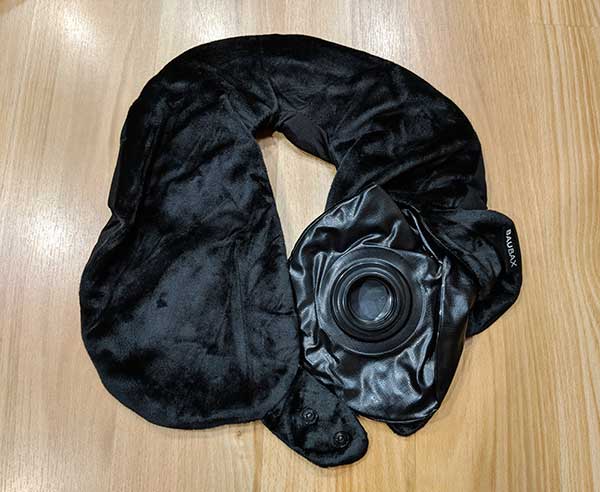
The pillow has a soft plush cover and a zipper reveals the air valve. The cool thing about the port is that it takes barely any air or effort to inflate the pillow. Just place your mouth over the valve and blow a few puffs of air to inflate it. You don’t even have to quickly plug the valve because as soon as you stop blowing, it automatically closes on its own.

To deflate, you just press your finger in the air valve to open it and press out the air. It’s quick and simple.

How does it fit?

I originally asked for the jacket in small, but it felt too tight, so I traded for a medium which is a perfect fit for my 5ft 6in 130 pound frame.

The jacket is soft and comfortable. The only part of the jacket that I didn’t like was the pillow stowed in the hood because it caused the hood to tug on my neck from the weight and bulk.


Oh look, I’m Mr. Robot. 🙂 You can click the images for a larger view. The hood with the built-in eye mask is actually useful when you’re not trying to sleep as it gives your head a bit more protection if it’s raining.

Accessories

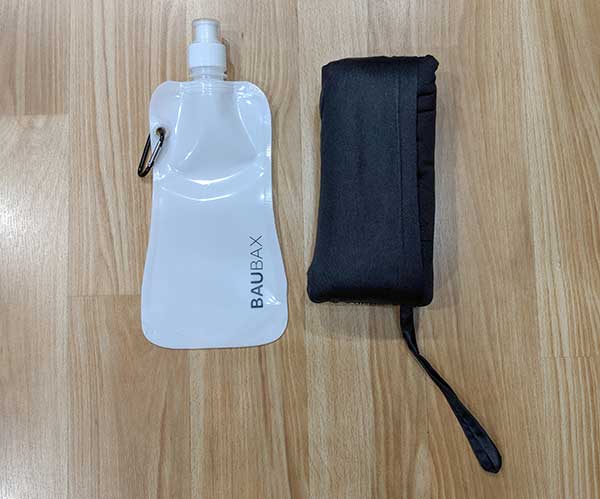
The BauBax Women’s Sweatshirt jacket comes with the combo pen/stylus, but if you want the 55x37inch 100% Polyester pocket blanket, it’s an optional purchase with a price tag of $25. You can also get a collapsible BPA free bottle that runs $10. I think both of these accessories should be included with the jacket.

What I like

  • Comfortable like a traditional hoodie
  • 9 pockets
  • Hood has a built-in eyemask and can hold a neck pillow

What needs to be improved

  • Expensive
  • Blanket and bottle should be included with the jacket
  • The lining is thin and attracts lint.

Final thoughts

When it comes down to it, I think the BauBax Sweatshirt is too pricey compared to my favorite hoodie (the SCOTTeVEST Cotton Hoodie). That said, I do like the little extras that come with the BauBax, like the combo stylus/pen and pillow, but I think asking people to pay an extra $35 for the blanket and bottle is too much considering that the jacket already costs $150.

When it comes to clothing, personal style is a huge part of the selection process. Some people aren’t “hoodie people”. But if you are a hoodie person and would like to have a jacket that offers more ways to carry your gear besides the two handwarmer pockets, the BauBax Sweatshirt jacket for men and women is one option to consider.

Price: $149.99
Where to buy: BauBax and Amazon
Source: The sample for this review was provided by BauBax.

The post BauBax Women’s Sweatshirt jacket review appeared first on The Gadgeteer.

Filed in categories: Reviews

Tagged:

BauBax Women’s Sweatshirt jacket review originally appeared on The Gadgeteer on May 21, 2018 at 2:00 pm.

Note: If you are subscribed to this feed through FeedBurner, please switch to our native feed URL http://the-gadgeteer.com/feed/ in order to ensure continuous delivery.
Bastion Braza Bro EDC folding mini-knife review

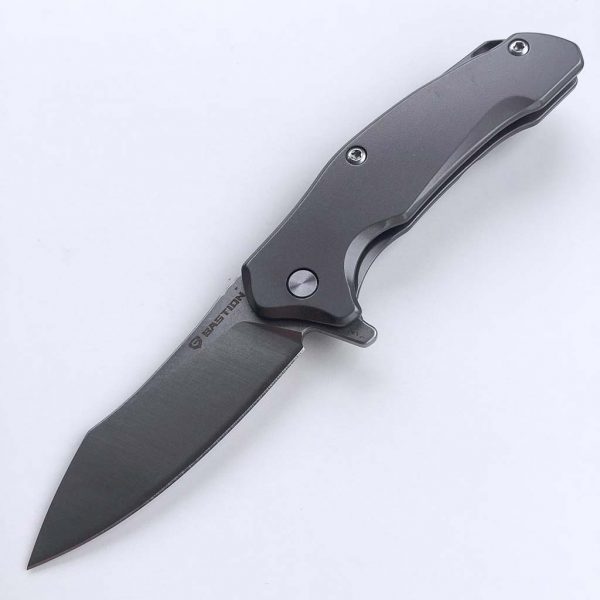
One of the much-debated yet virtually universal axioms of EDC philosophy is that you need at least two items in your EDC kit: a flashlight and a knife.  While some prefer or even need to carry flashlights and/or knifes that are on the more powerful or larger end of the product spectrum, there are some (likely many) who done need or just cannot effectively a higher level of bulk or weight.  While I think I have found the perfect EDC light for me, the Lumintop Tool AAA flashlight, the perfect knife had been eluding me until I stumbled upon the Bastion Braza Bro EDC folding mini-knife crowdfunded Kickstarter campaign.  This little giant is small but very functionally packed with just about every feature I’d been wanting in a small EDC knife.  Let’s check it out!  Gadget on!

What is it?

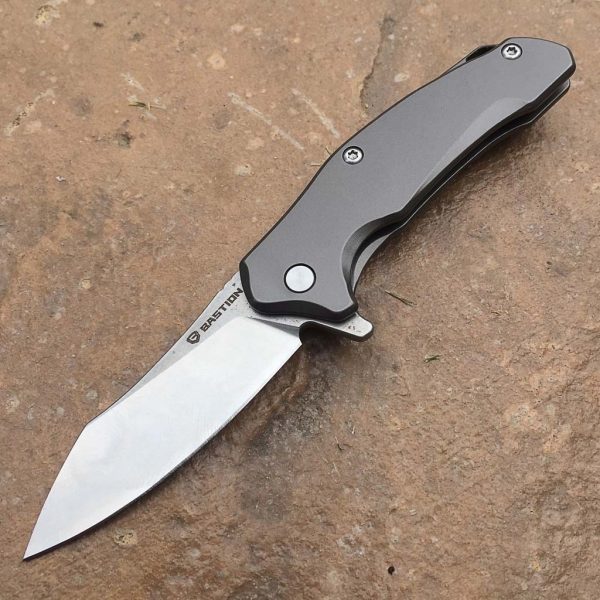
Bastion designed their Braza Bro to be a “little brother” version of their larger Braza EDC folding knife.  Translation: the Braza Bro is smaller, lighter, and less expensive, but retains virtually all of the functionality of its larger sibling, such as flipper deployment, a frame lock, pocket clip, other features.

Hardware specs

  • D2 tool steel blade
  • Ceramic ball bearing pivot
  • Titanium-coated stainless steel frame and pocket clip
  • Stainless steel Torx fasteners
  • Flipper for fast deployment
  • Ergonomically-contoured grip
  • Keychain/lanyard hole
  • Ultra strong frame lock
  • Weight = 4.18 oz (41.9 g)
  • Length closed = 2.75 in (70.0 mm)
  • Overall length open = 4.77 in (121.3 mm)
  • Blade length = 2.12 in (53.9 mm)
  • Width = 0.93 in (23.5 mm)

What’s in the box?

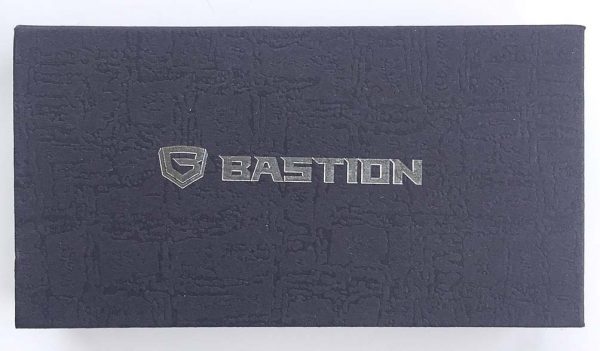
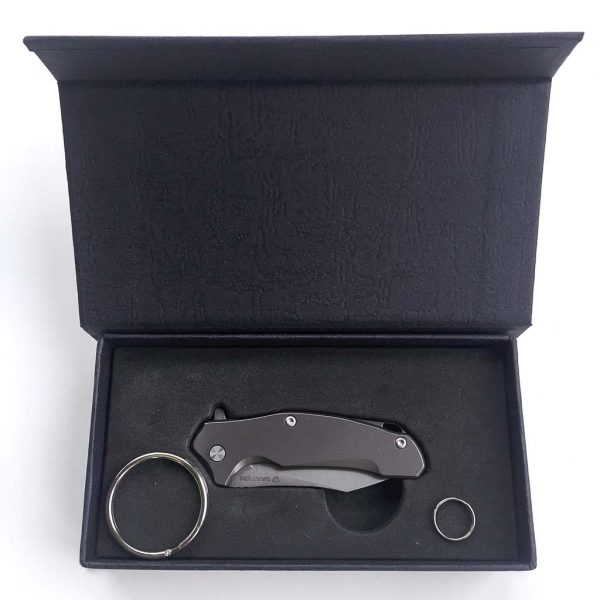
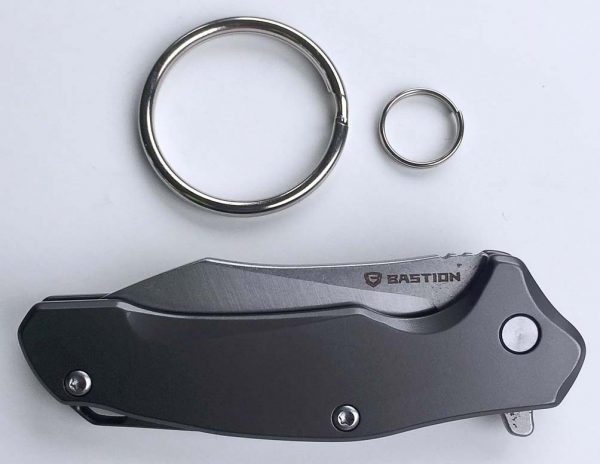
Let’s start with the packaging itself, seen in the two images above.  The box is a clamshell style with magnetic lip closure and inside includes a foam tray with cutout for the Braza Bro.

Inside the box were the items shown above and listed below:

  • Braza Bro EDC folding knife
  • Standard keychain-sized split ring
  • Smaller split ring

Design and features


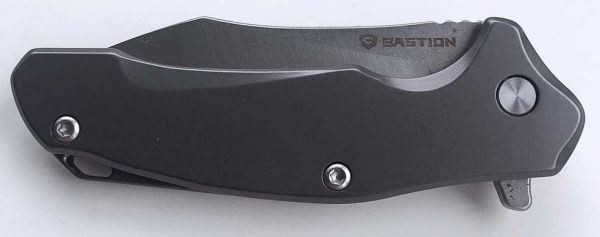
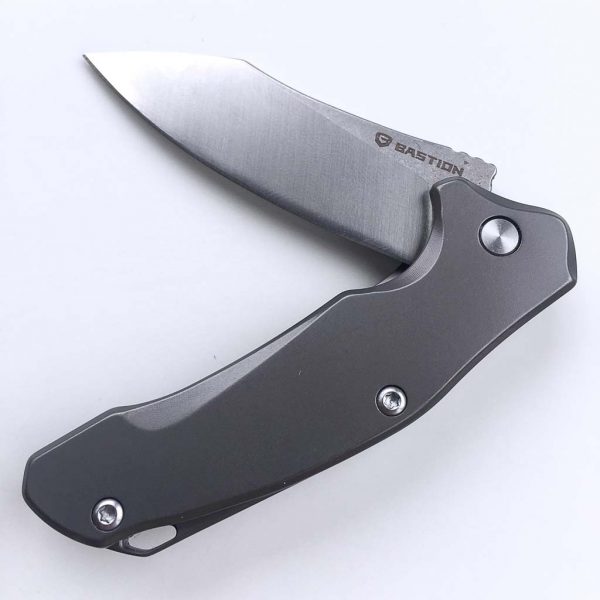
The Braza Bro was one of those items that immediately felt and looked high-quality right out of its box.  It actually looked and felt even more impressive than I expected from the pics and videos in its Kickstarter campaign.  Its Titanium-coated stainless steel frame looks and feels very solid.

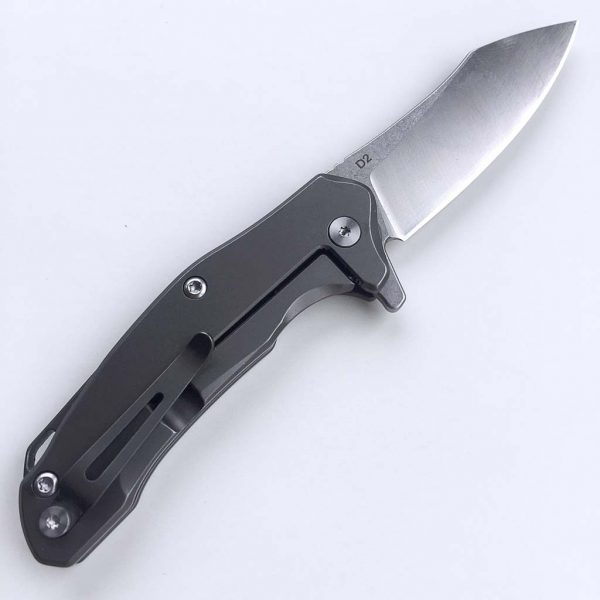
I was stoked to try the Braza Bro out and immediately began playing around with it.  I was impressed with its small but functional pocket clip, a feature that I was especially happy that it had.

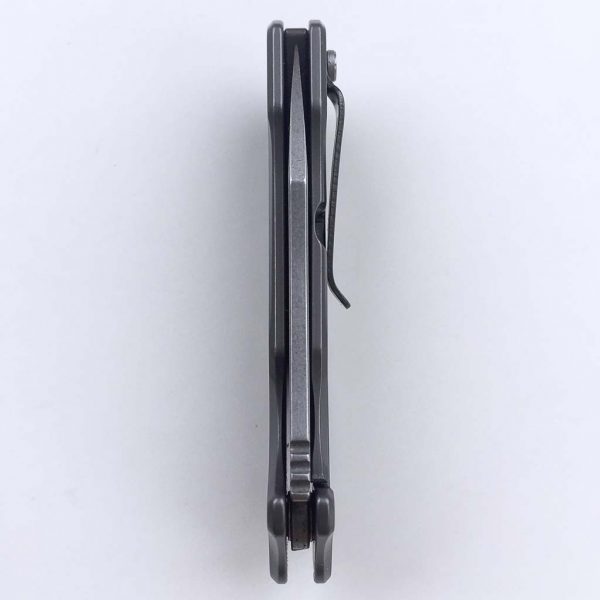
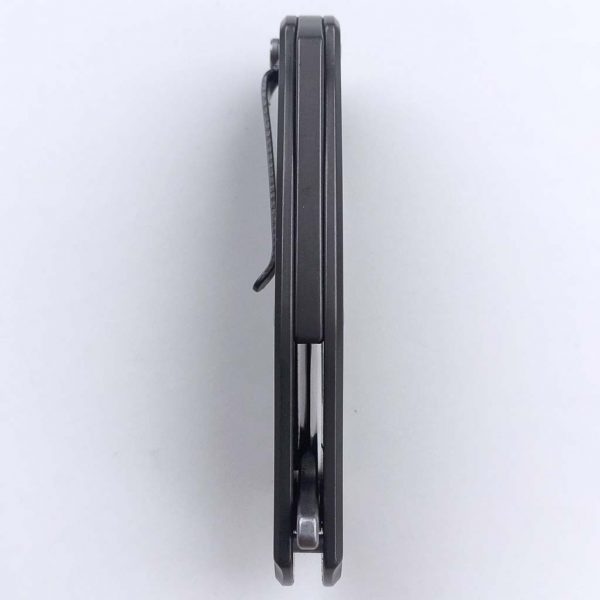
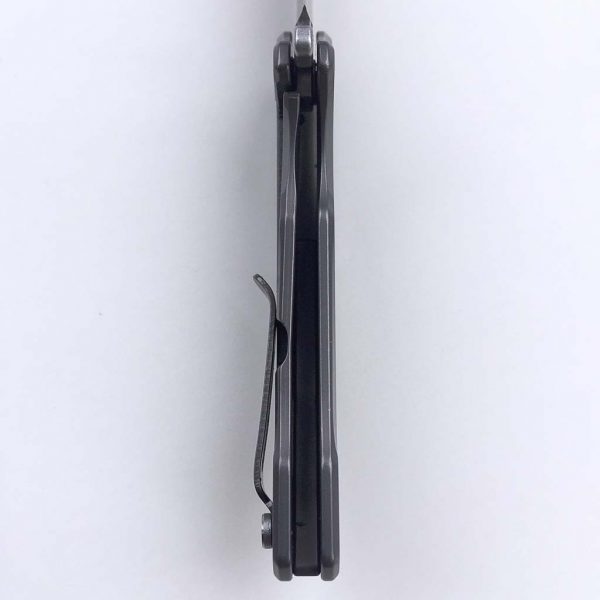
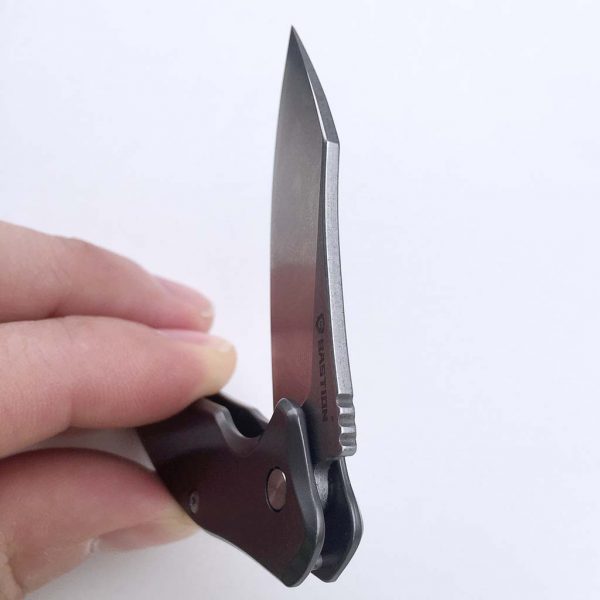
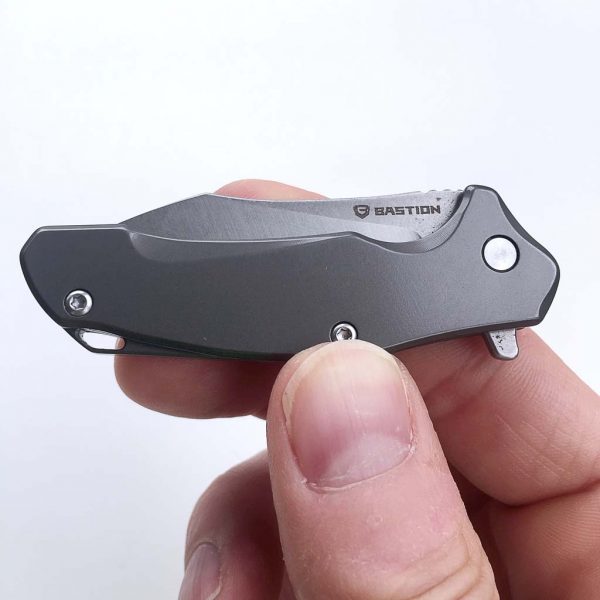
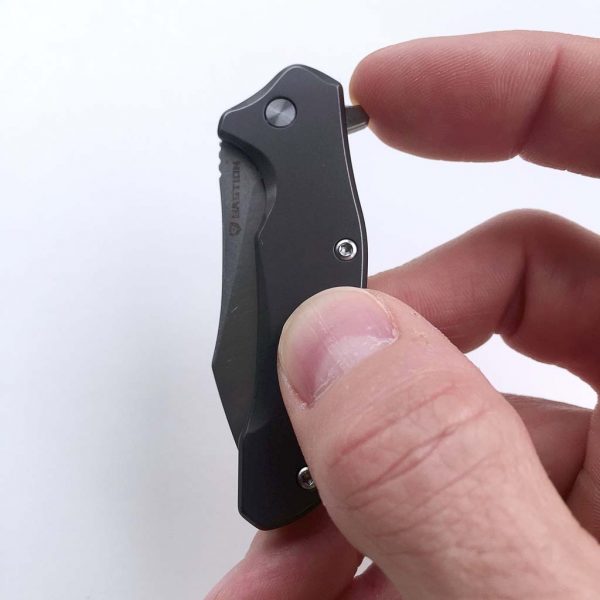
The Braza Bro is not only small in a footprint (length and width sense), it is also quite slim (in a thickness sense), as seen in the images above and below.  I especially liked this as well, as it cuts down on the knife’s bulkiness, which helps make this a much more effective EDC knife for me.

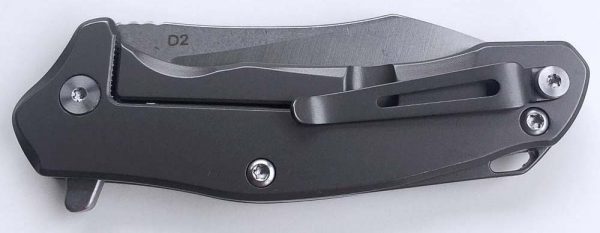
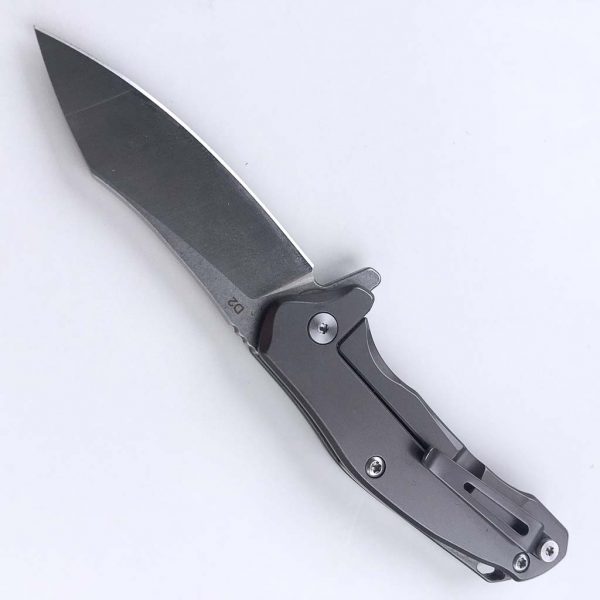
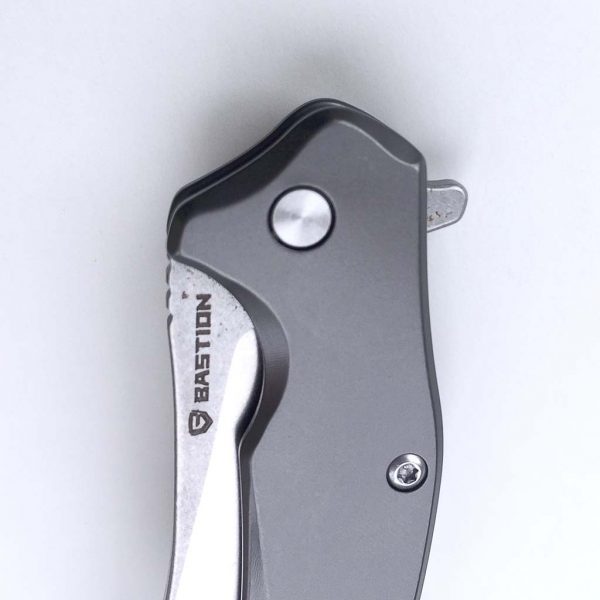
The Braza Bro utilizes tiny stainless steel Torx head screws to secure its frame together, as seen above.  While Torx drivers are not exactly easy to find, they are available, and if you had to disassemble the Braza Bro, it could be done.  Additionally, Braza Bro includes a small loop built directly into its frame, that can be used to attach either of the split rings include with it, as well as 550 paracord or other items that can be used to attach and secure Braza Bro.

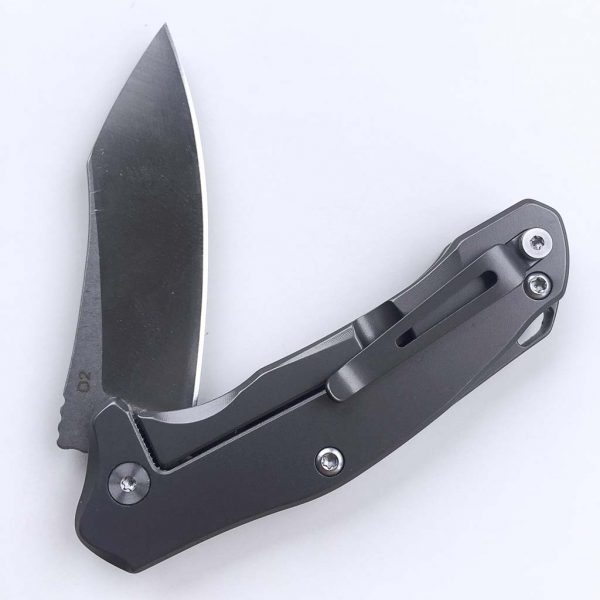
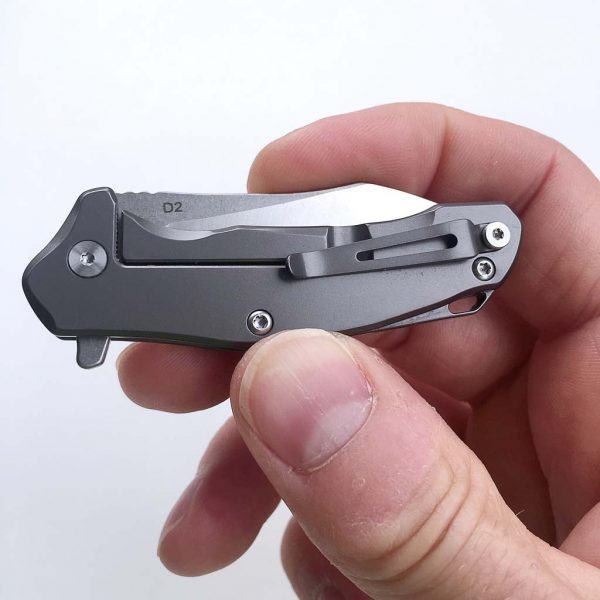
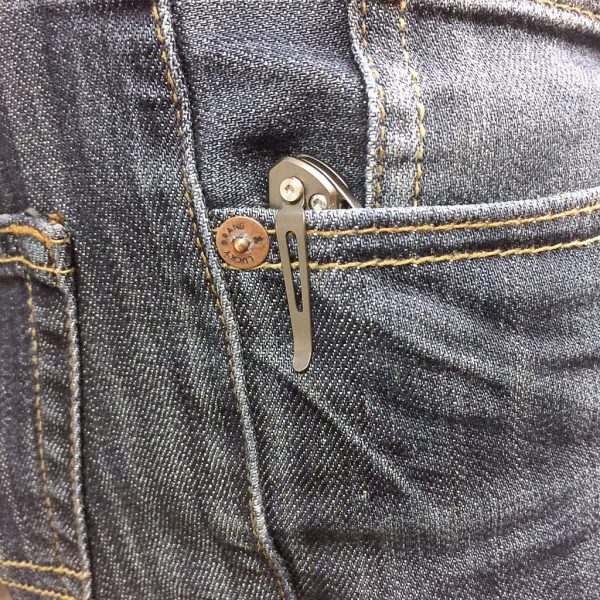
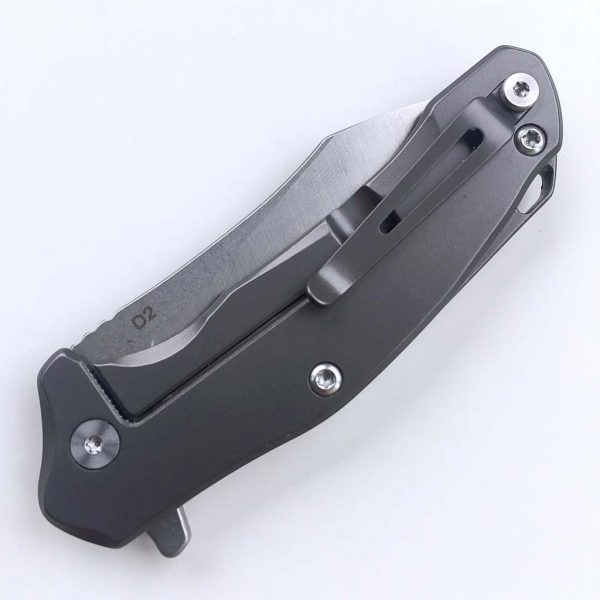
As mentioned further above, the Braza Bro has a small but very solid and functional pocket clip.  Again, it is secured with a small Torx screw, so the clip could be removed if desired, though the clip is such a low-profile shape and size that I can’t see a reason to do so.

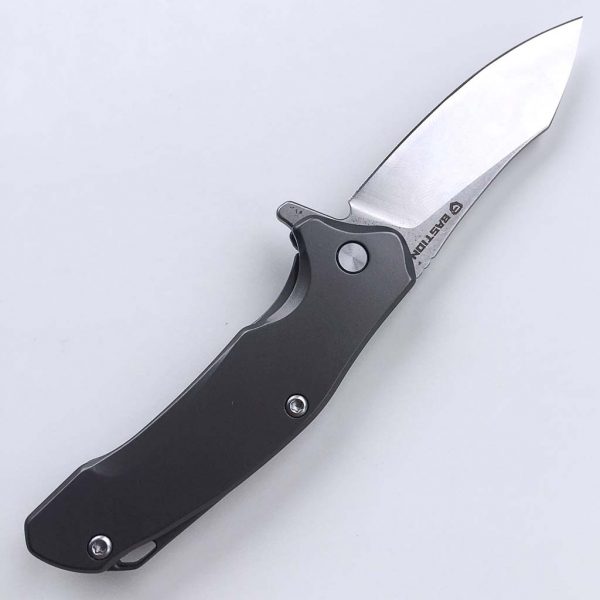
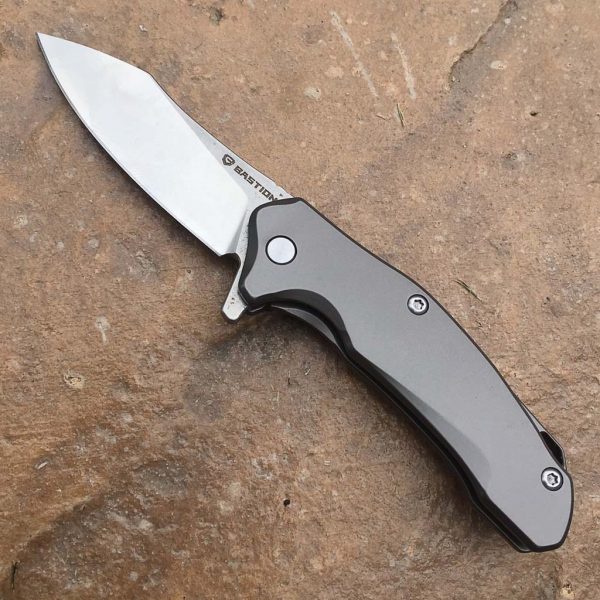
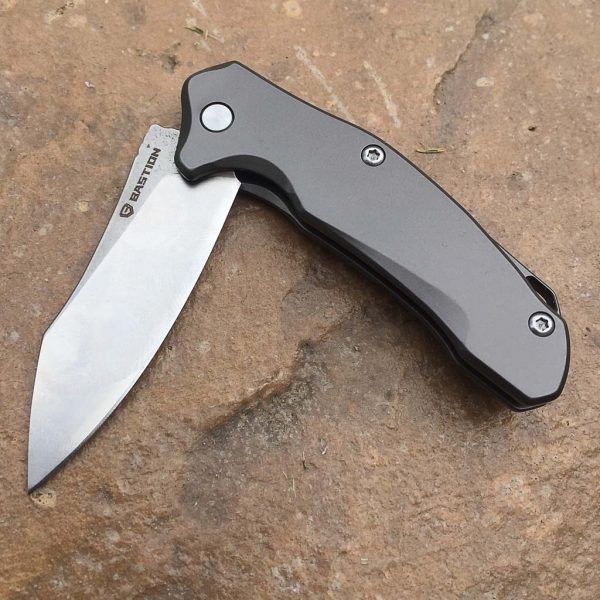
Above and below, I’m including several images of the Braza Bro from various angles and positions to showcase its styling, but the images don’t really do it justice.

In the image above the Braza Bro’s frame lock mechanism can be seen.  Like most folding knives today, the frame lock is a feature that “locks out” the blade into a fixed position, thereby effectively turning it into a fixed blade knife and preventing the bland from closing accidentally.  The frame lock is disengaged by pressing it slightly outward, allowing the blade to be folded back into the frame.

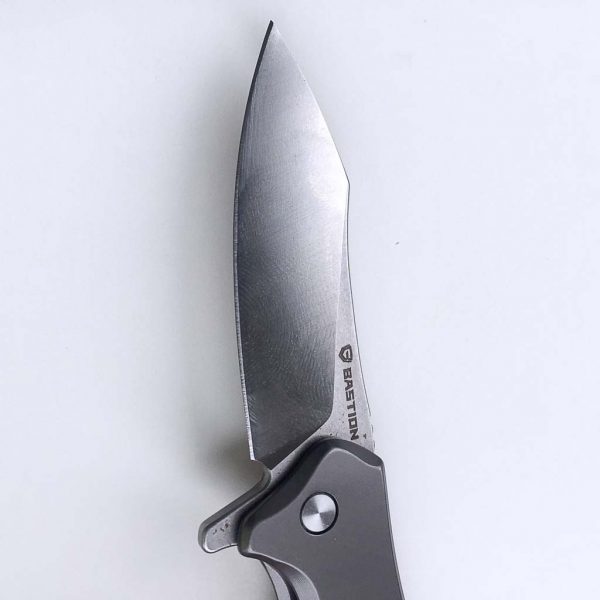
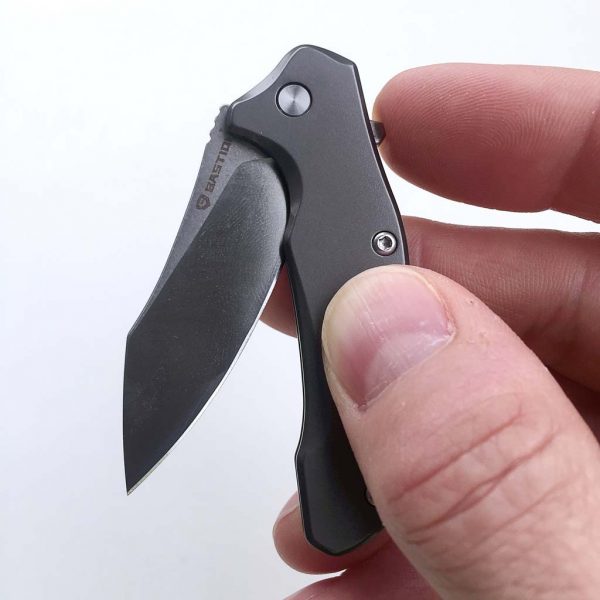
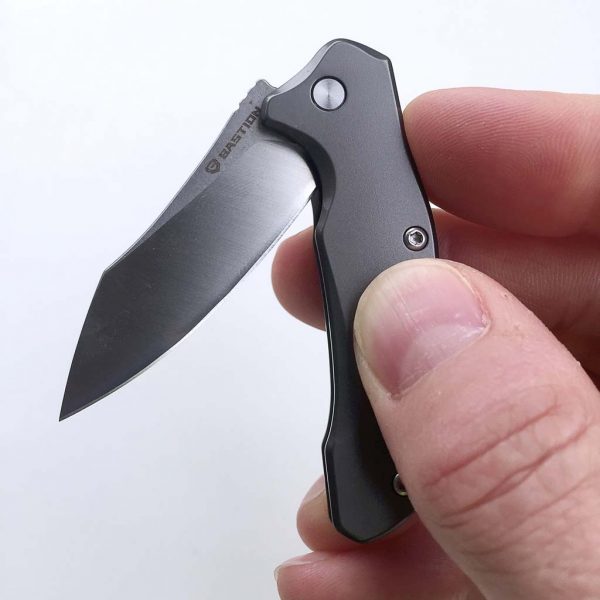
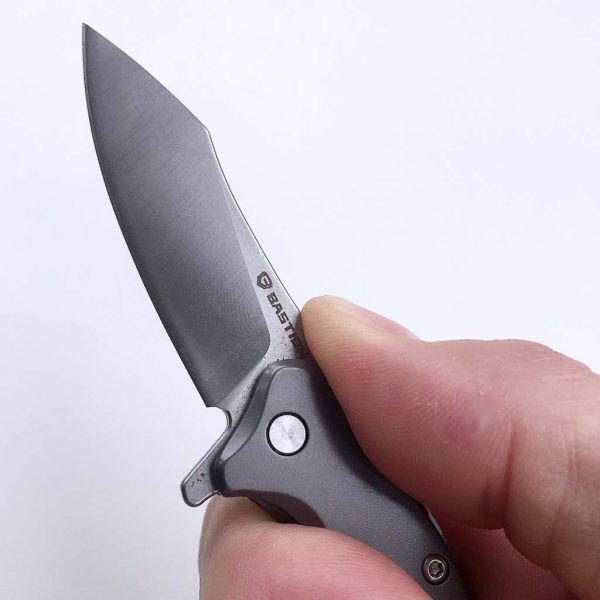
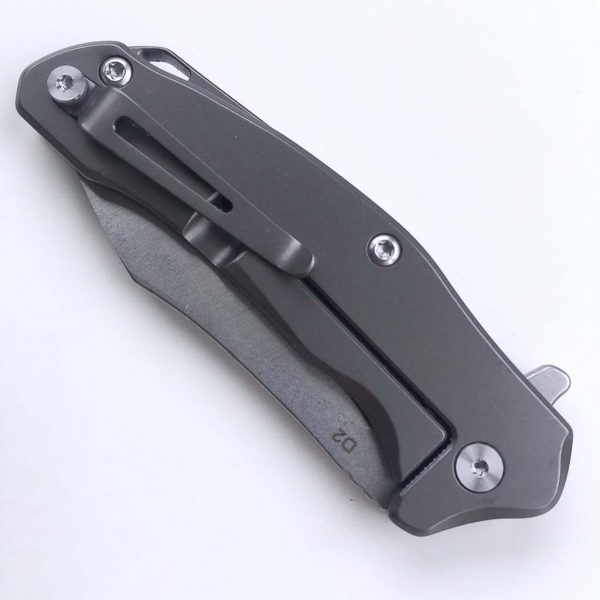
Braza Bro’s blade is quite complex in its feature set.  For starters, it is made from heat treated D2 tool steel with a stone washed finish before its edge is ground.  The blade’s tip is a Sheepsfoot Blade Mod Sloping Front which helps with tasks that require more of a sharp tip.  It has a Drop Point Blade Belly (or cutting edge) which is versatile and easier to sharpen.  Along the back of the blade is Harpoon Style Blade Spine that can act as a spot for the thumb or forefinger, giving more precise control when cutting.  Finally, it includes Tanto Blade Inspired Grind Lines, which give it a more tactical appearance due to having been drawn from the Tanto style heritage.  I found the Braza Bro’s blade to cut quite well for most everyday applications, such as opening boxes or letters, cutting loose threads and slicing fruit or other food at my desk at work.

Additionally, the back of the Braza Bro’s blade includes three spine jimping grooves, as seen above, which are a spot that the thumb or forefinger can further utilize to improve grip and control when cutting.

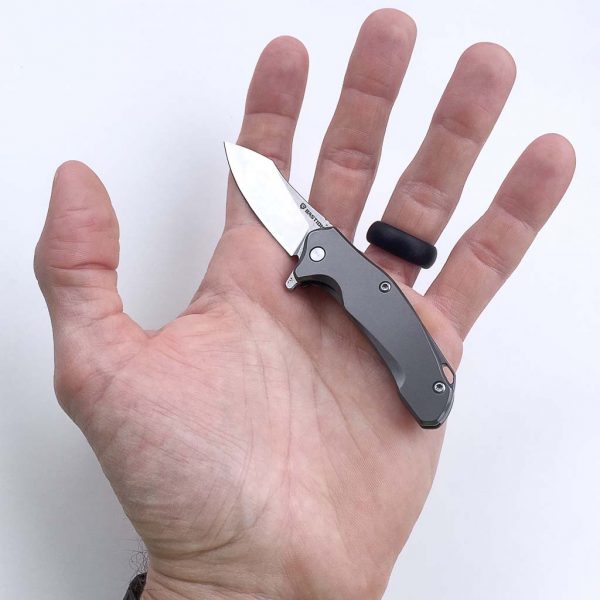
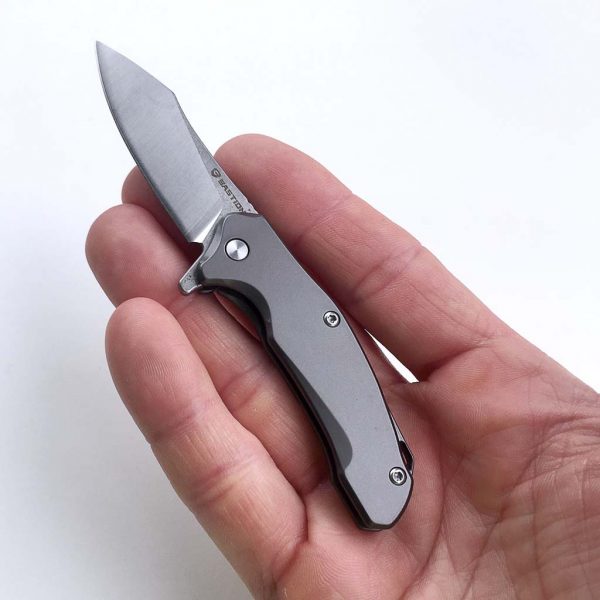
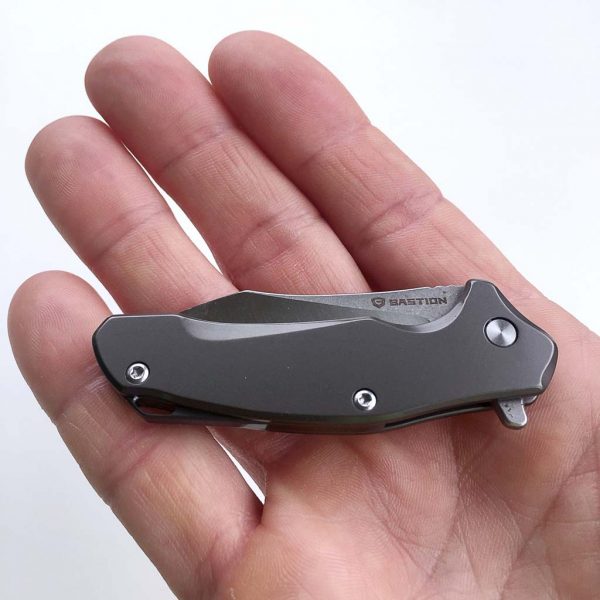
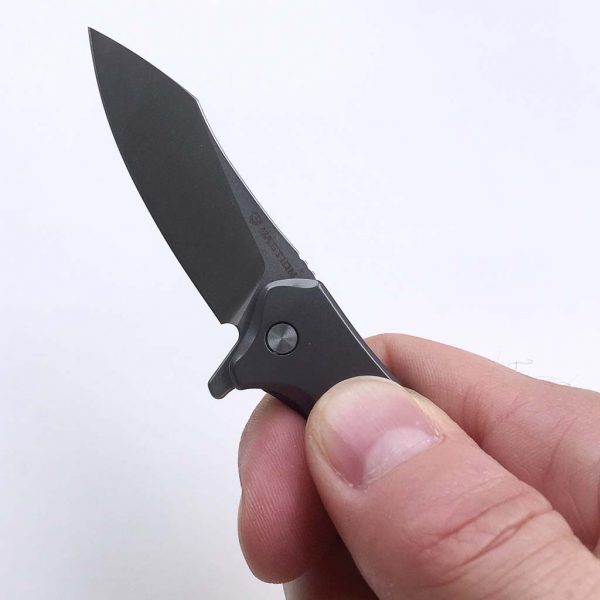
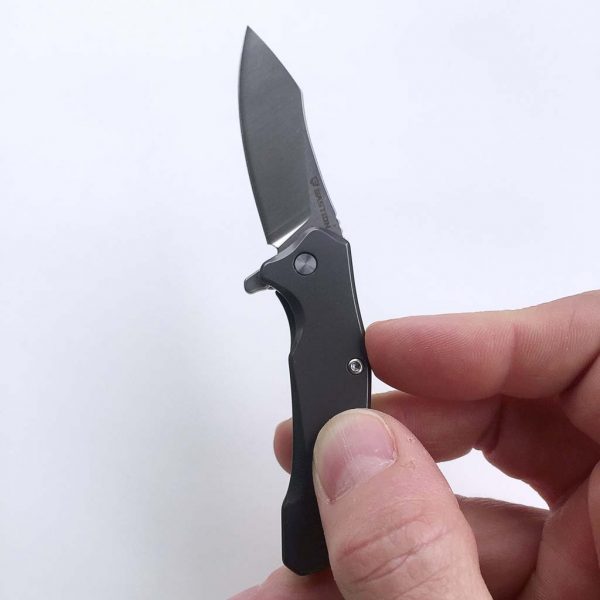
Before we get into functionality, let’s check out the Braza Bro’s size.  As seen above, it really is a small knife; it is probably as large in the open black position as many other folding knives are in the open position.  However, I think that its small size is actually a strength in Braza Bro’s case.

This is because although Braza Bro is indeed small, it is intended to pack a lot of larger knife features and functions into a small package.

Although I would prefer to be able to carry a larger knife in my EDC kit, it is just not practical for me, mainly because of where I work and what I do (engineered desk jockey). 

The Braza Bro, however, is darn near perfect for me because of its small size.  If I want to toss it into the bottom of my pants pocket, no probs.  If I want to clip it to the edge of my pocket, not a big deal, because the location of its clip allows the knife to ride low in my pocket without attracting unwanted attention.

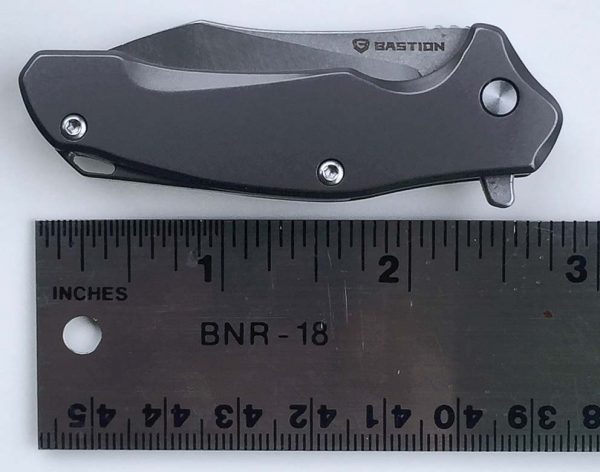
I measured the Braza Bro to be just shy of 3 inches in length while closed.  That’s a pretty small knife.


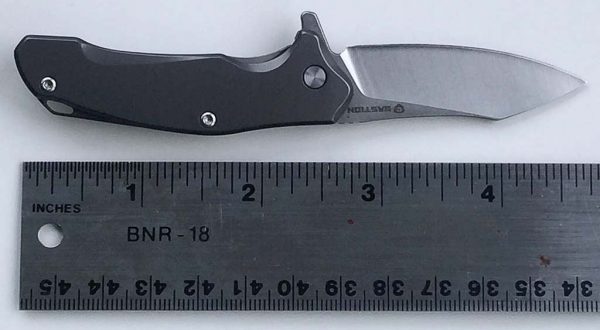
I measured the total, fully-opened length of the Braza Bro to be just under 5 inches in length.

Next, let’s talk about the flipper-style deployment of the Braza Bro.  Again, like many cutting edge knives today (pun very much intended), the Braza Bro includes a one-handed, rapid deployment feature, in this case, a “flipper.”  The Braza Bro’s flipper utilizes a small nub attached to the back side of the blade that protrudes through the frame when the blade is closed.  The user places their finger, typically the index finger, on this nub and rapidly flicks the nub downward into the frame, which deploys the black rapidly in a flipping motion.  That’s it—no spring, no assist, and not an automatic blade, so it is a manual and generally much safer deployment operation than other knives.  The image above and next three below demonstrate this from starting to fully deployed position.

The flipping deployment can take a bit of practice to master, but due to Braza Bro’s solid yet smooth Ceramic Ball Bearing Pivot, it generally doesn’t take long and you are flip-deploying like a pro.  In fact, my 15-year-old son, who has little experience with flipper-deploying knives, correctly and fully did it on the first try.
Once the blade has been fully deployed and frame locked, Braza Bro can be held quite securely and comfortably due to its contoured grip which includes a choil or indentation, for the index finger, and your next three fingers fit along the grip’s contour securely.  The flipper nub becomes a finger guard for your index finger.  And finally, the three spine jumping notches provide a perfect spot for your thumb to sit and give it extra grip and control.
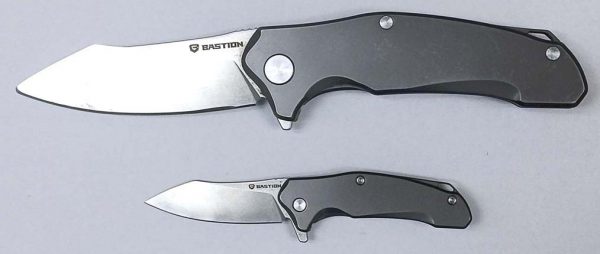
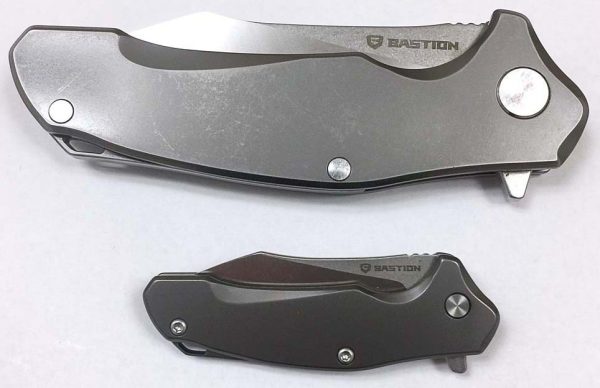
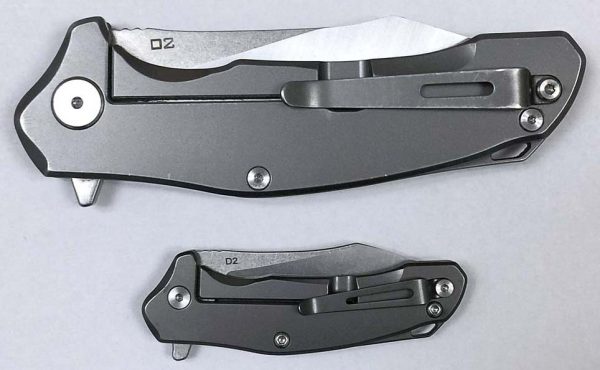
My one and only complain about the Braza Bro is that it seemed to have some debris, grit or grime on a few areas of it right out of the box.  I’ve attempted to capture what I am referring to in the image above.  However, I am willing to give Bastion the benefit of the doubt on this, considering that this is a product sample that they were very gracious to send to me for review even before the end of their Kickstarter campaign, which is a rare occurrence with crowdfunded items.  I’m going to chalk this up to attempting to get this item in my hands as quickly as possible, and I suspect that a final Kickstarter reward item would not have the above-mentioned debris or grit.  It just doesn’t seem consistent with otherwise very high quality Braza Bro. Edit: At work today, I showed the Braza Bro to a friend and incredibly, he produced HIS full-sized Bastion Braza from his pocket!  What an amazing coincidence!  This allowed me to take a few quick comparison pics between the Braza and the Braza Bro:
What I like

  • Superior quality of materials and construction
  • Very well thought-through design incorporates many features of full-sized knives into a very small package
  • Perfect size for those of us who can’t practically or effectively EDC a larger knife
  • The entire knife feels very solid and the flip-deploy action is quite satisfying

What needs to be improved

  • Grime or grit on various areas

Final thoughts

I really like the Braza Bro EDC folding mini-knife.  It is packed with many features of larger knives in a very small size, and because of this is perfect for folks like me who can’t practically carry a larger knife in their EDC kit.  I really like its flip-deploying action and pocket clip, and it just looks cool, which is an important factor as well. 🙂  If you are interested in Braza Bro, you may want to move quickly, because as of this writing, the Braza Bro Kickstarter campaign only has about 10 days left (it ends May 31, 2018).

Price: Kickstarter campaign pledge packages start at $34
Where to buyBraza Bro Kickstarter campaign page
Source: The sample of this product was provided by Bastion via their Braza Bro Kickstarter campaign.

The post Bastion Braza Bro EDC folding mini-knife review appeared first on The Gadgeteer.

Filed in categories: Reviews

Tagged: , ,

Bastion Braza Bro EDC folding mini-knife review originally appeared on The Gadgeteer on May 21, 2018 at 10:00 am.

Note: If you are subscribed to this feed through FeedBurner, please switch to our native feed URL http://the-gadgeteer.com/feed/ in order to ensure continuous delivery.