Fuse Side Winder Apple MacBook Charging Adaptor Holder review

I love simple solutions for annoying problems. Take the Fuse Side Winder, for example. It’s like a hose reel, but it’s made for your MacBook charger. Let’s go wrangle those pesky cables!

What is it?

It’s a reel designed to manage the cables for your MacBook MagSafe charger. A model is also available for your USB-C charger.

What’s in the box?

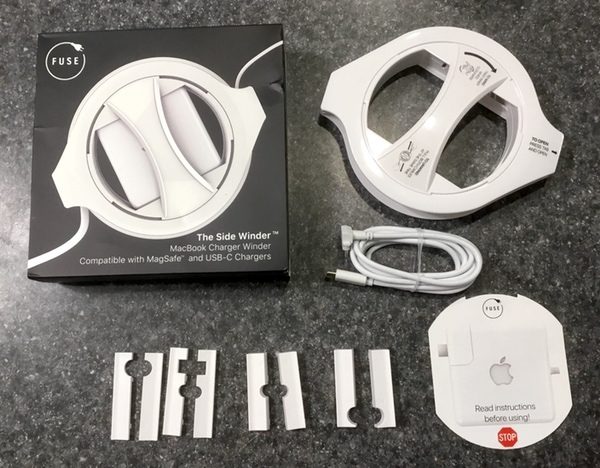
The Side Winder comes with the reel and adaptor tabs for a 45W MacBook Air charger, 60W/61W MacBook Pro charger, or 85W/87W MacBook Pro charger. It also comes with a USB-C cable (this requires the power adaptor & extension cable, which are not included in the package).
Design and features

The Fuse sidewinder is a pretty straightforward affair. Your power brick sits in the “hub” of the gadget, which rotates in the housing that reels in your cables. Construction is tight and solid, nicely protecting your cable from drops and bangs as you use it. It’s a nice build.

I appreciate the clear, easy to use instructions. Big type. Simple step-by-step instructions. No going to the Internet. It’s a nice touch:

You start by opening the case, and picking the adaptor slots based on your charger type. I’m using an older MacBook air adaptor, so it’s pre-set with those slots out of the box:
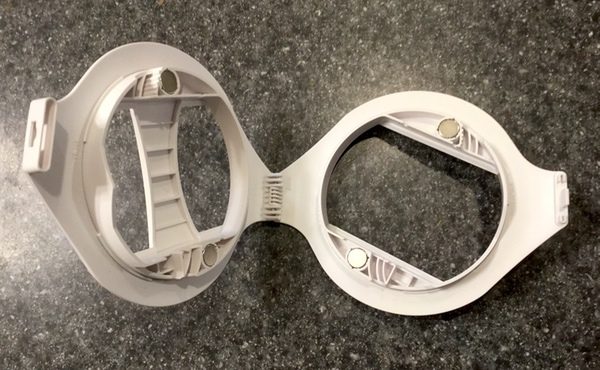
You’ll insert the brick in the hub, and feed the cables through the appropriate slots. The slots are machined perfectly so that there’s no waggle that could cause fraying in use:
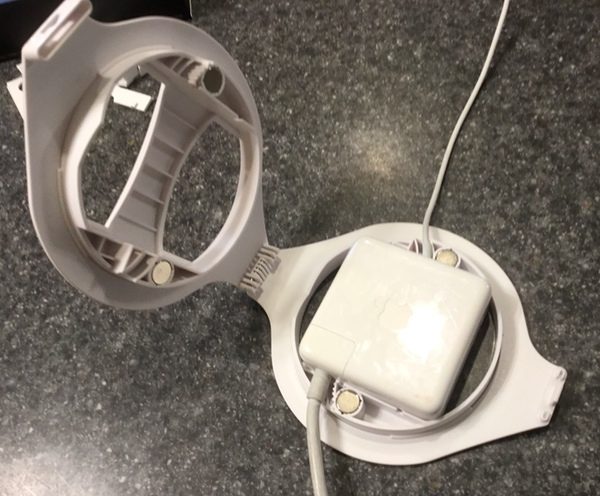
The chamber snaps closed the help of a pair of magnets and a locking tab, and you’re good to go:
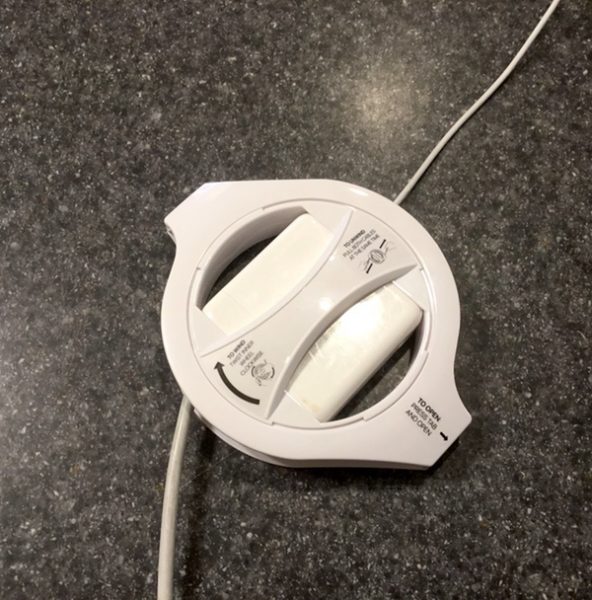
Winding is simple. You hold the outside of the case with one hand, and crank the handle in the middle to wind the cables. There’s a little housing on each side that catches the plug ends so that you don’t overwind:

When you’re ready to pull the cables out, you just grab each and pull:
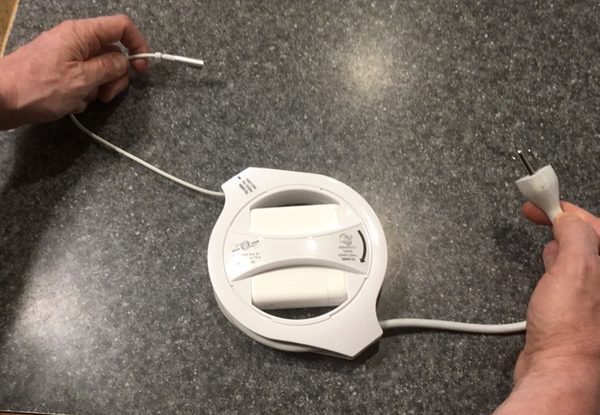
It’s a very simple, straightforward design that I like quite a bit. There are no springs, coils, or elaborate mechanisms that could fail with repeated use. Just wind and pull. Lovely.

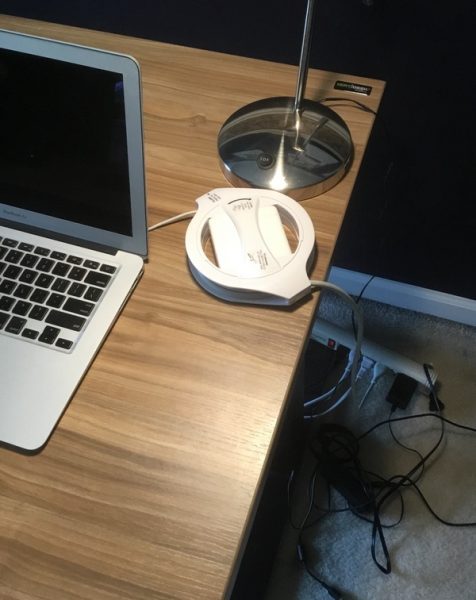
If there’s one thing to keep in mind about the design, it’s that it does add some size to your charger. Here’s a size-by-side pic of my charger coiled up next two the Fuse Side Winder for reference. You’ll notice that the Fuse Side Winder is a bit bigger, but not as thick as wrapping the cables around the charger in the traditional manner:
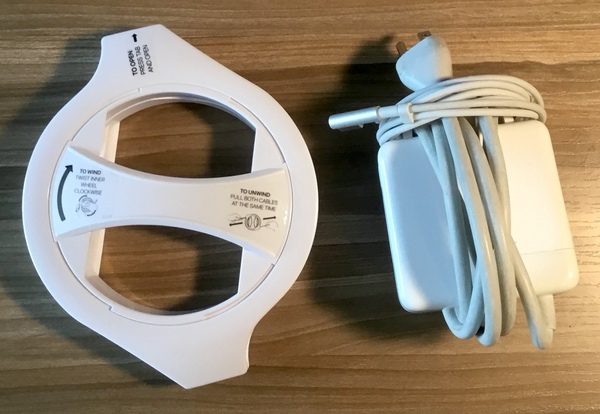
This may or may not be an issue for you, depending on how you carry your gear. I dropped some comparison pics here in one of my briefcases for reference.
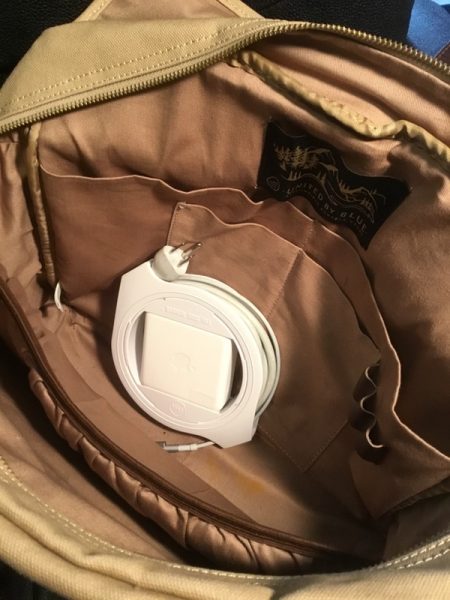
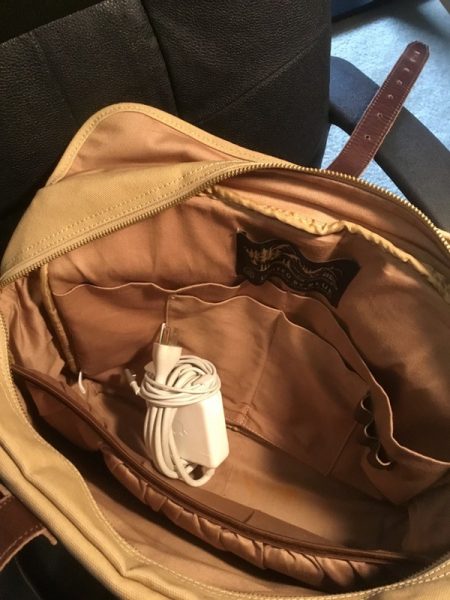
See the difference? I actually think that it’s easier to manage with the Side Winder, as it’s slides easily in and out of my bag. This is especially handy if you have a narrower bag (like a briefcase) since there is less chunky depth from wrapping up those cables. Some bags have those smaller charger “garage” pockets, however which may not fit the extra length and width. You’ll want to check your bag type and packing style if this might be an issue for you.

One last note on compatibility: the Fuse Side Winder is sold in two models. There’s one for Magsafe chargers, and another for newer USB-C chargers. Most variations are covered. Check the Fuse web site for a guide to what fits (and which one you need) before you buy!

What I like

  • Well designed with solid construction
  • Easy to install
  • Easy to operate

What needs to be improved

  • Adds some extra bulk to your charger

Final thoughts

A simple solution for a common problem, the Fuse Side Winder is a winner in my book. I’ve been using it for a month, and it does a great job removing the hassle of wrestling with another set of cables. It’s a well-designed piece of gear. Just check the specs to make sure it’s compatible with your charger.

Price: $29.99
Where to buy: Get it at the Fuse web site or Amazon.
Source: The sample of this product was provided by Fuse.

The post Fuse Side Winder Apple MacBook Charging Adaptor Holder review appeared first on The Gadgeteer.

Filed in categories: Reviews

Tagged:

Fuse Side Winder Apple MacBook Charging Adaptor Holder review originally appeared on The Gadgeteer on May 25, 2018 at 1:00 pm.

Note: If you are subscribed to this feed through FeedBurner, please switch to our native feed URL http://the-gadgeteer.com/feed/ in order to ensure continuous delivery.

Logitech C922 Pro Stream Webcam review

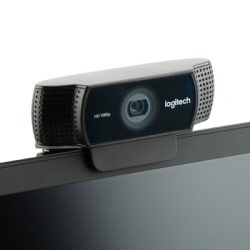
I used to write video chat software a few years ago, so I’ve seen my share of webcams. When the chance came along to review the Logitech C922 Pro Stream Webcam I jumped at the opportunity to see how good the latest webcam from Logitech really is.

What is it?

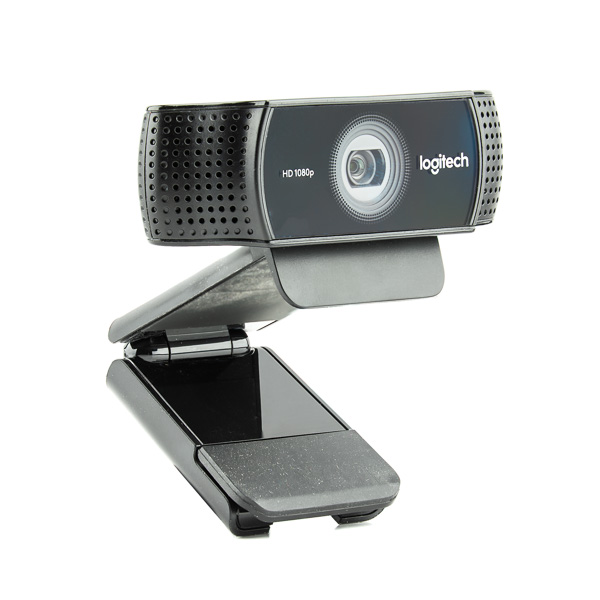
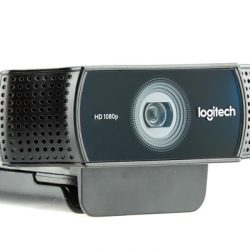
The Logitech C922 Pro Stream Webcam is a full HD webcam with Full HD 1080p at 30fps, 720p at 60fps and 30fps streaming capability. The C922 is optimum for recording, game streaming, or video conferencing – basically all of your webcam needs.


Hardware specs

Dimensions 1.73 in (44 mm) x 3.74 in (95 mm) x 2.80 in (71 mm)
Microphone Type Built-in Dual Stereo
Recording 1080p30fps, 720p60fps, 720p30fps
Lens and Sensor Type Full HD Glass Lens
Diagonal Field of View 78° horizontal
Frame Rate (max) 720p60fps/1080p30fps
USB Protocol 2.0
Image Capture (4:3 SD) Yes
Image Capture (16:9 W) Yes
Video Capture (4:3 SD) Yes
Video Capture (16:3 9) Yes

What’s in the box?

  • C922 Pro Stream Webcam
  • Tripod
  • XSplit 3 month premium license
  • Setup Guide

Design and features

Having owned literally dozens of webcams over the years, I’ve seen webcams ranging from the absolute worst to some of the best. Up until now, I was using a webcam that I paid nearly $200 for about 10 years ago. I thought it was a great webcam (it was when I bought it). As soon as I plugged in the C922 and fired up a video window, I literally said “Oh wow!” out loud. The video was that good!

I do daily video conferences using Google Hangouts with my main client. They immediately noticed that my video was much sharper and had a better frame rate than before. One thing that I noticed right away was the excellent autofocus of the C922, gone are the days of trying to manually focus my webcam, which is very difficult because I sit more than an arm’s length away from it.

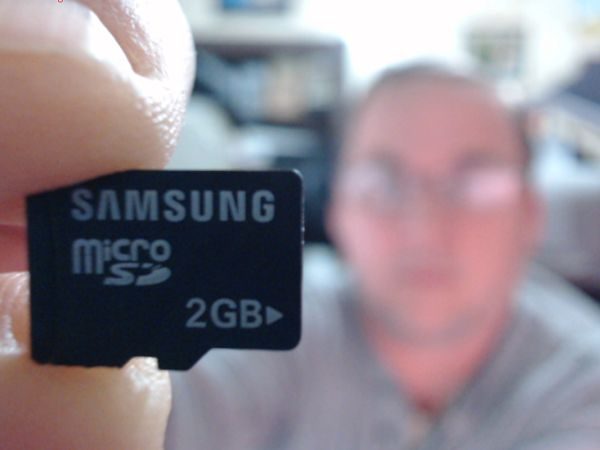
If you’re needing to take close-up video or pictures, this webcam can focus at about 1.5 inches from the lens! The auto focus worked very well for the most part, but I couldn’t get it to focus automatically on the tiny micro-SD card. It did however work very well with larger objects, which is what you would probably be using it for anyway.

Although the camera will work just by plugging it in with modern versions of Windows, you’ll want to download the settings program from the Logitech support pages if you want to adjust the settings which include brightness, contrast, autofocus, color intensity, and white balance. Autofocus and white balance also have an automatic setting (the default).

On Windows, the webcam uses the standard Windows driver, so it will pretty much function with anything that can access a camera through those standard drivers. I used it with Google Hangouts in Chrome and Firefox, OBS, and XSplit broadcaster. The C922 has H.264 capability which is an advanced compression technology that demands less network bandwidth.

The C922 works very well in low light, and the video automatically adjusts to accommodate flickering room lights or multiple computer screens. The screenshot below is lit with just a single browser window.

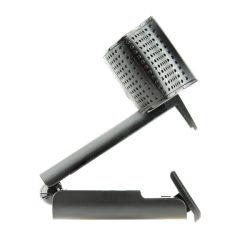
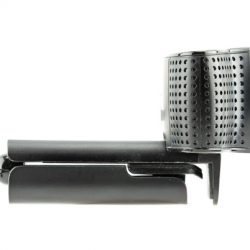
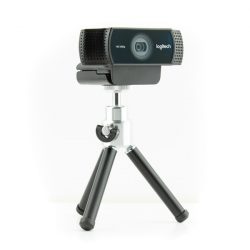
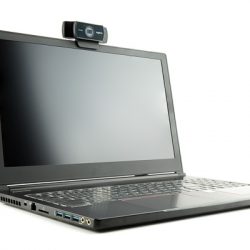
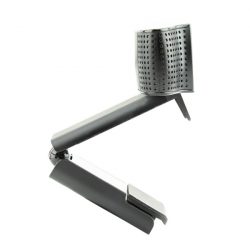
The integrated stand/base of the webcam is quite configurable. It has a standard 1/4-20 thread socket in the bottom for attaching it to a tripod and adjusts to fit monitors up to 2 inches deep. The tripod legs also pull out to double their length and making the footprint a 7″ triangle – plenty stable enough for any use. The base also is designed to just sit on a flat surface and has a rubberized surface to prevent sliding. It can easily fit on top of any modern monitor or laptop screen.


The settings program that can be installed is nothing to brag about. Ordinary users will find it easy to use and adequate. The settings used to be much more complex, but it feels like Logitech has designed it for basic users now. The first tab (Home) has settings for Standard and Widescreen, and anti-flicker control for 60hz and 50hz. The second tab (Advanced) has settings for brightness, contrast, autofocus, color intensity, and white balance.


The ChromaCam software is supposed to allow the replacement of your background, but on Windows 7 in Google Chrome it constantly crashed before I could evaluate it. When it crashed in Firefox it crashed the entire browser, and then repeated that each time the browser started because the page kept reloading automatically. Although it’s probably something particular to my computer, I’ve never seen a software based background replacement solution work very reliably.

The audio captured by the webcam was satisfactory. It wasn’t pro-grade audio, but no one expects that for a camera that costs less than what most pro-audio people spend on just their microphone.

What I like

  • Excellent video picture
  • Can record at 1080p30fps, 720p60fps, 720p30fps
  • Excellent  autofocus
  • LED’s indicating that it’s on
  • Excellent low light performance
  • H.264 streaming

What needs to be improved

  • Settings are limited, advanced users want more settings
  • ChromaCam software was not stable, crashed every time

Final thoughts

If you really want a webcam with a great picture, this is the webcam to get. This is currently the best Logitech HD Webcam, with only the 4K Pro Webcam model ($199) being better. I really wish I had bought one of these a long time ago.

Price: $79.99
Where to buy: Logitech and Amazon
Source: The sample of this product was provided by Logitech.

The post Logitech C922 Pro Stream Webcam review appeared first on The Gadgeteer.

Filed in categories: Reviews

Tagged: ,

Logitech C922 Pro Stream Webcam review originally appeared on The Gadgeteer on May 25, 2018 at 10:00 am.

Note: If you are subscribed to this feed through FeedBurner, please switch to our native feed URL http://the-gadgeteer.com/feed/ in order to ensure continuous delivery.
Belkin Active Pro Backpack review

Commuters. City-walkers. Road warriors. Office samurai. Whatever you want to call them, there’s a good chance if you find yourself working in an office, you have a bunch of stuff to carry with you on a daily basis. There are thousands of options for containing those items, but does your bag hit the perfect trifecta of comfort, content and looks, all at a great value? Belkin’s Active Pro Backpack aims to check off that whole list.

What is it?

The Active Pro Backpack is an unassuming, padded backpack built for protection, organization and on-the-go convenience. It’s well-suited for commuters carrying laptops, tablets and other mobile accessories in a variety of travel conditions.

Hardware specs

  • Dedicated protection for laptop (up to 15”) and tablet
  • Adjustable mesh padded shoulder straps
  • Padded back panel
  • Water-resistant coating on base
  • Reflective strips for visibility in low light
  • Top loading, upright design stands without support
  • Internal organization for ancillary items
  • Vertical pockets allow fast access on-the-go
  • Hidden high security pocket
  • Loop for a bike light
  • Luggage strap fastens bag to trolley or case
  • Knapsack opening for visibility and easy access
  • width x height x depth: 11.8” x 17.3” x 6.7” depth / 30cm x 44cm x 17cm
  • weight: 1.7lb / 776g

What’s in the box?

  • 1x Active Pro Backpack

Design and Features

Whenever I asses the usefulness of a backpack or other bag, I usually split my thoughts into three categories: Looks, Organization (which includes carry capacity) and Comfort. Let’s dive in!

Looks

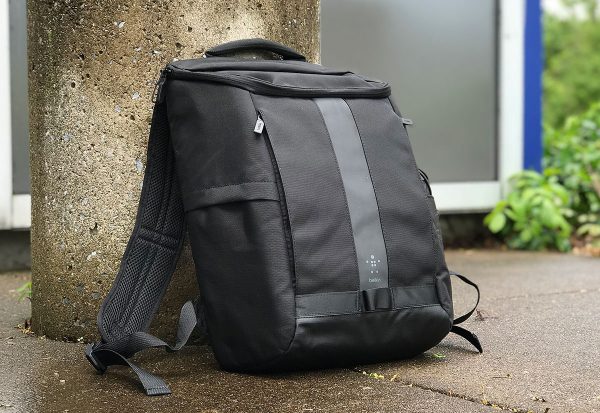
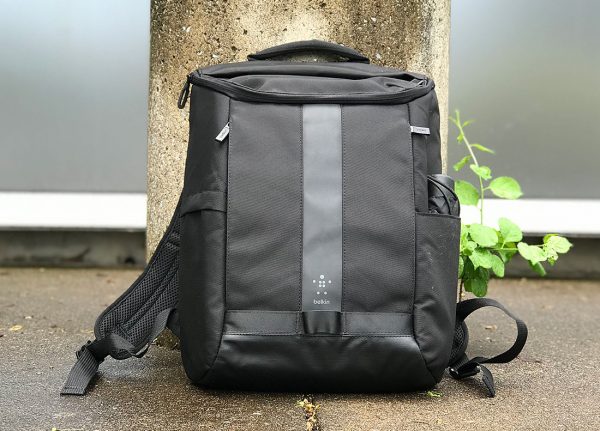
The Active Pro Backpack is relatively unassuming, in a good way. It doesn’t look expensive, but it doesn’t look cheap, either. It looks like the kind of bag you’d see on the back of a regular commuter or city walker that sort of blends right into the rest of their outfit, and to me, that’s exactly what it was designed for. The logo on the outside of the bag is relatively small.

There’s a rubberized coating on the bottom just in case you set your pack into something unseemly.

The bottom of the bag is coated in a rubberized, water-resistant texture. It seems like the bag could handle being set down in a puddle for a bit while protecting the contents, but I wouldn’t call it super-rugged, and certainly not something you’d want to leave out in the rain.

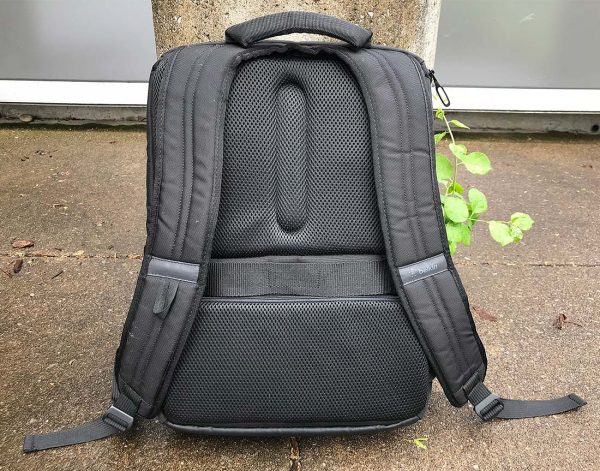
There are a couple of reflective strips on the back and on the shoulder straps to be more visible in a dimly-lit crosswalk.

Overall, it’s not flashy and doesn’t advertise “hey look at me, I got some ‘spensive stuff inside.” It’s forgettable, which is perfect.

Being a black backpack with a rough texture, it did pick up quite a bit of lint and cat hair from the couch-side area I usually store my bag. The material felt a bit more clingy than you’d expect.

Contents / Organization

I get a little thrill whenever I explore a new backpack and find a multitude of pockets and zippers and compartments. Belkin’s Active Pro Backpack has plenty to spare.

Behold! Cavernous space.

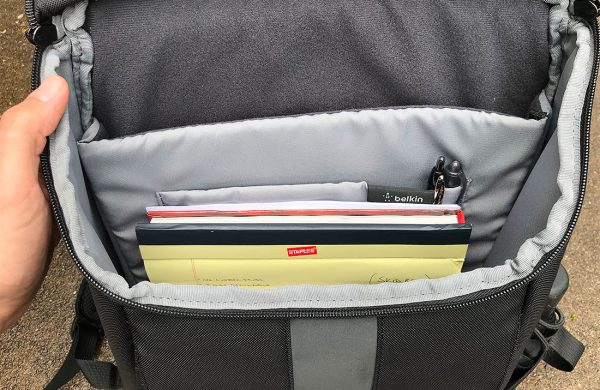
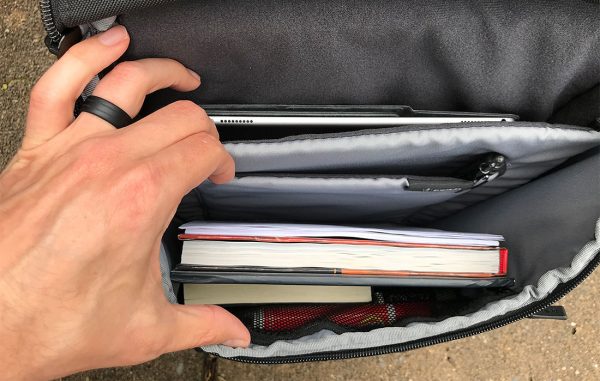
First off, I love the top-loading main compartment. The entire top of the backpack unzips to reveal a wide entry point to the main compartment, which is itself divided into 3 vertical compartments — one padded area for a laptop or tablet, one smaller area for an e-reader or other small books, and a wide main area, flanked by a zippered, netted pocket.

Plenty of dividers and the little mesh, zippered pocket toward the front.

It’s worth mentioning that the bag stands up on a flat surface and doesn’t slump over or fall to one side if the contents are properly balanced. Nothing worse than having to contend with a tipsy backpack while trying to get something out of it.

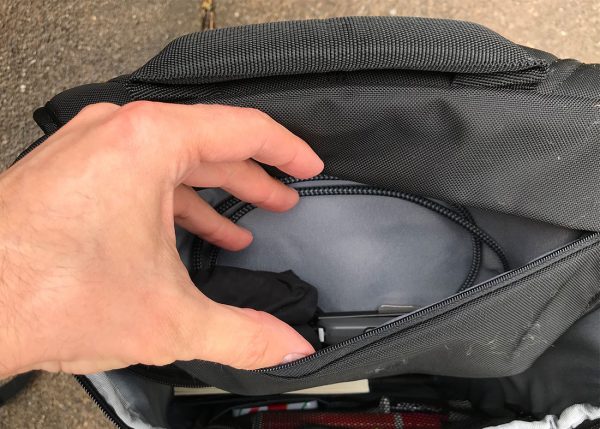
Probably best not to put anything heavy in this top pocket.

The top flap of the backpack has a zippered pocket. I do appreciate more organization, but this pocket could become somewhat annoying depending on how much stuff you put into it. It basically has to flip the contents of that pocket 180º in order to get into the main compartment. It does easily flip over to the back of the backpack, but all I can think about is all the items in that pocket tumbling over themselves every single time.

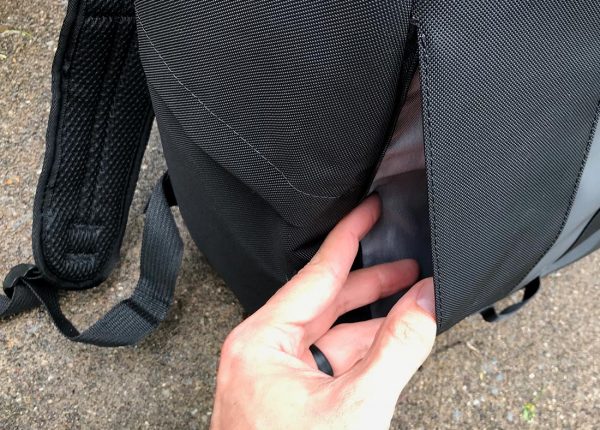
The vertical zippered pockets are actually two separate compartments and are meant to be accessed quickly by swinging the backpack around to the front of your body.

The vertical side pockets are actually two separate areas.

Additionally, there are two narrow side pockets. One is simply an open pocket for storing an umbrella or thin water bottle, and the other has a more secure velcro flap.

Wait… what’s that on the back, is it…?

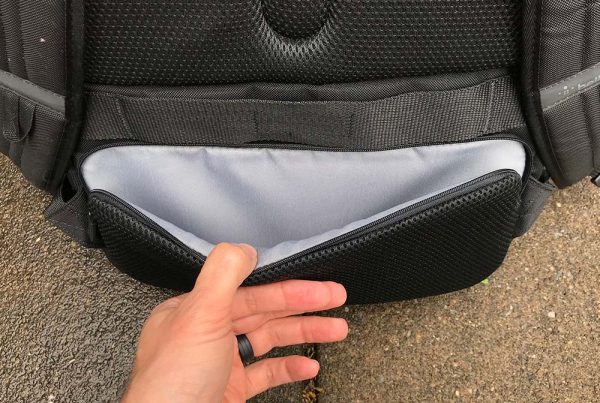
Finally, there is a super-secret, zippered and padded security compartment on the backpack right where it would meet your lower back while wearing it. And wouldn’t you know it, it’s the perfect fit for my Nintendo Switch. I don’t always go looking for a Switch-sized compartment, but I do often take it with me, so when there’s any sort of padded area that can accommodate it, bonus points.

ANOTHER pocket?! This one good for securing something tightly against your back to thwart thieves.

Just for some real-world application, I’ll include what I was carrying in my bag when I took these photos:

  • an umbrella
  • iPad Pro 12.9” size with Smart Keyboard
  • Legal pad
  • 5th Edition D&D Players Manual
  • A multitude of pens and cables
  • A book of writing prompts
  • Small stack of papers

Carry Comfort

All of these features would be practically useless if the bag itself was uncomfortable to wear in a typical commute. Fortunately, the Active Pro Backpack lives up to its namesake and is very comfortable to wear for extended periods of time, thanks to its heavy padding on the shoulder straps and back.

Looks right at home on the back of a regular fella.

I wore the backpack on several hikes around the business park where I work, some of those walks on warm days. My back did get warm, as you’d expect, but not stifling… it still felt like it had breathability against my back.

Your mileage may vary from exactly how much weight you add to the pack, but at least the initial weight of the bag is light.

If you’re a cyclist or are rolling some luggage behind you, there are sturdy luggage straps on the backpack as well.

The straps are stitched on very well and the bag itself seems plenty durable.

Final thoughts

The Active Pro Backpack checks all my boxes for looks, comfort, and organization while also maintaining durability and a fair price. I can wholeheartedly recommend it to anyone in need of a commuter bag.

Price: $49.99
Where to buy: Belkin or Amazon.
Source: The sample of this product was provided by Belkin. You can find out more and see their full line of products on their website.

The post Belkin Active Pro Backpack review appeared first on The Gadgeteer.

Filed in categories: Reviews

Tagged:

Belkin Active Pro Backpack review originally appeared on The Gadgeteer on May 24, 2018 at 1:00 pm.

Note: If you are subscribed to this feed through FeedBurner, please switch to our native feed URL http://the-gadgeteer.com/feed/ in order to ensure continuous delivery.
MIOU Solar Motion Sensor Light Review

It never fails.  I always seem to forget to take out the trash until after the sun has set.  It also figures that the place where my trashcans are located is a very dark side of our house.  Most of the time I just stumble around hoping to get to the proper trash can (we have 3 – each for a different kind of trash).   Lucky for me I just got the opportunity to review the MIOU Solar Motion Sensor lights.

What is it?

The MIOU Solar Motion Sensor Light is a solar powered light that has 30 LED bulbs inside.  It has a built in Lithium-Ion battery that converts solar energy to power and stores it for use at nighttime.    No external wiring is necessary, you just need to make sure the solar panel on the top of the light has several hours of direct sun access.

Hardware Specs

  • It is IP64 waterproof certified.  I personally tested this by accidentally leaving the unit on the ground where I was initially charging it right where my sprinkler system could easily give it a good shower.
  • It has an automatic motion sensing function that will turn the light on when it senses people or animals coming within 10-26 feet of the light with a 120 degree lighting angle.
  • It has 30 LED bulbs.
  • Internal Lithium-Ion battery that stores energy from solar power.

What’s in the box?

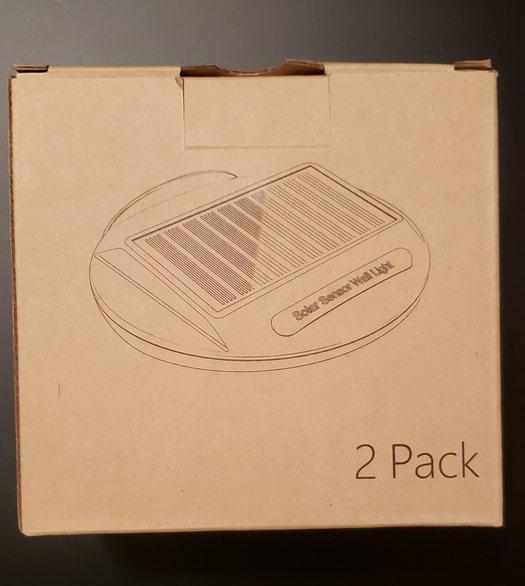
The box itself was a rather plain cardboard box.  Inside the box and very tightly packed there was the following:

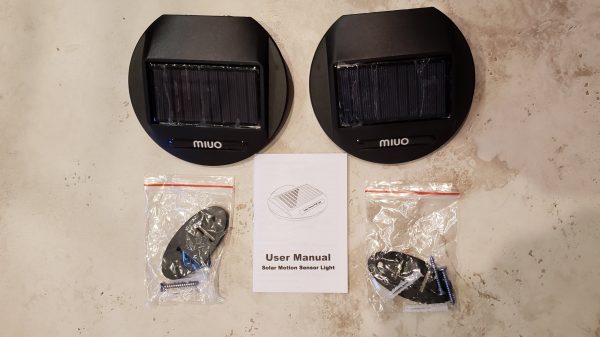
  • 2 solar powered lights
  • 2 packages of mounting hardware.  The mounting device for the light, 2 wood screws and two anchors for mounting the light in sheet rock.
  • 1 user manual

Design and features

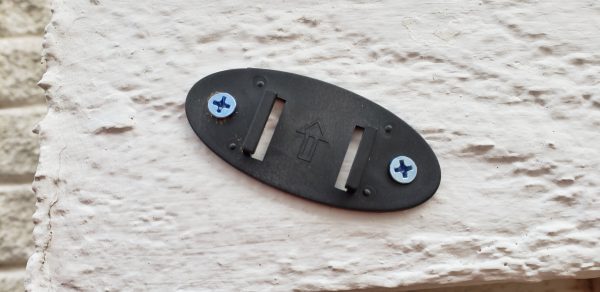
The first thing I had to do before I could use the lights was to give it an initial charge.  There is an on/off button on the bottom of the light that I pressed on to make sure it would light up properly.  Once I confirmed the light was working I then had to place it outside in direct sun for an initial 8 hours.  I did this for both lights and actually spread it out across 2 different days.  While the lights were getting their initial charge, I installed the mounting hardware.   The above picture shows you how simple it is.  Simply have the arrow facing up (although I will admit the light will mount in either direction).  When installing in wood I did drill a small pilot hole first.  That made the install much easier.

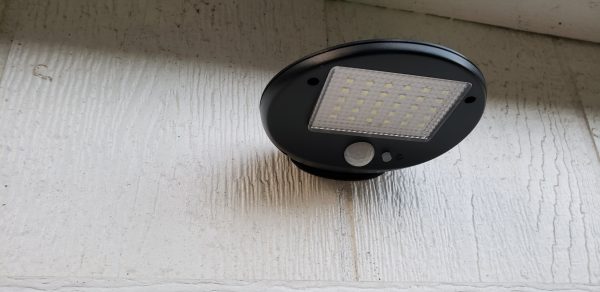
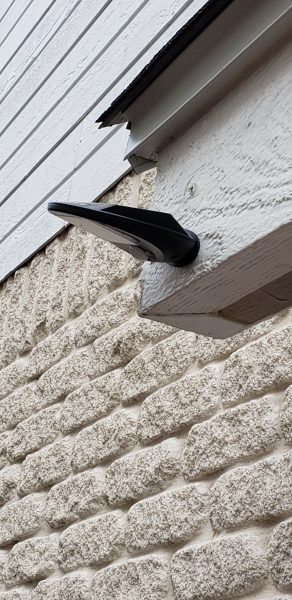
Once the lights were charged, I simply slid the back of the light which had two matching grooves onto the mounting hardware.  You should note that you do want the screws screwed all of the way in or it will interfere with mounting the light.   The picture above shows the light mounted above my trash can area.  I purposely tilted it so that it would better illuminate the area and catch the sun’s rays.

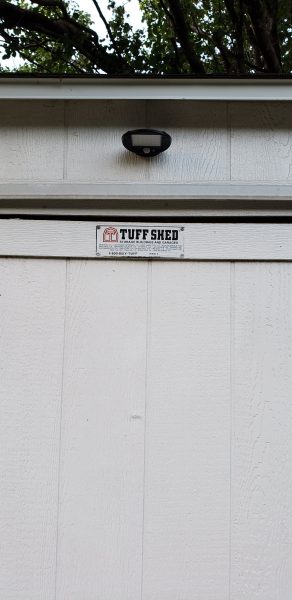
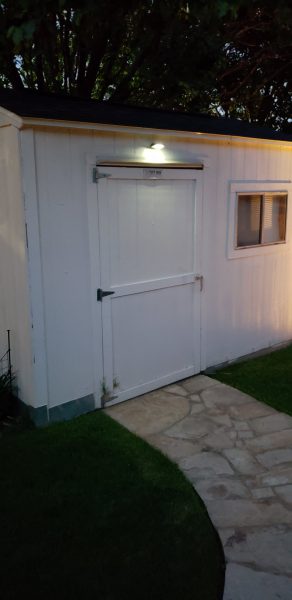
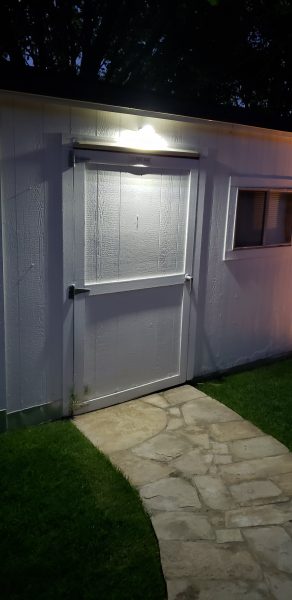
I mounted the second light right above my storage shed door.  That area is also rather dark and I figured the light would make it much easier to find the keyhole when trying to open the shed.   Both pictures above will show you the location of that mount.

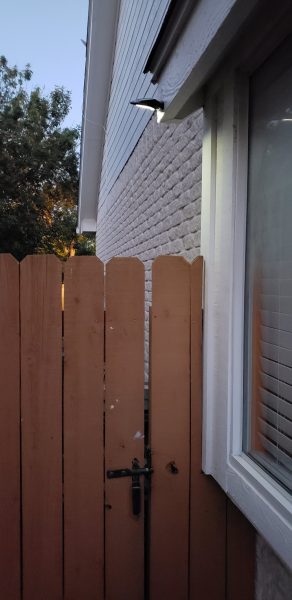
I left the switch on the bottom of both units in the ‘on’ position.  When it is ‘on’ the unit will go into standby with a light glow like the picture above.  It was much darker than what the picture shows, but my camera is trying to do me a favor by adjusting for the light.

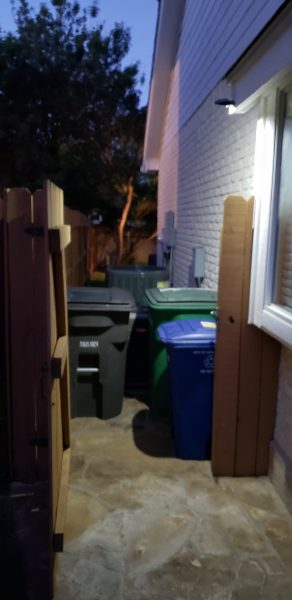
When I approached the gate, the light saw the movement and activated the brighter LEDs.  You can see how well the entire trash can area is lit up.  I am really happy with how it is lit.

The next two pictures show the lights in the low standby position in the first picture and on bright in the second picture.  Once again you can really tell a difference.

What I like

It was super easy to install.  Having a cordless drill certainly made the job even that much easier.  It is pretty hard to mess up the installation of the mount and the light.  They give you all of the necessary hardware.   I also like that it came with 2 lights.  I had no problem thinking of additional places I would install future lights.

What needs to be improved

The only suggestion I would give is to have an option for the lights to come in white instead of black.  In south Texas, the lights will get extremely hot during the day.  Only time will tell how well the plastic will hold up to the heat.  I had replaced an older solar light in my trash can area and it had been white.  I will be sure to try and give an update on how well they have held up after our predicted super hot Texas summer.

Price: $24.99
Where to buy:  Amazon
Source: The sample for this review was provided by MIOU.

The post MIOU Solar Motion Sensor Light Review appeared first on The Gadgeteer.

Filed in categories: Reviews

Tagged: ,

MIOU Solar Motion Sensor Light Review originally appeared on The Gadgeteer on May 24, 2018 at 10:00 am.

Note: If you are subscribed to this feed through FeedBurner, please switch to our native feed URL http://the-gadgeteer.com/feed/ in order to ensure continuous delivery.
The Ouh Snap SnapBag Daily review

Whether you are an amateur or professional photographer, there are always days when you need to travel light and without any bulky backpack. You just need to take along a basic camera with a couple of lens, or maybe even a small video camera. You also need space for the other knickknacks that you would need while you are out and about. If this describes you, then the Ouh Snap SnapBag Daily may be the perfect match.

What is it?

The Ouh Snap SnapBag Daily is a camera backpack that can comfortably carry all of your daily photography essentials, and other small items, in an organized and convenient way.

What comes with it

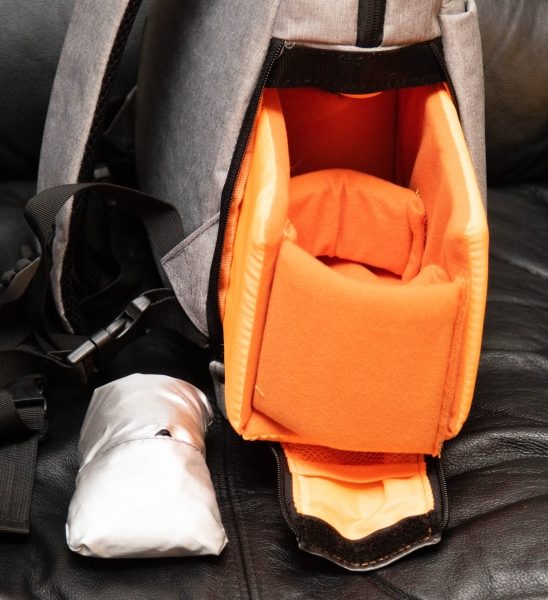
The Ouh Snap SnapBag Daily comes with a removable camera storage compartment, and a rain cover.
Design and features

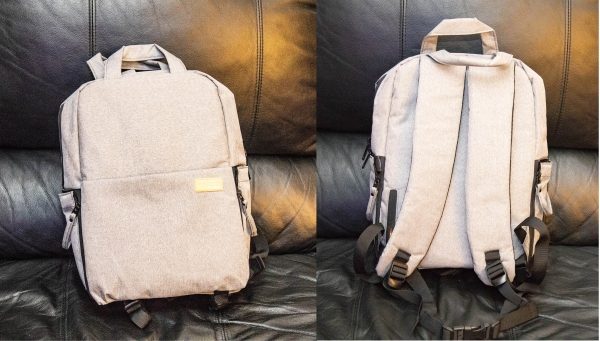
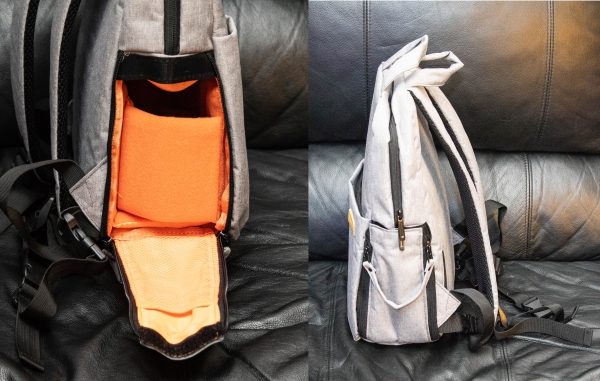
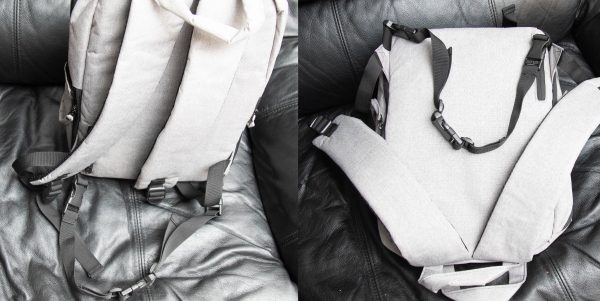
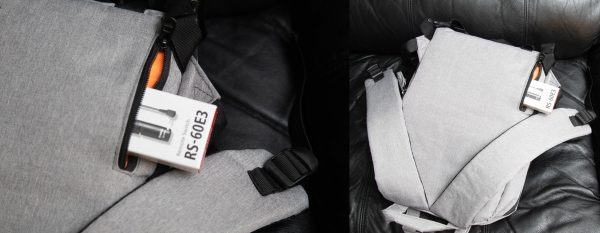
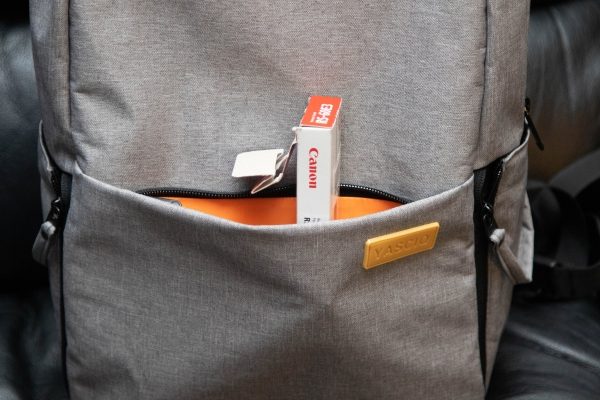
The backpack is well made, with very comfortable adjustable shoulder straps, zippers on each side to allow you to remove the padded camera storage from either side, and brand name tag on the outer zippered pocket.


Once you remove the camera storage compartment, you can fit a mid-size DSLR with a mid-size lens attached. A DSLR with an extended battery grip attached to it, will not fit. There is a removable velcro strap that you can secure over the lens to provide for extra protection.

On the front of the bag there is a zippered pocket that can hold accessories like batteries, and keys, memory cards, etc.

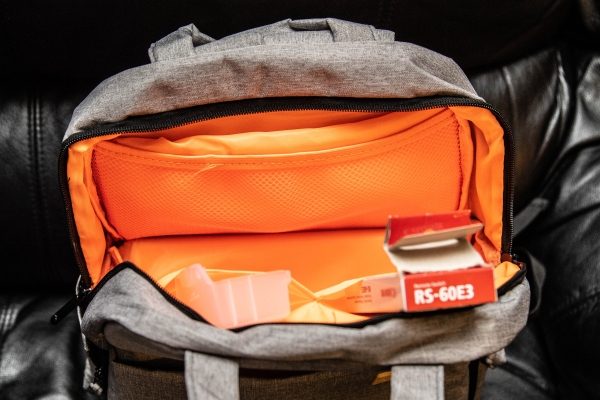
When you open the zipper at the top of the bag, there are several accessory/storage pockets. On one side there are two small pockets that are about five inches deep and each one is about half the width of the bag. The pockets are above the lower camera compartment.

On the other side of the bag there is a pocket that spans the width of the bag and is about five inches deep as well.  It is a fully padded pocket. In front of it, there is a second pocket that has a netted front and a thin cloth divider between the net and the front of the back pocket. These are also great for storage. As you can see in the picture below on the right, there is a divider that separates the top half of the bag from the bottom half containing the camera. This allows you to remove the camera storage container and the divider, and use the entire space as one bag. You also have the option to remove the divider and access the camera from the top of the bag.

As you can see in the pictures below, the top half of the bag offers lots of storage.

There is a waist strap with buckles that can be secured around your waist, and will keep the bag more stable if you have a need to do so.

On the back of the exterior of the bag, there is another small accessory pocket.

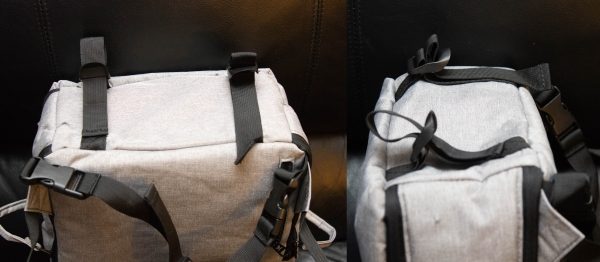
At the bottom of the bag there are two adjustable straps that can be used to carry a small tripod, or a rolled up blanket, or anything else similar.
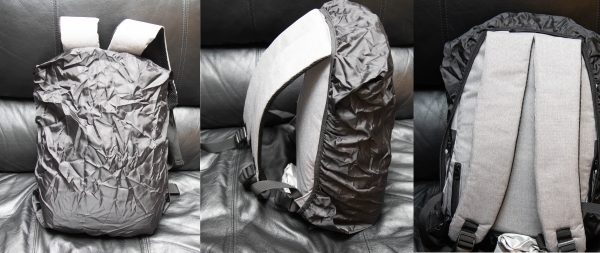
The included rain cover has elastic around the edges, and you simply stretch it over the exterior of the bag to cover the open areas that would not be protected by your back.

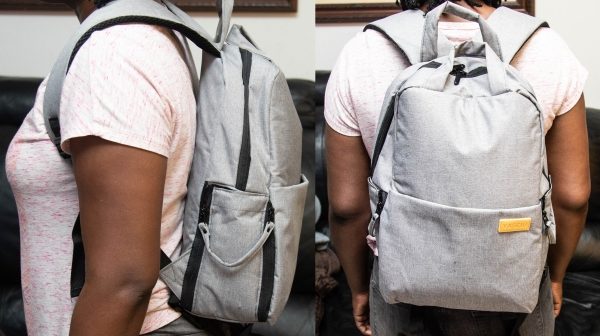
As you can see below, the bag fits very well as a backpack, and my wife really enjoys using it.

What I like

• The material used to make the bag
• The fit and comfort it provides
• The padded interior
• The number of interior and exterior pockets
• The removable padded tray for the camera
• The flexibility to keep the bag in 2 sections or to make it one larger bag

What can be improved

The only improvement that I would recommend, is for a better designed rain cover that would include a more secure attachment to the SnapBag, so that it cannot easily come off on its own.

Final thoughts

The Ouh Snap SnapBag Daily is a really nice backpack for carrying your daily photography “stuff” along with some other personal items. The bag is lightweight and well made, and just looks nice. It has become the daily-use backpack for my wife who is an amateur photographer, and a mom. She loves it, and in my opinion, for her to endorse it makes it a worthy bag.

Price: $39.95
Where to buy: OuhSnap
Source: The sample for this review was provided by OuhSnap

The post The Ouh Snap SnapBag Daily review appeared first on The Gadgeteer.

Filed in categories: Reviews

Tagged: , , ,

The Ouh Snap SnapBag Daily review originally appeared on The Gadgeteer on May 23, 2018 at 12:00 pm.

Note: If you are subscribed to this feed through FeedBurner, please switch to our native feed URL http://the-gadgeteer.com/feed/ in order to ensure continuous delivery.