The Andiamo by Tivoli Audio is a small Bluetooth speaker that may pack a big punch!


As Bluetooth speakers continue to become mainstream and par for the course, companies continue to design and redesign their products to provide more convenience and better sound for consumers, and of course to be a better choice than the competition.

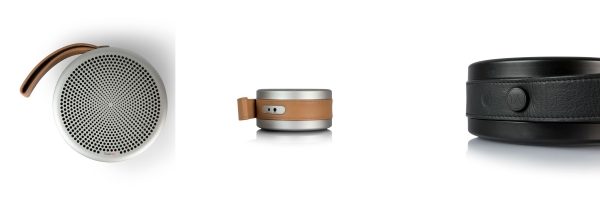
Tivoli Audio is an audio company that has been around for a while, and recently they decided to offer the Andiamo, which is a small compact Bluetooth speaker. It is being marketed as a high-end compact Bluetooth speaker, with finishes that include an Italian leather carrying strap. It will be offered in a black or silver model, and hopefully since the name Andiamo means “Let’s go” in Italian, it will sound as good as or better than the competition.

Tivoli Audio is scheduled to release the Andiamo in June 2018, and it will cost $199. You can visit the Tivoli Audio website for more details.

The post The Andiamo by Tivoli Audio is a small Bluetooth speaker that may pack a big punch! appeared first on The Gadgeteer.

Filed in categories: Reviews

Tagged:

The Andiamo by Tivoli Audio is a small Bluetooth speaker that may pack a big punch! originally appeared on The Gadgeteer on June 5, 2018 at 12:00 pm.

Note: If you are subscribed to this feed through FeedBurner, please switch to our native feed URL http://the-gadgeteer.com/feed/ in order to ensure continuous delivery.

Bestek MRJ1011 Wi-Fi smart plug review

The Bestek MRJ1011 Wi-Fi smart plug is a device that can turn on or off the AC outlet on it’s front. The device can be controlled manually, self-controlled by timers set by an app, or controlled by the IoT through the Smart Life app, Amazon Alexa, Google Home,  or IFTTT. It also has two 2.4 amp USB ports. Read on to see what I think!

What is it?

The Bestek MRJ1011 Wi-Fi smart plug is part of a new wave of inexpensive AC Adapters that allow users to remotely turn on and off items through a Wi-Fi connection. Smart plugs came into existence about eight years old; even though they costs less these days, they still offer about the same features as they did at their introduction. Not every manufacturer offers every feature but the smart plug generally offers local control, remote control by one or more communication protocols, energy monitoring, and USB power. The design of smart plugs includes various layouts and power capacities. What has immensely improved in the past eight years is the maturity of home automation and IoT. These days, the capacity of the smart plug to integrate with home automation and IoT is a key component of it’s usability.

What’s in the box?


Bestek MRJ1011 Wi-Fi smart plug
User Manual
Information card

Design and features

Specifications
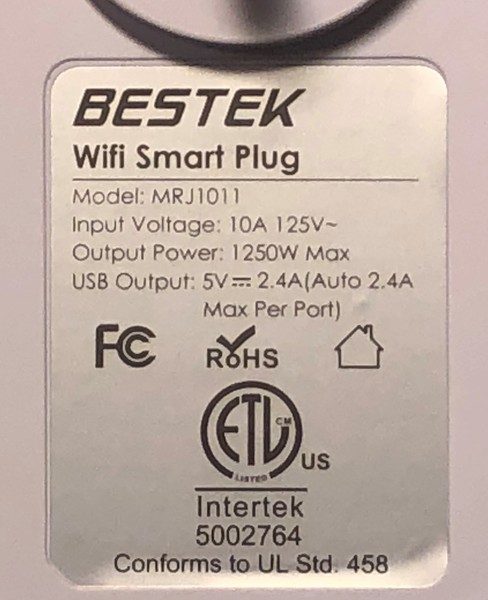
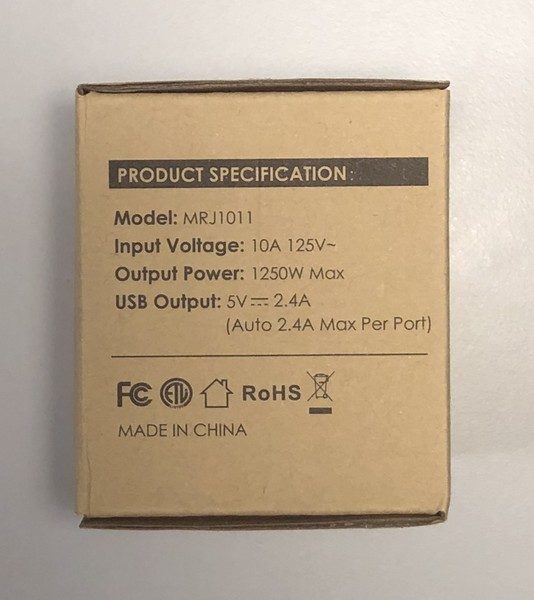
AC Input: 10A 125V ~ 1250W Max
USB Input: 100-250V ~ 50Hz/60Hz 0.45A Max
USB Output: 5V 2.4A(Auto 2.4A Max Per Port)
Total USB Output Power: 12W
Size: 3.25 x 2.00 x 2.40 inches
Weight: 96g

Unboxing
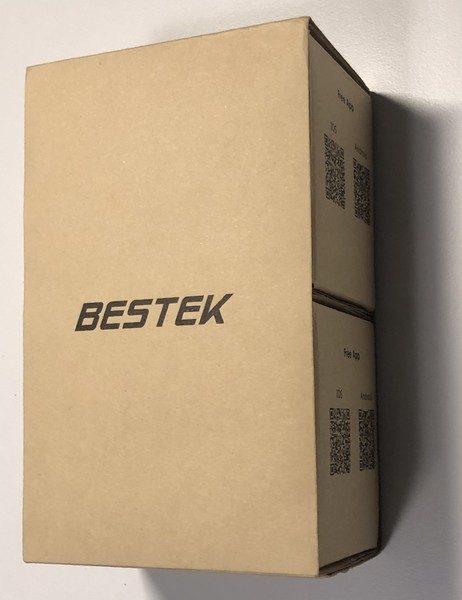
The Bestek Wi-Fi Smart Plug comes in a no-frills cardboard box. The two pack comes in a cardboard sleeve. The front, back and sides are printed with the product, specifications, and QR codes for the control app. 
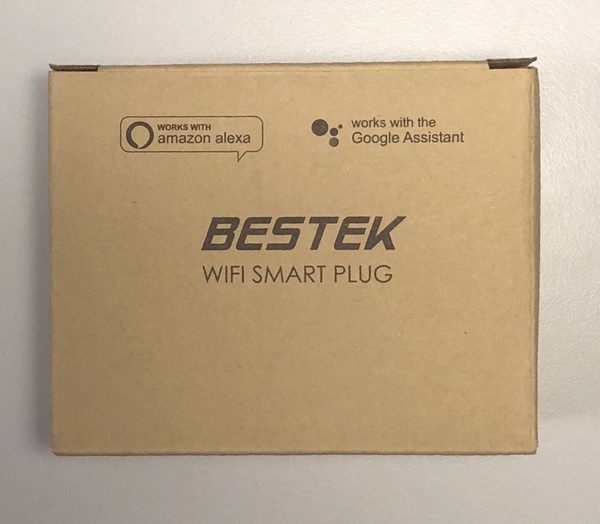
The QR codes below will redirect you to a page to download the control app.


Design of the Bestek MRJ1011 Wi-Fi smart plug

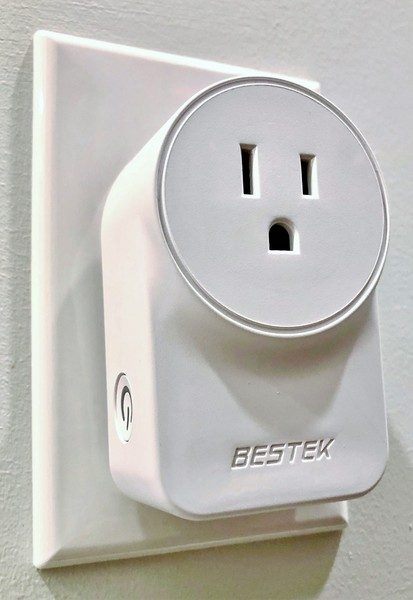
The Bestek MRJ1011 Wi-Fi smart plug is a white plastic plug adapter that looks similar to the “wall wart” transformers that are part of many electronics.  However,  like many Apple voltage adapters, its smooth lines and unobtrusive design enables it to blend in to light colored wall plates better than the typical black plastic designs.

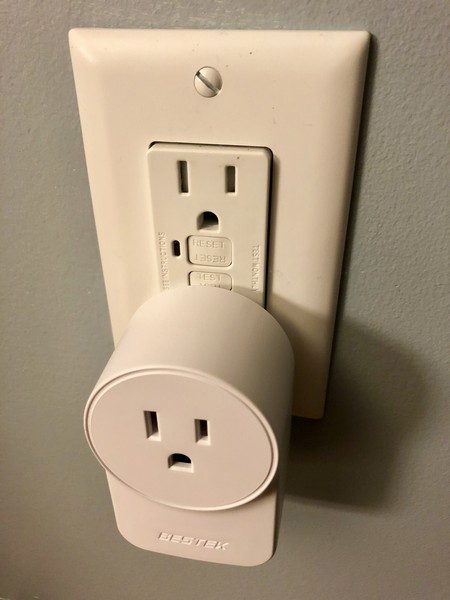
The front of the unit contains a 15 amp grounded receptacle. Since it isn’t tamper resistant, to comply with the intent of the NEC and for general safety, only install the smart plug if an item is plugged in it.  Also, even though the receptacle on the front is a 15 amp design, the unit itself is only rated to 10 amp. Consequently, to ensure that this item is not overloaded the user must be cautious and ensure the wattage of items plugged in to the front does not exceed 1250 watts.   This precludes using this item with many space heaters, most ovens/toasters and perhaps coffee brewers. I do not see any internal circuit breaker or fuse, so I’m not sure what will happen if this powers something over 1250 watts.

The rear of the unit includes a specification decal and the unit’s plug that slightly protrudes from the rest of the unit’s rear. The stepped design of the real may allow installation of the smart plug on decorative wall plates where the outlets are slightly below the highest point.
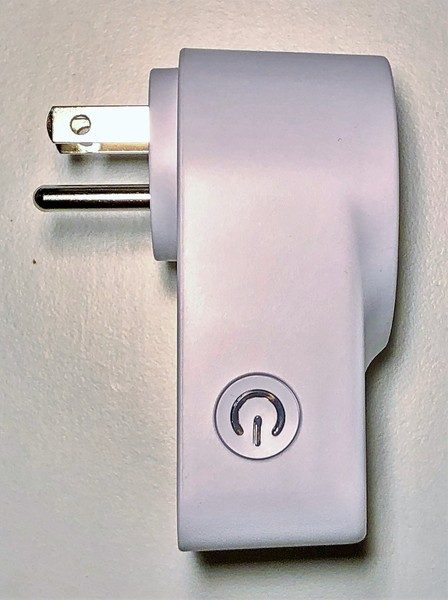
The unit’s plug does not block the top outlet of a duplex receptacle. However, the portion of the smart plug that contains the electronics and the USB connections will block the bottom outlet of a duplex receptacle.
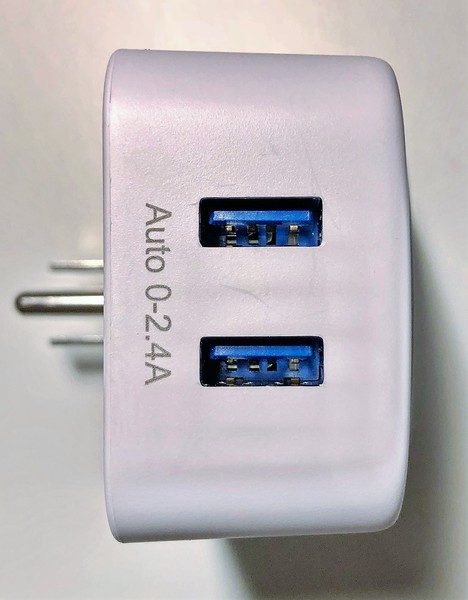
The bottom of the unit contains two USB plugs that are not switchable but can power and recharge USB devices.
Operation

The smart plug operates in three ways: by the manual pushbutton, by an internal timer, and by an IoT signal.

Manual mode

Manual operation is by a pushbutton on the unit’s side. When the receptacle on the front is on the button glows red.
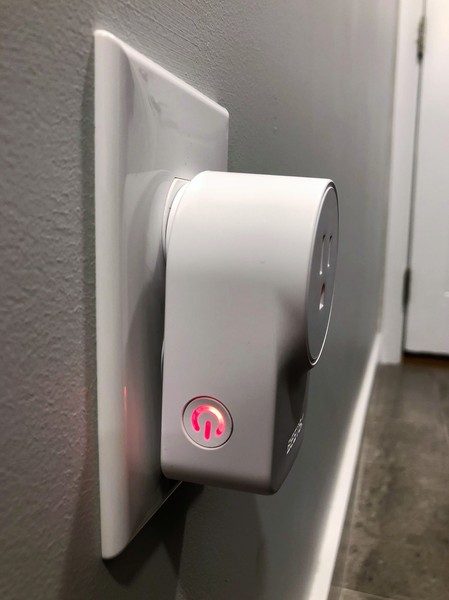
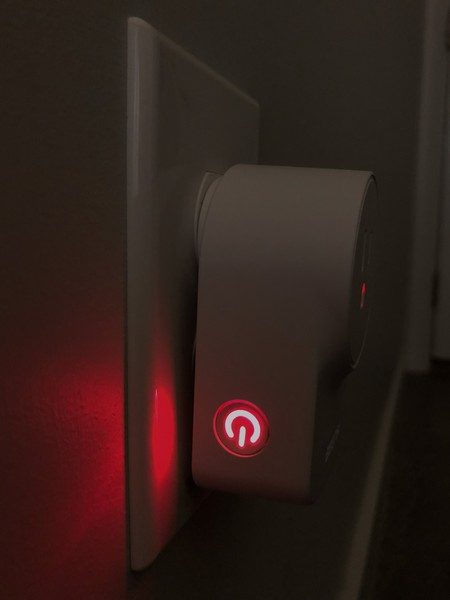
The red glow may seem overbearing at night. Some electrical tape will block out the red glow if its presence is a nuisance.
Timer Mode

Timer mode requires the Smart Life or BESTEKHOME app. You can use either one – the BESTEKHOME app is the same as the Smart Life app with a new title and app icon. To connect the smart plug to the app power it on, wait ten seconds and then power it off, then hold the power button for ten seconds. The power button will blink after performing these steps.  The app will ask for Wi-Fi credentials so that the device can join a network on its own. Note that this device only supports 2.4Ghz Wi-Fi channels. The device has its own access point that can pair to a phone if no other Wi-Fi is available.  in this scenario, the phone needs to join the devices AP.

After installation, the app can turn on the device remotely, turn on or off the device after a set time (like a countdown timer) or schedule the device to turn on or off at some future time. The schedule may apply to each day or certain days during a typical week.

IoT Mode

There is an entire 26-page booklet of instruction for how to connect the device to Amazon, Google, or IFTTT. The manual can be viewed here (https://fccid.io/2AKS6-MRJ1011/User-Manual/User-Manual-3801625) on the FCC site. In each case, the first step is to pair the unit with the Smart Life or BESTEKHOME app. The activation by Amazon Alexa is straightforward and the IFTTT includes both trigger and action. Note that IFTTT integration permits SmartThings to interact with the device; IFTTT can turn on the physical smart plug when SmartThings switches on a virtual switch, and vice versa.

Performance

The operation through the Smart life or BESTEKHOME app is very quick and operation through Amazon Alexa is only a little slower. The relay inside does make an audible pop, so using this to blink decorative lights is going to create a lot of unwanted noise.

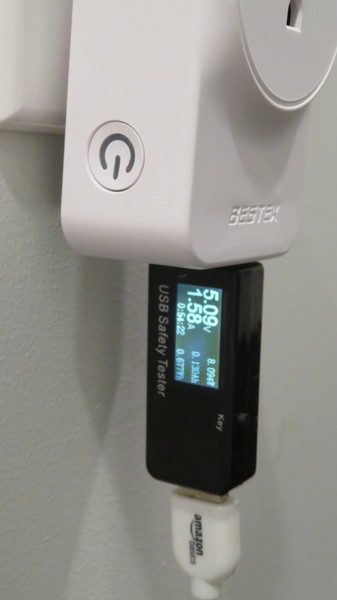
The smart plug contains circuitry that optimizes USB port current to intelligently charge or power the connected device. However, I was not able to get a full 2.4 amps out of the port even with a mostly dead phone battery. 1.58 amps is the highest draw I saw.
What I like

  • Lots of IoT connectivity
  • Included USB ports

What needs to be improved

  • 15 amp service
  • internal circuit breaker/fuse

Final thoughts

The Bestek MRJ1011 Wi-Fi smart plug has a host of connectivity options that enable control with a variety of services. If the allowable current were only more than 10 amps this would be a really great design.

Price: $15.99
Where to buyAmazon
Source: The sample for this review was provided by BESTEK.

The post Bestek MRJ1011 Wi-Fi smart plug review appeared first on The Gadgeteer.

Filed in categories: Reviews

Tagged: ,

Bestek MRJ1011 Wi-Fi smart plug review originally appeared on The Gadgeteer on June 5, 2018 at 10:00 am.

Note: If you are subscribed to this feed through FeedBurner, please switch to our native feed URL http://the-gadgeteer.com/feed/ in order to ensure continuous delivery.
Utama Spice Danau Satu nebulizing essential oil diffuser review

If you’re interested in trying aromatherapy with essential oils, you will need a diffuser. This is a topic I’ve been aware of for a while now but had never tried until I was offered the opportunity to review the Danau Satu nebulizing essential oil diffuser from Utama Spice.

What is it?

The Danau Satu nebulizing essential oil diffuser is a small wood and glass device that diffuses essential oils (concentrated forms of herbs, spices, and plants) into the air to fill a room (up to 400 sq ft) with the aroma of the oil which can provide calming or other effects. The Danau Satu diffuser does not use water or heat so it is more effective at dispersing the aroma throughout a room or your home.

What’s in the box?

  • Danau Satu diffuser base
  • Glass reservoir
  • Glass cap
  • 2 eye droppers
  • USB power cable
  • USB AC power adapter
  • Manual

Design and features

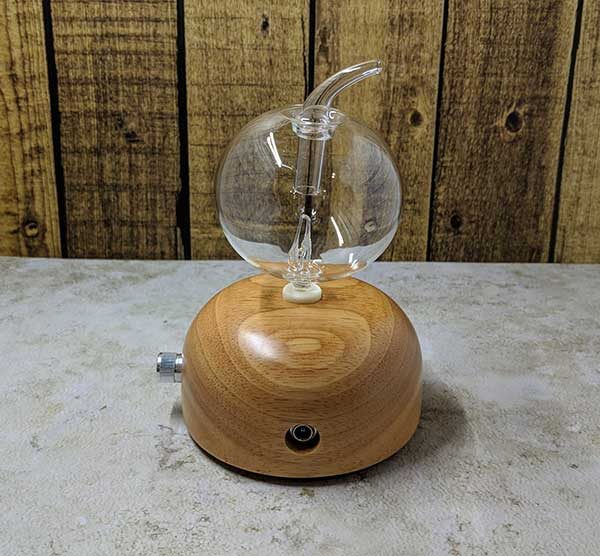
This is the first essential oil diffuser that I’ve ever used, so I don’t have anything to compare to, but my first impression of the Danau Satu is that it has a very attractive minimalist design.

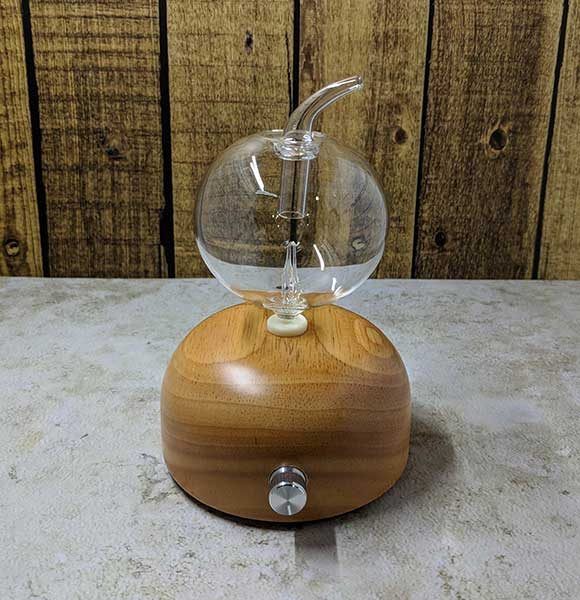
The base is made of wood, and the reservoir is made of clear blown glass.

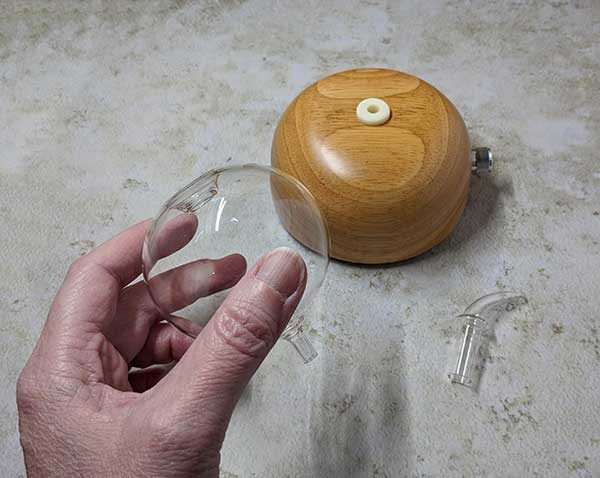
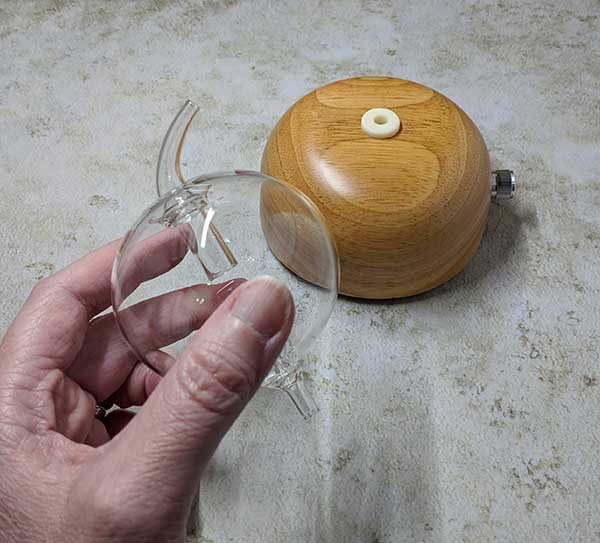
There are two glass parts. The main reservoir and the glass cap which sits in the top of the reservoir to direct the diffused oil particles into the surrounding air.

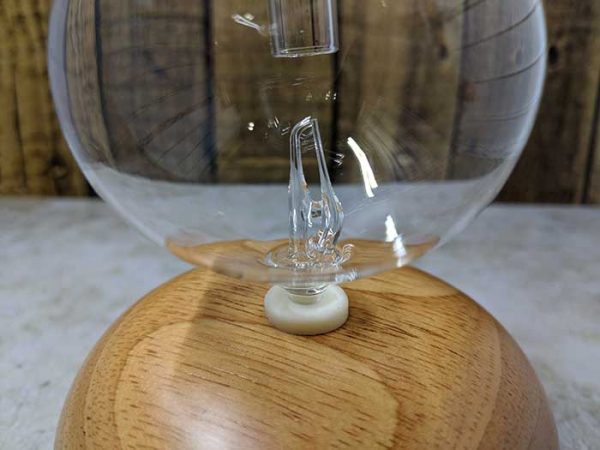
There is a little bit of assembly that is required before you can use the Danau Satu diffuser. You press the pointed end of the reservoir into the wooden base. It’s important not to twist it into the rubber gasket in the base, but to just press it in place. The same goes for removing it when you need to clean it. You can wiggle it back and forth as you pull it out, but you shouldn’t twist it as it could break off in the base.

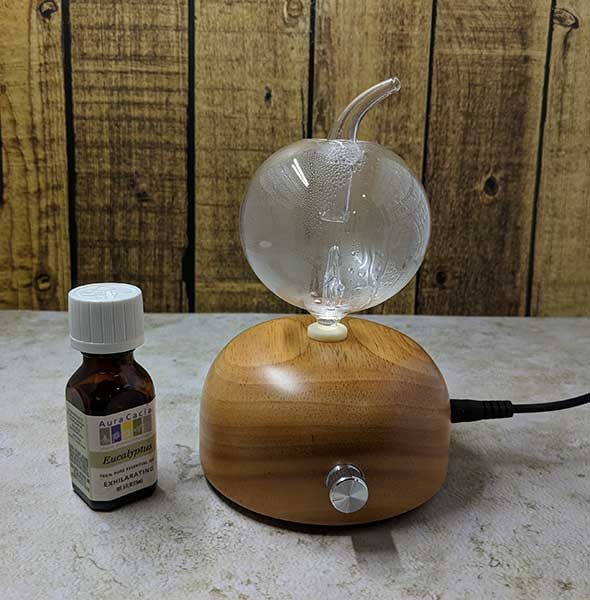
Once the reservoir is seated into the wooden base, you can plug in the included power cord, add a few drops of essential oil into the opening at the top of the glass reservoir, place the glass cap on top and then turn on the diffuser using the knob which rotates from low up to a high setting.

How does it work?

There is a glass nozzle and a microtube at the bottom of the reservoir that is connected to the tube that is pressed into the wooden base.

Air generated from the base enters the bottom of the reservoir and forces the oil to diffuse through the microtube and out through the glass cap.

A white LED glows from the base when the diffuser is turned on and a special timer diffuses the oil for 2 minutes and then turns off for 1 minute before turning back on for 2 minutes. This cycle continues for 2 hours before the diffuser turns off. Note that the LED does NOT turn off after 2 hours, but remains on.

While the diffuser is running, it does make a sound, but it’s not too loud or annoying.

Utama Spice included a small bottle of their Citronella essential oil with the diffuser so that I would have something to test. It’s important to only use pure essential oils that do not contain perfumes or other synthetic fragrances since you will be breathing in the oil particles. It’s also important not to use thicker oils like sandalwood, cypress, etc. which can clog of the microtubes.

It is pretty easy to clean the reservoir which needs to be done occasionally. The manual advises that you can put some alcohol in the reservoir and diffuse it for a few minutes to clean the microtubes or you can submerge the glass reservoir into a pan of hot water.

The Utama Spice Danau Satu nebulizing essential oil diffuser is very easy to use and easily filled my basement with a wonderful aroma. That said, I wasn’t able to use it very many times because I happened to read that some essential oils are toxic to cats and the citronella essential oil that they included with the diffuser was on the list of toxic oils that should not be used around a cat. Since I didn’t want to make my cat Max sick, I only tested the diffuser a few times with him outside at the time. I don’t have a lot of experience with essential oils, so I wasn’t sure how long the oil particles could “hang” around in the air. I didn’t think there would be any harm testing the unit with him outside, but it made me a little nervous that I could make him sick doing it very much, so I limited my testing.

What I like

  • Easy to use
  • Easy to clean
  • Attractive design

What needs to be improved

  • Box or manual should provide a warning that some oils are toxic to pets.

Final thoughts

There are many uses for essential oils for aromatherapy. Some oils can help with headaches, stress, insomnia, anxiety, and even some health problems. The Utama Spice Danau Satu nebulizing essential oil diffuser is an easy to use and attractive diffuser that will let you explore this type of therapy. Just make sure you read about all possible toxic issues for pets and even babies BEFORE you use any essential oils.

Price: $54.99
Where to buy: Utama Spice and Amazon
Source: The sample for this review was provided by Utama Spice.

The post Utama Spice Danau Satu nebulizing essential oil diffuser review appeared first on The Gadgeteer.

Filed in categories: Reviews

Tagged: ,

Utama Spice Danau Satu nebulizing essential oil diffuser review originally appeared on The Gadgeteer on June 4, 2018 at 4:53 pm.

Note: If you are subscribed to this feed through FeedBurner, please switch to our native feed URL http://the-gadgeteer.com/feed/ in order to ensure continuous delivery.

Anti-snore nose purifier by Social Hotcakes puts an end to violent snoring

Hog callers and hay mowers, this one is for you. Actually, it’s for who you sleep with.

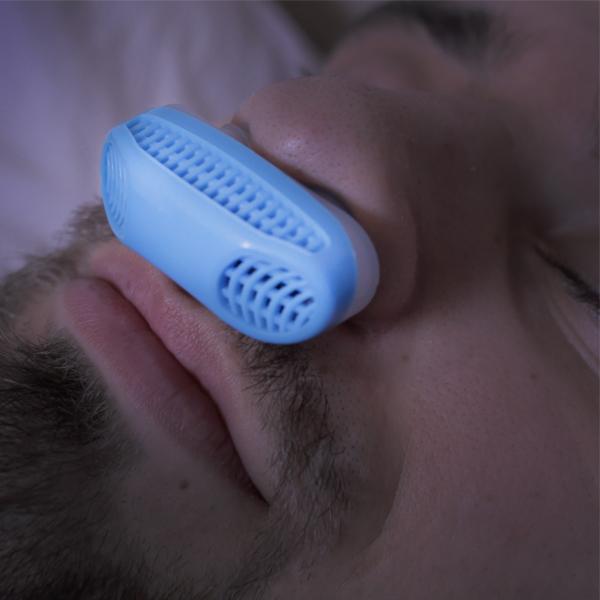
The anti-snore nose purifier by Social Hotcakes is a gadget made to fit up your nostrils while you sleep and eliminate your snoring, while also acting as an air purifier.

It works by using micro blowers that create pressured airflow through magnetic plates, and usage ultimately results with one partner quiet and the other happy. The colors it comes in are blue, red, and white.

Eliminating snoring and breathing pure air can make your entire night of sleep more enjoyable. Sleeping with a violent snorer is like waking up to an alarm that you never set, and can’t turn off. The heaviest of snorers tend to be in denial, so just gift this to someone who needs it.

It’s only $9.54.

Snore no more.

The post Anti-snore nose purifier by Social Hotcakes puts an end to violent snoring appeared first on The Gadgeteer.

Filed in categories: Reviews

Tagged: ,

Anti-snore nose purifier by Social Hotcakes puts an end to violent snoring originally appeared on The Gadgeteer on June 4, 2018 at 12:00 pm.

Note: If you are subscribed to this feed through FeedBurner, please switch to our native feed URL http://the-gadgeteer.com/feed/ in order to ensure continuous delivery.

Tend Secure – Lynx Pro Camera Review

We currently have a security camera on our front doorbell, our driveway, and our back deck.   All three are what I call ‘dumb’ type cameras where they just record and can send notifications when they sense movement. What we do not have is a security camera inside our home.  When I was offered the chance to review the new Tend Secure Lynx Pro security camera I jumped at the chance to put it in my home and see how it worked.

What is it?

The Tend Lynx Pro is a ‘smart’ camera that has the ability to recognize faces and only send notifications when it does not recognize the person.  You can even train the camera when it fails to recognize the person you have set up by pointing out the face in the video and indicating the person whose profile you have set up.  It works in both daylight and dark and can be set up outdoors and indoors.

Hardware Specs

This camera is really impressive and gives you a lot for your money.
  • 801.11 b/g/n wireless connectivity
  • Network security – WEP (40-bit, 128-bit)/WPA (TKIP,AES)/WPA2 (TKIP,AES)
  • 1/3.2 inch security grade CMOS sensor
  • 100° diagonal viewing angle
  • Infrared Night vision – 850 nm LED: up to 25 feet
  • Camera resolution – 1080p (1920×1080) HD at 30 frames/sec
  • Built in microphone
  • Built in speaker
  • Can handle temps from -4 to 115 degrees Farenheight
  • Built in battery to handle up to 1 hour of recording for up to 3 days.  It also has the internal storage to hold the data.  This is perfect for power outages.
  • You get a full 7 days of cloud storage for no charge.
  • App works with IOS 9 or higher and Android 5 or higher.

What’s in the box?

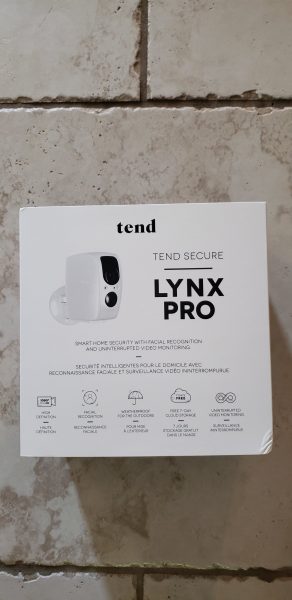
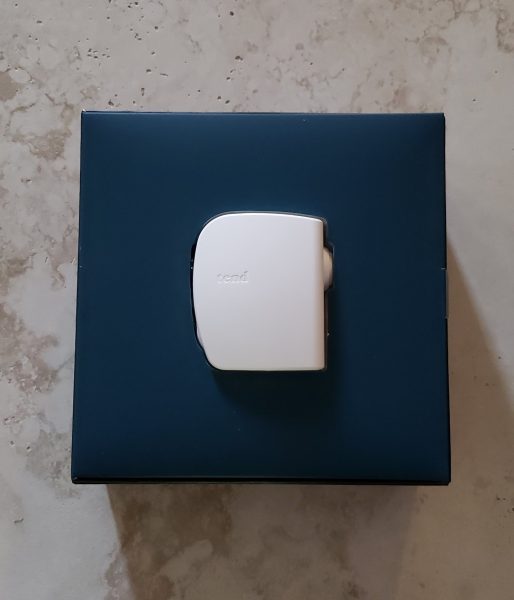
The packaging for this camera is excellent.  The picture above shows the outer slipcover for the box.  Once you pull that off and open the top cover you are presented with the actual camera as you see below.

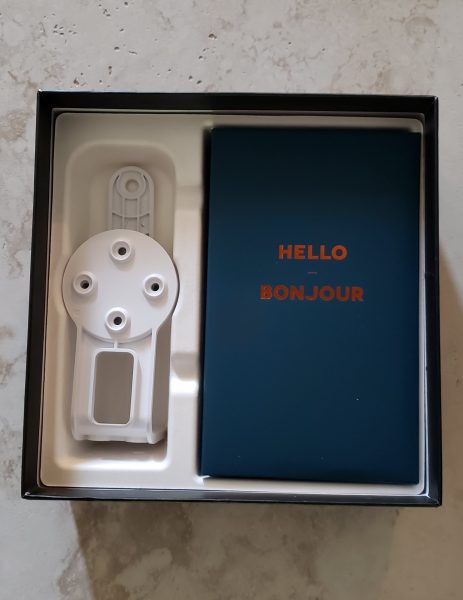
You then lift that whole blue box top section off and you see the mounting stands on the left and the paperwork and accessories on the right.  The power adapter and extra long cord are all in a separate box stored below the Hello paperwork.

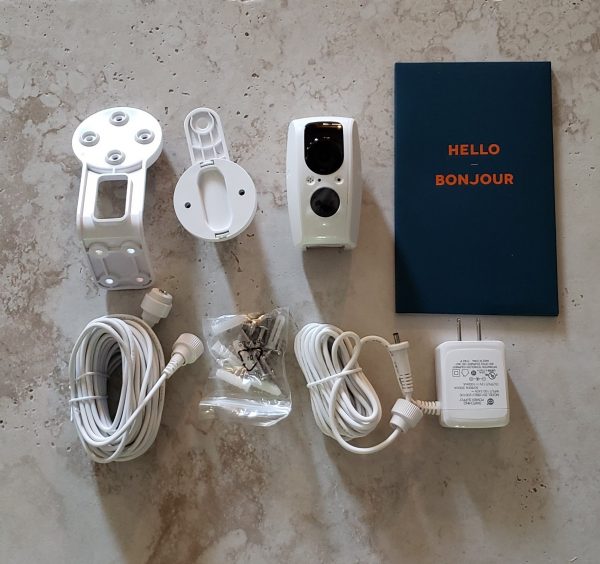
The image below shows exactly what is inside the box.

  • Mounting stands for the wall
  • Camera
  • User Manual
  • Extra power extension cord.  It does not have to be used if you do not need it.
  • Hardware to mount the camera
  • Power adapter and long power cord.

Design and Features

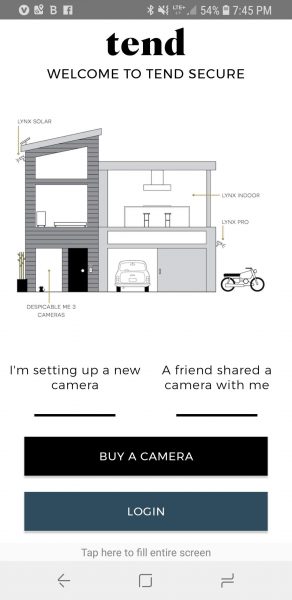
After unpacking the box, the next thing I did was to place the camera where I wanted it and install the app.  Let me state right up front that manual recommends that you mount the camera 6 to 7 feet above ground shooting towards the ground.  They state that will help with the facial recognition.  For my testing purposes, I ended up placing the camera on top of several boxes that were sitting on top of a bar in our home entryway.  So the camera was shooting across horizontally instead of having a nice downward view.  The camera still did a pretty good job on the facial recognition.  The app will work on IOS and Android.  I loaded it onto my Galaxy S9.  The screenshot below is the opening screen of the app.  I clicked on the ‘I’m setting up a new camera’.

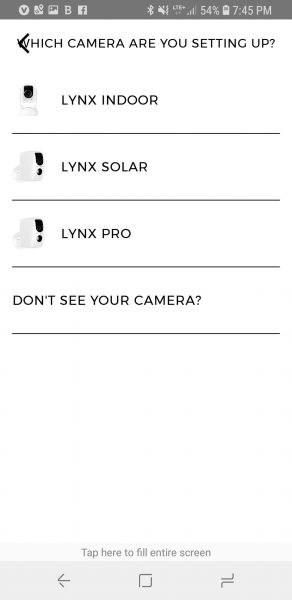
The next screen asked me which type of camera I was setting up.  Tend makes several cameras so I chose the Lynx Pro.

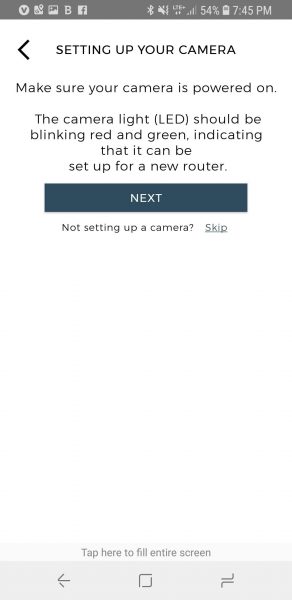
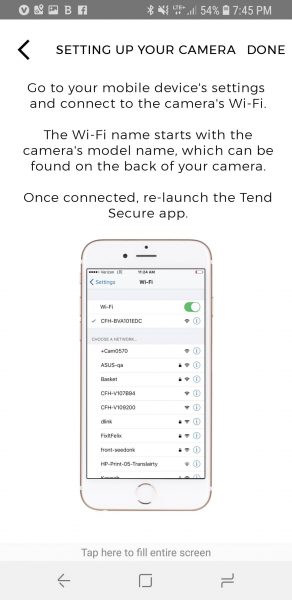
The next few screens wanted me to be sure the camera was powered on and the LED was blinking red and green.  I then went to my phone settings and connected via WIFI directly to the camera.

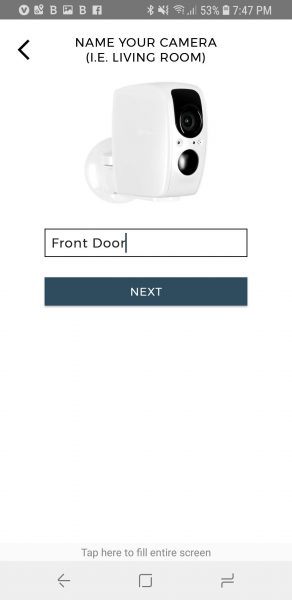
Once connected to WIFI, I went back into the app.  The app recognized I was connected and asked me to name the camera.  As you can see below, I named it ‘Front Door’.

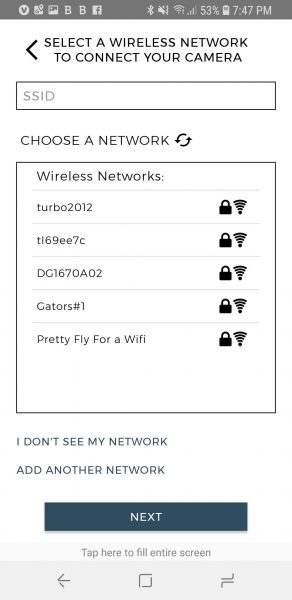
I then got the option to pick the wireless network I wished to connect to.  As you can see, there are some networks with some interesting names in our neighborhood!

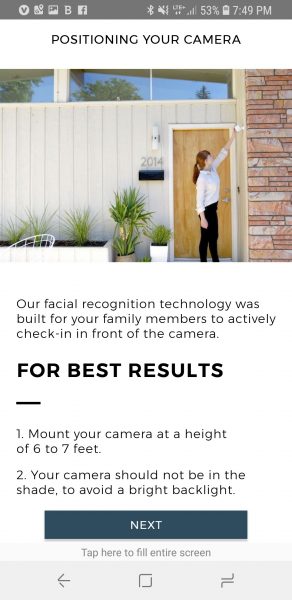
The last setup screen tells you how to mount the camera for best facial recognition.  I will note that originally I had the camera facing my front door, however that was causing way too much back lighting and the camera was having a hard time with facial recognition.  Once I moved the camera away from facing direct light it worked much better.

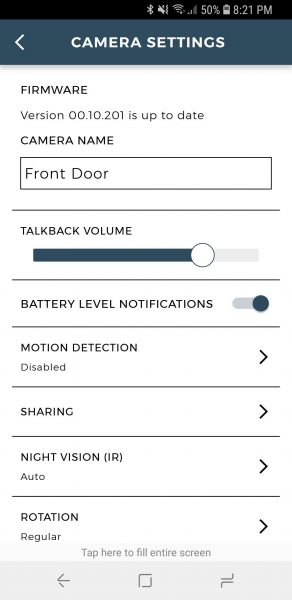
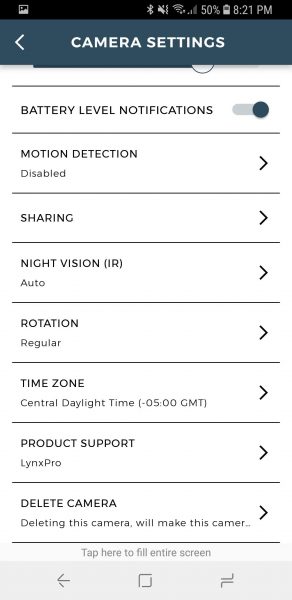
The next few screenshots will show you how the settings screens look in the app.  This first screen gives you a lot of great info and options.  I want to note that the level you are seeing for talkback volume is rather loud.  The speaker on the camera is quite impressive.

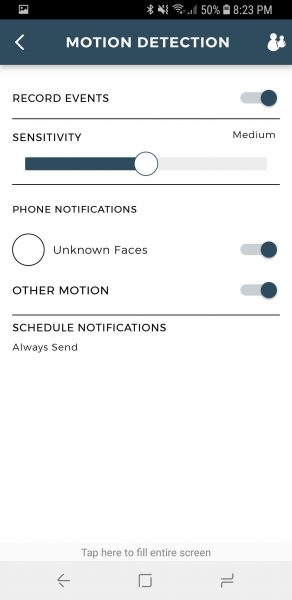
This next screen below shows you the secondary screen you get when you turn on motion detection.  You can adjust sensitivity and have the camera send notifications for unknown faces.   You can even set schedules as to when you want to be notified.  Once you start adding folks to profiles for facial recognition, you can turn off notifications profile by profile if the camera recognizes the face.

The screenshot below is the entry screen to set up profiles.  You simply take a picture of the person with your phone and they are set in the app.

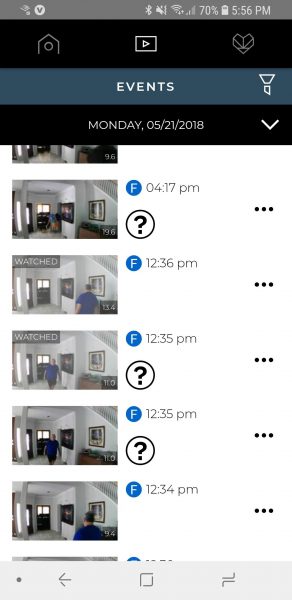
The screenshot below shows the recordings it made for part of a day in my home.  When you see a big question mark it means the app did not recognize the person in the video.  I found when lighting was good, the camera did a great job of recognizing both myself and my husband.  Of course, when we entered the scene walking away from the camera it almost never recognized us.  I believe if I ‘taught’ the camera that it was me by clicking on the head in the video and pointing to my profile it might have learned to recognize us better.  You can also see the screen will show you a ‘watched’ indicator if you have already viewed the video.  As stated earlier, the app will store up to 7 days of video in the cloud for free.

Below are some sample recordings it made during the day and one from nighttime.  There was little to no light in the room when the nighttime recording was made.

What I like

I love the video quality.  I think it does a pretty good job of facial recognition.  I also love that you get a full week of free cloud storage.  The microphone and speaker on the camera are also both excellent.  The fact that it also has a backup battery and internal storage in case of power failure is a winner.  I used to own a Nest camera at one time and I believe this camera gives you way more bang for the buck.

What needs to be improved

This camera is pretty awesome.  If any suggestion could be made it would be to see if they could somehow get this camera to work without wires.

Final thoughts

I really loved this camera.  When compared to the outside cameras that I have the video quality is excellent.   I feel the video quality is certainly comparable to the Nest home camera I used to have.  You can’t beat the free 7-day cloud storage.  This camera just offers a ton of options for the price.

Price: $149.00
Where to buy: Tend and Amazon
Source:  The sample for this review was provided by Tend

The post Tend Secure – Lynx Pro Camera Review appeared first on The Gadgeteer.

Filed in categories: Reviews

Tagged:

Tend Secure – Lynx Pro Camera Review originally appeared on The Gadgeteer on June 4, 2018 at 10:00 am.

Note: If you are subscribed to this feed through FeedBurner, please switch to our native feed URL http://the-gadgeteer.com/feed/ in order to ensure continuous delivery.