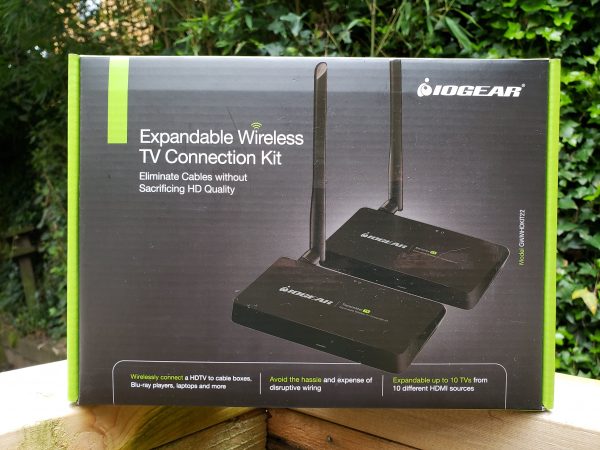
IOGEAR Wireless TV Connection Kit review

We love to entertain, and with our recent house remodel we added an outdoor movie theater to enjoy those cool Seattle summer nights.  With a small backyard it is hard to put the entertainment everywhere our guests are without an abundance of wires.  The IOGEAR Wireless TV Connection Kit promises to solve that problem and do it in full HD.  How does that claim stack up against reality?  Read on to find out…

What is it?

The IOGEAR Wireless TV Connection Kit is a transmitter and receiver combo which allows you to stream video via an HDMI connection from a source like your laptop or a cable/satellite receiver to a display device like a TV or projector.  It does so without wires up to a claimed 150 feet, and at a full 1080p and 60 frames per second without sacrificing sound or picture quality.  It uses the 5.8 GHz frequency so it should not interfere with any existing wireless networks, Bluetooth devices or home automation hubs.

What’s in the box?

The kit includes a clearly labeled transmitter and receiver plus associated antennas.  You also get 2-3 foot HDMI cables (HDMI 1.3), 2 power supplies, and an IR Blaster (for the transmitter to control your device remotely) and an IR receiver (plugged into the receiver, it transmits commands from your remote back to the transmitter).

Design and Features

Our intended use is for our outdoor movie theater, and our projector is a full 1080p model.  In order to support simulcasting on our living room TV, we need a transmitter that also supports this.  Our original design included a 45 foot run of HDMI cable from a media connection box in the backyard, an HDMI splitter to handle one signal to two devices, and the ugly notion that we would end up cutting holes in the outside of the house, the open basement beams, and the living room floor to accommodate the cable run.

So, when IOGEAR offered this kit for review, I jumped at the opportunity to try it out.  Did it solve my problem?  In a word, yes.  As with any solution, there are some gotchas waiting along the way.  But nothing at all earth-shattering to overcome.

The kit comes with two boxes – one transmitter and one receiver.  Because the kit was originally intended to connect a cable box or satellite dish receiver to a TV, the box also includes an IR blaster and extender to allow you to remote control your input.  As my setup is driven by my laptop, these were not important – I tested them on my cable box and they work as well as any IR setup will.  If you use a Roku or other streaming setup that uses a different connection technology, though, you will have to come up with an alternate solution to remote control.  Thankfully there are apps to cover most of these scenarios, but your mileage may vary.
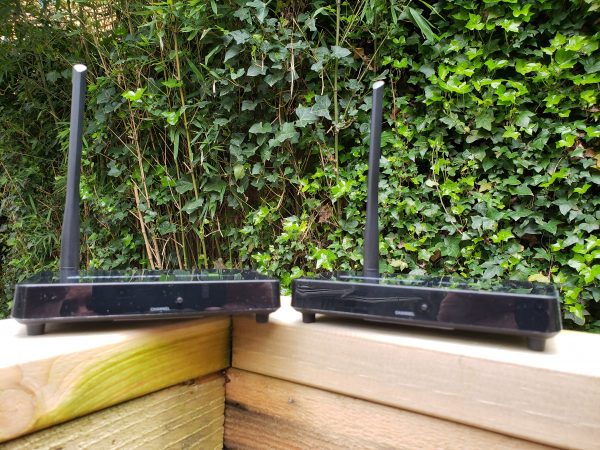
The antennas on each unit are omnidirectional, so you do not need to worry about orientation other than just being up.  The back of each unit has the antenna barrel connector, power input, IR blaster receiver/transmitter input and an HDMI connection.  Pretty simple.  The front of the unit has a power indicator and a channel button.  More on that in a moment.  Unless you have been living in a Luddite bubble for the last dozen or so years, setting this up should be drop-dead simple.  And the boxes tell you which is which, so again – easy to set up.
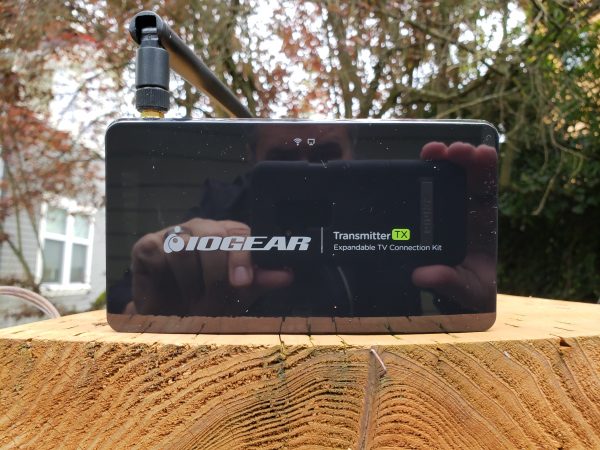
With the receiver connected to my TV, I plugged the transmitter into a USB-C cable with an HDMI plug running from my laptop.  Windows 10 immediately recognized the transmitter as an HDMI-capable device operating at 1080p and mirrored my desktop to the transmitter.  Here is where I ran into my first “issue” (and I put that in quotes because it is easily overcome, but may take a little sneaker-work if you are doing this alone).  The transmitter and receiver have to operate on the same channel, and unfortunately, there is not a channel indicator on the device – nor is there a scan feature that I could find.  This means you have to press the channel button on one unit and then see if the devices sync.  Best to have someone help you if there is a gap between the transmitter and receiver that won’t allow you to see both at the same time.

Once synced, however, both devices displayed my desktop in great color.  This being a still image, the real test is in handling video.  So I fired up VLC and started playing Black Panther.  And I have to say I am impressed – if you didn’t know otherwise, you would swear the connection was wired.  No artifacts, no interference, no lag – just a clear, bright signal with perfectly synced sound.

My laptop was running in my backyard and the TV/receiver combo was in my living room.  The signal had to go through my kitchen and a brick fireplace.  Total distance was about 25 feet, so I figured I would see what a little distance and the walls of a 101 year old house would do to the performance.  I took my laptop out the back fence and then set up a monitor just outside my front fence.  In addition to the house, there were trees, dogs and all manner of other signal disruptors.  The total distance between the transmitter and receiver was about 65 feet, with my wifi network, microwaves, smart home appliances, and Bluetooth devices in between.

The IOGEAR devices never skipped a beat.  Clear, strong signal with no apparent lag or artifacting.  The thing just worked.

What I Like

  • Very easy to set up and use
  • Even at 60+ feet through walls and foliage, the signal was strong, the audio clear and no static
  • If I wanted to use this inside with a hidden cable or satellite receiver the IR Blaster would likely work
  • It is a very cost-effective solution to a specific problem

What needs to be improved

  • Channel selection and synchronization between the transmitter and receiver can be tricky – a display on the front of the transmitter and receiver would remedy this

Final thoughts

Some things to keep in mind: if you are using this with a computer of any sort you will want to mirror your desktop, not extend it – unless, of course, you are able to see the receiver.  Without mirroring you will be unable to see where your cursor or windows are on the receiver.

Also, your receiver will only be as good as your transmission device – if the device hooked up to the transmitter does not run at a full 1080p or if the sound coming from the HDMI is not stereo, this device will do nothing to help you (to be fair, this is true of most devices in this class unless the transmitter specifically states that it will upscale the image).

And finally, if you use protected content (say a Blu-ray disc on your computer) you may have problems with security protocols built into those devices.  This means that a computer will likely not transmit the signal from a Blu-ray disc playing on it like a standalone Blu-ray player will because of the High-bandwidth Digital Content Protection (or HDCP) built into devices.

At $170 this is a great solution to a specific problem.  If you share my situation and are looking for a way to get a 1080p signal across a distance without a cable run, the IOGEAR connection kit could be your answer as well.  I did have to contact technical support during the course of this review, and I found their team responsive and highly supportive, so you can be assured if you run into issues there is someone on the other side of the sale ready to help you.

Price: $169.95 as described
Where to buy: IOGEAR’s web site has additional information and you can buy there or at Amazon.
Source: The sample for this review was provided by IOGEAR.

The post IOGEAR Wireless TV Connection Kit review appeared first on The Gadgeteer.

Filed in categories: Reviews

Tagged:

IOGEAR Wireless TV Connection Kit review originally appeared on The Gadgeteer on June 11, 2018 at 9:00 am.

Note: If you are subscribed to this feed through FeedBurner, please switch to our native feed URL http://the-gadgeteer.com/feed/ in order to ensure continuous delivery.

CHOETECH Wireless Charging Pad review

While wireless phone charging is certainly not new (Android phones have this capability for some time), it has exploded in popularity in the past several months due, arguably, to the iPhone 8, iPhone 8 Plus, and iPhone X having incorporated the wireless Qi charging standard into their newest feature sets.  With this has come a veritable tech tsunami of wireless charging devices for Qi-enabled phones of all types.  Here, we try out the CHOETECH Wireless Charging Pad.
What is it?

The CHOETECH Wireless Charging Pad is a simple, low-cost, wireless charger that can be used with any phone that supports the wireless Qi charging standard.

Tech specs

  • Model number = T511
  • Color options = Black (reviewed here), Rose Gold, Blue, Red
  • Qi charging standard certified
  • Input = 5 Volts @ 2 Amps
  • Output = 5 Watts
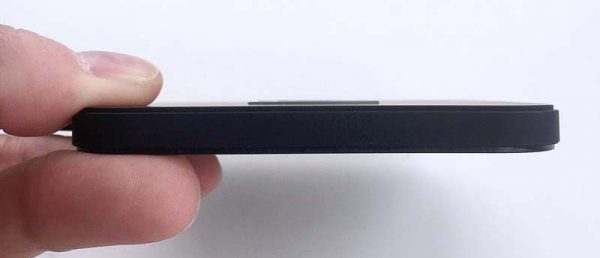
  • Dimensions = 3.5 x 3.5 x 0.4 in
  • Over-current, over-voltage and over-temperature protection
  • Compatible with iPhone 8 / 8 Plus, iPhone X, Samsung Galaxy Note 8 / S8 / S8 Plus, S7 / S7 Edge and other Qi-enabled devices
  • Location of manufacture = China

What’s in the box?

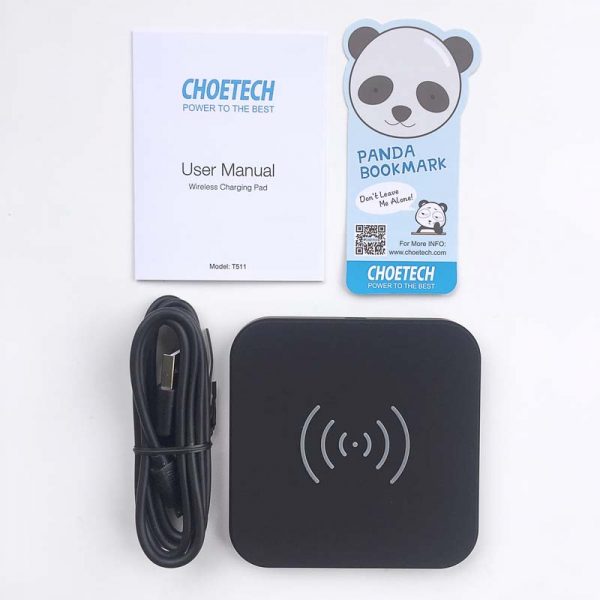
Inside the box were the above items show in the image above and listed below:

  • CHOETECH Wireless Charging Pad
  • Micro USB cable
  • User Manual
  • Adorable Panda bookmark

Design and Features

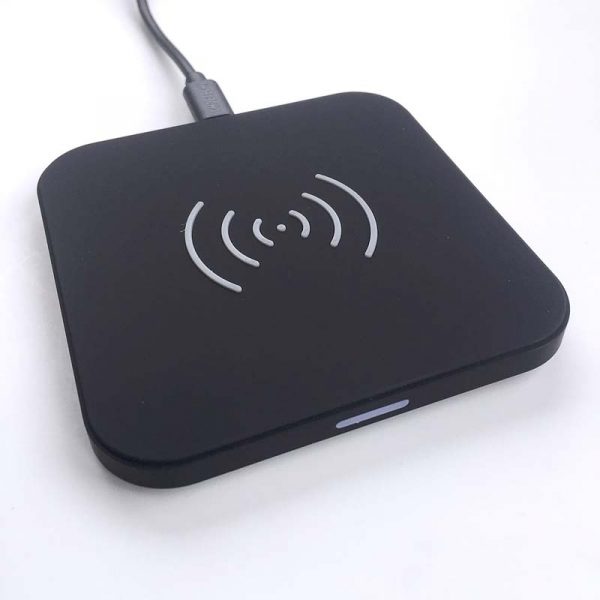
The CHOETECH Wireless Charging Pad is a slim design with a square footprint.  It has a soft-to-the-touch satin finish and in its center it features a gray silicone dot with two sets of gray silicone “waves” emanating outward from either side.  This dot and waves are intended to act as a target to aid the user in positioning their Qi charging-enabled phone onto the pad to align the charge transmitting and receiving hard for best charging results.  Assembly consisted of simply plugging the included micro USB cable into its port on the back of the charging pad.  Note that the CHOETECH Wireless Charger does not include any type of power adapter, and CHOETECH recommends a 5V/1.5-2.4A adapter for best result.

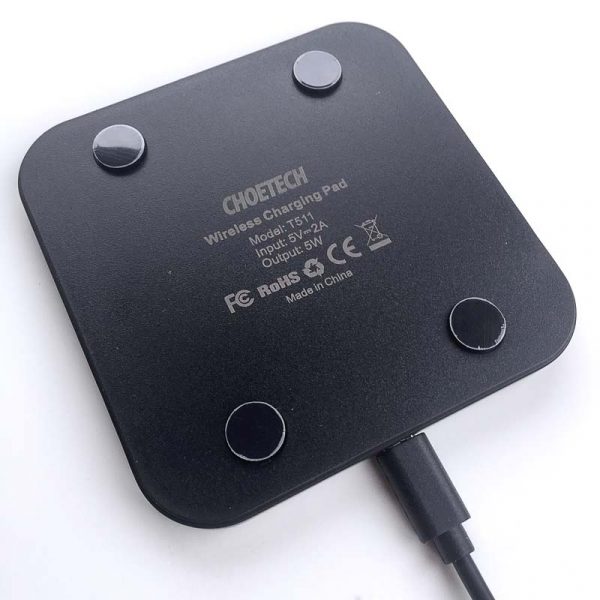
The underside of the pad features a small rubber foot located at each of the four corners.  These pad help prevent the pad from slipping around while placing your phone onto or removing your phone from the pad.  However, don’t be like me and forget to remove the thin plastic layers protecting the feet (as seen in the image above)—the foot pads grip much better with the plastic removed. 🙂

As mentioned above, the CHOETECH Wireless Charging Pad is quite slim, as seen in the image above.  It is only 0.4 inches (about 10mm) thick.

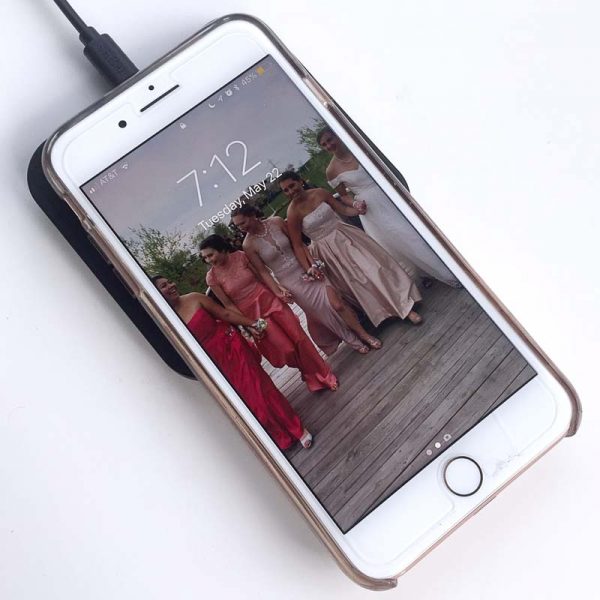
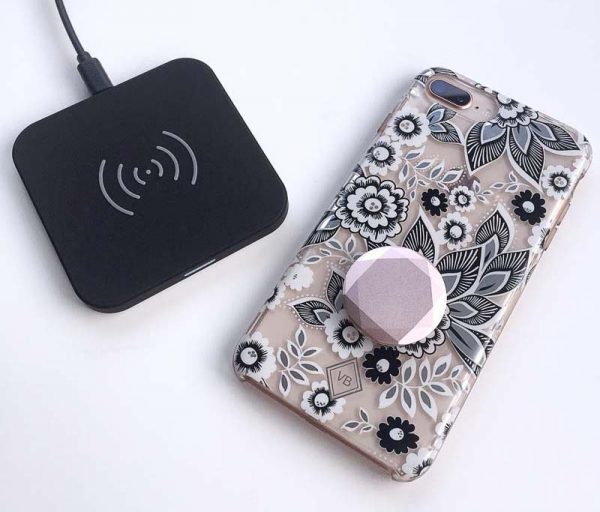
The first phone that I tested with the CHOETECH Wireless Charging Pad was my daughter’s iPhone 8 Plus.  She typically protects her iPhone 8 Plus in a case (currently a floral-print Vera Bradley case), and she has also attached a Pop Socket to the outside of the case.  See above for details.

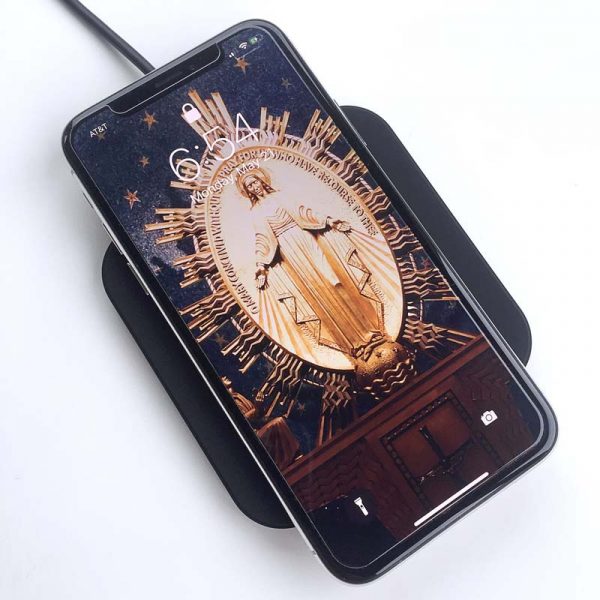
With the case and the Pop Socket attached to the iPhone 8 Plus, it sat quite a bit off-center of the pad, as seen in the images above and below.

The Pop Socket prevented the CHOETECH Wireless Charging Pad from actually charging her iPhone 8 Plus.  My guess is that the location of the Pop Socket prevented the Qi charging hardware in both the iPhone and charging pad from aligning properly, thus preventing transfer of energy between the pad and iPhone.

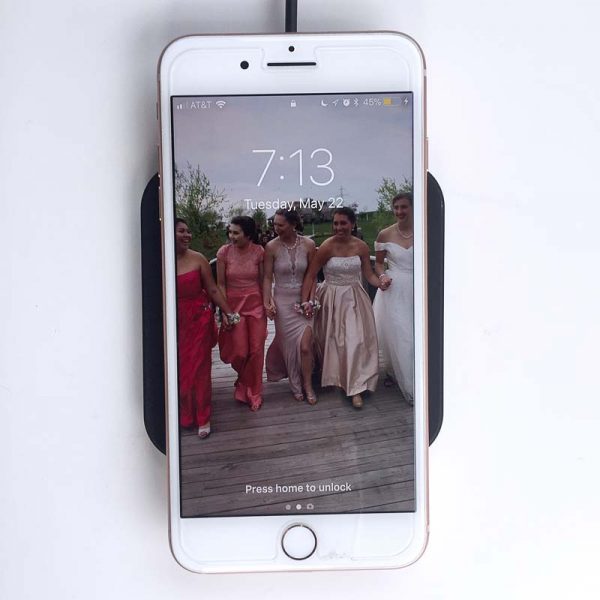
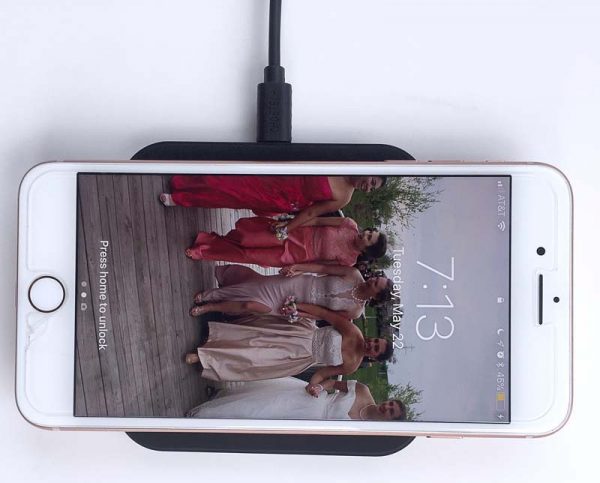
Next, I removed my daughter’s iPhone 8 Plus from her case and placed it back on the CHOETECH Wireless Charging Pad, as shown in the images above and below.

As can be seen in the previous two images, the pad charged her iPhone with no issues once the case and attached Pop Socket was removed.  With the Pop Socket no longer blocking proper alignment between the charging hardware in the iPhone and the pad, it charged as expected.  Additionally, the iPhone 8 Plus charged with no issues in either the horizontal or vertical orientation.

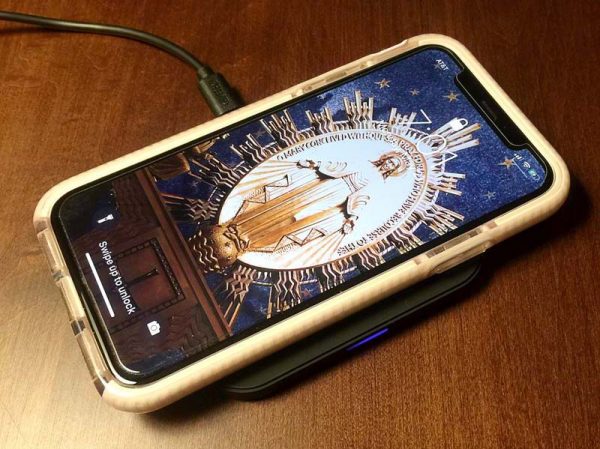
Next, I tried out the CHOETECH Wireless Charging Pad with my wife’s iPhone X.  My wife does have her iPhone X in a case, but does not have a Pop Socket on it.  I found that without the Pop Socket but even within the case, her iPhone X charged as expected, as seen above.  In fact, I had a fair amount of freedom to position her iPhone X, provided that it was roughly centered on the pad, and still achieve a charging connection.  Charging the iPhone X while in the case didn’t seem to slow down the charging speed, but it did seem to produce a bit of heat on the surface of the case.  So, although the pad’s User Manual recommends removing your phone from a case to charge it, this did not seem to impede the charging of my wife’s iPhone X.

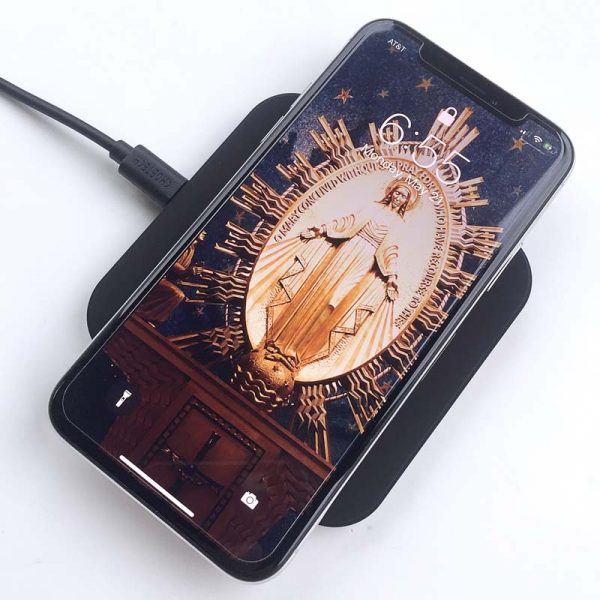
In the interest of being thorough, I then removed the case from my wife’s iPhone X and as expected, it charged without issue.  I even varied the position from vertical to horizontal relative to the pad (see images above and below) and it didn’t seem to affect the charging, as long as the iPhone remained fairly centered on the pad, using the dot and waves to help align it properly.


In the image above, you can see the blue indicator light on the front of the charging pad, which illuminates when a positive charging connection has been made.

After using the CHOETECH Wireless Charging Pad for several weeks, my wife reported that she really likes it.  It doesn’t charge as fast as a cable connection, but its level of convenience is increased over plugging in and unplugging a cable.  She just lays her iPhone X—while in the case—on the pad and, ensuring that it is properly aligned, it charges every time, and when she wakes up in the morning, she can just grab it and go.   It should be noted that this charger does not support rapid charging, so if you have a phone that supports this feature, you will not be able to take advantage of it with the CHOETECH Wireless Charging Pad.  I didn’t really miss this feature because Apple has yet to include rapid charging in the latest iPhones.
What I like

  • Simple, clean, thin design
  • Works with or without a case, though the phone must be aligned with the pad properly.

What needs to be improved

  • Nothing that I can report at this time

Final thoughts

The CHOETECH Wireless Charging Pad is a simple, functional wireless charging device that seems to work well for its relatively low price.

Price: $12.99
Where to buy: CHOETECH or Amazon
Source: The sample for this review was provided by CHOETECH.

The post CHOETECH Wireless Charging Pad review appeared first on The Gadgeteer.

Filed in categories: Reviews

Tagged: ,

CHOETECH Wireless Charging Pad review originally appeared on The Gadgeteer on June 10, 2018 at 2:48 pm.

Note: If you are subscribed to this feed through FeedBurner, please switch to our native feed URL http://the-gadgeteer.com/feed/ in order to ensure continuous delivery.

AIRFREE P2000 Air Purifier review

As I continue to look at as many as possible air purifiers to combat the allergies that my kids and I battle against every season, I “jumped” at the opportunity to test and review another one. Let’s see how it stands up to the test.

What is it?

The AIRFREE P2000 is an air purifier that as per the manufacturer “destroys mold, dust mites, bacteria, viruses, pollens, pet dander, tobacco and other organic allergens”.

What’s in the box


In the box, you will find the AIRFREE P2000 Air purifier and the instruction booklet.

Design and features

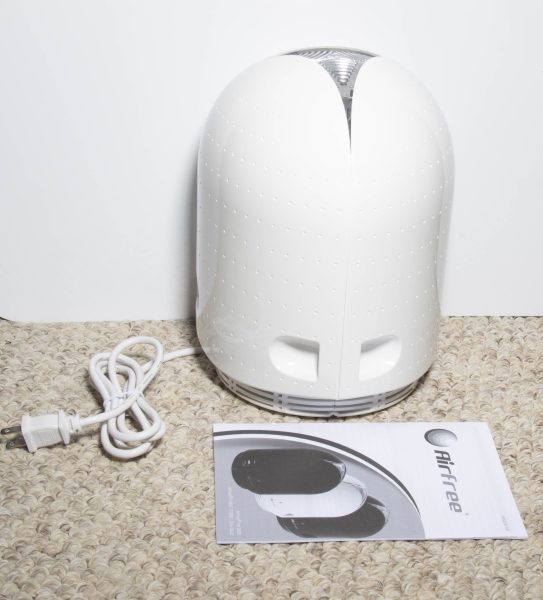
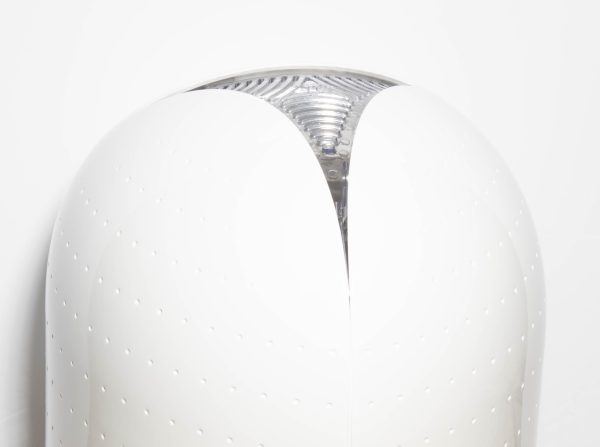
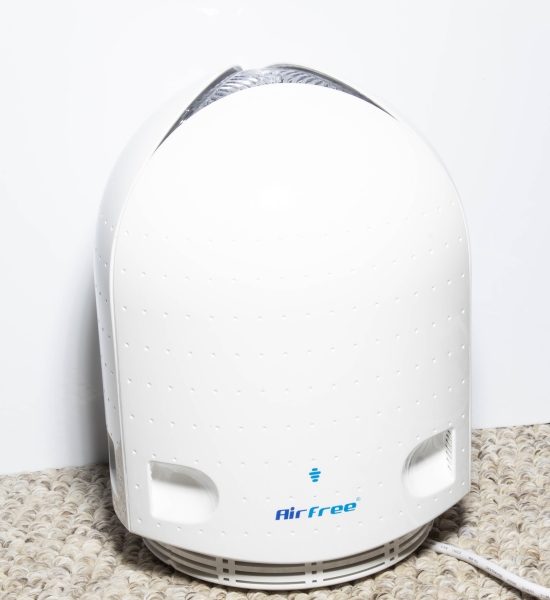
The AIRFREE P2000 is a small compact air purifier that is made of sturdy plastic with a built-in power cord. It is approximately 10 inches high and 8 inches in diameter and weighs only 3 1/2 pounds. The manufacturer’s specs state that it is effective in any room up to 550 square feet, and it has a small enough footprint that I think would allow it to blend in well with almost any decor. It is filterless and completely silent and requires no maintenance.


At the back of the P2000, there is the brand name, a few air vents, a touch sensor above the brand name that controls the adjustability of the night light, and the power cord.


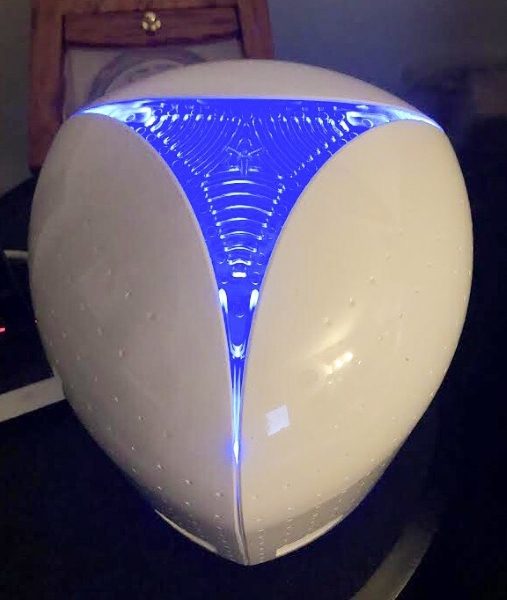
On the top of the P2000, there is an adjustable night light that as you increase the intensity via the touch sensor, goes from white light to an intense blue light.

Performance

After plugging in the AIRFREE P2000, I began to feel the difference after about 2 days. I normally suffer from allergies that include symptoms like watery and itching eyes, sneezing, and the occasional rash and runny nose. This air purifier seems to do a pretty good job and at remarkably reducing those symptoms. It is completely quiet, and the built-in night light is a plus. It is filterless, so there is no maintenance, but I do wonder how I would know if the filtering process ever failed, other than the possible clue if my symptoms return. Otherwise, the performance so far has been good, and I will keep paying attention to see how long it remains noticeably effective.

What I like

I like the compact size of the P2000, and the fact that it is filterless thus cost-effective, and completely silent.

What can be improved

In my opinion, the P2000 seemed to take almost 2 days before I began to feel its effectiveness, albeit that after that it did work quite well. Also, if it ever stopped working properly due to some unknown factor, there should be a display that could relay the status. Otherwise, as a filterless system with nothing to check, it would just be plugged in continuously as if working and regardless of its status.

Final thoughts

This is the second Air Purifier that I have tested since ditching my conventional HEPA air purifiers, and I must say that I am pleased with both devices. While the first one is simply amazing, more effective and more capable than the AIRFREE P2000, it also costs $800. For a room that is 200 to 300 square feet, this Air Purifier works quite well, and will now serve as the allergy deterrent in my living room.

Price: $269
Where to buy: The Air Purifier Store website and Amazon.
Source: The sample for this review was provided by The Air Purifier Store.

The post AIRFREE P2000 Air Purifier review appeared first on The Gadgeteer.

Filed in categories: Reviews

Tagged: , ,

AIRFREE P2000 Air Purifier review originally appeared on The Gadgeteer on June 10, 2018 at 9:00 am.

Note: If you are subscribed to this feed through FeedBurner, please switch to our native feed URL http://the-gadgeteer.com/feed/ in order to ensure continuous delivery.

Roli Lightpad Block M review

What is it?

Roli’s Lightpad Block M is a touchpad for musicians that attempts to and mostly succeeds in removing restrictions and enabling musical discovery. With their Lightpad, all you need is a mobile phone or tablet and your fingers. What you do or create beyond that is completely up to you.

Hardware specs

Dimensions: 94 x 94 x 21.8mm
Weight: 260g
Connectivity: USB-C, Bluetooth LE, 8 DNA connectors
Battery: 4 hour battery life / 2 hour charge time
Bluetooth: 15 meter range
System Requirements: iPhone 6, 6 Plus or newer | iPad Air 2 or newer | iOS 9.0 or above |Google Pixel or Pixel 2 | Mac OSX 10.10+ / Windows 7 / Windows 10

What’s in the box?

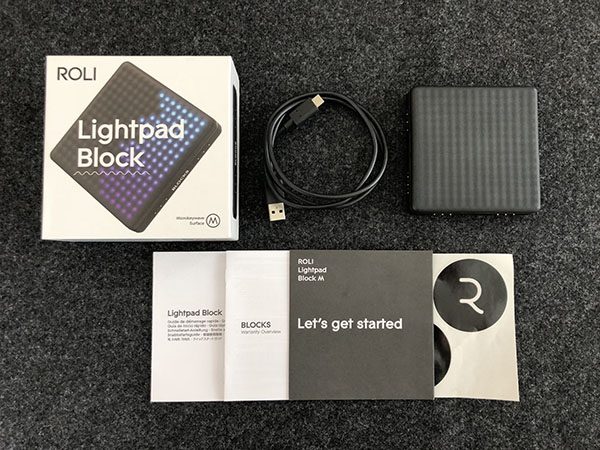
  • Lightpad Block
  • USB-C to USB-A cable
  • Quick start guide
  • Software through registration: Ableton Lite, Equator Player, Strobe2 Player, Tracktion Waveform 8, Blocks Dashboard, Max MSP (3mo. license)

Design and features

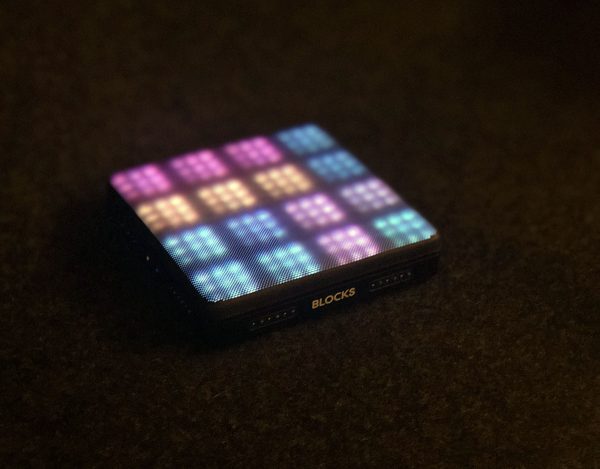
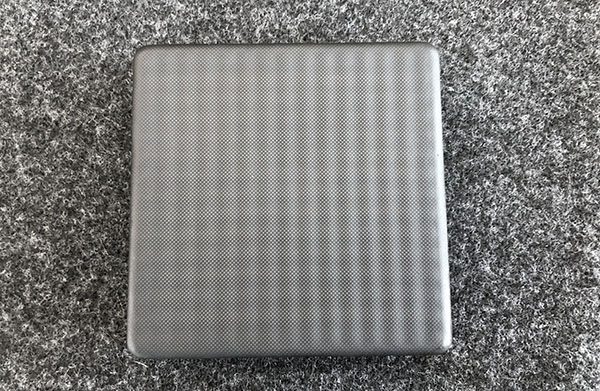
The design of the Roli Lightpad Block M is relatively unassuming at first. It’s square with gently rounded corners and a little under an inch thick. Looking closely at the top surface however you start to uncover what makes the unit (and a lot of Roli’s products) special. It has a dimpled grid formed into the top of a silicon material with a silky texture that your fingers want to slide across.

It almost has a memory foam kind of feel to it but satisfyingly firmer. It’s this surface that allows Roli to not only tell where you are touching the block, but also how hard and with what velocity. But, I’m getting ahead of myself. Let’s look at some of the other features.

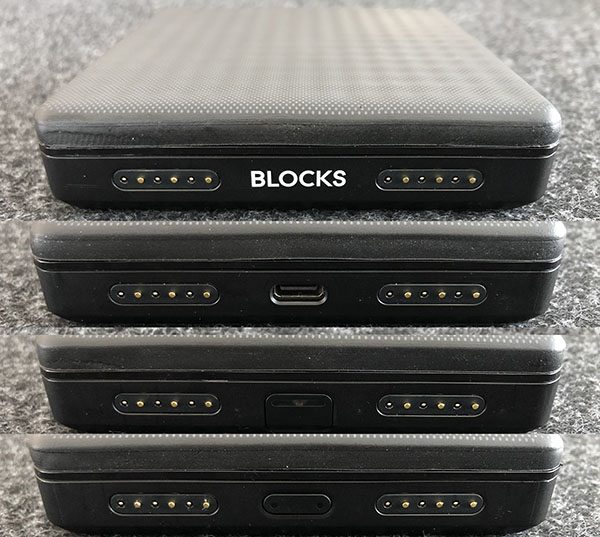
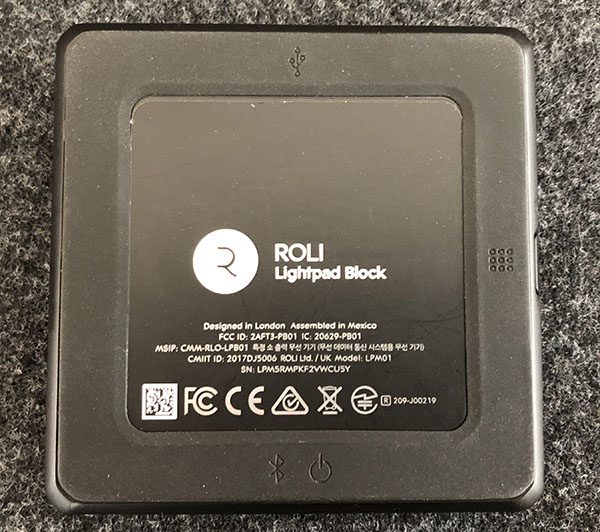
All four sides of the LightPad have a pair of their DNA connectors that allows you to connect other modules from Roli including another Lightpad, their Live or Loop blocks or their Seaboard which applies that same top surface to piano keys. Three of the sides have an additional feature between the DNA connectors. They are a USB-C port for charging or connecting to a computer, a battery status button, and a power/BT pairing button. The bottom of the device has a non-slip foot with identifying logos for each of those features.

As with most connected devices, the Lightpad requires the use of an app, or a computer. The app is the easiest entry point, but also one of the most flexible. The packaging and manuals that came with the Lightpad all refer to their Noise app. Roli has another app called Play which I’d recommend starting with as it has a great introduction to the different movements you can employ while playing. They are Strike, Glide, Slide, Press and Lift. The Noise app is super fun and really gives you a huge sandbox to start creating but it can feel a little overwhelming if you aren’t yet familiar with the surface mechanics of playing. In this review I have not explored much beyond use with an iPhone, so look for an update in the near future with some additional info on use with a computer including some of their other software. All that said, there’s really no wrong way to play this thing. Let’s set it up.

Setup

Getting started is pretty easy.

  • Plug the USB-C end of the cable into the Block and the other end into a USB power adapter or computer to charge the battery fully. This block had almost a full charge on receipt.
  • Download and install the App on your device. I’ll use the Play App for this walkthrough.
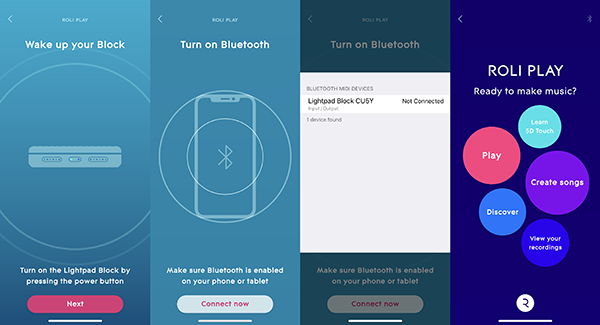
  • Launch the app and it will tell you to press the power button which is the first time you’ll see the lights fly across the surface.
  • On the app, press Connect now and then choose Lightpad Block XXXX from the list. This one said CU5Y instead of XXXX. I’m assuming that changes per block.
  • From there, your Block and phone should connect and you’ll see the Block change to a 3×3 grid of color and the app will give you 5 options where you’ll want to start with Learn 5D Touch.

Performance

As I mentioned before, there’s no right or wrong way to use the Lightpad Block. The app will walk you through learning the gestures and how it’s quite different than striking a key on a piano or even a drum pad. You can strike and hold, and wiggle, and slide or glide as well as use multiple fingers. It gets really fun as you get into using the Noise app as that lets you create loops and melodies and layer tracks. Their Learn section has short videos on how to use all those functions which will help your learning curve significantly. Additionally, there’s the main area for your projects, an area for discovering what other users have created and a store where you can purchase additional bundles and packs of sounds and effects.

The learning curve is actually pretty quick and the hardest part is just getting past that your first couple experiments won’t sound that great. Using the Noise app I was able to quickly lay down a beat and then start layering sounds. I’d get a couple then botch something, but it’s super easy to go back in and remove a layer. The app shows you where you are in the count and helps you align your next layer’s start and stop. You can literally lose an hour to messing around and then find that there’s a whole additional section of sounds or features you didn’t see on first glance.

Tapping and sliding on the surface is really fun. If you’ve ever messed around with a guitar you know that your fingers can hurt a lot until you get used to the pressure of strings and fret positions. Similarly, if you’ve played an action game on your phone for too long, your thumbs or fingers can get pretty sore. It’s possible that can happen here too, but the silicon surface feels wonderful and the interaction with lights showing you where you’re pressing and how you’re moving is really quite something.

Here’s a video of my son using the Lightblock without layering sounds, just having fun with the Happy Drum Kit that’s available for free through the integrated store in the app. As you’ll see the interaction between the Lightblock and the app is pretty important. It shows what you’re doing on the Lightpad but also provides additional controls and settings.

Now here’s a series of videos where he’s exploring layering. You’ll see that it’s easy to get something looping and then experiment on top of that while you find something you like. Then you can record and repeat until you’re happy with the output.

In that second video, he’s layering on top of what he did in the prior vid. There’s also a subtle reminder in this one that you want to turn off alerts and notices when you’re recording as it can totally disrupt the flow. It won’t affect the actual music you’re recording but certainly can knock you off your groove. You can also see that he starts messing with the levels on each layer to help balance and get to the feel he’s looking for.

In this third video, he records another layer, messes with the levels and then changes the layer he just recorded from Darkmass Bass to Guitar Overdrive Lead to get something that stands out more. We both liked that you aren’t stuck with the sound that you recorded. You’re able to go to those individual loops and switch the sound to something new and Roli just makes it work. From that layers screen, you can then turn them on or off one at a time and play the song the way you want to hear it.

What I like

  • The solid build quality and inviting nature of the product
  • Flexibility of what you can do with it
  • Portability. It can go anywhere you want to take it
  • Creative potential. Liberating and malleable in its playability

What needs to be improved

  • Better compatibility with other music programs (like Reason for example)
  • Some areas of the pad seemed to be less consistent than others
  • Interesting and fun, but not precise enough as a midi controller

Final thoughts

As a tool for creation and developing musical ideas it’s a great piece of equipment. It packs a huge punch in terms of it’s size and capability. As a recording tool, the precision can be frustrating as it doesn’t always register touches the way you expect. I do think that Roli has a gateway product here as we both want to see how it works in conjunction with the other blocks that Roli makes. If you’re looking for something that can help with rhythmic and musical discovery, this may be the very thing you’re looking for.

Price: $199
Where to buy: roli.com and Amazon
Source: The sample of this product was provided by Roli.

The post Roli Lightpad Block M review appeared first on The Gadgeteer.

Filed in categories: Reviews

Tagged: ,

Roli Lightpad Block M review originally appeared on The Gadgeteer on June 9, 2018 at 11:30 am.

Note: If you are subscribed to this feed through FeedBurner, please switch to our native feed URL http://the-gadgeteer.com/feed/ in order to ensure continuous delivery.

iMovR ZipLift 42″ Standing Desk review

Get up outta your seat! Standing desks are all the rage for ergonomic workspaces, and convertible standing desks allow you to get healthy without buying a whole new office setup. The iMovR ZipLift Standing Desk we’re looking at is the 42″ wide model, which can handle 2 monitors and a laptop if you’re all tricked out. Let’s raise it up!

What is it?

It’s a desk converter that turns your work surface into a standing desk. It also includes a portable standing mat.

Hardware specs

  • Top Work Surface: 42″ W X 15.7″ D X .5″ H; maximum weight capacity 45 lbs plus 15 lbs counterbalance
  • Keyboard Tray: 26.4″ W X 13″ D X .5″ H; maximum weight capacity 5 lbs.
  • Base: 29.2″ W X 22.2″ D
  • Work Surface Maximum Height: 20 5/8″ 
  • Maximum Monitor Size: 2 x 27″ 
  • Grommet Hole Diameter: 2 inches
  • Keyboard Tilt: +10 degrees, -15 degrees
  • Unit Weight: 45 lbs.
  • Shipping Box Dimensions: 44″ W X 27.5″ D X 8″ H 
  • Shipping Weight: 55 lbs.

What’s in the box?

A fully assembled ZipLift comes in the box, along with the standing mat.

Design and features

The ZipLift converts your existing desk into an adjustable standing desk. Place it on your desk, add your computing gear, and you can adjust the height for sitting or standing use. As we’ll see in a moment, the ZipLift incorporates a number of ergonomic & design details that separate it from the pack.

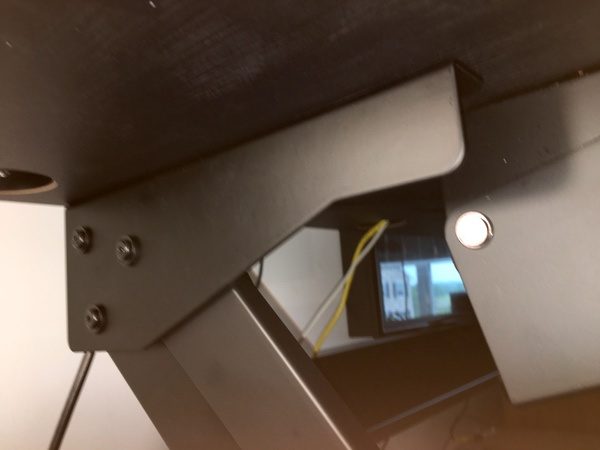
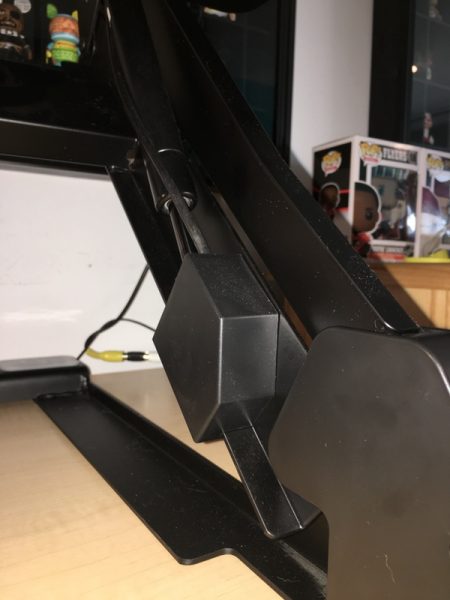
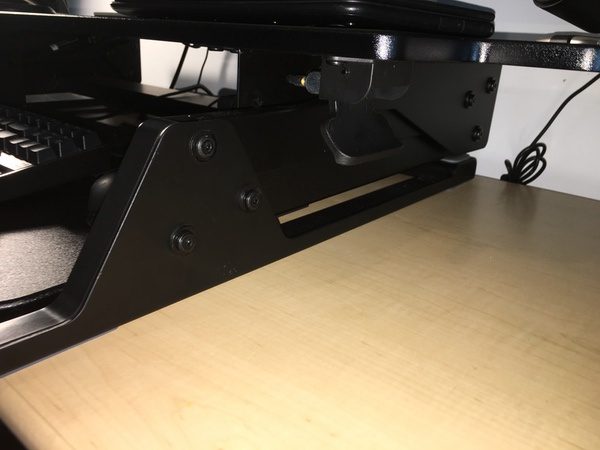
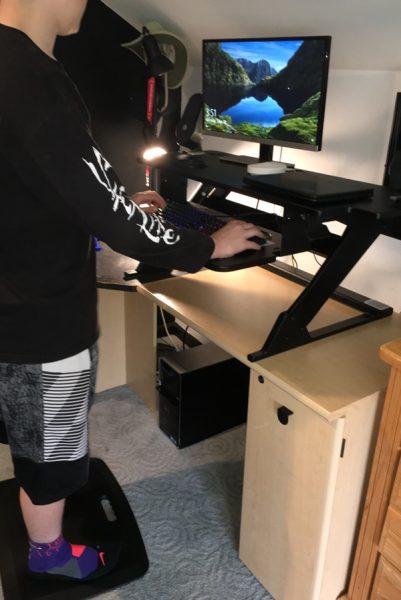
Size and stability tend to be the biggest problems with standing desks, and the ZipLift does a great job of addressing both of these issues. A wide, deep work surface allows plenty of room for dual 27” monitors and a laptop plus accessories. The beefy z-frame lift mechanism and heavy-duty construction can handle 45 pounds of gear, and is extremely stable at any height. It’s a solid piece of gear at a 45 pound net weight; fortunately, it comes pre-assembled and ready to go out of the box. Check out the burly construction under the hood:

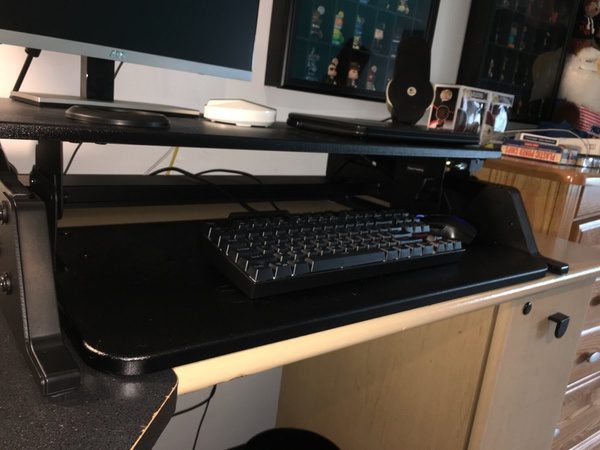
I really like the design of the keyboard tray. The wide, deep tray space will accommodate extra-large keyboards plus a mouse, a feature that I don’t see in all the stands in this category.

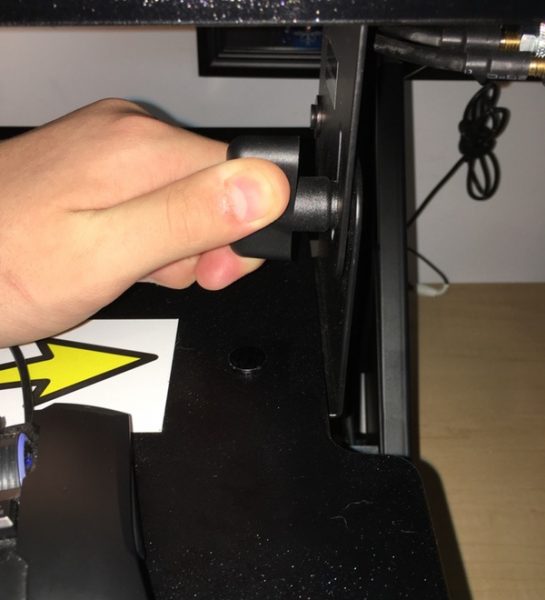
Not only is it big, but the tray can be tilted up to 15 degrees up or down by loosening the adjustment handle. If you spend a lot of time on a standing desk, you quickly learn to appreciate this feature for comfortable ergonomics. Little adjustments make a big difference.

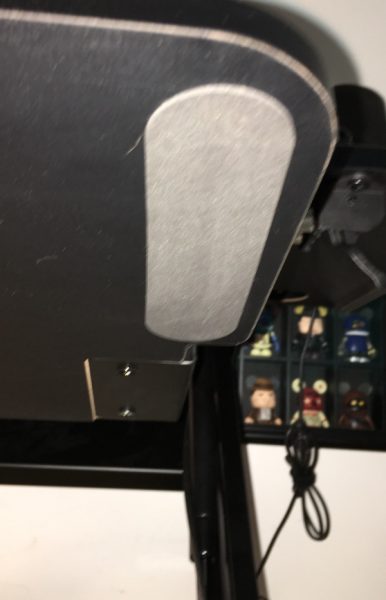
They keyboard tray also includes soft pads on the underside, so it doesn’t scratch up your work surface. A nice touch!

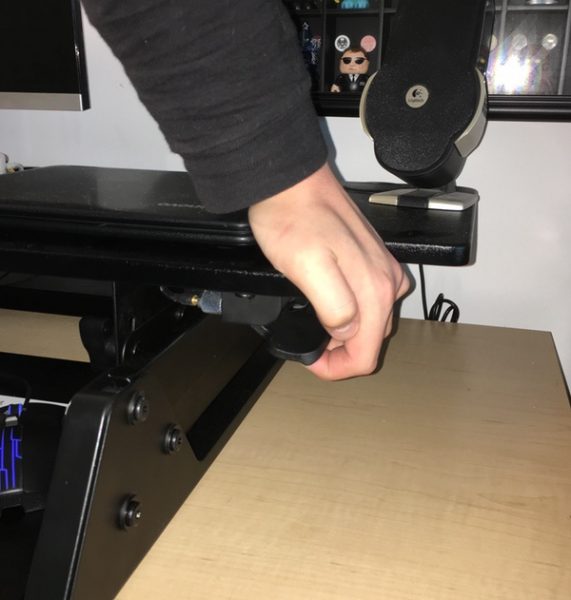
The lift mechanism is operated by squeezing the hand paddle to release the brake on the right-hand side of the desk. With a maximum height of 20 inches the desk will accommodate users up to 6’7” tall, and has an infinite level of height adjustments in between. A 15 pound counterbalance assists with raising the desk, which helps if your desk is fully loaded. The desk lift also brakes during lowering operations so that you don’t get any sudden jolts when you drop it to lower heights. Tracking is silky smooth (and quiet!) across the full range of motion, with no detectable wobble even at maximum height.

Here’s a comparison shot of the desk in the sitting and standing position, modeled by my 15 year old son. He’s 6′ tall, and I claim no responsibility for his fashion choices. He is a teenager, after all:

It’s important to note that the lift mechanism includes no additional power assist for raising operation. A 42” work space accommodates a lot of gear. While the 15 pound counterbalance helps, it still takes some effort to raise the desk if it’s fully loaded. You don’t need hulk-level strength to make it go, but you’ll want to consider your intended loadout if you have issues with this sort of thing.

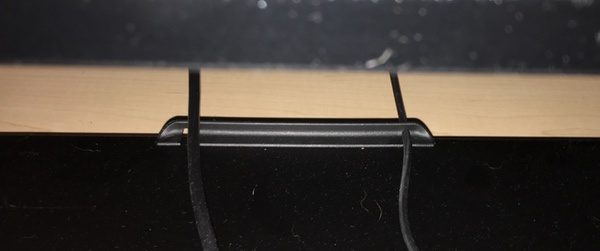
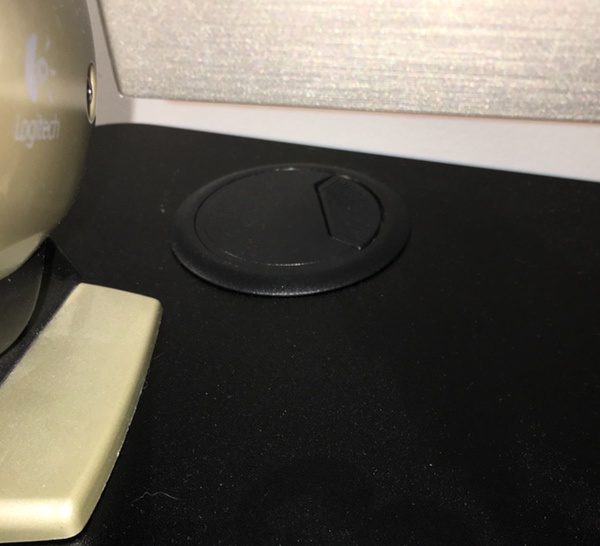
You’ll also find some nice finishing touches in the ZipLift. The keyboard tray includes a couple of slots to wrangle your keyboard and mouse cables if you’re not wireless. There are also three ports in the top surface to organize your power chords and peripheral cables. All the edges are beveled and finished to eliminate sharp edges. The unit is also surprisingly lean and streamlined for such a beefy build. It all adds up to a nice package that, in addition to providing great ergonomics, makes your workspace a clean and organized place to spend your time.

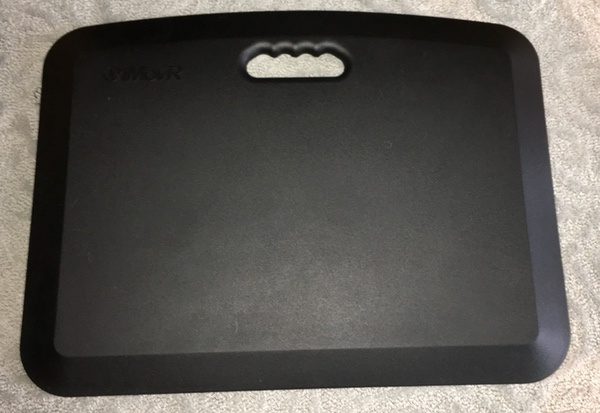
As an additional bonus, ZipLift includes a standing mat with your purchase. The mat measures 18” by 24” and 3/4” thick, and includes a grab handle for portability. It’s a nice addition that adds comfort when standing for long periods of time, and saves you a few bucks in the process.

Speaking of pricing… the ZipLift is not cheap. The 35″ wide model starts at $350, while the 42″ wide model I’m testing comes in at $429 before adding any options (like monitor arms). There are a lot of options at this level including both motorized lift desk converters and full-size adjustable height desks. I think that the build quality and design is worth your consideration, but you’ll want to do a bit of comparison shopping before making the investment.

What I like

  • Huge work surface to handle two 27” monitors, a laptop, and accessories
  • Wide, deep, adjustable keyboard tray
  • Rock-solid construction with little or no wobble at any height
  • Multiple ports and slots to organize your cables
  • Smooth operation with a broad range of height adjustment
  • The inclusion of the standing mat is a great bonus item

What needs to be improved

  • Does require a little muscle to raise the desk if loaded to max capacity
  • Pricey for the category

Final thoughts

The iMovR ZipLift is a great all-around standing desk converter. Build quality is outstanding with excellent ergonomics, while the finishing details in the build (including the addition of the standing mat) make it a worthwhile lifetime investment. It is on the high end of the price scale, however, so you’ll want to make sure that you carefully consider your needs before purchasing.

Price: $369.00
Where to buy: You can purchase the ZipLift at iMovr’s web site. Also available on Amazon.
Source: The sample of this product was provided by iMovR.

The post iMovR ZipLift 42″ Standing Desk review appeared first on The Gadgeteer.

Filed in categories: Reviews

Tagged: ,

iMovR ZipLift 42″ Standing Desk review originally appeared on The Gadgeteer on June 9, 2018 at 9:30 am.

Note: If you are subscribed to this feed through FeedBurner, please switch to our native feed URL http://the-gadgeteer.com/feed/ in order to ensure continuous delivery.