Diamond Brand Gear Belay Bag review

Today we’re sharing a piece of American history. The Diamond Brand Gear Company has been making tents and camping gear in the U.S.A. since 1881. I’m reviewing the latest edition of their iconic Belay Bag, a daypack made for exploring on and off the grid. Let’s get packing!

What is it?

It’s a 22 liter daypack with a fully adjustable harness system that converts from a backpack to sling bag.

Hardware specs

  • 1000D Nylon fabric construction
  • Pockets made from upcycled 70D Ripstop with Polyurethane Coating
  • Nylon Webbing
  • YKK zippers
  • All Metal Hardware
  • Main Compartment: 19 inches tall, 12 inches wide, 6 inches deep
  • Front pockets: 14 inches tall, 2 1/2 inches deep
  • 22 Liters

What’s in the box?

The package includes the pack, 2 adjustable/removable shoulder straps, and an extra set of pull chords if you want to change up the colors.

Design and features

Diamond Brand Gear supplied the U.S. military in World War I and II, and made the first packs for the Boy Scouts of America in the 1930s. The Belay Bag was first introduced in the 1980s. There’s a lot of history here, and the Belay Bag does a nice job of presenting a contemporary design that still pays homage to it’s roots.
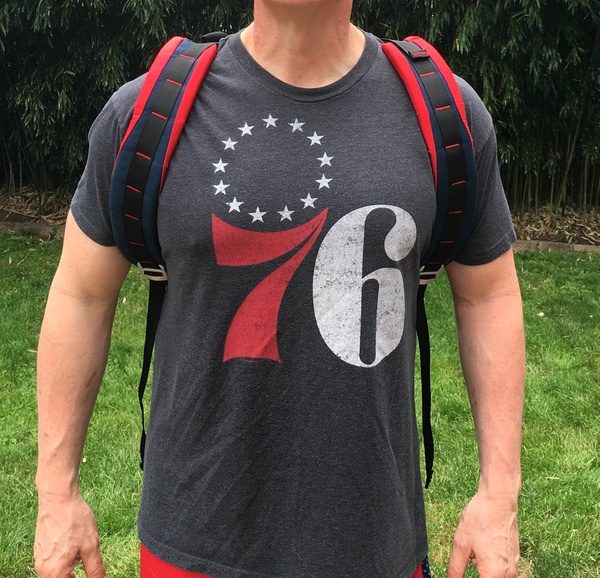
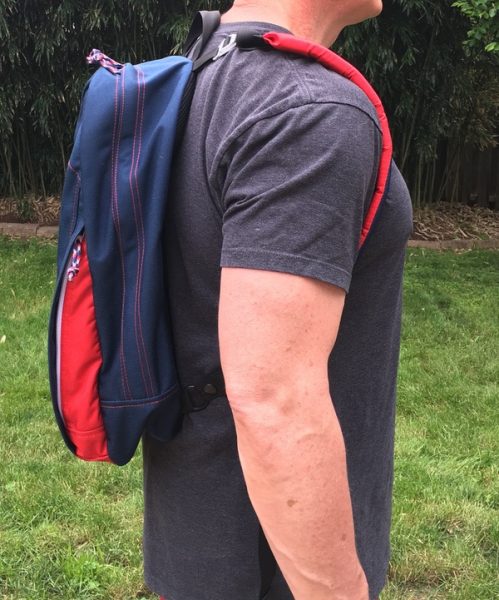
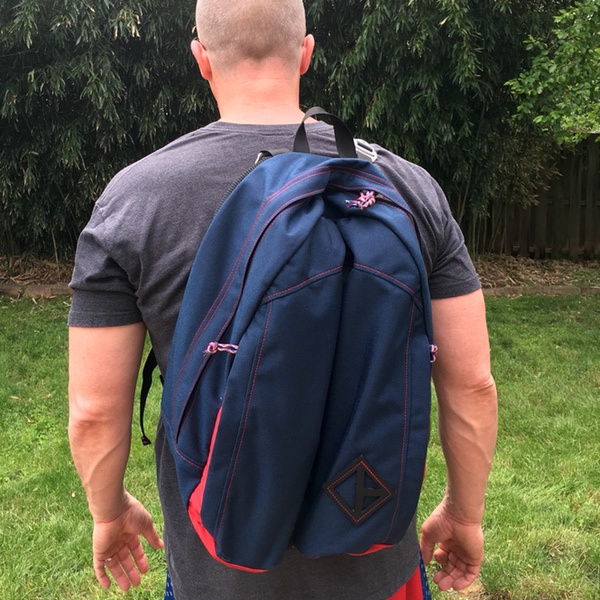
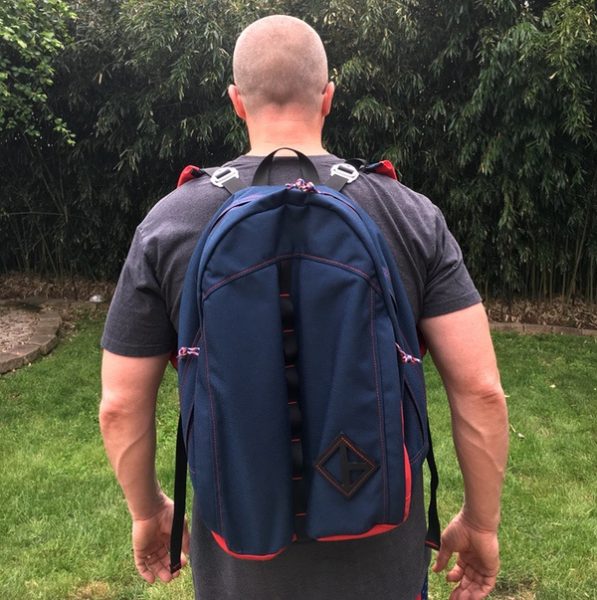
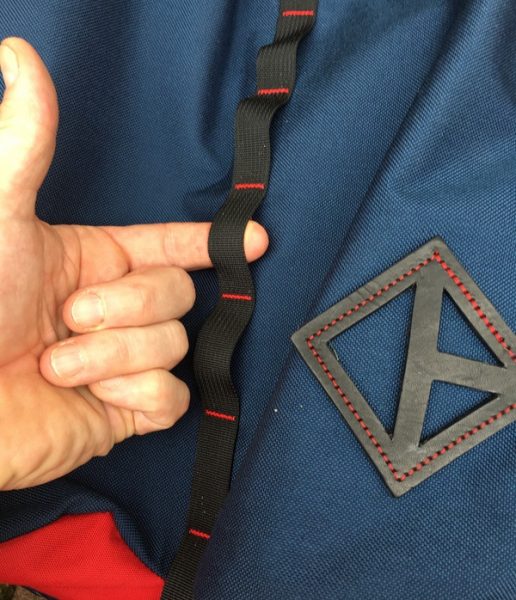
You’ll find a lot of heritage-inspired design elements in the Belay Bag: the bullet-shape, the bold pops of color, and the big ol’ Diamond-branded leather lash tab on the front face of the pack. But the whole look is pulled together with a clean, sophisticated treatment that works just as well on the street as it does on the trail. The profile is streamlined and modern, and those bold pops of color are tastefully placed to accent the form of the bag. It’s definitely at home in business casual workplaces or city commutes, standing out against the sea of black and grey business bags. One of my coworkers complimented me on it’s “fashion forward” style in a recent meeting. Seriously. Those were his actual words.
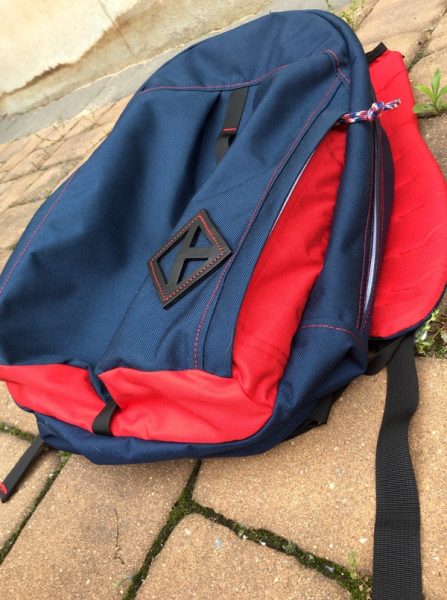
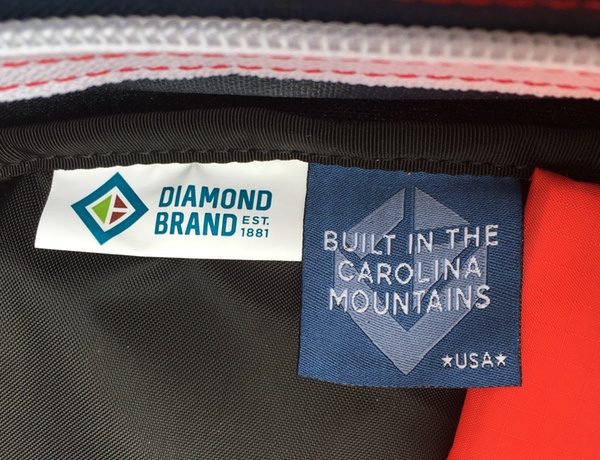
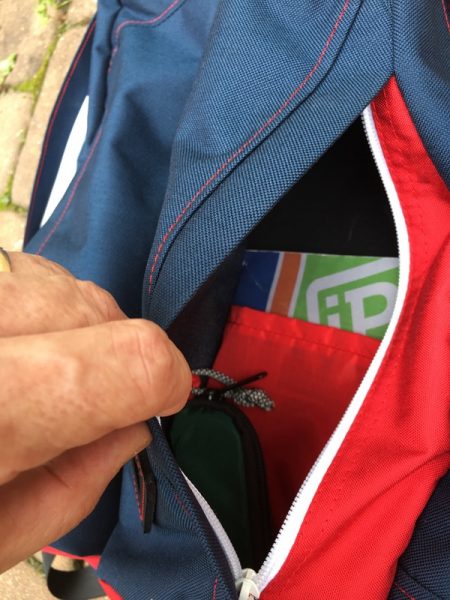
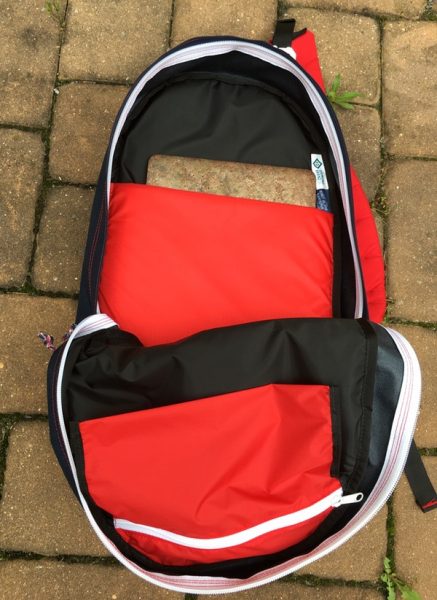
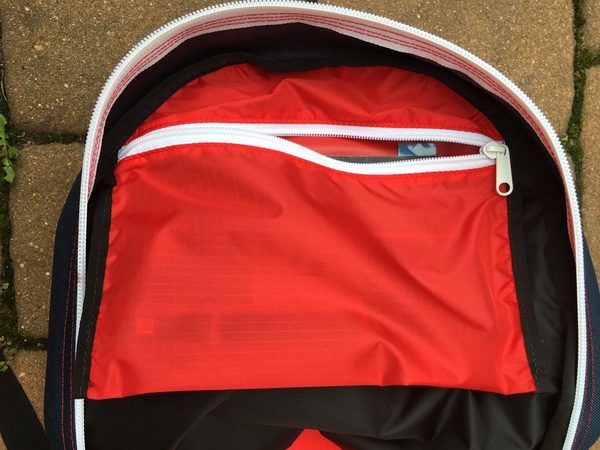
The form factor is that of a clamshell top-loader. A pair of zips open down to just about the bottom of the bag, which is great for allowing easy access to main compartment while ensuring that things don’t tumble out when the bag stands up. A simple padded sleeve protects your laptop (up to 15”) and a tablet, and there’s a zippered pocket at the top of the bag (on the front face) for little odds and ends. It’s simple and functional with room to spare (19” by 12” by 6”) for a lunch, a sweater, and assorted extras.
The front face of the bag features two HUGE external pockets, each of which is 14” tall and 2-1/2” deep. Either pocket will house a big hydration bottle or a rolled-up light jacket. They’ll also each take a 32-ounce growler or a bottle of your favorite party beverage (I like to bring whiskey) so that you’re ready for the next gathering. Each pocket also has a sleeve on the rear face to manage smaller items. The zips stop short of the bottom of the pocket, so you can toss loose items like your keys in there without fear of them falling out. They are great multifunctional spaces that extend the overall functional flexibility of the bag in day-to-day situations.

At a 22 liter capacity, the Belay Bag fits perfectly in the daypack category: room for extras, but not so much that you’re feeling like you have too much bag for day trips. If you are hitting the trail, you won’t lack for outboard attachment points. Strips of nylon loops on the front face of the bag and the shoulder straps give you a total of 22 places to hang axes, tripods, ball caps, cell phone pouches, a bedroll, walking sticks, a wet gear bag… you name it. The possibilities are endless.
Diamond Gear placed an emphasis on comfortable carry with the new Belay Bag design. The back pad is thick closed-foam with a mesh cover, designed with an open center channel for air circulation. The attachment points at the top and bottom of the shoulder straps are also completely adjustable to your shoulder width and body type. The strap pads contour slightly at the hips to reduce rubbing against your sides. It’s really comfortable for all-day wear.
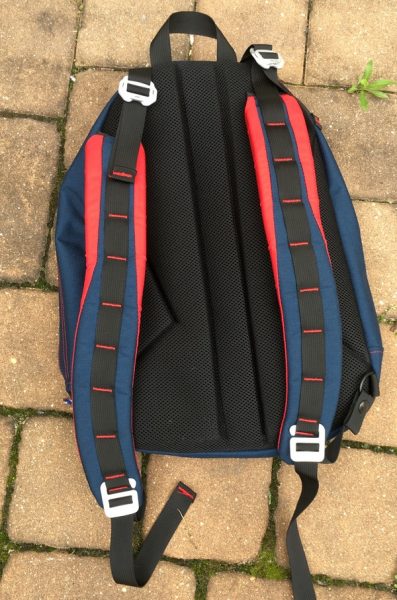
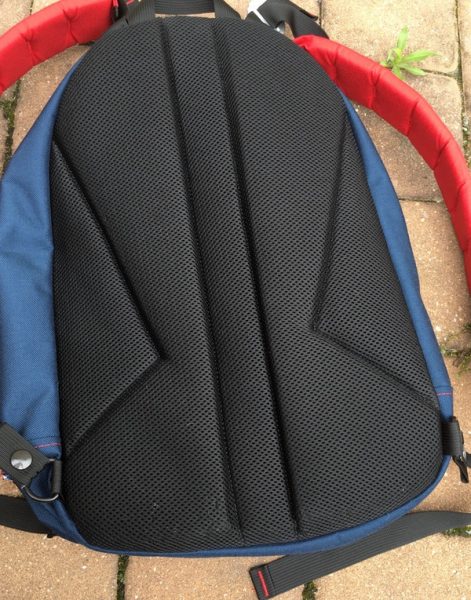
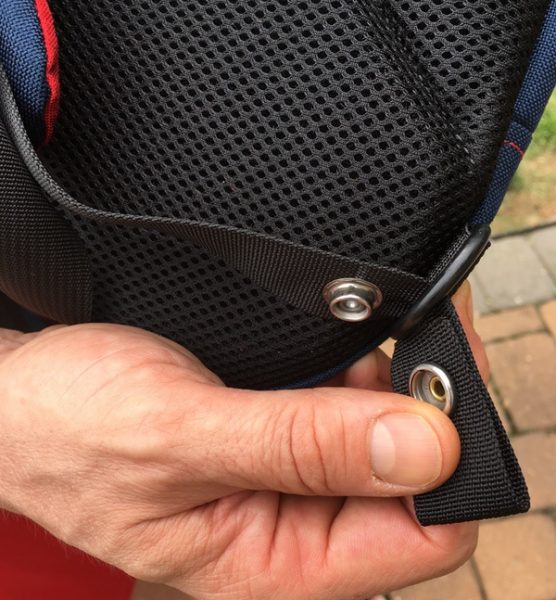
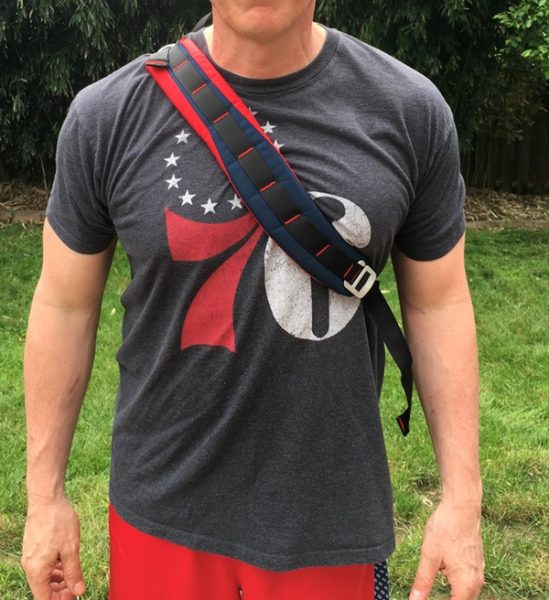
The Belay Bag has another trick to play: it converts to a sling bag. Quick release metal tabs at the top and buttoned loops at the bottom allow for quick removal of the shoulder straps. Take one strap and re-attach it at the opposite shoulder, loosen up the leads, and the bag wears cross-body like a messenger bag. It’s not an afterthought, either: the bag is designed to works really well in both configurations. I actually prefer using it in sling mode given the bag’s size… think of it like a vertically-oriented messenger bag. 
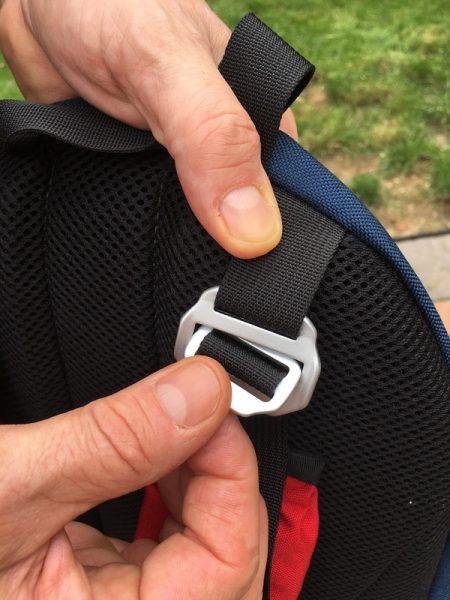
Construction is excellent across the board. 1000D Cordura nylon is the primary material. Upcycled materials from tent production (70D Ripstop with Polyurethane Coating) are used in the pockets, adding a cool little sustainability bonus. Metal hardware and YKK zips are used throughout. It’s a solid utilitarian build that matches the personality and multipurpose usability of the bag.

I do have two minor design improvements that I think would help the bag. The internal zip pocket kind of flaps about, and could probably be attached to the front face so it doesn’t get in the way when you’re digging in the bag. I also wouldn’t overpack that pouch, because it gets in the way of reaching stuff in the main compartment. The shoulder pads are a bit blocky and stiff, and could probably use a touch more refinement. But these are both extremely minor issues.

What I like

  • Very comfortable and adjustable for all-day wear
  • Perfect size for a daypack
  • Excellent multipurpose external pockets
  • Lots of external attachments, tastefully designed
  • Great for both work and play
  • Works equally well in both backpack and sling bag mode

What needs to be improved

  • Shoulder pads are a little stiff and blocky but will break in over time
  • Internal zip pocket is useful but can get in the way if the bag is full

Final thoughts

Made in the Carolina Mountains, the Diamond Gear Brand Belay Bag is an ideal multipurpose daypack. While it’s not a heavily tech-focused bag, the usability is solid as a daily work commuter that will adapt seamlessly to travel and off-road exploits. The big external pockets and plethora of attachment loops, while subtly rendered in the design, make the bag super-adaptable. It is very comfortable to wear for extended periods, and the easy conversion to a sling-style bag is a well-executed bonus. It’s rapidly becoming one of my favorite all-around performers. I’ll be giving it some more in-depth travel testing in the next few weeks!

Price: $139.00
Where to buy: But direct from Diamond Brand Gear or on Amazon. Additional colors are also available.
Source: The sample of this product was provided by Diamond Brand Gear

Filed in categories: Reviews

Tagged:

Diamond Brand Gear Belay Bag review originally appeared on The Gadgeteer on June 15, 2018 at 12:00 pm.

Note: If you are subscribed to this feed through FeedBurner, please switch to our native feed URL http://the-gadgeteer.com/feed/ in order to ensure continuous delivery.

Speck Presidio magnetic mount case and Scosche MagicMount Pro Charge review

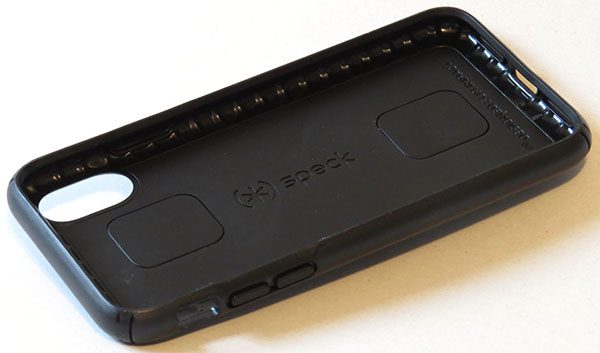
Wireless charging is one of the reasons I upgraded to the iPhone X, but I could not sacrifice my magnetic car mount just to charge my phone. Speck must have known of my dilemma because their new Presidio mount case for the iPhone X is made for magnetic mounts like the Scosche MagicMount Pro Charge, which I was also able to try out.

What is it?

The Speck Presidio is a protective case for the iPhone X that allows for use with magnetic mounts and wireless charging. The Scosche MagicMount Pro Charge is a magnetic car mount that allows for wireless charging.

What’s in the box?

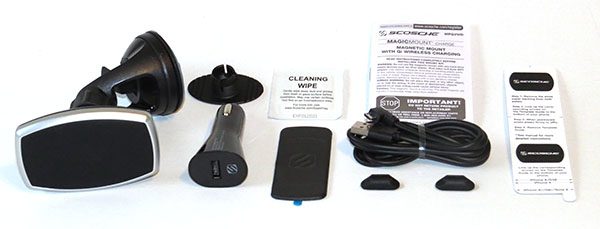
Inside of the Scosche box, you’ll find:

  • The MagicMount Charge mount
  • Optional low-profile adhesive dash mount
  • Large single plate with template guide for mounting to device
  • Two small metal plates with template guide for mounting to case
  • 12v car power adapter
  • Micro-USB charging cable
  • Two wire clips
  • Cleaning wipe
  • Instruction manual

Design and features

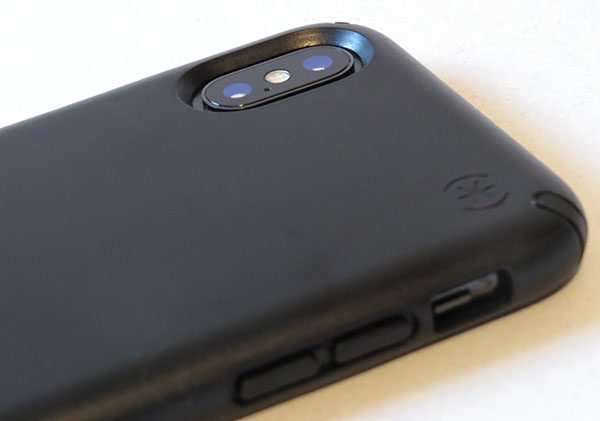
Like most Speck cases, the Presidio is built to be protective by using two layers of protection to cushion the impact of a drop. There is also a nice lip on the front to keep the screen protected. This lip worked well, since I proceeded to pull my phone out of my pocket and practically toss it face down, where it skidded five feet in front of me. My glass screen protector was safe! The case has a few scratches but it fared very well overall. Another time, I dropped it straight on the corner and it bounced slightly and the phone was just fine. For protection, it is great.

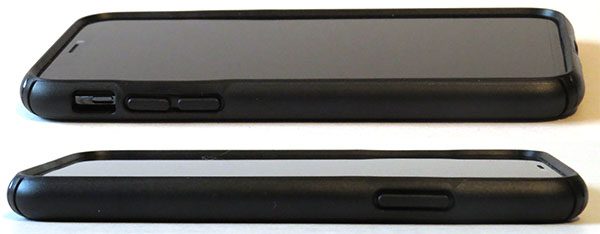
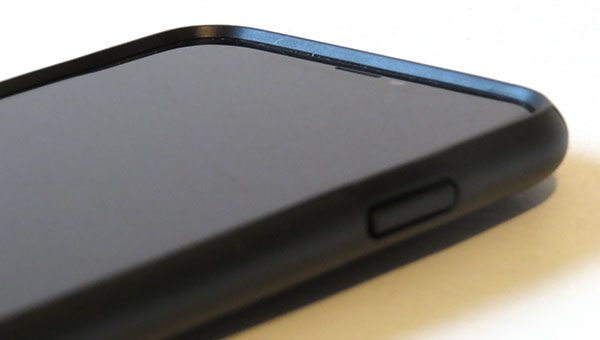
Each button is covered but easy to use, while the bottom of the case has a cutout wide enough for all of my charging cables. The vibrate switch was easy to access, and the overall design and quality is what you’d expect from a Speck case.

While the case is smooth, I never felt as though I was going to drop it. The times that I did drop it was due to user error, not due to the case. It did not add much bulk at all to the phone.

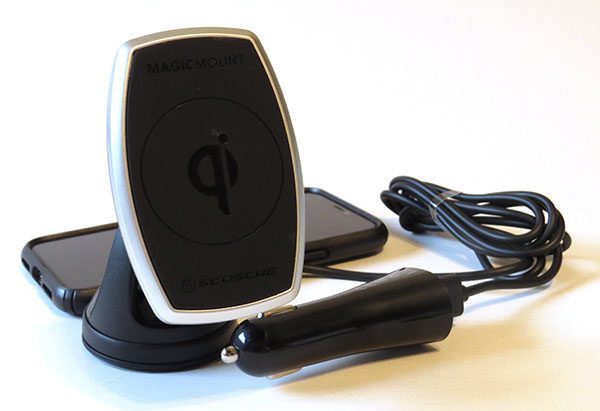
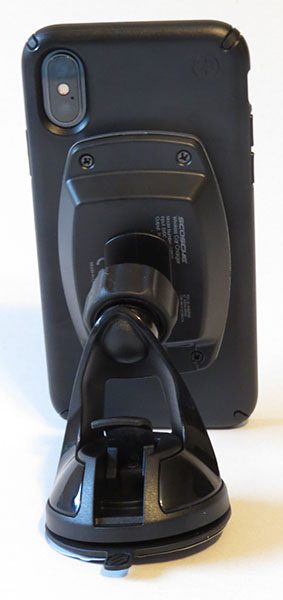
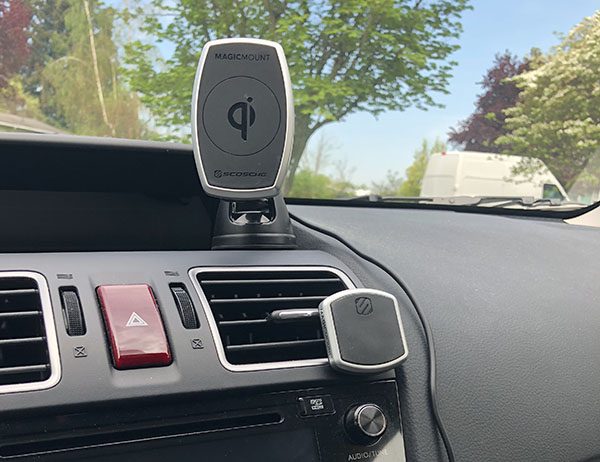
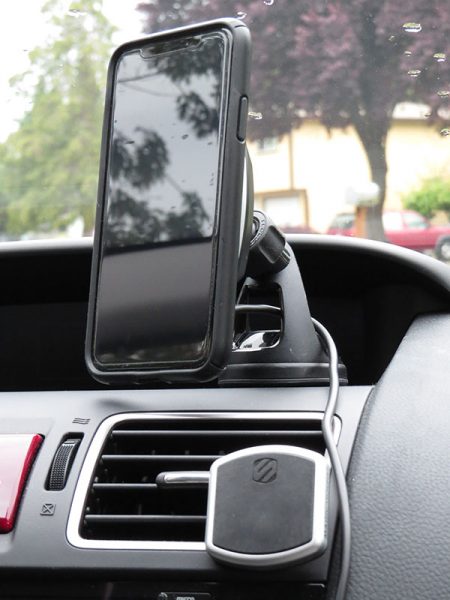
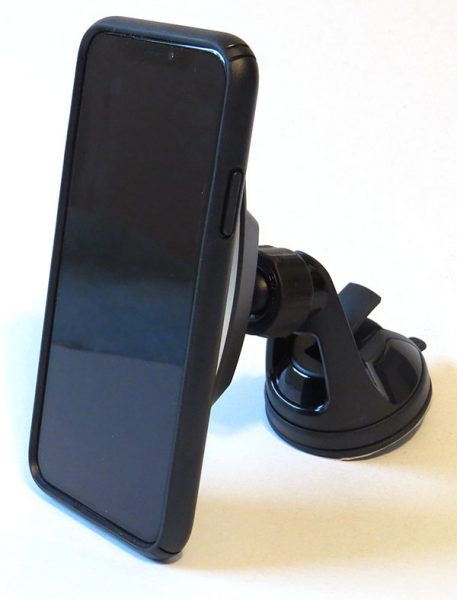
The biggest difference between a regular case and this one is the ability to use a magnetic mount and wirelessly charge. I already had a Scosche MagicMount vent mount that I used daily, and it worked fine with the case. Since the case has two smaller metal plates versus one big one, you cannot reliably mount the phone in landscape mode on the square vent mount. It worked fine in landscape and portrait mode with the MagicMount Charge since that one is rectangular and both metal plates in the case can attach firmly to it.

The Scosche MagicMount Charge mounts to either a window or dash and can be positioned to whatever angle you desire. I chose to mount mine to the dash and it was very easy to do. First I cleaned the dash with a wipe of my sleeve and placed the sticky side of the mount down. It stayed firmly in place the entire time, and I changed the positioning three times over the few weeks I have used it.

One thing I noticed was that over time, the joint that holds the head of the MagicMount Charge would come loose enough that it would start to turn downwards. It was easy to re-adjust it, but it was something noticeable.

I chose not to use the wire clips since my vent mount kept the cord perfectly off to the side. The power adapter worked well and is of a good enough quality to allow for quick charging of the iPhone. Over the span of 45 minutes, while using the GPS, I went from 47-73% charge using the mount and Speck case. I also like that the charge mount will not continue to charge after the phone is full, and instead go into standby.

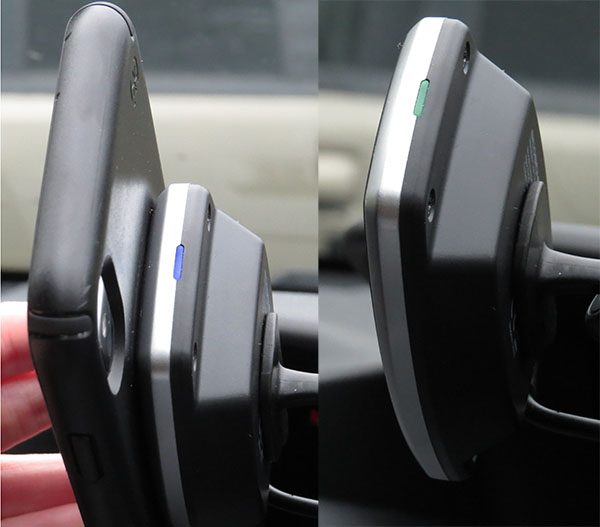
There is a light on the top that signals when the phone is being charged or if the device is on standby, but I could not see it since my phone was always in the way.

What I like:

  • Case: Easy to just throw on the mount and drive off.
  • Case: Very good protection.
  • Case: Can wirelessly charge and use a magnetic mount.
  • Mount: Stays firmly in place.
  • Mount: Adjustable to the perfect angle.
  • Mount: Easy to use once installed.

What needs to be improved:

  • Case: Some bright color options would be nice!
  • Case: Cannot attach to some mounts in landscape mode.
  • Mount: Head joint comes loose every week or so.

Final thoughts:

I absolutely loved the combination of the Speck Presidio case and the Scosche MagicMount Charge dash/window mount. Since using these, my phone has yet to die at the end of the day, since I am charging it each time I drive the car, which is multiple times a day. The protection of the case is great, and the ease of use of the mount is awesome. Overall, I would highly recommend the Speck Presidio case if you want to use a magnetic mount yet also want to wirelessly charge your phone, and the Scosche MagicMount Charge is an excellent companion to the case.

Price: Case – $44.95, Mount – $59.99
Where to buy: Speck Presidio, Scosche MagicMount Pro Charge, and Amazon.
Source: The sample for this review was provided by Speck and Scosche.

Filed in categories: Reviews

Tagged: ,

Speck Presidio magnetic mount case and Scosche MagicMount Pro Charge review originally appeared on The Gadgeteer on June 15, 2018 at 9:00 am.

Note: If you are subscribed to this feed through FeedBurner, please switch to our native feed URL http://the-gadgeteer.com/feed/ in order to ensure continuous delivery.
totallee thin Pixel 2 XL case review

When it comes to using a case on my smartphone, I normally only use them for one reason and that’s to add some extra grip to an otherwise slippery phone. I don’t use a case to protect it from scratches because I really don’t care THAT much if my phone shows a bit of wear and tear. That said, I don’t want to drop it on a hard surface and bust the display. So I usually seek out a thin case that doesn’t add bulk but does add grip. My current everyday phone is the Pixel 2 XL and the latest case that I’m testing on it is the totallee thin Pixel 2 XL clear case. Let’s take a look.

What is it?

The totallee thin clear case for the Pixel 2 XL is a soft clear case that’s only 0.02-inches thick and only ads 0.1 oz to the overall weight of the phone. Not bad!

Design and features

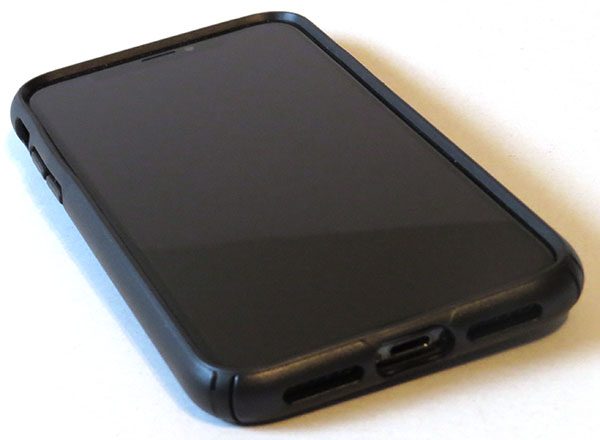
The case is made of a glossy clear soft flexible material that feels like silicone but isn’t sticky like some silicone cases and doesn’t attract lint.

It has cutouts for the camera and flash as well as the fingerprint reader on the back of the phone.

There’s a circular cutout on the top for the microphone.

And on the bottom, you’ll find a cutout for the USB-C port.

There aren’t cutouts for the power button and volume button though. The buttons are molded into the case. I’m not a fan of this as I feel like it ruins that tactility of the buttons. I’m not saying that it makes the buttons impossible to press, but it does take slightly more effort. In the end, I wish there were cutouts…

Because the case is soft and flexible, you don’t have to worry about breaking a fingernail or your phone when you try to put the case on or remove it. One word about that: Yay!

Once it’s on, you really don’t really notice it because it doesn’t add much bulk. But it does add a nice level of grip that is missing with a naked Pixel 2 XL.

Note that this case is not going to protect your phone from drops to a hard surface. It’s only going to help protect it from everyday wear and tear and scratches.

What I like

  • Easy to put on and remove
  • Adds grip without unnecessary bulk

What needs to be improved

  • Molded buttons for power and volume make interacting with the phone slightly more difficult
  • Expensive

Final thoughts

There really isn’t a lot more to say about the totallee thin Pixel 2 XL case. It does what it’s been designed to do which is to add a minimum level of protection and grip without adding bulk. The only complaint that I have is that it’s kind of expensive at $25 although you can get it for a few cents short of $20 on Amazon. Even at that price, it feels too pricey when you can find other thin cases for the Pixel 2 XL for significantly less. I don’t hate the totallee, but I’m sticking with my current favorite (check my favorite gear page to see what that is)… unfortunately, it’s even more expensive than the totallee, but I like the look and feel better so…

Price: $25
Where to buy: totallee and Amazon
Source: The sample for this review was provided by totallee.

Filed in categories: Reviews

Tagged: ,

totallee thin Pixel 2 XL case review originally appeared on The Gadgeteer on June 14, 2018 at 1:00 pm.

Note: If you are subscribed to this feed through FeedBurner, please switch to our native feed URL http://the-gadgeteer.com/feed/ in order to ensure continuous delivery.
Mission Workshop Axis Modular Waist Pack review

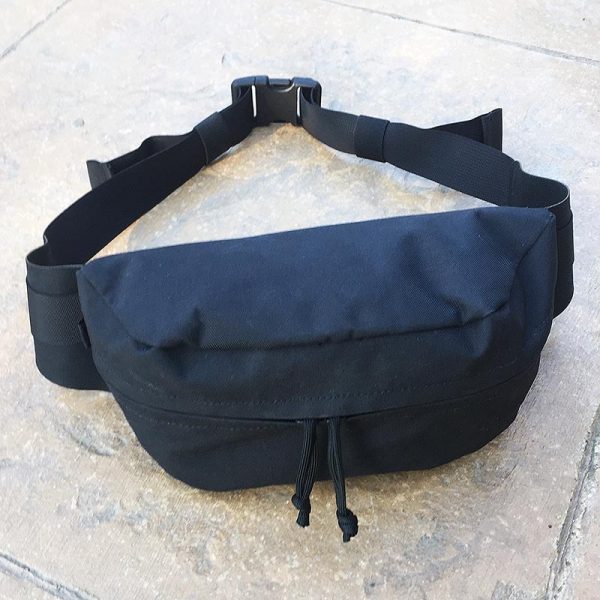
We all love our gadget and gear hauling bags, but sometimes we don’t want or need to lug around that full-sized backpack or messenger bag.  I’ve seen several smaller alternative options pop up over the years, but many of them either looked like a strange purse, a European man-bag, or just plain weird.  The Mission Workshop Axis Modular Waist Pack is none of those things.  In fact, I very quickly got past the fact that the Axis resembles a “fanny pack.”   The Axis is low-profile in both design and styling, build from high-quality, durable materials and it is compatible with Mission Workshop’s modular Arkiv® system.  Let’s check it out!  Gadget on!

What is it?

The Mission Workshop Axis is a lightweight Arkiv-compatible waist pack built with rugged materials and a weatherproof design that is intended to carry essential gear close to the body.

Hardware specs

  • Model number = HT500
  • Color options = Black (reviewed here), Gray, Black Camo
  • Materials =
    • High Tenacity 500D nylon
    • TPU coated nylon liner
    • YKK urethane coated zipper
    • Laser cut back panel
  • Dimensions = Height: 5” x Width: 10.25” x Depth: 3.4”
  • Total maximum circumference = 50″
  • Internal volume = 2.5L
  • Weight = 8 ounces
  • Country of manufacture = Built by hand in small batches in the USA
  • Lifetime guarantee

What’s in the package?

  • Mission Workshop Axis Modular Waist Pack

Design and features

OK, let’s get this out of way early: Yes, the Mission Workshop Axis Modular Waist Pack does resemble the “fanny pack” that was so very popular in my formative years, the Decade of Excess, the 1980s.  But I was totally willing to overlook that for a few reasons.  First, I’ve never owned or tried anything from Mission Workshop, but their products look very much my style, very functional, and I’ve read that their products are extremely well-made and very durable.  Second, the online photos of the Axis made it look a lot more like a tactical/”tacti-cool” pouch than one of the gaudy, dorky fanny packs from the 80s.  And once I slid the Axis from its shipping pouch, I knew that I had made a good decision to volunteer to try it out.  Immediately the Axis felt like it had been built from super high-quality materials and with the highest attention to detail and quality in the build process.  The main material and the one used to build all of the exterior parts of the Axis is High Tenacity 500D nylon.  This is a great material for a small pack like this because it is very strong yet flexible and lightweight, quite abrasion resistant, has a fairly high degree of moisture resistance and is weave is relatively tight, so it will not tend to abrade your clothing light higher-denier nylon fabrics.

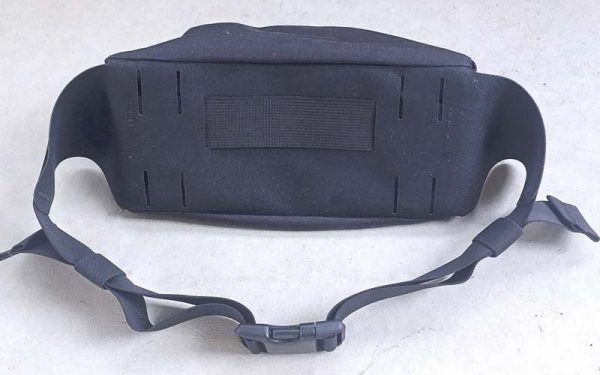
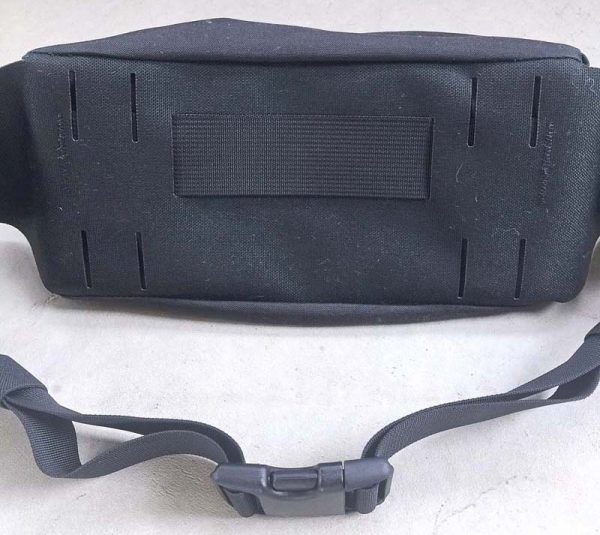
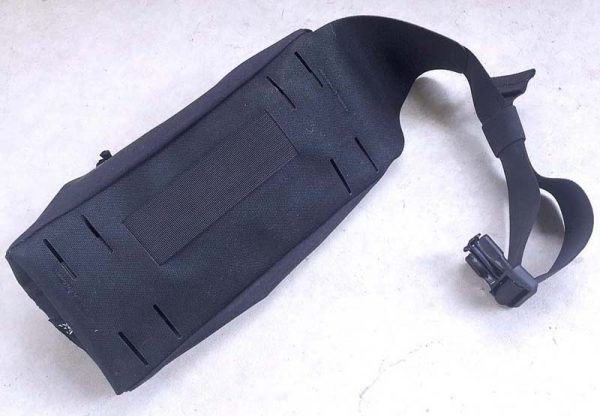
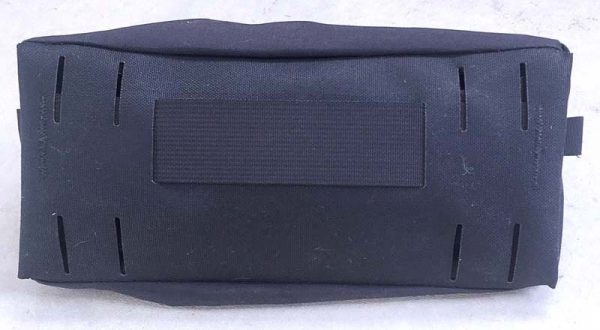
I’m going to start from the rear of the Axis first, beginning with the photo above.  The first of many features worth pointing out is something you can’t see from the outside but adds greatly to the overall product durability and performance, and that is a laser-cut panel made of semi-rigid plastic that is enclosed in the back of the Axis.  This panel serves a few functions.  First, it gives the Axis a bit of rigidity, preventing it from being completely floppy and unstructured.  Second, this panel helps when wearing the Axis, because it provides a flat, solid shape up against your body (it will curve slightly to help confirm, however, which is also helpful for comfort).

The back of the Axis also has a short length of webbing that at first I thought was some type of handle, but the placement seemed odd to me.  Then I realized that this strip of webbing is actually a holder for a mini bike U-lock.  Just slip the mini U-lock down through the webbing and it will be held securely while you ride, then pull it back out when you need to lock up your bike.  My apologies that I don’t own a mini U-lock or I’d show a pic to demonstrate this functionality.

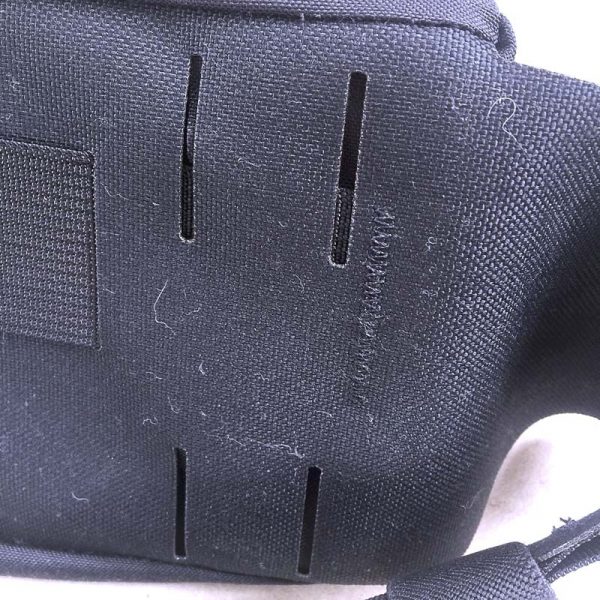
The final feature on the back of the Axis is a series of four pairs of laser-cut slots that are specifically designed and built to allow the Axis to be compatible with Mission Workshop’s Arkiv modular system.  The Arkiv system utilizes webbing straps and small metal clips, which are available separately in a set of 4 for $10, to attach all sorts of modular accessories to the Arkiv line of backpacks.  Alas, as this is my first Mission Workshop item, I do not have any of their Arkiv-compatible products to evaluate with the Axis, but the principle and method they employ for achieving modularity does seem very sound and functional.

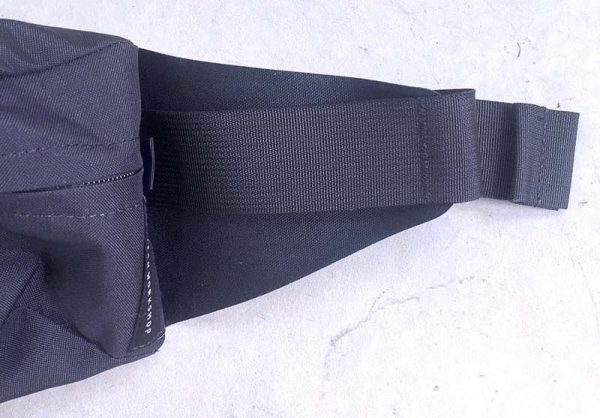
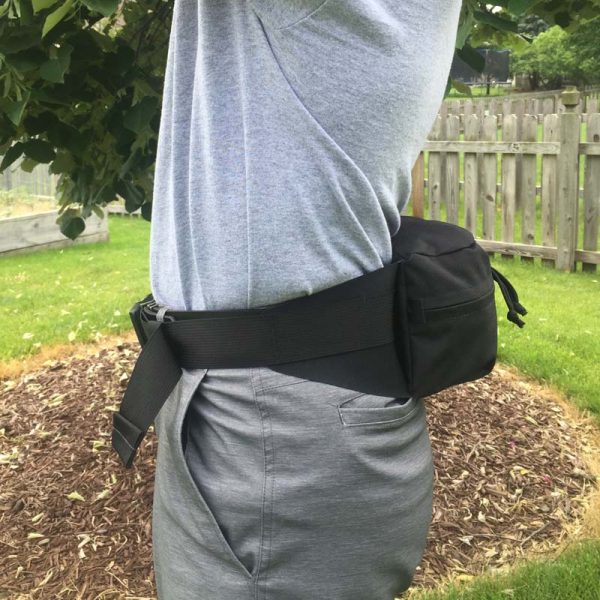
Working our way towards the front of the Axis, let’s check out the belt itself.  The belt is actually a strip of heavy-duty, laser-cut nylon webbing material.  Additionally, on either side of the Axis are two triangular “wings” (seen above) under the belt that help give it extra support when the Axis is in contact with your body, and the belt is stitched to the wings in such a way that a length of the belt (seen above) can be used as an attachment point for other items using carabiners or other, similar types of fasteners.

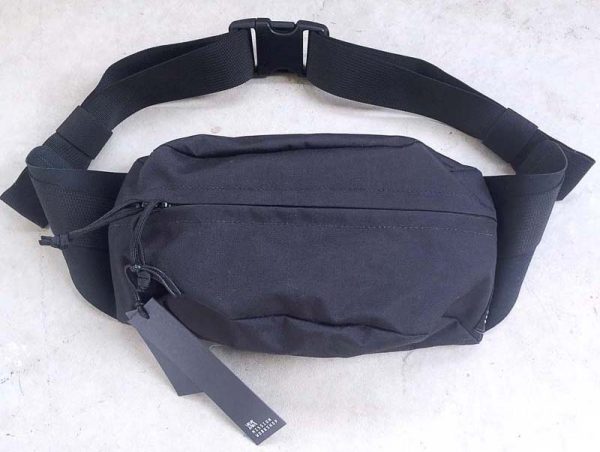
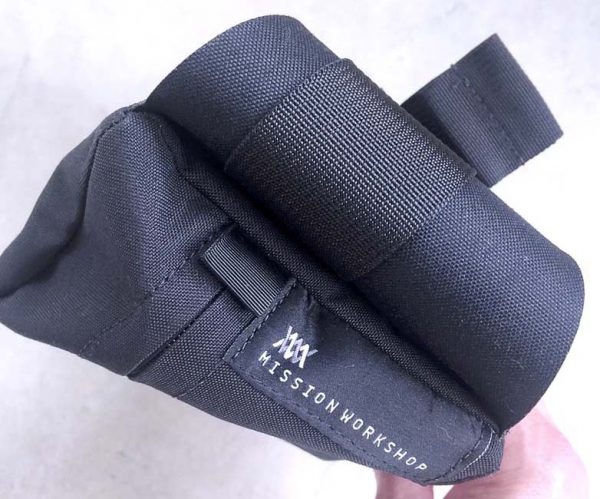
I just wanted to briefly touch on the Mission Workshop external branding, which is a subdued label stitched to the side of the Axis, as seen in the image above.  I really like that Mission Workshop does not feel the need to include overly visible (i.e. obnoxious large or eye-catching) branding on the Axis.  This very much add to the clean and low-profile look of the Axis, which I think is one of its selling points.  Good job on this.

Now back to the belt.  The belt is stitched to the Axis, so it can’t be separated from the main Axis body.  However, what Mission Workshop has done is, I think, actually more clever and useful than simply a removable belt.  As shown above and below, the belt ends can be slid back inside the main body of the Axis, effectively hiding them and getting them out of the way.  This does two things: prevents you from ever losing the belt, and makes it easier when using the Axis with the modular Arkiv system, because the belt would typically not be needed when attaching the Axis to an Arkiv-compatible pack.  Nice feature!

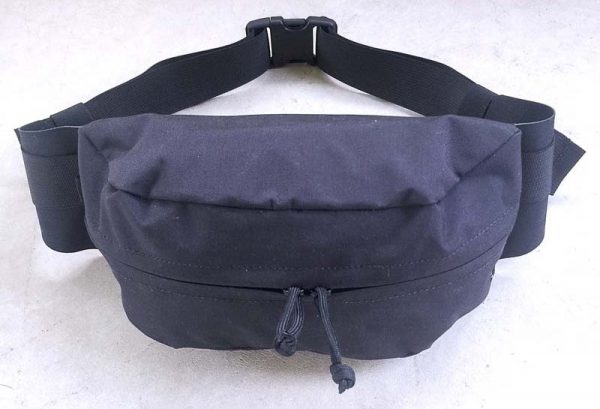
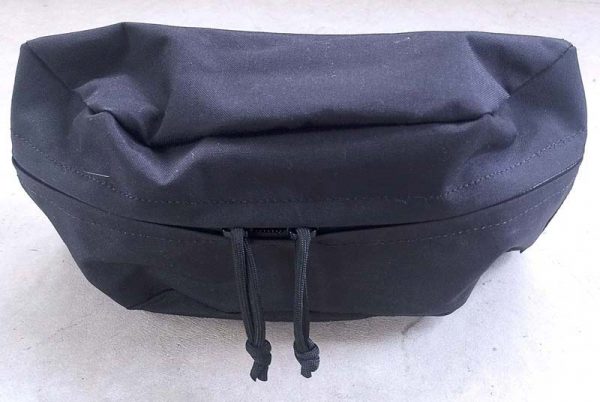
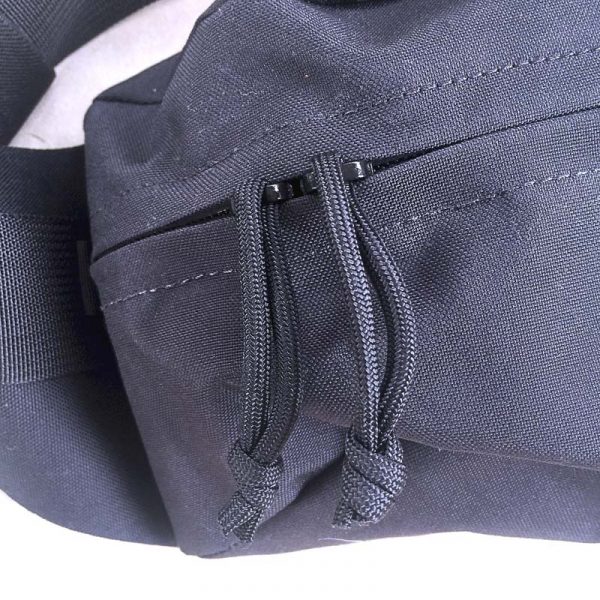
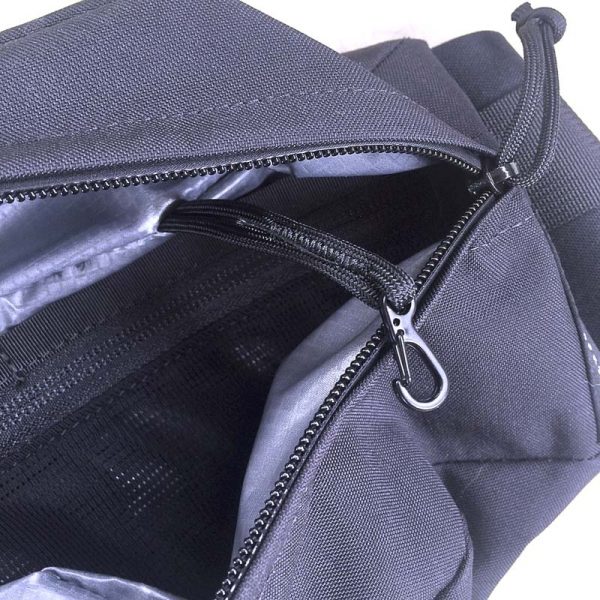
Next, let’s start moving toward the front and inside features of the Axis.  Its compartment is accessed via a YKK urethane coated zipper with a slim top and bottom flaps “kissing flaps” that have been perfectly cut and sewn to join together, helping to prevent moisture ingress into the compartment.  The zipper pulls on the Axis are made from tied loops of 550 Paracord material.  I think this is a great feature because 550 Paracord pulls are ninja silent, unlikely to wear out, and can be easily swapped out for a multitude of 550 Paracord colors if they do happen to actually wear out, or if you would like to do a bit of customization to your Axis.  The knots also make them easier to grip than a standard zipper pull.

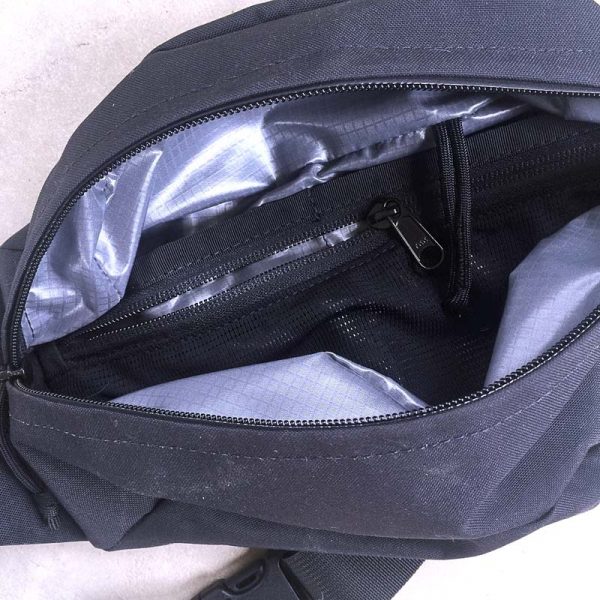
Opening the Axis reveals an interesting lining and some organizer features.  Let’s start with the lining.  While the front of the Axis, as detailed above, is made from High Tenacity 500D nylon material, which is fairly water-resistant itself, the Axis also has a “floating liner” made from TPU coated nylon, which is the gray, grid-pattern material seen in the photos above and below.  This floating liner is intended to provide an addition layer and higher level of moisture and water protection for any sensitive items you may want to carry inside the Axis, like your phone, earbuds or a camera.  Additionally, there is an organizer along the flat back of the compartment that consists of a long mesh zipper pocket plus two pockets behind the mesh zipper pocket, all of which are very handy for stowing smallish items.  And, with a 2.5L capacity, the main compartment will hold quite a few larger items as well.

The final organizational feature is a spring hook that is attached to the inside of the Axis by a loop of 550 Paracord.  This spring hook is not a cheap, fragile plastic hook, no sir.  It is a metal hook with a black finish.  This could be used to secure your keys or other similar items.

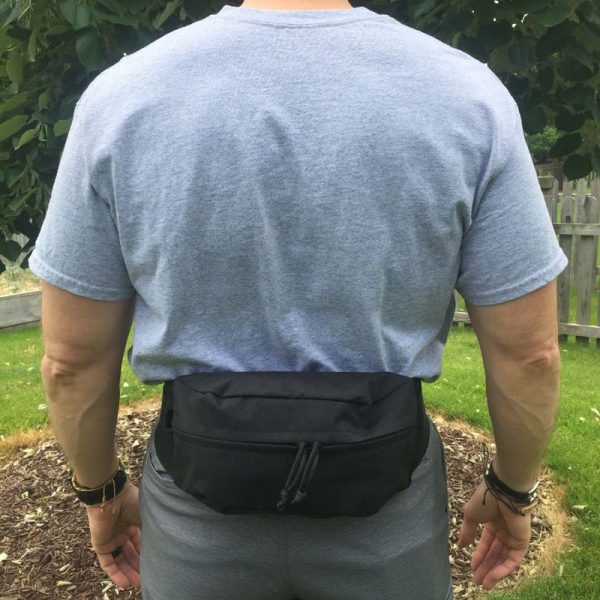
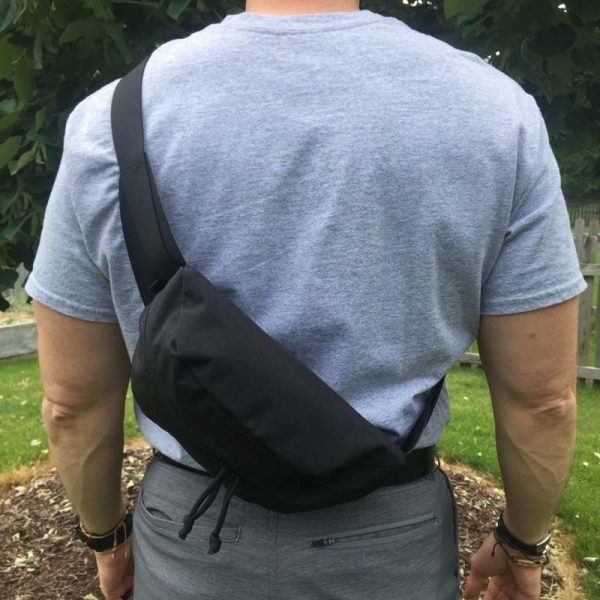
Next let’s take a look at various carry options for the Axis, starting with the most obvious, wearing it in the lower back/lumbar region (yes, the classic “fanny pack” position).  I’ll be honest, once I cinched it down, it was very comfortable, more than I even thought it would be, and its easy to spin around to the front to retrieve items, then spin it back.  It only weighs 8 oz while empty, which helps.  Plus, I think it actually looks pretty cool.  The materials and design certainly contribute to this.

I think the plastic back plate combined with the wide belt strap and the “wings” all contribute to the Axis feeling quite comfortable when worn in this position.  I barely noticed that I had it on.

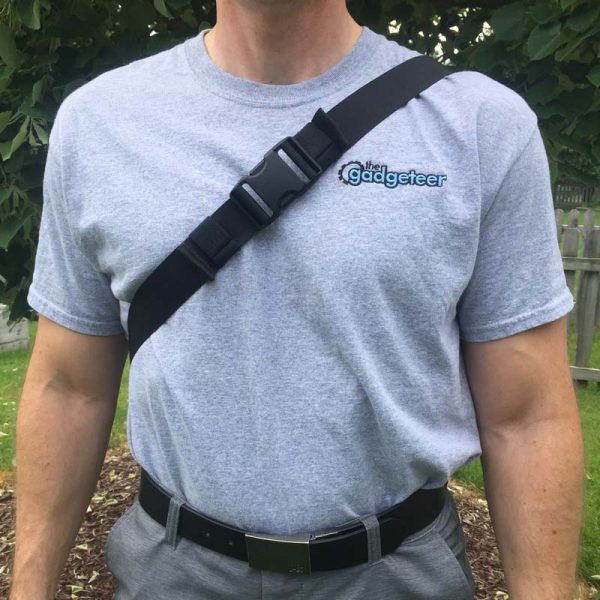
Next, I wanted to try the sling bag style carry position, with the Axis slung over my left shoulder.  Looking at these photos as I type this, I think I probably could have tightened the Axis’ belt strap a bit, because it seems to be hanging a bit low on my back, but honestly it felt fine like this to me.  

With the Axis in this sling bag style carry position, it made it easy to tighten or loosen the belt strap so that I could adjust how high or low the Axis would sit.

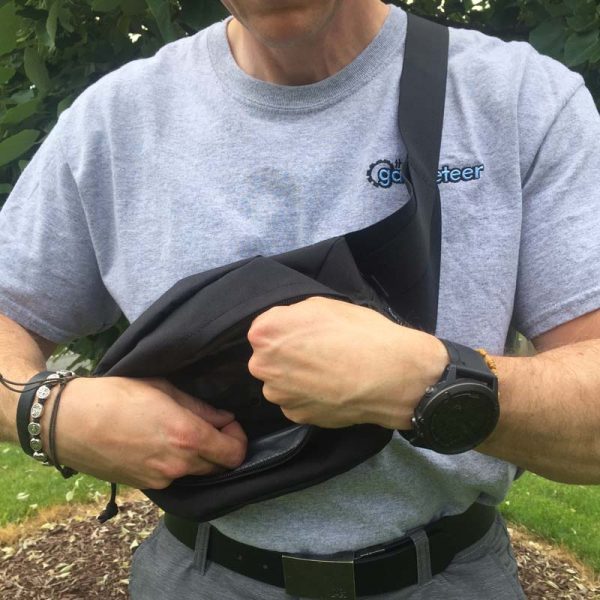
Additionally, this sling bag carry style allowed me quick access to the Axis’ contents; all I had to do was rotate it around up under my right arm and the Axis was right in front of my chest in just the right position to get inside and retrieve or store an item, which was convenient.

What I like

  • Well-designed, sturdy build, smart + durable
  • Weatherproof materials keep contents dry
  • Stowable belt straps
  • Compatible with Mission Workshop’s modular Arkiv system

What needs to be improved

  • Pricey.  Way pricey.  While I fully understand and appreciate that Mission Workshop’s products are made in small batch size in the USA, $120 is still pretty expensive for a bag of this size and type.  Though it does have a lifetime guarantee.

Final thoughts

The Mission Workshop Axis Modular Waist Pack defies the socially-stigmatized reputation of its 1980s “fanny pack” ancestor.  It is a versatile, sleek, low-profile, well-designed and even more well-built mini waist pack that is actually quite comfortable to wear. The only drawback I see is that it is a bit pricey for what it is, but I can somewhat understand its pricing considering its quality of materials and construction, its USA manufacturing and its lifetime guarantee. For further evaluation, I plan to bring the Axis on a 2-week family vacation to Europe in a few weeks and I will report my findings here.

Price: $120.00
Where to buy: Mission Workshop
Source: The product sample for this review was provided by Mission Workshop.

Filed in categories: Reviews

Tagged:

Mission Workshop Axis Modular Waist Pack review originally appeared on The Gadgeteer on June 14, 2018 at 11:00 am.

Note: If you are subscribed to this feed through FeedBurner, please switch to our native feed URL http://the-gadgeteer.com/feed/ in order to ensure continuous delivery.
IOGEAR HVER RGB Aluminum Gaming Keyboard review

I’ve been a gadget geek all my life, and a computer gadget geek for over 36 years. I’ve had so many gadgets that I’m pretty used to everything from the mediocre to the fabulous. I have boxes of old keyboards, and I’m very picky about the kind I like – mechanical clicky of course! It’s not that often that I’m surprised with a gadget being of a very poor quality, but the IOGEAR HVER RGB Aluminum Gaming Keyboard succeeded in doing just that.

What is it?

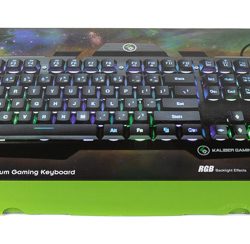
The IOGEAR HVER RGB Aluminum Gaming Keyboard is an RGB multi-zone backlit keyboard with a brushed aluminum chassis and the ability for 3 user profiles and programmable keys.

What’s in the box?

  • IOGEAR HVER RGB Aluminum Gaming Keyboard
  • Quick Start Guide
  • Warranty Card


Design and features

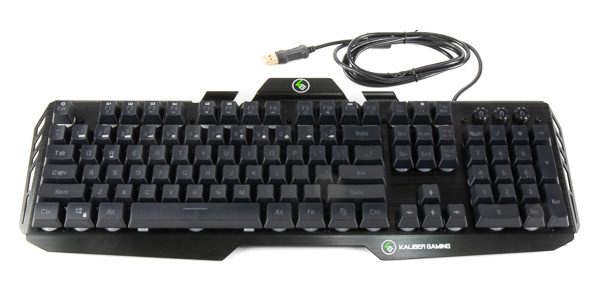
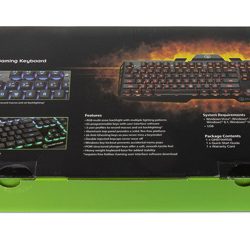
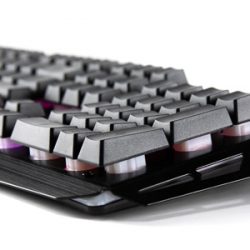
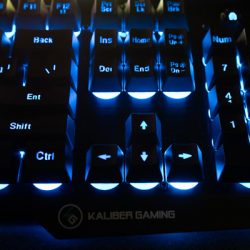
The HVER keyboard has an open frame design with elevated keys that appear to “hover” above the brushed aluminum chassis. In addition to the standard HVER features like 26 anti-ghosting keys, Windows key lockout, and heavy-weight gaming base, the HVER RGB also adds the ability to program individual keys as macros for in-game use or shortcuts to system controls, PC functions, etc.


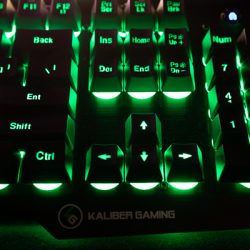
When I first plugged in this keyboard I wanted to see what I could do before I installed any of their software. Surprisingly all of the special function (FN) key options worked, except for the programmable keys of course. I was able to change all 13 of the backlighting effects. The backlighting was fairly good. I really liked the various options for the lighting:

  • Multicolor light dance
  • Multicolor breathing
  • Multicolor techno beat
  • Solid color fixed (7 colors)
  • Solid color rotation breathing
  • Solid color techno beat
  • Multicolor fixed


The lighting can be turned off, or set to one of three levels of brightness.

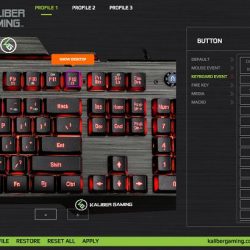
Then I installed the software. This is where everything went downhill.

First, neither the installer nor the app itself is digitally signed. On Windows, this causes windows to display the “Unknown Publisher” warning when launching, and for limited users, it can even prevent the software from running at all. In this day and age, signed installers and executable programs are a must.

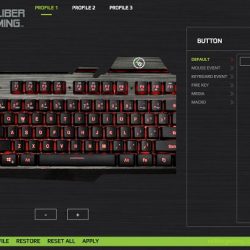
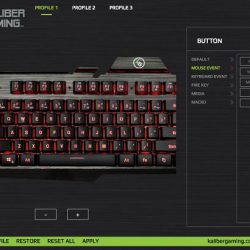
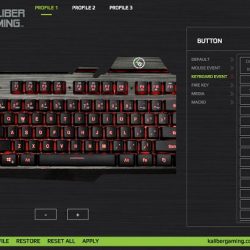
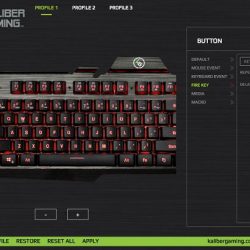
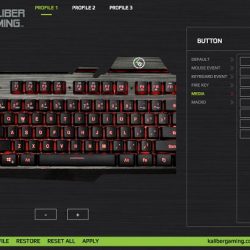
With no instructions on how to use the software, it took me a few minutes to learn that you click on a function, then click on a key to assign it. That worked great. Then it took me a while to figure out how to undo that assignment. Turns out that you have to select Default, then the Default effect, and assign that to the key to restore the original keys function.

I didn’t notice exactly when, but I think when I clicked Apply, the app applied the settings (which is odd, since the changes already worked), but the backlighting on the keyboard stopped working. No amount of unplugging, restoring, rebooting, or resetting made it work again. The backlighting does flash when changing profiles, but it doesn’t stay on.

To make matters worse, the lettering on the keys are barely visible without the backlighting.


What I like

  • Function keys for lighting works without installing software
  • Windows Key Lockout feature

What needs to be improved

  • Software seems broken
  • Uneven key lettering backlighting on some keys

Final thoughts

This is a definite “don’t buy” unless you don’t want to customize any of the keys.

Price: $42.97
Where to buy: Amazon
Source: The sample of this product was provided by IOGEAR

Filed in categories: Reviews

Tagged:

IOGEAR HVER RGB Aluminum Gaming Keyboard review originally appeared on The Gadgeteer on June 14, 2018 at 9:00 am.

Note: If you are subscribed to this feed through FeedBurner, please switch to our native feed URL http://the-gadgeteer.com/feed/ in order to ensure continuous delivery.