Pluto Pillow Review

“A pillow built just for you” is what they said. I was perfectly happy with my “memory foam” pillow. In fact, I had been sleeping with pretty much the same design for nearly 20 years, and I had no complaints. I don’t NEED a new pillow! But, what if I was wrong?

Yes, I’ve been using the asymmetrical “memory foam” thing you probably first saw in a Brookstone or Sharper Image store in the late 1990s. I was a tough sell. Why give something up if it’s working just fine?

What is it?

The Pluto Pillow is a custom-built pillow based on your answers to an online questionnaire. There are over two dozen possible different combinations.

Design and features

I’m no textiles expert, but the Pluto Pillow is best described as a pillow within a pillow. The inner core is a more sturdy foam, and the outside is fill of different densities, depending on your survey. The outer cover is either smooth, or quilted (again, depending on your questionnaire answers).

Setup

First, you log in and fill out questions about your height, weight, your sleeping preferences (side? back?) and others.

You also get a chance to weigh in on how much you like (or dislike) your current pillow.

This is what I wound up with. Mine would consist of a particular foam core, soft fill, a quilted cover, and so on. Pillows ship out of Los Angeles, CA, so I got mine very, very fast (San Francisco). Most orders take 7 days.

What’s in the box?

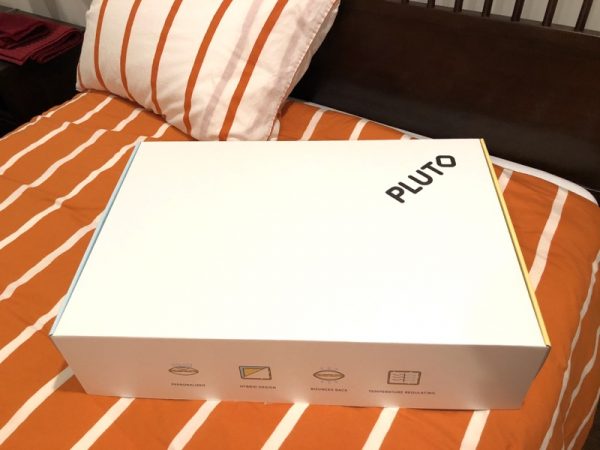
The big day arrived! My new pillow came in a pretty box.

I opened it up and found… a piece of candy? Nice touch.

In this picture, you can really see the quilted cover. I believe mine came quilted because I prefer a cooling surface.

The side unzips to reveal the inner foam core, sandwiched between two layers of very, very soft fill (the way I wanted it).

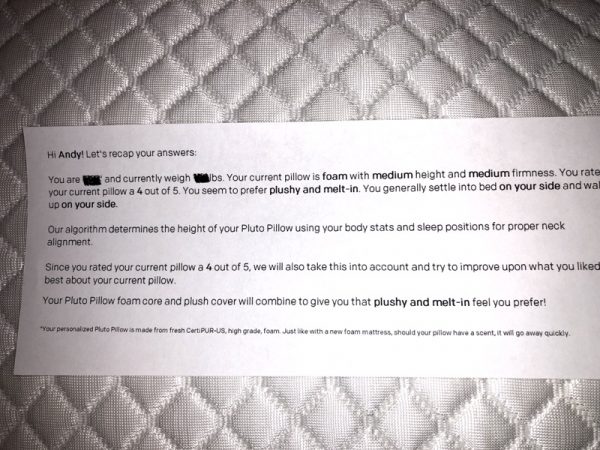
Here’s a slip of paper with my pillow preferences:  I really wanted a plush, pillowy feel and I tend to sleep on my side.

Performance

I was advised to give the Pluto Pillow at least two weeks before rendering final judgment, so that’s what I did.

“This thing feels tall” I thought on the first night. My oddball memory foam pillow is fairly flat, so this was different. However, the Pluto Pillow was ridiculously soft. I’m talking, cotton candy, puffy white cloud soft. The promise of that “melty” sensation was totally true.

As the days went on, I found myself actually looking forward to going to bed to my new, poofy pal. It felt cool and cozy.

Two weeks went by very quickly. In fact, I had to add a note to my calendar (“Two Weeks”) to remind me. I went to bed that night with the old memory foam pillow, and it felt like sleeping on a paving stone: Flat and hard.

This was odd. I was certain I was going to try this pillow I’d never heard as a novelty, and go back to the old guard as if nothing had happened.  “Why don’t you just keep using the new one?” my wife said. “You seem to LIKE it.” She was right, and that’s just what I did.

What I like

A pillow built around your likes and needs. I was surprised how different this was compared to my old pillow, and even more surprised how much I would like it.

What needs to be improved

Only if it grew on trees.

Final thoughts

I was under the impression that the only way you’d like a pillow sight unseen is if you really hated your current one. Boy was I wrong.

Price: $89 (base price, look for coupons)
Where to buy: Pluto Pillow
Source: The sample of this product was provided by Pluto Pillow.

The post Pluto Pillow Review appeared first on The Gadgeteer.

Filed in categories: Reviews

Tagged:

Pluto Pillow Review originally appeared on The Gadgeteer on June 26, 2018 at 9:00 am.

Note: If you are subscribed to this feed through FeedBurner, please switch to our native feed URL http://the-gadgeteer.com/feed/ in order to ensure continuous delivery.

Tsumbay car vacuum cleaner review

Cleaning the inside of my car usually involves two choices, one, pay a couple dollars at the local car wash or, two, drag out my old Dirt Devil hand vac. The Dirt Devil usually wins out (because its free). However, because it requires a power outlet that means dragging out my 50-foot electrical cord. As you can imagine it’s not very convenient, so I jumped at the chance to review the Tsumbay car vacuum cleaner. Hoping it might make my life just a little bit easier.

What is it?

The Tsumbay car vacuum cleaner is a lightweight portable vacuum cleaner that’s designed to plug into your cars 12V outlet (or cigarette lighter).

Hardware specs

  • Suction: 5000PA
  • Voltage: DC 12V
  • Power: 120W
  • Power cord length: 14.8ft
  • Weight: 2.2lbs
  • Size: 16” x 4” x 4.5”

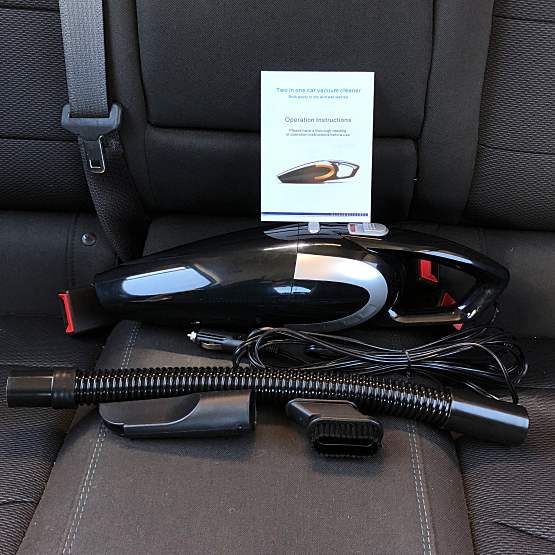
What’s in the box?

  • 1 x Vacuum
  • 1 x  17-inch EVA extended suction pipe
  • 1 x Vacuuming flat nose attachment
  • 1 x Brush attachment
  • 1 x Manual

Design and features

Constructed of a very lightweight plastic the car vac has a sleek design. I received the black version, but it’s also available in white.

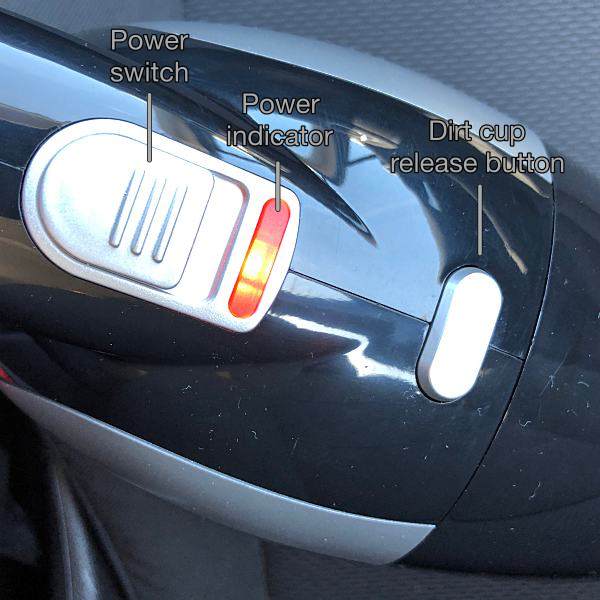
The vacuums power switch and power indicator light are located at the top rear of the vacuum, near the handle.

The Tsumbay is a 2 in 1 vacuum meaning it’s both a dry and wet vac (more on that in the performance section).

Dirt cup and washable filter

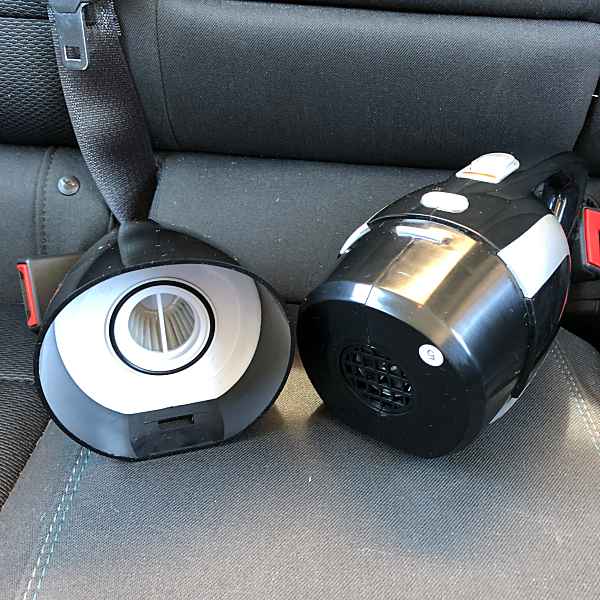
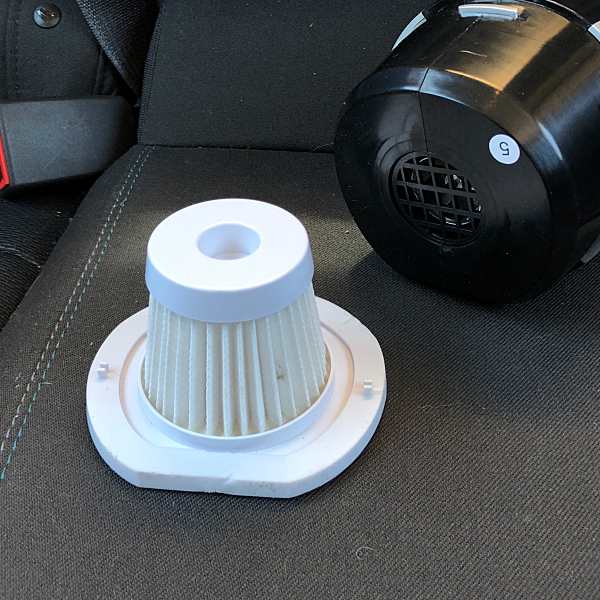
The front of the vacuum doubles as the dirt cup. Emptying it is done by pressing the latch release button located just in front of the power indicator light. Pull out the small filter and dump out the contents.

A few taps on the ground does a good job of clearing debris from the filter.

The filter is washable, and Tsumbay recommends washing it after every use to maintain performance.

Note: The filter is small and gets clogged up quickly. For max performance, I recommend clearing it out multiple times while vacuuming.

Performance

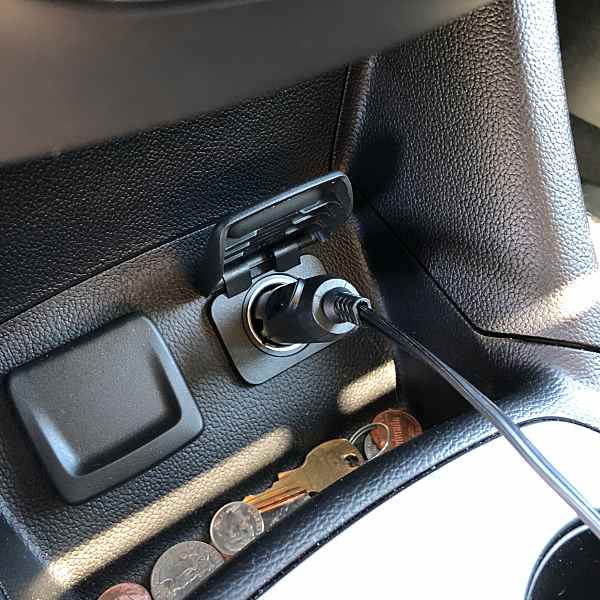
After plugging the vac into my cars 12V outlet, I fired it up. 

The first thing I noticed was the sound or lack of it. It was surprisingly quiet especially compared to my Dirt Devil or one of those car wash vacuums. Tsumbay lists the vacs decibel level at 65db. For comparison that falls between an air conditioner and a dishwasher on the decibel scale.

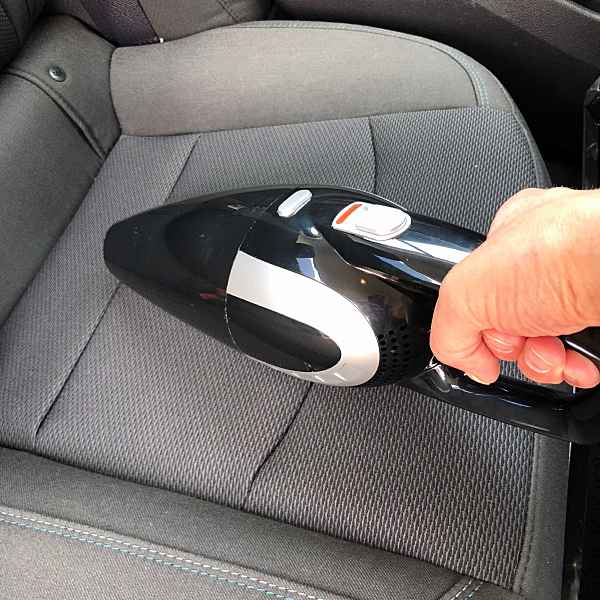
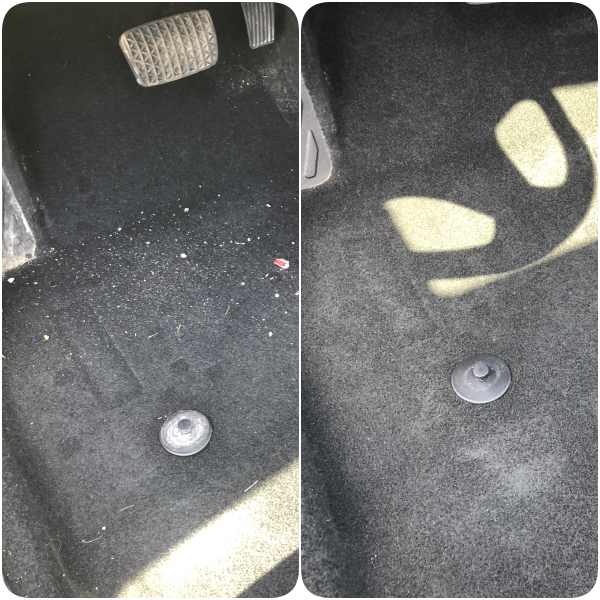
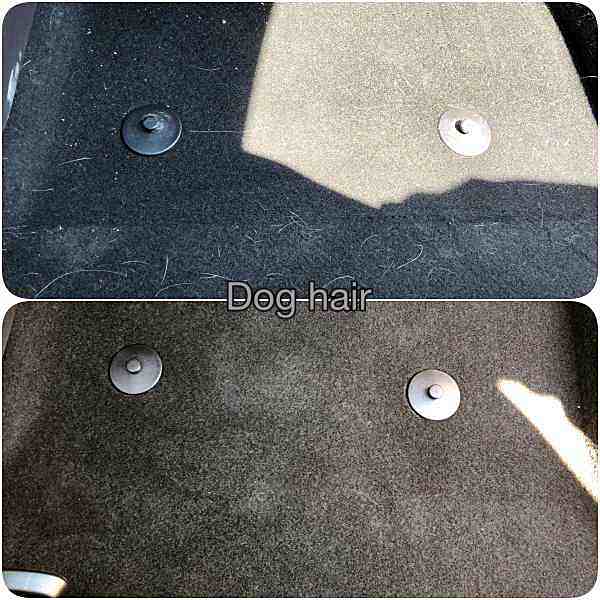
I used the extension tube and crevice tool to vacuum the floor of my car. I was pleasantly surprised by the suction power. The vacuum did a good job of picking up small pebbles, grass, and dog hair.

Check out the short video and before/after pics below to see the results.

Another thing I liked was the length of the power cord. Measuring 15-feet It allowed me to reach every corner of my Chevy Cruze, including the trunk.

Picking up dog hair

I have a puggle named Zoey, I love her to death but, she sheds like it’s her job. And even though I use a cover on the front seat, her hair ends up everywhere, the back seat, driver’s seat, even the dash. I often refrain from taking her places because the cleanup afterward is such a pain. Her hair was one of the biggest reasons why I chose to review the car vac.

I used the brush attachment to vacuum her hair from the floor and seats. I was happy with the results. The brush did a great job of loosening the hair from the seats fabric and carpet allowing it to be sucked up.

Finally, a quick and easy way to clean up after a trip to the vet or dog park!

Wet Vac

As I mentioned the car vac also doubles as a wet vac, I tested this by pouring water onto one of the car mats and vacuuming it up. Once again the vacuum performed well. You can see the results in the video below.

One note, the vacuum is only meant to vacuum up small amounts of liquid. In my testing I found anything over 1/4 cup tends to spill back out of the dirt cup.

I also noticed that once the filter is saturated, the vacuum loses most of its suction. Remove the filter and allow it to dry before using it again.

What I like

  • Plugs into cars 12V outlet (cigarette lighter)
  • Lightweight
  • Low noise
  • 15-foot power cord
  • Good suction power
  • Wet vac ability

What needs improvement

  • Extension tube could be a little longer and more flexible.
  • No storage bag

Final thoughts

I love this little car vac. I like the convenience of being able to plug it directly into my car. No more dragging out my 50-foot extension cord, and it’s perfect for spot cleaning. It’s also nice to know that if I spill something, it can be used for that as well.

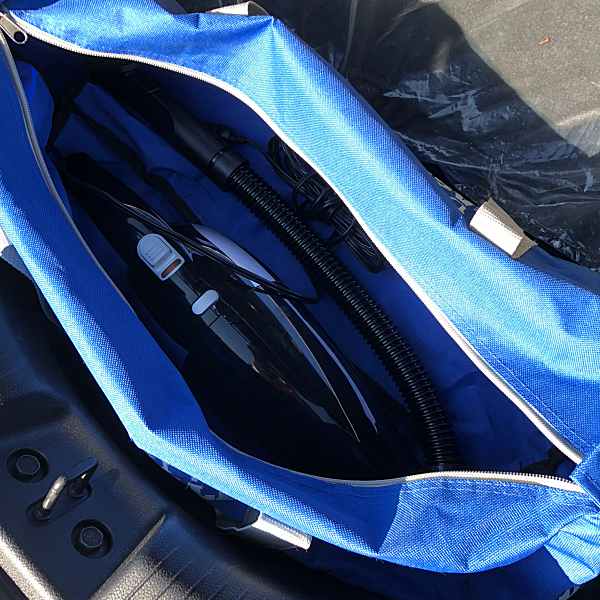
I used an old duffle bag to store the vacuum and accessories, and it now has a permanent home in the trunk of my car.

If you have kids, pets, or just like keeping the inside of your car clean the Tsumbay car vacuum is the perfect car cleaning accessory.

 Price: $28.99
Where to buy: Amazon

Source: The sample for this review was provided by Tsumbay.

The post Tsumbay car vacuum cleaner review appeared first on The Gadgeteer.

Filed in categories: Reviews

Tagged: ,

Tsumbay car vacuum cleaner review originally appeared on The Gadgeteer on June 25, 2018 at 11:25 am.

Note: If you are subscribed to this feed through FeedBurner, please switch to our native feed URL http://the-gadgeteer.com/feed/ in order to ensure continuous delivery.

Abox 4 Android TV 4K Streaming Box review

These days, many people are looking to find alternatives to cable services and cable boxes. This is primarily so because of the continuously rising costs of cable TV and the way their “packages” provide less versatility. In response to the cable companies, numerous devices have “popped up” on the market and they claim to provide alternative options at a lower cost. Let’s take a look at one:

What is it?

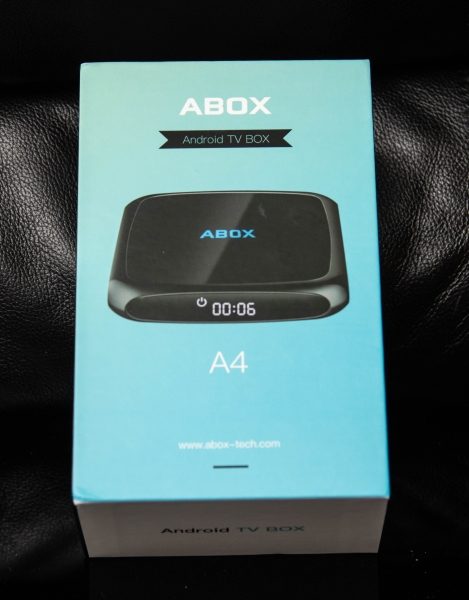
The Abox 4 Android TV box is an Android OS based streaming device that provides a way to stream TV programming via various services, as well as the ability to stream from other sources on the same network.

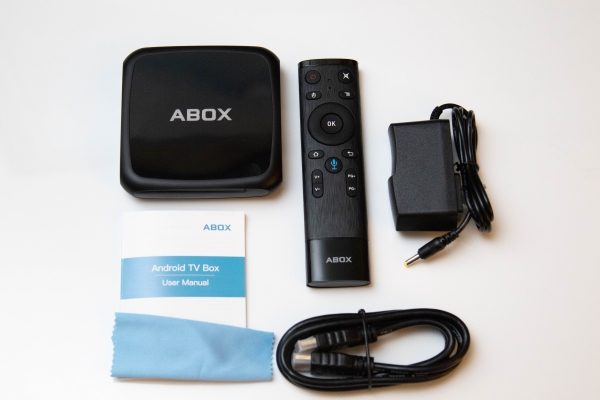
What’s in the box


1 x Abox 4 Android TV Box
1 x AC Adapter
1 x HDMI Cable
1 x Remote Control
1 x Instruction Booklet
1 x Micro Fiber Cleaning Cloth

Design and features

Specifications

Operating system: Android 7.1.2
CPU: Quad Core Cortex A53 2.0GHz 64bit
GPU: Penta-Core Mali-450MP GPU at 750 MHz
ROM: 2 GB DDR3
RAM: 16GB EMMC FLASH
Bluetooth: V4.0
3D: Hardware 3D graphics acceleration
HDD file system FAT16 / FAT32 / NTFS
Supported subtitles: SRT / SMI / SUB / SSA / IDX + USB
High-definition video output: 4k * 2k
LAN: Ethernet: 10 / 100M, standard RJ-45
Wireless: Supports 802.11 a / b / g / n at 2.4 GHz
Supported Airplay / DLNA / Miracast & H.265
Supported decoder format: HDMPEG1 / 2/4, H.265,4K-HD, HD AVC / VC-1, RM / RMVB, XVID / DIVX3 / 4/5/6, REALVIDEO8 / 9/10
Supported media format: AVI / RM / RMVB / TS / VOB / MKV / MOV / ISO / WMV / ASF / FLV / DAT / MPG / MPEG
Supported music format: MP3 / WMA / AAC / WAV / OGG / AC3 / DDP / TrueHD / HD / FLAC / APE
Supported Photo Format: HD JPEG / BMP / GIF / PNG / TIFF
Supported subtitles: SRT / SMI / SUB / SSA / IDX + USB
Supported language: English / French / German / Spanish / Italian and more
Power supply: DC 5V 2A

The Abox 4 Android TV 4K Streaming Box is a streaming box that provides access to numerous streaming app including, Netflix, Hulu, Crackle, Amazon, and all apps in the Google Play Store. It also allows you to add almost any Android app via the standard .apk file. (Some Android apps added via their .apk files may not provide 100% compatibility). Once connected to your network, this device also acts as a single point of streaming for all of your shared media on your network including, pictures, movies, music, etc. The Abox is small and compact and has ports on 2 sides, a display on a 3rd side, and the brand name on top. On one side there are the following ports from left to right:
Audio out
Ethernet
AV port
HDMI
Audio out

On the 2nd side, there are 2 USB ports and one micro SD card port to add external storage devices

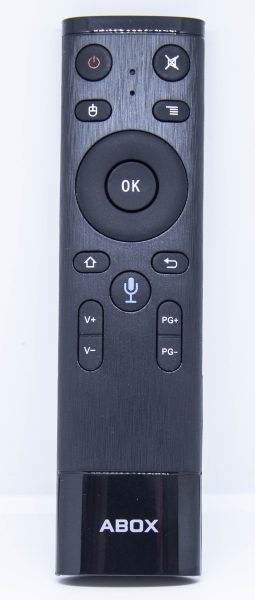
The remote control provides the standard functions of a media remote control, along with a microphone button that allows you speak commands, like “find the latest action movies” or just action movies”, or something more specific. There is also a button that toggles a “mouse” option on and off. With the mouse “on”, you can use the circular control to move the mouse. Other functions include volume, page up/down, power on/off, home, mute, return, etc.

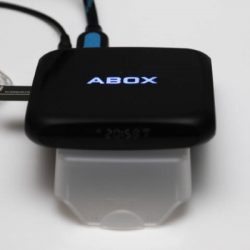
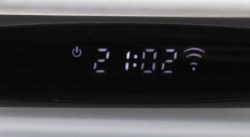
On the front of the Abox, there is an LCD with a time display and the power on indicator along with the WiFi status symbol. On the top of the Abox is the brand name that lights up blue. The picture on the bottom right below shows the HDMI and power cables connected.


Operation

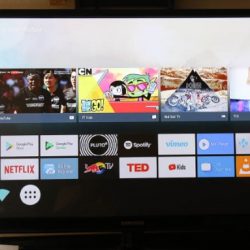
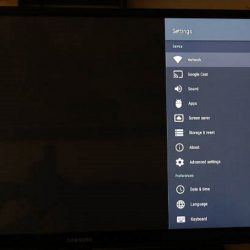
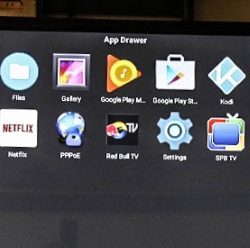
Once the Abox is plugged in, and the basic initial setup of language, time and network access are completed, the main screen is launched. On the main screen there is a preview of Google Play movies selection, a couple of rows showing some of the most/recently used apps, and the icons for the “settings” screen, the “Network setup” screen and the “app drawer”. The “settings” screen provides access to all settings as seen below. The “network” screen provides access to all of the network access related settings, and the “app drawer” screen shows all of the apps that you have downloaded and installed.
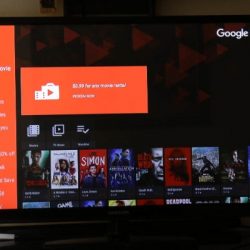
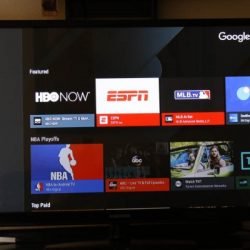
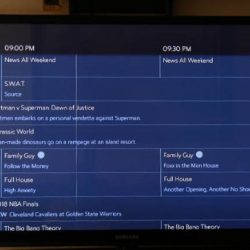
I have also included the screens that show the “on Demand” movie/series option, the File Explorer screen that allows you to access all of your shared network drives, and a screen that shows the tv guide from my cable TV app. Unfortunately, I could not get the remote to properly navigate the tv guide to make that app usable. While I think that I was doing everything correctly, I am not ruling out “lack of knowledge by user” 🙂
There is also a screen showing access to Spotify to listen to online streaming music.


Performance

I was able to watch movies from my USB drives and across my network via WiFi and wired ethernet with no issues, and they played flawlessly and in full HD. Installing apps from the Google Play store is very easy, and all of the apps that I tested worked well. The cable TV app that I referred to was one that I installed via an external website, and not from the Google Play Store apps offered from within the box. Once the Abox is on your network, you have the option of adding Android apps using a computer on the same network. It is important to note that I installed the cable tv app via a networked computer since it was not showing as an available app when I searched the Play Store from the Abox. This is likely why it is not fully compatible and functional.

I am not a gamer, so I cannot provide too much information on those types of apps. However, based on the overall performance of the Abox, I would suspect that they will work flawlessly as well. The Abox also offers the ability to connect a keyboard and mouse via Bluetooth, and they sell a combination keyboard via the Abox-tech website for $34.88.

What I like

I really like that the Abox provides access to all of my shared media on my home network and that even via WiFi it maintains a strong connection. I also like that I can add drives directly to it vis the built-i USB ports and that is with the apps from the Google Play Store, I can play all of my various types of files with ease.

What can be improved

My biggest issue with the Abox is the inability to navigate certain apps properly when using the remote. For example, I am used to watching my Cable TV programming using my Roku Streaming Box and the cable TV app. With the Roku remote, I can use the up/down functions of the remote to scroll through the TV guide. This function does not work with the Abox remote, and for me, that is a big deal.

Final thoughts

The Abox 4 Android TV 4K Streaming Box offers a lot of options and convenience for the price. The 2 USB jacks along with the card slot and network capabilities make it easy to integrate it into your network of devices. While I do find the Android OS and the remote response somewhat sluggish when compared to my IOS devices, I do enjoy using the Abox and for now, it has a permanent place among my media equipment.

Price: $79.99
Where to buy: Abox-tech website and Amazon.
Source: The sample for this review was provided by Abox.

The post Abox 4 Android TV 4K Streaming Box review appeared first on The Gadgeteer.

Filed in categories: Reviews

Tagged: ,

Abox 4 Android TV 4K Streaming Box review originally appeared on The Gadgeteer on June 25, 2018 at 9:00 am.

Note: If you are subscribed to this feed through FeedBurner, please switch to our native feed URL http://the-gadgeteer.com/feed/ in order to ensure continuous delivery.

ClearStream FLEX Wireless HD Antenna review

What is it?

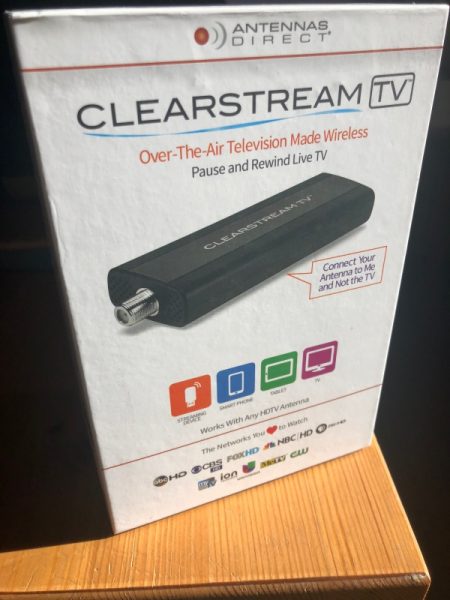
The ClearStream FLEX Wireless HD Antenna is a unique cable-cutting solution in that it allows you to receive HD channels over-the-air (OTA) and then broadcast those channels over your WiFi network to be accessible for your other devices. Does it work? Let’s find out.

Hardware specs

Antenna range: 40 Miles
Antenna beam angle: 470 to 700MHz: 70º (horizontal plane) – wide reception pattern
Antenna gain: UHF-3.6 dBi | VHF-2.1 dBi
Antenna dimensions: 12 x 16 x 1/4” (antenna only)
Antenna weight: 6 oz
WiFi range: 20 feet
Requirements: a Wifi network, a compatible smartphone, tablet or streaming media player and the Clearstream TV app (free)
Compatibility: Android 4.2 or above, iOS 8.4 or above, tvOS 10.2 or above, Roku v7.50 b4099 or above, and Amazon Fire devices from 2013 or newer.

What’s in the box?
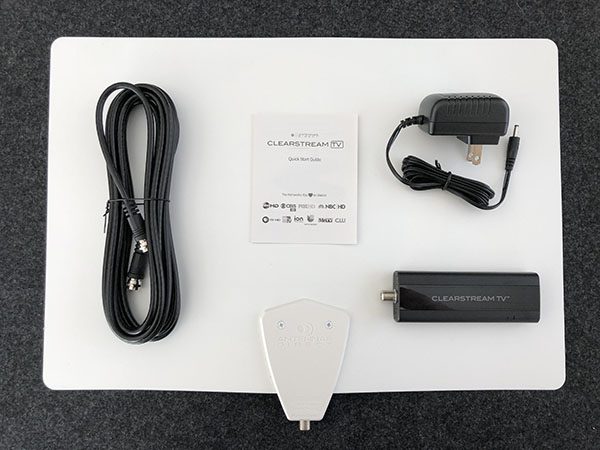
  • ClearStream FLEX TV Antenna with Sure Grip
  • ClearStream TV WiFi Tuner Adapter
  • 12 ft. High-Performance Coaxial Cable
  • Power Adapter with 4 ft. Cord
  • Step-by-Step Instructions

Design and features

The design is really an exercise in blending in. The antenna is thin and rectangular with one side black and the other white. You can choose whichever side you’d prefer to see and it is paintable so you can really make it blend in. The rest of the elements are meant to not be noticed. The WiFi Tuner Adapter is minimally sized. The power cables can be tucked behind shelves and the coax painted if necessary or replaced with white coax if you have some on hand.
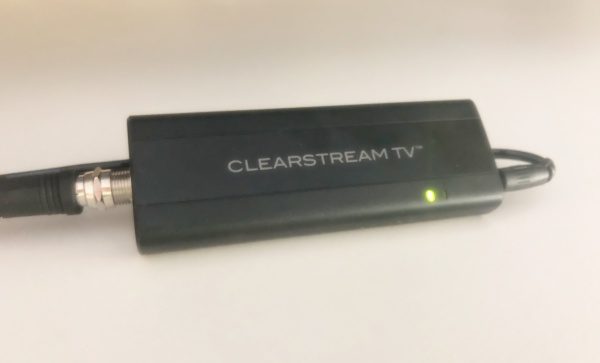
The part of the system you’ll interact with most is the mobile app or a on a streaming device like a Roku, so let’s dive into the setup.

Setup

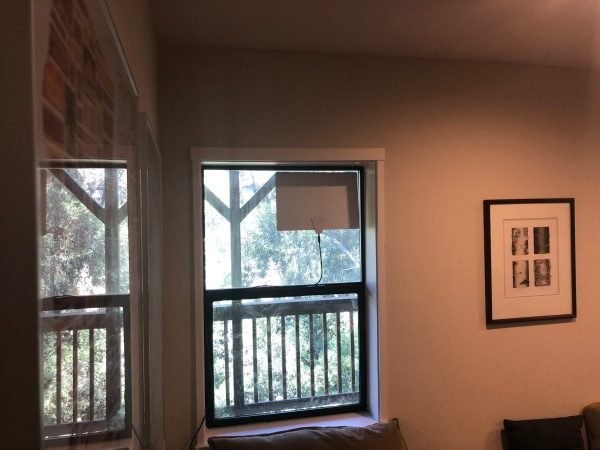
Let’s set it up. Start by placing the antenna in the best possible location within 20 feet of your wifi router. I was lucky to have a window right next to mine facing the city. You’ll likely end up experimenting with placement so use some painters tape to hang it for now.
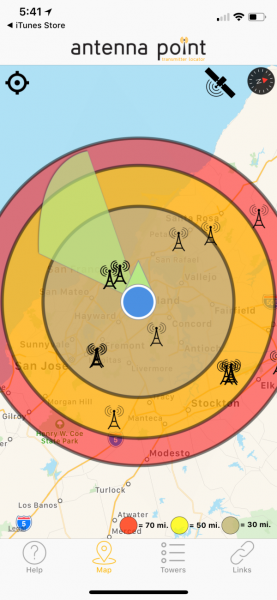
Antennas Direct has an app (and website) called Antenna Point which will help you with placement if you’re unsure. Antenna Point confirmed that I was within about 10º of optimum placement, so I went ahead and used the included clear double-sided tape to secure the antenna to the window. Here’s a screenshot of their app at work.
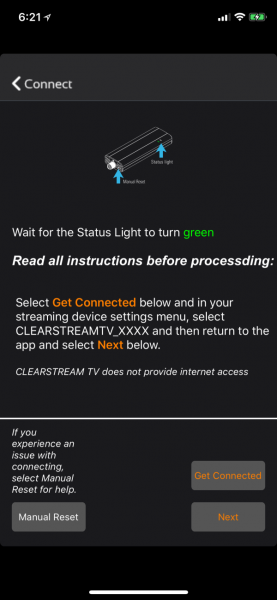
Next, connect the power adapter to an outlet and to your WiFi Tuner Adapter, then connect one end of the coaxial cable to your antenna and the other end to the tuner adapter. The light on the WiFi unit will blink blue and red during startup and then change to a green. That’s your signal to set up WiFi.

Download the ClearStream TV app on your phone or tablet and launch it. It will walk you through the setup which includes connecting to the WiFi broadcast by the Tuner where you can then enter your information to have it connect to your network. When complete, the tuner reboots and you’ll scan for channels. This step is as easy as hitting the scan button and then waiting for the process to finish which is between 15 and 30 minutes.

Performance

The setup was pretty smooth, so I was very interested to see what the rest of the experience had to offer on different devices.

The first thing I discovered is that the setup is only complete for the device I used in the first step. Both Roku and an iPad obviously required downloading their app but also needed to repeat the scan for channels step. Fortunately, that’s only a couple of clicks and another 15-30 minutes one time per device. They also mention that Roku is currently not able to do that initial setup of the WiFi unit, so that should be done with a mobile device.

On iPhone/iPad

Launch the Clearstream app and you’re presented with four options. Live TV, Recordings, Guide, and Settings. The next few images will bounce back and forth between iPhone and iPad depending on where I took screenshots.
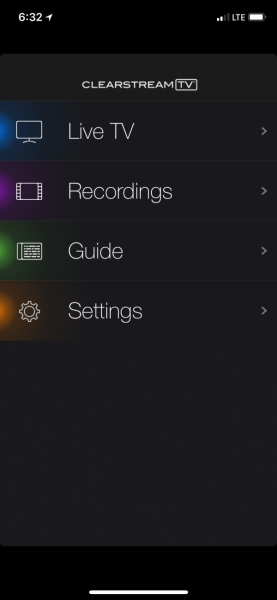
Live TV presents you with a list of channels which in my case are 2-1 (KTVU-HD), 2-2 (LATV) etc. as you can see in the screenshot.
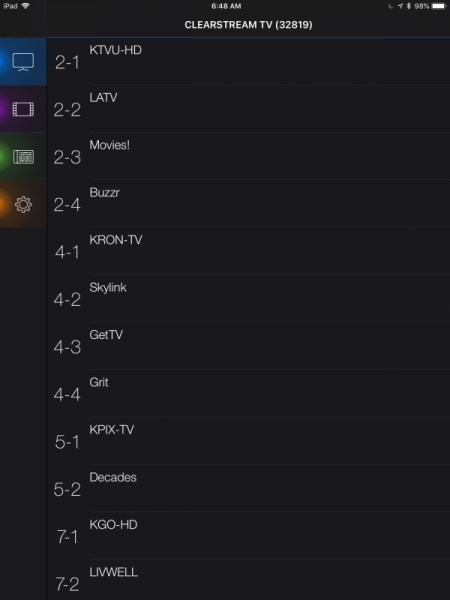
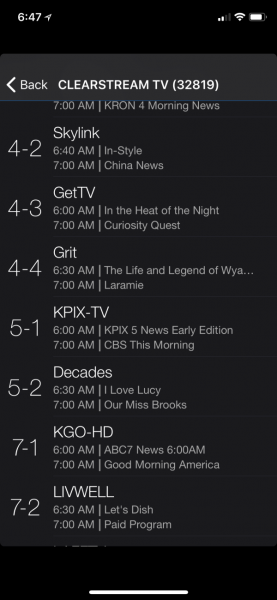
On initial load, that’s all you’ll see, but after a bit, the program information starts to fill in.
Choose a station and after a few seconds of buffering, the program starts to stream in a small section above the channels. Rotating the device to landscape automatically takes the program full screen. With one tap you have access to play/pause, FF/RW in about 10sec increments and a record button.

You also have a settings icon in the upper right which provides screen ratios, closed captioning and video quality settings which get applied across all channels.
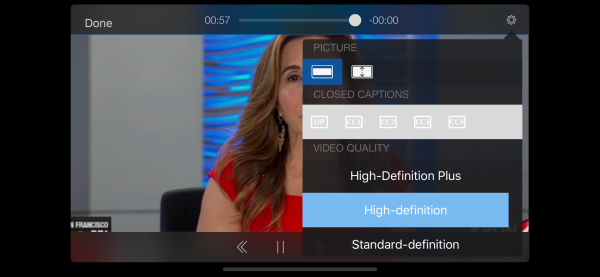
Tapping the record button starts a recording as you might expect and you’ll see some small text next to the button with recording time remaining. Tapping again stops the recording. You’ll find anything you’ve recorded in the Recordings option from the main screen.

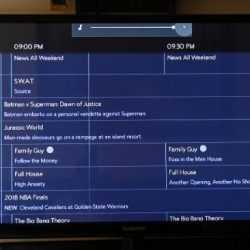
The Guide is surprisingly good although it takes a fair amount of time to update with information as it seems to do so in batches of a few channels at a time instead of grabbing the next two hours for all channels first which is what you’re more likely to want to see. The only other quirk is that once you find what you want to watch, you’ll need to note the channel and bounce back to Live TV in order to launch that channel.

I was able to send the video to Apple TV easily using the mirror function, but the app does not have a built-in cast function for either Apple or Chromecast.

On Roku

Much the same here, but it obviously feels much more like cable when full screen on your TV and a remote in your hand. There are only three options on the main screen as interestingly, recording is not an option on Roku.
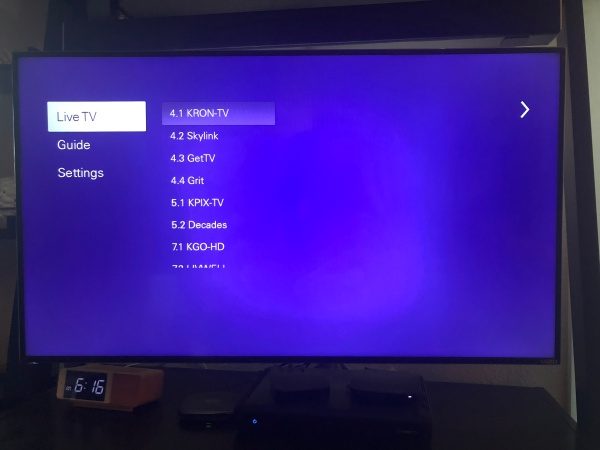
All the settings are done from this menu so the watching experience is really just channel switching and enjoying the picture. The Guide seems to start fresh every session which each channel listing displaying “No information” at first, and if you’re searching towards the end of your channels it might be a while before it updates.
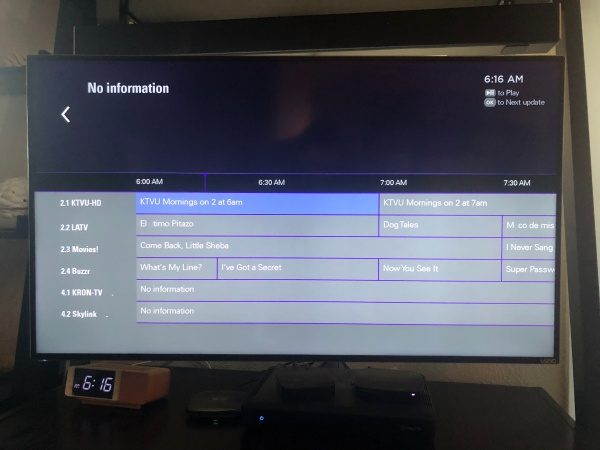
The Live TV screen here is pretty sparse as it does not pull the program information like on iOS. Beyond that, the quirks are about the same.

Overall

The picture is great on all devices, especially if you bump up the resolution to High Definition Plus. The only reason to knock it down would be if your bandwidth is limited. You’re still going to have some channels that stutter, but the majority of the 60 that came in for me were as clear as what I get with DirecTV.

Small catches

The system only supports a single device at a time. I first noticed this waiting to see how long it would take for the program information to fill in on my iPad while I had Roku running. Clicking on the Guide prompted the below message.
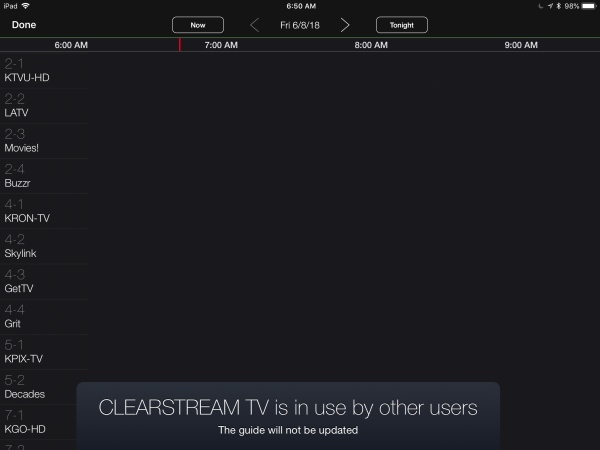
A similar message pops up if you click on Live TV giving you the option to choose “use” which boots the other device off so you can watch.

Recordings are not shared across devices as they are stored locally on the device where your recorded the program.

What I like

  • A minimal amount of hardware
  • Relatively easy set up
  • Great picture
  • Channel guide
  • Support for different devices

What needs to be improved

  • Support for simultaneous devices
  • A way to share channel scans across devices
  • Chromecast support

Final thoughts

If you’re looking for a way to cut the cord on cable or satellite, this is an option worth considering. The cost is pretty low and a one time fee instead of a recurring monthly charge which seems to be increasingly rare. You’ll need internet and a strong WiFi network with good speed. Lastly, you’ll need to be okay with only being able to watch on one device at a time. This last point is the hardest to overcome if you’ve got a family or roommates, but then again maybe the only time you’d be streaming live TV is for group events like sports so maybe it’s less of a blocker? Head on over to Antennas Direct for additional details.

Price: $119.99
Where to buy: Antennas Direct
Source: The sample of this product was provided by Antennas Direct.

The post ClearStream FLEX Wireless HD Antenna review appeared first on The Gadgeteer.

Filed in categories: Reviews

Tagged:

ClearStream FLEX Wireless HD Antenna review originally appeared on The Gadgeteer on June 24, 2018 at 10:00 am.

Note: If you are subscribed to this feed through FeedBurner, please switch to our native feed URL http://the-gadgeteer.com/feed/ in order to ensure continuous delivery.

HP df1050tw Wi-Fi Photo Frame review


Digital photo frames have come a long way since they were first introduced shortly after LCD’s in the late 1990’s. The HP df1050tw Wi-Fi Photo Frame is no exception as it almost feels like a modern tablet.
What is it?

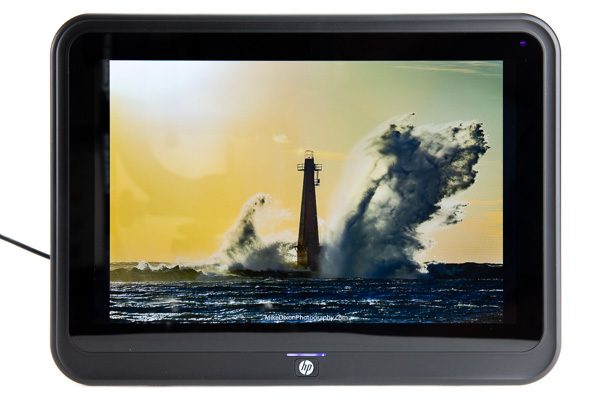
The HP df1050tw Wi-Fi Photo Frame, as its name implies, is a photo frame. However, it has a few features that make it more than just a photo frame. This HP photo frame features a touchscreen, WiFi, mobile app ability, calendar, clock and the ability to play music.

Hardware specs

Display Size 10.1 inch TFT LDC Screen
Screen Resolution 1280 x 800px
Aspect Ratio 16:10
Internal Memory 8GB
Storage Media SD (SDHC) Card up to 32GB (Class 10), USB Memory Stick
Touchscreen Yes
Speakers 2x 2W
Sensors Light
Photo Format JPG, BMP, PNG
Music Format MP3
Power AC 110~240V 50/60Hz, DC 5V/2A
Color Black, Rose Gold, White

What’s in the box?

  • HP df1050tw Wi-Fi Photo Frame
  • Power Cord
  • Quick start instruction sheet


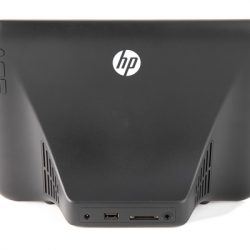
Design and features

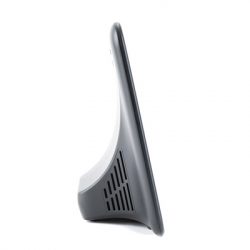
The HP Photo Frame is designed to sit on a flat surface, unlike some photo frames that can be hung on a wall. The initial setup included selecting the language and connecting to my WiFi. After displaying instructions on where to get the mobile app, the device detected that a firmware update was available, and was able to download that and update it without connecting the device to a computer as some devices do.


Connecting a mobile device is as easy as downloading the app, signing up for an account, and entering the device ID, or scanning the QR code on the tablet screen.

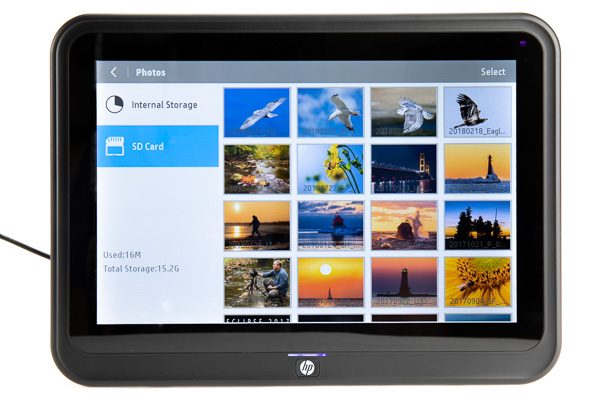
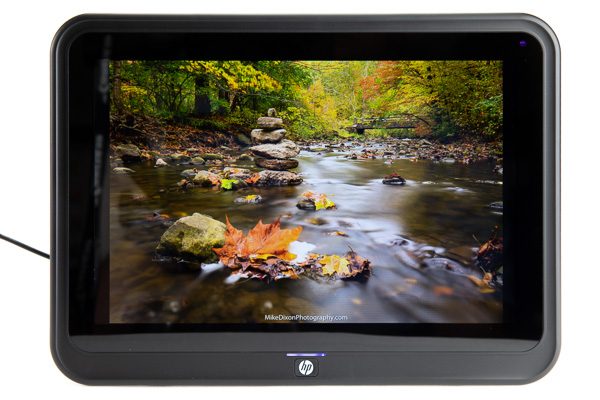
The display of photos on the screen is really nice. The colors are vibrant and the brightness is adequate. You can manually browse photos in the internal memory where the cloud photos are, or the SD card.

The photo frame and app work pretty much as designed, and for the most part they are probably adequate for most people. However, I found several things that I did not like.

The mobile app is quite basic, and poorly written. There are numerous instances of poor English and misspellings. For example, “Account” is spelled “Accout” in several places. When registering a login for the app you’re prompted to enter “Account, Password, and Nickname” – “Accout” is an obvious misspelling of “Account”, but if you leave it empty and try to create an account you’re prompted with “Username can’t be empty” – so it’s really your username. However, on the login screen of the app, it shows Username and Password. There is no password length enforcement for security either. Account and Username are used interchangeably in various messages.

If the wireless is turned off on the frame and you try to add the device via the app, the device list in the app displays “Req..erify” which is probably short for “Require Reverify” based on the poor English in the app.

Choosing the Forgot password option in the app presents you with a screen titled “Change Password”, and fields named “Please enter the device code”, “Please enter a new password”, and “Username”. This is a completely non-standard way of handling a forgotten password.

After you have selected photos on your phone and sent them to the device, there’s no indication of which photos you have already uploaded. If you select a duplicate photo you’ll have two of the same image on the device. There’s also no way of undoing a transfer so if you send the wrong photo to the device, it can only be removed from the photo frame using the photo frame user interface.

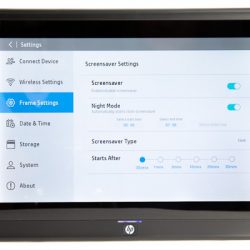
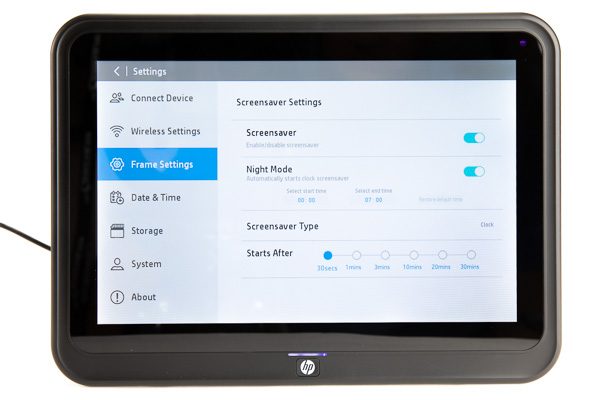
On the photo frame itself, there is an option for a screensaver, where you can set hours for it to display a clock at night for example. However, when the screensaver turns off at the end of the set period of time, there’s no way to make it automatically display the photos on an SD card, only the internal memory.
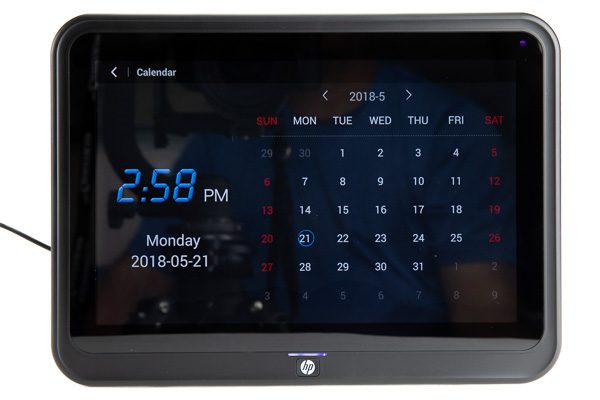
There is also a calendar option, which I thought was a really nice feature. Built-in stereo speakers and a music player provide for playing MP3 files.

The photo frame also has an alarm feature, which took me a little while to find the settings for. You have to tap the clock on the menu screen to access the alarms. After which you can set up multiple alarm times, alarm ringtones, and which days to repeat the alarm. There 7 ringtones for the alarm, but two of them sound identical.

What I like

  • Responsive and nice looking touchscreen
  • Additional features such as alarm and clock

What needs to be improved

  • Mobile device app needs much work
  • Advertises 8GB internal storage, but only 5.6GB is free to use for photos
  • In settings, if the current time is between the times set for the Night mode, you can’t change the screensaver type
  • No wall mount

Final thoughts

The mobile app needs much more work to make this photo frame a family and friends device. There needs to be a way to manage photos remotely from the app. I had thought about putting one of these at my mom’s house so I just load my most recent photos automatically to the frame but without the ability to remotely remove photos that option is not realistic.

Price: $149.99
Where to buy: Amazon
Source: The sample of this product was provided by Idea Electronics.

The post HP df1050tw Wi-Fi Photo Frame review appeared first on The Gadgeteer.

Filed in categories: Reviews

Tagged:

HP df1050tw Wi-Fi Photo Frame review originally appeared on The Gadgeteer on June 23, 2018 at 2:05 pm.

Note: If you are subscribed to this feed through FeedBurner, please switch to our native feed URL http://the-gadgeteer.com/feed/ in order to ensure continuous delivery.