OrbitKey Key Organizer, Strap and Clip review

OK, I admit it.  I am one of the people guilty of putting my phone and keys in the same pocket or bag.   I have suffered the consequences of my actions by getting scratches on my phone screen.  So when I got the opportunity to review the OrbitKey Key Organizer I jumped at the chance to see if it could save me from myself.  Let’s see if it does a good job protecting my phone from the dreaded key scratch.

What is it?

The OrbitKey Key Organizer is a cowhide leather or rubber key holder/organizer.  It comes in several different colors and really makes your jangling key collection much more organized, less noisy and less likely to scratch anything else in your pocket. You can purchase an additional ring clip that will easily let you add and remove additional items like a car key fob to the other end of the organizer.

Hardware specs

The leather key organizer has the following features:

  • Comes in 10 different color combinations in cowhide leather.
  • You can add monogramming for an additional $11.90 on the cowhide leather.
  • Fits 2 – 7 keys
  • Comes with a premium D-ring attachment
  • The active version of the organizer is made with water and dust resistant TPU polymers.
  • The active version comes in 7 different  colors

The Ring accessory has the following features:

  • Stainless steel enclosure surrounds a flexible polymer core.
  • Diameter – 30mm, Thickness – 3.5mm, Opening – 3.6mm
  • Carries up to 10 keys
  • Pinch and rotate to open
  • Secure mechanism

The OrbitKey Clip has the following features:

  • Length including Ring – 103mm, clip only – 52mm, width – 30.5mm, thickness – 4.5mm
  • Will hold up to 10 keys
  • Made of cowhide leather
  • Comes in three color combos – all black, tan with white stitching, and black with metal accessories.
  • Big gate opening on the carabiner
  • Comes with an OrbitKey Ring
  • Quick release system between the carabiner and the ring. Simply slide the metal band with the OrbitKey name up and slip out the leather strap.

The OrbitKey Strap has the following features:

  • Made with premium full-grain cowhide leather
  • Comes with OrbitKey  Ring
  • Carry up to 10 keys
  • Same quick release system as the Clip – Simply slide the metal band with the OrbitKey name up and slip out the leather strap.
  • Length with Ring – 238mm, Length strap only – 207.5mm, Width – 14mm, Thickness – 1.6mm
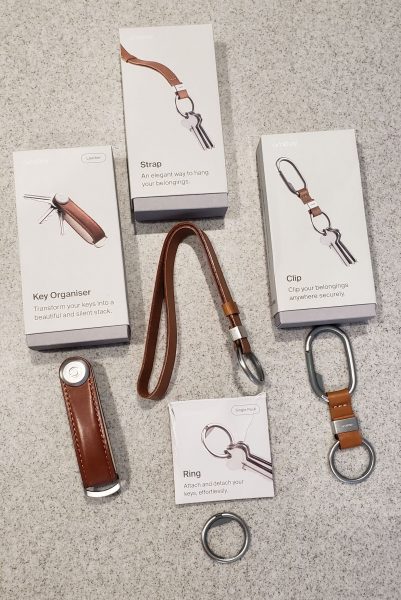
What’s in the box?

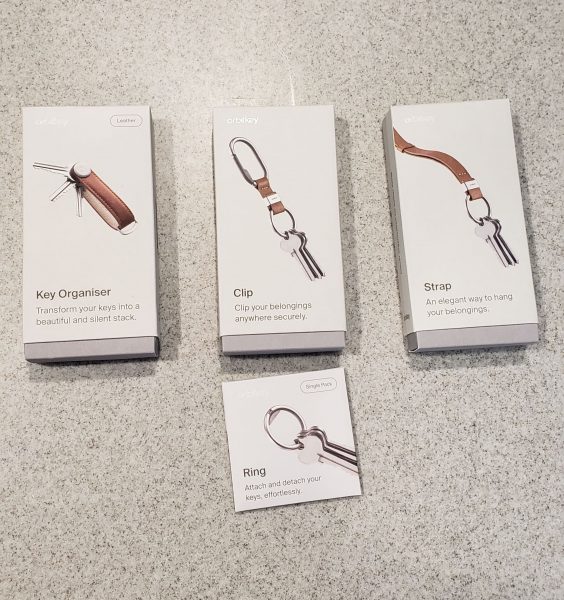
In the picture above you can see what came in each separate box.   The Key Organizer just included the organizer and no Ring accessory.  The Ring accessory can be purchased separately and came in the small package at the bottom of the picture.  The strap came with the strap and the Ring attached to it.   The Clip came with the carabiner and the Ring attached to it.   The boxes were are all made of cardboard/Kraft paper and can go into the recycle bin.
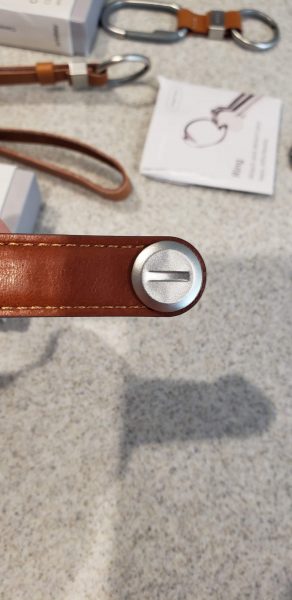
Design and features

The organizer is very simple to use.  In the picture above you can see the back side of the hardware used to hold the keys.  Simply grab a quarter or any handy coin and turn it counter clockwise to loosen the screw.
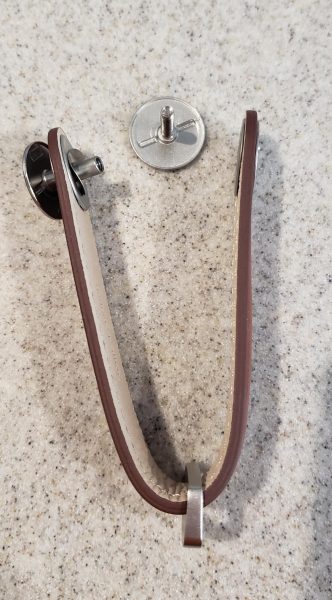
Once the back side of the hardware is off you can see the individual pieces.  There is a front cap with a tube attached that has the screw threads.  That inserts into one end of the leather strap.  There is a nice sturdy rivet attached to both sides of the leather on the inside of the strap.  Once the front side of the hardware is through the leather, there is a small washer that is in a concave shape.  That is used to control the tension of the keys.  You simply place your keys on to the threaded tube, close the other end of the leather band on top and screw the back cap back on to the front cap.  You can tighten or loosen the back cap to adjust the amount of tension in the keys.   I found it very easy to install my keys.  Time will tell if the tension will stay in place to my desired setting.
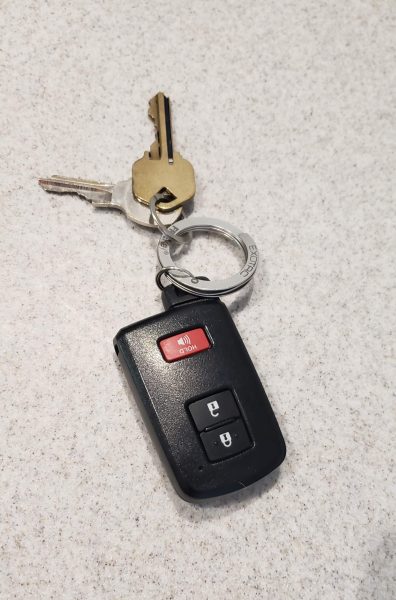
The above picture shows my current setup for my keys.  I am very simplistic and try to carry as few keys as possible.  I have my car key fob (Toyota Tacoma), a silver mailbox key and a gold house key.  I was using the Exotac key ring to make it easy to detach the key fob when I took the truck in for service or valet.
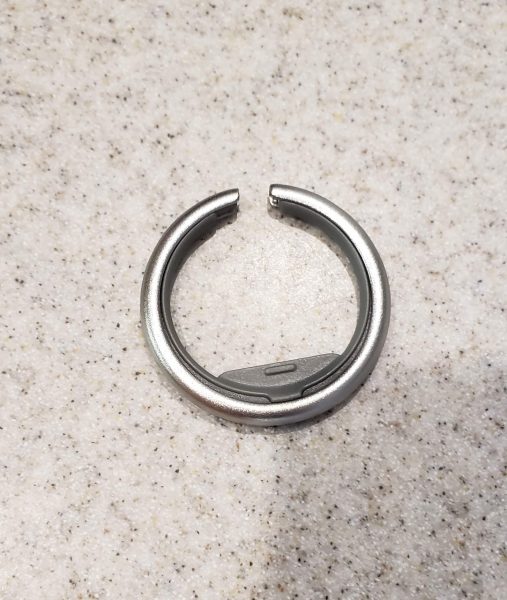
The above picture shows the Ring accessory.  Once I figured out the trick of how to use the release mechanism on the Ring I find that it is much easier to add and remove keys than on my Exotac.  I also love that the Ring is slightly smaller than the Exotac which keeps the mass down in my pockets and bags.   The one issue I did have with the Ring was that I had issues with my truck key fob.   Part of the problem is that the key fob for my truck does not have a very wide opening for a key ring and it really likes to keep getting hung up on the Ring when it encounters the inside plastic enclosing device.
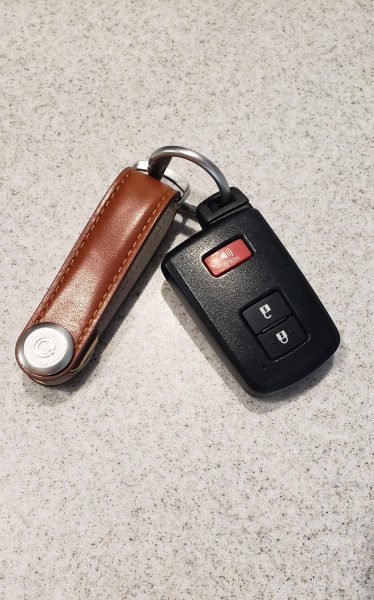
The above picture shows the organizer with two keys inside and my truck fob attached.
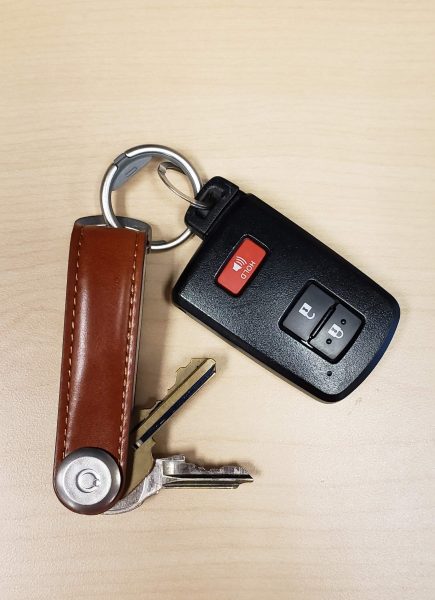
What I ended up doing is using a small ring from the Exotac system and put that on the fob and then put the small ring on the OrbitKey Ring. This picture shows the same as the last picture, but with the two keys swiveled out and how I am using the smaller ring to attach my key fob.

What I like

I love the way these items from OrbitKey look.  They are very elegant.  No more jingling keys and the organizer should reduce the number of scratches I put on my phone when my keys and phone share the same space. The hardware seems top notch and I really don’t see how it would fail.  I will try and remember to do an update a few months from now to see how well the tension on the keys holds up over time. The Clip is a nice elegant option for those folks who like attaching their keys to the belt loops or possibly to a purse handle.  I also love how they market the strap towards other items besides keys.  They have pictures on their site of folks using the strap to small items like a compact camera or even a wallet or small purse.  I also love that they sell the hardware for the organizer separately should you ever need to replace it.  They also sell a few accessories like a bottle opener, multi-tool and 8 or 32GB USB drives that all will work in the organizer.

What needs to be improved

I was a bit frustrated by the extra depth of the Ring due to the quick release mechanism.  I realize though that I did have the same issue with the Exotac ring and had to use an additional smaller ring in order to connect the fob to the main ring.  I also noted that on the Clip the carabiner clip part is made of the same plastic that the quick release mechanism is on the Ring.  I wonder how durable that would be over time and think I would have preferred stainless steel there of which the rest of the carabiner is made.  I also found that pushing in the release mechanism on the carabiner several times started to make that plastic clip not sit as snugly as it used to.  I also think it would be nice if they offered an organizer that was a little shorter than the one they currently have.  I have about three-quarters of an inch of free space between the end of my key and the D-ring.  If it was about a half an inch shorter it would make for a more compact package.

Final thoughts

I think I will definitely be adding the smaller ring attachment to my truck key fob and use the organizer going forward.  I really think it is a nice look and I love that I no longer have jangling keys.  It does certainly make the whole package of key fob and two keys a bit bulkier but it is something I think I can get used to.  I would definitely recommend the organizer and the strap to anyone who is looking for a high quality and elegant method for organizing their keys.

Price: Leather organizer – $43.50, Active organizer – $24.90,  Ring single pack charcoal or navy – $14.90, Ring single pack black – $16.90, Clip – $42.90, Strap – $34.90  – NOTE they sell packages of 2  Rings at a discount of almost $5
Where to buy: OrbitKey and Amazon
Source: The sample for this review was provided by OrbitKey.

The post OrbitKey Key Organizer, Strap and Clip review appeared first on The Gadgeteer.

Filed in categories: Reviews

Tagged:

OrbitKey Key Organizer, Strap and Clip review originally appeared on The Gadgeteer on June 30, 2018 at 12:30 pm.

Note: If you are subscribed to this feed through FeedBurner, please switch to our native feed URL http://the-gadgeteer.com/feed/ in order to ensure continuous delivery.

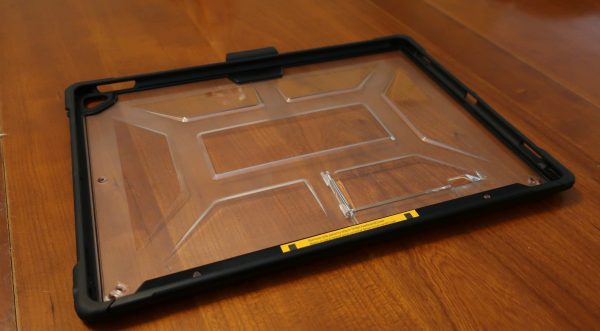
Urban Armor Gear Plasma iPad Pro 12.9″ case review

The iPad Pro 12.9″ has been reviewed and discussed all over the Tech Press, and, love it or hate it, everyone agrees on one thing: it’s a big, thin, fragile slab that is a bit unnerving to handle. Adding a case to the already 1.5-pound unit is almost a given, but then it’s hard to schlep around. Enter our friends from Urban Armor Gear. They have designed a case they dubbed the Plasma, which protects this beast of an iPad while not significantly increasing the weight or the visual impact. Not an easy task.

Note: Photos may be tapped or clicked for a larger image.

What is it?

The UAG Plasma case combines the protection of a larger case with the features of a traditional iPad case – full back coverage, a pop-out stand, and access to the smart connector. They threw in a pencil clip for good measure. (Since I’ve taken to writing out my articles in Nebo with one of the iPads and my Apple Pencil, this ease of access is not lost on me!)

What’s in the box?

Just the case – no frills.

Design and features

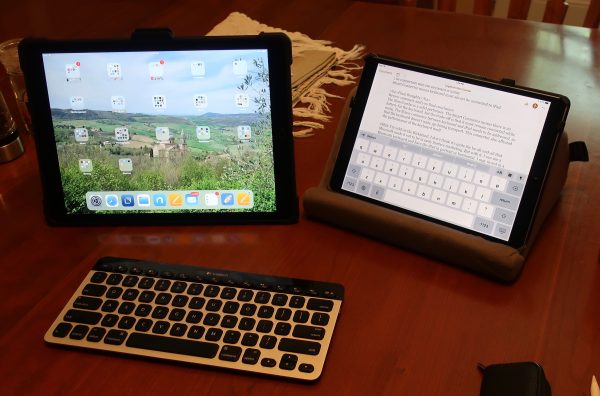
The back cover of the Plasma is a hard, clear acrylic with the traditional UAG pattern of angular lines and open spaces etched in a clear v. frosted finish. I know it went against everything they consider holy, but the UAG logo was not emblazoned front and center in the large, silver type it usually comes in! It was instead writ small at the top center of the vertical orientation, under the pencil clip. (I give these guys a hard time about their logo, but their stuff is really kick@$$!) The photo below is the other side of the table from the photo just after the break above. I wanted to post it to show the difference in the stand between the Plasma (right) and other methods of holding an iPad at a good typing angle. That’s an iPad Pro 10.5″ on the left, but it takes up quite a bit more space due to the WedgeStand that’s supporting it.

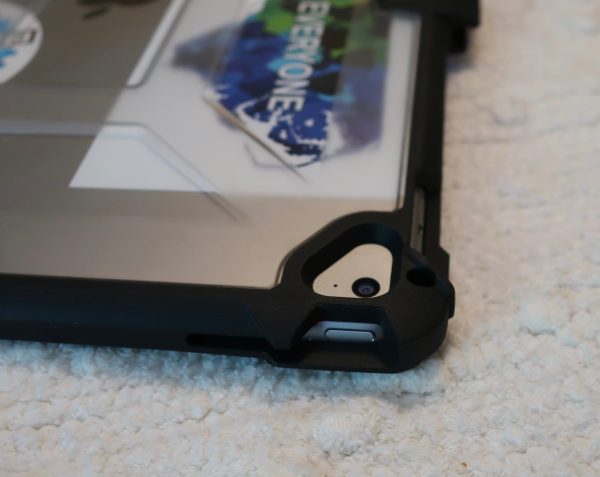
As expected, the mics, camera, charging port, speaker grills, and earphone jack are all left open and accessible. Even the volume controls and the sleep/wake button are uncovered. The sleep/wake button and the earphone jacks are somewhat covered by overhanging protective eaves, however, which was a welcome touch. The power port has a large enough opening to easily allow an Apple Pencil to “assume the position” for charging.

While a nice feature, I found the Pencil clip a bit difficult to use. Putting the Pencil in is not a problem, but when I tried to remove it, I was always afraid of it breaking in the center as I pried up a loose end. I could probably just slide it up and out, but I’m still quite paranoid about hanging a $100 piece of plastic in an exposed loop in my bag. I have a case where I keep it nice and safe. For the record, I also never clipped good pens to the rings of spiral notebooks back in the day, either. You do you.

On the long edge opposite the pencil clip, there is a pop-out stand which gives the Plasma the ability to stand at a 16º slant from vertical. This position is quite nice if you’re watching a video, or writing in split-screen view with a keyboard. The frame below this pop-out prop can also be removed before installing the case, exposing the side of the iPad Pro that contains the smart connector, as well as those clever magnets that allow screen covers to be attached. Different from some covers on the market, this choice is reversible-you can leave it off on one trip where you want to add a smart keyboard or cover, then clip it back in when you want full coverage of the bumper. I like choices.

One oddity I found was the lanyard tether attachment point just under the earphone jack and the opposite side. As heavy, unwieldy, and awkward as I sometimes find the 12.9″, I have not once imagined threading a lanyard to it and having it hang around my neck. But, if that’s your thing, you can do it with the Plasma case! Might be good if you’re using it for field work and having to do something else with your hands with no good place to sit your iPad between annotations.

What I Like

  • Excellent protection around the rim and scratch-proof coverage for rear of the iPad.
  • Pop-out stand to allow the use of a keyboard.
  • Pencil clip for the daring.
  • Removable cover on Smart Connector/Magnetic Smart Cover edge.

What needs to be improved

  • Nothing, really.

Final thoughts

The iPad Pro 12.9″ continues to be a bit of a puzzle. Most users I know love theirs, but rarely take them out of their homes or offices. This case, with its open side for smart covers/keyboards and the kickstand, gives me enough protection that I have been taking mine out more. Look for it in your local Best Buy and consider how you could use your iPad Pro, rather than that heavy laptop. You may start a new trend!

Price: $89.99 for 12.9″, $79.99 for 9.7″and 10.5″ iPads.
Where to buy: This is a Best Buy exclusive.
Source: The sample of this product was provided by Urban Armor Gear.

The post Urban Armor Gear Plasma iPad Pro 12.9″ case review appeared first on The Gadgeteer.

Filed in categories: Reviews

Tagged: ,

Urban Armor Gear Plasma iPad Pro 12.9″ case review originally appeared on The Gadgeteer on June 30, 2018 at 10:30 am.

Note: If you are subscribed to this feed through FeedBurner, please switch to our native feed URL http://the-gadgeteer.com/feed/ in order to ensure continuous delivery.
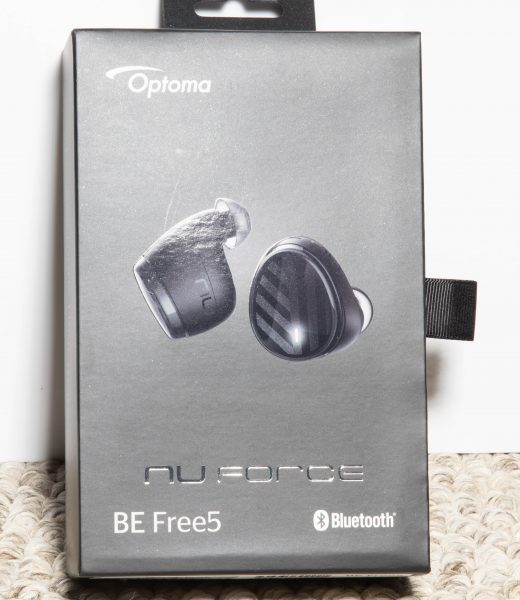
Optoma BE Free5 wireless earbuds review

As I continue on my quest to find the “perfect” wireless earbuds for “me”, I jump at every opportunity to review whatever earbuds come my way. The Optoma BE Free5 earbuds seem interesting, so with much anticipation, here we go:

What is it?

The Optoma BE Free5 wireless earbuds are a pair of Bluetooth wireless earbuds that can be used for both listening to music and receiving and making phone calls.

What’s in the box


1 x BE Free5 Wireless Earbuds
1 x Charging Case
3 x Pairs Ear Wings in three sizes
3 x Pairs Ear Tips in three sizes
1 x Micro USB Cable
1 x Instruction Booklet

Design and features

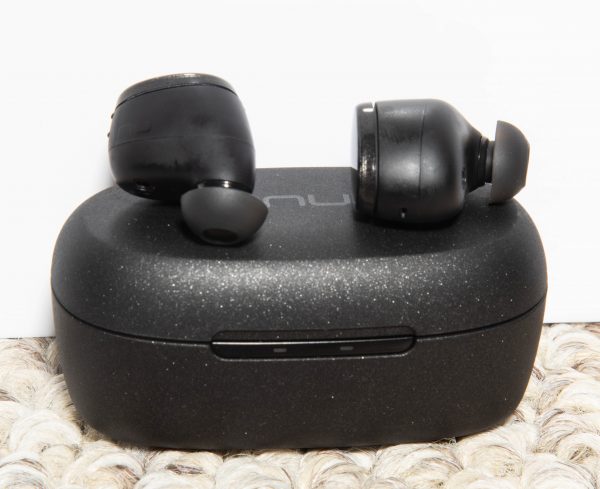
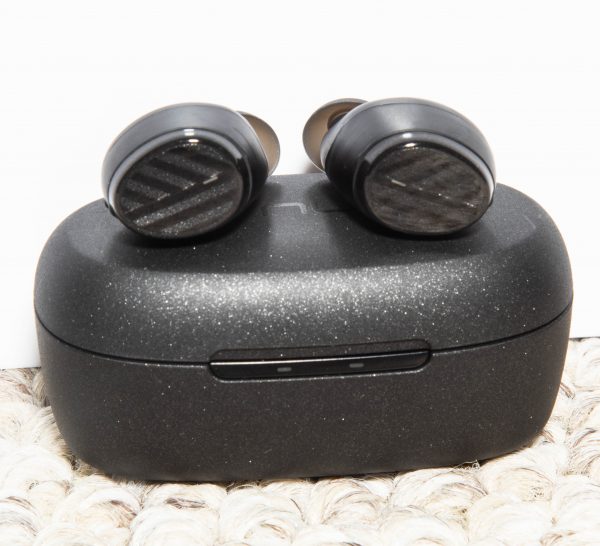
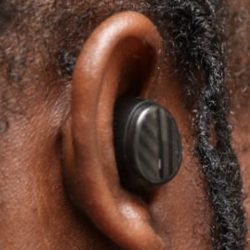
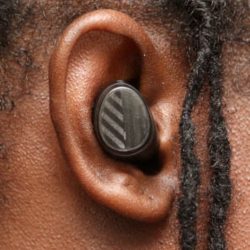
The Optoma BE Free5 wireless earbuds are designed with grapheme audio drivers with AAC Bluetooth codec support for both Apple and Android Oreo. They feature mic noise canceling, a charging case that can charge the earbuds 4 times on one charge for close to 16 hours of listening time, an IPX5 rating for water resistance, and on and off and touch controls for phone and music functions, and for Siri and Google Assistant. They also include 3 sizes of Ear Wings and Ear Tips for the perfect fit and comfort, and they remain in your ears while exercising and moving around during normal daily activities.

All of the control functions are handled via the surface of the earbuds.
When you first use the earbuds, you press the right earbud surface and hold it down until it flashes red and blue, and this puts it into pairing mode.

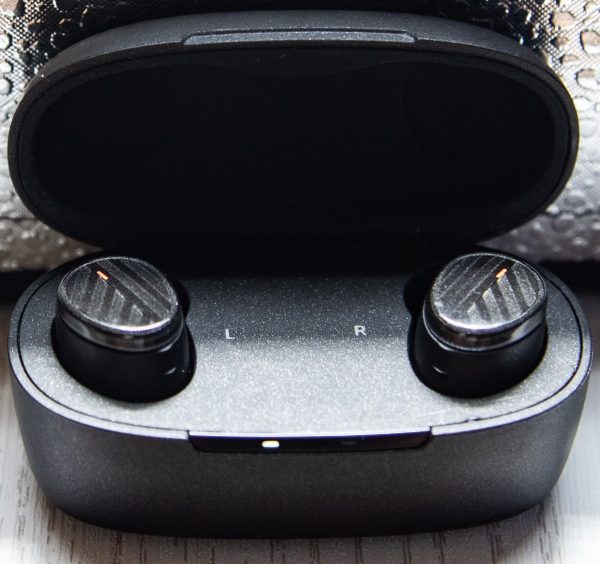
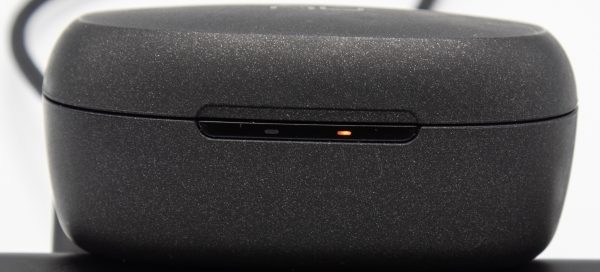
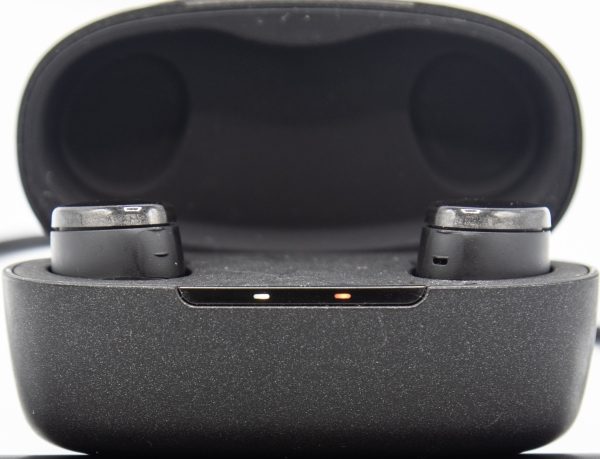
Once paired, the next time you use the earbuds, you power on the earbuds by pressing the right earbud for 2 seconds. It then engages the Bluetooth connection, and it is confirmed by voice command. Pressing either earbud for 2 seconds turns them on individually as well, and pressing either one for 4 seconds turns them both off. They can also be turned off by placing them in the charging case. When placed in the charging case, the LEDs on each earbud light up orange when charging. On the outside on the front of the case, there are 2 LEDs. The one on the left Lights up orange when the case is less than 25% charged and white when it is greater than 25% charged. The LED on the right lights up orange when the case is charging and white when it is fully charged.


When in playing mode, touching and holding the left earbud for 2 seconds lowers the volume, and touching and holding the right earbud for 2 seconds raises the volume. Pressing either the left or right earbud once controls play and pause. Pressing the left earbud twice, forwards to the next track and pressing the right earbud once answers and hangs up calls. Pressing the right earbud twice activates the mic for Siri and Google Assistant, and once the mic is active, pressing the right earbud once will mute the mic. If that all sounds confusing, it is, and it takes some time to remember the controls and to get used to them.


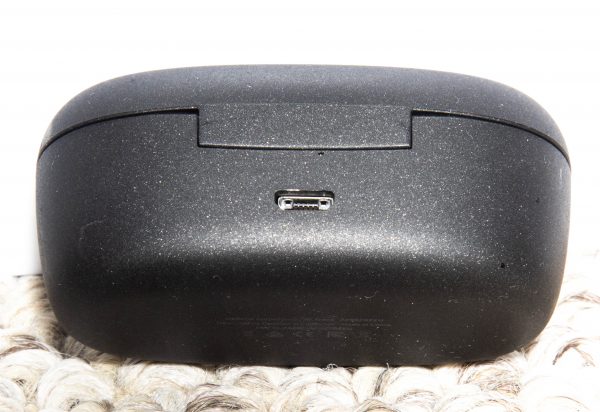
At the back of the charging case, there is a micro USB port for charging the internal battery of the case.

Performance

These earbuds perform quite well in most categories. The sound is very good and clear, and the Lows, Mids and Highs all sound present and bright. However, I did encounter a few issues that knock the performance rating down a bit:

1: While on phone calls, I could hear the person on the other side of the call quite clearly, by everyone I tested with said that I sounded as if I had my hand over my mouth and that they could tell that I was using a device.

2: While not very frequent, the earbuds either both lost the Bluetooth connection, or sometimes one side would drop out and then come back while the music continued to play in the other ear.

3: Several times, when I placed the earbuds in the case and assumed as per how most wireless earbuds work, that they disconnected from the phone, they did not. I would miss calls and then after checking to see why I did not hear the phone, I would discover that the Bluetooth was still connected and I would have to go into the phone settings and disconnect. The other way to avoid this is to power off the earbuds before placing them in the charging case.

4: Since there are no individual buttons for functions, touching anywhere on the surface of the earbuds, activates some function. This is a bit annoying for me when placing them in my ears or adjusting them, since touching them on the surface is the only comfortable way of handling them.


What I like

I like how nicely these earbuds fit in my ears, and that that stay put even during rigorous activities. I also really like the style, the sound, and the range of the volume. I like that they would last quite a long time on each charge, and I like the convenience of access to Siri which worked quite well on my iPhone.

What can be improved

  • The Bluetooth connectivity
  • The phone call clarity for both parties on the call.

Final thoughts

The Optoma BE Free5 wireless earbuds are quite promising, and with a few adjustments could be one of the better earbuds that I have tested. I know that each person is different and that the things that I find as both positive and negative may not be the same for others. I do like how they sound, and I love that they are completely wireless and fit my ears nicely, with the included options for comfort. I will continue to use them and likely submit an update in the weeks or months to come. Regardless, for $99 they are a decent deal, and in my opinion, buyers should give them a try.

Price: $99
Where to buy: Amazon
Source: The sample for this review was provided by Optoma.

The post Optoma BE Free5 wireless earbuds review appeared first on The Gadgeteer.

Filed in categories: Reviews

Tagged:

Optoma BE Free5 wireless earbuds review originally appeared on The Gadgeteer on June 29, 2018 at 11:00 am.

Note: If you are subscribed to this feed through FeedBurner, please switch to our native feed URL http://the-gadgeteer.com/feed/ in order to ensure continuous delivery.

AirTame HDMI display enabler review

Given that we’re all probably carrying around more video and photo data than graced the entire planet 20 years ago, I’m sure we’ve all been somewhere and wanted to show a group of more than 2 people a great shot. Perhaps you’ve wanted to actually present to a group, and you only had a phone with a pdf and a TV, and no cable to connect them. The folks at AirTame have seen your plight and have concocted a solution, in the form of an HDMI dongle that needs no setup other than with your phone or another device. It fits in the space of your earbuds, but it has a lot more hidden superpowers than this….

Note: Photos may be tapped or clicked for a larger image.

What is it?

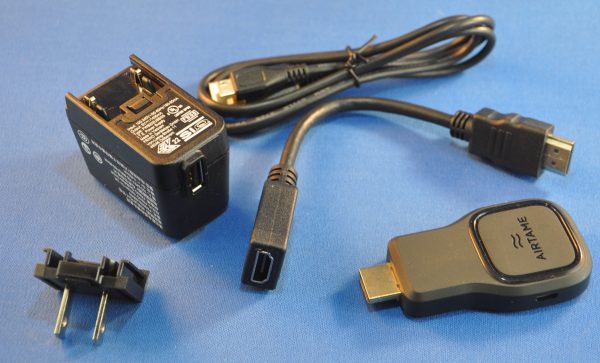
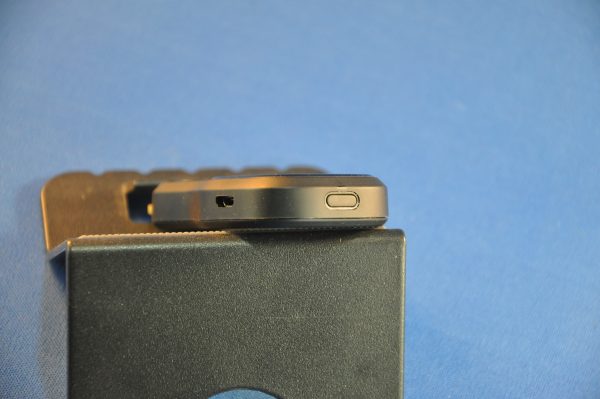
The AirTame is a black dongle 3”x1.5”x.5” with an HDMI plug on one end. It looks like an HDMI thumb drive. On one of the sides, there is a microUSB port for power, and opposite the plug, there is a small button to power it on. When it’s connected and powered on, your device’s images show up on your HDMI display. Once it’s on your wireless or Ethernet network, however, it is also available to be seen by full computers (Mac, Windows, Linux) or ChromeOS. These devices can share full screen live screens.

What’s in the box?

AirTame device
USB-A< ->microUSB power cable (1m)
USB power brick with plugs for US, UK, and EU (US only is shown above.)
7.5” HDMI extension cable

Design and features

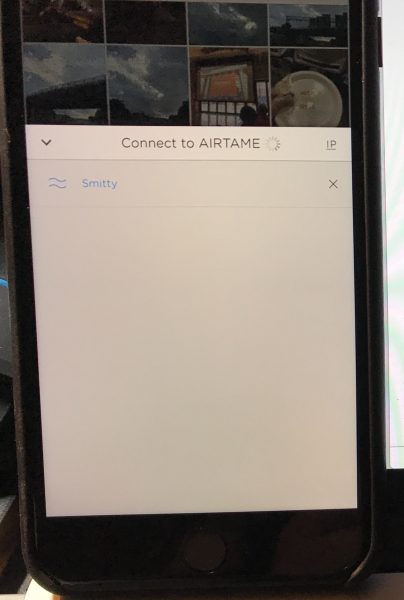
The AirTame is easy to set up, easy to carry along, and easy to use. I’ll cover the setup below. Once it’s set up, there’s little to do. As long as you are connected to the same network, you can send PDF and JPG files to any HDMI source from your iOS or Android device, using their app. If the files are on your device, you give the AirTame app permission to read them, and you’re off to the races. If you want to store them in a DropBox account, the design is there to allow you to access that account. (During testing, I ran into a snag with changes that are happening with the DropBox app, but I feel sure this will be worked through in due course. The solution is to open the PDF in your device’s PDF reader, and “Open In” AirTame. This will copy the document to the Files section of the AirTame app, where it can be accessed and displayed.)
For computers and ChromeBooks, the dongle is much more powerful. You can do full-screen sharing. You can use the app to find any AirTame on your network, and send your video to it. This is fantastic for tech support, training, or viewing remote computers (servers, network monitors, etc.).

Setup

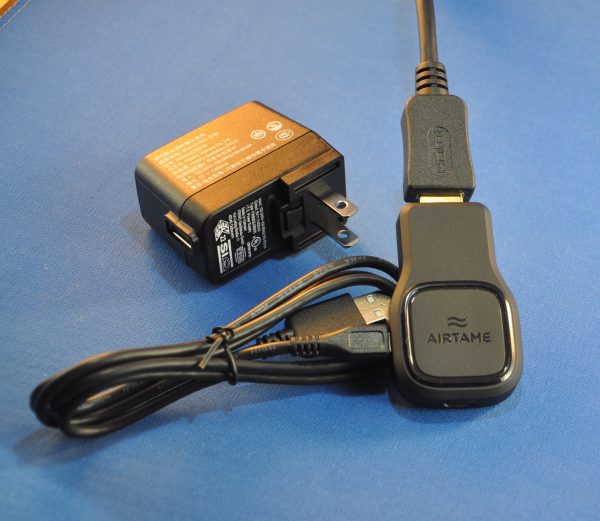
Setup is simple. Connect to an HDMI port on your display of choice and connect the AirTame to power using a microUSB cable. These things can be problematic, however, due to the placement of the display, or other cables that are already in place. There is an extension cord in case the HDMI of your display won’t allow the wide and long AirTame to attach directly. In many conference rooms and boardrooms, you may need to invest in a gender changer, since the only option available may be an HDMI plug, rather than a port. Other than private displays, I can’t remember the last time I had access to the port itself.
AirTame’s idea, however, is to have organizations put one of these devices on every HDMI screen in an organization. The pricing model changes rapidly from 1-3 to 4-9 and more than 10. Being able to remotely log in to any display in your company or campus and show your screen can make for quick resolution of issues where groups need to be shown something. (Audio can be turned on or off.)

Performance

I found the performance to be acceptable. Since video files are not supported with iOS/Android devices, the display rate isn’t going to be a problem. Bringing up a multi-page PDF document allows a PowerPoint / Keynote-like screen on your device where you see the current and next thumbnails, rather than the full screen being the current image. If you export your slide deck to PDF, you’ll only lose the animations and sound/video links, but those have lost favor of late. (Clicking the green button in the multi-page PDF document below leads to a screen-by-screen slide deck presentation.)


For computers, there is a bit of a lag over Wifi. (The company offers ethernet adapters that will allow direct connection to a router, which will speed up screen motion and video display. I was not sent this to test.) It’s not really that bad unless you’re trying to show video or any other high-frame-rate media.

What I Like

  • Very easy setup and installation
  • Fast, clear display
  • Supports virtually all platforms

What needs to be improved

  • Device gets hot after 30 minutes or so
  • Limited file formats supported on iOS/Android
  • Would benefit from a battery that lasted 15-20 minutes for traveling users

Final thoughts

Presenting to a large screen seems to be the modern curse, and I see no end to it in our current businesses. Presenting from something other than a full computer, however, is quite nice, and this device covers the basics of getting an image before a group with little to no roadblocks. If you need sound, animations, active video display (for training or visualization of content), this device paired with any modern computer will most likely fill the bill. If you can be happy with images and PDFs from your handheld, this is a worthy consideration.

Price: $299.00 (quantity discounts available)
Where to buy: Manufacturer website and Amazon
Source: The sample of this product was provided by AirTame.

The post AirTame HDMI display enabler review appeared first on The Gadgeteer.

Filed in categories: Reviews

Tagged: , , ,

AirTame HDMI display enabler review originally appeared on The Gadgeteer on June 29, 2018 at 9:00 am.

Note: If you are subscribed to this feed through FeedBurner, please switch to our native feed URL http://the-gadgeteer.com/feed/ in order to ensure continuous delivery.
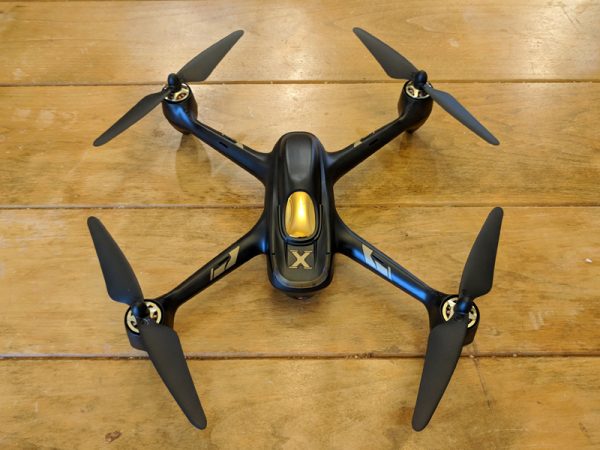
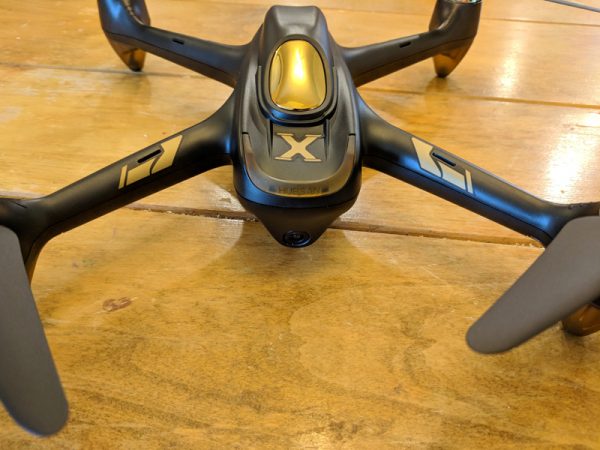
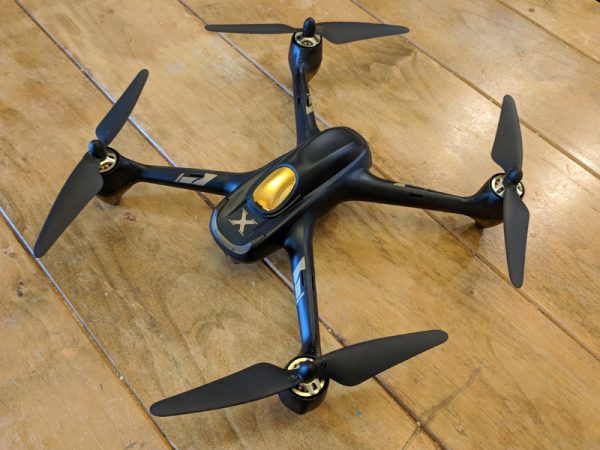
Hubsan H501A X4 Air Pro Advanced Drone review

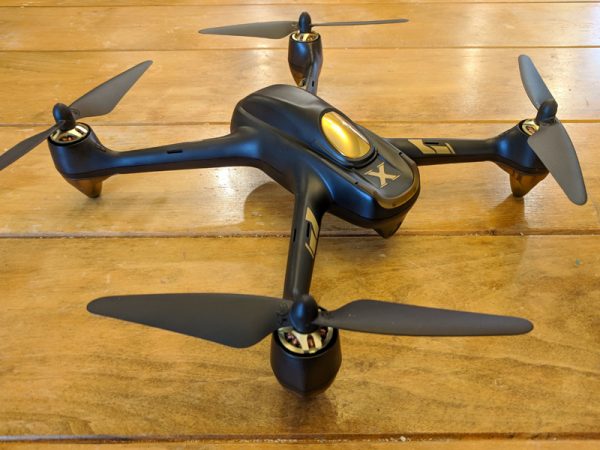
Drone technology has exploded in the last few years as cameras have gotten smaller, batteries have gotten bigger and cool new features have been developed. The Hubsan H501A X4 Air Pro Advanced Drone has a lot of the latest tech packaged in a sleek, powerful little frame. It’s fun to fly, if you have the patience to get through the ridiculously frustrating setup and can handle the anxiety of knowing that your drone can (and will) stop responding to your commands at random times. The amount of features you get packed into this drone for around $200 make it a great buy on paper, but in reality the low-end tech never really delivers on its promises.

What is it?

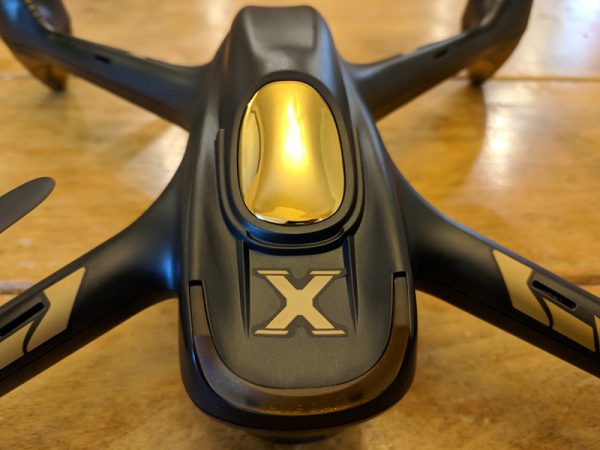
The Hubsan H501A X4 Air Pro Advanced Drone is marketed as a GPS waypoint-enabled, FPV (first person view) quadcopter. The manufacturer, Hubsan, is known for making affordable, fun, and reliable, albeit somewhat disposable, drones. With products like the H501A X4, Hubsan is now venturing into the high-end drone space to compete with heavyweights like DJI and Yuneec.

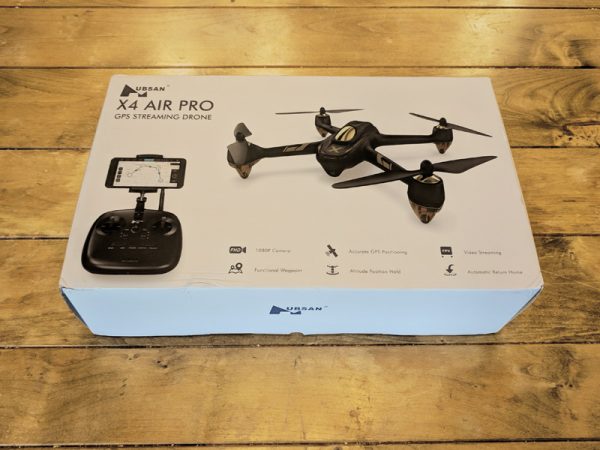
The H501A X4 Air Pro arrives packaged in a nice box featuring photos of the drone and included controller as well as a quick list of the drone’s advanced features.

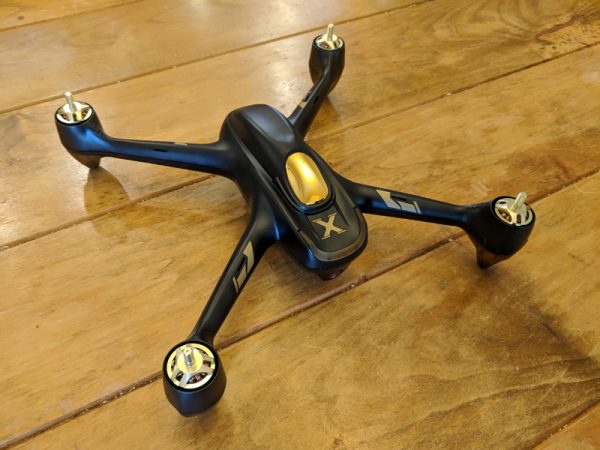
Everything comes pre-assembled, aside from the rotors, and fits perfectly back into the box after use. The box has a handle as well, so it functions great as a basic carrying case.

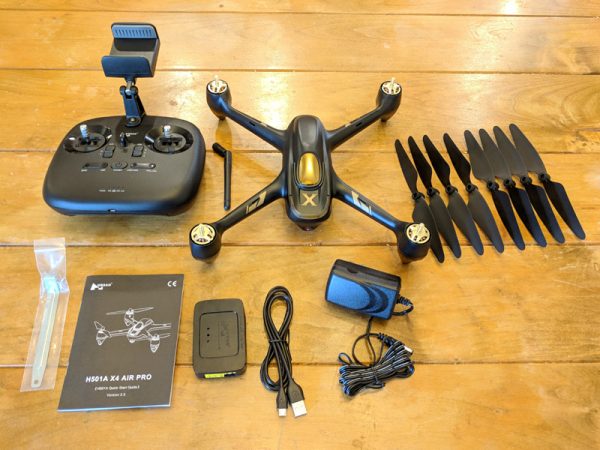
What’s in the box?

  • 1 x H501A Aircraft Body
  • 1x HT011A Remote Control
  • 1 x 7.4V 2700mAh LiPo Battery
  • 4 x Propeller A
  • 4 x Propeller B
  • 1 x USB Charging Cable
  • 1 x AC Adapter
  • 1 x Balance Charger
  • 1 x Prop Wrench
  • 1 x Instruction manual

Hardware specs

  • Size: 8.6″ x 8.6″
  • Flying Weight: 450g
  • Battery: 7.4V 2700mAh Li-Po
  • Charging Time: 210 minutes
  • Flight Time: 20 minutes
  • Max Flight Distance: 400 meters
  • Motors: 4 x Brushless KV1650 PM1806
  • Camera Resolution: 1920 x 1080
  • Main Rotor Diameter: 7.3″
  • Frequency: 2.4G
  • Supported SD Card Types: Micro SD max 16-32 GB. Class 10 or UHS-1 rating required

Design and Features

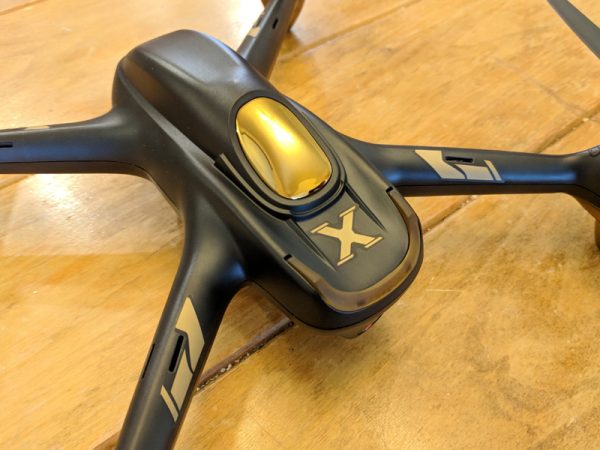
The Hubsan H501A X4 Air Pro Advanced Drone is a sleekly designed FPV drone with a bunch of GPS based features like Follow Me, Automatic Take-Off, Orbiting, Return-to-Home and Waypoints. In my testing, I couldn’t get a majority of those features to function properly, but even without them, the drone itself is expertly designed for standard recreational flying.

Setup

Since the H501A X4 arrives preassembled, all that remains for full functionality is to attach the propeller blades to the motors before flight.

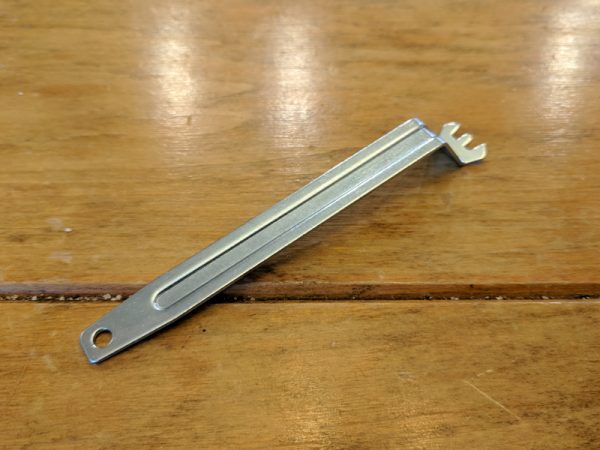
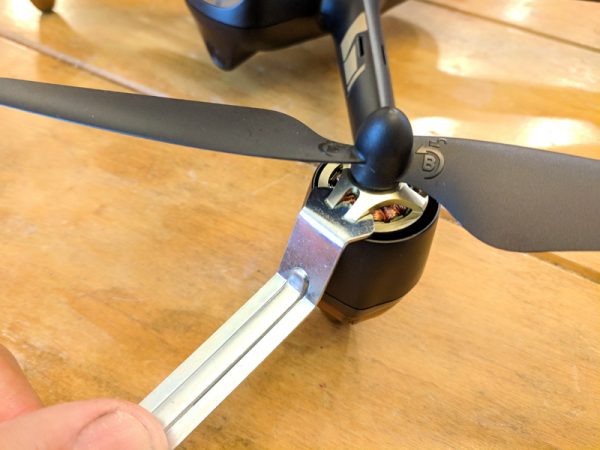
Luckily, the H501A X4 comes with a prop wrench for safely attaching and removing the propellers. There are four propellers and the drone comes with four replacement propellers as well.

The prop wrench fits perfectly into grooves on each motor and holds the motor in place so that the propeller can be rotated on.

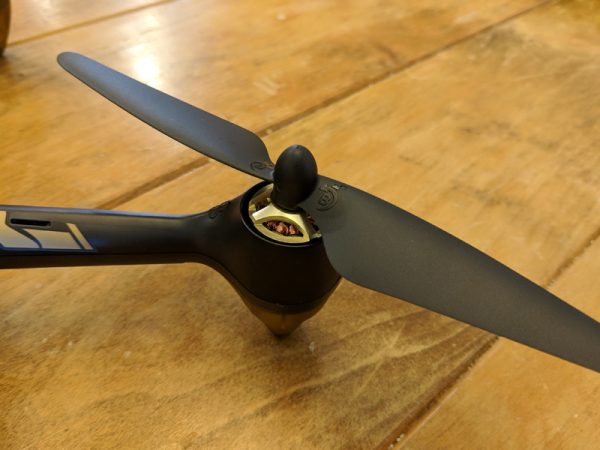
Each motor and propeller is labeled A and B. It’s vitally important that only the A propellers are attached to the A motors and likewise for B. The propellers screw on in opposite directions for A as opposed to B. It’s also important that the propellers are not tightened too much, otherwise they can be damaged.

Once the propellers are attached properly it’s time to set up your controller.

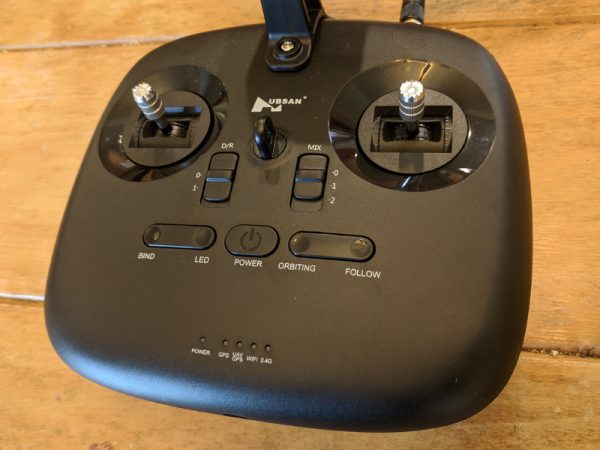
This version of the H501A X4 comes with the Hubsan HT011A controller. The HT011A can control your drone via WiFi or 2.4G. You can run the drone with the controller alone, but for full functionality, you’ll need a smart device running Hubsan’s X-Hubsan app, which is available for Apple or Android devices.

The directions in the manual are pretty useless for the controller setup, but if you’re lucky, you can stumble through the process of linking the controller to the drone via the X-Hubsan app. Basically, this involves powering up the drone and controller, allowing the app to connect to the drone via WiFi and then connecting to the controller’s WiFi signal which should bind the two together. In my testing it took about four attempts to get this to work properly.
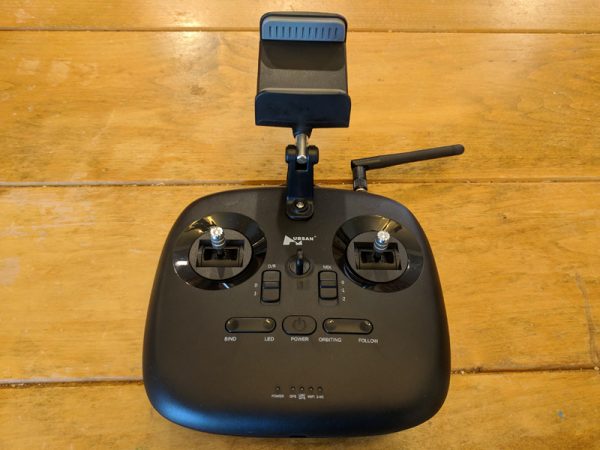
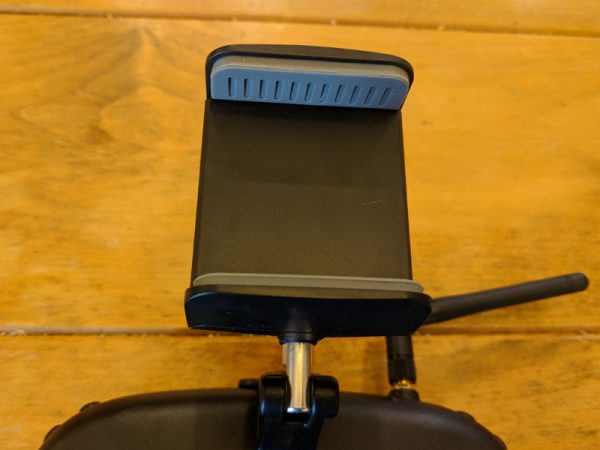
The HT011A holds your smart device in place with a spring-loaded clamp mounted to the top of the controller. While the documentation says that you can use a tablet, the clamp opens just barely enough to snugly hold a smartphone. Also, the design of the clamp is such that if your smart device has volume keys on its side, they will be continually activated by the clamp’s pressure.
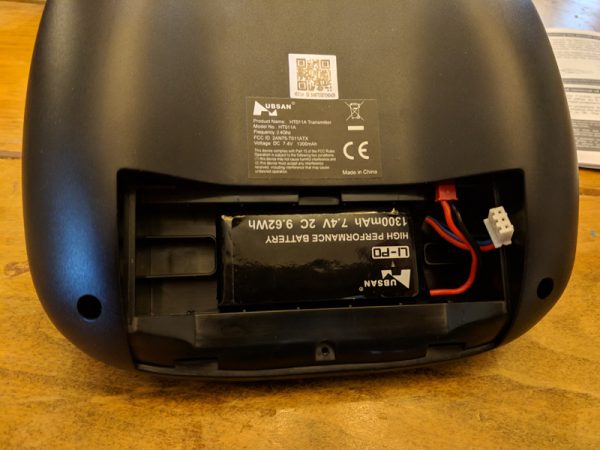
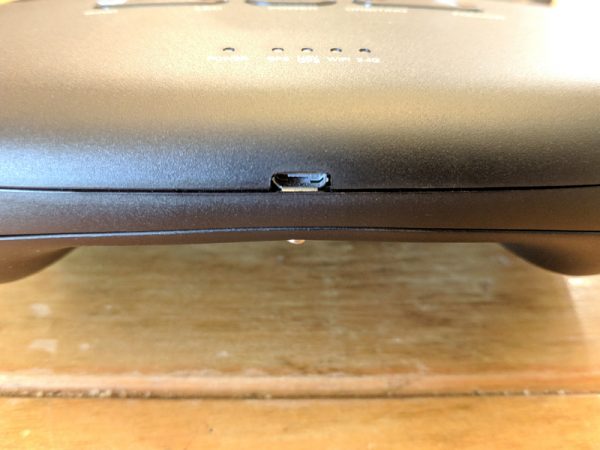
The controller is powered by a 1300mAh Li-Po battery similar to the one that powers the drone. There’s a micro-USB port on the bottom of the controller, and you’d think this is how you charge the battery, but no, this port has no functionality. What’s so frustrating is that you’d have to scour the poorly written, small font directions to find that information. And, the drone only comes with one Li-Po charger, so you can’t charge your drone and controller concurrently.

Since it takes over three hours to fully charge the drone, having to then charge the controller is a real bummer. Also, unless you buy extra drone batteries, three hours is a long time to wait between the short 15-20 minute flights the battery powers.

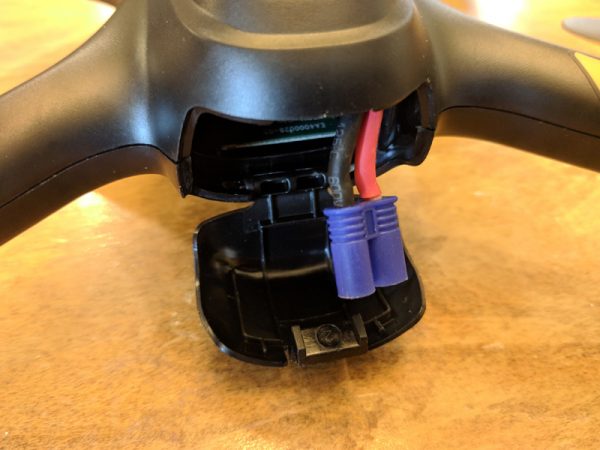
The drone’s battery sits inside a rear compartment accessed by a latch. The LiPo battery connector hangs out just enough to snugly fit the battery inside.

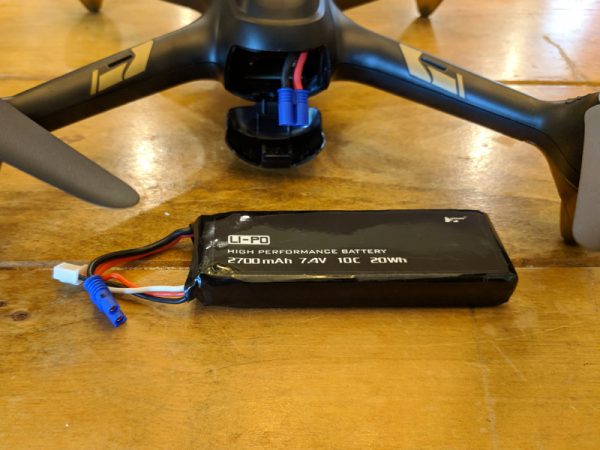
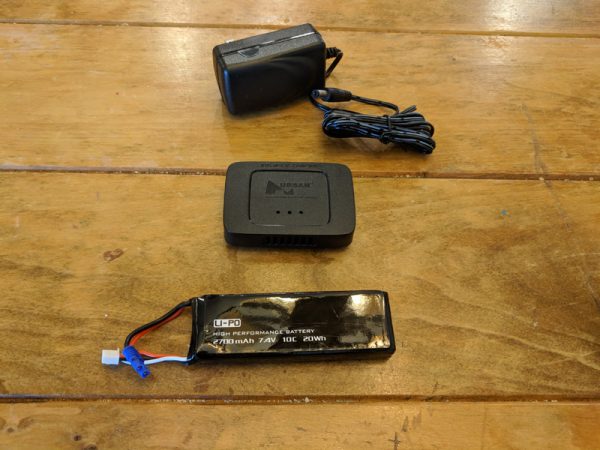
While most newer drones arrive with some type of USB charging solution, the Hubsan uses a standard LiPo brick and charger.

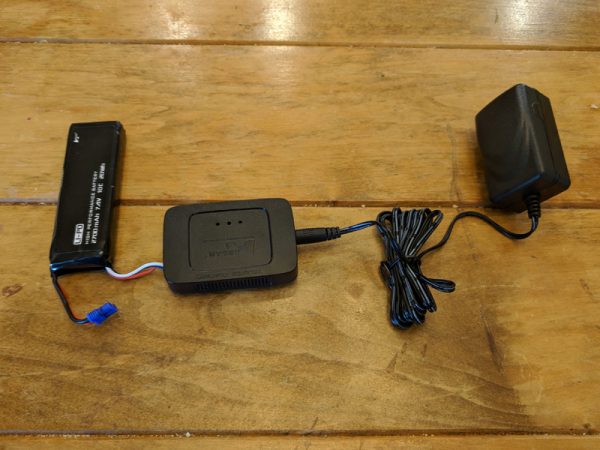
There are two wires on the LiPo battery, one for connecting to the drone and a smaller white plug that connects to the charger.

The setup makes for an ungainly solution, but it does works.

Performance

The HT011A controller does feel great in your hands and the controls are very crisp and responsive. Buttons on the controller mimic some of the control options from the app. You can toggle the drone’s lights, change the control scheme, or activate the some of the GPS functions like Orbit and Follow (even though in my testing I never got any of these functions to work properly).  A string of LEDs on the bottom of the controller let you know if the GPS, WiFi, or 2.4G options are active.

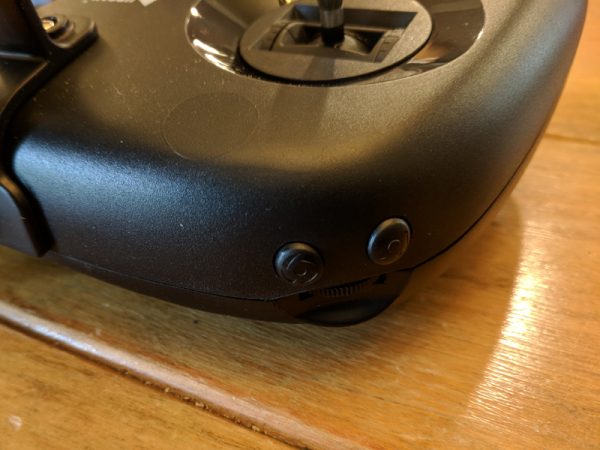
There are additional buttons on the shoulders of the controller to activate the drone’s camera. you can switch between photo and video as well as start and stop recordings.

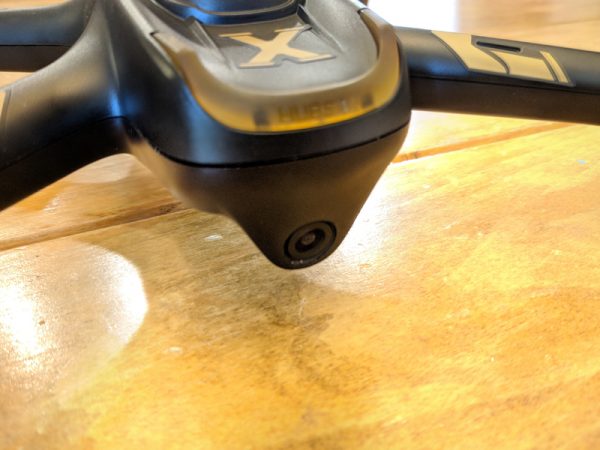
The H501A X4 has a great 1080p front-facing camera. The photos and videos it records are bright with vibrant color and clarity.

The auto white balance on the camera blows out in some areas of sunlight, but overall the camera produces some stunning pictures.

There’s a slight cyan cast over the raw images and a clear distortion from the fisheye lens, but for a tiny drone camera, this is expected.

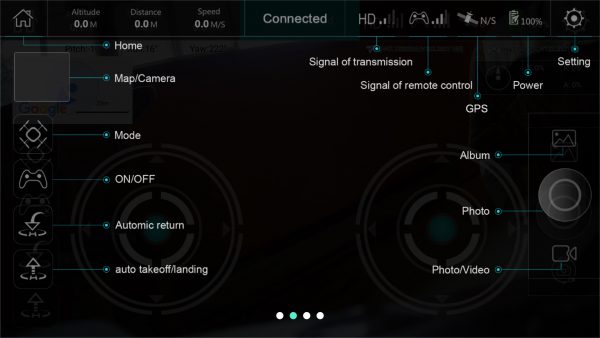
Once you take flight with your drone, the main screen of the app conveys all the info you need to safely fly. You can see your signal levels, the drone’s distance, speed and altitude.

Flying the drone is a lot of fun. The H501A X4 is quick and powerful enough to shoot up to altitude pretty quickly. The problem is that, occasionally, especially at altitude, the drone just stops responding. There’s no indication on the app that control has been lost, which is why it’s always important, when flying ANY drone, to always have a visual line-of-sight to your drone.

Luckily, I didn’t experience any fly-offs with the H501A X4, but other reviewers have reported them. When I lost control, the drone simply stayed exactly where it was. It was still pretty scary and frustrating, especially when the drone was at a higher altitude. This happened a number of times and each time, after about a minute or two of switching the app and controller off and on, I was able to regain control of the drone and land it safely.

In all my attempts to test the GPS functions, the drone and app failed to respond. A few times when I tried the Return-to-Home function the drone stuttered in place, like it was trying to initiate the function, but it never succeeded.

The other functions like Waypoints and Orbit just never gave an indication that they were activated, whether they were initiated from the app of the controller.

What I like

  • Fun to fly
  • Sturdy construction
  • Great camera quality

What needs to be improved

  • Difficult set up
  • Frequent loss of control
  • Poor instructions
  • Single charger for remote and drone

Final thoughts

The Hubsan H501A X4 Air Pro Advanced Drone is fun to fly and it has a great camera, good for recording all types of exciting photos and videos during your flights. Unfortunately, the setup is pretty frustrating and there’s a good chance the drone will lose its connection frequently during your flights. The H501A is reasonably priced though, so if you can put up with the drawbacks, it might be worth checking out.

Price: $219.99
Where to buy: Hubsan and Amazon
Source: The sample of this product was provided by Hubsan.

The post Hubsan H501A X4 Air Pro Advanced Drone review appeared first on The Gadgeteer.

Filed in categories: Reviews

Tagged:

Hubsan H501A X4 Air Pro Advanced Drone review originally appeared on The Gadgeteer on June 28, 2018 at 11:00 am.

Note: If you are subscribed to this feed through FeedBurner, please switch to our native feed URL http://the-gadgeteer.com/feed/ in order to ensure continuous delivery.