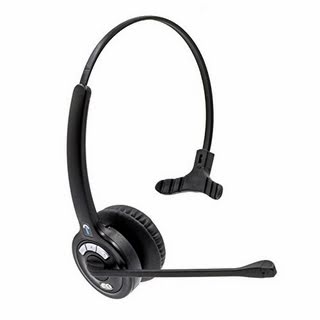
ZAGG InvisibleShield glass+360 screen protector review

REVIEW – I’m a huge screen protector advocate. I can’t tell you the number of times they have saved my, my wife’s, and many other clutzy friend’s and family’s smartphones. It is amazing how well they work, taking the bullet for your precious device, leaving your screen alive and well. In this case, ZAGG has released a whole-phone, barely-there solution, protecting not only the front and back glass but the sides and edges of your phone as well. The InvisibleShield glass+ 360 is engineered to protect your entire iPhone in hardened tempered glass and a minimal rubber bumper case.

What is it?

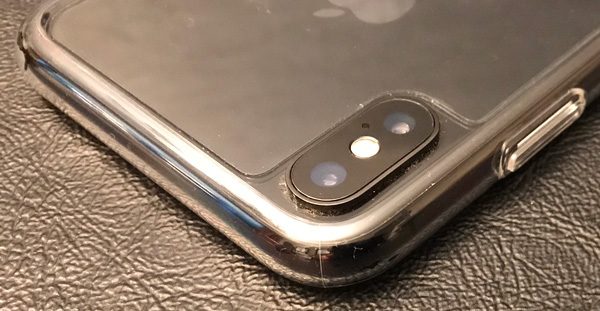
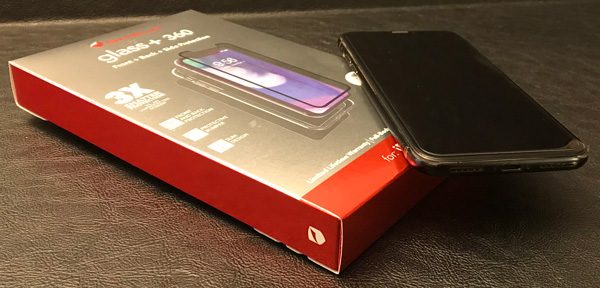
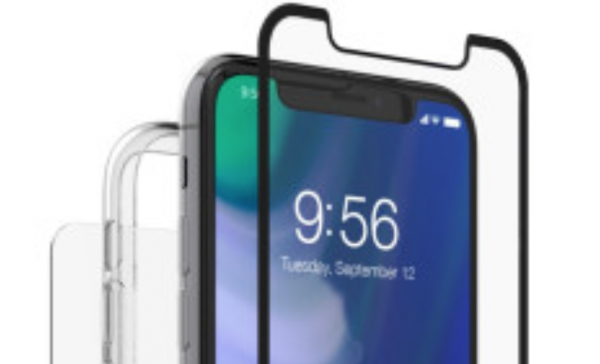
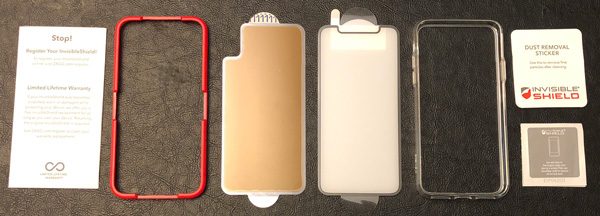
As I stated above, the ZAGG Glass+ 360 provides whole-phone, relatively unobtrusive protection to your all glass and metal iPhone X. The Glass+ 360 has three components: smooth tempered glass on the front, hybrid glass on the back, and a clear, durable bumper that protects the sides and corners of your phone from bumps and drops.

Let’s face it, as smartphones have evolved into something we tech/sci-fi-nerds only dreamed of a decade ago, they have become increasingly slippery, fragile, and very expensive to repair or replace. The iPhone is a prime example of this; even though Apple continues to harden their smartphones…gravity and concrete typically win.

Design and features

ZAGG has engineered the InvisibleShield glass+360 to complete encase and protect your very expensive iPhone from the outside world.

What’s in the box

  • Glass+ 360
  • EZ Apply Tray
  • Cleaning Wipe
  • Microfiber Cloth
  • Dust Removal Sticker
  • Instructions

Installation

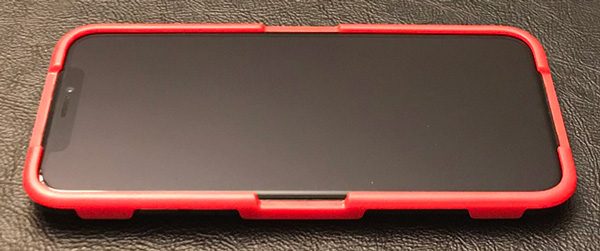
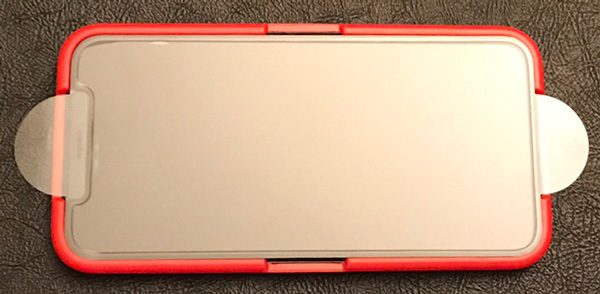
ZAGG includes their EZ Apply technology to help you install the screen and back protectors. This system includes the red EZ Apply Tray seen above.

The tray and wings on each of the sheets of glass are supposed to help you align and set the protectors on your smartphone perfectly on the first try…at least that is the hope/theory. For me, the tempered glass front went on seamlessly.

But try as I may, I could not get the back glass on the InvisibleShield glass+ to adhere to the bottom corners and edge. Lynn had similar issues when reviewing the ZAGG’s InvisibleShield curved glass screen protector for the Samsung Galaxy S9That said, the problem does not seem to be getting worse and the bubble has not become any bigger or gotten dust between the protector and the back glass of the iPhone X.

I have installed nearly a hundred of screen protectors in my day from the plastic film on my Palm Vx to the high-tech curved glass of today. I do this for myself, family, friends, coworkers, etc. Not to toot my own horn but I’m a screen applying ninja…no dust or bubbles while getting the placement/alignment spot on more often than not. So, I was frustrated and disappointed I could not get the back protector to seat properly no matter what I tried.

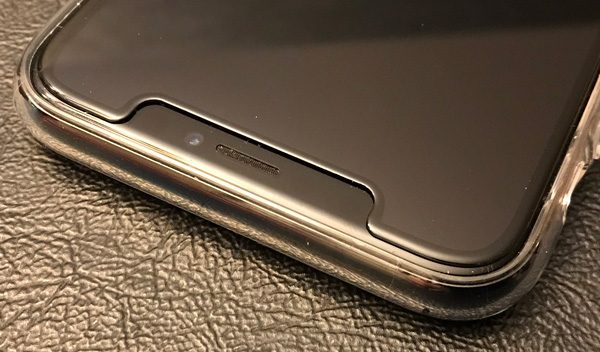
The front glass is perfectly sized for the screen with a black edge and cutout for the notch camera assembly. The surface coating they use on the glass is silky smooth and extremely smudge resistant. I can’t say the same for the back ‘hybrid’ glass, that is a fingerprint magnet. But that is a minor thing being the back vs the screen.

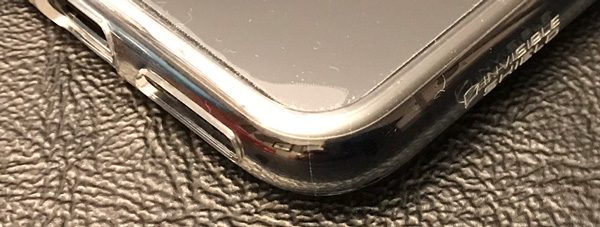
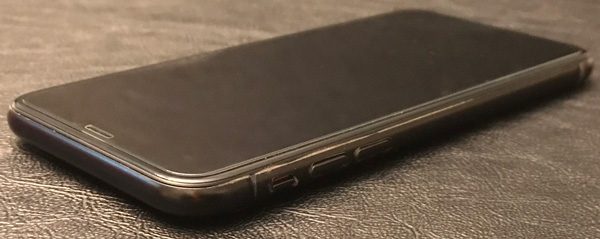
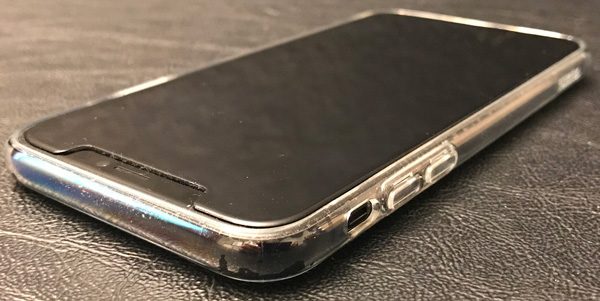
The left side of the bumper case has a cutout for the mute switch and push-throughs for the volume buttons.

The right side has a push-through for the power button.

The base has cutouts for the iPhone’s lightning port and speakers.

As you can see, dust and bits collect under the clear bumper case. This is the situation after about a week of living in my pocket. But the case itself can be easily removed, cleaned, and reinstalled.

The bumper case extends past the front and back of the iPhone providing extra protection for both faces.

What I like

  • Well designed
  • 360 protection
  • Includes EZ Apply technology
  • Excellent feel and smudge resistance
  • Lifetime warranty
  • Compatible with wireless charging

What needs to be improved

  • Expensive
  • Back glass failed to seat correctly

One More Thing…

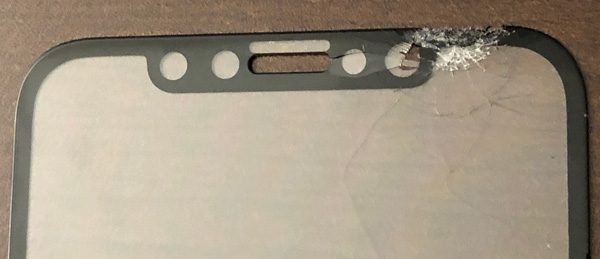
The InvisibleShield glass+360 is expensive to say the least…$70 for two pieces of glass and a rubber bumper case. I grant you the whole system is well engineered with excellent material quality but just the same, that is seriously insane in today’s world. Where you can find the pieces to create your own ‘system’ on Amazon for about 10 bucks. Before I received the Glass+360, I had been using a $3 screen protector (actually a 3 pack for $8) and Slickwrap film on the back I bought on sale for $8 for two (pictured above). About as minimalistic as you can get.

And as the story goes, this extremely minimal setup was not only inexpensive but effective. It protected my iPhone X from several serious falls. One of the times, I dropped my iPhone from approximate six (6+) plus feet off of an elliptical machine, where it bounced off various parts of the machine before coming to rest on the concrete floor below. I thought I was totally horked seeing the carnage the screen protector had taken, but low and behold once I removed the glass protector and back film the phone looked new/untouched. Now that is rock solid, barely-there, nearly naked protection.

Once I got home, I slapped on another $3 protector from the box, applied the spare film and I was good to go…

Final thoughts

Even at half the cost, I would have a difficult time recommending the ZAGG InvisibleShield glass+360 case and screen protector system to anyone. It is just too expensive with issues adhering to some of the surfaces. I grant you it feels very nice on the iPhone X, is well made, easy to install, insanely clear, and comes with a lifetime warranty but still. I have used many ZAGG products over the years and they rarely disappointed me and really the InvisibleShield glass+360 doesn’t either…it really just comes down to the bang for the buck.

Price: $69.99
Where to buy: InvisibleShield Glass+360 is available from ZAGG.
Source: The sample of this product was provided by ZAGG.

The post ZAGG InvisibleShield glass+360 screen protector review appeared first on The Gadgeteer.

Filed in categories: Reviews

Tagged:

ZAGG InvisibleShield glass+360 screen protector review originally appeared on The Gadgeteer on July 5, 2018 at 9:00 am.

Note: If you are subscribed to this feed through FeedBurner, please switch to our native feed URL http://the-gadgeteer.com/feed/ in order to ensure continuous delivery.

Kwilt Shoebox Mini smartphone backup adapter review


REVIEW – While I love my iPhone 8 Plus, I hate paying so much money to get the version with the most storage memory. It would be much easier to have all of my pictures stored on a drive and to have access to them whenever and wherever. The Kwilt Shoebox Mini smartphone backup adapter claims to be able to give me exactly what I want. Let’s see!!

What is it?

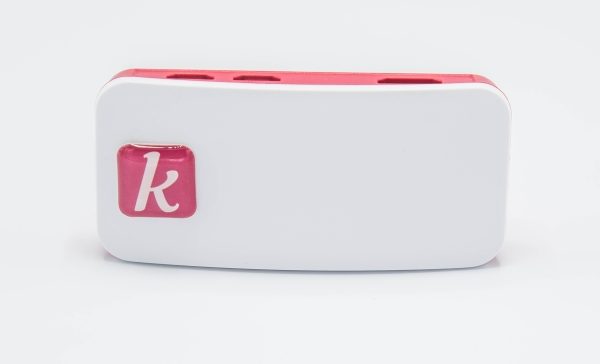
The Kwilt Shoebox Mini backup adapter, allows you to offload your photos and videos from your phone or tablet, and have access to them and any other media attached to the shoebox from anywhere in the world and at any time, as long as you have internet access.

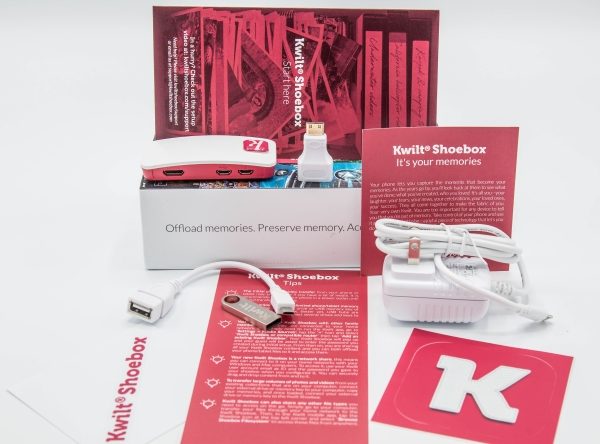
What’s in the box


1 x Kwilt Shoebox
1 x Mini HDMI to HDMI adapter
1 x Micro USB to USB adapter
1 x 32GB Thumb Drive
1 x Micro USB Power Adapter
1 x Quick Start Guide
1 x Tips Leaflet
1 x Additional Information Leaflet
2 x Kwilt Stickers

Design and features

The Kwilt Shoebox is a small and lightweight device that allows you to connect a relatively limitless amount of hard drive storage and apart from offloading your pictures and videos from your mobile device to “free up” storage, you have access to the content from anywhere in the world as long as you have internet access and the app configured on your device. You can set up additional accounts for family and friends and others.


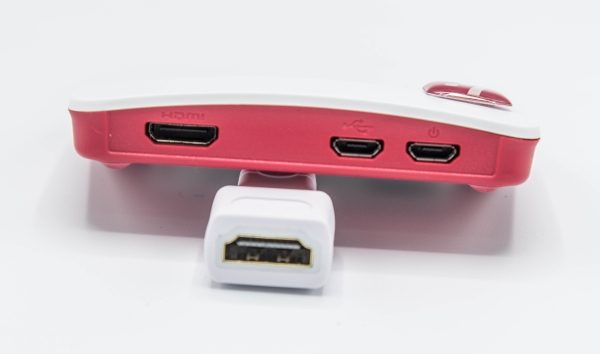
On the back of the device, from left to right, there is a mini HDMI port, a micro USB data port, and a micro USB power port.


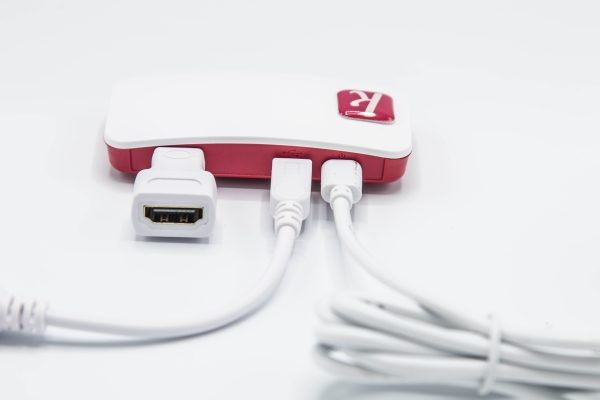
The picture below shows how the cables are connected.


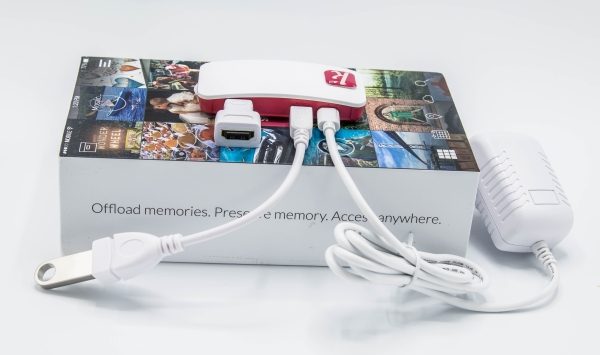
With the mini HDMI to HDMI adapter, you can attach to a TV or monitor and view the content stored on the shoebox. You can connect a thumb drive to the micro USB to USB dongle as shown below, or you can connect a USB hub with multiple drives.

Performance

The initial setup of the Kwilt was very easy right out of the box, with no issues at all. The fact that they provided a 32GB flash drive to get you started is simply amazing and a great gesture by the manufacturer. After downloading the app and following the setup instructions, all was set and ready to go. Before I go any further, here are some of the features offered:
• Creates virtually unlimited phone/tablet memory
• Share with others
• Transfer large volumes of photos and videos
• Store other types of files

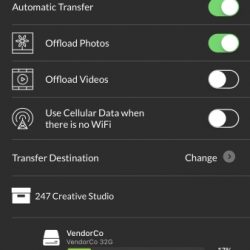
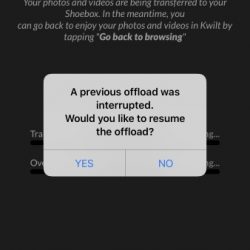
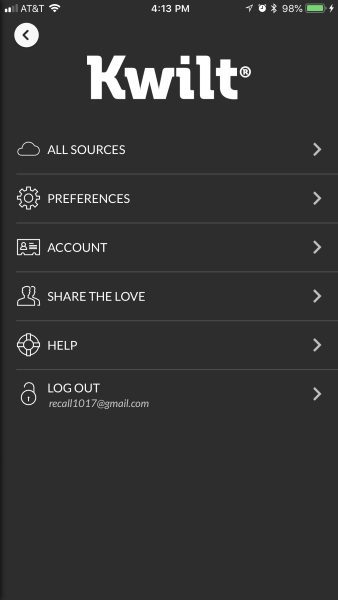
Once you sign in to the app, there is the main screen that displays some of your photos and videos as a background, with the options overlayed. In the upper left corner, there is an icon that looks like a large shoebox. Selecting this icon takes you to the options to transfer your photos and videos, as well as to set your preferences. Below are pictures of some of the screens. (Not all of the screens are included in the pictures. There are too many to show, but these should give you an idea).


When I selected the option to transfer my photos and videos together, the app crashed every time without completing the task. Eventually, I selected just the videos, and those transferred successfully. At that point, I figured that it was no big deal, and I would just transfer my pictures separately. However, no matter how many times I tried, the app crashed and I had to try again.  Despite my efforts to reach their customer support by sending multiple emails via their in-app email, I never received a response from their customer service. However, I decided to try the app on my iPad and everything worked. After taking a closer look at what was happening, and comparing my iPhone settings with my iPad, I realized that the Kwilt app does not run in the background if your phone is set to auto lock and if it goes into that mode before the transfer is completed. I find this strange and quite inconvenient since unlike my iPad, I set my phone to auto lock after 5 minutes for privacy and security reasons. The solution here for the first transfer that included a large number of photos was to disable the phone’s auto-lock feature, and then the transfer was successful.

The Kwilt Shoebox can also be set to perform automatic transfers one your device connects to the same network that the Kwilt is on.


Moving on, at the bottom of the screen, there are 3 icons. From left to right, they are the live camera view, sub-menu, and settings icons. The first icon which is the live camera view, allows you to take pictures or record videos from within the app. The middle icon gives access to the sub-menu options. Once you select the middle icon, the sub-menu icons appear in a semi-circle across the bottom of the screen. Here are some screenshots:


The last icon to the right is the settings icon that provides tabs to additional setup options, preferences, account information, help options, social media sharing options and the Logout option.

What I like

I like that the Kwilt Shoebox is small and lightweight, and uses a wireless connection so that you can place it just about anywhere.

I also like that you can attach a drive of any size including a thumb drive, and even a USB hub with multiple drives. This makes the storage virtually unlimited and provides the ability able to accommodate just about anyone that you want to share access with to store their files as well.

The incremental automatic transfer once your devices and Kwilt are connected to the same network is also a great feature.

What can be improved

The app needs some work, since it crashes (or just stops working) if the device goes into auto lock mode during the transfer process.

Without a doubt, customer service/support/response must be improved.

Final thoughts

The Kwilt Shoebox is a really nice device that is designed to perform a very useful and convenient function. It provides for virtually limitless storage for your mobile picture and videos, far beyond the built-in storage capacity of any phone on the market today. What is even nicer, is the ability to allow access to others of your choice. This is a much-needed device that would serve many people very well. Once I figured out the issue with the auto lock, this device became a permanent and convenient asset on my network.

Price: $59.00
Where to buy: Kwilt Shoebox Website and Amazon.
Source: The sample for this review was provided by Kwilt Shoebox.

The post Kwilt Shoebox Mini smartphone backup adapter review appeared first on The Gadgeteer.

Filed in categories: Reviews

Tagged:

Kwilt Shoebox Mini smartphone backup adapter review originally appeared on The Gadgeteer on July 4, 2018 at 9:00 am.

Note: If you are subscribed to this feed through FeedBurner, please switch to our native feed URL http://the-gadgeteer.com/feed/ in order to ensure continuous delivery.
Blitzwolf BW-SDB1 Sound Bar review


REVIEW – Gone are the days when a whole room of equipment was needed to have great audio. As sound reproduction improves, small and smaller gadgets are being built to permit room-filling sound without the bulk. There are many sound bars on the market to fill such needs so I decided to take Blitzwolf’s BW-SDB1 for a spin to compare.

What is it?

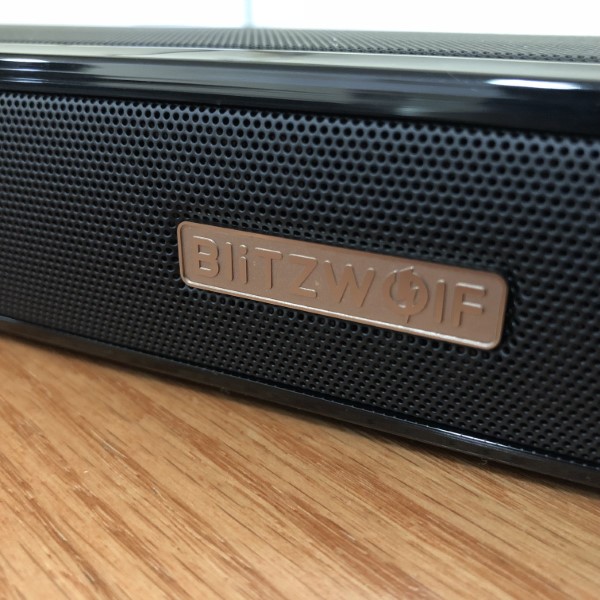
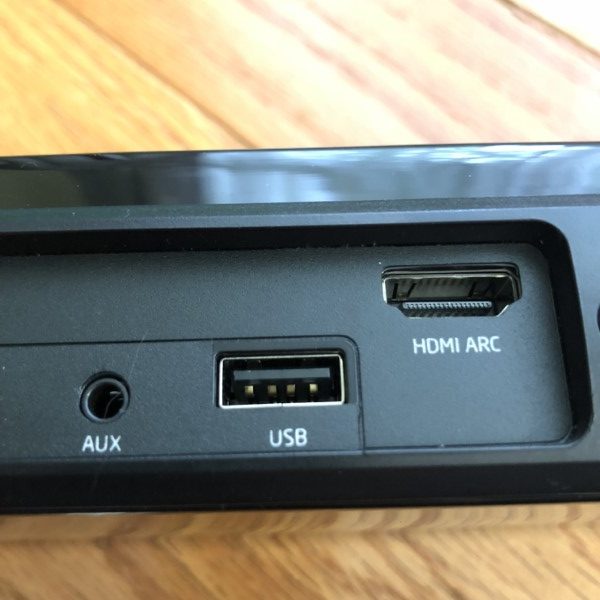
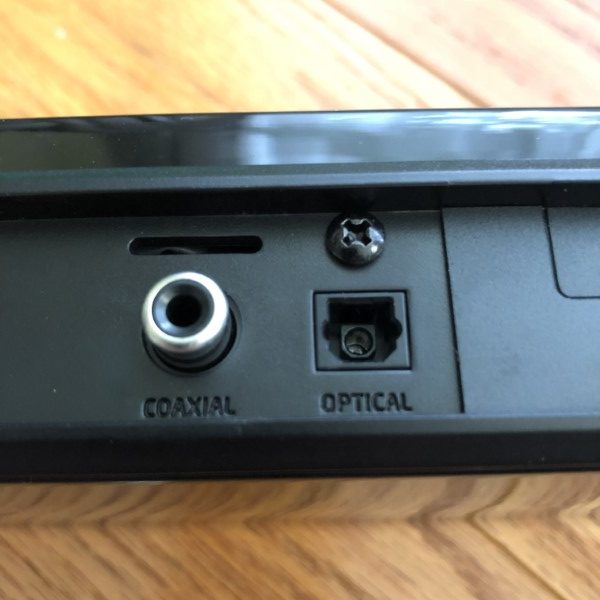
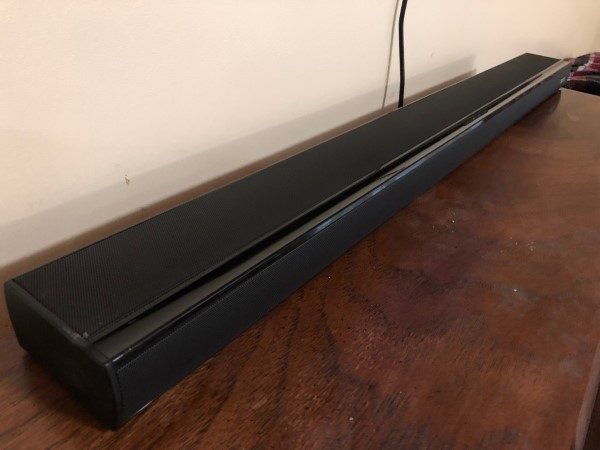
The Blitzwolf BW-SDB1 is a 60 Watt integrated stereo amplifier and speakers housed in an attractive black plastic and metal housing. Inputs include 1/8” stereo jack, optical, coaxial, HDMI and Bluetooth. A wireless remote control is included.

Hardware Specs

  • Material:Aluminum alloy+ PC
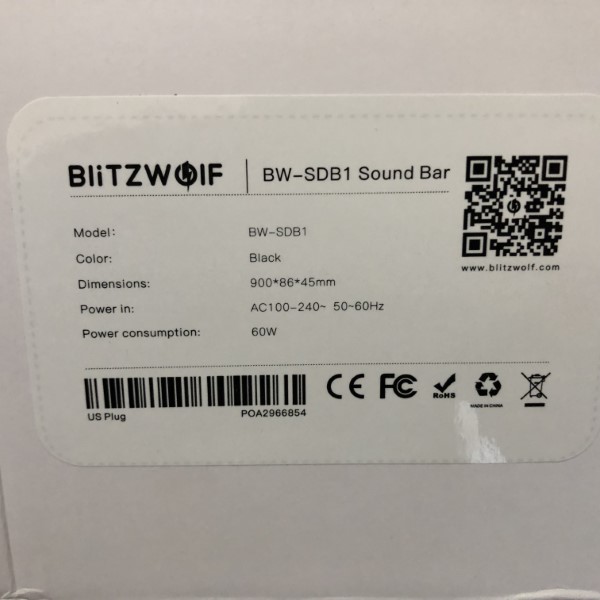
  • Dimensions: 35.4*3.4*1.7
  • Weight:3.96lbs.
  • Power Supply:AC 100V – 240V 50 – 60Hz
  • Power Consumption: 60W
  • Audio Input Sensitivity:500mV
  • Frequency Response:40Hz – 20KHz
  • Impedance:8Ω
  • Bluetooth Version:V4.2
  • Transmission Distance:10 – 15m

What’s in the Box?

  • BW-SDB1 speaker
  • Remote control with button cell battery
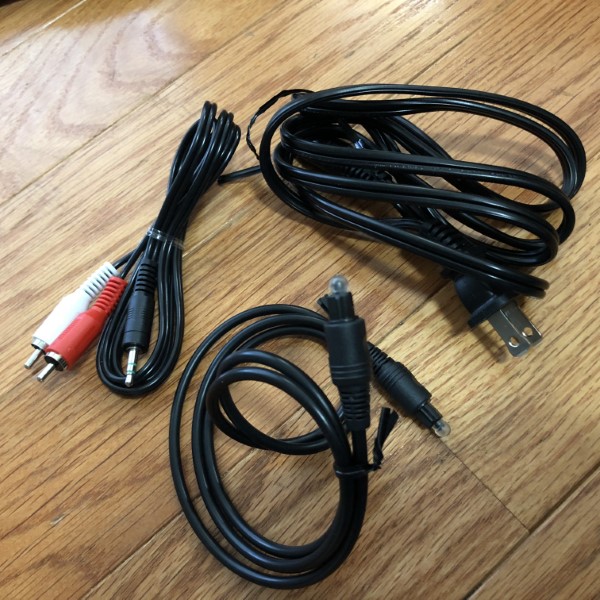
  • Power cord
  • 1/8” stereo to RCA male cord
  • Optical cable
  • Instruction manual

Design and features

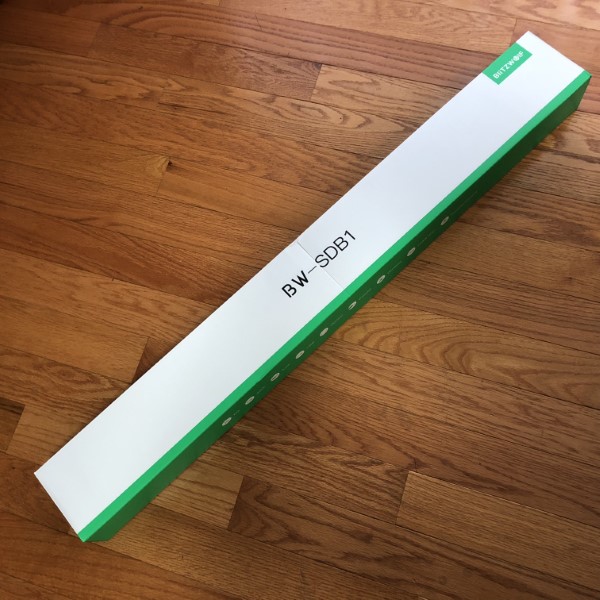
The Blitzwolf BW-SDB1 arrived in a long, slender green and white box. Packaging is good, with foam padding to keep the speaker from thrashing about during transportation

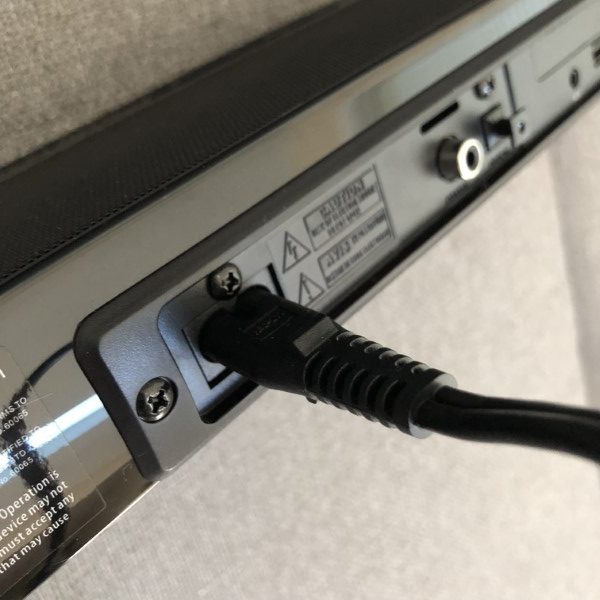
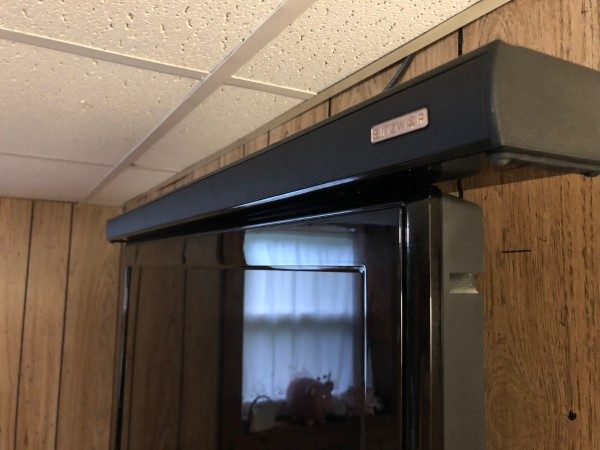
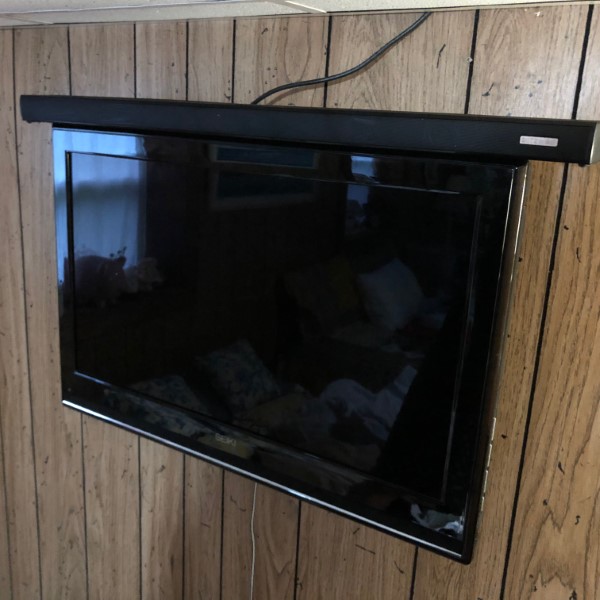
The power supply is integrated into the speaker housing so there is no bulky transformer, however, the AC cord protrudes some distance from the back, so care will need to be exercised to ensure sufficient room. With such a speaker, my primary application would be to install it on top of a wall-mounted television. In my case, there is not enough room to put the speaker on top of my living room TV without purchasing a right-angle power cord, however, my guest room TV is angled away from the wall, so the Blitzwolf soundbar has no trouble finding a home here (as shown above). The audio, optical and HDMI connectors follow suit. Should the speaker bar be placed on a cabinet forward of the television, this would not be an issue.

I powered up the speaker, plugged in my iPhone and selected a short playlist. Drivers in the face and top of the enclosure deliver good quality audio with little distortion. Frequency range is limited predominantly by the size of the speakers, but, to me, sounded better than comparable models. Stereo separation is very good, sounding like the speakers are much further apart than they really are. Bass was fairly good for a unit of this size, particularly when lacking a dedicated subwoofer. Treble was clean and acceptable. Vocal audibility was well balanced and this speaker would do well as an enhancement to TV speakers. I duplicated my tests using the HDMI, Bluetooth, coax, and optical inputs with similar results.

I was able to keep the Bluetooth connected anywhere I went in my home, but your mileage may vary. At the limits of the reception range of about 45’, there was a little dropout, but that is quite typical.

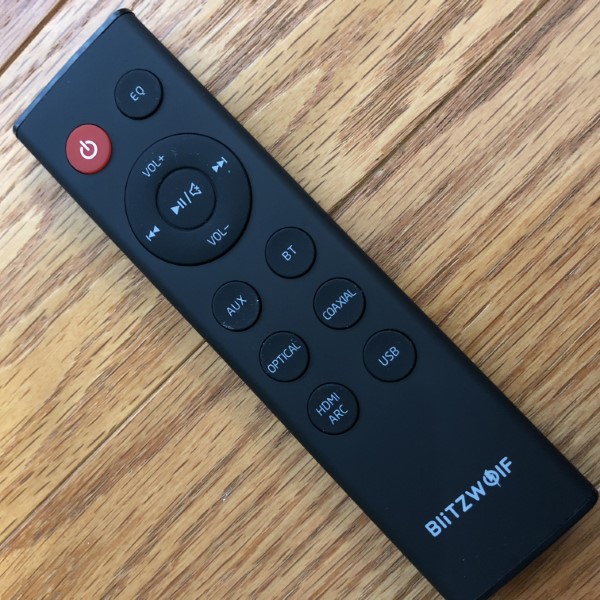
The remote uses a button battery. It’s simple but definitely gets the job done. Equalizer settings are verbally reported as they are cycled.

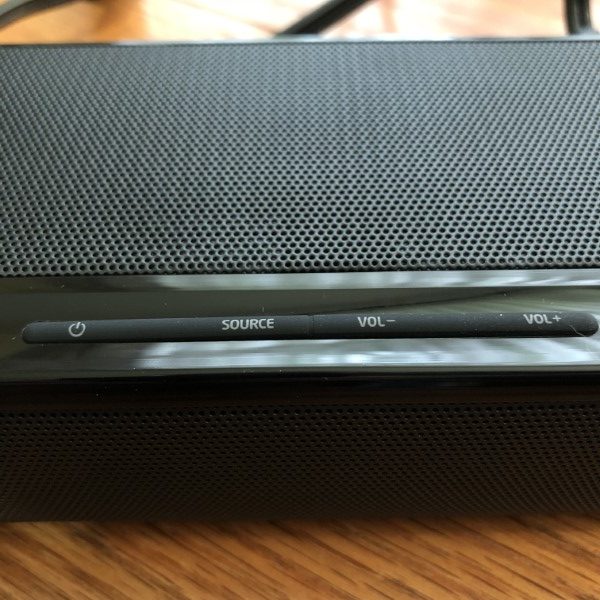
Buttons on the main speaker can also be used to control the settings, input, and volume.

I’ve used several speaker bars, some more, some less expensive than the Blitzwolf BW-SDB1 with wildly differing audio quality. The BW-SDB1 has good sound, good volume, plenty of inputs and remote control and represents a good value.

What I like

  • Metal construction
  • Remote and cords included
  • Not too expensive

What needs to be improved?

  • Cord placement makes it difficult to mount on a wall.

Final thoughts

Blitzwolf’s BW-SDB1 60 Watt soundbar is a solid contender for those wishing to enhance their television sound. It’s not going to rival a full surround sound system for audio quality, but overall I found it to be very good.

Price: $99.99
Where to buy: Amazon
Source: The sample for this review was provided by Blitzwolf.

The post Blitzwolf BW-SDB1 Sound Bar review appeared first on The Gadgeteer.

Filed in categories: Reviews

Tagged: ,

Blitzwolf BW-SDB1 Sound Bar review originally appeared on The Gadgeteer on July 3, 2018 at 1:00 pm.

Note: If you are subscribed to this feed through FeedBurner, please switch to our native feed URL http://the-gadgeteer.com/feed/ in order to ensure continuous delivery.
IOGear Quantum Thunderbolt 3 Docking Station Pro 85 review

What is it?

The Quantum T3 is a desktop docking station for USB-C computers that adds additional ports and functionality all through a single USB-C connection.

Hardware specs

Front connections: 2 USB ports (USB-A 3.1 and USB-C)
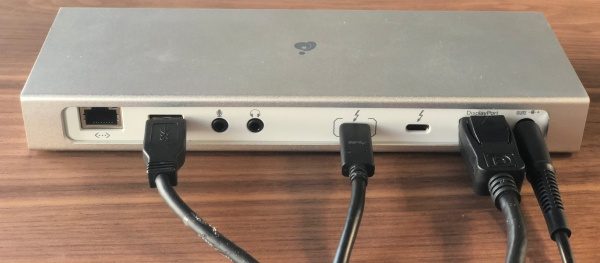
Back connections: Gigabit Ethernet, USB-A 3.1, 3.5mm Audio in, 3.5mm Audio out, 2 USB-C, Displayport and DC power
Dimensions: 22 x 8.1 x 2.5cm
Video capability: DisplayPort 1.2 (up to 4K@60Hz with single video stream), Thunderbolt 3 (USB-C port), up to 5K@60Hz on DP Alt mode with single stream or 4K@60Hz with dual streams

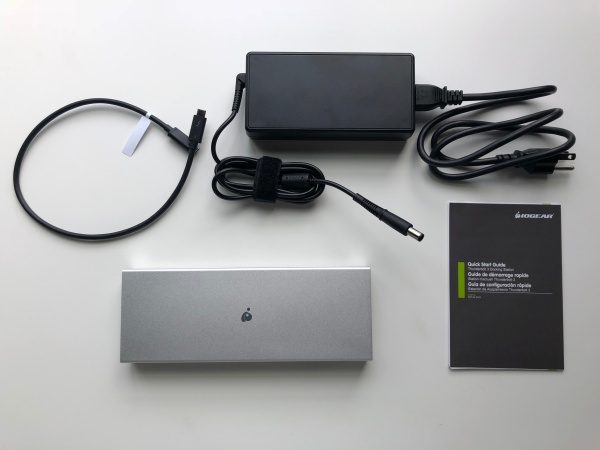
What’s in the box?

  • Quantum Thunderbolt 3 Docking Station Pro 85
  • Thunderbolt 3 cable
  • AC power adapter
  • Quickstart guide & warranty card

Design and features

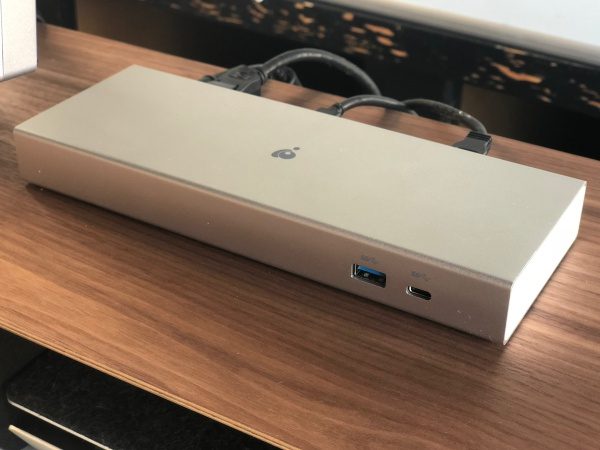
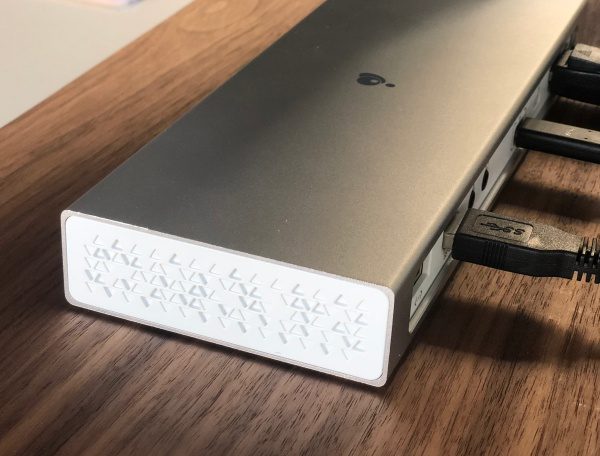
The Quantum 3 is a beautiful piece of equipment that looks at home with current computers of the aluminum variety and provides all kinds of connectivity to your USB-C computer at your workstation. The main body is aluminum with plastic used for the inset back connector panel and the end panels which sport a cool repeating triangular relief pattern.

As you can see in the next photo, there are also connections for gigabit ethernet, USB 3.0, microphone, headphones, USB-C, displayport and power.

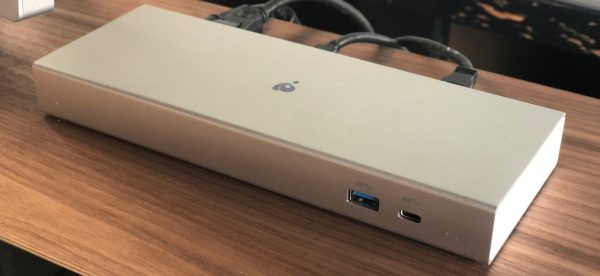
On the front of the unit there is a pair of connectors, one for USB-C and one for USB 3.0.

Setup

Connect to Quantum 3 to its power supply and then the included USB-C cable to your computer. It’s important to note that the first one with the [    ] around the port has a higher throughput and 85 power supply for connecting to your computer, supporting the other functions through the hub and keeping your computer charged without a separate power cable.

All that’s left is connecting everything else you plan to use. I have an HP Envy ultrawide monitor that I selected specifically because it had USB-C input. What I found in initial use is that some of the other connections through the monitor like standard USB 3.0 accessories, required me to add another cable to my mac which is what I was trying to avoid in the first place.

With the Quantum 3, I connected a DisplayPort cable to the monitor along with a USB 3.0 cable and that’s it. The office I work in is all wifi, so I haven’t had to try the gigabit ethernet yet. Maybe in the new office starting next week.

Performance

It’s really quite amazing how seamless a product can be when it does exactly what it’s supposed to. It’s not like I forget that it’s there, but at the same time, I don’t have to monkey with it. With the connections described above, I’m able to set my Mac down, connect a single USB-C cable and everything just works and my Mac is charging. The headphone amp that’s connected to the monitor with USB works perfectly. The monitor’s built-in pop-up camera works perfectly (previously required an extra cable to the mac). I can go on, but you get the picture.

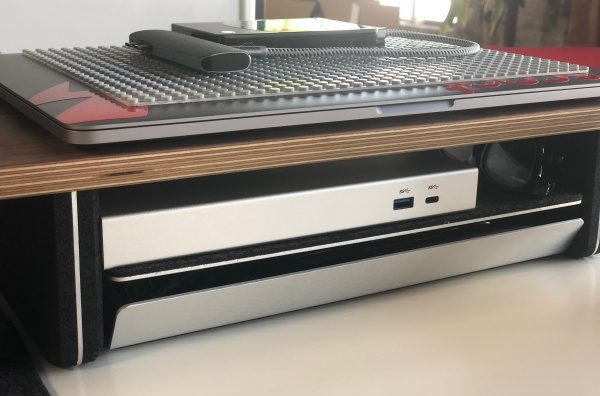
I’ve got the Quantum 3 tucked into a pocket of my desk riser where I have access to the front two ports should I need them and everything else is out of the way.

What I like

  • Simple set-up
  • It just works
  • Single connection to the computer (including charging!)

What needs to be improved

  • The cost is pretty steep (but less so when you factor in the cost of buying a second Mac power adapter)

Final thoughts

The Quantum 3 is a docking station that does exactly what it’s intended to do. It’s not inexpensive but is incredibly well made and will likely outlast a couple of laptops. If the idea of a single connection to your computer gets you excited, this is a great solution. I’m at my desk a lot during the day, but it is generally in fits and starts and that means a lot of plugging and unplugging. The Quantum 3 solved that with style and now the power adapter that came with my Mac can stay in my backpack.

Price: $299.95
Where to buy: Amazon
Source: The sample of this product was provided by IOGear.

The post IOGear Quantum Thunderbolt 3 Docking Station Pro 85 review appeared first on The Gadgeteer.

Filed in categories: Reviews

Tagged:

IOGear Quantum Thunderbolt 3 Docking Station Pro 85 review originally appeared on The Gadgeteer on July 3, 2018 at 11:00 am.

Note: If you are subscribed to this feed through FeedBurner, please switch to our native feed URL http://the-gadgeteer.com/feed/ in order to ensure continuous delivery.
Leitner LH270 Wireless Office Headset review

REVIEW – I’m a remote worker – and no, that has nothing to do with my emotional attachment to the people in my office.  Because I am remote 90% of the time, I need effective communications tools.  For years I have been looking for the perfect Bluetooth headset to use with the various communications apps I use daily, and to me perfect includes wireless.  Is the Leitner LH270 Wireless Office Headset the answer to my quest or just another stop on the journey?  That’s a great question, and thank you for asking…

What is it?

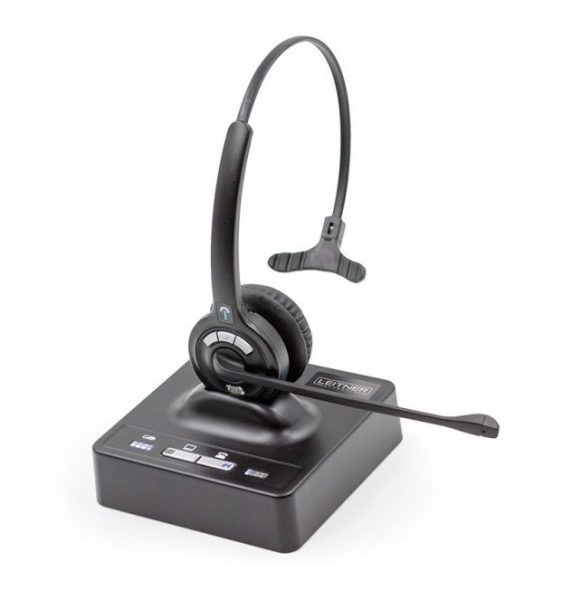
The Leitner LH270 is a professional-grade communications headset designed to work with both a traditional phone line and soft-phone applications like Skype and WebEx.  The LH270 is a monaural headset, meaning it has a single earpiece (the LH275 model is exactly the same except it has 2 earpieces).  The headset itself is wireless, but it connects to a base unit that acts as both the interface to your communications devices/software as well as a charging stand.

There are volume up/down buttons on the headset as well as an indicator light (and button) to let you know when the headset is on or online.  The light and button also act as a call answer/end switch.  The boom mic rotates a full 180 degrees, so you can safely disregard the “left” notation on the earpiece and wear the headset on either the left or right sides.  The middle button between the volume buttons is your mute/unmute switch when in a call.

What’s in the box?

You get the LH270 headset and a replaceable battery pack for the headset (making it relatively easy to get a spare battery and never miss a call).  You also get the base unit/charger, a power cord for the base unit, an RJ-9 phone cord to connect to a handset on a traditional phone, and a type A to mini USB cord to connect to your computer.  That last item is important – the headset is wireless, but the base unit must be connected to your computer and/or your phone.

How it works

Once you have installed the battery in the headset, connected the base unit to power and then charged the headset (normally about 4 hours for a full charge), you are ready to begin.

Plug one end of the USB cable into the base unit and the other end into your computer.  On both my MacBook Pro and Surface Book devices, drivers automatically installed and within minutes I was ready for my first call (or, at least, ready from a hardware perspective).  It has been a while since I had a dedicated landline or VOIP phone, so I made a semi-annual pilgrimage to my office where I have an actual desk and phone.  I try to visit at least twice a year, and this seemed like a way to kill two birds with the single stone.  On my desk phone, I unplugged the handset from the phone base and plugged it into the LH270 base.  Then, using the RJ-9 cord I plugged the LH270 base unit into the phone.

Now I am REALLY ready.

And this is where I found the first quirk.  There is a button on the base unit that determines which device the base is connected to.  By default on power up the base unit selects the phone and not the computer.  So when I received a Skype call I pressed the answer button only to find that the base unit does not switch to the active source automatically.  You will have to get to the base unit, switch to the proper mode and then answer the call.

If you use the LH270 with a regular phone you are going to want to invest in a handset lifter.  Without it (and assuming you are in the proper mode on the base unit), you must be close to the phone in order to lift the handset to answer.  With the handset off the phone base, you can press the answer button on the headset to divert the signal to the headset rather than the phone’s handset.  Oh, and you will also have to hang up the handset when the call is over because – without doing that – you will not get any calls.

WebEx proved to be an interesting quirk.  And note, this is not a problem with the LH270, but rather with the WebEx software on both the Mac and Windows.  About half the time on loading WebEx it would select a different mic rather than the one on the LH270, with the end result being that no one could hear me until I switched the communications device in settings.  I have never had that problem with any other device, but it was consistent with the LH270 over about 14 calls, so if WebEx is the preferred app you might want to check with Cisco about a software update.  Nothing in time to help me, though.

So those are the oddities when answering or ending a call.  As a communications headset, though, the LH270 is close to perfection.  The calls are crystal clear, and people on the call could hear me with the same clarity.  I could move all over the office without any drops in connection or static.  I could get about 30 feet away from my desk without a clear line of sight to the base unit before I had any problems.  That included multiple walls between me and the base.

Did I mention the battery life?  Extraordinary.  I can spend 6+ hours during the day on calls with the LH270 and end the day with over 50% of the battery remaining.
When in the right mode, starting and ending computer-based calls was easy.  Moving around was also easy – if I ever strayed too far, the headset would beep but the call would not drop.  To get back in the conversation, all I had to do was move back within range and the headset automatically reconnected to the call.
What I liked

  • Amazing clarity on calls
  • Outstanding battery life
  • Easy setup
  • Little touches like call retention when out of range

What needs improvement

  • No handset lifter in the box (important if you use a regular phone)
  • No automatic switch between PC and phone mode based on the incoming signal

Final thoughts

If business communications are important to your work, you can’t do much better than this headset.  It is pricey at $288 and I wish it came with a handset lifter, but it also comes with a 5-year warranty out of the box so the clarity you get in your calls today will be with you for a long time to come.  Should Leitner solve the lifter issue along with the active mode issue, I could see this – and the LH275 dual earpiece version – becoming the gold standard for business communications.

Price: $288.28
Where to buy: Amazon
Source: The sample for this review was provided by Leitner.

The post Leitner LH270 Wireless Office Headset review appeared first on The Gadgeteer.

Filed in categories: Reviews

Tagged:

Leitner LH270 Wireless Office Headset review originally appeared on The Gadgeteer on July 3, 2018 at 9:00 am.

Note: If you are subscribed to this feed through FeedBurner, please switch to our native feed URL http://the-gadgeteer.com/feed/ in order to ensure continuous delivery.