Pampered Chef Breakfast Sandwich Maker review

REVIEW – You’ve probably heard that breakfast is the most important meal of the day.  Given that, with our busy lifestyles we need a tool that can help us make quick, healthy choices for that most important meal.  The Pampered Chef Breakfast Sandwich Maker aims to do that by giving you a better, faster and more convenient choice than your local drive-through.  But can it live up to the expectation of a tasty breakfast sandwich?  That’s what we are going to find out today…

What’s in the box?

The Pampered Chef Breakfast Sandwich Maker consists of four parts: there is a ceramic deep bowl that is the base of the sandwich maker.  This is where you put the egg that is the centerpiece of your sandwich.  Next is a deep silicon tray where you can put any other sort of filling you want heated – Canadian bacon, a veggie patty or any other sort of pre-cooked item.  It is important to note that you cannot use frozen meats in the sandwich maker – all fillings need to be pre-cooked and at worst, refrigerated but not frozen.  After the filling insert is a shallow silicon tray for your bread.  An English muffin, a thin sandwich round or even a tortilla will work.  Finally there is a ceramic top.

How does it work?

OK, so let’s get started.  I love an over-medium egg sandwich, so that’s what I will begin with.  After greasing the bottom of the ceramic bowl with butter as instructed, my lovely assistant is ready to crack a large egg into the bowl.

According to the instructions, if you are making an over-medium egg you should use only 1 egg.  If you are scrambling the egg, you can use 1-2 eggs.  One egg it is.  I also like Canadian bacon, so we add the deep silicon tray with a single slice.

We are ready for stage 1 cooking.  I place the ceramic lid on the bowl, place it in the microwave and begin.  The instructions state that cooking times are calculated for a 1200 watt microwave, and as my microwave is a measly 1100 watts, I adjust up from the suggested 30 seconds cooking time to 40 seconds.  And so the interminable wait begins.

Visibly 30 seconds older, I remove the bowl from the microwave and the top from the bowl.  Adding the shallow insert and a sliced English muffin, I return the lid to the top.  Another 30 second eternity in the microwave.

Now comes the hard part: removing from the microwave, I have to let the bowl rest for a whole minute before removing the trays and assembling my sandwich.  Patience is a virtue, just not one of my virtues.

A minute later, I open the container to…disappointment.  The egg is not cooked.  At all.  It is still a liquid mess.  The Canadian bacon, on the other hand, is dried out on the edges, a classic sign of over-cooking.

I replaced the lid on the pot and begin cooking the egg in 10 second bursts as instructed.  After an additional 30 seconds, the egg yolk is a hard mess but the white part is still mostly liquid.

OK, so over medium is not going to work.  Did I mention that I love scrambled eggs?  After a thorough cleaning and then re-greasing the bottom of the bowl, my lovely assistant breaks a single egg into the bowl and we scramble it.  Despite what my high school guidance counselor said, I learned from my mistake last time.  This go-around I put the egg in the microwave by itself and cook for 30 seconds per the instructions for a single-egg scramble.  After 30 seconds, I remove the bowl, add the tray with another slice of Canadian bacon, and cook for 10 seconds.  Yes, I know, I am going off script here, but I am trying to reach the happy center of the experience – a fully cooked egg, Canadian bacon that does not look like it spent 6 months in the Sahara, and an English muffin.

After the initial 40 seconds, I add the muffin and cook for a final 30 seconds.  Another minute wait, and another disappointment.  While the Canadian bacon is fully cooked and in pretty decent shape, the egg is still mostly uncooked.

After two more tries making scrambled eggs, I am completely unable to get a nicely cooked egg.  Either it is horribly overdone or undercooked.

What I like

The Pampered Chef Breakfast Sandwich Maker is nicely made.  My wife loves the pieces and will re-purpose them for other uses.  Unfortunately, you just can’t use it to make breakfast sandwiches.

What needs to be improved

I’m not sure – it seems to me that there are 2 issues at work here.  First is that a “one approach fits all” way just doesn’t work.  There are too many variables, specifically in the microwave part of the equation.  The second is that in order to get past the first you have to have some sort of innate cooking skills, or the patience and time to go through many failed experiments to find the combination that works for your ingredients, your microwave and your time.  And with a limited selection of ingredients that are compatible with the sandwich maker (and the associated breakfast boredom that would set in with those choices), it seems like a lot of work for a very limited return.

All I know is that I have to go back to the old, less convenient way of making breakfast sandwiches.

Final thoughts

The Pampered Chef Breakfast Sandwich Maker seems to fail at its basic function: cooking an egg for a breakfast sandwich.  My microwave is as standard as they come, and no amount of tweaking the cooking time yielded a nicely cooked egg.  I suppose I could have used a pre-cooked scrambled egg patty, but then if I did why would I need the sandwich maker?

Another concern is the bread.  A good sandwich (in my humble opinion) has a toasted bread.  The sandwich maker gives you a steamed muffin.  Adding the muffin is a crucial part of the cook timing, so if you choose to toast and not use the sandwich maker for your bread, there is even more adjustment you need to do to ensure your ingredients are not overcooked.

Price: $29.95
Where to buy: The Pampered Chef web site
Source: The sample of this product was provided by The Pampered Chef.

Filed in categories: Reviews

Tagged: ,

Pampered Chef Breakfast Sandwich Maker review originally appeared on The Gadgeteer on July 22, 2018 at 10:00 am.

Note: If you are subscribed to this feed through FeedBurner, please switch to our native feed URL http://the-gadgeteer.com/feed/ in order to ensure continuous delivery.

TaoTronics Smart LED Floor Lamp, Works with Alexa review


REVIEW – I must admit that I am a fan of Alexa controlled smart devices, not only because of the smart integration but also because my kids simply love the “play around” with Alexa.

What is it?

The TaoTronics Smart LED Floor Lamp is a floor standing LED lamp that works independently or with Alexa as a smart device.

What’s in the box


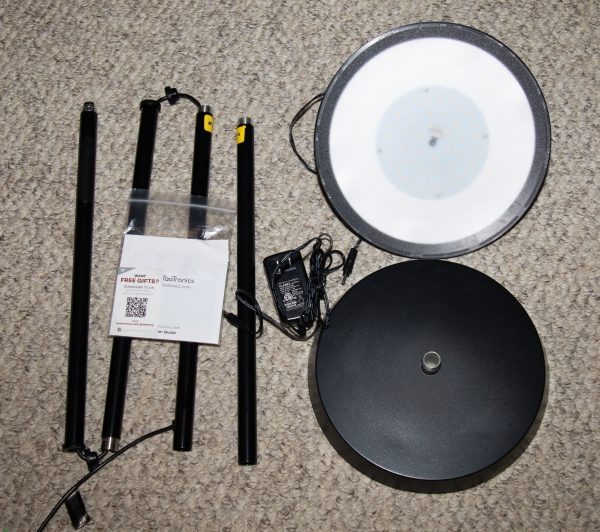
In the box, there is the base of the lamp, the top of the lamp that includes the LEDs and the diffusion shade, the lamp pole that comes pre-wired, and in 4 sections that have to be screwed to together, the AC adapter and the assembly/instruction manual.

Design and features

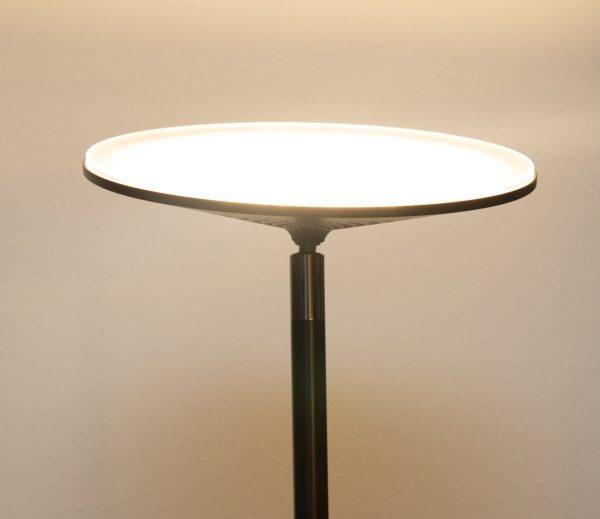
The TaoTronics Smart LED Floor Lamp works with Alexa as a smart device. It is a 65 inch Dimmable Lamp with 3000 Kelvin Warm Light that is covered by a diffusion shade. You can control this wifi-connected light with your voice via Alexa, or it can be manually controlled.
There are apps available for both IOS and Android. The app allows you to stay connected and control your lamp even when you’re not at home. You can also use the timer function to pre-set the time to turn the lamp on or off from anywhere in the world.
Additional functions include wireless dimming and the ability to control the percentage brightness of the lamp either by tapping the power sensor on the lamp or by voice command. (For example: “Alexa set floor lamp to 60 percent). “Floor lamp” is just an example of a name that can be assigned to the lamp when you set it up in the Alexa app. The lamp also memorizes your most recent brightness settings.


Once the lamp is assembled, the power cable extends out of the bottom and connects to the AC adapter. The 4 rubber plugs seen in the picture below are shipping plugs that protect the threads on the sections of the lamp pole.


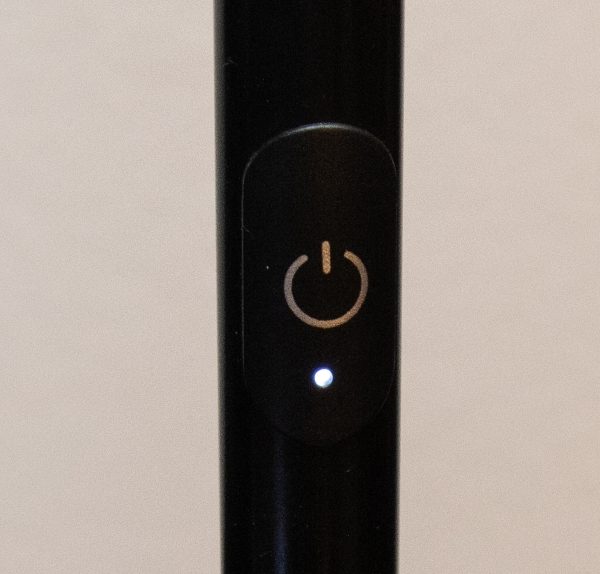
The only control on the pole of the lamp is a power/sensor button that controls powering on and off and dimming. Also, with a press for a few seconds in the off mode, it activates the wifi function so that it connects to your network. (Same network as Alexa of course)


The head of the lamp that includes the LEDs and the diffusion shade connects to the lamp pole with a swiveling ball joint. It swivels approximately 20 degrees in any direction.


The lamp gives off an even and widely spread diffused light that is easy on the eyes and yet provides adequate coverage for a 20′ x 10′ room.

App

Taotronics offers the SunHome app for IOS and Android, that allows you to control the lamp including power functions and setting scenes. Here are the screenshots from the app:


What I like

I like everything about the physical lamp. It looks great and functions well.

What can be improved

When I signed up to gain access to their app, I was initially successful, but then I got an “invalid login” message and it took over a dozen attempts over a 2 week period to finally get continuously successful access. This included submitting requests to reset my password and entering new passwords and codes over a dozen times. Access to their app needs to be simplified and improved.

Final thoughts

This TaoTronics Smart LED Floor Lamp that works with Alexa is simply a nice looking and great functioning lamp, that easily integrates into the smart environment in my home. Prior to receiving this lamp, I already had a floor lamp that works with an Alexa enabled WEMO outlet. Since I received this lamp, the pre-existing lamp is rarely used. The cost to value dynamic is usually individually subjective, so I will not quantify it. However, I am very happy to have this lamp, and if I did not, I would consider it at its current price.

Price: $89.99
Where can I buy: Amazon
Source: The sample for this review was provided by Taotronics.

Filed in categories: Reviews

Tagged:

TaoTronics Smart LED Floor Lamp, Works with Alexa review originally appeared on The Gadgeteer on July 22, 2018 at 9:00 am.

Note: If you are subscribed to this feed through FeedBurner, please switch to our native feed URL http://the-gadgeteer.com/feed/ in order to ensure continuous delivery.
Uni Jetstream Stylus Ballpoint Pen review

REVIEW – What features do you look for when shopping for an inexpensive everyday pen? A capless design? Lightweight body? Slim barrel? Built-in stylus? If you answered yes, yes, yes, and yes to those questions, then the Uni Jetstream Stylus from JetPens ticks all those boxes and is priced at a reasonable $5.25. Let’s take a closer look.

What is it?

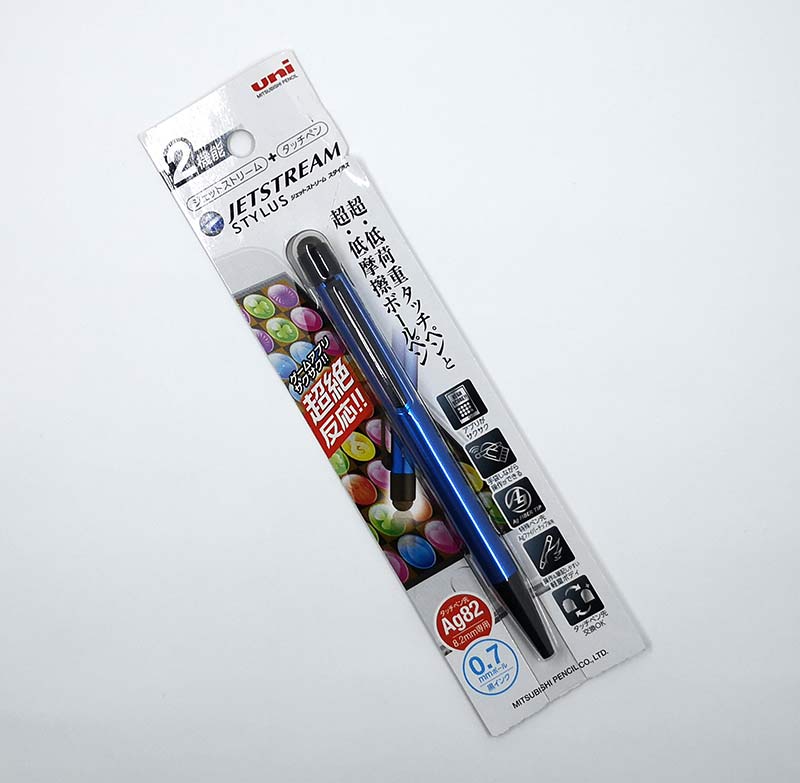
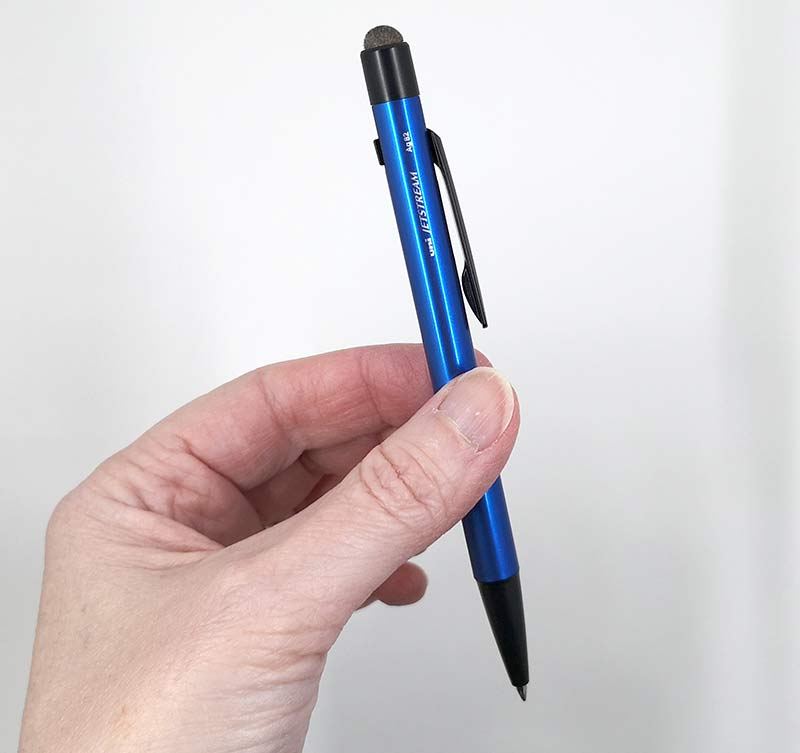
The Uni Jetstream Stylus Ballpoint Pen is just what you would think it is. It’s a ballpoint pen with a built-in stylus. It’s available in 4 colors including the bright blue version that was sent to me.

Design and features

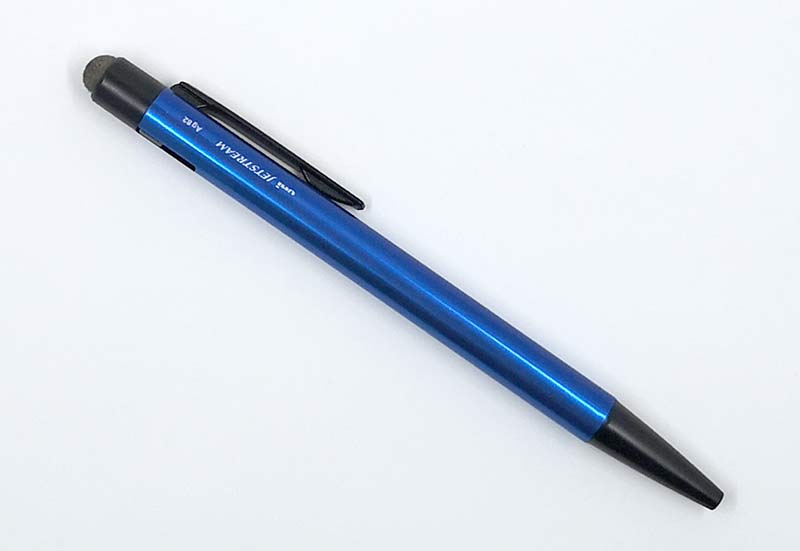
The Uni Jetstream Stylus Ballpoint Pen has a sleek look, with a slim plastic resin barrel which looks like brushed aluminum, but without the weight. A black tip, top, and clip give it a snazzy look.

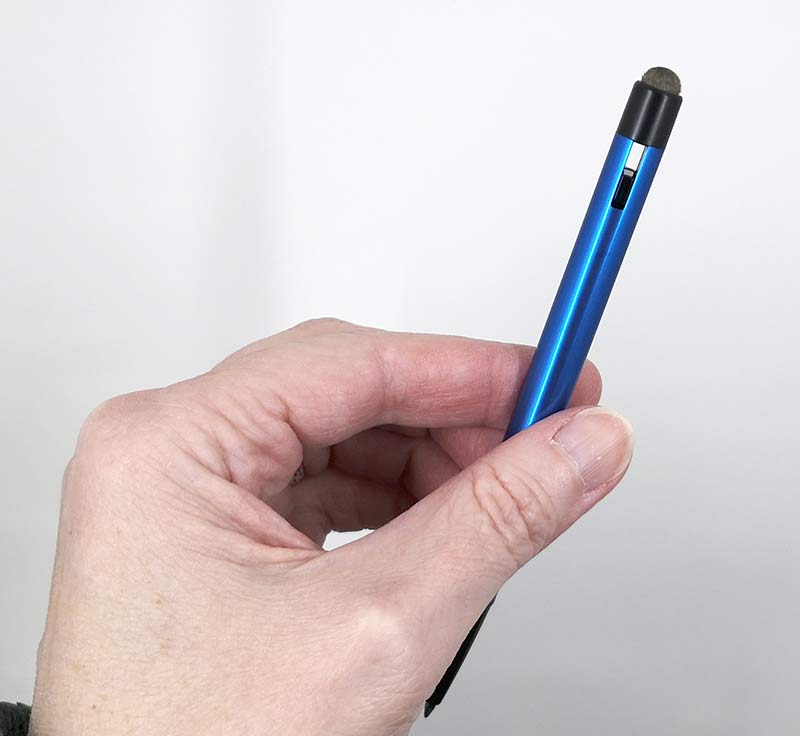
The writing tip is extended by sliding down the pocket clip which snaps in place and when it does, a retract button pops out of the opposite side. Pressing that button immediately retracts the tip with a satisfying click.

When the writing tip is extended, you can see through the Jetstream’s barrel.

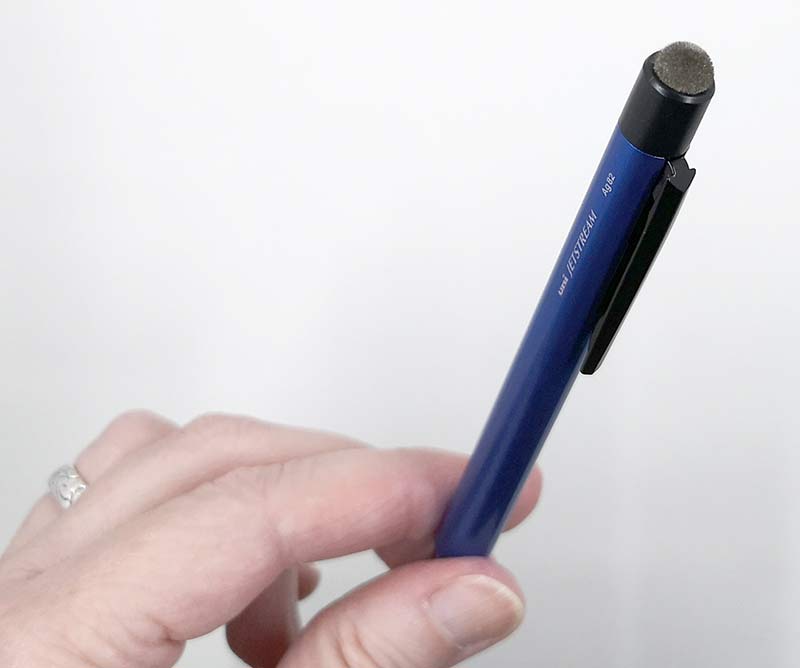
On the top of the pen is what might look like an eraser, but it’s really a capacitive stylus tip. It’s an Ag Fiber capacitive stylus tip to be exact. This stylus tip has silver coated fibers that make is soft and fuzzy. I wouldn’t recommend it as a drawing or writing stylus just because it’s a bit wide and can obscure your view while writing and drawing. But for scrolling through lists, and web pages and selecting icons on your tablet or phone, it works great and better than a typical rubber tipped stylus.

Both the ink and stylus tips are refillable/replaceable. The ink refills are $1.95 each and the stylus refills come in a pack of 2 for $5.25.

What I like

  • Lightweight and slim
  • Inexpensive
  • Ink can be refilled
  • Stylus tip can be replaced

What needs to be improved

  • Stylus tip doesn’t have a protective cap

Final thoughts

Although the Uni Jetstream Stylus Ballpoint Pen 0.7mm pen writes smoothly and puts down a nice line of black ink, it won’t exactly blow your mind. That’s fine though. After all, it’s a $5.25 pen, it’s not expected to change your life. But if you’re looking for a nice slim everyday pen with a built-in stylus tip that is a lot nicer than a generic rubber tipped stylus, this pen will do the job and look pretty snazzy while doing it.

Price: $5.25
Where to buy: Jetpens
Source: The sample for this review was provided by Jetpens.

Filed in categories: Reviews

Tagged: ,

Uni Jetstream Stylus Ballpoint Pen review originally appeared on The Gadgeteer on July 21, 2018 at 10:00 am.

Note: If you are subscribed to this feed through FeedBurner, please switch to our native feed URL http://the-gadgeteer.com/feed/ in order to ensure continuous delivery.

LiteXim Aerobuds wireless earbuds review


REVIEW – Once again I got the opportunity to further my search to find the earbuds that are perfect for me. So far, I have come across 2 that are close to perfect but I always wonder if there is something better “out there”. Given the opportunity to try another set, I willingly said yes!! Now let’s see what my experience was like.

What is it?

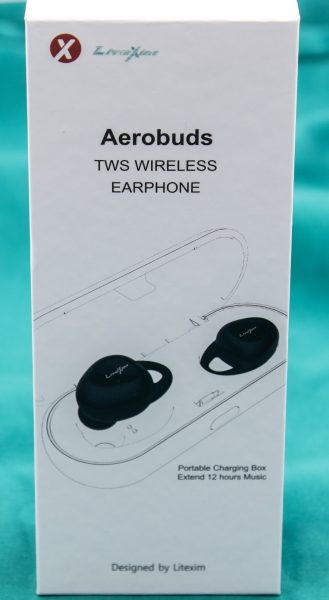
The LiteXim Aerobuds are a pair of wireless, Bluetooth lightweight earbuds with the usual charging case. They perform the standard audio functions including phone functions.

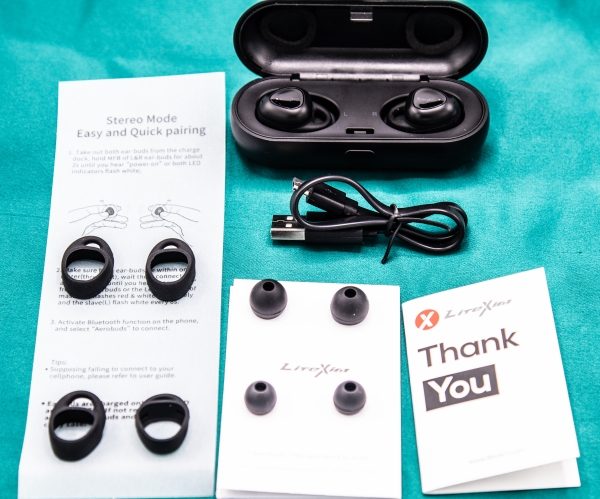
What’s in the box


1 x Pair of Aerobuds
1 x Charging Case
3 x Pairs of Wing Tips
3 x Pairs of Ear Tips
1 x USB Micro USB Cable
1 x Instruction Booklet

Design and features

The LiteXim earbuds come nicely and safely packaged. Once you remove them from the box and charge them, you are ready to go. I was able to use the Wing Tips and Ear Tips that were already installed. It is important to note that the instruction manual that comes with the earbuds is more like a quick start guide. There is a printed QR Code on it that allows you to download the full manual onto your phone or you can go to their website and download the manual to your computer.


Once the earbuds are charged, you press down on the surfaces of each simultaneously for 2 seconds, and they power on and show up in the Bluetooth settings screen of your phone. The surface of each earbud is the Multi-function button (Referred to as MFB for the rest of this article). Just as an FYI, I use the iPhone 8 Plus. The earbuds automatically connect to each other, and the right earbud flashes red and white while in pairing mode, just like most earbuds. Once the earbuds are paired, they are ready for use. For phone calls, only the right earbud is enabled.

The following is the status indicator chart from their manual:

Performance

Specifications:
Bluetooth version: 4.2
Stand-by-time: Approx. 60 hrs
Talking time: Approx 3.5 hrs
Earbud battery capacity: 50 mAh each
Charging case battery capacity: 500 mAh

Using the earbuds:

To answer a call: Press MFB once.
To hang up: Press MFB once.
To reject a call: Double tap MFB.
To play/pause music: Press MFB to play or pause when playing music.
To switch to the next song: Double tap MFB.

When the batteries are low, the earbuds will announce “low battery” and eventually power off. They will also auto shutoff if they fail to connect to your device within 3 minutes after powering on, or if they are connected to your device and lose the connection for more than 5 minutes.

These earbuds work well for use during daily running around and needing or wanting to listen to music. They sound ok but are definitely not audiophile grade. The bass is somewhat lacking, and the highs tend to be harsh even at lower volumes. The Mids are fairly present and within range. I did encounter the following issues:

  • I charged the earbuds overnight, and the next day, about 10 minutes into listening to them, the left ear announced that the battery was low and shut off. It turns out that even though you drop them in the case, you have to move them around a bit to ensure that they are connecting properly. Once I figured this out, I charged them again overnight, and they have been fine since. I do check them each time I “drop” them in the charging case.
  • I travel back and forth to work using the same route every day, so all of the earbuds that I have tested are used within the same environment. These earbuds would lose their Bluetooth connection a few times on each journey, and this is not counting the disconnections in the known areas on my route where interference is high and where difficulties are presented to all of the earbuds.
  • When earbuds like these are functioning properly, once paired they should automatically connect to the mobile device when powered on and disconnect when placed in the case. Neither of these functions works consistently. I have to go into my settings and manually connect to the earbuds at least 2 out of 3 times, and this is even though they appear in my Bluetooth device list as they should. On most occasions, the earbuds would remain connected to my Bluetooth after they are placed in the case and the case is closed. I would wait for a couple of minutes to see if they would disconnect, and then I would have to go into my Bluetooth settings and manually disconnect. I have tested many earbuds, and if my memory serves me correctly, this is only the second time I have come across this issue.
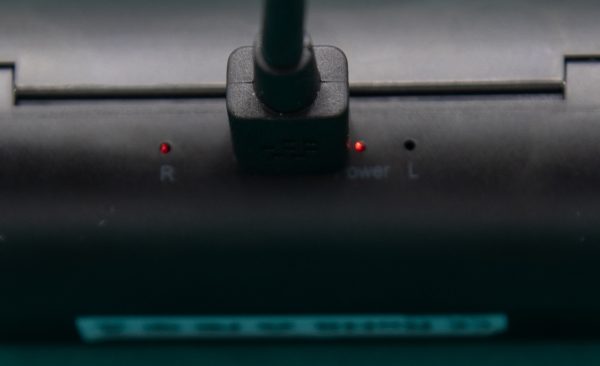
  • As you can see in the picture below, when I charge my Aerobuds, only the LED for the right earbud and the power LED light up. For some reason, the LED for the left earbud never lights up. I do suspect that my case is defective since both earbuds do charge once I make sure that they are seated properly in the case.


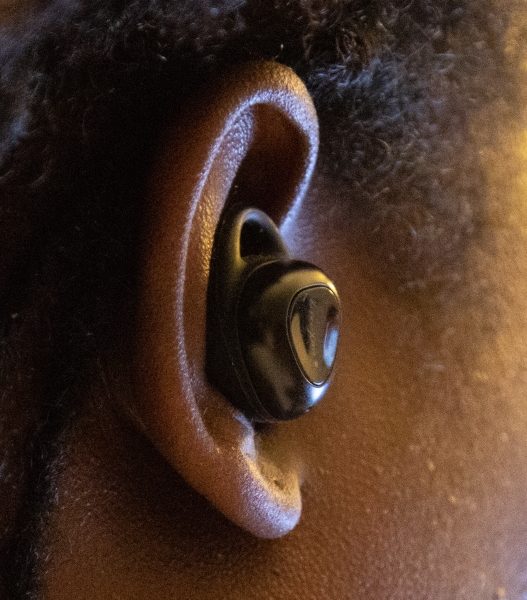
The Aerobuds fit quite comfortably in the ears and stay in place quite well. They are lightweight and do not add any additional noticeable presence other than what can be expected as “normal”.

The Phone functions work as they should, and I could hear the person on the line very clearly. However, the other party would indicate that while they could hear me clearly, my voice is very low. I have to raise my voice significantly for them to hear me in a volume that would be considered close to “normal”.

What I like

I like the small size of the Aerobuds and how well they fit in my ears. They are lightweight and feel quite comfortable.

What can be improved

  • The stability of the Bluetooth Connection
  • The upper-frequency threshold for the highs
  • The range of the bass
  • The quality control related to the Aerobuds and the connection in the charging case
  • The ability to connect and disconnect from the mobile device

Final thoughts

The LiteXim Aerobuds have many positive features for the everyday run-around earbuds. They are lightweight and for the price, they are an ok value. I also usually mention in my “Final thoughts” segment, that feel, fit and sound are all individually subjective dynamics. For me, the issues that I experienced with the Bluetooth connection along with the overall sound that was a bit harsh in the highs and lacking in the lows make these more usable for convenience if my other earbuds are charging or for some reason out of reach. They are not my first choice if my other earbuds are readily available. I would mention the names of some of the others, but that might be unfair given their cost.

Price: $65.99
Where to buy: Amazon Use the code RD4336XO for 28% off (expires 7/30/18)
Source: The sample for this review was provided by LiteXim.

Filed in categories: Reviews

Tagged:

LiteXim Aerobuds wireless earbuds review originally appeared on The Gadgeteer on July 20, 2018 at 4:15 pm.

Note: If you are subscribed to this feed through FeedBurner, please switch to our native feed URL http://the-gadgeteer.com/feed/ in order to ensure continuous delivery.

Pitaka Magcase Pro iPhone X case review

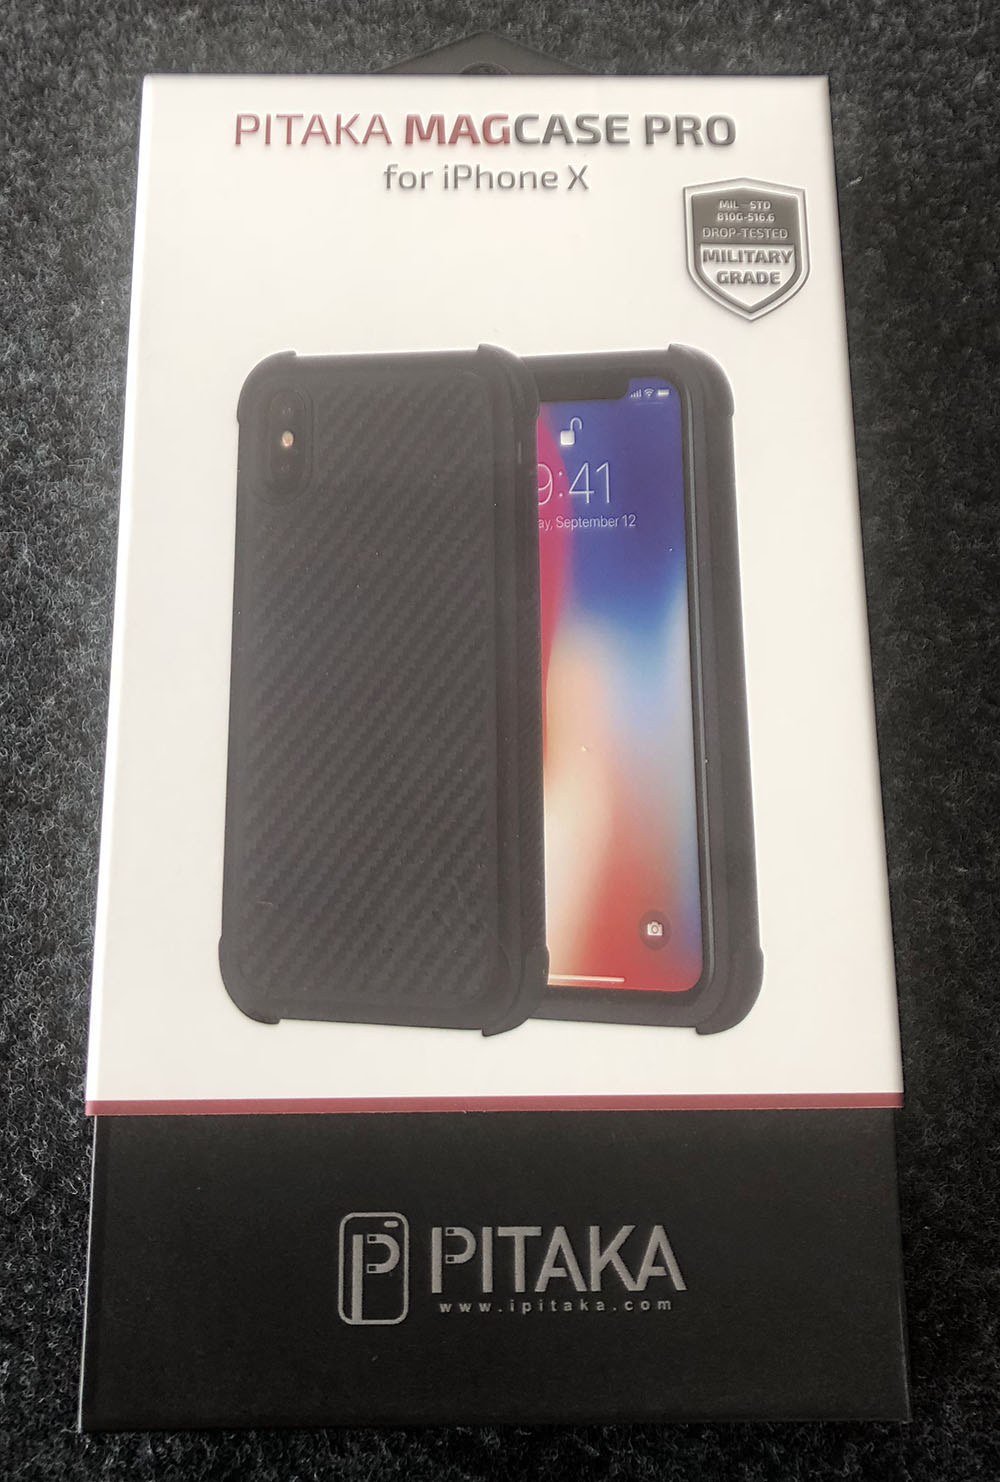
REVIEW – Pitaka has made the leap from single layer cases to a multi-material protective case in the new MagCase Pro for the iPhone X. Does the military spec testing grade matter? How bulky is it? Does it come in black? All these questions and more are answered below.

What is it?

MagCase Pro is a protective case for iPhone X built to take drops and still be relatively thin without affecting the daily use of your phone.

Hardware specs

  • 5 layers of defense to provide the ultimate protection.
  • Protective yet not bulky. Only 0.1 inch profile.

  • Specially-designed bumper corners provide excellent shock-absorption.
  • Shock-resistant back protects the phone against shock.
  • Anti-slip grip ensures a firmer hold when carrying the phone.
  • No interference to WIFI, GPS, Apple Pay, Wireless charging or your signals.

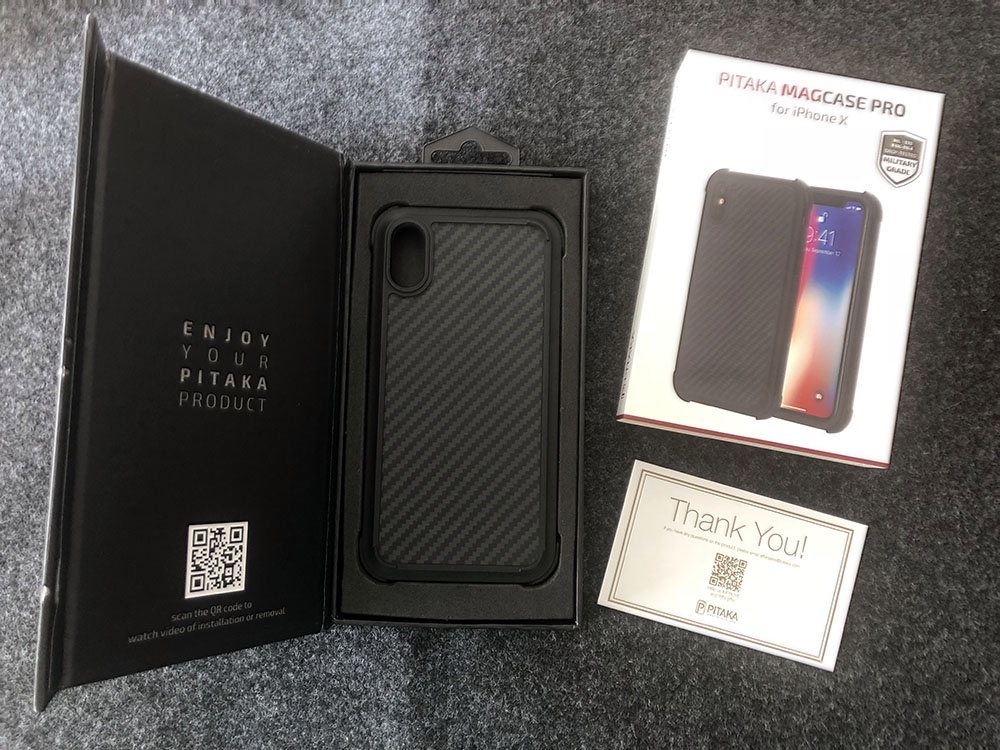
What’s in the box?

  • MagCase Pro for iPhone X
  • Thank You & social media contest card

Design and features

The design of this case has really come to intrigue me. It’s not that I was particularly drawn to the way it looked. I purchased Pitaka’s MagCase for my previous iPhone 6 Plus and it was the first case I ordered for my iPhone X. Interestingly enough I’m not terribly fond of carbon fiber either and the Aramid fiber they use definitely has that look to it. What originally struck me about their MagCase was how thin it was, how sturdy it was, that it always had a slightly warm feel and that it wasn’t slippery, nor too grippy. The opportunity to review their MagCase Pro came up recently and I wanted to see how they designed a case for increased protection.

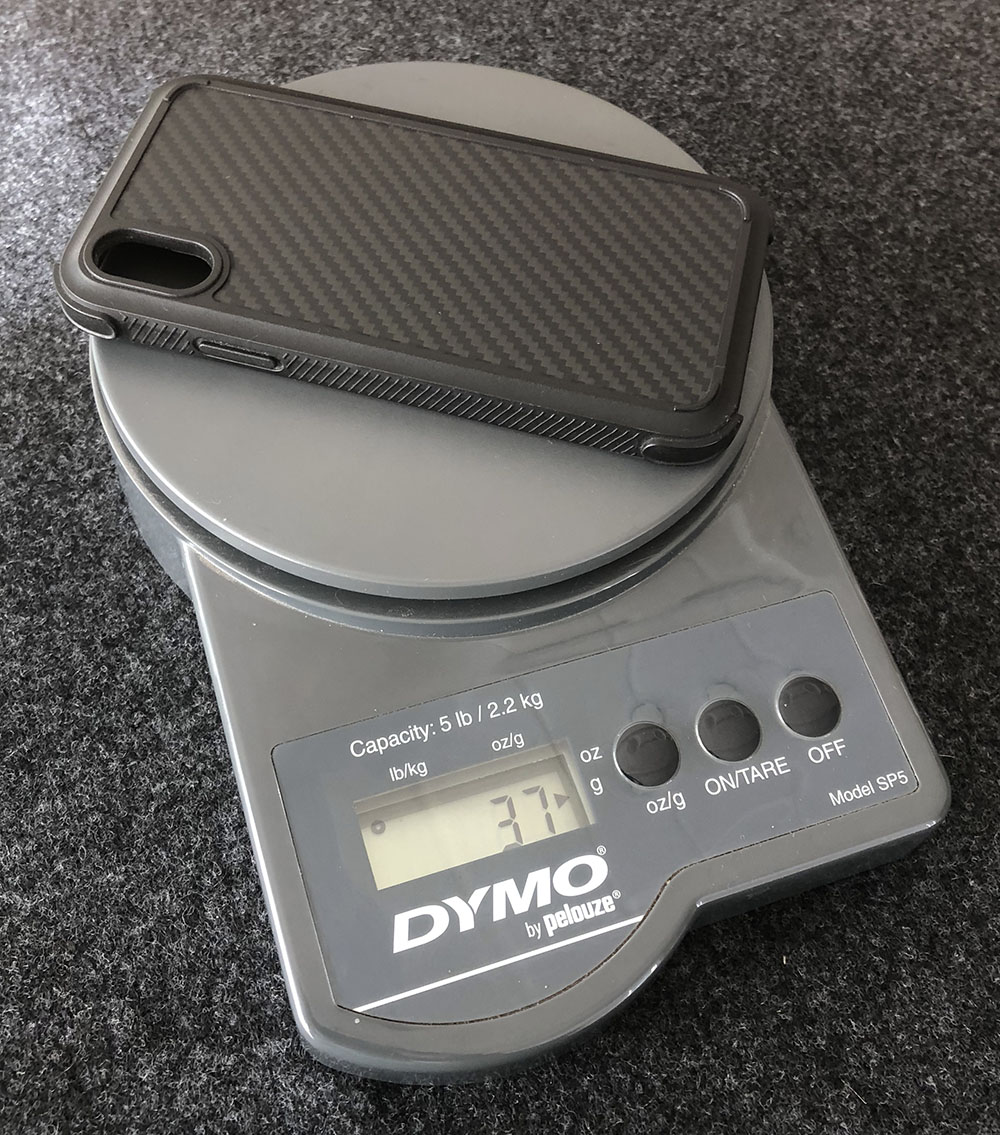
From a design perspective, let’s look at what you can see and feel. The website images show a protective case that adds some bulk and isn’t too dissimilar from the many protective cases out there, other than their distinctive Aramid material on the back. The box that showed up had me concerned as it felt pretty heavy. 180g on the scale. Opening the box however immediately assuaged my fears as the box is very overbuilt for a case and weighs 143g. If you’re doing the math that means the case is 37g.

I threw a few other protective cases on the scale and they’re all between 40 and 50g. That may not seem like a big difference, but it’s noticeable when the iPhone X is already 174g (an iPhone 6 plus is 172g btw).

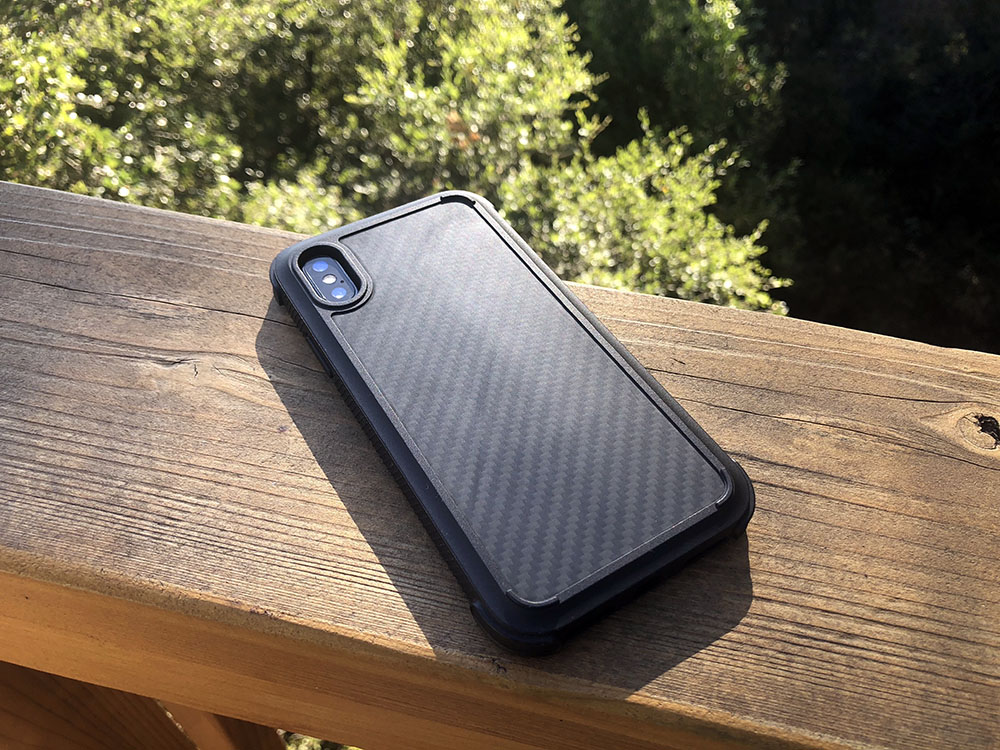
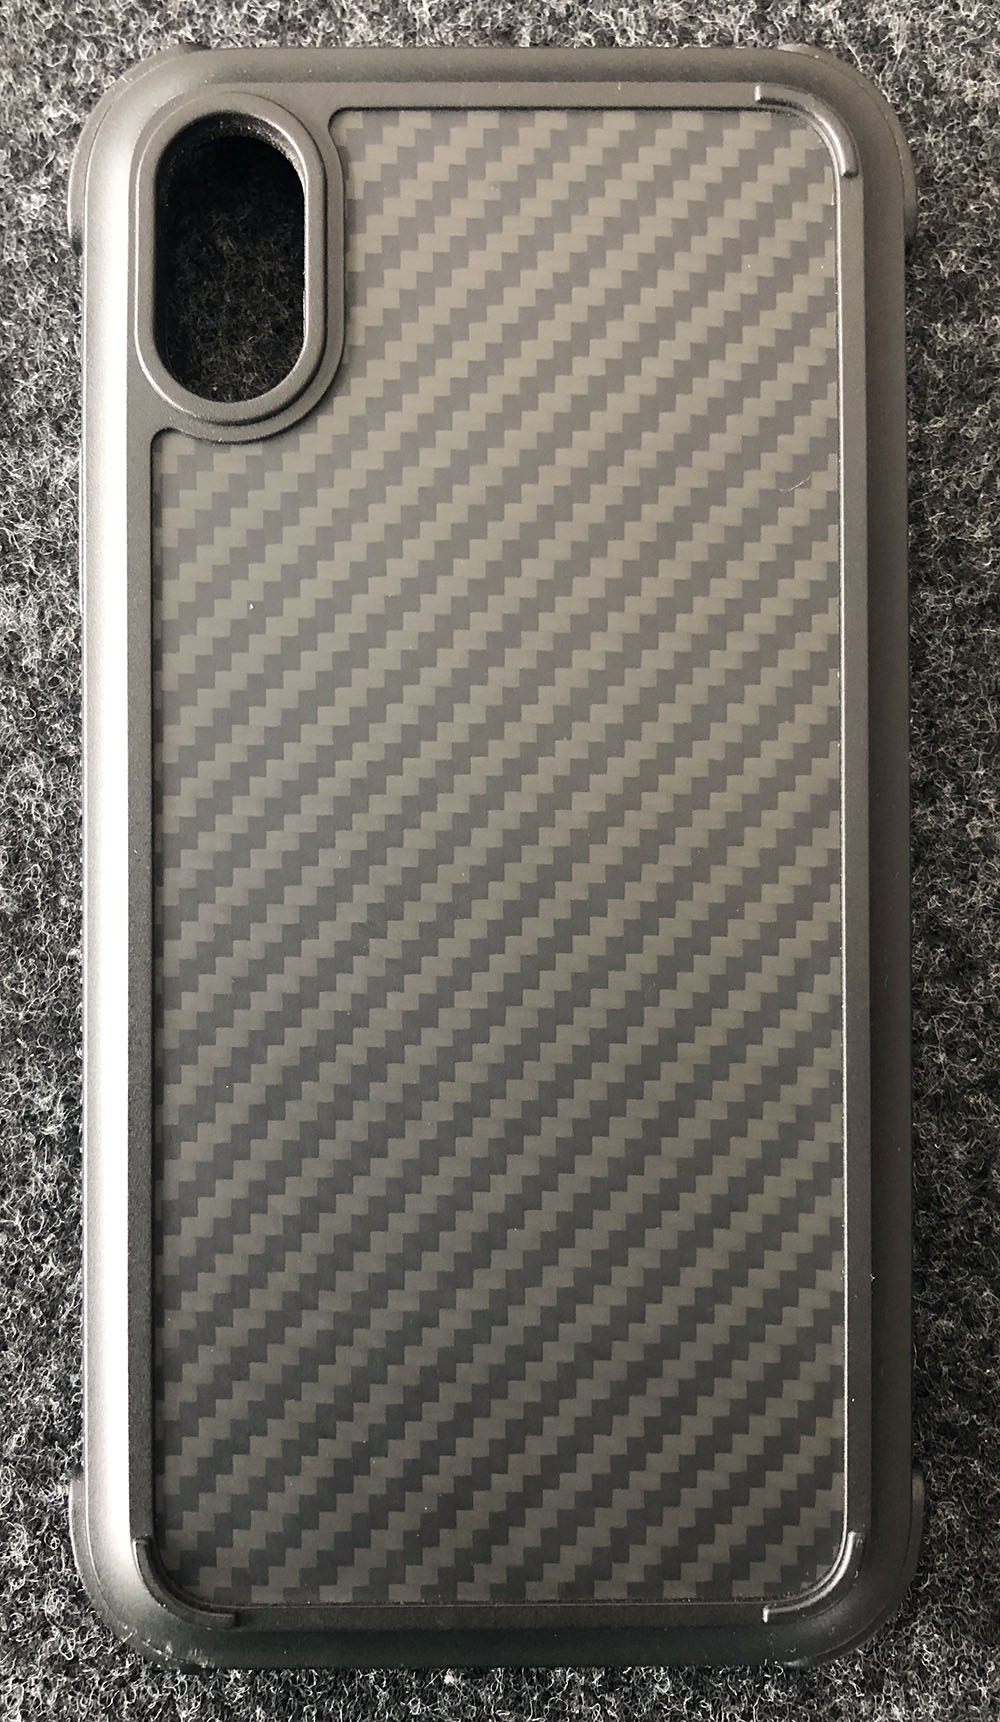
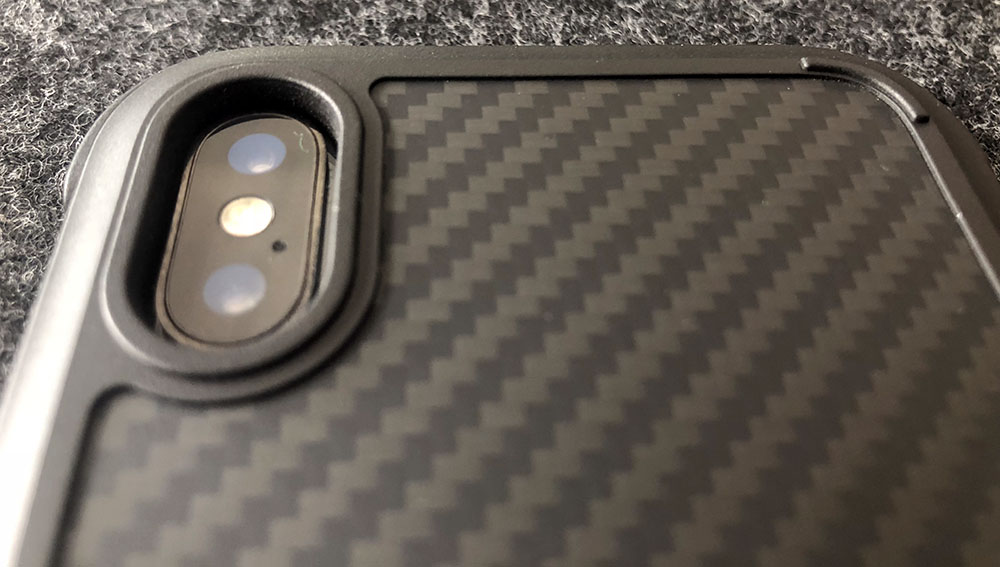
From the back, there are some interesting details. The back plate is their Aramid material which I’ll detail out in a bit.

The camera hole has a raised edge offering increased protection of the lens. The other three corners have small arcs raised to the same height so the phone sits totally flat on a table.

Just beyond that rounded rectangle is a scalloped relief that absolutely aids in making the case feel thinner than it is. The last thing visible from this back view is the four corners which clearly protrude (~ 1mm) and add protection for those unexpected drops which happen to all of us.

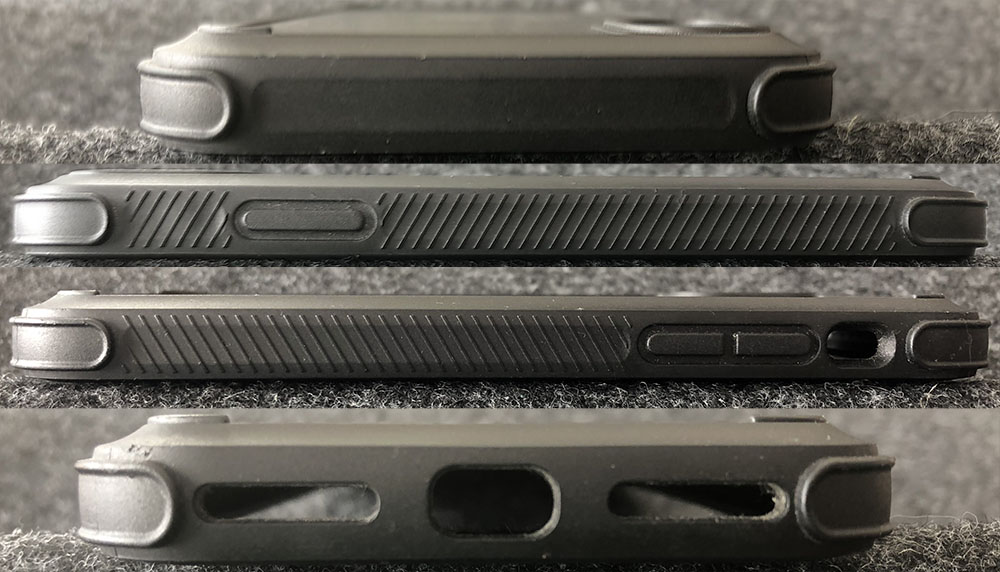
Looking at the sides, you’ll notice the slanted ridges on the long sides look very pronounced at first. The spacing of them however provides comfortable traction and even something to play with. I find myself frequently dragging my thumbnail along it washer board style.

The power and volume buttons all have great button actuation where you don’t have to press very hard, and you can feel that it pressed and registered. The cut-out for the ringer switch is a good size without being too deep. The bottom has cutouts for the speakers/mic and a charging port large enough for most cables while the top is nice and smooth. Those same four protruding corners come in handy while handling the phone.

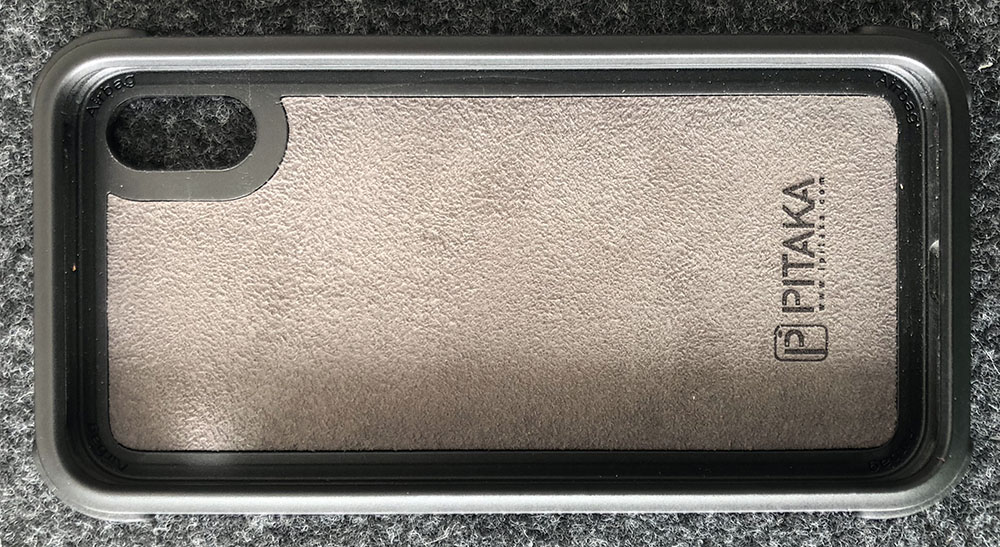
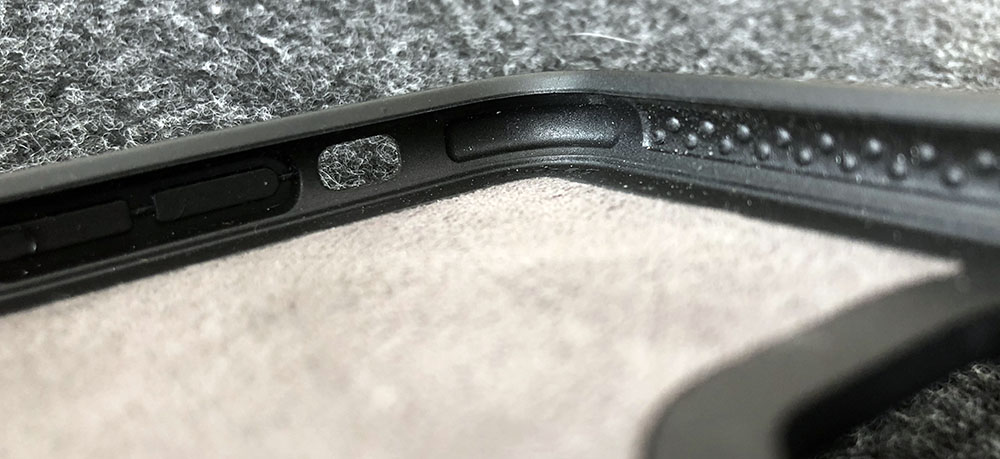
Inside the case is a soft microfiber to protect the glass back of your phone while the inner sides have a dimpled texture in the TPU. Those dimples make contact with your phone and compress on impact offering a bit of an air cushion.

The amount of ‘travel’ is pretty minimal compared to the four corners. What was protrusions on the outside is a void on the inside and this provides a good bit more travel should your phone take a direct corner hit in a drop.

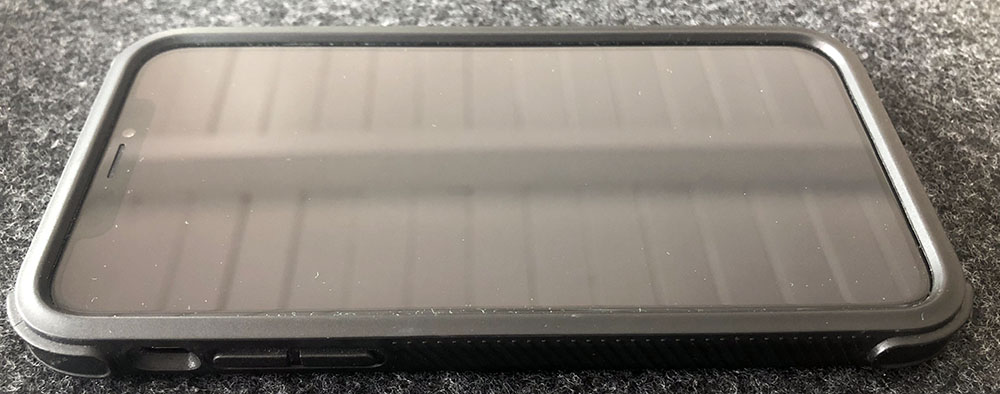
That leaves us with the front of the case. There’s a slight ramp up from the sides towards the screen and then a noticeable lip to the screen edge.

This raised lip means you can set your phone face down without any worries, even if you want to add screen protection as well. This is an underrated and definitely something that was missing from their MagCase product.

Setup

This step is really easy. The TPU material that Pitaka uses is rigid while still being very pliable. You can literally put the phone in any side first, or even flat and just push down. The phone pops right in and all the sides bounce back.

Performance

I’ll get this right out of the way. The MagCase Pro is my new favorite case. I’m a switcher. I swap my case a lot, or I should say I did. This has been on my phone solidly since I got it, the exception being a cycling specific case that mounts to my bike. I can honestly say that I’ve dropped my phone less, and when it has dropped it’s never made one of those sounds where you think ‘Uh oh’. The corner hits absorb well enough that had you not seen it you’d think there was rug down there.

Pitaka claims that this case passes 3x the military specification standard. I don’t doubt the veracity of that claim at all. Does it matter? Or is mil-spec a relevant standard? That’s a little harder to quantify as it’s really hard to repeatably drop a device the exact same way. I’ve had cases before that have protected a device flipping off the roof of a car, yet shattering the screen when falling 3 feet from a table at a car dealer. What you can take away is that they’ve done a lot of drop testing and it’s done well.

One of the other reasons this is now my case of choice is their daily use compatibility. If you’re like me, you’ve got some kind of mount in your car and probably a wireless charger at home, at work or both. Pitaka made sure that wireless charging was not affected by their design. That’s one thing when creating a protective case. When you also include magnets to work with your car mounts, that’s pretty cool.

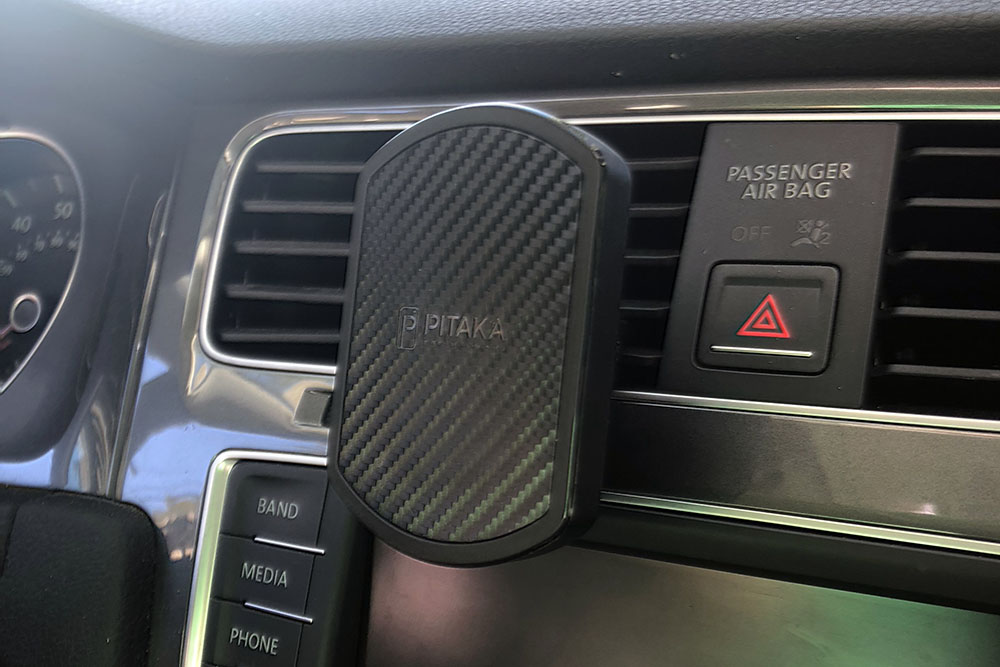
Pitaka has two car mounts; MagMount ($14) and MagMount Qi ($25). Both are available in your choice of vent, suction or CD mount solutions. I’m partial to magnetic mounts and the annoying thing has been the requirement to put a metal plate on the back of your case, or inside if you like to live dangerously. They sent the standard MagMount with vent clip along with this case for review.

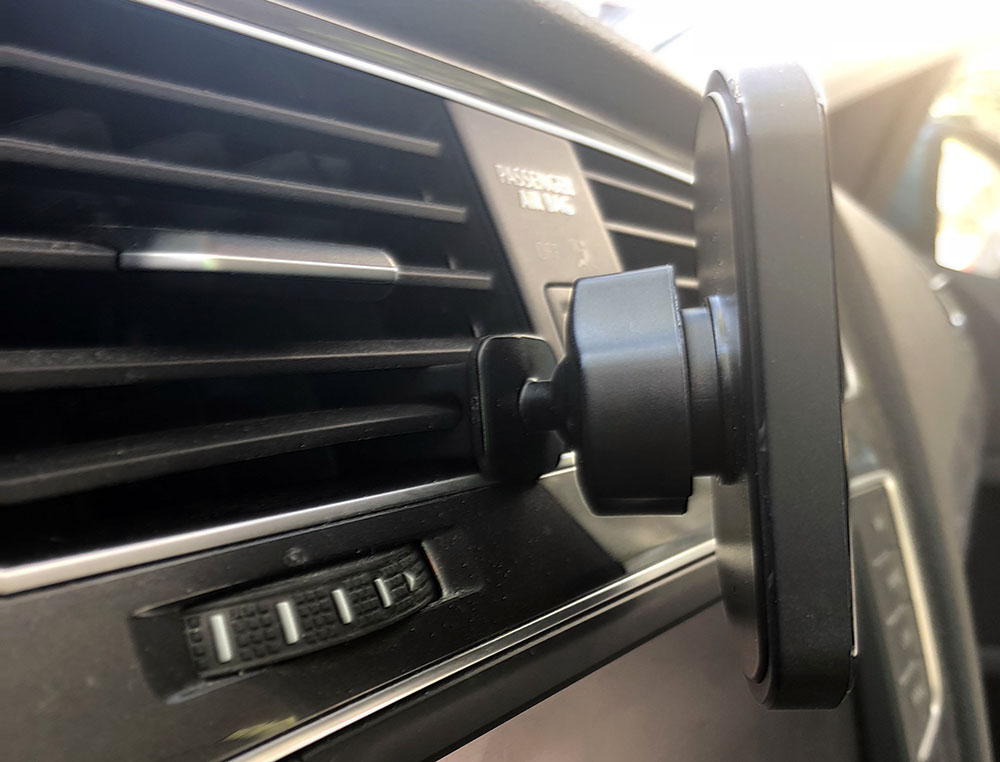
It’s a pretty simple ball joint connected to a larger vent clip that grabs the vent fins well. If you mount it closer to the bottom of your vent, the weight of your phone keeps things from bouncing around.

Having metal plates embedded and manufacturing both the case and the mount has allowed Pitaka to create a very sturdy and reliable solution. I’ve yet to have it slide off in the car on this mount, or their MagMount Qi which I had purchased to use with the MagCase I own.

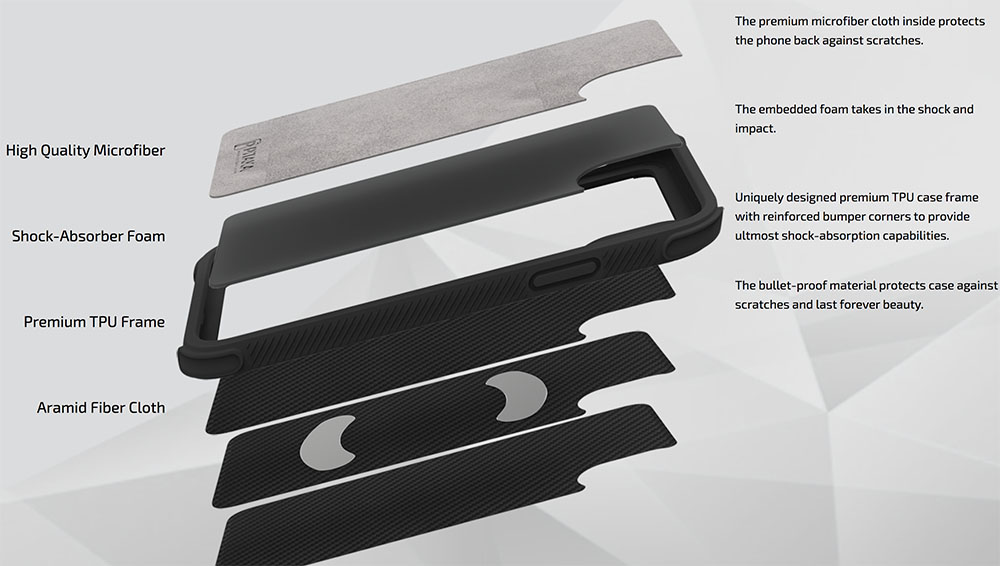
I’m going to steal a graphic from their site now because I really don’t want to cut this case up to show you the layers. There’s 5!

From inside out it’s; microfiber, shock-absorber foam, Aramid layer, Aramid with magnets, and Aramid again. That’s all surrounded by the TPU perimeter.

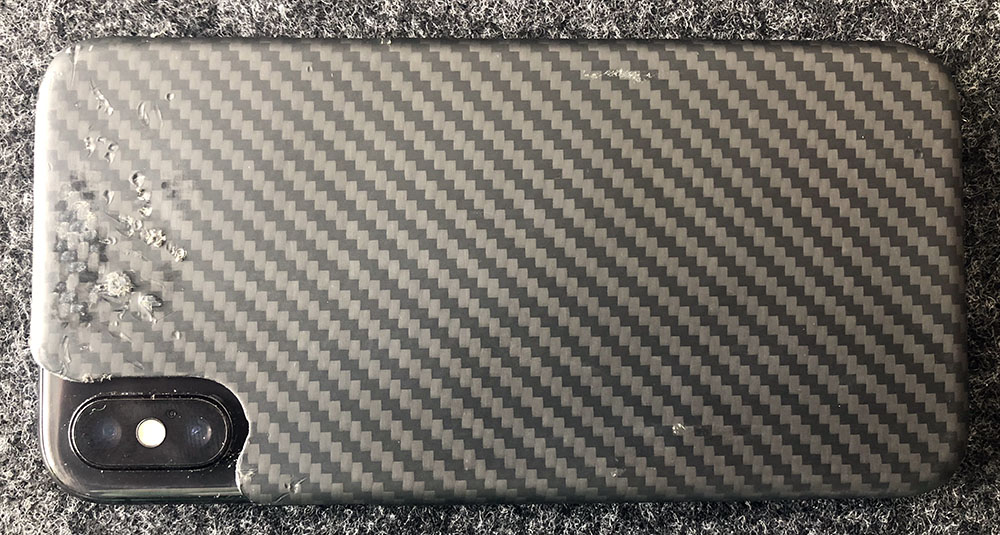
So what’s Aramid? And how did we get this far down without talking about it? Let’s just answer the first of those two. Aramid is short for aromatic polyamide. They’re man-made synthetic fibers originally made for aerospace. There’s a lot more detail on their website, including a detailed article but what you should take away is how durable it is. It will show some scratches, but it also seems to have some self-healing properties as you can ‘rub-them-away’ in most cases. Funnily enough, I have an extreme example I can show you. This is Doolittle, our beagle.

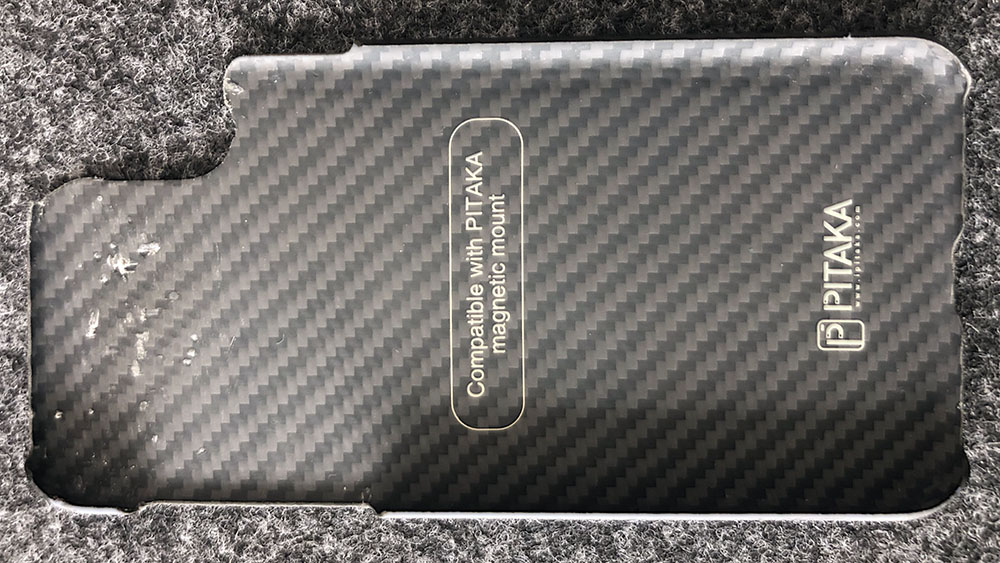
He’s a chewer and got ahold of my previously mentioned MagCase a while back. Here are some photos of it now after trimming off the seriously damaged corner and using a sanding wheel to smooth out and flatten a couple spots.

Still fits and works other than not protecting the camera corner anymore.

So, can it be possible that there’s nothing I’d change? Almost, but it’s not on the case itself. I want to see is more colors and more devices supported. Right now you can get a MagCase Pro for any device, in any color as long as it’s black for iPhone X. If there were versions for iPhone 7, I’d require my kids to use this case. It’s that good. Luckily for me, I do have the right phone and Black/Grey is fine by me.

What I like

  • Fit, feel and finish
  • Non-slippery in hand, non-grabby in pocket
  • Protection from drops
  • Magnetic mount and Qi compatibility

What needs to be improved

  • Options. 1 device, 1 color

Final thoughts

So let’s recap. This is my new favorite case and I think my phone is safer for it. If you have the right phone, you like black and want to protect your phone investment, please consider this case. If you have a different device and/or want some color in your life, let’s hope Pitaka expands their collection as this case is great.

Price: $49.99
Where to buy: Pitaka and Amazon.
Source: The sample of this product was provided by Pitaka

Filed in categories: Reviews

Tagged: ,

Pitaka Magcase Pro iPhone X case review originally appeared on The Gadgeteer on July 20, 2018 at 10:00 am.

Note: If you are subscribed to this feed through FeedBurner, please switch to our native feed URL http://the-gadgeteer.com/feed/ in order to ensure continuous delivery.