Solo NY Everyday Max Backpack review

REVIEW – A good looking backpack with a clean silhouette, lots of pockets and organization at a great price? Sign me up, please. Click on through to find out more.

What is it?

The Everyday Max Backpack is an all-purpose pack from Velocity Collection of Solo NY that’s meant to tackle all your needs in a single bag. Capable of carrying a 17″ laptop, gym clothes, water bottle and almost anything else you’re likely to need in an average day, it does a really good job of living up to it’s name and purpose.

Hardware specs

No hardware here, but that doesn’t mean it doesn’t have specs…

  • Dimensions: 21 x 13 x  8″
  • Weight: 2.4 lbs
  • 17.3″ laptop compartment
  • Internal iPad/Tablet pocket
  • Separate shoe/gym compartment
  • Large zippered side pockets
  • 6 additional pockets
  • Large centered ‘duffle’ opening
  • Padded carry handles (4!)
  • Padded straps and back panels

Design and features

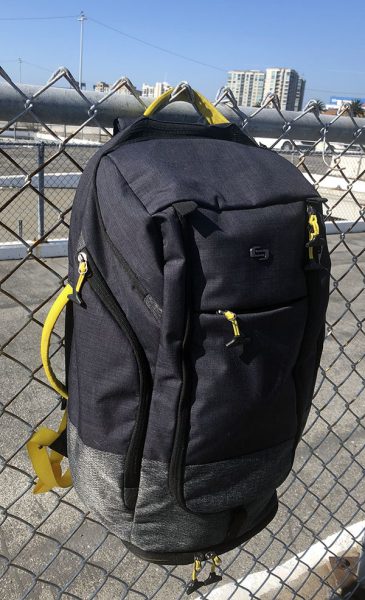
Streamlined is the best word I can think of to describe this bag. The outside surface doesn’t have bulges or unnecessary dangling things. When it’s all zipped up it just looks clean. It’s meant to hug your back and feel comfortable when hanging there.

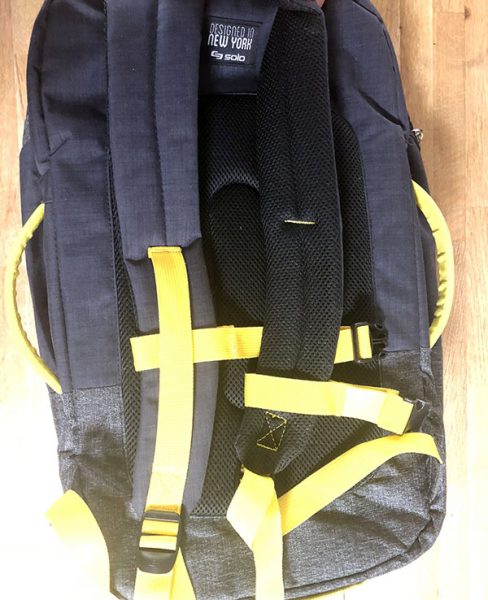
The outer materials are compromised of three main materials; a heathered ripstop in the lower third of the bag, a smooth twill in the upper two thirds and a tight air mesh used on the underside of the straps and the entire back panel.

The other details are as follows. The zipper pulls are all small T-handles threaded through the metal pulls in a typical outdoorsy way.

The handles and webbing are a slightly muted, but still bright yellow webbing with the former having a structural padded interior that amazing maintains its form over time and is comfortable to carry.

Setup

With a backpack, there is a setup step. Well at least for me there is. This is the step where you figure out what you’re going to keep in each pocket and where your critical items live.

Some of these are obvious. The laptop, an iPad. Others like earbuds, cables, sunglasses may have multiple options… or none?

Let’s lay out the bag, the organization and where all these pockets are…
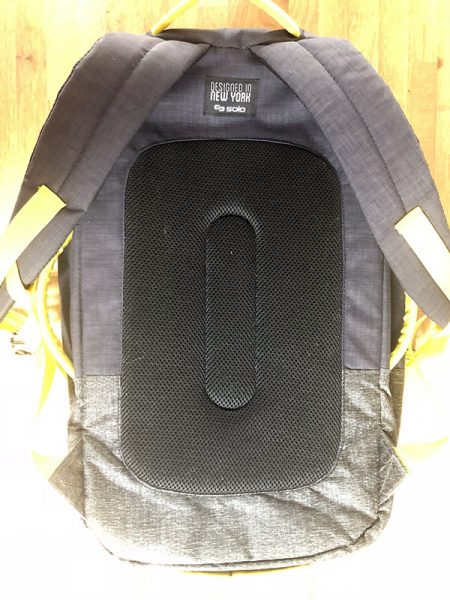
The back panel is fully padded along with the undersides of the straps. This material compresses well, doesn’t thin out over time (so far) and isn’t very slippery on top of outerwear. The straps have a durable webbing that holds its position well, not slowly slipping or being so hard to move that it’s a pain.
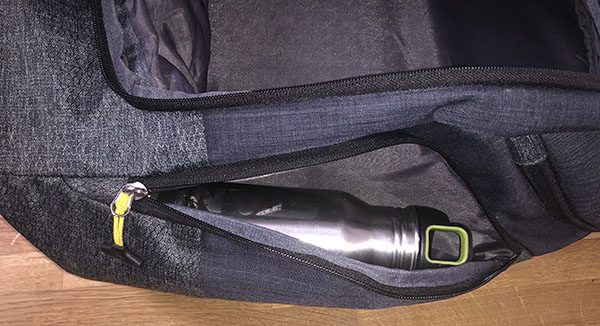
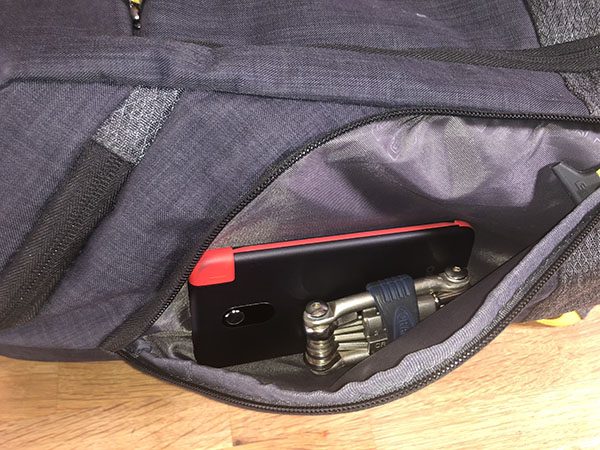
The side panels both sport large zippered pockets that are large enough to hold tall water bottles. As someone who’s been hit in the head by my own bottle when bending over it’s hard to understate how awesome this is, plus it’s still separated from all the other stuff I’m carrying if my water bottle were to start leaking.
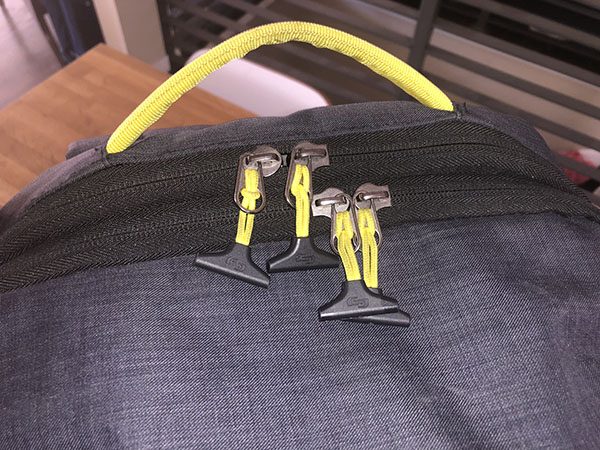
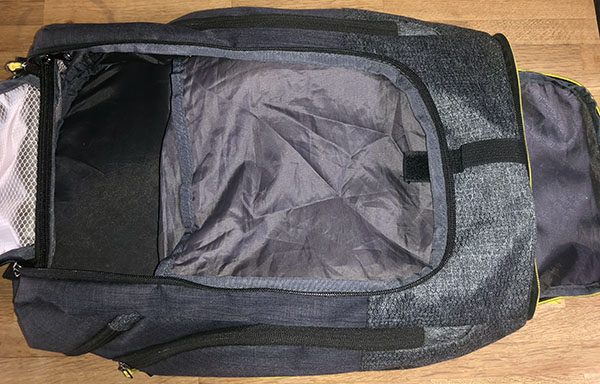
On the top, there are two zippers. The flat one opens into the laptop and tablet pocket. The other is on a bias and opens into the main compartment. Four zipper pulls on the top makes it very easy to open the wrong pocket. I’ll likely cut off one of the two pulls for the laptop compartment to simplify a bit.
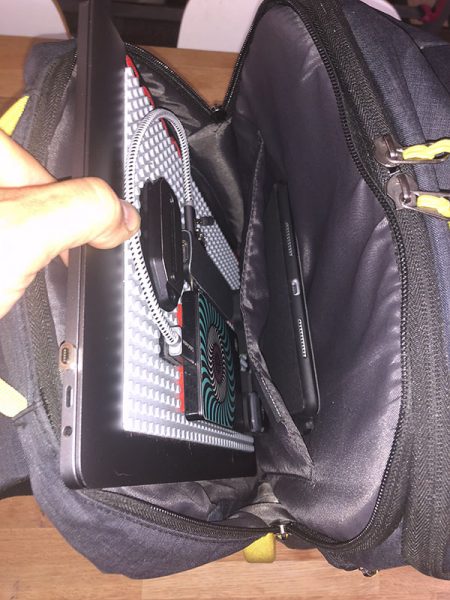
The above photo shows my 15″ laptop sliding into place. Here is also my largest concern with the bag. There is very little cushioning at the bottom of the laptop sleeve. If you are not holding the bag off the ground when you slide your laptop into place, you will hear it make contact. Later if you are setting the backpack down you’ll want to do so gently as the ‘thunk’ is noticeable. I really hope they can make a running change as this is a critical issue.
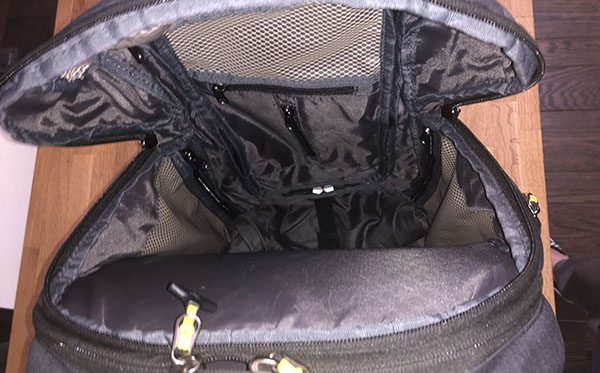
The large opening into the main pocket is great for loading and unloading, but not so great for getting into the many pockets you’ll see staring back at you, which is where the next feature is so handy.
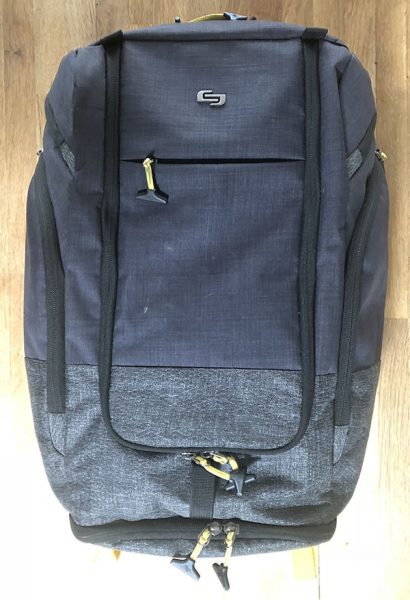
On the front of the bag, there’s a small stash pocket and a long u-shaped zipper that opens up the whole interior of the bag like a duffle. With this flap unzipped you have unrestricted access to the two interior side pockets and the two pockets on the flap’s inside.
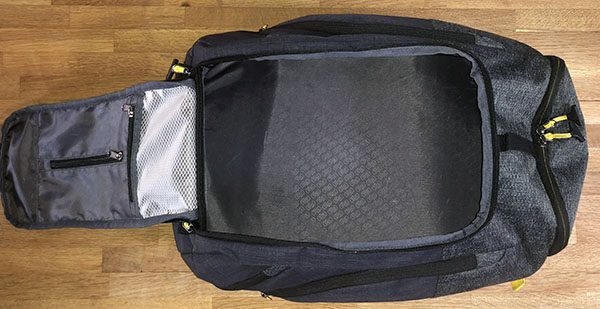
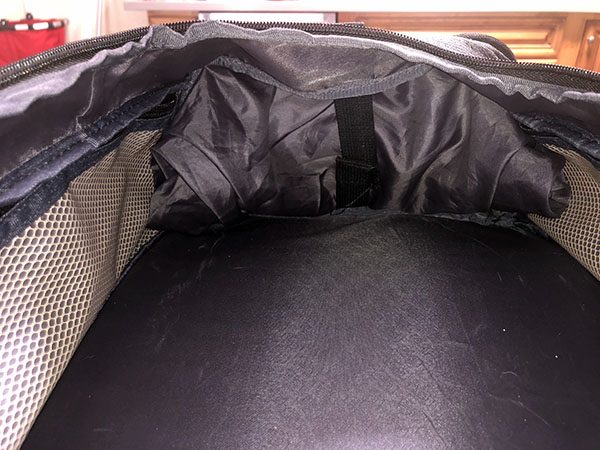
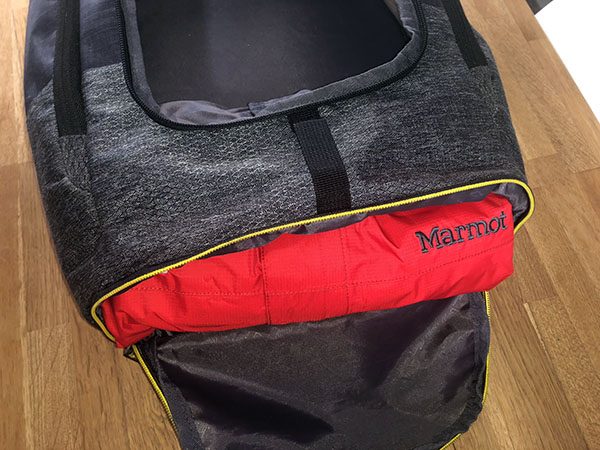
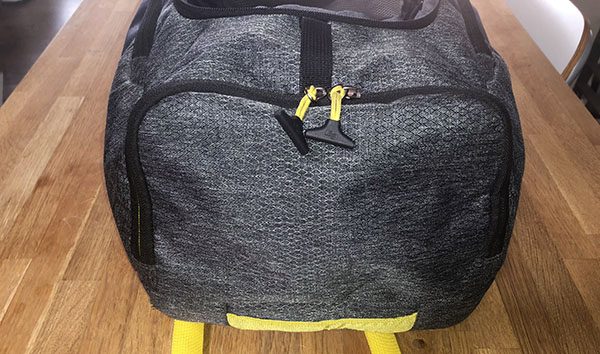
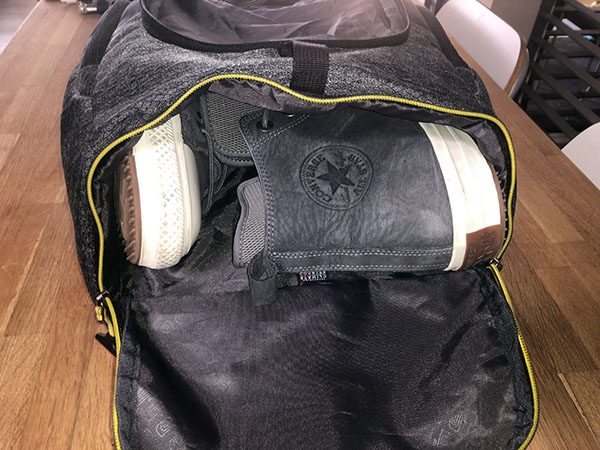
The other thing you’ll find at the bottom of the inside is a small elastic and velcro tether for securing a collapsible bag that’s accessed from the outside bottom pocket. This is great as you can ignore it until you need it. I’ve used it for shoes, power adapters, and lunches. In can eat up a considerable amount of space depending on what you put in there. Most of the time I have a hoodie or jacket in there for quick deployment if I’m hoping on my bike or if the SF weather does what it does. This bottom zipper has yellow teeth hidden behind the black zipper tape creating a cool hit of color when using the zipper.
Performance

Overall this pack is exceptionally comfortable. I’m 6’3″ and the shoulder straps are long enough and the back pad strikes the right blend of comfort without a weight penalty. That’s something I should call out. Solo lists this bag at 2.4 lbs, but it’s one of the lightest packs I’ve used so I’m thinking that’s packaged shipping weight. Heavily loaded or traveling light it’s been comfortable the whole time.

Regarding daily use, there are definitely scenarios where you’re carrying a pack like a briefcase, or lifting it into an overhead bin on a plane. Solo clearly wanted to make sure that you were never reaching for a handle that wasn’t there as there’s 4! One on each side. These grab handles are comfortable and hold their shape standing slightly off the bag as if begging to be handled.

Let’s talk about the interior pockets. The two inside-side pockets are long (or tall) and work great provided you don’t have a water bottle in the corresponding outside pocket (which you’re very likely to). With the duffle panel open you have easy access to these and you’ll find yourself using them frequently as well as occasionally forgetting that’s where you put something.
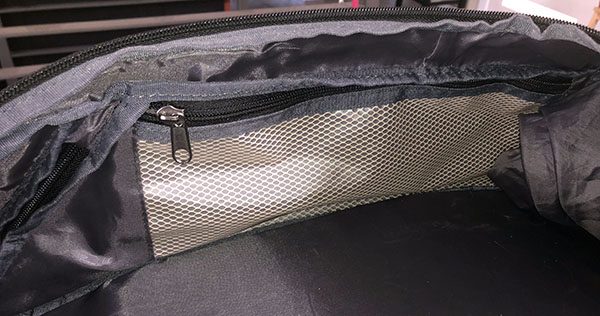
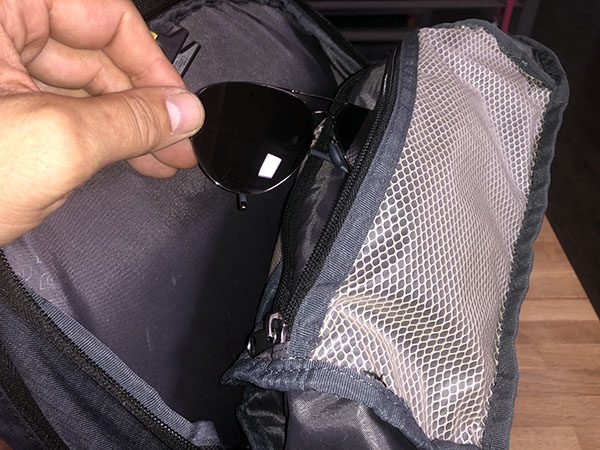
The remaining 3 interior pockets I definitely have some issues with. Like the pocket shown above, the first one closest to the opening has a clear material that lets you see what’s in there. This is great until you unzip and all of it falls out because the flap is now flayed open and the zipper is on the downhill side of the pocket.
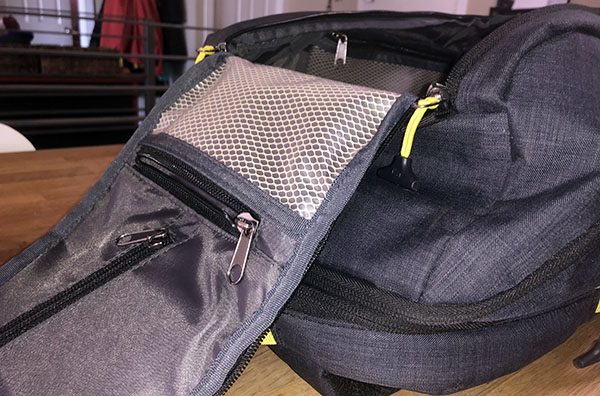
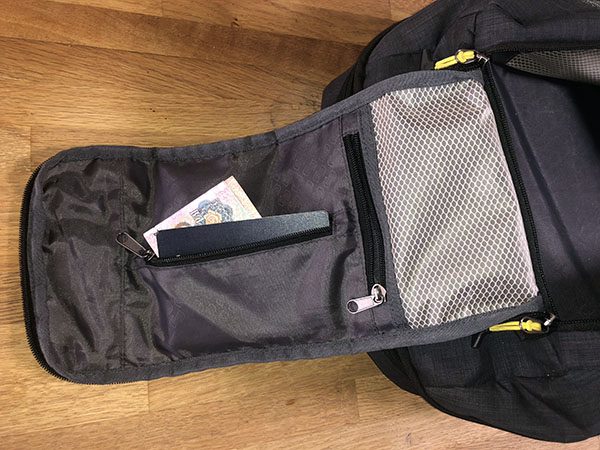
The second pocket inexplicably has the zipper right through the middle of the usable space. Something like a passport will fit, but it’s a slide in, pry the other side and bend the passport scenario. The last pocket is on the underside of what is the top of the bag. It makes sense to get into it from the duffle opening, but it’s not very visible that way. From the top opening, the zipper of the pocket is at the bottom, so I’ve ended up flipping the top inside out to use this pocket. Feels weird.
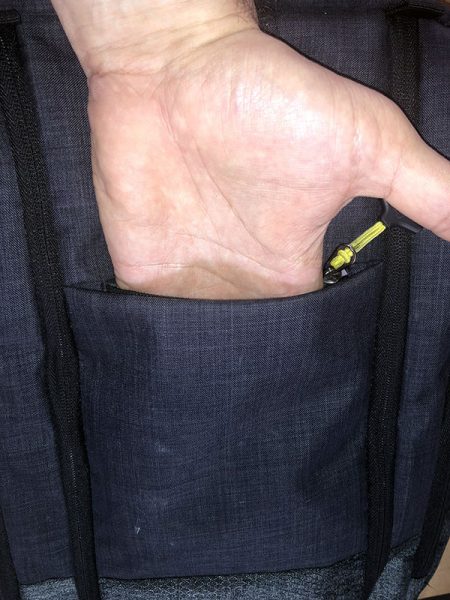
The last pocket is one that I typically use more than any other on a pack, and fight with on the Everyday pack. The outside front stash pocket. It’s well placed and ideal for earbuds, gum, or dumping your phone as you go through TSA. My complaint is how narrow it is. I can get my four fingers in there, but not my thumb which makes it hard to get stuff back out.
Again, in everyday (see what I did there?) use these issues have not been able to overpower the strengths of the bag which I can boil down to a great weight, comfort, accessibility and storage volume as well as a great aesthetic. Even the critical laptop padding issue has not kept me from wanting to use this bag. Since my laptop is smaller than the pocket I’ll cut a piece of closed cell foam to place down in the bottom. Let’s wrap this up.

What I like

  • The weight, or lack-thereof more specifically
  • Comfort; padded back and straps
  • Side pockets (fully enclosed water bottle!)
  • Bottom shoe/gym pocket
  • The multiple grab handles

What needs to be improved

  • Lack of non-compressing padding for the bottom of laptop compartment – Please fix!
  • Width of front stash pocket
  • Every pocket on the duffle flap
  • Tether for interior shoe pocket needs adjustability

Final thoughts

If it wasn’t apparent in the review above, I have a love/hate relationship with backpacks. I usually get excited about, then buy a pack only to find a ‘fatal’ flaw in the first couple weeks. That’s what stands out about the Everyday Max pack here. It’s been a solid two months (review way overdue) and I’m still running it. All the photos above were shot at the end of this period of time. It’s been with me to Shenzhen, Shanghai, Taiwan, Singapore, Barcelona, and Paris along with daily commuting from Oakland to San Francisco by car, Bart, ferry, bus, bicycle, and moped. It’s taken everything I can throw at it including a 350W Bafang hub motor, large 48v e-bike battery, and all my EDC stuff. While I have some pocketry gripes, its missing sunglass-specific pocket and a dangerous lack of padding under the laptop it’s still maybe the best backpack I’ve used. That’s a hard statement to write considering what I’ve spent on some other packs. Time will tell as I revisit packs frequently and rediscover why I abandoned them to my closet of carrying. Looking like this one may be different. Let’s hope.

Price: $79.99
Where to buysolo-ny.com and Amazon
Source: The sample of this product was provided by Solo NY.

Filed in categories: Reviews

Tagged:

Solo NY Everyday Max Backpack review originally appeared on The Gadgeteer on July 26, 2018 at 9:00 am.

Note: If you are subscribed to this feed through FeedBurner, please switch to our native feed URL http://the-gadgeteer.com/feed/ in order to ensure continuous delivery.

tulo pillow review

REVIEW – I’m on a quest. But it’s not for the best smartphone or the best gear bag. I’m on a quest for the best pillow and the latest pillow to cradle my head while in gentle slumber is the tulo pillow. Will it be too hard? Too soft? Or will it be just right? It’s time to find out.

What is it?

tulo means “sleep” in Chichewa which is a language spoken in Zambia, Malawi, Mozambique, and Zimbabwe. tulo is also a pillow that is made of high-density foam that is infused with particles of titanium. No, I’m not kidding. It also features an AquaCool phase-change material designed to keep you cool. That’s a lot of tech for something that isn’t powered by a battery.

Design and features

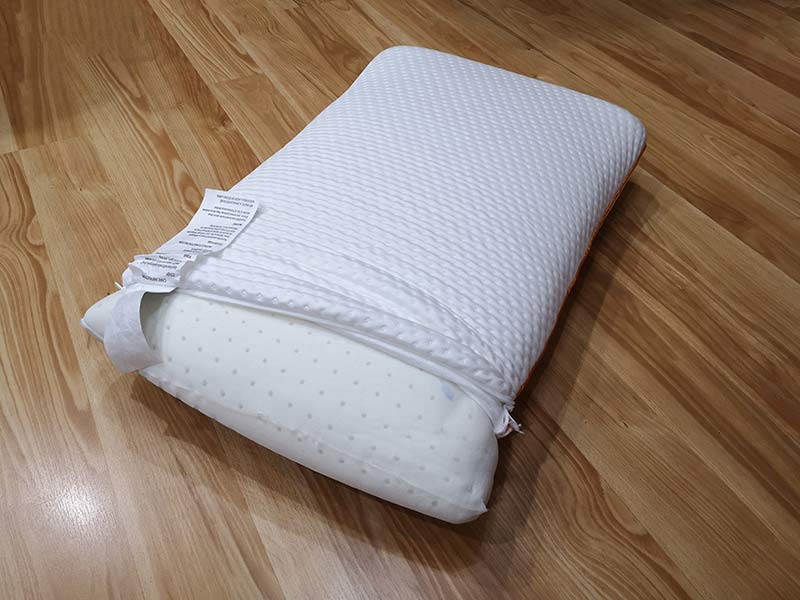
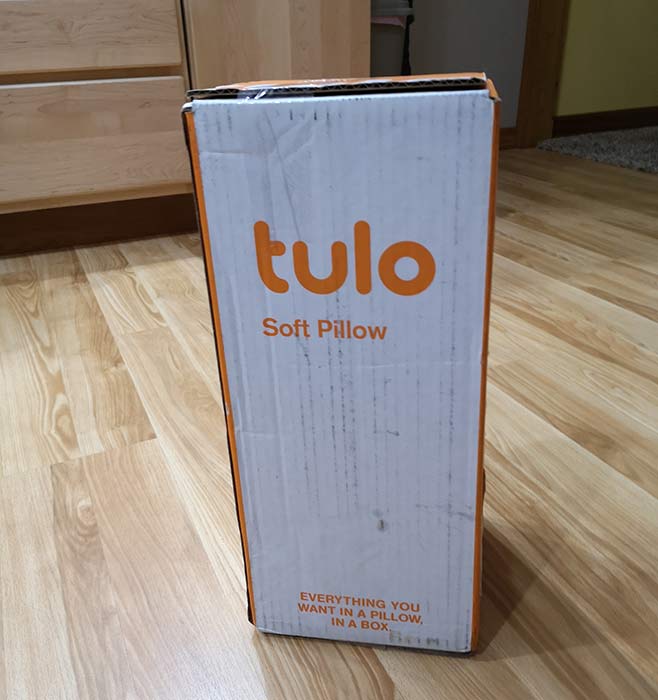
The high-density tulo pillow arrives in a surprisingly non-pillow shaped box. Opening the box reveals a compressed “jellyroll” pillow wrapped in protective plastic.

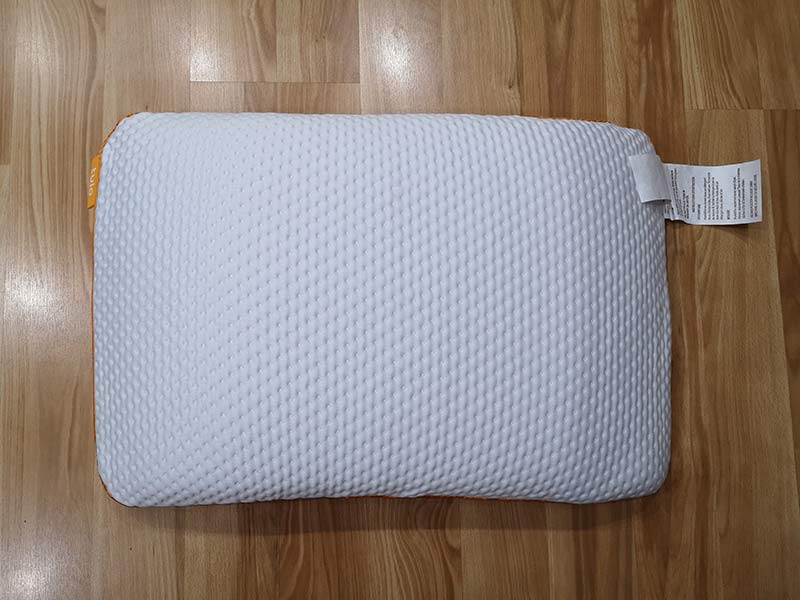
When unwrapped, the pillow unfurls into a  16″L x 26″W x 5″H form factor which fits into a standard-sized pillowcase.

I was sent the soft version of the pillow, but the tulo also is available in a medium and firm version. Choosing the firmness level depends on your typical sleeping position. Soft is for stomach sleepers, medium is for back sleepers, and the firm version has been designed for side sleepers. Even though I sleep on my side, I opted for the soft version of the tulo because I like a soft pillow.

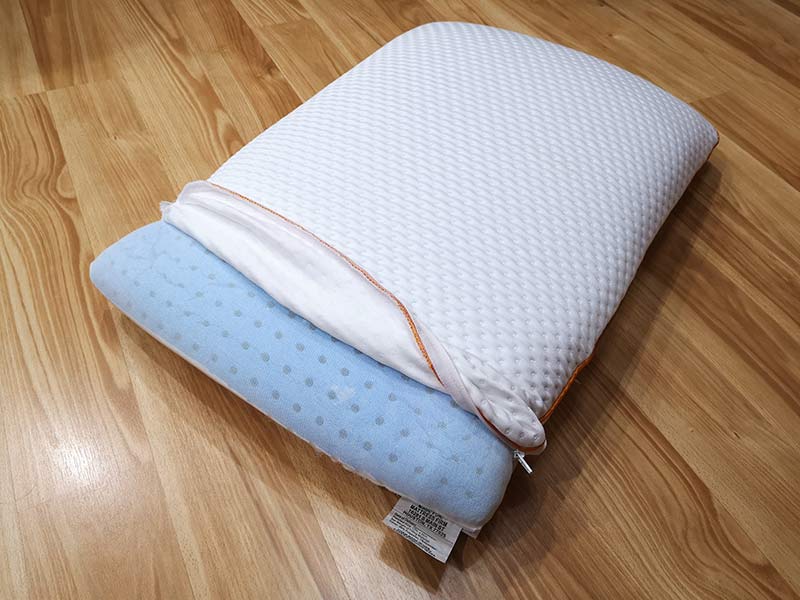
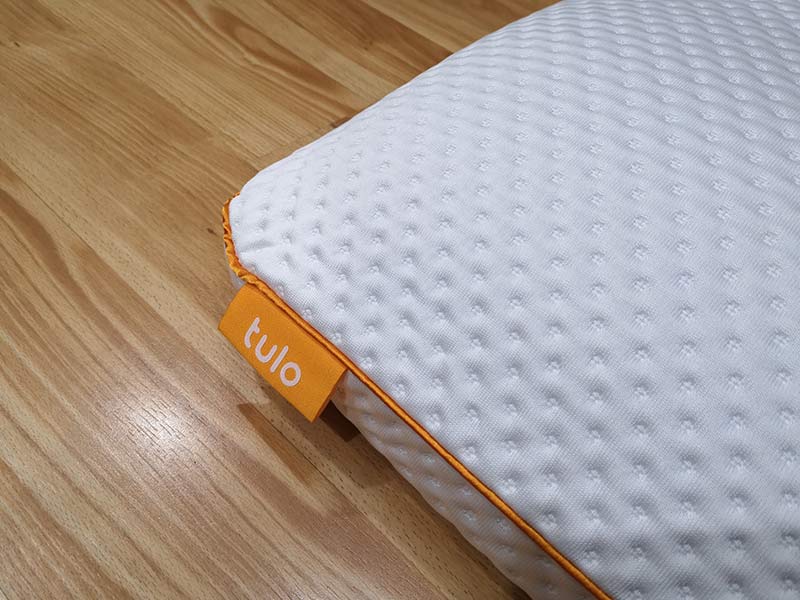
The outer cover of the tulo pillow is a soft dimpled material with an orange piping around the sides and a tulo branded tag sewn into the seam.

The cover unzips to reveal the foam pillow. One side is blue as shown above. I’m assuming that this side is the side with the AquaCool phase-change material that is designed to keep you cool. The tulo website and the materials included with the pillow do not offer any details about this special material except that they say that it’s a super conductive highway for heat flow.

The same is true about the opposite side of the pillow which is white. This side might be the one that is infused with particles of titanium. But again, I can’t find any details about the benefits of this “feature”.

Can you throw the pillow in the washer to clean it? Nope. The zippered cover can be washed, but the pillow itself can only be spot cleaned with mild soap and water, and then air dried.

Time for a snooze!

I’ve mentioned in some of my other pillow reviews that I’m like Goldilocks. Pillows are either too hard, too soft (rarely), and almost never just right. That’s why I’ve continued to sleep on the same pillow for too many years now because I just can’t find a new pillow that is as comfortable as my current one.

As for the tulo, I was happy with the height of the pillow. That tends to be my main complaint when it comes to trying new pillows. They are usually too high and cause my head to raise at too much of an angle when I’m sleeping on my side. The tulo didn’t have that issue, so it got an immediate thumbs up. Laying on the pillow supported my head and neck at the perfect angle and also didn’t bother my shoulder.

What about the AquaCool and titanium particles? Did they keep my head cool while sleeping on the tulo? Well, I didn’t wake up with a cold head or a hot head. I woke up with my head feeling just right. Yes, we’re using the Goldilocks reference again. So a thumbs up for the special materials too – I guess. Seriously though, I don’t the pillow has a super conductive heat highway. It just feels like a pillow as far as coolness goes.

Unfortunately, that was where the happiness ended because the tulo pillow didn’t live up to its “soft” name. It felt one level too firm for me. If it were just a bit softer, it would be a keeper.

What I like

  • Right size and right height
  • Washable cover

What to watch out for

  • Can’t be put the pillow in a washer or dryer
  • Soft version of the pillow wasn’t soft enough for me

Final thoughts

I realize that pillow firmness is subjective and everyone will have their own comfort level when it comes to a pillow. That said, of all the pillows I’ve tried in the past year or so, the tulo is the one that comes closest to replacing my antique pillow. The tulo is well made and comes in at an affordable price, so it is worth a try if you’re also looking to replace an older pillow.

Price: $89.00
Where to buy: tulo.com and Amazon
Source: The sample for this review was provided by tulo.com.

Filed in categories: Reviews

Tagged: ,

tulo pillow review originally appeared on The Gadgeteer on July 25, 2018 at 1:00 pm.

Note: If you are subscribed to this feed through FeedBurner, please switch to our native feed URL http://the-gadgeteer.com/feed/ in order to ensure continuous delivery.

Jabra Elite Active 65t true wireless earbuds review

REVIEW – Earlier this year I reviewed Jabra’s Elite 65t earbuds, their latest high-tech truly wireless headphones. Jabra has packed a long list of features and excellent sound into a tiny, secure, and comfortable package. The Elite 65t’s have a water resistance rating of IP55, engineered to withstand normal use and moderate exercise but I hesitated to use them during epic workouts in fear of damaging with sweat. Jabra has recently released their more exercise-centric sibling: the Elite Active 65t’s which have a IP56 water resistance and are engineered to survive many sweat-soaked efforts. Let’s see how well they fair against their (nearly) twin sibling.

Since the Active version of the Elite 65t’s is nearly the same in terms of form-factor and features, I will be plagiarizing myself from my original review and focusing on differences between the two variants.

What is it?

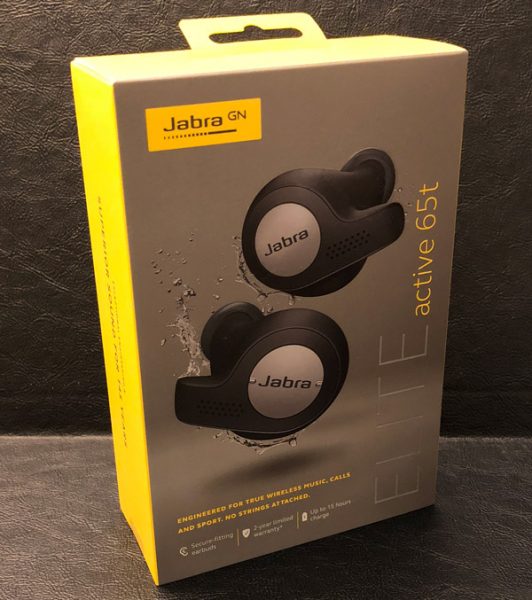
The Elite Active 65t true wireless earbuds are a twin of the standard Elite 65t’s but have been engineered to withstand greater exposure to moisture and thus are more hardened against sweat and the great outdoors. Both Elite 65t’s are Jabra’s second generation of truly wireless earbuds with improved sound quality, a better, more secure fit, and Bluetooth 5.0 connectivity. These lightweight earbuds are not only comfortable with a secure fit but engineered/optimized for listening to music, videos, working out, and participating in calls.

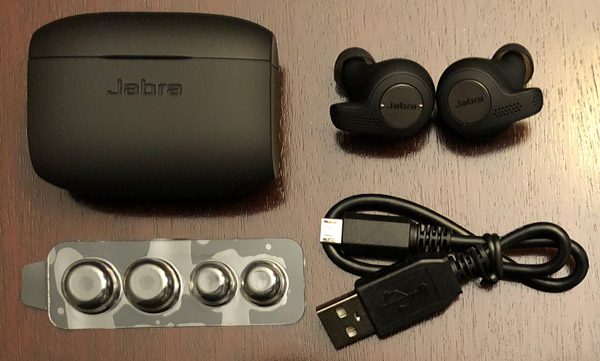
Package Contents:

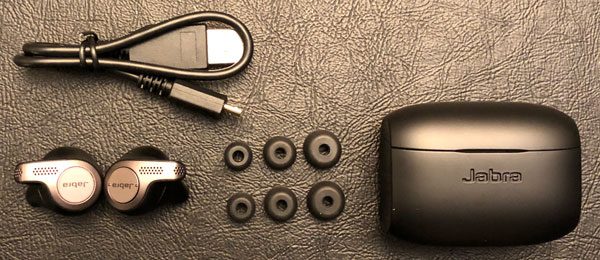
  • Jabra Elite Active 65t
  • Charging case
  • Micro USB cable
  • 3 sets of silicon EarGels
  • Quick Start

Design and features

The Elite Active 65t’s design is a departure from Jabra’s classic fin-stabilized form factor. Unlike its predecessor, the 65t’s molded shape is all that is needed to securely hold the earbuds in your ears. Inserting them into your ears is a simple quarter turn process…as easy as turning a 90-degree valve.

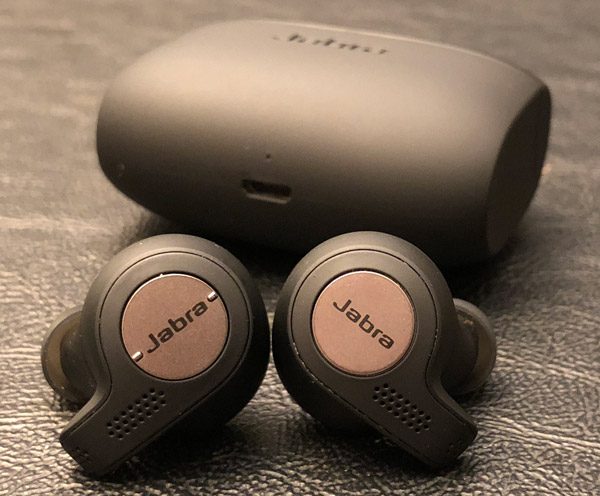
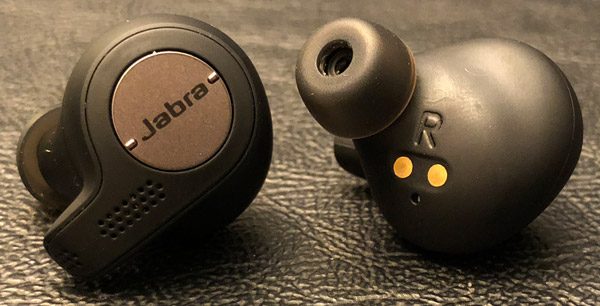
The exterior of the Active 65t earbuds is made of a black rubberized plastic and pewter metallic coloring with Jabra stamped in the center of both multifunction buttons. Each earbud has two microphones for better ambient noise and wind reduction, making for crisp clear calls on both sides of the conversation. The rest/majority of the Elite Active 65t earbuds are a hardened black plastic, each with a pair of metal connectors for charging in their case.

Build quality and style:

The Elite Active 65t earbuds’ material and build quality are both very good, as you would expect from a high-end and relatively expensive set of headphones. As I mentioned, the Elite Active 65t and its charging case have a rubberized/grippier finish than the standard Elite 65t giving them a slightly better grip in the ear.

The Elite 65t series earbuds (both the standard and Active) are direct competitors of Apple’s AirPods and crush them in nearly every category including secure fit, features, controls, sweat-proofing, and overall looks. I admit style is subjective, but Apple’s earbuds look like white dangly earrings from the 1980’s that could come falling out @anytime. The Elite’s secure fit, compact design, and subdued looks are much more me. Add in the fact the Active 65t’s are engineered to survive the best workout you can muster, I do not even see why ANY athlete would choose the AirPods over the Elite Actives (and I’m an Apple guy).

Charging & Storage:

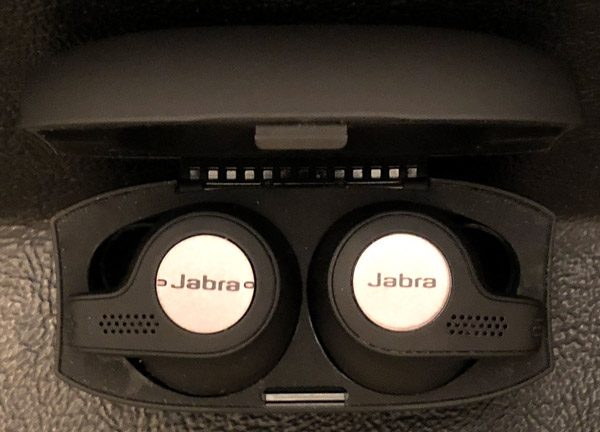
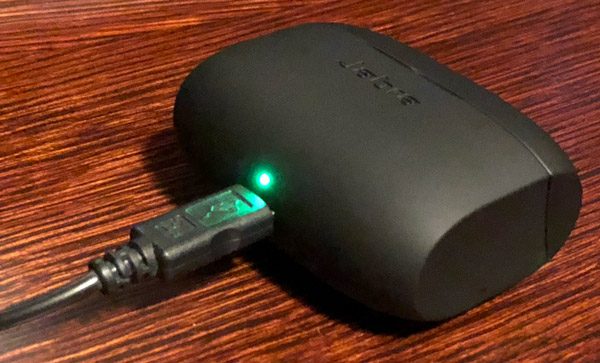
The charging case is small, black, and well made, with the shape of a small pillbox. It is meant to not only charge the Elite earbuds but store, transport, and protect them as well. The case is powered by a micro USB charging port on the base. There is an associated status LED meant to let you know when it needs to be recharged, is charging, or fully powered up.

The top third of the case opens to reveal two form-fitting spaces for the earbuds, with a LED in between that lets you know if the headphones are fully charged and ready to go. The lid has a tight and very firm seal that can be tricky or an effort to open. But with a bit of practice and use, opening the lid becomes easier as the case/mechanism wears in. When the earbuds are in the case, LEDs on their exterior momentarily pulse, depending on how charged they are (green) or that they’ve made contact with the charging points as you store/charge them (red).

Jabra promises 5 hours of use before needing to recharge. The storage case has an internal battery with two additional charges before the earbuds + case needs to be plugged back in. If your earbuds run out of power and you want to use them on the fly, a quick 10-15 minute charge gives an hour plus of listening, long enough for most runs, commutes, phone calls, even most shows and videos.

The earbuds themselves are relatively lightweight and so comfortable, you barely know they’re there. The right bud has a single multipurpose button for call answering, pausing/playing music, and pinging your smart-devices’ digital assistance (longer press) and the left is a rocker button with two small tabs for managing volume and track skip/repeat (longer press).

Fit and Comfort:

Jabra includes three sets/sizes of silicon EarGels meant to help find an ideal, custom fit. With the right fit, the Elite Active 65t earbuds are very comfortable to wear producing excellent sound. Jabra’s new wingless design works extremely well, providing a secure fit second to none. Once inserted into my ears, I rarely had to adjust them for comfort or better sound. Even when pressing either multifunction buttons (aka adjusting volume or answering a call), the Elite Active 65t’s remain securely in place.

The easiest way to get them properly situated/inserted is to position each earbud with the arm facing straight down, and then twisting backward. The arms should point toward your face with a slight downward angle, as pictured above.

Sound Quality:

As with most/all earbuds, the better the earplug-type of fit you can get, the better the sound quality and passive sound isolation. Overall the sound experience was excellent on all fronts: music, video, calls, and video chat. Bottom line: the Elite 65t series are the best sounding earbuds I have ever used or tried.

The Major Difference:

Other than finish and coloring, the only significant differences between the Elite Active 65t (right) and standard Elite 65t (left) models come in terms of workout performance/data tracking and survivability. The Elite Actives have a built-in motion sensor for tracking workout activity that is viewable/available on the Jabra+ app. But as I have mentioned, the real enhancement from the standard Elite 65t is their IP56 rating, which means they can survive high-pressure water jets and limited dust exposure. Theoretically, no matter how insane your workout is, they should live to fight another day. The Elite Active 65t’s are backed by a one year warranty on parts and workmanship and two years against failure due to dust, sweat, and weather. And for those of you that need your earbuds even more hardened, the Jabra Elite Sports earbuds that are still available, have a IPan7 survivability rating, and include a three year warranty against failing due to sweat or moisture. FYI: mine are still going strong…

I have been using the Elite Active 65t’s daily for about a month now, doing my best to put them through their paces. I used them during my daily commute, running stairs, elliptical machine, a dozen runs, walking around, on a inversion board, etc…definitely many sweaty moments and occasionally upside-down.  They have stayed securely in my ears, sounded great, and have not shown one sign of dying or being impacted whatsoever.

What I like

  • Solid, secure, comfortable fit
  • Excellent sound quality
  • Great call quality
  • Solid passive noise isolation
  • 5 hr battery life (15 w/case)
  • Zero video lag
  • One year warranty on parts and workmanship and two years against failure due to dust, sweat, and weather

What needs to be improved

  • None

Final thoughts

The Elite Active 65t’s have become my new goto headphones overall. Their comfort, secure fit, sound quality, IP56 water resistance, and overall design are excellent and really the truly wireless earbuds to beat. Their in-the-case charging, form factor, and portability are ideal for athletes on the go. I carry the Jabra Actives Elite 65t earbuds with me everywhere I go for listening to music on the bus ride into work, walking around town, video on the elliptical machine, running stairs @lunch, or pounding the pavement in the rain…they are up for the task. I love the fact they fit so well, rarely needing to be adjusted, and have no cords dangling definitely add to the Zen of running.

Price: $189.99
Where to buy: The Elite 65t’s are available from Jabra or Amazon.
Source: The sample of this product was provided by Jabra.

Filed in categories: Reviews

Tagged:

Jabra Elite Active 65t true wireless earbuds review originally appeared on The Gadgeteer on July 25, 2018 at 11:00 am.

Note: If you are subscribed to this feed through FeedBurner, please switch to our native feed URL http://the-gadgeteer.com/feed/ in order to ensure continuous delivery.
TRENDnet Powerline 200 AV PoE+ Adapter review

REVIEW – The TRENDnet Powerline 200 AV PoE+ Adapter extends a computer network almost to 1000 ft by transmitting an encrypted signal over existing electrical wiring. The adapter can also power PoE+ devices. Best of all it is ready to use out of the box. Read on to see what I think!

What is it?

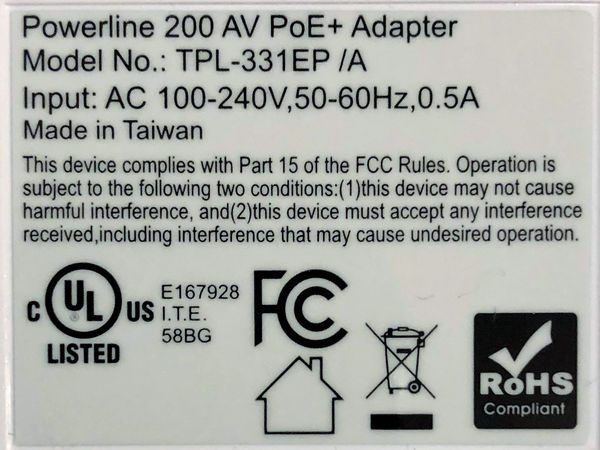
The TRENDnet Powerline 200 AV PoE+ Adapter creates a high-speed computer network on top of  your home’s existing electrical wiring. It does this by creating an encrypted radio signal within home wiring for transmitting and receiving network traffic. This is useful for using network components that require wired network connections in rooms where no such connection is available. The TRENDnet Powerline 200 AV PoE+ Adapter also has PoE+ capability, which means that it can supply up to 30W of power over the ethernet connection for powering devices. Some devices which may benefit from this include IP cameras, wireless access points and VoIP handsets. 

What’s in the box?

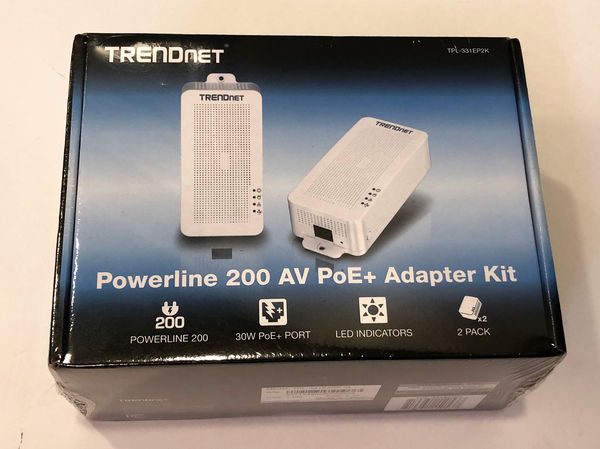
The product review is for the TPL-331EP2K which contains two units for starting a network.

  • 2 x TPL-331EP
  • Quick Installation Guide
  • Safety note (about the dangers of using damaged electrical equipment and exposing the unit to extreme heat)
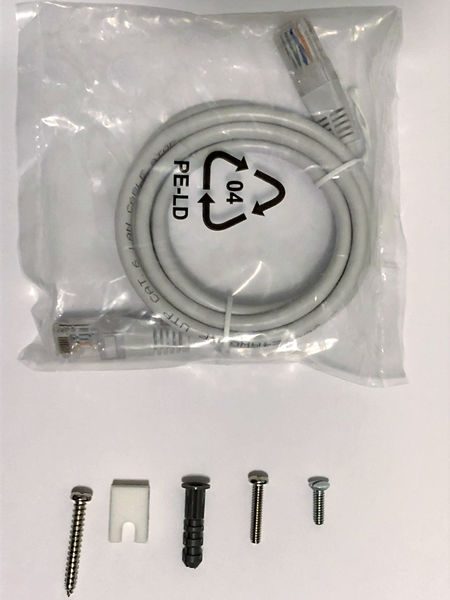
  • 2 x Network cable (1.2m/4 ft.)
  • 2 x mounting hardware

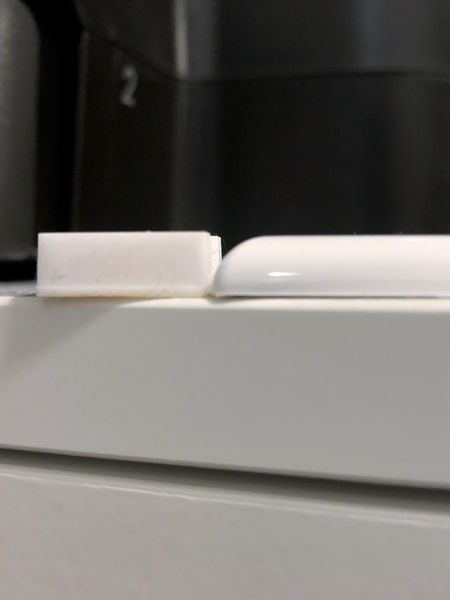
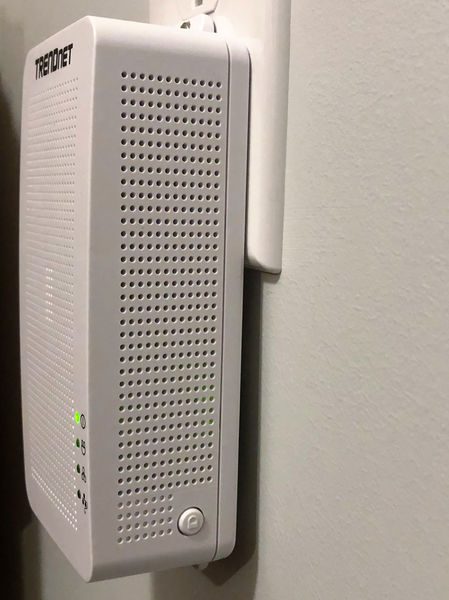
Mounting hardware includes a plastic drywall anchor, screw and foam spacer so that the base of the unit can be fastened to the drywall below the wall receptacle. You can see from the picture below that the spacer, on the left, is about the same thickness as the wall plate (on the right).

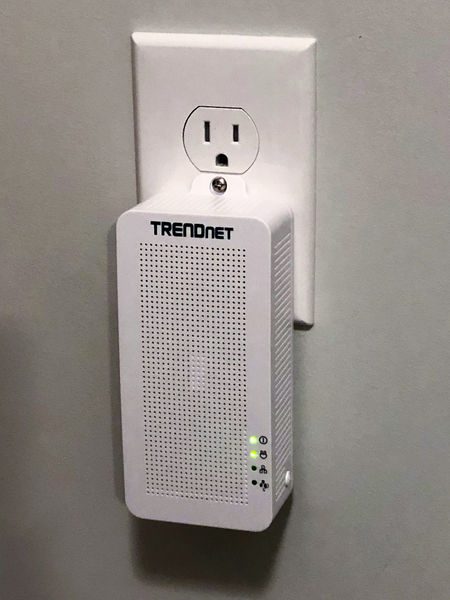
The mounting hardware also comes with an extended wall plate screw that can support the weight of the adapter in a standard duplex receptacle design. The unit weighs 7 1/4 ounces so it will generally stay installed without the screw – the hardware provides assurance that it will not be removed accidently. The picture below shows the unit fastened by the wall plate screw only. 

Design and features

Specifications

Standards  • IEEE 802.3, IEEE 802.3u,  IEEE 802.3x,  IEEE 802.3af,  IEEE 802.3at,  IEEE 1901
Frequency Band • 2 – 28MHz
Modulation/Protocol • OFDM, 1024/256/64/16/8-QAM, QPSK, BPSK, ROBO; CSMA/CA, CSMA
Data PHY Rate • Up to 200Mbps
Networking Distance • Powerline: Up to 300m (980ft.) linear distance over electrical power lines***
Encryption • 128-Bit AES (Advanced Encryption Standard)
Powerline Nodes • Up to 8 (max.)
Overlapping Powerline Networks • Up to 4 (per electrical system)
Special Features • Auto-connects to other TRENDnet Powerline adapters;  IPv6 support;  IGMP / MLDv2 Streams
Power • Input: 100 – 240V AC, 50-60Hz; Consumption: Active mode: 2.3W (max.); Standby mode: 1.7W (max.); PoE Budget: 30 Watts (max.)
PoE Delivery • Pin 1, 2 for power+ and pin 3, 6 for power- (mode A)
Operating Temperature • 0 – 55°C (32 – 131°F)
Operating Humidity • Max. 93 % non-condensing
Certifications • FCC;  IC
Dimensions • 156 x 67 x 43 mm (6.14 x 2.6 x 1.7 in.)
Weight • 205g (7.2 oz.)
Warranty: • 3 year

TRENDnet Powerline 200 AV PoE+ Adapter Design

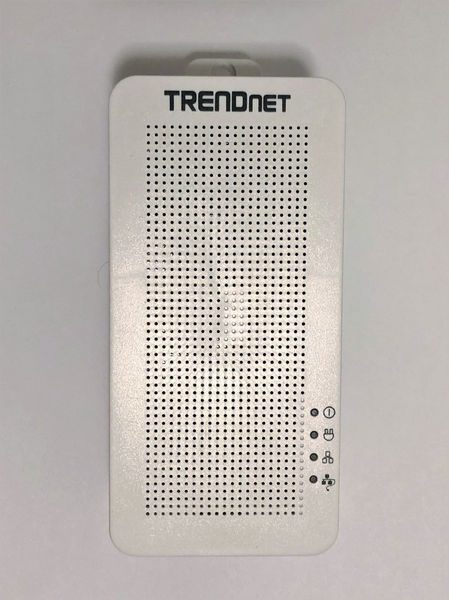
The power adapter will look at home in any fairly technical setting, such as an AV area or near a computer workstation area. However, it’s technical design and lines will be somewhat of an eyesore anywhere else. For instance, if you are using this to discreetly power an IP camera then the large TRENDnet box will certainly provide a hint that there may be surveillance in the area.  The front of the unit is well ventilated but it seems excessive for a device that only consumes 2.3 W.

The four LEDs on the front indicate the operating state of the unit. The top LED is always lit whenever the device is powered. The second from top LED is lit when the powerline network is connected and blinks when data is transmitted over the powerline network. The second from bottom is lit when the Ethernet port is connected and blinks when data is transmitting over Ethernet. Therefore, the middle two LEDs always blink together, but the second from the top may blink on its own (indicating the powerline network overhead). The bottom LED is lit when a PoE/PoE+ device is connected.

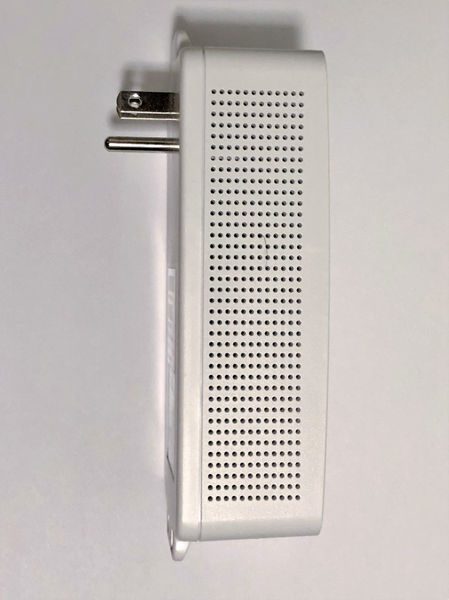
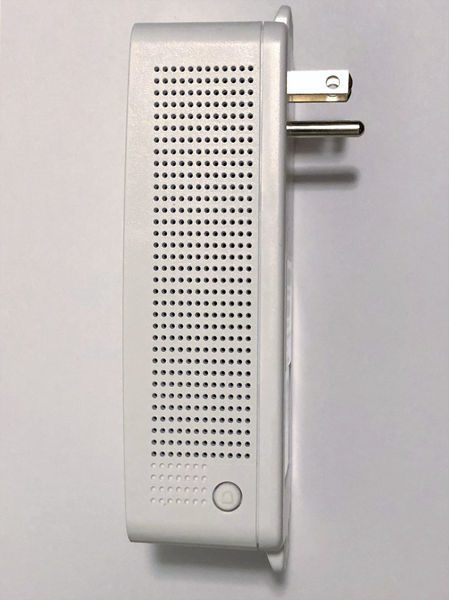
The left side of the unit has more ubiquitous venting but no other interface or indicators.

The right side of the unit looks similar to the left side but there is a sync button at the base. Pressing the sync button for 3 seconds initiates a synchronization session. The powerLED will begin to blink for 2 minutes. Pressing the Sync button on additional adapters within the time frame will synchronize encryption keys between these adapters and create a private network. Without performing this step any additional TRENDnet adapters introduced into the electrical circuit will also be allowed to join the network. Performing this step on a subset of adapters (if four or more adapters are connected) will create an isolated network of adapters.

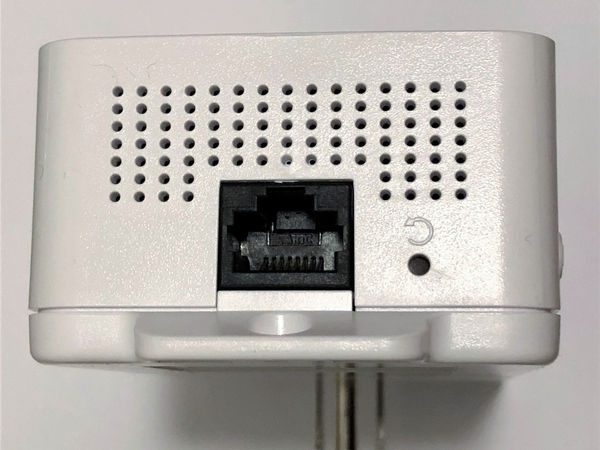
The bottom of the device is shown in the picture below. The Ethernet port is a standard design. The reset button to the right restores factory defaults settings if it is pressed for more than 10 seconds. When resetting  all LEDs will turn off and on again. After reset the powerline network name will return to the default “HomePlug AV”.

Operation

Operation is the definition of simplicity. The adapters automatically establish a network out of the box. The adapters are also cross-compatible with Powerline 1200, 600, and 500 adapters.

The powerline communication works on a single electrical system. (Usually controlled by a single distribution panel). Power strip, GFCI outlets, and AFCI circuit breakers may degrade Powerline network signals. My first choice for outlets in my home was on two different end-runs powered by different breakers. One breaker is the standard design from 1973. The other breaker is a GFCI type installed last year. The Powerline signal did not transmit across the GFCI. However, it was easy to debug this situation by observing the LEDs on the front.

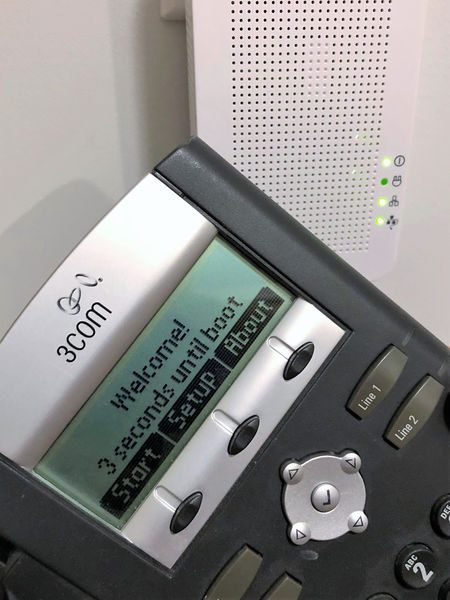
I tested the operation of the PoE with a VOIP phone from work and it successfully powered up. You can see the PoE LED illuminated in the picture below, and the Powerline LED in the middle of a blink. I didn’t have any PoE+ devices at my disposal.

Performance

Aside from the PoE capability, the most important aspect of the system is how quickly it can provide communications over the electrical system and how reliable it is. Every electrical system is a little different so these tests only indicate one set of results and can’t guarantee the maximum or minimum performance achievable in another application.

One thing I did notice is that I cannot use touch-sensitive lamps on the same line as the adapters. The adapters must introduce signal noise that triggers the circuitry to turn the touch light on and off.

To test performance, first I plugged my laptop directly into my router and then the router to the TRENDnet and the TRENDnet to another computer. I tested the speed between the systems using LAN SpeedTest Portable Ver. 4.1.0 Lite by Totusoft. The OS parameters the computer used for the test:

Operating System: Windows 10 Build 14393
Window ScaleFactor: 1
Network Cards: 1
HP Timers: 0 = 0.01 1 = 0.09 10 = 9.38 100 = 99.02
Packet Size: 1 MB to 1 MB
Packet Size Avg: 1,000,000 Bytes
Packets: 1
Write Cache: Enabled
Read Cache: Disabled

The results vary considerably from test to test. However, in general, the results using the Wi-Fi in my house (with the Ethernet ports disconnected):

Write Speed: 149.08 Mbps
Read Speed: 199.52 Mbps

The typical results using the TRENDnet without Wi-Fi:

Write Speed: 16.51 Mbps
Read Speed: 24.60 Mbps

And for comparison, the results at work (using a different source and destination):

Write Speed: 231.96 Mbps
Read Speed: 273.98 Mbps

The results above indicate that the Powerline is not operating at 200 Mbps. Unless the Powerline network is very clean there may not be sufficient bandwidth for 4k video, for instance. However, 25 Mbps is adequate for  general web surfing, email, social media, Online gaming, Video conferencing, and HD video streaming. It would be great if the TRENDnet could provide an indication of  signal quality. Maybe an LED that indicated the electrical system signal-to-noise ratio could be included in future designs.

The TRENDnet has been connected to my SmartThings hub for the past month. I have not had any reports from my hub that the internet signal has dropped. Therefore I can say that the connectivity remains very high.

What I like

  • Easy Set-up
  • PoE/PoE+ for devices that can use it

What needs to be improved

  • electrical system quality check

Final thoughts

The TRENDnet Powerline 200 AV PoE+ Adapter provides network access through electrical wires when network cabling or Wi-Fi isn’t available. Setup is easy since the adapters auto-connect to an encrypted network out of the box. Even if the signal isn’t the fastest, it seems to be very reliable.

Price: $59.99
Where to buyAmazon
Source: The sample for this review was provided by TRENDnet.

Filed in categories: Reviews

Tagged:

TRENDnet Powerline 200 AV PoE+ Adapter review originally appeared on The Gadgeteer on July 25, 2018 at 9:00 am.

Note: If you are subscribed to this feed through FeedBurner, please switch to our native feed URL http://the-gadgeteer.com/feed/ in order to ensure continuous delivery.
MIOPS Smart controllable camera and flash trigger review

REVIEW – Each photographer has his or her own type of photography that is special to them. I like to photograph subjects in nature, and I also like to use existing objects to create my scenes. Water drop photography is a favorite of mine, and this device promises to greatly help me to expand my creativity.

What is it?

The MIOPS Smart is a device that responds to Lightning, Sound, Laser, Timelapse, HDR and more to trigger the shutter of a camera to take a picture.

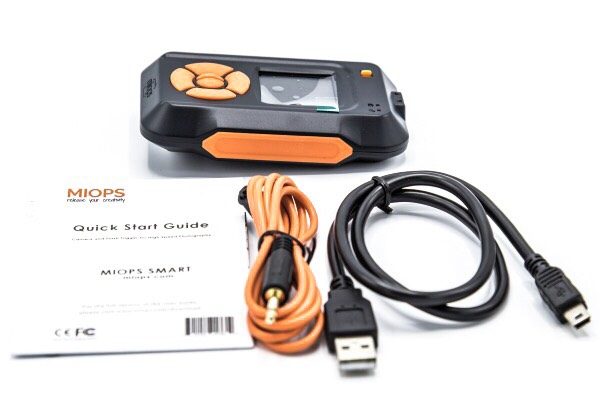
What’s in the box


1 x MIOPS Smart
1 x Mini USB Cable
1 x Camera Trigger cable
1 x Quick Start Guide

Design and features

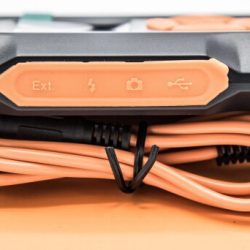
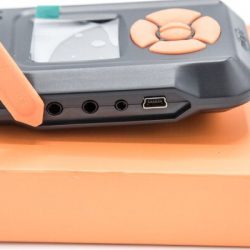
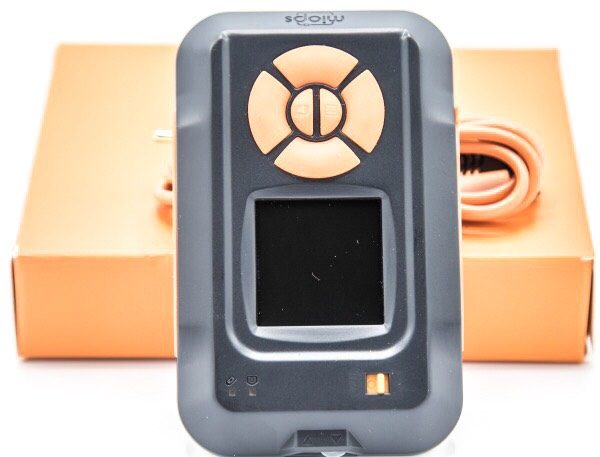
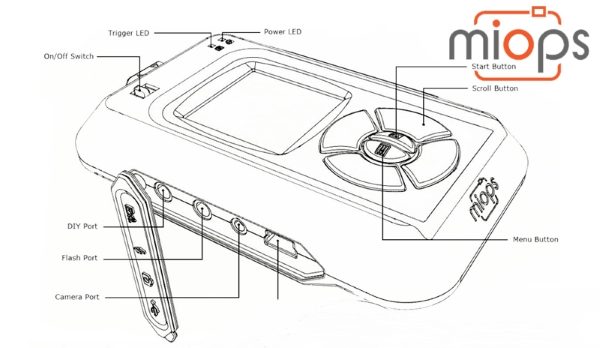
The MIOPS Smart is a small and nicely built camera shutter trigger that can be activated in several modes. On the front there is a display screen and buttons to navigate the screens should you choose to do so from the device. On the side under a removable cover, there is a port for extension DIY projects, a flash trigger port, a camera trigger port, and a mini USB port for charging the battery.

On the top, in addition to the control buttons and the display screen, there is the trigger LED, the power LED and the on/off power button.


On the front (side), there are an infrared sensor and a motion sensor lens.

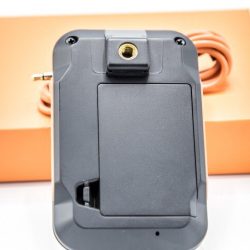
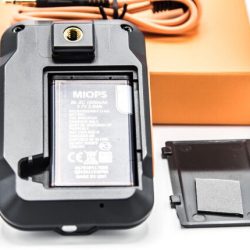
On the back of the MIOPS Smart, there is a 1/4-20mm female mount that sits on a Hot Shoe mount, the microphone and a battery door that covers the slot that holds the rechargeable battery.

Performance

While you can control the MIOPS Smart via the buttons on the device, the optimal way to use it is via the app. It has several operational modes and setup screens that are available via the app.

App

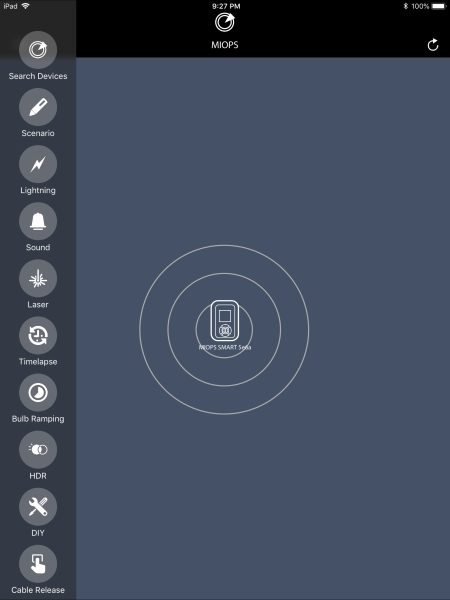
Once you install the app and launch it, and turn on the MIOPS Smart, it appears on the app. If you have more than one MIOPS device turned on, they will all show up as available for selection.


Once you select the MIOPS Smart by touching the icon on the screen, it connects to the app and is ready to be controlled via the app. At this stage, all of the available modes and options are available on the left of the screen. (I used the app on my Pad for this demonstration)


Scenario option:

For example, you can create custom scenarios by combining all available modes with up to five different steps. You can do so by using any combination of the sensors or by using different sensors for various steps of your scenario. For instance, you may want the MIOPS to trigger the camera shutter to take a picture after an object breaks the laser beam and then makes a sound either from hitting a surface or by some other action.


Lightning option:

This option has one screen which gives you the ability to set the sensitivity level to trigger the device.


Sound option:

Settings for Sensitivity, Delay, and Lock.


Laser option:

Threshold, Delay and Frame settings screens.


Time Lapse option:

Settings for Interval, Exposure, and Limit


Bulb Ramping option:

There are 4 settings screens for this option: Interval; First Exposure; Last Exposure; Frame.


HDR option:
Settings screens are for: Center; EV (+-); Frame.


DIY option:
Settings screens: Threshold; Delay; Mode.


Cable Release option:

For my testing of the MIOPS Smart, I chose the sound option. I set up for water drop photography using the MIOPS Splash Water Drop Kit and the MIOPS Smart, within a photography lightbox enclosure. (Additional items like a catch basin for the water, etc are necessary)


The enclosure that I used does not have any built-in lighting. To light the effect, I used a flash strobe with a colored gel insert. To take the pictures, I used a Canon EOS 7D Mark II with a 70mm Sigma Art Macro Lens. The MIOPS Smart was connected to the 3-pin trigger port on the Canon and mounted close to the MIOPS Splash. A flash trigger transmitter was attached to the shoe on top of the camera, and a receiver was connected to the strobe. I used 2 iPhones to simultaneously control the MIOPS Splash app and the MIOPS Smart app. When I trigger the MIOPS Splash device to drop water, the mechanism makes a sound that in turn triggers the MIOPS Splash to trigger the camera shutter. This setup takes time and a whole lot of patience to get the size and timing of the waterdrops as desired, as well as to get the sensitivity and timing correct for the MIOPS Splash to receive the sound and trigger the camera to take the picture at the right time. This setup is actually one of my less complicated setups and describing the details of it is challenging.

The MIOPS Smart is a great device, and I do plan to try it with a laser beam for the laser option, as well as with lightning when a safe and convenient opportunity presents itself. The following are 2 pictures of water drops that were taken as a part of the testing:


What I like

I like the build quality and the functionality of this device. So far it has worked flawlessly and has allowed me to increase my photography creativity.

What can be improved

1: Longer camera trigger cables must be made available
2: Include a tested laser that works with the device. (They are quite inexpensive but all may not work with this device)
Final thoughts

The MIOPS Smart is a great camera trigger device that is nicely built, and that offers endless opportunities for creative photography. I am thoroughly enjoying using it, and every day I am designing more elaborate photo opportunities. As long as it continues to function well, it is well worth it.

Price: $219
Where to buy: MIOPS Website or Amazon
Source: The sample for this review was provided by MIOPS.

Filed in categories: Reviews

Tagged: ,

MIOPS Smart controllable camera and flash trigger review originally appeared on The Gadgeteer on July 24, 2018 at 1:00 pm.

Note: If you are subscribed to this feed through FeedBurner, please switch to our native feed URL http://the-gadgeteer.com/feed/ in order to ensure continuous delivery.