ELEGIANT 300Mbps Wireless Signal Booster WiFi Repeater review


REVIEW – When I  use my own mobile hotspot at work, I often lose connection to it as I roam about my floor which is quite large. Knowing that an extender/repeater could possibly provide a solution for better coverage and signal strength, I accepted the offer to test this device that boasted an easy installation and solution.

What is it?

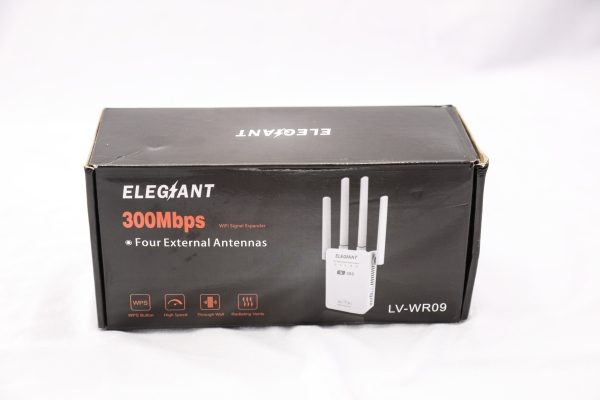
The ELEGIANT 300Mbps Wireless Signal Booster WiFi Repeater is a device that can work as a signal relay or access point to provide extended wireless access to your router.

What’s in the box
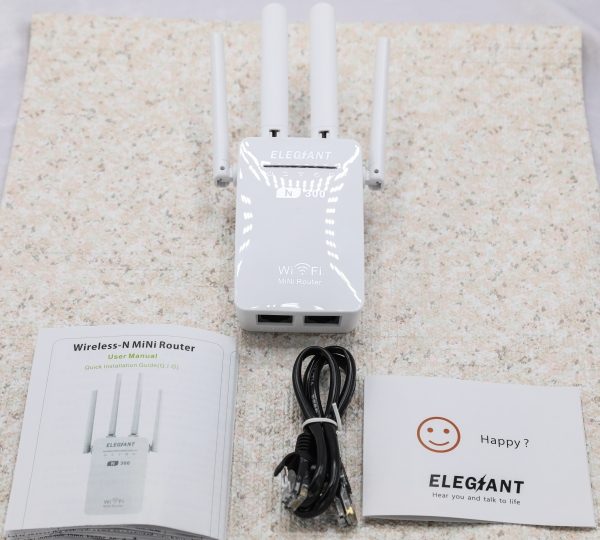
1 x ELEGIANT 300Mbps Wireless Signal Booster WiFi Repeater

1 x Ethernet Cable

1 x Instruction Leaflet

1 x Contact Card

Design and features

The ELEGIANT 300Mbps Wireless Signal Booster WiFi Repeater is a small white box measuring 4″ x 1″ x 2.25″, with 4 antennas attached and a built-in AC plug.  The antennas are on hinges that allow you to move them around for the best signal strength. On the front of the device, there are 5 LEDs that represent the following from left to right:
1. Power
2. WPS
3. WLAN
4. WAN
5. LAN

It operates in 3 modes: Repeater Mode, AP Mode, and Router Mode. In the router mode, you can create a wireless network and share Internet access with to multiple Wi-Fi devices. In the repeater mode, you can extend the wireless coverage range, and in AP mode you can connect to a wired network and share your internet connection. It provides 360-degree coverage.
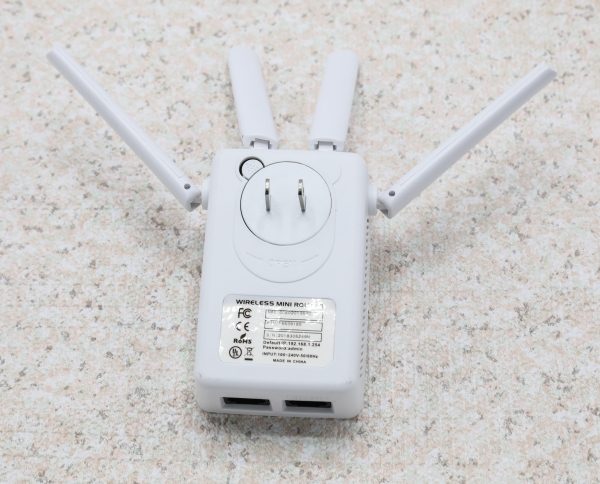

On one of the short side of the device, there are 2 Ethernet ports for the WAN and LAN connections.
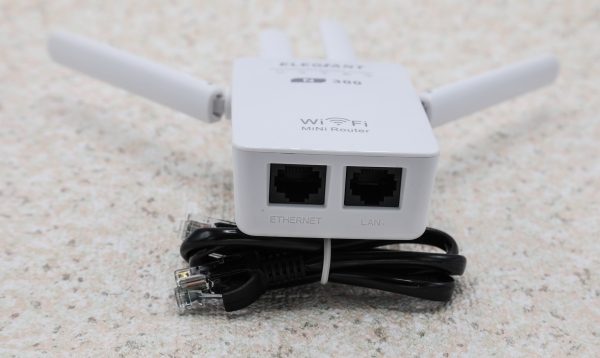

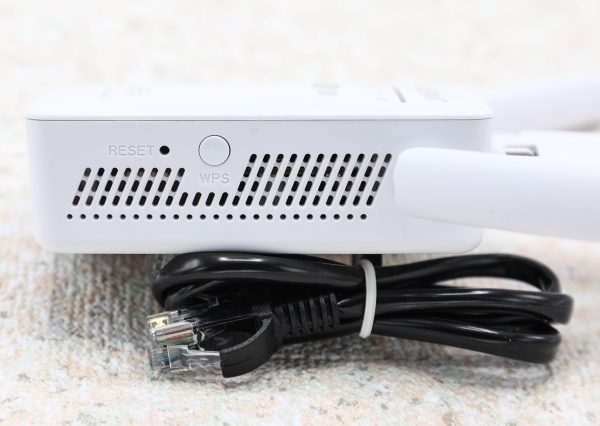
On one of the long sides, there is a Reset button, a WPS button, and air vents.
Performance

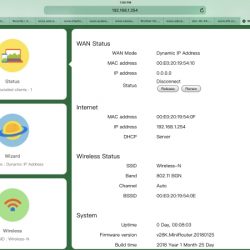
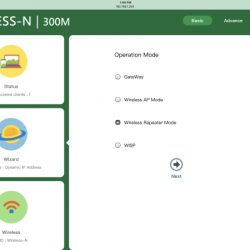
The instruction booklet gave precise directions, and setup was easy once I connected to the Elegiant. I used my iPad Pro 12.9 to set up the device, and I did have to try a few times including starting over and refreshing the browser to get all of the settings to load completely. This started with the login screen. Since this could be caused by uncontrollable things like environmental interference, I will not blame the device. However, the distance between the Elegiant and my mobile hotspot was only about 2 feet. The actual configuration process was very easy and straightforward. For this review, I set mine up in the relay mode to extend the signal coverage. Here are some of the setup screens:


I work in a high security IT environment, and signal interference is very present. For several reasons, I was only able to place the repeater about 3 feet away from my mobile hotspot. Nevertheless, I was completely impressed by the performance of this device. It literally doubled my wifi range and that is despite the fact that when I move around my floor, there are multiple security doors in between me and the repeater. Based on this experience, I suspect that the other 2 modes will provide the same level of performance.

What I like

  • The small and compact size
  • The user-friendly browser GUI
  • The consistent wireless range it provides

What can be improved

  • The browser settings and how slowly and inconsistently they load.

Final thoughts

The ELEGIANT 300Mbps Wireless Signal Booster WiFi Repeater is a very useful device that performs a very useful and needed function and does it very well. The small footprint means that it can be present but hidden, and the range is superb for its specifications. I do know that there is an AC1200Mbps version that is available, and likely provides even more range and an even stronger signal. Based on the performance of this 300Mbps model, I am very pleased and now very eager to get the chance to test the 1200Mbps model.  For the price, this is a win.

Price: $19.99
Where to buy: Elegiant website or Amazon.
Source: The sample for this review was provided by Elegiant.

Filed in categories: Reviews

Tagged: ,

ELEGIANT 300Mbps Wireless Signal Booster WiFi Repeater review originally appeared on The Gadgeteer on August 12, 2018 at 11:30 am.

Note: If you are subscribed to this feed through FeedBurner, please switch to our native feed URL http://the-gadgeteer.com/feed/ in order to ensure continuous delivery.

Waterfield Pro Executive Laptop Backpack review

REVIEW – I’ve used Waterfield gear for many years and continue to add to my collection when need be. With even my oldest WF slipper case (think first gen 17″ MacBook) still going strong, having been repurposed many times. Over the years, Waterfield has continued to evolve and design new products as the tech-landscape changes. Recently, Waterfield has released a premium collection for those executives needing a sophisticated EDC bag with great looks, features, and functions. In this case, they sent me their new Pro Executive Laptop Backpack for this review, let’s see if they hit the mark…

What is it?

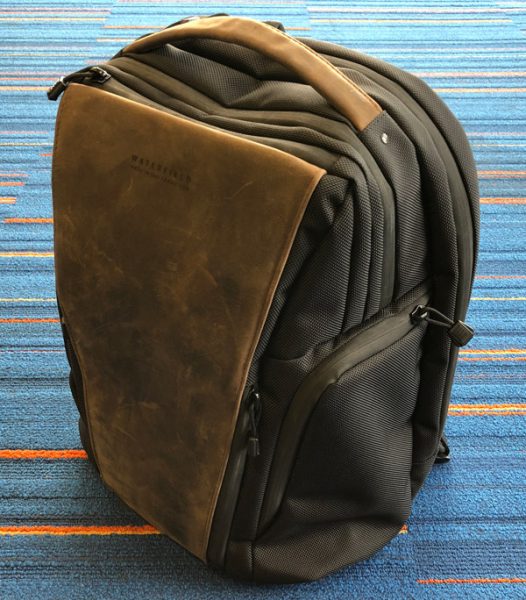
The Waterfield Pro Executive Laptop Backpack is a premium EDC bag that “blends sophisticated style with serious functionality”. The Pro laptop backpack has a very well thought-out, crowd-sourced design with a professional-look worthy enough for any boardroom, airport executive lounge, or exclusive sports club.

Design and features

Waterfield developed this “Boardroom Backpack” in collaboration with their customers. Their goal was “to create a professional-looking backpack that balanced functionality with style elegant enough for the boardroom. The Pro Backpack blends sophisticated style with serious functionality. It’s highly organized with two compartments, strategically-placed pockets, and a removable Executive Folio for taking to short meetings”.

Layout:

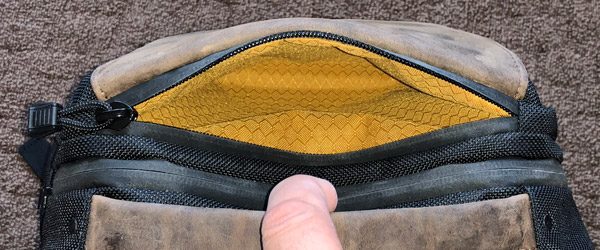
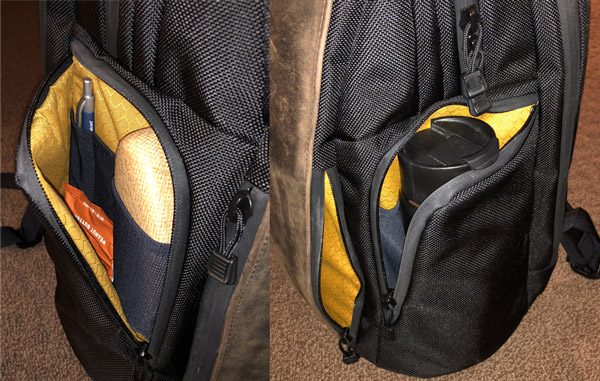
The main face of the Executive Pro backpack has two quick-access, zippered pockets engineered to hold a smartphone, keys, business & misc cards, wallet, pocket knife, pens, etc. One of these pockets is accessible from the top and the other from either side of the front (see below). Both pockets placement are very convenient and easily accessible on the fly.

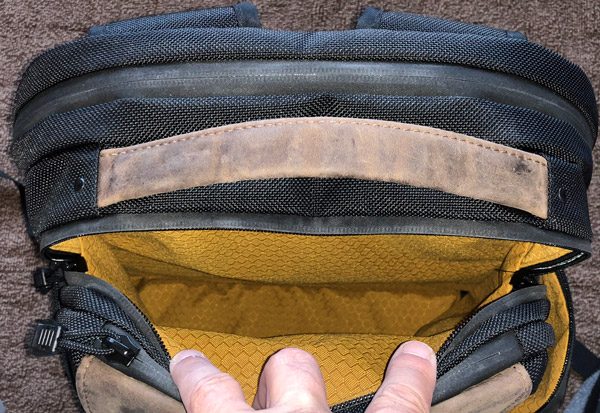
The center compartment is surprisingly spacious and is able to hold a good amount of gear. It easily fits my workout clothes and leftovers for lunch with room to spare. While the zippers do not open fully, the opening is large enough to accommodate more or less whatever you need to jam into the void.

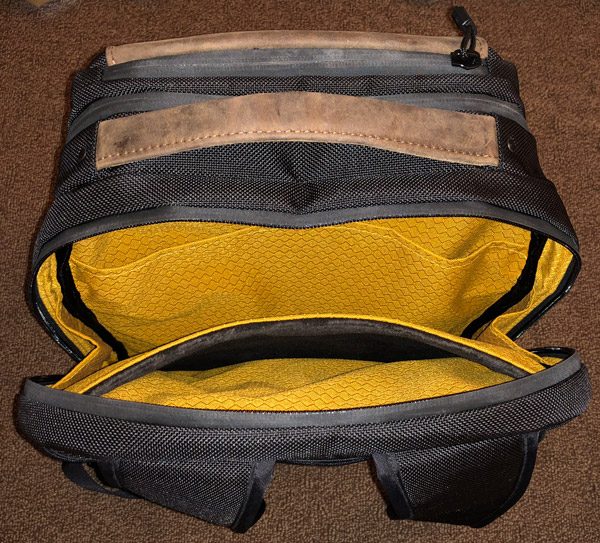
The back compartment has two slipper pockets, one on either side spanning the height of the backpack for your laptop and tablet. There is also space between the two for holding Waterfield’s optional Executive Folio.

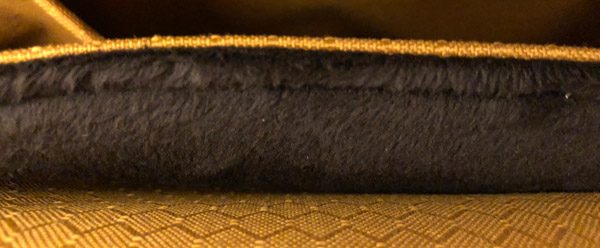
The front slipper pocket is unlined and fits my 10.5″ iPad Pro nicely.  The slipper pocket meant for your laptop is lined/padded with a soft felt that sits against your back for greatest protection.

Like the rest of the Pro Executive Laptop Backpack, the two zippered side pockets are nicely placed, well organized, and very convenient. Located symmetrically on either side, each compartment has three elastic slots of various width to hold your EDC gear and a few power bars as well 😉 . They are also tall enough to accommodate a decent sized water bottle.

Material and construction quality:

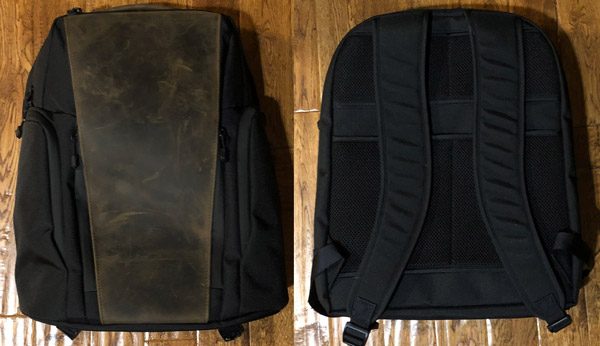
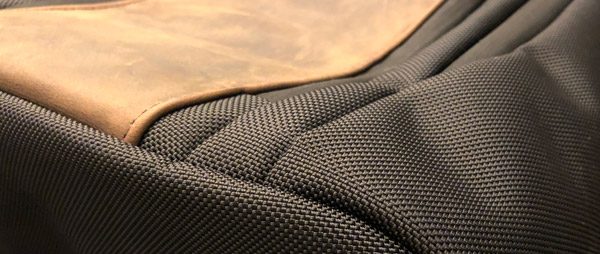
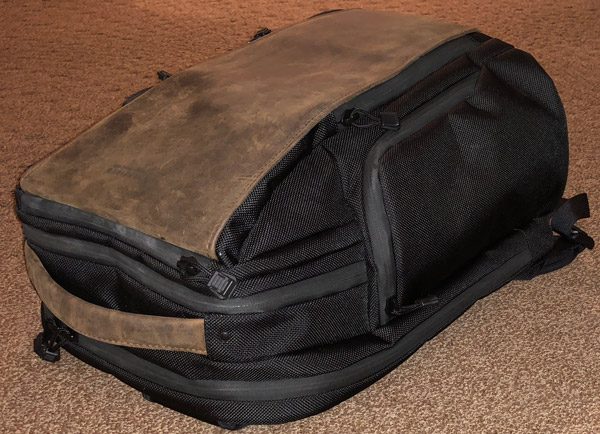
The Pro Executive laptop backpack material and build quality are excellent. The 1050 Denier ballistic nylon, full-grain leather, zippers, rivets, and stitching are all nicely constructed and built to last. In addition to strength, the premium full-grain accent leather adds a quality look and style to the backpack.

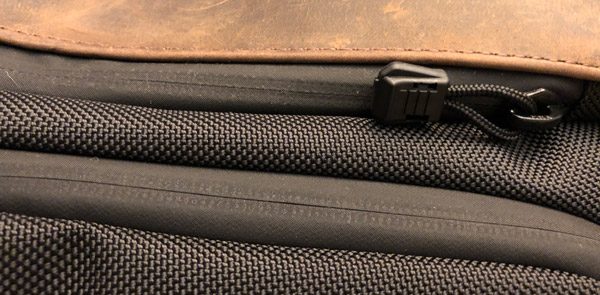
All of the zippers are low profile, covered, and waterproof with a solid but easy pull to them.

Specifications:

Material:

  • 1050 Denier black Ballistic nylon
  • Full-grain leather accents

Dimensions & Weight:

  • Pro Executive Backpack:
    One size: 13.5″ (L) x 16.5″ (H) x 7.0″ (W), 2.9 lbs.
    Volume: 25.5 liters
  • Executive Folio:
    -13” size: 10.25” (L) x 13.25” (H) x 1.75” (W), 1 lb.
    -15” size: 11.0” (L) x 15.0” (H) x 1.75” (W), 1.2 lbs.

Features:

  • Crowd-sourced design with customers to create a stylish and functional backpack for professionals.
  • Includes an optional Executive Folio to take for short meetings.
  • Stands upright when it’s set down.
  • Two main chambers: back chamber zips down to carry laptop or tablet, documents, and the Executive Folio. Front chamber is spacious enough to hold other items needed for a day at the office.
  • Premium full-grain leather front panel and handle.
  • Two zip pockets on the front panel to quickly access items when swinging the backpack from the shoulder.
  • Two large side pockets for water bottle and small items.
  • Top front pocket that’s deep enough to hold items securely.
  • Back slot for slipping onto suitcase handles.
  • Top handle is premium leather for a more comfortable grip.
  • Comfortable shoulder straps.
  • Sleek, waterproof zippers throughout.

Functionality:

One of the best features of the Waterfield Pro Executive Backpack is that it can stand on its own. Instead of needing to lean against anything or be laid flat, it stays upright where you set it.

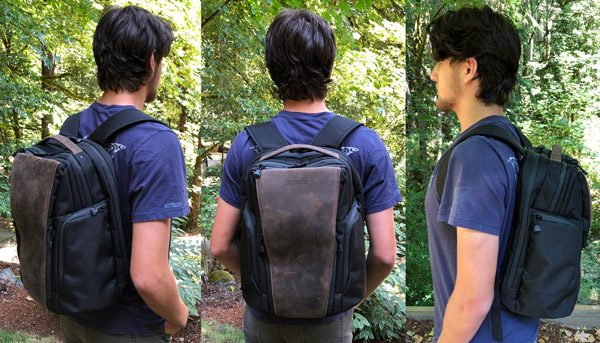
As you can see and would expect, this bag has a classic backpack design and wears accordingly. The Pro Executive Laptop Backpack rides very comfortably on a single or both shoulders. Empty, the bag weighs less than 3 pounds and even with all my EDC gear, laptop, and full water bottle the total weight isn’t too heavy at all.

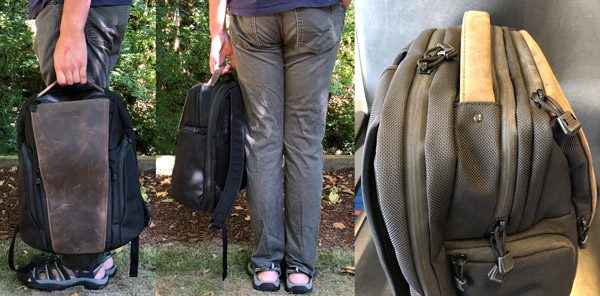
The reinforced, built-in handle carries comfortably as well. The handle is wrapped in the same full-grain leather as the front of the backpack, for a solid grip and greater durability. As I mentioned, even with all my gear, this bag isn’t all that heavy, especially considering it is approximately two plus pounds lighter than my all-leather Colonel Littleton Navigator bag.

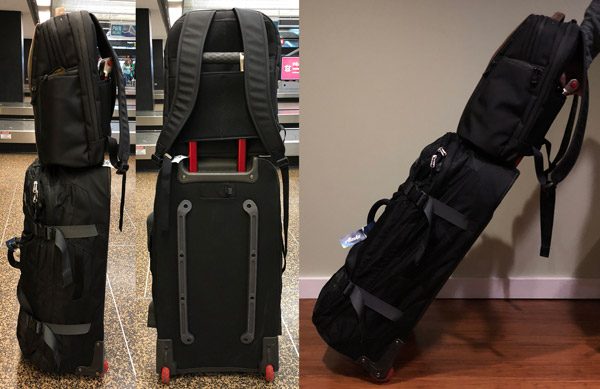
The back of the Pro backpack has a pass-through slot for slipping onto wheeled suitcase handles.

I took this backpack on several long, hectic trips during this review. It came thru with flying colors. It was the perfect size to carry everything I needed on my go-go-go travels, all while keeping a ton of my gear organized and easily accessible.

What I like

  • Excellent material quality and craftsmanship
  • Well designed/thought out
  • Stylish, professional design
  • Wheeled-suitcase handle pass-through
  • Relatively lightweight

What needs to be improved

  • Expensive

One More Thing…

Waterfield offers a matching (optional) folio made from the same ballistic nylon and full-grain leather as the rest of their executive line. The Executive Folio is designed as a grab and go when you don’t need all your EDC gear, just some of the basics.

The Executive Folio has slipper pockets for your laptop, tablet, pens, paperwork, etc.

In addition to the chocolate accent leather you see in this review, the Waterfield Pro Executive Laptop Backpack is also available in black, crimson, and grey leathers.

Waterfield Designs backs all of their products with a (limited) lifetime warranty.

Final thoughts

The Waterfield Boardroom Backpack is excellent. Other than being pricey, I have nothing negative to say about this stylish, very well made EDC bag. Waterfield’s crowd-sourced, collaborative effort has hit the mark, creating an exceptionally functional, nicely laid out backpack with a sophisticated look suitable for any business situation. Roomy enough to carry all your EDC gear, workout clothes, and lunch while not weighing you down.

Price: $349.00 / optional folio adds $49
Where to buy: Waterfield Designs.
Source: The sample of this product was provided by Waterfield Designs.

Filed in categories: Reviews

Tagged:

Waterfield Pro Executive Laptop Backpack review originally appeared on The Gadgeteer on August 12, 2018 at 9:30 am.

Note: If you are subscribed to this feed through FeedBurner, please switch to our native feed URL http://the-gadgeteer.com/feed/ in order to ensure continuous delivery.
The Kwilt Shoebox Plus review


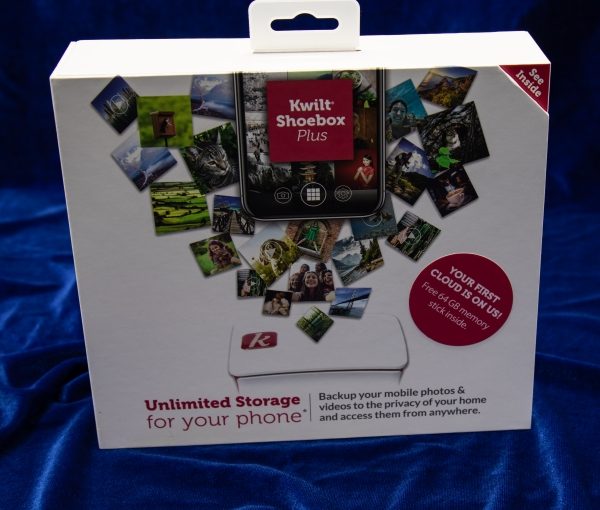
Not very long ago, I tested and reviewed the Kwilt Mini Shoebox, which is a device that allows me to transfer and/or backup any or all of the videos and photos from my phone or tablet to storage attached to this device via my network. I found it to be a very nice and useful gadget, but with some flaws. Just recently, Kwilt released the Kwilt Shoebox Plus and allowed me the honor of reviewing their upgraded device. So, here we go:

What is it?

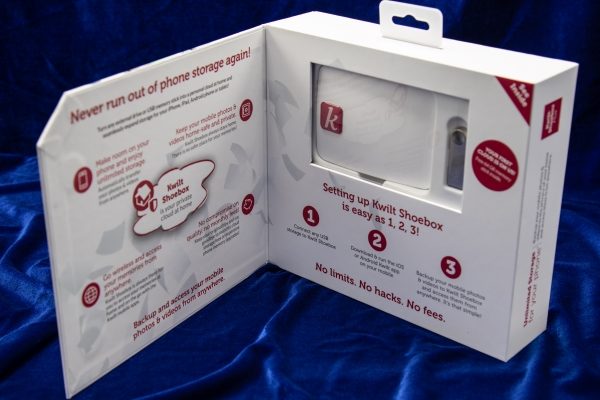
The Kwilt Shoebox Plus allows you to transfer/backup your photos and videos from your phone or tablet, and to have access to them and any other media attached to the shoebox from anywhere in the world and at any time, as long as you have internet access.

What’s in the box


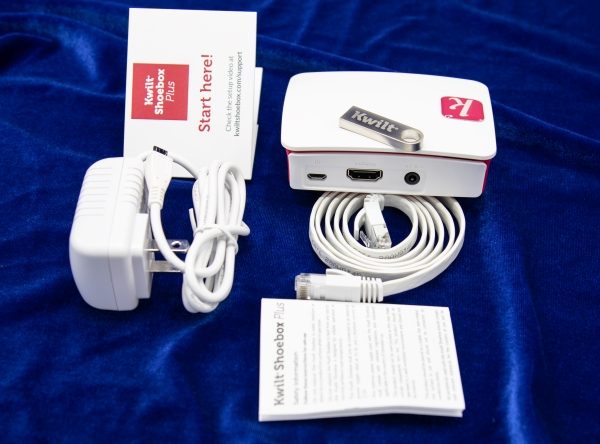
1 x Kwilt Shoebox Plus
1 x 64GB Thumb Drive
1 x Micro USB Power Adapter
1 x Quick Start Guide
1 x Additional Information Leaflet
1 x Ethernet Cable

Design and features

Much like the previous model, the Kwilt Shoebox Plus is a small and lightweight device that allows you to connect a relatively limitless amount of hard drive storage via its 4 built-in USB ports. You can transfer your pictures and videos from your mobile device to “free up” storage, or you can create a backup of your content. The device allows you to have access to the content from anywhere in the world as long as you have internet access and the app configured on your device. You can set up additional accounts for family and friends and others. You can display the photos and videos on a display via the HDMI port and hear any audio via the audio port.
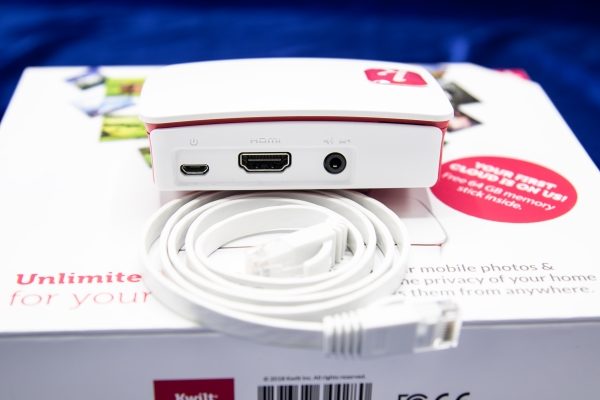
On one of the long sides of this device, there are 3 ports. From left to right there is a power port, an HDMI display port and an audio out port.


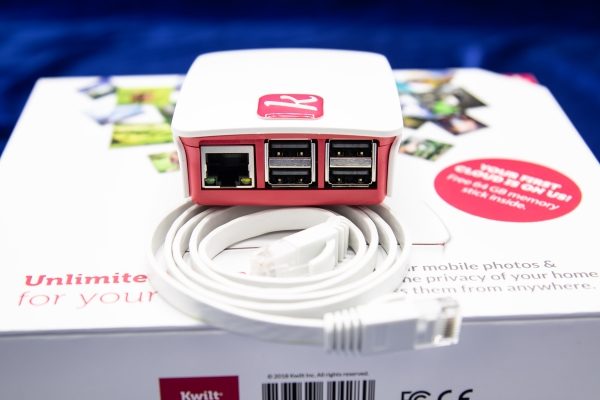
On one of the short sides of the device, there are 4 USB ports and an Ethernet jack.

Performance

Once again, much like the previous model, the initial setup of the Kwilt was very easy right out of the box, with no issues at all. This time around, they provided a 64GB flash drive to get you started which as I stated in the first review, is simply amazing and a great gesture by the manufacturer. Since the app was already loaded on my devices, as soon as I connected the Kwilt Shoebox Plus to my network, it showed up as a second Kwilt in the app. (This time around, I connected the Kwilt via the Ethernet cable). The instructions were easy to follow, and since I had already created an account for the first Kwilt, in a few seconds, all was set and ready to go. When I opened the app, the first screen asked me to create a name and password for the new device.


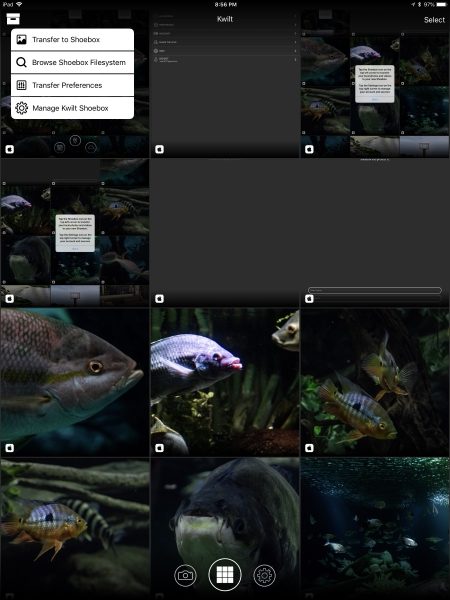
Once I gave the device a name, (Unlike my first Kwilt, I just named this one Kwilt Plus), the next screen was the main screen with a thumbnail view of some of my photos/videos, and the icon in the upper left corner for the choices.


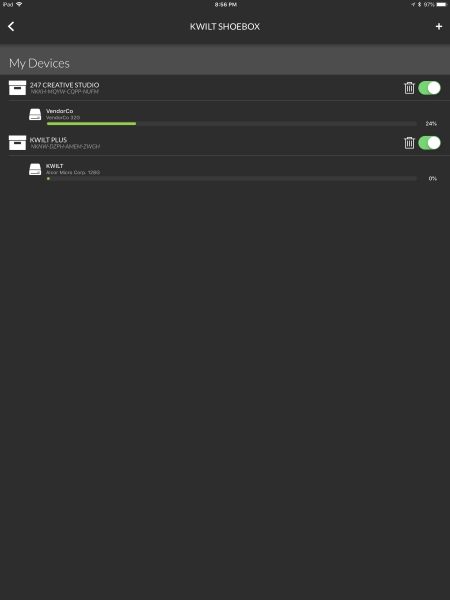
First I selected Manage Kwilt Shoebox to see what the app showed for my devices.


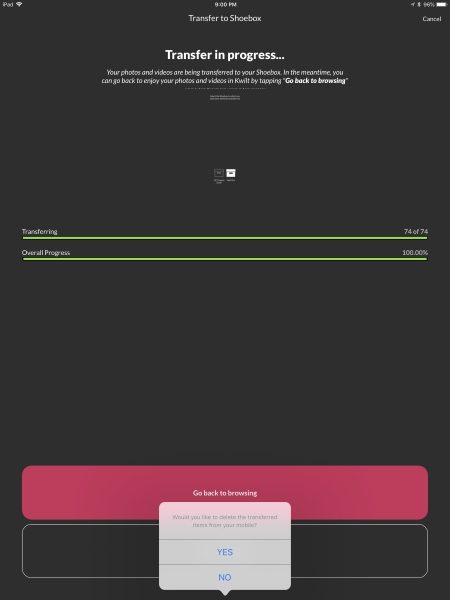
Once that selection looked good, I selected the choice to Transfer to Shoebox and both Kwilt devices were displayed for my selection.


This time around, when I selected the Kwilt Plus option to transfer my photos and videos together, I had no problem with the app. I selected the option to transfer all files including both videos and photos, and the process was flawless. When I tested the first Kwilt, whenever my phone went into sleep mode, the app would stop the transfer. This time around, the phone stayed awake and successfully completed the transfer.


Another great improvement and also a pleasant surprise is that unlike my failed efforts to contact support during my testing of the previous Kwilt device, on this occasion, I received the following email shortly after setting up the Kwilt Plus:


All of the functions included in the original Kwilt Shoebox are also included in this version. To see the review of the first Kwilt Mini Shoebox, click here: Kwilt Shoebox review.
In addition to the app functions to edit and share your photos, you can also perform the following functions:

  • The KwiltKeys photo keyboard for IOS allows you find any picture and place it into any relevant app.
  • The Kwilt for MS Office365 add-on allows you to find and insert any photos into Word or PowerPoint.
  • The Kwilt for MS Outlook add-on that allows you to find and insert any photos into MS Outlook.

What I like

  • The addition of wired Ethernet for this new model.
  • The great improvement of the functionality of the app.
  • The great improvement in the Customer Support function.
  • The addition of multiple USB ports for flexibility and expansion.

What can be improved

  • In my opinion, there is nothing to be improved. They got it right.

Final thoughts

The Kwilt Shoebox Plus is a great improvement to the first model and continues to be a really nice device that is designed to perform a very useful and convenient function. Just like its predecessor, it provides for virtually limitless storage for your mobile picture and videos, far beyond the built-in storage capacity of any phone on the market today. It continues to allow access to others persons of your choice, and with a bit of imagination, it can be useful in more ways than mentioned in my review, including as an example, when you get a new cell phone and you are switching from say Android to IOS. The Kwilt Shoebox Plus makes the process of safeguarding your priceless pictures and videos that are on your cell phone, easy and painless. I can’t wait to see what Kwilt comes up with next. In my opinion, this is a win.

Price: $119.00
Where to buy: Kwilt Shoebox Website.
Source: The sample for this review was provided by Kwilt Shoebox.

Filed in categories: Reviews

Tagged:

The Kwilt Shoebox Plus review originally appeared on The Gadgeteer on August 11, 2018 at 9:00 am.

Note: If you are subscribed to this feed through FeedBurner, please switch to our native feed URL http://the-gadgeteer.com/feed/ in order to ensure continuous delivery.
Vena 6Netic Magnetic Smartphone Bike Mount review

REVIEW – My husband and I have always been bicycle riders.  Back in the day, we used to do the MS Bike to the Beach here in Texas where we rode 150 miles over 2 days for Multiple Sclerosis.  Since then we have notbeen the true roadies we once were.  We have started to ride the numerous bike paths that they have finally built here in the San Antonio, Texas area.  In an effort to make himself use his bicycle more, my husband expressed a desire to be able to mount his IPhone to his bicycle’s handlebar so that he may use his bike as a method to easily get more Pokemon.  Yes, he is a die-hard fan of the game.  We have gone through several different mounts and not found one that is really stable and easy to use.  So when I got the chance to review the Vena Magnetic Bike Mount I jumped at it.  Let’s see how it worked out.

What is it?

The Vena 6Netic Smartphone Bike mount is a bike mount that uses two different methods to keep your phone safe and secure on your bicycle.  It uses a six magnet phone mount and a rubber strap system to securely hold your phone in place.

What’s in the box?

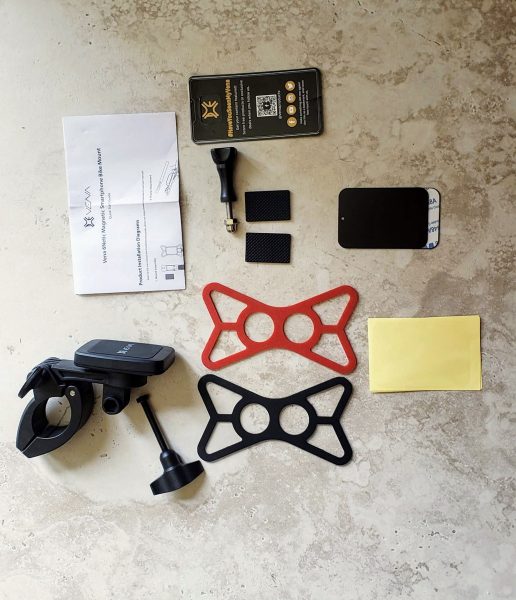
The box itself could not be any plainer.  There was no outside writing on it to even describe what was in the box.  However, everything inside was well packed and protected.   Inside the box I found:

  • The mount itself
  • A long bolt with a plastic screw head and nut that is used to attach the mount to the bike
  • Two different colored rubber strap systems (red and black)
  • Instructions on a single sheet of paper
  • A GoPro screw you can use to mount a GoPro camera to the front of the mount
  • Two rubber pads used to hold the mount on the bicycle handlebars
  • Two metal plates – one with 3m tape on one side and one plain
  • Sticker from Vena

Design and Features

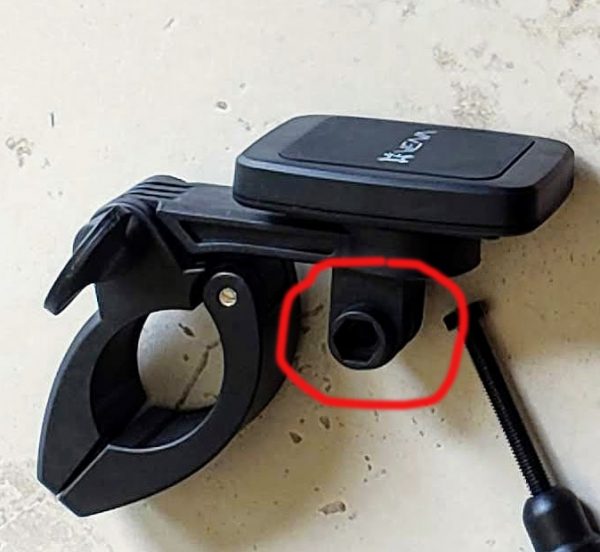
The picture below has the GoPro mount highlighted on the bicycle mount itself.  I do not own a GoPro so since I could not use it, I removed it from the mount.  This was easy to do with two small Phillips screws at the back of the mount.  The Vena website states that you can even mount some compatible headlights using this particular mount.

The next picture below shows you what my husband’s bike handlebars look like.  He has a Specialized Sirrus which we bought last year.  The handlebars are unusual in that they start off fat in the center by the stem and then go down to normal size when you get to the handlebars.  This has presented us with issues when trying out other bike mounts.  I would place the mount as close to the stem as possible and tighten down, but inevitably the mount would start slipping down the handlebar.   A lot of this had to do with the mounts tightening down using just a basic screw that I had to tighten down with a screwdriver.  Many of the mounts were awkward to mount and made tightening the mount really hard to do.   The Vena mount with its large hand screw made mounting really simple.

The next picture below shows the mount completely open where it would go around the handlebar.  I have just placed the two rubber grip strips inside the mount.  This was very easy to do and they mounted with the 3M tape that was already attached to one side of the rubber.  A lot of mounts will just give you a rubber strip you have to manually hold in place while you tighten down the mount.  Having these stuck in place made mounting very easy.

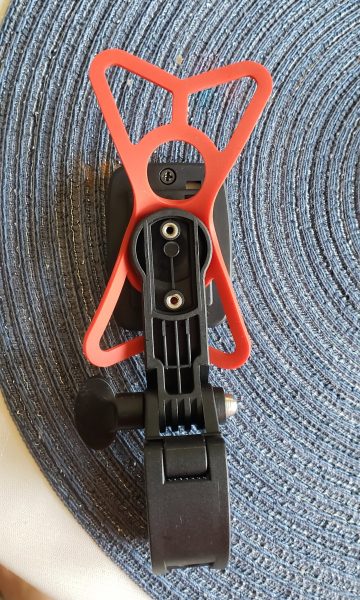
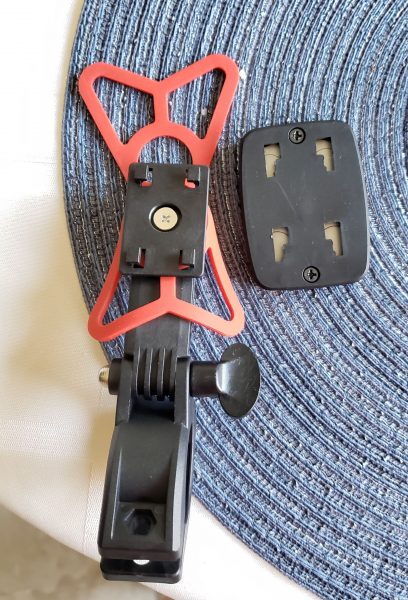
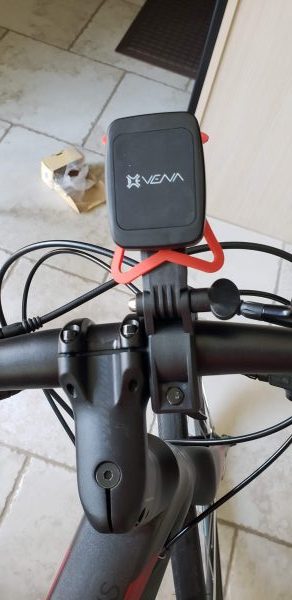
The next two pictures show how I mounted the rubber strap to the main mount.  The picture on the left is showing the back side of the mount.  This is the side that would be facing out towards the street in front of you.  You can see the two screw holes where I removed the GoPro mount.   The picture on the right is the side of the mount that would be facing the rider.  I simply slid the magnet holder up and it popped off the mount.  You are looking at the back side of the magnet on the right of the mount.  I then slid the rubber strap over the magnet mount then clipped the magnet back in place.   There were two identical circles in the rubber strap so I just picked on and left the larger part of the strap system sticking out of the top of the mount.  The instructions were not very helpful in showing how to mount this rubber strap.

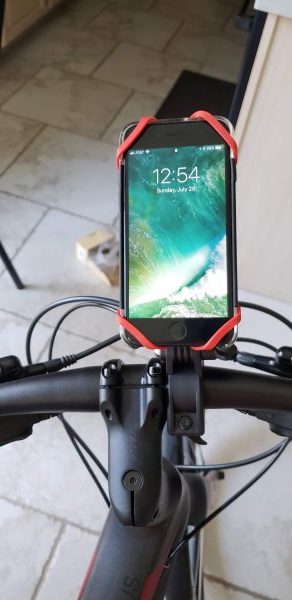
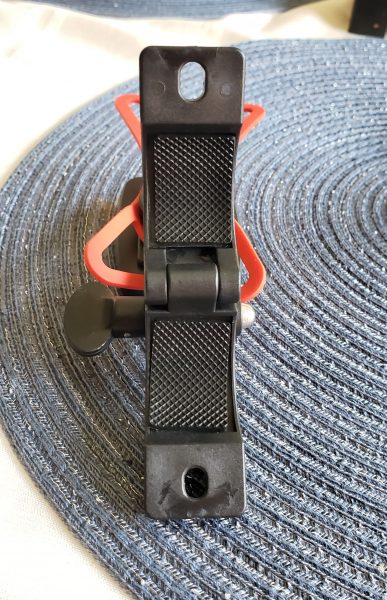
In the picture below you can now see the mount on the bicycle.  The knob on the right lets you adjust the angle in which the phone is viewed.

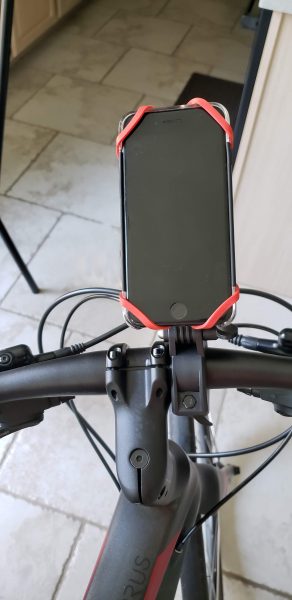
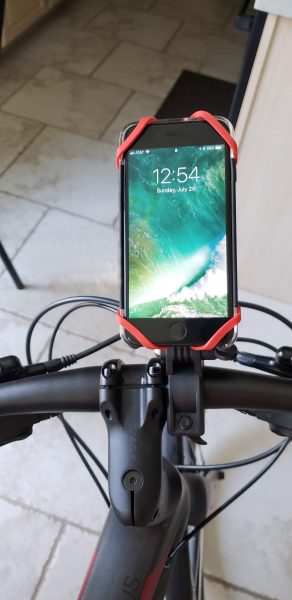
The next two pictures show you how the mount looks with my husband’s iPhone 7s installed.  Something to note, I wonder if you had an iPhone X with no bezels if the rubber straps would interfere with phone usage?  I took one of the metal plates and placed it inside the phone case between the phone and the case.  I could not even tell it was there once mounted.  I then place the phone on the mount where it was held in place by the magnet.  Finally, I pulled the rubber straps out and around each corner of the phone.  Let’s just say that phone is going nowhere.   I literally picked the bike up and bounced it several times on the tires in an effort to dislodge the phone and it never budged.    Time, of course, will tell if the mount itself will slip on the handlebars, but at least my husband will be able to hand tighten it out on the trail.

What I like

I love how easy it was to mount this smartphone holder on to the bicycle.  Just being able to have a nice sturdy plastic screw head to be able to hand tighten down the mount without any tools was awesome.  I also loved how they gave you the capability to easily change the angle at which you view the phone.  Finally not having to manually hold a rubber strip in place while trying to tighten down the mount was also a big plus.  So far the mount has held steady over a couple of rides with no issues.

What can be improved

The only concern I would have is what I mentioned before about the rubber straps going over a screen instead of just bezels like on the iPhone 7.  I wonder if the touch screen would think the straps are fingers touching the screen.  Maybe someone who has used a similar mount can comment on this.  They also could improve their instructions so they could show exactly how the rubber strap should go on the mount.

Price: $16.99
Where to buy: Amazon
Source: The sample for this review was provided by Vena.

Filed in categories: Reviews

Tagged:

Vena 6Netic Magnetic Smartphone Bike Mount review originally appeared on The Gadgeteer on August 10, 2018 at 10:59 am.

Note: If you are subscribed to this feed through FeedBurner, please switch to our native feed URL http://the-gadgeteer.com/feed/ in order to ensure continuous delivery.
Pandorra Willgoo Carrying Case and Power Bank for Apple Pencil

REVIEW – Tired of hauling your Apple Pencil accessories around in a zip bag so that you don’t lose them? Me too. The Pandorra Willgoo carrying case solves that problem for you and acts as an alternative charging source for your Pencil to boot. Let’s have a look!

What is it?

It’s a travel case for your Apple Pencil and all it’s accessories that also serves as a charging station.

Hardware specs

  • Length: 7.95 inches
  • Width: 1.73 inches
  • Height: 1 inches
  • Weight: 5.2 oz
  • Battery Capacity: 1700mAh
  • Input: 4.2V
  • Output: 0.3V-4.2V

What’s in the box?

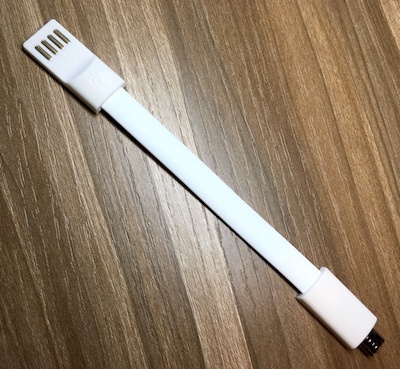
The Pandorra Wilgoo Carrying Case comes with the case and a USB cable to charge the unit. You’ll need to bring your own USB Lightning cable to charge your pencil.

Design and features

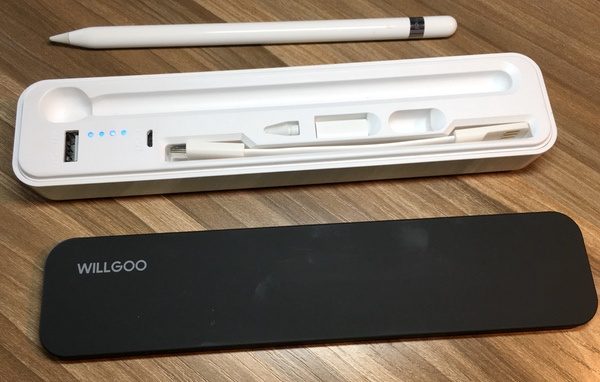
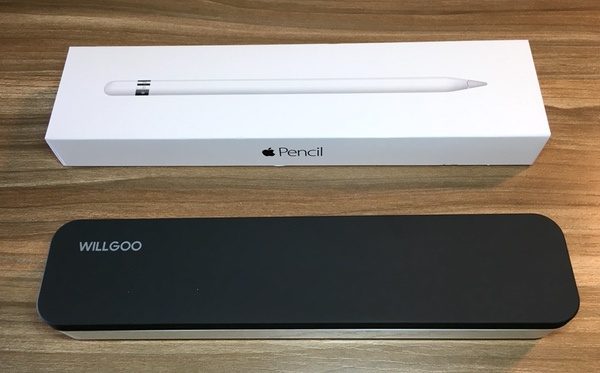
The Willgoo is a sharp looking case, made from solid hard plastics with a magnetic lid. The case itself is *just* a bit smaller than the Apple Pencil box itself (see pic below for reference). At roughly 8” by 1.75” by 1” it’s not super-compact, but it does slide easily into open spaces or slightly larger pockets in your bag.

The hard plastic case does a good job of protecting your Pencil from knocks and bumps. The magnetic lid is secure enough that it won’t come loose in the jumble that is your bag. It’s also got a soft-touch padded on the underside to protect the components.

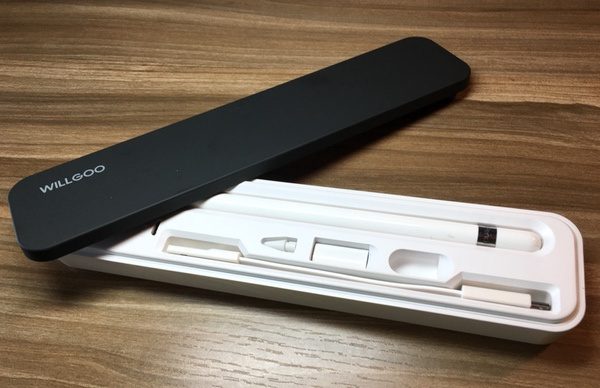
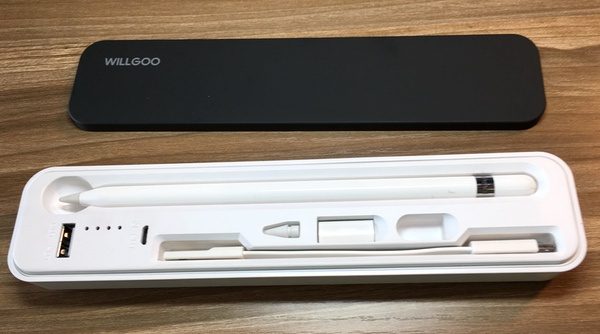
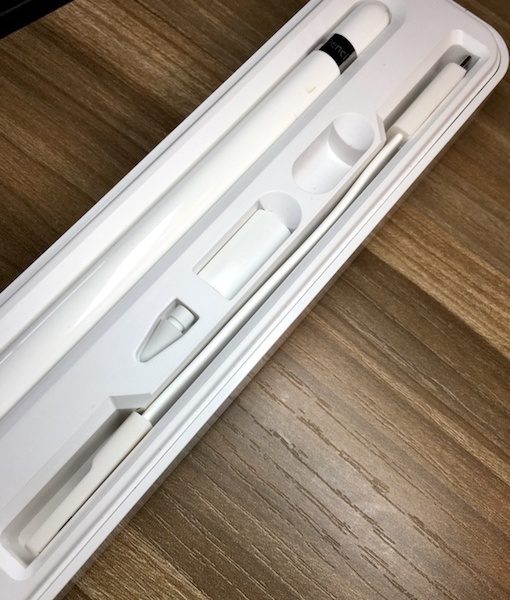
Pop off the lit and you’ll find a set of slots for your Pencil, the charging adaptor, an extra nib & the Pencil cap when charging. The included USB-to-microUSB charging cable also has its own place. Everything has a happy resting place.
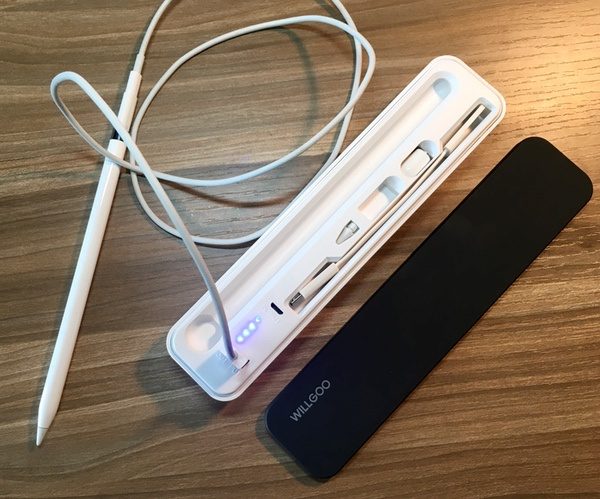
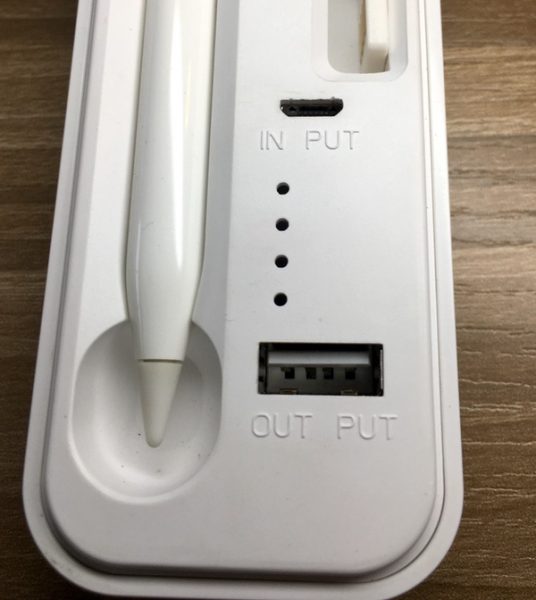
You’ll also find two ports on the Willgoo: one for charging the unit (marked “input”), and one for charging your Apple Pencil (marked “output”).

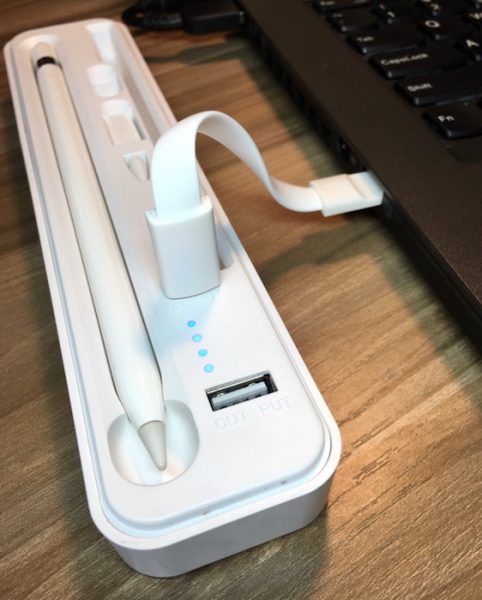
To charge the unit, you’ll plug the included cable into the “input” micro-USB slot, and then into a USB port. Blue indicator lights let you know your charge level.

To charge your pencil, plug a lightning cable into the USB port on the unit. The same blue indicator lights are activated to let you know how much capacity the battery has left. Note that the cap sits nicely in its slot and hasn’t run off to get into mischief…

The case has a battery capacity of 1700 mAh, which will give you plenty of charges for the Pencil (86 mAh capacity). You could use it to give you a partial charge for other devices, but it won’t get you too far.

Performance

The Pandorra Willgoo Carrying Case and Power Bank for Apple Pencil solves a couple of storage problems. It’s a great solution to keep around the office. I like the peace of mind it brings… I was always worried about losing the cap or that little charging adaptor. Mine is parked on the desk in my family room, keeping the whole kit in one space when I need it.

As far as travel and commuting go… well, it depends on your intended use.

For the day tripper, the Apple Pencil already has great battery life and portability. For that reason, most Apple Pencil cases are simply sleeves that you can attach to your iPad or a pocket. While this case does give you a spot for all your components, it is a bigger solution that will take up space in your bag. It seems like the unit is excessively beefy for what it holds and does, so carry minimalists may not be a fan of the solution.

If you’re traveling and foresee a need to charge your iPad on the go, you’re all set here. It will happily find an open space in your backpack, carry-on or messenger bag (or larger briefcase) and give you quick access to all the parts. While the charging capability isn’t an absolute necessity, it gives you a nice option if you need it. I’d like to see a design that’s a bit more compact, but the pros outweigh the cons in my mind.

I should also note that the components do sit loosely in those little slots. If you turn the case upside down with the cover off, they will spill out. It’s something to consider if you’re on the run.

What I like

  • A well-organized solution for your Apple Pencil & accessories
  • Nice protection in your bag or briefcase
  • Magnetized lid
  • Charging feature is a bonus, but not completely necessary

What needs to be improved

  • Could be more streamlined; probably too chunky for those with minimalist bags like thin briefcases or portfolios
  • Components will spill out of the case is flipped over with the lid off

Final thoughts

The Pendorra Willgoo Carrying Case and Power Bank is a nice solution for managing the Apple Pencil and its components. There are a few things I’d change in the design, but it’s a solid overall performer that has found a place in my daily kit. I’m happy to send the zip bag I was using for those little parts to the recycling bin.

Price: $25.99
Where to buy: Pendorra web site and Amazon
Source: The sample of this product was provided by Pendorra.

Filed in categories: Reviews

Tagged: , ,

Pandorra Willgoo Carrying Case and Power Bank for Apple Pencil originally appeared on The Gadgeteer on August 10, 2018 at 9:00 am.

Note: If you are subscribed to this feed through FeedBurner, please switch to our native feed URL http://the-gadgeteer.com/feed/ in order to ensure continuous delivery.