Juschef Professional Blender review

REVIEW – There’s a big market for home blenders that provide decent power without breaking the bank. Today we’re looking at the Juschef Professional Blender, which promises high-powered function at a price tag of under $100 while adding a heating feature. Let’s see what it’s got!

What is it?

It’s a high speed blender that also heats liquids.

Hardware specs

  • 14.6 pounds
  • 9” deep by 8.5” wide by 19” tall (22-1/2” with stirring rod)
  • 35,000 RPM blade speed
  • 900 W motor power, 800 W heater
  • 110-120V, 60Hz
  • BPA Free glass pitcher
  • 56 ounce capacity

What’s in the box?

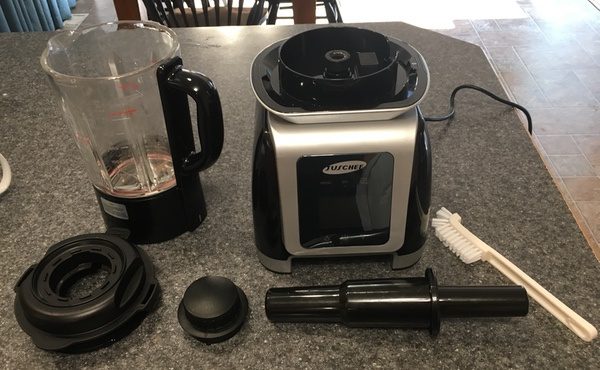
The package includes the blender base, the pitcher, a locking lid, a lid cap, a stirring rod and a cleaning brush. An instruction manual (not shown below) is also included in the kit.

Design and features

The Juschef Professional Blender is a big, heavy beast of a blender. Heavy duty plastics, a weighted base, and a thick glass pitcher give the Juschef what feels like professional-level durability and stability. All the components are substantial and beefy, including the pitcher lid and stirring rod. You’ll want to find a permanent space on your counter for this 15 pound appliance; just note that it’s 19”+ height won’t fit under most cabinets.
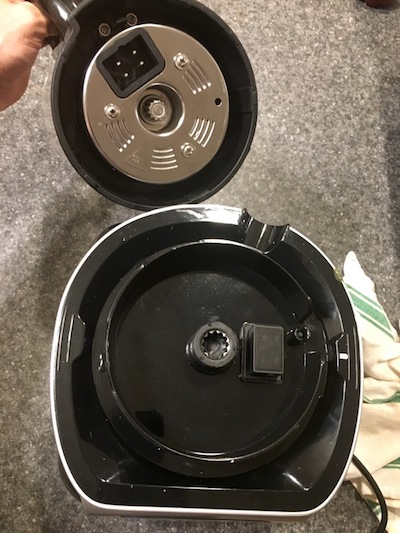
The blender has the ability to heat liquids, and the heating unit is built into the pitcher base. While it’s a nice bonus feature, I’m not crazy about this part of the design because the electronics are exposed. While those elements are sealed off in use, you can’t submerge the pitcher in water for cleaning. It also adds quite a bit of weight to the pitcher.
The pitcher itself is nice and thick, and has a maximum capacity of 56 ounces (40 ounces for heating). Unfortunately, the liquid measurements only start at the 24 ounce mark. The picture below shows 12 ounces of stock in the pitcher, measured separately. Not a huge deal, but it would be nice if the measurements ran down the whole side.

The lid mechanism is nice and sturdy, with a rubber gasket underneath to ensure a tight seal. You’ll need to rotate the lid tab into the locking slot before it will start, which is a good safety feature. I have no doubt that the lid will hold up to extended use.

 

The kit includes a pitcher cap and stirring rod that fit precisely in the lid. Both are built from durable plastic and are just as burly as the lid itself.


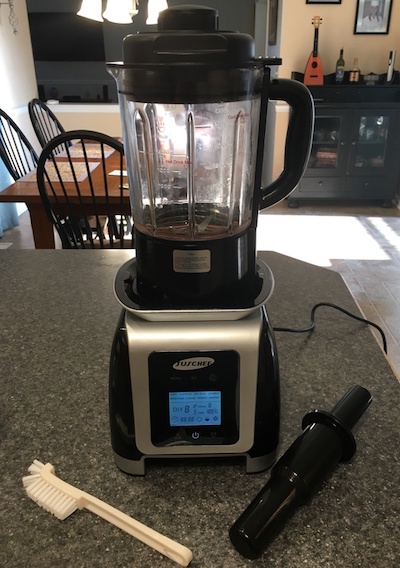
All of your operations are managed through an LED interface. There are 8 preset options as well as a “DIY” function for custom blending. 6 touch-panel buttons are utilized to set your operations. We’ll talk more about this in the Performance section.

The Juschef Professional blender sports a 900 watt power motor, which puts it above your typical countertop blender in terms of power (like the Ninja lineup), but not quite as powerful as high-end home models like the Vitamix or Blendtec. The blade speed is rated at 35,000 RPMs. This combination makes for a blender that, on paper, should handle most of your home needs.

Performance

The Juschef Professional Blender is a good choice for safety and durability. The whole unit is rock solid, and won’t bounce around your counter even when crushing ice at the highest blend settings. You also have to lock the lid to operate the unit, which is great for safety. You’ll find, however, that there’s a bit of a learning curve to understand all of the operations.

There’s no easy way to put this: the manual is just awful. It’s really poorly written with bad grammar and unclear instructions. It’s also incomplete and doesn’t explain how the presets work. The congee function, for example, is simply described as “To make healthy congee.”  Do you know what a congee is, or how to make one? I had to google it. It’s basically a rice-based soup or porridge that’s heated and blended. The blender gives no instructions about whether you add raw or cooked rice first, how long it will heat, or how the blend function works to make it. The same goes for “Porridge,” “Chi Soup,” and “Soy Milk.” Some of the functions are more obvious, and a quick reference guide is supplied with a recipe for each function… but I couldn’t tell you what the presets actually do or how long they take to work. There’s no online support either. You’re on your own.

To start things up, you’ll plug in the blender and add your desired ingredients. Lock the lid, and the unit will beep and the display lights up. We’re not “on” yet though. You have to press the power button to get into the features. It’s not particularly obvious, and Amazon reviews point to a bit of confusion and frustration with this.

Once you hit the power button, the rest of the buttons light up to indicate operation. Select “DIY” and you can set your own power level and duration using the up and down arrows at the bottom of the panel. You’ll hit the “DIY” button to cycle through each setting, then “On/Stop” to fire it up.
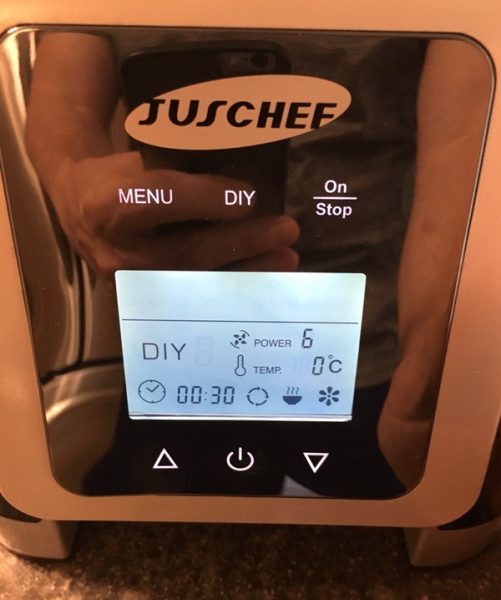
If you choose the “Menu” button, you can now cycle through the available functions. “Menu” or the up/down arrows now toggle through the preset functions, and you hit “On/Stop” to start the function.

As I mentioned earlier, each function does some combination of blending and/or heating if needed. The Smoothie function, for example, runs a 45 second cycle that winds up the blender to different speeds during operation. All good there. The Simmer function is stated as being used “To make different kinds of smooth soups,” but it doesn’t blend the ingredients other than the occasional 3 second whirl to stir things up. You have to blend your stuff first. It’s all very confusing.

Once we get past the interface woes, the blender actually does a fairly good job. Here’s a pitcher full of fresh tomatoes from my garden that I pureed using the DIY feature in about a minute on a higher setting. The result was pretty well done, with a little thickness, but no seed or skin remnants in the blend:

Running on the preset smoothie function, I added a combination of spinach, frozen fruit, almond milk, protein powder, and some diced ginger. It did not completely liquefy the spinach or the ginger and left some frozen fruit chunks, but the results were generally smooth. It’s about what I would expect from a blender at this level.

For my next trick, I decided to make a soup using the simmer function. We’ve got cucumbers and tomatoes (my garden is going nuts this week), basil, some chicken stock, a couple picked garlic bulbs, with some jalapenos to give it some oomph:

On my first go I tried the “simmer” function, assuming would also blend as the instructions implied. I got a hot bowl of stuff. This was how I learned that the instruction manual isn’t too clear.

When I realized that it was just heating, I stopped the process, blended the ingredients, and restarted the simmer mode. I did, in fact, get a nice smooth soup out of the deal:

It took about 20 minutes to get to full heat. That may be because simmer is intended to be a slower process. I haven’t quite figured that out yet. After all is said and done, however, I’d probably skip the heating feature and use my stovetop to get faster, more predictable results.

The blending function on the Juschef is plenty strong for most home uses and the stability of the unit is great, but I am also concerned about cleaning. It’s hard to clean since you have to be so careful around those components at the base of the pitcher. There’s also the blade configuration to consider. The blades are three separate components,  bolted together to form a six-bladed configuration that cannot be removed from the unit. Here’s the problem: see that discoloration in the crevasses?
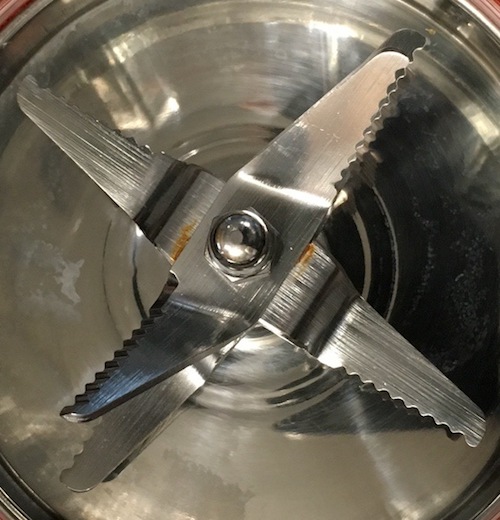
I am hoping that’s not rust. I’ve only used it a few times. Those little nooks and crannies will accumulate moisture and material, and present a real problem for cleaning and potential rusting no matter how well you clean and dry it. The unit ships with a soft brush that’s nice, but I am not sure that it is getting the job done.

What I like

  • Heavy, stable unit that won’t bounce around
  • Nice safety features
  • Well-build components
  • Strong blending capabilities

What needs to be improved

  • Awful documentation and instructions
  • Confusing user interface requires a steep learning curve
  • Hard to clean due to electronic components in the pitcher
  • Blade assembly will accumulate material, and might be susceptible to  rust

Final thoughts

At a retail price of $80-$90, the Juschef Professional Blender seems to be a good value for the money. It’s a stable, powerful unit that will handle most kitchen needs. The heating feature may be useful to some as well. Usability is not good, however, so expect some trial and error to use anything beyond the basic features. Cleaning and maintenance is also a potential trouble spot. I think you’d do well to check out some competitors in this category before buying this item.

Price: Between $80 and $90 depending on availability.
Where to buy: Buy it on Amazon.
Source: The sample of this product was provided by Juschef.

Filed in categories: Reviews

Tagged: , ,

Juschef Professional Blender review originally appeared on The Gadgeteer on September 3, 2018 at 9:00 am.

Note: If you are subscribed to this feed through FeedBurner, please switch to our native feed URL http://the-gadgeteer.com/feed/ in order to ensure continuous delivery.

Ketzal Bags Universal Seat back Organizer review

REVIEW – I love being organized. I loathe clutter and do everything I can to have a place for everything and everything in its place. This extends to my car as well. Driving one of the smallest cars on the road, a Smart, storage space is at a premium. Ketzal’s universal seat back organizer should make it easier to reach my goal of orderly nirvana.

What is it?

Ketzal’s universal seat back organizer is a storage system that straps to the back of an automobile seat.

Hardware Specs:

  • 22 X 14 X 3 inches unloaded
  • Leather construction
  • Metal snaps and buckles

What’s in the Box?

  • Ketzal’s universal seat back organizer, that’s it

Design and features:

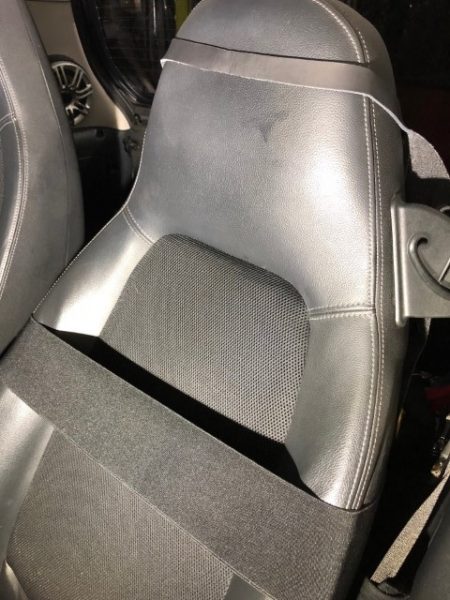
Ketzal’s universal seat back organizer is constructed of heavy leather, adorned with a wide elastic band to secure it to the seat.

Leather straps and buckles are used to adjust the height of the organizer on the seat. My car’s seats are integrated, so I needed to reroute the straps. This was a simple and intuitive process.

The adjustments are simple and the organizer fits the seat tightly, but my car has bucket seats. The elastic band does not follow the contours of the seat, but with it stretched across, I was still comfortable sitting and driving.

My car also has an airbag in the side of the seat so it’s probably not a good idea to cover the opening in any way. Ketzal has anticipated this, implementing D-rings and grommets that can be used to secure the organizer without using the elastic band; however, you will need to provide your own straps, string or another mechanism to use alternative attachment methods.

The organizer fits securely and doesn’t flail about while the car is in motion.

Pockets of different sizes cover the face of the organizer.

Anything of suitable size and weight can be placed into the pockets. In my vehicle, I almost always carry tools, a small air pump, umbrella, pen and pencil, and assorted pieces and bits. It’s great to have a place to put things and makes finding them so much easier

The button snaps are easy to fasten and unfasten. Provided the object is small enough to fit completely in the pocket, the snaps should hold securely. In some cases, I decided to leave an object protruding from the top of the pocket. Now I can move lesser used items from my glove box into the Ketzal organizer.

Already, my younger daughter, who does not have her driver’s license yet, has claimed the Ketzal Seat back organizer as her own. She might have a hard time getting me to give it up.

What I like:

  • Fantastic workmanship and construction
  • Premium quality materials
  • Lots of pockets
  • Fits tightly with plenty of attachment options

What needs to be improved?

  • Include additional hardware to utilize other attachment points.

Final thoughts 

I’m finding it more and more difficult to remember where I put my stuff, especially the stuff I don’t use much. I’ve tried to adopt a much more visual storage philosophy and it’s great to have the Ketzal Universal Seat Back Organizer to help. Its first-class workmanship, materials, and construction are superb. This is my first Ketzal product, but after using this, I’ll be keeping a close eye on Ketzal’s other products.

Price: $150.00
Where to buy: Ketzalbags.com
Source: The sample for this review was provided by Ketzal Bags.

Filed in categories: Reviews

Tagged: ,

Ketzal Bags Universal Seat back Organizer review originally appeared on The Gadgeteer on September 2, 2018 at 11:00 am.

Note: If you are subscribed to this feed through FeedBurner, please switch to our native feed URL http://the-gadgeteer.com/feed/ in order to ensure continuous delivery.

Cherry MW-4500 Ergonomic Wireless Mouse review

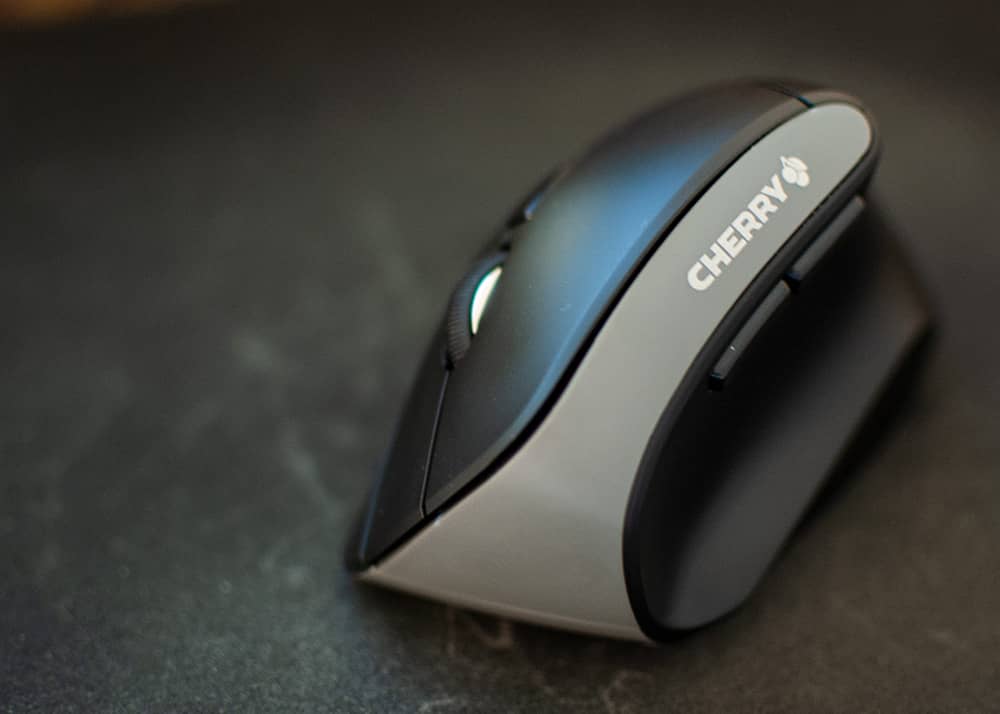
REVIEWS – In my day job as a creative director, I use a mouse almost nonstop for between 8-10 hours, so I’m a prime candidate for wrist fatigue and repetitive stress injury. This is exactly the sort of thing that ergonomic input devices like the Cherry MW-4500 Wireless Mouse were designed to alleviate.

What is it?

The Cherry MW-4500 is a wireless ergonomic mouse that puts an emphasis on natural hand and wrist position to prevent fatigue and repetitive stress injury.

Hardware specs

  • Number of Buttons: 6 buttons and scroll wheel
  • Weight: Approx. 0.26 Lbs. with batteries and receiver
  • Dimensions: Approx. 4.17 x 2.67 x 1.53 Inches
  • Connection: USB
  • Transmission Range: Approx. 10 m / Approx. 32.8 ft
  • Resolution: 600 / 900 / 1200 dpi (adjustable)
  • Ergonomic form in 45° design
  • Infrared sensor for precise movement of the mouse pointer
  • Nano USB receiver – leave in laptop or store in mouse
  • Status LED indicates low battery charge
  • Abrasion-proof surface finish is pleasant to the touch

What’s in the box?

Batteries included!
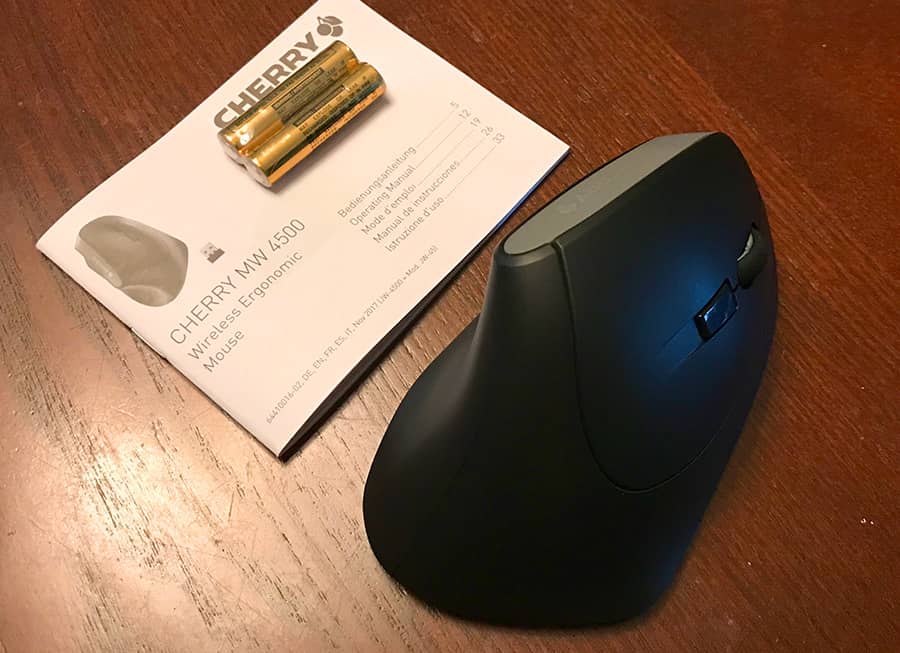
  • CHERRY MW-4500
  • Operating Instructions in hard copy
  • 2 Batteries (type AAA)
  • 1 Nano USB transmission receiver

Design and Features

I can remember the first time I ever used a mouse. My cousin’s grandfather had an original Macintosh, with its now-tiny monochromatic screen and boxy, beige 1-button mouse, and I can remember even then how strange and wonderful that input device was.

Aside from conforming to a human hand a bit better, switching from a ball to lasers, and adding a scroll wheel and a few more buttons, the computer mouse hasn’t really changed all that much.

Years later, and nearly two decades into a career in design, you can bet I’ve heard reports on how bad using a mouse and keyboard are for your hands and wrists. Repetitive stress injuries, carpal tunnel and tendonitis are all easily attainable in this line of work, and I’d be lying if I said I haven’t experienced some stiff wrists after long days in the office.

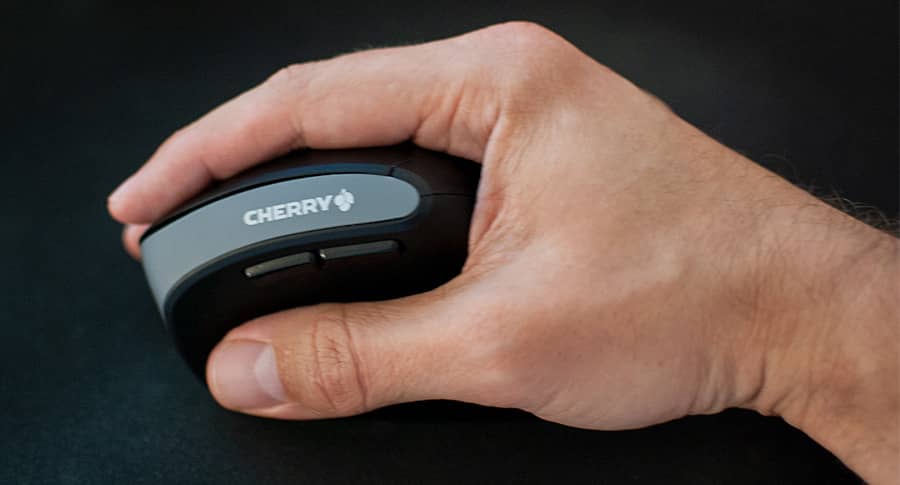
It felt like my hand was just a tiny bit too large for the mouse, curled around it like the big spoon.

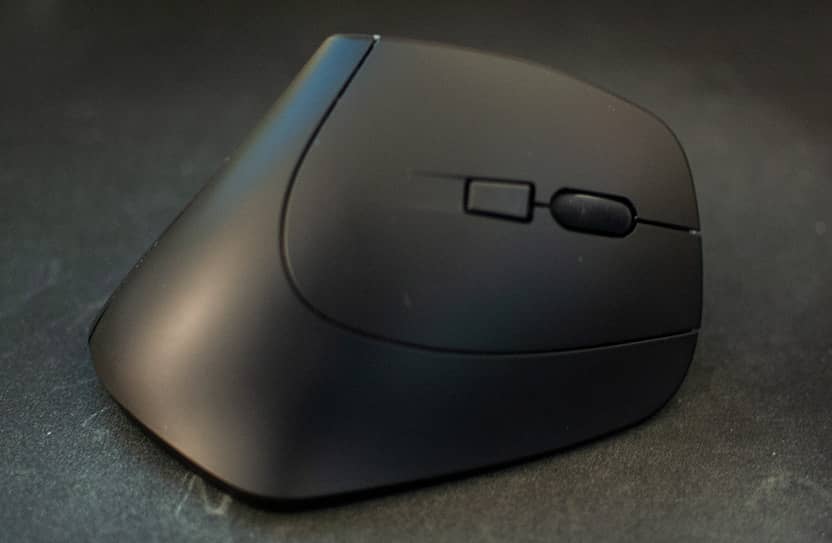
I had seen — but never used — ergonomic input devices before… like big trackballs, those funny split keyboards, and 45º angled mice like the one I’m reviewing today. The Cherry MW-4500 is a cost-effective ergonomic wireless mouse designed by the same company famous for their clicky mechanical keyboards. And its goal is to provide a mouse designed for a more natural mousing position for your hand and wrist.

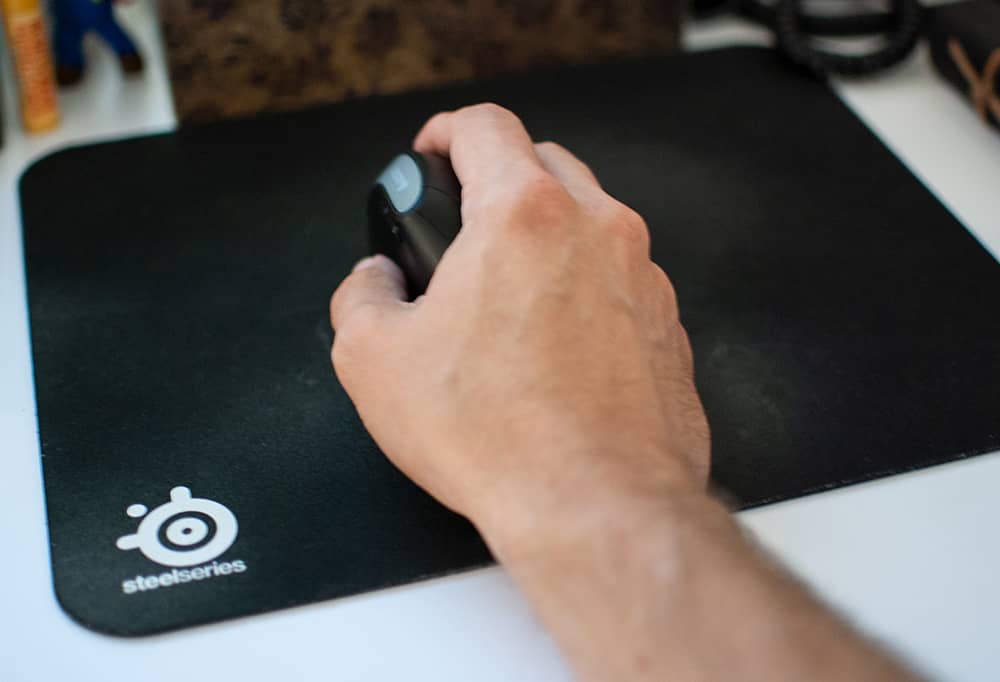
Try a little experiment with me. Take your arm and lay it down on a surface in front of you, in the most relaxed and natural way you can. Don’t even think about it. Likely, your hand looks like it’s holding an invisible can of Red Bull. While using a regular mouse, your wrist is turned in at a roughly 90º angle, and whether you are aware of it or not, it’s causing a bit of tension on your wrist to keep your hand flat against a mouse.

With 45º angled mice, like the MW-4500, your hand is positioned on top of a mouse at a more natural, relaxed angle. Does it really make much of a difference for hours on end? I’m inclined to believe that it does, perhaps cumulatively over years and years, but it’s hard to say that even after 3 weeks of regular use if I really noticed any less stress or fatigue.

Just … relaaaax.

I was more focused on how strange it felt. I’ve heard that with mice like these, you either like it or hate it immediately, with little middle ground. I wouldn’t say I hated it, but I did notice a very crucial difference between using this mouse and my usual Apple Magic Mouse.

My typical needs from a mouse require very precise movements. I have to do fine brushwork and clipping paths in Photoshop, which necessitates exact mousing and clicking. I can click my usual mouse all day and it doesn’t move even one pixel. Rock solid. However, I had a hell of a time using this angled mouse simply because the mouse buttons are angled and therefore leveraged against the mouse body itself rather than the table.

So the mouse stays as still as your thumb can counter the pressure of your forefinger’s click. In trying to keep the mouse perfectly still, it feels more like a squeeze, or a pinch, every time you click. Initially, after a long day of this, I felt more fatigue in my thumb joint from gripping the mouse so hard than I ever had in my wrist. That seemed to ease with time, but personally, I found it distracting.

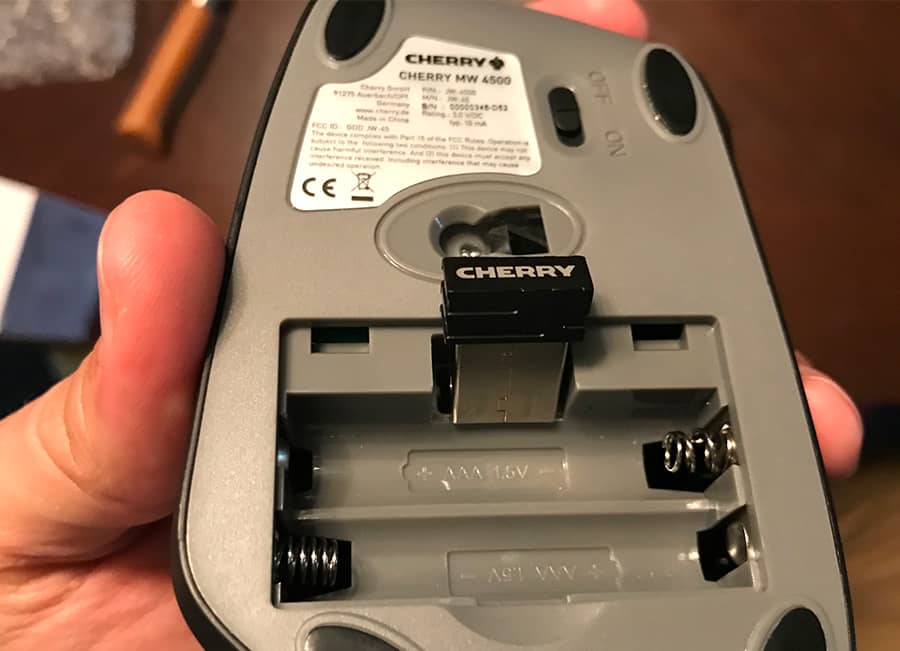
The built of the mouse itself is decent. Setup is easy — there is a tiny USB receiver that is built right into the body of the mouse, and it’s as simple as removing that receiver and inserting it into a spare USB port. You could easily leave it in a laptop without worrying about it popping out. But I’m surprised that these little receivers are still a thing. Perhaps they’re cheaper to manufacture that way instead of simply relying on Bluetooth. It takes 2 AAA batteries that are supposed to last for months, so that’s pretty good, too.

Tiny USB dongle built right into the body for easy storage.

Speaking of cost, the MW-4500 is cheap! We’re talking $25, which is a pretty good price for any wireless mouse. In this case, it does feel like a $25 mouse. It’s very lightweight, for better or worse, and has an almost hollow feeling. It also has a rather loud click.

I appreciate the extra buttons, however, they’re not programmable unless you have some sort of third-party plugin or app that lets you customize them. There is the typical main left and right buttons, a click button built into the scroll wheel, and browser back and forward buttons situated just above where your thumb rests.

That DPI adjustment button, right there where your whole hand goes.

Finally, there is a DPI adjustment button on top of the mouse. I’ve never quite understood the purpose of these. I used to have one on an old Logitech gaming mouse and I believe its purpose in that regard was to increase or decrease the sensitivity and speed of the mouse on the fly. But I’ve never really had a use for that. In fact, I managed to hit that button on more than one occasion only to wonder why my mouse cursor was now flying all over the screen.

My final two cents … I think this mouse would be a great entry into experimenting with ergonomics for general computing like browsing and basic office work. I wouldn’t recommend it for gaming or anything that requires a very fine level of precision like digital painting or design work, but I could certainly see no problem for giving it a shot if you have to use a mouse for long periods of time. Unless of course you use a mouse with your left hand.

What I like

  • promotes correct wrist position
  • very long battery life
  • inexpensive

What needs to be improved

  • takes some time to get used to using it, if at all
  • right-hand only (sorry southpaws)
  • difficult to use with high precision

Final thoughts

I think that if you can get used to using it, Cherry’s ergonomic offering could help relieve some of the stress of mousing all day, and at a decent price. Personally, the odd hand positioning doesn’t offer the leverage for precise clicks and movements that graphic design work requires, and that’s a dealbreaker for me. Most other general computer tasks would be fine.

Price: $31.24
Where to buy: The Cherry MW-4500 can be purchased online from multiple sources, such as OfficeSupply.com, but not directly from Cherry itself.
Source: The sample of this product was provided by Cherry. You can find out more about this and their full line of computer input devices on their website.

Filed in categories: Reviews

Tagged:

Cherry MW-4500 Ergonomic Wireless Mouse review originally appeared on The Gadgeteer on September 2, 2018 at 9:00 am.

Note: If you are subscribed to this feed through FeedBurner, please switch to our native feed URL http://the-gadgeteer.com/feed/ in order to ensure continuous delivery.
Masterbolt Travel Door Lock review

REVIEW – For near 30 years, I traveled the world for work. I’ve had cause to stay in some less desirable places, sometimes losing sleep worrying if someone might gain access to my lodging while I slept. On one occasion, one of my coworkers woke to find a hotel employee in his room in the middle of the night. I took to carrying a door wedge with me, but the Masterbolt Travel Door Lock is a far better option

What is it?

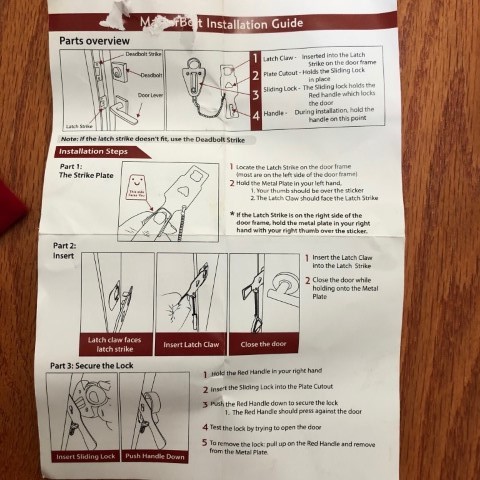
Masterbolt Travel Door Lock is a simple two-piece mechanism that when properly deployed, renders it extremely difficult to open a door from the outside, even when in possession of the keys.

Hardware Specs:

  • 7 x 3 x 1.1 inches
  • 4 ounces
  • Portable – Masterbolt is easily packable and comes with its own pouch to place in your suitcase or backpack to provide additional security when you travel
  • Installs in seconds – No tools required. Protects you from unwanted intruders
  • Travel security – Use at home, hotels, Airbnb, hostels, rentals, and anywhere you travel and need added security
  • Perfect for students – Use in your dorm, while travel, or for internship apartment stays during the summer
  • Protect tour children – Prevent toddlers and small children from leaving the house unsupervised

What’s in the Box?

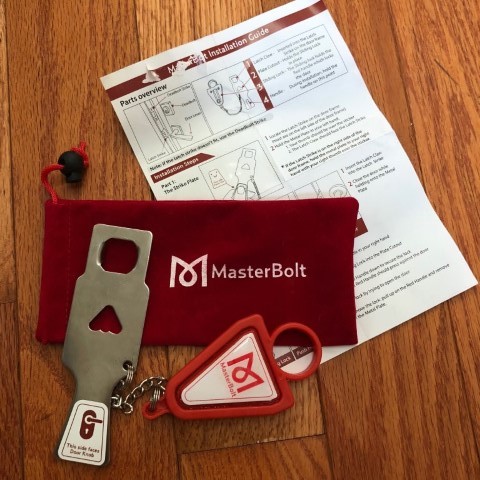
  • Two-piece lock chained together
  • Storage pouch
  • Instruction sheet

Design and features:

The Masterbolt lock arrived in a simple white cardboard box. It’s refreshing to receive something that is not over packaged.

The design is elegant, simple and fiercely effective – two pieces, chained together is all that’s needed. After practicing a few times, it literally takes seconds to deploy and remove.

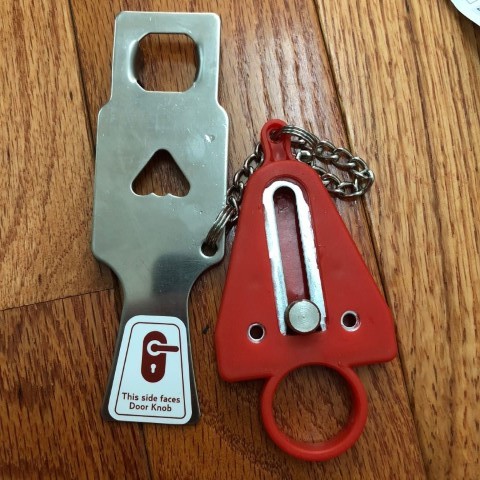
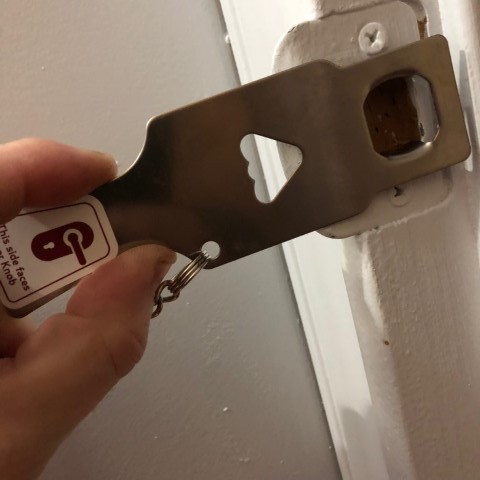
First, the long metal part’s tabs are placed into the strike plate on the door frame.

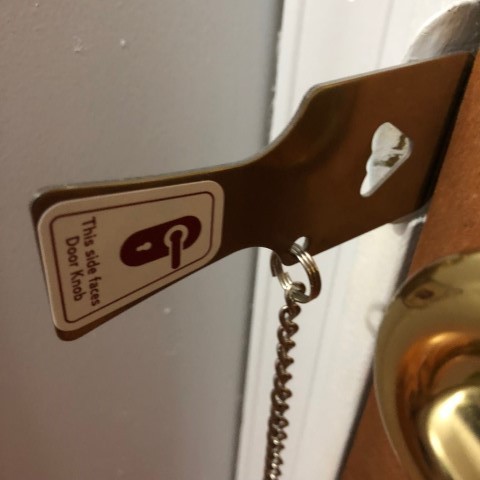
The door is closed and the latch bolt protrudes through the hole in the Masterbolt plate.

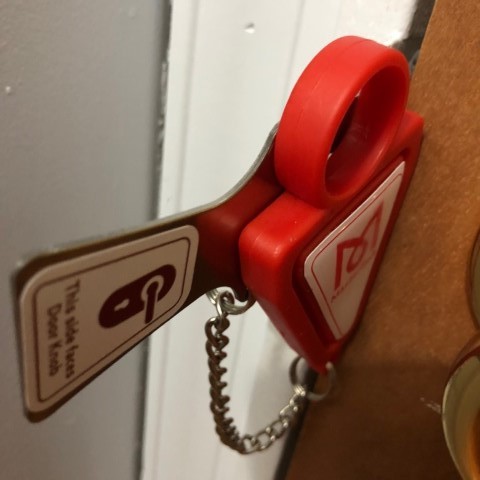
On the knob side of the plate, the sliding bolt on the red part is placed into the triangular hole in the metal plate. The edge of the red part rests against the door. That’s it – secure.

Once the Masterbolt is installed, the door is VERY securely locked, whether the door is locked using the knob or not. I tried, hard, to dislodge the Masterbolt. If the strike plate is properly anchored, only an extreme amount of force is going to breach that door.

Pulling on the doorknob in an attempt to open the door resulted in flexing and distortion of the entire door frame. The stronger the door and frame, the better the Masterbolt is going to work. I’m confident that nothing short of a sledgehammer, SWAT breaching tool, reciprocating saw, or vicious kick by a mule is going to get that door open.

What I like:

  • Small size
  • Simple, effective design
  • Easy to use
  • Inexpensive

What needs to be improved?

  • Nothing

Final thoughts

Masterbolt’s Travel door lock is one of those “I wish I had thought of that” products. It’s tough and, in my opinion, works better than described. I was genuinely shocked at the stability and security this lock provides. Gone are my days of frequent travel, but I’ll be using the Masterbolt Lock every time I will be sleeping in an unfamiliar location.

Price: $19.95
Where to buy: Amazon
Source: The sample for this review was provided by Masterbolt.

Filed in categories: Reviews

Tagged: ,

Masterbolt Travel Door Lock review originally appeared on The Gadgeteer on September 1, 2018 at 11:00 am.

Note: If you are subscribed to this feed through FeedBurner, please switch to our native feed URL http://the-gadgeteer.com/feed/ in order to ensure continuous delivery.

Potensic T25 Drone with 1080P HD Camera review

REVIEWS – Potensic’s new T25 drone has a lot of features, almost too many to grasp. Want to know more? Read on.

What is it?

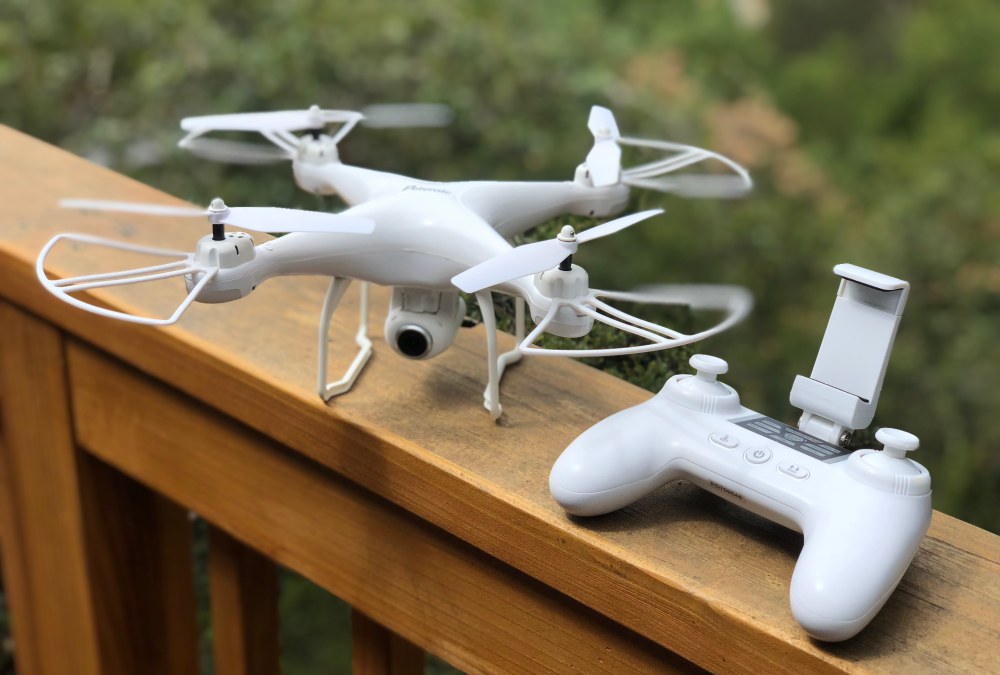
The T25 is a small to mid-size drone with a full suite of capabilities including takeoff and landing assist, return to home, full 1080P recording and much more. Are you looking for your first drone or an upgrade from a low-cost mini-drone? Let’s take a look at the T25 and see if their feature set and performance are right for you.

Hardware specs

Drone GPS and specs
– Follow Me, GPS return home, GPS positioning and hold, Geo-Fencing, and Low Battery Return
Drone inflight features
– Headless mode, Auto Takeoff / Landing / Hover, 9-Axis gyroscope, Color-coded dual LED lights, 2.4G technology
– Range: Up to 300m (Image range up to 100-150m)
– Max Height: Up to 120m, Max Speed: Up to 25km/h
Camera
– HD Wifi Camera with 75º articulating 120º wide-angle lens
– Optional SD card (sold separately)
Battery
– 3.7v 1000mAh lithium ion
– Micro-USB port allows for charging in or outside drone
– LED lights for battery level indication
Controller
– Internal lithium polymer battery
– Micro-USB port for charging

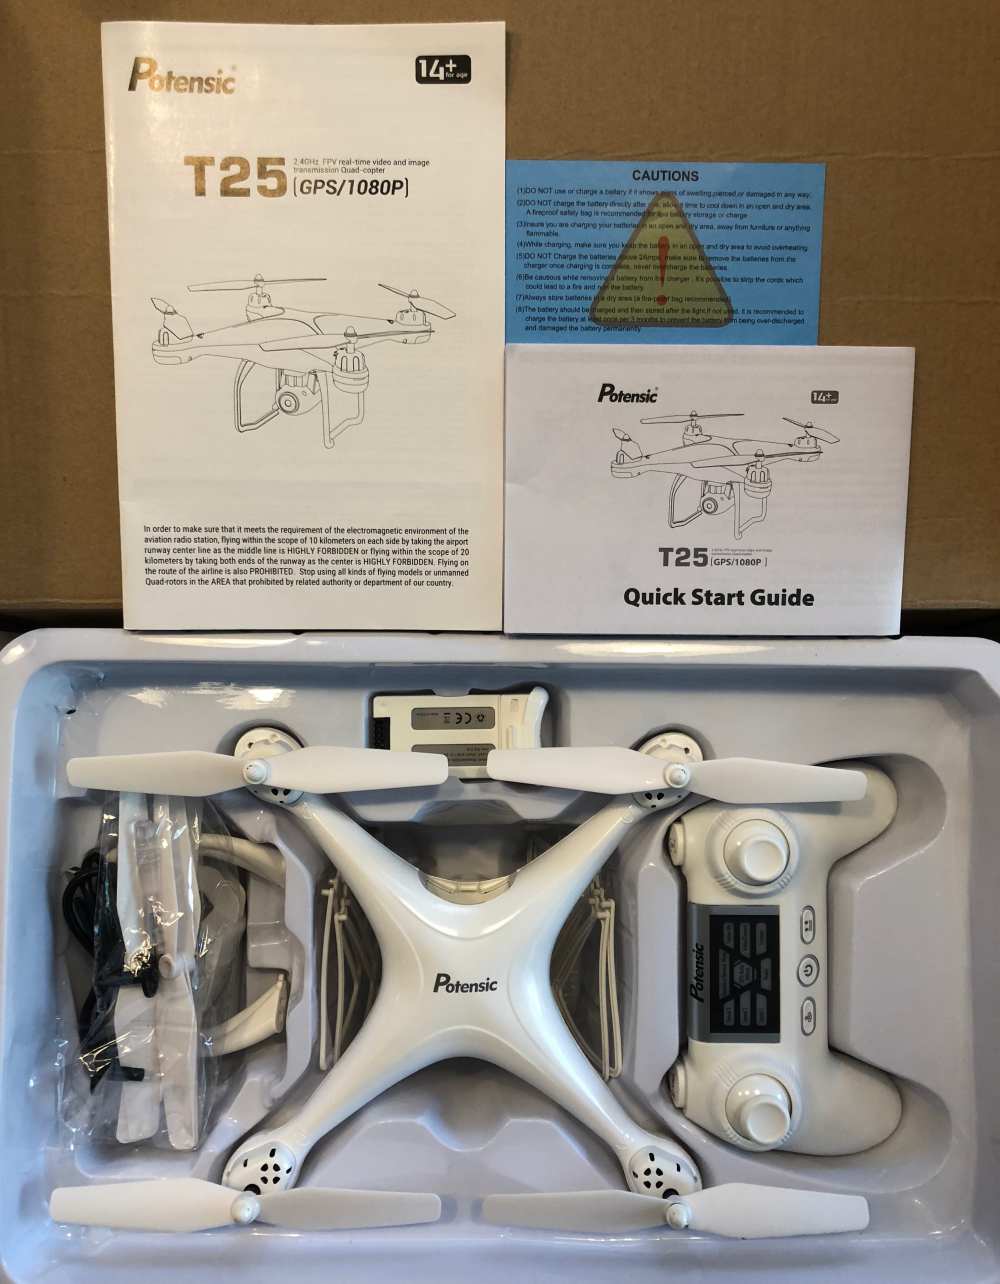
What’s in the box?

  • (1) T25 Drone
  • (1) 1080P HD camera module
  • (1) Transmitter w/ mobile phone cradle
  • (1)  3.7V 1000mAH Battery
  • (1) User Manual & Quickstart Guides
  • (1) USB Battery Charger
  • (1) Screwdriver, (1) Wrench
  • (4) Propeller Protection Guards
  • Spare Parts
  • (2) Landing Leg pairs
  • (4) Propeller Blades (2 each rotational direction)
  • (2) Propeller gears, (2) Propeller caps, (4) Propeller screws

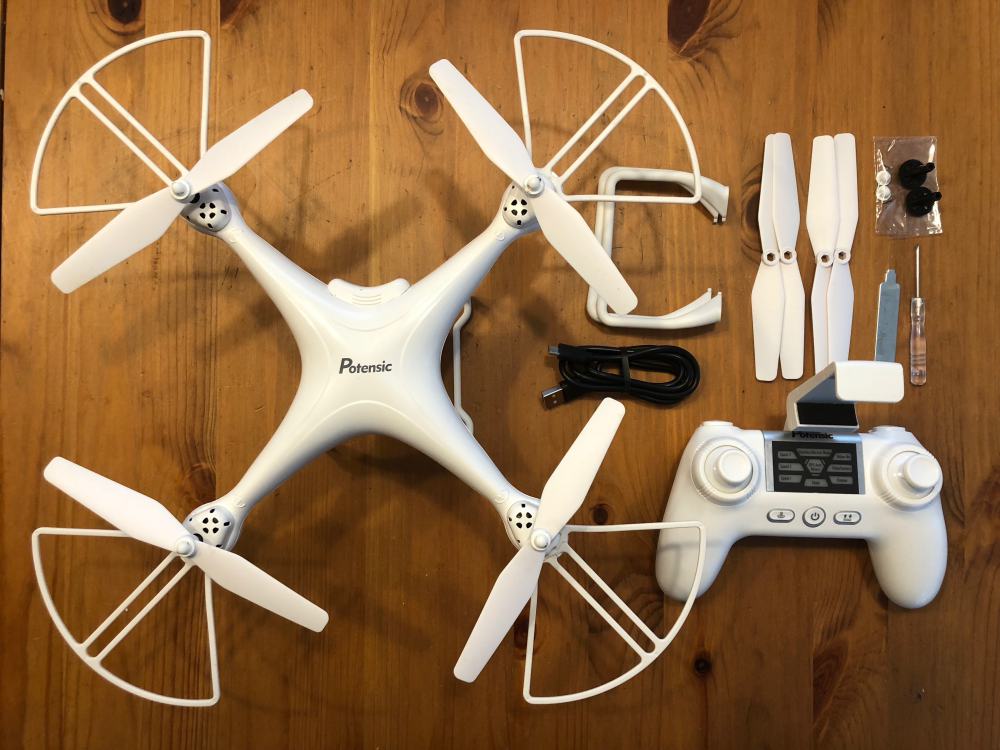
Here’s a better look at those parts removed from the packaging.

Design and features

Functionally, the design of the T25 is well done. The landing legs are replaceable as are the propellers and the propeller guards. The will hold most (if not all) smartphones and the app works well during use. From an aesthetic standpoint, there is little here that stands out as being unique to this drone so I would forgive almost anyone for mistaking it for a drone from the market leader. Maybe that’s the point, but in the end, while you are watching the drone as you fly, you quickly start to go heads down and watch your phone where the camera feeds a live view. As bland as the exterior may be, you’ll want to avoid putting stickers on or painting it as even adding the 4 propeller guards changes flight characteristics and a medium gust of wind definitely does. Let’s move on to set up and performance.

Setup

If you’ve had a drone before, none of the following is likely to surprise you. If not, let’s just say that setup isn’t hard, it’s just not fast nor straightforward if you’re expecting something similar to an RC car. The T25 is relatively assembled in the box, but as you saw in the photos above, there are so many additional small parts, both required and spares that it still feels like a kit instead of a finished product. That’s actually part of the charm in some respects.

If we boil it down, the setup process is as follows…

  1. Charge the batteries
  2. Install a microSD card (not included) into the camera
  3. Press the propeller guards into place
  4. Install batteries in the controller
  5. Install the phone cradle into the controller
  6. Download and launch the Potensic-G App

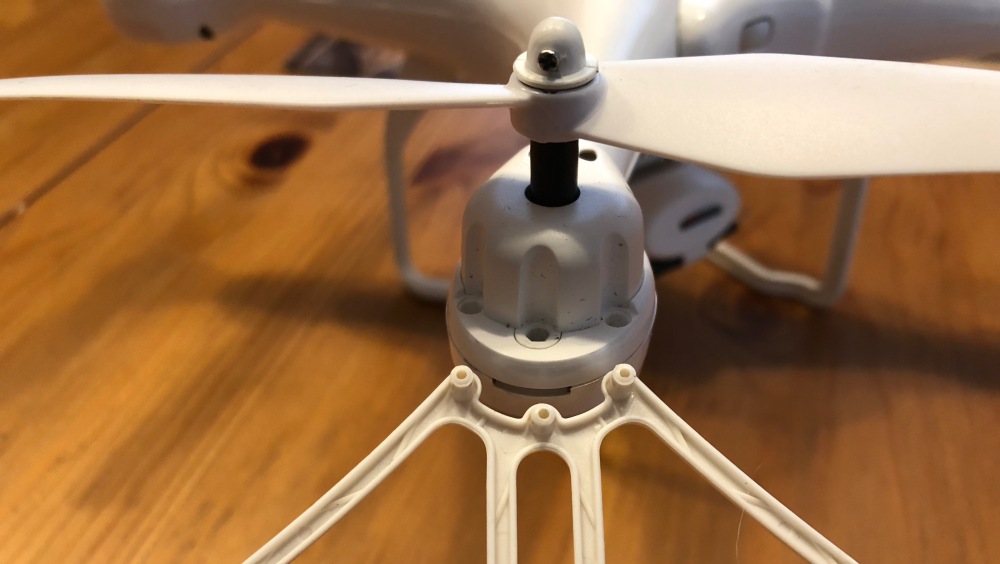
Here’s a shot of the propeller guard posts and the press-in receivers on the drone. It literally is a press-fit.

Right about here is where you think you’re ready to fly, and you kind of are. As a drone novice, I underestimated the amount of time the next steps would take including getting comfortable piloting the drone. While awaiting the review sample to arrive I did happen to notice that the battery provides about 8 minutes of flight time, so I ordered a spare battery from Amazon so that I’d have double the flight time between charging sessions. All that out of the way, here’s the next set of setup instructions. (Feel free to skip this if you’re familiar with drone calibrations)…

  1. Turn on the drone and set it down on a level surface, and all lights should be blinking red (This is an important step as the drone will use this as its perception of flat – You should also be in a wide open space, and the lights can be hard to see in strong sunlight)
  2. Turn on the controller (Here’s where it gets all secret game code-like)
    1. Press UP then DOWN on the left joystick
    2. Front lights will flash WHITE, rear BLUE
    3. On your phone hop into settings and connect to WiFi broadcast by the drone (Potensic-xxx) then jump back to the app
    4. Calibrate the gyro by pressing each joystick to the forward and outward corners (left @ 11, right @ 1) – lights should blink rapidly
    5. Calibrate the compass by pressing each joystick to the forward and inward corners (left @ 1, right @ 11) – lights should now add a red between the flashes (white/red in front, blue/red in rear)
    6. Pick up the drone and in one smooth motion turn your body in a circle keeping the drone level in front of you – rear lights should go solid blue
    7. Now tip the drone face down (propellers forward) and do the same thing keeping the drone in this position – front lights should go solid white
    8. The app should confirm calibration okay and you will set the drone back on the level surface where the lights will return to respective white/blue flashing while the drone is ‘Waiting for GPS signal’.  [NOTE: If you happen to be somewhere where you cannot get a GPS lock (large indoor area?), you can press and hold the right joystick for 2 seconds to disable GPS. Keep in mind that will also disable any of the features reliant on GPS like return home and follow me.]
    9. When the lights return to all solid you’re ready to fly and the app should say so.
    10. Last thing that was not mentioned anywhere that I could find is that in the app, you need to click on ‘CONTROLS’ to get to the flying screen.

Performance

There are a lot of controls on the controller (which makes sense), but it makes for a learning curve that’s as steep as your familiarity with this kind of setup. If you play any kind of modern gaming system you’ll already be more likely to jump in. Let’s take a look at all those controls quickly…

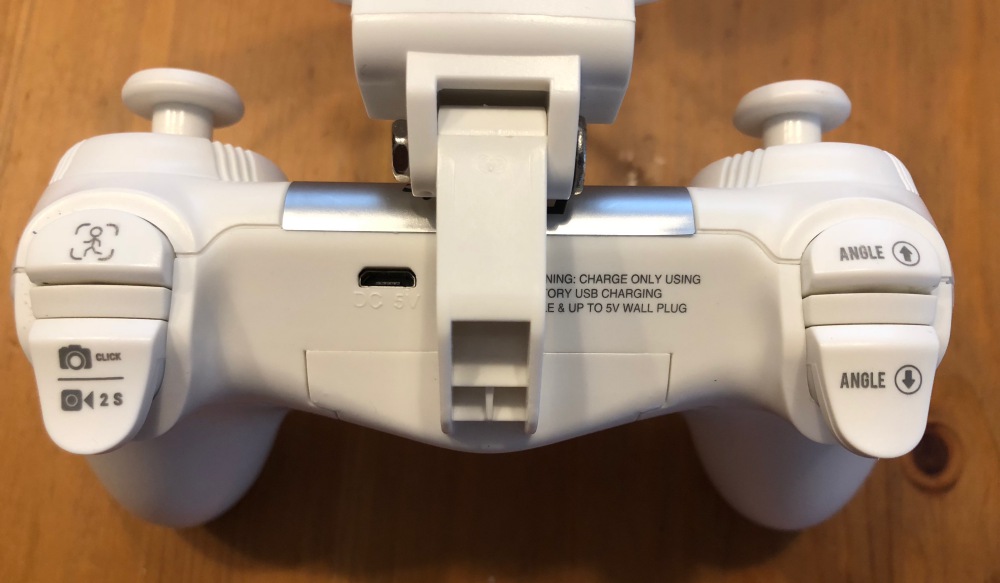
Above you see the trigger controls for [follow me], [camera/video] and on the left hand [angle up] and [angle down] adjustments

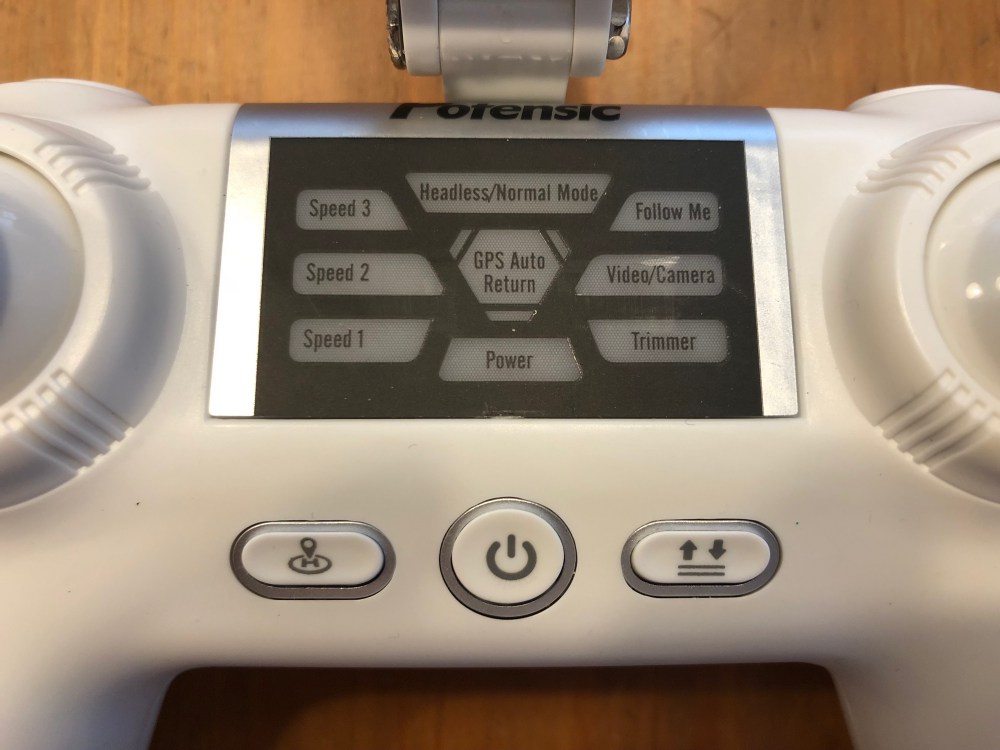
Here are the [return to home] , [power] and [takeoff/landing] buttons along with a whole lot of indicators above which help to communicate which settings the drone has active. These are lit well during use and hard to confuse.

When it comes to actually flying the drone, Potensic has done a few things that aid a new pilot significantly. The first is a one button take off which literally works as advertised. Press that button and the propellers whirr to life lifting the drone to about 5 feet off the ground at which point it just unnaturally maintains its position. Auto land is another that just takes a huge headache away by just landing for you.

A unique feature is “headless” mode which basically translates to the controls never switching orientation. This means that forward is always forward based on the starting position of your controller and left is always left of that forward motion. This is super useful if you’re thinking grid style, but if you turn around because you flew the drone behind you, you’ll need to mentally remap the controls to have the drone do what you want it to do.

Follow me is a feature that got me really excited and in my first attempts also concerned me the most. I don’t trust the GPS on my phone to be accurate to within 10 feet. When experimenting, the drone does what it’s supposed to do and if you back up, it advances. The problem is that with some GPS drift, sometimes it would get a little closer than I expected which resulted in me stepping back and it continuing to advance. Comical right? Also scary.

So as a new pilot, the reality is that it learning to fly is a bit stressful and just when you think you’ve got it, something changes and your gut reaction ends up causing a problem. It’s also a bit frustrating to see all these beautiful drone-shot videos on youtube and other media outlets, only to realize that it’s not quite that easy to get that beautiful shot without a lot of practice. So here are a couple of reference comments for you to consider.

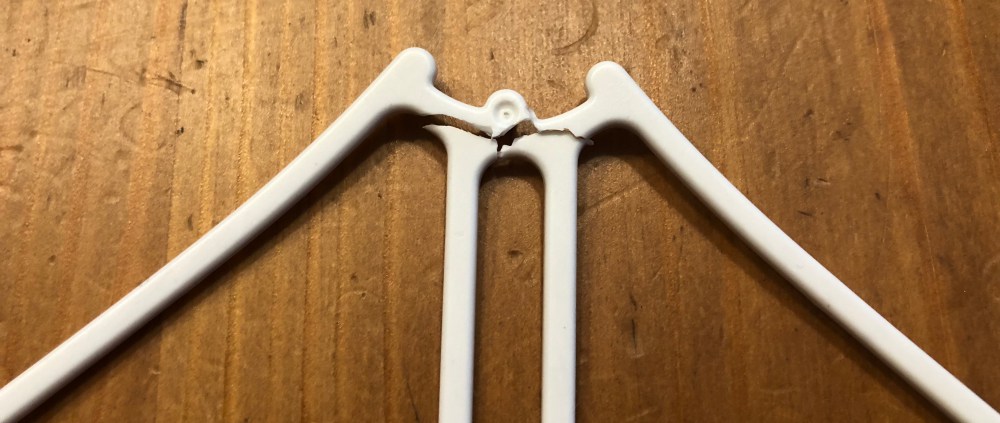
I only had one real ‘crash’. It was before I discovered headless mode and I ended up sending the drone into the side of our car. The propeller guards did what they were supposed to do and kept both the car and the drone uninjured, but one propeller guard snapped. It would be nice to have some spares in the box as it seems like these are more likely to be needed than spare landing gear, but then again who’s really to say.

The on-board video camera is why I think drones intrigue most of us, and the T25 boasts 1080P. Note that both the below videos are posted here at 720. On a recent family vacation, we were filming a sequel to an ongoing saga of movies with our kids as action heroes. There was a scene with my older kids running towards the beach and it seemed like the perfect opportunity for a drone shot. In the video below you’ll see that while it worked, I didn’t account for the amount of wind and controlling the drone was quite difficult. I will say that it was impressive to see the T25 tilted at almost a 25º angle and just holding its position which was right at the beginning of this video.

Here’s another video of one of the earlier flights just getting the hang of the controls and even just comfort level of having it head back towards me. The camera does a pretty good job, but it can be a bit jumpy and the clarity isn’t quite as good as I was hoping.

A couple of things to note about the way the camera works. You see exactly what you’re shooting on your controller display (iPhone in my case). Any photos or videos are recorded directly to your phone as well as an SD card if you have it installed. Videos record in .avi format on the SD card while .mov on the iPhone. That’s helpful as macs don’t read .avi natively so you’ll need to grab VLC or some other player/editor. I did not see resolution differences between the SD card recordings or the iPhone recordings.

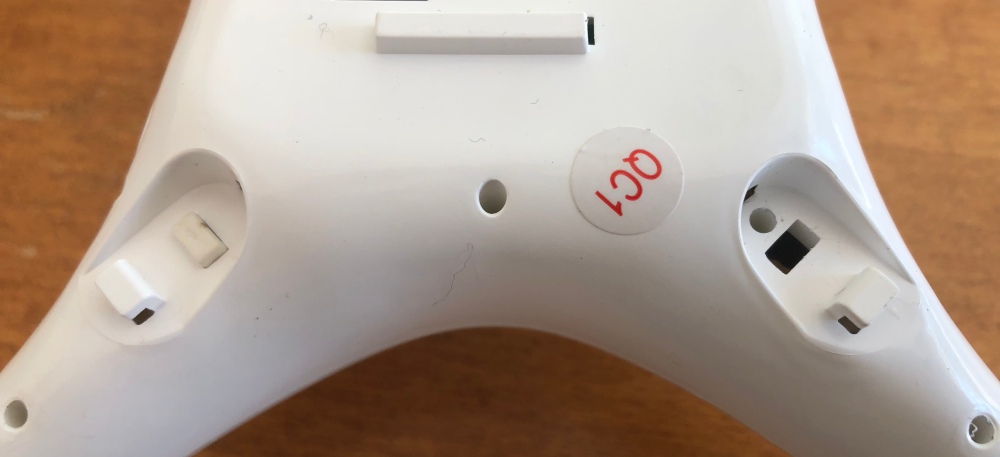
When initially setting the drone up and looking over all the parts I took off the legs and inadvertently pushed one of the release buttons too far where it pushed inside the drone and the spring was rattling around. In retrospect, this is why their wrench has a small extended section with physical stops. Regardless, it resulted in taking the drone apart to rescue the button and I got to look at some of the inner workings. You can see in the second shot where the button arm is keeping it trapped against the assembly post. Overall an easy fix, albeit with a lot of screws.

What I like

  • Small and compact without being diminutive
  • Learning aids are great for new pilots
  • Spare parts included for some key items

What needs to be improved

  • Battery life/flying time – and/or – 2nd battery in the box would help
  • Propeller guards are more fragile than they should be
  • Add a learning mode where certain features can only be unlocked if you’ve passed ‘flight school’ levels
  • Battery swap requires redoing all the calibration steps

Final thoughts

I’ve flown a couple of drones before, but it was quick flights with the drone’s owner right there. When it’s your own and you’re doing all the setup, the “am I doing this right?” weighs on you quite a bit and I can only imagine that ratcheting up a lot if you’ve dropped your own dollars to purchase it. The more time you can spend flying, the more efficient you’ll be and the better results you’ll get out of video and photos. The main complaint from any user will be flight time. I’d recommend a minimum of one extra battery and likely two as if you’re headed out to fly, you’ll want a good 30 minutes and 3 won’t quite get you there. Also once the controller battery is depleted you’re done as it takes an hour to charge even if you brought a power bank. Overall the T25 is a good value, not too light, not too heavy and sits in a pretty good spot as far as not being too expensive while having an impressive feature set.

Price: $189.99
Where to buy: Amazon
Source: The sample of this product was provided by Potensic.

Filed in categories: Reviews

Tagged:

Potensic T25 Drone with 1080P HD Camera review originally appeared on The Gadgeteer on September 1, 2018 at 9:00 am.

Note: If you are subscribed to this feed through FeedBurner, please switch to our native feed URL http://the-gadgeteer.com/feed/ in order to ensure continuous delivery.