Tactical Emergency Flashlight Kit Escape Tool review

REVIEW – In my world, the answer to the question “Do I need another flashlight?” is always the same: YES! The MeetIdea Tactical Emergency Flashlight Kit Escape Tool is definitely a welcome addition to my collection. I have flashlights everywhere – in the Jeep, in the truck, in my photography bag, and all over the house.

What is it?

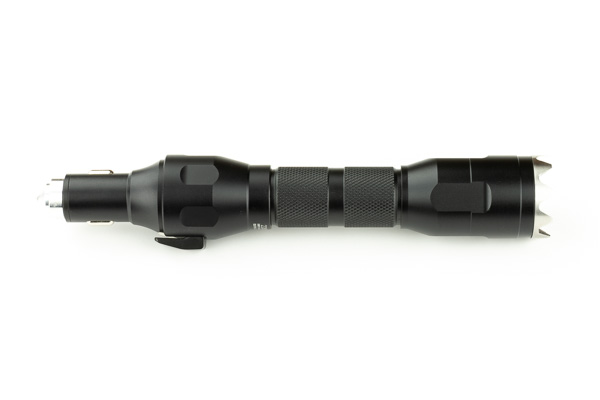
The MeetIdea Tactical Emergency Flashlight Kit Escape Tool is a multi-function 5-in-1 car escape tool includes a car charger, power bank, seatbelt cutter, window breaker, and emergency light.

What’s in the box?

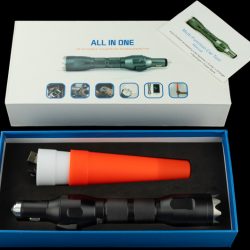
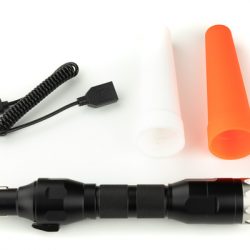
  • Tactical Emergency Flashlight Kit Escape Tool
  • Light Cones
  • USB Cable


Design and features

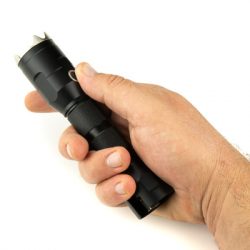
The Tactical Emergency Flashlight Kit Escape Tool came to me with a bit of reservation on my part. I’ve seen many aluminum flashlights that look great, but once you get them in your hand you realize that they’re just cheap junk. This flashlight was an exception to that.

The box looked really nice and as often is the case, indicated that there was some pride in its packaging as well as its construction. Normally I don’t open a product box until I’m ready to photograph it, to keep fingerprints and dust to a minimum, but this one looked so nice I just had to handle it.

From the moment I picked it up, I was not disappointed.

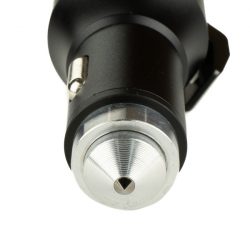
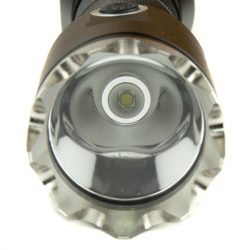
Being attracted to shiny objects, the first thing I noticed about this item was the serrated attack head. It’s milled from stainless steel, and has well-defined edges, but not too sharp as to damage your pocket while you’re carrying it. The first thing I thought was “I would NOT want to take a hit to the face with this thing!” The attack head also unscrews, making it easy to remove and clean the front lens of the light.
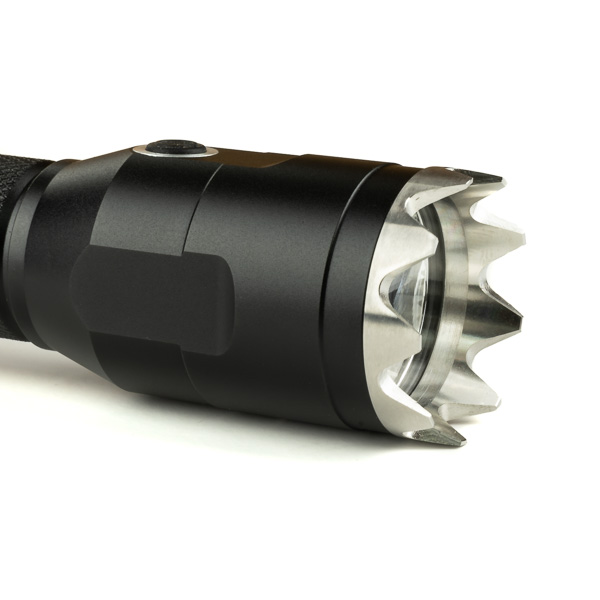
The power switch is accented with a complementary metal ring, making it easier to visually locate, and is positioned in exactly the right spot and has a very nice feel to the click when changing modes. The 300 lumen LED light has four modes: High, Low, Blink, and SOS. To start the SOS mode, simply hold the power button for 3 seconds.


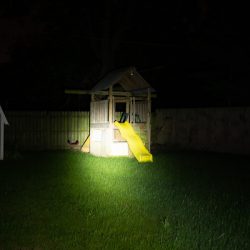
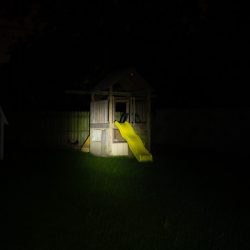
I found the light to be plenty bright enough, in fact for anything close to you the low power mode is plenty. The photos below were shot at the same exposure, with the swingset being about 50 feet from me.


Advertised as “At least 2 hours battery life under bright mode, 200 mins for strobe mode.”, I ran it for over 2.5 hours on bright mode.

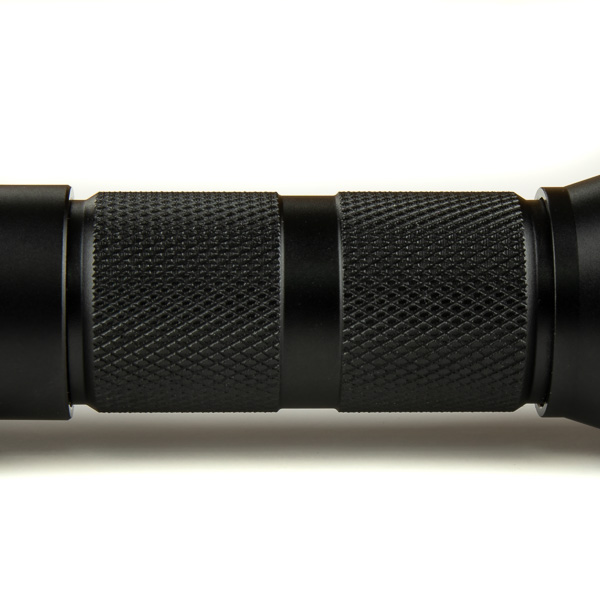
The knurled hand grip provides a skidproof gripping surface without being overly aggressive. The narrower hand grip area fits nicely in the hand for use in either direction. The body portion has o-rings to seal it, but I’m not sure just how waterproof the entire light would be considering the USB ports at the back.
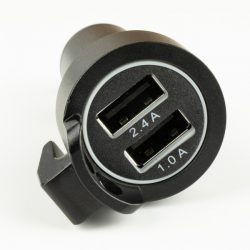
At the base of the light is the multi-function portion featuring a 12-volt car charger with 2.4a and 1.0 amp USB charging ports, a seat belt cutter, and a tungsten steel window breaking tip. The charger features a blue ring LED light that helps with locating the ports in the dark, and it’s not overly bright like some chargers. The light can be charged with this portion or via the included USB cord.


Perhaps one of my favorite features is the ability to use the flashlight as a battery bank to charge USB devices, such as a phone. The 2200mAh Li battery will provide a full charge for most phones.
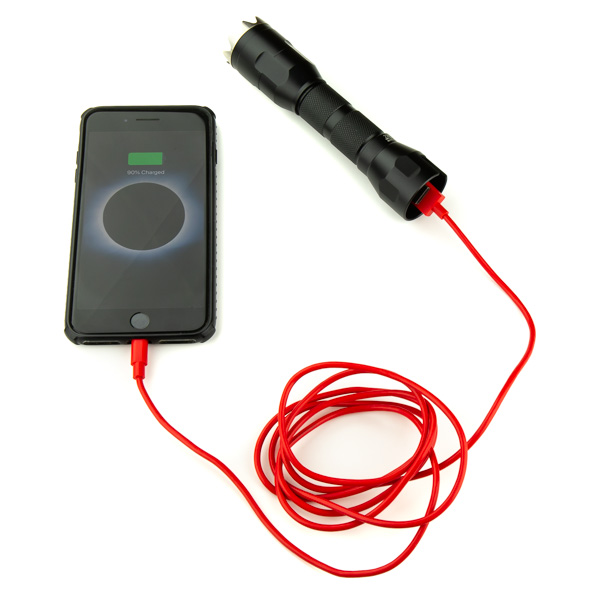
I do wish there was a cap to cover the end of the light when the car charger isn’t installed, but I’m sure I can find a rubber cap at the local hardware store.

What I like

  • Defensive end
  • Multiple charging options
  • Rechargeable Battery
  • 2200 mAh Battery pack capability
  • Overall build quality

What needs to be improved

  • No charging indicator light
  • No battery level indicator lights
  • Cutter end has no positive connection to keep from falling off

Final thoughts

Currently priced at $29.99 makes this tool a great bargain. I’m going to be buying several of them to give as gifts and for my other vehicle.

Price: $29.99
Where to buy: MeetIDEA and Amazon
Source: The sample of this product was provided by MeetIDEA.

Filed in categories: Reviews

Tagged: ,

Tactical Emergency Flashlight Kit Escape Tool review originally appeared on The Gadgeteer on September 23, 2018 at 9:00 am.

Note: If you are subscribed to this feed through FeedBurner, please switch to our native feed URL http://the-gadgeteer.com/feed/ in order to ensure continuous delivery.

Brydge 12.9 Series II Bluetooth iPad Pro keyboard review

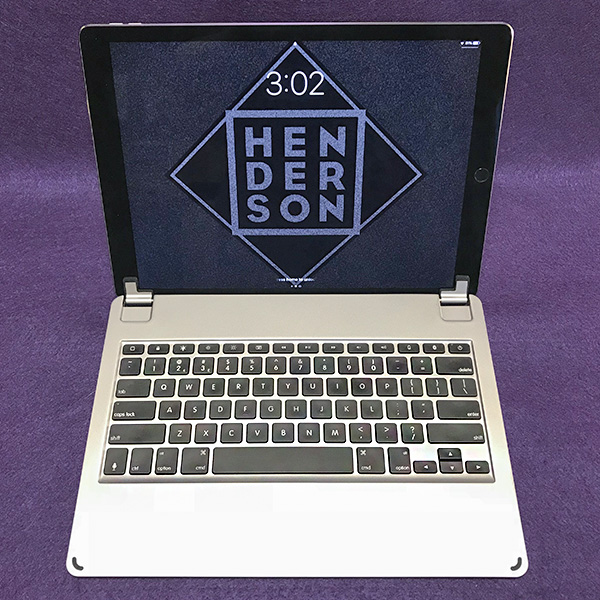
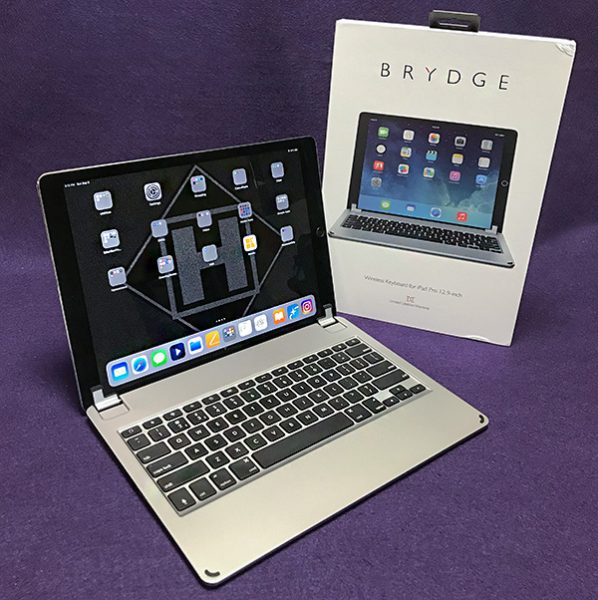
REVIEW – When I got a 12.9 in. IPad pro, I had already purchased a case for it. I’m that paranoid of dropping and ruining any iDevice I buy. The case I bought was the Speck Stylefolio Pencil Case—a great case that does not include a keyboard. I’ve never been thrilled with the choice of keyboard cases (including Apple’s), so I resorted to using a discarded Apple Bluetooth keyboard to do my typing. What I really wanted was something that was as easy to type with as my wife’s MacBook Pro laptop. I now have that keyboard—the Brydge 12.9 Series II Bluetooth keyboard.

What is it?

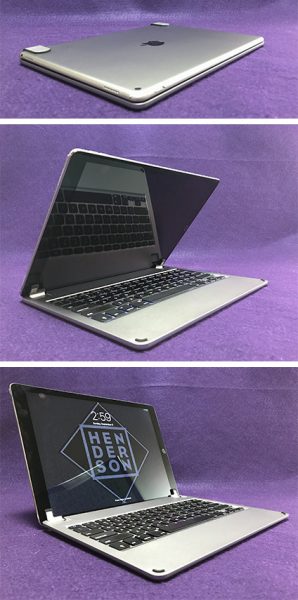
The Brydge 12.9 Series II Bluetooth keyboard is just that—a full-size keyboard for the larger iPad Pro. But it’s a bit more than that. The Brydge keyboard is so perfectly matched to my iPad Pro, that when closed, it looks just like a Mac laptop. You can feel the engineering quality as you open/close the lid or type on the keyboard. This is what Brydge calls the Series II Bluetooth keyboard.

Specs

  • Compatibility: iPad Pro 12.9 in.
  • Dimensions: 12 in. x 8.75 in. x 0.25 in.
  • Material: Aluminum
  • Weight: 1.55 lb.
  • Backlit Keys: Yes (3 levels)
  • Battery Life: 12 months (rechargeable)”
  • Connectivity: Bluetooth 4.1
  • Warranty: Limited Lifetime Warranty
  • Colors: Silver / Space Gray / Gold
  • What’s In The Box: Keyboard / USB Charging Cable / Quick Start Guide

Series II improvements over Series I

  • Faster connectivity
  • Longer battery life
  • Lower profile “butterfly” keys
  • Improved backlighting

Design and features

If you’re familiar with how the keyboard on an Apple MacBook laptop looks and feels, you will feel right at home with the Brydge 12.9 Series II Bluetooth keyboard. When paired with the 12.9 in. iPad Pro, the combination keyboard/iPad will fool anyone except an astute person that you’re typing on a Mac laptop. The giveaway is when you start touching the screen to perform certain functions. No Mac has a touchscreen option.

Since the Brydge Bluetooth keyboard has Bluetooth 4.1, there is no noticeable lag time—typing is instantaneous. Plus, the Brydge keyboard comes with many features that make typing much faster than using the on-screen keyboard. For instance, Command-C will copy any selected text and Command-V will paste—just like a Mac. The top row of keys features keys that control screen brightness, speaker volume, play/pause, on/off and battery life. There’s also a home button that will take you back to the home page regardless of what app you’re in. Speaking of battery life, the Brydge keyboard will last 12 months between charges. Impressive.

One of my favorite features are the backlit keys that can be set in three brightness levels at the touch of a key. Apple’s own overpriced keyboard case doesn’t even have backlighting. I also appreciate the directional text arrow keys. I don’t have to touch the screen to place the cursor. The arrow keys move it much more efficiently—just like a Mac. (Notice a trend here?)

One thing the Brydge 12.9 Series II Bluetooth keyboard does not have is a way to connect to the iPad’s built-in Apple Smart Connector. This connector bypasses Bluetooth completely and allows an attached keyboard to have more custom functions than is possible with Bluetooth alone. Maybe Brydge can incorporate the Smart Connector in a future version of their keyboard. Time will tell.

When the Brydge 12.9 Series II Bluetooth keyboard is open for typing, there’s a large area below the keys for resting the palms while typing. Ordinarily, this is where a trackpad would go, but Apple’s iOS does not support trackpad gestures. 

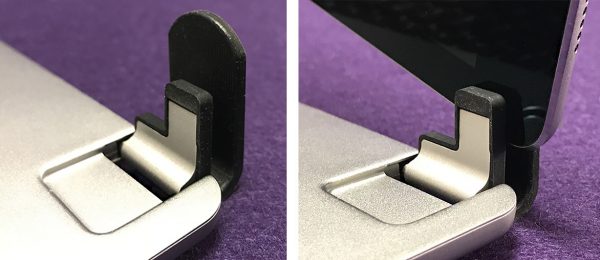
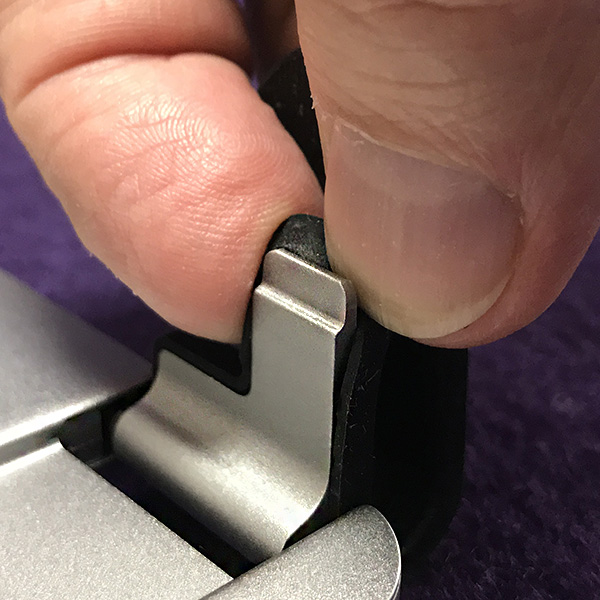
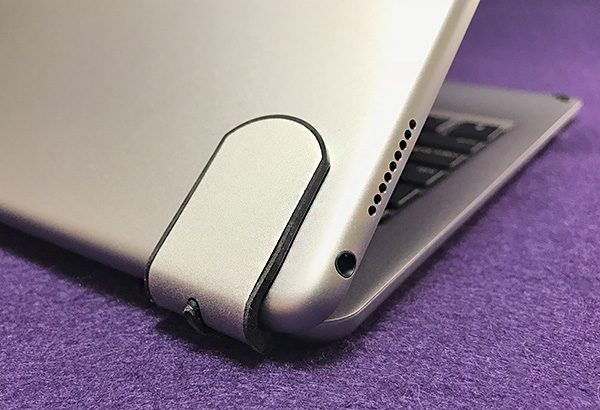
One thing to note is that the Brydge is a “clip-on” keyboard only. It is not a case and does not add any protection to the iPad, except maybe the screen surface when it’s closed. But it was never Brydge’s intention to design a case that also happens to have a built-in keyboard. Let others do that. Brydge set out to make an aluminum keyboard that perfectly matches the iPad and that’s exactly what they accomplished.

What I like

  • The Brydge 12.9 Series II Bluetooth keyboard ranks up there with Apple’s own laptop keyboards. 
  • 3-level backlighting for typing in less than favorable conditions 
  • Superb 12-month battery life
  • Quality construction

What needs to be improved

  • Offers no protection
  • Doesn’t connect to iPad’s Smart Connector

Final Thoughts

The last 3 reviews I’ve written have been typed mostly using the Brydge 12.9 Series II Bluetooth keyboard. I tend to switch between my iMac and iPad when writing reviews and the Brydge makes it much easier to jump from one to the other using Apple Pages with iCloud. It’s becoming my new—and improved—way of working. The Brydge has made my portable life more efficient, productive and fun. I may not be a quick typist, but my typing speed has noticeably improved since using the Brydge keyboard. It’s a keeper.

Price: $149.99
Where to buy: Amazon
Source: The samples for this product were provided by Brydge.

Filed in categories: Reviews

Tagged:

Brydge 12.9 Series II Bluetooth iPad Pro keyboard review originally appeared on The Gadgeteer on September 22, 2018 at 11:00 am.

Note: If you are subscribed to this feed through FeedBurner, please switch to our native feed URL http://the-gadgeteer.com/feed/ in order to ensure continuous delivery.
MK Controls Lightning Bug review


REVIEW – As a photographer, I like to shoot all types of photos. Recently, I have been shooting waterdrop photography, with a device that functions in many modes including being triggered by sound and light to be able to photograph other events. Another type of event I would like to shoot is lightning strikes, and while the device that I have incorporates that ability, I was very intrigued when I came across a device that is designed specifically for lightning strike photography. MK Controls immediately and willingly granted our request to review and test their Lightning Bug. Here is the summary of the review.

What is it?

The Lightning Bug is a device that is designed to connect to your compatible camera and trigger it to take photos when lighting strikes. As per the manufacturer: “The Lightning Bug is based upon the science of lightning. There are two components of lightning; the bright white flash everyone wants to capture and the unseen infrared light that always precedes it. The Lightning Bug uses a high-speed photodiode sensor optimized to the infrared burst that occurs just before a lightning strike. This infrared light comes from the vaporization of air and particles in the air. The Lightning Bug acts as a lookout for your camera, watching for a change in infrared light. When a significant change of infra-red light over a very short period of time is detected, it directs the camera shutter to trip and capture the lightning in action”. It will also work for fireworks.

What’s in the box


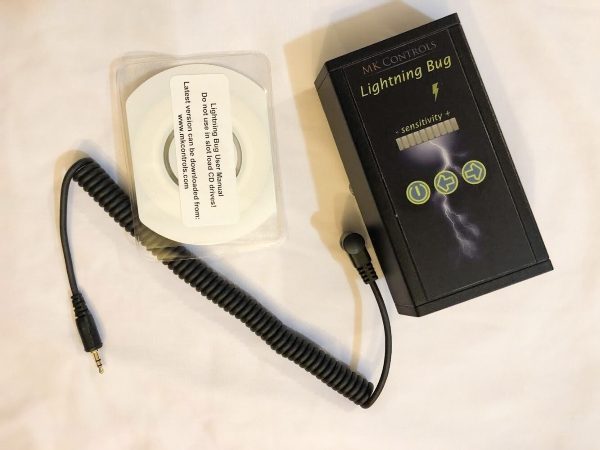
1 x Lightning Bug
1 x CD instruction manual
1 x Compatible camera cable

Design and features

Manufacturer Specifications:

Power-On Self-Test
Sensitivity set-point indicator (LED Bargraph)
MOSFET isolation between the camera and the Lightning Bug™ circuitry
26 levels of sensitivity
Easily adjust frames per second (from 1 to 10)
Water Resistant Soft-touch panel buttons
Front Overhang (from the center of camera shoe): 3.51″
Rear Overhang (from the center of camera shoe): 0.74″
Overall Height (not including the shoe mount): 1.13″
Overall Height (including the shoe mount): 2.10″
Overall Length: 4.25″
Overall Width: 2.60″
Weight (not including Battery): 2.96 oz
Weight (including Battery): 4.48 oz
Battery: Standard 9V Cell

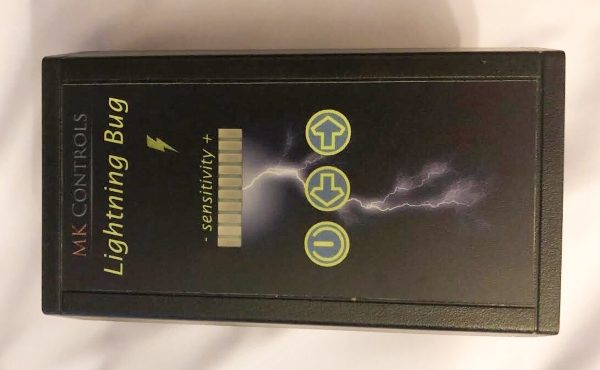
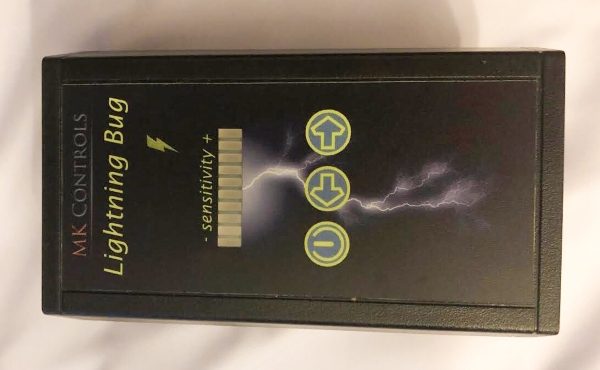
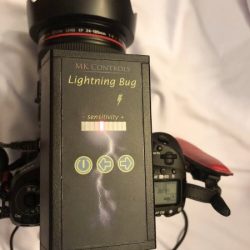
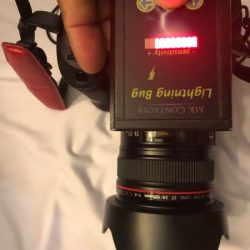
On the top surface of the Lightning Bug, there is the company name and device name, the sensitivity meter, and the 3 surface-mounted control buttons.


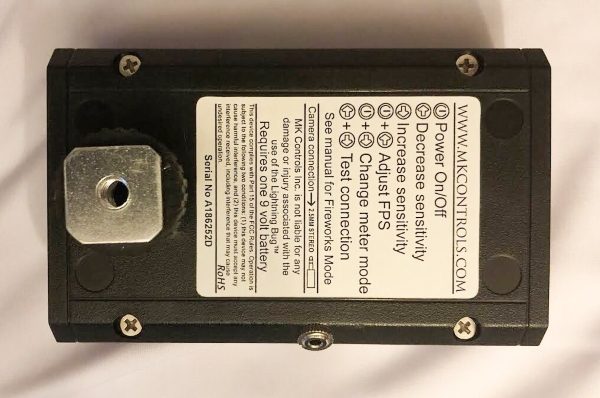
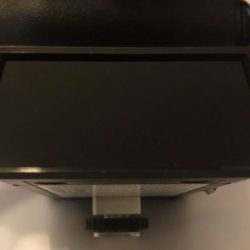
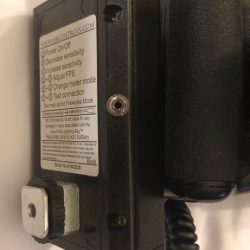
At the bottom of the Lightning Bug, there is a camera shoe mount that also has a 1/4-20″ threaded mount so that it can be mounted off camera on a light stand or tripod, etc, and a sticker with a summary of the controls and other industry required information.


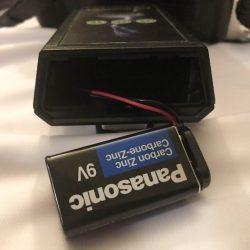
One one of the short sides at the back of the Lightning Bug is a cover and a battery compartment for the required 9-Volt battery. On the opposite side at the front is the IR cover, and on one of the long sides is the 1/8″ jack for the camera cable.


Connectivity and function

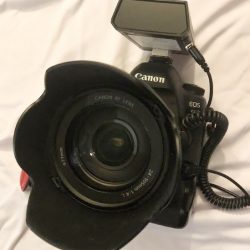
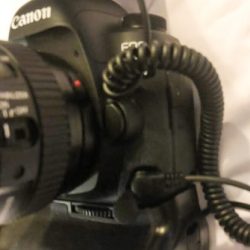
The Lightning Bug attaches to the camera shoe mount or any mount with a 1/4″-20 stud, and the cable is attached to the 1/8″ jack on the device and the appropriate jack on the camera. (See the MK Controls website for the compatible camera list).


When you power on the camera and the device, the sensitivity indicator lights up. You can use the left or right buttons to increase or decrease the sensitivity.


Operation and Performance

The Lightning Bug has 2 operational modes which are Standard Mode and Fireworks Mode. When you power on the device starts up in Standard Mode which is used for Lightning photography) or in Fireworks Mode depending on which buttons are held down during startup. Fireworks Mode allows for delayed shutter release.
To start the unit in Standard Mode, you have to press and hold down the power button for approximately 2 seconds. To start the unit in Fireworks Mode you have to press and hold down the power button and the Increase Sensitivity button at the same time for approximately 2 seconds, and then release both buttons.
When you first turn on the device, it displays the current firmware version by lighting up the LEDs, and the display stays that way until the power button is released. The settings that you choose are saved in the device’s memory for the next time you power on. An additional nice feature is that the device will automatically turn your meter off after approximately 15 minutes of inactivity.
There are a total of 26 levels of available sensitivity. The factory default setting is level 12. The yellow LED that looks like a lightning bolt, lights up whenever the unit has detected an event and has triggered the shutter.
With fireworks photography, the yellow activity light flashes to let you know that you are in the Fireworks Mode. In this mode, you must be relatively close to the fireworks to be successful. To exit, you have to turn the device off, then back on again.
There are numerous settings to customize. The complete manual is available on the MK Controls Website.

This section will be updated once I get an opportunity to photograph fireworks and/or storms.

What I like

  • That it is lightweight
  • The size
  • The functionality

What can be improved

  • Although I like how lightweight it is, I would prefer it to have a rechargeable battery that can be charged internally or externally
  • (Nothing else so far until I get to take pics)

Final thoughts

As a photographer that likes many types of photography, I like the Lightning Bug device. Apart from the fact that it is compact and lightweight, it provides a dedicated function that should produce amazing results. There are fantastic examples of photos taken with the use of this device on the MK Controls website. You can take a look at them here. While I have not yet been able to shoot with it, I will give a thumbs up to its simple construction and its intended functionality. Winter is on its way in NYC, so I will be on the lookout for photography opportunities. To be continued…

Price: $179.00 (Includes the required cable for your compatible camera)
Where to buy: MK Controls website
Source: The sample for this review was provided by MK Controls.

Filed in categories: Reviews

Tagged: ,

MK Controls Lightning Bug review originally appeared on The Gadgeteer on September 22, 2018 at 9:00 am.

Note: If you are subscribed to this feed through FeedBurner, please switch to our native feed URL http://the-gadgeteer.com/feed/ in order to ensure continuous delivery.
Bestek 3-Outlet Vertical Cube Mountable Power Strip

REVIEW – Let’s have a real talk for a minute. Your house or office is full of electronics, and you know that the old clunky power strip you bought 10 years ago is getting a little… dated. It’s time for an upgrade! Today we’re reviewing a charger from Bestek that combines modern features with excellent usability. It looks good, too. Let’s plug in!

What is it?

It’s a cube-shaped power strip that includes 3 standard outlets, 3 USB ports, and a USB-C port. It’s also mountable on your wall.

Hardware specs

  • Input Voltage : 100-240V
  • AC Rated power: 1875W(125V 15A)
  • USB Output: 20W 4A(Total), 5V/2.4A Max(each port)
  • Size(Base included)/Weight: 3.4*3.4*3.2 in / 1.05 lb
  • Cord length: 5 Feet (14AWG)
  • Includes protection from overloading, overheating, short circuits, and power surges

What’s in the box?

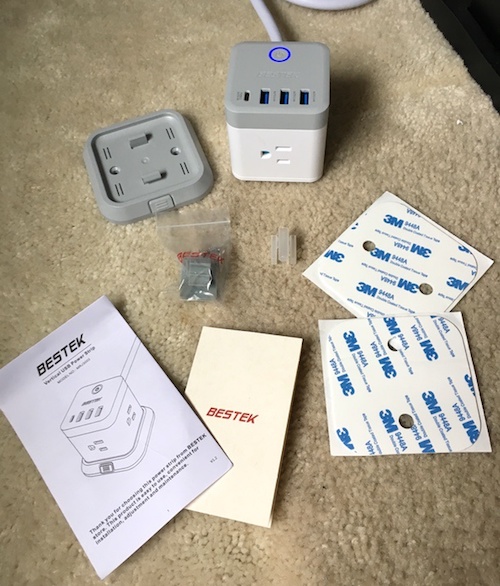
The package comes with a power strip, detachable base, double-sided adhesive trips and screws for wall mounting, a self-adhesive cable clamp, and the instruction book.

Design and features

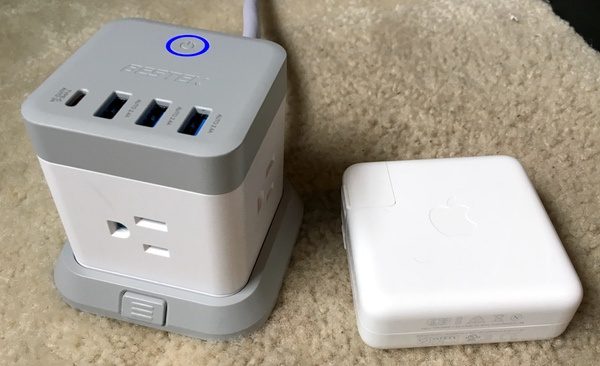
The Bestek 3-Outlet Vertical Cube is a cube-shaped design that packs some nice usability extras for managing all of your power sources. It’s compact exterior dimensions measure in at 3.4″ by 3.4″ by 3.2″. It also looks nice, which is a bonus if you’re mounting it on your desktop. Here’s a pic with my MacBook Pro power brick for a size reference:

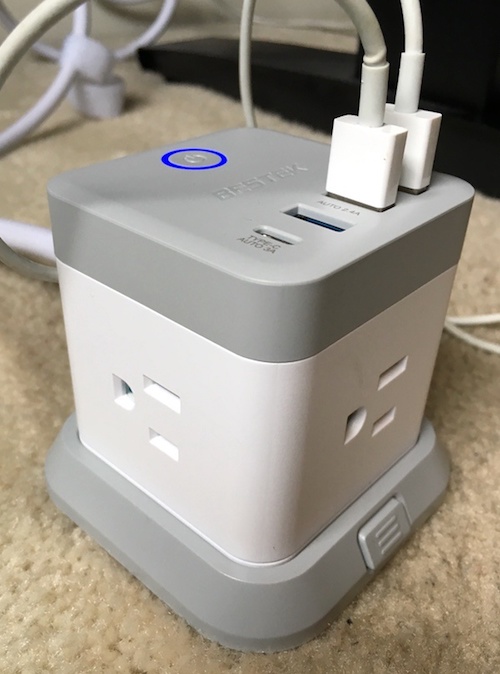
If you’ve ever had to play Tetris with all of your odd-shaped power bricks, you’ll appreciate the form factor here. Three of the vertical faces each have one three-pronged plug, oriented sideways to accommodate those oddball bigger bricks (I’m looking at you, Apple!). Have a look:

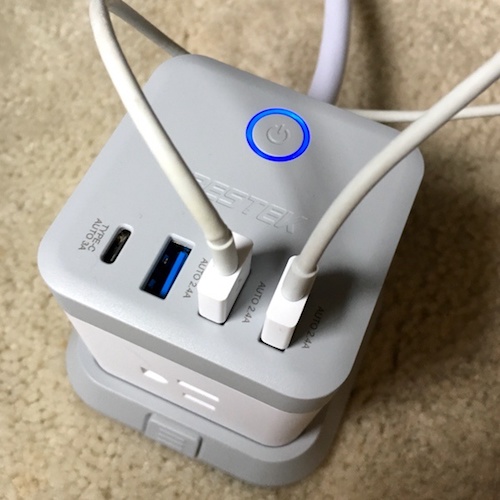
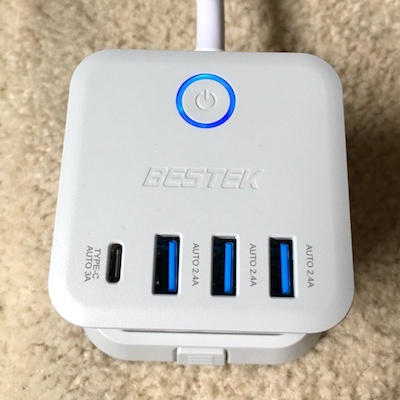
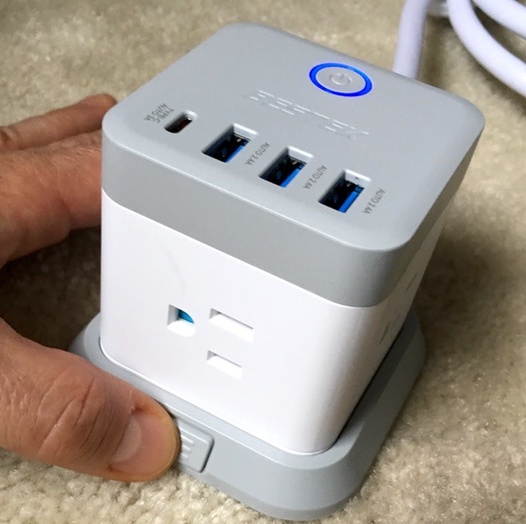
On the top face of the block, you’ll find three USB ports, a USB-C port, and the power button for the unit. The button glows blue to let you know when it’s on. Placing these ports and the control on the top face is lovely, as none of the functionality fights for space with your traditional 3-prong blocks:

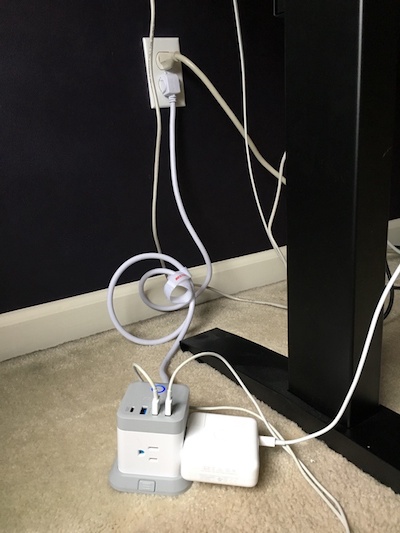
Here’s what the unit looks like in its natural habitat. Check out that 5′ long cable that allows you to position the block pretty much anywhere you want it, including on the desk if desired. I love that.

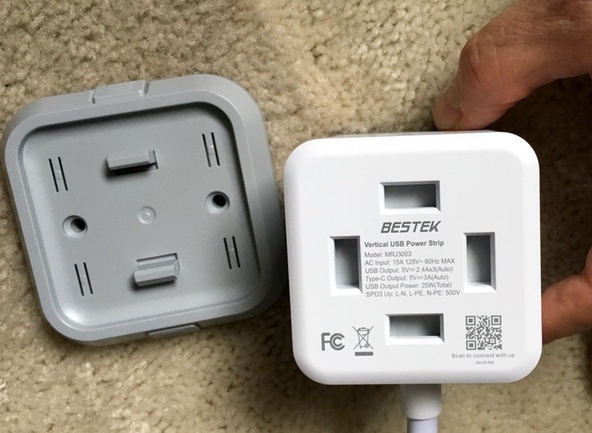
The block is also removable from the stand. Squeeze those little tabs and it pops off. Why is this useful? Well, you can mount the stand to any surface with the two screws included or the double-sided adhesive mounting strip if you want it connected to your desk or hung on your wall. You can then remove the block if you need to use it in another location in the house or office.

The block can be positioned in 90-degree increments, so you can drop the cable below your plugs if it’s vertically mounted.

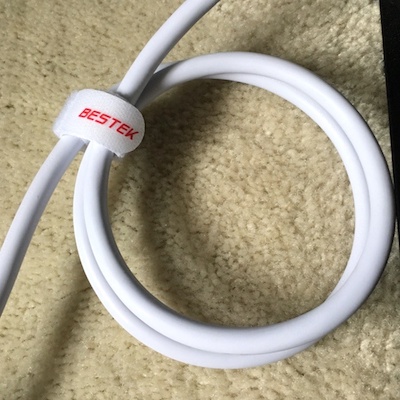
Bestek has clearly thought about their customers in the little usability enhancements at work here. The chord includes its own velcro cable wrangler, and the package includes a second mountable clamp that uses self-adhesive backing to manage running chords (not shown):

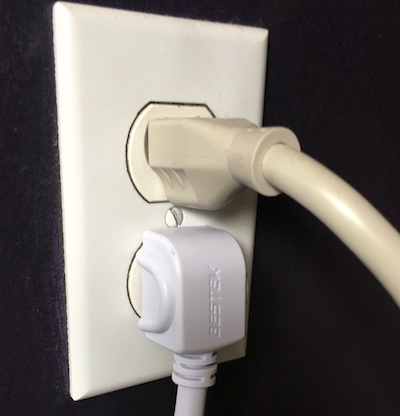
The power plug itself is also nice. It’s designed to drop below your outlet, making room for other plugs. It’s also got some nice ergonomic grips on either side to facilitate removal. Little stuff like this make users (and product reviewers) happy.

You’ll have a total of 7 power ports when installed: three traditional three-prong outlets, three USB ports, and one USB-C port. I just got a new MacBook Pro, and I love the inclusion of the USB-C port here. It allows me to free up one of the three-prong outlets for other stuff. Again, this makes me happy.

As far as protection goes, you have a bunch of safety features to protect your precious electronics. There’s protection from over-heating, short circuits, power surges, and overloading. It’s also FCC certified for reliability and quality.

What I like

  • Designed to accommodate a wide variety of power blocks
  • 3 USB and one USB-C port that won’t fight for space with your 3-prong plugs
  • Good looking, compact design
  • 5′ long cord makes for easy positioning on your desk if desired
  • Wall-mountable
  • Nice usability features

What needs to be improved

  • None to be found

Final thoughts

The Bestek 3-Outlet Vertical Cube Mountable Power Strip is a great upgrade for your charging needs. It looks great, handles USB and USB-C duties in addition to traditional three-prong plugs, and you can mount it just about anywhere you need it. The little usability and safety details are all on point. What’s not to like?

Price: $27.99
Where to buy: Get it at the Bestek Web Site.
Source: The sample of this product was provided by Bestek.

Filed in categories: Reviews

Tagged:

Bestek 3-Outlet Vertical Cube Mountable Power Strip originally appeared on The Gadgeteer on September 21, 2018 at 2:00 pm.

Note: If you are subscribed to this feed through FeedBurner, please switch to our native feed URL http://the-gadgeteer.com/feed/ in order to ensure continuous delivery.
Baron Fig Wander Dream Journal review

REVIEW – Are you the type of notebook or journal user who likes to have a separate notebook for different subjects or topics like travel, daily journal, tasks, etc? How about a journal that’s dedicated to recording your dreams. But, not dreams for your future, I’m talking about the dreams you have when you’re asleep. Baron Fig’s new Wander Dream Journal is a journal just for that task. Let’s check it out.

What is it?

The Baron Fig Wander Dream Journal is a 192-page hardbound notebook that has been specially designed to make it easy to record the dreams that you have during the night.

Design and features

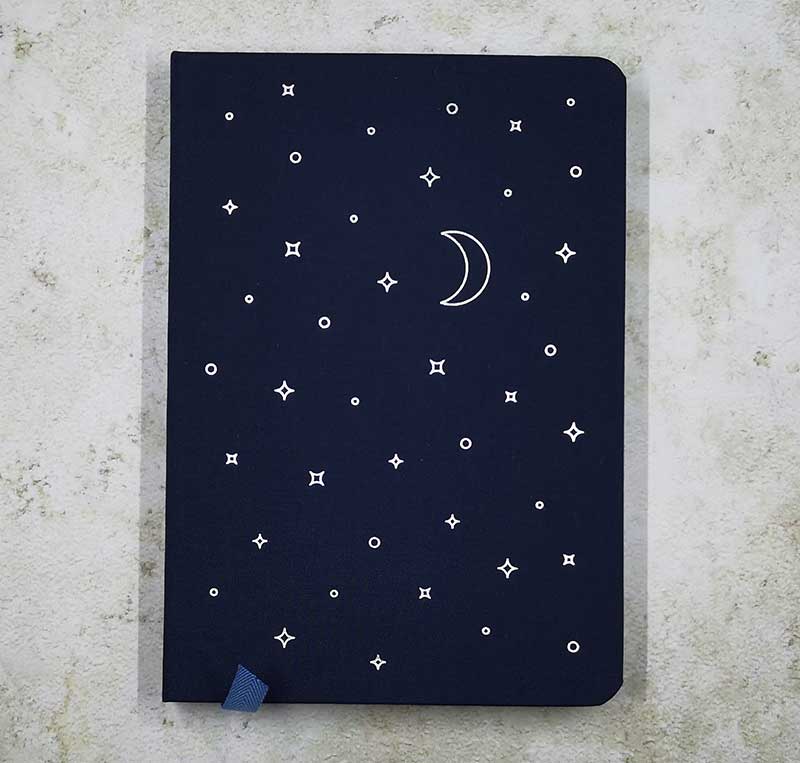
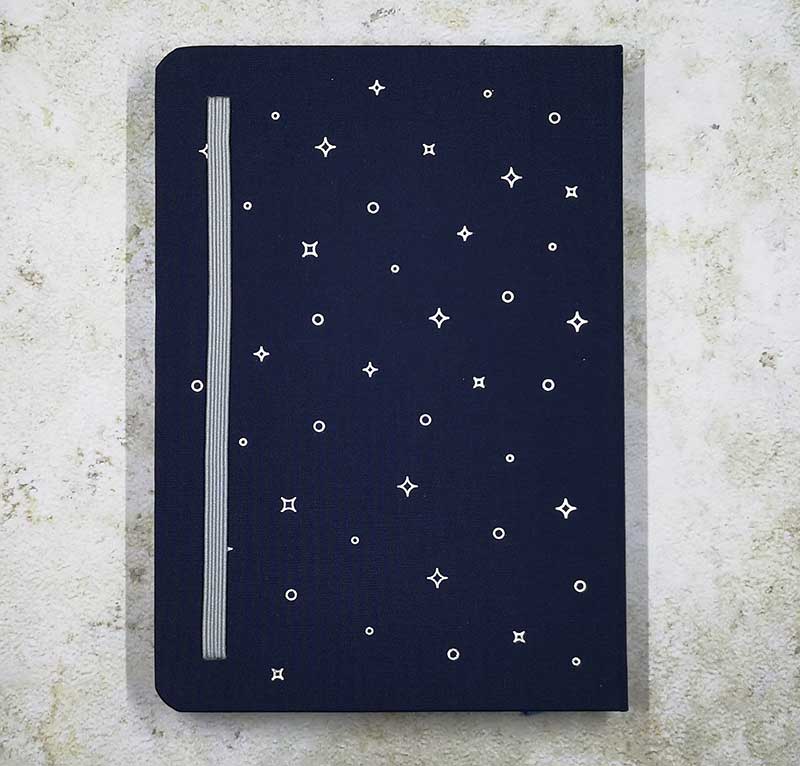
The Wander Dream Journal is a 5.4″ x 7.7″ cloth-bound book that is dark blue with silver stars and a moon stamped into the front and back covers.

The journal has rounded corners and a grey elastic band that can be used to secure the top cover.

Each notebook has 192 pages of acid-free fine grain 90gsm paper that’s a light cream color.

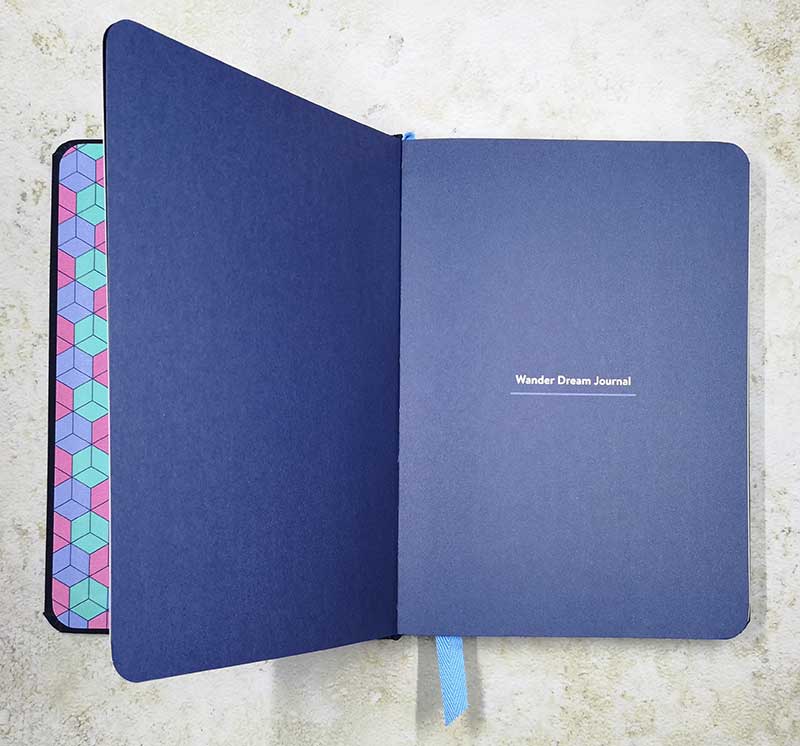
When you open the front cover, you’re greeted with a lively geometric design and a blank area where you can write your name and contact info should you lose the book, or dates that the book covers, etc.

You’ll have to flip a couple pages before you get to the actual journal area of the notebook.

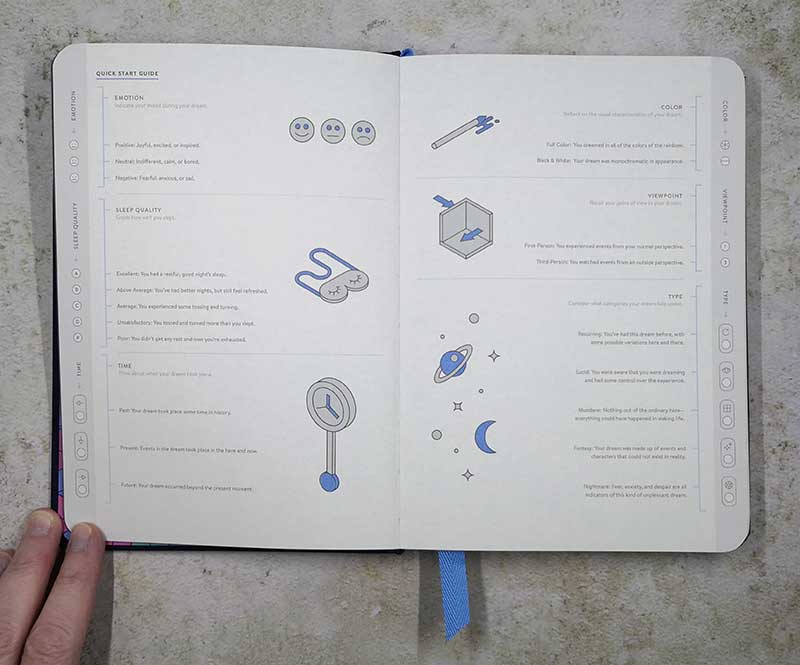
You’ll find a quick start guide at the beginning of the book that explains the page’s outer edge “gadgets”… at least that’s what I’m going to call them.

They say that the best way to remember your dreams is to document them as soon as you wake up. The Gadgets on each page help you do that by including things like emoticons for your mood during your dream, your sleep quality, when your dream took place in history, if your dream was in color or in black and white, the viewpoint of the dream, and type of dream.

Then the 2-page layout gives you a whole page to write about what happened in the dream on the left and a place to draw and interpret what the dream might have meant on the right side.

Notice at the top of the left page that there’s a place to circle the day of the week and add the current date. This dream journal has all the bases covered.

What I like

  • 2-page layout for each dream
  • Lots of info to record about each dream
  • Attractive book
  • Lay flat design

What needs to be improved

  • The book isn’t a standard size, so it would be nice if they offered one that was A5 sized just so it would be the same height as other journals on a bookshelf

Final thoughts

The Baron Fig Wander Dream Journal is a nicely made notebook that has all the features that someone would want in a journal. It has acid free pages, a lay-flat design, ribbon bookmark, and an elastic closure. But then they add extra features to the pages to help you document each dream. All in all, this is a nicely designed dream journal. The only thing missing is a pen with a built-in red light so you can write your dream in the dark without bothering your sleeping partner or wrecking your night vision.

Price: $22.00
Where to buy: Baron Fig
Source: The sample for this review was provided by Baron Fig.

Filed in categories: Reviews

Tagged: ,

Baron Fig Wander Dream Journal review originally appeared on The Gadgeteer on September 21, 2018 at 9:26 am.

Note: If you are subscribed to this feed through FeedBurner, please switch to our native feed URL http://the-gadgeteer.com/feed/ in order to ensure continuous delivery.