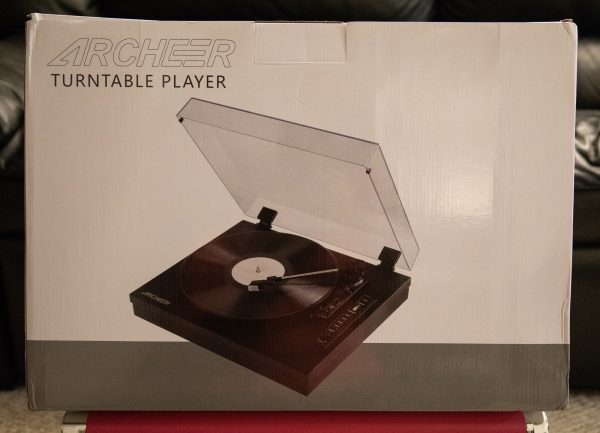
Archeer Vinyl Turntable Record Player Review


REVIEW – As an audiophile, I have long had a love/hate relationship with turntables because while I love the unique sound of vinyl, I hate how much it costs to buy an audiophile turntable that is built with the right technology and materials to compliment the other components of even a mid-range audiophile system. And since the number of vinyl enthusiasts has decreased exponentially, the cost of a classic record can be prohibitive. I decided to accept the opportunity to test and review this turntable because I still love vinyl, but I accepted with the understanding that it is not considered audiophile equipment. So here goes.

What is it?

The Archeer vinyl turntable record player is a 3 Speed Turntable with a diamond stylus cartridge. It plays records at 3 speeds which are 33, 45 & 78 RPM and supports 7, 10 and 12″ records. It has 2 built-in 3 Watt speakers and includes auxiliary and Bluetooth connectivity.

What’s in the box
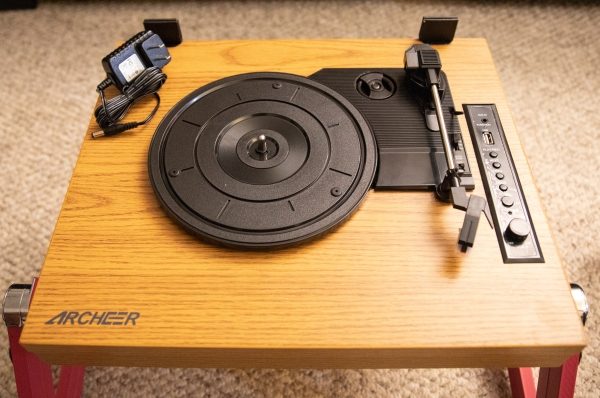


1 x Wooden Turntable
1 x AC Power Adapter
1 x Plastic Turntable Cover
1 x Record Spindle Adapter
1 x User Manual

Design and features

Specifications:

Type: Belt drive turntable, fully automatic

Speeds: 33, 45 & 78 RPM

Turntable Platter: Plastic

Signal-to-Noise Ratio: >40dB

Power Adapter: 5V/ 1A

Frequency Response: 125Hz-10KHz

Output Level: 450mV±150mV

Output Power: 5W

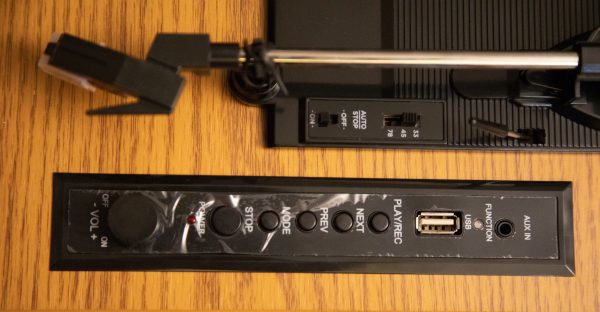
This turntable has the usual tonearm controls that are Auto Stop on/off and the speed selection switch along with the tonearm lever and lock. In addition and as shown below, there is a control panel that has the following controls (from front to back): Power on/off and Volume Control, Power LED, Stop button, Mode button, Previous Track button, Next Track button, Play/Record button, USB Port, Function Indicator and AUX-In Port.
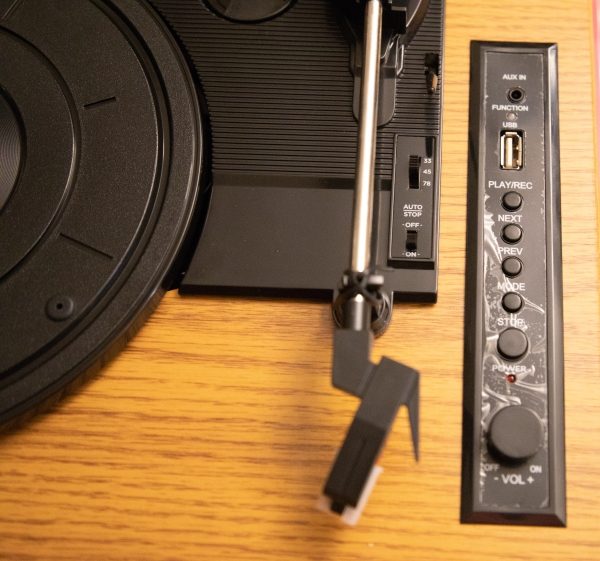

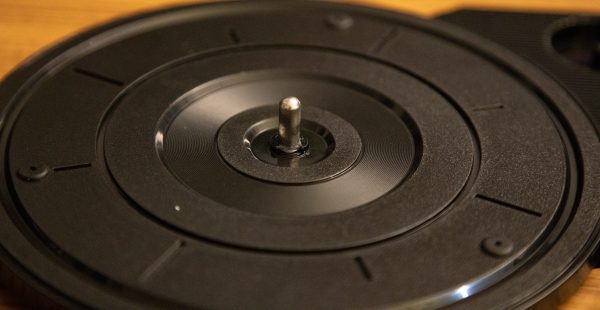
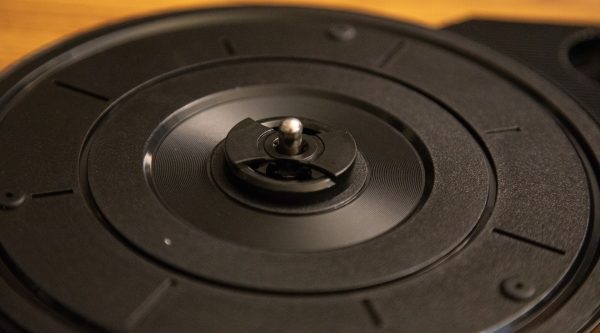
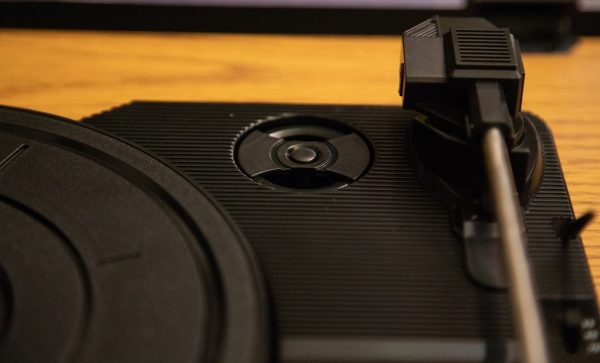
The turntable also comes with the record spindle adapter that stores away when not in use as seen in the first picture below. It is placed on the turntable center spindle when playing 45RPM records that have the larger hole in the center.


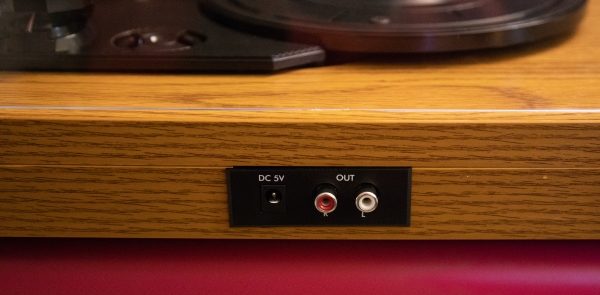
At the back of the turntable, there is the power jack and left/right RCA output jacks so that you can connect the turntable to external speakers or a preamplifier/amplifier.
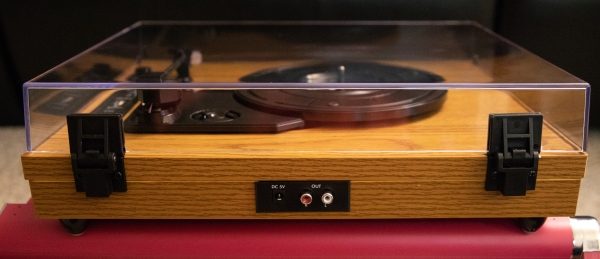

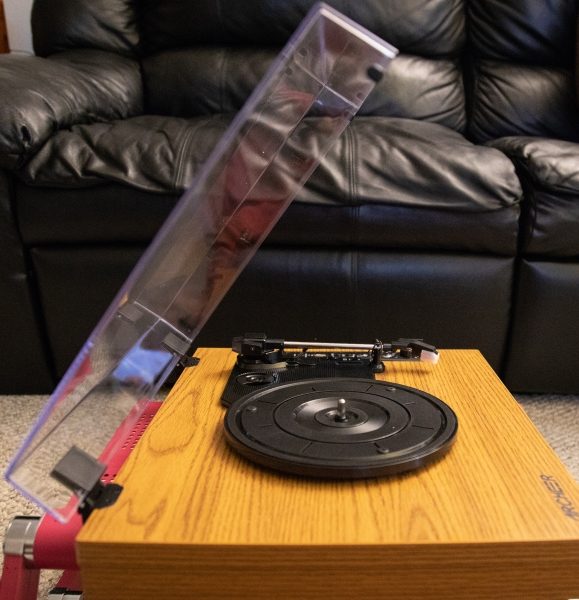
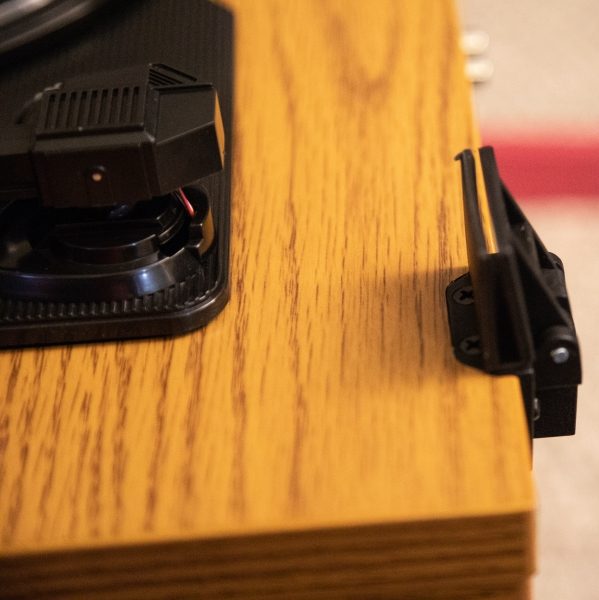
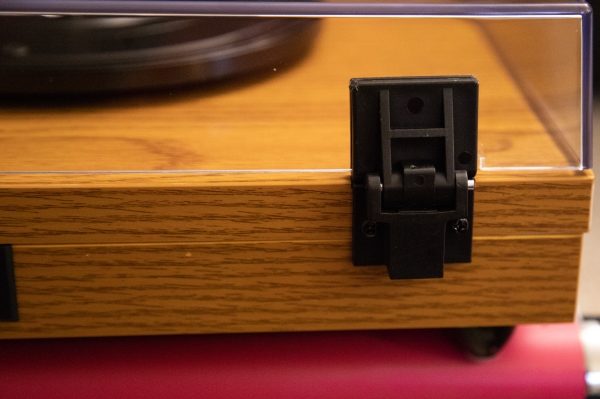
The clear plastic/acrylic cover is connected to the turntable via 2 plastic hinges. The cover has 2 notches that mark where it slides into the hinges.

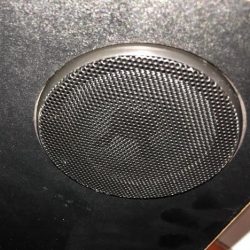
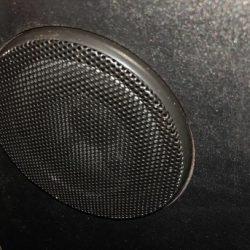
Underneath the turntable, there are the two built-in 3-watt watt speakers.


PICTURE

Performance

When I first unpacked the turntable, the internal packing material was crushed, and upon further examination, I discovered that one of the plastic hinges that secure the turntable cover to the base was broken. After contacting the vendor, and waiting for a couple of weeks, a replacement was sent for testing and review.

I like the basic features of this turntable. Playing a record is simple and straightforward as with any turntable. I used a 33RPM 12″ LP for my test. The sound out of the speakers if full-range so it lacks any sort of depth or separation of frequencies and exists mostly in the midrange. I also connected the RCA output to my audiophile preamplifier, but the result was the same since there is no equalization with audiophile systems and low quality in = low quality out. Keep in mind that this is not really a criticism of this turntable since by design it is not expected to perform as such. Connecting your phone or mobile device to the turntable is easy and works well. Connecting an iPod or iPhone via a 3.5mm to the AUX-IN port yielded the same result as the Bluetooth connection albeit wired. The feature I like the most is the USB port that allows you to plug in a USB flash drive and record the record as an MP3 file. This is better than having to buy an additional interface to accomplish this. Again, the quality of the sound is the same. I do suppose that if you have powered speakers and/or some amount of external equalization, that you may be able to get a better quality of sound.

Here are the four operational modes and how they function:

Bluetooth Mode:
Turn on the power, press the mode button once, and the function indicator will flash blue. Once you go into the Bluetooth settings on your mobile device, the device “TS5310” should be available to connect to.
AUX-IN Mode:
Turn on the power, press the mode button twice and the function indicator flashes red and blue. You can then connect your device via a 3.5mm cable.
USB Mode:
Turn on the power, plug in your USB flash drive, press the mode button twice, and the function indicator will flash red and the turntable automatically starts playing any music on your USB drive. In this more the previous track, next track and stop functions work.
Record Mode:
Turn on the power, plug in your USB drive to the USB port, Start record to play and press and hold the Play/Rec button until the function indicator flashes red. This means that the recording has started. You can press and hold the Play/Rec button again until the function indicator is steady red to stop the recording and save the file.

What I like

  • The built-in Bluetooth and Auxiliary Port
  • The ease of use
  • The original look

What can be improved

  • Better/safer packaging
  • Better/stronger made hinges for the turntable cover

Final thoughts

The Archeer turntable is an “old-school” throw-back to the original turntable era. It is designed with that simple look but includes convenient and usable features that make it a more inclusive component. However, it is very basic and serves more as a convenience than for a purposeful listening experience. If you are looking for a turntable for basic listening to serve as entertaining ambient sound, this may work. If you are looking for an immersive listening experience, look elsewhere. Regardless, it is not a bad value for the price.

Price: $119.99
Where can I buy: Amazon
Source: The sample for this review was provided by Archeer.

Filed in categories: Reviews

Tagged:

Archeer Vinyl Turntable Record Player Review originally appeared on The Gadgeteer on September 28, 2018 at 9:00 am.

Note: If you are subscribed to this feed through FeedBurner, please switch to our native feed URL http://the-gadgeteer.com/feed/ in order to ensure continuous delivery.

Aiwa Arc-1 Bluetooth headphones review

REVIEW – Does anyone remember Aiwa? Years ago, I installed an Aiwa car CD player in a ‘92 Acura. It was good—not great. Later, Aiwa just about disappeared after Sony bought them. Now they’re back and getting some serious (as in good) attention. First Aiwa released the Exos-9 Bluetooth speaker—a monster speaker that’s getting rave reviews. Now, they’ve just come out with their own wireless headphones—the Arc-1 Bluetooth headphones. Aiwa’s goal is to offer affordable wireless headphones that sound better than it should for its price. Did they achieve their goal?

What is it?

The Arc-1 is a wireless, over-ear Bluetooth headphone that utilizes a non-traditional biocellulose speaker cone—more on this later. 

Specs

  • Design: Closed back, dynamic, circumaural (over ear)
  • Driver: 40mm dynamic
  • Driver technology: Bonded biocellulose composite with flexible surround
  • Impedance: 20 ohms.
  • Frequency range: 15Hz to 20kHz
  • Max. power: 40mW
  • Inputs: 3.5mm stereo mini jack or Bluetooth 4.2
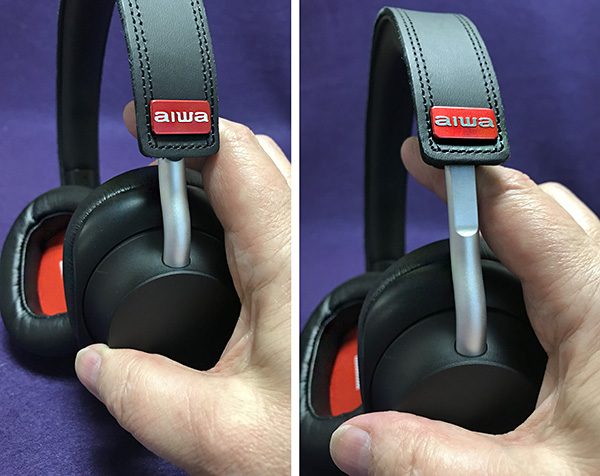
  • Materials:  Aluminum, protein leather, real leather
  • Bluetooth range: 33+ feet
  • Battery life: 20 hours playback
  • Microphone
  • Codecs: aptX, AAC

In the box

  • Arc-1 Bluetooth headphones
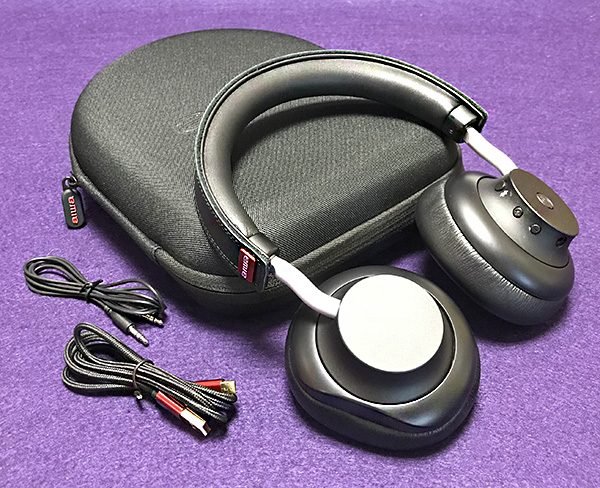
  • Travel case
  • Micro USB charge/data cable
  • 3.5mm audio cable
  • Quick Start Guide

Design and features

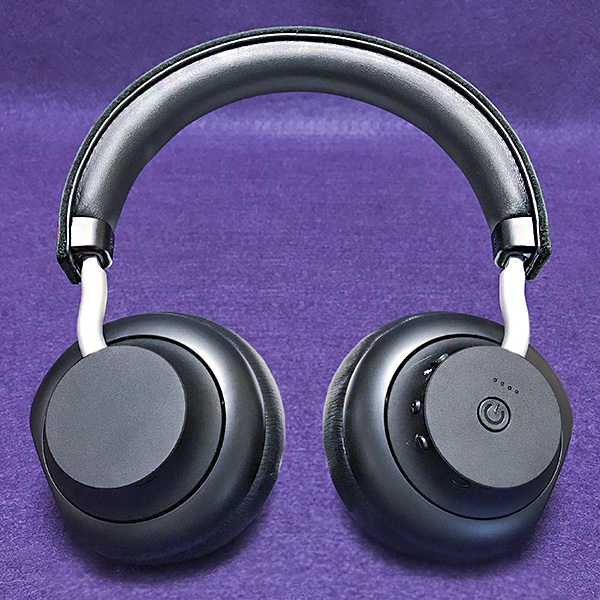
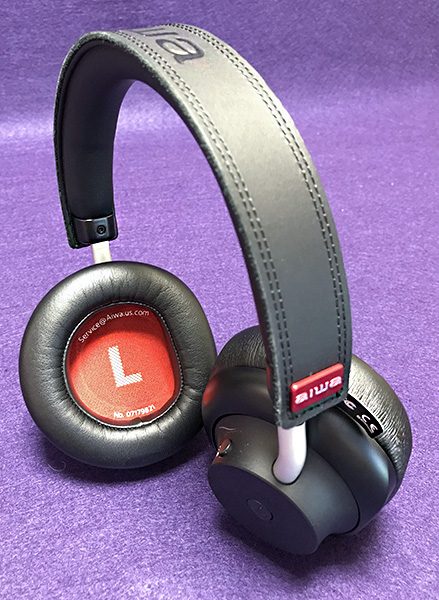
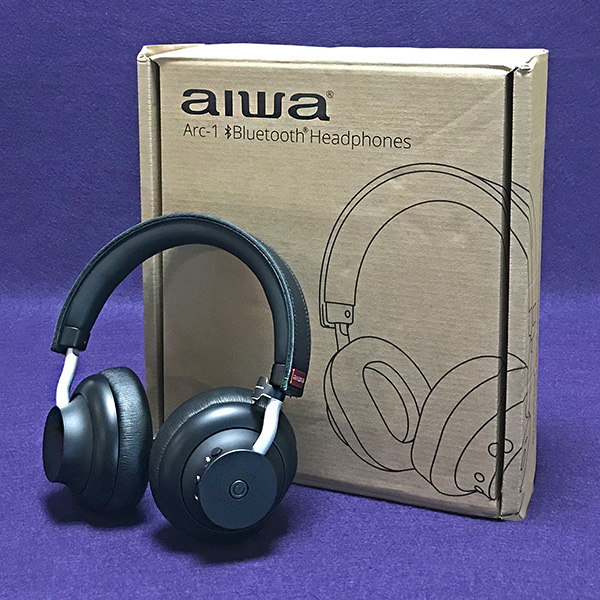
There’s nothing about the Aiwa Arc-1 headphones that scream, “Look at me!” The design is rather bland and generic looking. It’s not surprising because Aiwa freely admits to picking certain non-audio related parts off the shelf, so they could concentrate resources on the important stuff. A bright and colorful exception to the bland design are red speaker covers that have L and R printed on them. That’s actually helpful when you quickly grab your phones to put them on. Aiwa also printed the serial number and service web address above and below the large L on the left speaker. If you ever have any issues with the Arc-1, the info you need is right there. Clever. The Arc-1 has a 90-day “No questions asked” return policy and a 3-year warranty that will provide a replacement should they ever have a defect.

The packaging is even blander than the design. Aiwa’s stated goal is to place more effort into the product than the disposable box it comes in. That is plainly evident.


The first thing one notices when wearing the Arc-1 headphones is how comfortable they are. The clamping factor is just enough without being too tight. I do have to extend the ear pads all the way, so anyone with a larger head may have fit issues. Extending the ear pads was not as smooth feeling as I would have liked, but the build felt solid. 

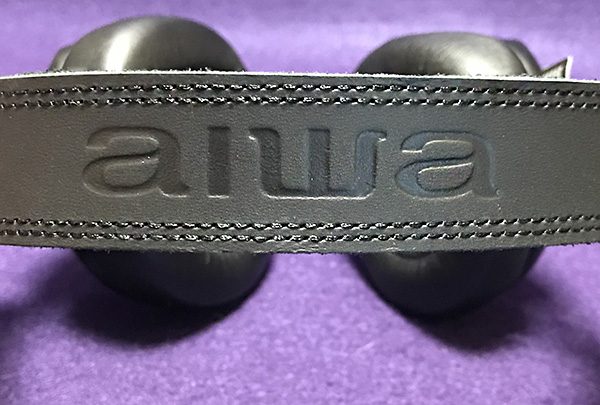
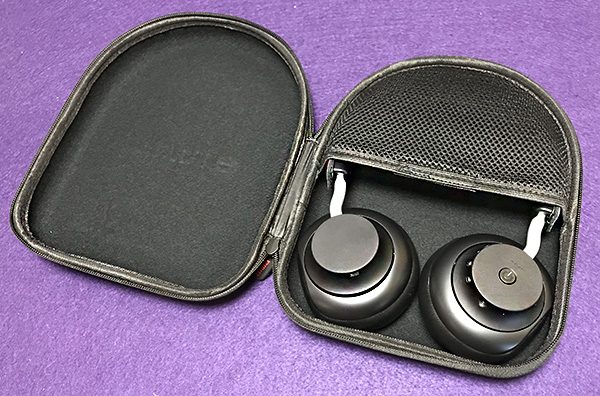
The leather ear pads are soft and have an unusual shaped flat spot that works quite well at completely covering the ear. Even though the Arc-1 headphones do not have active noise canceling, the pads provide good isolation from exterior noise. The headband could use a bit more cushioning, but it didn’t detract from the comfort. It’s sturdy and can be bent without any damage. The headphones are protected by a large, but sturdy case. Unfortunately, the Arc-1s don’t fold, which is too bad, since the wireless headphones were made for use while mobile.

The selling point to the Arc-1 headphones is the speaker material. Rather than the usual—and fragile—mylar speaker material, Aiwa uses a 40mm biocellulose-diaphragm driver that they designed. Biocellulose is a natural material (made from bacteria!) that retains its stiffness similar to metallic speaker cones, while remaining lightweight—perfect for headphones. This stiffness helps individual audio waves quickly snap back to a neutral position resulting in better music reproduction with sharper bass. You might think that this approach would create super accurate sounding headphones, but it doesn’t. And that’s a good thing.

It’s apparent that the Arc-1 headphones were tuned for a mass audience rather than a select group that may prefer a bass heavy model or one with a bright sound. The Arc-1’s sound signature is slightly warm and smooth. Bass is slightly boosted, but not too much. It’s just enough to allow for hours of listening with no aural comfort issues. Mellow is a word that comes to mind. The speaker’s smooth character is forgiving which simply means that lower resolution song files can sound better than they might on more accurate (and more expensive) headphones. This is especially true when streaming music from a smart phone over Bluetooth. 

Aiwa uses 24-bit digital signal processing to help achieve its sound signature. They’ve also set up what’s known as Qconnect—dual-radio Bluetooth. This allows the Arc-1 headphones to not only receive the Bluetooth signal but also send a signal allowing you to share your music with a friend no matter what brand wireless headphones they may have. Note that Qconnect is still in Beta. Future firmware updates will improve Qconnect as well as improving audio tuning. Unfortunately, firmware updates can only be done using Windows PCs—sorry Mac users. 

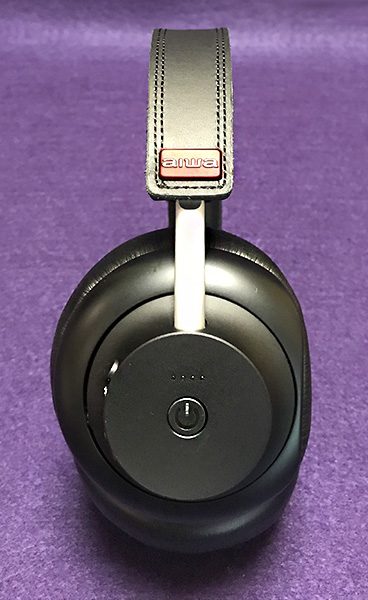
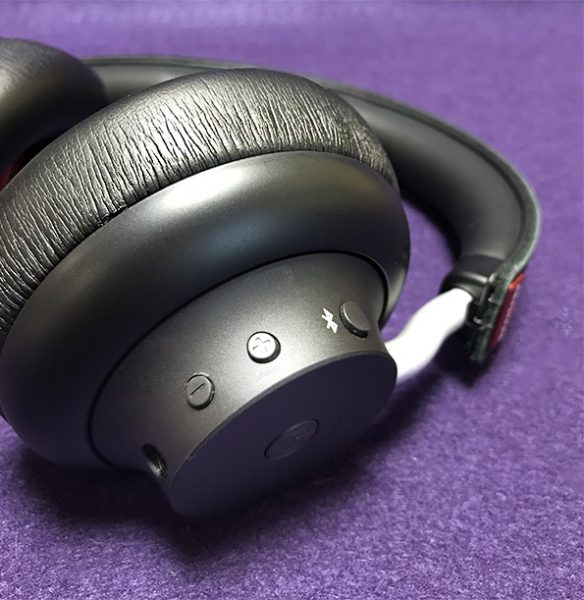
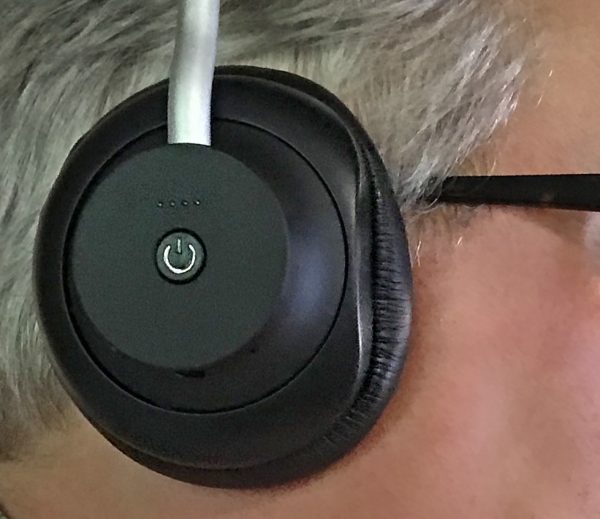
Battery life is rated at 20 hours on a full charge. 3 extra hours can be quickly added after only 20 minutes of charging. Battery life is indicated by lights on the right headphone cup. This cup also houses the on/off button as well as Bluetooth pairing and volume/forward/reverse buttons. A built-in mic allows for phone calls, but I’m not a fan of talking on the phone through any headphones—no matter the brand or cost.

As I said, the Arc-1 headphones are smooth sounding. This helps with older recordings which can be a bit weak on bass due to recording restrictions that existed back then. I’m a fan of 60s and 70s rock. Some of my favorite albums were dismally recorded. Listening with the Arc-1 headphones makes many of these older albums tolerable. One of my favorite late 60s albums was an obscure country-rock album from Chicago’s Mason Proffit. Their first album perfectly captured the political tone of that tumultuous time with biting lyrics wrapped in a radio-friendly country sound. As good as the songs were (and still are), the recording is in dire need of remastering. Until that happens though, it’s easier to listen to the album on the Arc-1s than many other headphones.

Bass-happy modern music also fares well with the Arc-1 headphones. Yes, bass on these recordings is most definitely there, but it’s tuned in such a way that it doesn’t create a headache. Credit Aiwa’s DSP at work. Groups like Massive Attack, Orchestral Manoeuvres in the Dark and Daft Punk benefit from this tuning approach. While bass may be more up front than what I prefer, it’s never distracting or unwelcome.

What I like

The design may be bland, but the constriction is solid. Despite that, it’s the sound and comfort that captivates me. These are headphones I could listen to for hours—and have. 

What needs to be improved

I like the sturdy case but I would have preferred that the Arc-1s fold into a more compact, easy to carry form.

Final Thoughts

Aiwa has risen from the ashes in a big way with the Arc-1 headphones. If they can keep up the momentum with more great products, the future of personal audio will become even more interesting.

P.S.

If you’re interested, you can read an exhaustive history of Aiwa here. The short version is that an entrepreneur named Joe Born acquired the Aiwa name for North America and several European countries. Shortly after, the Exos-9 Bluetooth speaker was born (pun intended). 

Price: $199.99 US
Where to buy: Amazon
Source: The sample of this product was provided by Aiwa.

Filed in categories: Reviews

Tagged:

Aiwa Arc-1 Bluetooth headphones review originally appeared on The Gadgeteer on September 27, 2018 at 11:33 am.

Note: If you are subscribed to this feed through FeedBurner, please switch to our native feed URL http://the-gadgeteer.com/feed/ in order to ensure continuous delivery.
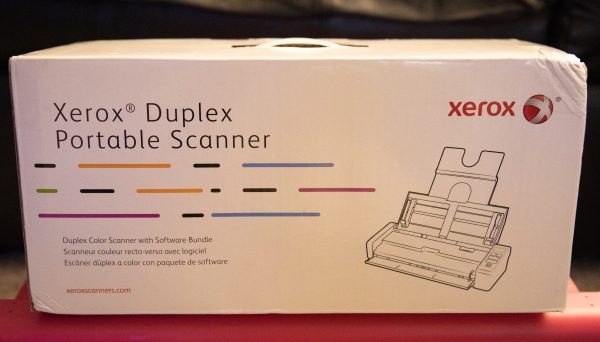
Xerox Duplex Portable Scanner review


REVIEW – For folks like me that walk around with as much technology as possible, portability is a critical need. The art of being ready for any and every situation related to the photography/videography industry means that I should be ready and able to meet the needs of clients at a moments notice. In my mind, a portable scanner adds value to my on-the-go gear.

What is it?

The Xerox Duplex Portable Scanner is a compact, well built portable scanner that is capable of simplex or duplex scanning. However, it is not battery powered.

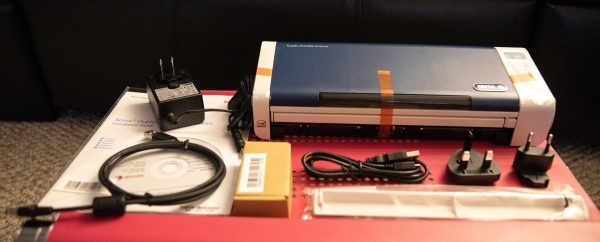
What’s in the box


1 x Xerox Duplex Portable Scanner
1 x AC Adapter
1 x Rear Paper Feed Tray
1 x Spare ADF Pad
1 x Micro USB Cable
3 x Power Plug Adapters
1 x Quick Install Card
1 x Warranty Card
1 x DVD (includes user’s manuals and software)

Design and features

Specifications:

• Weight: 3.3 lbs.
• Simplex or Duplex: Duplex (two side scanning)
• Interface: USB 2.0
• Optical Resolution: 600 dpi
• ADF Capacity: 20 sheets (20 lb. paper)
• Visioneer OneTouch Technology (PC): Yes
• Duty Cycle: 1000 pages/day
• Dimensions: 11.78″ x 4.1″ x 2.93″ (299 x 104 x 74 mm) (W×D×H)
• Output Bit Depth: 24/8/1
• Scan Method: ADF Duplex
• Light Source: LED (light emitting diode) instant on
• Maximum Paper Size: 8.5 x 118 in
• Drivers: PC: DriverPLUS TWAIN, ISIS, WIA Mac: Visioneer Scan Utility, TWAIN, ICA
• Imaging sensor: CIS (contact image sensor)
• Paper Thickness/Weight: 16 – 28 lbs.
• Background Color: Black
• Minimum Paper Size: 2.25 x 2 in
• Speed @ 300 dpi, b&w, grayscale, or color: 15 ppm / 30 ipm
• Speed @ 200 dpi, b&w, grayscale, or color: 20 ppm / 40 ipm

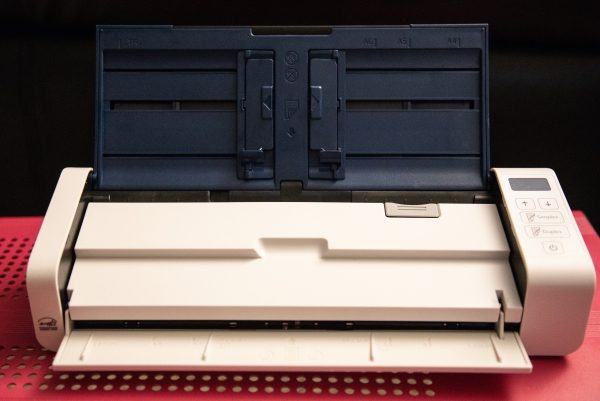
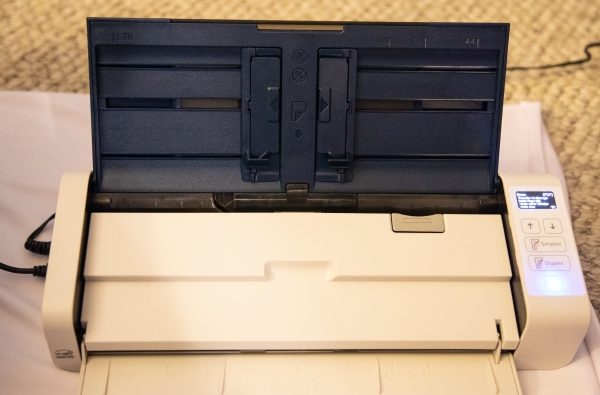
This scanner has a sleek and simple design. When opened up from its compact state, it has a rear paper feed tray, a front folding out paper tray and a top side control panel.


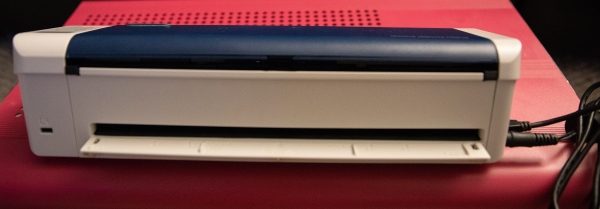
There is also an included rear scanning tray for pass-through scanning.


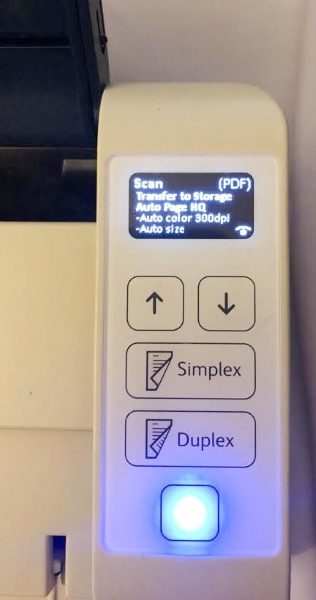
When the scanner is powered on the power button lights up blue and the LCD display shows status and current settings.


Below is a close-up view of the control panel. It is well labeled with function buttons for scanning in simplex or duplex mode and the up/down buttons for changing settings.


Below are screenshots of some of the screens that are presented when installing the software suite.
Software included in the bundle:
PC: Visioneer OneTouch with Acuity
ABBY® Fine Reader Sprint
ABBYY Business Card Reader 2.0
Desktop Organizer software
Scanner Drivers: Visioneer DriverPLUS, TWAIN, ISIS, and WIA
Mac: Visioneer Scan Utility
TWAIN and ICA drivers
ABBY® Fine Reader Sprint


Performance

System Requirements:

  • Intel Pentium 4 or equivalent processor
  • DVD-ROM drive capable of reading Dual Layer DVDs
  • Universal Serial Bus (USB) port
  • Microsoft Windows operating system
  • 2 gigabyte (GB) internal memory (RAM)

Minimum available hard disk space:

  • 350 MB for the scanner driver
  • 1GB for Visioneer OneTouch
  • 1 to 2 GB for each additional application

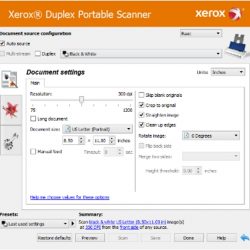
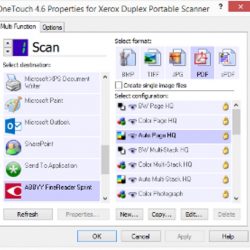
Opening the scanner from its compact form and getting it ready to scan is very easy, and the installation of the software that includes the drivers and the software bundle is very easy. I installed it on a laptop with the Windows 10 OS and there were no issues. One important process is to follow the instruction to not connect the USB cable until the software installation prompts you to do so. This process is actually normal practice when installing USB devices. Once the installation was completed, I placed a document in the feeder and pressed the simplex button. In seconds it scans and appears on the screen. I did the same for a two-sided document using the duplex function. For the first test, I chose .pdf as the file format. You can also scan documents as various image formats and you can scan various types of documents like business cards, etc. You can scan via the Automatic Document Feeder or via the rear scanning tray. In addition, you can initiate the scanning process from the software. There is an abundance of settings available that are too many to mention in this review. You can see all of the features by reading the manual here.
The following are some screenshots to show some of the options, settings, and features available via the software:


What I like

  • The size of the scanner
  • The simplicity of the setup
  • The included software
  • The ease of use
  • The build quality
  • The simplex/Duplex functionality
  • The scanning options and versatility

What can be improved

  • A built-in rechargeable battery to make the scanner truly portable and usable even in environments where AC power is not available

Final thoughts

I really like this Xerox Duplex portable scanner. it is lightweight but yet well built, and it is so easy to use. As a photographer/videographer, I frequently meet with clients at locations convenient to them, and when I have them sign a contract, I usually take it back to my studio, scan it and then email a copy to them. On many occasions, I have seen the uneasiness with some clients after they make a down payment, and don’t have a copy of their contract right away. I will use this scanner to scan the signed contract on the spot, and then they can have the document and I will have a copy. Well done Xerox!! Thumbs up!!

Price: $249.99
Where to buy: Xerox website or Amazon
Source: The sample for this review was provided by Xerox.

Filed in categories: Reviews

Tagged: ,

Xerox Duplex Portable Scanner review originally appeared on The Gadgeteer on September 27, 2018 at 9:00 am.

Note: If you are subscribed to this feed through FeedBurner, please switch to our native feed URL http://the-gadgeteer.com/feed/ in order to ensure continuous delivery.
Cascade Wallet review


REVIEW – If you like gadgets and mechanisms (and you likely do since you’re here), the Cascade Wallet might be something to take a closer look at. Being a daily-carry item, a good wallet is a necessity. Mani Wonders has a very technical take on what makes a good wallet. It definitely caught my attention. Let’s jump to the test drive.

What is it?

The Cascade Wallet is a minimalistic credit card case with a sliding mechanism for accessing the cards along with a hidden money clip for cash and other thin items like business cards. A snap-on cover (available separately) lets you expand the storage capabilities.

Hardware specs

Wallet

  • Aircraft aluminum construction
  • RFID protection
  • Credit card lifting mechanism
  • Holds 5-6 cards
  • Hidden money clip
  • Dimensions 66.9 x 10.2 x 100.9mm

Cover (Sold separately)

  • Leather construction
  • Metal snap pins
  • Velcro closure
  • 4 card slots
  • Cash area

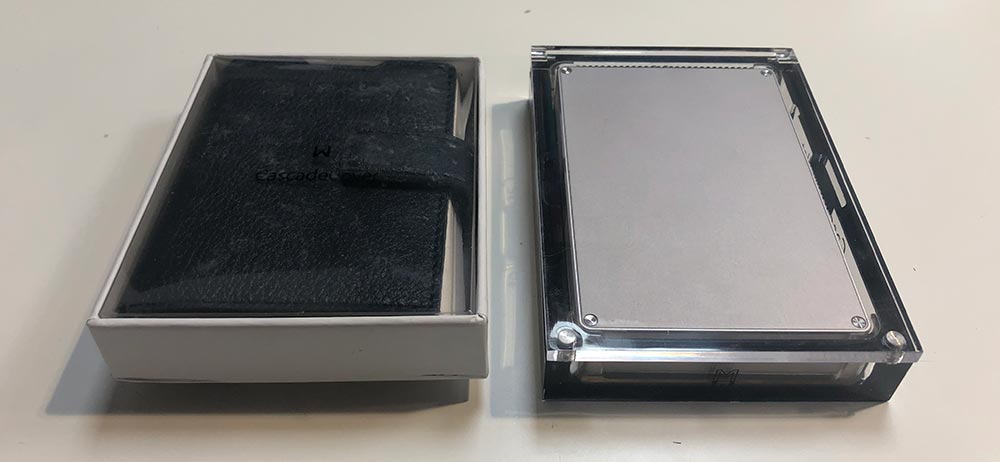
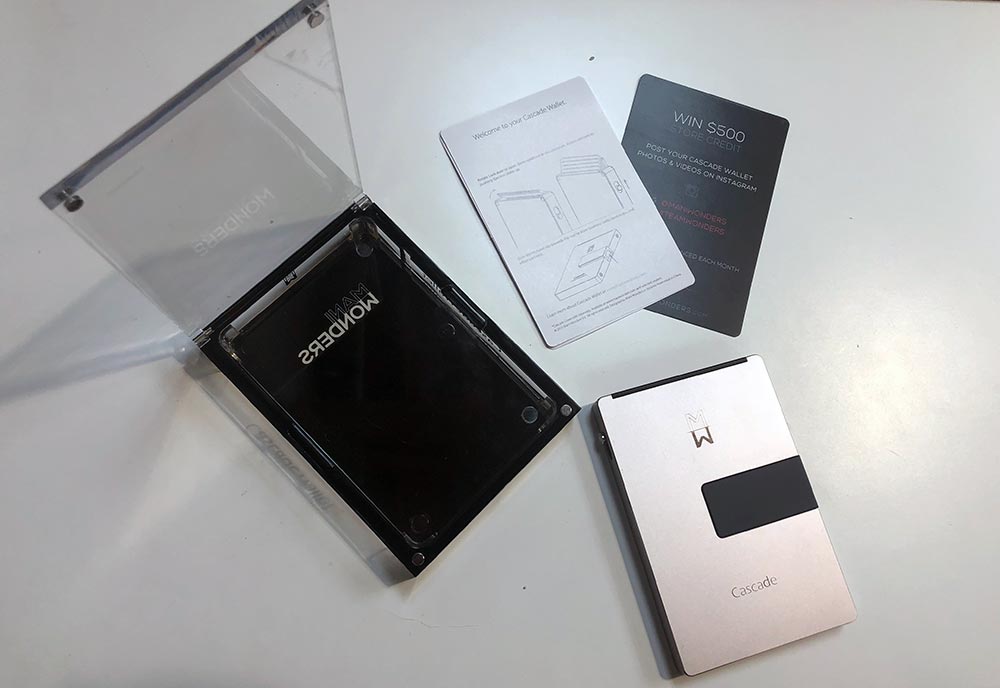
What’s in the boxes?

  • Cascade Wallet
  • Instruction card
  • Cascade Wallet Cover

Design and features

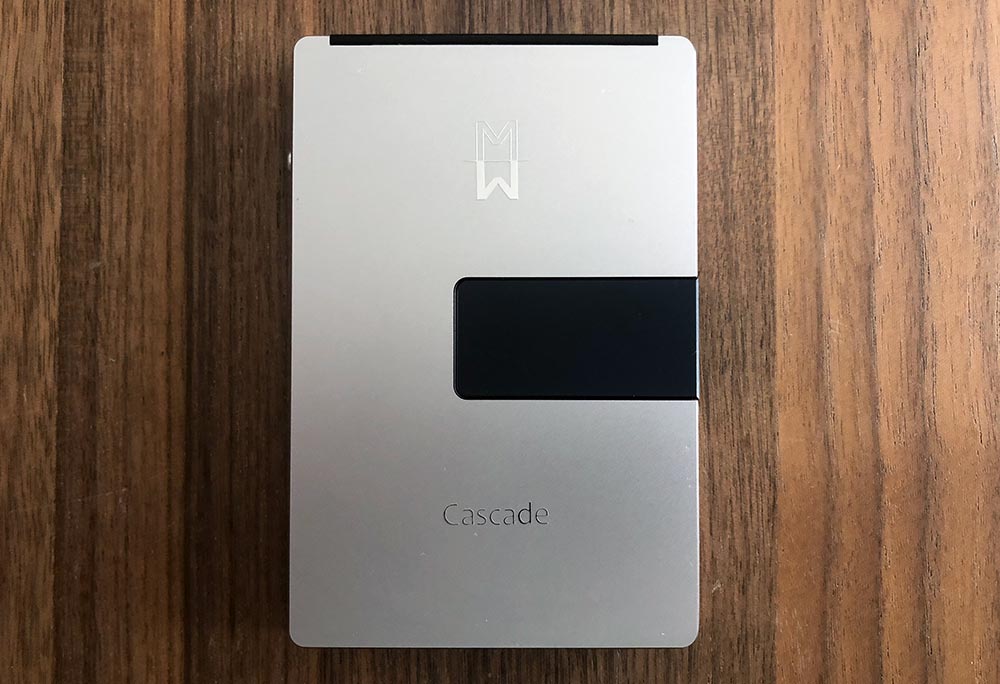
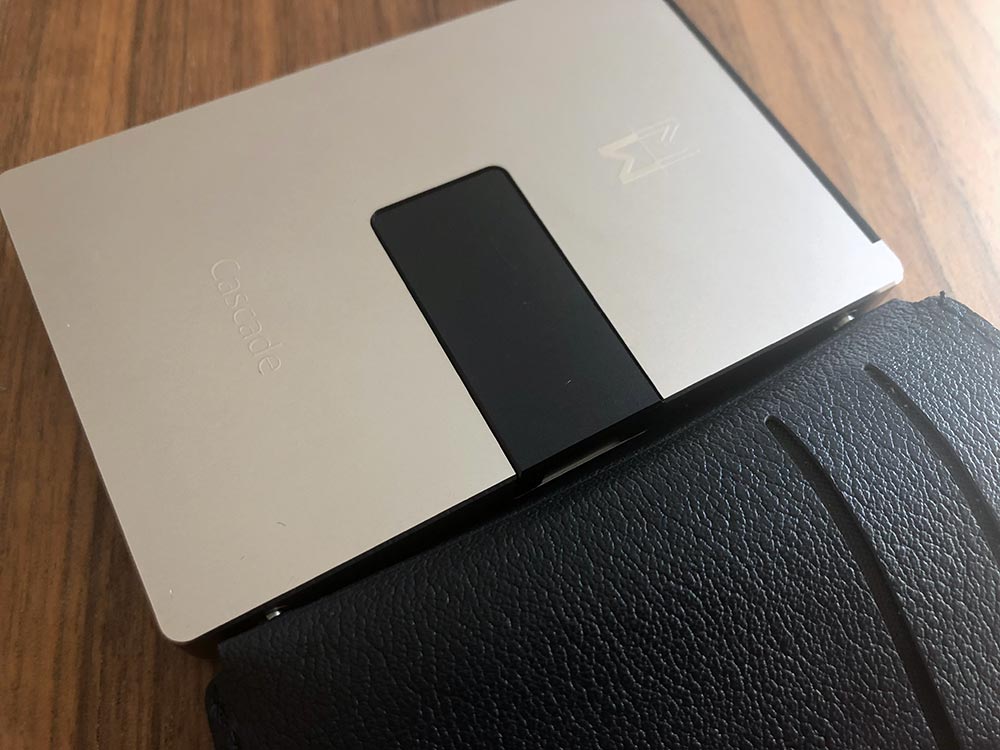
The Cascade Wallet is extremely well made. It’s primarily a two part, aluminum construction. The front half, sides and bottom are all a single part with mounting areas for the credit card door, slider switch and the money clip. The back plate hides the internals.

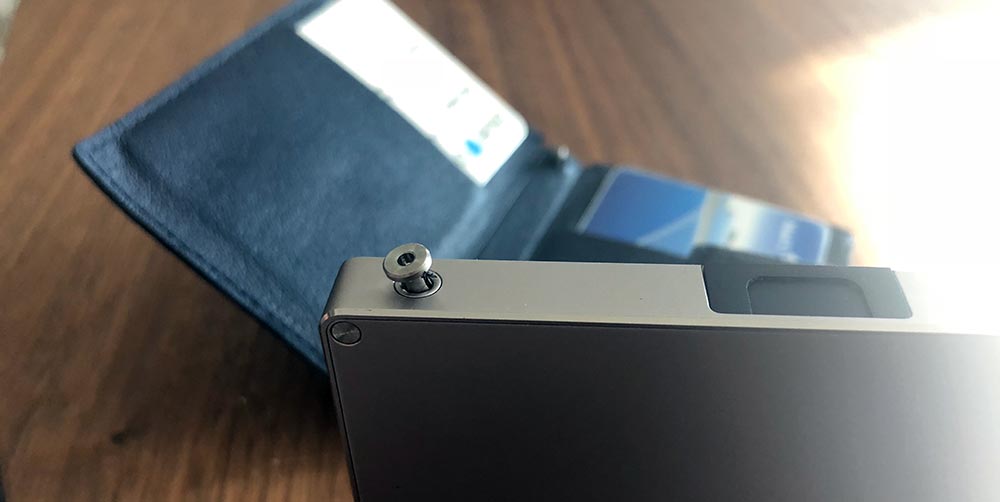
The right side of the case houses the money clip lever and has two flush receiving rivets for attaching the cover.

The slider switch lives on the left side of the case which is used to raise credit cards out of the wallet.

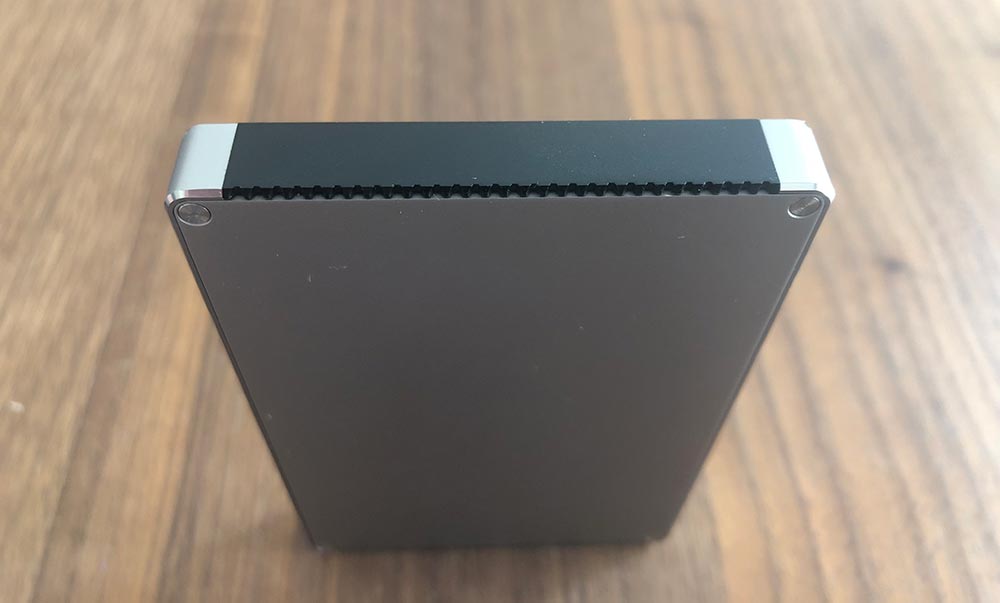
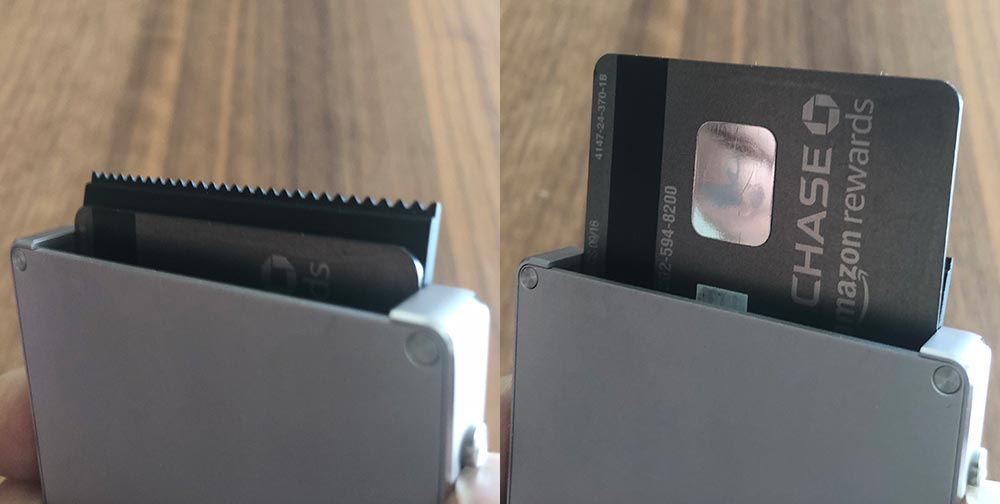
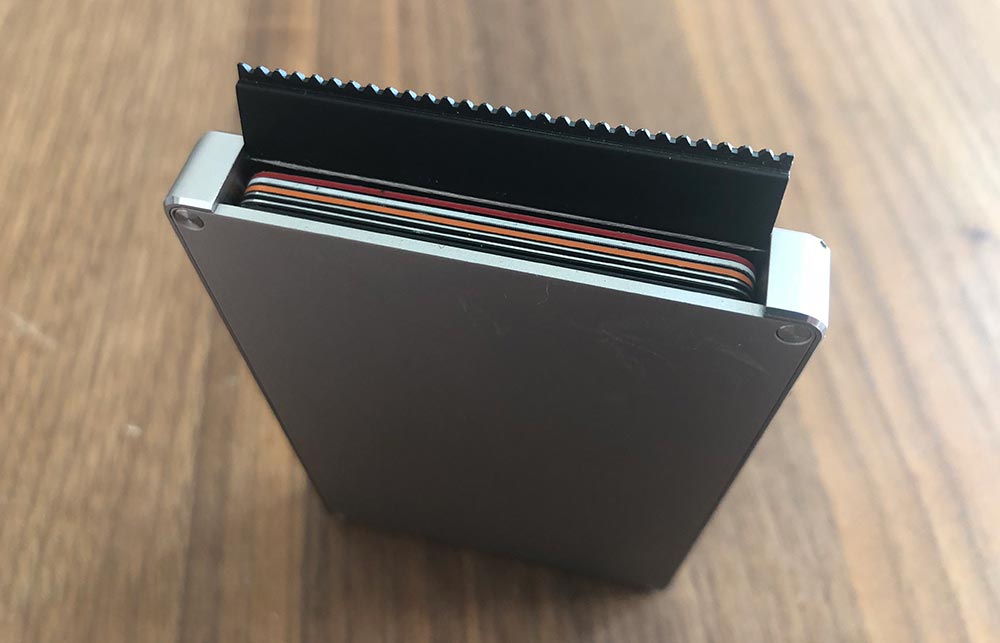
The credit card door is on the top and has a serrated edge used for opening the constant resistance hinge.

Setup

Part of starting to use any new wallet is figuring out which cards to put where. Using the Cascade Wallet (without a cover) makes this pretty simple as there is room for 5-6 cards. More and more credit cards have moved away from having raised numbers on the card’s face. If you’re running more of the flush, you should be able to get 6 in there.

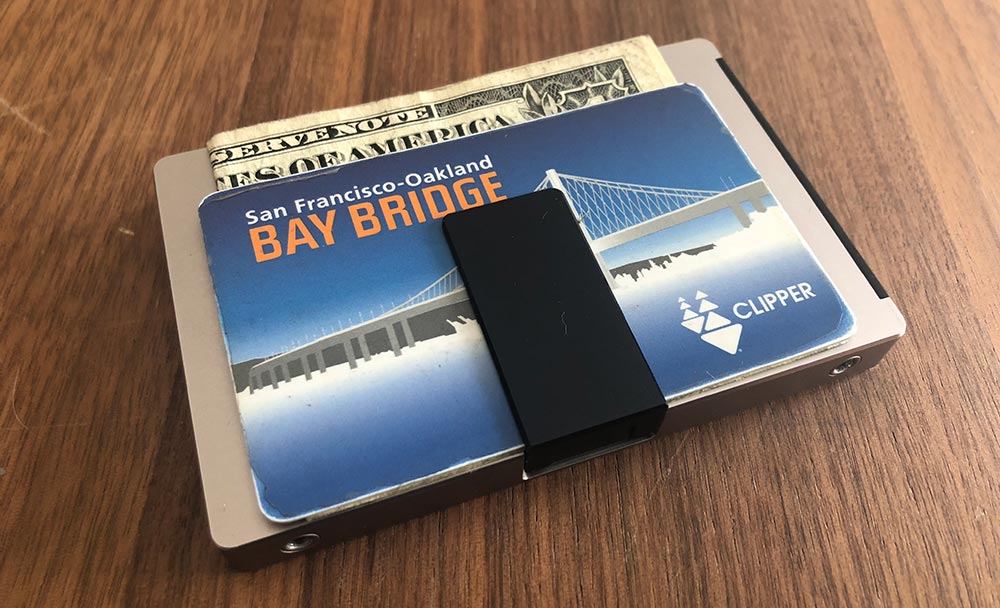
The money clip will hold a few bills and a card.

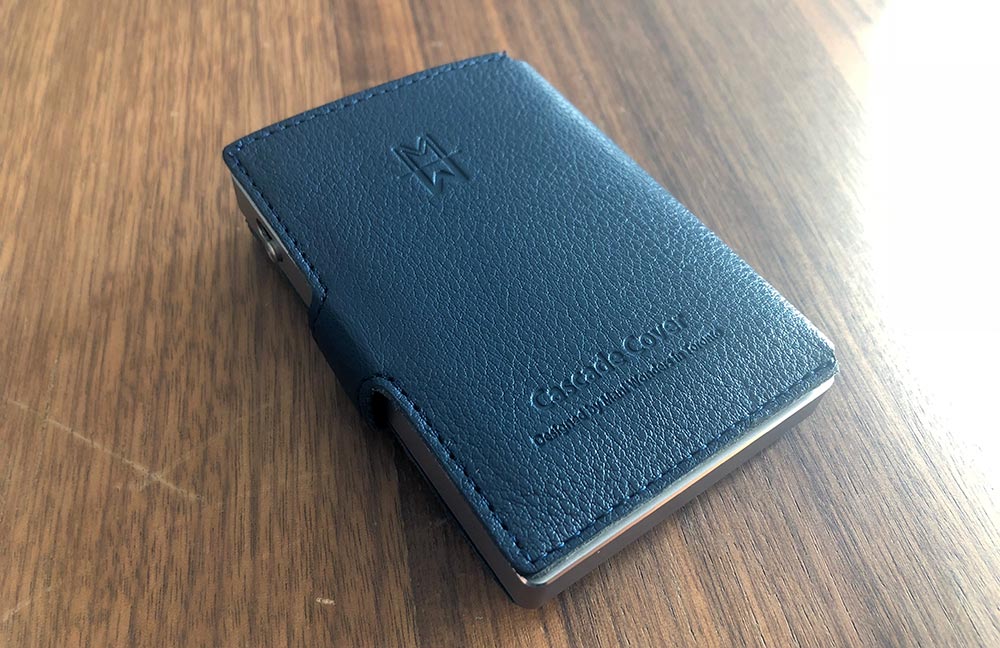
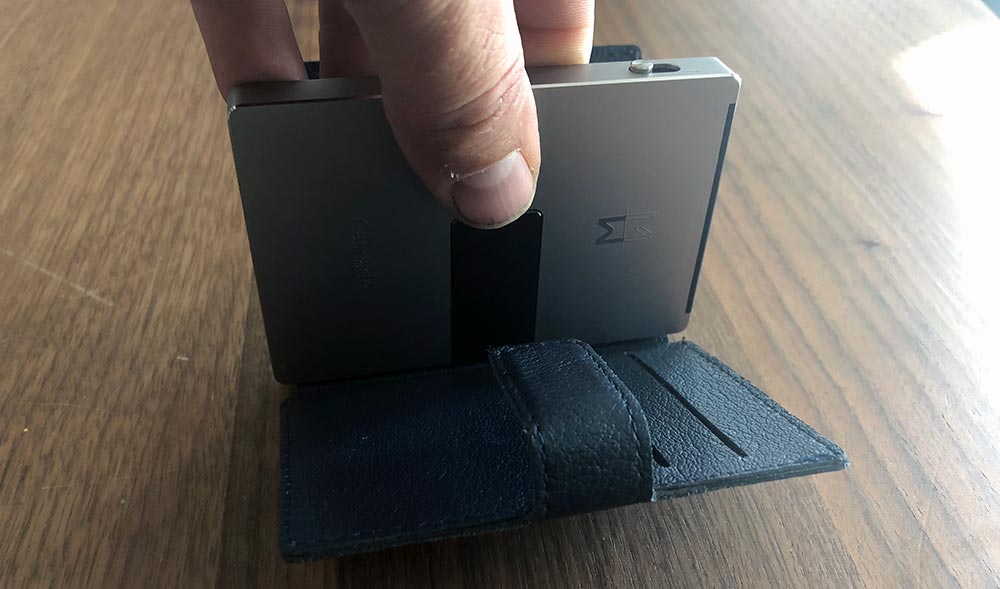
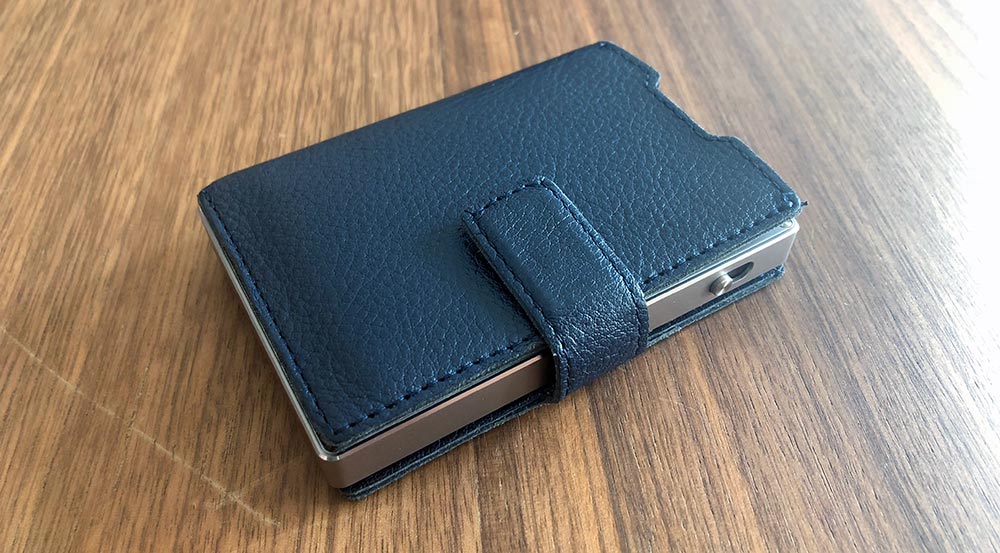
If you choose to purchase the cover, you’ll have some additional storage options. Installation isn’t hard, but it’s a bit tricky. Inside the cover on the spine are two small metal posts. You’ll want to align these with the two holes on the wallet and then press down on the wallet as shown below.

Once installed, the velcro holds the cover closed around the wallet.

Performance

It’s really a shame that the wallet is as beautiful as it is as I really wanted to like it, and there are plenty of things to like. They’re just overshadowed by functional issues that for me, resulted in returning to my previous wallet.

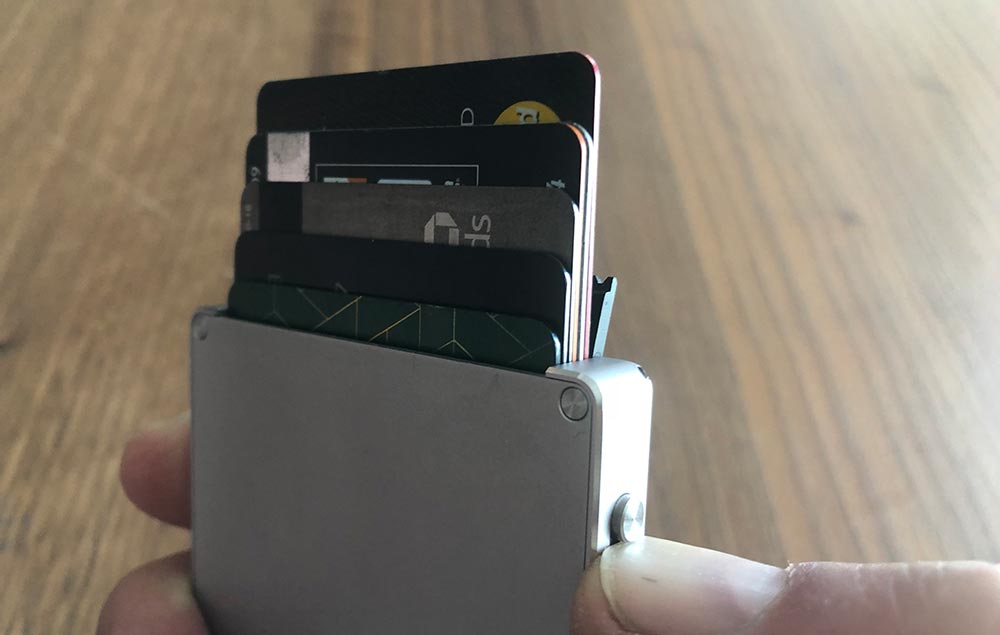
The key feature is the switch that slides the cards up. When it works, it’s magical. It fans the cards semi-evenly depending on the thickness and stack order of your cards.

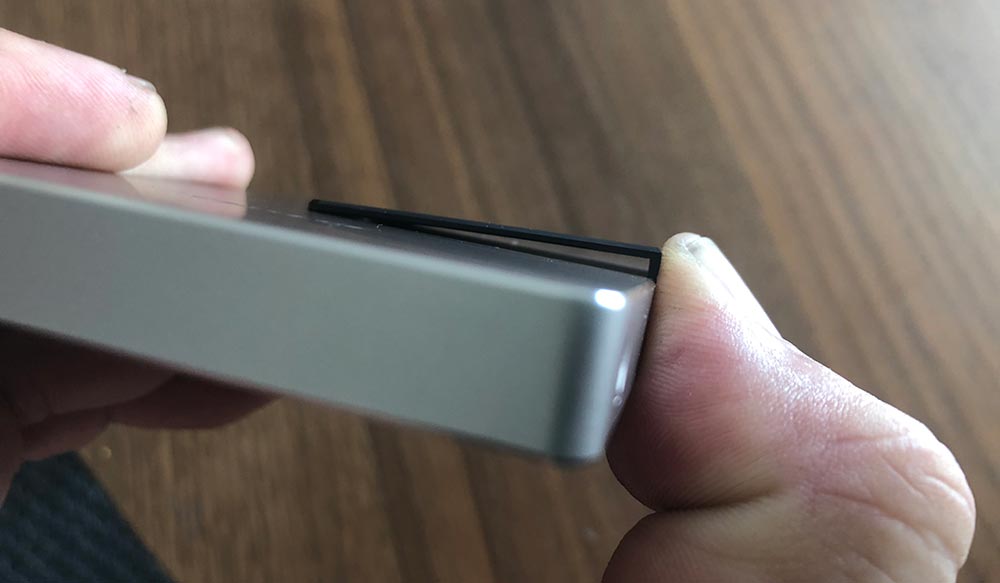
So first things first. You can’t use the switch unless you have already pivoted open the door. This door is tight enough that initially, you think you are doing something wrong. On the plus side, this is never going to accidentally swing open.

The switch itself protrudes slightly and if you try and slide it single-handed with your thumb, the inward pressure of your thumb jams the mechanism. If I use the top of my thumbnail, it works much better, but it’s less of a natural motion. Using my other thumb (which is already close by from opening the door) doesn’t offer any advantages.

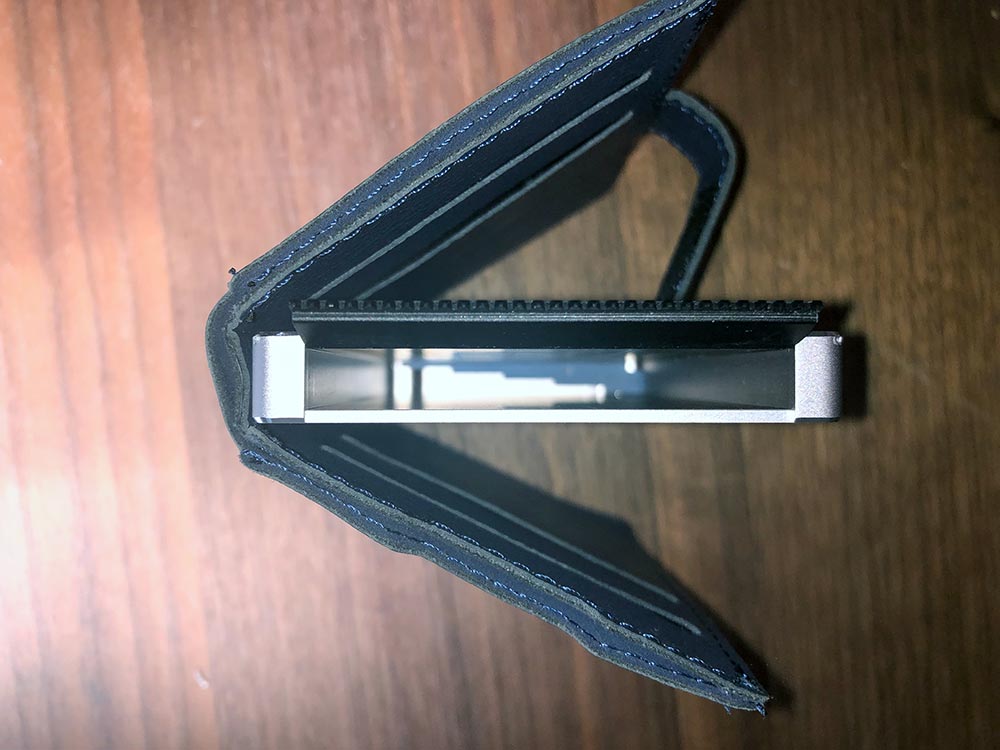
In this photo, you can see the stepped lifter at the bottom of the inside. As that rotates it lifts each of the cards to different heights.

Next up. You may have noticed I didn’t say 1-6 cards. If you have a single card in the wallet, it rattles around, but depending on which way you’re holding the wallet it will rest on a different lifter when you use the switch. It might be barely up, fully up or somewhere in the middle. The same thing happens with 3-4 cards, or even with 6 if you happen to have closed your wallet while you’re using the one you took out, making it a bit tricky to figure out where to put the one back.

Even if you do have the full 6 cards in there, extracting the one you want is more challenging than you would think. The front and back cards are pretty easy, but ones in the middle are tricky, especially if they’re paired up like the two in the photo above. If you tip the wallet to help out, there’s zero retention and all six go sliding out (usually at speed).

Let’s move onto the money clip. It’s really cool that they were able to design a mechanism that sits this flush when not in use. To open the money clip, you need to slide the clip towards the front of the wallet with your thumb. This motion, while opening the clip, tilts the front edge of the clip enough where it’s hiding again.

As a result, you end up trying to wedge your bill or card underneath the edge closest to your thumb and then navigating your cash into place. After numerous tries, I figured out that you can push it up and then rock your thumb backward to kinda level out the clip. Not ideal. It also opens just far enough to tackle a bill or two. If you paid with a 20 and got back 8 in bills, you’ll be fighting it a bit.

At this point, I opted to try out the cover. The RFID function of the main wallet is a great safety feature, but also means that my transit card won’t work at readers, so I already knew I’d end up using the cover for regular use. With the cover on, I was able to put 6 cards inside the wallet, health/insurance cards in the left side of the cover and my Clipper and driver’s license on the right side.

The cover’s length is about 15mm short of being able to put bills in without folding, so you’ll have to decide your preferred folding, lump stack up. All closed up the wallet doubles in thickness to about 20mm loaded this way. Still pretty thin, but just an FYI.

It’s also worth noting that once you have the cover on, it further renders the money clip useless as the lever is now trapped inside the spine of the cover.

When it came time to take some photos for this review I needed to take the cover back off. There are no instructions on how to do this in the card that came with the wallet and none on their site. I would imagine that the pins relax a bit over time, and maybe Mani Wonders didn’t think someone would take the cover back off this quickly, but it was not trivial. In fact, both of the pins pulled through the cover and sat proudly from the side of the wallet. At that point, they were much easier to remove.

What I like

  • The slim aesthetic and overall size
  • The intent of the design
  • The materials

What needs to be improved

  • Functionality
  • Cost

Final thoughts

There’s so much potential here, but so many misses when it comes to the core functionality of a wallet. I need to be able to quickly get to the card I need, use it and return it without challenge. With the Cascade Wallet, it felt like I had passed some kind of a test if it all went as it should. The materials and attention to detail are amazing, but it’s really hard to ignore functionality problems this big, especially at this price. Here’s hoping they can figure out how to make V2 better.

Price: $159 ($39 extra for cover)
Where to buy: Mani Wonders
Source: The sample of this product was provided by Mani Wonders.

Filed in categories: Reviews

Tagged:

Cascade Wallet review originally appeared on The Gadgeteer on September 26, 2018 at 11:00 am.

Note: If you are subscribed to this feed through FeedBurner, please switch to our native feed URL http://the-gadgeteer.com/feed/ in order to ensure continuous delivery.
Vantrue N1 Pro Mini Dash Cam review


REVIEW – For many years, I really disliked dash cameras. I felt like they were in the way of my vision, and always had some sort of shortcoming, whether it was the quality of the footage or connectivity that made me say away from them. Most recently I have been able to test and review a few of them, and I have begun to like them more as the overall quality has increased. This dashcam really caught my interest because of its really tiny size and yet indications of nice built-in features.

What is it?

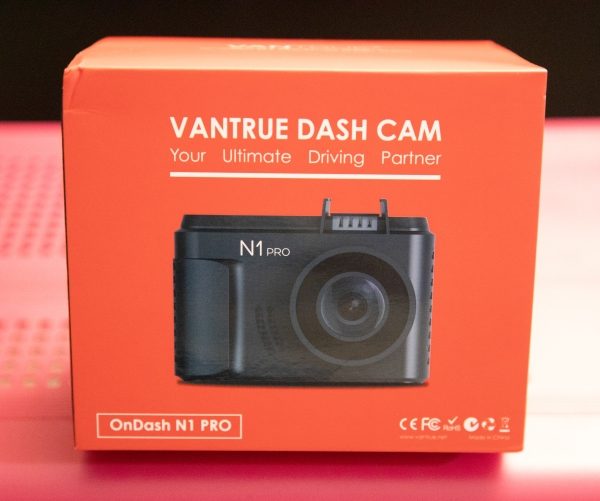
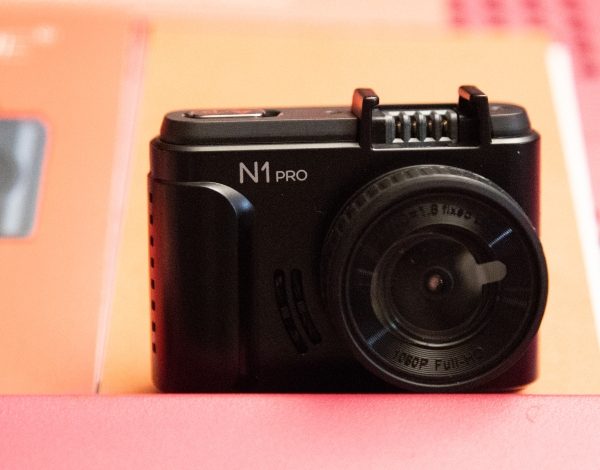
The Vantrue Dash Cam is a “tiny” dash cam with a 1.5″ LCD and a 160-degree wide angle lens that produces full 1080P HD footage and includes features like Parking Mode and collision detection.

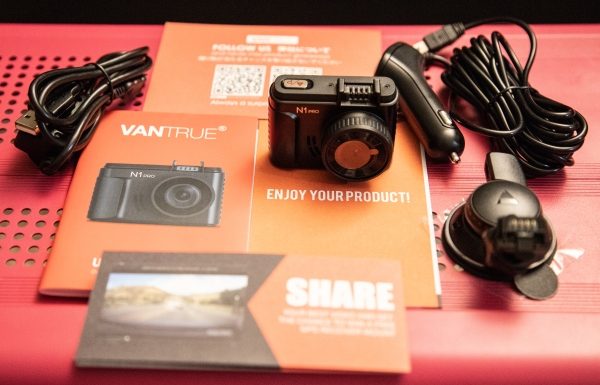
What’s in the box


1 x Vantrue N1 Pro Dash Cam
1 x Suction cup mount
1 x 3’ Micro USB data cable
1 x Car charger/power adapter with connected 10’ mini USB cable
1 x User Guide
1 x Quick Start Guide
1 x Warranty card

Design and features

This dash cam has a tiny and compact design and measures 1″ x  2 1/2″ x 1 1/2″.

Specifications:

Display: 1.5 inch TFT LCD (4:3)
Lens: 160-degree wide viewing angle and a full 6 layer glass lens with a wide aperture of F/2.0
Languages: English/Japanese/Germany/简体中文
Video Format: .MOV; H.264 compressed format
Video Resolution: 1920x1080P30, 1280x720P30
Image Resolution: 12M Pixels
Image Format: JPEG
Motion Detection: ON/OFF
Parking Monitor: ON/OFF
Audio Recording: ON/OFF
Memory Card: Micro SD Card up to 64GB (Class 10; in FAT32 format)
MIC/Speaker: Built-In
Backlight: Off ON/OFF
USB Port: USB 2.0, mini
Battery Capacity: 130mAh
PC Operation System: Windows XP/Vista/Windows 7/Windows 8/Window 10/Mac

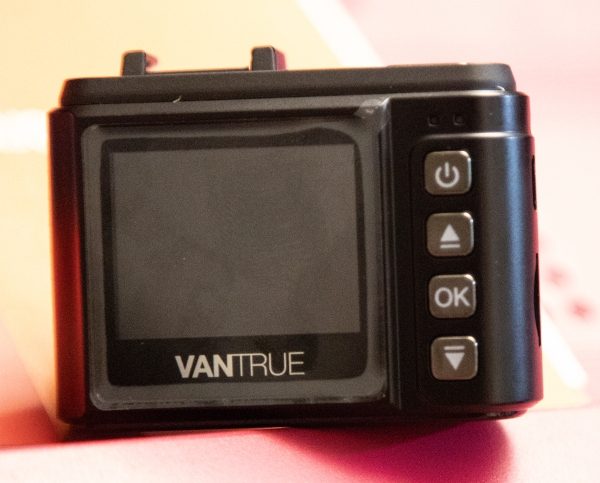
On the front of the camera, there is the logo and to the right of it the camera lens. On the back on the top right-hand corner, there are 2 LED indicators that show when the camera is charging and when it is recording. In the column of the 4 buttons, the top button is on/off power button, the second is the upward selection button that also serves as the fast forward playback button and as the microphone on/off switch. Next, there is the OK button that starts and stops video recording and performs the “confirmed” function, and last, there is the downward selection button that also serves as the slow forward playback button and to turn the screen on or off.

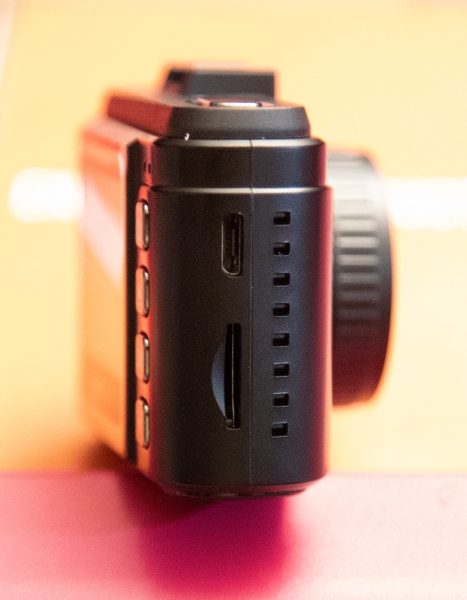
On one side of the camera, there is a micro USB port on top for charging or data transfers, and a micro SD card slot below.


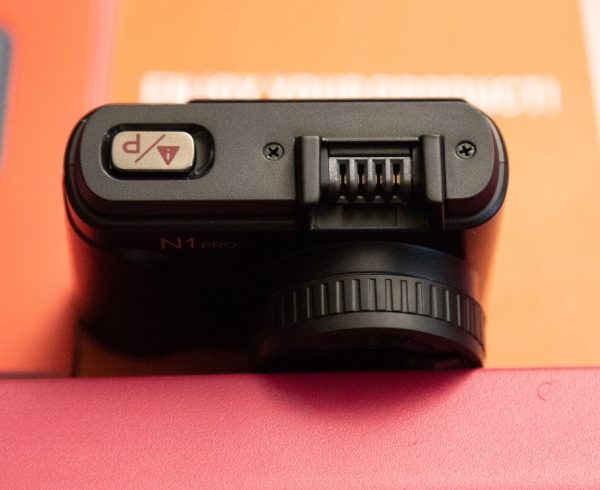
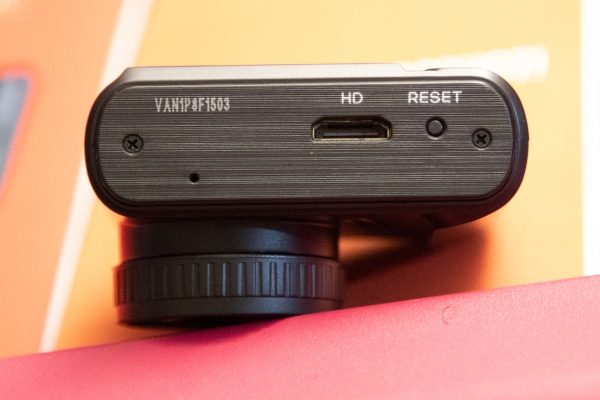
At the top of the dash cam to the left, there is the emergency mode button that you press to capture a photo while the camera is recording, and a long press, while the camera is recording, will put it in Parking Mode. To the right of the emergency mode button, is the connection that receives power for the camera once it is connected to the mount and the mount is plugged in. At the bottom of the camera as shown below is the HDMI port and the factory reset button.


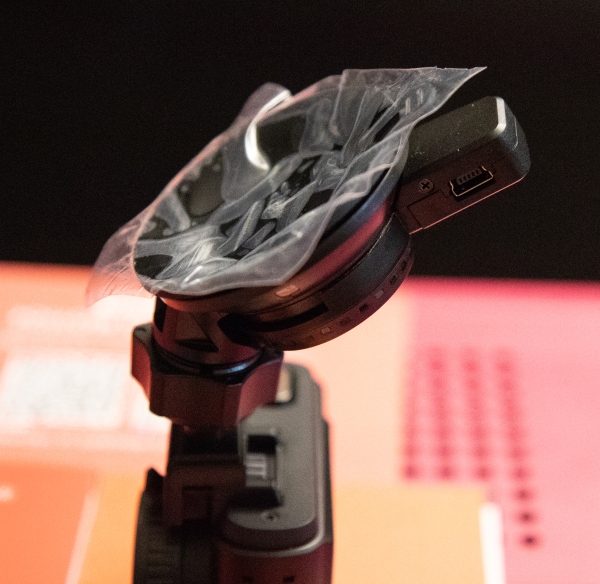
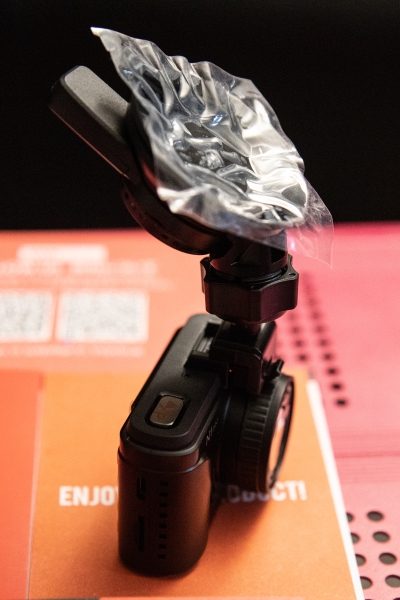
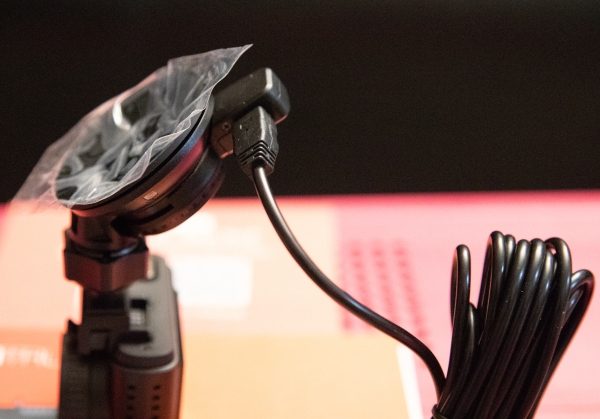
The 3 pictures below are of the windshield mount and they show how it is positioned when connected to the dash cam, the mini USB power jack and how the power adapter is connected to the mount.


Performance

This dashcam really performs well. The settings are easy to navigate and the choices are very straightforward. The image stabilization works well and the video and images are clear even in overcast and/or rainy conditions. Its “tiny” size, it has no noticeable effect on your view when driving.


It includes features like 1080P/30 fps HD video with Supper Night Vision, seamless loop recording on micro SD cards up to 256GB, and a G-sensor that automatically detects a sudden shake/collision and locks the footage to prevent the video from being overwritten even in loop recording. The 24-hour Parking Monitor motion activated parking mode allows the camera to automatically record when it detects motion in front of your car. To take advantage of this feature, the power adapter should be plugged into an “always on” outlet or hard-wired to the battery. This way, if the dash cam is off and it detects a crash to the front of the vehicle, it will turn on and end recording after 20 seconds, and the recorded videos are saved and locked.

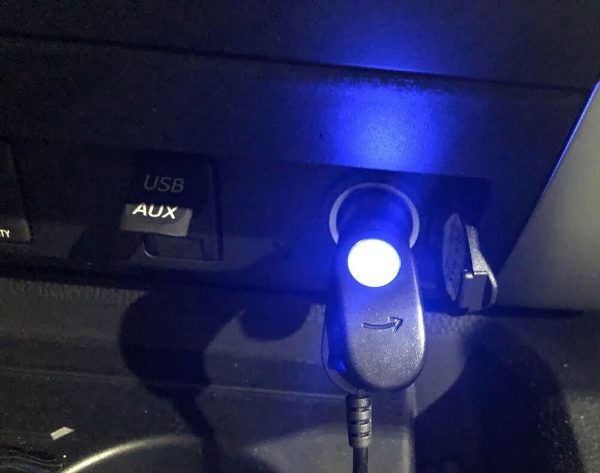
If you enable the time-lapse feature, the Vantrue N1 will keep taking photos at the set time interval and then auto edit them together to a video clip. This reduces the size of the video file. The dash cam also provides excellent audio quality. I also like that the power adapter has a nice blue LED on the end that plugs into your vehicle. Not only does it indicate power on/off, but it is a nice interior light.
Videos


What I like

  • I love the size
  • The video quality
  • The features and ease of use

What can be improved

  • The connector to the dash/windshield mount

Final thoughts

Out of all of the dash cams that I have owned and/or tested, I like this one the best. It is so small that it does not present any type of bothersome obstruction of your view and yet it functions much like the bigger and more expensive dash cams. While it is not 4K, its footage is perfect for its function and quite “crisp and clean”. It is simple and effective, and gets an exuberant thumbs up from me!!

Price: $79.99
Where to buy: Amazon
Source: The sample for this review was provided by Vantrue.

Filed in categories: Reviews

Tagged: ,

Vantrue N1 Pro Mini Dash Cam review originally appeared on The Gadgeteer on September 26, 2018 at 9:00 am.

Note: If you are subscribed to this feed through FeedBurner, please switch to our native feed URL http://the-gadgeteer.com/feed/ in order to ensure continuous delivery.