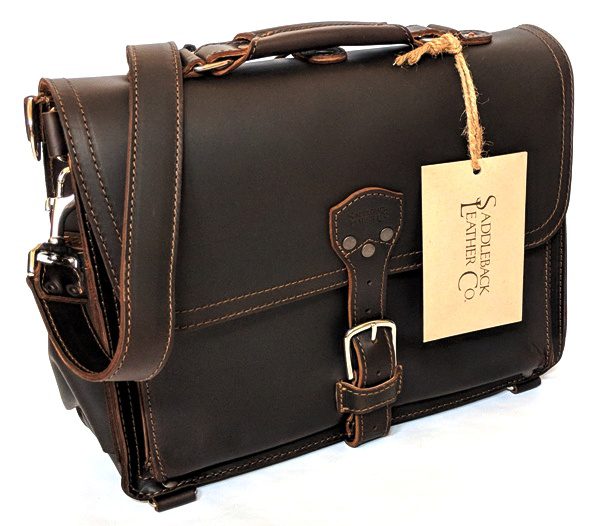
Saddleback Leather Slim Laptop Briefcase review

REVIEW – Mmm, leather. The look. The smell. The durability. What’s not to love? I’m a huge fan of high-quality leather bags and wallets. Saddleback Leather updated their Slim Laptop Briefcase and I was given the opportunity to review it. What’s my impression? Simply put, it is a wonderful laptop briefcase – Saddleback bags are some of the best-made leather bags I’ve ever seen. The briefcase carries my 13″ laptop, many other materials, can double as a backpack, has a secret compartment, and “They’ll fight over it when you’re dead”. The only reasons you may not like it are because of the weight (it’s 5.6 pounds when empty – thick leather is heavy), the style, or the price ($529).

What is it?

The Saddleback Leather Slim Laptop Briefcase is a leather bag that you can use to carry your laptop (15″) and other everyday essentials.

Specs

  • 100-Year Warranty
  • Materials: full-grain leather, pigskin lining, and marine-grade thread (the kind used on shipping sails), heavy-duty nickel plated hardware
  • 1 large interior floppy pigskin pocket
  • 2 small interior leather pen pockets
  • 1 large exterior back panel pocket
  • 1 large exterior front pocket with flap
  • 2 exterior side pockets for water bottles
  • Interior key clip strap keeps your keys from wandering off
  • Can convert to backpack mode (comes with 2 shoulder pads)
  • Detachable shoulder strap – can carry on shoulder, backpack mode or by the handle
  • Interior false bottom / secret compartment to hide cash or important documents
  • Great as a laptop bag, a book bag, or other everyday carry needs
  • Dimensions (approximate size):
    Exterior: 11.5″ H x 15″ W x 4.5″ D
    Interior: 10″ H x 14.25″ W x 4.25″ D
  • Weight: 5.5 pounds

What’s in the box?

The Saddleback Leather Slim Laptop Briefcase includes Saddleback cards (thank you card, contact information card, and Saddleback sticker).

Design and features
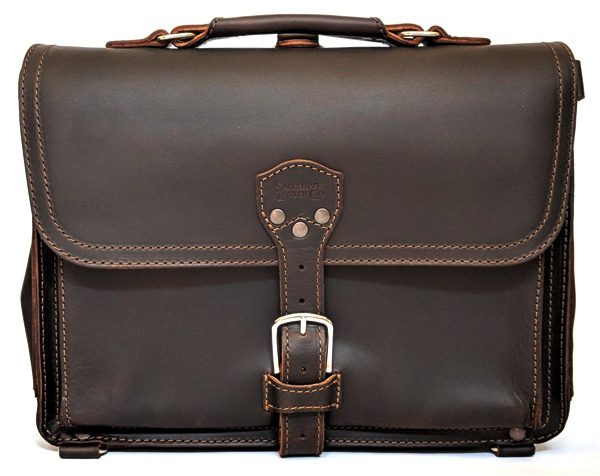
I research my purchases pretty intensely before buying. I want to know as much about the product as possible – I want it to be a high-quality, functional, and durable. Dave Munson, the president and founder of the company, provides a plethora of information about how his leather products are made (Craftsmanship & Quality) on the Saddleback website. It’s actually a great education on the high-quality leather, thread, and hardware used in the making of Saddleback products. Did you know he uses $12,000 – $14,000 sewing machines to assemble his leather products? I can’t even imagine what a $12,000 sewing machine looks like. Apparently, they have variable speeds and clutches, etc. to get through sometimes several layers of thick full-grain leather that he uses for each item.

This review covers one of Saddleback’s products – an updated version of the Slim Laptop Briefcase. I received the Dark Coffee Brown color but it also comes in Tobacco, Chestnut, and Black. The front of the briefcase is straight-forward and classy. It is made from full-grain leather, premium marine-grade UV resistant continuous filament polyester thread (for the top AND bottom stitching), and heavy-duty nickel-plated metal hardware. All the leather used to assemble the bag is about 2 mm thick (5 oz). That means that when two or more pieces come together to be sewn, the amount of leather that the sewing machine needs to get through is really thick.

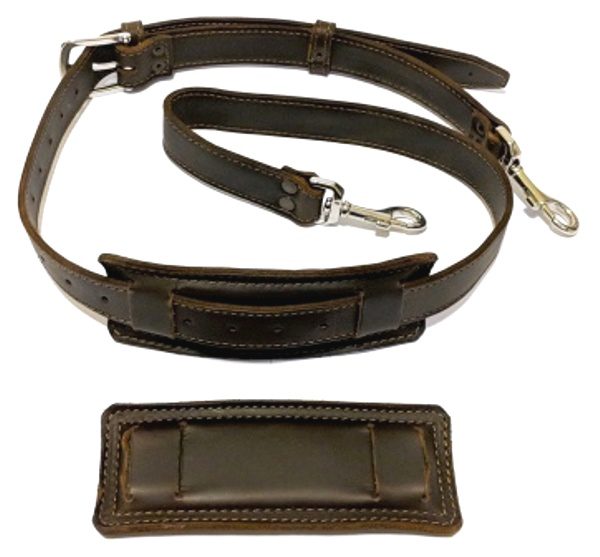
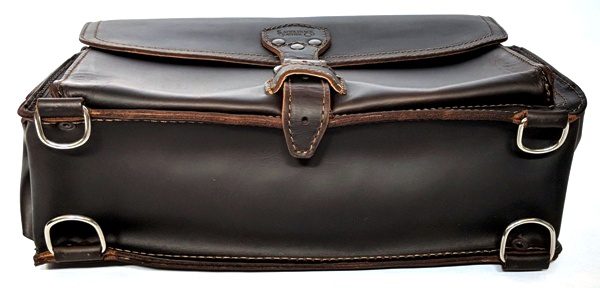
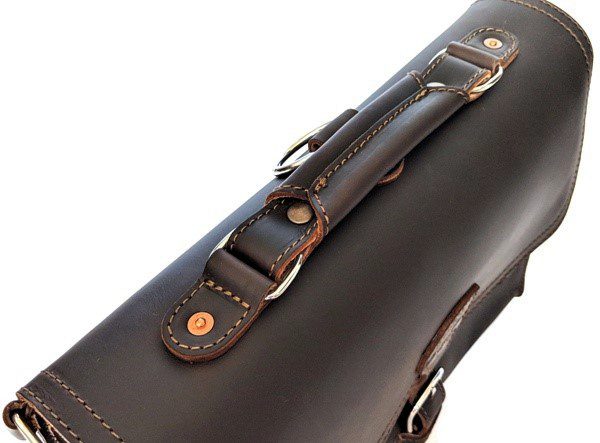
The front flap of the briefcase is double stitched and is a single piece of leather that continues down to the back of the bag. The front buckle is heavy and feels durable. And the strap for the main buckle is sewn and riveted onto the front flap of the bag. The outer measurements of the bag are about  15″ W x 11.5″ H x 4.5″ D. Also shown above, is a large exterior front pocket with external measurements of 13.25″ W x 9.25″ H x 1″ D.The detachable leather shoulder strap comes with two shoulder pads (just in case you want to convert the bag into a backpack). The strap for the briefcase is made from two long single pieces of leather (about 2 mm thick) sewn together making it about 4-5 mm thick and very durable (other manufacturers’ leather straps and belts are often several pieces of leather spliced together to obtain the length needed). The buckle and large swivel hooks are heavy-duty metal. Notice how the stress points (the ends of the strap holding the hooks) are sewn and then reinforced with two rivets at each end. Saddleback uses one piece of leather to create the sides and bottom of the briefcase. The bottom also contains four D-rings that are sewn and riveted onto the bag. The rings can be used to attach things to the bag (e.g. tripod, etc.) or to attach the shoulder strap in order to convert it into a backpack. The top of the bag contains the handle which is sewn onto it and then reinforced with copper rivets. The handle is also made using 2 mm thick leather (lined with pigskin) – ready for decades of use. The sides of the bag contain more D-rings to attach things. I would be careful to only attach the shoulder strap to those D-rings that are rivet-reinforced (the upper rings located toward the back of the bag have rivets, but those located toward the front do not).
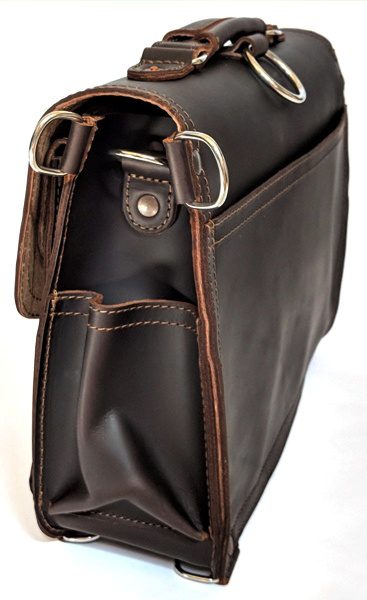
Each side of the briefcase also contains a pocket that measures 4″ W x 5.25″ H and will hold a narrow 20-fluid ounce bottle of water (Dasani or Evian bottle) very snugly.

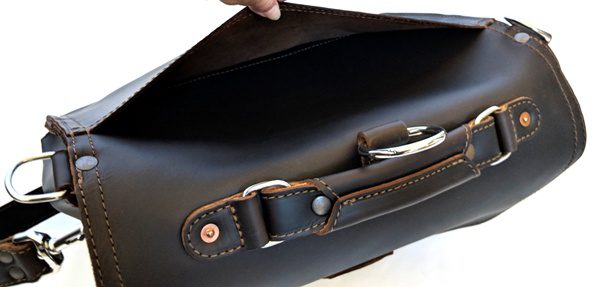
In addition, the above photo shows that there is a ring that is sewn onto the top of the bag which is also reinforced with a rivet. This is used to convert the briefcase into a backpack (more on that later). The back of the bag contains a back panel pocket for easy access to things like boarding passes, documents, magazines, etc. Its internal measurements are 13.25″ W x 8.25″ H.Opening the main compartment flap, you’ll notice that the bag is lined with pigskin which is much stronger than typical cloth lining. There is also a 5 mm thick rigid bar under the flap that has been riveted onto the bag to provide reinforcement for the handle (and the ring located on the top of the briefcase) to ensure that the briefcase will not fail at this stress point.
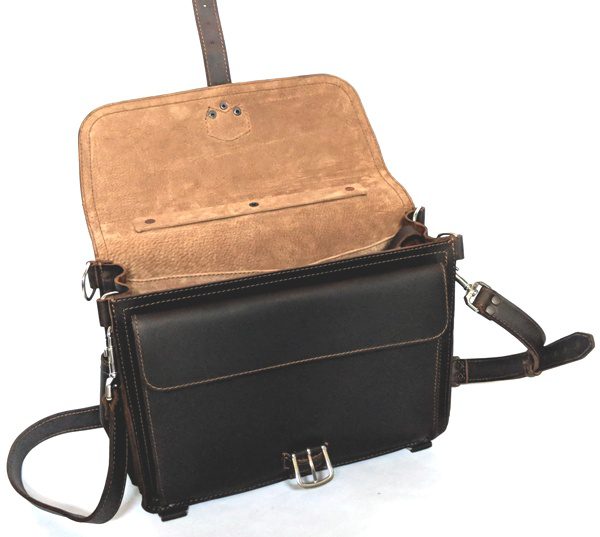
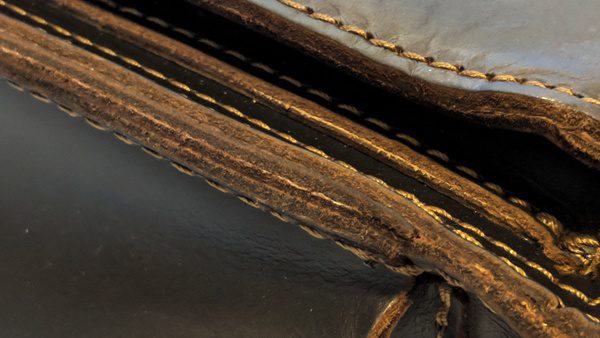
In the above photo, you can also see that the large exterior front pocket has a simple flap. It doesn’t have a closure and doesn’t need one since the main buckle is the closure for this pocket and for the entire bag. The above photo shows one of the areas of the briefcase where four pieces of leather come together: one for the outer side pocket (water bottle pocket), one for the gussets, one for the internal side (pen) pocket, and one for the front of the bag. These four thick pieces of leather are sewn together creating a 3/8″ thickness. None of the layers have been thinned out at the seam to make the assembly easier. That sewing machine must be the Hulk of sewing machines.
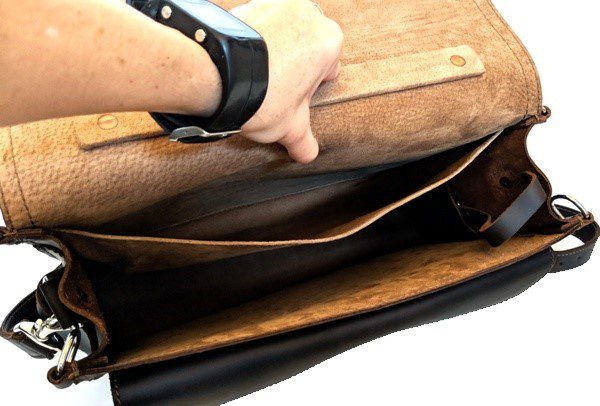
Inside the bag is a “large interior floppy pigskin pocket”. It measures 13.5″ W x 9″ H. This pocket is big enough for a 13″ laptop (or bigger depending on the outer dimensions of your laptop). None of the areas inside the briefcase are padded to protect your laptop from drops, although the leather will help insulate your electronics from the hot or cold weather. The main compartment’s internal measurements are 14.25″ W x 10″ H x 4.25″ D and will carry a 15″ laptop. This compartment is lined with pigskin which is soft and strong. I find that I really like this lining much better than cloth linings (like cotton, polyester, etc.). It goes better with the briefcase and will last.
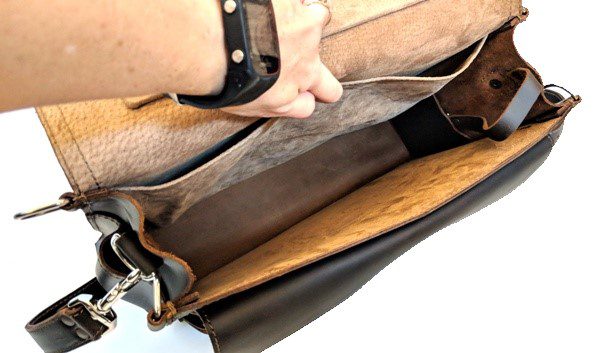
Looking at the above photo, you’ll notice that one side of the bag has a leather key clip strap and a small interior leather side pen pocket in which to insert your keys (and pens). The other side has an interior leather pen pocket as well without the key clip strap. The above photo shows the leather keychain which is attached to the leather strap by a swivel lobster claw hook. There is a hidden flap located on the bottom of the bag to hide things like your money or passport (as shown in the photo above). Although with a bag this nice, if someone steals it, they’ve got all your valuables (bad), even though they may not realize they do (possibly good if you are able to get your bag back).
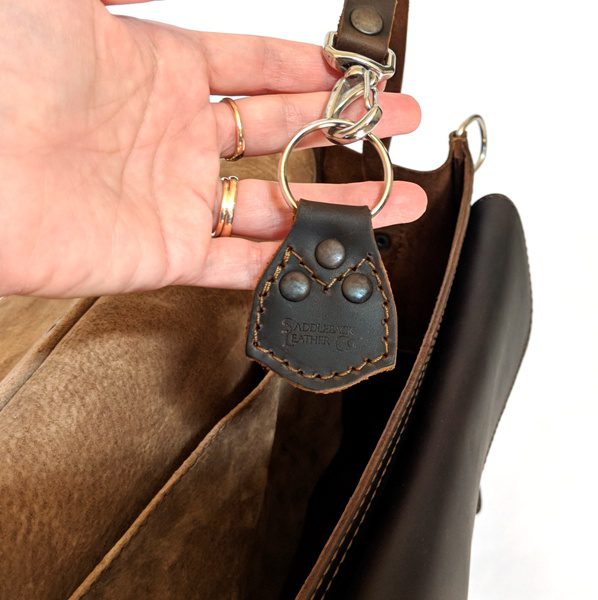
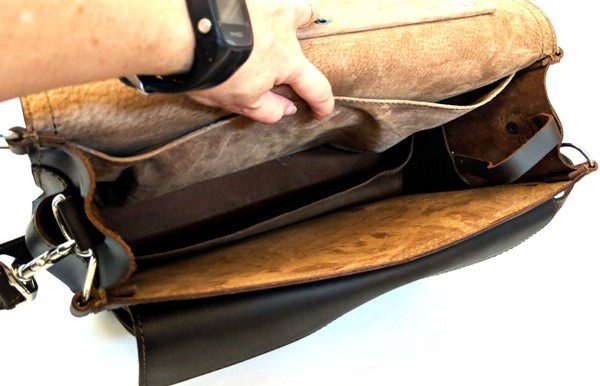
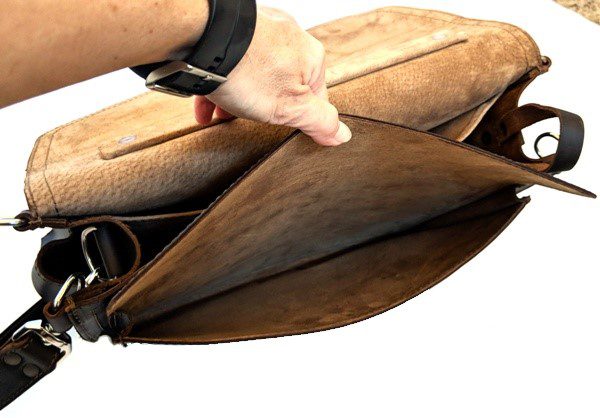
The large front pocket has internal measurements of 12.5″ W x 8.75″ H x 0.75″ D.
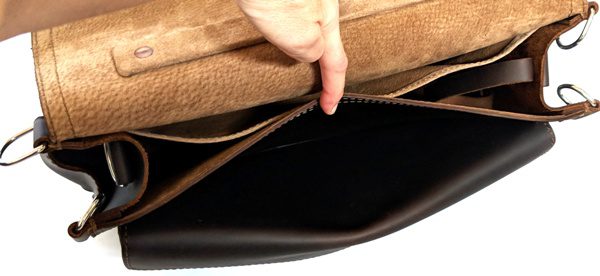
Just behind the front pocket is another area to carry documents, etc. as shown in the photo above. I love it that Saddleback does this. Other manufacturers sew all around the pocket thus eliminating this extra storage area. As I stated earlier, you can convert this briefcase into a backpack. This is the simple way to do it (by simply feeding the strap through the center ring on the top of the bag and attaching the strap’s clasps to the lower D-rings of the briefcase). However, the strap slides through the ring on the top of the bag when you go to pick it up by the strap thus making it difficult to carry the “backpack” on just one shoulder.
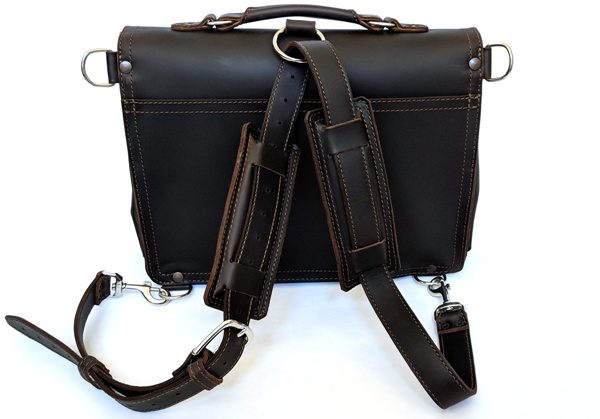
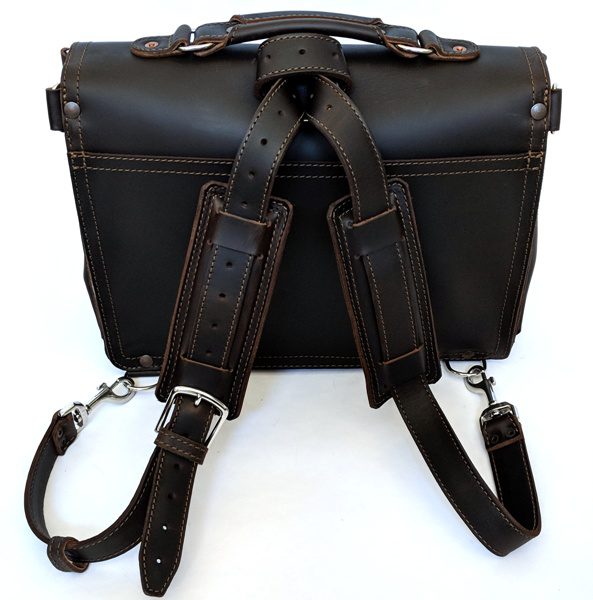
Note: Even though the briefcase looks almost black in the above photo, in-person, it is a dark coffee brown. Here is another way to loop the shoulder strap through the top ring so that the strap does not slide when you pick up the bag by that strap. I found out how to do this from MyFireVideos on YouTube. Clever! I like this – it works well and is a better configuration for those who like to carry the “backpack” on one shoulder without it sliding.
There are a few other things to note about the briefcase. New, the entire bag is stiff (so is the shoulder strap and shoulder pads) but will become more flexible over time. Also, the briefcase weighs 5.6 pounds when empty. And last according to the Saddleback website, areas that would stretch over time are reinforced with hidden nylon straps sewn in – places like the handle, possibly the shoulder strap, etc.

Performance
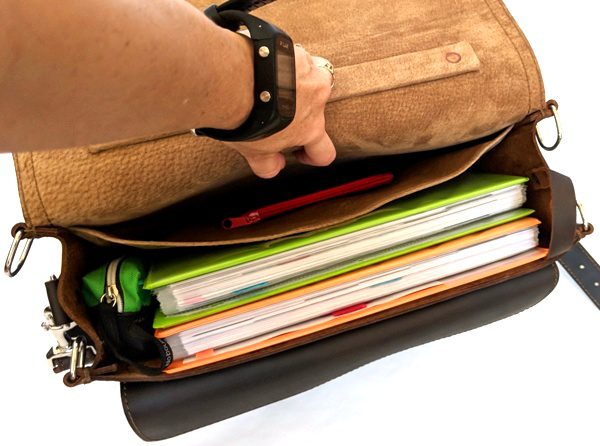
The Slim Laptop Briefcase holds a lot of my stuff. In the photo above, I have two full one-inch binders and a pencil case in the main compartment. I also have my small pouch of miscellaneous Post-it tabs located in the floppy pigskin pocket with some room to spare.

Our larger 15.6″ laptop (external measurements: 15″ L x 10.25″ W x 1″ D) fits snugly in the main compartment (without the binders; it will not fit with them in it). When sliding this laptop into the briefcase, it did get caught on the interior side (pen) pockets which needed to be moved out of the way. This laptop would not have been able to fit inside the main compartment if those pockets had been full of things or if the laptop was in a sleeve.
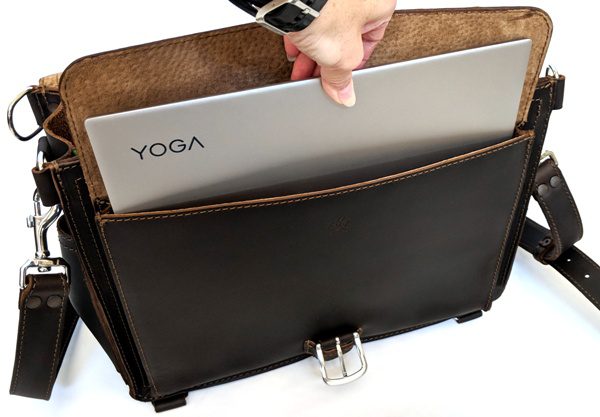
I have a 13″ Lenovo Yoga 730 laptop (external dimensions: 12″ L x 8.5″ W x 0.63″ D) that fits very nicely in the front pocket of the briefcase with a little room to spare. Again, there is no padding in any of the pockets of this briefcase. Even so, I felt like my laptop was safe enough in this pocket because when the bag is placed on the floor the pocket does not touch the floor (the bottom of the pocket is located about 0.75″ from the bottom of the bag).

I was also able to fit this laptop with its thick Tomtoc protective sleeve (external measurements: 13.25″ L x 10.13″ W) inside the main compartment easily but not in the front pocket.

The empty briefcase weighs 5.6 pounds and when filled with the items as shown above (the binders, pencil case, Post-it tabs pouch, and 13″ laptop), it weighed 16 pounds.


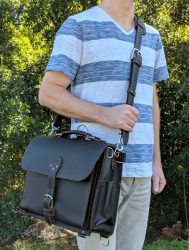
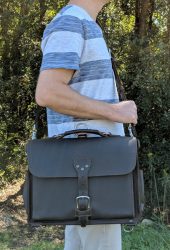
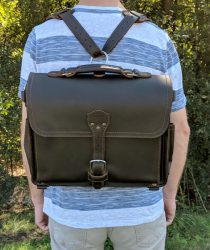
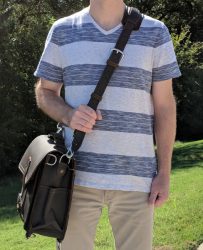
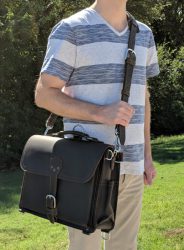
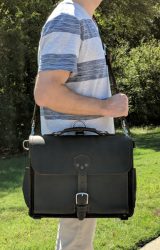
The bag was comfortable for me in the crossbody position while carrying all of my stuff for a short duration. I used my husband to model the crossbody position for me as shown in the photos above. You can also see the color of the bag under sunny conditions (which have been rare over the last month).


And this is the look of the briefcase in the shade.


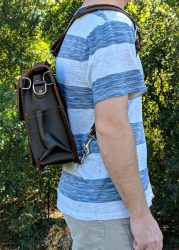
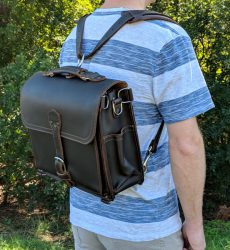
The backpack configuration was also comfortable for me. If I needed to carry the briefcase around for a long duration, this is the configuration I would use.

What I like

  • It’s made with really thick (usually 2 mm) durable full-grain leather
  • The hardware is heavy duty nickel-plated metal and some of the rivets are copper
  • The thread is marine-grade (used in sails) continuous filament UV resistant polyester thread
  • All stress points are reinforced by rivets
  • All areas that would stretch over time have a hidden nylon strap permanently sewn in
  • There are plenty of D-rings on the bag on which to attach things
  • It accommodates my 13″ laptop (and will accommodate 15″ laptops)
  • It has interior leather pen side pockets so you can easily retrieve them from inside the bag
  • It has a secret flap on the bottom of the bag to store important documents or paperwork

What needs to be improved

  • I don’t think anything needs improvement
  • However, you might be concerned about the weight (5.6 pounds empty), the style might not match your style, and it is expensive

Final thoughts

Saddleback Leather products are the best-made leather bags I have ever seen. They simply stand apart from the crowd. The Slim Laptop Briefcase is an excellent example of their quality and craftsmanship. It is made using ~2 mm (5 oz.) full-grain leather, marine-grade polyester thread, and heavy-duty nickel plated metal hardware, plus all the stress points are reinforced by rivets.

It has a quick access back panel pocket to place documents or boarding passes in, a floppy pigskin interior pocket (internal measurements: 13.5″ W x 9″ H) that will carry documents or a laptop, a main compartment (internal dimensions: 14.25″ W x 10″ H x 4.25″ D) that carries two full one-inch binders (or a 15″ laptop), and an large exterior front pocket (internal measurements: 12.5″ W x 8.75″ H x 0.75″ D) that will also carry a small laptop like my 13″ Lenovo Yoga 730. There are also two small interior side pockets to place your pens in for easy access and retrieval when necessary. There’s even a secret flap located in the bottom of the bag to hide important documents.

The only identifiable detractors of the bag are that it is heavy (5.6 pounds when empty – but thick durable leather is heavy), it may not suit your style, and it is expensive ($529).

Price: $529.00
Where to buy: Saddleback Leather or Amazon
Source: The sample of this product was provided by Saddleback Leather.

Filed in categories: Reviews

Tagged: ,

Saddleback Leather Slim Laptop Briefcase review originally appeared on The Gadgeteer on November 12, 2018 at 9:00 am.

Note: If you are subscribed to this feed through FeedBurner, please switch to our native feed URL http://the-gadgeteer.com/feed/ in order to ensure continuous delivery.

Mobvoi TicPods Free wireless earbuds review

REVIEW – My personal quest to find my next favorite pair of Bluetooth headphones continues with the Mobvoi TicPod Free wireless earbuds which are reminiscent of Apple’s AirPods. The TicPods Free was an incredibly successful Indiegogo campaign that earned 2.8 million! Let’s check them out.

What is it?

The TicPod Free earbuds are Bluetooth earbuds that are completely wireless without a cable that connects the left and right earbuds to each other.

Hardware specs

Connectivity – Bluetooth 4.2
Speaker – 92dB +/- 3dB SPL
Noise cancellation – Yes
Battery life with case – 18 hours
Battery life on single charge – 4 hours
Fast charging – Yes 1.5hr
Water resistance rating – IPX5

What’s in the box?

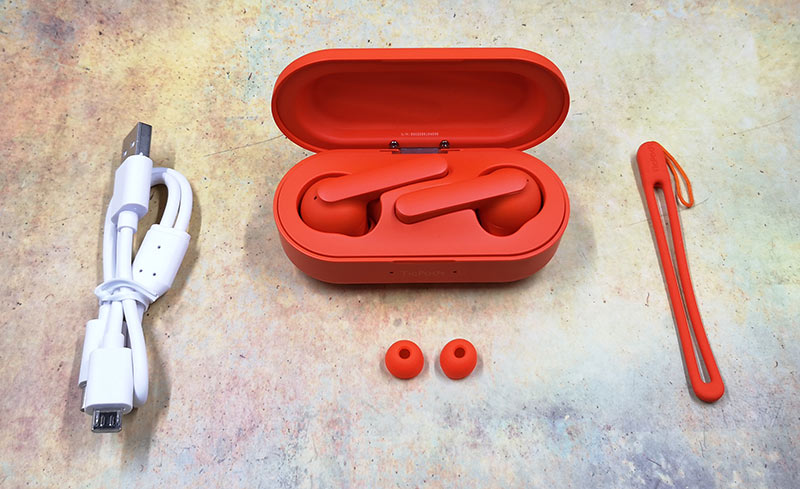
TicPods Free Bluetooth earbuds
Extra set of ear tips
Charging case and lanyard
micro USB charging cable

Design and features

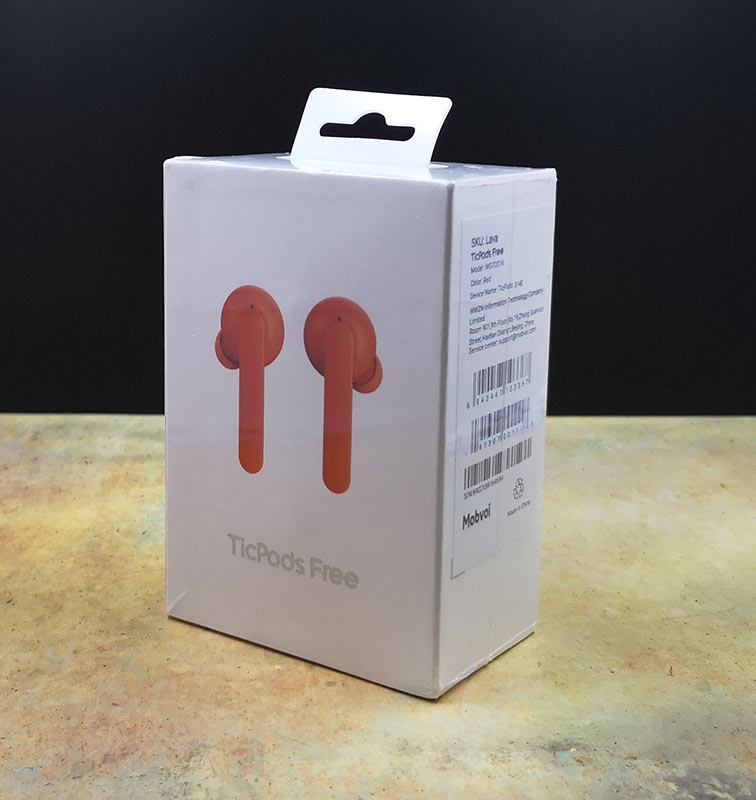
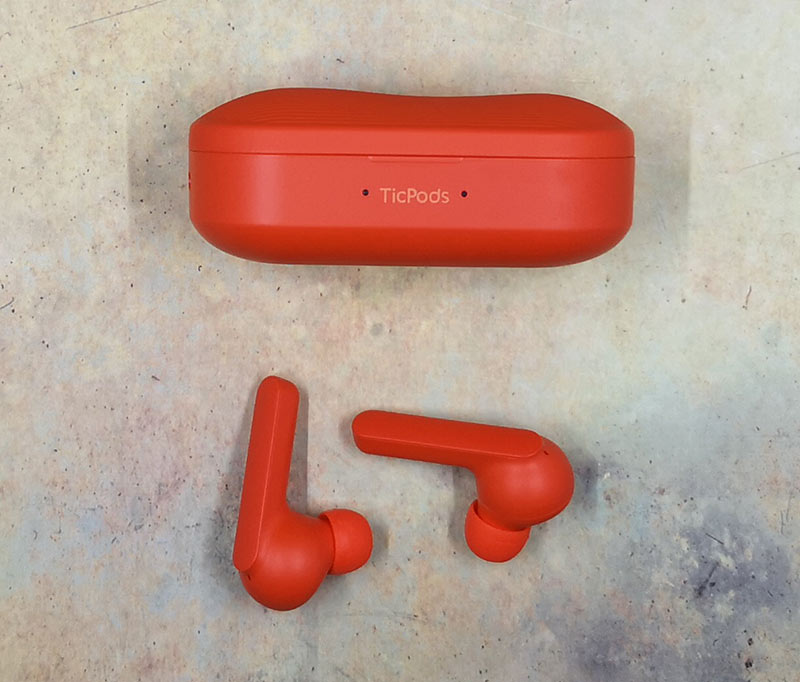
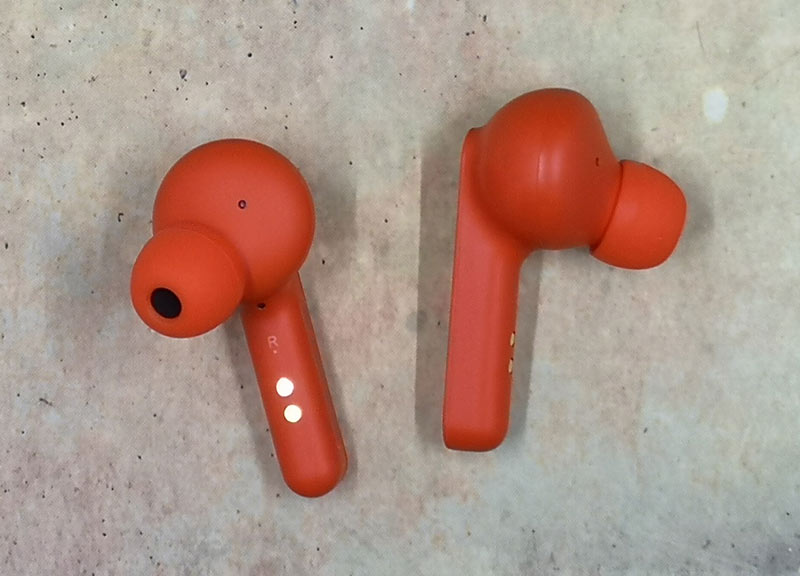
I’ve never tried Apple’s Airpods, but the TicPods Free earbuds certainly share a similar design with  “stems” that point down from your ears. The TicPods Free earbuds are a little more adventurous than Airpods because they come in a lava red color in addition to navy blue and white versions. As you can see, Mobvoi sent me the red version.

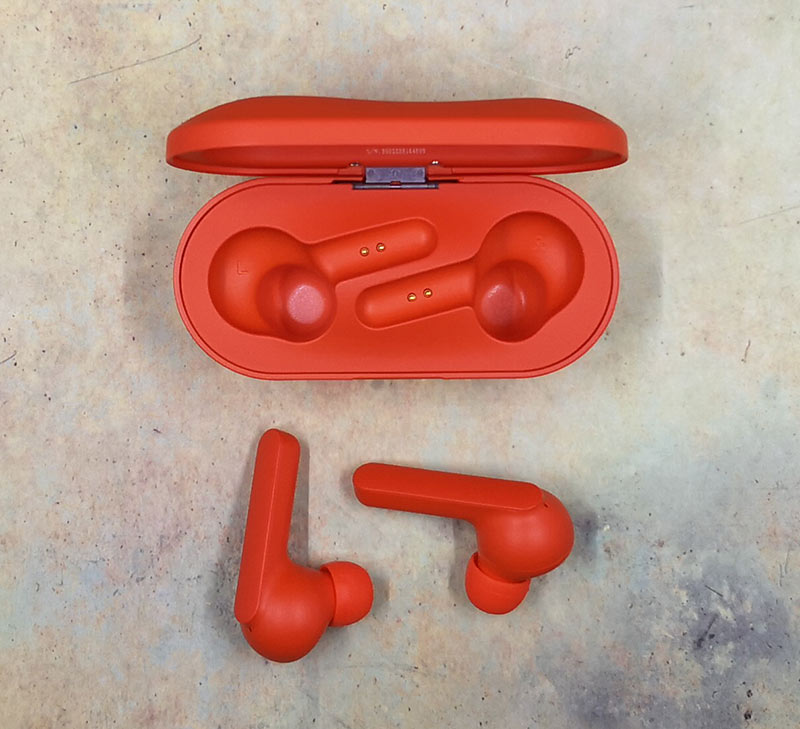
The earbuds feel solid and feature replaceable ear tips and a touch-enabled stem. Each earbud is clearly marked so you’ll know which ear it goes in. There are also two electrical contacts on each earbud stem for charging purposes.

The TicPods Free comes with a handy storage/charging case. Magnets hold the earbuds in place and as soon as you flip open the case’s cover, the earbuds will automatically power on and reconnect to the previously paired device. When you place the earbuds back in the case, they will power off, disconnect from the paired device, and charge. The case itself has a built-in battery which charges with the included micro USB cable. The earbuds will recharge within 1.5hrs after being placed in the case.

Fit and comfort

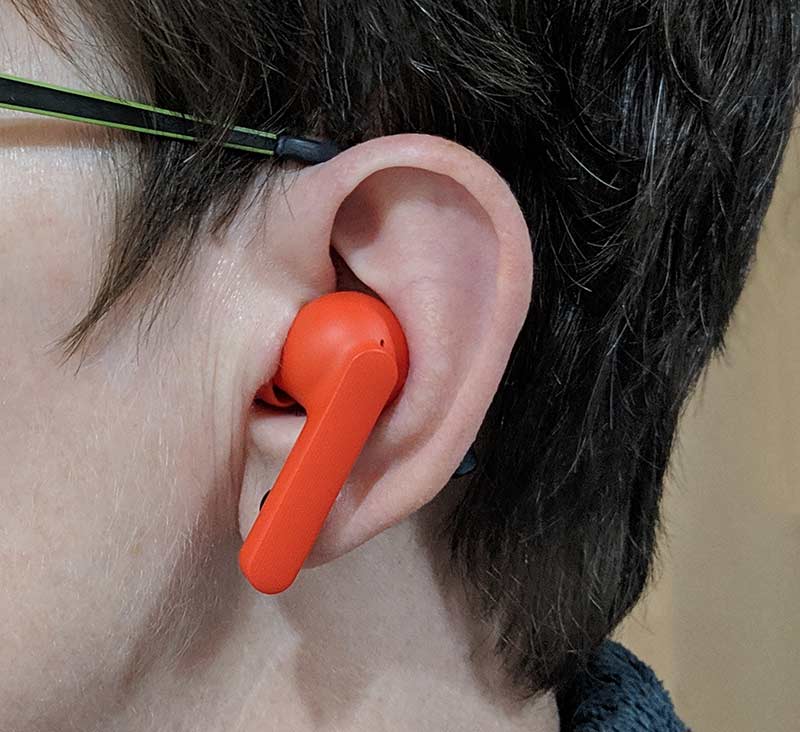
I’m happy to report that the TicPods Free is the most comfortable pair of earbuds that I’ve tested so far. The left bud fits perfect, but the right one is a little more fiddly. But that’s just me and my ears. Everyone will have a different fit and feel due to individual ear shapes. But for me, I can wear the TicPods Free for hours on end with no ear fatigue which is a big deal since most earbuds become painful for me within minutes of wearing them.

I can’t comment on how well these earbuds will stay in your ears if you wear them during workouts or while running. I used them while doing my workouts, but I don’t jump up and down a lot. That said, they didn’t fall out during the movements I did do.

The small ear tips do provide noise isolation which you may or may not like.

Touch controls

There’s good news here too. I usually hate touch controls on wireless earbuds because they require me to tap harder and harder to get the gesture to be recognized and as a result, my ear starts hurting from all that pounding. That’s not the case with the TicPods Free. The double tap to answer/end a call or advance to the next song works great as does the slide up and down gesture to adjust volume. Then there’s the tap and hold on the left bud stem to play/pause and on the right stem, the same gesture initiates voice assistant (Google or Siri). If you do the same gesture on either earbud while in a call, the call will be rejected.

I really love that I can leave my phone in my pocket or across the room and still be able to change tracks and adjust volume.

Audio quality for music and calls

More good news! Audio quality on the TicPods Free is awesome. I tested the earbuds with Spotify, Amazon music and other streaming services, and was very happy with the audio quality of the music. Even bass lines sound better than so many other Bluetooth earbuds that I’ve tested.

In calls, the TicPod Free earbuds sounded fine on my side of the conversation, but on the opposite side of the call, I was told that I sounded a bit muffled but no so more than when I’ve tested other Bluetooth earbuds. Note that due to their in-ear noise isolation style fit, you’ll hear your own voice in your head as you talk.

Multiple device usage?

From what I can tell, you can only pair with one device at a time.

One earbud usage?

There’s a feature built into these earbuds which will automatically pause music if you remove one of the earbuds from your ear and will resume when you put the earbud back in your ear. While this feature is nice, I often like to use only the left earbud to listen to music when I’m at work so that I can hear things that are going on around me and I can talk to people if they walk up to my desk. I didn’t think I’d be able to do that with these earbuds but I found that it is possible to use the right earbud individually, but not the left earbud. From the Mobvoi website:

The microphone is located on the right earbud, which functions as the master control earbud. How it works is that phone calls/music will be transferred from your phone to the right earbud, and then from the right earbud to the left earbud. So you can leave the left earbud in the charging case, close the case, and continue to listen to calls/music using just your right earbud.

You might be wondering why the right earbud is the “master earbud”. It’s because the right earbud is the one that has the microphone for calls and using the voice assistant.

Battery life

Each earbud has an 85mAh battery and a full charge will provide up to 4hrs of play time. The fast charging case has a 700mAh battery which will provide up to 18hrs of battery life.

What I like

  • Comfortable
  • Fast charging
  • Fast pairing
  • Above average audio quality
  • Easy to use touch controls
  • Auto pauses audio when removed from ear(s)

What needs to be improved

  • Can’t use just the left earbud
  • Only comes with one extra pair of ear tips
  • Doesn’t have multi-device pairing capability

Final thoughts

Drumroll please… I’m happy to report that the Mobvoi TicPods Free wireless earbuds have earned the award of becoming my current favorite pair of completely wireless earbuds. They tick all the boxes for me. They are comfortable to wear for hours at a time, they have easy to use touch controls, they sound great, and they charge in their own case when they aren’t being used. I highly recommend these earbuds.

Price: $129.99
Where to buy: Amazon
Source: The sample for this review was provided by Mobvoi.

Filed in categories: Reviews

Tagged:

Mobvoi TicPods Free wireless earbuds review originally appeared on The Gadgeteer on November 11, 2018 at 11:30 am.

Note: If you are subscribed to this feed through FeedBurner, please switch to our native feed URL http://the-gadgeteer.com/feed/ in order to ensure continuous delivery.
Tile Mate and Tile Pro Bluetooth trackers review


REVIEW – Tile’s family of Bluetooth trackers make it easy to find your important items. I was hesitant to try them because I’ve never had very consistent behavior with Bluetooth tracking devices but read on to find out how the newly updated Tile Bluetooth trackers worked.

What is it?

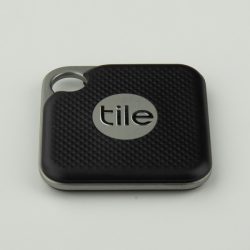
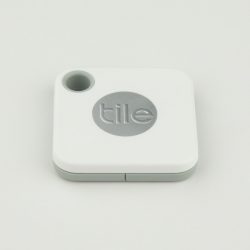
The Tile Pro and Mate Bluetooth trackers are a small device that you attach to your important items and make it easy to find or track them via your smartphone. Tile sent me one of each, so I gave them a go.

What’s in the box?

  • Tile Tracker
  • Getting started sheet
  • Warranty Information

Design and features


I normally don’t lose things because I tend to always leave them in one of two or three locations. However, when I do lose them or someone moves them I panic because I normally go right to the “it’s stolen” scenario in my head.

The Tile Pro and Tile Mate trackers are great little Bluetooth trackers that do exactly what they say, and they do it well.


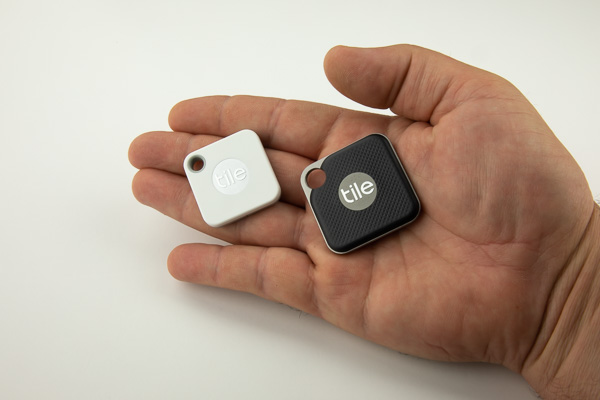
The Tile Pro is a metal framed tracker with a range of 300ft (90m) and also has a louder speaker, whereas the Tile Mate is plastic with a range of 150ft (45m). The Tile Pro comes in black or white whereas the Tile Mate comes in white. They use replaceable CR2032 and CR1632 batteries respectively.

The smartphone app is available for both iPhone and Android. Once you install the app, you sign up for a Tile account via Facebook or Email. The app is simple but does everything you need it to do.


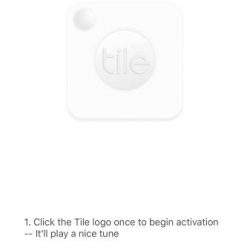
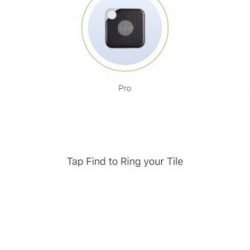
Setup is easy, simply follow the steps in the app to connect to a new Tile.


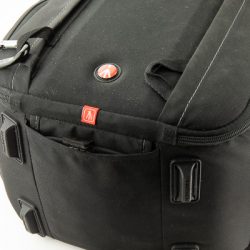
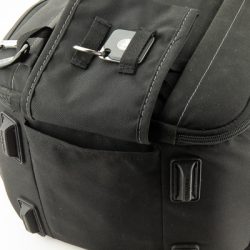
I placed the Tile Mate on my key ring and the Tile Pro on my camera bag. I was able to attach it to the tripod pocket, which not only keeps it somewhat outside of the bag and easier to hear but also makes it more difficult for someone to find. My office is in my basement and I have used it several times to determine that my camera bag was in my office and not left in my truck.


Simply put, the Tile app never failed to locate my Tiles each and every time I tried to locate them. Even from all the way across my house and from the upstairs to the downstairs. I’ve honestly never had a Bluetooth device work so well.

The app will also tell you how many other Tile users are near you. This could come in useful if you lose an item. When your Tile is out of the range of your phone’s Bluetooth, it will have a “Notify when found” option instead of the normal “Find” option that rings your Tile. When this option is enabled, when any Tile user comes within range of your Tile device, it notifies you of the device’s location. This works seamlessly and without the other user’s knowledge or interaction.

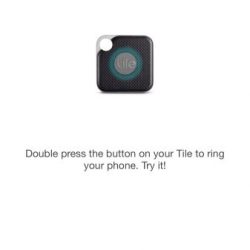
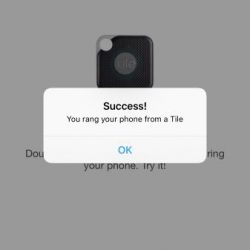
Another nice feature of the Tile devices is that you can double-click the button on the Tile device to locate your phone. Your phone will even ring when on silent mode.

There is also the ability to set up a “Left Behind Alert” that will alert you when you leave home without an item.

What I like

  • It simply works as advertised
  • Replaceable battery
  • Discounts when purchasing packs
  • No maintenance, it just works
  • Find your phone feature

What needs to be improved

  • I didn’t really find anything that I thought could be improved with the Tile products.

Final thoughts

It’s refreshing to review a product that simply works just as it should. Tile also offers great discounts when you purchase packs of Tiles, saving up to 40% when you purchase a 4-pack (Pro 4 for $100, Mate 4 for $60). Check out the Tile website for all of their products and discounts.

Price: $35 Pro, $25 Mate
Where to buy: Tile and Amazon
Source: The sample of this product was provided by Tile.

Filed in categories: Reviews

Tagged:

Tile Mate and Tile Pro Bluetooth trackers review originally appeared on The Gadgeteer on November 11, 2018 at 9:30 am.

Note: If you are subscribed to this feed through FeedBurner, please switch to our native feed URL http://the-gadgeteer.com/feed/ in order to ensure continuous delivery.
Nonda ZUS Wireless Smart backup camera review

On a recent vacation, we were not able to get the usual tiny car we like to rent, and instead were “upgraded” to a crossover SUV. While initially irritated, the Gadgeteer side of my nature soon kicked in and I started enjoying the bits of tech that our cars don’t have. A backup camera was possibly the nicest of the lot, so when the offer for the ZUS Wireless Smart backup camera from NoNDA came to the team, I scrambled to volunteer. I’ve had it for a few weeks now, so it’s time to report.

Note: Photos may be tapped or clicked for a larger image.

What is it?

The ZUS wireless camera is built to be installed into the license plate holder that all cars in the US have as a standard feature. There are two pieces: one that mounts onto the car and holds the plate in place, and a second that has the camera, sensors, and battery. This allows the user to remove the camera module and take it somewhere to charge, even if that’s only in the trunk with a powerbank. Installation is simple, according to the package.

Hardware specs

  • Size: 1.29 x 10.74 x 1.14 in / 33 x 273 x 29 mm
  • Batteries: 2×18650(Total 5200mAh)
  • Weight: 8.48oz / 240.4g
  • Camera: Panasonic 34210
  • Size: 1.44 x 0.68 x 3.33 in / 36.05 x 17.36 x 84.64 mm
  • Storage Temperature: -40°F ~ 176°F / -40°C ~ 80°C
  • Operating Temperature: -4°F ~ 122°F / -20°C ~ 50°C
  • Lens: 170 HD Wide-angle Lens
  • Wireless Connection: Bluetooth4.0 2.4Ghz

What’s in the box?

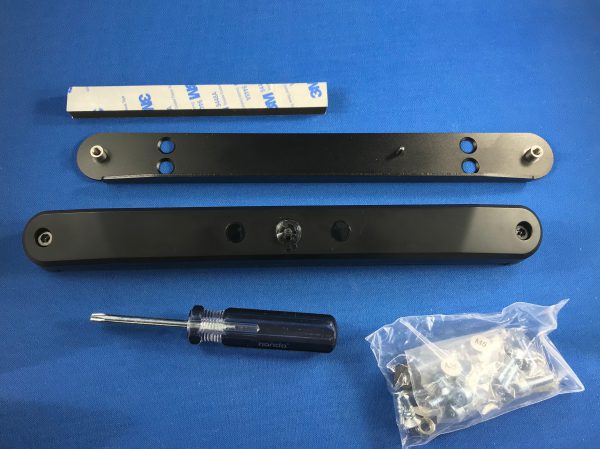
  • Outer piece with the camera, battery, and weather-resistant charging port
  • Mounting plate
  • Mounting kit with 8 pairs of nuts and bolts in various sizes
  • USB charging cable
  • Foam mounting tape
  • Hex wrench
  • Star safety bolt screwdriver

Design and features

The kit itself is packaged securely but ecologically in a cardboard box with minimal anti-scratch film. The camera bar is in the center, with a long cardboard box holding all the mounting hardware bits and bobs, and a matching one with the mounting plate that holds your license plate to your car and has threaded screws for the camera unit. The mounting plate is a heavy gauge steel angle with a shelf on one side. (This thing is a much heavier gauge than any license plate frame I have ever seen anywhere!)

There are two sets of counter-sunk mounting holes on either side to align with your car and license plate. There are also two outer threaded tubes that will accept the captive safety screws from the camera unit. There is also a mounting pin that helps to prevent the camera from being inserted upside down. There is a hole in the rear of the camera unit that accepts the pin.


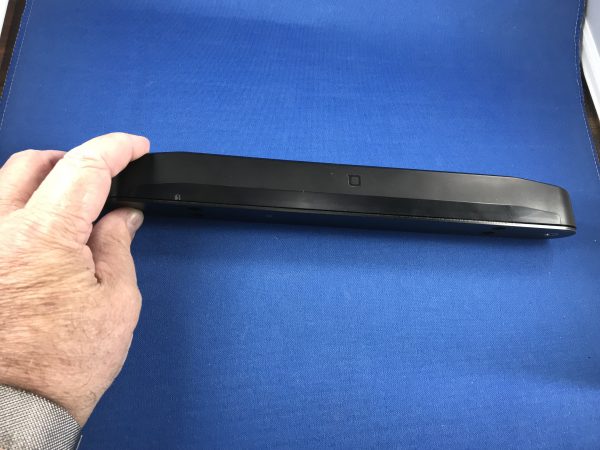
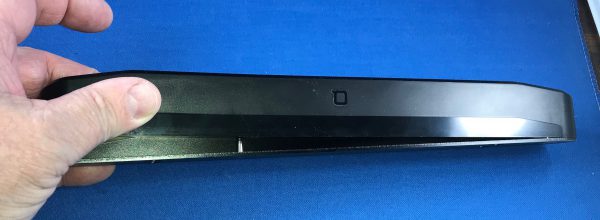
The camera unit has, obviously, a camera mounted in the center, with a pair of sensors to either side, about an inch away. On the far ends are the captive star screws for attaching to the mounting plate. The security star head, while not common, is used in many places where you don’t want folks to remove screws. It won’t stop a determined thief, but it’s going to stymie kids out being kids who say, “Look! There’s a camera on that car’s license plate holder! Let’s grab it!”

Setup

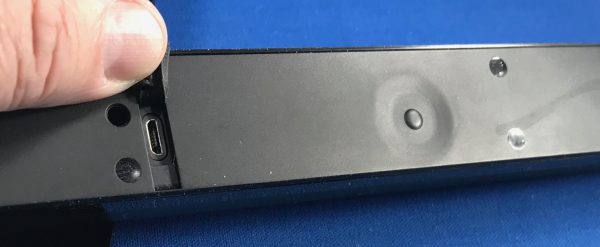
Despite the clear 4-step “Install and Use” diagram on the back of the box, the setup is fraught with issues. First of all, the instructions list installing on the car in steps 1 and 2 and pairing with your phone in step 4. In order to initiate pairing, you have to access the rear of the camera module where the reset button is. You’ll also have to have it fully charged as well, and the charging port is also sealed off when it’s fully installed.


The app goes through a much better and clearer process after you’ve downloaded it and created your account. To pair, you have to press the reset button and wait for three flashes of the light from the LED under the camera. The reset button is not a nice little pinhole, but a membrane button with a hard nub that you have to press. It takes quite a bit of pressure to make it engage at all, so holding it through three flashes to get pairing mode took quite a toll on my finger.

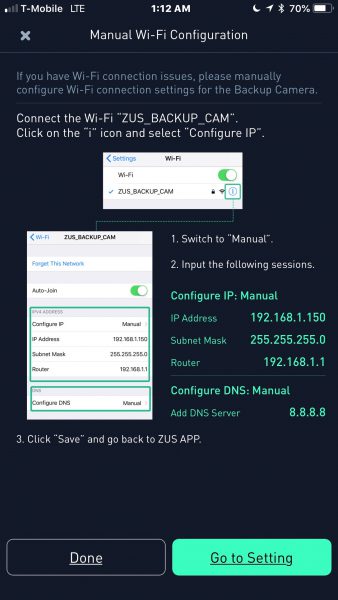
The app then states you need to connect to the wifi network of the camera. In order to do this, you have to totally remove any other saved networks from your device, because the wifi radio of the camera is a bit spotty, and takes a bit of work to join. (I found this out after my first contact with Tech Support.) I performed this step sitting in my office with the unit on my desk. Once I finally removed my home wifi settings from my phone, I was able to connect, and the camera went into an actual “Connecting” phase for several minutes. I checked with support, and they said I should move closer to the camera. I guess four inches is too far.

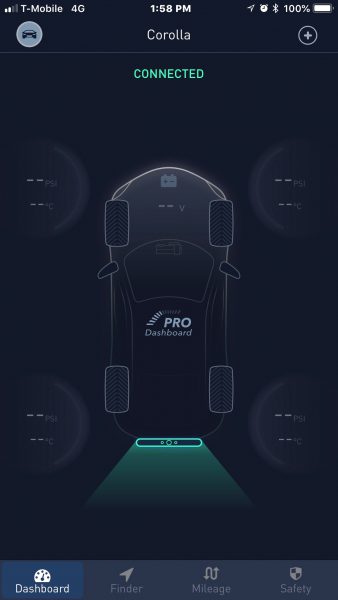
I finally did get to the “downloading image” screen but was never able to get an actual image, let alone a live video feed from the backup camera. I went through several rounds with support, and they finally said there are engineering issues they have been seeing with “certain mobile providers”.

Performance

Since I never got it to actually connect, I’d say performance is not acceptable.

What I Like

  • Kit contains all hardware and tools needed to install and use
  • Support is very helpful, if not successful.

What needs to be improved

  • Requires removal of all saved access points at any place you intend to use the backup camera.
  • Will only work with some cellular networks.
  • Requires launching app, waiting for a connection, and then viewing display anytime you back up.

Final thoughts

I really want a backup camera for my car that I don’t have to drill and thread wires for. This unit promised that, but never even got close. I’m sure it can be done, so the search is on. If you’re not on T-mobile, maybe this unit will work for you, but make sure the vendor has a good return policy.

Price: $96.00
Where to buy: Amazon
Source: The sample of this product was provided by Nonda.

Filed in categories: Reviews

Tagged:

Nonda ZUS Wireless Smart backup camera review originally appeared on The Gadgeteer on November 10, 2018 at 2:34 pm.

Note: If you are subscribed to this feed through FeedBurner, please switch to our native feed URL http://the-gadgeteer.com/feed/ in order to ensure continuous delivery.

Wraptie 240 Twin Pack review

REVIEW – We recently tried to transport an 8 foot fiberglass step ladder across town on the roof of our SUV and found that our ratcheting tie-down straps that anchored the ladder to our vehicle were inadequate for the job because we didn’t have a way to safely hook them onto our roof rails. Rope would have been a better choice than my tie downs, but when the Wraptie was offered to the Gadgeteer to review, I was eager to see if these would function better for us and if it was as easy to use as advertised.

I received the largest size available, the 240 cm length version, and I was interested to see if these tie downs compromised safety for the sake of ease of use. After using them I can say that they work very well when used properly and are so much easier to use than rope or ratcheting tie down straps. The only downside to these (if you can call it that) is that their ease of use may lead to misuse by some individuals who don’t take the time to make sure their load is secured properly and to consider the inherent limitations of the elastic / hook and loop Wraptie design. However, that isn’t really the fault of the Wraptie, and these straps do exactly what the manufacturer says they will do, and they do it very well. When following the manufacturer’s instructions, these can be used to safely restrain a load for transport.

What is it?

The Wraptie is an elastic and “hook and loop” (don’t call it Velcro!) multi-function tie down strap used to “wrap” or tie down items for transport or to bundle items together. It is intended to be an alternative to bungee cords or buckle and strap tie downs (like NRS straps). These do not take the place of ratcheting tie downs straps which have much higher load limits.

The Wraptie 240 Twin Pack contains two Wrapties that are 240 cm long and are the largest version made. The 240 would be used for attaching larger items to the top rack of an SUV or in the back of a pickup, thus this review will focus on that type of use. The manufacturer literature states that the 240 size could be used to attach surfboards to roof racks, for moving furniture, and for bundling bulky goods.  Wraptie also makes smaller 180 cm and 130 cm long ties. The 180 is often used by motorcyclists to attach small cargo to their bikes and can also be used to bundle PVC pipe/conduit or tie-down of small ladders. The 130 is ideal for securing small items to backpacks, luggage, and roof racks, for camping and biking, and for keeping hoses and power cords tidy.

Specs

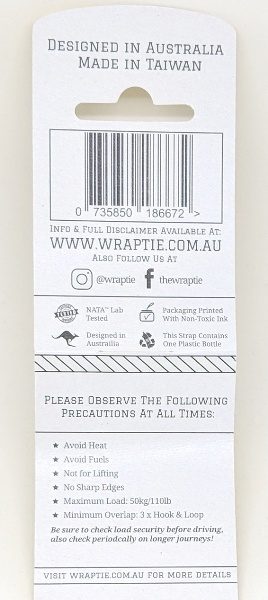
  • Length: 240cm (94.5″) …. can be stretched to 480cm (189″)
  • Width: 2.5cm (1″)
  • Materials: High tension industrial grade elasticized webbing, knitted polyester high strength webbing, nylon “hook and loop” fasteners
  • Weight (Approx.): 150g
  • Rated Load: 50kg (110 lbs.) @ 60cm (23.6″) diameter – Using 2.4m length*
    * Load rating decreases as load diameter increases. Max recommended diameter is 75 cm (29.5″)
    * Different length straps give different performances
    * If in doubt use a longer WRAPTIE™ tie-down strap
  • Avoid heat or open flame
  • Avoid fuels
  • Avoid sharp edges
  • Not for lifting
  • UV resistant
  • Minimum overlap: 3 x Hook & Loop
  • You can join two Wrapties to double the length

What’s in the box?

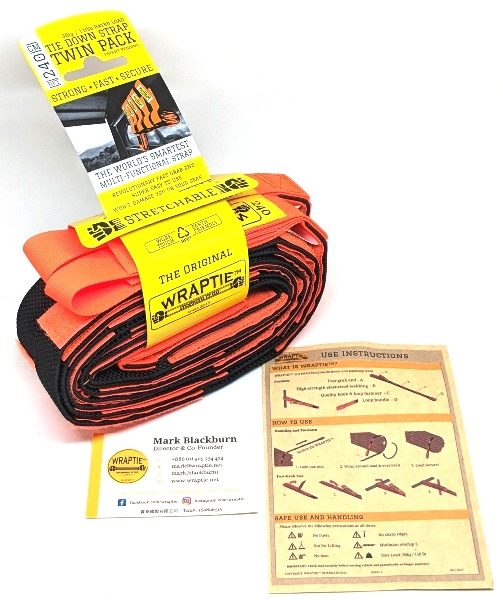
The Wraptie 240 Twin Pack comes with two 240 cm long tie-down straps. Also included were instructions on how to use the ties and a business card from the director and co-founder of Wraptie.

Design and features

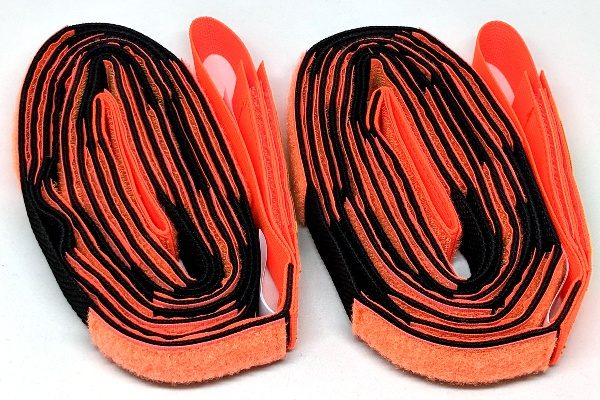
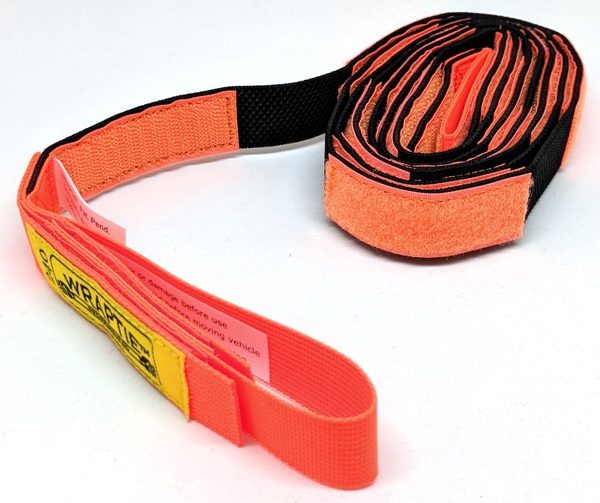
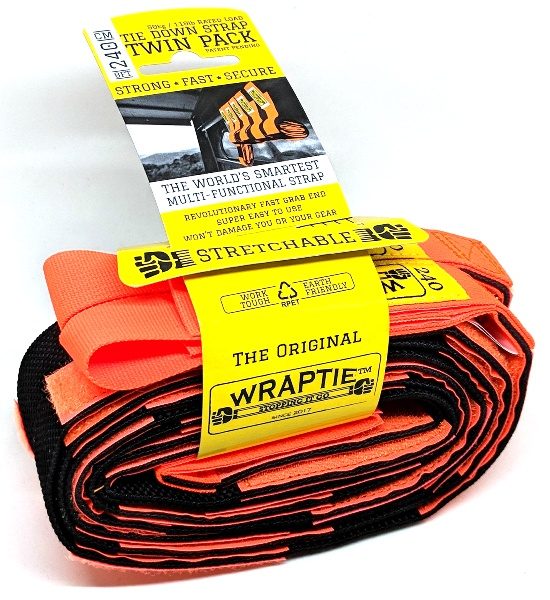
The Wraptie 240 tie-down straps come in safety orange and black.
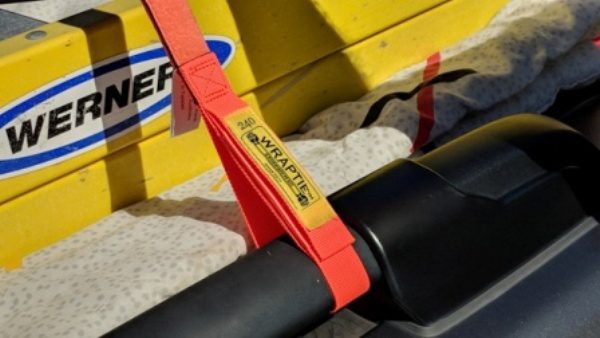
The end shown in the photo above is the “fast-grab end”. The opposite end located in the center of the bundle contains the loop handle. These are made from “knitted polyester high-strength webbing”.

The straps also contain nylon “hook and loop” fasteners. Like the handles, the hook and loop fasteners are a nice bright safety orange. The main portion of the straps (the black portion as shown in the photo above) is made from “high-tension industrial-grade elasticized webbing”. It is strong and durable and can be extended to up to twice its unstretched length.

I contacted Wraptie to get some additional details about the load ratings and failure modes of these straps. The load ratings were developed based on testing conducted in Melbourne at a NATA (National Association of Testing Authorities, Australia) accredited polymer testing laboratory. When I asked Wraptie about the failure mode, this was the response from Paul McNeill, the inventor and company co-founder:
We conducted a specific test to simulate actual use, which involved wrapping the product around 2 cylinders and then pulling the cylinders apart – the peak load was then recorded. We also tested the webbing materials and stitching independently. We were then able to confidently provide the load rating as specified.  The [hook and loop fastener] is indeed the weakest link since it is the actual fastening mechanism – similarly the buckle is generally the weakest link in cheaply made webbing buckle straps.

This means the load rating considers all parts of the Wraptie, including the polyester and elastic webbing, as well as the hook and loop fasteners. The hook and loop fasteners, specifically the fast-grab end, would be the first to fail by coming apart, but this would always occur at a load that is greater than the load rating of 110 lbs. This load rating is applied up to the maximum recommended bundle diameter which is 75 cm (29.5″) for the 240, 50 cm (19.7″) for the 180, and 30 cm (11.8″) for the 130. The same load rating can also be applied when two Wrapties are connected to double the length.

One other important unique feature about the design of Wraptie was mentioned by Paul:

One aspect of WRAPTIE worth noting is that when you wrap it over itself the tension in the webbing puts the [hook and loop fastener] under pressure and actually increases its shear strength. If you wrapped a WRAPTIE 240 several times around a bundle of timber is really is impressively strong and shows no signs of slackening.

Securing a Load for Transport

Before discussing how the Wrapties performed, I’d like to take a moment to mention how critical it is to properly tie down a load. There is no easy way to state this other than with cold hard facts. A study published by the AAA in 2016 found that between 2011 and 2014, road debris contributed to nearly 200,000 crashes injuring 39,000 people and killing 500. This study found that about two-thirds of these accidents were the result of items falling from a vehicle, and some of those incidents were due to unsecured loads. However, a more applicable study was performed by the GAO in 2012 focusing only on non-commercial loads. This study found that in one year, 51,000 accidents were the result of non-commercial loads falling from vehicles, and these accidents resulted in 10,000 deaths and 440 fatalities.

Every time you are securing a load to a vehicle, it is absolutely vital to use the right number and type of tie downs that are in good condition and properly attached. In fact, in many states it is the law (see here for state statutes for non-commercial loads), and you can be pulled over and/or fined if you have an improperly secured load. You can also be held criminally and financially liable for damages if your load falls onto the road and causes an accident. The laws typically state that the responsibility falls with the driver of the vehicle, regardless of who secured the load. And if your load is commercial (meaning used for business purposes), then federal Department of Transportation (DOT) rules may apply, which are even more restrictive and would not allow the use of the Wraptie since it is not DOT certified.

So what does this mean? It means that you should use common sense when securing a load and consider the size and type of load and the limitations of your vehicle and any straps that you might be using. I’m speaking from the point of view of someone who has made poor choices for tying down loads in the past. In the example I mentioned above with the ladder, I was lucky that I didn’t lose the ladder when my tie down straps popped loose. The Wraptie makes it very quick and easy to secure a load, but it is important to first make sure that the Wraptie is the appropriate type of tie down to use. It has a low load limit (110 lbs) which means that you should not be using this to tie down a pallet of Quikrete bags or to secure a lawn tractor to a trailer. It is appropriate for moderately light weight items that you might secure to the roof rack of your SUV or in the bed of your pickup. My Honda Pilot has rails that are rated for 165 lbs, and crossbars that are rated for 132 lbs, so I would never exceed these limits. For example, an 8 foot 2×4 weighs 13 lbs, so no more than 10 of those would ever go on my roof rack at any one time. However, it could potentially be used to secure a larger load (like a piece of furniture) in the back of a pickup, but more straps might be required.

Adhering to the manufacturer load rating is vital because this ensures the load will remain restrained under potentially varying conditions. Manufacturers like Wraptie provide the load rating considering a factor of safety up to the failure point that accounts for variable loads that can occur during transport (such as acceleration/deceleration/turning that could cause a load to shift or wind loads that can apply forces during high speed travel on interstate highways). If you are loading the strap beyond its rating, you are using up the factor of safety and significantly increasing the likelihood of failure because the margin to the failure point has been reduced.

So now it’s time to see how the Wraptie performed …..

Setup / Use

Using the Wraptie takes a little practice since it is so much different than a ratcheting tie down or a rope. You can’t tie this in a knot or cut it to length, plus unlike rope or ratcheting straps, it is harder to get taut. However, it isn’t too difficult to figure out, and is definitely easier than tying a knot.

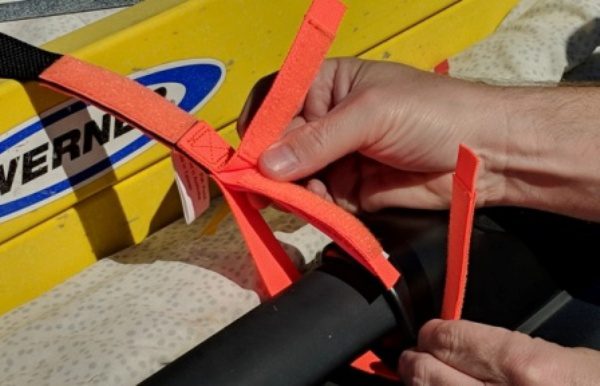
The first thing to do is to determine if the fast-grab end should be used. If you are tying something down, then you will probably want to use it, but if you are only wrapping something (like a bundle of wood) then there may not be a need to. Also, if you have connected two Wrapties together, you will have used the fast-grab end for that purpose. The fast-grab end allows quick and easy attachment to a roof rail and consists of a loop that can be opened and secured easily using the layered hook and loop fasteners.

First you detach the overlapped top piece, then pull apart the loop to open it up and pull it around your attachment point (in this case our roof rail).

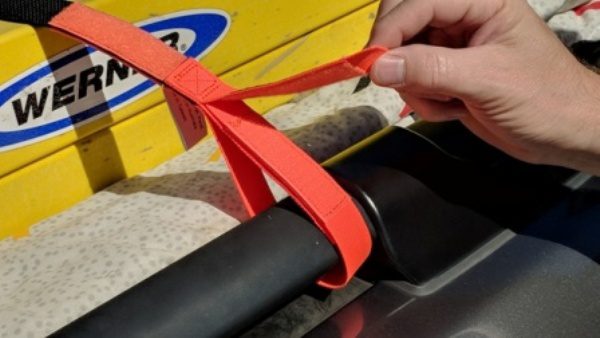
Next, pull the open end around the rail and secure the loop with the hook and loop fasteners …..then reattach the overlapped top piece ….. and voila! Much easier than tying a knot!

The next thing you will notice in the photo above is that on the loop handle end (the non fast-grab end), you can’t just loop around the rail once and attach the Wratpie to itself. It won’t work because in that configuration the hooks face the hooks or the loops face the loops, unless you twist it one time to get the hooks to face the loops as shown above. Also note in the photo above that in order to get three hook and loop pads to attach, I had to also loop it around the rail.

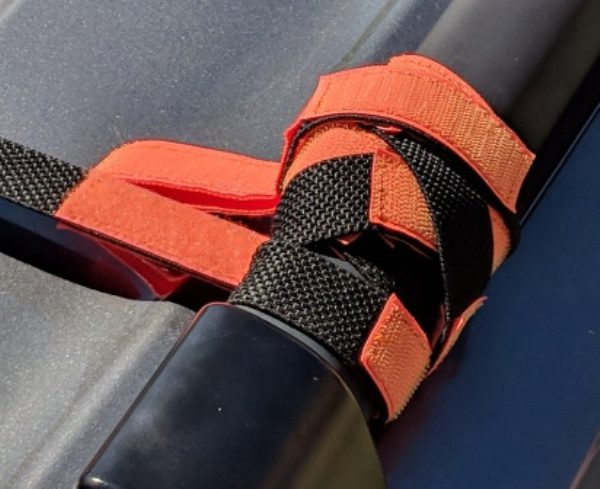
It is preferred to just wrap it around the rail several times to ensure you get at least three hook and loop pads to overlap (per the manufacturer instructions), as shown above. Wrapping would be the preferred option because it is tighter and more in keeping with how the Wraptie is intended to be used.

One challenge I noticed when wrapping was to make sure that at least three full hook and loop fastener pads were attached together. Depending on the diameter of what you are wrapping, the pads may not line up right on top of each other. In this case it is obviously important to have an equivalent of three full pads worth of contact.

We used the Wraptie to attach several different objects to the roof of our Honda Pilot. First we first did two tests where we attempted to tie something down on the roof of the vehicle directly, using only the side rails with no cross bars; an 8 foot fiberglass ladder, and an empty box. These are tests intended to show how NOT to use the Wraptie.

Test 1 – Ladder on Roof

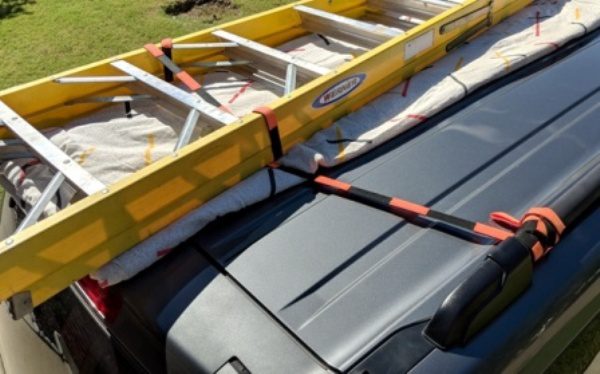
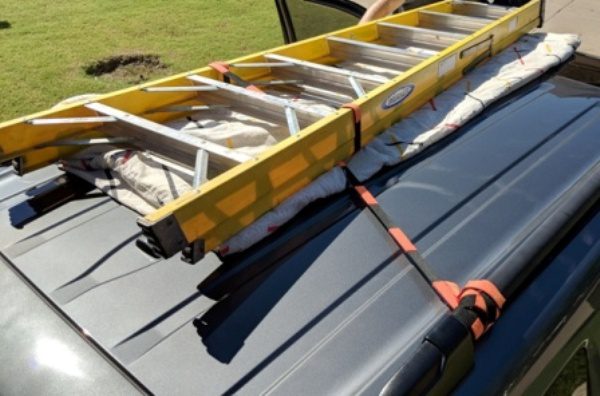
In a duplication of my near fiasco described in the opening paragraph, I decided to try to tie down my 8 ft fiberglass step ladder (~ 25 lbs) directly to the top of the vehicle with no cross bars.

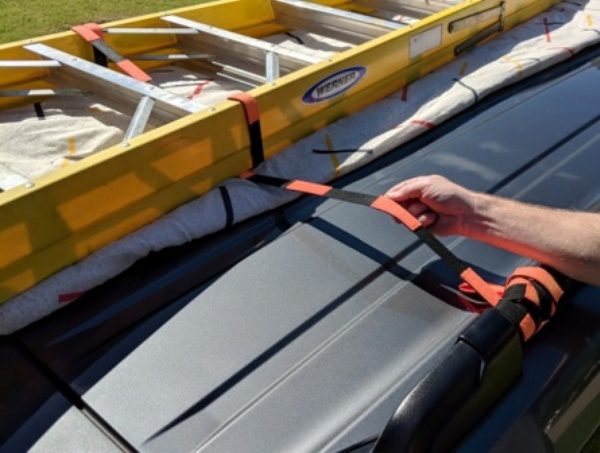
We set the ladder directly on the roof of the vehicle and used the Wrapties to secure the ladder to each of the roof rails. This involved first attaching the fast grab end to the driver side roof rail, then looping the Wraptie around one side of the ladder, and then the other side. Finally, the loop handle end was pulled to the passenger side roof rail, pulled as taut as possible, then looped around the rail numerous times.  The Wraptie is looped around the ladder, so it is “captured”, meaning that it isn’t possible for the ladder to come completely detached unless the Wraptie were to fail in multiple locations.

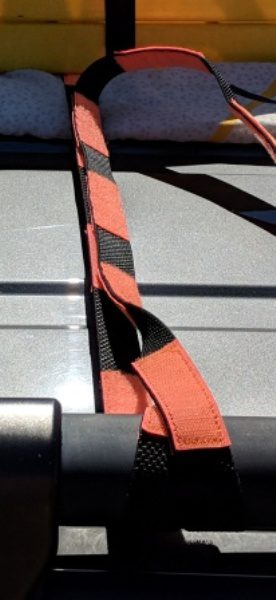
However, in this configuration, the ladder is too loose as shown in the above two photos, so I did not drive the vehicle with it this way. The problem is that you are relying on only the tension from the Wraptie to keep the ladder in place, and the elastic design won’t provide enough tension to keep the load from moving. Even though it is captured, this load is not secure, and thus the ladder would move around as we made turns or stopped and started. It was very easy to move the ladder forward and backward.

This illustrates the catch 22 that is the elastic design. While the elastic will help to keep things from working loose, it is not possible to get it as taut as a rope or nylon strap. This is an important consideration when using Wrapties.

One important thing to note about securing the ladder in multiple points with one tie is that you have to provide tension for each loop individually. For instance, once I looped around the left side ladder rail, as I pulled the strap over to loop it around the right side, the Wraptie will not tighten any more on the left side due to the hook and loop fasteners. Furthermore, as I pulled it to wrap it around the passenger side roof rail, neither of the two loops around the ladder would tighten any more. The Wraptie will not slide by itself like rope will, which is part of its inherent design.

Test 2 – Box on Roof

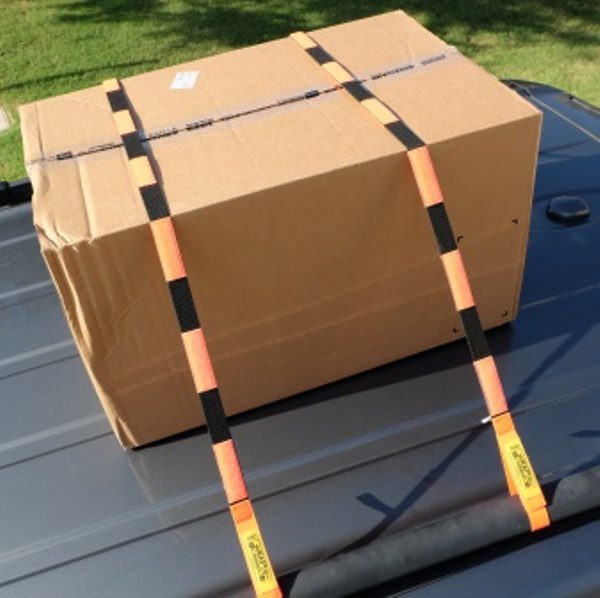
I wanted to try to hold a larger object down that was very light weight, so I got a large empty cardboard box (18″W x 16″H x 28″L) and placed it directly on the roof of the vehicle, again with no cross bars. I attached the fast-grab end to the driver side rail, the went over the box and attached the loop handle end to the passenger side rail. It was not possible to loop around the box due to its size.

I pulled the Wraptie as tight as I could without crushing the box, and I used two straps as shown above. In this case, the box was not captured, so this is definitely not a desirable way to restrain this load. In this configuration the load can slip out even if the Wrapties don’t break, and the only thing holding the load (in the horizontal direction) is friction between the box and roof or Wraptie.

Now it was time to hit the road, but I was concerned so I used the nearby interstate service road and I did it at 2:00 A.M. when there was very little traffic. Once I got to about 50 mph, the box went flying.

This wasn’t really a fair test because bungees, buckle type (NPS) straps, or even rope may not have worked in this configuration either, although a rope or other type of strap would have been able to get more taut. In order to properly secure this item, I should have used a third and maybe even a fourth Wraptie across the front and back to keep the box from moving due to the wind force. This was mostly just a data point to illustrate that Wrapties are better at wrapping than tying down. One other thing to note; the wind force on this box at 50 mph is about 3 lbs, and at 60 mph it would be 4 lbs. This just shows that not much force was needed to work the box loose. This should be a consideration when tying down large light weight items (like a kayak for instance).

Test 3 – Ladder on Racks

Now it is time to try attaching some loads with the cross bars installed on my roof rails.

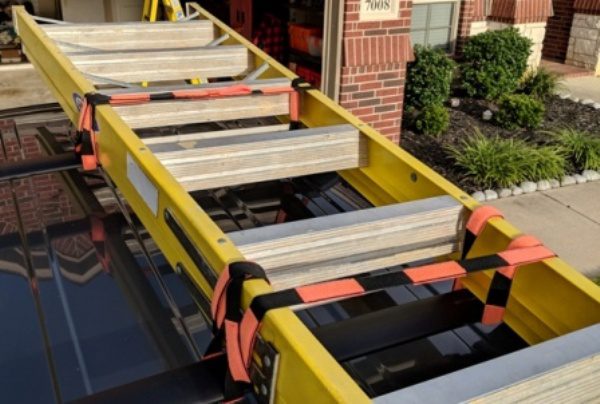
The same 8 foot ladder was now set on top of my cross bars.

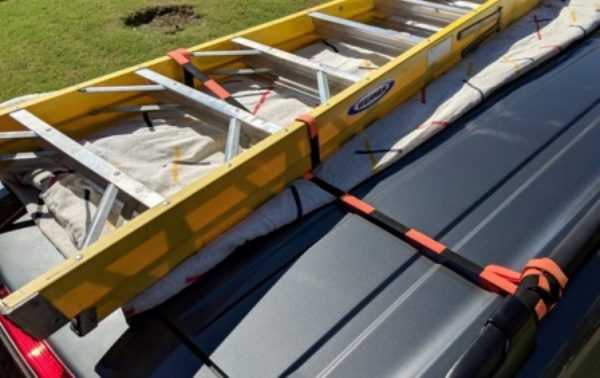
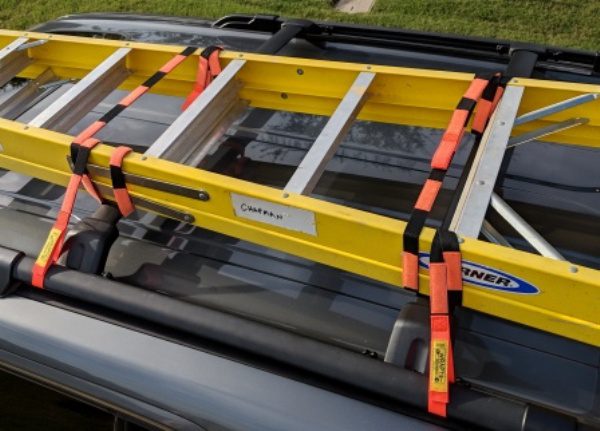
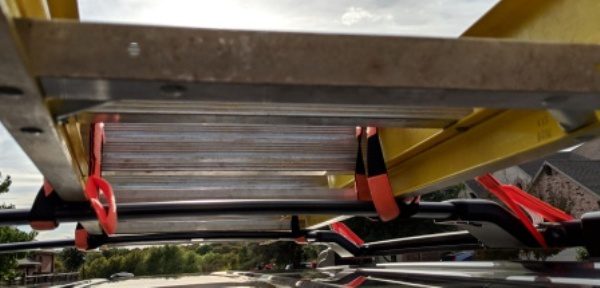
Like before, I attached the fast-grab end to the driver side rail, then looped around the ladder and the cross bar on one side, then did the same to the other side of the ladder. However in this case I did not extend the Wraptie over to the passenger side rail. I repeated this with the second Wraptie to generate 6 attachment points (4 on cross bars and 2 on the driver side rails rails). This is a proper attachment because the ladder is captured and tightly restrained to the cross bars. It is restrained from moving front to back by looping the Wraptie around the cross bars. It is also restrained from moving left to right by the driver side rail attachments and also by the tightness (in wrapping) around the crossbar in two locations for each Wraptie.

Time to hit the road again. We did several sudden stops and starts and some quick turns, and then also got up to about 65 mph, and the ladder didn’t move at all. Success!

Test 4 – Bamboo Roll on Racks

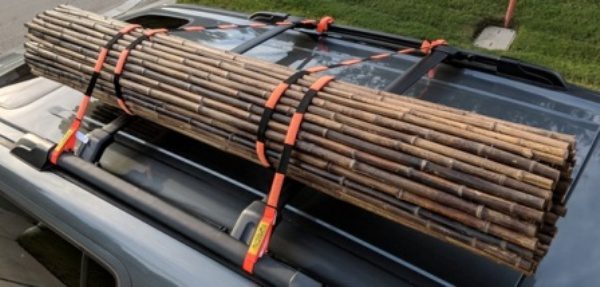
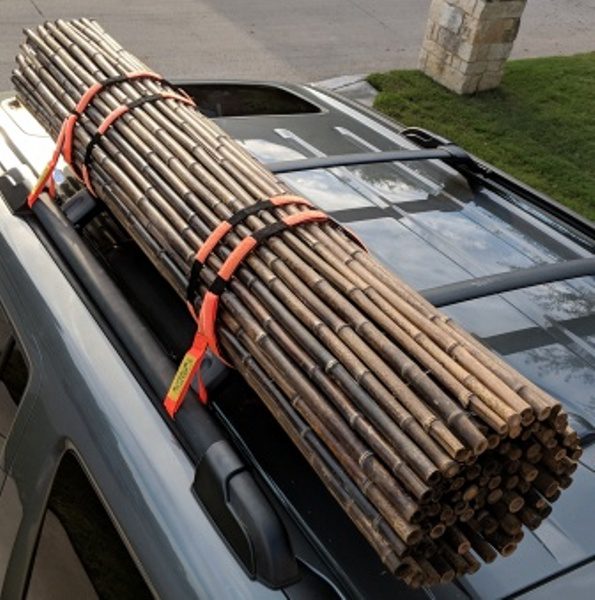
Now it was time to try something a little larger and heavier. We have rolls of bamboo fencing that are 6 feet long 16″ in diameter (when bundled) and weigh about 50 lbs. I placed one bundle on the crossbars next to the driver side rail, then tried two different attachment methods.

Method 1: I started with the fast-grab end attached to the driver side rail, then looped the Wraptie around the bundle and crossbar once, then pulled the Wraptie to the passenger side and wrapped it multiple times around the rail.

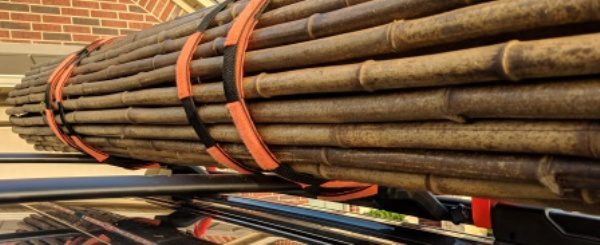
Method 2: I started with the fast-grab end attached to the driver side rail then wrapped the remaining length of the Wraptie at least two times around the bundle and crossbar (keeping tension as I wrapped) while ensuring that I had at least three hook and loop pads in contact.

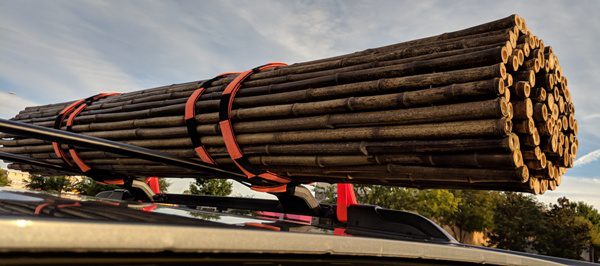
Method 2 is the clear winner and shows the best way to use Wraptie ….  for wrapping. The second loop around the bundle and crossbar did a lot more to tighten the load down (and to keep the bundle together) than pulling the Wraptie over to the passenger side roof rail. This further illustrates the point I was making above, that the design of the Wraptie is great for wrapping, but its elastic design prevents it from being pulled taut, and thus it is not as ideal when using a long length like you would a rope. The longer the distance between the load and the attachment point, the more force is required to pull it to get it tight. Additionally, this bundle is not captured and could potentially slide out even if the Wrapties did not break, and therefore having it attached really tight to the cross bars is vital.

When we did our test drive in this configuration, we had success. The load did not shift at all with sudden stops and starts, sharp turns, and driving up to 65 mph (the above photo was taken while driving). Also note the other benefit of Wraptie …. no flapping excess strap material!

Performance

The Wraptie did exactly what it was designed to do, and did it quite well. It is designed to restrain or bundle objects by wrapping. It is not a rope, or a bungee cord, or an NPS type buckle strap. It definitely stands out because it is so versatile and is very easy to use because the hook and loop design is much easier to attach than tying knots. I was able to tie down objects to my roof racks and I when I drove around the loads did not move at all. As I noted above, the load should be secured by wrapping to a rigid cross bar. Wraptie does not do as well when you try to extend it and use it like a rope because of the elastic webbing, and it isn’t really designed for that.

Another great feature is that it is easy to secure the loose ends you aren’t using so you don’t have excess straps flapping in the wind.

The stowage of Wraptie is also quite a nice feature. If you take the few minutes to carefully roll the Wraptie up, it will stay together in a nice small tight bundle that can be stored almost anywhere. However, if you don’t take the time to do this, and you decide to toss a couple of these together on the floor unrolled, get ready for a challenge to separate them! They are extremely sticky and difficult to untangle.

The manufacturer has stated that these are UV resistant, and although the color may fade slightly over time, this does not affect the performance. I live in Texas, so time will tell how these perform in this area. I don’t expect any problems here since they won’t likely be exposed to sunlight for an excessive amount of time.

The only real downside I can see to these is that they are so easy to use that they may be easy to misuse. This is not as a result of any defect in the product, but more about the end user not following the manufacturer’s instructions.

What I like

  • Much easier to use than rope, bungee cords, or buckle type straps
  • Very versatile
  • Excellent wrapping capability by design
  • Elastic design prevents slackening
  • Easy to restrain excess to prevent flapping in the wind
  • Reasonable price
  • Rugged design

What needs to be improved

  • Elastic design limits how taut you can get it – maybe provide a version with stiffer elastic
  • Could be easily misused by someone – but so can rope, bungee cords, and ratcheting tie down straps

Final thoughts

The Wraptie is an extremely rugged elastic and “hook and loop” strap that is excellent for wrapping to attach loads to roof racks or in pickup beds. It is much easier to use than rope since tying a knot is not required, and the elastic design prevents slackness and loosening of the load. It is very strong when wrapped multiple times over itself to bundle or restrain a load. It is quite versatile, reasonably priced, and easy to store. It offers several benefits over bungee cords and buckle type straps. The only real limitation is the elastic design which prevents how taut you can get the strap (which isn’t an issue if you are wrapping it). Also, as with any type of strap, it is possible to misuse the Wraptie since it is so easy to use. However, as long as the user applies common sense, follows the manufacturer instructions, abides by the load ratings and limitations, and follows the local laws, the Wraptie is an excellent tool to safety secure a load and save time in the process.

Price: $43.00
Where to buy: Wraptie and Amazon
Source: The sample of this product was provided by Wraptie.

Filed in categories: Reviews

Tagged:

Wraptie 240 Twin Pack review originally appeared on The Gadgeteer on November 10, 2018 at 9:00 am.

Note: If you are subscribed to this feed through FeedBurner, please switch to our native feed URL http://the-gadgeteer.com/feed/ in order to ensure continuous delivery.