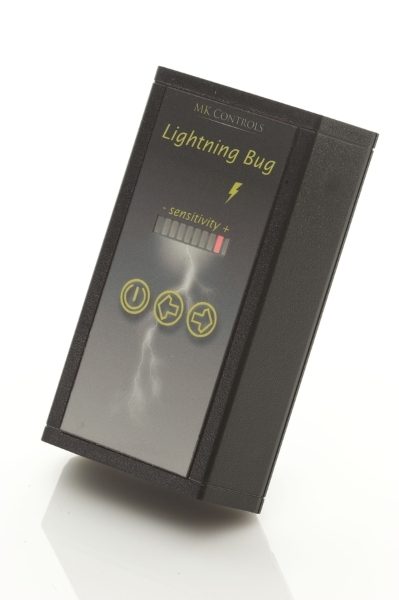
The Lightning Bug will give you the bug to capture amazing lightning shots!


NEWS – Some time ago, I was fortunate enough to get the opportunity to review the MIOPS Smart device, which allows me to photograph water drops, and other events triggered by sound, or movement or lightning. While I have used the MIOPS Smart exclusively for water drop photography, I have been thinking about trying it with lightning which is not an easy task. As I continue my planning for the lightning test, I started to wonder if there is a similar device that is designed specifically for lightning as opposed to multiple types of events. My hope was that such a device would make the setup and process easier.

Just recently I came across just such a dedicated lightning capture device call the Lightning Bug. This device claims to provide specific functions and features to allow you the required and desired customization aimed at capturing the best lightning photos. Its features include 26 levels of sensitivity for control in any type of lightning situation (LED Bar Graph built-in), the ability to adjust frames per second from 1 to 10, and a simple 3-button control of all functions via a water-resistant soft-touch panel.

This device is compatible with a large number of various brands and models of cameras. You can see the compatibility list here.

If you would like more information on the Lightning Bug, or you would like to purchase one, you can head over to the MK Controls website or Amazon to pick one up for $179. This price includes the compatible cable for your camera.

Filed in categories: News

Tagged: ,

The Lightning Bug will give you the bug to capture amazing lightning shots! originally appeared on The Gadgeteer on August 10, 2018 at 12:00 pm.

Note: If you are subscribed to this feed through FeedBurner, please switch to our native feed URL http://the-gadgeteer.com/feed/ in order to ensure continuous delivery.

Photojojo Shutter Remote works with Apple and Android devices

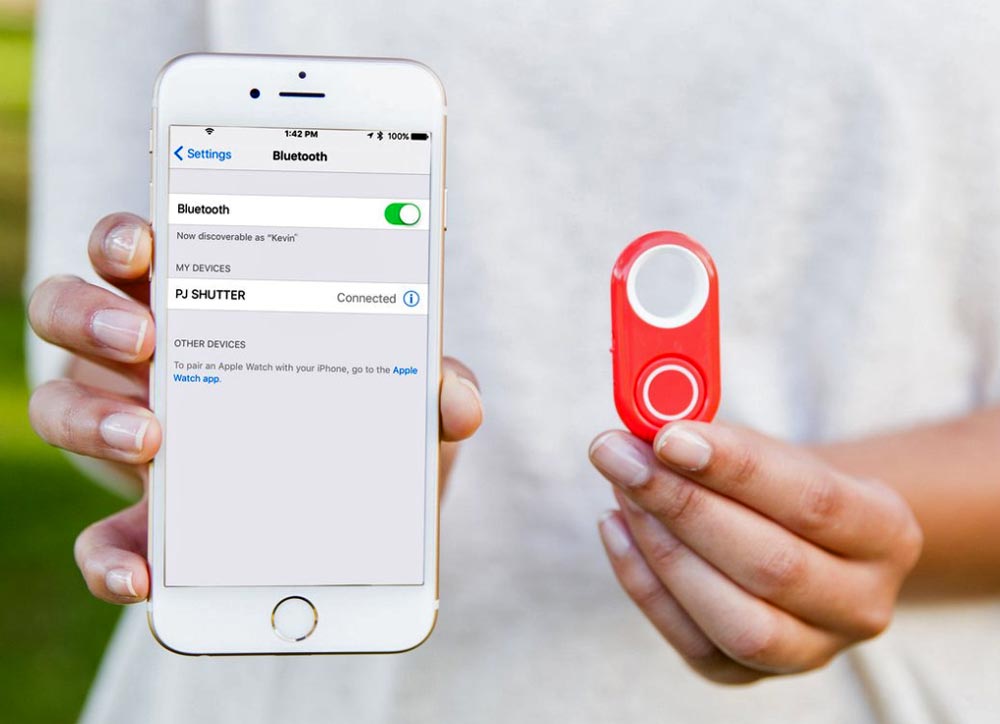
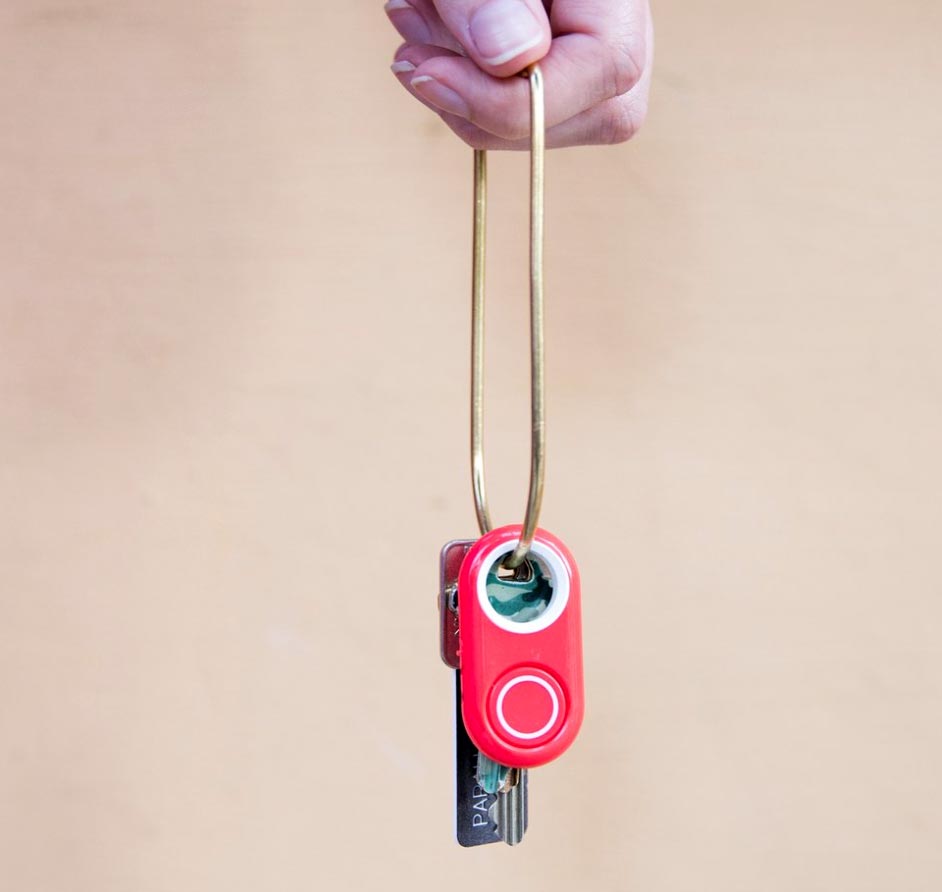
NEWS – Photojojo’s Shutter Remote works with most every mobile device’s camera – Android or Apple.  Pair the remote to your mobile device via Bluetooth, and you’re ready to take candid photos or group shots from up to 30 feet away from the phone or tablet.  You can also use it to start/stop video recording.  There won’t be any blur or out-of-focus shots caused by shaking the camera while pressing the shutter, either.

The Shutter Remote is $25.00 at Photojojo.

Filed in categories: News

Tagged: ,

Photojojo Shutter Remote works with Apple and Android devices originally appeared on The Gadgeteer on August 8, 2018 at 8:00 am.

Note: If you are subscribed to this feed through FeedBurner, please switch to our native feed URL http://the-gadgeteer.com/feed/ in order to ensure continuous delivery.

Nixplay WiFi Cloud Frame review

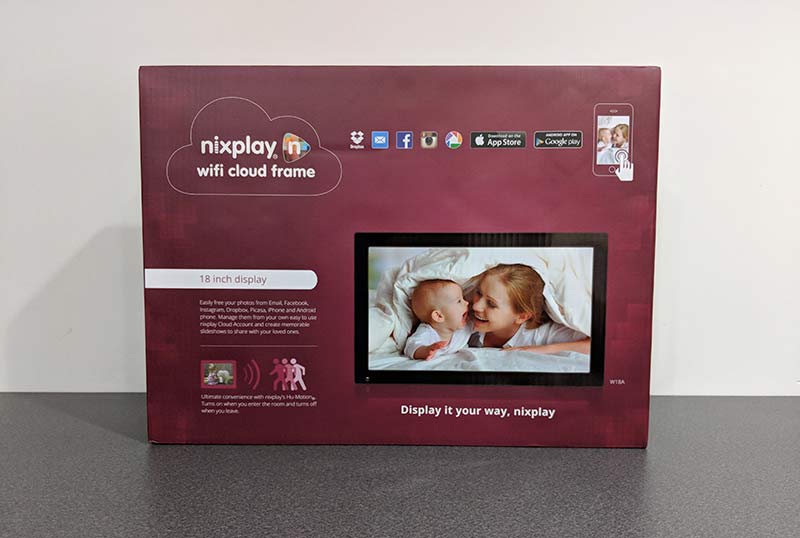
REVIEW – Several years digital photo frames were a popular gift idea. I reviewed at least a dozen of them until their popularity grew stale. But what’s old is new again and today digital photo frames are making a comeback. One new frame that I’m going to show you today is the Nixplay WiFi Cloud Frame. Let’s take a look.

What is it?

The Nixplay WiFi Cloud Frame is a digital photo frame that can be used to view your favorite images. Nixplay makes a variety of frames but their  Cloud Frames are available in 15 and 18-inch screen sizes. I was sent the 18-inch version.

Hardware specs

Screen Resolution: 1366 x 768 pixels
Aspect Ratio: 16:9
Brightness: 350 cd/m2
Supported Photo Format: JPEG / JPG / PNG
Supported Video Format: H.264 HD 720p
Speakers: 2 x (1.5W) Stereo Speakers, 3.5mm Stereo Headphone Input
Ports: USB Drive / SD / SDHC
Wireless: 802.11 b/g/n
Width: 18.4 inches (467mm)
Height: 11.4 inches (290mm)
Depth: 1.3 inches (33mm) – without stand, 4.5 inches (115mm) – with stand
Weight:2.72kg – without stand, 2.80kg – with stand

What’s in the box?
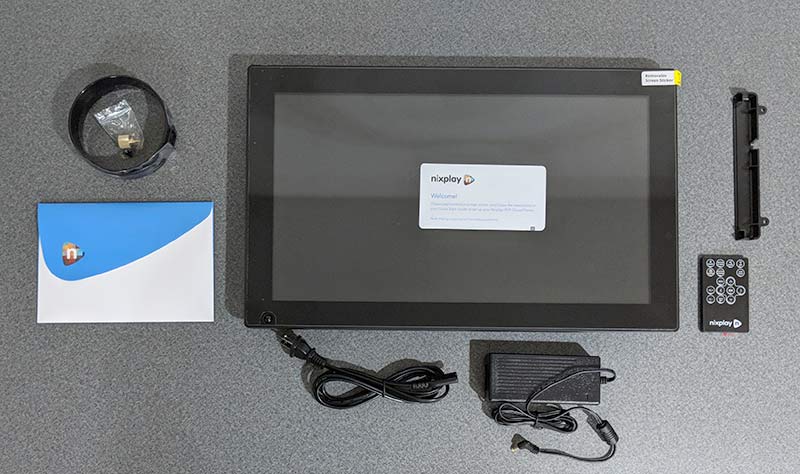
Nixplay WiFi Cloud Frame
Screw in stand
IR remote
AC adapter
Quick start guide

Design and features
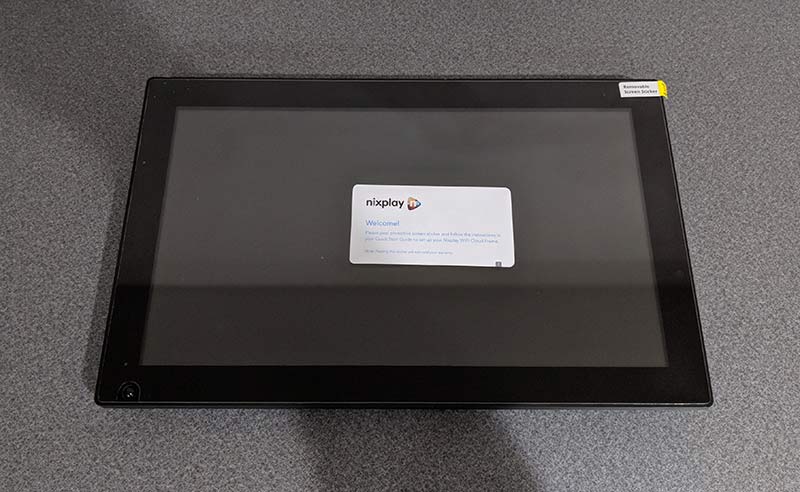
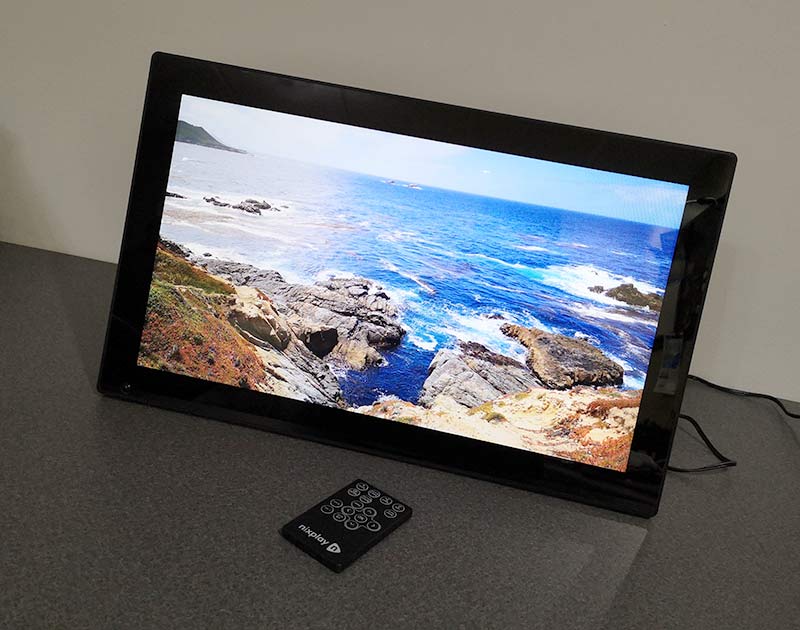
This is the largest digital photo frame that I’ve reviewed and I have to say that if you’re going to buy a digital photo frame, go big or forget it. This 18-inch frame is big and well made. It has black 1-inch bezels on all sides to make it look like a picture frame.

The Nixplay has two sensors that are built into the lower part of the frame. In the lower left corner is the motion detection sensor and there’s also the IR sensor for the included remote control.
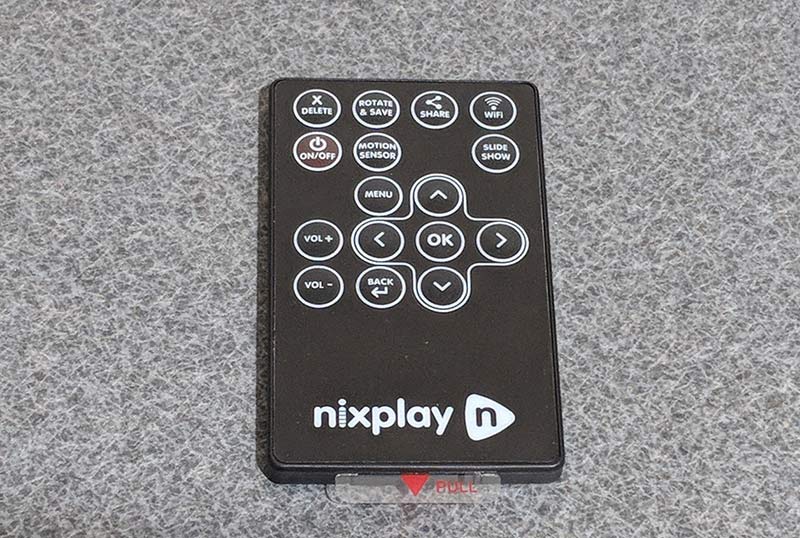
The remote control has a membrane style keypad with functions to control the photo slideshow and video playback.
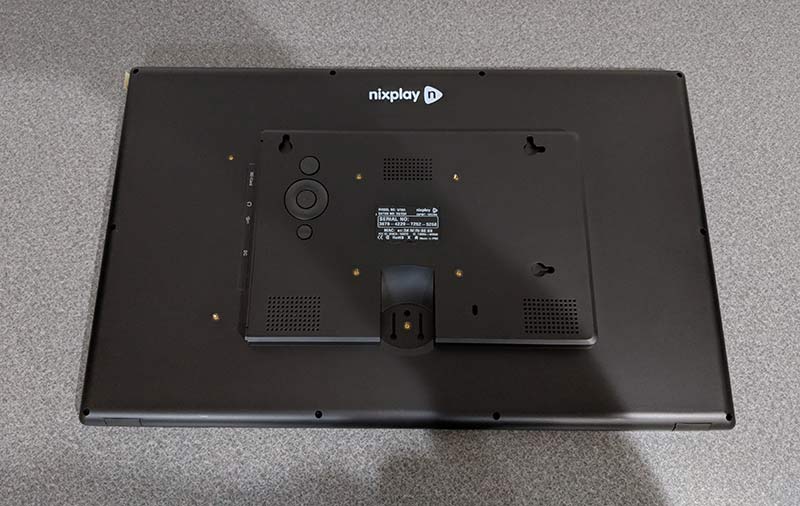
The back of the Nixplay Cloud WiFi Frame has mounting slots to help you mount the frame on a wall in either landscape or portrait orientation.

There are also speakers built into the back of the frame and a set of control buttons in case you lose the IR remote control.
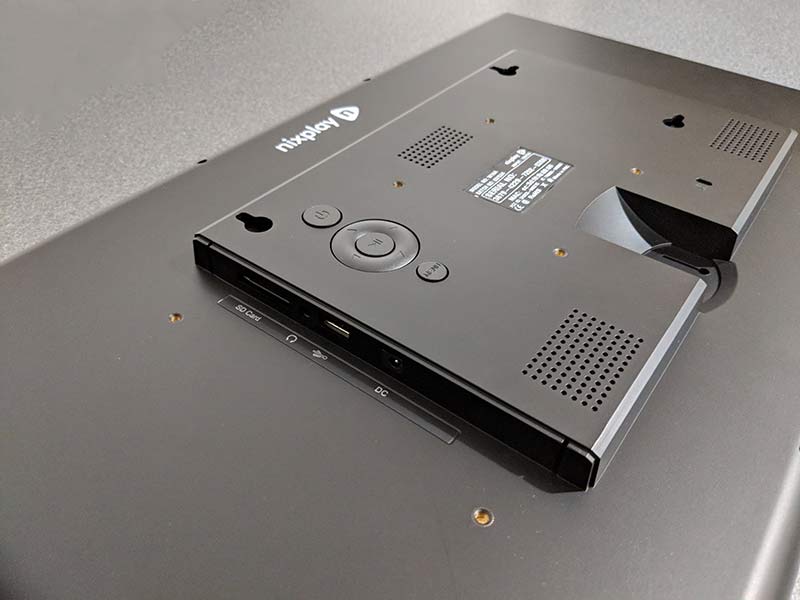
The back of the frame has an SD card slot and a USB port if you want to load your own images from flash memory. There’s also a 3.5mm headphone jack and the power port.
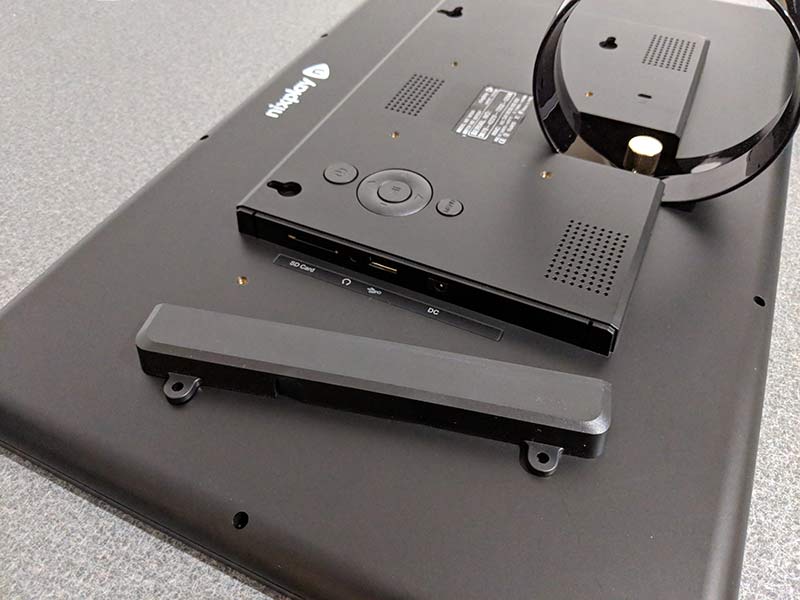
If you don’t want people messing with the ports, you can block them by using the included cover.
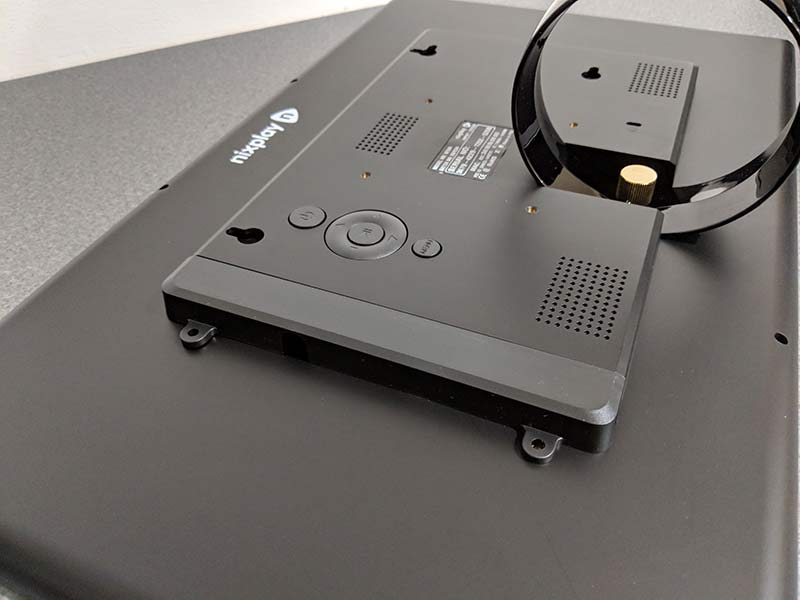
The port cover is secured by two screws.
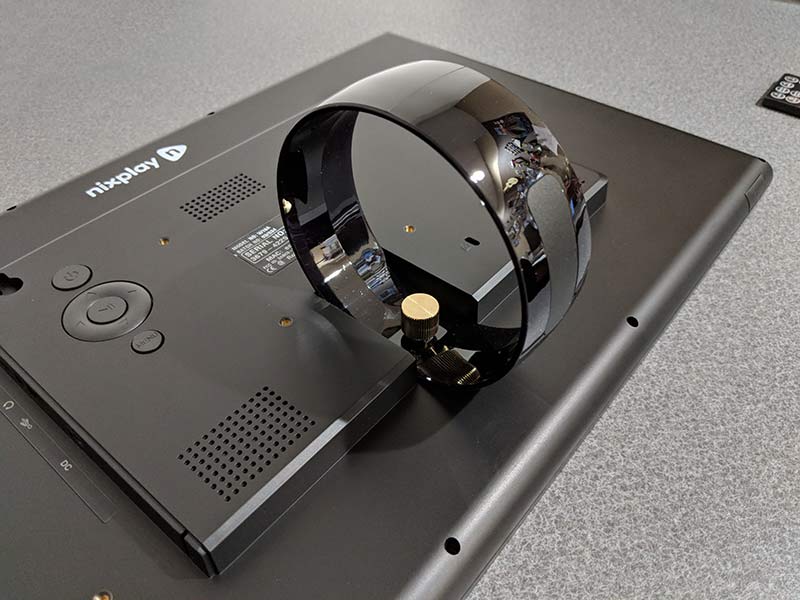
If you don’t want to mount the Nixplay on a wall, you can attach the included stand which snaps into the back of the frame and is secured by a brass thumb screw.
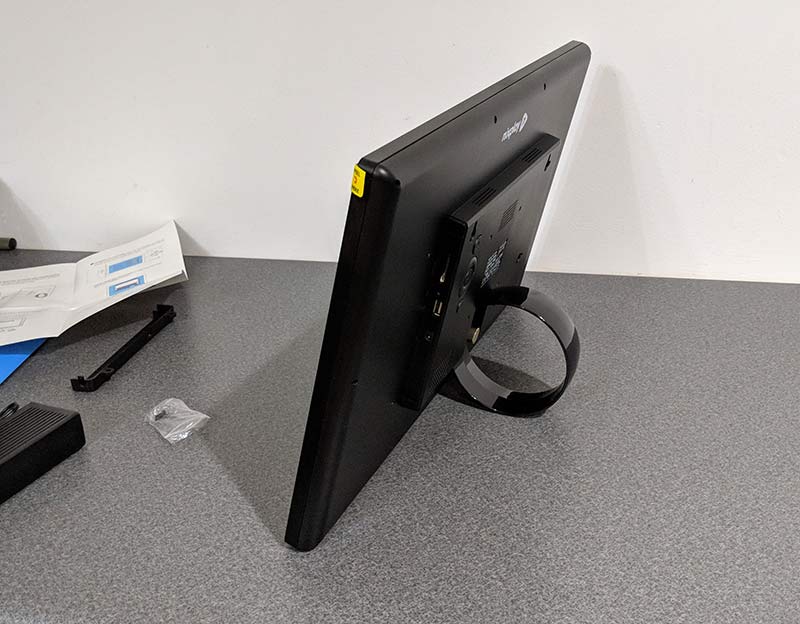
I opted to do my testing of the frame with the stand. However, by using the stand, you can only use it in landscape orientation.

Loading your images and videos into the frame
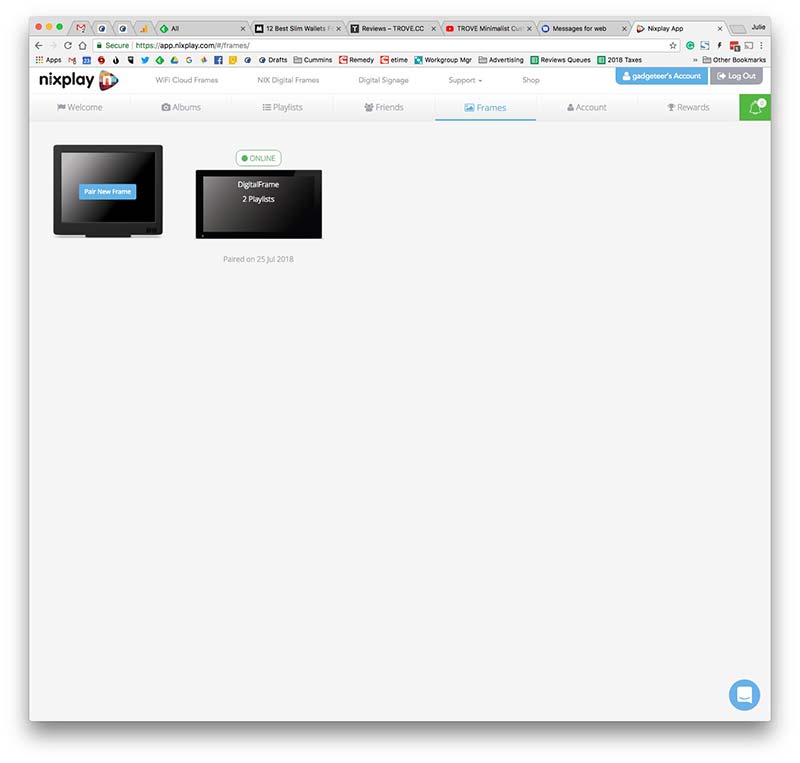
To see slideshows of your favorite images and video, you can load them on an SD card, a USB flash drive, or you can connect the frame to your wireless network and then load images from a selection of social media sites like Dropbox, Facebook, Google Photos, Instagram, Flickr, and Verizon Cloud by using the Nixplay web app. Note that except for the Dropbox dynamic playlist, the other social media sites will not automatically sync new images to the frame. You will need to update the playlists when you add new images that you want to show up on the Nixplay frame. Don’t worry though, it’s as easy as dragging and dropping the images into the playlist from the Nixplay web app.

Another way to get images into the frame is by email. Each frame has an email address assigned to it once you create a Nixplay account. Images sent to the frame using this address will be added to a special playlist.

Last but not least, you can install the Nixplay app on your smartphone or tablet and send images from your device to the frame that way too.
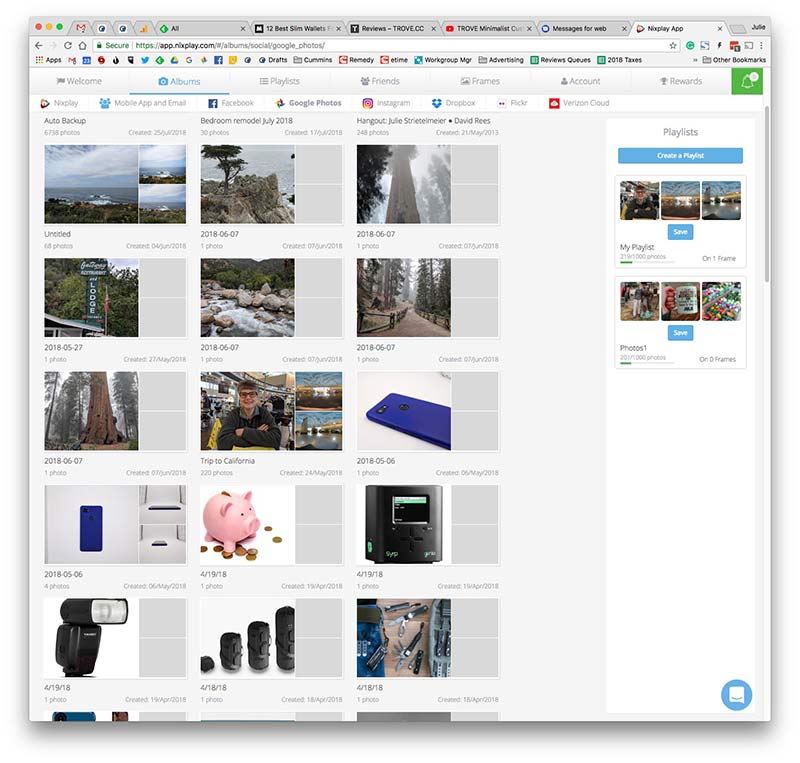
Before you can use the frame, you’ll need to create a Nixplay account which is free and allows you to easily configure a variety of settings on the frame. The free account also allows you to create and modify playlists of up to 10GB of photos for up to 5 different Nixplay frames. If you need to manage more frames, Nixplay offers a Plus account where you’ll have 10 frames per account and 30GB of storage.
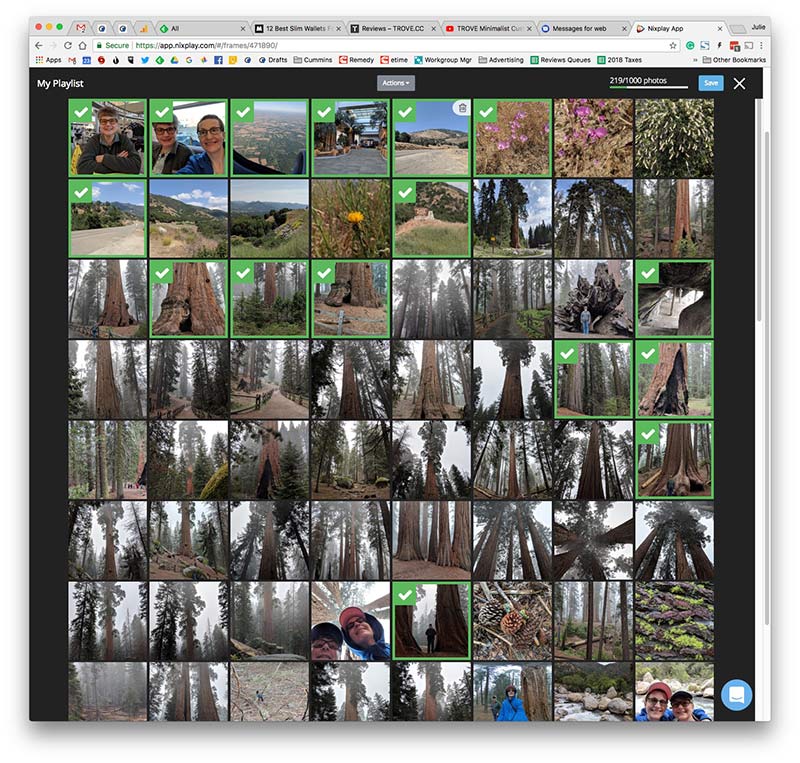
For example, if you load an album of photos from Instagram or Google Photos like I did, you can remove images that you don’t want to see or disable the playlist altogether.

Note that the images will be loaded on to the frame itself so that even if you log out of the Nixplay account or lose WiFi connectivity, the frame still continues to work.
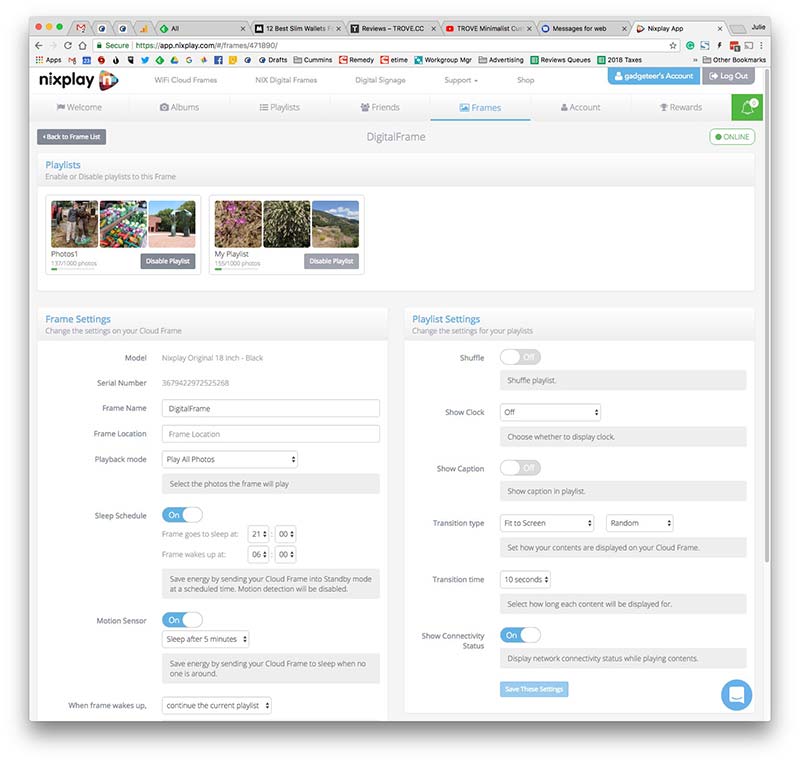
Most nicer digital photo frames allow you to set a sleep schedule so that the frame goes into standby mode during the nighttime hours when no one would be seeing it anyway. The Nixplay will allow you to either have the screen turn off or it can display a clock during the sleep schedule hours. But that’s not all. The Nixplay WiFi Cloud Frame goes even one step further by implementing a motion sensor that will put the display in sleep mode when it senses that there’s no one in the room. I love this feature and have found that it works really well.

Another feature worth mentioning is that you can control your Nixplay frame with Alexa. You can ask it to play specific playlists just by using your voice. I don’t have an Amazon Echo set up to test this feature, but you can find out more about it by visiting the Nixplay site.

Display quality
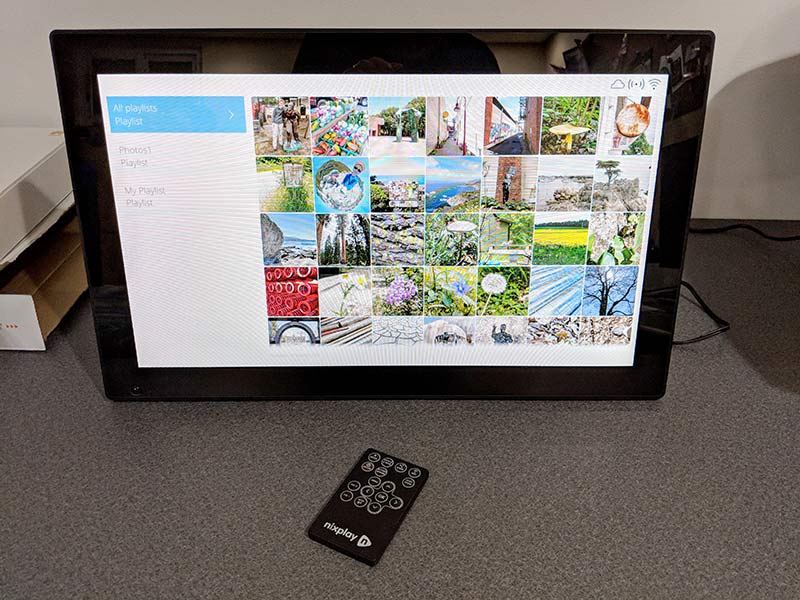
A digital photo frame is only as good as the display quality right? Well, there’s nothing to worry about with the Nixplay because the glossy LED-backlit display is bright, crisp, and vibrant with excellent viewing angles so that you can see image details even if you’re not directly in front of the frame.
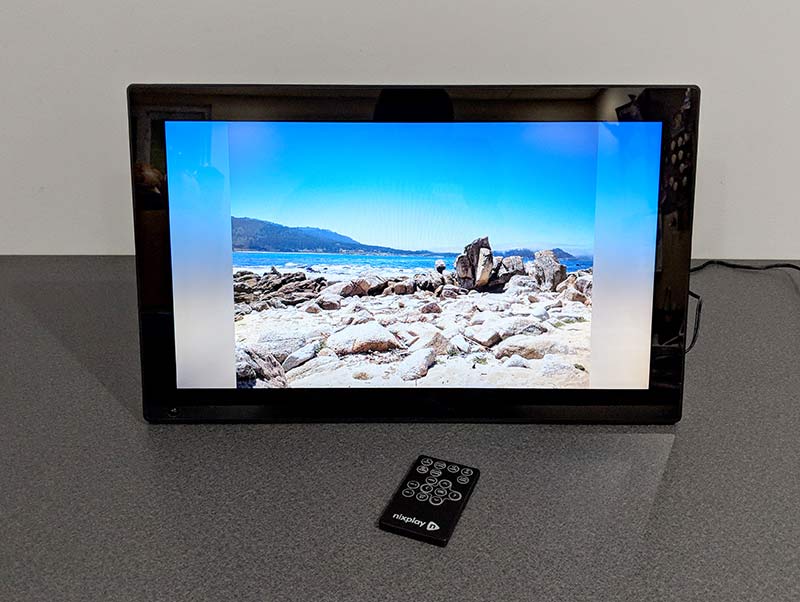
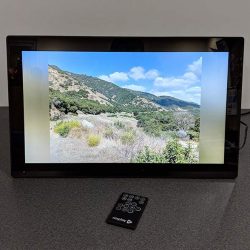
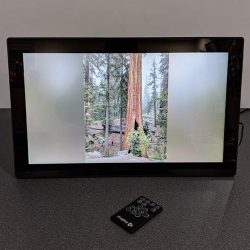
The frame has a 16:9 aspect ratio so images that you take with your phone will probably not fill the screen and you’ll send up seeing bands on the sides or the top and bottom of the screen. The cool thing is that Nixplay makes the color of the bands match the image on the screen.
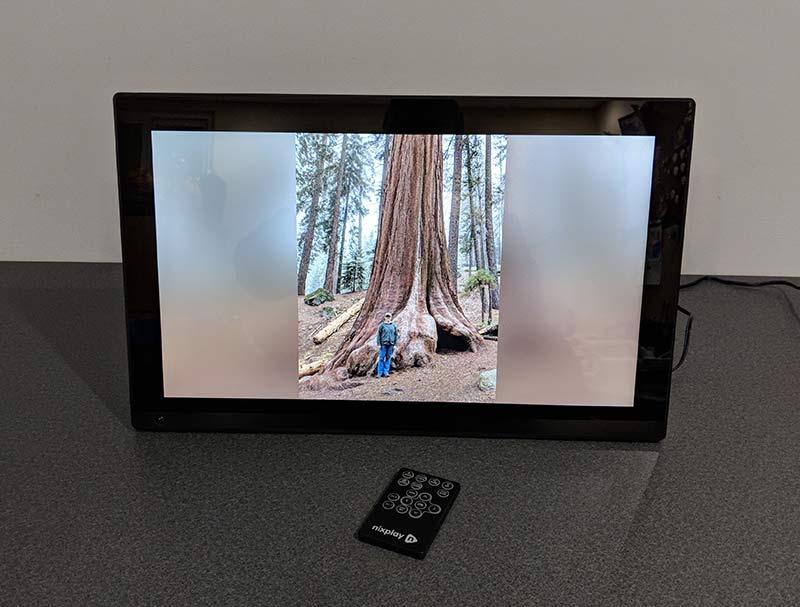
This way the bands aren’t just white or black.
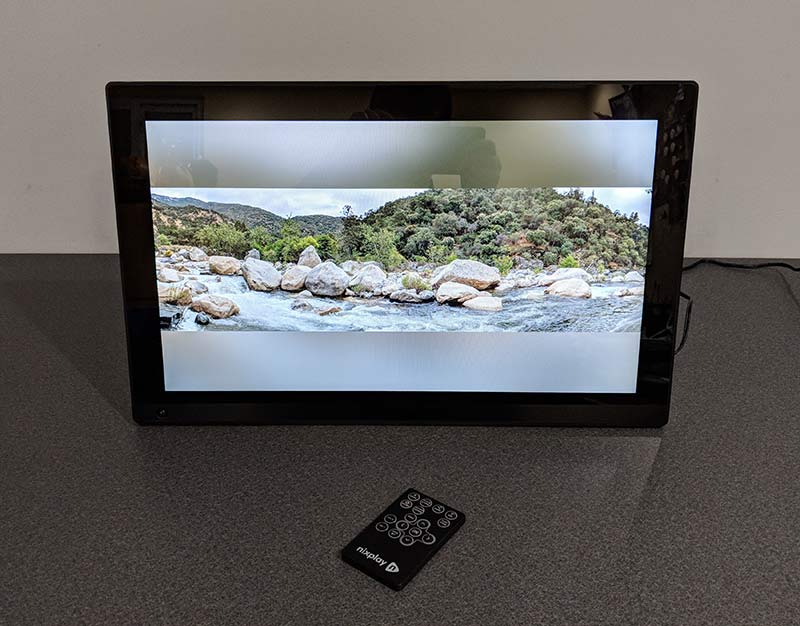
Here’s an example of a panoramic image that I took while on vacation in Three Rivers California. See how the Nixplay is showing top and bottom bands?

Here are some other examples. Click the pics to see the full image.


You’re probably wondering if there’s a way to fill the screen with the image to get rid of the bands and yes, there is. Actually, there are a few other ways to display your favorite pictures on the Nixplay frame.
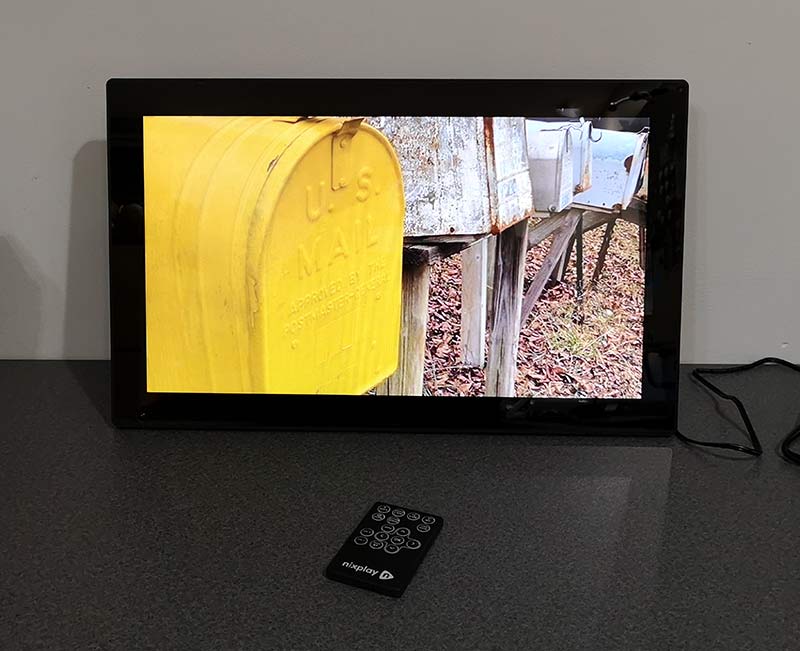
You can set the images to fill the frame which Looks good as long as the subject of the image is in the center of the picture and is small enough that certain details don’t get cut off with the image fills the frame. See the image above, it’s an Instagram picture which is typically a square image. I’ve set the image to fill the screen.
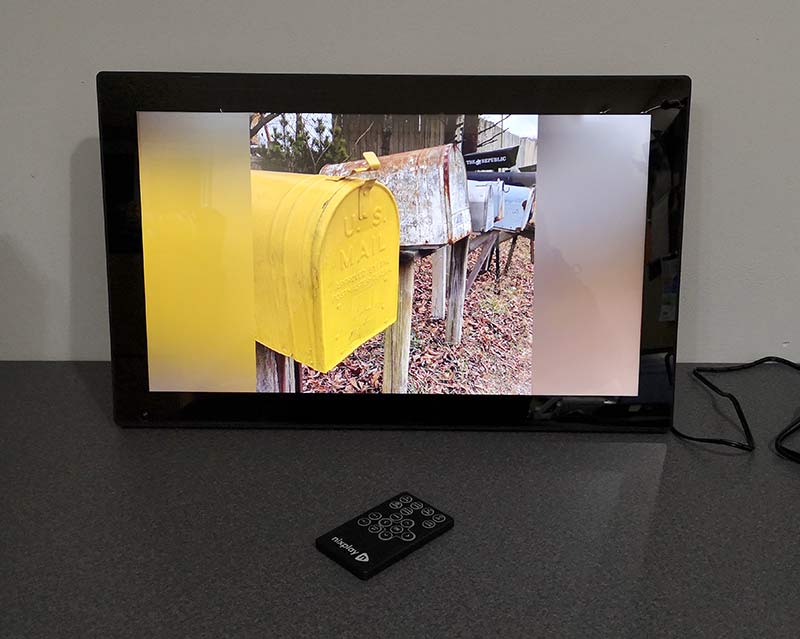
And here’s the original image. See how the tops of the mailboxes are cut off when it’s using the fill display mode?
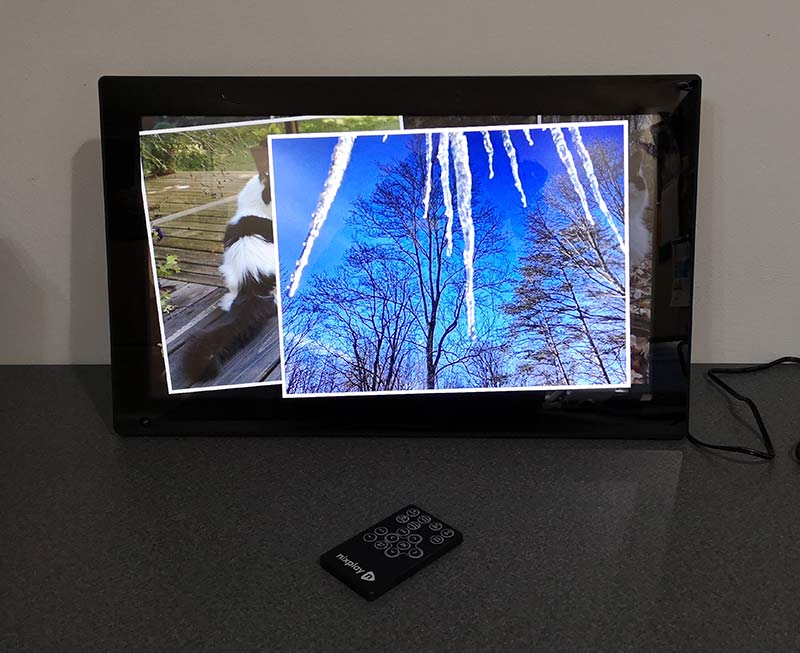
Here’s the snapshot display mode which shows each new image on top of the previous image.
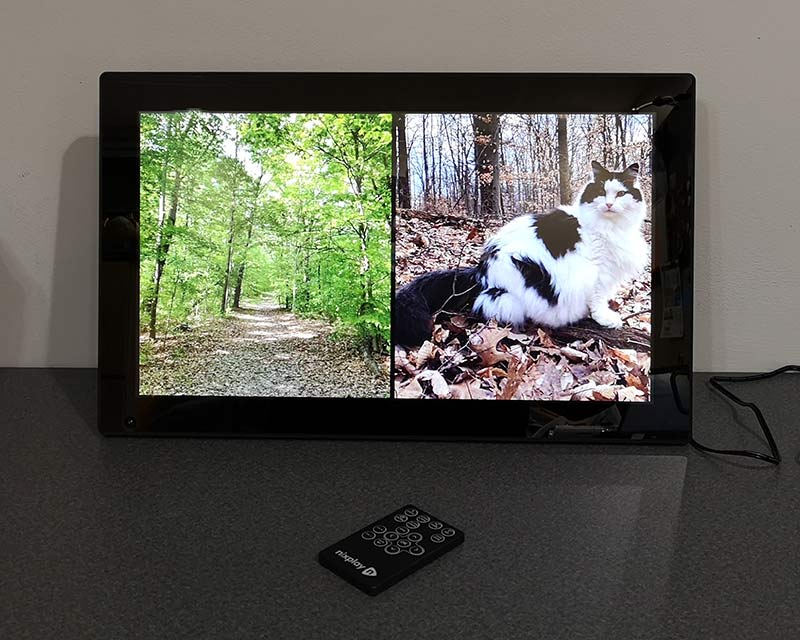
And here’s the tile display mode which shows two images side by side. This mode works great for images that are up and down (portrait) instead of wide (landscape).

In addition to the multiple viewing styles, the frame also has 11 different transition styles when it loads a new image. You can specify the one you like best or just set it to random so it uses all of the styles.

What I like

  • Great display
  • Doesn’t require a paid subscription
  • SD card and USB readers
  • Alexa enabled
  • Motion sensor

What to consider before buying

  • Price

Final thoughts

As I mentioned in the opening paragraph of this review, I’ve reviewed at least a dozen digital photo frames in the last 2 decades, but the Nixplay is the first digital photo frame that has actually impressed me on all fronts. It makes my images look great and the built-in features like motion detection and sleep schedules make this an enjoyable digital photo frame to use.

Price: $279.99
Where to buy: Nixplay and Amazon
Source: The sample for this review was provided by Nixplay.

Filed in categories: Reviews

Tagged: , ,

Nixplay WiFi Cloud Frame review originally appeared on The Gadgeteer on July 31, 2018 at 12:00 pm.

Note: If you are subscribed to this feed through FeedBurner, please switch to our native feed URL http://the-gadgeteer.com/feed/ in order to ensure continuous delivery.
MIOPS Smart controllable camera and flash trigger review

REVIEW – Each photographer has his or her own type of photography that is special to them. I like to photograph subjects in nature, and I also like to use existing objects to create my scenes. Water drop photography is a favorite of mine, and this device promises to greatly help me to expand my creativity.

What is it?

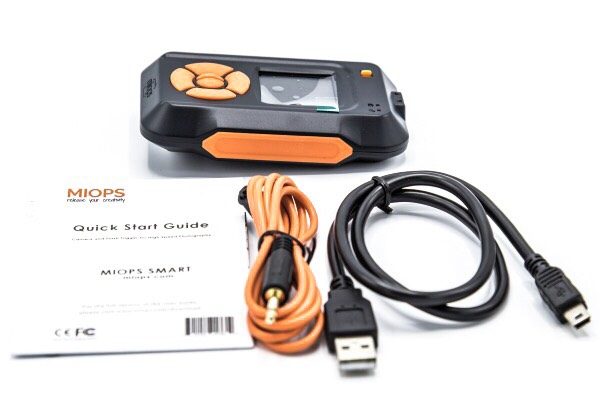
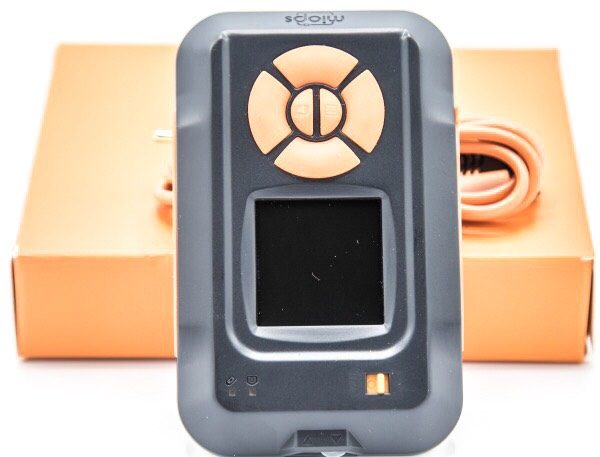
The MIOPS Smart is a device that responds to Lightning, Sound, Laser, Timelapse, HDR and more to trigger the shutter of a camera to take a picture.

What’s in the box


1 x MIOPS Smart
1 x Mini USB Cable
1 x Camera Trigger cable
1 x Quick Start Guide

Design and features

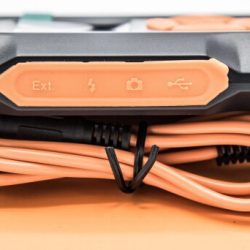
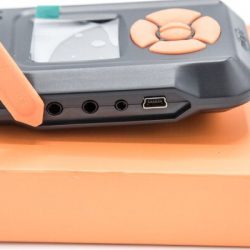
The MIOPS Smart is a small and nicely built camera shutter trigger that can be activated in several modes. On the front there is a display screen and buttons to navigate the screens should you choose to do so from the device. On the side under a removable cover, there is a port for extension DIY projects, a flash trigger port, a camera trigger port, and a mini USB port for charging the battery.
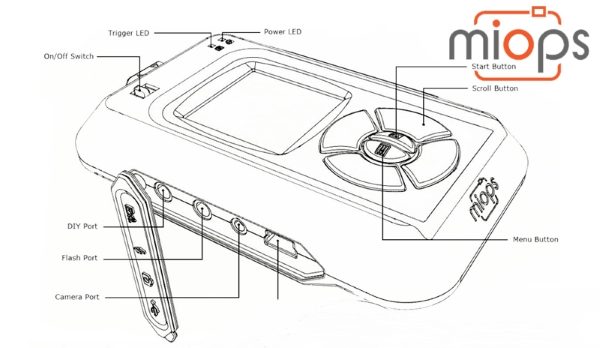

On the top, in addition to the control buttons and the display screen, there is the trigger LED, the power LED and the on/off power button.


On the front (side), there are an infrared sensor and a motion sensor lens.

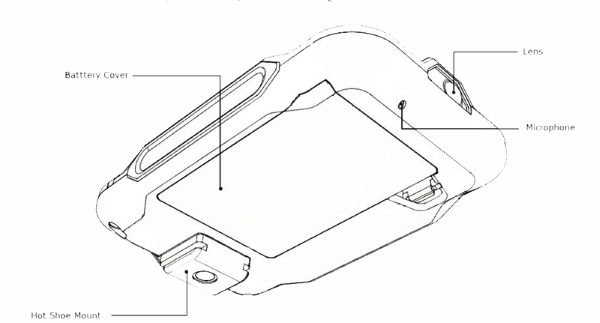
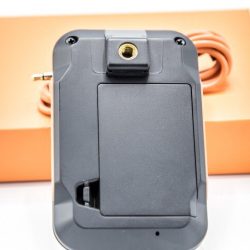
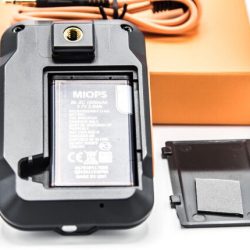
On the back of the MIOPS Smart, there is a 1/4-20mm female mount that sits on a Hot Shoe mount, the microphone and a battery door that covers the slot that holds the rechargeable battery.

Performance

While you can control the MIOPS Smart via the buttons on the device, the optimal way to use it is via the app. It has several operational modes and setup screens that are available via the app.

App

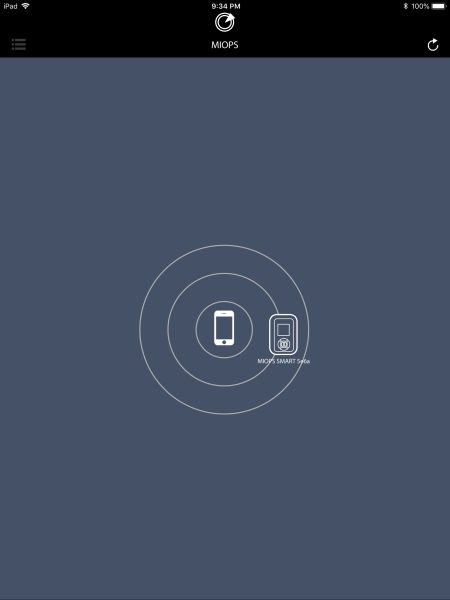
Once you install the app and launch it, and turn on the MIOPS Smart, it appears on the app. If you have more than one MIOPS device turned on, they will all show up as available for selection.


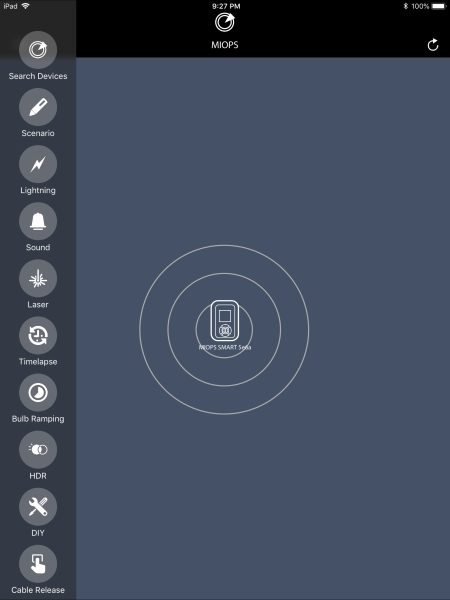
Once you select the MIOPS Smart by touching the icon on the screen, it connects to the app and is ready to be controlled via the app. At this stage, all of the available modes and options are available on the left of the screen. (I used the app on my Pad for this demonstration)


Scenario option:

For example, you can create custom scenarios by combining all available modes with up to five different steps. You can do so by using any combination of the sensors or by using different sensors for various steps of your scenario. For instance, you may want the MIOPS to trigger the camera shutter to take a picture after an object breaks the laser beam and then makes a sound either from hitting a surface or by some other action.


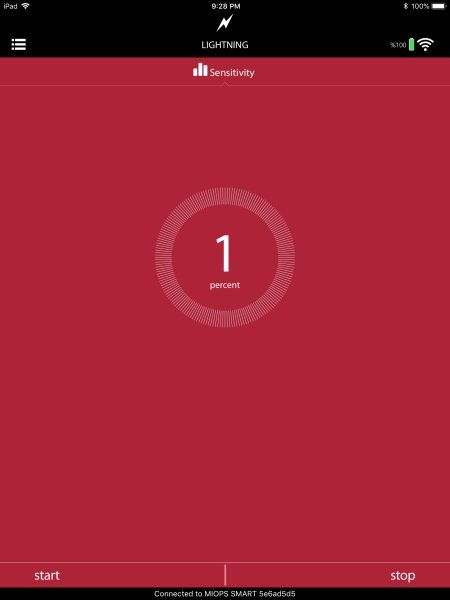
Lightning option:

This option has one screen which gives you the ability to set the sensitivity level to trigger the device.


Sound option:

Settings for Sensitivity, Delay, and Lock.


Laser option:

Threshold, Delay and Frame settings screens.


Time Lapse option:

Settings for Interval, Exposure, and Limit


Bulb Ramping option:

There are 4 settings screens for this option: Interval; First Exposure; Last Exposure; Frame.


HDR option:
Settings screens are for: Center; EV (+-); Frame.


DIY option:
Settings screens: Threshold; Delay; Mode.


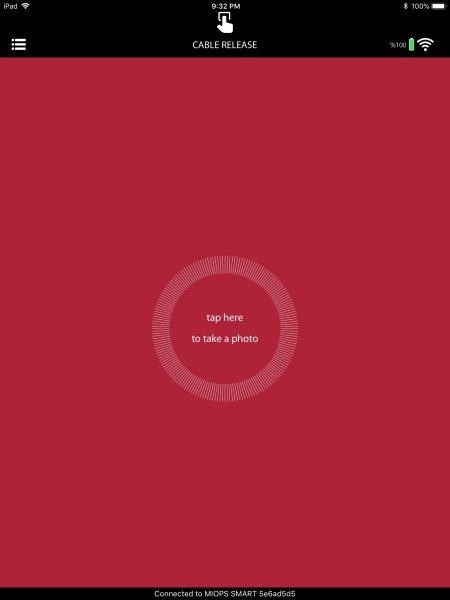
Cable Release option:

For my testing of the MIOPS Smart, I chose the sound option. I set up for water drop photography using the MIOPS Splash Water Drop Kit and the MIOPS Smart, within a photography lightbox enclosure. (Additional items like a catch basin for the water, etc are necessary)


The enclosure that I used does not have any built-in lighting. To light the effect, I used a flash strobe with a colored gel insert. To take the pictures, I used a Canon EOS 7D Mark II with a 70mm Sigma Art Macro Lens. The MIOPS Smart was connected to the 3-pin trigger port on the Canon and mounted close to the MIOPS Splash. A flash trigger transmitter was attached to the shoe on top of the camera, and a receiver was connected to the strobe. I used 2 iPhones to simultaneously control the MIOPS Splash app and the MIOPS Smart app. When I trigger the MIOPS Splash device to drop water, the mechanism makes a sound that in turn triggers the MIOPS Splash to trigger the camera shutter. This setup takes time and a whole lot of patience to get the size and timing of the waterdrops as desired, as well as to get the sensitivity and timing correct for the MIOPS Splash to receive the sound and trigger the camera to take the picture at the right time. This setup is actually one of my less complicated setups and describing the details of it is challenging.

The MIOPS Smart is a great device, and I do plan to try it with a laser beam for the laser option, as well as with lightning when a safe and convenient opportunity presents itself. The following are 2 pictures of water drops that were taken as a part of the testing:


What I like

I like the build quality and the functionality of this device. So far it has worked flawlessly and has allowed me to increase my photography creativity.
What can be improved

1: Longer camera trigger cables must be made available
2: Include a tested laser that works with the device. (They are quite inexpensive but all may not work with this device)
Final thoughts

The MIOPS Smart is a great camera trigger device that is nicely built, and that offers endless opportunities for creative photography. I am thoroughly enjoying using it, and every day I am designing more elaborate photo opportunities. As long as it continues to function well, it is well worth it.

Price: $219
Where to buy: MIOPS Website or Amazon
Source: The sample for this review was provided by MIOPS.

Filed in categories: Reviews

Tagged: ,

MIOPS Smart controllable camera and flash trigger review originally appeared on The Gadgeteer on July 24, 2018 at 1:00 pm.

Note: If you are subscribed to this feed through FeedBurner, please switch to our native feed URL http://the-gadgeteer.com/feed/ in order to ensure continuous delivery.