2018 Gift Guide – Gift ideas for photographers

ARTICLE – It’s Christmastime again, and time to make that shopping list. Here is a collection of great gift ideas for the photographer in your life, or maybe you are the photographer and you want to treat yourself this holiday season.

Spider SpiderPro Single Camera System V2 camera holster

This holiday season, give the photographer in your life a gift that will keep on giving. Photography gear is expensive, and many photographers spend a lot of money on their equipment and sometimes neglect to invest in the important accessories needed to safeguard that equipment. This camera holster will ensure that they can walk around with their camera and lens with ease and not worry about dropping and damaging their precious gear. Securing and removing the camera and lens is quick but safe, and the entire holster is built to last.

Price: $150.00
Read our reviewSpider SpiderPro Single Camera System V2 camera holster review
Where to buy: Spider or Amazon

Canon’s new 470EX-AI flash

Getting your camera Speedlite to give you the right lighting is always a challenge, especially when you need to bounce light off of a wall or ceiling to get the perfectly lit shot. This holiday season, give the gift of Artificial Intelligence and help your photographer to take the guessing out of their hands. This flash does it for you and intelligently moves into the right place at the right time.
Price: $349
Read our news storyCanon’s new 470EX-AI flash may be just the right solution
Where to buy: B&H Photo Video

The Yongnuo YN-14EX-C Macro Ring Flash

Macro photography is a great way to enjoy photography and to take really close up detailed and interesting pictures. Maybe you know a photographer who has never tried macro photography, or maybe they are interested in this type of photography but they simply do not have the right tools. For the perfect macro shot, you need the perfect lighting. This macro flash will help to make sure that your photographer is a happy camper and that their macro shots hit the right spot every time.

Price: $99
Read our news storyThe Yongnuo YN-14EX-C Macro Ring Flash is a winner
Where to buy: Amazon

The Canon SELPHY CP1300 Compact Photo Printer

While technology has taken us all the way to digital photos on our phones and tablets, there are still many people that like to have an actual photograph in their hands. Whether your favorite photographer is an amateur, enthusiast or professional it does not matter. Give them the ability to instantly show off their skills by producing real photograph prints right on the spot. The Canon SELPHY CP1300 can do just that and more and is truly portable.

Price: $99.95
Read our news storyThe Canon SELPHY CP1300 Compact Photo Printer prints your selfies in a flash
Where to buy: Amazon

Ruggard Electronic Dry Cabinet

After spending a whole lot of $$cash on expensive photography gear, where can you keep all of it safe from dust and spills and moisture, and from all of the other mishaps that can ruin your gear and your Christmas? You can put them all in a well built and attractive Dry Cabinet. Ruggard makes great and affordable dry cabinets and has a good selection of sizes to choose from to accommodate all necessary photography equipment storage needs. And, if you are not a photographer, it will work for any other gadgets you want to keep safe and dry.

Price: Starting at $149.95 (30L)
Read our news story: Protect your expensive camera gear with the Ruggard Electronic Dry Cabinet
Where to buy: B&H Photo Video

Manfrotto Compact Action Aluminum Tripod

Photographers are always on the run, looking for the next best shot or just traveling with their gear. Usually, it takes a steady camera to get the best shot and a lightweight and compact tripod is the right gear for the job.

Price: $57.40
Read our news story: The Manfrotto Compact Action Aluminum Tripod is ready to go with you everywhere
Where to buy: B&H Photo Video

Ruggard Lens Cases

Whether you have an entry level lens or an expensive lens or many lenses that you have collected over time, keeping them safe from accidental mishaps and minor bumps and spills is very important. When on the go, nothing can protect your lens better than a lens case. Ruggard makes great lens cases in a variety of sizes to fit any and every lens, and the cases are easily secured and well padded. They are also designed to work with your gear belt or your gear bag.

Price: Starting at $14.99
Read our news story: Ruggard Lens Cases are built for the job!
Where to buy: B&H Photo Video

PortraitPro Photo Editing Software

No matter what level of photographer you are whether you are an enthusiast, an aspiring amateur or a professional, you are always looking to tweak your photos to take them from great to awesome. This is especially true when you take all of those family photos at those important family gatherings, and you want to capture the memories and send copies to everyone and share them on social media. PortraitPro Software makes every face and feature look just right.

Price: Starting at $44.95 for the Standard Edition
Read our review: PortraitPro 17 Studio Max photo editing software review
Where to buy: PortraitPro

Filed in categories: Articles

Tagged: , ,

2018 Gift Guide – Gift ideas for photographers originally appeared on The Gadgeteer on November 21, 2018 at 8:00 am.

Note: If you are subscribed to this feed through FeedBurner, please switch to our native feed URL http://the-gadgeteer.com/feed/ in order to ensure continuous delivery.

Night Sight is available now for Pixel phones and I love it

NEWS – Just in case you didn’t already know, the Night Sight feature on the Google Camera app is now available for Pixel phones. This feature allows you to take better photos under dark lighting conditions. I have been eagerly awaiting this feature since it was announced in October. I’m an amateur photographer and anything that easily improves the quality of my photos, especially those that I take for the Gadgeteer, is VERY welcomed. If you’re curious about how it works, I’ll just point you to Google’s Research Blog, for a detailed explanation.

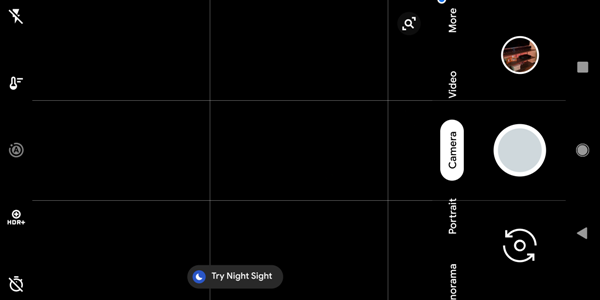
After updating your app, if the lighting conditions are low enough, a “Try Night Sight” button pops up. Tapping on it enables the feature and you are ready to go. After tapping on the shutter button, be sure to hold your camera steady until the software completes the task of taking the photo.

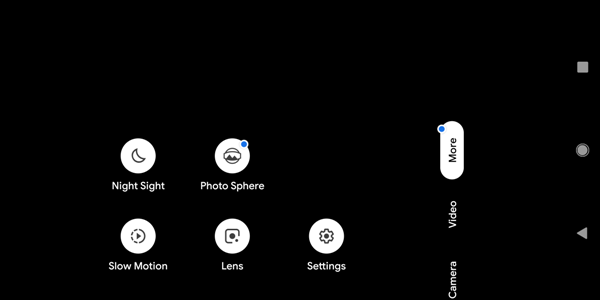
If “Try Night Sight” doesn’t come up automatically and you want to try it, you can also find the Night Sight mode located in the “More” section of the app.

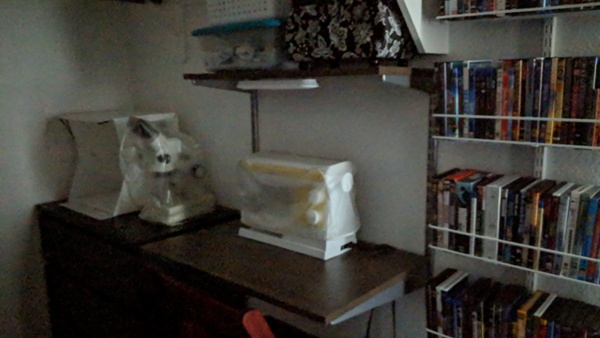
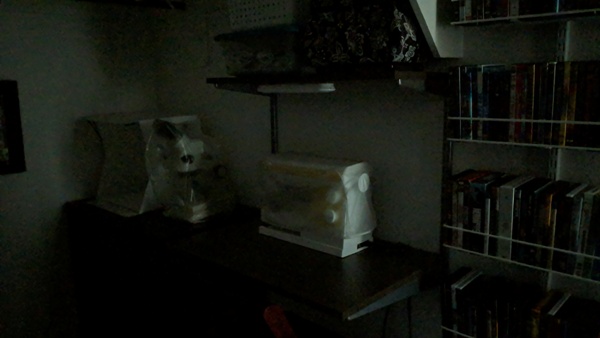
I tried it out and am truly impressed. The following are a couple of my pics.

The above photo was taken in a VERY dark closet of our house. 

Night Sight dramatically improved the closet photo. 

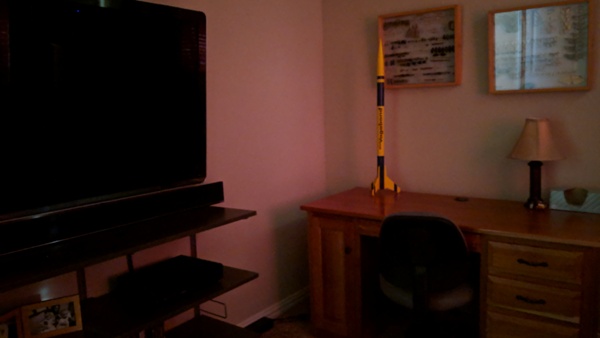
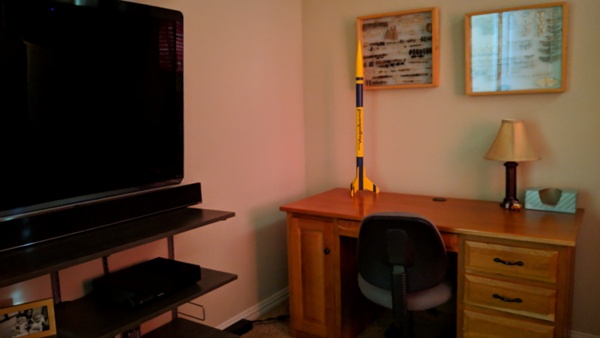
The above photo was taken in a dimly lit room.

It’s not quite as dramatic as the first set of photos, but the improvement is readily observed.

What do you think of the Night Sight mode? Leave a comment and let me know!

Filed in categories: News

Tagged: ,

Night Sight is available now for Pixel phones and I love it originally appeared on The Gadgeteer on November 18, 2018 at 11:00 am.

Note: If you are subscribed to this feed through FeedBurner, please switch to our native feed URL http://the-gadgeteer.com/feed/ in order to ensure continuous delivery.
Bitplay AllClip and Premium HD lenses review

REVIEW – I’m a smartphonographer. What’s that? It’s a person who uses their smartphone as their primary camera. I sold my Canon 70D DSLR last year and have been using my Pixel 2 XL and Huawei P20 for all my photos. Can the addition of add-on lenses from Bitplay take my photos to the next level? Let’s find out.

What is it?

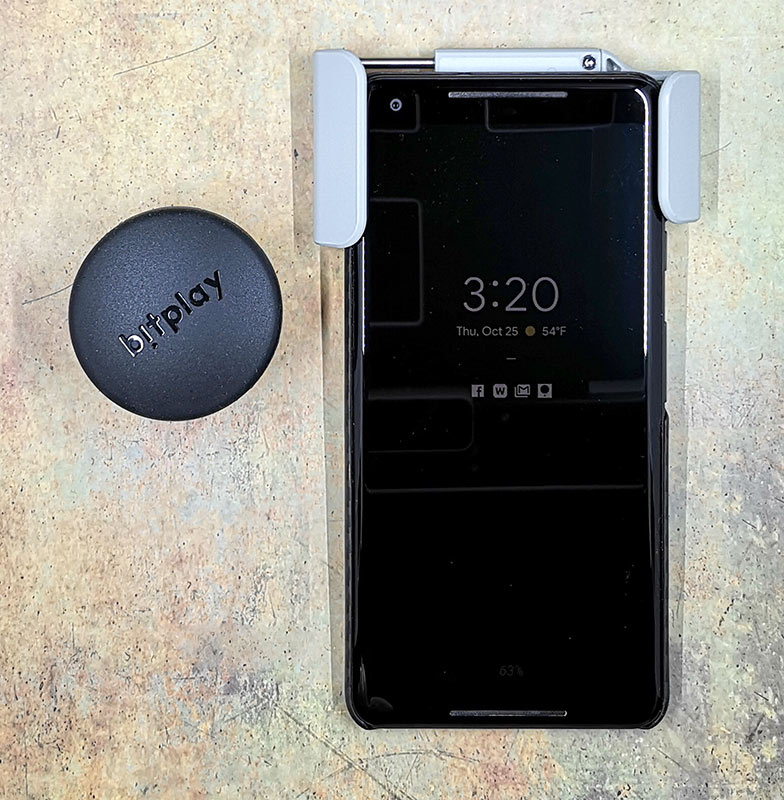
The Bitplay AllClip is a universal smartphone lens holder that is designed to hold Bitplay’s specially designed lenses.

What’s in the box?

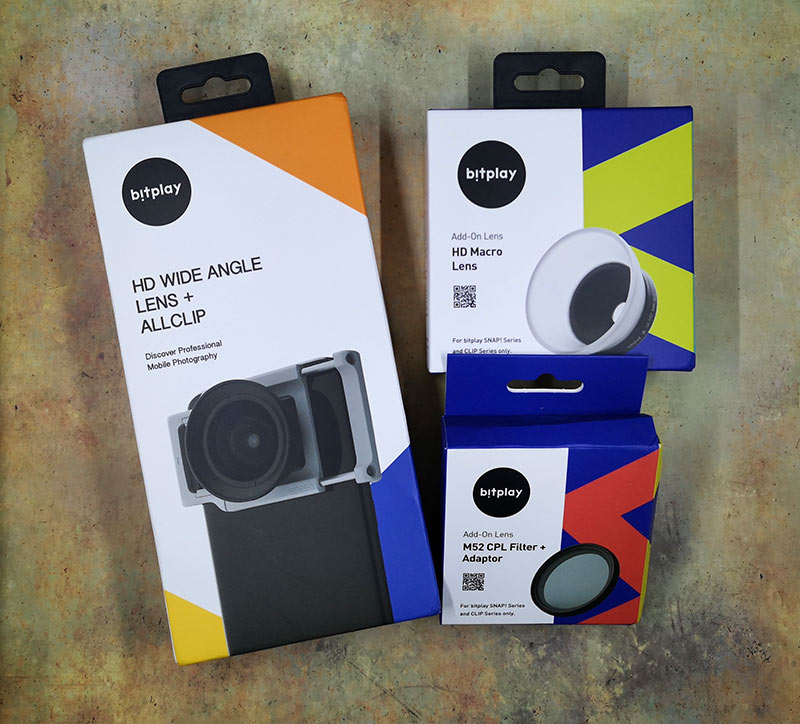
I was sent the following items, but they are all separate items and don’t come in a kit/set.

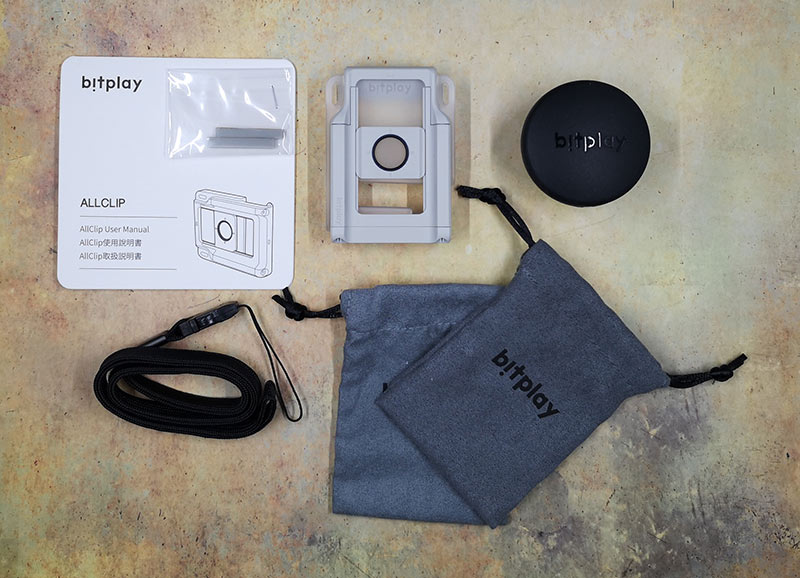
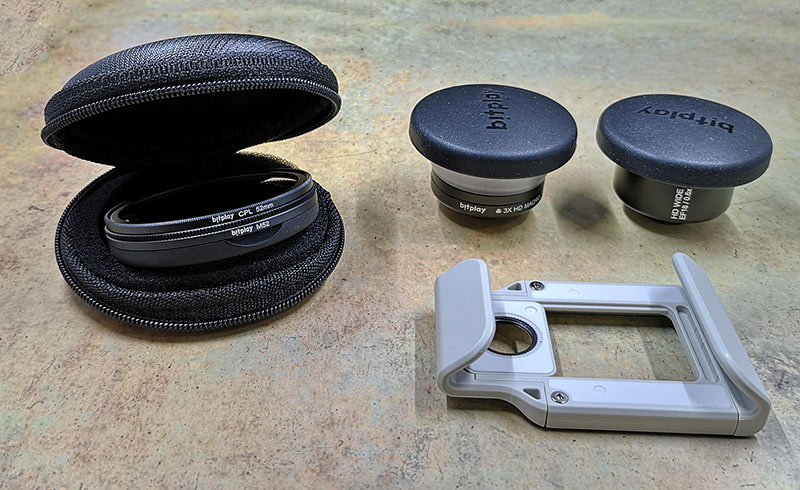
AllClip
HD wide angle lens
HD Macro lens
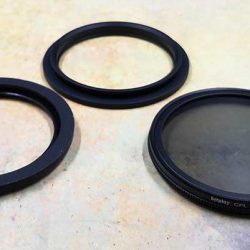
M52 CPL Filter and adapter

Design and features

I have seen all sorts of add-on lenses for the iPhone which usually require a special case that has a threaded socket over the area of the phone over the lens. That’s great for iPhone users, but what about Android phone users? That’s where Bitplay comes in with their AllClip which is a universal lens mount that is compatible with smartphones that have a width ranging from 58mm – 80mm (2.3″ to 3.2″).

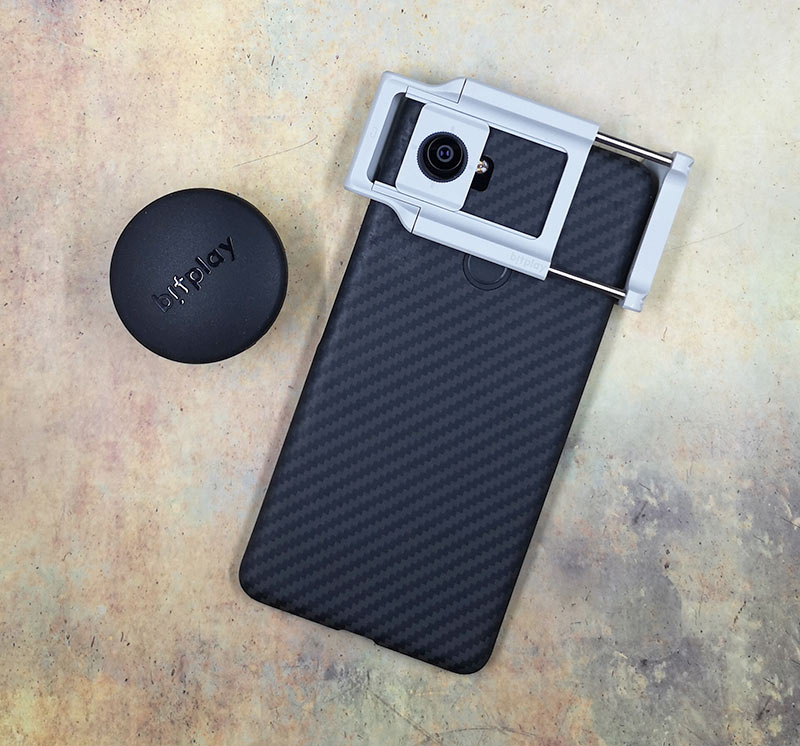
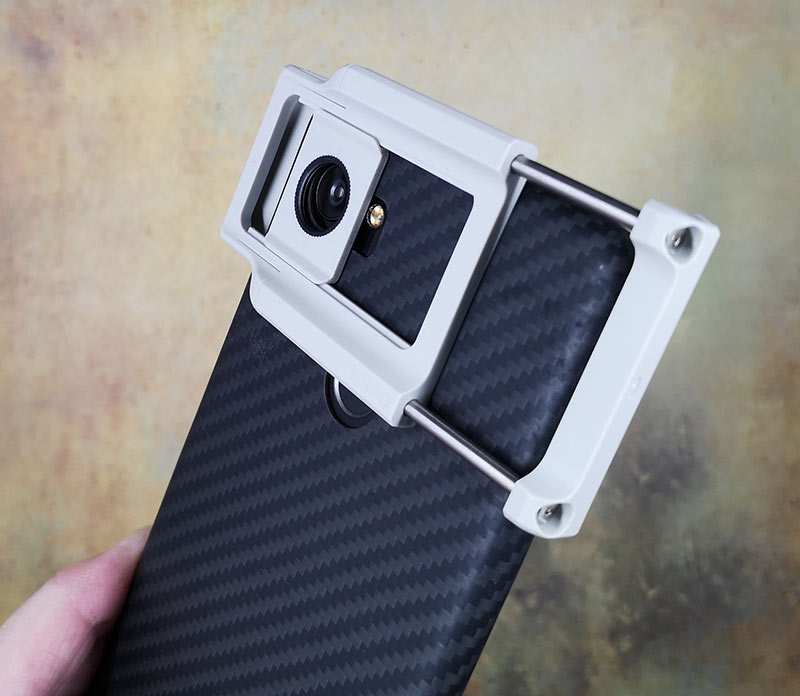
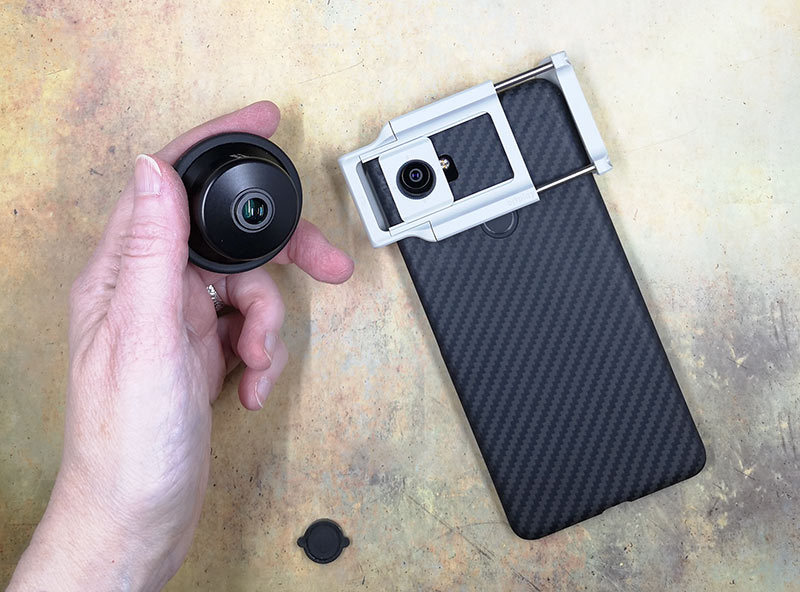
I did all my testing of the AllClip and lenses with my Pixel 2 XL. The AllClip is an expandable holder that has clips on the end that wrap around the edges of the phone to hold it in place. With a case on my Pixel 2 XL, the AllClip was still able to fit over the back of the phone so that I could attach the Bitplay Premium HD lenses to the clip.

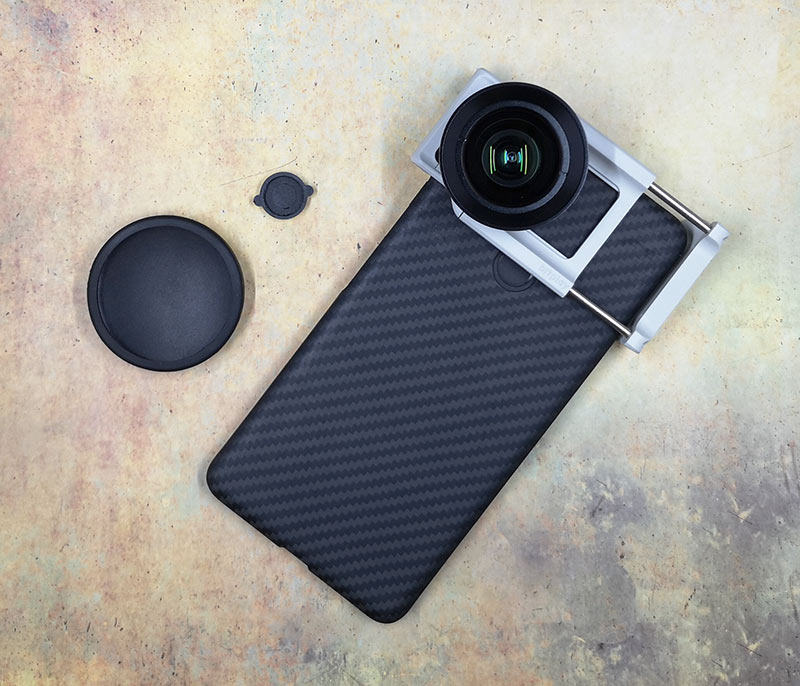
The AllClip is a universal Bitplay lens mount that lines up over the phone’s lens. You can adjust the horizontal and vertical alignment of the mount by moving the AllClip up and down and by sliding the mount left or right. Once the mount is over the lens and the AllClip is securely in place, the mount is fixed in position and won’t inadvertently slide around. At least I found that to be true while testing with the Pixel 2 XL.

You will notice that with my phone, the AllClip covers the fingerprint reader sensor and interferes with the flash next to the lens. Depending on the phone, the clip also might cover the power switch, volume buttons, and other controls, so this is something to keep in mind.

With the AllClip installed, you can now attach Bitplay’s lenses. They sent me their premium wide-angle lens, and their macro lens, along with an M52 CPL filter.

The Bitplay lenses have a 13mm threaded mount that screws into the socket on the AllClip. Each lens comes with a protective cover for the mount and for the lens itself. Each lens also comes with a small drawstring pouch to hold the lens when it is not being used.

Attaching the lenses is simple and takes little to no effort.

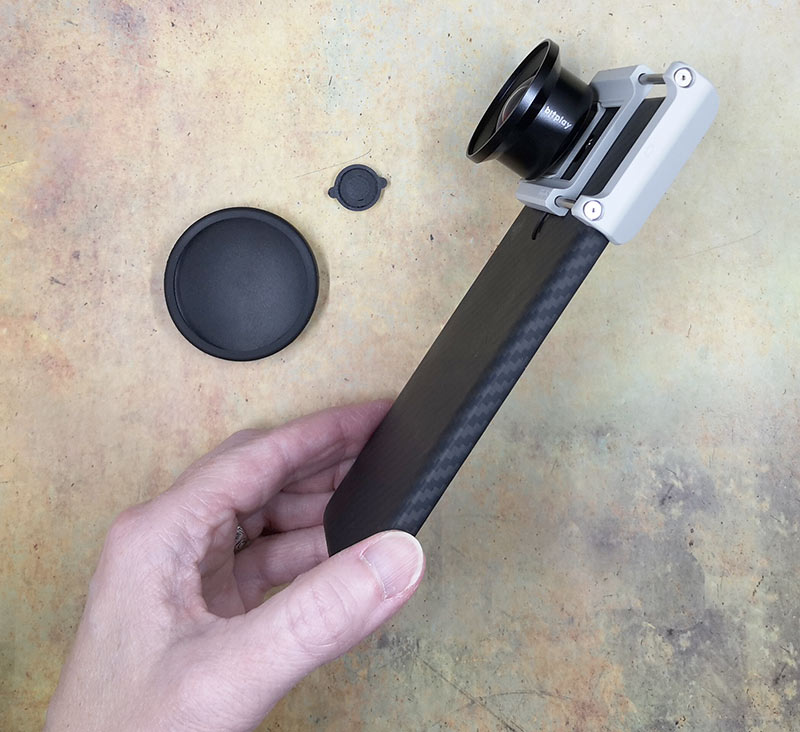
The AllClip and attached lens definitely add significant bulk to your phone and you probably would not want to stick your phone with the clip and lens in your pocket as it most likely would not fit and the clip could come off.

I said above that attaching and reattaching the lenses and the AllClip isn’t hard, but it can be a little awkward depending on the situation. For example, a week ago, I was in Florida on vacation and thought it would be a perfect opportunity to try out the Bitplay lenses for some beach shots. The problem was that trying to juggle the AllClip, lenses, lens caps, and drawstring pouches without getting sand on them was a bit tedious.

I can’t imagine wanting to carry my phone around with the AllClip and a lens attached to it for very long because I use a fingerprint reader to unlock my phone and with the AllClip on the back, it was covered and inaccessible. But enough whining, let’s take a look at a few picture samples using the Bitplay lenses.

Sample pics

Premium HD Wide-Angle Lens


The difference when adding the Premium HD wide-angle lens is obvious. You can see significantly more of the condo in the photo with the wide-angle lens compared to the photo taken without the lens.


Again, you can tell that you see a lot more of the beach when using the wide angle lens.


I noticed something odd about the wide angle shot above. If you click on it and look at the trees/leaves in the upper left side of the image on the left, they look smeared.

Premium HD Macro Lens

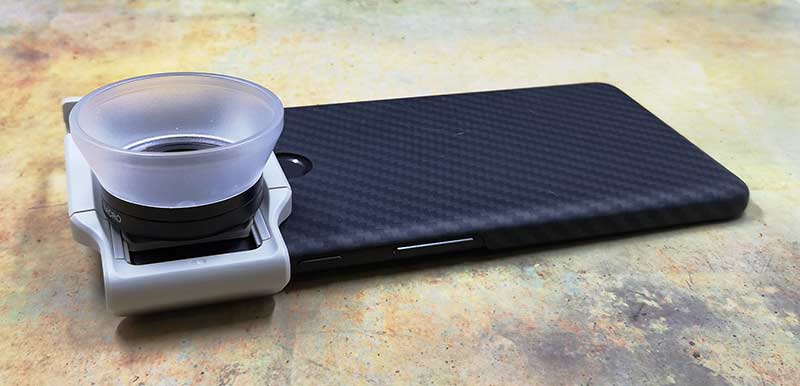
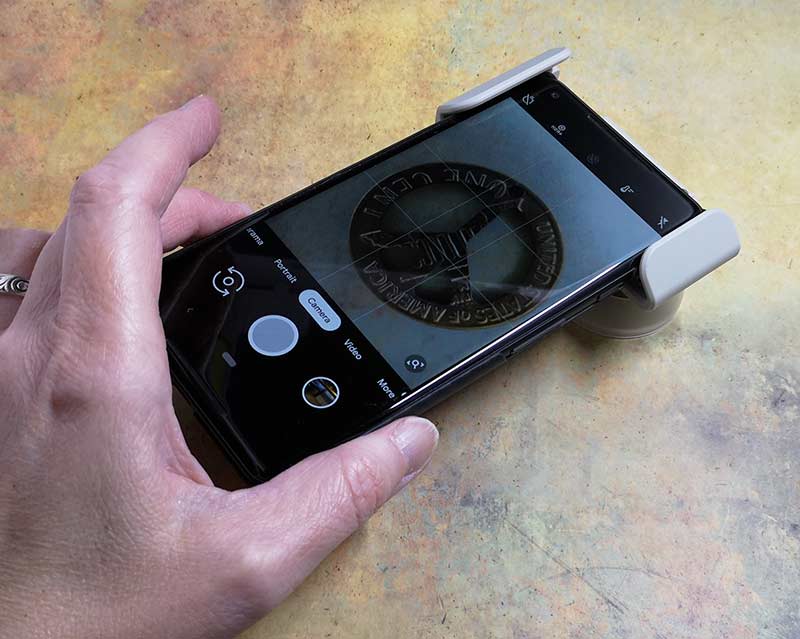
I obviously take a lot of close up shots for my reviews, so I was excited to test the Bitplay macro lens. Unfortunately, it didn’t turn out to be useful to me because it only works well if you can place the lens at an exact distance from the subject. This is aided by the lens design. As you can see, it has a frosted hood. This hood is designed to let light in.


But as you can see, shadows can cause the subject to become too dark.


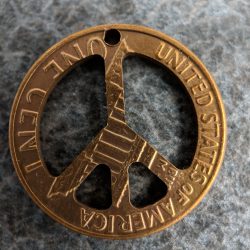
The close-up images that I was able to take with the macro lens are ok, but that’s only because I took them indoors on a flat surface. When I tried to take some pictures of the same shells out on the beach, it was much harder to get the lens correct distance from the subject and with the sun shining, I wasn’t able to see what I was doing on the phone’s display.

M52 CPL Filter


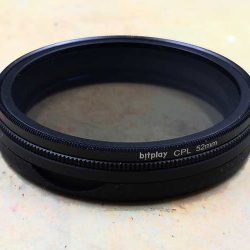
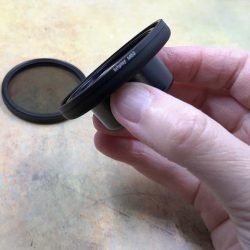
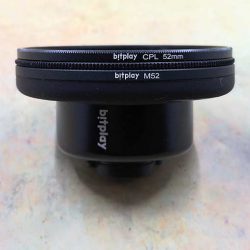
It looks like a lens, but the M52 CPL is a filter that is made up of 3 parts. The filter itself and an adapter with a silicone ring. attaching the M52 filter to the Premium HD wide-angle lens took some effort only because it didn’t seem to make sense until I read the directions. But even then, the process is a little fiddly and it was not easy to do while I was on the beach.

Once attached, this particular filter is designed to remove glare on glass or water surfaces and improve the capture of blue skies and white clouds by filtering out the unwanted lighting.


The difference between the two images is subtle. You can see that the sky in the image with the filter has more blue. Turning the filter when it’s installed over the lens is supposed to have some effect on the image but I didn’t even know that was something you should try based on the instructions that came with the filter. I just happened upon that info on Bitplay’s site. Unfortunately, it was after I came back from Florida and we haven’t had a sunny day to try it here yet.

What I like

  • Adds extra capability/features to your existing smartphone camera
  • Wide angle lens lets you capture more
  • Macro lens allows you to get very close to your subject

What needs to be improved

  • AllClip can cover some features/buttons
  • Bulky
  • Not sure how useful the macro lens and M52 filter really are

Final thoughts

My smartphone is the best camera I’ve ever owned because it’s always with me. I like Bitplay’s universal AllClip and lenses which provide the ability to extend smartphone camera’s capabilities as long as you are ok with the caveats that come with these accessories. My guess is that I will rarely use the M52 CPL filter and the macro lens going forward, but I can definitely see myself using the wide angle lens, especially when I travel and want to take landscape pictures.

Price: $19.96 for the AllClip, $49.99 for the Premium HD Macro lens, $99.99 for the Premium HD Wide angle lens, $43.99 for the M52 CPL Filter
Where to buy: Amazon
Source: The sample for this review was provided by Bitplay.

Filed in categories: Reviews

Tagged: ,

Bitplay AllClip and Premium HD lenses review originally appeared on The Gadgeteer on November 9, 2018 at 1:21 pm.

Note: If you are subscribed to this feed through FeedBurner, please switch to our native feed URL http://the-gadgeteer.com/feed/ in order to ensure continuous delivery.
MK Controls Lightning Bug review


REVIEW – As a photographer, I like to shoot all types of photos. Recently, I have been shooting waterdrop photography, with a device that functions in many modes including being triggered by sound and light to be able to photograph other events. Another type of event I would like to shoot is lightning strikes, and while the device that I have incorporates that ability, I was very intrigued when I came across a device that is designed specifically for lightning strike photography. MK Controls immediately and willingly granted our request to review and test their Lightning Bug. Here is the summary of the review.

What is it?

The Lightning Bug is a device that is designed to connect to your compatible camera and trigger it to take photos when lighting strikes. As per the manufacturer: “The Lightning Bug is based upon the science of lightning. There are two components of lightning; the bright white flash everyone wants to capture and the unseen infrared light that always precedes it. The Lightning Bug uses a high-speed photodiode sensor optimized to the infrared burst that occurs just before a lightning strike. This infrared light comes from the vaporization of air and particles in the air. The Lightning Bug acts as a lookout for your camera, watching for a change in infrared light. When a significant change of infra-red light over a very short period of time is detected, it directs the camera shutter to trip and capture the lightning in action”. It will also work for fireworks.

What’s in the box


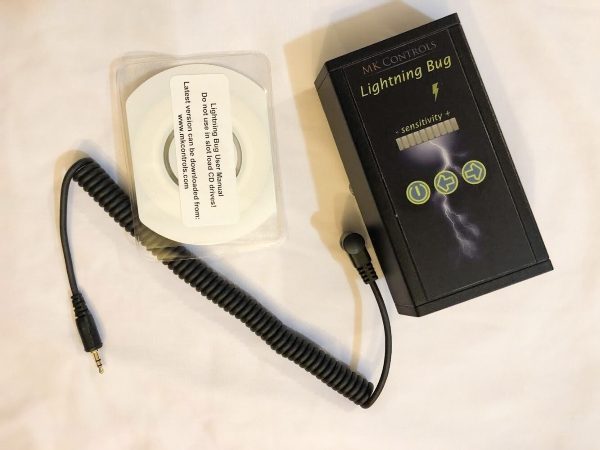
1 x Lightning Bug
1 x CD instruction manual
1 x Compatible camera cable

Design and features

Manufacturer Specifications:

Power-On Self-Test
Sensitivity set-point indicator (LED Bargraph)
MOSFET isolation between the camera and the Lightning Bug™ circuitry
26 levels of sensitivity
Easily adjust frames per second (from 1 to 10)
Water Resistant Soft-touch panel buttons
Front Overhang (from the center of camera shoe): 3.51″
Rear Overhang (from the center of camera shoe): 0.74″
Overall Height (not including the shoe mount): 1.13″
Overall Height (including the shoe mount): 2.10″
Overall Length: 4.25″
Overall Width: 2.60″
Weight (not including Battery): 2.96 oz
Weight (including Battery): 4.48 oz
Battery: Standard 9V Cell

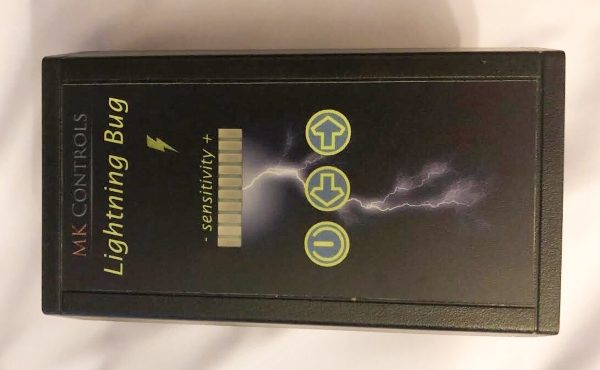
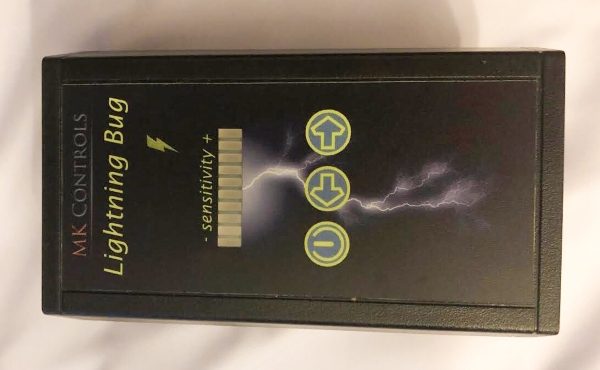
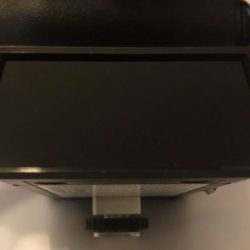
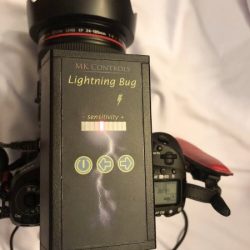
On the top surface of the Lightning Bug, there is the company name and device name, the sensitivity meter, and the 3 surface-mounted control buttons.


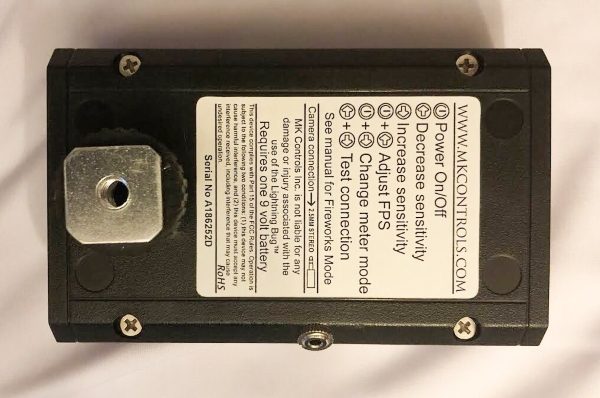
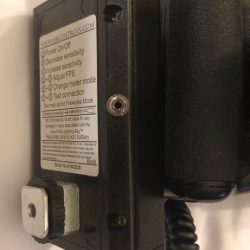
At the bottom of the Lightning Bug, there is a camera shoe mount that also has a 1/4-20″ threaded mount so that it can be mounted off camera on a light stand or tripod, etc, and a sticker with a summary of the controls and other industry required information.


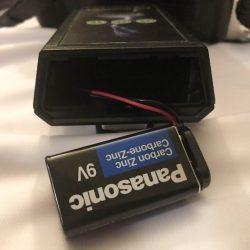
One one of the short sides at the back of the Lightning Bug is a cover and a battery compartment for the required 9-Volt battery. On the opposite side at the front is the IR cover, and on one of the long sides is the 1/8″ jack for the camera cable.


Connectivity and function

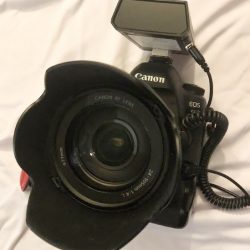
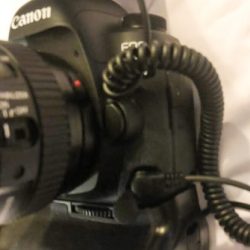
The Lightning Bug attaches to the camera shoe mount or any mount with a 1/4″-20 stud, and the cable is attached to the 1/8″ jack on the device and the appropriate jack on the camera. (See the MK Controls website for the compatible camera list).


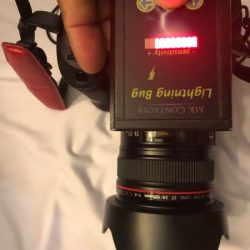
When you power on the camera and the device, the sensitivity indicator lights up. You can use the left or right buttons to increase or decrease the sensitivity.


Operation and Performance

The Lightning Bug has 2 operational modes which are Standard Mode and Fireworks Mode. When you power on the device starts up in Standard Mode which is used for Lightning photography) or in Fireworks Mode depending on which buttons are held down during startup. Fireworks Mode allows for delayed shutter release.
To start the unit in Standard Mode, you have to press and hold down the power button for approximately 2 seconds. To start the unit in Fireworks Mode you have to press and hold down the power button and the Increase Sensitivity button at the same time for approximately 2 seconds, and then release both buttons.
When you first turn on the device, it displays the current firmware version by lighting up the LEDs, and the display stays that way until the power button is released. The settings that you choose are saved in the device’s memory for the next time you power on. An additional nice feature is that the device will automatically turn your meter off after approximately 15 minutes of inactivity.
There are a total of 26 levels of available sensitivity. The factory default setting is level 12. The yellow LED that looks like a lightning bolt, lights up whenever the unit has detected an event and has triggered the shutter.
With fireworks photography, the yellow activity light flashes to let you know that you are in the Fireworks Mode. In this mode, you must be relatively close to the fireworks to be successful. To exit, you have to turn the device off, then back on again.
There are numerous settings to customize. The complete manual is available on the MK Controls Website.

This section will be updated once I get an opportunity to photograph fireworks and/or storms.

What I like

  • That it is lightweight
  • The size
  • The functionality

What can be improved

  • Although I like how lightweight it is, I would prefer it to have a rechargeable battery that can be charged internally or externally
  • (Nothing else so far until I get to take pics)

Final thoughts

As a photographer that likes many types of photography, I like the Lightning Bug device. Apart from the fact that it is compact and lightweight, it provides a dedicated function that should produce amazing results. There are fantastic examples of photos taken with the use of this device on the MK Controls website. You can take a look at them here. While I have not yet been able to shoot with it, I will give a thumbs up to its simple construction and its intended functionality. Winter is on its way in NYC, so I will be on the lookout for photography opportunities. To be continued…

Price: $179.00 (Includes the required cable for your compatible camera)
Where to buy: MK Controls website
Source: The sample for this review was provided by MK Controls.

Filed in categories: Reviews

Tagged: ,

MK Controls Lightning Bug review originally appeared on The Gadgeteer on September 22, 2018 at 9:00 am.

Note: If you are subscribed to this feed through FeedBurner, please switch to our native feed URL http://the-gadgeteer.com/feed/ in order to ensure continuous delivery.
Capture the perfect selfie of your furry friend

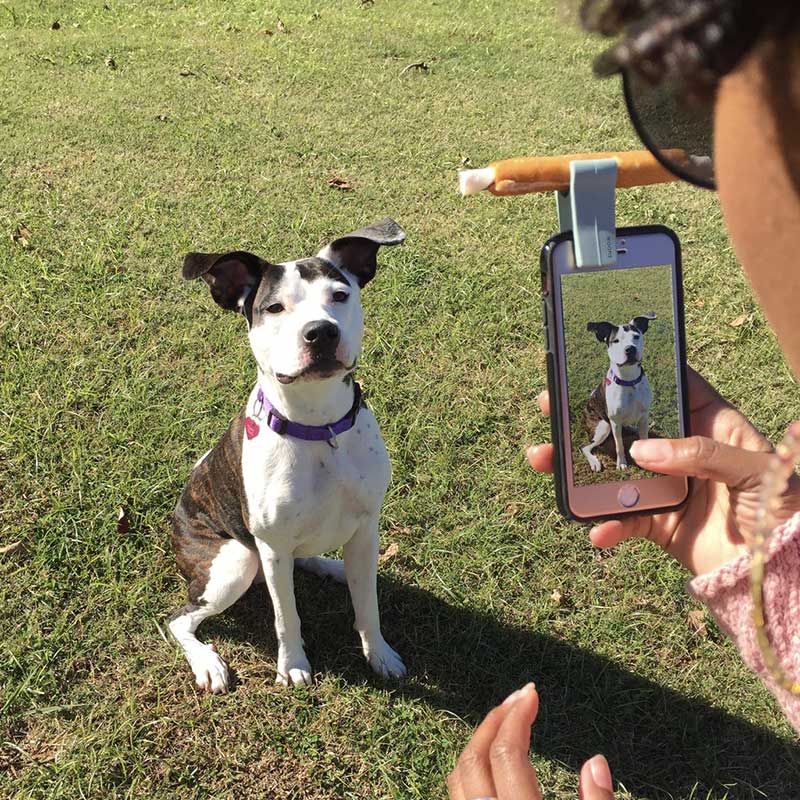
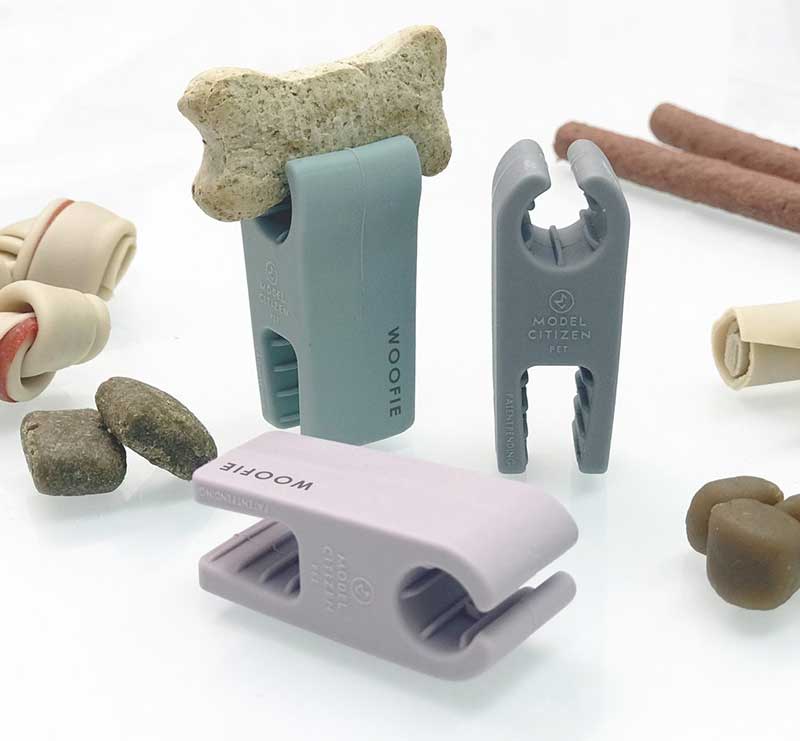
NEWS – Woofie is a small holder that clips to the top of your smartphone to make capturing the perfect picture of your pet easier because it gives your pet your absolute attention. Well, not really YOUR attention, but close enough. The secret of the Woofie is that it is designed to hold your pet’s favorite treat near the camera lens so he’ll be looking at the camera when it comes time to say cheese! No more yelling his name over and over to try to get him to look at the camera.

Woofie is compact so you can easily take it with you when you and your four-legged BFF are out on an epic adventure. Woofie is available in Glamour Green, Posh Pink, or Slay Grey for $9.50 from Modelcitizenpet.com and Amazon.

Filed in categories: News

Tagged: ,

Capture the perfect selfie of your furry friend originally appeared on The Gadgeteer on August 20, 2018 at 12:00 pm.

Note: If you are subscribed to this feed through FeedBurner, please switch to our native feed URL http://the-gadgeteer.com/feed/ in order to ensure continuous delivery.