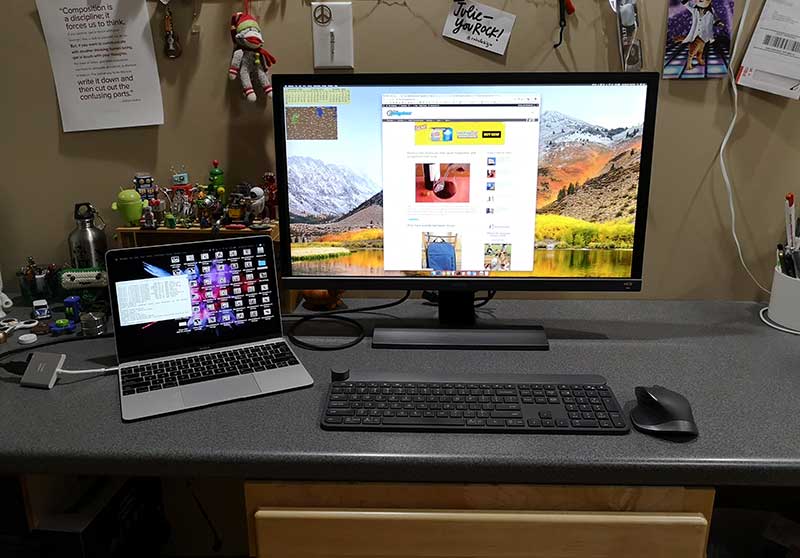
BenQ EL2870U 28″ 4K eye-care monitor review

REVIEW – Back in May I reviewed BenQ’s PD2710QC DesignView 27-inch Designer Monitor and have been using it ever since because I like the built-in USB-C dock and the excellent picture quality. But, it’s not 4K so I kept wondering what a 4K monitor would be like to use. I don’t have to wonder any longer because BenQ asked if I would like to review their EL2870U 28″ 4K eye-care monitor and I said yes. Let’s check it out.

What is it?

The BenQ EL2870U 28″ 4K eye-care monitor is marketed as a gaming monitor that offers special eye care features like low blue light, flicker-free, and auto brightness features. I explained to BenQ that I’m not a gamer and that they might not want me to review this particular monitor, but they said that it was fine and that there would be no problem reviewing this monitor for my normal everyday tasks. Well, alrighty then…

Hardware specs

Screen Size: 27.9
Resolution (max.): 3840×2160
Panel Type: TN
Backlight Technology: LED backlight
Brightness: 300
Native Contrast(typ.): 1000:1
Viewing Angle (L/R;U/D) (CR>=10): 170/160
Response Time: 1ms (GtG)
Refresh Rate: 60Hz
Aspect Ratio: 16:9
Display Colors: 1.07 billion colors
Audio: Built-in Speaker
VESA Wall Mount: Yes
Gaming: FreeSync
Connectivity: HDMI (v2.0)x2, DisplayPort (v1.4)x1
Dimensions (HxWxD mm): 657.9×476.27×194.6
Net Weight (kg): 5.7
Tilt (down/up): -5˚ – 15˚

What’s in the box?
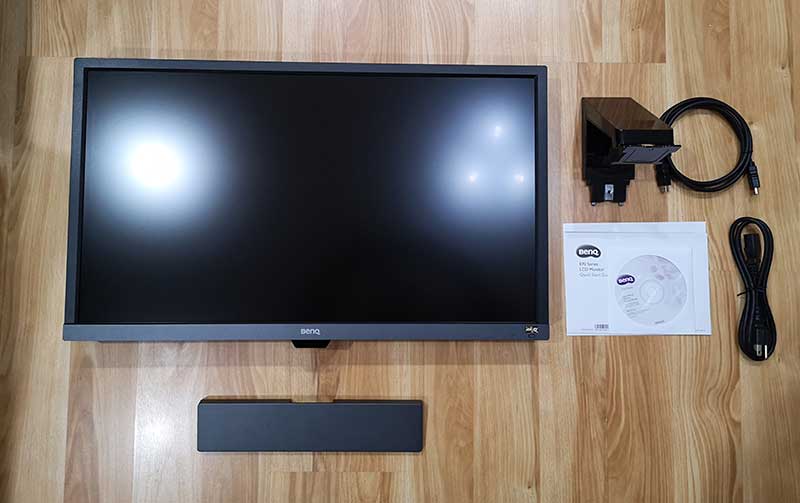
Monitor
Monitor stand
HDMI cable
Power cable
Quick start guide
CD of video drivers

Design and features
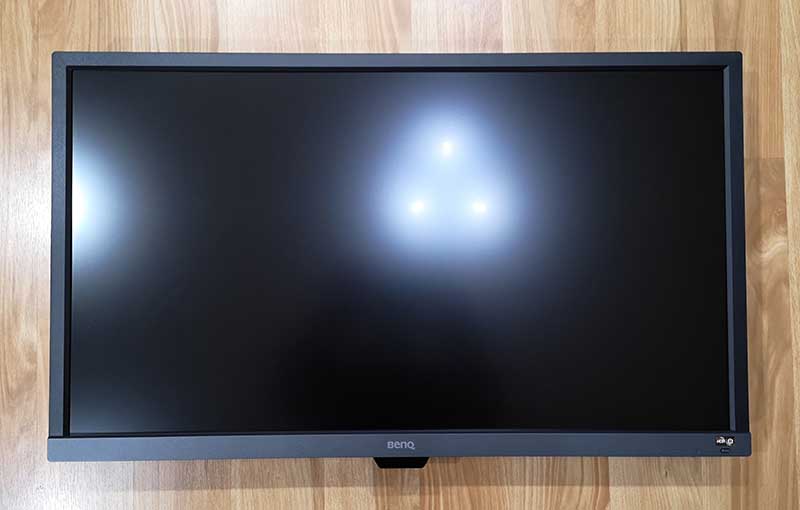
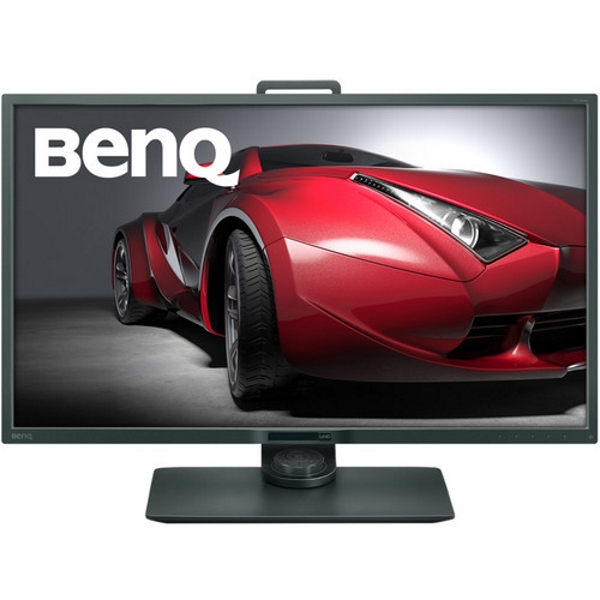
This monitor has a 28-inch glare-free matte display with a black plastic housing that has wider bezels compared to a lot of other monitors on the market and much wider bezels than the BenQ PD2710QC DesignView 27-inch monitor that I’ve been using.

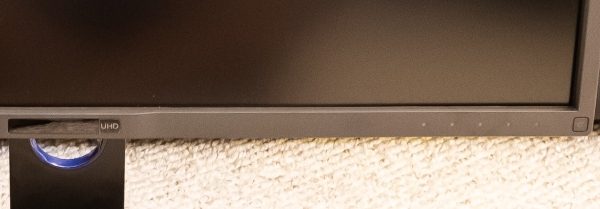
There’s a Benq logo in the center of the bottom bezel and below the logo is a light sensor which is used for the eye care feature. On the right lower corner, there’s a button that you can use to toggle the HDR and Brightness Intelligence+ features. More about those features later.
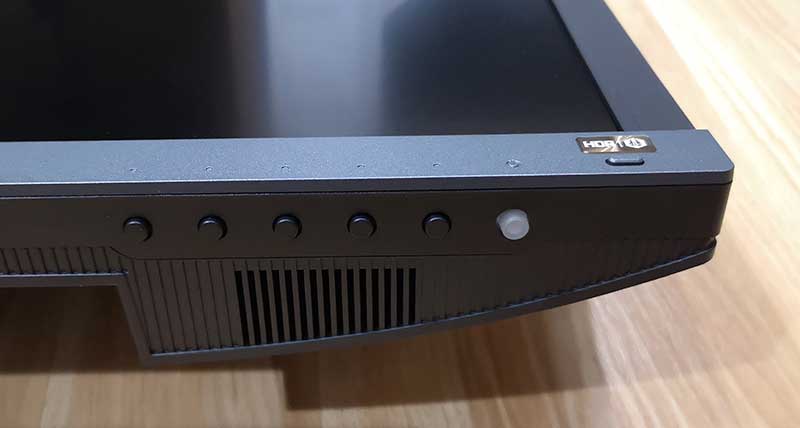
Along the bottom right side of the monitor are five small buttons that are used to navigate through the on-screen menus and another larger button that toggles power. You can also see the grill for the built-in 2-watt speakers.
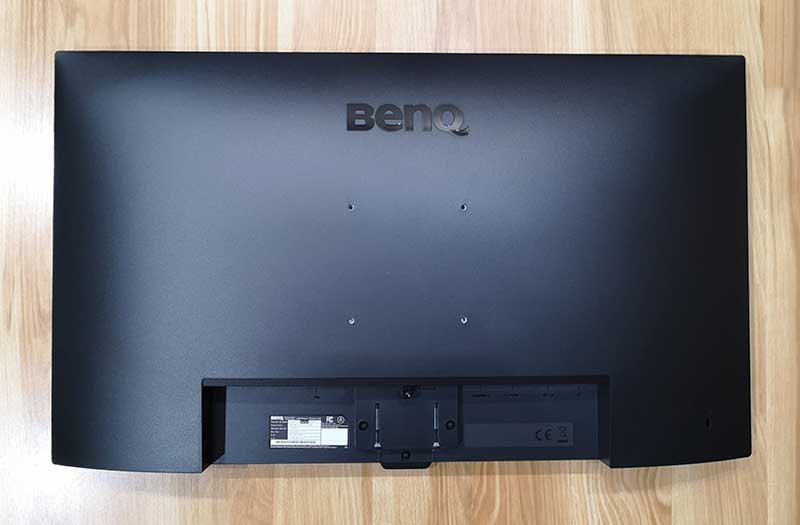
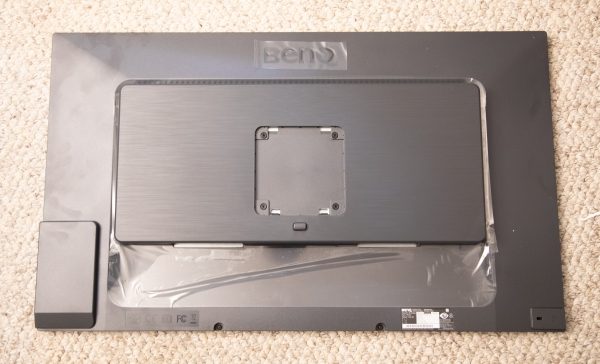
On the back of the monitor is a standard Vesa pattern so that you can mount the monitor to a wall mount or a dedicated monitor stand.
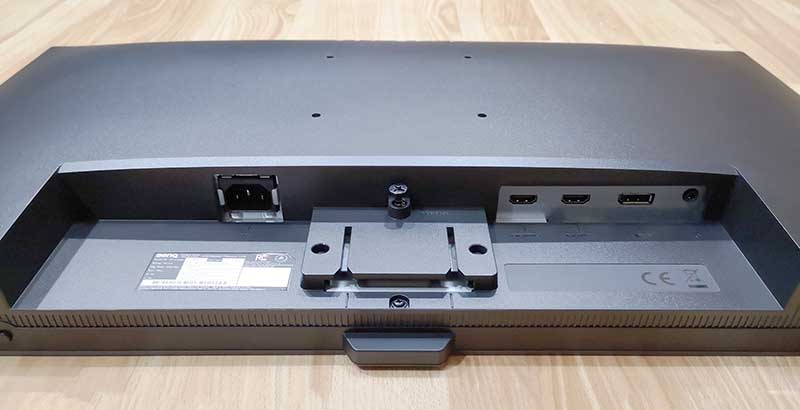
There is a mount point for the included table stand and a connection panel which has the power port, 2 HDMI 2.0 ports, a DVI 1.4 port, and a headphone jack. Unfortunately, there aren’t any built-in USB ports.
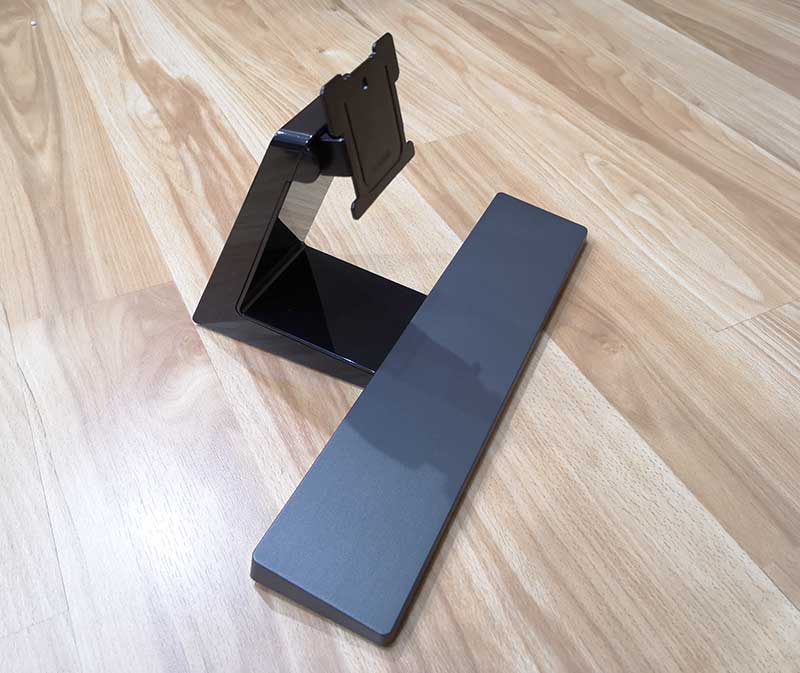
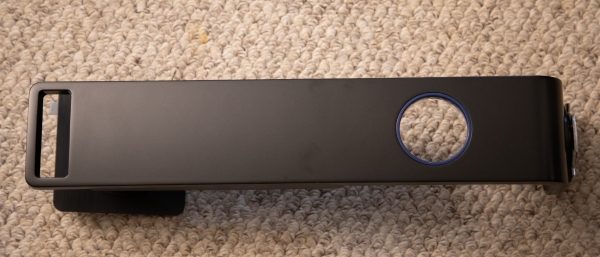
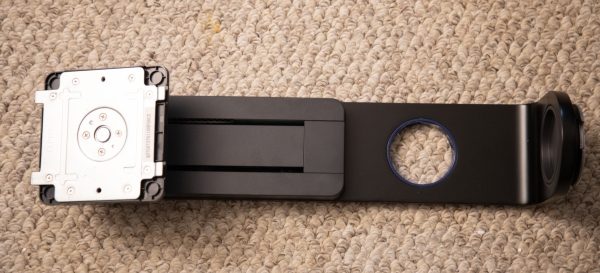
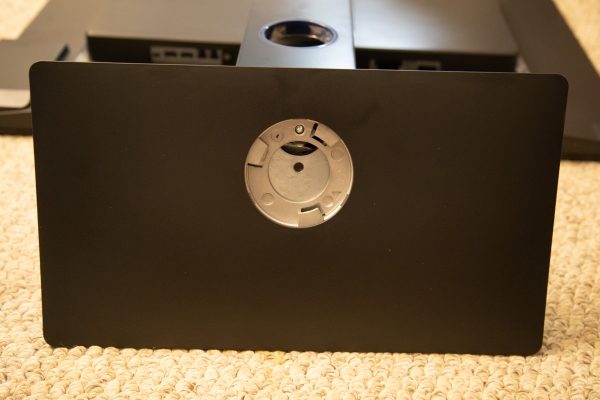
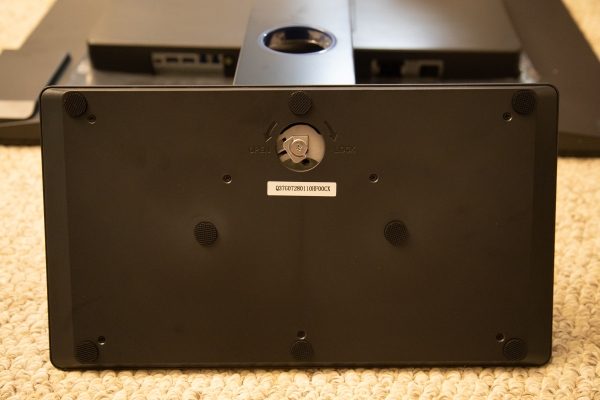
The table stand is two pieces that slide together to form a wide T shaped stand.
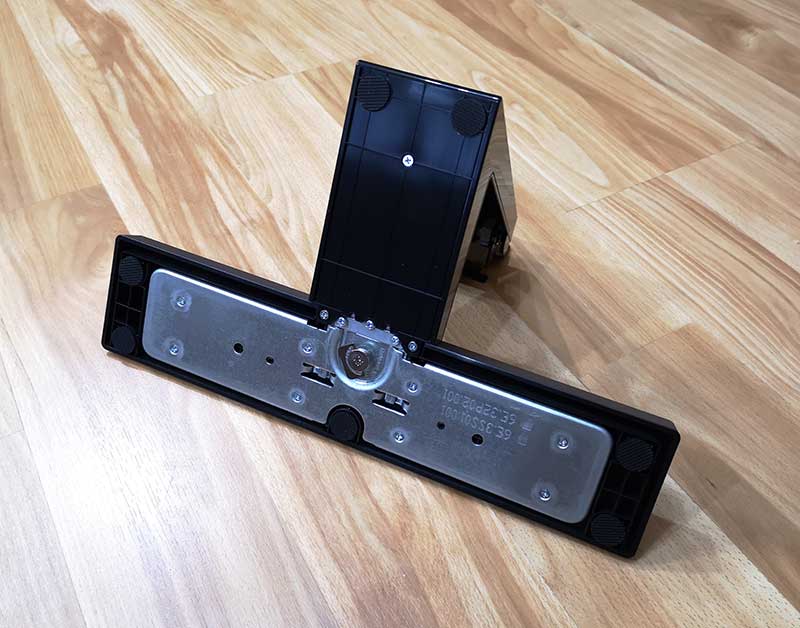
A tool-free screw tightens down to secure the two parts of the stand.
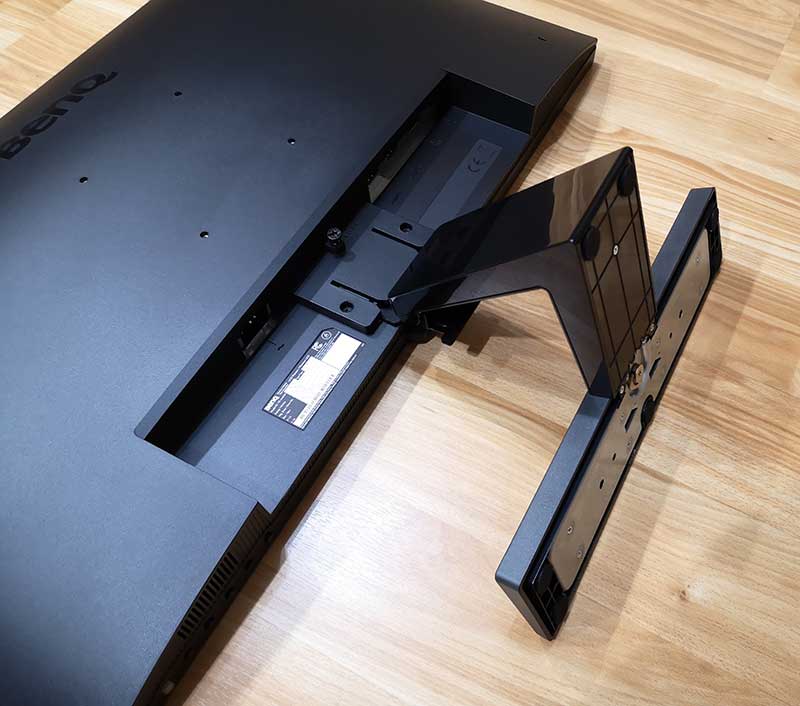
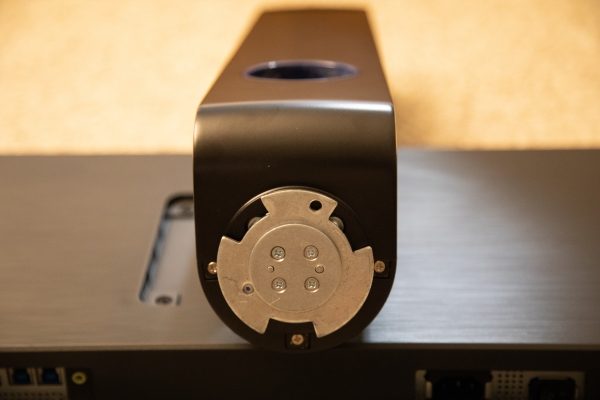
Then the top part of the stand slides into the bottom of the monitor where there’s another screw that secures the stand to the monitor. This screw requires a Philips screwdriver to tighten it down.
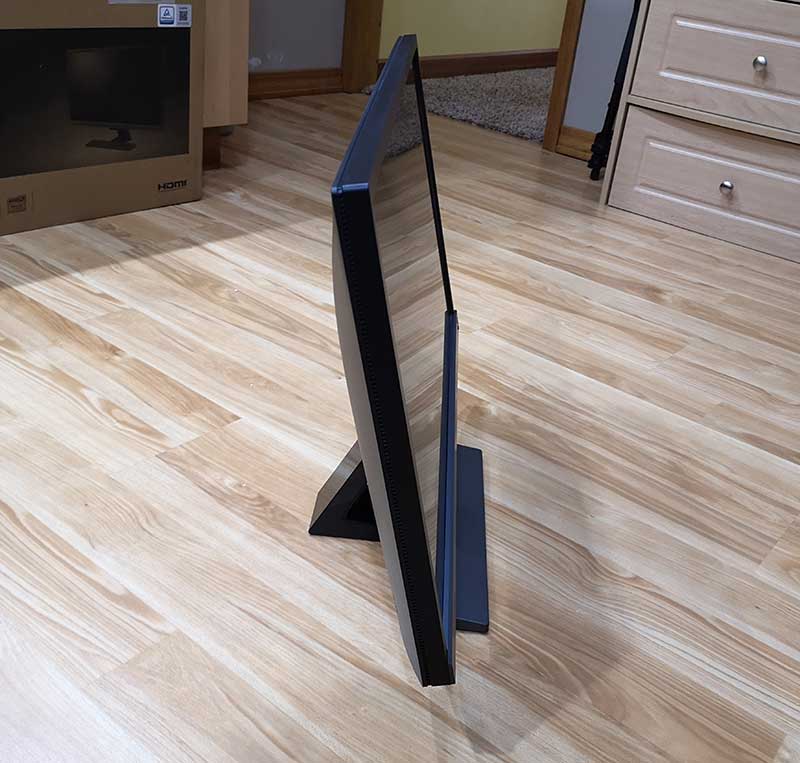
Here’s the BenQ EL2870U 28″ 4K eye-care monitor ready for service. Big thumbs up for the fact that the monitor has a built-in power supply, so it doesn’t come with a giant power brick.

One thing I noticed right away is a lack of a height adjustment feature with this monitor. The monitor pivots forwards and backward to adjust the viewing angle, but you can’t raise or lower the screen which I think is an unfortunate oversight.
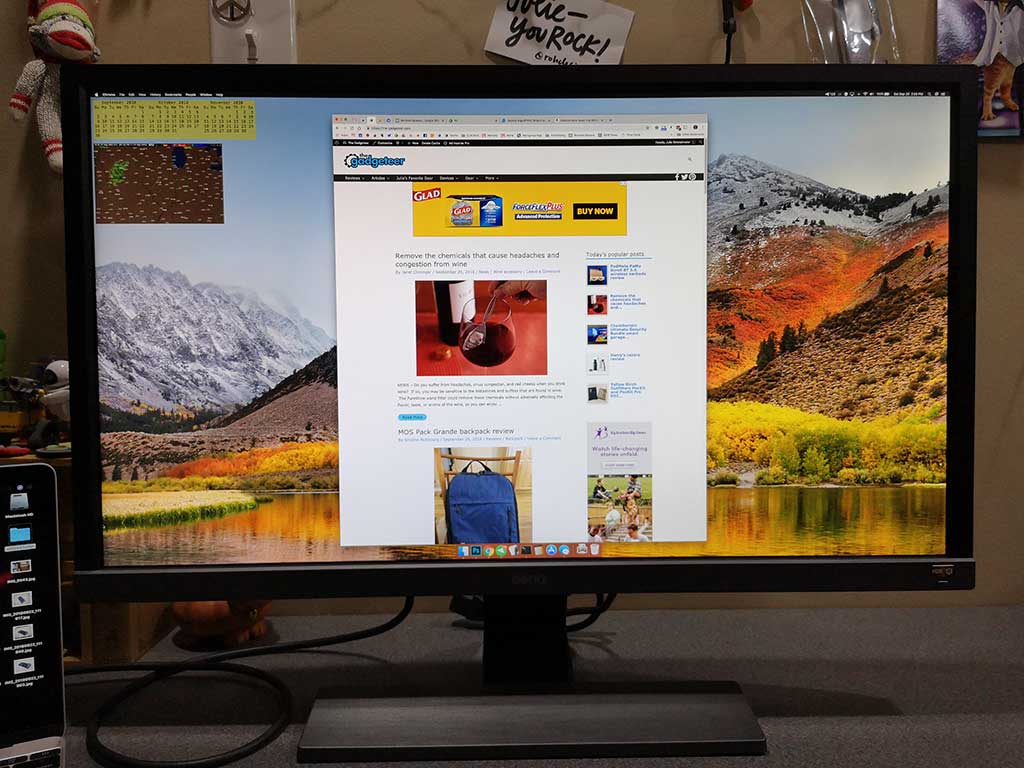
I performed my testing of this monitor with my 12-inch MacBook using a USB-C to HDMI adapter and the included HDMI cable that is included with the monitor. I was immediately struck by the additional screen real estate, crisp text, and vibrant colors.
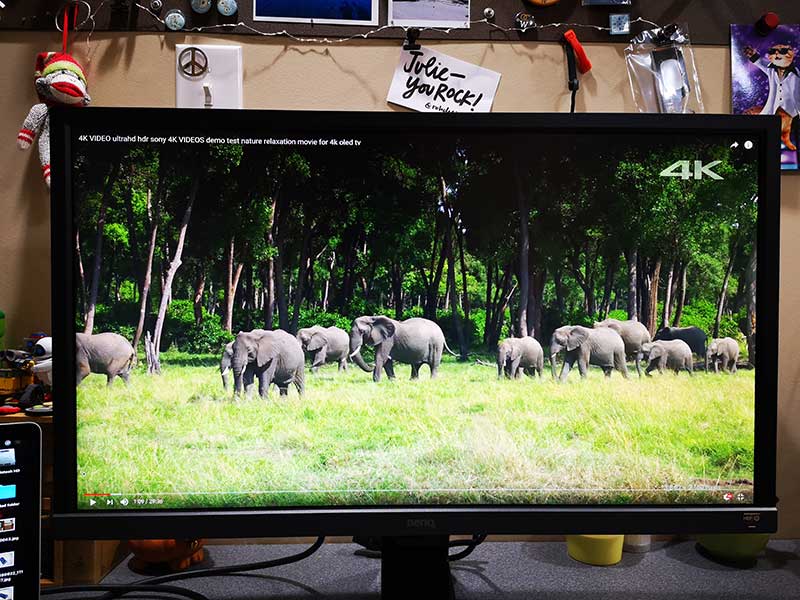
I used the monitor while doing all of my normal everyday activities working in the Chrome browser and Adobe Photoshop. I also used it to watch full-screen 4K video streamed from YouTube and other video streamed from Netflix and Hulu. The picture on this monitor is very nice but I noticed what I thought was sluggish performance with my 12-inch MacBook while connected to this monitor. It’s something I don’t notice when I’m using the other BenQ monitor and I later figured out that it was just that the display has more resolution, so it takes longer to move the mouse cursor around the screen. 😉 At least that’s what I think was the issue and after increasing the mouse cursor movement speed, I’ve not noticed any more issues with my MacBook feeling sluggish.

Text on this monitor is noticeably sharper than with non-4K monitors. Even when the text is white on black, it still looks great and it feels like I take a big step backward when I switch to back to another monitor.

This monitor looks best when viewed straight on, but if you view it at an off angle, the screen takes on a yellowish tint, at least to my eyes.

The BenQ EL2870U offers some features that minimize eye strain and irritation during long sessions of use. The Brightness Intelligence Plus (B.I.+) feature automatically adjusts the brightness and color temperature according to on-screen content, ambient light conditions, and color temperature in your surroundings. When you toggle this feature on by pressing the button in the lower right corner, it will adjust the display settings, with soothing warm white for comfort and cool white for productivity.

The HDR/B.I.+ button switches between 4 levels of HDR and B.I.+ modes to balance maximum contrast and vibrancy of the display. I tested all 4 settings and did notice a boost in color vibrancy contrast with the HDR emulation turned on.

But what does a gamer think about this monitor?

Even though BenQ said they didn’t care that I wasn’t a gamer, I decided to find out what a gamer thought about this monitor since that’s the segment of buyers that it’s being marketed for. I let Vincent, a friend from work borrow the monitor for a few days so he could share his thoughts with how the BenQ performed with some of his favorite games.

Here are some of his thoughts after testing the monitor with Assassin’s Creed Odyessy and Prey connected to his custom built i7 8700k (6 core)(12 core hyper-threading) PC with an NVidia GTX 1080 video card.
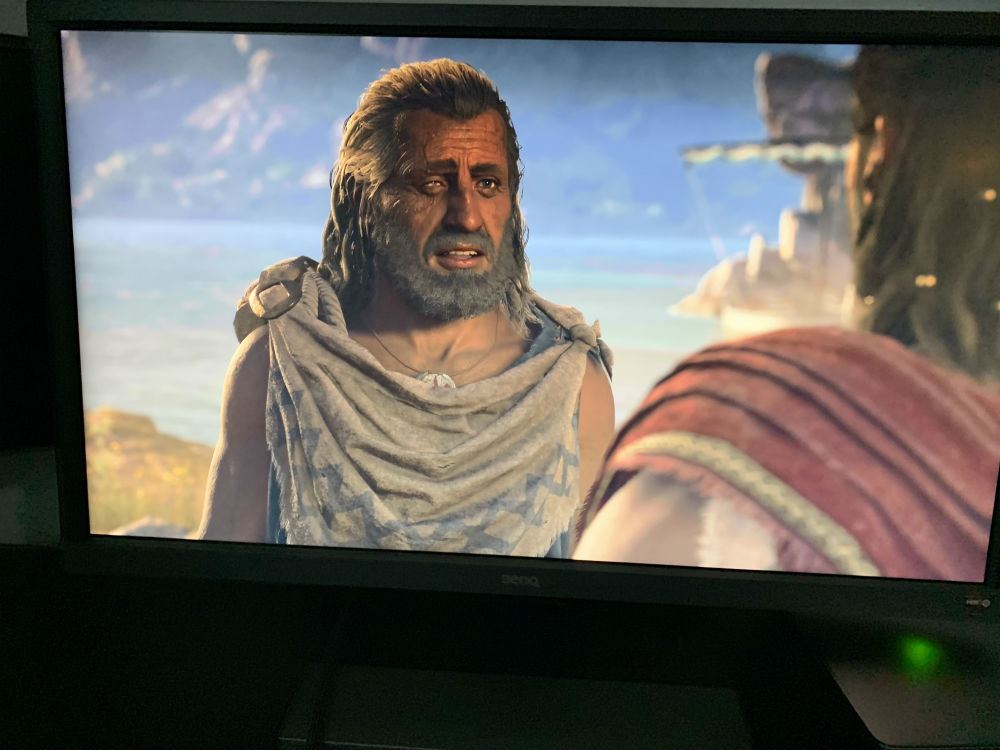
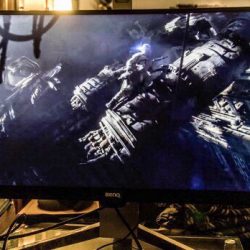
BenQ says that this monitor works best games that have dark scenes like Resident Evil, Tomb Raider, Anthem and so on. Vincent commented that he didn’t like the way the BenQ handled shadows (dark scenes) because it actually made them too bright. For example, the image above is from Assassin’s Creed Odyessy and the character’s shoulder on the left side of the screen looks grey when it should be much darker or almost black. Vinnie said that he could see how the brighter image feature would be good for multiplayer games so you could see bad guys creeping up on you from the shadows, but he wasn’t a fan of the feature.


He also mentioned that the Freesync feature of this monitor is only useful if you have an AMD video card. He uses an NVidia card, so he wasn’t able to test this feature which claims to fix choppy gameplay and broken frames. That said, he thought the refresh rate of the monitor was good.

The BenQ monitor uses a TN panel which doesn’t have burn-in issues like monitors that use IPS panels and he didn’t notice any light bleed as he has noticed with multiple ASUS monitors that he’s owned.

Like me, he wasn’t a fan of the monitor’s thick bezels but said he would definitely consider this monitor as a budget monitor for gamers who also have an AMD video card.

What I like

  • Crisp, vibrant image
  • Blue light blocking features
  • HDR features (if your video card supports them)
  • Power supply is internal, so there’s no ugly power brick
  • 3-year warranty

What needs to be improved

  • No vertical adjustment, can’t move the monitor up or down
  • Off angle viewing not the best
  • No built-in USB ports

Final thoughts

The BenQ EL2870U 28″ 4K eye-care monitor is a good option for a 4K monitor for everyday computer work and for gamers who have an AMD video card and want to take advantage of the FreeSync features. I loved the sharp text and vibrant colors of this monitor and also liked the crazy amount of customization that is possible if you want to tweak the settings in the onboard menus. But even if you aren’t a settings tweaker, right out of the box, this monitor looks good with everything I threw at it and for gamers, it provides a fast response for fast motion games. I’ll be switching to this monitor full time but I’m going to miss the built-in USB-C hub of the PD2710QC, at least until they offer a 4K version of it.

Price: $499.00
Where to buy: Amazon
Source: The sample for this review was provided by BenQ.

Filed in categories: Reviews

Tagged: ,

BenQ EL2870U 28″ 4K eye-care monitor review originally appeared on The Gadgeteer on October 9, 2018 at 10:02 am.

Note: If you are subscribed to this feed through FeedBurner, please switch to our native feed URL http://the-gadgeteer.com/feed/ in order to ensure continuous delivery.

BenQ PD3200U 4K Monitor review


REVIEW – As a photographer and videographer, editing videos including 4K videos and editing photographs are integral parts of my work. Also, viewing both in “true” color makes my editing process easier and more accurate. As a huge BenQ monitor fan, I have been looking forward to the opportunity to test and review a 4K BenQ monitor. Here is a summary of my experience.

What is it:

The BenQ PD3200U is a 32″ 16:9 4K IPS Monitor with enhanced color accuracy. It is 100% Rec 709 and the sRGB color space supports Darkroom, CAD/CAM, and Animation display modes. It has a built-in KVM switch that allows you to control two different computers from this single display with a single mouse and keyboard. It also features DualView mode to display content in different viewing modes side by side and BenQ has included a Hotkey Puck that simplifies switching between modes. The HotKey Puck is also programmable so that it can be used to quickly adjust the displays settings.

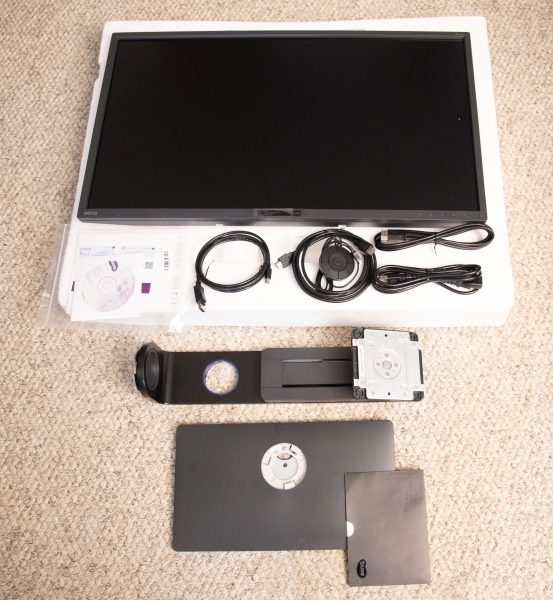
What’s in the box


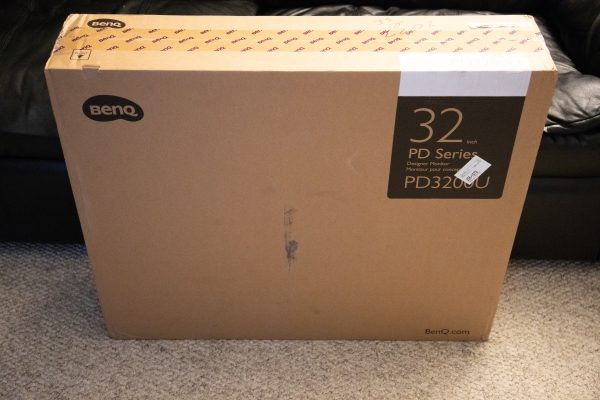
The monitor comes in a large brown shipping carton that is well padded inside to perfectly protect the contents.

1 x BenQ PD3200U Monitor
1 x Monitor Stand
1 x Monitor Base
1 x AC Power Cord
1 x Video Cable: DVI-D Dual Link
1 x Video Cable: DisplayPort cable
1 x USB Cable
1 x Hotkey Puck
1 x CD Rom Driver/Manual CD
1 x Quick Start Guide

Design and features

Specifications:
Size: 32″
Screen Area: 27.9 x 15.7″ / 70.8 x 39.9 cm
Native Resolution: 3840 x 2160
Aspect Ratio: 16:9
Maximum Brightness: 350 cd/m2
Contrast Ratio: 1000:1
Dynamic Contrast Ratio: 20,000,000:1
Refresh Rate: 60 Hz
Bit Depth / Color Support: 8-Bit+FRC (1.07 Billion Colors)
Look-Up Table: 10-Bit
Color Gamut: 100% sRGB
Response Time: 4 ms
Viewing Angle Horizontal: 178°, Vertical: 178°
Connectivity: 1 x 3.5 mm Input/Output ,1 x 3.5 mm Output, 4 x USB Type-A (USB 3.0) Output, 2 x DisplayPort 1.2 Input, 1 x HDMI 2.0
HDCP Support: Version 2.2
Built-In Speakers: 2 x 5 W
Height Adjustment: 5.9″ / 15 cm
Rotation Adjustment: 90°
Swivel Adjustment: 90° (-45 to 45°)
Tilt Adjustment: -5 to 20°
Mounting-Hole Pattern: 100 x 100 mm
Dimensions: (W x H x D) 29.1 x 19.4 x 9.2″ / 74.0 x 49.2 x 23.4 mm (With Stand), 29.1 x 17.2 x 2.6″ / 74.0 x 43.6 x 6.6 mm (Without Stand)
Weight: 18.7 lb / 8.5 kg

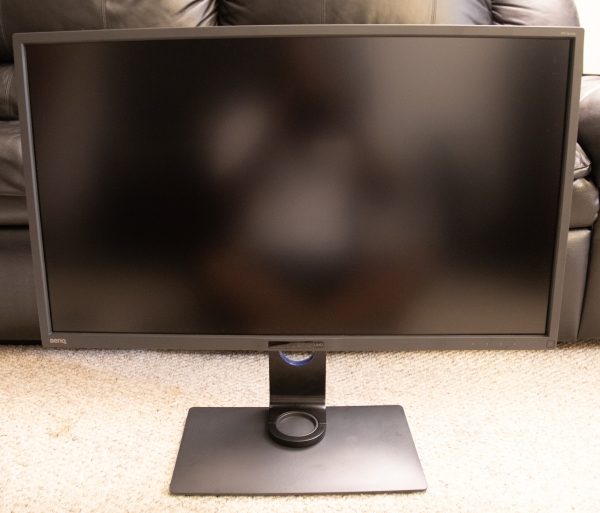
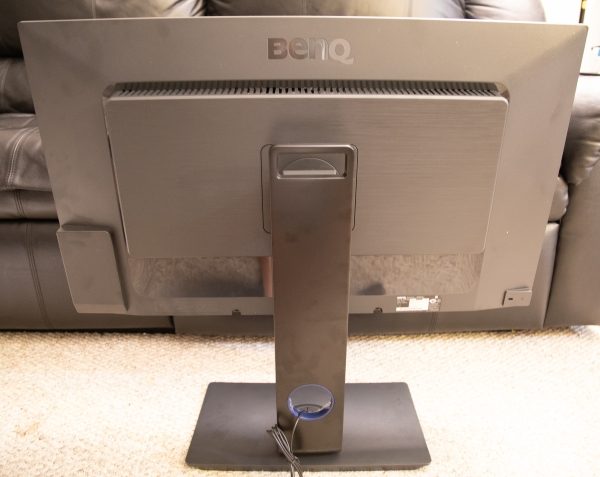
When you look at the front of this 32″ monitor, it looks sleek and impressive even with the small bezel around the edges. The back is vented and the stand “clicks in” to the back for a nice, clean look.

When you first remove the monitor from the box and lay it flat to assemble it, there is a Vesa square mount that allows you to simply “click in” the stand for a perfect and secure fit. The button that you see below the Vesa square is used to release the stand from the monitor.

The included stand has a pass-through hole for the cables, a sliding mechanism for you to adjust the height of the monitor, and a metal interface for the base.


The base of the monitor has a receiver that connects with the stand’s metal interface as indicated above, and there is a wingnut type screw that is used to connect the two.

Connectivity

This monitor has many available connections. Starting with the controls, on the front of the monitor as shown below and starting from left to right on the bottom bezel, there is the light sensor/Eco sensor that is in the middle, the five control buttons and the power button.


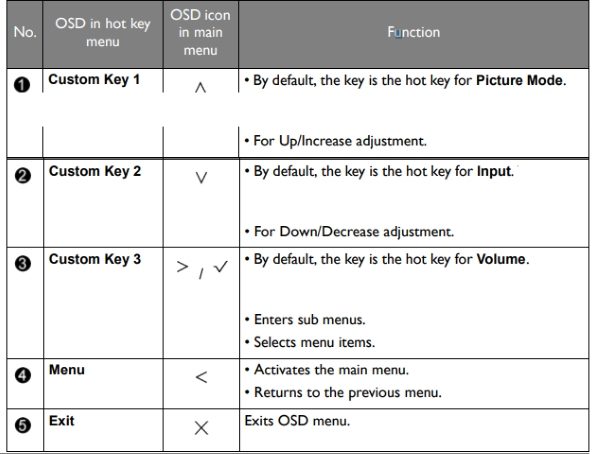
The following table shows the functions for the five control buttons from left to right.

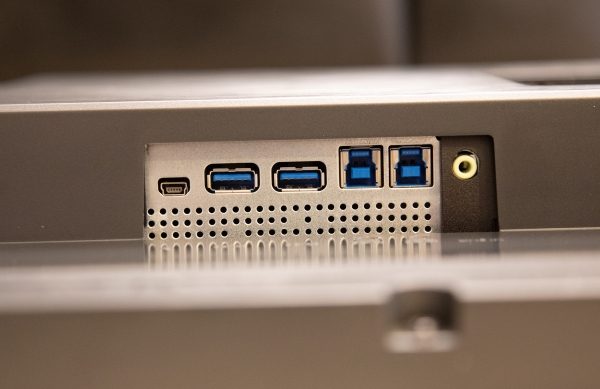
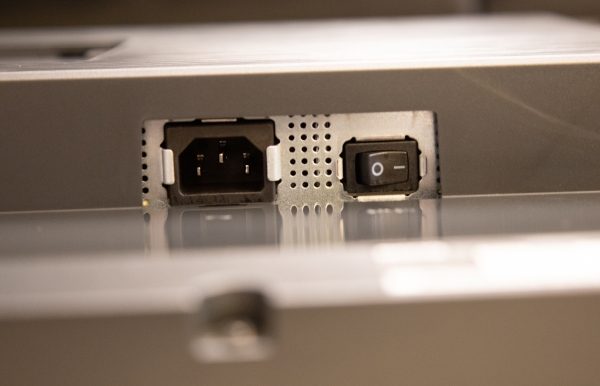
If you are facing the back of the monitor, the following are the controls from left to right at the bottom of the back of the monitor.

In the first picture:  Hotkey Puck socket, USB 3.0 ports (downstream; connecting to USB devices), USB 3.0 port (upstream 2; connecting to the PC), USB 3.0 port (upstream 1; connecting to the PC) and the Audio Line In.

In the second picture: The AC power input jack and the AC power switch.


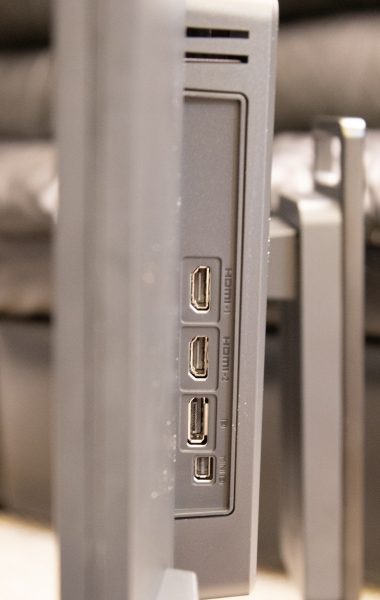
Again facing the back of the monitor, there are ports on the left side of the back section of the monitor that has the vents and that connects to the stand.

From top to bottom as shown below: DVI-D socket, HDMI socket, DisplayPort socket, and Mini DisplayPort socket.


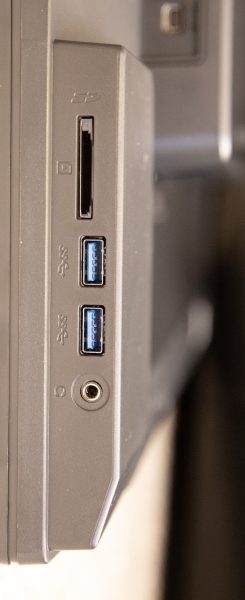
When facing the back of the monitor, on the left edge of the front section of the display housing, there are the following ports:

From top to bottom: SD card slot, 2 x USB 3.0 ports (downstream; connecting to USB devices), and the Headphone jack.


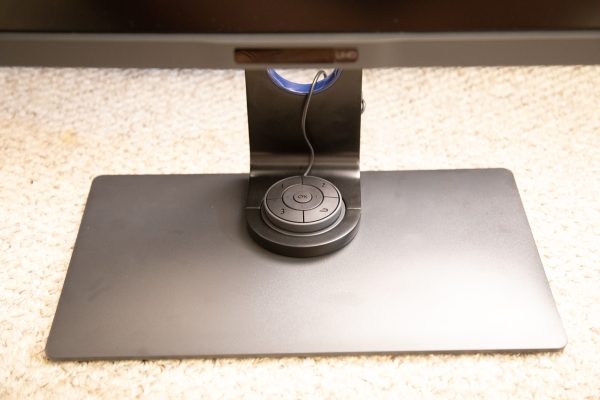
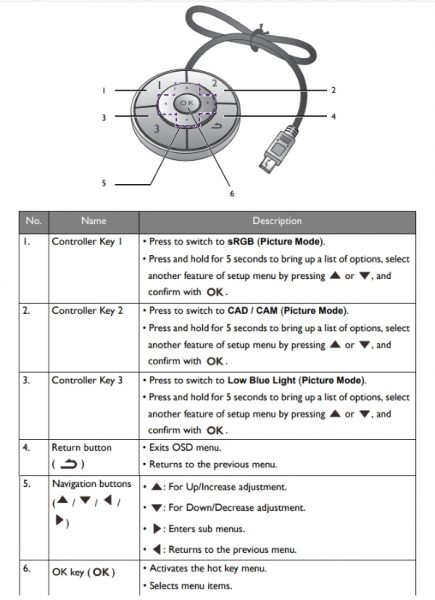
The picture below shows the included Hotkey Puck that simplifies switching between modes. It is also programmable so that it can be used to quickly adjust the displays settings.

The following is BenQ’s control chart for the HotKey Puck.

Performance

First and foremost, this is a well-built monitor with a hefty base and stand for maximum stability. Assembly was relatively easy with a bit of patience needed when aligning the screw hole and wingnut screw to connect the base to the stand. When I turned on this monitor I was immediately blown away by the color accuracy and brightness and vividness levels that for me were perfect right out of the box. I did have my calibration tools at the ready, but I did not need to calibrate the monitor to use any of my editing software or otherwise. I connected my monitor using a DisplayPort cable to my Workstation, and I was able to free up a couple of ports on one of the 3 USB hubs that I use by connecting the keyboard and mouse to the monitor. This is a great convenience for me since when they were connected to my powered hubs, it would sometimes be a “pain” when I would lose power and forget to power up the hubs when I regained power. While I tested the SD card slot which works like my other card slots, I still use the SD card module on my Lexar Workflow Hub for daily use because it is easier than reaching to the side of the monitor to use the built-in card slot. However, it is a nice convenience when I just want to pop in a client’s SD card for a moment to grab some files. The functionality of the USB ports is also great. If you connect a USB cable between the computer and the monitor using the upstream USB port, you can transmit data between the computer and any USB devices connected to the downstream ports on the monitor. This works for USB flash drives and other USB drives that are USB or externally powered. The HotKey Puck is really very convenient for using the On Screen Display menus. It takes a bit of getting used to, and I am still playing around with it and trying to get used to it. It is very responsive with very little lag between pressing the button and the on-screen response.

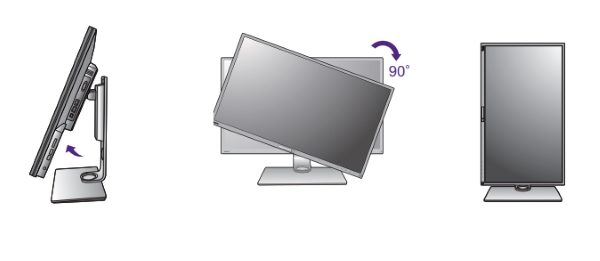
In terms of manipulating the monitor itself, BenQ offers Display Pilot Software on their website that you can download and add functionality to the monitor including switching it into portrait mode. This allows you to extend the monitor to its maximum height, tilt it the full 20 degrees that it can tilt, and then rotate it 90 degrees clockwise.  To be honest, I never use any monitor in portrait mode, and my cabling setup does not work properly when the monitor is in portrait mode. However, to demonstrate this function here is an illustration photo that I put together:
The built-in speakers are decent on this monitor with enough volume to work with ambient room noise. they are also clear sounding.

As a photographer/videographer/filmmaker, I regularly use the following programs:

  • Adobe Premiere
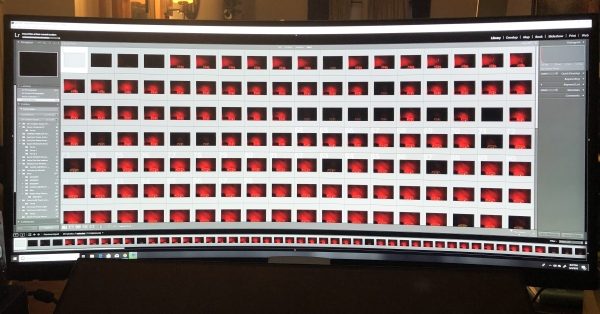
  • Adobe LightRoom
  • Adobe Photoshop
  • DaVinci Resolve
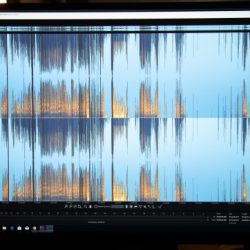
  • Izotope Rx
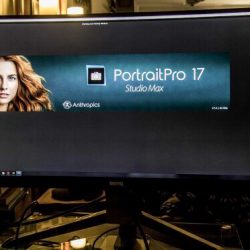
  • PortraitPro Studio

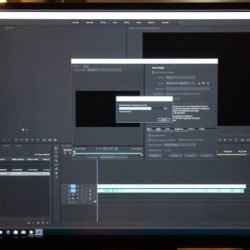
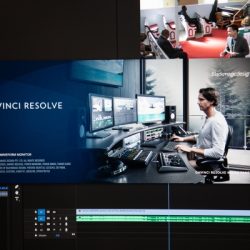
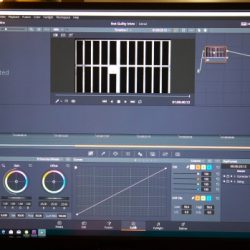
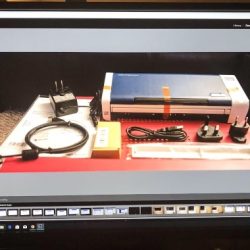
Every day when I sit in front of my workstation to use one or several of these applications, it is really an enjoyable experience with this monitor. Here are some pictures of the screens that use in my various projects:


In addition, when I use this monitor for daily tasks like reading emails or internet browsing, the text is clear and the colors on the websites just seem more brilliant than my other monitors.

What I like

  • The color accuracy right out of the box
  • The number of connectivity options
  • The size of the monitor
  • The KVM capability
  • The stability and adjustability fo the monitor
  • The build quality

What can be improved

  • An easier connection of the base to the stand

Final thoughts

The BenQ PD3200U is now by far my most favorite monitor. Rarely do I say that a monitor is perfect, and I demand a lot from a monitor. The controls are responsive and the color right out of the box is simply amazing. I spend an enormous amount of time editing photos and video footage and this monitor is simply gorgeous to look at and use. Whenever I need a break, I open a YouTube 4K video of some nature footage, just so I can be completely immersed and totally block out the world around me. The underwater 4K videos look phenomenal. While we all have our own preferences, and some of us can be more critical than others, for me, this is a win!! Win!! Win!! I absolutely believe that anyone in the photography/videography industry would find this monitor to be a very good fit in their workflow and for their productivity. I can’t wait to see what BenQ comes up with next to beat this one.

Price: $899.99
Where to buy: Amazon
Source: The sample for this review was provided by BenQ.

Filed in categories: Reviews

Tagged: ,

BenQ PD3200U 4K Monitor review originally appeared on The Gadgeteer on September 24, 2018 at 11:00 am.

Note: If you are subscribed to this feed through FeedBurner, please switch to our native feed URL http://the-gadgeteer.com/feed/ in order to ensure continuous delivery.
BenQ EX350IR Curved Monitor review


REVIEW – When editing photos or videos, a reasonably sized display with great color reproduction is really essential. I have always been a fan of the quality of BenQ monitors, but I have not purchased a new one for quite some time. When I was offered the opportunity to review one of their newer curved monitors, I jumped at the chance to see if they could keep me as a fan. Here is how it went:

What is it

The BenQ EX350IR is a 21:9 35″ Vertical Alignment MonitoCurved Monitor, boasting a  3440 x 1440 resolution.

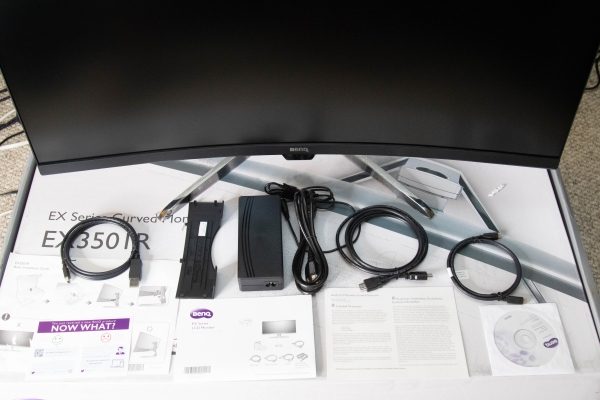
What’s in the box

Unpacking

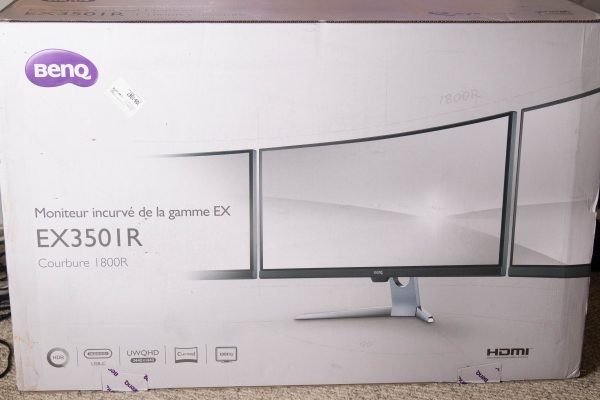
As you can see from the pictures below, the monitor and the accessories arrived well-packed and in a very large box that was cushioned in every way with styrofoam. The screen also had additional protection.


Contents


1 x BenQ EX350IR Curved Monitor
1 x System CD-Rom
1 x Power Cord
1 x Power Adapter
1 x DisplayPort to Mini DisplayPort Cable
1 x HDMI Cable
1 x USB Type-C Cable
1 x Back Cover
1 x Quick Start Guide

Specifications

Size: 35″
Screen Area: 32.26 x 13.62″ / 81.94 x 34.59 cm
Panel Type: VA LCD
Native Resolution: 3440 x 1440
Aspect Ratio: 21:9
Pixels Per Inch (ppi): 103 ppi
Brightness: 300 cd/m2
Contrast Ratio: 2500:1
Dynamic Contrast Ratio: 20,000,000:1
Refresh Rate: 100 Hz
Adaptive Sync Technology: FreeSync
Bit Depth / Color Support: 8-Bit (16.7 Million Colors)
Color Gamut: 100% sRGB
Response Time: 4 ms (GtG)
Viewing Angle: Horizontal: 178°
Vertical: 178°

Connectivity:
2 x HDMI 2.0
1 x DisplayPort 1.4
2 x USB (USB 3.0) Output
1 x USB (USB 3.0) Input
1 x USB Type-C
1 x 3.5 mm Output

HDCP Support: Version 2.2
Dimensions (W x H x D): 32.8 x 19.8 x 8.8″ / 83.4 x 50.4 x 22.4 cm
Weight: 22.93 lb

Design and features

The BenQ EX350IR Curved Monitor is a beautiful curved monitor that has a 178-degree viewing angle from each side. It is a 21:9 format that has a HD resolution up to 3440 x 1440.
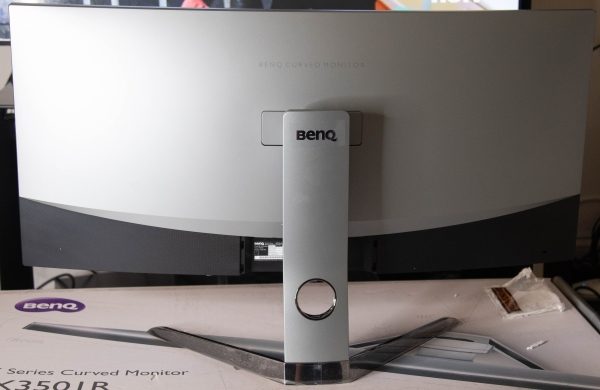
The picture below shows the back of the monitor with the hole in the stand to pass the connected cables through. I already have holes on my desk to triage the cables, so I did not use this feature. You can also see where the stand with its triangular style platform connects to the back of the monitor. Ths stand can be removed, and an optional VESA wall mount transfer kit can be purchased separately and attached so that the monitor can be VESA mounted.

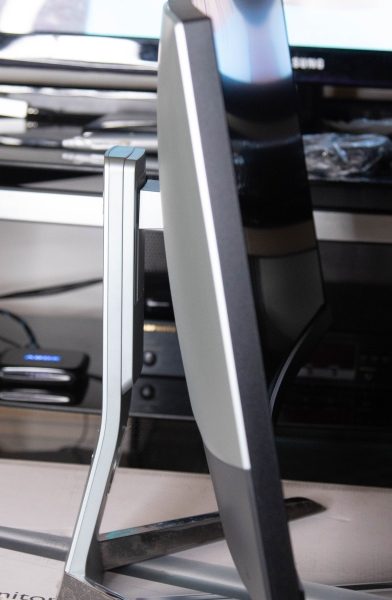
This angle below shows the tracks on the stand between the stand and the monitor that allow the height of the monitor to be raised or lowered simply by pulling it up or pushing it down. The tracks provide the necessary tension to keep it firmly in place. The visible spring that you see controls the tension when tilting the display.

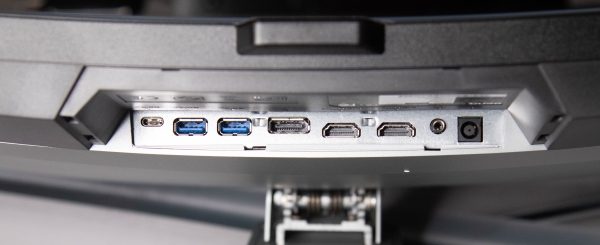
This monitor has a nice selection of ports. (From left to right as pictured below):
1 x USB Type-C Port
2 x USB 3.0 Ports
1 x DisplayPort
2 x HDMI Ports
1 x Headphone Jack
1 x DC Power Input Jack


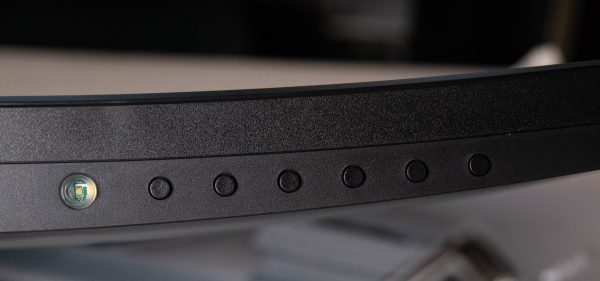
If you are facing the front of the monitor, the control buttons are underneath the bottom right side of the display (From left to right):
Button 1 – Power Button: Power On /Off
The next 6 buttons are “Control Keys or hotkeys” (Pressing any control key brings up a menu function)
Button 2 – Input Hot Key: Input Selection
“The Custom Keys perform as hotkeys to provide direct access to pre-defined functions. You can change the default setting and designate different functions for these keys”.
Button 3 – Custom Key 1: Picture Mode
Button 4 – Custom Key 2: Contrast
Button 5 – Custom Key 3: Brightness
Button 6 – Menu: Activates the Main Menu
Button 7 – Exit: Exit On Screen Display Menu
(For the record, I did not change any of the functions of the Custom Keys, since they worked well for me at the factory default settings)

Performance

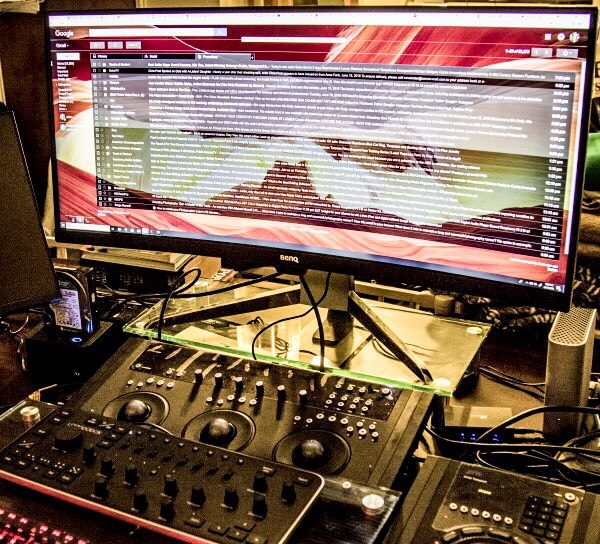
I connected the monitor to my main workstation where many nights I work into the early morning hours editing videos and photos. (Note: Some aspects of the following pictures are purposely blurred).


In my testing, I worked with Adobe Premiere, LightRoom, and Photoshop, as well as PortraitPro Studio as my main editing tools. This monitor performed flawlessly. The color reproduction was great and extremely close to being 100%”true”. I made sure that I left everything as it was right out of the box, and did not do any color calibration. The added desktop space 0f 3440 x 1440 @21:9 is really great to work with, and this 35″ monitor still seems massive when compared to my previous 29″ monitor.


Here are some screenshots of the actual applications that I work with:


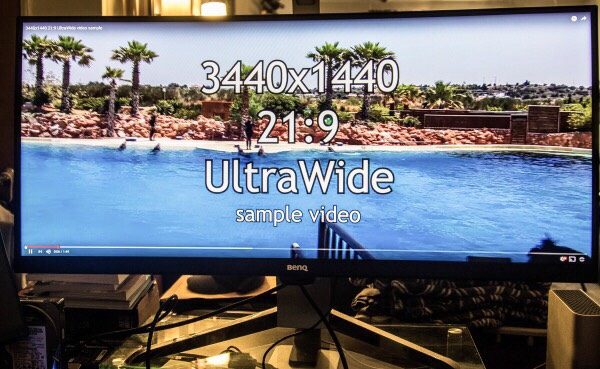
While I am not a gamer, I did test using a few gaming demos to see what they looked like on this display. While it may not be realistically visible in the pictures below, the colors are great from edge to edge, and I did not notice any kind of color bleeding or dead pixels in any scenario throughout my testing.


The refresh rate of this monitor works very well for all of my needs and for all of the applications that I work with. And since I work a lot with editing and rendering videos, that is a major help when rendering and utilizing “live view” simultaneously.

In terms of additional hardware functions, I also tested the audio output jack. The sound is very good and close to the sound I get from my external USB DAC. However, for my purposes, I did not find it practical to have the headphone cable draped across my desk from the bottom of the monitor. If the choice is to use the audio output from the monitor, I would suggest using a Bluetooth audio transmitter and receiver to make the connection wireless.

What I like

First of all, I absolutely love the size of this display. I also love the color reproduction and the refresh rate. The build quality is great and despite its size, this monitor is sturdy and stable. It performs very well for photo and video editing, as well as for watching movies and performing everyday tasks.

The only thing that could make me more overjoyed about a BenQ monitor like this is if/when I get the opportunity to test a 4K version. For me, the 4K capability would make a BenQ monitor like this the “above all” monitor for my use.

What can be improved

Since this monitor has a sizeable bezel, I think the design would work better if the control buttons are on the bottom right front face of the monitor. In my opinion, the design that places the buttons underneath the display where you have to feel for them, and either memorize their position or keep pressing buttons until you get the right ones is not practical unless there is at least a corresponding label on the front.

Final thoughts

Since I have always been a fan of BenQ monitors and their quality, I was expecting a whole lot in the design, build, and performance of this monitor, and it does not disappoint. While there is the issue of the location of the control buttons that I find inconvenient, that is as far as “MY” negatives go. We may all have a difference of opinion about a product like this, especially when it is a major part of the typical workflow experience. However,  I would not hesitate in any way to recommend this monitor. Just like with my previous BenQ monitor that I purchased probably over 12 years ago, I am a fan.

Price: $849.00
Where to buy: Amazon and B&H Photo Video
Source: The sample for this review was provided by BenQ.

The post BenQ EX350IR Curved Monitor review appeared first on The Gadgeteer.

Filed in categories: Reviews

Tagged: ,

BenQ EX350IR Curved Monitor review originally appeared on The Gadgeteer on July 2, 2018 at 11:00 am.

Note: If you are subscribed to this feed through FeedBurner, please switch to our native feed URL http://the-gadgeteer.com/feed/ in order to ensure continuous delivery.
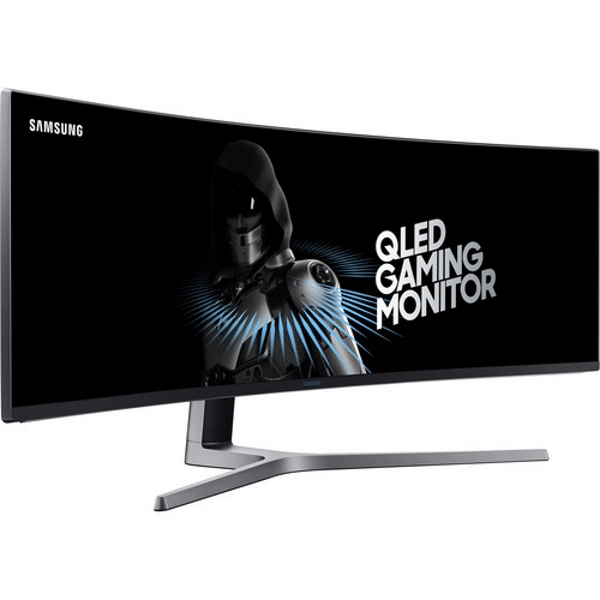
The Samsung CHG90 49″ HDR LCD Monitor might just check all the boxes as the right display

Each week, I spend a lot of time in my home studio editing photos and videos, and I rely on the four monitors that I use to create a multitasking environment. It is a bit tedious using four monitors for my workflow, and I would much prefer to just have two. My concept relevant to my workspace and workflow is to have one large high-resolution curved monitor, and one flat 4K monitor. While this arrangement may sound weird to some, it would work great for me.

I have been researching large high-resolution curved monitors, and I came across the Samsung CHG90 49″ 32:9 Curved 144 Hz FreeSync HDR LCD Monitor. Now I know that this monitor by the manufacturer’s description is designed more for the gamer than the editor, but I do wonder if it will work for me both for its size and its specifications. It is obvious that the real estate would work well for me, but the jury is still out on its functional ability for editing, until I can actually see it in person and ascertain how well it can properly reproduce true colors, etc.
According to the manufacturer’s specs, it is equipped with AMD FreeSync 2 technology, has a 1 ms response time, and a 144 Hz refresh rate. It has a built-in USB 3.0 hub with 1 x USB 3.0 (upstream) and 2 x USB 3.0 (downstream), 2 HDMI ports, 1 DisplayPort, 1 Mini DisplayPort, 1 3.5mm Audio-in port, and a headphone jack. It is also wall mountable.

If you would like to read more about the Samsung CHG90 49″ 32:9 Curved 144 Hz FreeSync HDR LCD Monitor or purchase one, head over to Amazon and check it out.

The post The Samsung CHG90 49″ HDR LCD Monitor might just check all the boxes as the right display appeared first on The Gadgeteer.

Filed in categories: News

Tagged:

The Samsung CHG90 49″ HDR LCD Monitor might just check all the boxes as the right display originally appeared on The Gadgeteer on May 21, 2018 at 8:00 am.

Note: If you are subscribed to this feed through FeedBurner, please switch to our native feed URL http://the-gadgeteer.com/feed/ in order to ensure continuous delivery.
The LG 43UD79-B 43″ 16:9 4K IPS Monitor is big, bright and right!


Video editing and photo editing can become a strain on your eyes, especially when working with a smaller monitor. The bigger the monitor, the easier it is to see all of the small details. In addition, I am usually multitasking, and I work with three monitors, with applications open on each one. I am beginning to get tired of this setup, and I also need to get a new monitor with 4K capability.

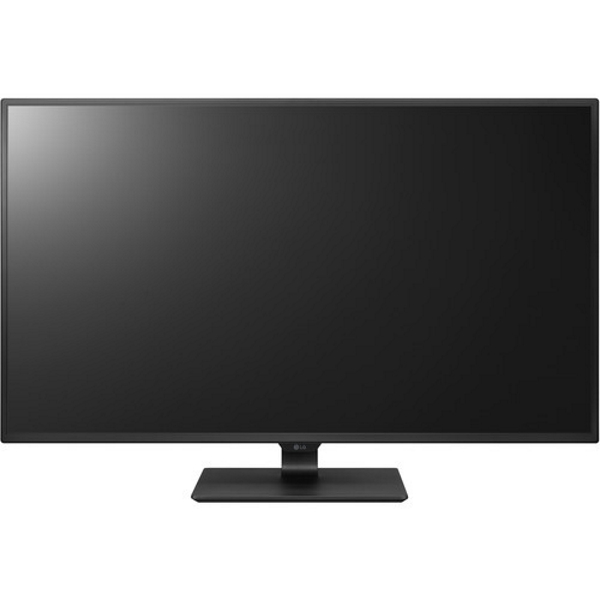
So far, my research has led me to a couple of monitors that I think will work well for me. The one that I am currently looking at is the LG 43UD79-B 43″ 16:9 4K IPS Monitor. This monitor has a resolution of 3840 x 2160 on a 43 inch In-Plane Switching panel, and provides a wide 178 degree viewing angle. It also features a Dual Controller that allows you to connect and control two computers with one mouse and keyboard. The 5ms response time is decent, along with a 60 Hz refresh rate, and support for up to 1.06 billion colors. This monitor also supports PIP and PBP modes for multitasking. The built-in ports include 2 x HDMI 1.4, 2 x HDMI 2.0, 1 x DisplayPort 1.2 and 1 x USB Type-C port. There is a 200 x 200 VESA mounting capability on the back.

If you are thinking of the LG 43UD79-B 43″ 16:9 4K IPS Monitor as a display solution, you can purchase one at Amazon for $600.98.

The post The LG 43UD79-B 43″ 16:9 4K IPS Monitor is big, bright and right! appeared first on The Gadgeteer.

Filed in categories: News

Tagged: ,

The LG 43UD79-B 43″ 16:9 4K IPS Monitor is big, bright and right! originally appeared on The Gadgeteer on May 16, 2018 at 8:09 am.

Note: If you are subscribed to this feed through FeedBurner, please switch to our native feed URL http://the-gadgeteer.com/feed/ in order to ensure continuous delivery.