iseeBell Video Doorbell Security Cam review

In all of my reviews, I try to be as fair as I can. Every product has its good and bad points and I try to point them out. No product—no matter how good it is—is perfect. At first glance, my review of the iseeBell Video Doorbell Security Cam may not seem fair—and maybe it isn’t. But that doesn’t mean I don’t like it. Let me explain.

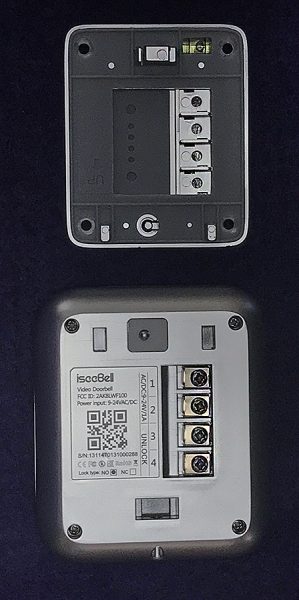
My intended use for the iseeBell video doorbell was just that—a video doorbell. The setup is advertised as super easy: You remove your original doorbell and then use its existing wiring to connect. All you need are some minor drilling and mounting skills (iseeBell even supplies the proper tools and instructions). But I had forgotten one (not so) minor detail: About 6 years ago, we switched to a wireless battery doorbell. After removing the previous (wired) doorbell, I shoved all the wiring inside the wall and then stuccoed over the hole. It seemed like a smart idea at the time! As a result, I could not use and review the iseeBell as it was intended. However …

Even though I no longer could give the iseeBell a fair review as a video doorbell, they also advertise it as an indoor/outdoor security camera. After considering this, I realized that I still had a great use for it as a security camera. That’s fair, right?

I live on 2 acres in Florida and my large backyard has a separate studio building where I do freelance graphic design and also write about and photograph the products I review. Needless to say, I have some expensive stuff in the studio. Up until now, the studio has never had any security monitoring. We have large and very protective dogs in our house, but I worried about the studio because it’s 100 feet away and out of reach of the dogs. With the iseeBell, I now have a chance to monitor the building 24/7. So how does it work? Let’s see.

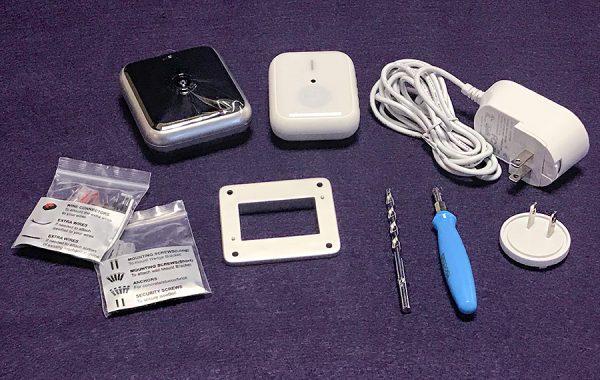
When you open the box of the iseeBell, you are presented with a lot of stuff which can seem overwhelming. However, you generally won’t need all of it. iseeBell has done a good job of accounting for different installation setups you may have. The setup & installation guide is straightforward and easy to follow with clear directions and illustrations. Granted, if you have no experience with home repair tools, you may be better off asking for help. The Guide lists everything included in the box and what kind of wifi you need. A 2.4Ghz network is required, but since I have an Apple dual-band router, I was good to go. One caveat is that your wifi router must either be strong enough or physically close enough to the iseeBell to work properly.

As I said earlier, the iseeBell will run on existing doorbell wires (if you have them). The guide uses step-by-step instructions. Yeah, I know, I didn’t actually install it as a doorbell—and that’s the unfair part of this review. But trust me, I’ve installed enough stuff to know that these are easy instructions to follow.

Also included in the box is a separate indoor wireless door chime (must be plugged in), which I haven’t decided if I’m going to use or not. Why? Because the iseeBell comes with a downloadable app (iOS and Android) that works just as well for my use.

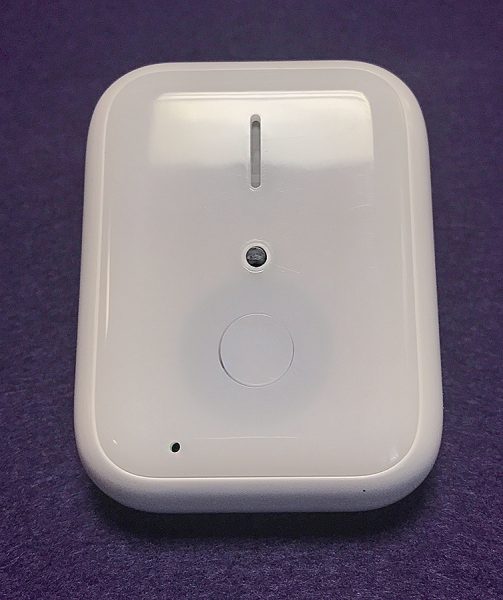
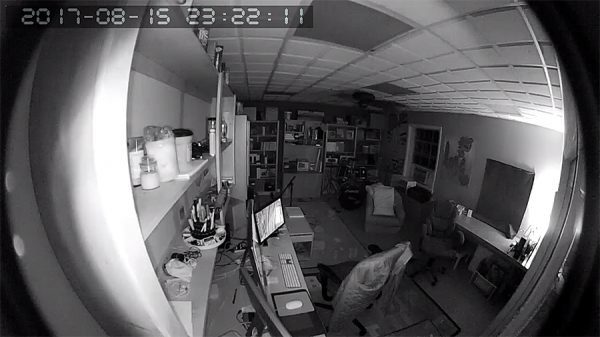
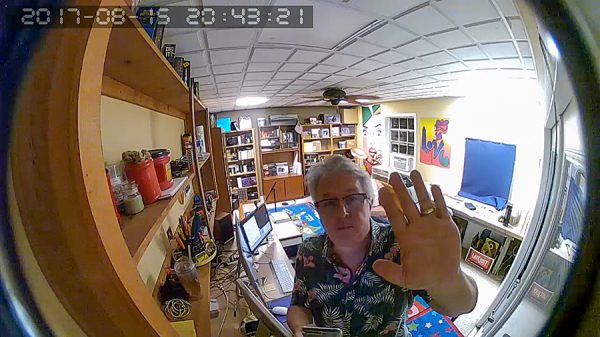
The iseeBell unit itself has a 720p HD camera that works well in low light, although the video loses some detail and becomes monochromatic. The camera is wide-angle which captures a great peripheral view. It does distort in a fish-eye effect around the edges, though. Using the app, you can you see what the iseeBell sees. It also records and stores photos and video on your phone and/or in iseeBell’s cloud. This cloud service is an extra cost option—$2/month or $20/year. While that’s not expensive, it’s worth noting. You get a free month trial with purchase. iseeBell claims your photos and videos are protected by bank-grade security. Strangely, you can only purchase the cloud service through the iseeBell app. There is no mention of it on their web site.

The iseeBell easily connects to a home’s existing wifi via the app. There’s also a motion detector that works a little too well. More on that later. The unit is weatherproof, so rain shouldn’t be a concern.

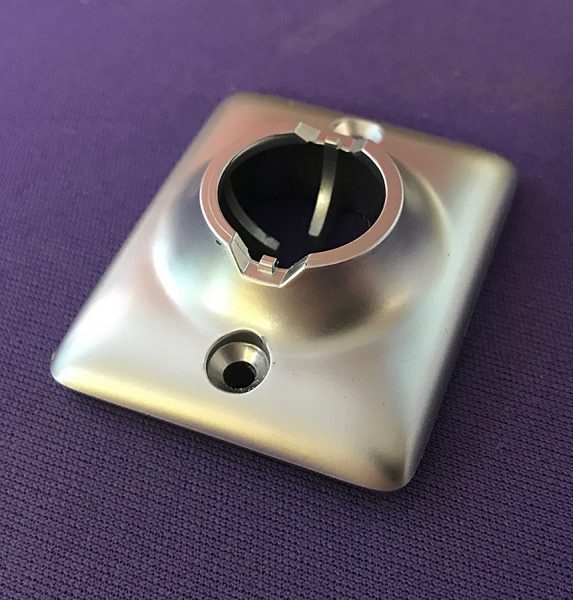
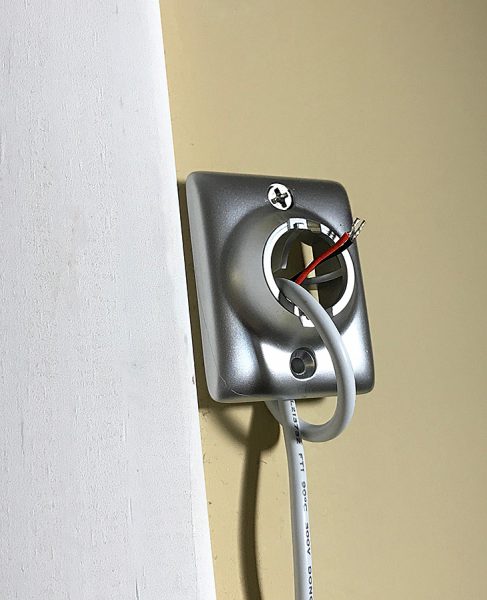
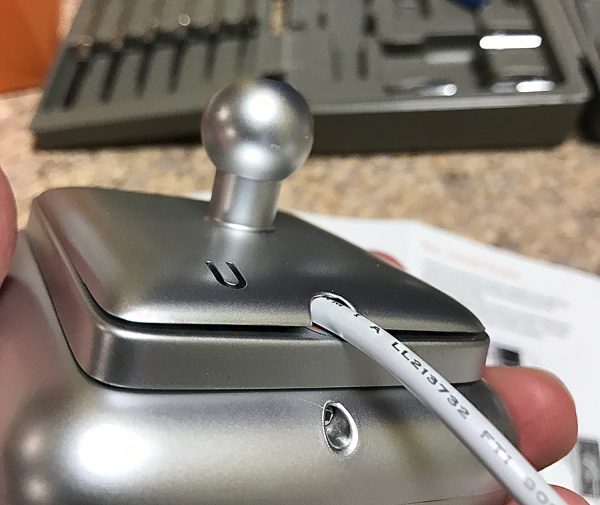
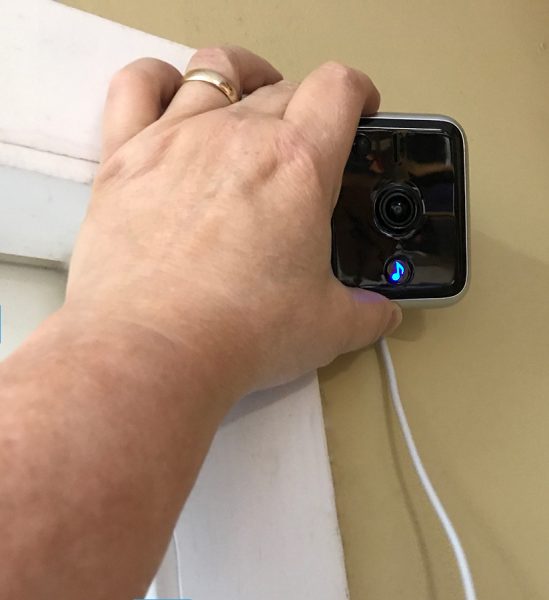
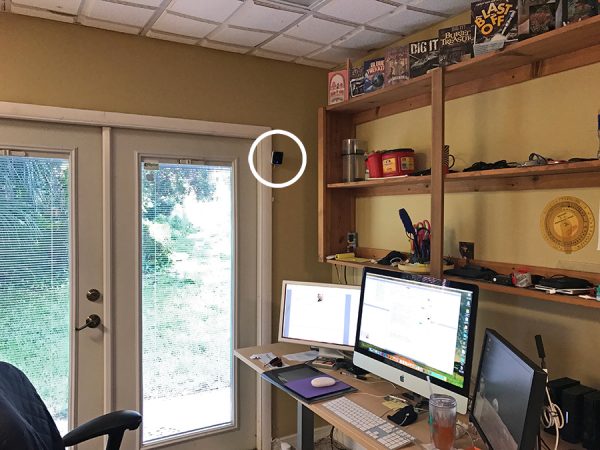
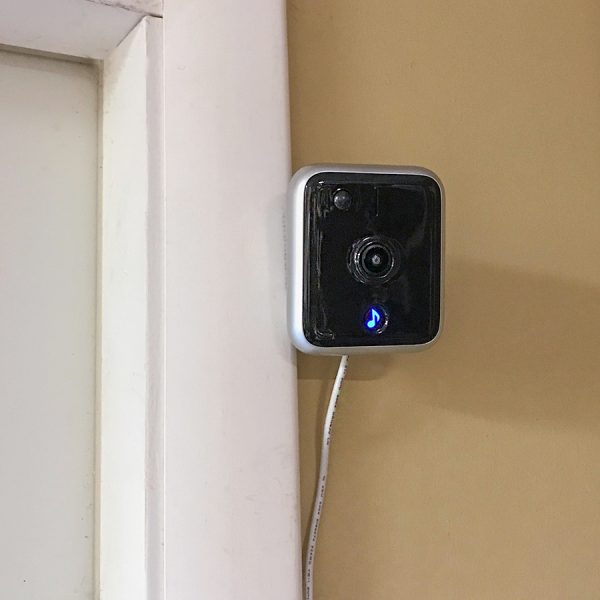
For my use, I mounted the iseeBell just inside the door of my studio a little above eye level. I used some of the supplied screws but did not need the included masonry drill bit as this was an indoor installation. All I had to do was decide where I wanted the camera placed and drill the screws into the wall. iseeBell offers an optional adjustable wall mount that allows the camera to be swiveled at various angles for a better view. I highly recommend this option—it acts as a mounting base and allows you to point the camera practically in any direction.

I ran into two issues with the wiring on the iseeBell. Since I’m using it indoors and not as a doorbell, it needs to be plugged into an outlet for power. I wanted to mount the camera up at ceiling height, but the cord was a few inches too short to do this, so it had to be lower than I preferred.

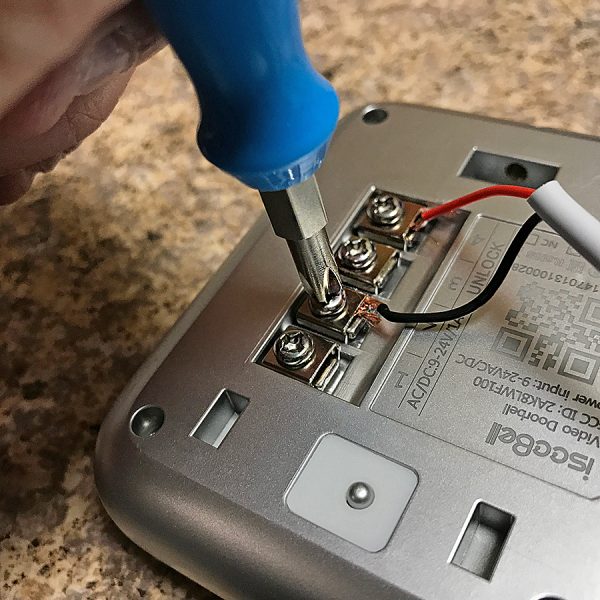
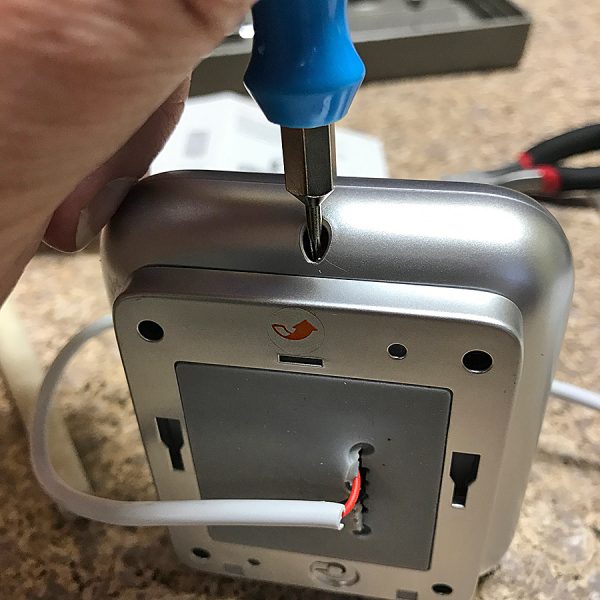
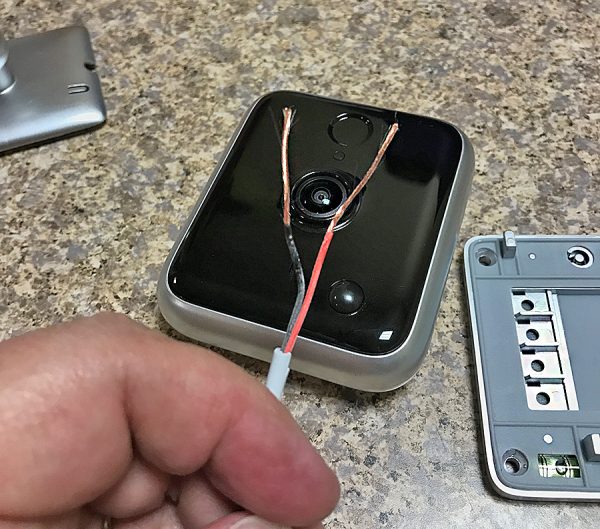
The white cord was a bit too thick to fit into the slot at the rear of the camera, so I had to strip some of the wiring to expose more of the black and red wiring from inside the cord. It was not easy, but I’ve stripped wiring before, so I knew what I was doing. However, I could picture some people pulling their hair out if they ran into a similar problem as I did. Note that doorbell users won’t have this issue since the iseeBell won’t need the power cord.

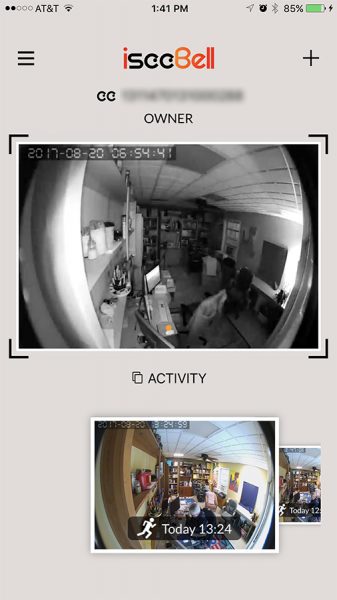
Once I got the wiring taken care of, all went well. I opened the iOS app, set up my account and linked the app to the camera via my wifi network. With that done, I could see a live image of myself in the apps video frame. There’s a bit of a lag, but not enough to matter. As I said earlier, The image is wide angle, and since the camera is above eye level, there is little opportunity for a close-up of a face. But the image can easily be zoomed in even while live.

Audio quality was so-so. it was somewhat distorted and difficult to understand when watching the video. There’s also a built-in speaker allowing you to talk to the person/intruder if necessary. The speaker volume was a bit weak and should have been louder.

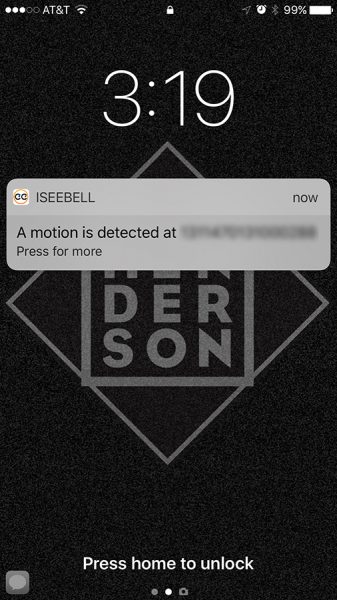
After setting up the motion detector in the app, I noticed that it works really well … as in really well. Whenever I stretch or get up from my chair I get an audible beep and a motion warning shows up on my iPhone. It’s becoming a bit comical, but at least it works! And since I’m only concerned when there should be no one in the studio, I appreciate its sensitivity. Incidentally, the warnings can be controlled through the iPhone’s Notifications or Android’s Sound and Notification settings.

All in all, I like the iseeBell Video Doorbell Security Cam, even though I’m not using it as it was intended. It does what it’s advertised to do and does it well. I now have added peace-of-mind if anyone should enter my studio (invited or not) and I will instantly know about it.

I’m now wondering if it’s time to get my doorbell rewired?

The iseeBell Video Doorbell Security Cam sells for $149.95 US.

Source: The sample for this review was provided by iseeBell. Please visit www.iseebell.com for more information and Amazon to order.


Product Information

Price: $149.95 US
Manufacturer: iseeBell
Retailer: Amazon
Pros:
  • Easy to install and setup
  • Good camera and video quality
  • Sensitive motion detector
  • Smartphone notifications
  • Cloud service available
Cons:
  • Wiring can be tricky if using supplied power cord with optional wall mount
  • Audio quality could be better

Filed in categories: Reviews

Tagged: ,

iseeBell Video Doorbell Security Cam review originally appeared on The Gadgeteer on August 22, 2017 at 10:00 am.

Note: If you are subscribed to this feed through FeedBurner, please switch to our native feed URL http://the-gadgeteer.com/feed/ in order to ensure continuous delivery.

ANNKE 1080P lite security system DVR review

I think I’ve indicated before that I’m a bit paranoid when it comes to home security. I have several cameras in and outside my house, and I’m always considering adding more. Not only are the cameras great for deterring burglars, but they often help find toys my children lost.

Recently I volunteered to review a DVR security system by Annke. It’s a four camera indoor/outdoor system with a multitude of features.

In the box

  • Annke DVR
  • 4 x 720P indoor/outdoor cameras – wired
  • 4 x video cables (60 ft)
  • 2 x power adapters
  • Power adapter “splitter” for cameras
  • USB mouse
  • 4 x anchors for mounting cameras
  • Quick user manual
  • Software CD
  • 2 x door/window stickers

Specifications

  • Analog video input – 8-ch;BNC interface (1.0Vp-p, 75 Ω)
  • HD TVI input – 720P, 1080P
  • AHD input – Support
  • CVBS input – Support
  • IP video input – 2-ch;Up to 960p resolution
  • Audio input/Two-way audio input – 1-ch;RCA (2.0 Vp-p, 1 KΩ)
  • HDMI/VGA output – 1-ch, 1920 × 1080/60Hz,1280 × 1024/60Hz, 1280 × 720/60Hz, 1024 × 768/60Hz
  • Audio output – 1-ch, RCA (Linear, 1 KΩ)
  • Video compression standard – H.264+/H.264
  • Encoding resolution & Frame rate – 1080p lite/720p: 12 fps;960H:25fps(P)/30fps(N)
  • Video bitrate – 32 Kbps to 4 Mbps
  • Stream type – Video & Audio/Video
  • Dual-stream – Support
  • Audio compression standard – G.711u
  • Audio bitrate – 64 Kbps
  • Synchronous playback – 2-ch
  • Remote connections – 128
  • Network protocols – TCP/IP, PPPoE, DHCP, Hik-connect Cloud P2P, DNS, DDNS, NTP, SADP, SMTP, NFS, iSCSI, UPnP™, HTTPS
  • SATA – 1 SATA interface
  • Capacity – Up to 6 TB capacity for each disk
  • Network interface – 1; RJ-45 10 M/100 Mbps self-adaptive Ethernet interface
  • USB interface – Rear panel: 2 × USB 2.0
  • Power supply – 12 VDC
  • Consumption(without hard disks) – ≤ 12W
  • Working temperature – 14ºF to 131ºF
  • Working humidity – 5V DC±10%
  • Power Consumption – 10% to 90%
  • Chassis – 1U chassis
  • Dimensions(W × D × H) – 10.2 × 8.7 × 1.8 inch
  • Weight(without hard disks) – ≤ 2.2 lb

Design

The DVR looks a bit like a cable set-top box without an LCD display.


The front of the DVR has LED indicators for power status, hard drive activity, and network activity. The rear of the DVR contains all of its ports. The top of the DVR is plain while the bottom contains the model number, serial number, and external access code.

The system also includes four 720p cameras.


Each camera is equipped with infrared LEDs, providing 66 feet of night vision.

Additionally, the cameras have an IP66 ingress rating, meaning they are rain and dustproof.

The remainder of the system is primarily composed of cables and power adapters.


I can’t imagine any DVR system being completely inconspicuous; however, this system does a fine job blending into the background. The DVR would blend in with any entertainment center containing your everyday media devices, and the cameras could be tucked away into just about any corner.

Setup

The system isn’t particularly difficult to set up; however, the included user manual is of no help. The manual immediately skips from describing the LEDs and ports on the DVR, to explaining how to install a hard drive; there is absolutely no mention of how to connect the cameras or power adapters. Fortunately, if you’re somewhat tech-literate, the process is pretty easy to figure out.


First you attach the plugs from “cable end A” into the plugs at the end of the camera. You then plug the blue end of “cable end B” into one of the video ports on the rear of the DVR. Next you plug the red end of “cable end B” into one of the power adapter splitters. You then plug the splitter into one of the power adapters.

Once you’ve installed the cameras you can plug the DVR into a HDTV or computer monitor. You then attach the system to your router, plug in the remaining power adapter, and plug the mouse into the USB port.

Once all the hardware is set up, you can begin the on-screen setup; this is a pretty simple process.


The first time you turn on the system you will be asked to activate it. This requires nothing more than choosing an administrative password for the system. You next choose an unlock pattern in order to avoid having to reenter a password repeatedly. Finally, you go through the setup wizard.

Once you’ve completed the wizard, the DVR system is ready to operate. For the most basic use, this is all you need to do. I’ll discuss more advanced use later.

Performance

Although I’ve never had a DVR system for my home, I’ve utilized and interacted with them countless times at work. I was very pleased with how well the Annke system worked compared to others I’ve seen.

The system was easy to use and the picture quality was generally very good; although, in low light situations the image was a bit darker than I would like.

Truthfully, the basic use of the DVR system is so simple there isn’t a lot to write about. You install it, go through the setup wizard, and it immediately starts streaming a live view of things.

It works wonderfully, and that’s really all there is to say.

Annke App

Not only can the system be viewed through your TV or computer monitor, but you can also access it through Annke’s app.

The app is available for Android and iOS.


After you download and install the app, you’ll go through an easy setup wizard where you’ll choose your location, set up your mobile account, and connect your system.

After you’ve completed the wizard, you should have access to your live view.


As with the basic use of the DVR, the mobile app is wonderfully simple to use.

Advanced Use

So here’s the thing, this DVR would be great for a basic home surveillance system, but it also has a ton of features that would make it great for protecting a business or any other institution. In fact, it has so many features that I couldn’t have possibly gotten around to trying them all.

In order to take advantage of all the extra features, you’re going to want to install a hard drive in the DVR. (according to its Amazon listing, the system does not include a hard drive; however, the sample they sent me included a 1 TB hard drive.)

Once a hard drive is installed you can choose from several different recording features.

You can set the DVR to record continuously or only record during specific hours on specific days.

You can choose to have it record when motion is detected or when specific types of motion, AKA “events”, occur.

Examples of events are as follows: face detection/face capture, line crossing detection, people gathering detection, fast moving detection, parking detection, unattended baggage detection, etc.

Admittedly, I didn’t come close to testing all the different triggers; however, I did set a motion alarm and it appeared to work well, consistently.

As with recording, there are a handful of different ways to playback events.

You can choose to playback an event by time period, by event type, by user created tags, by using smart search to analyze video footage, and by going through system logs.

If the DVR is connected to a network there are another dozen options to consider, including connecting to a Network Time Protocol sever, configuring email settings for email alerts, monitoring network traffic, etc.

This is just scratching the surface; you can set on-screen labels, place a black privacy box over certain areas, run hard drive diagnostics, and create backup files.

The amount of features available is borderline overwhelming, but in a good way.

My only issue with all the features was the lack of instruction in the included user manual. While some features were covered, most didn’t appear to be. I was able to locate a 110 page advanced user manual on Annke’s website; however, based on the diagrams inside, it wasn’t the manual for the exact model I was reviewing.

Conclusion

I’m impressed with the Annke DVR; it can function as a basic home surveillance system or work as a full featured security DVR.

The system provides good video quality and an abundance of features.

Everything is fairly easy to use and set up, but you have to do some digging on Annke’s website to get the correct information.

All in all, for $109.99, I’m not sure you’re going to find a better deal.

Source: The sample for this review was provided by Annke. Please visit their site for more information and Amazon to order.


Product Information

Price: $109.99
Manufacturer: Annke
Retailer: Amazon
Requirements:
  • An extra computer monitor or TV with HDMI to display video footage
  • Android, iOS, or Windows device for certain features
Pros:
  • Simple set up despite lack of directions
  • Good video quality
  • Tons of features
Cons:
  • Included user manual not always useful
  • Footage can be dark in low light

Filed in categories: Reviews

Tagged: ,

ANNKE 1080P lite security system DVR review originally appeared on The Gadgeteer on July 17, 2017 at 3:20 pm.

Note: If you are subscribed to this feed through FeedBurner, please switch to our native feed URL http://the-gadgeteer.com/feed/ in order to ensure continuous delivery.
Netatmo Welcome Indoor Security Camera review

I reviewed the Netatmo Presence Outdoor Security camera a few months ago and really, REALLY enjoy using it because it uses deep learning to tell the differences between people, animals, cars, and other motions thus virtually eliminating unnecessary motion detection alerts. In addition, there are no subscription fees because all the video is stored locally and copied to Dropbox or your personal FTP server (if you set these up). Now I have the opportunity to review the Netatmo Welcome Indoor Security camera which has the ability to tell the difference between individual people with facial recognition. After having used it for a few weeks, I find that I like this camera too. It is able to tell the difference between individuals in our household and will alert you to an unfamiliar face or tell you that motion was detected if it can’t see the face of the individual. Like the Presence, the Welcome camera also records videos locally and will save them in your Dropbox account or personal FTP server thus eliminating subscription fees.

Package Contents

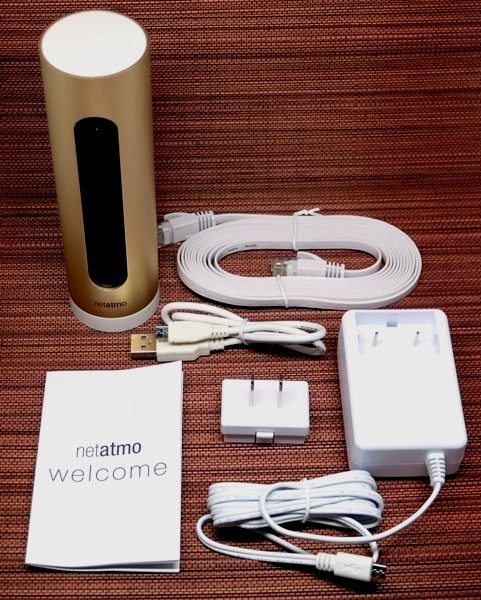
  • Netatmo Welcome Indoor Security camera with 8 GB micro-SD card
  • Ethernet cable
  • Micro-USB cable
  • AC power adapter
  • Welcome guide

Technical Specifications

  • SIZE: 45 x 45 x 155 mm / 1.8 x 1.8 x 6 inches
  • MECHANICS & DESIGN: Single piece durable anodized aluminum shell
  • CAMERA:
    • Video sensor: 4MP
    • Resolution: Up to 1920×1080
    • 130° field of view
  • CONNECTIVITY SPECIFICATIONS:
    • Ethernet RJ-45 port: 10/100 Mbits
    • Wireless: Wi-Fi 802.11 b/g/n (2.4G)
  • DATA STORAGE: MicroSD card up to 32GB (8GB class 10 MicroSD card included)
  • IPHONE AND IPAD COMPATIBILITY: iOS 9 minimum required
  • ANDROID COMPATIBILITY: Android 4.3 minimum required
  • BROWSER SUPPORT: Webapp available for the two latest versions of Chrome, Safari, Firefox, Internet Explorer
  • No subscription fees

Design & Build Quality


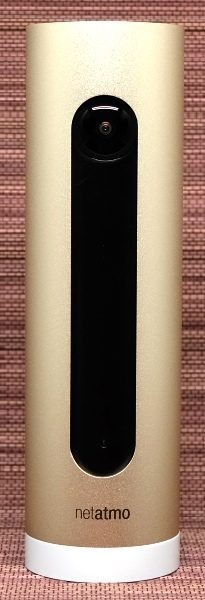
The Netatmo Welcome camera is actually a small camera measuring 6″ tall (15.3 cm) and 1.75″ in diameter (4.5 cm). It is encased in a very nice gold-colored aluminum cylinder housing and the camera, nighttime infrared LED, and motion sensor are contained behind black plastic. The back of the camera contains a micro-SD card slot (the camera comes with an 8 GB card), a micro-USB port, and an Ethernet port.

Setup

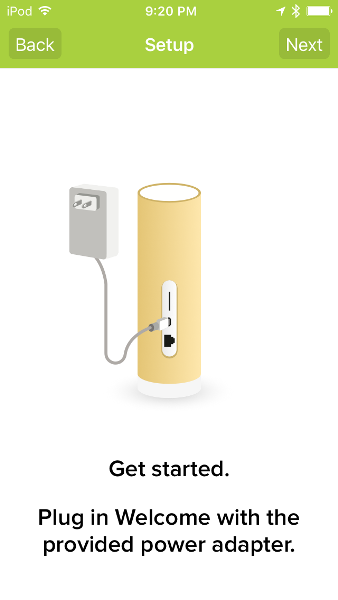
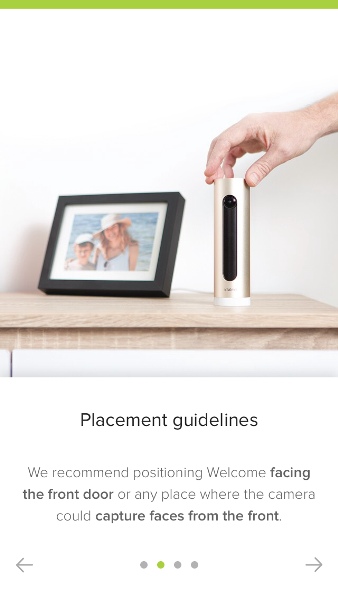
When setting up the Welcome camera, I decided to connect it to my network via WiFi rather than Ethernet cable, thus I only needed to plug the camera into an outlet for power. I placed the camera on a table facing the front door.


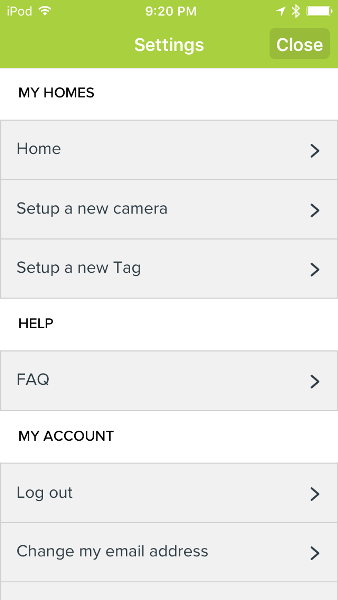
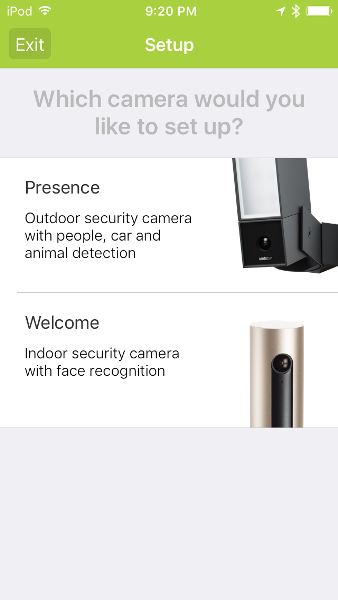
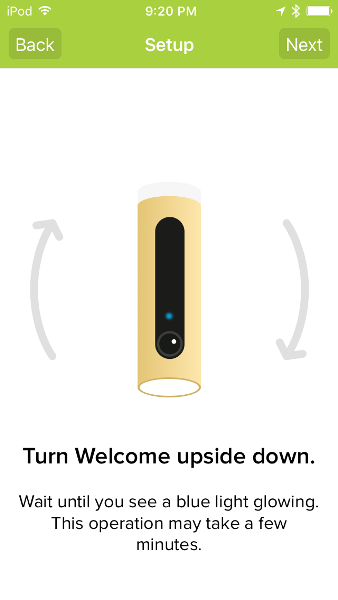
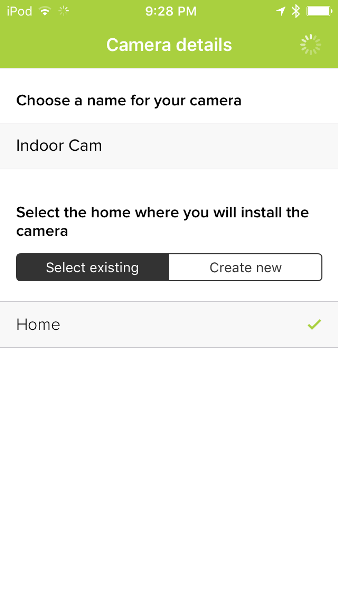
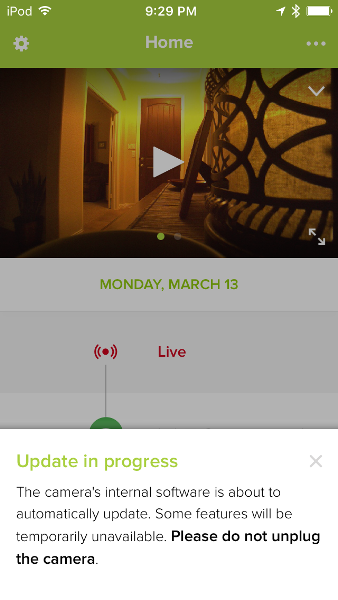
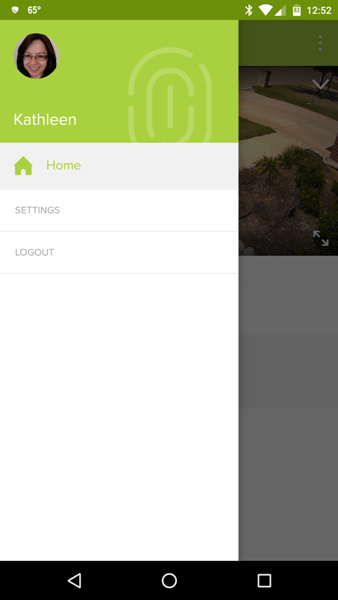
My camera did not come with a user guide, but the Netatmo Security app instructs you how to setup your camera. The above screenshots are taken from my iPod Touch 6G. If you do not have the Security app, you’d have to download it and create an account. Since I already use the app on my iPod and my Nexus 6 phone with the Netatmo Presence Outdoor Security camera, I needed to tap on the Menu icon located in the upper left of the Security app home screen, select “Setup a new camera”, then tap on the image of the Welcome camera in the app settings. I plugged the camera in, then turned it upside down. I needed to keep the camera oriented upside down during the setup process (I made the mistake the first couple of times of not keeping it that way and thus the app had trouble detecting the camera).


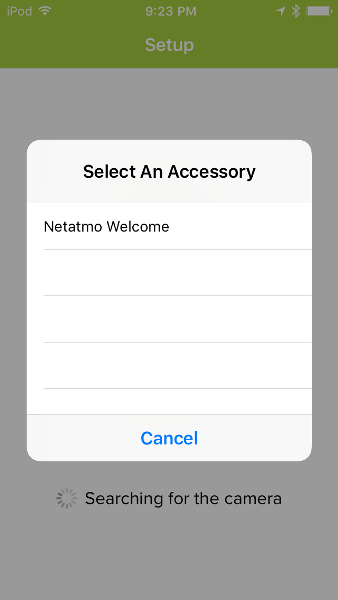
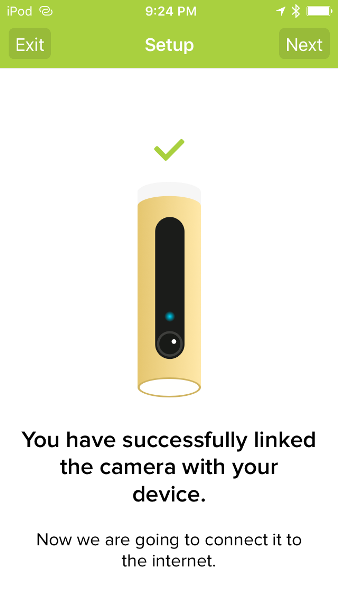
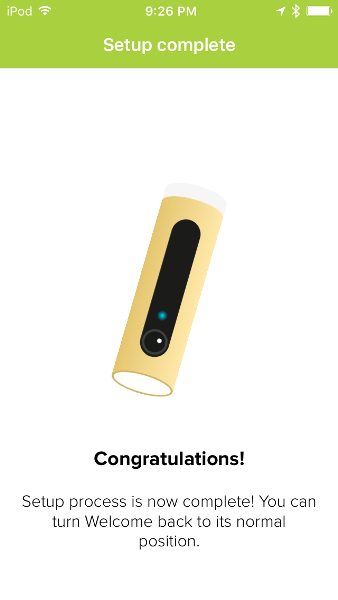
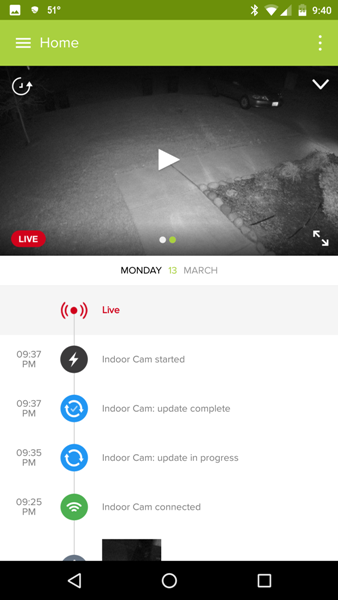
Once the app detected the camera, I selected it from a list (first screenshot) and was then connected. After that, I needed to name the camera (I named my Welcome camera “Indoor Cam” as shown in the last screenshot) and select the geographic location where the camera was installed (e.g. home, vacation home, business, etc.) – in my case, I selected my home (aptly named “Home”) which is the same place my outdoor security camera is installed.


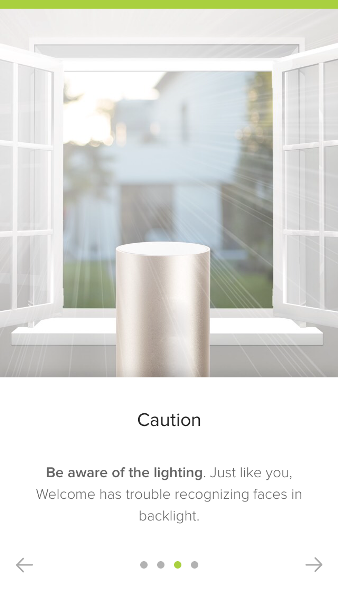
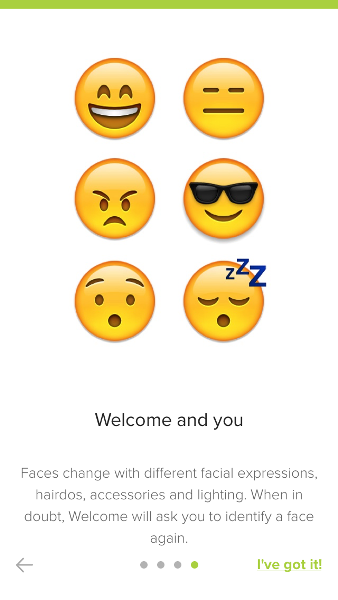
At this point, the app informs you that the Welcome camera can recognize your loved ones from each other and from strangers after training the camera to recognize all the different faces captured of each of the residents. The app also suggests where to place the camera while warning you to be aware of backlighting.


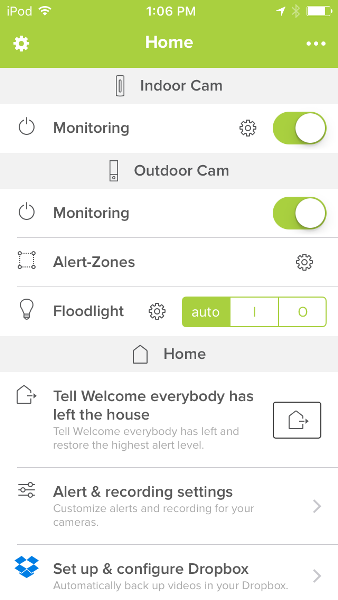
You can adjust the camera settings by tapping on the ellipsis (three dots in the upper right of the Security app home screen) then tapping on the gear icon located under the name of your Welcome camera (“Indoor Cam”).


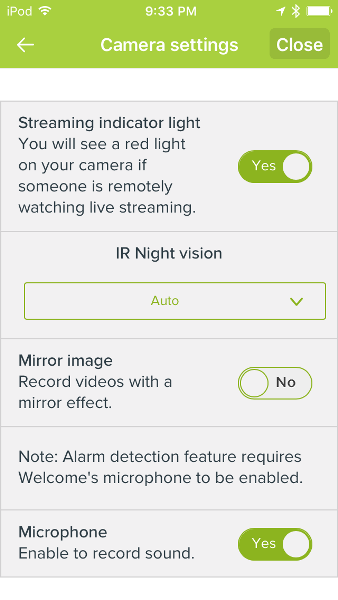
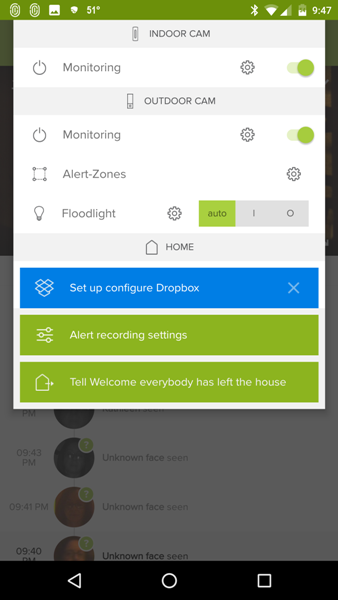
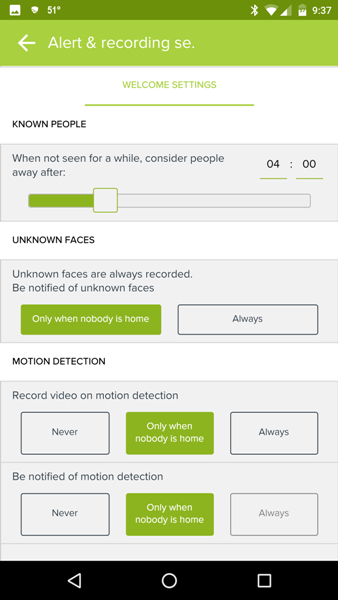
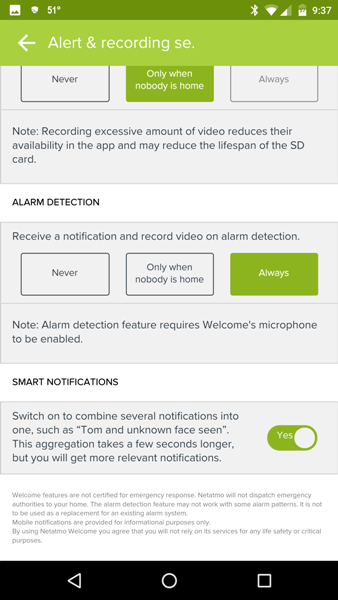
Welcome Camera Settings: The above screenshots were taken from my Nexus 6 phone. By tapping on the vertical ellipsis, you can also access the Alert Recording Settings on the Welcome camera or you can tap on “Tell Welcome everybody has left the house” (left screenshot). In the middle screenshot, there is a setting that allows you to set a time that if the identified individuals are not detected for that amount of time, they will be considered “Away” instead of at “Home”. The middle screenshot also shows how you may also set up whether or not the camera should record video and send a notification when it detects motion (“Never”, “Only when nobody is home”, or “Always”). The last screenshot shows additional camera settings.


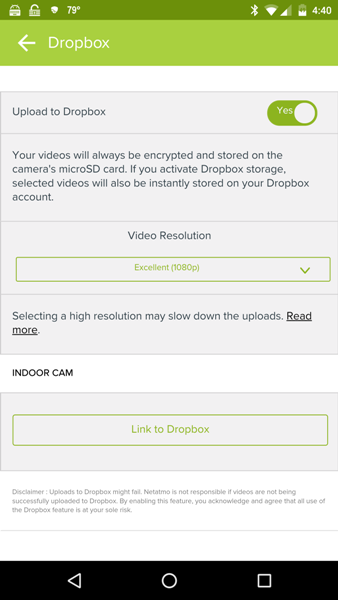
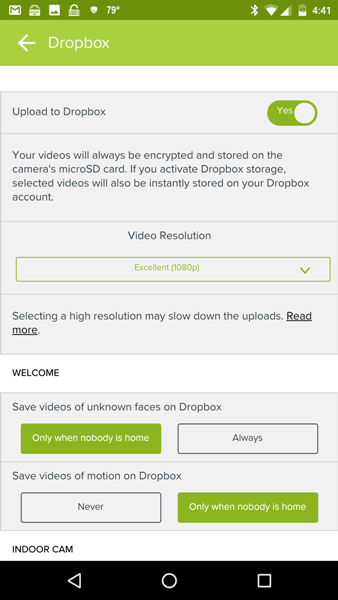
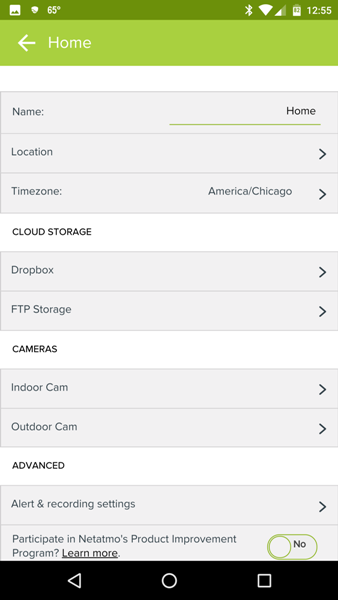
Linking Dropbox to the Welcome Camera: The Welcome camera records all videos locally on a micro-SD card (the camera comes with an 8 GB card) and does not require any ongoing subscription fees like other security cameras. You can also set up your Welcome camera to upload a video of the events it detects to your Dropbox account or your personal FTP server. I chose to link the Welcome camera to my Dropbox account. After doing so, I was able to select things like whether or not to “Save videos of unknown faces on Dropbox” or “Save videos of motion on Dropbox”. I personally really like the fact that there are no subscription fees.


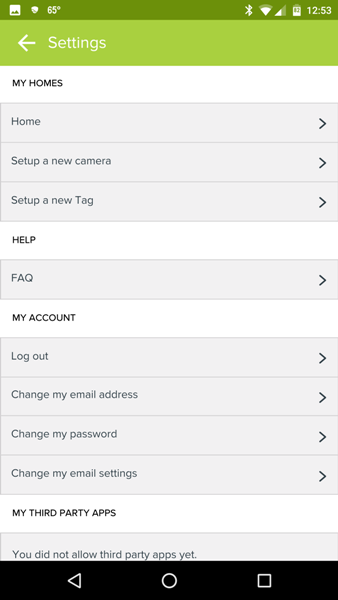
Security App Settings: By tapping on the Menu icon located in the upper left corner of the home screen, you can access other settings. From here you can add a new camera, change your email address or password, or tap on Home (or Vacation Home, Business, etc. – wherever you installed your camera) to view all of your connected cameras. After tapping on Home, you will be able to set up your camera(s) to upload to Dropbox or your private FTP server (middle screenshot). When you tap on each of your connected cameras (last screenshot), the app will show you the strength of the WiFi signal, it’s MAC address and the current firmware being used.

Use


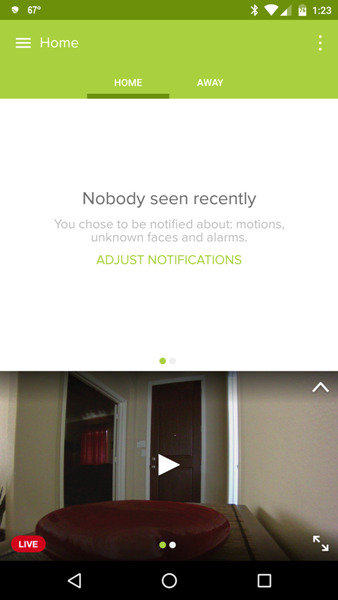
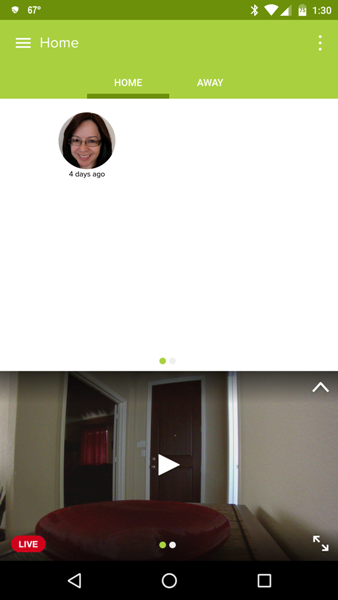
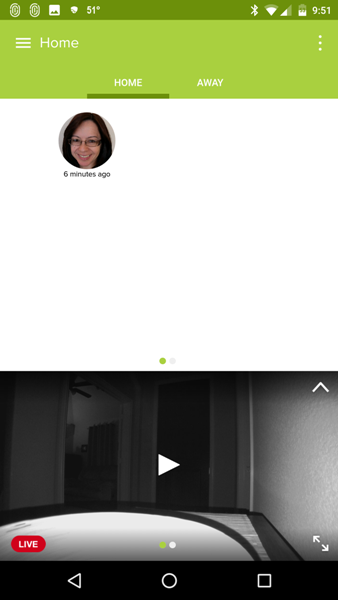
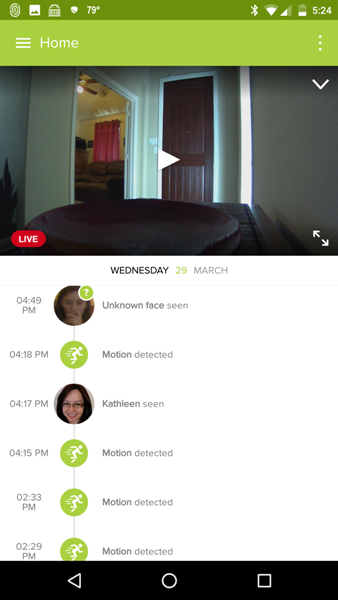
Security App Home Screen: When you launch the Security app, the home screen will display whether or not any faces have been detected by the Welcome camera. Once the camera has been trained to recognize each of the residents of your home, it will show you if it has detected them. If it has not detected anyone in a certain amount of time, it will flag them as being “Away” from home. Swiping up (or tapping on the “Up” arrow located in the upper right of the video display) will hide the “faces detected” screen.

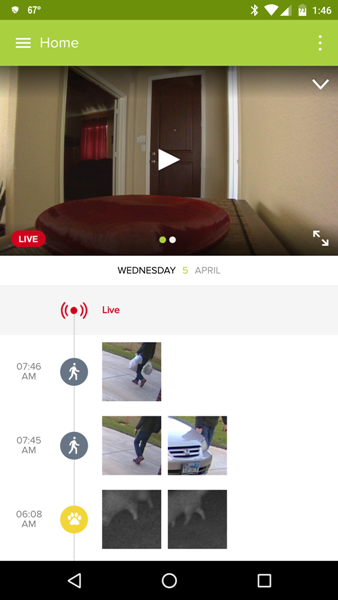
Viewing Live Video: By tapping on the Live icon just below the video, you can swipe left or right on the video display to view the view from your different cameras. The third screenshot shows the view from the indoor Welcome camera and the last screenshot shows the view from our outdoor Presence camera. To view the live video streaming of the indoor camera, you must tap on the Play button in the middle of the video display.

When viewing any live activity going on in front of the camera, there is a few second delay in the live feed and also when a motion is detected. This happens with the Netatmo Presence Outdoor Security Camera as well which according to the Netatmo website, “Presence uses http Live Streaming protocol. Experiencing a slight lag time of a few seconds is normal, as live stream is sent through an encrypted connection from Presence to your device.” This may also be the case with the Welcome camera.


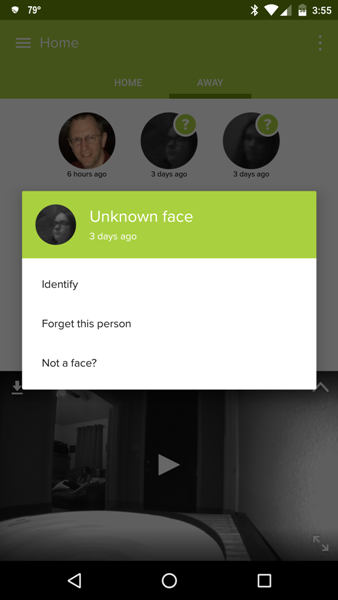
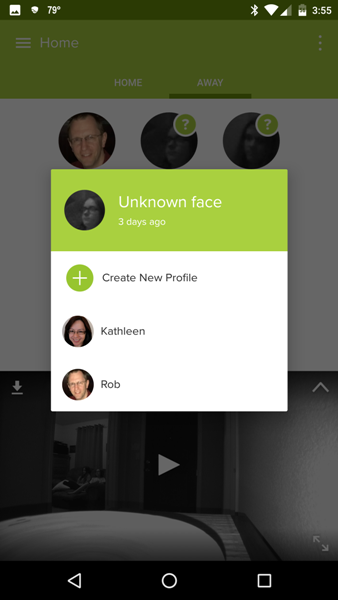
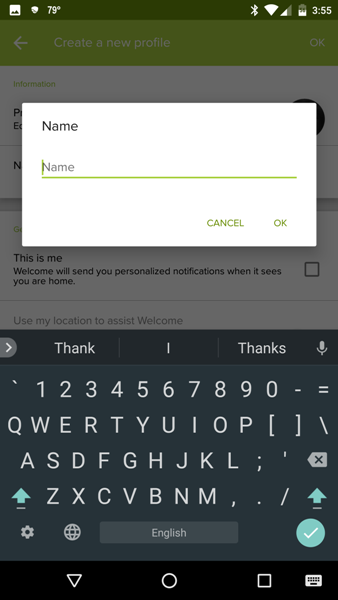
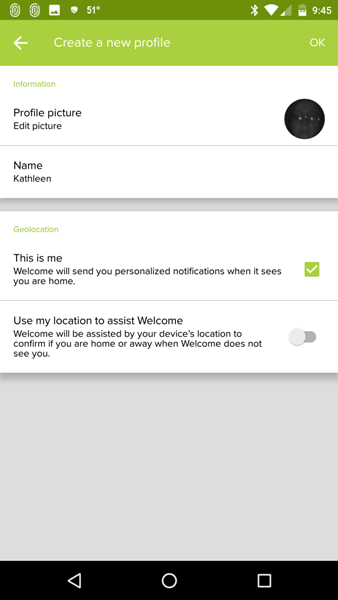
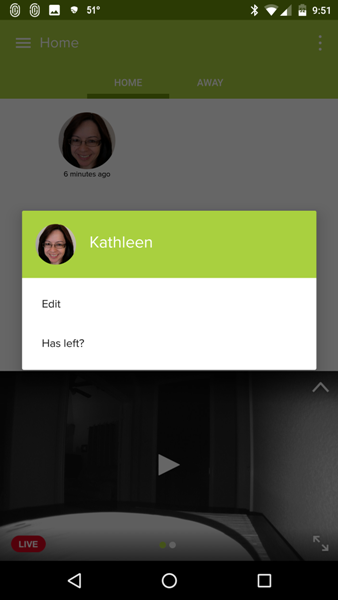
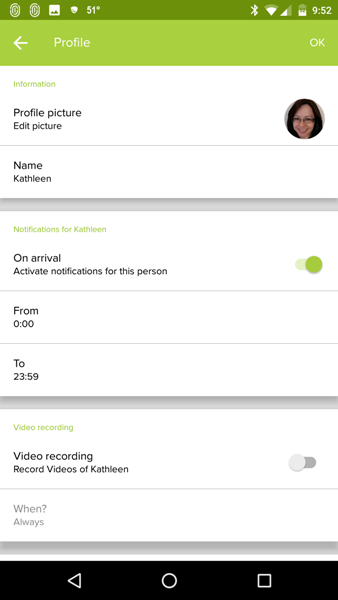
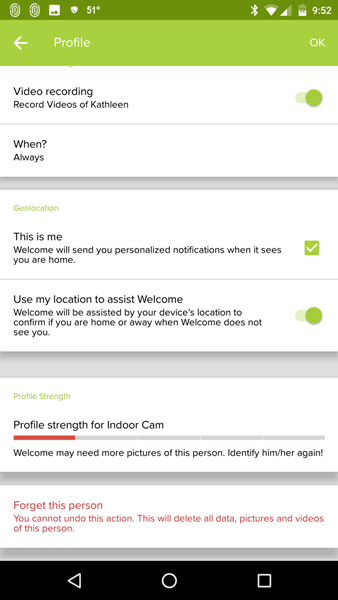
Setting Up Facial Recognition Profiles: When the Welcome camera captures the face of someone it doesn’t recognize, it will display that face on the home screen of the app above the video display. Long pressing on the image in this “faces detected” screen will allow you to identify the person, forget the person, or tell the app that the image is not a face. When you are identifying the person for the first time, you will set up a profile for that person by giving them a name, uploading a profile picture if desired, and flagging the image as yourself or someone else and using your phone’s location to assist Welcome in determining whether or not you are home.


When the Welcome camera detects my face, it identifies that I am at “Home” versus “Away”. Long pressing on my image in the “faces detected” area, allows me access to my profile to change the settings. I can tell the camera to record videos of myself or not during the time that I designate.

I would have preferred to see the setting that allows me to set a time interval to tell the Welcome camera whether I am “Away” or at “Home” here in the Profile settings right under the “Use my location to assist Welcome”. As it is, that setting is located under the “Alert recording settings” for the Welcome camera.

If the Welcome camera can see your face, it will flag it as an identified person or unidentified person. If it cannot see your face, it will notify you that a motion has been detected.

Alarm Detection: If the camera detects an alarm of any kind (smoke alarm, CO alarm, etc.) it will also notify you of this alarm if you set the camera up to do so in the “Alert recording settings”. The Welcome camera did give me a couple of alarm notifications but none of our alarms went off (I was home at the time and did not hear anything). Curious.


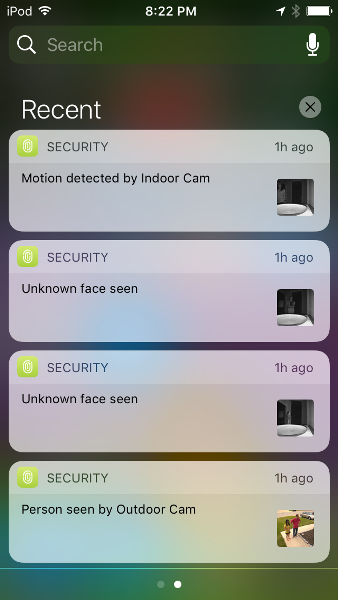
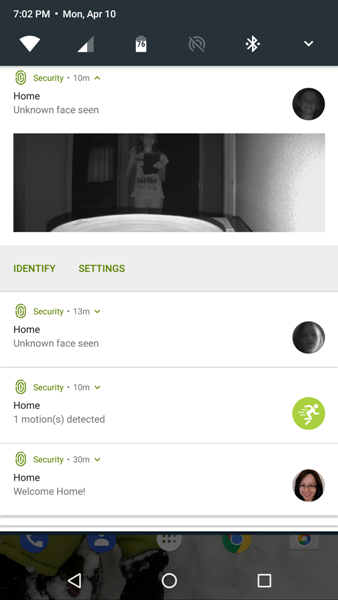
Notifications: Whenever you receive a notification about a motion, if a face is detected, it will identify the person as a known or unknown individual, otherwise it will identify it as a motion. The screenshot on the above left illustrates the iOS notifications and the right screenshot is that from my Android device (Nexus 6 phone).

Facial Recognition Accuracy and Sensitivity: I found that Welcome camera detected almost all motions or faces that passed by the camera. It was fairly accurate in discerning the faces of the individuals in our house. However, it did not always send a notification that one of us had passed in front of the camera even though I set up the camera to always send notifications when motion is detected.

Resolution: The clarity of the videos was a high-quality 1080p resolution with clear sound (when sound was detected). However, in a few instances when viewing the videos, the resolution was lower. I think this is a function of the strength and quality of my WiFi. Here is a video captured of motion that was detected by the camera during the day.

One-Way Audio: The camera also picks up sound very well but it is only one-way audio. It is not possible to speak to your invited and uninvited guests when they approach the camera.

Here is another video of motion that was detected at night. I was pleased with the quality.

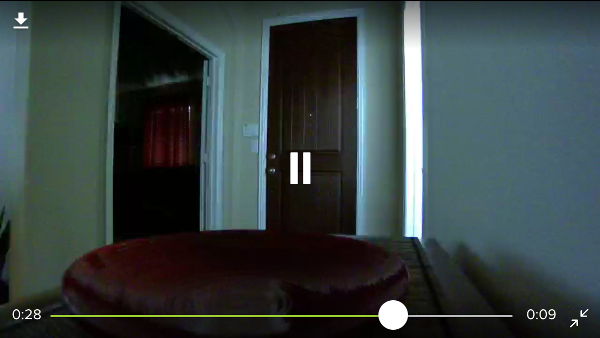
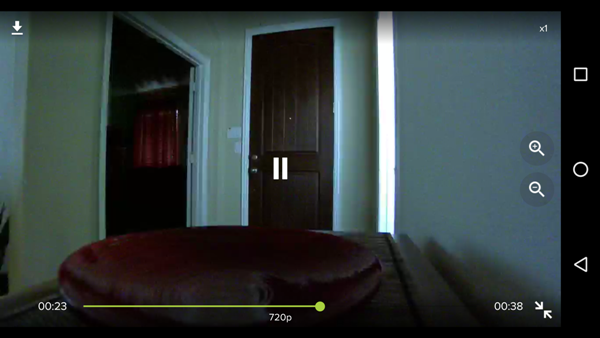
Android vs. iOS App (Zoom features): Just like the Presence Outdoor Security camera allows you to zoom in and out of live or recorded video (when playing them), you can do the same for the Welcome Indoor Security camera videos. There were only a couple of differences between the Android app and the iOS app that I have noticed. The iOS app (top screenshot) allows you to zoom into a specific area of the video using the pinching gesture, while the Android app (bottom screenshot) requires you to tap on the magnifying glass zoom icons located along the right side of the video screen. I found that after tapping on the zoom icons, I then needed to reposition the video thus I really appreciate the “pinch” zoom feature of the iOS app – with it, I could zoom in on the specific area that I was curious about quickly and efficiently.

Resolution Information: I also noticed that when you tap on any area of the live video feed within the Android app, the information displayed included the resolution of the video which isn’t included in the iOS app.

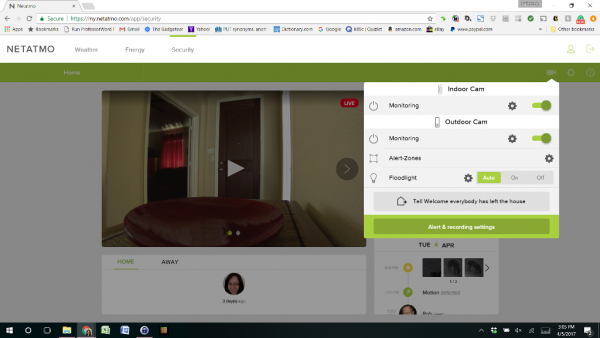
Web Access: Netatmo also allows you web access to your Netatmo energy, weather, or security products. I have both the Welcome Indoor Security camera and the Presence Outdoor Security camera. The web interface does not appear to provide any additional features than that provided by the iOS or Android apps, which I appreciate because then I can see and alter any settings that I want to from any device, not just my computer.

Final Thoughts

I liked using the Netatmo Welcome Indoor Security camera. Setup was straightforward, it recorded identified faces, unidentified faces, and motion in 1080p (most of the time) whether it was daytime or nighttime. It has a 130° viewing angle and it records videos locally and to your Dropbox account or personal FTP server thus avoiding subscription fees. It is important to consider backlighting issues when placing your camera in a spot in the house.  Just the fact that it can tell the differences between the inhabitants of the house and unidentified faces is a wonderful feature, thus allowing us to ignore those individuals that are known and to tell us when someone else is in the house.

There are a couple of things to consider before you purchase. The camera did miss us a few times when we passed in front of it (perhaps because we had passed in front of it a little earlier?), I received a couple of alarm notifications when no alarms had gone off (smoke alarms, security system alarms, etc.), and the camera has only one-way audio. However, for the most part, the camera worked well for me.

Source: The sample used in this review was provided by Netatmo. Please visit their website for more information or visit Amazon to purchase.


Product Information

Price: $159.90
Manufacturer: Netatmo
Retailer: Amazon
Requirements:
  • High-speed Internet connection needed
  • Public hotspots not supported
  • iOS 9 minimum required
  • Android 4.3 minimum required
Pros:
  • Recordings are 1080p
  • Facial recognition fairly accurate
  • Records only videos we deem important
  • No subscription fees – records videos locally and to my Dropbox account (or personal FTP server if I had one)
Cons:
  • Did not always send notifications when one of us passed in front of the camera
  • One-way audio

Filed in categories: Home and Kitchen, Reviews

Tagged:

Netatmo Welcome Indoor Security Camera review originally appeared on on April 12, 2017 at 7:38 am.

Note: If you are subscribed to this feed through FeedBurner, please switch to our native feed URL http://the-gadgeteer.com/feed/ in order to ensure continuous delivery.
See people moving around inside your home without using security cameras

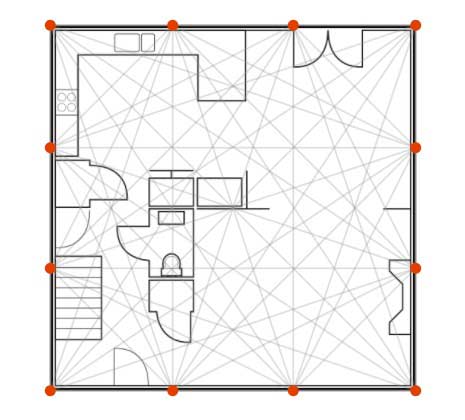
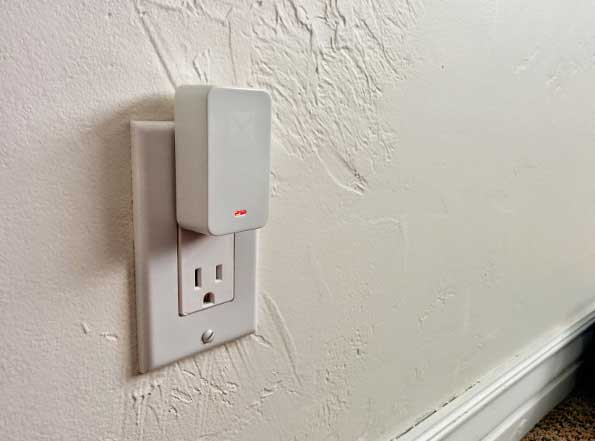
Most home security systems involve setting up cameras and a variety of sensors like motion detectors, door and window opening/closing sensors, temperature sensors and more. The Xandem system is more like something straight from a Mission Impossible style movie. Xandem uses a gateway and a set of modules to create a mesh network that puts a security blanket over your home that can detect when people are moving around inside it.

Xandem offers Home and Pro systems. The Pro systems are more for commercial installations while the Home system has been designed for… homes. Both systems can be purchased with modules that plug into standard wall outlets or are hardwired.

You can buy systems with 6, 10 or 15 modules. Of course, the more modules you need, the more the system will cost. Luckily, the mesh created by the modules can go through walls and furniture.

After you set up the gateway device and plug in all the modules you can then use the web client to draw the floor plan of your home. The client will also let you create alarms that will fire based on certain criteria and can notify you or others via email. The system can also be programmed to sound a siren or activate lights to scare away an intruder.

According to the FAQ on Xandem’s site, tracking is accurate to within 5-10 feet for most installations and can be adjusted to disregard small pets.

The 6 module system runs $430, and the 10 and 15 module systems are priced at $495 and $595 respectively. The systems come with one free year of Xandem’s cloud service. After the year is up, you don’t have to renew if you don’t want to as the system will work without the cloud service. You’ll just lose certain remote functionality.

DIY geeks will be happy to learn that Xandem provides API info so you can program your own apps to interact with the system.
For more info visit Xandem.com.

Filed in categories: Home and Kitchen, News

Tagged:

See people moving around inside your home without using security cameras originally appeared on on March 23, 2017 at 5:06 pm.

Note: If you are subscribed to this feed through FeedBurner, please switch to our native feed URL http://the-gadgeteer.com/feed/ in order to ensure continuous delivery.