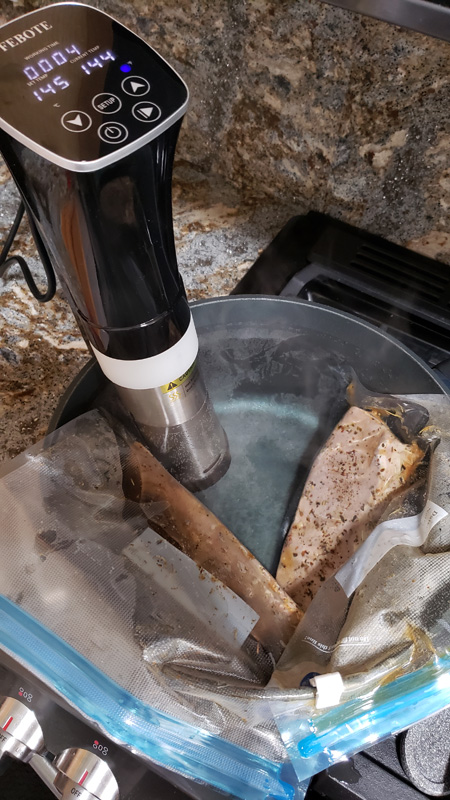
Febote 1000 watt sous vide cooker review

REVIEW – There are a ton of different ways to cook.  You can fry, air fry, grill, barbeque, boil, stir fry and so on.  One of the trendiest cooking methods today is sous vide (pronounced soo-veed). Sous vide is French for under vacuum.  Sous vide cooking places the food in vacuum bags that are immersed in a precisely temperature-controlled water bath. For years, this cooking method was primarily confined to high-end restaurants because it took costly, dedicated equipment to achieve the required temperature precision, and, it takes time. In recent years, that has changed as a number of affordable sous vide cookers have hit the market.

What is it?

The Febote 1000W sous vide cooker is a standalone cooker that clamps into your 5 – 6 gallon pot.  It circulates and heats water to maintain a precise cooking temperature for a programmable amount of time.

What’s in the box?
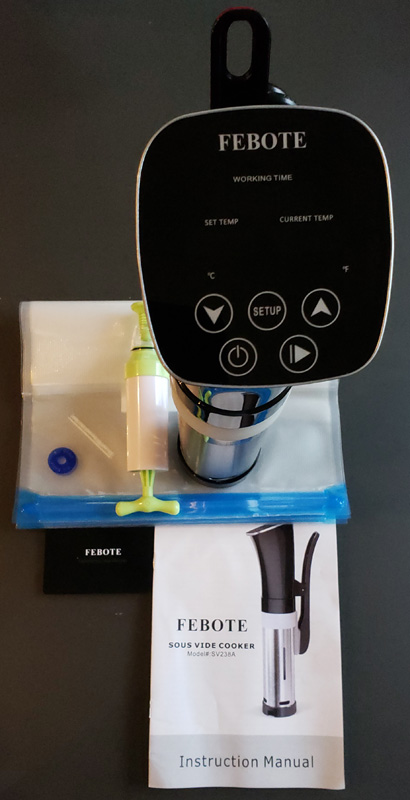
  • Sous vide cooker
  • Instruction manual
  • Five cooking bags with vacuum port
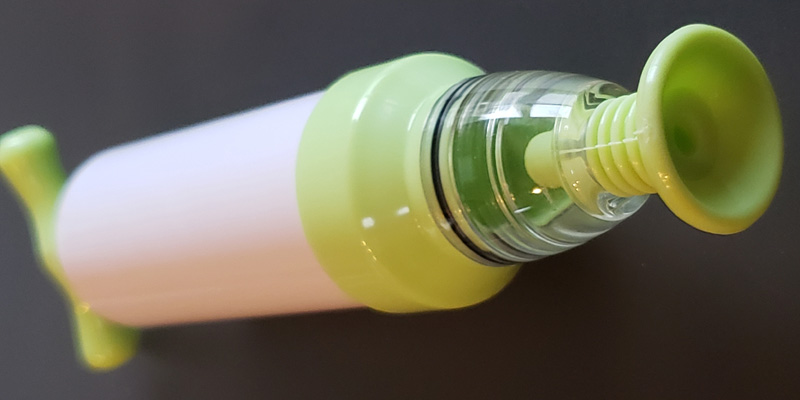
  • Bag air removal pump
  • Bag clip (not visible)
  • Warranty and contact card

Hardware specs

  • Dimensions: 3.2 x 14 x 6.5 inches
  • Weight: 3.8 pounds
  • Cooking power: 1000 watts
  • Temperature range: 32° F – 203° F
  • Temperature accuracy: +/- 1° F
  • Minimum water depth: 2.6 inches
  • Maximum water depth: 5.0 inches
  • Pump speed: 7 – 8 liters per minute
  • Maximum recommended water tank capacity: 5 – 6 gallons
  • Input voltage: 100V to 120V AC
  • Power cord length: 39″

Design and features

The cooker comes with several accessories. The first is a set of five cooking bags.
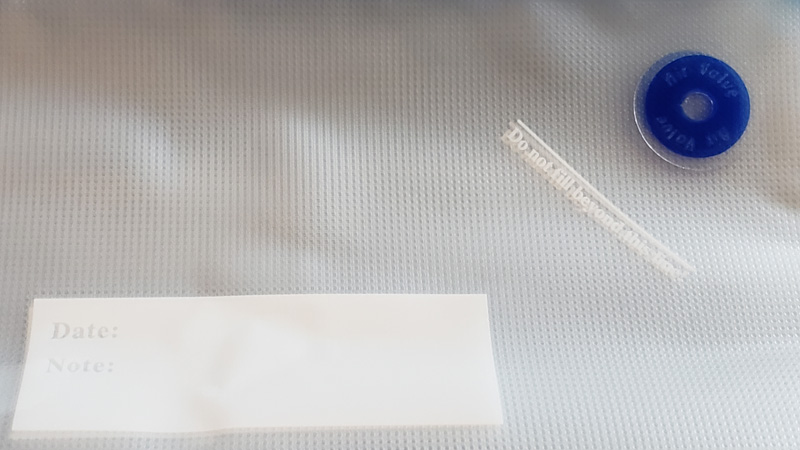
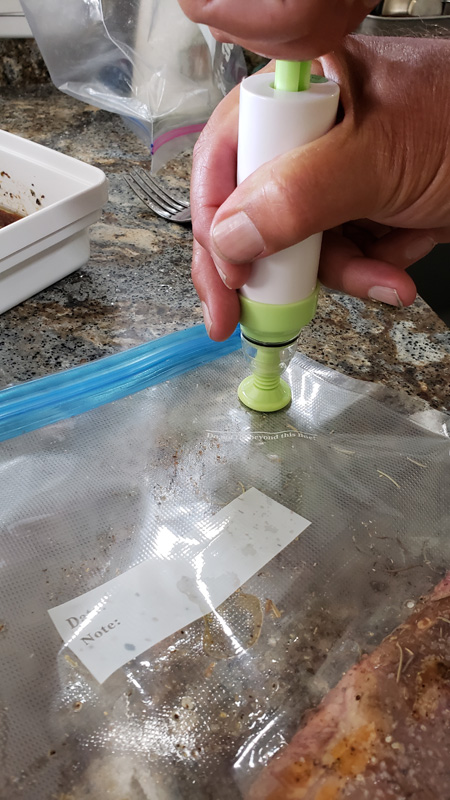
The bags have a space to write the date the items were cooked and a note.  This is great if you want to prep a bunch of food and freeze it. The blue circle is the air removal port.  To remove the excess air from the bag, you place the included pump over the port and repeatedly pull the handle to suck out the air.
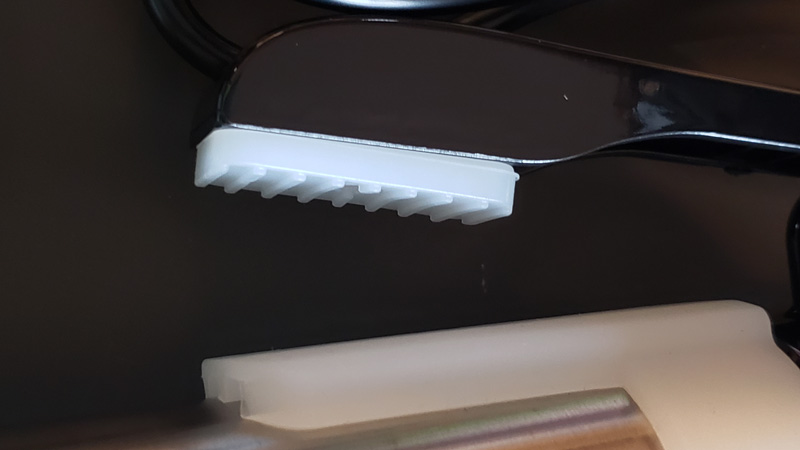
The cooker clips onto the side of your pot with the attached clamp with silicone pads.
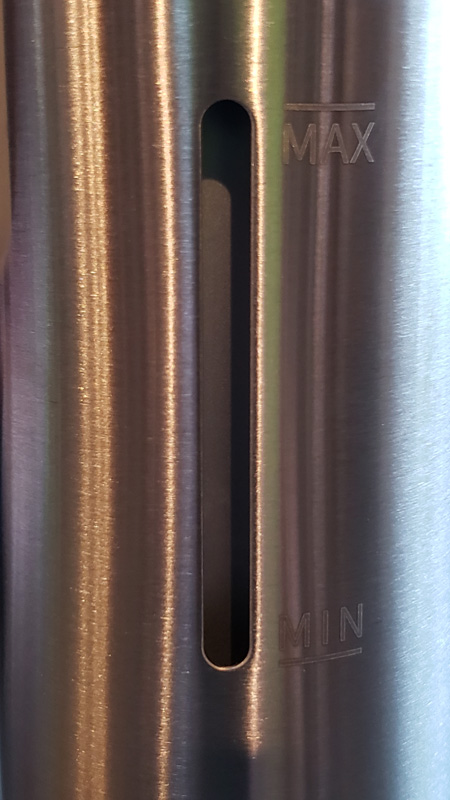
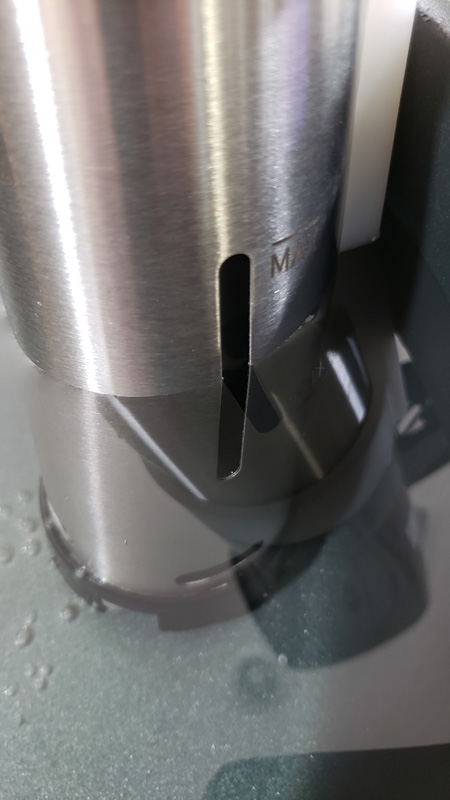
The metal column has etched markings to identify the appropriate water level.
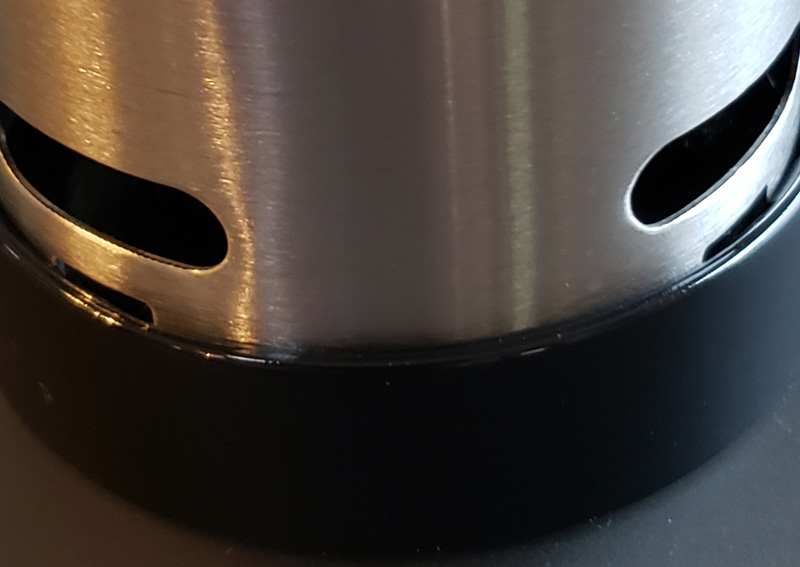
At the bottom of the column, we find several circulation ports where the water is pulled in, heated, and then expelled.
The control panel is located on the top and is shiny black with touch-sensitive buttons and multiple LED displays.
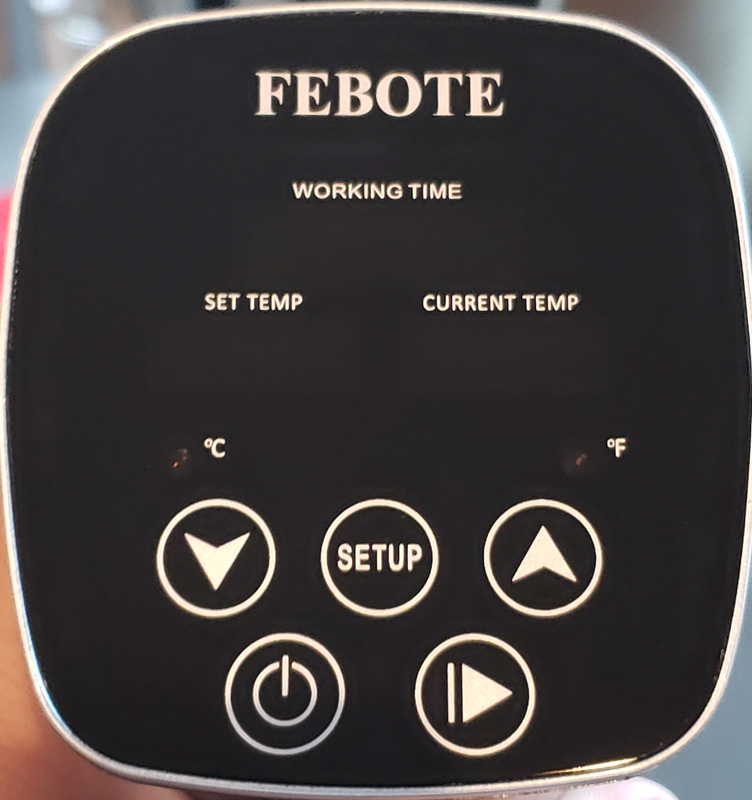
The buttons are used to turn the power on/off, enter the setup mode where you use the up/down arrows to raise or lower temperature and cook time and start cooking.

The LED displays show the current temp, set temp, cook (working) time, and a couple of LEDs that indicate whether the displayed temps are Fahrenheit or Celcius.

Performance

Plugging in the cooker, the current temp display comes on as does either the Celcius or Fahrenheit indicator LED.
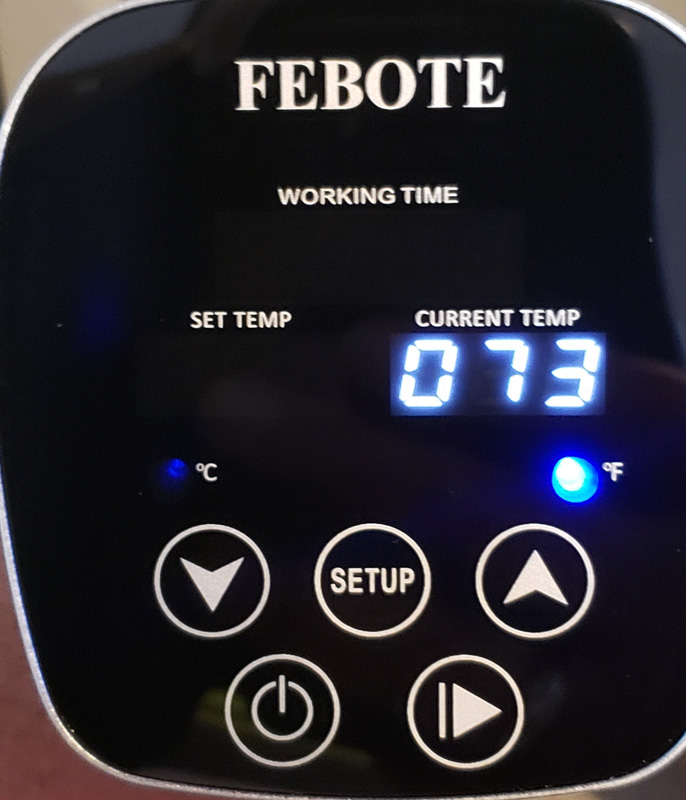
Pressing the setup button takes you into the setting mode where you can set the cooking temperature and the cooking time.  You use the up/down buttons to change the values and the setup button to cycle through temp/hours/minutes. The active field flashes to indicate you can set it.  Holding the setup button for three seconds toggles the unit between Fahrenheit and Celsius.
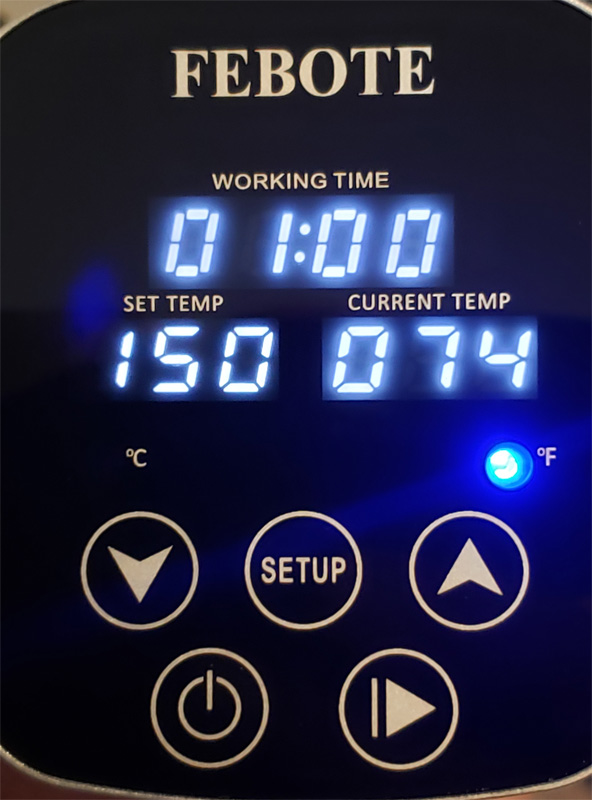
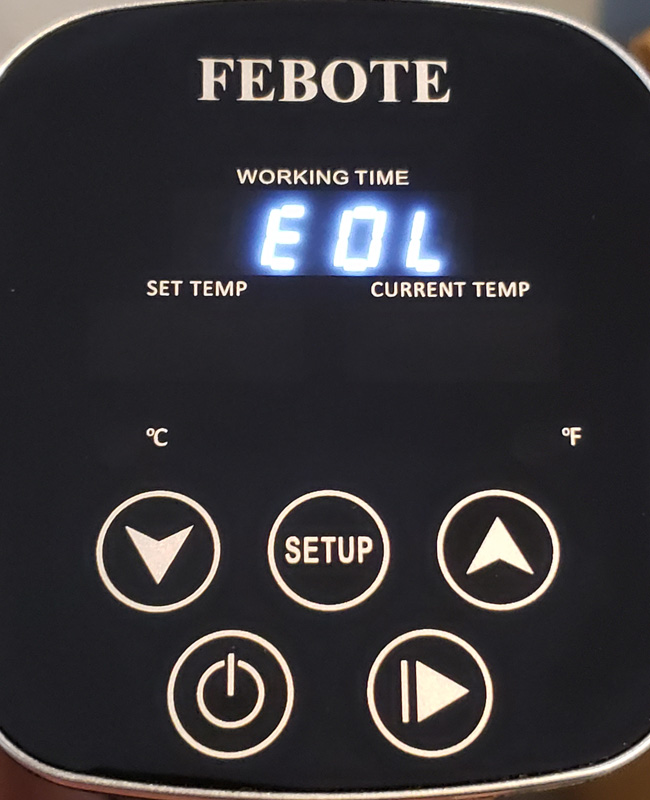
Once you have everything set up for your specific cook, hit the start button and the cooker will start circulating and heating the water.  If your water level is too high or too low, the display will show EOH or EOL and force you to power down and back up.
Once you have successfully started the cooker, it’s time to prep your food, since you have to wait for the water to reach cooking temperature. Place your food, along with any spices or other flavor enhancers into the cooking bags and press out as much air as possible.  Then, use the pump to remove the rest.

Once the water reaches cooking temp, the cooker will sound a one-minute alarm to alert you.  At this point, place the bags into the water and use the included clip to hold them in position so the food remains fully submerged.  After that minute is over, the cooker will go into cooking mode and the cooking timer will begin counting down.

Some commentary here:

Sous vide is not fast.  At all.  If you’re looking for a quick meal, look elsewhere.  Think of it like a low-and-slow smoker, but without the smoke. But, sacrificing speed gets you a pretty good and precise cook to your food.  You absolutely cannot overcook.  If your target temp is 160° F and your water bath is precisely maintained at 160° F, the food simply cannot cook beyond 160° F.  It’s that simple.  And, since your food is essentially vacuum sealed, it cannot dry out.  That’s the attraction to sous vide – you can perfectly prepare food, but it takes a little longer.  Once the cooking is done, most cooks then typically do a finishing sear on a hot cast iron pan, final broil, or other technique to finish the food.

Now, back to our regularly scheduled review…

The cook

We bought some nice sirloin strip steak and got to work.  My wife marinated the steak for flavor for a few hours.  I filled the pot to midway between the min/max markings.
As soon as you plug in the cooker, the display comes on with the water temp,
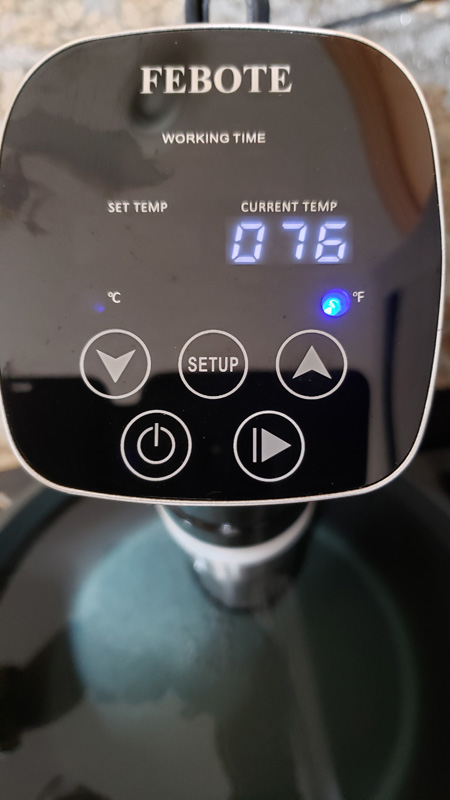
I set it for 1:30 cooking time and 135° cook temp and hit start.  The cooker started softly whirring and the water started circulating.
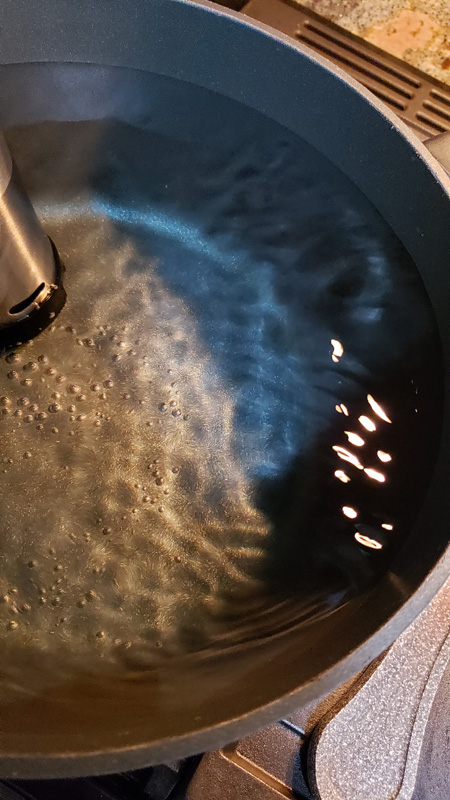
One thing to note is that the power cord is about 39″ long.  This means that you have to have a power outlet within that distance from wherever you plan to cook.  Since the cooker generates all the heat, you don’t need to cook on the stove, so that shouldn’t pose an issue.  Just place your pot on a hot pad or trivet near a power outlet.

While the water heated up, I pulled the steaks from the marinade, put salt and pepper on both sides and put them into the cooking bags with a little rosemary and thyme.  Once in the bags, I put the vacuum pump over the blue valve and pulled out the remaining air.

A note here – there were no instructions on how to use the bags and pump included in the instruction manual.  Granted, it isn’t exactly rocket science, but for those unfamiliar with things like this, putting it in writing would be nice.

The included bags and pump worked well, but you can use any zipper seal bag by using the immersion vacuum method.  Partially seal the bag and slowly immerse the bag into a water bath.  The water pressure will force out the air in the bag.  When the bag is nearly submerged, finish sealing the bag and you’re good to go.
The cooker took about ten minutes to heat the water.  Not too shabby.  About five degrees before it hits temp, it beep-beeps for a minute to let you know the cooking time is about to begin.  Personally, I think the beep is pretty soft and could use a little more volume to be able to be heard easily if you’re not right next to the stove.
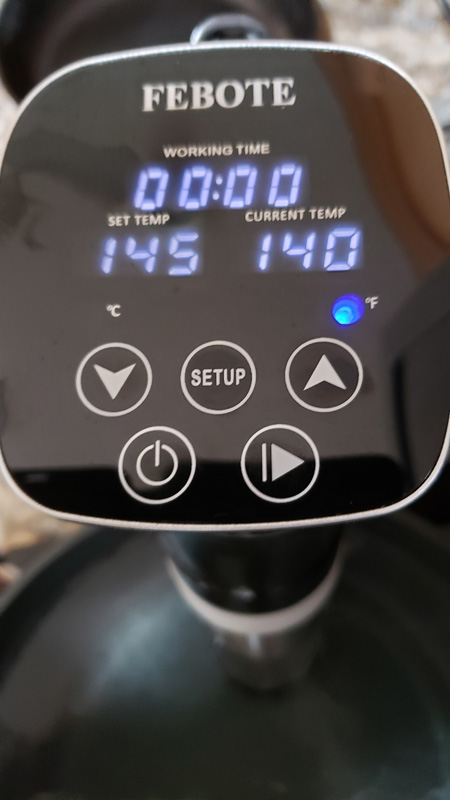
I clipped the two bags on the pan to keep the meat submerged as the cooker started timing.  Rather than a countdown, the timer is a count-up, so you have to remember how many minutes you set it to know how much more cooking time is left. I didn’t like this.  In my opinion, it should count down to zero, not up to the cooking time.

Now, the ID-10-T error.  If you’re not familiar with that error, read the error code without the dashes as all letters.  I’ll swear the recipe said 145° for medium.  Nope – it said 135°.  Whoops.  So, I hit the start button, hit setup and then changed the temp down to 135° and hit start again.  Unfortunately, this restarted the cooking timer.  Dang.  But, there’s no way that in a few minutes the steaks were up to 145°.  And, since you really can’t overcook via sous vide, we should be all good.

Just before the cooking time ended, I cranked up the cast iron fry pan on the stove and got it toasty hot with a nice layer of bacon grease bubbling away.  Once the timer beeped, I pulled out the steaks, patted them dry and flopped them in the sizzling fry pan for a minute or so on each side and a few seconds on each end to give everything a good sear.  After shutting off the burner, I tossed in some mushrooms and onions for a quick saute and placed the steaks on the plates to rest for a couple of minutes. This is an important step as it lets the fibers in the meat contract a bit to hold in the juices, keeping the meat moist.  Here is the end result.
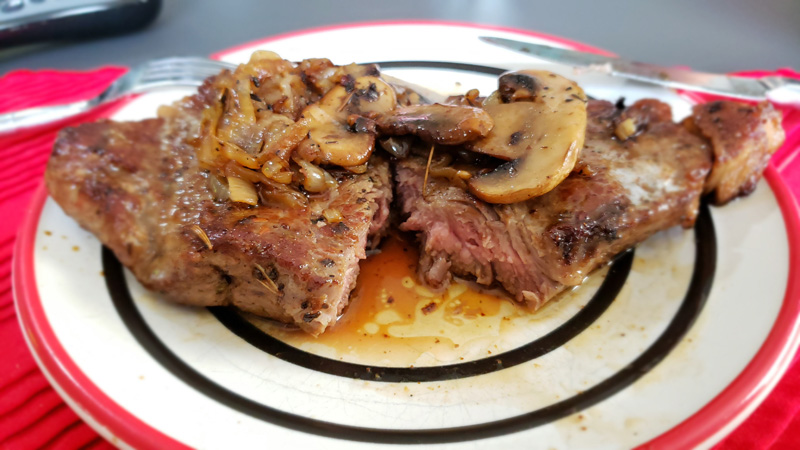
The steak’s color was uniform throughout the steak.  It was very moist as well.  I’d venture to say it was moister than a grilled or smoked steak.  Overall, it was a nice meal.

One thing I don’t like about sous vide cooking is that since the food is in a sealed bag, there is no way to test the meat with an instant-read thermometer to verify that the desired temperature is reached.  That isn’t a criticism of the Febote cooker – just a byproduct of the sous vide method.  There are many websites devoted to sous vide cooking where you can get cooking time suggestions for a variety of food.

Speaking of sous vide websites…I spent a bunch of time there looking for cooking suggestions for the steaks.  Why, you ask?  Febote doesn’t include any recipes with the cooker.  I think this is the first food prep kitchen appliance I have ever gotten without recipes.  Air fryer?  Yup. Food processor? Yup. Instant Pot? Yup. Blender? Yup. Febote sous vide? Big ol’ nope.  And, for me, this was an issue, since this is a very different cooking method with different prep methods and cooking times.

What I like

  • Fast heating time
  • Super quiet operation
  • Vacuum bags and the vacuum pump worked well

What needs to be improved

  • The cooking time beep could be louder
  • The cooking timer would make more sense as a countdown
  • No recipes included
  • No instructions for the included vacuum bags and pump
  • No way to check food temp – an issue with sous vide cooking and not the cooker

Final thoughts

Sous vide is an interesting addition to our cooking repertoire.  We already smoke/barbeque, pressure cook, air fry, and all the usual bake, broil, stir fry options.  It will be interesting to try chicken breasts as they notoriously dry out on grill or smoker.

As far as this specific sous vide cooker goes, it was easy to use, and based on our cooking results, worked perfectly. If you’ve got the time to cook using sous vide, don’t mind the count-up timer, and are adept at finding your own recipes, the Febote sous vide cooker might be the right choice for you.

Price: $79.99 direct, or $72.99
Where to buy: Direct from Febote.com and Amazon
Source: The sample of this product was provided by Febote.

Filed in categories: Reviews

Tagged: , ,

Febote 1000 watt sous vide cooker review originally appeared on The Gadgeteer on May 17, 2019 at 9:00 am.

Note: If you are subscribed to this feed through FeedBurner, please switch to our native feed URL http://the-gadgeteer.com/feed/ in order to ensure continuous delivery.

Roidmi F8 cordless vacuum review

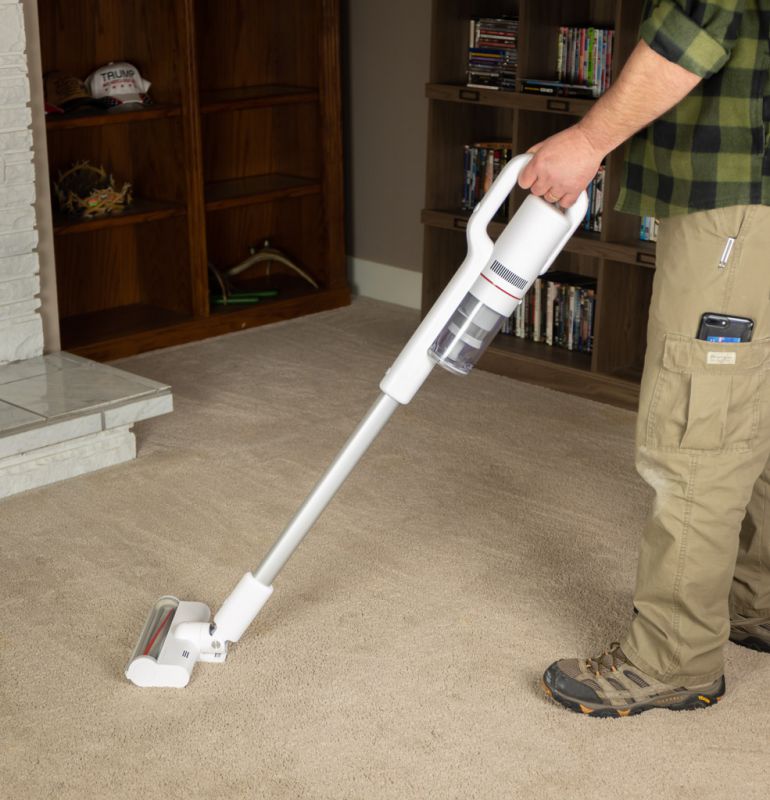
REVIEW – Perhaps one of the most annoying things with vacuuming is the cord. The Roidmi F8 cordless vacuum aims to make that a thing of the past.

What is it?

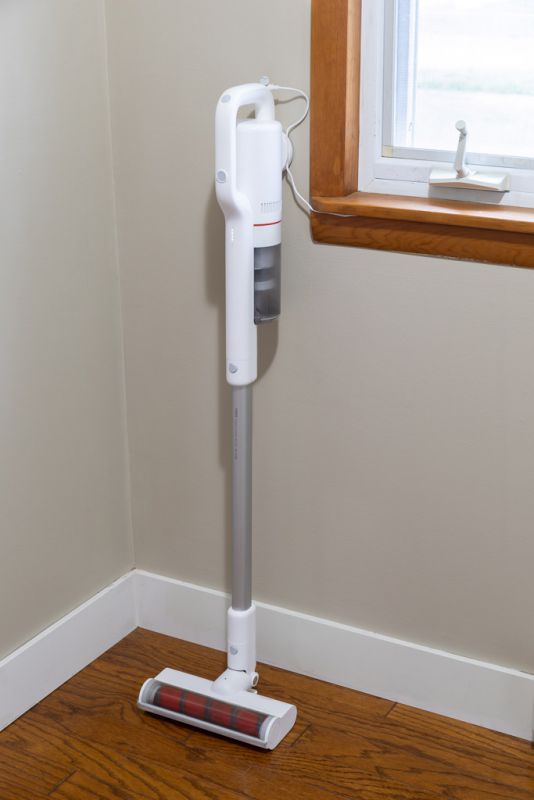
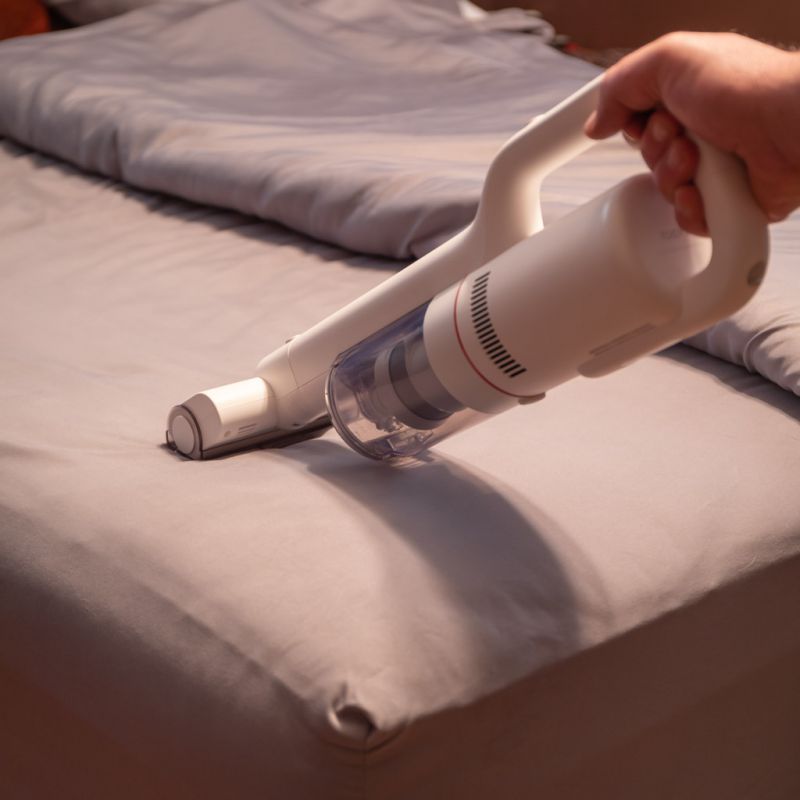
The Roidmi F8 cordless vacuum is a lightweight yet powerful cordless handheld vacuum featuring a wide range of useful attachments.

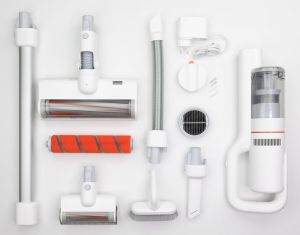
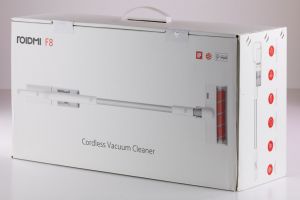
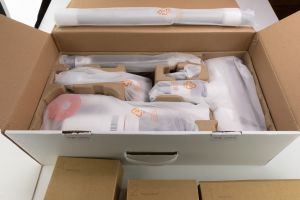
What’s in the box?

  • Main vacuum body
  • Large Soft brush head (Includes a hard floor brush and a carpet brush)
  • Small anti-mite brush head
  • Bendable extension pipe
  • Multifunction brush
  • Long flat suction head
  • Long connecting pipe
  • Spare HEPA filter
  • Multi-function brush for cleaning brush heads
  • Operation manual
  • Charging plug
  • Magnetic wall mount


Hardware specs

  • 18,500 Pa vacuum degree
  • 115W suction power
  • 55 minute battery
  • 3.3 lbs (1.5 kg)
  • 75dB(A) low noise
  • No nail magnetic mount

Design and features

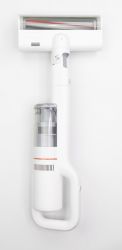
The Roidmi F8 cordless vacuum features a sleek design that incorporates easy to use controls and a modular system that adapts to many different configurations.

The heart of the F8 is a battery that lasts for 55 minutes under standard mode (3800 square feet), and 10 minutes under maximum power. The charge time is rated at 2.5 hours. The 100,000 rpm brushless DC motor generates strong suction power.

Second to suction power for a vacuum is its ability to filter the air and debris that it sucks up. The Roidmi F8 features a 4 stage filtration system. The filtration system absorbs participles as small as PM0.3, purifying up to 99% of your air.

  1. Metal Mesh
  2. Cyclonic air flow
  3. HEPA filter cartridge
  4. Sponge filter.

The Roidmi F8 also includes many attachments which make it very versatile.

  1. Large Soft brush head. Includes a hard floor brush and a carpet brush.
  2. Small anti-mite brush head.
  3. Bendable extension pipe
  4. Multifunction brush
  5. Long flat suction head
  6. Long connecting pipe


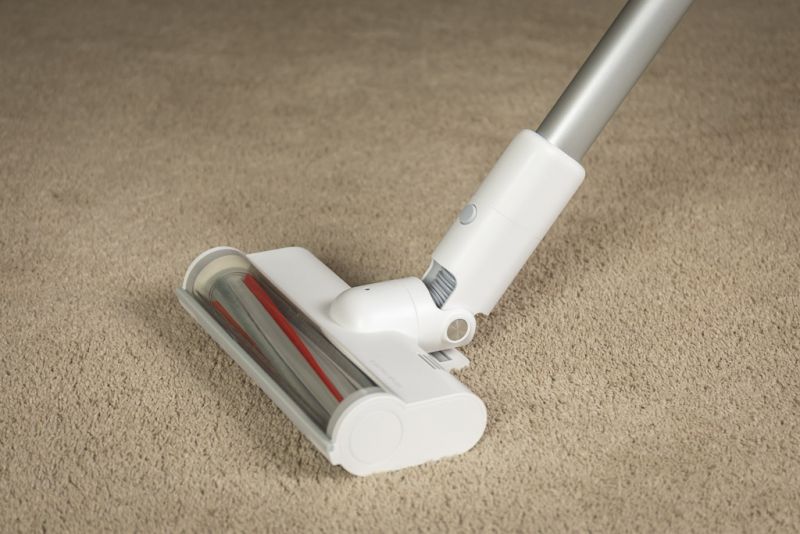
The brush heads are electrically powered, unlike some vacuums that just spin the head via air flow. The soft woven nylon roller brush is designed for hard floors and the carbon fiber brush is designed for carpeted areas. The brush rollers are easy to change without tools.

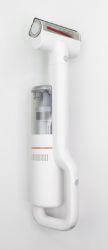
The biggest advantage to a cordless vacuum is obviously the time saving and convenience factor of not having to deal with unwrapping and wrapping up a cord. The magnetic mount is just for holding the vacuum in an upright position, the charging cord still needs to be manually inserted which does detract slightly from the convenience of it.

As for doing what it’s designed to do, the Roidmi F8 certainly has the power to vacuum quite a bit of space on one charge. I don’t think I would vacuum an entire carpeted room regularly with it, as a regular corded vacuum would do a better job, however for small areas or small cleanup jobs it will do just fine on carpet.

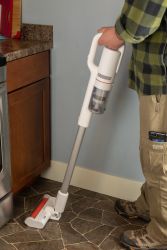
For hard floors, it does a great job. It’s so much easier than chasing around dirt and dust with a broom. It does take a little to get used to the weight being at the top instead of the bottom like a normal vacuum.


The head on the main brush also swivels nicely, making it easy to maneuver around obstacles.

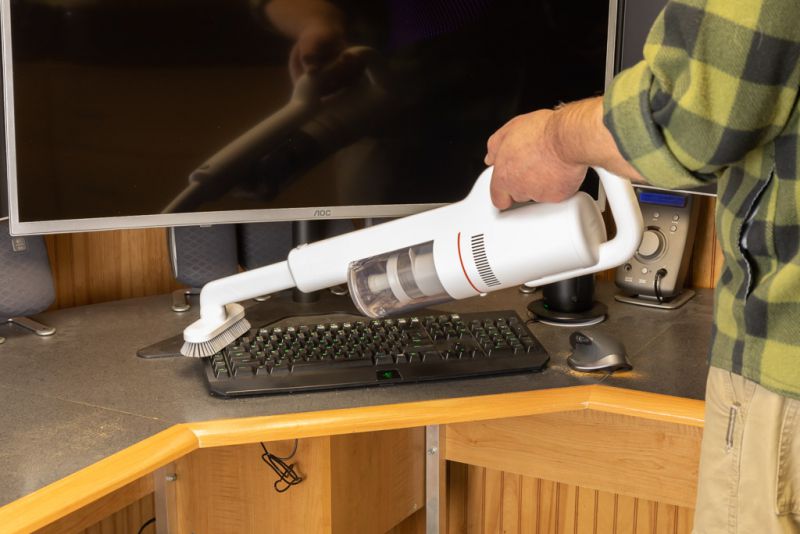
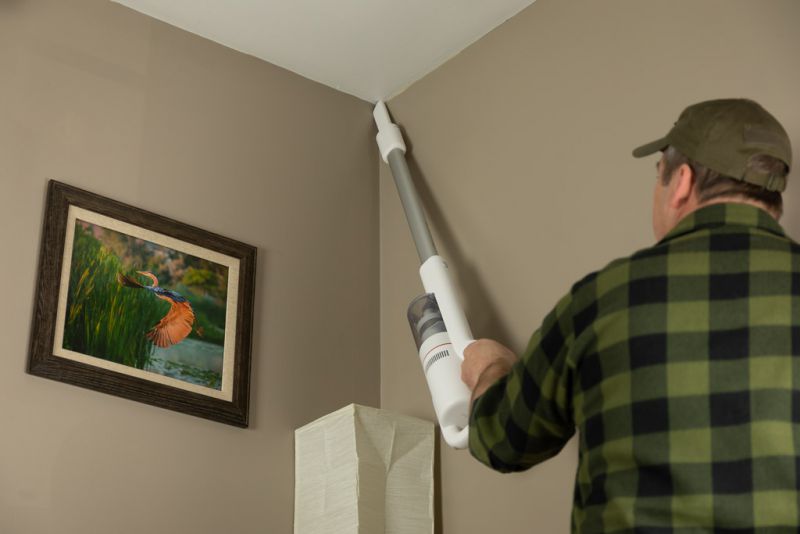
The other attachments make it so easy to quickly clean small things as you see them instead waiting to do them after you get out the regular “big” vacuum. When so see that cobweb or small pile of dirt you simply grab the Roidmi F8, clean it up, and then put it away.

I really like the extension tube as it can be used with all of the attachments. The dust cup is also easy to empty and clean.

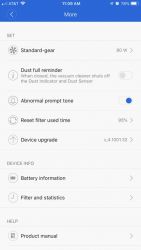
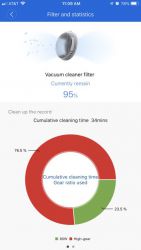
There is also a smartphone app available that connects via Bluetooth and provides battery status, filter status, firmware updates and more.


What I like

  • Portable and powerful
  • Simple to operate and configure
  • Many attachments

What needs to be improved

  • Review unit came with a 240v charging plug so I had to use a travel adapter to charge it
  • It would be nicer if the brush went closer to the sides to clean closer to the wall
  • Manual plug-in for charging instead of charging from the mount

Final thoughts

Overall I think this vacuum is a great device, and will definitely see a lot of use around my house. Despite a few of the things I would like to see improved, none of them were a “deal-breaker” for me.

Price: $299
Where to buy: Amazon
Source: The sample of this product was provided by Roidmi.

Filed in categories: Reviews

Tagged: , ,

Roidmi F8 cordless vacuum review originally appeared on The Gadgeteer on May 5, 2019 at 9:30 am.

Note: If you are subscribed to this feed through FeedBurner, please switch to our native feed URL http://the-gadgeteer.com/feed/ in order to ensure continuous delivery.
Sparkel can carbonate drinks without using a CO2 tank

CROWDFUNDING NEWS – I love using my SodaStream Fizzi One Touch for making sparkling water and I make my own zero-calorie sodas by using flavor drops and stevia. But I’ve always wanted to try carbonating other drinks like tea or juices. The problem is that doing that with a SodaStream can damage it. So I was excited to learn about the Indiegogo campaign for the Spärkel: The Sparkle-Everything Beverage Maker.

What is it?

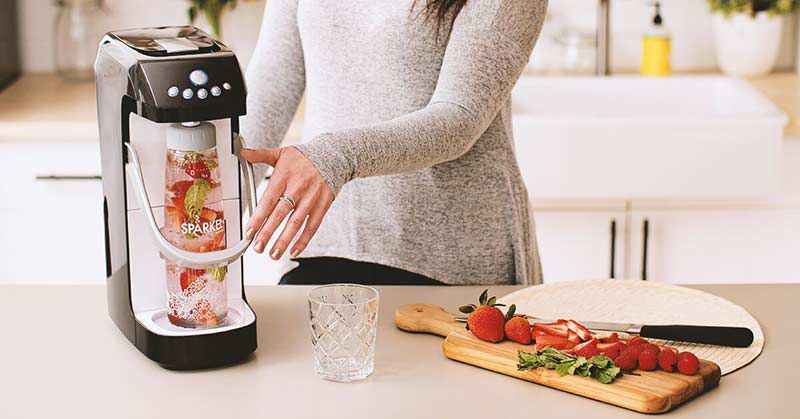
The Spärkel Everything Beverage Maker is a tabletop appliance that carbonates beverages without using a CO2 tank (sorta).

Why do I like it?

I like that you can use the Spärkel Beverage Maker to carbonate all sorts of beverages. It’s not just limited to carbonating water and you can even put fruits, herbs, spices, and more directly in the bottle so that the flavors are infused into the beverage.

Things to consider before pledging for this campaign


Although the Spärkel device does not use a CO2 tank like a SodaStream, it does use a small carbonator packet that consists of a special granulation of citric acid and sodium bicarbonate. Each packet generates CO2 gas when placed in a sealed chamber within the Spärkel appliance. The problem is that each packet is only good for one 24oz. carbonated beverage, unlike a traditional CO2 tank which can carbonate multiple bottles.

You also won’t be able to go to a local store for a new CO2 tank when you run out of CO2 packets. But according to the campaign page, you’ll be able to order a box of 90 CO2 packets for $49.99

Where can I find more info?

The Spärkel campaign ends on 5/30/19 they are working towards their funding goal of $30,000. You can pre-order a Spärkel starting at $49. After the Spärkel campaign ends, rewards are estimated to start shipping in August 2019. Visit their Indiegogo page for all the details.

Filed in categories: News

Tagged: , ,

Sparkel can carbonate drinks without using a CO2 tank originally appeared on The Gadgeteer on April 30, 2019 at 5:49 pm.

Note: If you are subscribed to this feed through FeedBurner, please switch to our native feed URL http://the-gadgeteer.com/feed/ in order to ensure continuous delivery.

Elechomes UC3101 air purifier review

REVIEW – I take the air that I breathe for granted because I live in an area where the air is pretty clean. At least that’s what I thought. Can the air that you breathe seem clean but in reality, it’s not? Yes. Is there a product that can purify the air and make it better to breathe? You bet! Let’s take a look at the UC3101 air purifier from Elechomes.

What is it?

The UC3101 is an air purifier from Elechomes which features:

  • 1 Pre-Filter and a 3-Layer composite HEPA filter that helps trap and eliminate up to 99% of airborne pollutants
  • A dust sensor and an odor sensor work together to monitor air quality and identify harmful pathogens
  • Smart Mode & Sleep Mode
  • Intelligent Timer & Child Lock: 1-8 hours for automatic working and shutdown purification
  • Up to 350 square feet coverage
  • Remote Control: allows controlling the air purifier from up to 16.4 ft. (5M) away

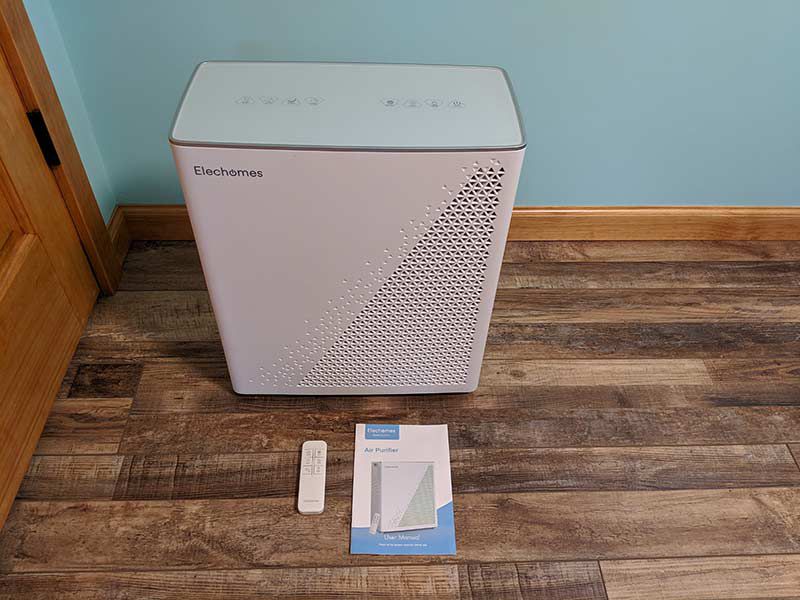
What’s in the box?

  • Air Purifier with filters
  • Remote control
  • User manual

Design and features

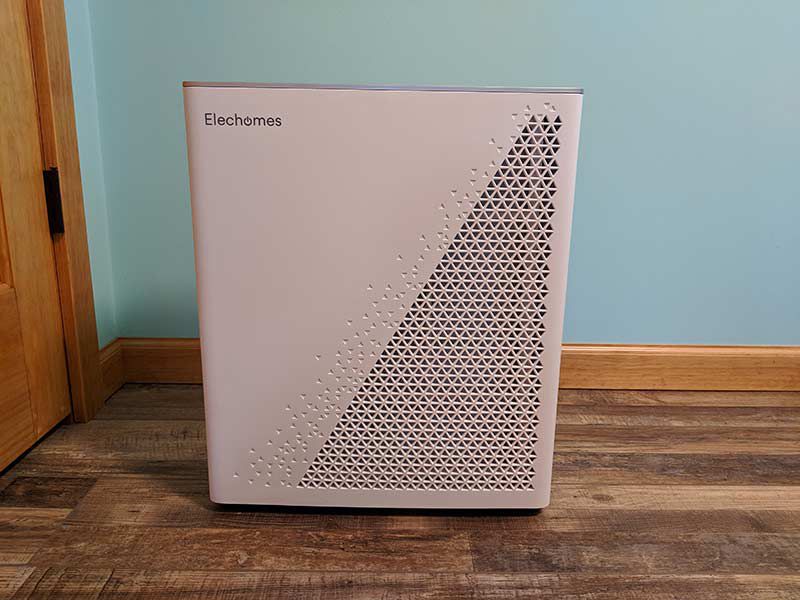
The Elechomes UC3101 air purifier is 16.5 x 8.3 x 19.3 inches and has a white plastic case with decorative vent cutouts on the front.

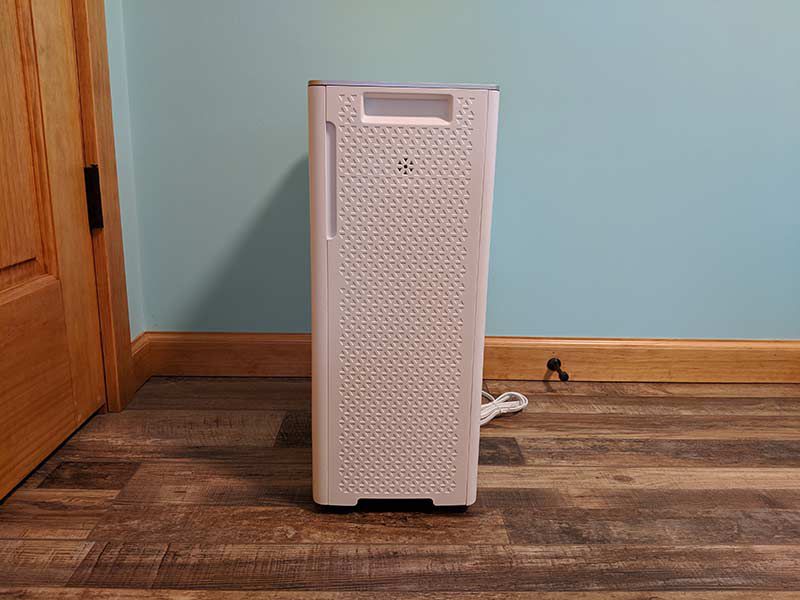
The sides have built-in handles that allow for easy relocation of the 18.74 pound unit.

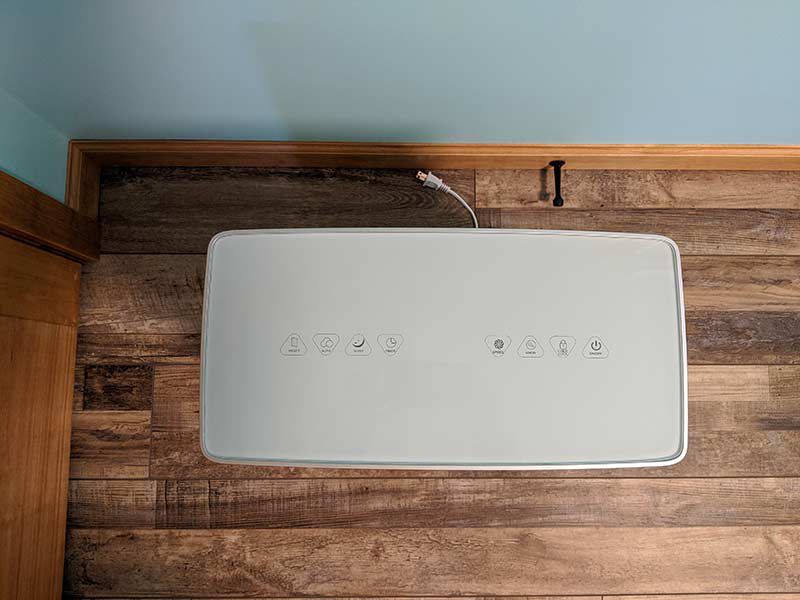
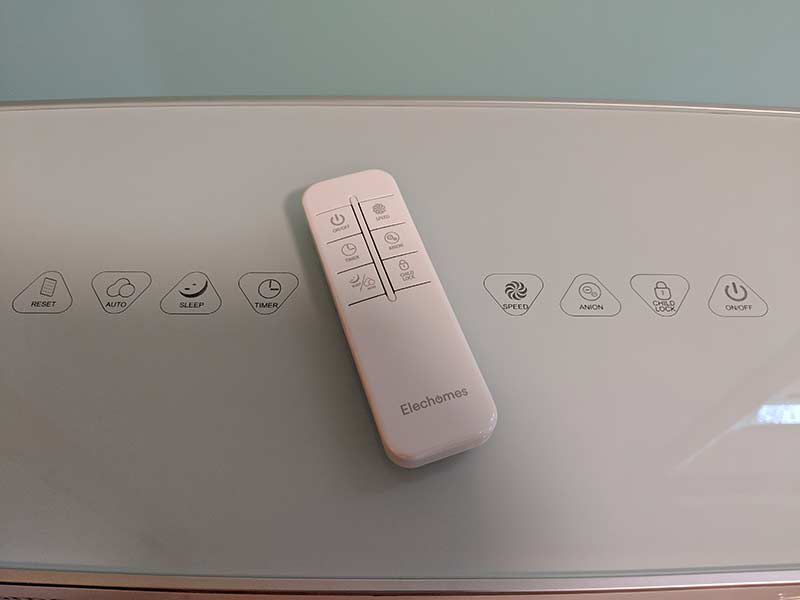
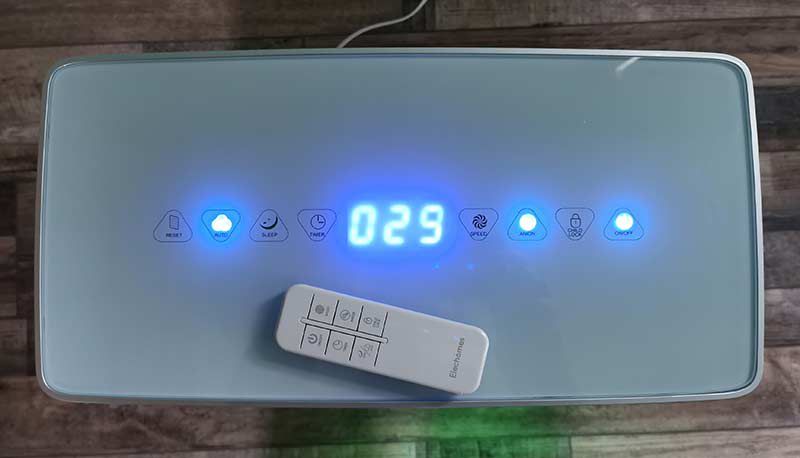
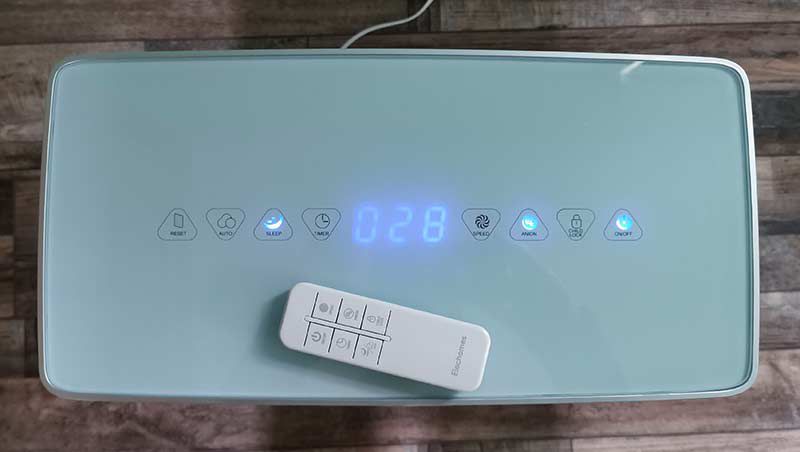
The top surface of the UC3101 air purifier has a touch panel with 8 buttons with the following functions from left to right: Filter change notification and reset, auto mode, sleep mode, timer, particulate matter display, fan speed, negative ion function, child lock, and power toggle.

The UC3101 air purifier comes with a handheld battery-powered remote control that has the same functions so that the unit can be controlled from up to 16 feet away.

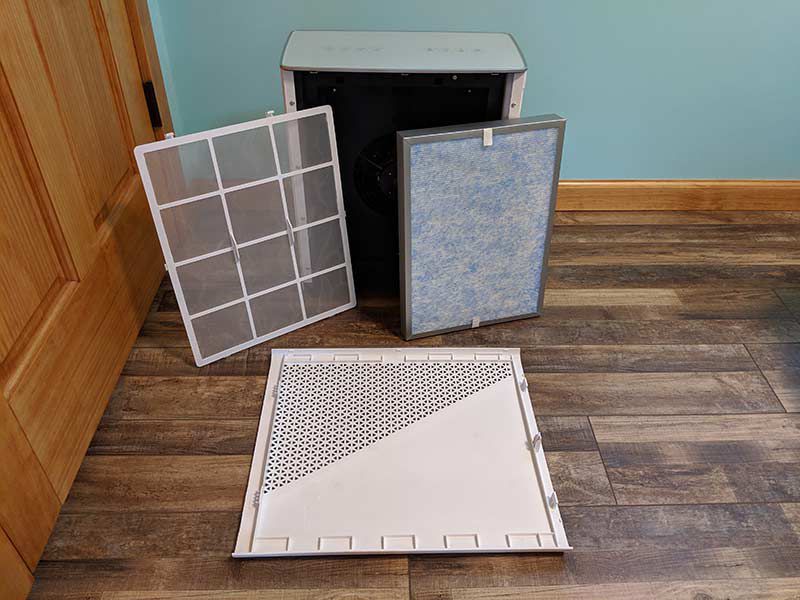
The unit comes with a pre-filter which is washable and the main HEPA filter which should be replaced once a year or after 3000 hours of use.  Currently, Amazon does not sell the replacement filters, but that’s supposed to change soon.

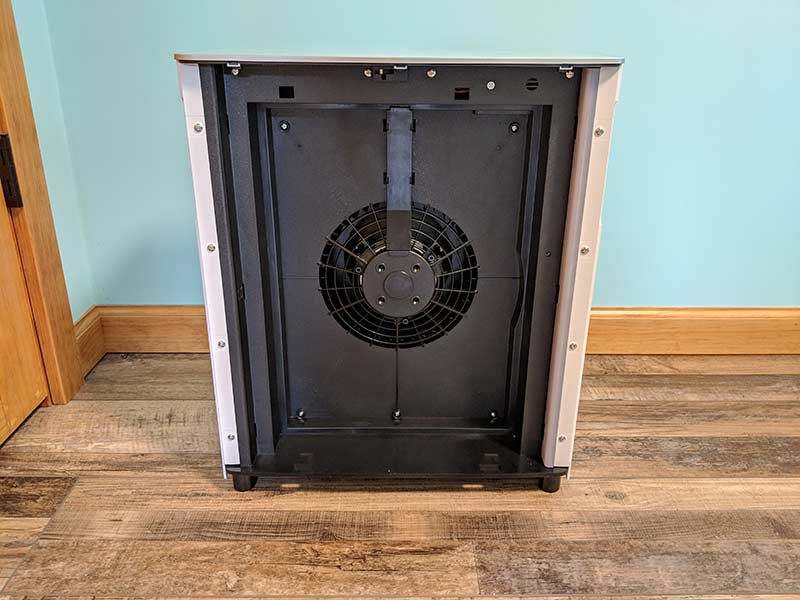
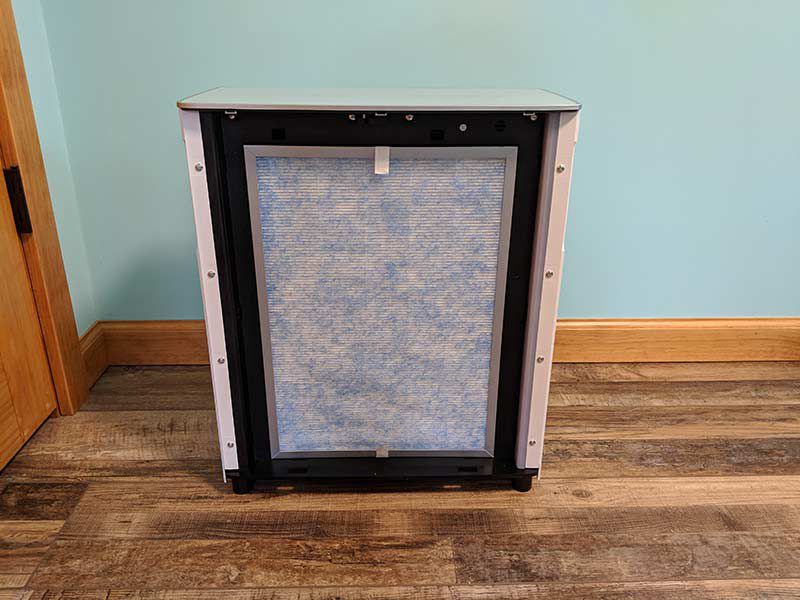
Installing and replacing the filters is not difficult. The front panel of the air purifier unsnaps to reveal the interior of the device.


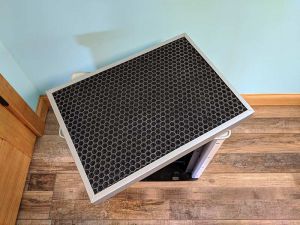
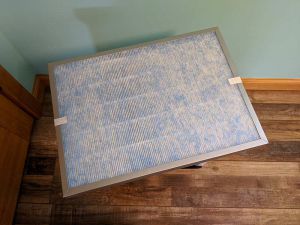
The HEPA filter has activated carbon which reduces benzene, formaldehyde, and more and it also has an antibacterial cloth that kills most bacteria and viruses.

It fits in place with the honeycomb side of the filter facing in towards the fan.

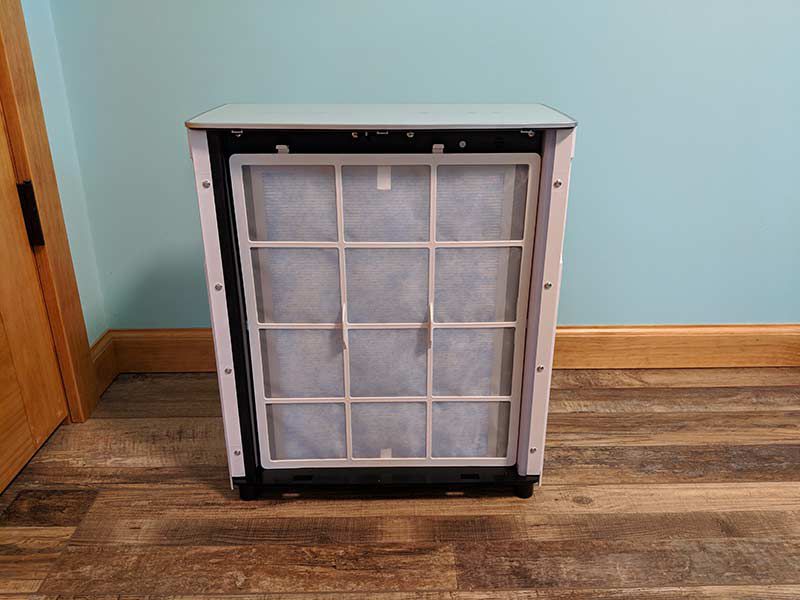
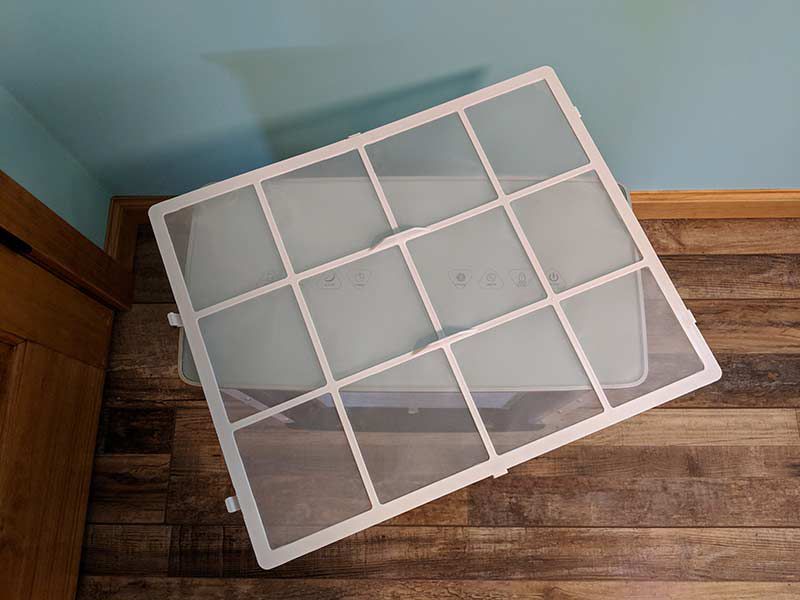
The pre-filter is designed to trap larger pollutants like hair, lint, and more.

The pre-filter fits over the main filter and is the first line of defense against to trap all the icky stuff you should not be breathing. The UC3101 air purifier sucks in air through the filters, to clean it and then sends the clean air back into the room through a vent on the side of the unit.

Operation

To use the UC3101 Air Purifier, all you have to do is make sure the filters are installed correctly, plug in the unit and press the on/off switch on the touch panel on top.

The touch panel buttons and display have bright blue LEDs that make them easy to see even in a dimly lighted room.

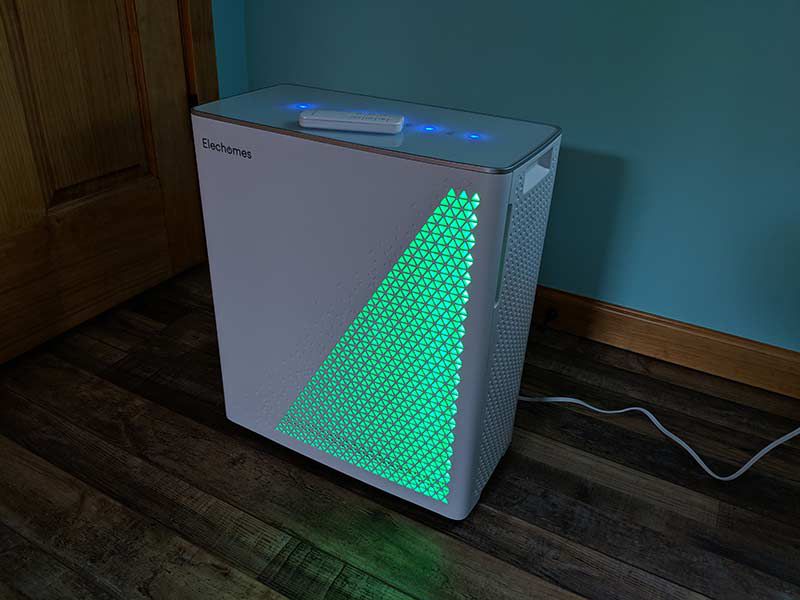
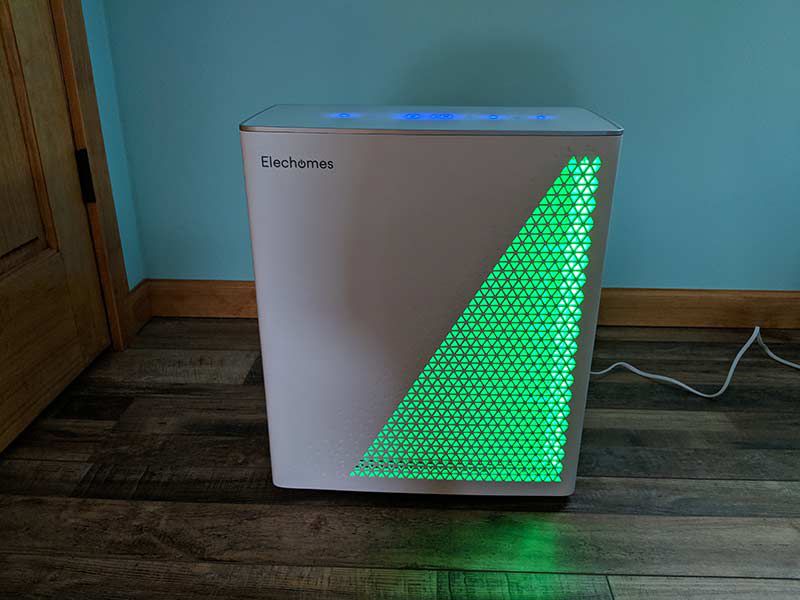
The front air vent of the air purifier also lights up to provide an easy to see a visual indicator of the air quality in the room. It should be obvious that green means good air quality. The PM display on top of the unit will have a reading of between 0-75 and the fan speed will be low.

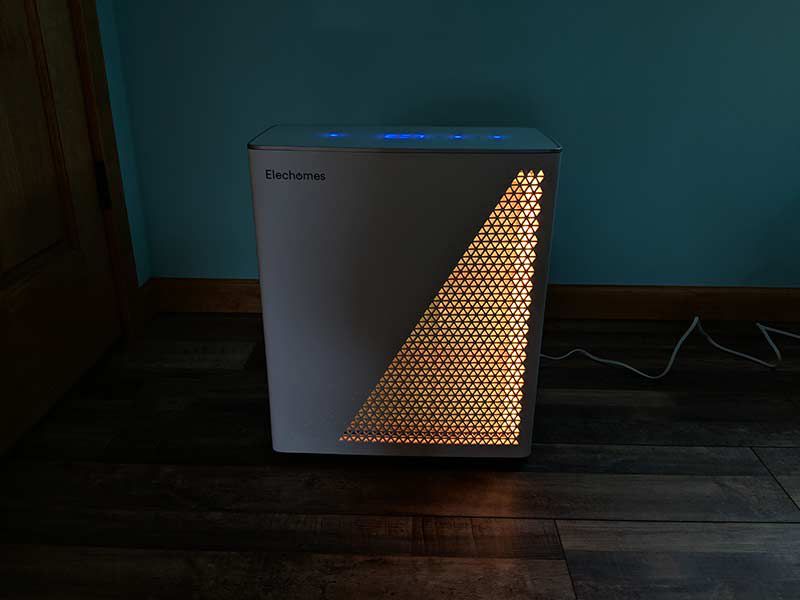
If the PM display on the top of the unit shows between 75-150, the vent light will turn yellow and the fan speed will increase to medium.

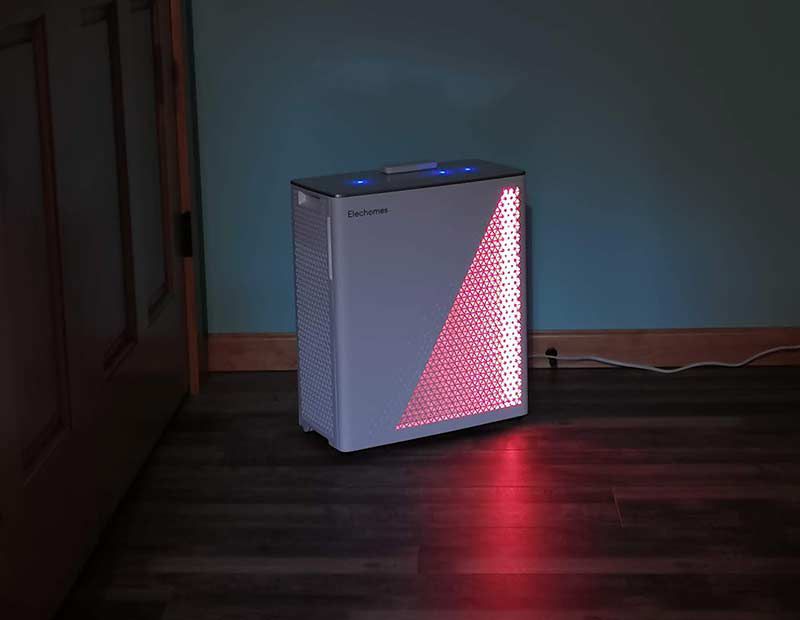
If the air quality is bad, the PM display reading will be over 150 and the fan speed will increase to high.

I’ve been having a lot of remodeling work done on my home lately and with remodeling comes a lot of dust and fumes. The Elechomes air purifier cranked into high gear after sessions of drywall sanding and even when we had some plumbing work and there were just glue fumes in the air. I was impressed that the sensors were able to detect both types of air quality problems very quickly.

The air purifier has a negative ion feature that is supposed to provide for maximum purification efficiency. I’ve tried using the unit both ways and I’ve just left that feature turned on even though I can’t tell a difference when it’s been disabled.

I have noticed that this air purifier is louder even when than other air purifiers that I’ve reviewed. This is true even when the air quality is good and the fan speed is low. When the air quality is bad and the fan speed is high, it is really loud.

Another issue is that the lighted function panel is bright. Even if you put the air purifier in sleep mode (shown above), the panel only dims slightly, which is still bright enough to light up a room and disturb your sleep. In sleep mode, the fans go to low speed but you can still hear the unit running. The unit does have a timer function that you can use to turn off the unit in 0-8 hours.

What I like

  • Easy to see air quality setting
  • Has dust and odor sensors
  • The HEPA filter should last for one year before needing to be replaced

What needs to be improved

  • Replacement filters are not yet available on Amazon
  • Fan is loud
  • Function panel lights are bright even in sleep mode

Final thoughts

The Elechomes UC3101 air purifier is an attractive appliance that will clean the air of a 350sq foot area of up to 99% of airborne pollutants. It’s easy to use and easy to maintain. The only downsides are that the fan is pretty noisy on the high-speed setting, the LEDs are bright even in sleep mode, and replacement filters are not yet available for purchase. It might sound like I have a lot of complaints, but the good side of this air purifier is that it makes the air smell better, and seem fresher after running for a short time. It’s made a big difference in the quality of the air in my home especially during the times that lots of dust and odors are being stirred up from remodeling projects.

Price: $299.99
Where to buy: Amazon
Source: The sample for this review was provided by Elechomes.

Filed in categories: Reviews

Tagged: ,

Elechomes UC3101 air purifier review originally appeared on The Gadgeteer on April 30, 2019 at 11:00 am.

Note: If you are subscribed to this feed through FeedBurner, please switch to our native feed URL http://the-gadgeteer.com/feed/ in order to ensure continuous delivery.
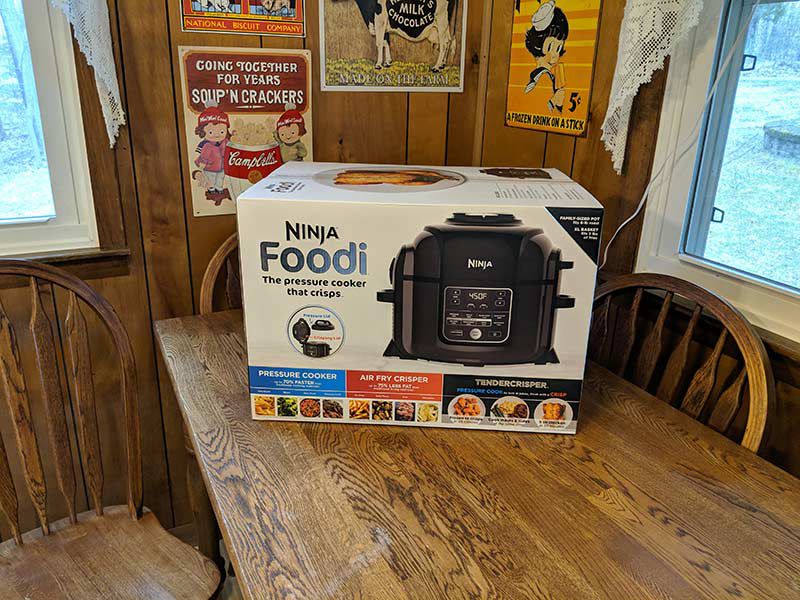
Ninja Foodi pressure cooker review

REVIEW – It might seem like pressure cookers are the latest cooking gadget fad, but pressure cookers have been around for decades – just not with fancy displays and features like the ones we’re seeing today. The traditional pressure cookers just had an analog gauge on top to show the pressure level and I thought they were scary as heck with their sputtering and spinning valves. Today’s pressure cookers have come a long way and they rank as my number one favorite kitchen gadget. Today I want to tell you about the Ninja Foodi pressure cooker which raises the bar when it comes to this category of cookers. Let’s take a look!

This post was created in partnership with Ninja and I received a complimentary product but all opinions within are my own.

What is it?

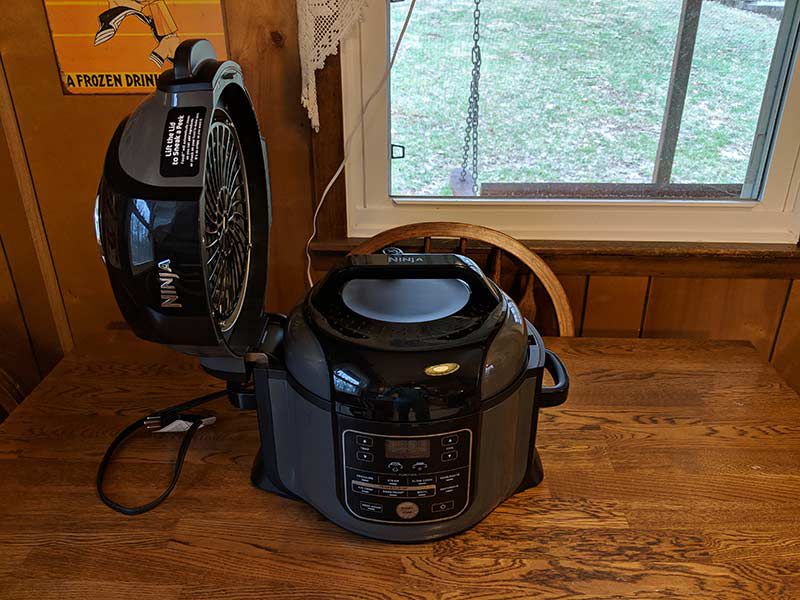
The Ninja Foodi is a modern pressure cooker with a set of feature that includes a digital display, multi-pressure levels, timer, and a keep warm feature. But the feature that really sets this pressure cooker apart from other brands is that it doubles as an air fryer that not only pressure cooks your food super fast, it can make it crispy too.

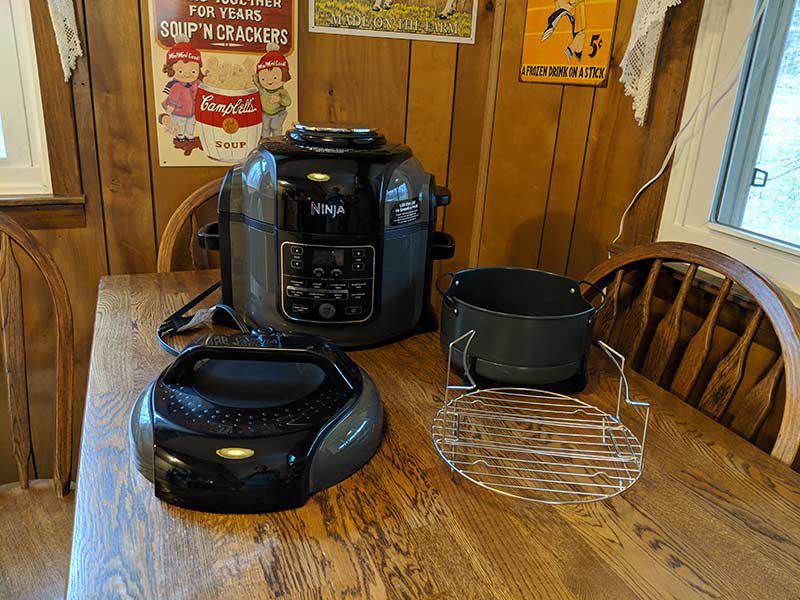
What’s in the box?

  • Ninja Foodi pressure cooker
  • Crisping lid
  • Pressure lid
  • 6.5 qt. Removable cooking pot
  • 4 qt. Cook & Crisp basket
  • Reversible rack
  • Detachable diffuser
  • Silicone ring
  • Anti-clog cap
  • Condensation collector
  • Recipe book with 45 recipes
  • User manual

Design and features

The Ninja Foodi is larger than other popular pressure cookers on the market, but that’s because it can do a lot more than those cookers.

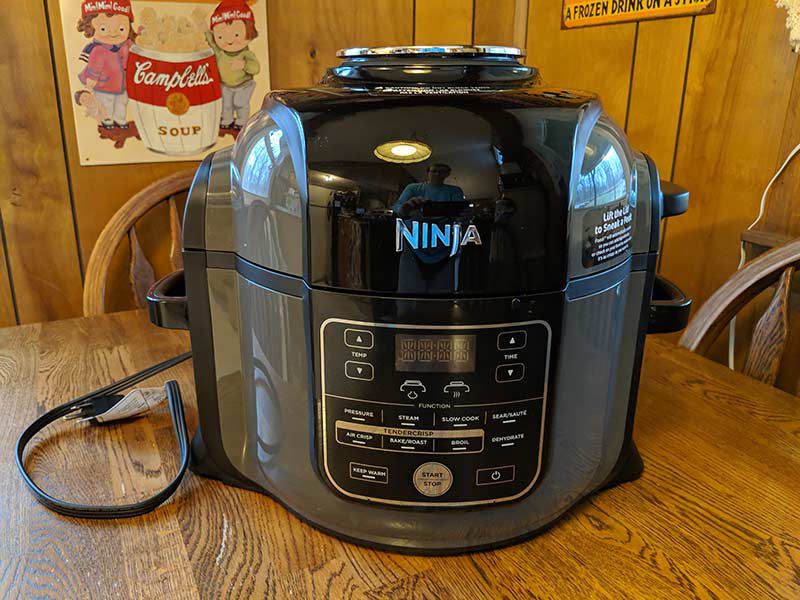
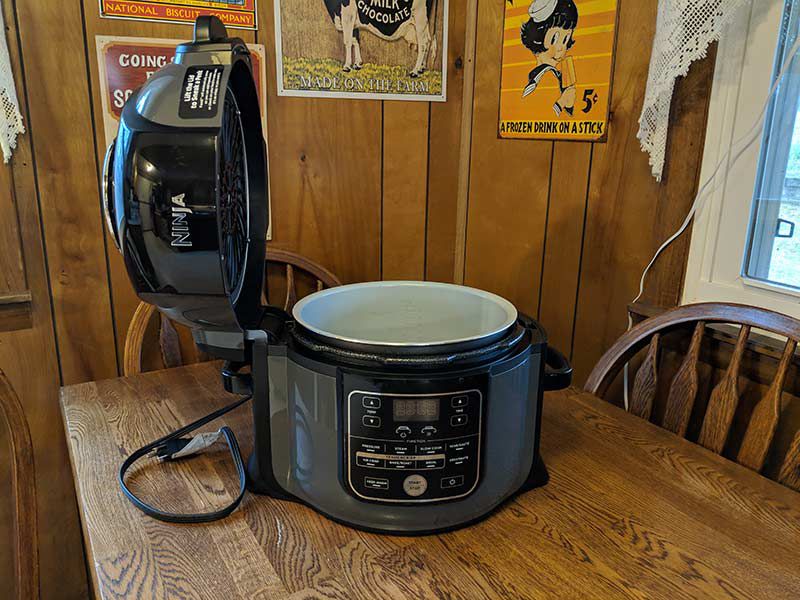
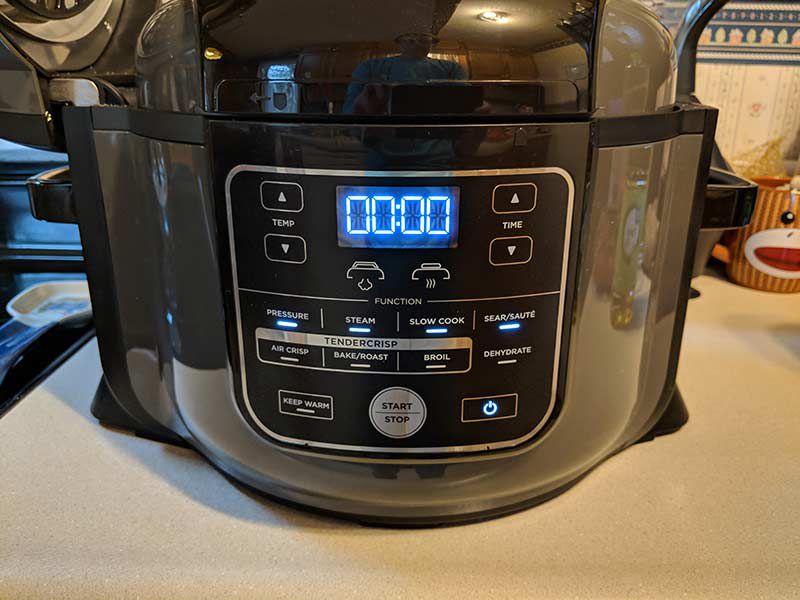
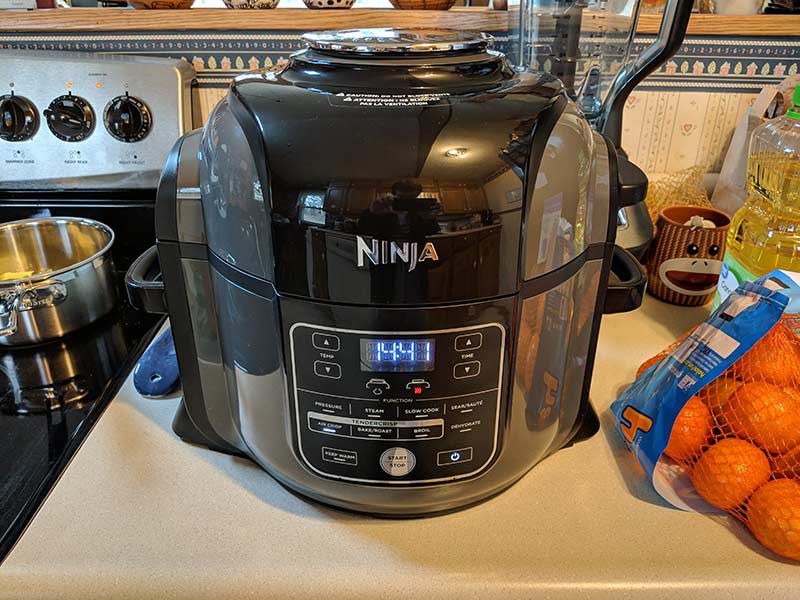
The front of the Foodi has easy to understand display and touch panel that will let you set the timed cooking sessions and adjust the pressure setting from LO to HI. You can also choose which style of cooking to use: pressure, steam, slow cook, sear/saute, air crisp, bake, broil, and dehydrate.

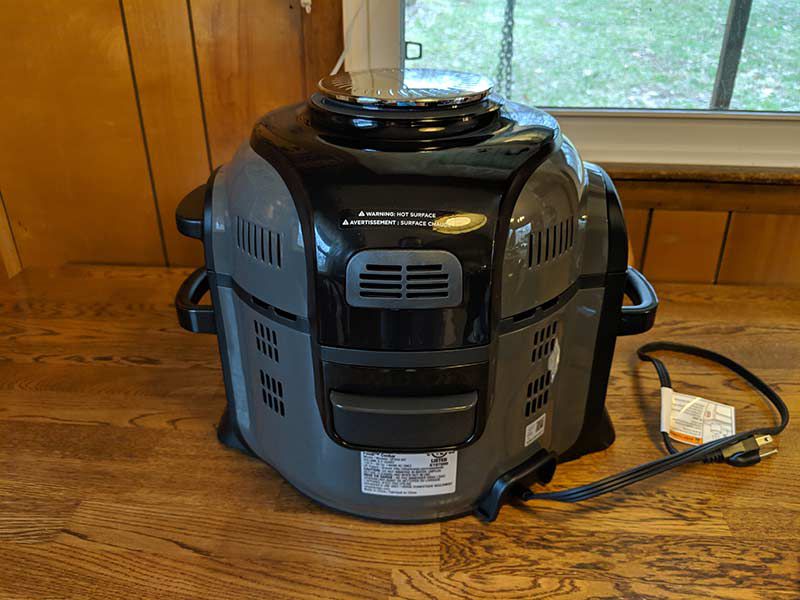
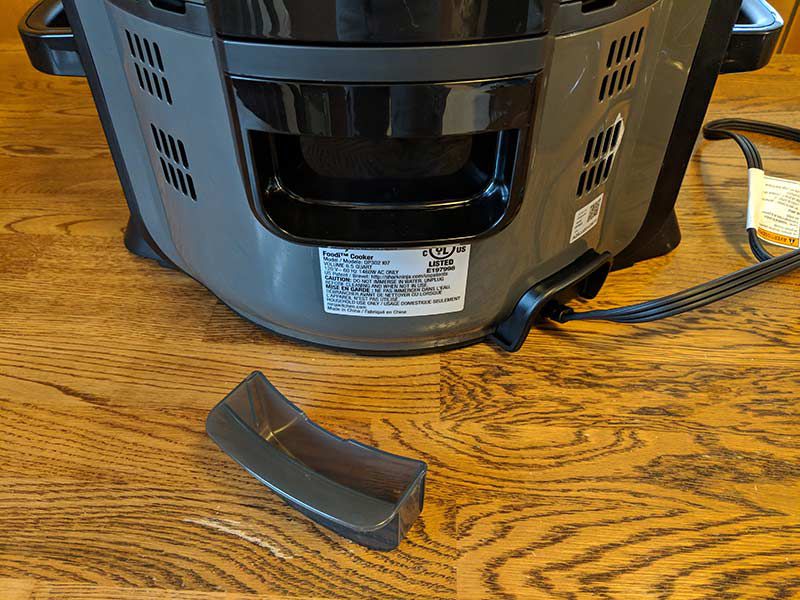
The back of the Foodi has several vents and a drip cup.

The plastic drip cup pulls out for easy cleanup.

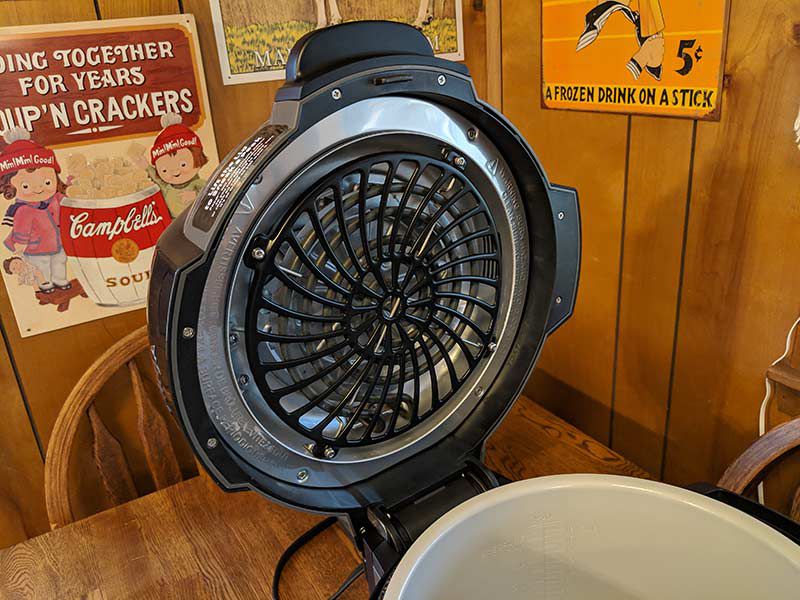
Where the Ninja Foodi differs from other pressure cookers is the 2-lid system. The lid attached to the cooker is actually the air crisper / air fryer lid.

The lid has a built-in fan that circulates air around the cooking food to crisp skin and outer food surfaces without needing to use a deep fryer.

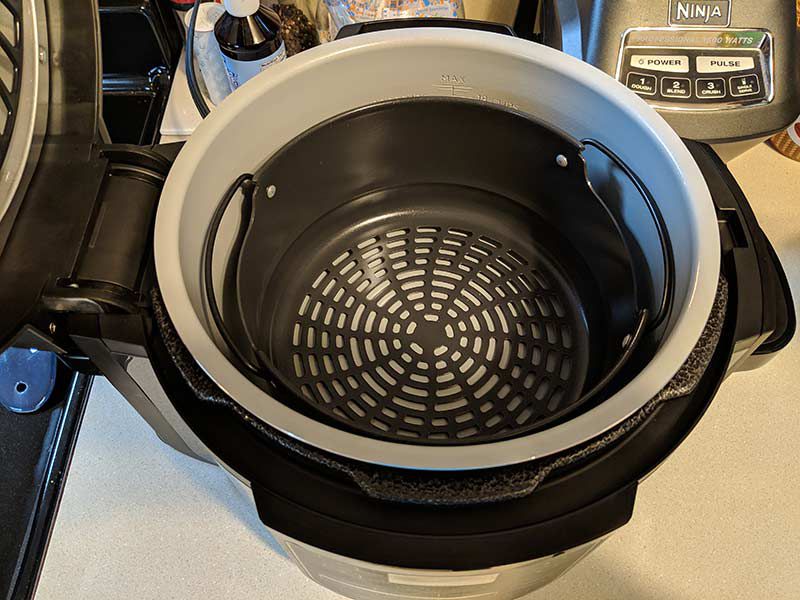
Included with the Foodi is a metal air crisper basket that is perfect for using the Foodie to make french fries and other foods. The slots on the bottom of the basic allow the air to circulate and any oils to drip into the main 6.5qt. cook pot below it.


When you want to use the pressure cooker feature, you use the pressure lid with the air crisp lid in the open position.

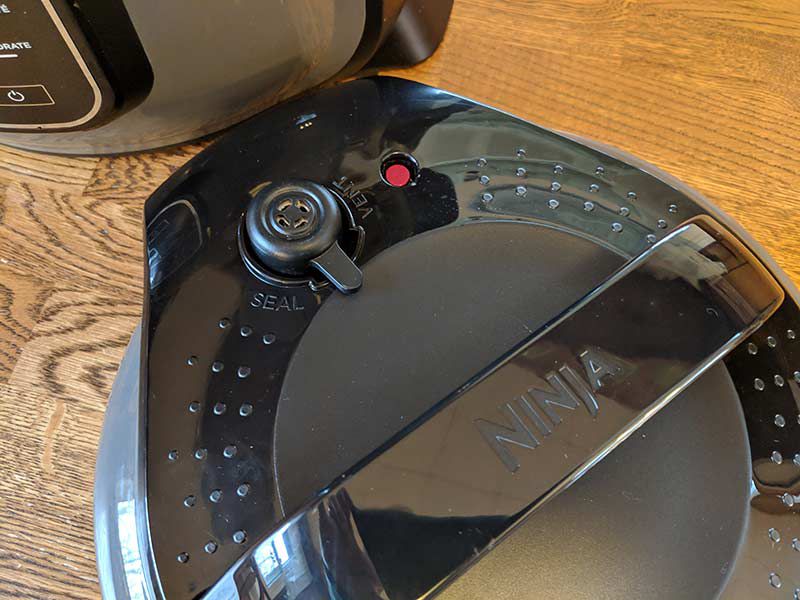
If you’re already familiar with using a pressure cooker, the Ninja Foodi pressure lid has a seal/vent valve on top and a large handle that makes it easy to secure and remove the lid.

I’m hungry, let’s cook like a Ninja!

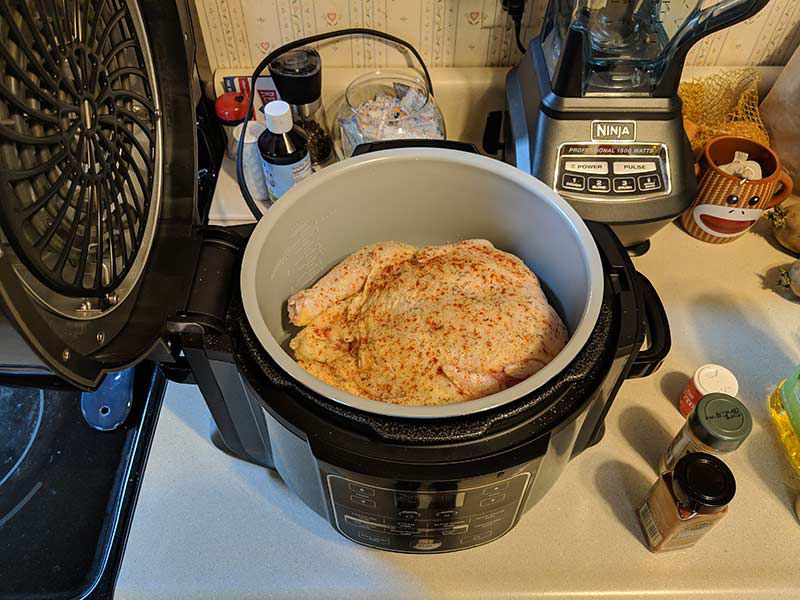
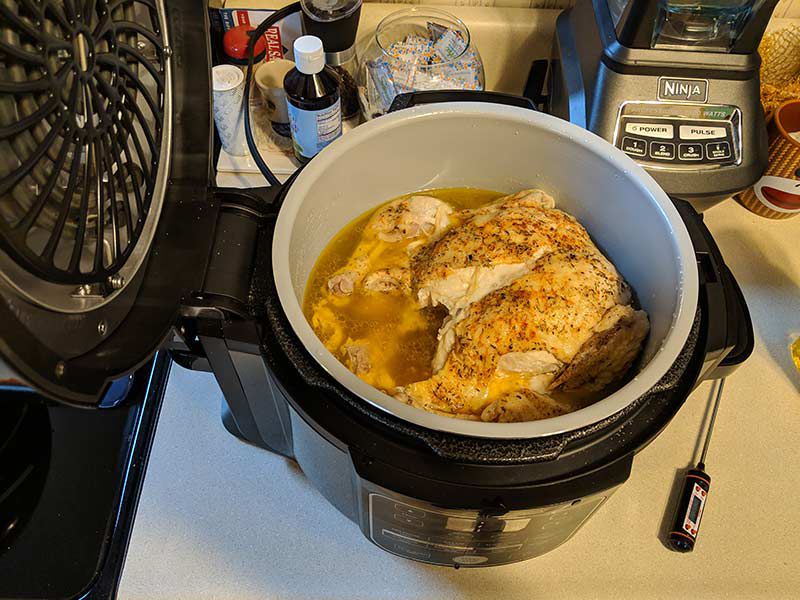
The first food that I cooked in the Ninja Foodi was a 6 lb. chicken which went from raw to perfectly cooked in about 30 minutes vs. the usual 20 minutes per pound formula that I use when I cook a chicken in the oven. Talk about saving time.

It was so easy to cook the chicken. I just added a cup of water to the pot, put the chicken in the pot, added some salt, pepper, paprika, and tyme. Then the pressure lid went on top, the valve was set to seal, I pressed the power button, pressed the pressure cook button, set the time to 30 minutes, and pressed start. The display showed an animated cursor rotating around the display until the pressure in the pot reached the right level. Then the timer counted down until it finished with a tone.

I let the pressure release naturally for a few minutes and then rotated the valve to the vent position until the pressure pin dropped which meant that it was then safe to remove the lid. Look at that bird! It was perfectly cooked and tasted amazing.

In the bottom of the pot was several cups of golden chicken broth that I used later to make chicken and noodles with the leftover chicken – in the Ninja Foodi! The noodles only took about 20 minutes and YUM!

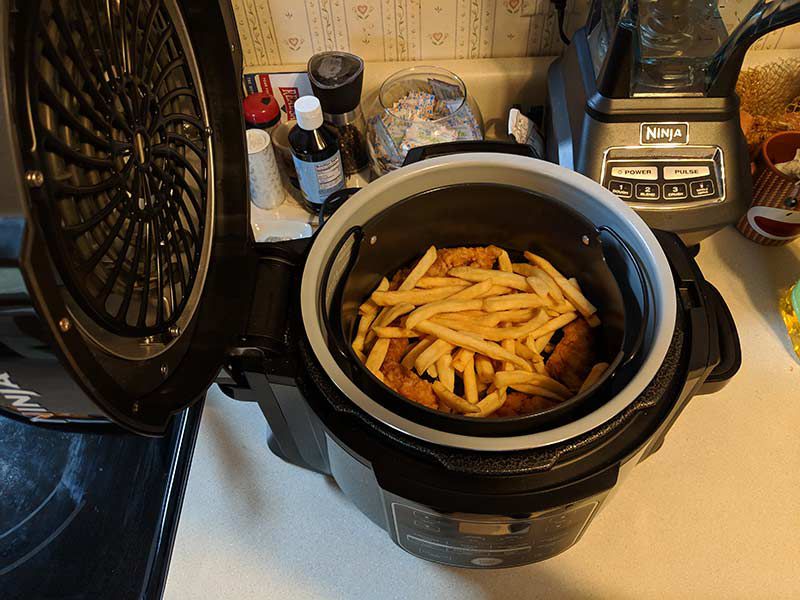
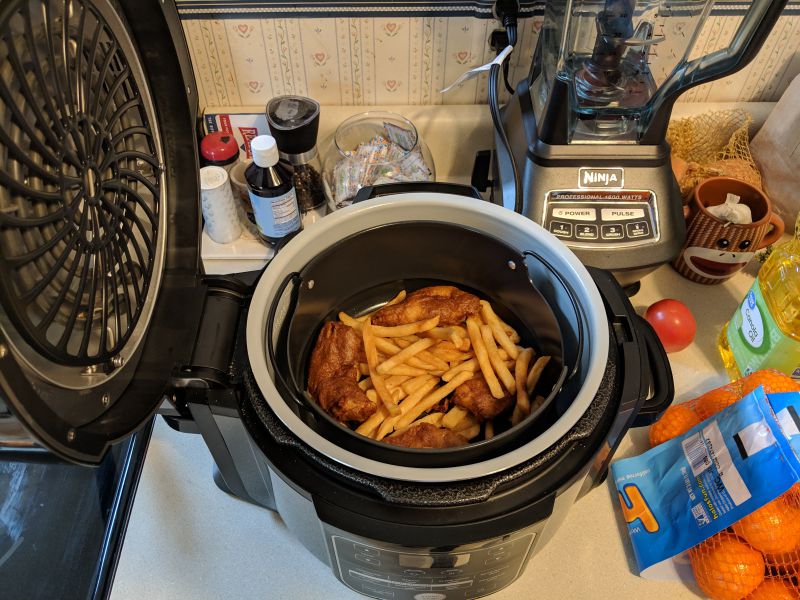
What about the air crisp lid? I used it to revive some leftover fish and fries from a trip to Cheesecake Factory. I like to eat out but almost never eat my entire meal. Trying to heat up leftover fried foods usually results in a soggy rubbery mess but the air crisp lid perked up the food to taste almost as good as it did in the restaurant. All I did was arrange it in the air crisp out which was then placed inside the main 6.5qt cooking pot.
Then I set the air crisp to 350 degrees for 15 minutes.

With the air crisper lid, you can lift it anytime you like without having to wait for the cooker’s pressure to bleed off because the pressure isn’t used in this cooking mode. It worked great.

Clean up is fast too!

One of my favorite things about using the Foodi other than eating the delicious food that I cook with it, is that clean up is as fast as cooking with it. The inner cooking pot can go in the dishwasher. The pressure lid has to be hand washed but it really doesn’t get that dirty because the pressure keeps food from splattering on it.

What I like

  • Versatile: pressure cooker, air fryer, and more
  • Easy to use
  • FAST cooking made simple

What needs to be improved

  • Need a way to store the air pressure lid when not being used

Final thoughts

I’ve been a huge fan of modern pressure cookers after trying my first one a year or so ago. Since then I use it to cook foods that would normally take an hour or more in a fraction of the time. You might think that cooking faster could mean that the foods wouldn’t taste as good but it’s the opposite with the Ninja Foodi. Pressure cooking makes the flavors better because they are infused into the foods.

Price: $199.80
Where to buy: Ninja
Source: The sample for this review was provided by Ninja.

Filed in categories: Reviews

Tagged: , ,

Ninja Foodi pressure cooker review originally appeared on The Gadgeteer on April 25, 2019 at 8:00 am.

Note: If you are subscribed to this feed through FeedBurner, please switch to our native feed URL http://the-gadgeteer.com/feed/ in order to ensure continuous delivery.