Altair Aerial Outlaw SE Drone with 1080p HD Camera review

REVIEW – I saw a t-shirt on Etsy that said, “A bad day flying is better than a good day working,” and in the middle was a picture of a quadcopter drone.  I love my job, but after a couple of weeks of flying Altair Aerial’s Outlaw SE, I’m inclined to agree with that t-shirt.

What is it?

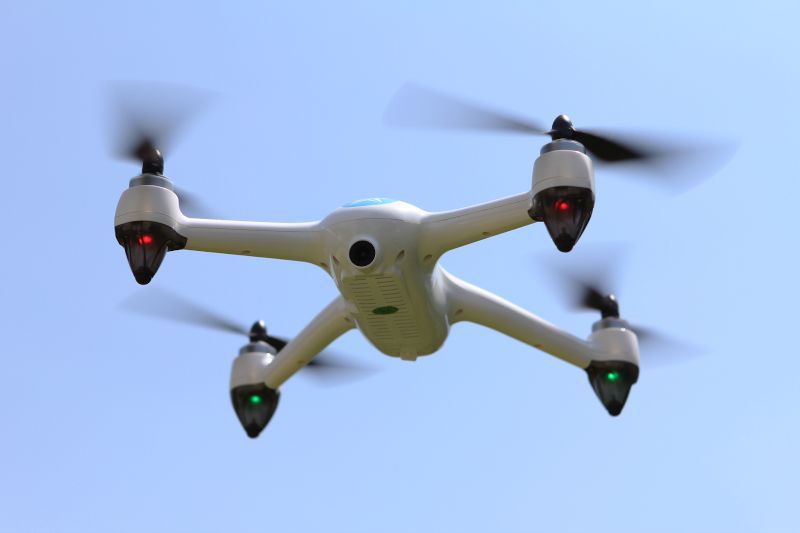
The Altair Aerial Outlaw SE is a quadcopter with a built-in 1080p HD camera that offers a first-person view (FPV) via a mobile app.  Altair describes it as a “GPS-capable all-skill-levels drone with Return Home & Follow Me functions that offers a professional-grade feature set.”

What’s in the box?
  • The drone
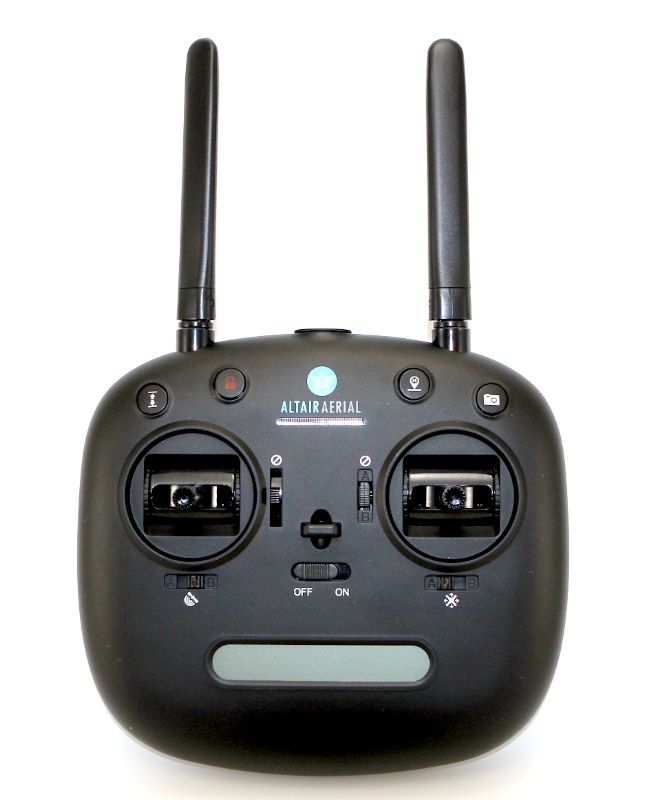
  • A handheld controller
  • A battery and a charger
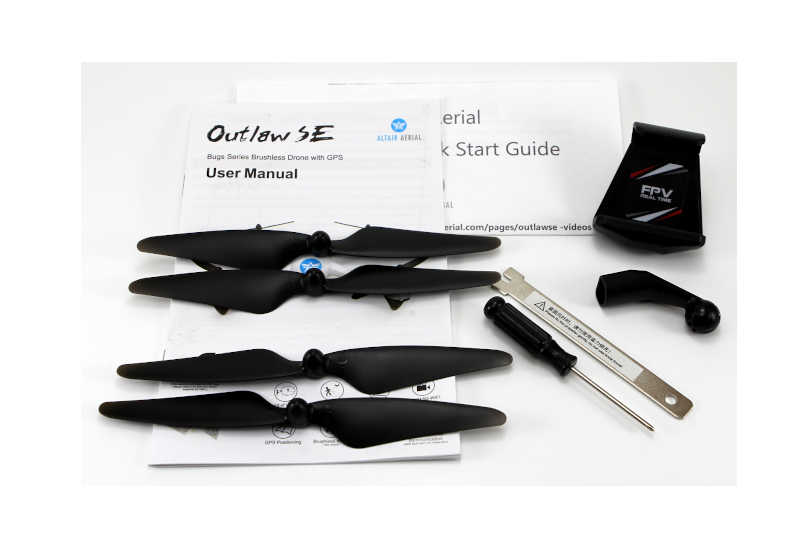
  • 4 spare propellers with tools for changing
  • A kit for attaching a mobile phone to the controller
  • A quick start guide
  • A manual with 19 pages of English instructions
Hardware specs

  • Camera:  built-in 1080p HD
  • Range:  up to 1950 feet
  • Connectivity:  GPS and WiFi
  • Flight Time:  18-20 minutes
  • Battery:  Lithium Ion
  • Dimensions of body: 10 x 10 x 3 inches
  • Length of each propeller: 7.5 inches
  • Weight:  2.8 pounds

Design and features

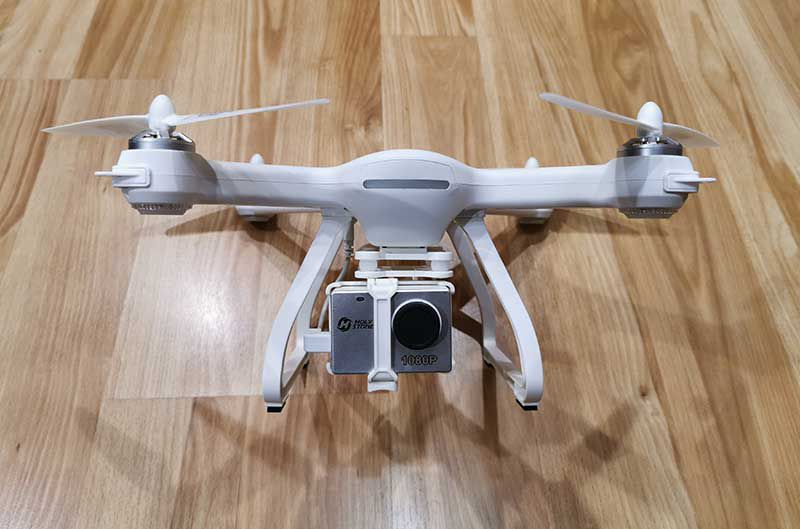
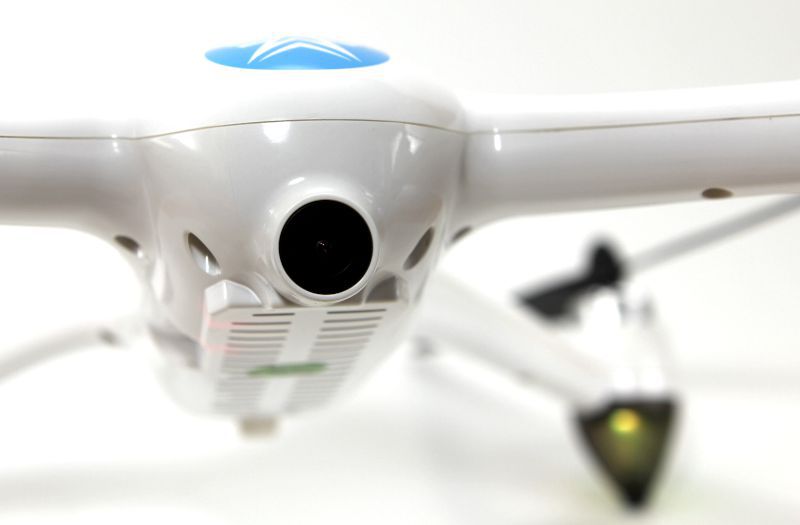
The Outlaw SE is a sleek-looking drone in a white, plastic body.  The built-in camera glares out the front of the body, like a cyclops looking for its next victim.
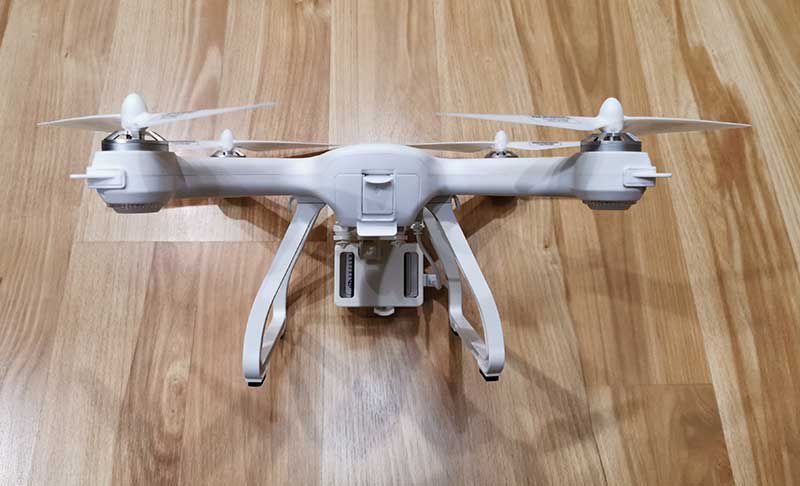
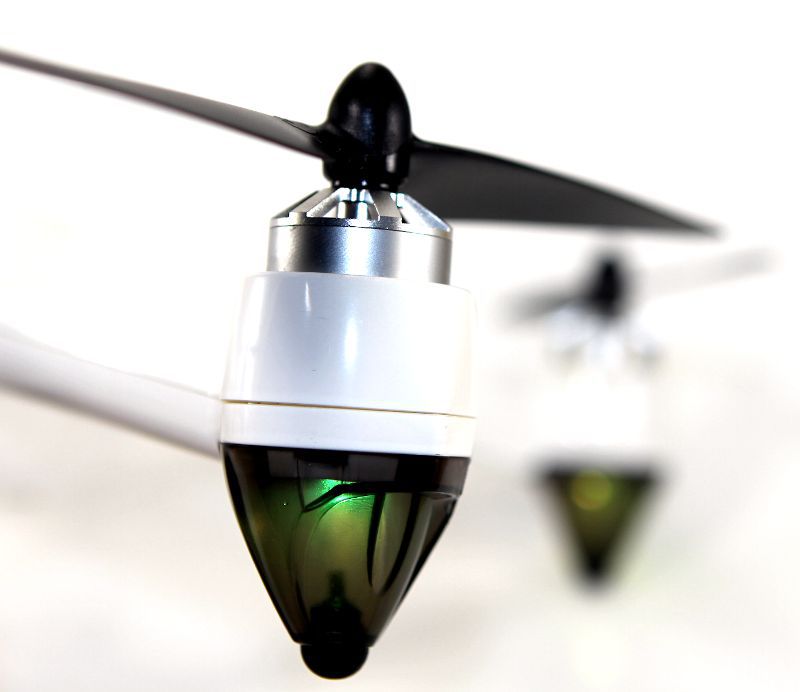
Under the end of each arm is a light that can be green, red, or yellow.  They make it easy to see the drone, especially at dusk, and can be used to distinguish the front of the drone from the back.
Installation and setup

When I opened the box, I was pleased to find that I would not have to assemble the Outlaw.  The only thing not connected out of the box is the battery.  That was easy!

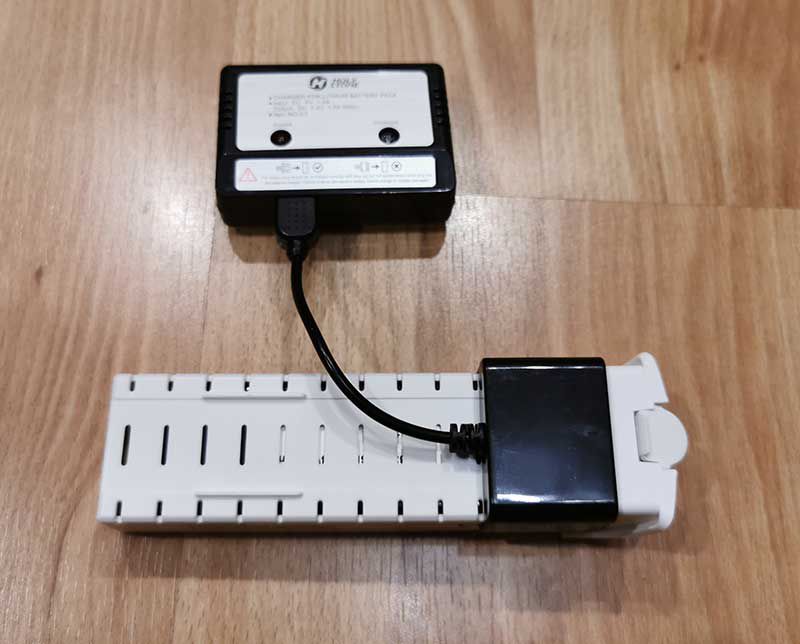
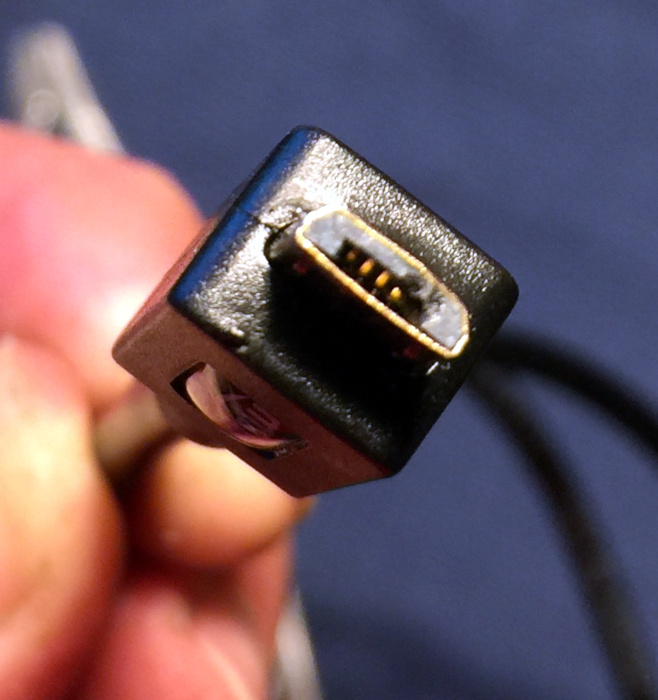
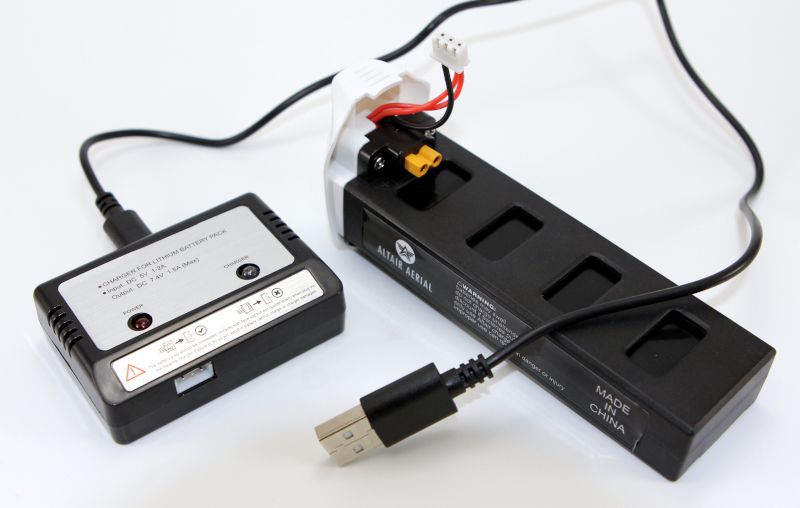
The first thing to do is charge the drone’s battery, which takes nearly 5 hours.  The battery has a small cable tucked into a little space that can be pulled out in order to connect it to the battery charger.  The USB cable is connected into the battery charger on one end and into a USB power source on the other.  I’m a bit concerned about this little cable that connects the battery to the charger.  It’s fairly fragile and rather hard to pull out of the charger.  Short of the crashing the drone—which I did once—I’m fairly sure that this is what is going to break first, and I wish there were a sturdier connector here.  The battery provides 18-20 minutes of flight time, and additional batteries can be purchased from Altair.  The controller also requires batteries, a set of 4 AAs, which are not included.  It chews through these batteries at a surprisingly fast pace, so it might be a good idea to use rechargeable ones.
Altair Aerial has a set of videos on their website that are both instructional and informative, so the next thing to do is watch them all.

The final thing to do is carefully read through the manual, which explains each of the Outlaw SE’s many features. I found the manual to be pretty easy to understand, especially since I had already seen “Mike from Altair” demonstrate what to do in the videos.

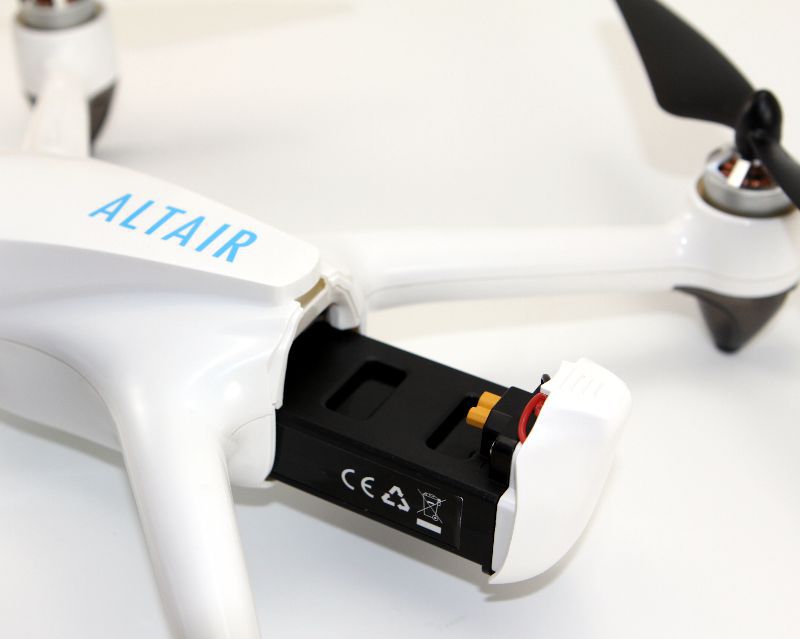
Once the battery was fully charged, it was time to head out and have some fun.  For my first test, I took my daughter and the dog out to a city park where’s there was a huge parking lot and four baseball diamonds.  I wanted lots of space around me while I learned to fly this thing.  As the videos and manual explains, there’s a set of pre-flight setup steps that you have to go through before flying the drone:  Turn the controller on, insert the battery and lock it in place, and wait for the controller to sync with the drone.
Perform compass calibration by rotating it horizontally and then vertically.  Finally, it was ready, and I hit the unlock button on the controller. Zoom!  The propellers started!

Fun Factor

Flying this drone is a blast!  It’s got a lot of power and moves up and forward plenty fast.  It’s also agile and turns on a dime.  The range is fabulous, and I can easily fly it to the edge of my vision.  My favorite time to fly is just before dusk, as it’s easier to see the lights under the props and know exactly where it’s at and which direction it’s facing.  If you want to have some fun with a quadcopter, this is a great choice.

Controller Features

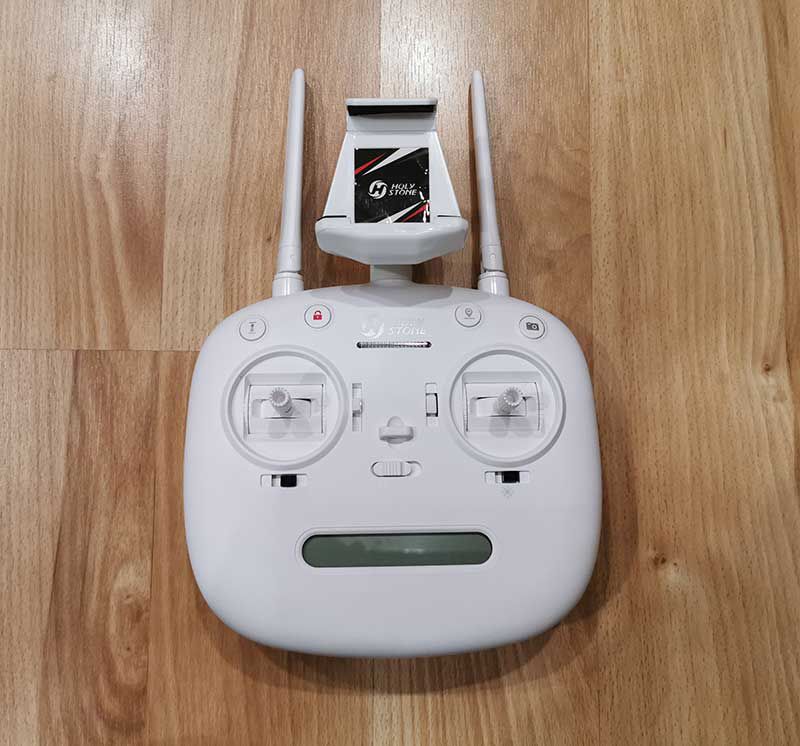
The controller has a button for automated takeoff and landing.  Once the propellers start, you can tap this button and it will gracefully takeoff for you and ascend to a height of about 6 feet; now you’re ready to take control and fly.  If the aircraft is already flying, you can this tap button once again, and it will automatically land the drone.  The landing process is a bit slow, as the drone descends cautiously, but the result is a landing that is surprisingly gentle.

The Outlaw SE is GPS-enabled, which enables a feature called attitude hold.  Once you turn on the GPS mode via the controller, the drone will hover in the same spot (both altitude and position) whenever you’re not controlling it.  This requires more than 7 GPS satellites to be available—the number is displayed on the controller—and generally, I found that I had 10 or 11.  In my experience, the SE needs anywhere from 10 to 60 seconds of flight time before the GPS hovering kicks in, after which it does an amazing job maintaining its position.  I’ve only crashed the Outlaw SE once, and it happened right after take-off.  There was a bit of wind, and the GPS had not yet kicked in. Before I knew it, the drone blown away from me, hit a tree, careened across a parking lot, and crashed into the road.  Surprisingly, nothing was broken.  Once that GPS kicks in, however, it’s super stable and much easier to control, even with a bit of wind.
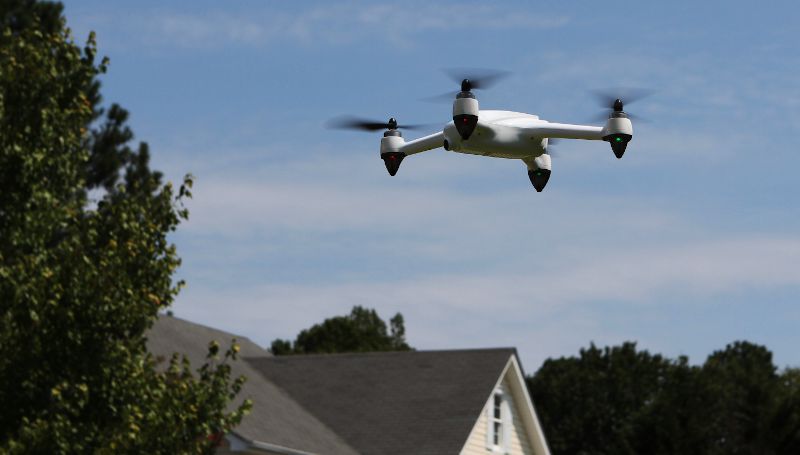
When the drone is in GPS mode, it has a return to home capability.  When you press the return button, the Outlaw SE will ascend to a safe height and then head back in a straight line to the location where it first established a GPS connection.  This feature will activate automatically if the drone loses connectivity with the controller or if the battery gets too low and the drone is over 300 meters away.
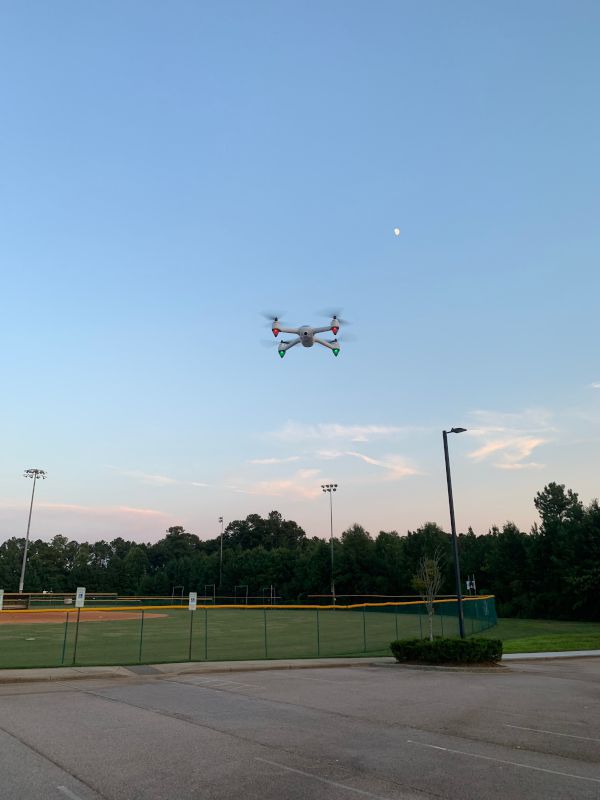
In an email, one of Altair’s employees wrote, “The Outlaw is our most advanced drone and it is a little more complicated to use than the others.”  Similarly, the manual says, “This aircraft is applicable for pilots aged 14+ who are with skilled flying experience.”  Setting aside the poor grammar in this sentence—the manual could definitely use a good editor—I was a bit concerned that I would not be able to handle this drone, as I had never flown one previously.  I had no reason to fear.  It takes off for me.  It hovers in place.  It comes home when I call it.  It lands for me.  It’s like having a “get out of jail free” card!  These features give rookie pilots like me a lot of confidence that they can get out of a jam and safely land the aircraft.  Even if you are not “with skilled flying experience,” you should find this drone to be very approachable.

The drone has two modes for controlling it, headless mode and normal mode.  In headless mode, the idea is that there is no head (or front) of the UAV.  The pilot faces the same direction as the drone faces when it takes off, and from then on he can fly without worrying about the orientation of the craft.  Forward is forward, back is back, etc.  It’s supposed to be very natural and thus easier to fly.  For whatever reason, it didn’t feel very natural to me, so most of the time I flew in normal mode.  In this mode, the drone has a front and a back, kind of like a car.  You put it in “drive” to go forward and put it in “reverse” to go backward.  You can turn left or right and even rotate left and right.  I really appreciate that Altair designed two different modes; you can try both and use whichever mode feels more natural to you!

Photos and Videos

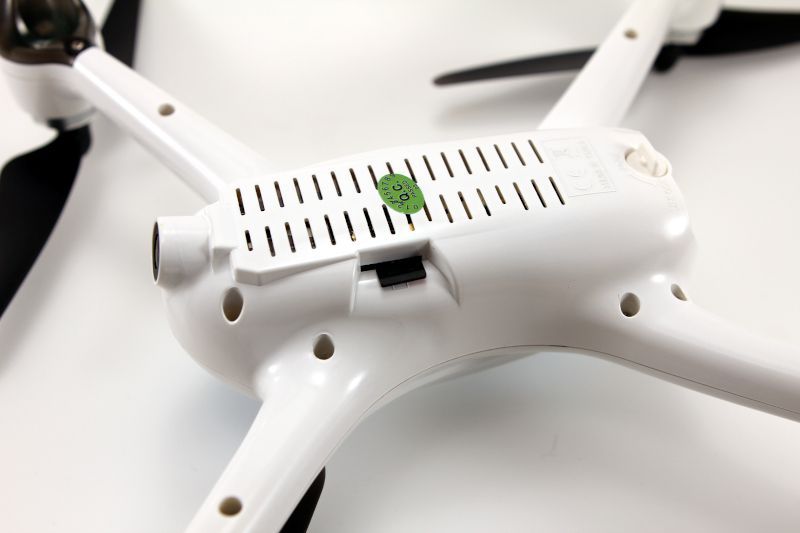
Flying the drone is a blast, but it can also take pictures!  The drone has a built-in camera, and the only thing that you need to take stills or video is a memory card, which is not included.  The manual says that it requires a “TF card,” an outdated term for a micro SD card, so I popped in my 64 GB Samsung EVO Micro SDXC card.  While flying, you can press a button on the controller and take a picture.  Although the controller beeped each time I pressed the picture button and the photo icon flashed on the controller to let me know that it took the picture, when I brought the drone home and put the SD card into my computer, there were no photos. I tried a handful of things, but I couldn’t get this to work.  Eventually, I went to Altair’s contact page, found their support email, and sent them four specific questions about taking photos.  The good news is that their support team was quick to reply; the bad news is that they would not answer all my questions, even though I asked a couple of times.  I had to do some extra experimentation in order to figure out how to make this work. The bottom line is that you need a class 10 micro SD card that is 32 GB or less—no hope of using that new 1 TB card—and format it card as FAT32 on a Windows 10 machine.  If you format it as Journaled on a Mac, or if you buy the wrong type of card, it won’t take any pictures.  It would be nice if the controller gave some sort of indication of an error when it can’t record a picture; it’s a bit frustrating to return home and find an empty card.  To use the SD card, flip the drone over and insert it into the SD slot in the bottom.
The Outlaw SE takes 1920×1080 still pictures.  The quality of photos is ok but not great.  They are a bit fuzzy, presumably because there is no image stabilization.  Occasionally there is a horizontal line through the picture, such as in the picture below of the houses in my neighborhood.  It also appears that the drone uses a wide-angle lens, as there is some distortion.  Don’t expect the pictures to look as good as those taken with your new Samsung or Apple phone.
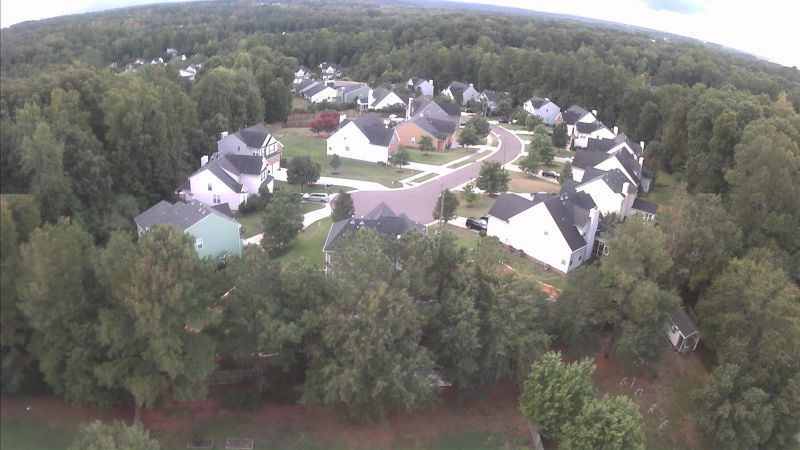
On the other hand, can your mobile take pictures from 400 feet in the sky?  I don’t think so!  The key to great photos is getting shots that you simply can’t get without using a drone.

The same button used to take photos is used to take video, except that you press and hold for a second to start recording and press and hold again for a second to stop.  The video icon flashes on the controller while video is recording.  The resulting video is similar to the photos:  It’s not the highest quality, but the views can be simply amazing.  Note that the videos do not have any audio, so you may want to use a video editor to add a soundtrack or do a voice-over.

Mobile App Features

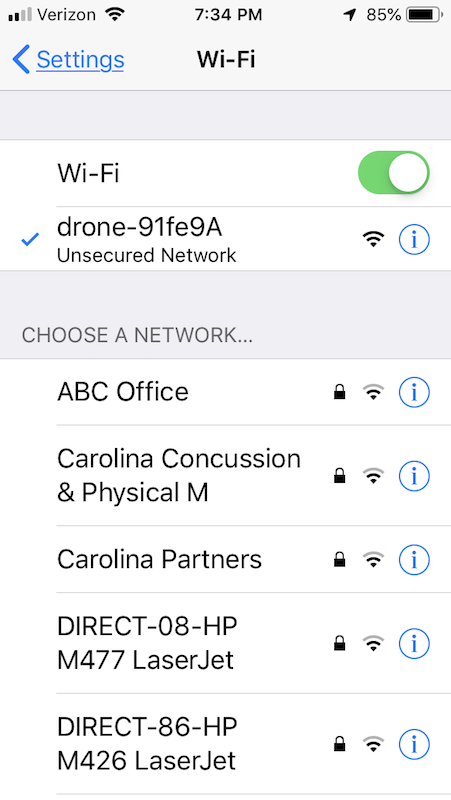
The drone can also be connected to your mobile phone via WiFi. The manual says that your phone requires 5G WiFi, which is a term that means that your phone should support 802.11ac. If your phone was made any time in the last 5 years, it supports 5G WiFi.  (Confusingly, this is not the same as a 5G phone, which is a reference to a cellular standard.)  The manual has QR codes to the Apple and Google app stores, where you can download the X-DRONE app.  Oddly, the app in the Apple store is developed by “zhaoxuan cai,” not by Altair Aerial; it appears that they are recommending the use of a third-party app instead of developing their own.  During the pre-flight setup steps, just before doing compass calibration, you can connect your phone to the Outlaw’s WiFi.
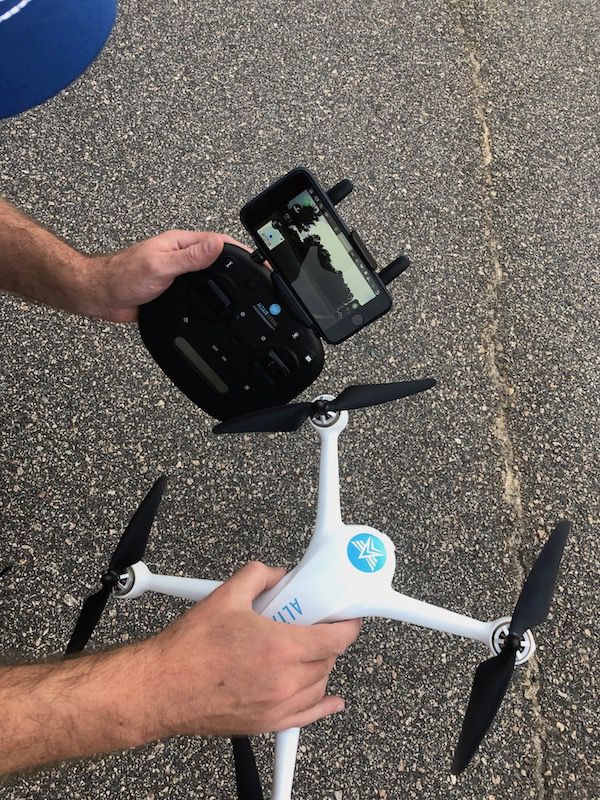
The angle of the camera is fixed, so by using your phone as a preview, you can see exactly what the camera is seeing.  This makes it easier to fly and easier to photograph.
While the app is undoubtedly cool, it’s UI is rough around the edges, and unfortunately, the Outlaw’s manual provides no help on how to use it.  The English in the app is broken, and the only instructions that the app itself provides is one screenshot that is a bit hard-to-read and rather cryptic.
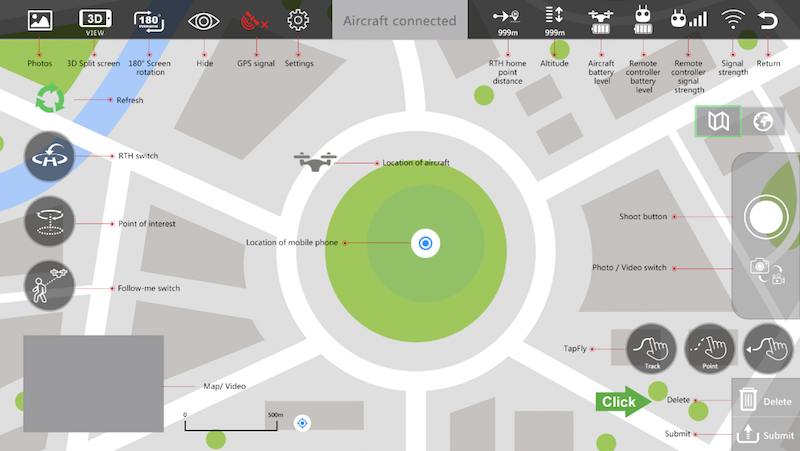
I honestly don’t know what all of these mean, and it’s tough to try and figure things out while flying, especially when you only have 20 minutes of battery life.  Consider this to be a challenge:  You’ll get to explore all of these features for yourself!  Here’s what it looks like while in use.
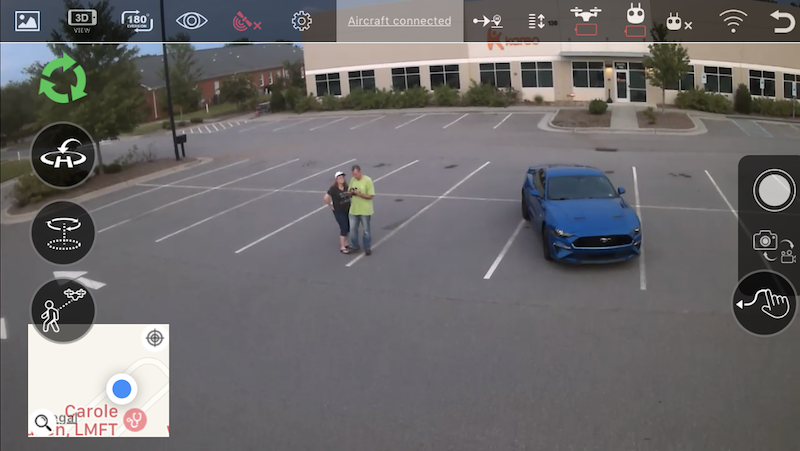
The best part is the buttons on the right (Shoot and Photo/Video switch), which make it easy to take photos and videos.  Additionally, you can save photos and videos directly to your phone; this saves you from having to buy a micro SD card, assuming you have the extra space on your phone.

The icons in the upper right are mostly informative, and some are duplicates of what is displayed on the controller.  Try as I might, I couldn’t get some of the buttons to work.  The Point of interest, Follow-me switch, and Tapfly buttons all gave me an error, “Your aircraft is not in hovering status or GPS signal is weak.” I don’t understand this error message, since the drone was in GPS mode at the time and was hovering in place while I was pressing buttons.  Perhaps some things don’t work because it’s a third-party app?  I’m not sure.
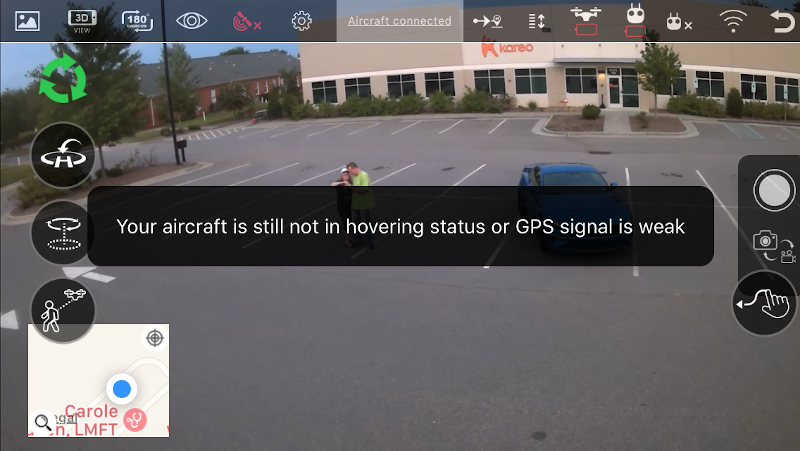
The green refresh icon in the upper left can be used to resync the display, which can be necessary when the Outlaw gets too far away.  It’s worth noting that while the range of the drone is over 1950 feet, the range of the mobile is limited by the use of WiFi; in my testing, I only got about 50 feet worth of range before the app would disconnect.  It’s best to use the app for close-range flying, perhaps when you’re trying to do something very precise, like checking your gutters for leaves.
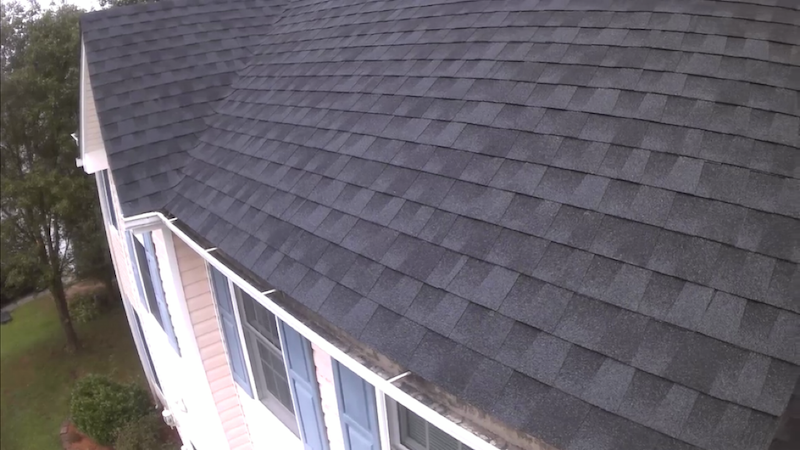
Although I was underwhelmed with mobile app, I don’t feel like it’s a significant loss, as you can totally have fun and take pictures and videos without it.

Rules and Regulations

One quick note for new operators:  Many states have rules for flying drones, so make sure that you read up on the rules for your locale before flying.  For example, here are the rules for recreational operators in the state of North Carolina, which is where I live.

What I like

  • Great performance and range
  • Lots of features that make it easy to fly
  • Built-in camera that’s easy to use

What I’d change

  • An explanation in the manual of which micro SD card to buy and how to format it
  • An error message (or beep) when a picture cannot be taken
  • A better-designed mobile app

Final thoughts

I was a bit nervous about flying my first drone, but between the instructional videos, detailed manual, and great safety features, Altair Aerial has made certain that I have nothing to fear.  I enjoyed flying the Outlaw SE and enjoyed taking photos with it.  It’s a well-designed gadget.  There are a lot of drones that you could buy, but if you’re in the market for a mid-ranged drone, the Outlaw SE would be a great choice!

Price: $264.90 ($33.80 for each extra battery)
Where to buy:  Altair Aerial’s online store and Amazon
Source: The sample for this review was provided by Altair Aerial.

Filed in categories: Reviews

Tagged:

Altair Aerial Outlaw SE Drone with 1080p HD Camera review originally appeared on The Gadgeteer on September 3, 2019 at 9:00 am.

Note: If you are subscribed to this feed through FeedBurner, please switch to our native feed URL http://the-gadgeteer.com/feed/ in order to ensure continuous delivery.

The Cleo Drone makes flying indoors easy!


NEWS – While there are thousands of gadgets that offer something exciting for every gadget nerd, there are also those gadgets that get added to our wishlist that represent the dream of “if I could I would”. I love drones, and since NYC is a very restrictive city in terms of where you can fly drones, I would love one that I could easily use indoors without any major risk of crashing because the propellers hit something. Also, the noise of the propellers makes it a bit inconvenient.

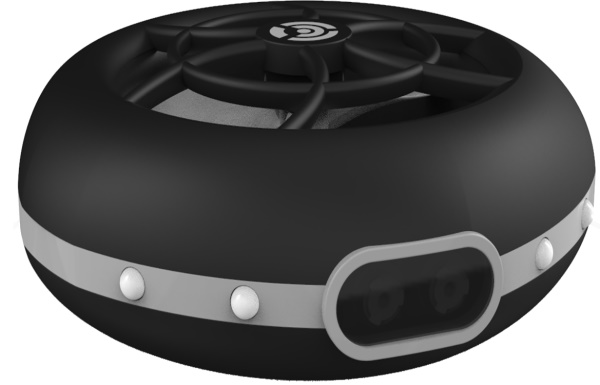
During one of my recent web surfing experiences, I came across the Cleo Drone. This drone is “the first mobile platform designed specifically for data collection in hard to access and potentially dangerous spaces”. It is the size of the average palm and is made of a carbon-fiber body. It boasts a flight time of up to 20 minutes and can operate in areas where GPS capabilities are unavailable. While I am sure this drone was developed for much more than I would use it for, it looks really cool and I know that I would find my own uses for it.

If you want to add it to your dreamy wishlist or if you really want to purchase one, you can head over to the Cleo Robotics website and pick one up. A $1000 deposit is required when ordering, with a balance of $8,800 due at shipment. And yes!! That is the real price and not a typo.

Filed in categories: News

Tagged:

The Cleo Drone makes flying indoors easy! originally appeared on The Gadgeteer on August 22, 2019 at 8:00 am.

Note: If you are subscribed to this feed through FeedBurner, please switch to our native feed URL http://the-gadgeteer.com/feed/ in order to ensure continuous delivery.
Holy Stone HS700 FPV Drone review

REVIEW – Lately I’ve been having fun reviewing drones and that fun isn’t over because I have another drone review for you today. This is my third one from Holy Stone. It’s the HS700 FPV Drone and it’s currently their most premium model. Let’s take it for a spin (and hopefully not a crash!).

What is it?

The Holy Stone HS700 FPV is a first-person view drone which you control with the included handheld remote controller and an Android or iPhone.

Hardware specs

Drone
Motor: Brushless Motor 2204 1500kV
Max Flight Height: 120 m
Max Flight Distance: 800-1000 m
Max Flight Speed: 25 km/h
Max Flight Time: 20 min
Battery Capacity: 2800 mAh
Charging Time: 7 h
Weight: 370 g
Size: 220 x 220 x 155 mm

Camera
Effective Pixels: 2 MP 1080p
Lens: 120° Wide-angle
Gimbal: 90° Manually Adjustable
Photo Size: 1920 x 1080
Video Resolution: 1080P@25fps

Remote Controller
Remote Control Range: 1 km
Transmission Frequency: 2.4 GHz
Battery: 1.5 V AA x 4

WiFi Mode
WiFi Live Stream Range: 400 m
WiFi Live Stream Frequency: 5 GHz

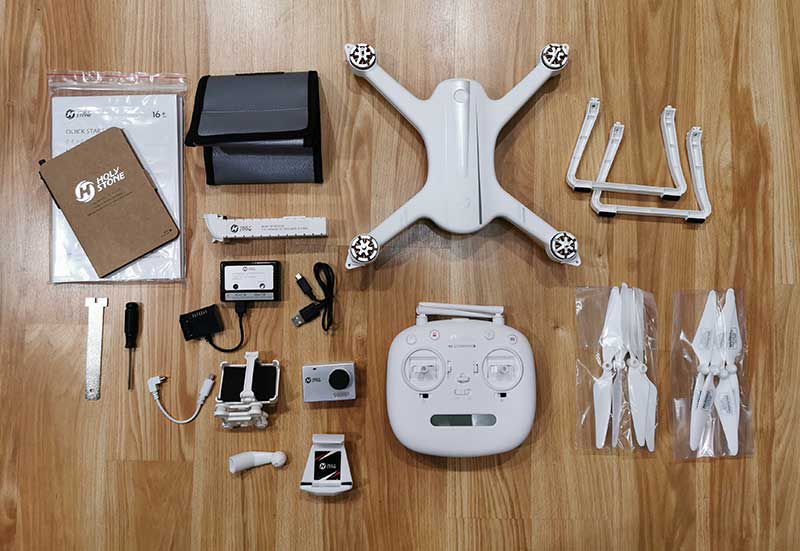
What’s in the box?

  • HS700 Drone
  • Remote Controller
  • Drone Battery
  • Propeller x 8
  • Landing Gear x 2
  • Camera
  • Camera Holder
  • Phone Holder
  • Balance Charger
  • Charge Transfer Box
  • USB Cable
  • Screwdriver
  • Propeller Spanner
  • Pouch
  • Logbook
  • Manual

Design and features

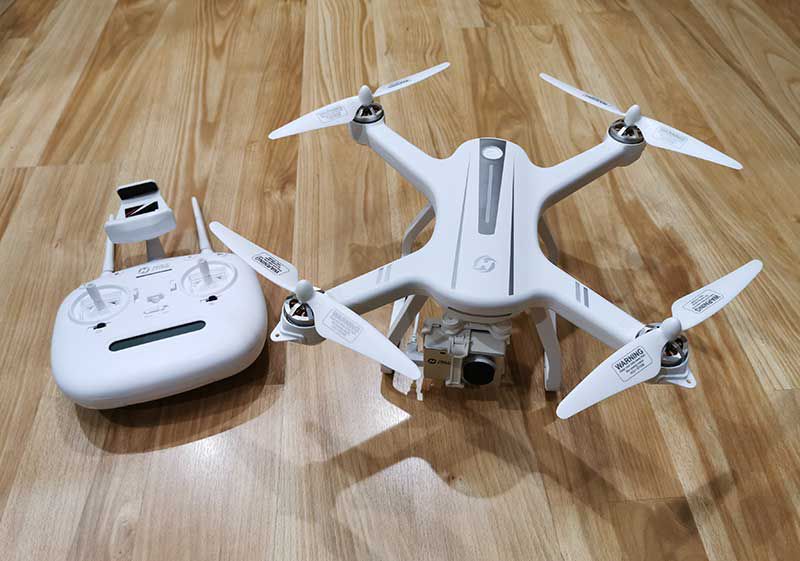
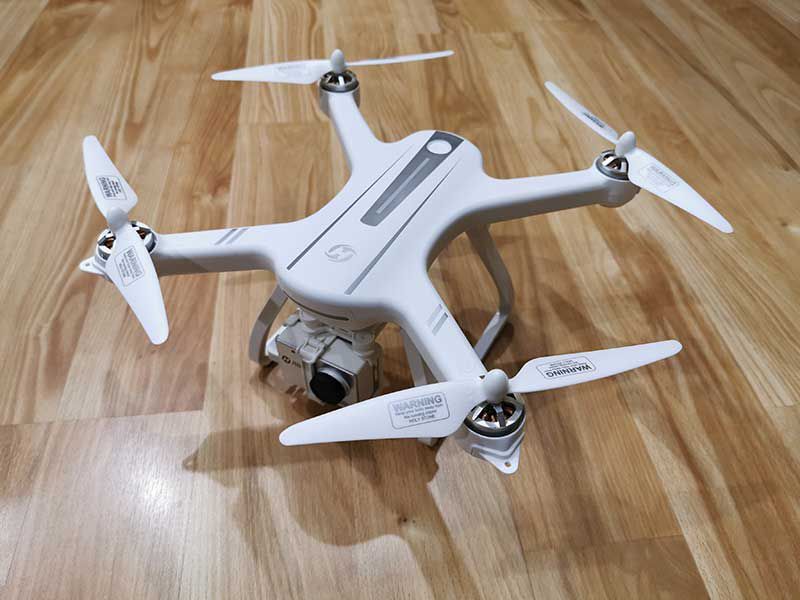
The HS700 FPV drone isn’t large and isn’t small, it’s jussssssst right. Seriously though, the plastic white (also available in black) body isn’t small enough that you will take it with you everywhere you go and isn’t so large that you’ll never want to take it with you.

It has a power button on the top along with the Holy Stone branding and quad propellers which you have to put on yourself. Don’t worry, it’s not hard as long as you pay attention that you put them in the right spot as there are 2 types of propellers.

Unlike the Holy Stone HS120D drone that I reviewed earlier this spring, the HS700 doesn’t have a built-in camera that you can pivot with the handheld controller while the drone is in flight. Instead, the HS700 comes with an action camera and a shock absorbing holder that you attach to the bottom of the drone. According to Holy Stone, the holder should hold most action cameras (it’s GoPro Hero 2/3/4 compatible). I wasn’t able to test that claim and just tested the drone with the 1080P camera that comes with the drone.

The back end of the drone is where the battery is housed. From what I understand, older versions of the HS700 required you to snap in the battery to power on the drone and remove it to turn off the drone. This isn’t true of the version of the HS700 which was sent to me as the drone has a dedicated power button on top.

The battery is larger than other drone batteries that I’ve tested so far and it charges with an odd looking two-piece charger that has 2 bright LEDs that let you know that the battery is connected to power and the status of the charging activity.

The first gotcha that I ran into was charging the battery because it can take 5-7hrs. No, that wasn’t a typo. It takes FOREVER to charge the HS700’s battery using the included charger and what’s worse is that for that 5-7 hour wait, you’ll only be rewarded with a 15-20 minute flight time. Ouch. For that long of a wait, I would have liked to see Holy Stone include 2 batteries with this drone instead of only 1.

A handheld remote control is included with the HS700 and is it just me, or is this remote smiling at me?

The remote controller has all the features you would guess should be available including one button take off / landing, video / image capture, etc. There’s also a small display that shows the status of the battery charge for both the drone and the remote controller, along with info on altitude, and GPS connection info.

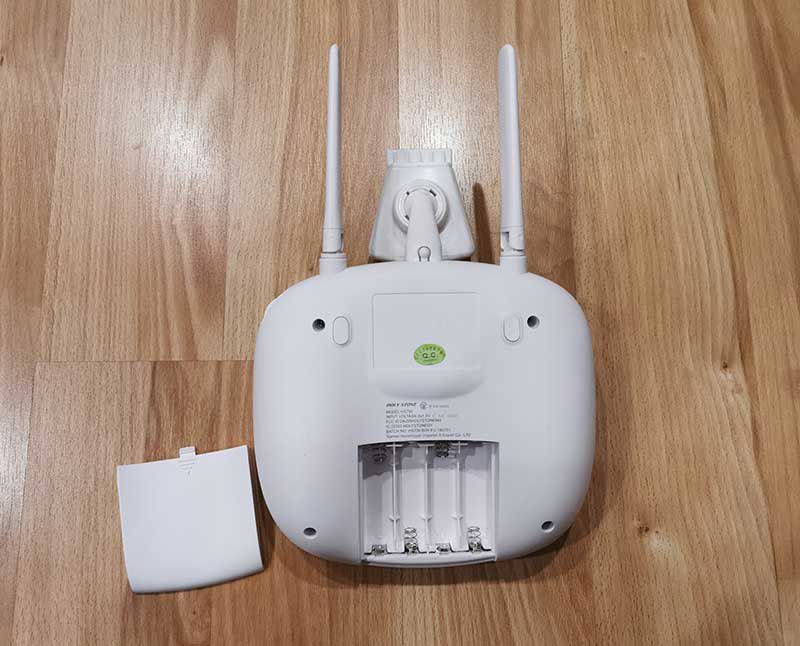
The remote control is powered by 4 AA batteries and unfortunately, batteries are included so you will have to take a trip to the store to buy some before you can take your first flight. But that’s ok because you’ll probably need to kill several hours waiting for the drone battery to fully charge!

Let’s fly!

If you watched the video, you can see that as long as you’re not moving, the video is pretty good and relatively stable for a drone that does not have image stabilization. But once you start moving in any direction, you will notice that the video becomes shaky.

Flying the drone is pretty easy and I managed to only crash it one time over the many flights that I took with it 😉 That crash was due to flying it into a tree branch because I miss judged just how fast this little drone can fly and that’s something that you’ll want to keep in mind if you end up buying one.

I tried the features such as one button take off, landing, rotating around a subject, and the follow me feature which you can see at the 4:28 minute mark in the video above.

What I like

  • Easy to fly
  • Fast flier
  • Follow me feature works well

What needs to be improved

  • Drone battery charge time is much too long
  • Include batteries for remote control
  • Needs obstacle avoidance feature

Final thoughts

For the price, I think this drone should include an extra battery, or a faster charger, and an action camera with 4K capability. Without that, I think it’s a bit overpriced.

As far as flying and video quality, I enjoyed testing and flying the Holy Stone HS700. I think it’s a nice drone if you don’t mind the extraordinarily long time that it takes to charge the battery and you realize that the video quality is good but not mind-blowingly good.

Price: $284.99
Where to buy: Amazon
Source: The sample for this review was provided by Holy Stone.

Filed in categories: Reviews

Tagged:

Holy Stone HS700 FPV Drone review originally appeared on The Gadgeteer on June 18, 2019 at 10:00 am.

Note: If you are subscribed to this feed through FeedBurner, please switch to our native feed URL http://the-gadgeteer.com/feed/ in order to ensure continuous delivery.
Drones By Us DBUS2 drone review

REVIEW – Drones are available in many shapes and sizes and are used as toys, tools, or both. The budget to buy a drone can be as little as $25 or even less for a toy drone or thousands of dollars for a professional drone that you can use to take high-quality video and photos for all sorts of reasons. Today I want to show the DBUS2 from Drones By Us. It’s a midrange drone when it comes to price, so let’s find out if it offers enough bang for your buck. Let’s take it for a spin!

What is it?

The DBUS2 is an easy to fly drone that offers 4K (unstabilized) or 1080P (stabilized) video capture.

Hardware specs

Camera – Sensor 1/3.06″ CMOS, 13 MP, 3840 x 2160,
Video Resolution – 4K unstabilized, 1080p at 30 fps Stabilized
Video Format – MP4, MOV (MPEG-4 AVC/H.264)
Memory – 16 Gb non-removable or expandable
Maximum Speed, horizontal flight, no wind – 2 m / 6.6 ft. per sec.
Hover accuracy – ±0.1 m (.33 ft.) Vertical and Horizontal
Maximum Operating Distance (Range) – Up to 100m. (328 ft.) horizontal and at 30 m (98 ft.) altitude above ground level
Maximum Flight Time – Up to 15 minutes
Battery – 1500 mAh
Dimensions: Folded – 145.5 x 80.8 x 52 mm / 5.7 x 3.2 x 2 in., Unfolded – 151 x 146 x 52 mm / 5.9 x 5.7 x 2 in.
Weight: 8.4 oz.

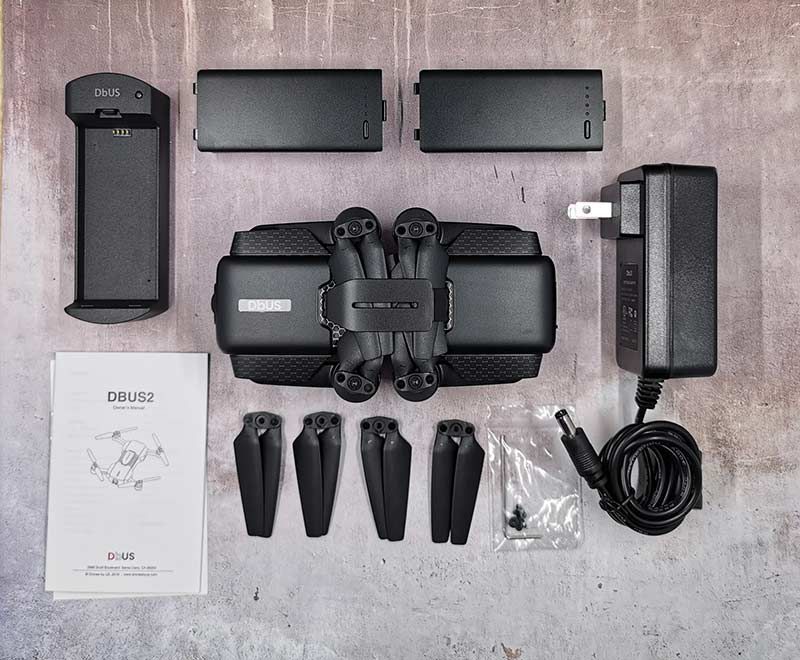
What’s in the box?

  • DBUS2 Drone
  • 2 Smart Flight Batteries
  • Charger Adapter
  • Replacement Propeller Mounting Kit
  • 8 Propellers
  • Know Before You Fly Card
  • Owner’s Manual

Design and features?

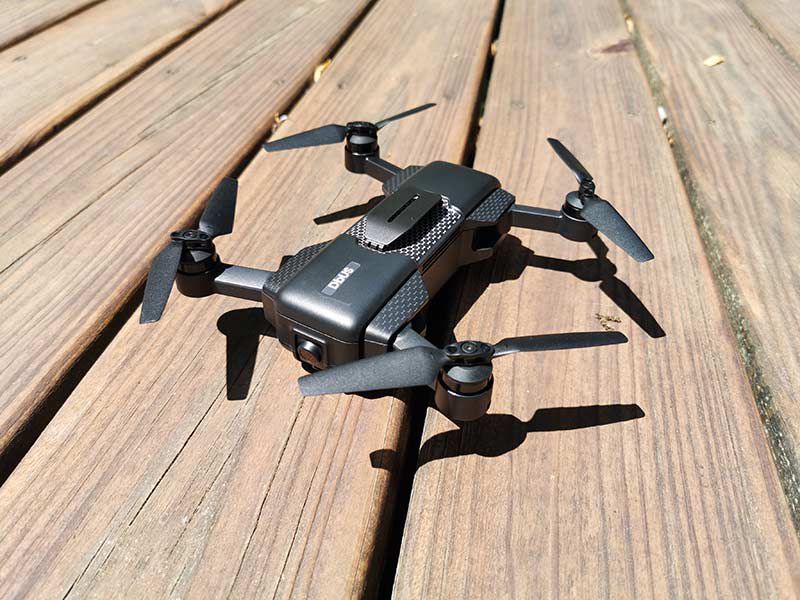
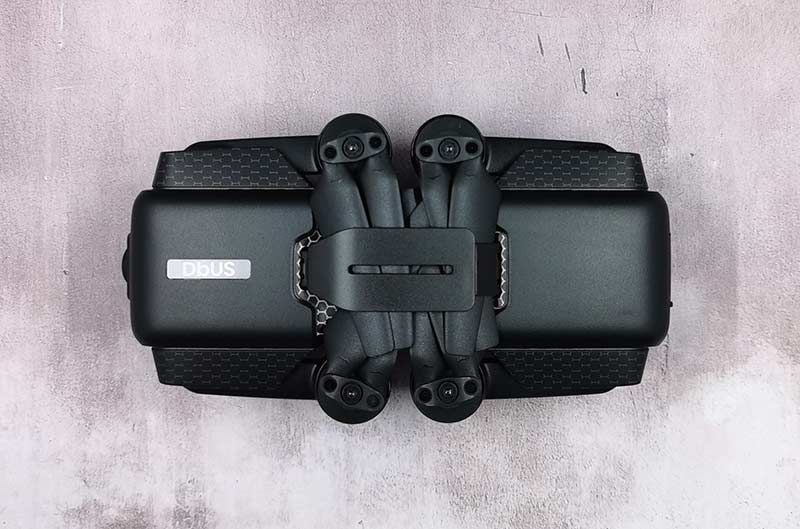
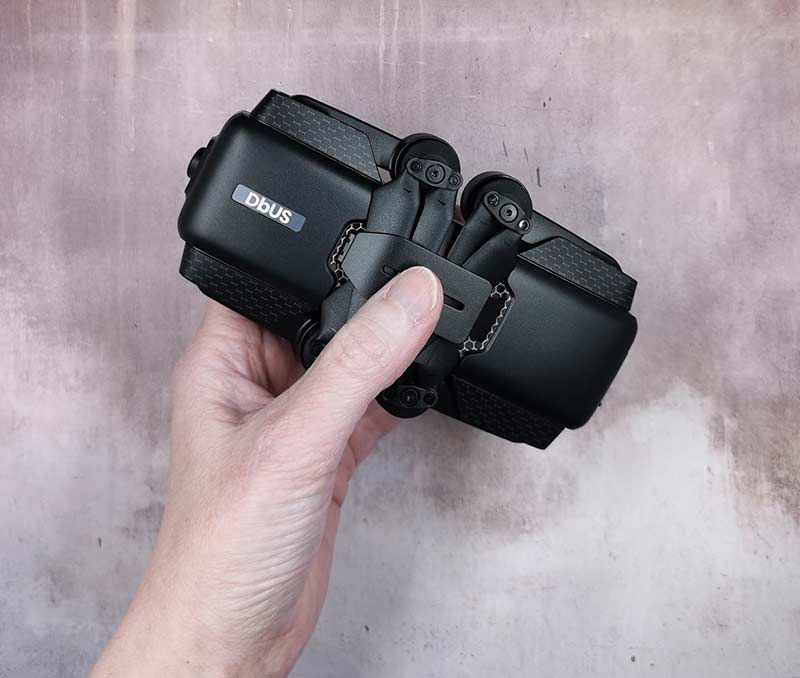
The DBUS2 has a durable matte black Polycarbonate and ABS plastic case with a strap across the top that holds the arms and propellers in place when the drone is folded.

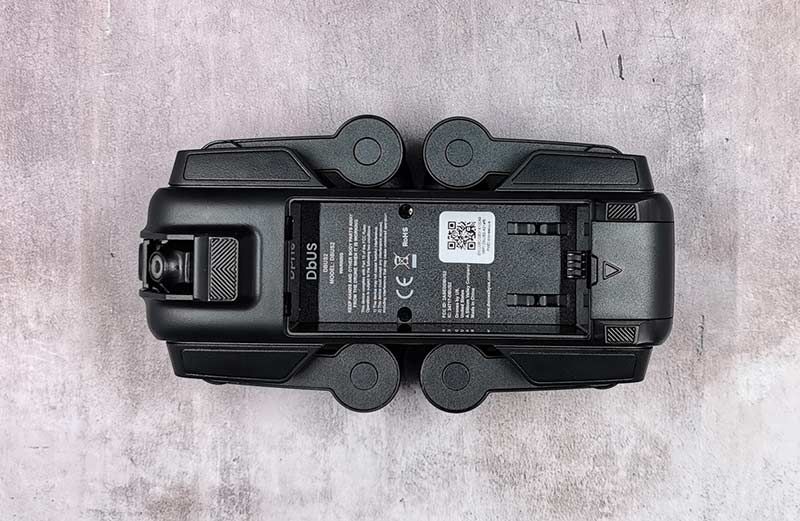
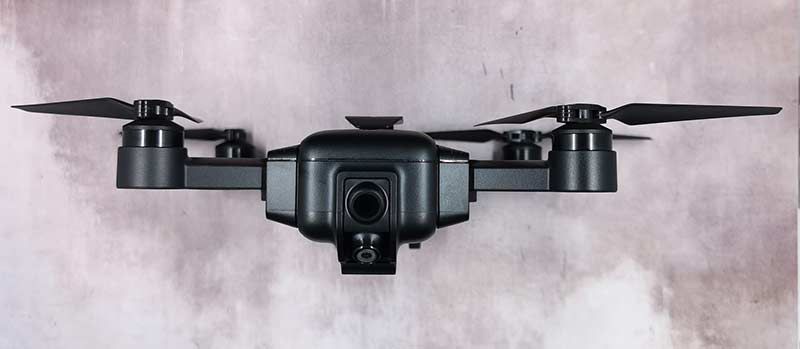
On the bottom of the drone is the battery compartment. In the image above you can also see the VIO (Visual Inertial Odometry) camera which is located below the main camera. This drone does not use a GPS to position the drone while in flight.

The VIO navigation system uses a 160° ultra-wide-angle camera optimized for odometry, inertial motion sensors and sophisticated software to recognize object shapes and determine where the drone is in relation to its environment. VIO enables drones the ability to see paths through objects, recognize optimum landing spots, and navigate indoors without GPS. It also does not require you to calibrate the drone by rotating it in a variety of positions each time you go out for a flying session.

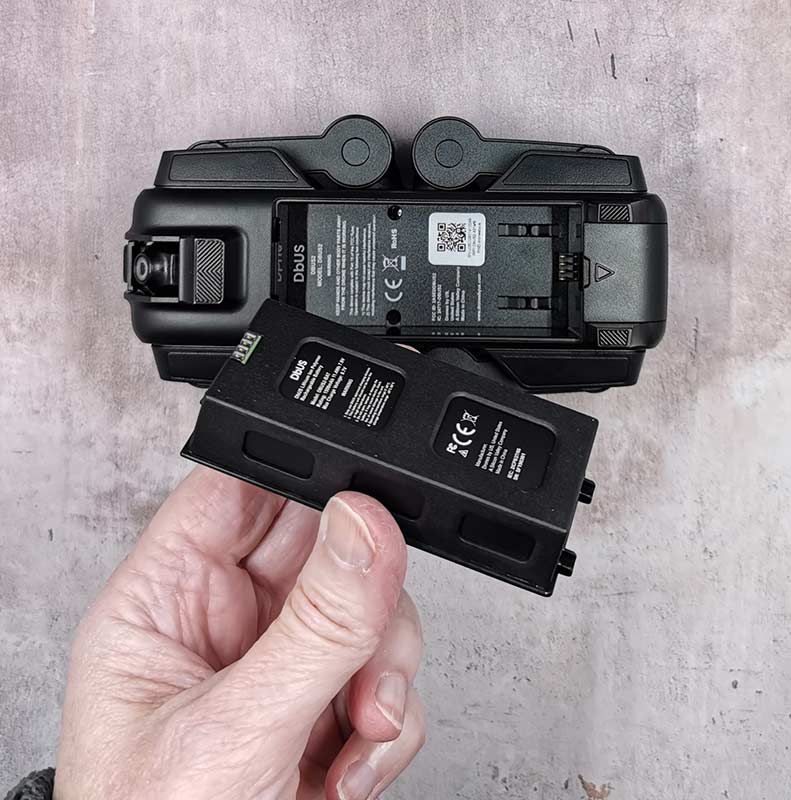
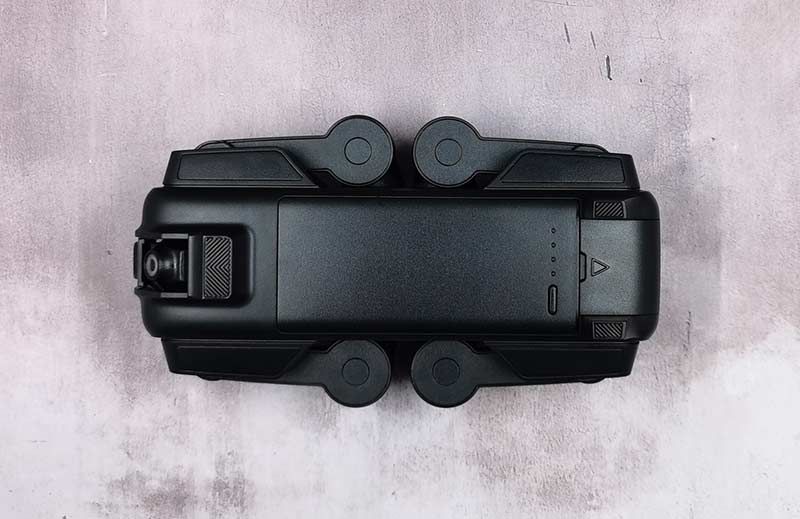
The DBUS2 ships with 2 batteries that easily snap into the bottom of the drone.

A button on the battery provides a quick visual indicator of the battery level by lighting up 1-4 LEDs. A fully charged battery can provide around 15 minutes of flight time. It takes about 45 minutes to fully recharge each battery.

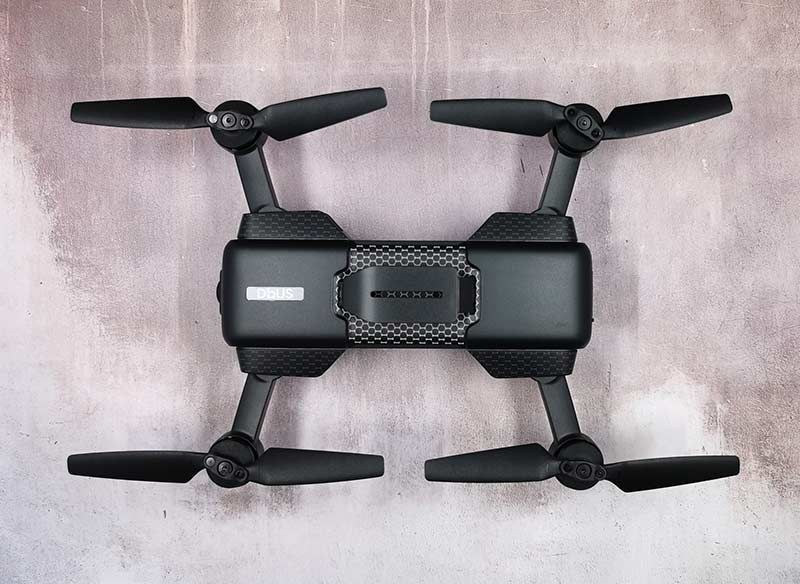
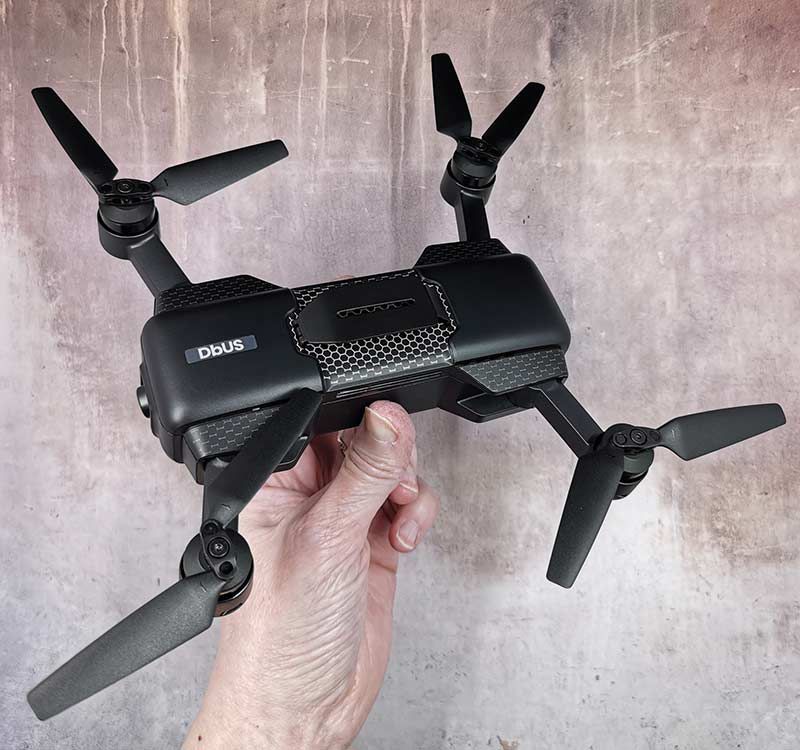
The propeller arms easily unfold when you’re ready to fly the drone.

The image above shows the main camera with the VIO camera below it. The main camera has a 160 degree wide angle lens that is fixed at a 27-degree vertical angle. That means that you’re not able to change the angle of the camera if you want to record video directly below you or in front of you. This the biggest issue that I have with the DBUS2, but I’ll talk more about that later.

I love the size of the DBUS2. It’s just the right size to make it easy to take with you day-to-day and on your travels.

When it’s unfolded, it’s not so large that you’ll attract attention. It’s also not too loud when it’s powered on and in flight. It’s not silent either. It sounds like an angry bumblebee 😉

Let’s fly this thing!

I’ve tested a few drones over the years and with each one, I’ve gotten better and better at flying them. I have to say that the DBUS2 drone is incredibly easy to fly and it’s rock solid when it comes to hovering. It’s so steady that you can fly this drone in the house without worrying that it will drift into a wall or furniture. As a matter of fact, I can see this drone as a fun tool for a realtor to make a walk (fly) thru of a home.

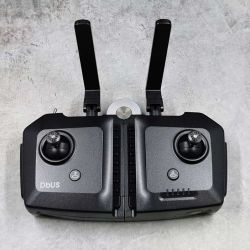
You can fly the DBUS2 drone just using the DBUS2 app on your Android or iPhone, or you can buy the optional DBUS controller $195.95. Yeah, that’s crazy expensive for a controller, isn’t it?


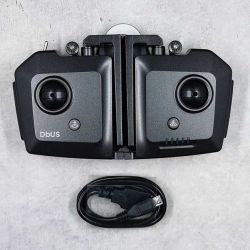
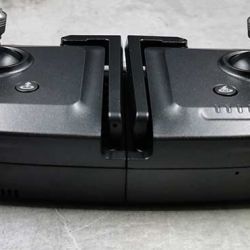
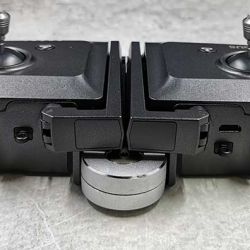
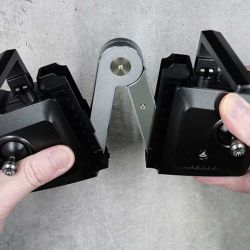
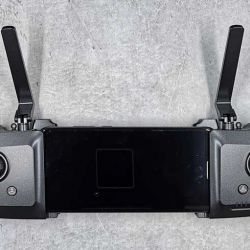
The controller features two removable joysticks and it has a built-in holder for your phone. The controller folds out so you can slide a phone between the left and right sides. I had some trouble finding a phone that would fit it though. My Pixel 2 XL barely fit it with the case off and my Huawei P30 Pro wouldn’t fit it. I wasn’t too bummed though because using the app is actually easier and means you don’t have to buy something extra to fly the DBUS2.

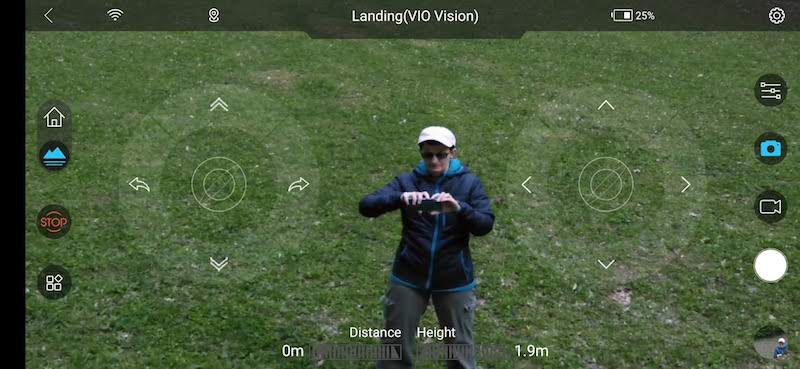
I used a Huawei P30 Pro for all my testing and flying of this drone. The app is easy to use and just requires that you turn on the drone, launch the app, wait for the drone to beep, tap the WiFi icon in the app, pair with the drone’s WiFi and you’re ready to go.

From there, the interface is basic and uncluttered, just the way I like it. You can use the onscreen buttons to launch, land, and maneuver the drone in flight. There are buttons to change from outdoor to inside flying, settings, snap a picture, start video capture, and go into the special flight features menu.

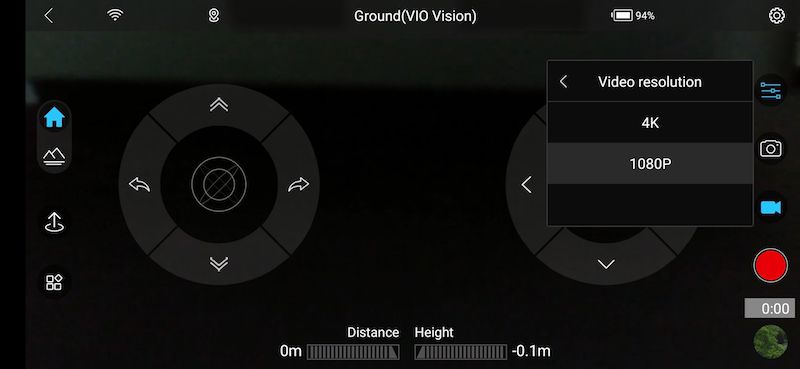
The DBUS2 drone defaults to 1080P resolution, but can also do 4K. The only caveat to using the 4K setting is that the video is not stabilized in that mode and jitter will be noticeable as you will see in the demo video below.

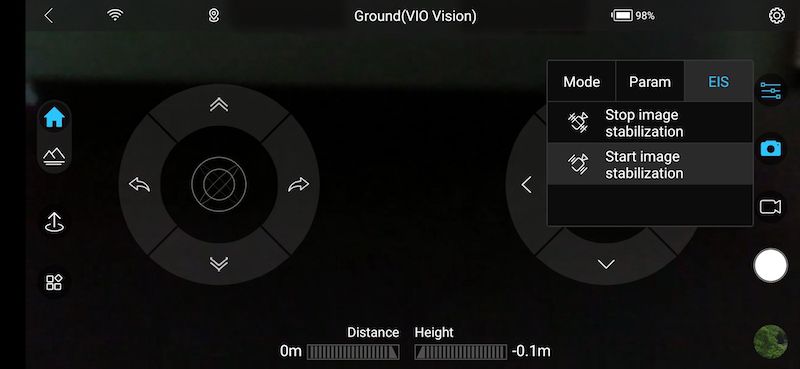
You can manually turn stabilization on or off while in 1080P mode.

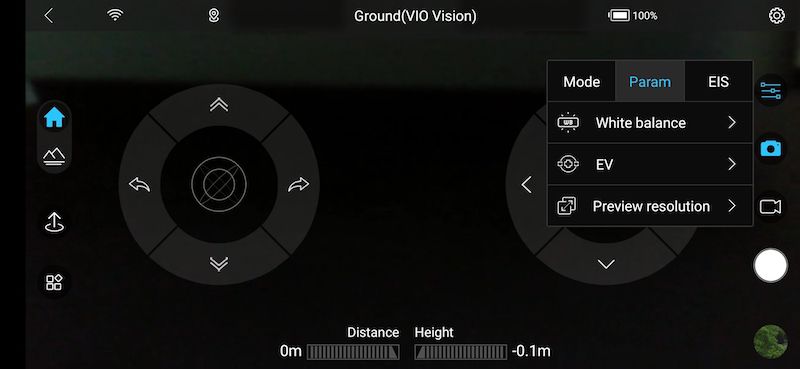
You can also adjust for white balance and other settings.

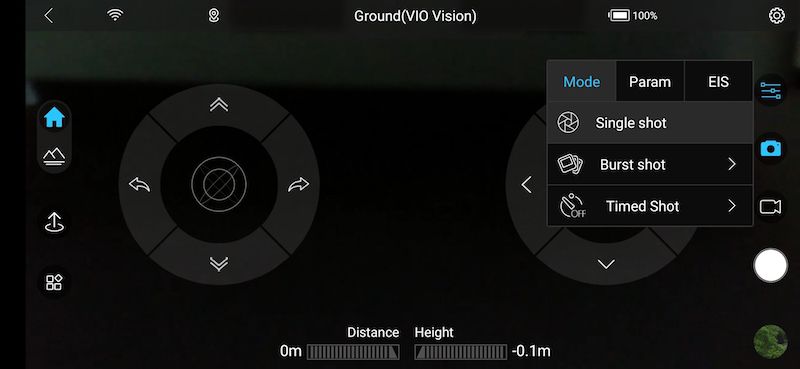
There are camera options that you can use to take single snaps, burst shots that take multiple consecutive images, and even timed shots.

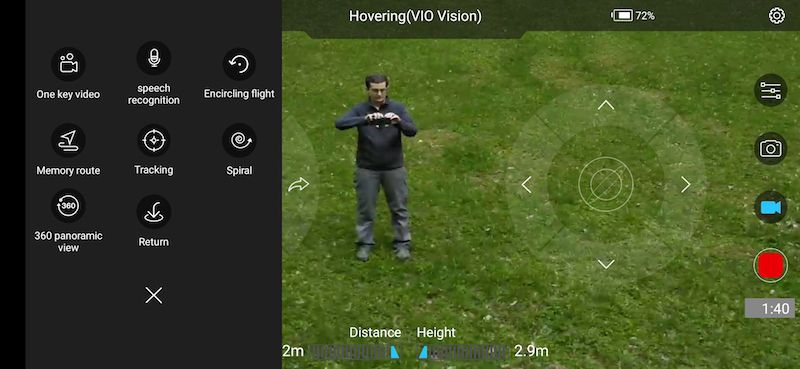
The special flight features menu gives you several fun ways to capture video including the ability to record a route by manually walking the camera around.

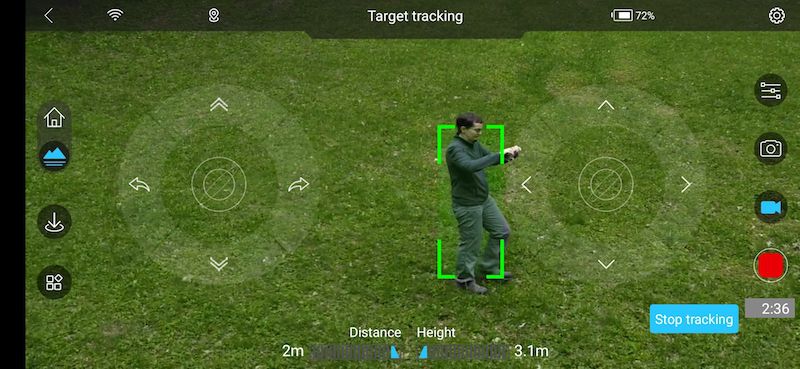
There’s a follow feature that is pretty fun to play with. You can draw a box around the subject and the drone will automatically follow it around (see my video demo for a clip of this feature in action).

You can also do some cinematic shots where the camera will start at a certain point and then fly back and up at an angle or fly left or right for a horizontal pan.

See it in action


It’s really a shame that the DBUS2 can’t fly higher and that you can’t change the angle of the camera. Not being able to shoot directly below the drone is my biggest disappointment with this drone.

Working with the video and image files

All of the drones I’ve reviewed in the past have featured removable storage in the way of a micro SD card. The DBUS2 drone has 16GBs of file storage but it is built-into the drone itself. To download the files, you have to use the app to download them to your phone. Or you can plug the drone into your computer using a micro USB cable (not included).

Connecting the drone to your computer will mount it like any other removable drive if you’re a Windows user. From there you can copy the files to your computer using drag and drop. But if you’re a Mac user like I am, you have to jump through an extra hoop to access the video files because plugging the DBUS2 into a Mac will result in nothing happening until you install the Android File Transfer app. That’s right, the DBUS2 is powered by Android. Although this app works fine, it’s not a very elegant solution in my opinion.

What I like

  • Compact folding design
  • Easy to fly
  • Extremely stable hovering
  • Includes 2 batteries

What needs to be improved

  • Add the ability to change the camera angle
  • Needs to fly higher
  • Add 4K stabilization
  • Improve file storage drive mounting for Macs

Final thoughts

The DBUS2 is a fun little drone. It’s super stable while hovering and easy to fly. It’s just too bad that the camera angle is fixed and that you can only fly a maximum of 100 feet in the air. At that height, you can’t even get above the tree line where I live.

Despite the fact that this drone lacks the ability to adjust the angle of the camera lens and it doesn’t offer image stabilization when recording in 4K mode, I still have thoroughly enjoyed testing the DBUS2 drone. My favorite features are the fact that it folds into a compact form factor that fits in a jacket pocket or bag and I love how easy it is to fly.

As it is, the DJI Spark is only $10 more and offers an adjustable gimballed camera, max altitude of 500m, obstacle avoidance, and most of the same cinematic features of the DBUS2. The only thing the Spark doesn’t offer is 4K video capture, but the DBUS2’s 4K video capture isn’t stabilized, so it’s a wash.

So I have to say that the DBUS2 doesn’t offer the same bang for your buck as other drones in this price range. That said, I look forward to what Drones By Us comes up with in the future. If a future Drones By Us drone can add an adjustable camera, stabilized 4K capture, other higher-end features, and can lower the price, I think they could have a winner on their hands.

Price: $389.95
Where to buy: Drones By Us
Source: The sample for this review was provided by Drones By Us.

Filed in categories: Reviews

Tagged:

Drones By Us DBUS2 drone review originally appeared on The Gadgeteer on May 22, 2019 at 5:51 pm.

Note: If you are subscribed to this feed through FeedBurner, please switch to our native feed URL http://the-gadgeteer.com/feed/ in order to ensure continuous delivery.
Potensic AW30 (Navigator III) Drone with Camera review

REVIEW – I have been casually shopping for an entry-level camera-equipped quad-copter drone for a year or so. The opportunity to test drive the Potensic AW30 (Navigator III) came at a good time as my sons have recently expressed interest in camera-carrying drones as well. Let’s hope the AW30 fills our needs for a trainer / gateway drone.

What is it?

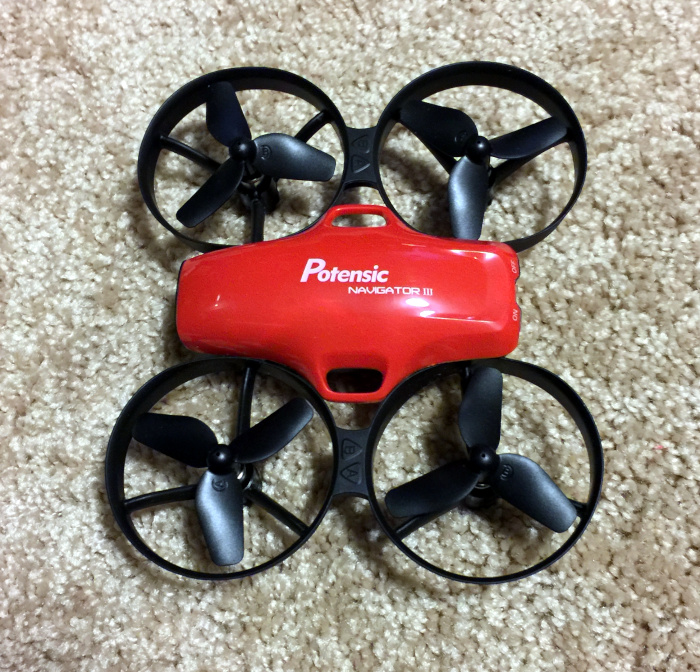
The Potensic AW30 (a.k.a. Navigator III) is an entry-level drone for kids and beginning enthusiasts. The AW30 packs an onboard WiFi hotspot for relaying images back to a iPhone /iPad or Android device using the company’s proprietary app. It supports video and photo capture and VR display on these devices.

What’s in the box?

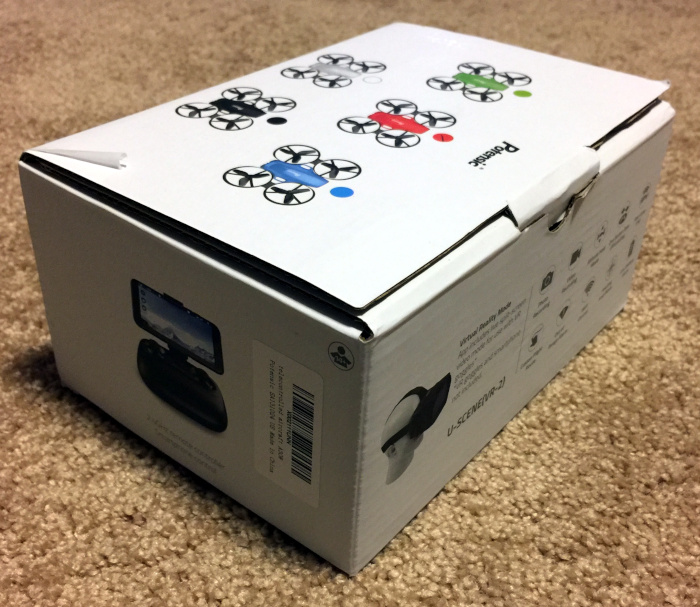
The Navigator III arrived in a full color box.

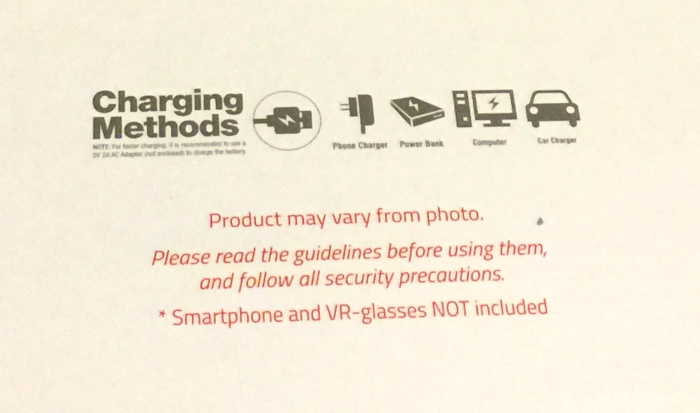
On the inside flap, the charging options are listed (more on this later). No charger is included.

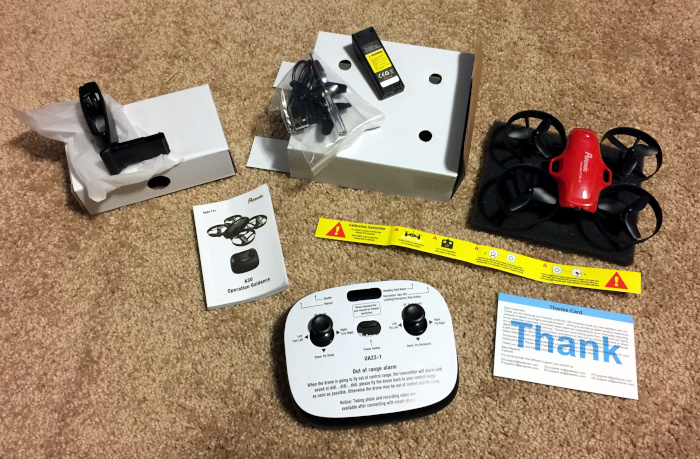
The full kit includes

  • AW30 / Navigator III drone
  • Spare set of propellers
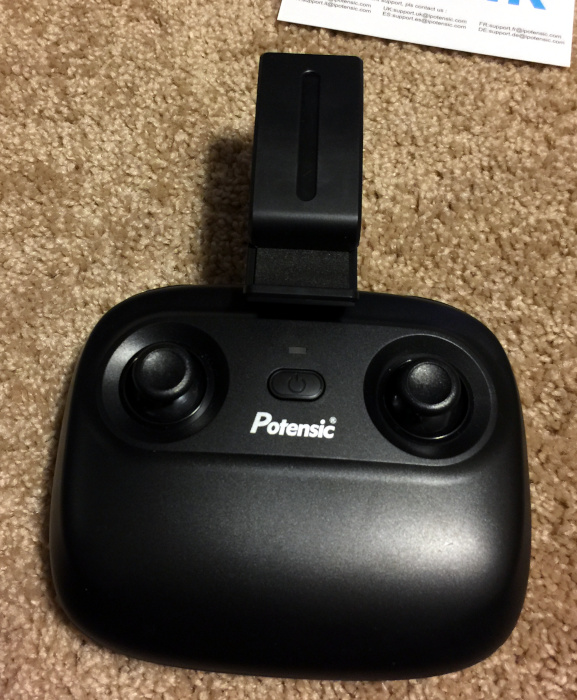
  • Remote control with instructional overlay
  • Phone mount for remote
  • Rechargeable lithium ion battery
  • USB A to micro USB charging cable
  • Multi-language instruction booklet
  • Quick start strip
  • Thank you card

Design and features

The AW30 is similar to other starter drones on the market with fixed position propeller / motor arms, fixed propeller guards, a fixed front-mounted camera, and a removable lithium battery. It includes a remote control which may be used to control the drone or the drone may be flown using the downloadable iOS / Android app. The app supports photo / video capture and live views from the drone’s camera.  The app also supports limited VR capabilities using the appropriate phone mount.

Setup

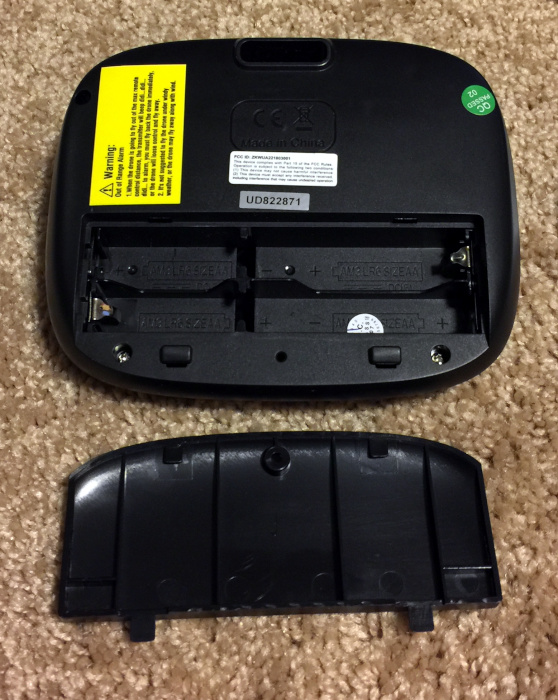
Setting up the AW30 involved installing the phone holder into the specified slot in the body of the remote and installing 6 AA batteries into the back of the remote.


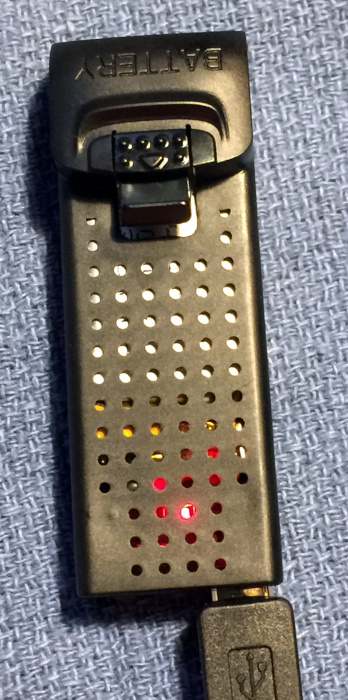
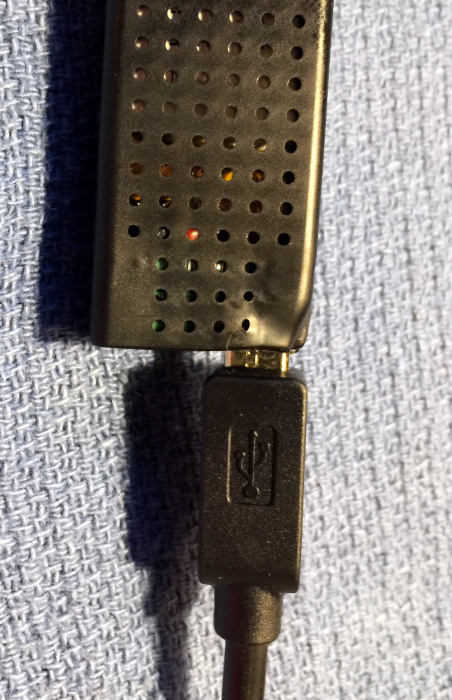
Before flight, the drone’s flight battery must be charged. I used the included cable plugged into a Bestek Vertical Power Cube, which will supply up to 2.4A per USB port based on the demands of the device being charged, to charge the flight battery. Right off the bat, I had trouble getting the cable to seat properly in the battery. When charging the battery has a red LED that lights up. A green LED lights up when the battery is fully charged.

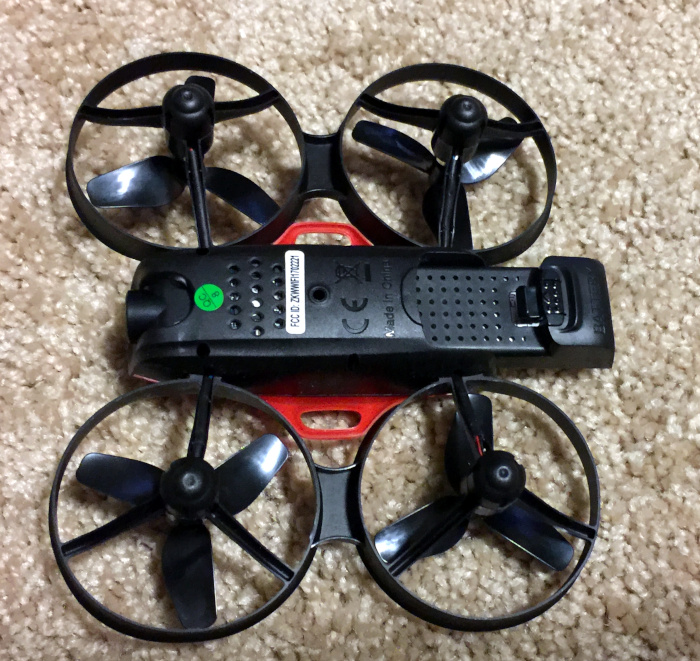
Once charged, the battery is inserted into the bottom rear of the drone (photo shows battery partially inserted).

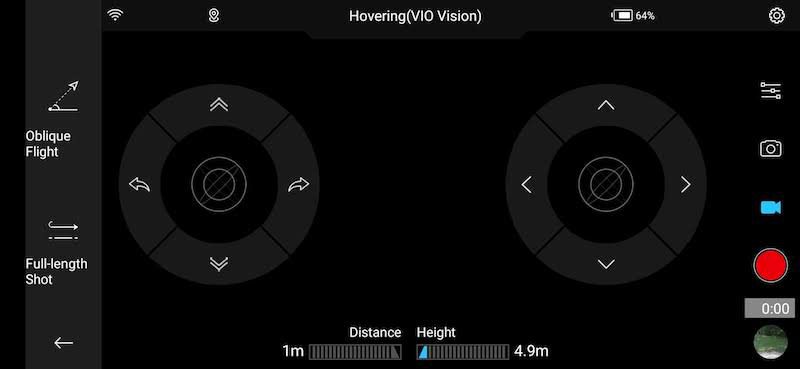
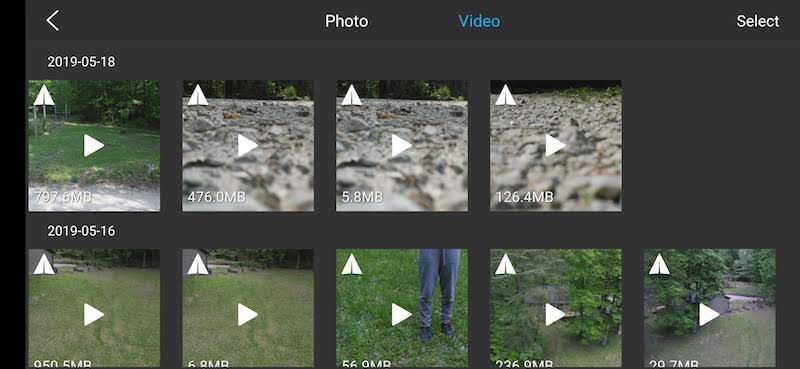
For the full experience, including video recording and photography requires the downloading of a iOS/Android app to an appropriate device and connecting to the WiFi hotspot in the drone. You must connect to the WiFi hot spot from your device to see live video. The app also includes flight controls that are independent of the remote operating over WiFi.

Before each flight, the drone and remote must be paired and the drone calibrated.

Controls

The controls on the included remote includes two self-centering joysticks and two self-centering toggle switches mounted in the top of the remote in addition to the power button.  The left toggle switch starts/stops video recording if pressed to the left and takes still photos if pressed to the right. The right switch toggles the smart controls, which will allow you to navigate the drone without worrying about what direction it is pointed, when pressed to the left and activates the auto takeoff / landing feature when pressed to the right.

The left joystick controls the altitude and rotation of the drone. The right joystick controls pitch and roll (nose up/down and left/right tilt). The remote will alert the pilot when the drone is flying out of range.

Performance

The piloting experience with the AW30 is much smoother than my last quadcopter. I had previously flown a DraganFlyer III. For those readers not familiar with the older DraganFlyer models, most do not have automatic gyroscopic stabilization or any other flight assistance–you are in complete control, and there is a steep learning curve coming from fixed wing flight.

Flight prep includes

  1. Turning on the remote and then the drone
  2. Pairing the remote and drone
  3. Calibrating the drone
  4. Connecting your phone to the onboard WiFi hotspot (optional)
  5. A quick press of the automatic takeoff button and the drone is airborne

Once in the air, the control trim may need to be adjusted. This is a non-intuitive process that requires using one joystick to go into trim mode and then moving the appropriate joystick to adjust the control trim. This process is much easier using the app controls.

The AW30 is quite nimble and is easy to get moving in any given direction. Like other aircraft and air-cushioned vehicles it doesn’t stop or turn on an dime. I was prepared for this, but the small size of the AW30’s rotors means that it does not respond quickly as vehicles with larger rotors.

My limited time with the AW30 was enjoyable. I was able to successfully fly the AW30 both inside and outdoors without damaging any of the propellers despite quite a few crashes while initially exploring the flight controls and then exploring the flight envelope.

Meltdown

My testing of the AW30 hampered by a battery / cable combination that would disconnect and stop the charging. This seemed to be a problem with the microUSB port in the battery itself. This meant that I would often come back to my workbench to find that the battery had not been charging for the past 2 hours so I had to wait longer to fly again. I was able to temporarily fix this problem by resting the cable and battery at a specific angle while charging.  I also changed to a known-good cable. This worked for several charging sessions. After a test flight one evening, I plugged in the battery into the 2A charger that I had been using and went to have dinner. When I came back the battery was deforming (bubbled) and a strong hot plastic smell, so I quickly disconnected the cable.

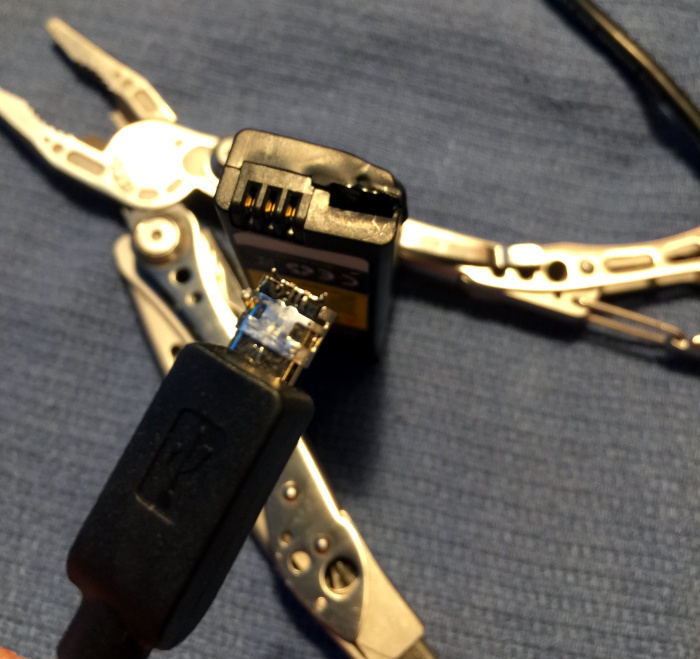
We reported this issue to the manufacturer who promised an investigation and sent out a replacement battery. I was in the process of performing a standard out-of-the-box battery top off using a 2A USB charging port and the known-good USB cable. I left the battery sitting on my workbench and walked away to grab a cup of tea. When I returned about 6 minutes later I noticed the hot plastic smell again. When I got over to the battery, the end of the battery had deformed and melted the microUSB plug into the battery charging port. I quickly unplugged the cable from the power supply. After the battery had cooled enough to handle, I examined the battery and cable. After a bit of wiggling, I was able to get the plug loose from the battery, at the cost of the port coming with it. After I separated the port and plug, I was dismayed to discover that the inside of the port was melted.

What I like

Before I had my problems, I was impressed with the

  • Price
  • Ruggedness
  • Support for VR
  • Can operate just from device without need of the remote

What needs to be improved

  • Better quality assurance for the charging cable
  • Much better current / thermal management in the battery
  • Improved trim performance when using the included remote control.

Final thoughts

Initial conclusions

The Potensic Navigator III drone is a fine toy despite the shortcomings in the flight time-to-charging time ratio. However, it shares this same problem with most other small battery-powered quadcopter aircraft. The Navigator III never lived up to the promises of it being a stable video / photo platform, as I could never get the trim dialed in to provide a stable hover, even indoors when our ventilation system wasn’t running. On the plus side, the Navigator III survived many rough “landing” and “encounters” with indoor and outdoor obstacles. The rotor guards protected the rotors from damage, and I’m still using the original rotors after 30 days. The Potensic Navigator III is a good first drone for both kids and enthusiasts to get their feet wet before upgrading to a more expensive and feature-packed aircraft. If you can master stable hovering and control with the Nagivator III, you will have saved yourself lots of trouble and money on replacement parts for your later drones.

Revised conclusions

I cannot recommend the Potensic Navigator III drone due to the persistent issues with safely charging the drone’s batteries. I have had two different batteries self destruct, with the second one taking a USB cable with it.

If Potensic can address the battery charging problem, I will reconsider this statement.

For now, save your money and your safety and steer away from the Potensic Navigator III.

Price: $69.99
Where to buy: Amazon
Source: The sample of this product was provided by Potensic.

Filed in categories: Reviews

Tagged:

Potensic AW30 (Navigator III) Drone with Camera review originally appeared on The Gadgeteer on May 13, 2019 at 11:00 am.

Note: If you are subscribed to this feed through FeedBurner, please switch to our native feed URL http://the-gadgeteer.com/feed/ in order to ensure continuous delivery.