Plugable USB-C Cube docking station review

REVIEW – How many times have you been somewhere with only your phone and wished you had a way to enter emails, browse the internet or work with various Microsoft applications like Word or Excel?  Better yet, how many times did you wish you did not have to lug a laptop or even your large tablet with you every time you traveled and could just use your phone as a computer?   Well if any of these have applied to you, your wishes may have been answered with the new Plugable Docking Station.   Read on to see if this device can make your life easier.

What is it?

The Plugable USB-C docking station  (UD-CUBE-15W) will take your Samsung DeX capable device and turn it into a full-fledged desktop PC.  It has multiple ports to connect an HDMI monitor, several USB devices and an ethernet port.

What’s in the box?
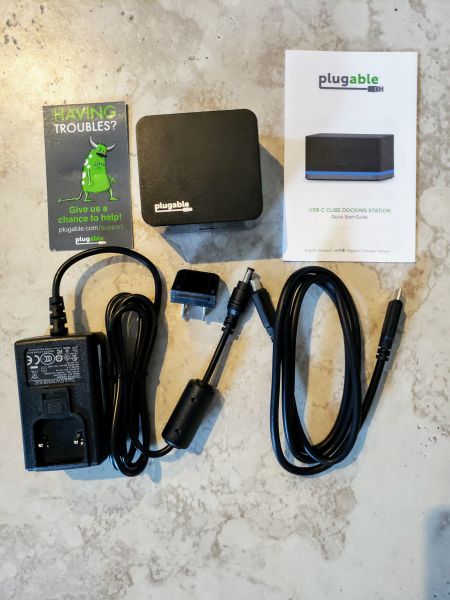
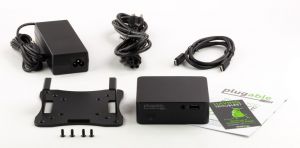
The box contents are surprisingly simple.  Inside the box you will find:

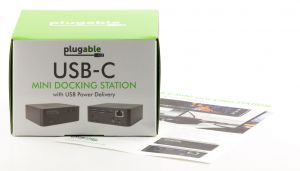
  • The cube itself.  The cube is very small.  Note the ‘Having troubles’ business card next to it.
  • A small business card with contact info if you run into any questions or problems.
  • A user manual.
  • Power adapter (20W 5V/4A)
  • Standard U.S.A. power plug which snaps into the power adapter
  • USB-C to USB-C cable to connect your phone to the cube. 36 inches long

Hardware specs
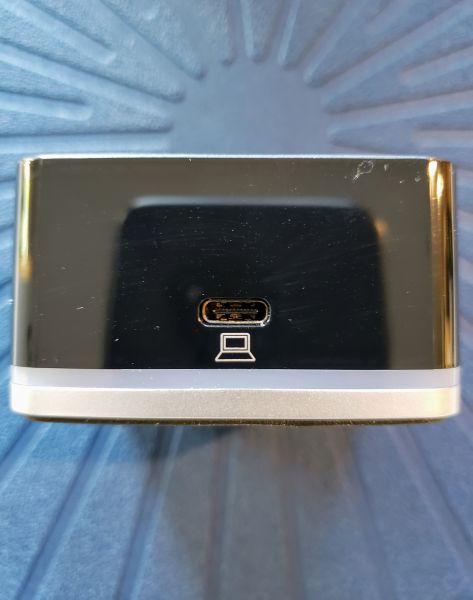
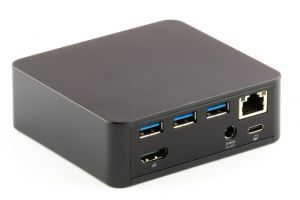
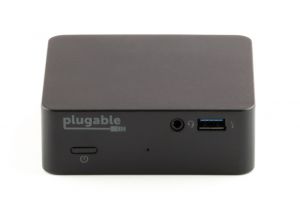
The front of the cube has a single USB-C port.  This is the port where you take the included USB-C cable and connect it to your compatible Samsung DeX device.   Your phone must have a USB-C connector.  Adapters that convert a micro USB or lighting connector to USB-C will not work with the Plugable.  Also, to work as a DeX device your phone must be running the Android 9 ‘Pie’ OS.
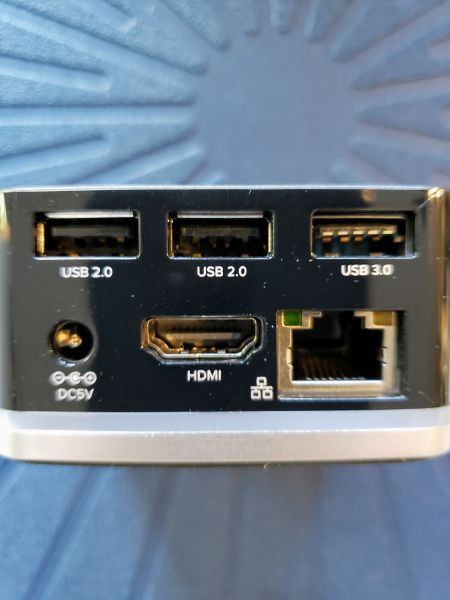
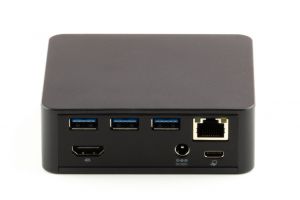
The back of the device has two USB 2.0 ports and one USB 3.0 port.  It also as the power connector, Ethernet, and HDMI port.  It should be noted that the display you use must have an actual HDMI port as DisplayPort monitors are not supported.  I also want to note that the cube supports rapid charging of your phone while it is connected to the cube.

Setup

My setup was pretty simple.   I connected the power supply and then connected my Samsung Galaxy S9 (Running Android 9) using the available cables.   I then used a standard HDMI cable and connected it to my desktop monitor.  I used the USB 2.0 port to connect my trackball mouse and then connected my wireless keyboard directly to the phone via Bluetooth.  It was all pretty painless and simple.

Performance

I first want to state that this is not a review of the DeX operating system, but rather of the cube itself and how well it performed displaying the DeX system.   The cube actually has two different options.   It defaults to the DeX display.  The screenshot below shows the initial screen I am presented.
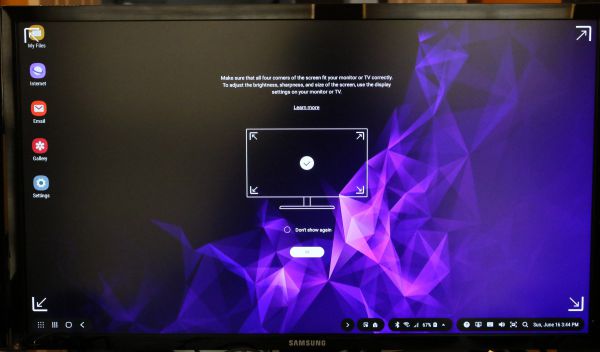
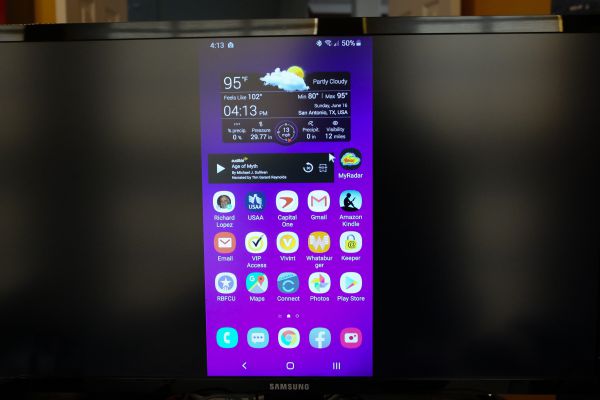
As you can see it looks like a regular desktop.   It is not displaying what is actually on the home screen of my phone.  The center display of the monitor was telling me to check the display and to make sure I could see all of the corners properly.  It went away after a few minutes.    The second option the cube has is that it can just screen mirror the phone to your monitor.  The manufacturer’s web page states that this will work with non-Samsung phones, but you have to check and see if your phone’s USB-C port allows for video output.  The screenshot below shows what the screen mirroring looks like.
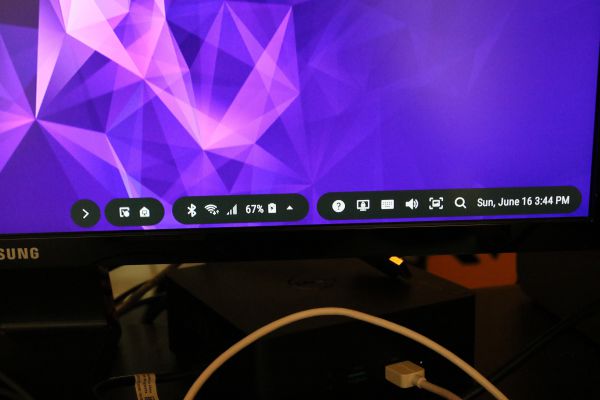
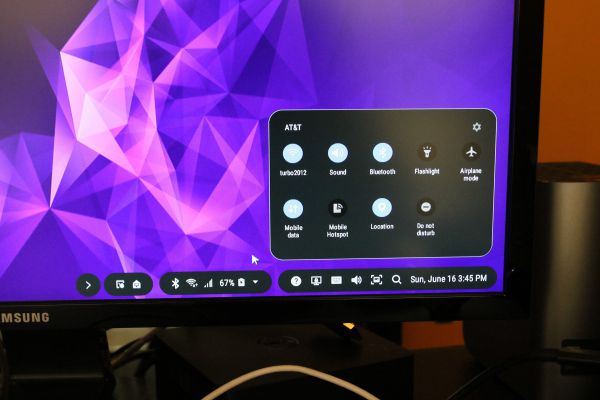
The screenshots below show the detail on the bottom of the DeX screen.  It has quick access buttons to your Bluetooth, Wifi and standard displays for cell signal and battery usage.  You also have quick and easy access to your standard setting buttons like you would have if you swipe down on your phone.
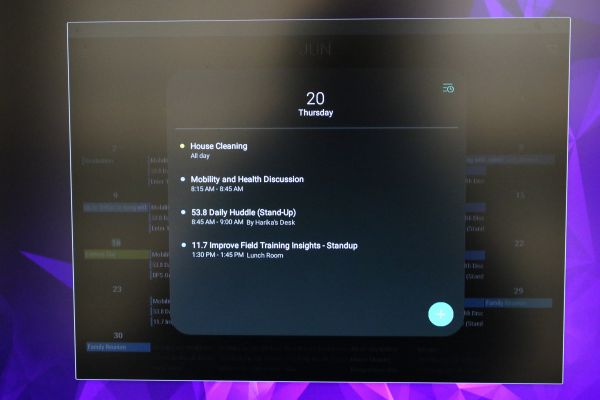
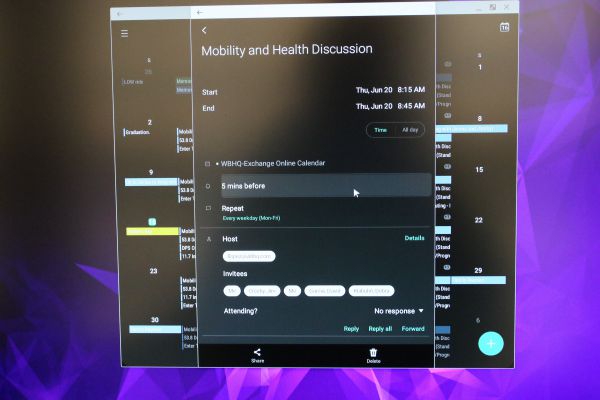
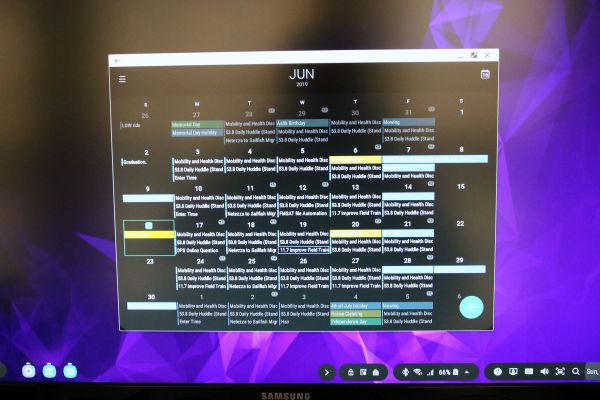
The screenshots below show the initial popup I get when clicking on the date on the far right of the taskbar.  It very nicely throws up my default calendar view.  I can then double click on a day and get the second screen.  Finally, I can click on an actual event and get the details for that event.
I can get full access to all of my installed app icons by clicking on the apps icon in the lower left corner of the screen.  I want to note that not all apps are DeX compatible.  For example, neither the Amazon Kindle or Audible apps will work on DeX.  You get a message saying they are not compatible.  You can switch to screen sharing and the Kindle app will then display at that time.
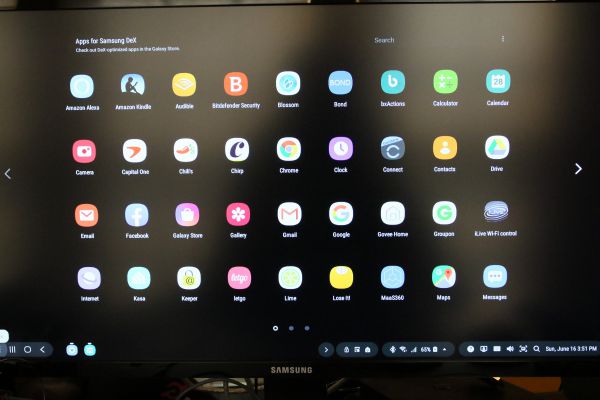
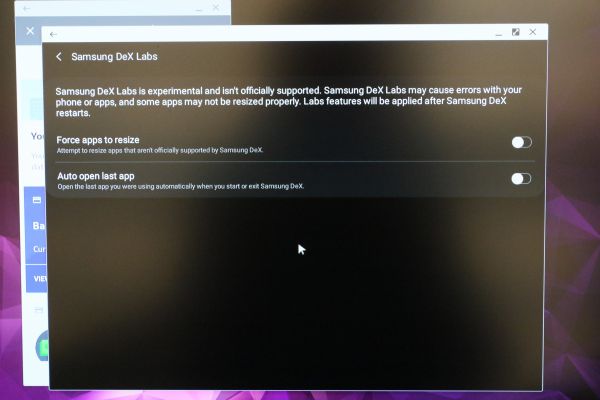
DeX does offer an option it calls Samsung DeX labs where it will let you turn the feature on and try to force noncompatible apps to display full screen.  I turned that feature on as you can see below.
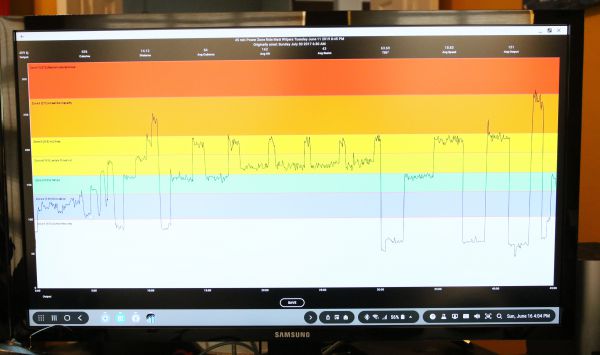
Once the feature was on I selected my PowerZone app which was originally only displaying vertically.  It said it would restart the app and try to display again and I got the following screen below.  You can see I received a nice full-screen display.
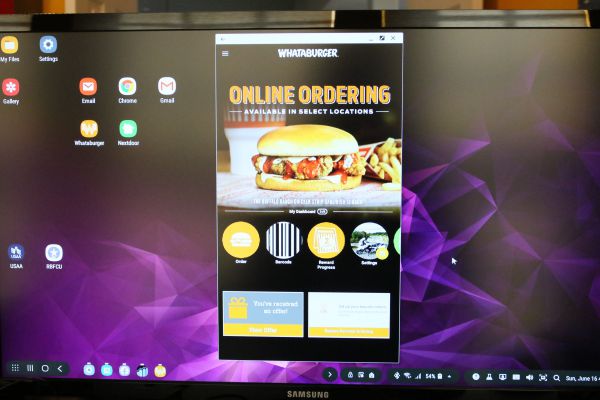
I tried the same with my Whataburger app and it still just continued to display vertically.  To be fair, this app looks pretty optimized for what it is trying to show.
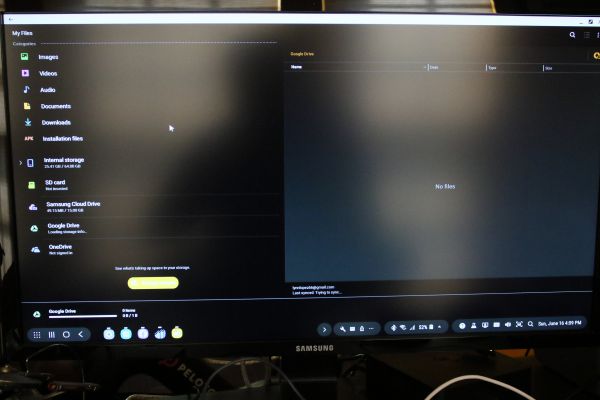
One of the last things I checked out was the My Files icon that displayed by default on the top of the screen.  I like that it tends to display like a standard Windows file explorer.  It gives you options to several cloud accounts like the Samsung, Google, and OneDrive accounts.
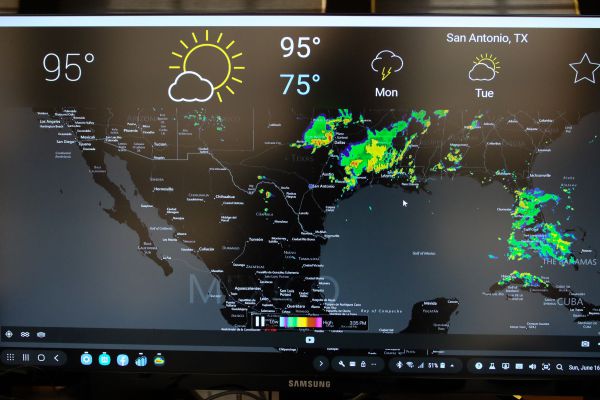
Finally, I wanted to show the full-screen shot of my MyRadar app which I think displays very nicely.
What I like

This was my first time using the DeX feature of a Samsung phone and I have to say I was pleasantly surprised.  I was expecting simple screen mirroring and what I received instead was almost a full PC like experience.   I was easily able to connect both Bluetooth and USB devices.  Because the cube connects using a cable, it does not matter what kind of protective case I have on my phone as long as the USB-C port is accessible.  The cube is really small.  It is certainly smaller than my phone and less tall than a business card.  It offers more USB ports than the standard Samsung DeX stations and you can keep the case on.

What I’d change

I honestly do not see much that needs to be improved.  If I had to complain about anything I think they could have included an HDMI cable with the setup.

Final thoughts

If you are looking for a DeX station for your latest model Samsung phone I really think this is the way to go.  You get more ports and can keep the case on your phone while using it.  It is very small and easy to pack.  Assuming that all you need to do on a computer is available through apps on your phone, I don’t see any reason why you would need to bring along a full-blown laptop on your travels.  The biggest thing you would have to pack would be the keyboard and hopefully, if you are going to work somewhere, they would have a keyboard, mouse, and monitor you could use while you were there.

Price: $99
Where to buy: Amazon
Source: The sample of this product was provided by Plugable

Filed in categories: Reviews

Tagged:

Plugable USB-C Cube docking station review originally appeared on The Gadgeteer on June 25, 2019 at 8:00 am.

Note: If you are subscribed to this feed through FeedBurner, please switch to our native feed URL http://the-gadgeteer.com/feed/ in order to ensure continuous delivery.

Plugable USB-C mini docking station review

REVIEW – One of the drawbacks to laptops is connecting external devices and monitors. The Plugable USB-C mini docking station aims to make that easier by adding a little bit of just about everything.

What is it?

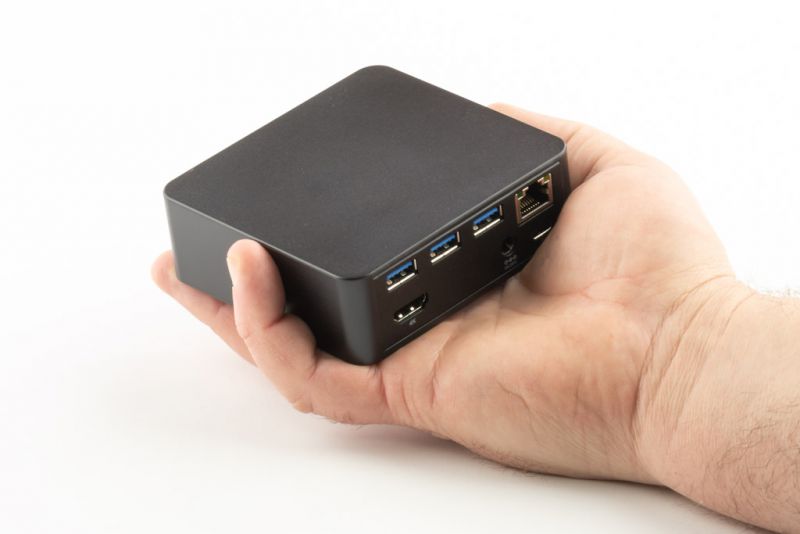
The Plugable USB-C mini docking station is a small USB-C docking station that includes a USB hub with 4 USB-A 3.0 ports, HDMI output, a gigabit ethernet port, and 3.5mm TRRS Headphone/Mic Combo Jack along with a USB-C port with charging functionality.

What’s in the box?

  • USB-C Docking station
  • 100W (20V, 5A) power supply
  • 1m USB-C to USB-C cable
  • VESA mounting bracket
  • Quick Start Guide


Hardware specs

  • HDMI 1.4 output for mirroring or extending your desktop to an external monitor. Supports 4K@30Hz, 2560×1440@60Hz & 1920×1080/1080P@60Hz
  • USB-C port with 85W Power Delivery functionality to charge compatible host computers (not all USB-C computers are able to charge through their USB-C port
  • Gigabit Ethernet port – The UD-CAM has a dedicated Realtek RTL8153 Ethernet controller
  • 3.5mm TRRS Headphone/Mic Combo Jack
  • Four total USB (Type-A) ports; One USB 3.0 port on the front and three USB 3.0 ports on the rear


Design and features

There’s an idiom that says “The more things change, the more they stay the same”. It seems like everything is going wireless nowadays, but even though wireless is everywhere, there are some things that just work better wired. External drives, monitors, and various hardware often works better wired.

Portable devices such as laptops and tablets seem to have fewer and fewer ports, but we still seem to have the same or more devices to plug into them.

The Plugable USB-C mini docking station addresses this problem with a small, yet powerful, hub.

Not only does the Plugable USB-C mini docking station add USB ports for your device, but it also adds functionality to devices. Most notably is the ability to add an HDMI 1.4 output that supports 4K resolution – all through one USB-C connection from your device.

The mini docking station also adds a gigabit ethernet port. In all my experience, a wired network connection always seems to have better stability and speed.

To use the Plugable mini docking station, you will need to have a supported USB-C system like the 2015 and later 12″ MacBook Retina with USB-C, late 2016/2017 MacBook Pro with Thunderbolt 3, Dell XPS, Precision, and Latitude systems with Thunderbolt 3, and the Microsoft Surface Book 2. See Plugable’s compatibility chart on the product page. https://plugable.com/products/ud-cam/

The Plugable mini docking station can also provide all of these features while simultaneously providing up to 85W of power to charge your system via the USB-C connection, so even though you’re adding a cable to connect the dock, you might be able to remove the original charging cable – depending on your device.

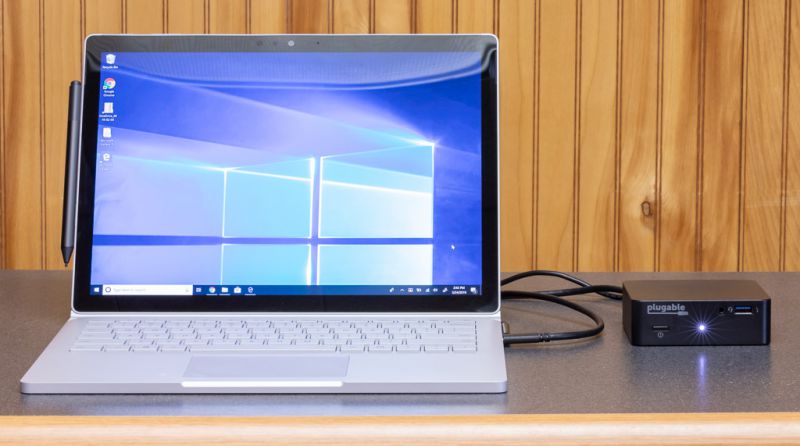
I set up the Plugable USB-C mini docking station with a Microsoft Surface Book 2. Windows automatically recognized it and installed the appropriate USB hub drivers. There wasn’t anything to manually install, it was just plug and play!

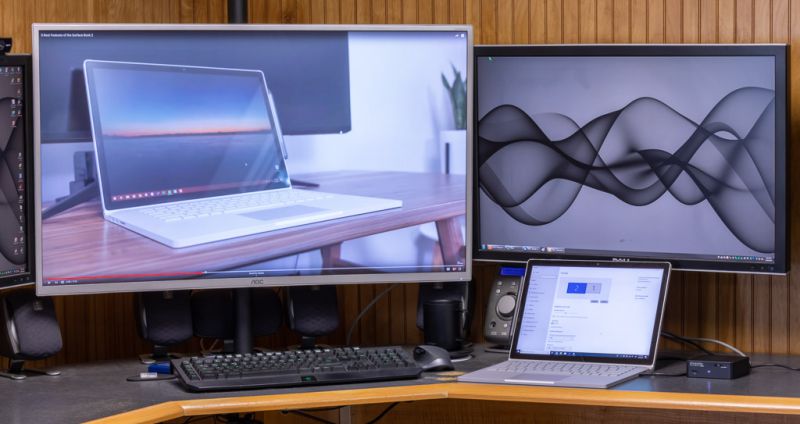
The first thing I did was check that it was charging from the docking station. Next was the one thing that really excited me about this device, it’s 4K HDMI connection. So I connected it to my 40″ AOC 4K monitor and I was up and running without a hitch. It performed just as well as my desktop machine for the tasks I performed such as 4K videos, photo editing, and a little bit of CAD design for 3D printing. I was quite happy with it. It is limited to 4K@30Hz, which may be a hindrance if you’re a gamer, but for normal computer tasks, it will work just fine.

I did not test it with any Apple devices as all of my Mac computers are older devices. I also did not test the VESA mount because all of my monitors are currently using their mounts on their stands, however, I’ve been using and abusing VESA mounts for over 20 years, so I can say that the included mount should work just fine.

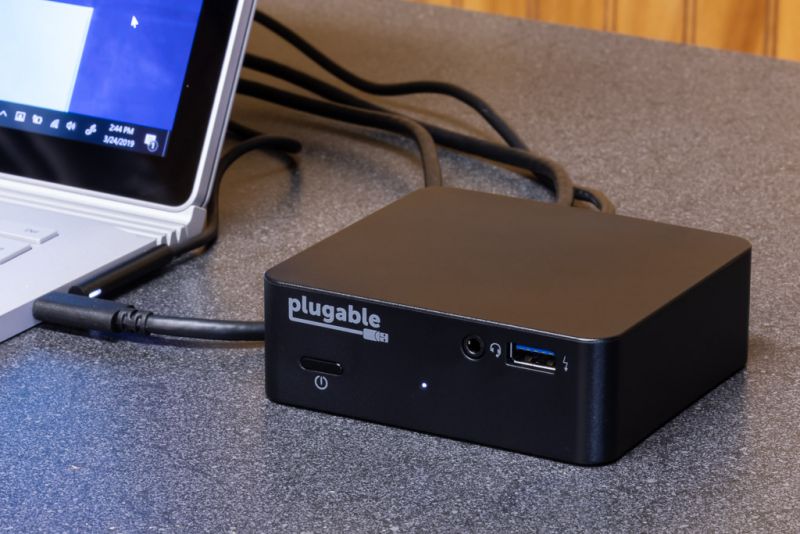
Although the Surface Book 2 power connector is connected in this photo, it’s technically not required when using the Plugable USB dock.

The Plugable USB-C mini docking station also features a VESA mount so that it can be attached to the back of a monitor that has the standard 100mm VESA mounting holes. This allows you to place it out of sight unless you need to plug and unplug devices regularly, then you might just opt to use the mounting bracket to mount the docking station under the edge of your desk. It really is a nice little feature that could save a lot of time over making your own bracket. Theoretically, one mounted out of sight you would still only have one cable running to your computer (laptop).

The device also has four rubber feet on the bottom. It may not sound like much of a feature, but if you’ve ever had a hub that didn’t you would know that the cables can make the device turn. These little rubber feet help it stay in place.

The Plugable USB dock driving a 4K monitor via HDMI, playing a 4K Youtube video full screen.

What I like

  • The VESA mount is a nice touch
  • The 4K video output is splendid
  • The rubber feet are nice

What needs to be improved

  • I could not think of anything that could be improved.

Final thoughts

The Plugable USB-C mini docking station is a great device that provides a lot of functionality in a small package. The additional ports provide functionality, usability, and speed increases (wired ethernet vs wireless).

Price: $129.00
Where to buy: Plugable and Amazon
Source: The sample of this product was provided by Plugable.

Filed in categories: Reviews

Tagged:

Plugable USB-C mini docking station review originally appeared on The Gadgeteer on April 16, 2019 at 9:00 am.

Note: If you are subscribed to this feed through FeedBurner, please switch to our native feed URL http://the-gadgeteer.com/feed/ in order to ensure continuous delivery.
IOGear USB-C Docking Station with Power Delivery 3.0 review


REVIEW – Last year, I got the opportunity to test and review a few USB-C docks that allowed me to expand the versatility of my several workstations so that I have all of the capabilities I need regardless of what platform I am using. This year, I am continuing my interest in USB-C docks looking to find the most practical with the most features and connectivity options for mobile use. The IOGear USB-C Docking Station with Power Delivery 3.0 is the first candidate in this category for 2019. So let’s get started!!

What is it?

The IOGear USB-C Docking Station with Power Delivery 3.0 is an expansion dock that provides multiple and various ports and connectivity via one USB-C connection. It is USB port powered and also includes a USB-C pass-through power delivery port.

What’s in the box

1 x IOGear USB-C Docking Station with Power Delivery 3.0
1 x Quick Start Guide
1 x Warranty Card

Design and features

Features:

    • Instantly dock up to 10 devices
    • Charge laptop & devices with up to 100W pass-through
    • Fast Role Swap provides safe operation for connected devices during power changes
    • Versatile video options: HDMI (4K), Mini DisplayPort (4K) or VGA (1080p)
    • Dual video outputs available via HDMI & Mini DisplayPort for up to 1080p @60Hz
    • Silicon rubber pad prevents dock from slipping or scratching laptop
    • SD/MicroSD card reader/writer supports memory expansion
    • 1 x 3.5mm Audio input & 1x 3.5mm Audio output
    • 3x USB-A 3.0 ports; 1x BC 1.2 charging port (1.5A)
    • 1 x USB-C data port
    • 1 x Gigabit Ethernet port
    • HDCP 1.4 compliant
    • Works with the new USB-C iPad Pro under mirror-mode

Specifications:
Upstream Port:
USB: USB-C Built-in USB 3.1 G1 Type-C cable
Downstream Ports:
HDMI: 1x HDMI port (v.1.4 spec compliant, up to 3840×2160@30Hz)
Mini DisplayPort: 1x MiniDisplayPort port (v.1.2 spec compliant, up to 3840×2160@30Hz)
VGA: 1x VGA port (up to 1920×1200@60Hz)
USB-A: 3x USB 3.0 A ports, 1 port with BC1.2 charging
USB-C: 1x USB-C port for sharing, 1 x USB-C for data
Card Reader: Supports SD/SDHC/SDXC @ UHS-I class, MMC
Ethernet: 1x Gigabit Ethernet port
Audio: DC3.5 port, support audio or microphone
Power Delivery Pass-Thru: PD 3.0 / 100W (A total of up to 85W can be charged to the laptop after deduction of max 15W used by the dock)
Operating System Requirements: Windows 7 / 8 / 8.1 / 10, Mac OS X 10.10.5+
Dimensions: Height 2.96″ (7.5cm), Depth 0.39″ (1.5cm), Length 13.78″ (35cm)

This dock is built with a slant/slope from back to front and is designed to sit directly under your laptop with the back edge of the dock aligning with the back edge of your laptop. This allows access to the ports while creating a better viewing angle. It has a built-in rubber pad on its surface that prevents the laptop from slipping off. It also includes a built-in USB-C connection cable that tucks away neatly underneath.


On the back of the dock, there are several connectivity ports. The second picture below shows the port configuration.

Performance

I started off by trying the dock with my HP laptop. I placed it under the laptop so that the ports protruded just past the back of the laptop. I found this to be the best position for me to be able to attach accessories and cables without moving the laptop.

Since my HP laptop does not have any built-in USB-C ports, I used the USB-C to A adapter shown below.

I then plugged the connection cable with the USB-C to A adapter into one of the USB ports on my laptop. While this dock seems to be geared towards a MacBook, the specifications say that it is also compatible with any Windows laptop. My MacBook Pro has 2 USB-c ports on its left side. However, if I wanted to plug in the connection cable to one of the USB ports on the right side of my HP laptop, it would only work while under my laptop if I use a USB extension cable. The cable built into the dock is not designed to swing over to the right side of the laptop.

The picture below shows the right side of my laptop and the dock under it. The only port on the right side of the dock is the 3.5mm audio input/output port.

In the picture below, the dock is connected to my Windows HP laptop, and I am using a Kensington wireless mouse with its USB wireless dongle plugged into the dock.

The next picture shows the dock underneath my MacBook Pro, with an HDMI cable for an external monitor attached as well as the MacBook Pro power adapter plugged into the USB-C PD Pass-through port.

Below you see the side of the MacBook Pro with the built-in USB-C cable from the dock plugged into my MacBook Pro.

And the screenshot below shows the charging icon on the screen to confirm that the MacBook Pro is being charged via the USB_C PD Pass-through port.

The extension monitor works well via the HDMI and VGA ports of the dock.

As shown in the picture below, the dock also works with the iPad Pro and an external/extension monitor.

Unfortunately, my laptop still has Windows 7 installed, so I was unable to test the dual monitor feature with it. However, I have no reason to believe that it will not work with a Windows 10 laptop as per the specifications. I also tested the ethernet connection, both the SD and micro SD slots, and the 3.5mm audio port and everything worked very well.

What I like

  • The form factor and compact footprint
  • The number of ports
  • The versatility of the selection of the ports and their functions
  • The USB-C pass-through power delivery port
  • The standard USB charging port

What can be improved

  • The addition of one or two USB ports on the sides of the dock
  • The ability for the built-in USB-C connection cable to be able to “swing” and plug into USB ports on either side of the laptop.

Final thoughts

When I first saw this delivery dock, I liked the concept of the design that allows you to place it under your laptop to provide an optimal viewing angle in addition to the expansion capabilities. I like the number of ports and the versatility that really accommodates most of the usual needs. The pass-through power delivery allows you to maintain just one power adapter, and the included 3.5mm I/O audio port rounds off the selection. I also like that it was easy to use it with my Windows laptop, my MacBook and my iPad Pro. With the exception of the inconvenience of not having any side connectivity, this dock works well and is well built. While it may not be 100% perfect for my personal needs, it comes very close. Well done!!

Price: $179.95
Where to buy: IOGear website and Amazon
Source: The sample for this review was provided by IOGear.

Filed in categories: Reviews

Tagged:

IOGear USB-C Docking Station with Power Delivery 3.0 review originally appeared on The Gadgeteer on February 25, 2019 at 9:00 am.

Note: If you are subscribed to this feed through FeedBurner, please switch to our native feed URL http://the-gadgeteer.com/feed/ in order to ensure continuous delivery.
Satechi Type-C Multi-port Adapter 4K with Ethernet V2 review

REVIEW – As newer laptops become thinner and more portable, they have fewer and fewer ports available. As a result, users have to purchase USB hubs to provide the missing necessary ports. My Lenovo Yoga 730 only has two USB Type-C ports (Thunderbolt 3), one USB 3.0 Type-A port, and a 3.5 mm audio input/output jack which means that I really need more ports. I had decided that I wanted a USB hub that has at least two USB Type-A ports, an Ethernet port, microSD and SD card slots, an HDMI port, and a USB Type-C port. Thankfully Satechi makes an adapter that has all that I was looking for.

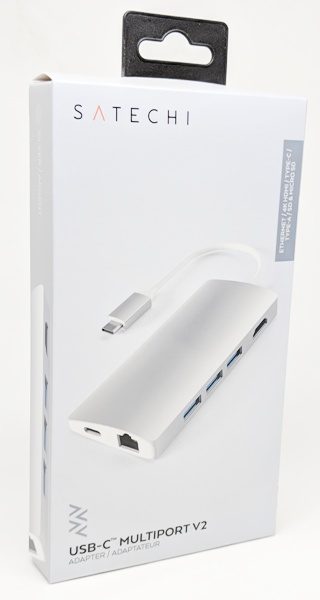
I was sent the Satechi Type-C Multi-port Adapter 4K with Ethernet V2 to review. It has three USB 3.0 Type-A ports, a 4K HDMI port, an Ethernet port, SD and microSD card slots, and a USB Type-C port which provides pass-through charging and will output up to 49W. I found that all the ports worked well but that the three USB Type-A ports were a little too close together to accommodate three different shaped USB flash drives simultaneously. In addition, it’s expensive.

What is it?

The Satechi Type-C Multi-port Adapter 4K with Ethernet V2 is a device that when plugged into your laptop’s USB Type-C port, provides you with three USB 3.0 Type-A ports, a 4K HDMI port, an Ethernet port, a USB Type-C port, and an SD and microSD card slots.

What’s in the box?

The only thing in the box was the adapter with its built-in USB Type-C cable. There was no information provided.

Design and features

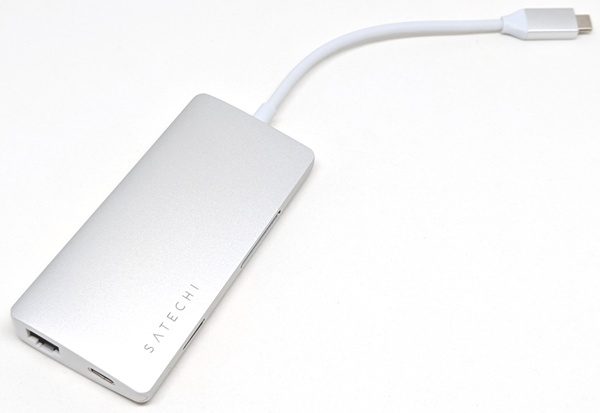
I received the silver Satechi Type-C Multi-port Adapter 4K with Ethernet V2. The outer portion of the adapter is made of a matte aluminum. The adapter also has a built-in 6″ USB Type-C cable (measurement includes connector). The Satechi brand name is also displayed on the top of the device.

One side of the adapter has a tiny LED status light that glows blue to indicate when the adapter is plugged in. The microSD and SD card slots are also located on this side.

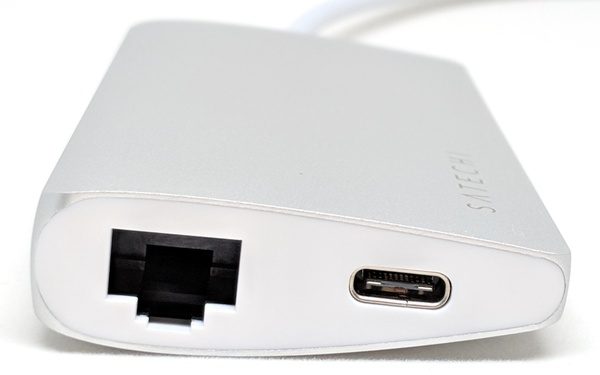
As the above photo shows, the Satechi adapter tapers from one long edge to another, thus making it a little more portable. The end of the adapter shown above has an Ethernet port and USB Type-C port, thus, the adapter replaces the USB Type-C port that it uses when plugged into your laptop. The adapter’s USB Type-C port will allow you to charge your devices (up to 49W) or allow you to charge your laptop.

The other side of the adapter has a 4K HDMI port and three USB 3.0 Type-A ports.

The length of the entire adapter is a little over 10″ long when including the built-in cable.

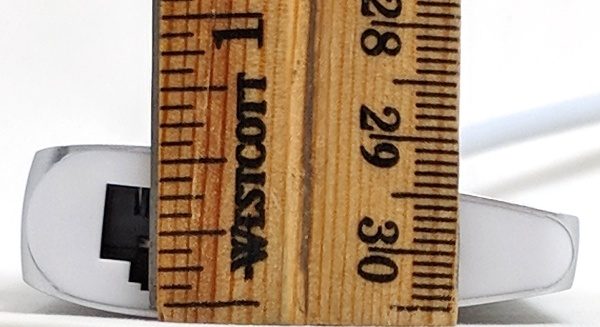
And it is only a little over 0.5″ thick and is thus very portable.

Use

I plugged the Satechi adapter into my Lenovo Yoga 730 laptop and was able to successfully use all of the ports simultaneously.

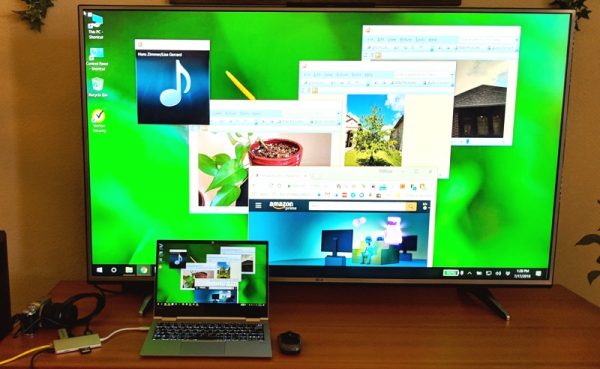
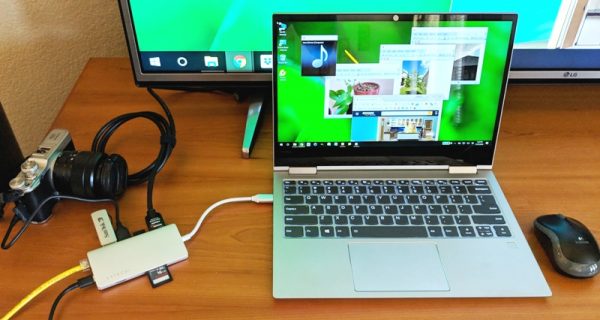
As shown in the photo above, I have plugged in the following (starting at the top right of the adapter and continuing counterclockwise): my TV using an HDMI cable, a USB mouse dongle, my camera using a micro-USB cable, a USB flash drive, an Ethernet cable, my laptop’s USB Type-C power cable, a microSD card, and an SD card. Notice how the SD card sticks out a great deal. When inserting this storage device, you only need to slide it into the adapter until it stops to seat it properly.

Each of the windows displayed on my laptop’s screen (and my TV) shows the photo stored on my camera, the music playing on my USB flash drive, the photos stored on my microSD and SD cards and the web page I pulled up using the Ethernet connection.

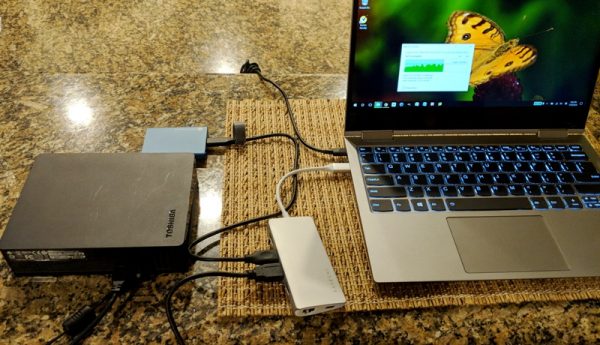
Using this adapter, I was also able to do things like easily transfer data from our larger external hard drive to our smaller portable hard drive as shown above. I had no problems doing this, nor did I have any problems transferring data between any of my portable storage devices or from my laptop to any of the storage devices using the USB Type-A ports and microSD and SD card slots. I also didn’t have any difficulties charging devices (or my laptop) using the USB ports, connecting to external monitors using the HDMI port, or using the Ethernet connection.

There was one thing that I noticed while using the adapter. Actively using some or all of the ports causes it to run a little warm. Satechi states that the operating temperature of the device is 86-122 degrees Fahrenheit, so apparently, this is normal.

My only complaints about the adapter are that it is expensive ($79.99), the USB 3.0 Type-A ports are too close together to accommodate anything other than physically small squared-off USB flash drives or cables, and in order to properly insert the microSD card, I needed to use my fingernail to push it far enough into the slot to get it to click into place. When inserted, the card sits flush with the adapter. And last, in the process of inserting or extracting the microSD card, sometimes the card would unexpectedly shoot out of the adapter if my fingernail slipped off of the card. *PEW* Whoa, look out! Where’d it go?!? This tiny projectile proved to be difficult to find a couple of times!

What I like

  • My laptop now has lots of ports available (3 USB 3.0 Type-A ports, a 4K HDMI port, an Ethernet port, a USB Type-C port, microSD and SD card slots) to accommodate my needs

What needs to be improved

  • Satechi should increase the spacing between the USB 3.0 Type-A ports
  • Inserting the microSD card is a bit of a challenge unless you have long enough fingernails
  • It’s expensive!

Final thoughts

I really love having the Satechi Type-C Multi-port Adapter 4K with Ethernet V2. It drastically increases the number of ports on my laptop and allows me to transfer and access data on my USB flash drives and microSD and SD cards. It also allows me to connect my laptop to a monitor or TV, my camera, or accessories that require a USB dongle.

The adapter’s drawbacks are that the USB 3.0 Type-A ports are too close together to accommodate physically large non-square USB flash drives, inserting the microSD card requires you to use a fingernail, and the adapter is quite expensive.

Price: $79.99 – $89.99
Where to buySatechi and Amazon
Source: The sample used in this review was provided by Satechi.

Filed in categories: Reviews

Tagged: , ,

Satechi Type-C Multi-port Adapter 4K with Ethernet V2 review originally appeared on The Gadgeteer on August 25, 2018 at 9:00 am.

Note: If you are subscribed to this feed through FeedBurner, please switch to our native feed URL http://the-gadgeteer.com/feed/ in order to ensure continuous delivery.
IOGear Quantum Thunderbolt 3 Docking Station Pro 85 review

What is it?

The Quantum T3 is a desktop docking station for USB-C computers that adds additional ports and functionality all through a single USB-C connection.

Hardware specs

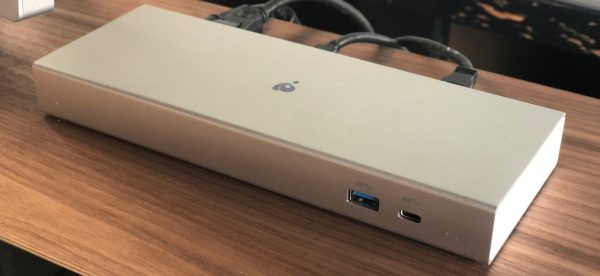
Front connections: 2 USB ports (USB-A 3.1 and USB-C)
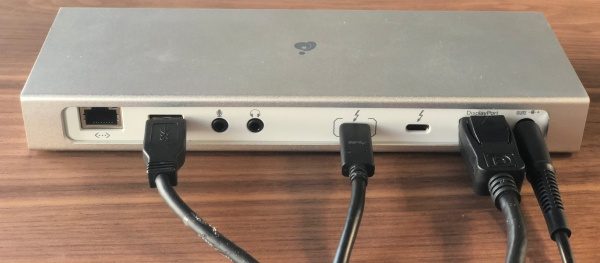
Back connections: Gigabit Ethernet, USB-A 3.1, 3.5mm Audio in, 3.5mm Audio out, 2 USB-C, Displayport and DC power
Dimensions: 22 x 8.1 x 2.5cm
Video capability: DisplayPort 1.2 (up to 4K@60Hz with single video stream), Thunderbolt 3 (USB-C port), up to 5K@60Hz on DP Alt mode with single stream or 4K@60Hz with dual streams

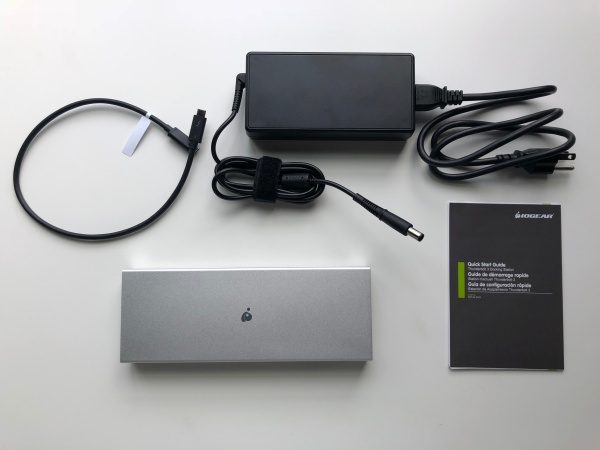
What’s in the box?

  • Quantum Thunderbolt 3 Docking Station Pro 85
  • Thunderbolt 3 cable
  • AC power adapter
  • Quickstart guide & warranty card

Design and features

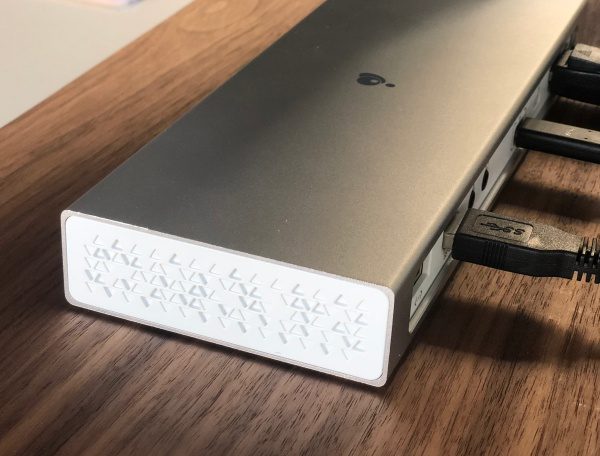
The Quantum 3 is a beautiful piece of equipment that looks at home with current computers of the aluminum variety and provides all kinds of connectivity to your USB-C computer at your workstation. The main body is aluminum with plastic used for the inset back connector panel and the end panels which sport a cool repeating triangular relief pattern.

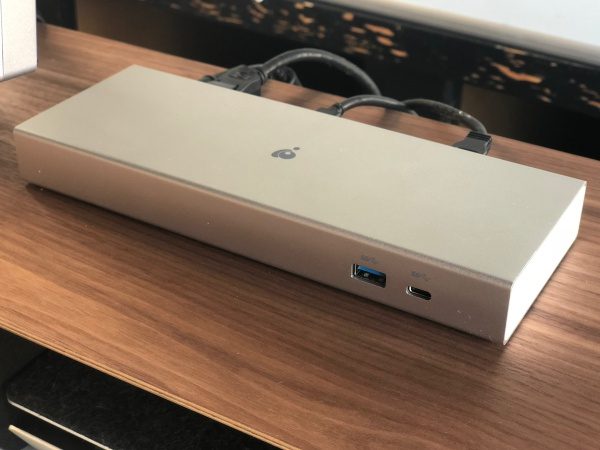
As you can see in the next photo, there are also connections for gigabit ethernet, USB 3.0, microphone, headphones, USB-C, displayport and power.

On the front of the unit there is a pair of connectors, one for USB-C and one for USB 3.0.

Setup

Connect to Quantum 3 to its power supply and then the included USB-C cable to your computer. It’s important to note that the first one with the [    ] around the port has a higher throughput and 85 power supply for connecting to your computer, supporting the other functions through the hub and keeping your computer charged without a separate power cable.

All that’s left is connecting everything else you plan to use. I have an HP Envy ultrawide monitor that I selected specifically because it had USB-C input. What I found in initial use is that some of the other connections through the monitor like standard USB 3.0 accessories, required me to add another cable to my mac which is what I was trying to avoid in the first place.

With the Quantum 3, I connected a DisplayPort cable to the monitor along with a USB 3.0 cable and that’s it. The office I work in is all wifi, so I haven’t had to try the gigabit ethernet yet. Maybe in the new office starting next week.

Performance

It’s really quite amazing how seamless a product can be when it does exactly what it’s supposed to. It’s not like I forget that it’s there, but at the same time, I don’t have to monkey with it. With the connections described above, I’m able to set my Mac down, connect a single USB-C cable and everything just works and my Mac is charging. The headphone amp that’s connected to the monitor with USB works perfectly. The monitor’s built-in pop-up camera works perfectly (previously required an extra cable to the mac). I can go on, but you get the picture.

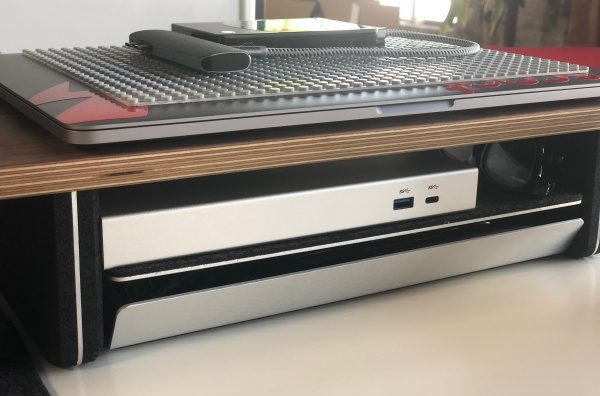
I’ve got the Quantum 3 tucked into a pocket of my desk riser where I have access to the front two ports should I need them and everything else is out of the way.

What I like

  • Simple set-up
  • It just works
  • Single connection to the computer (including charging!)

What needs to be improved

  • The cost is pretty steep (but less so when you factor in the cost of buying a second Mac power adapter)

Final thoughts

The Quantum 3 is a docking station that does exactly what it’s intended to do. It’s not inexpensive but is incredibly well made and will likely outlast a couple of laptops. If the idea of a single connection to your computer gets you excited, this is a great solution. I’m at my desk a lot during the day, but it is generally in fits and starts and that means a lot of plugging and unplugging. The Quantum 3 solved that with style and now the power adapter that came with my Mac can stay in my backpack.

Price: $299.95
Where to buy: Amazon
Source: The sample of this product was provided by IOGear.

The post IOGear Quantum Thunderbolt 3 Docking Station Pro 85 review appeared first on The Gadgeteer.

Filed in categories: Reviews

Tagged:

IOGear Quantum Thunderbolt 3 Docking Station Pro 85 review originally appeared on The Gadgeteer on July 3, 2018 at 11:00 am.

Note: If you are subscribed to this feed through FeedBurner, please switch to our native feed URL http://the-gadgeteer.com/feed/ in order to ensure continuous delivery.