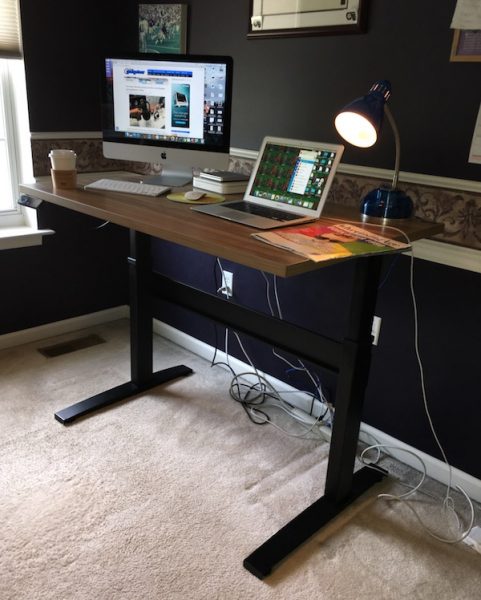
VertDesk V3 Electric standing desk review

Those of us who spend a lot of time plugging away on the computer are learning more and more about the health benefits of standing desks. While there are lots of options out there to get up off of your chair, electric desks provide the added benefit of being adjustable at the push of a button to your desired height. They can get expensive, however, and not all electric desks are created equal. It’s an investment that requires some serious consideration

The VertDesk V3 Electric Desk, as the name implies, is a third-generation design that seeks to continually improve in the areas of stability, function, and overall good looks. It also comes in at the lower end of the price point for this style of desk. Is it worth the investment? How does it perform? Let’s stand up to review and find out!

Unboxing and Assembly

The VertDesk is a beast and requires assembly on delivery. It’s a big factor in the decision making process, so we’ll walk through the unboxing and assembly before we get into reviewing the details of the finished product.
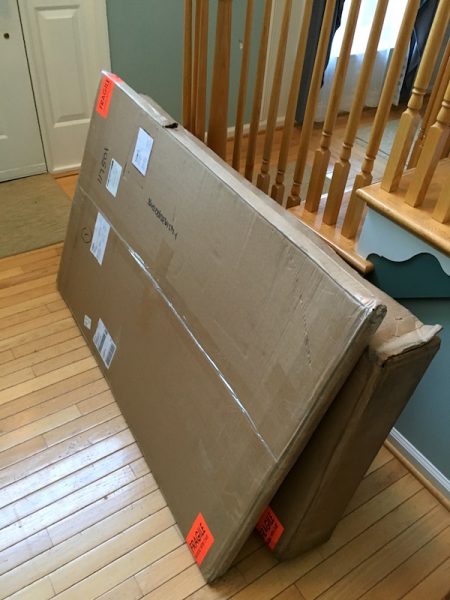
Solid construction makes for a heavy product, so prepare for a bit of a workout when the VertDesk arrives at your doorstep. There are two large, narrow boxes: one for the desktop, and one for all the components. These boxes weigh in at a combined total of about 115 pounds. Everything is well-packed and protected for shipping, but I’d recommend getting some help to lug ‘em to their ultimate destination in the house or office.

You’ll also need some tools to get started. A power driver is required, along with #2 Phillips head and #2 square head driver bits. An adjustable wrench, a tape measure, and two Allen wrenches (4 mm and 5 mm) round out your arsenal. Given that the desktop and leg assemblies are heavy, I’d also recommend keeping that friend who helped you move the boxes around to help with assembly. Have some pizza ready when the job is complete. Bribes always help.
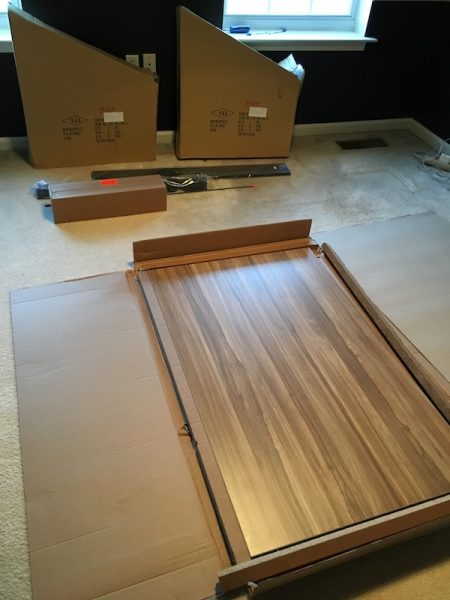
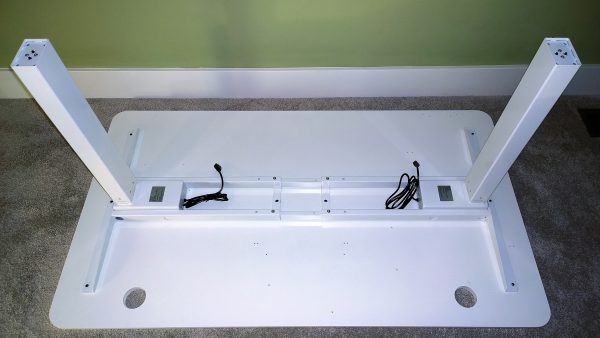
Once you’ve got things unpacked, you’ll be happy to know that all the major components are preassembled. The leg units, motor, control module, power unit, and control panel are all ready for installation. The underside of the desk has most of the installation points pre-drilled so that you can grab your tools and get down to business. Depending on the options you may have selected, there are about a dozen parts including the attachment hardware.
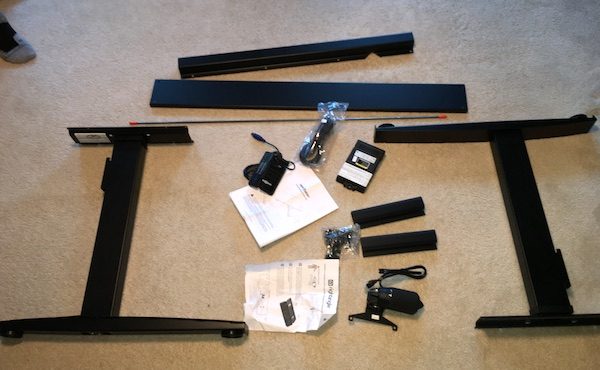
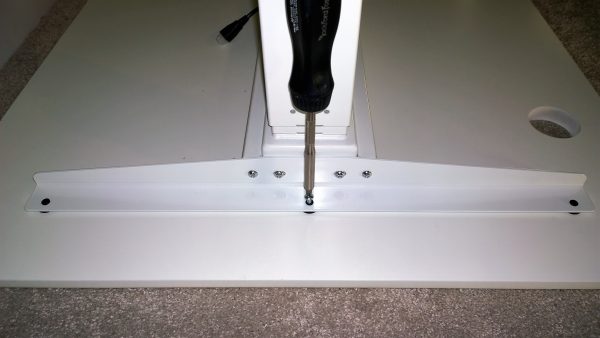
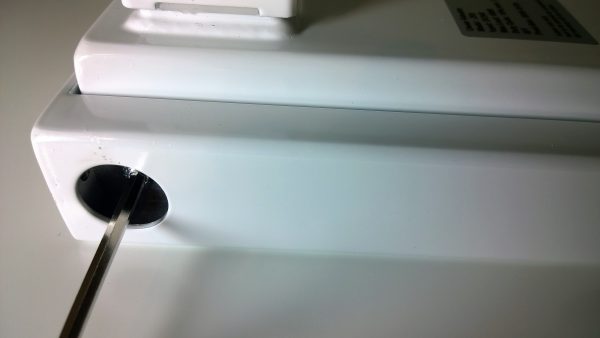
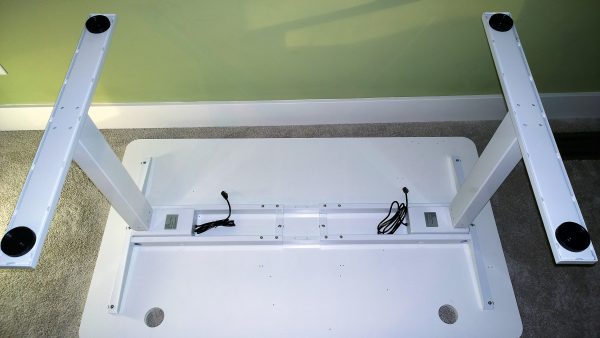
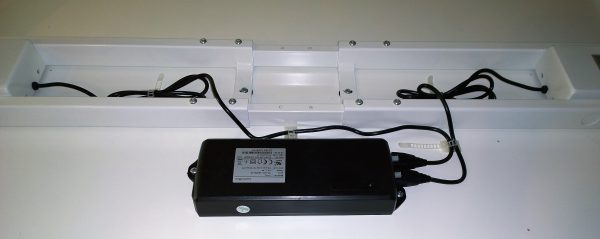
Here’s where things get a little tricky. You’ll assemble the desk upside-down, attaching all of the parts to the underside of the desktop. There’s a drive rod that runs through the drive motor and both legs; this takes some adjustment to make sure it is threaded properly. You’ll also install a cross-bar that stabilizes the legs. These components must be secured properly before you start screwing everything into the underside of the desktop. Once you have that in place, you’ll install the rest of the components which include the control unit, the power unit, the control panel, and a U-channel cover that protects the drive rod. You may also have other accessories to install before you flip the desk over and start connecting all the cables.

Got all that?

It’s actually not as bad as it sounds, if you proceed carefully. The key is to make sure all of the components are in the proper place before you start locking things down and tightening everything up. I’d HIGHLY recommend that you not only pre-read the instructions carefully, but also check out the handy installation videos on the VertDesk web site before you get started. 
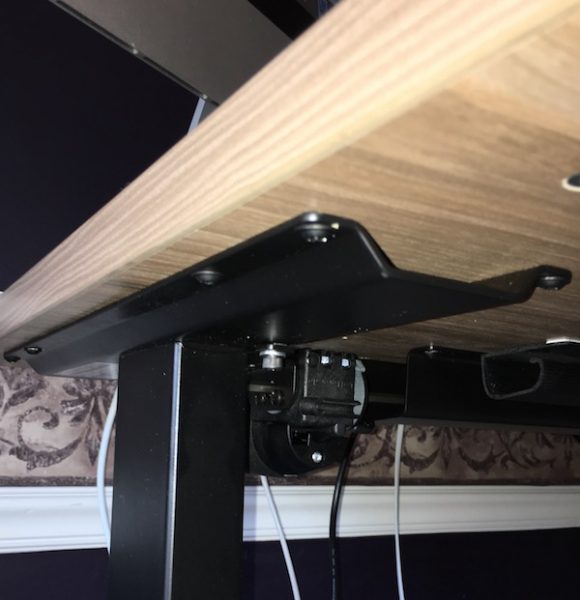
All in all, it took my son and I about an hour to assemble everything. There are some elements of the instructions that are a bit confusing, but we took our time and referred to the video several times during the process to fill in the gaps. Being handy with tools helps, and there is some measuring involved depending on what accessories you added to your purchase. There is also phone and e-mail support available through the web site if you get stuck. In my case, a teenager and YouTube were more than adequate support to get the job done. Honestly, I’be wrestled with some IKEA builds that were worse than this. If you can handle those, you’ll be good to go here.

If there was one area that was a gap in the installation, it was in positioning the control panel. My test unit came with the upgraded programmable switch, so there was a bit of extra measuring and positioning involved that wasn’t completely clear in the instructions.

The good news is that all that work pays off in a beautiful product. Let’s get into the details!

Design and Construction

As I mentioned above, the VertDesk is a beast. Materials and components are all solid, beefy, and built to last. There’s no skimping on components to be found. It’s also a simple, beautiful piece of furniture. 

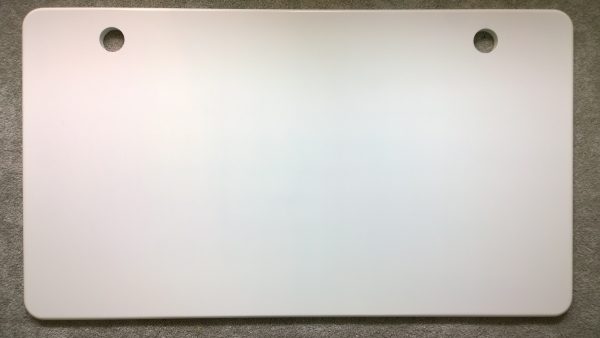
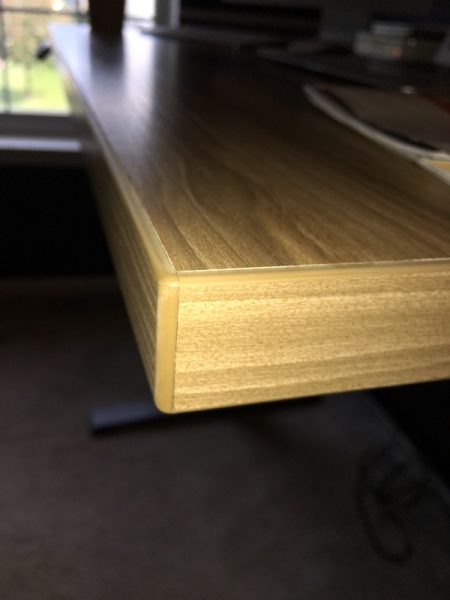
There’s really no other way to put this: the desktop is marvelous. At 48” wide by 30” deep, the 1-1/8” top is burly and feels substantial. The material is a composite, finished in what VertDesk calls a Wood Essence laminate. It’s powder coated, scratch proof and water resistant. All the corners are nicely beveled and the seams are bonded to ensure that they won’t peel or pull up to create sharp edges over time. There are 10 desktop options available including the Wood Essence, bamboo and real wood. My test model came with the Macchiatto Wood Essence, and it’s a beautiful color and finish. You can also choose from a variety of sizes ranging from 24” by 36” up to 30” by 72”.
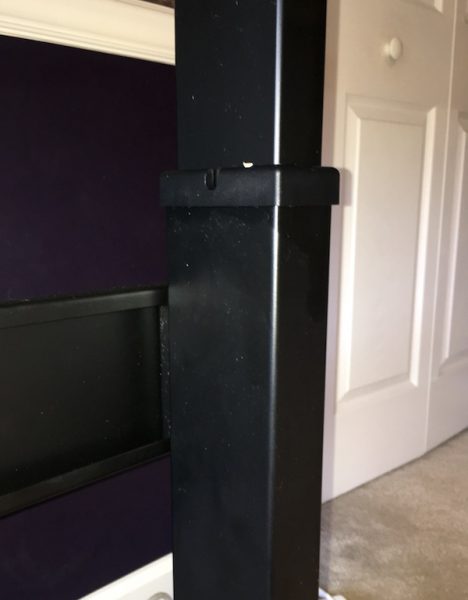
The base for the desk is made from heavy-duty recycled steel, and is built for strength and stability. Each leg is 3-1/2” by 2”, and is anchored to a base that is 3” wide and 27-1/2” long (the base is 22-1/2” long if you choose the 24” deep desktop). Coupled with a 4-1/2” steel cross beam, you’ve got excellent stability even at maximum height. VertDesk has done a really nice job with the finishing on these components as well. All the edges are rounded, welding is tight, and all the mechanicals and attachment points are capped or sealed in such a way that there are contained in the leg housings. There are also two wide, adjustable rubber feet under each base to protect your floor and to provide additional adjustments for leveling if needed. It’s a nice piece of engineering.
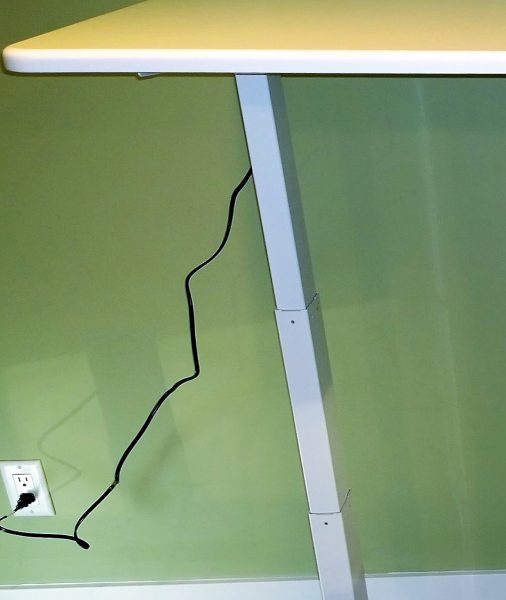
The motor, gear, and spindle systems are all German engineered; the electronic components are ISO 9001 certified and made by Logicdata. There’s a lot of detail on these components available on the web site that speak to the quality of the manufacturing that you can read at your leisure. I am not a mechanical engineer, but I can tell you that all these components look and feel substantial and in alignment with the overall design and durability of the product. They are also finished in black to match the base, so they don’t look out of place in the overall design. There are also some nice finishing features here including a black steel u-channel to protect and cover the drive shaft, and a pair of black self-adhesive j-channel covers to tidy up all the cables.
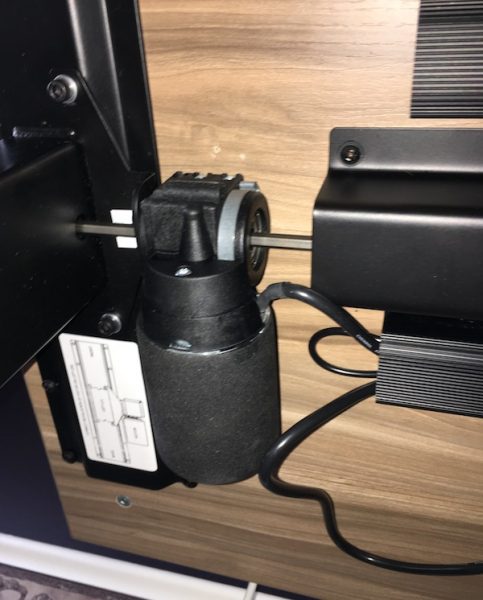
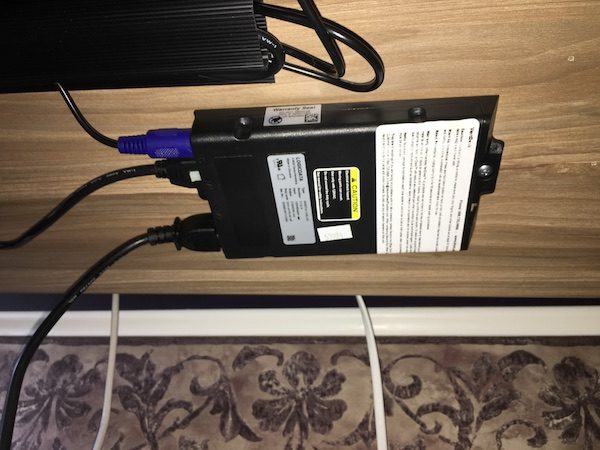
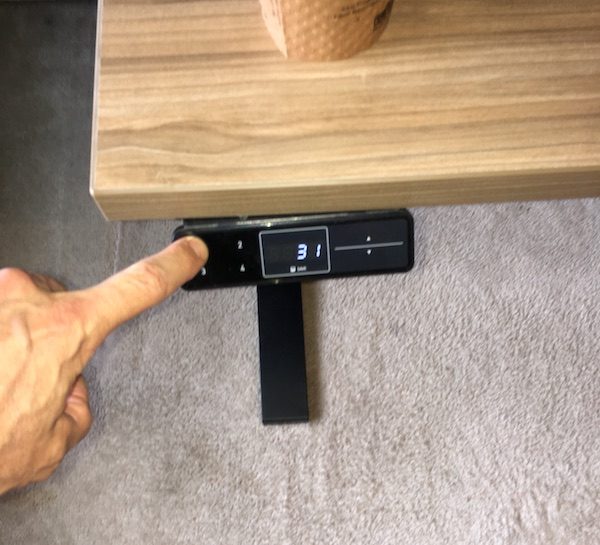
Finally, we turn our attention to the control pad itself. It’s a touch-pad style control element that, in my test model, includes the ability to pre-set up to four standard heights. You’ll find a simple up and down button, a digital readout that indicates the height of the desk, and four preset buttons that you can customize. The touch pads are wide enough that they make for easy operation, and it tucks away nicely under the corner of the desk. We’ll discuss this more in the next section.
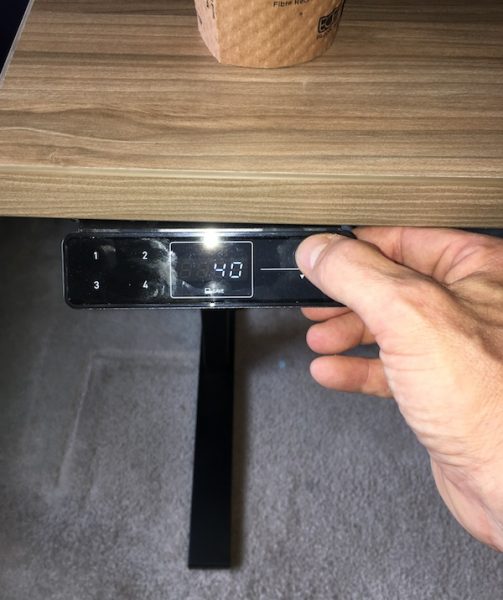
The bottom line on all of this is that VertDesk hasn’t skipped any steps in quality. The company claims that the hardware rivals that found in competitors that cost over $1000. It’s substantial and beautifully engineered, without being so burly-looking that it dominates the workspace. It also looks great in either the home office or your professional lair.

In Use

I’m relatively new to the whole standing desk thing. When I am at the office I tend to be in constant motion. Between formal and informal meetings, I’m rarely sitting at my desk for more than an hour at a time. The need for a standing desk was never an issue. Over the past year, however, I started incorporating a work from home day into my schedule every week so that I can focus on issues that require deep concentration. This means extended time sitting at the desk, plunking away on the computer(s). And that has been playing havoc with my back.
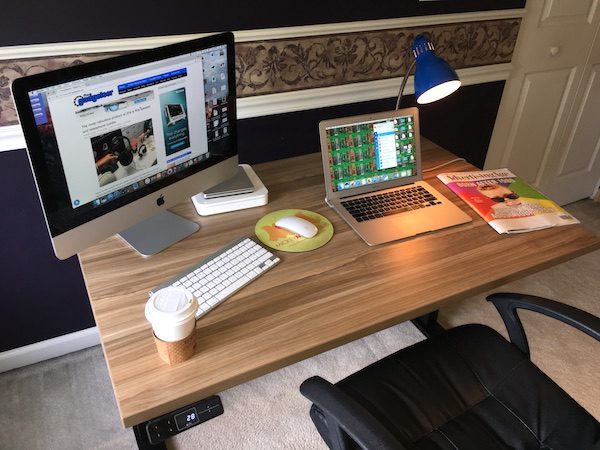
I’m fast becoming a fan of the standing desk. I’m a believer in the health and productivity benefits based on first-hand experience. And the VertDesk makes the transition to this new work style a pleasure.

When considering a desk, size matters… especially if you like to spread out your workspace. While my iMac and its peripherals occupy a permanent place on the desk, working from home requires access to my laptop, my iPad, notebooks, papers, and all the trimmings (including the mandatory cup of coffee). At 30” by 48”, the VertDesk model I tested puts everything within easy reach without playing “desktop Jenga” to switch between devices.

You don’t want your precious electronics to be balanced on an unstable surface for obvious reasons, and stability is often a problem with standing desks. The designers of the VertDesk have clearly put a lot of time into solving for this problem, and it shows. There’s no lateral motion under any circumstances, and just a hint of front-to-back waggle at maximum height. This also may be the result of my desk sitting on carpet, and I suspect that adjusting the feet would eliminate this issue. It’s solid, and inspires confidence in the safety of your gear.
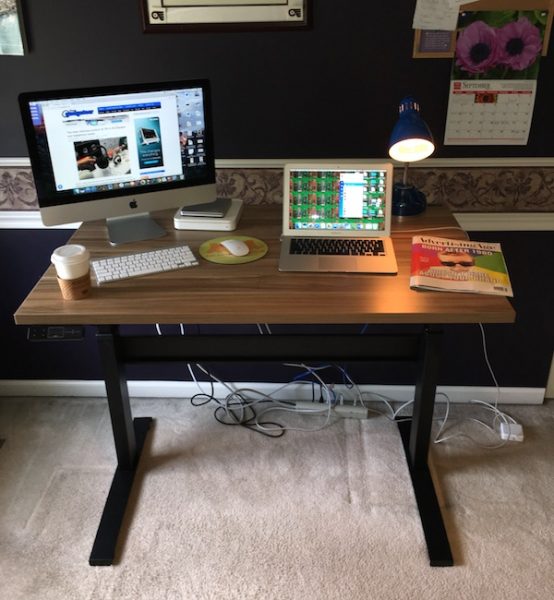
The VertDesk is motorized, and adjusts from 27” to 47.5” to accommodate your desired working height. Basic operation is simple. Press and hold the up or down button on the control pad raise or lower the desk at a rate of 1.55” per second, while a digital readout indicates the current height. Operation is smooth and controlled; you can sit a full cup of coffee on the desk during operation and not spill a drop. VertDesk has a load capacity of up to 275 pounds. I don’t know why you would ever get close to that in actual use unless you really load up with peripherals, but their web site does have some entertaining videos of stress-testing the desk that include a tester sitting on it during operation. It goes to show the quality of the overall construction.
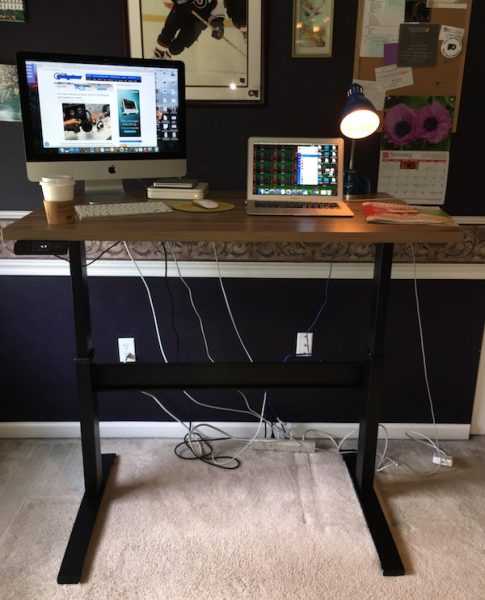
My test sample also came with the ability to pre-set up to four heights on the control panel. Use the standard controls to set your desired height, press the “save” button, and select with position you want in one of four standard slots. When you press and hold the pre-set, the desk will then move up or down to the saved setting and stop when the saved position is reached. Automatic operation would be nicer, but it’s handy if you switch between sitting and standing heights (like I do) or have multiple office-mates using the desk.
The VertDesk also has some additional safety and protection features, in addition to an excellent warranty. Overload protection automatically stops operation if the weight on the desk exceeds the designed limits. An automatic collision avoidance system stops operation if the unit comes in contact with a solid object during operation. The frame and desktop have 10 year warranties, while the electronics have a 5 year warranty. This all leads to confidence in your investment for extended years of use.
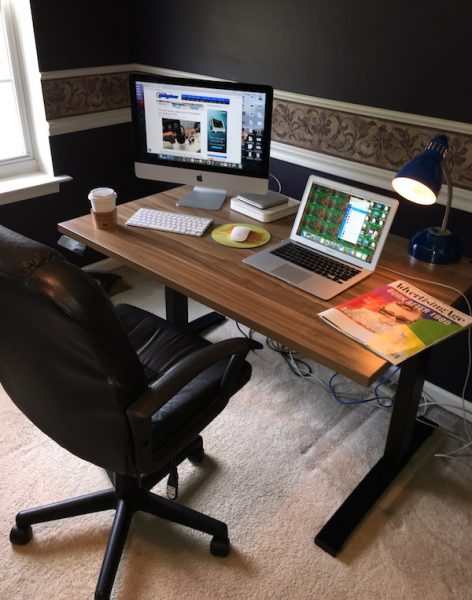
With all of the focus on the construction and mechanics, I don’t want to overlook one of the most important aspects of the VertDesk: it’s great desk, either in standing or sitting position. It’s streamlined and elegant, has a beautiful and durable surface, and regular operation does not interfere with it’s primary purpose as a solid, functional piece of office furniture. The VertDesk folks have dialed in all aspects of this design nicely, and it performs exceptionally well without letting all of that fancy engineering interfere with day-to-day operation.

Pricing, Qualifiers, and Caveats

After doing some digging into reviews for motorized standing desks, I’ve found quite a range of opinions on the VertDesk. It seems that some of the competitive reviews were based on earlier models, which did not compare favorably to the competition. The latest version that I tested (called the VertDesk V3) seems to address a lot of concerns found in the older models and receives high marks in most reviews. It does not have the height range or weight capacity of some competitors but the overall stability, lower price point, and longer warranty gain high marks.

The major knocks on the current version of this product when compared to the competition deal specifically with the height range and weight capacity. Some competitors offer a wider range of height adjustments by a few inches. The VertDesk is designed for users up to 6’5″ tall when standing, but you may need to look at competitive products if you have to duck when you walk through door frames. Some competitors also offer desks with a weight capacity higher than 275 pounds. I honestly don’t know how one would come close to loading up a desk to that kind of weight unless you’re dealing with specialized equipment, but it may be a consideration for you.

VertDesk also makes a whole range of accessories including single and dual monitor arms, keyboard trays, and undercarriage CPU holders. These were not tested for this review.

Finally, you have to really consider your work needs before investing in a vertical desk. The basic VertDesk V3 model starts at about $520, but prices can jump quickly when you start adding options or go for natural desktop materials. The model I tested prices out at about $650 with the larger desktop and programmable control. While these prices look to be good compared to the competition, there are lots of alternative options available: fixed-height vertical desks, add-on stands to your current desk, or home-made solutions will also do the job if you’re the handy type. It’s something to consider if you’re shopping around.

Conclusion

Let’s not mince words here: an electric desk is a significant investment. At the end of the day, you have to decide if shelling out $500 or more is worth the return with a purchase like this.

I’m a firm believer in paying for long-term quality, especially for those items that you use every day. Starting at just over $500, it’s priced very favorably compared to the competition. It’s impeccably engineered for function and durability and carries warranties that speak to the manufacturer’s confidence in its long-term use. Not only does it look great in both professional and home office settings, but it functions equally well as a standing or sitting desk. If you’re in the market for this kind of item, I think the VertDesk V3 Electric Desk is well worth your consideration. Check out their web site for all the details.

Source: the test sample for this review was provided by BTOD.com. Please visit their web site for more information.


Product Information

Price: $517.99
Manufacturer: VertDesk
Retailer: BTOD
Pros:
  • High quality engineering, materials, and construction.
  • Beautiful and durable desk surface.
  • Wide range of purchase options.
  • Looks great in professional and home office environment.
  • Competitive pricing against the competition.
  • Excellent warranties.
Cons:
  • It's heavy — get a friend to help put it together.
  • Some aspects of the assembly can be tricky.
  • May not meet everyone's requirements for size & weight capacity.

Filed in categories: Reviews

Tagged: ,

VertDesk V3 Electric standing desk review originally appeared on The Gadgeteer on September 15, 2017 at 9:00 am.

Note: If you are subscribed to this feed through FeedBurner, please switch to our native feed URL http://the-gadgeteer.com/feed/ in order to ensure continuous delivery.

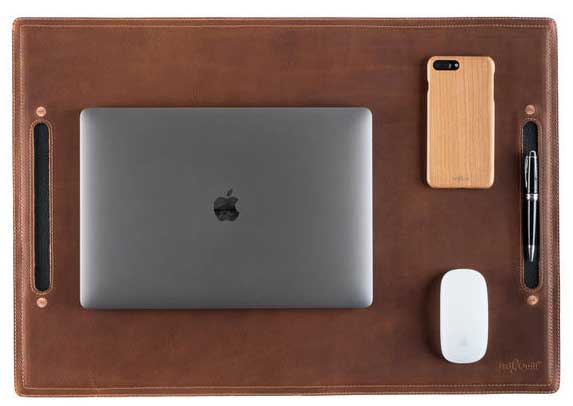
Pad & Quill adds an old school vibe to your desk top


That’s desk top and not desktop. As in the top of your desk and not your computer’s home screen. Now that we’re on the same page, let’s get back to the news… Pad & Quill is celebrating 7 years in business by offering 25% off their some of their most popular products.

Brian Holmes sent me an email letting me know about their big anniversary sale and their new Leather Desk Organizer series.

1200 bucks and we painted our web designers deck to start this idea with 4 prototypes in 2010. True story and one that Kari and I are so grateful for. We are celebrating with a big anniversary sale! Up to 25% off many of our most popular products.

Their new Leather Desk Organizer Series includes the Large Leather Deskpad shown above and their new Apple Pencil Stand shown below. Each piece is handcrafted with American Full Grain leathers and construction methods that ensure the product will be enjoyed and used for decades to come.

You can check out the new Leather Desk Organizer Series and take advantage of their 25% off anniversary sale by heading over to padandquill.com

Filed in categories: News

Tagged: , ,

Pad & Quill adds an old school vibe to your desk top originally appeared on on April 22, 2017 at 10:17 am.

Note: If you are subscribed to this feed through FeedBurner, please switch to our native feed URL http://the-gadgeteer.com/feed/ in order to ensure continuous delivery.

Autonomous SmartDesk 2 standing desk review

In my business travels, I’ve been starting to see more standing desks appear in the offices of both large corporations and small startups.  As health related studies have recommended periodic standing breaks for workers that are desk-bound, the convenient benefits of a standing desk are obvious.  Here, we will be reviewing the SmartDesk 2 from Autonomous.

SMARTDESK 2 OPTIONS

The SmartDesk 2 has several standing desk options to choose from.

Tabletop options include:

  • 5 different surface finishes from simple white or black to wood grains.
  • 6 different table shapes with different lengths(53″ or 70″), “cutout” styles, and curvatures

Frame options include:

  • 3 different colors consisting of white, black, or grey.
  • 2 different frame platform options:
    • Home Edition consisting of a single motor capable of supporting 220 lbs through a 29″ to 47″ height range
    • Business Edition consisting of dual motors capable of supporting 300 lbs through a 24″ to 51″ height range

For this review, we have a white rectangular 53″ tabletop with a white Business Edition frame platform.

DELIVERY

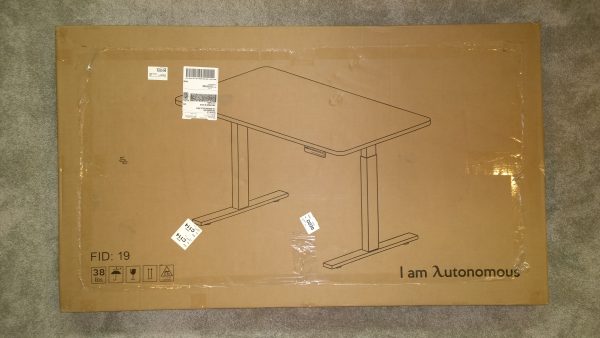
Your order comes in two boxes, presumably so they can efficiently send you separate tabletop/frame color options according to your order.
The box containing the frame is the heavier of the two, checking in at 67 pounds. It was laid down horizontally on my porch, and wasn’t the easiest package to handle as the size of the box was slightly unwieldy.
The tabletop package weighs a much more manageable 38 pounds and had outer nylon straps, enabling you to use those as handles to lift the package inside.
Overall, bringing the frame box indoors may require two people, or the box can be opened outside where the individual components can be removed separately.

Since my desk would be installed in a 3rd floor office attic space, it was easier to remove the contents from the frame box and bring each of the components individually upstairs.

UNBOXING

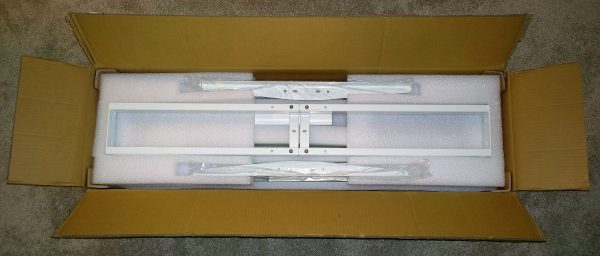
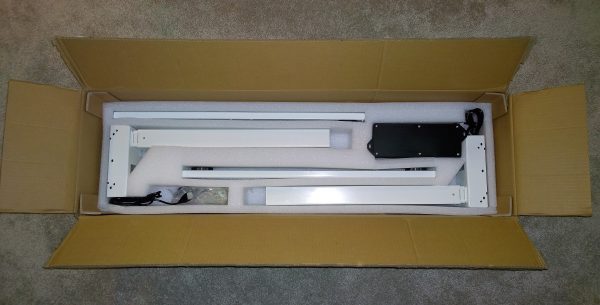
Opening the frame box, each of the components were housed with foam inserts protecting the contents from each other and from external damage.
In fact, my frame box had a sizable gouge on the side, but the foam did its job as all the components were undamaged.
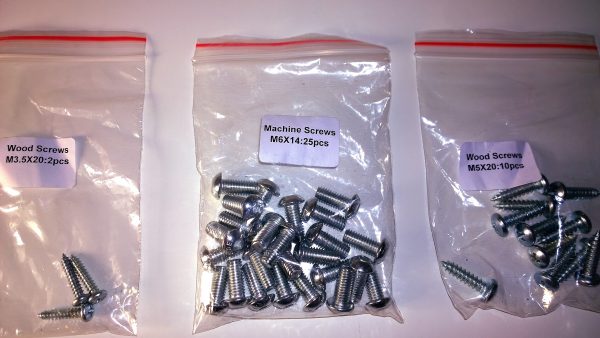
Tucked away inside the foam inserts were a few more accessories.  A parts bag included bags of screws, adhesive backed cable organizers, and your standard fare Allen wrench.  The screw bags were each labeled with fastener specifications (i.e. Mx12) which removed any doubt for screw selection during assembly.
A few electronics components were stored here including a controller box, a control pad, a power cord, and two cables that connect the actuators to the controller box.

Likewise, there were foam inserts for the box containing the tabletop protecting both its edges and surfaces.

TABLE DESIGN

The frame platform consists of several parts:

The tabletop is supported at each end with an “I” beam shaped configuration.  The horizontal pieces are comprised of the “side bracket” on the top, and “feet” at the bottom.  The vertical section, the “leg”, feature 3 tiered ‘telescoping’ structures that extend via a linear actuator.  The telescoping action is what ultimately gives the standing desk it’s height adjustability.

The tabletop is supported by horizontal components consisting mainly by 2 “crossbar ends” at each end of the table.  Both “crossbar ends” are joined together with lengthwise adjustable “center rails” that can accommodate all the different length tabletop options.

The tabletop itself is a nice semi gloss surface with rounded edges.  A “switch” panel at the right front edge controls the height of the table.  There are two cable holes at the rear of each side of the table to provide some measure of cable management.

ASSEMBLY

Assembly of the Smartdesk was straightforward and felt similar to putting together a piece of furniture from IKEA when it came to degree of difficulty.
The assembly manual consisted of two sheets with diagrams and instructions on half of a page.  The diagrams were small and sometimes it was difficult to discern details like screw placement.  I think I would have preferred a full sheet per page to have much larger diagrams to view.
Additionally, λutonomous had an assembly video on their YouTube channel.  I personally prefer paper instructions, but the video showed exactly how everything is installed/fastened to make things clear.
Assembly started with laying the desktop with the finished surface down and with the predrilled holes facing up.
The horizontal frame support for the desktop was initially positioned into place using the specified predrilled hole locations as a guide.  The vertical legs were then positioned into receptacles on the frame.
The toughest part of the install was here, where you had to line up the holes of the leg and frame.  The leg needed to be raised just about a millimeter or two to line up the holes.
The relative locations of all the holes between the frames, desktop, and legs fit well and you never felt you had to force fit anything. Overall, the Smartdesk felt well manufactured from an assembly standpoint.
The last part of assembly involved the wiring of the linear actuators and the control panel.  A “controller box” serves as the junction between the power cable, and the wiring for the other electric/electronic components.  It was unclear where the “controller box” needed to be mounted, despite the paper and video instructions.  I suspect that different tabletop options may have different locations for the controller.  I assumed it would be located towards the back of tabletop, around the center.  I moved the controller into different predrilled screw hole locations until the hole brackets on the controller lined up with them.
The “switch” panel mounting point was in a far more obvious location based on its screw holes.  One thing to note, the “switch” sticks out on an angle beyond the perimeter of the tabletop.  So, if the table is upside down, care must be exercised to ensure you don’t bend the panel when you attempt to flip the table right side up.
 Once all the electronic components were mounted, it was a matter of routing wires from each leg actuator to the “controller box”.  There weren’t any instructions in the manual or video to guide you with this.  It was a matter of common sense to plumb the wires as neat as possible, and the included adhesive backed cable clips held the wires into their final position.
Finally, a metal flange and cover were inserted into the 2 cable holes of the desk.

I would estimate that it would have taken me 20 minutes to assemble the desk if I wouldn’t have stopped to take notes and pictures for review purposes.  It probably could have gone faster if one were to use an impact driver on the fasteners.  However, there weren’t that many screws to deal with, and I felt more comfortable in this case using simple hand tools to ensure that I didn’t cross thread the metal holes or over torque the wood holes.

AESTHETIC IMPRESSIONS

I tend to prefer minimalist modern furniture with clean lines and minimal decorative details.  So I liked the look of the all white table top/frame combination of my SmartDesk.  It blended in well with the mid-century modern style furniture and seating I had in my office space.

USAGE IMPRESSIONS

Operation of the SmartDesk was pretty straightforward via the control switch.  There are buttons for “up” and “down” along with four numbered “memory” positions.
Pressing any of the buttons moved the tabletop in a smooth fashion with a satisfying “whirring” sound.
I liked how the actuator attenuated as it reached it’s minimum or maximum heights.  It eased into those extremes which prevented jarring of the components and it felt sophisticated.
The “memory” feature was a convenient feature, as you could store positions for multiple sitting and standing heights.
At my height of six feet, I found that a 43-inch tabletop height was the most comfortable setting to type on a keyboard while standing.  With an additional potential for 9 more inches of travel, I imagine that this desk could easily accommodate someone well over 6 feet tall.
As far as stability goes, even at it’s highest tabletop height on a carpeted floor, it still took some effort to topple the table over.  So the length of the feet of the frame seemed to provide sufficient leverage from easily tipping the table over.
After using the SmartDesk for a few weeks, everything still worked nominally and the table still felt sturdy.  All this despite constant everyday abuse from my kids who liked to all sit on the desk and fiddle with the controls to mimic an elevator ride.
The only critique I had about the SmartDesk was that the power cable could stand to be longer.  You will need to have a power outlet within 2 feet outside of one of the legs in order to accommodate a fully raised desk position.

Additionally, once you set various electronics on the table, like a computer, laptop, and/or monitor, you’ll have power cables dangling from the tabletop.  You’ll have to exercise care and judgment to ensure that when the tabletop is at its fully extended position, that the power cables are sufficiently long enough and don’t snare on other objects while the table is in motion.  It would be nice if there was some sort of cable management system or hardware to make the cables tied in a neat fashion while maintaining freedom of movement.  I suspect this is generally an issue with most, if not all, standing desks.

FINAL THOUGHTS

The Autonomous SmartDesk 2 is a welcome addition to my space.  The clean lines, sturdy build, and well-executed height adjustability add up to a desk that will stay in my home office for the foreseeable future.  I feel far more productive now that I have the ability to periodically work from a standing position.
Source: The SmartDesk 2 was provided by λutonomous for this review.  For more information, please visit Autonomous.ai
 

Product Information

Price: $299.00
Manufacturer: Autonomous
Pros:
  • – easy assembly
  • – well constructed and manufactured
  • – fits in well with modern and contemporary room designs
Cons:
  • – Could use longer power cable
  • – Could use some sort of cable management system

Filed in categories: Computer Gear, Reviews

Tagged: ,

Autonomous SmartDesk 2 standing desk review originally appeared on on April 1, 2017 at 9:00 am.

Note: If you are subscribed to this feed through FeedBurner, please switch to our native feed URL http://the-gadgeteer.com/feed/ in order to ensure continuous delivery.
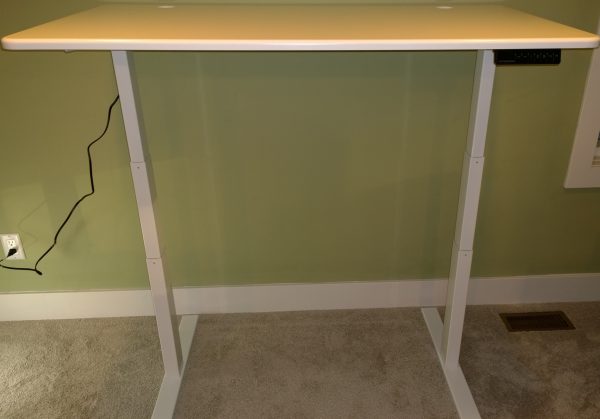
FlexiSpot M4B Corner Standing Desk review

Standing desks have been gaining in popularity for years since various studies were released warning of the dangers of prolonged sitting. There are now tons of standing desk options to fit every type of home or office environment. The FlexiSpot M4B Corner Standing Desk is a great, affordable choice for people who have an existing standard desk that they would like to use as a standing desk. The Flexispot desk is constructed of fiberboard and steel and once assembled is very sturdy and balanced. This particular model comes with an optional keyboard platform and is designed to be used in a regular or corner desk configuration.

The Flexispot desk comes delivered in a rather large box that weighs about 53lbs. Make sure you have help when lifting it.

It is very difficult to lift the desk out of the box from the top. The best way to extract the desk is to lay the box flat, cut open the sides, and open the box by lifting the front cardboard flap up.

The desk comes partially assembled. All that is required is to attach the optional keyboard platform and two protective caps that go over the main cross joints.

The included protective caps snap easily over the left and right cross joints.

Flexispot includes four cord organizers to route cords out of the way of hinges and joints. There is also a provided bolt for an ergonomic monitor mount which is sold separately.

The Flexispot desk can be used with or without the included keyboard platform. Assembling the keyboard platform is very simple. The two keyboard brackets fit perfectly into two indentations on the underside of the main platform.

The only tool required for assembly is a standard Phillips screwdriver. Learn from my mistakes and be sure to consult the instructions first because the brackets can fit on to the platform upside down. Once configured correctly, the keyboard platform brackets attach securely with eight wood screws. Be careful not to over-tighten the screws though, because it is very easy to strip right through the fiberboard.

The assembled keyboard platform then hooks in under the main workspace. The platform is secured in place by left and right pre-installed knobs. Simply loosen the knobs, hook the platform into place and then hand-tighten the knobs.

You’re not required to secure the Flexispot desk to your existing desk in anyway, it just sits on top of it. Once in place it’s very easy to adjust the height of the Flexispot desk. There are adjustment levers conveniently placed on either side of the main platform. Squeeze these levers simultaneously while holding on to the sides of the platform and you can lift or lower the desk into any height you like. Flexispot indicates that there are 12 adjustment levels, but I didn’t find that the desk “clicked” or settled into any particular spots.

The Flexispot has a “gas spring hovering system” which allows you to adjust the desk smoothly when fully loaded. Keep in mind that the workspace and spring system have a maximum indicated weight limit of 33lbs.

The Flexispot desk can adjust from low height of 5.9″ to a high setting of 19.7″. Whereas some similar standing desks extend out as well as up, the Flexispot desk moves straight up and down within its own footprint.

We use the Flexispot desk for our PC Virtual Reality/Edit workstation. This PC is used mainly for video editing and rendering as well as for testing our 360° videos and VR apps. It’s great to have the option to lower the desk into a traditional sitting position for long editing sessions and then be able to raise the desk for VR and 360° video demos.

I was initially concerned that the lowest setting of the desk would be too high to work at while seated. I soon found though that the low-height setting was actually perfectly designed to afford optimal keyboard and monitor placement while working in a seated position.

Even though the desk is designed for a corner space, the workspace is large enough to hold our 24″ Eizo monitor and all of the Oculus accessories with plenty of room to spare. If needed, we could definitely fit a second monitor as well.

The keyboard shelf is roomy enough for a full-sized PC keyboard and mouse. The mouse area is too small to place a regular mouse pad, but our basic Logitech mouse works fine on the shelf surface.

There is also a slot built into the front of the workspace for tablet or phone placement. I find this location for the slot a little odd though, and don’t use it to hold my tablet or phone.

At $349.99 I feel that the FlexiSpot M4B Corner Standing Desk is a great buy. The easy assembly, well-thought out design and sturdy construction makes it a standout among all of the current standing desk offerings. Although the manufacturer states that the desk is available in black or white, the only selectable item on both the Flexispot website and Amazon was black.

Specifications:
Product weight: 53 lbs.
Max. Loading Weight Limit: 33 lbs
Dimensions (Weighted Base): 23″(W) x 22.3″(D)
Dimensions (Flat): 5.9″(H) x 41″(W) x 23″(D)
Dimensions (Extended): 19.7″(H) x 41″(W) x 23″(D)
Extension Height: 19.7″ (Footprint Surface) & 14.2 ” (Keyboard Tray)
Work surface measures: 41″(W) x 31.5″(D) (Display Surface & Keyboard Tray)
Keyboard tray measures: 34″(W) x 11.8″(D) (Middle) & 7.9″ (D) (Both wings)

The sample for this review was provided by Flexispot. Please visit their website or Amazon to order.


Product Information

Price: $349.99
Manufacturer: FlexiSpot
Retailer: Amazon
Requirements:
  • • Existing standard desk
  • • Phillips screwdriver for assembly
Pros:
  • • Quick and easy setup
  • • Made to fit in corners
  • • Very simple to adjust
  • • Perfect height for sitting or standing
  • • Works with existing standard desk
Cons:
  • • No tilt adjustment
  • • Non-adjustable keyboard shelf
  • • Non-powered height adjustment

Filed in categories: Reviews

Tagged: ,

FlexiSpot M4B Corner Standing Desk review originally appeared on on March 26, 2017 at 8:39 am.

Note: If you are subscribed to this feed through FeedBurner, please switch to our native feed URL http://the-gadgeteer.com/feed/ in order to ensure continuous delivery.