Raven dashcam and connected car system review


REVIEW – I have tested many different brands of dash cams that offer HD and 4K resolution and a few additional features and they all seem to be close to the same with a few minor exceptions. When I first heard about the Raven Connected Car Device, my thought was, “here we go again”. Was I right? Let’s see!!

What is it?

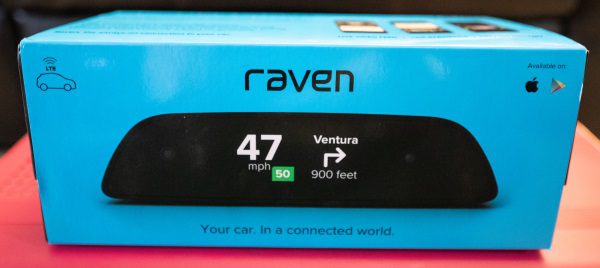
The Raven Connected Car Device is a smart device that connects to your car’s OBD connector and offers access to smart cameras,  sensors, navigation, diagnostics, and data. It works via the built-in LTE cell connection, so it is always connected.

What’s in the box
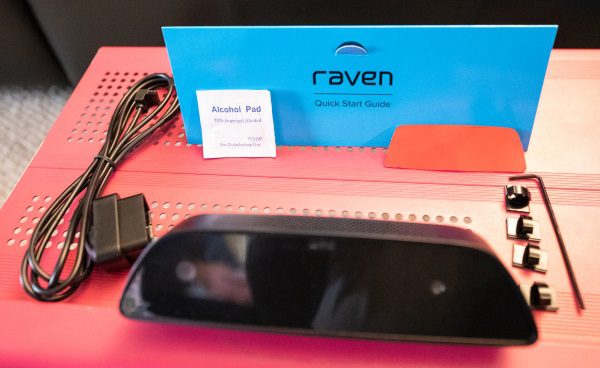

1 x Raven Connected Car Device
1 x Quick Start Guide
1 x Extra Double Sided Adhesive Tape
1 x OBD Connector Power Cable
4 x Cable Clips with Adhesive
1 x Allen Key

Design and features

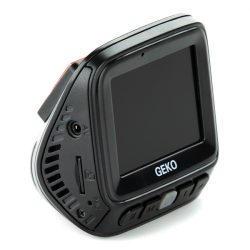
The device itself is a black sleek device, with a single cable connection to your car’s OBD connector. On the front, there is a display screen and an in-cabin camera hidden/embedded behind the clear surface.
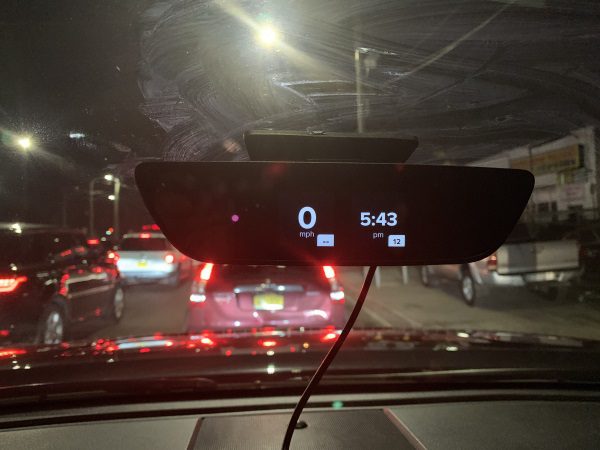


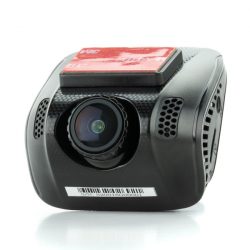
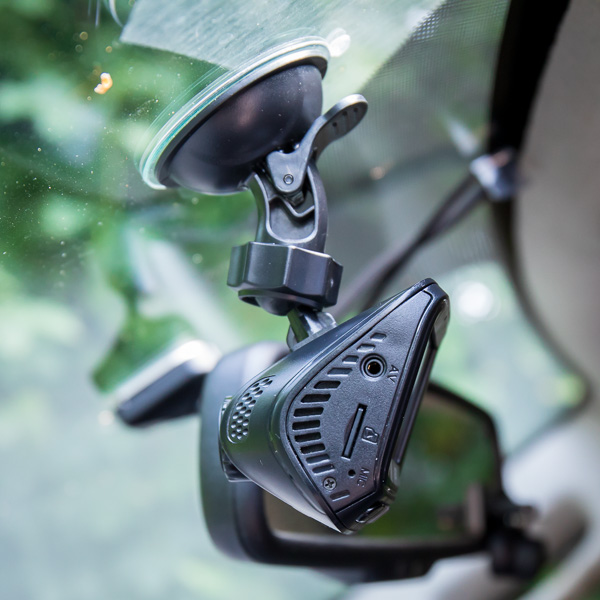
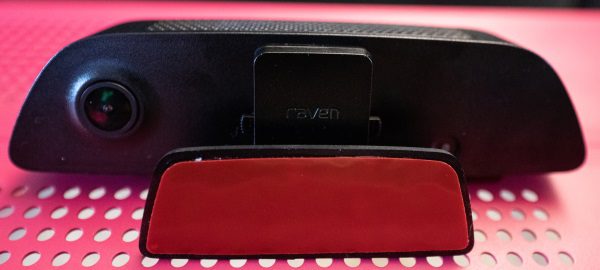
On the back, there is the outward facing camera, and on the bottom of the mount, there is the double-sided tape that does a great job of ticking and staying put on the windshield.

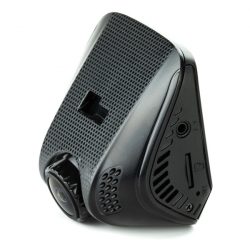
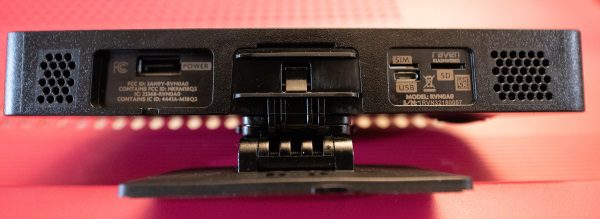
On the bottom, there is the adjustable mount, a micro SD card slot for on-board recording, a micro USB port for direct connection and the ability to download videos from the SD card without removing it from the device, and a “Sim” slot that is not currently used.
Performance

Features:

    • Wi-Fi Hotspot
    • Live preview and streaming from dash outwards and in-cabin
    • Speed alert and threshold settings
    • Next-turn Navigation
    • Video recording triggered by hand gesture
    • Real-time GPS location
    • Easily download and share video
    • Security Alerts and Notifications
    • Access onboard diagnostics and get information about what might be going on with your vehicle
    • Driving alerts and notifications
    • In-App Navigation

Once I connected the Raven and started driving, one of the first things that I noticed was that when viewing the speed of the vehicle on the Raven versus the digital speedometer on my dash, at times there was a +/- 1 MPH difference. This occurred mostly when accelerating or slowing down. Since the Raven is connected to the vehicle’s OBD connector, it would be interesting to find out which one is actually truly correct.

The Raven continuously records video while you are driving so that nothing is missed. The continuously recorded video files are not accessible through Media Manager on the app like the gesture or event generated videos. The continuous video is recorded on the micro SD card (optional), and you can access either by removing the card and viewing via a PC or by connecting the Raven to your PC using a micro USB cable. The raw video files are in the Videos folder. Another great feature of this device is that since it connects via the OBD connector, it always has power and can always provide live views of the cabin and the outside as well as security alerts as long as the cell signal exists.

App
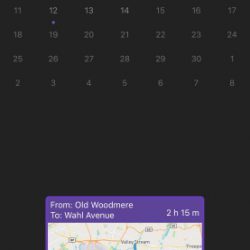
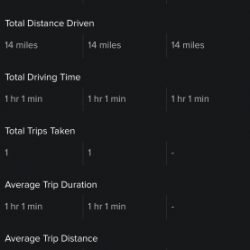
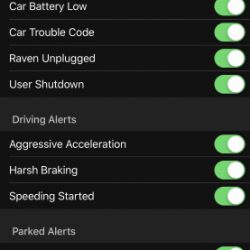
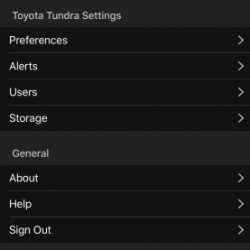
The app provides access to all of the functions and settings of the Raven. Here are some screenshots of the in-App choices and preferences:


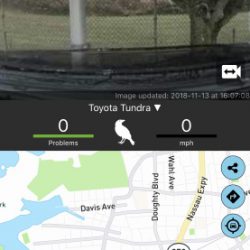
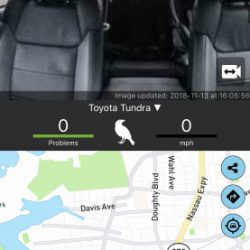
Screenshots of outward and in-cabin app views (Views can be fullscreen as well):


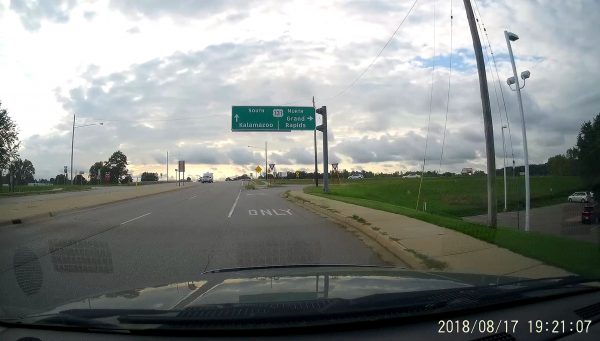
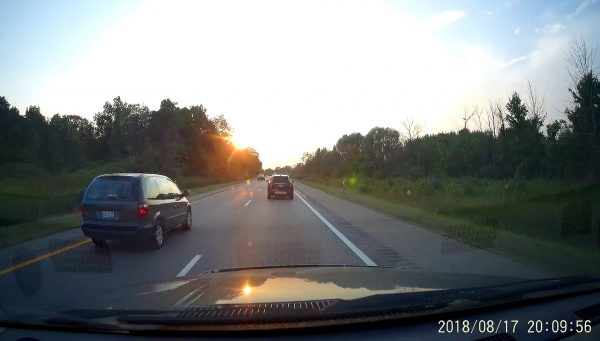
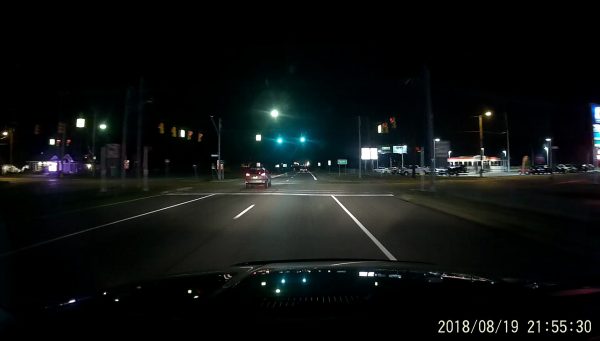
Here is actual footage downloaded from the camera. (The footage was not edited and is exactly as it was when downloaded including the speed of the video):

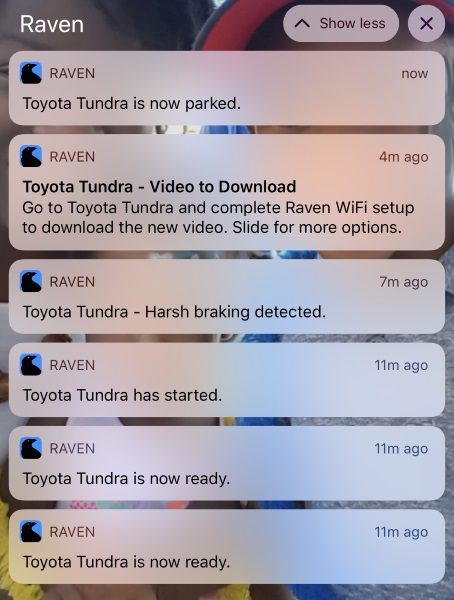
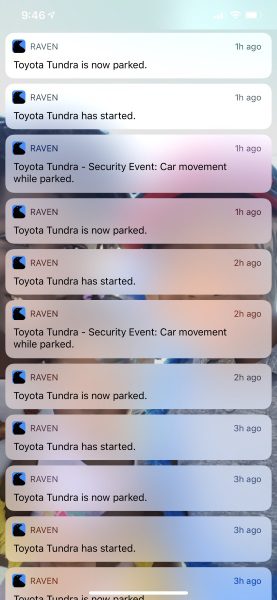
Here are screenshots of types of warnings and notifications that you receive on your mobile device:

Screenshots of fullscreen in-app navigation. Navigation directions are voice enabled:


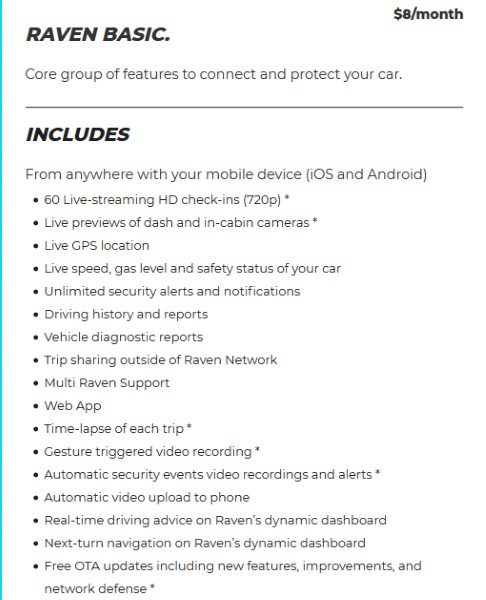
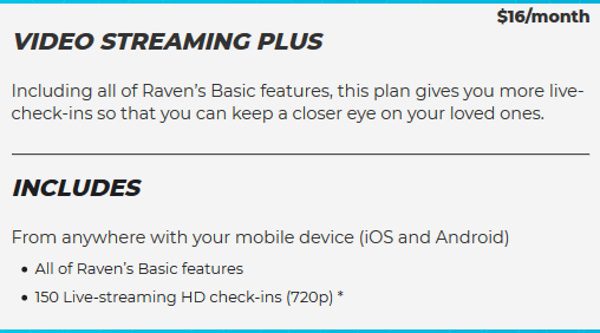
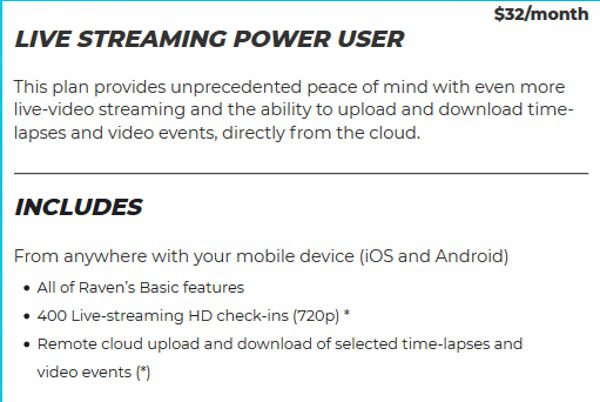
If you choose to continuously use all of the features and functionality of the Raven, there are 3 data plans to choose from:
What I like

  • The look
  • The build quality
  • The features and functionality

What can be improved

  • The length of the OBD connector cable so that larger vehicles are accommodated
  • Additional built-in cameras to provide a 360-degree view
  • Options for cell service. T-Mobile does not have the best coverage in NYC.
  • Addition of remote start feature since the OBD connection is being used (More like my personal wishlist item)

Final thoughts

After not expecting too much more than a dash cam from this device, the Raven has won me over in many ways. I love having this device and I love using its features and functionality. Having the ability to view my car when it is parked at the railroad station and in the garage or on the street is great, and the alerts are also great. Having that kind of heads-up display that gives me the option to view various parameters is a plus, and while my truck does have the navigation, having a second option is just a bonus. For my personal use, I can’t say enough about how much I like this device. I have actually replaced what was my favorite dash cam with the Raven. Each person has their personal preference, so keeping that in mind, I give the Raven a big two thumbs up!! If they add 360-degree camera views and remote start capability to the next version, I may have to get more thumbs.

Price: Two options – $299 plus a choice of a monthly data plan – $8, $16 or $32; With Affirm Credit starting @ $30 monthly for 12 months with 1 year of data included. The first 3 months of use are free for 24/7 connection to your car.
According to Raven, you can choose the additional following option:
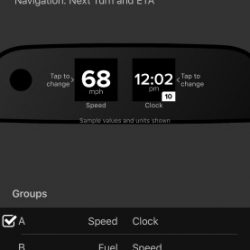
“RAVEN WITHOUT A PLAN – Though you won’t have access to Raven’s LTE features, you’ll still be able to use Raven as a dashcam for full-length videos, gesture triggered videos along with time lapses. You’ll also be able to use Raven’s displays to show driving data such as speed, compass, fuel, altitude etc. In the app, you’ll have access to the media manager, settings, historical trips, and historical driver reports.”
Where to buy: Raven website and Amazon
Source: The sample for this review was provided by Raven

Filed in categories: Reviews

Tagged: ,

Raven dashcam and connected car system review originally appeared on The Gadgeteer on November 19, 2018 at 12:00 pm.

Note: If you are subscribed to this feed through FeedBurner, please switch to our native feed URL http://the-gadgeteer.com/feed/ in order to ensure continuous delivery.

Thinkware F200 Dash Cam review

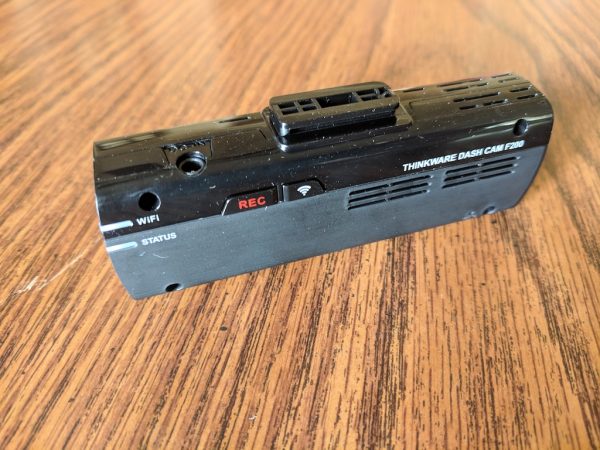
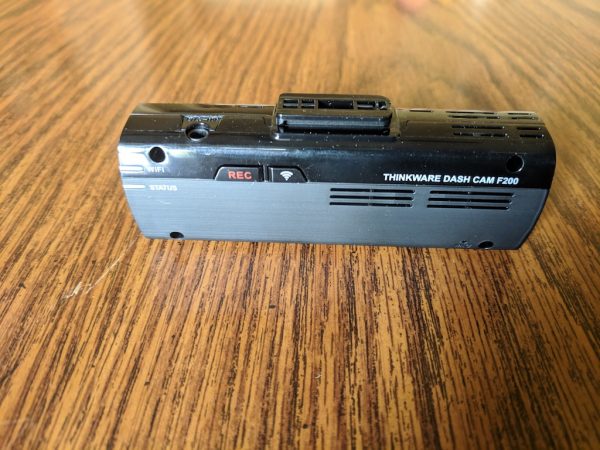
REVIEW – The Thinkware F200 Dash Cam is a reliable, somewhat simple-to-set-up dash cam with a ton of great features at an affordable price. The majority of the really great features are only available after purchasing some accessories and having the camera hard-wired, but the base F200 Dash Cam’s feature set and included companion app are definitely worth the $139.99 price.

What is it?

Dash cams are small cameras placed on your windshield or dashboard that continually record video while you drive and sometimes when you’re parked and away from your car. Dash cams have increased in popularity as the tech behind them has become smaller and more affordable. There are a number of great reasons for having a dash cam in your car; they can help you document accidents for insurance purposes, get you out of a ticket for a traffic violation you didn’t commit, or record something that happened to your car while it was unattended.

Hardware specs

  • Camera: Sony CMOS 2.12M
  • Camera Resolution:
    • Front: 1080p Full HD (1920 x 1080)
    • Rear: 720p HD (1280 x 720)
  • Frame Rate: up to 30 fps
  • Viewing Angle: 140° (Diagonal)
  • Capacity: Micro SD Card 16GB/32GB/64GB/128GB (UHS-I)
  • Recording Modes: Continuous Recording, Incident Recording, Manual Recording, Parking Recording
  • Sensor: Triaxial acceleration sensor (3D, ±3G)
  • GPS External GPS receiver (Optional)
  • Dimensions(WxDxH): 3.9 x 0.9 x 1.3 inch
  • Weight: 55g (0.121 lb)
  • Storage Temperature: -4°~ 158°F / -20°~ 70°C
  • Operating Temperature: 14°~ 140°F / -10°~ 60°C
  • Capacity: MicroSD card 8/16/32/64/128GB (UHS-I)
  • Input Power: DC 12/24V, Built-in Super Capacitor

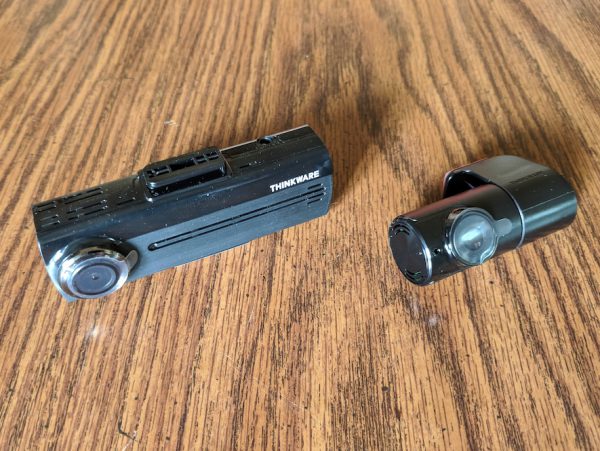
The Thinkware F200 Dash Cam is a mid-range dash cam with a moderate feature set. Thinkware has about eight different dash cams on the market of varying prices and functionality and the F200 falls around the middle. The front camera records in a beautifully clear 1080p at 30fps and the rear camera records at 720p.

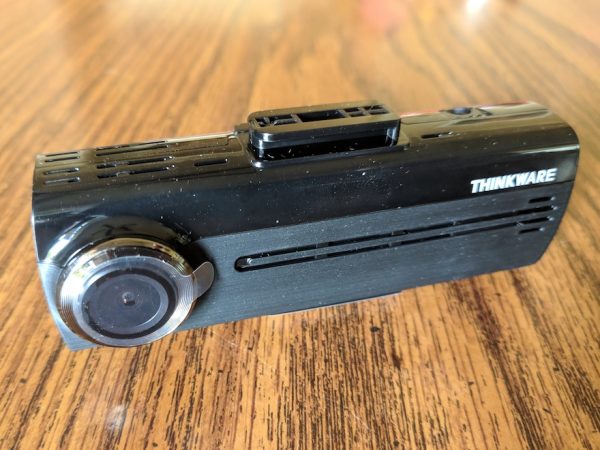
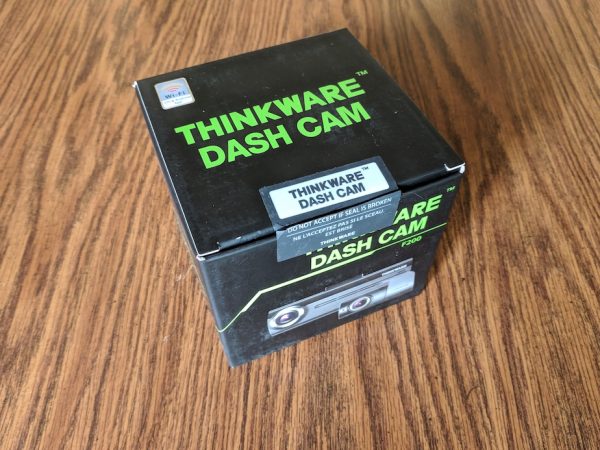
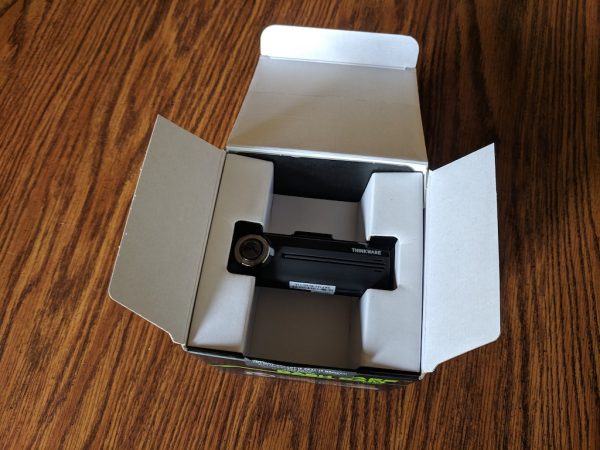
The Thinkware F200 arrives in a great little box with a tamperproof seal on it.

The F200 is nestled nicely into the box to protect it in transit and showcase the dash cam upon opening.

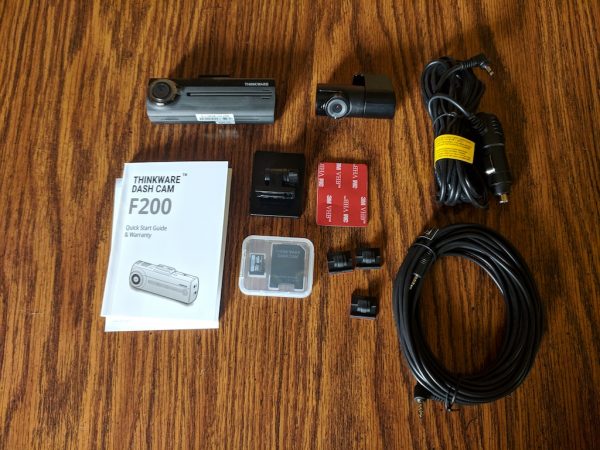
What’s in the box?

  • Thinkware F200 Dash Cam
  • Thinkware Rear-view Camera (optional, but included with my review unit)
  • Rear-view Camera Cable (optional, but included with my review unit)
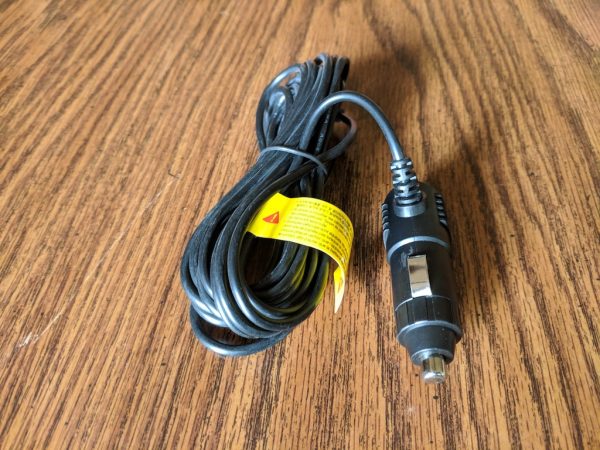
  • 12v Socket Power cable
  • Cable mounting clips
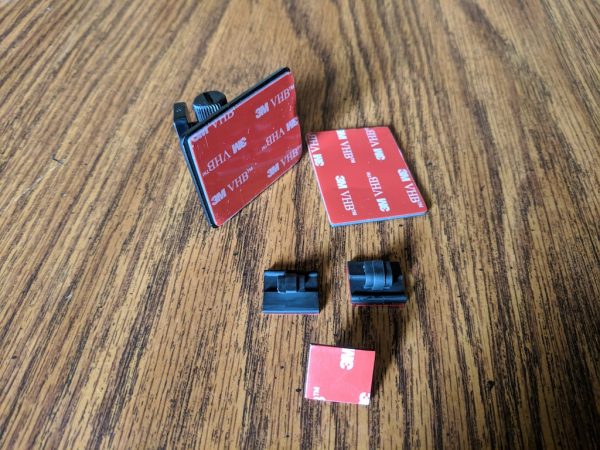
  • Dash cam mounting plates
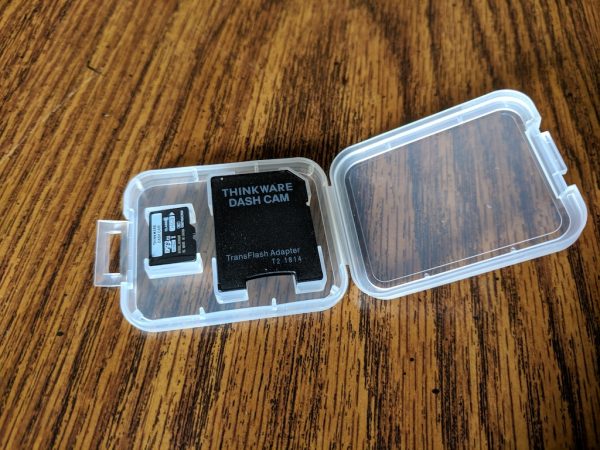
  • 16gb Micro SD Card with Reader
  • Instruction manual

Setup

Fortunately, the F200 comes with everything you need to quickly install, set up, and run your dash cam. I reviewed the Thinkware F200 with three optional accessories; a rear-view camera, a GPS module, and a hard-wiring kit. None of these are necessary to run the F200, but they add some cool features such as parking monitoring, speed camera detection, and dual camera recording.

I love that Thinkware includes a preformatted SD card and card adapter with the F200. I haven’t seen this before and it really helps you to get started setting up your dash cam right away.

Along with the F200 dash cam and the SD card, all you need to start using your dash cam is the 12v socket power cable and mounting kit.

Once you find a good mounting spot for the dash cam, center of your windshield preferably near the top, simply peel away the backing on the main mounting clip and press it into place. Slide the F200 into place fitting the mounting notch on top of the camera into the slot on the mounting bracket.

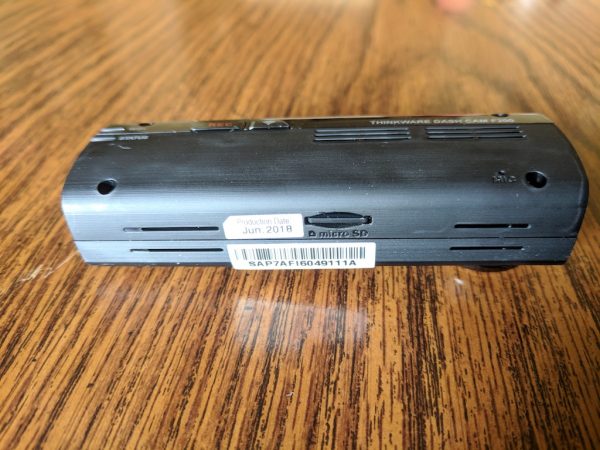
Be sure to insert the included SD card in the slot on the bottom of the F200.

Next, connect the power cable to the open power port on the top of the F200 by the REC button.

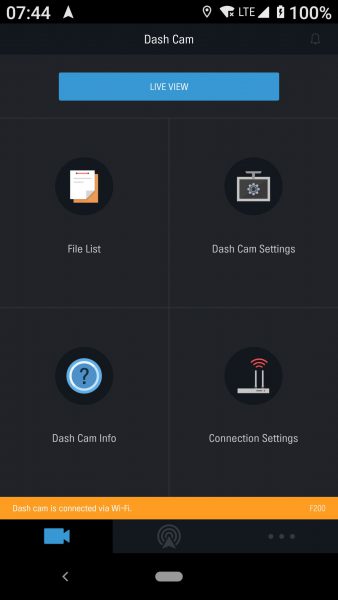
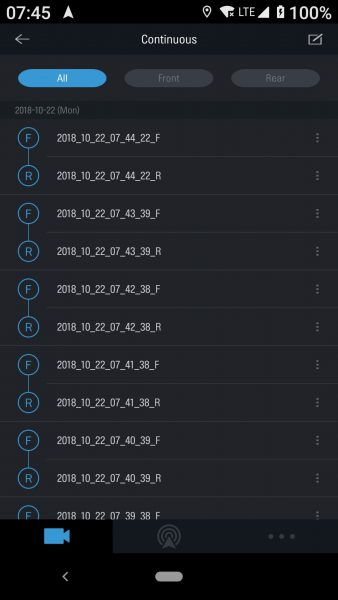
Once everything is plugged in and powered, download the Thinkware Dash Cam MobileViewer app for your device, it works on both Android and IoS. Once downloaded and installed, the app will attempt to walk you through the setup procedure. There’s a WiFi button on the back of the unit that activates a hotspot for your phone to connect to for setup.


This is usually where a lot of car-tech devices lose points with me, and the F200 is no exception. The printed documentation is very vague and difficult to follow. It took me several tries and more than a few internet searches to get everything connected, synced, and functioning. The physical setup was easy, but the technical setup took a bit of finagling. Fortunately, and to Thinkware’s credit, once everything was up and running, the system has worked flawlessly for about a month now.

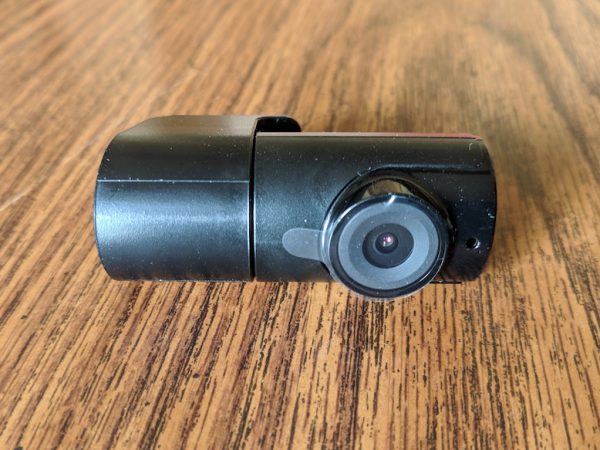
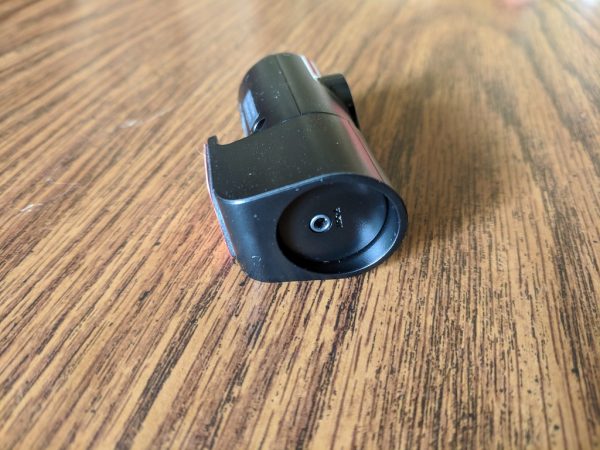
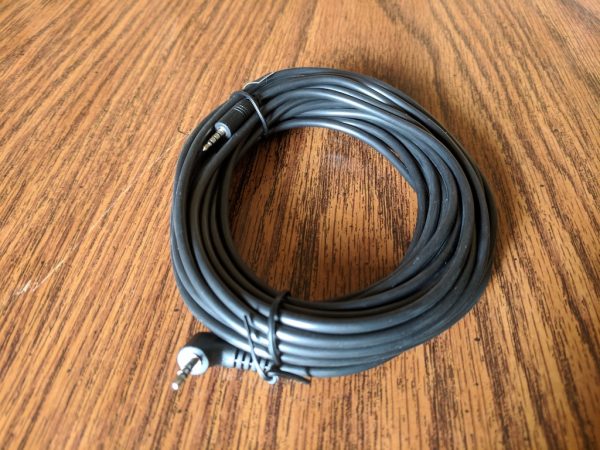
As I mentioned, the unit I’m reviewing included the optional rear-view camera, GPS module, and a hard-wiring kit. The rear view camera is pretty unobtrusive and has only one port on it for a video cable that connects back to the main unit. Wiring the rear-view camera was no easy feat and ideally should be done by a professional.

Thinkware provides about 19.6 feet (6 meters) of cable to reach a good spot on your rear-view window and the camera itself has mounting tape attached.

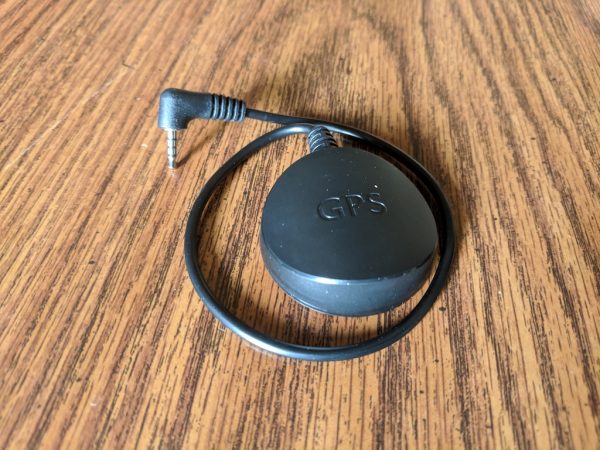
The GPS module is probably the simplest accessory to install.

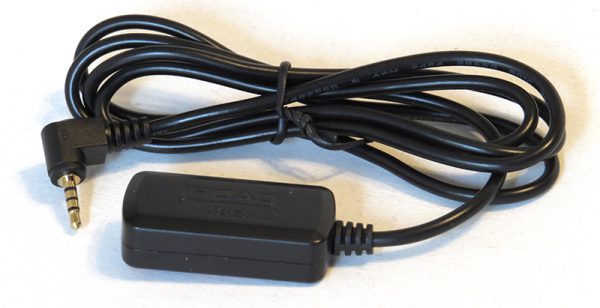
The little puck has a short cable on it so it must be mounted on the windshield near the F200.

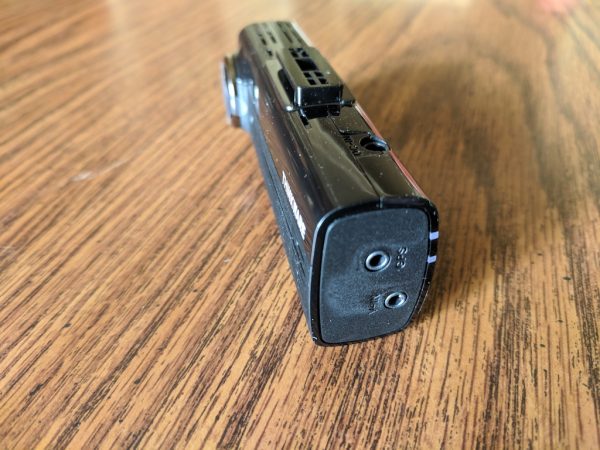
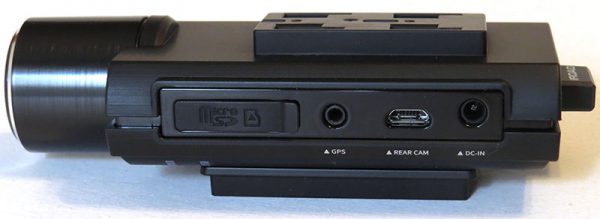
Both the GPS module and the rear-view camera plug into ports on the left side of the F200.

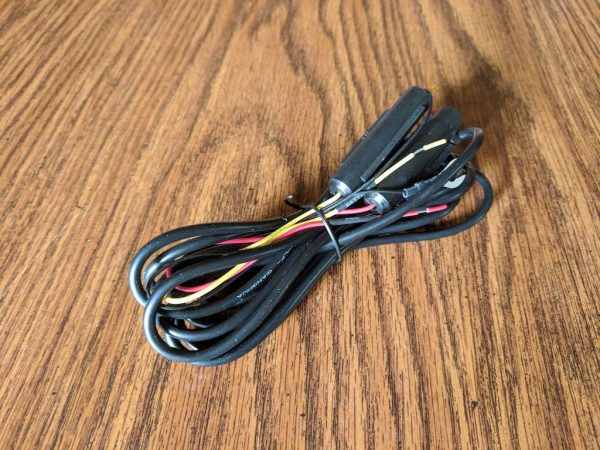
The final optional accessory I installed was the hardwiring kit. This is an included set of wires and inline fuses that allow you to run continuous power to the F200. The benefit of continuous power is that once wired correctly, the unit will power on and off with your automobile. Another great feature made available after hardwiring is parking monitoring. The F200 will monitor for incidents even when the car is powered off. If the F200 detects any movement while parked it will start recording. The best part of this feature is that the unit will monitor your car’s battery life as well, making sure that is never dips below a predetermined voltage. If the battery’s voltage drops to that point, the F200 automatically shuts off.

Performance

Once I had everything mounted, synced, connected, and adjusted to my liking the F200 did what all great technology should do, it disappeared. The unit dutifully powered on every time I started my car, recorded every trip I made, and then shut off when I exited the car.

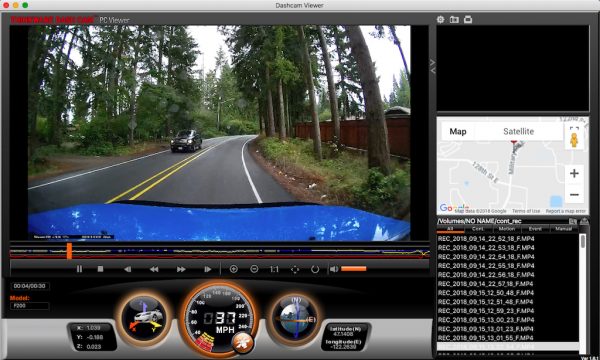
When I downloaded my first few videos to check the camera’s quality, I was really impressed with the amount of information that was recorded as well as the stunning video quality. Because I was using the GPS module, the F200 takes note of my car’s location as well as my speed, marking my trip with a tracking dot on Google Maps during playback. Additionally, the F200 unit itself has a built-in accelerometer recording the X, Y, Z axes of my car during all trips.

Accessing the videos on the F200 was as easy as connecting my cellphone to the unit as I did in setup and downloading what I needed. The F200 records videos in one minute blocks and then writes over the oldest videos once the SD card is full. You can also access the videos by popping the SD card into your Mac or PC and using Thinkware’s desktop app.

Check out a sample video recorded by my F200. The front facing dash cam mic picks up a lot of wind noise from open windows in addition to whatever is going on in the car’s interior.

What I like

  • Excellent build quality
  • Easy Initial Setup
  • Reliable performance
  • Great, stable companion app
  • 16GB Micro SD Card included

What needs to be improved

  • Documentation confusing and lacking in specifics
  • Some extra features like parking monitor only available if hard-wired
  • Rear-view Camera, GPS, and Hardwiring Kit cost extra

Final thoughts

I really like the Thinkware F200 Dash Cam, especially after adding on all of the accessories needed for it to be fully functional. The base F200 is definitely worth the $139.99 price tag though, and gives you plenty of built-in features. What’s great about the F200 is that you have the option to build it out and add accessories as you need them. As dash cams become more popular and affordable, this would make a great first dashcam for someone just getting their feet wet with this relatively new technology.

Price: $139.99 for the F200 Dash Cam only, $39.99 for External GPS, $49.99 for Rear-view Camera, $29.99 for Hardwiring Kit
Where to buy: Thinkware and Amazon
Source: The sample of this product was provided by Thinkware.

Filed in categories: Reviews

Tagged: ,

Thinkware F200 Dash Cam review originally appeared on The Gadgeteer on October 29, 2018 at 11:00 am.

Note: If you are subscribed to this feed through FeedBurner, please switch to our native feed URL http://the-gadgeteer.com/feed/ in order to ensure continuous delivery.
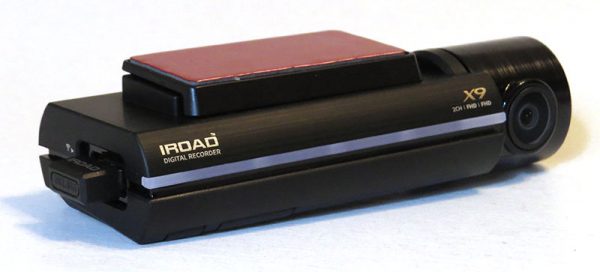
iRoad X9 front and rear dashcam review

REVIEW – I have been very hesitant about getting a dash-cam that adheres directly to my windshield. The idea that it may be a pain to remove if I don’t like it has kept me from looking into getting one. Well, after watching countless dashcam videos and hearing horror stories from my sister who worked in insurance claims, I finally decided to dive fully into a quality dashcam and hoped the iRoad X9 dashcam, which includes both a front and rear camera, would be all I needed.

What is it?

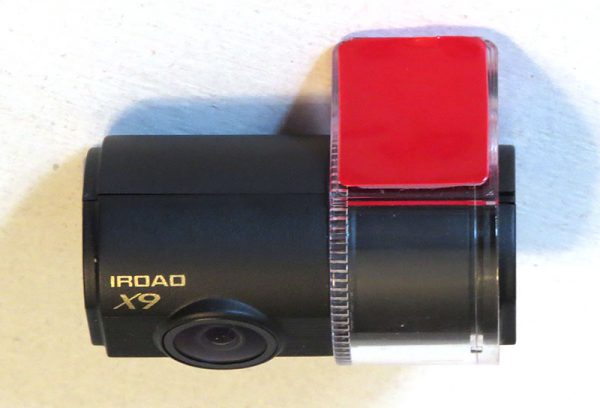
The iRoad X9 dashcam is a front and rear camera that can continuously record while you are driving.

Hardware specs

  • Front Camera:
    -Full HD 1920 x 1080P resolution
    -150 degree wide angle lens
    -30 frames per second
  • Rear Camera:
    -Full HD 1920 x 1080P resolution
    -145 degree wide angle lens
    -30 frames per second
  • ARM Cortex-A7 MP Core Processor V3
  • Lane Departure Warning System
  • Forward Collision Warning System
  • Front Vehicle Departure Warning System
  • GPS Sensor (optional, included in my review)

What’s in the box?

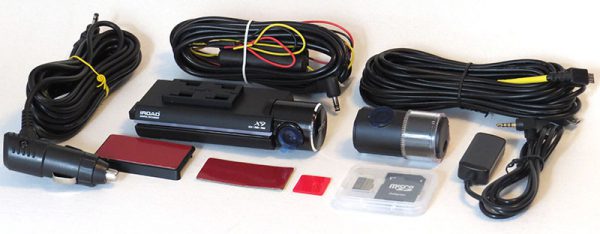
Inside of the box, you’ll find: A front camera, rear camera, Wifi dongle, 32 GB MicroSD card, Uninterrupted fuse cable, rear camera cable, user manual, and extra double sided tape. Mine also came with a power cable that plugs into the lighter as well, but the website says it is optional. I also was sent the optional external GPS antenna, which is sold separately.

Design and features

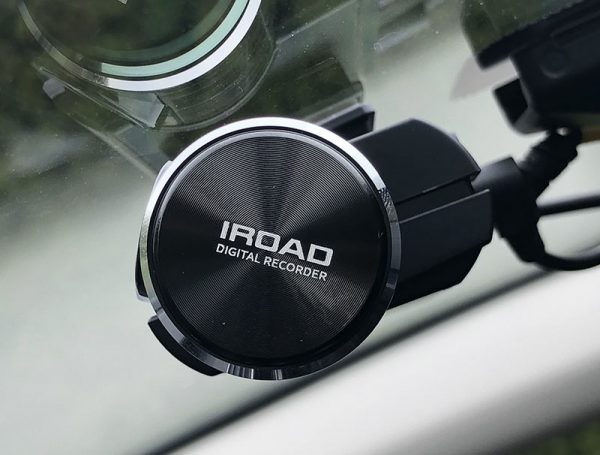
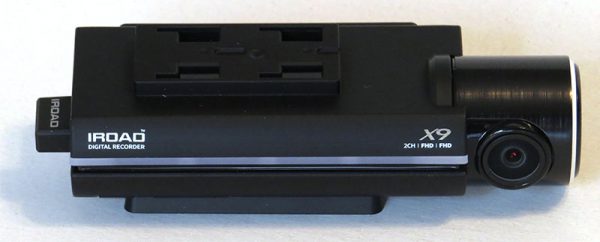
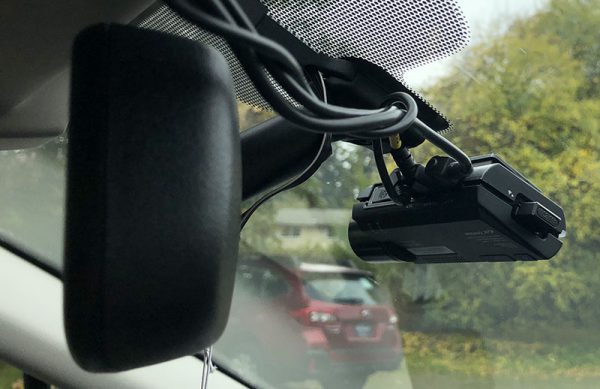
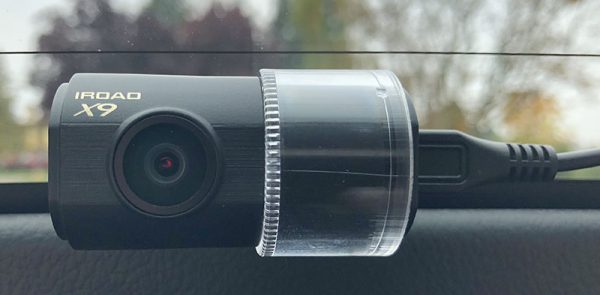
I really liked the look of both the front and rear cameras. They have a sleek, stylish look to them while seeming quite minimalist. Both can be twisted to adjust to the best angle for your car, which was very convenient and made the setup very easy since I could focus on properly adhering the camera rather than making sure the lens was in the proper location the whole time. When attached, I cannot see the front camera at all, since it hides behind my rearview mirror.

When the car is turned on, the camera will tell you when it starts recording, if the MicroSD card is missing, and when the GPS is connected. It sometimes took 1-5 minutes for the GPS to connect to the camera, and most the time I would be driving down the road and hear “GPS connected” from the camera. The GPS unit has to establish contact with the satellites, so I suppose that is why. If you forget to put the MicroSD card in, it will constantly remind you it is missing to the point that I unplugged the camera from the power because it did not stop. A few times to warn me is fine, but the entire time I am driving was quite annoying!

Other than recording video, one thing the iRoad X9 camera boasts is the ability to give lane departure, forward collision, and front vehicle departure warnings. I had the perfect car to test this with since my own comes with all three via the Eyesight camera system. I tried different sensitivity levels, and all three were far too sensitive for me to use on a daily basis. The camera would be beeping constantly that either someone in front of me has moved (while driving down the highway) or that a collision was imminent when the person in front of me does not even have the brakes on. The lane departure warning, however, did a fairly decent job and if I did not have it already in my car, I would have kept that mode activated.

Setup

I had two ways to choose from when setting the camera up. I could hard-wire it, or I could use the lighter port. Since I am not someone who is car savvy, and Subaru would not hard-wire it, I decided to use the lighter port.

First, I cleaned off a nice spot on my window, figured out where I wanted the front camera placed, and carefully applied it to my window. It stuck firmly right away. I threaded the power cable behind my glove box, up inside of my window panel, and, until I figure out a way to adhere it around my Eyesight cameras, up behind my visor. It actually turned out very well. The GPS unit was threaded up and through the visor, and placed around the handle above the passenger’s seat door. I used only the front camera for a week to make sure it was worthy enough to apply the rear camera.


The rear camera was applied in the same way, by centering it at the top of my back windshield and sticking it on firmly. I threaded the power cable up and above the two doors on the passenger side, and then through the visor and into the front camera. One thing I noticed right away when closing the back hatch was that it stretches out some when the hatch is open, so when it is closed, you can see the cord bow outward. This wouldn’t be a problem with a regular sedan. Aesthetically, it looks a little messy, but it isn’t terrible and doesn’t bother me that much.


After inserting the included MicroSD card and Wifi dongle, I followed the instructions on setting up the iRoad app on my iPhone. This was very easy and straightforward.

Performance

After having the rear camera installed for only a few days, I encountered my first tailgater, which gave me my first reason to download video from the camera on to my phone. When I arrived at my destination I opened up the iRoad app, scrolled through and found the video, (which is arranged from most recent to least recent recorded video) and downloaded it onto my phone, which took maybe two minutes at the most in total. I liked doing it this way because I did not have to worry about remembering to bring the MicroSD card in and out of the car.

As you can see, the quality is pretty good. The semi-visible line you see on the top is my window defroster, which is not visible anymore now that I angled the camera slightly more downward.


The video quality during the day was very good. Cars and landmarks are easily visible and are quite clear. I have no complaints about the video quality during the day. When I had my music volume turned up, the bass was definitely overpowering on the recordings, but if I had the volume set at a normal level, it sounded just fine.


In the dark, the video quality is not as good as indicated on the website, but still decent as long as there is light from headlights or streetlights. The rear camera was not as useful on dark rural roads since there was no light coming from the headlights. I can’t really fault the camera for that though since the camera has low light vision, not dark/night vision. It worked better in the city where there was lighting all around.


The performance and quality of the cameras were good, and the app is very useful. iRoad also has a PC viewer application that allows for multiple views at once, GPS tracking, and more. The ability to view the front and rear camera at the same time is a huge plus. Instead of writing a long and boring paragraph about the iRoad viewer application, I simply made a video demonstrating the abilities so you can see how easy it is to use. Enjoy!

I have one last tidbit about the iRoad phone app. If you mount your phone on your dash and connect to the camera while backing up, you can use it as a backup camera, which could be useful if you don’t have one installed in your car. It might be useful for a tight spot if you are in a bind.

What I like

  • The cameras are sleek and look nice from outside of the car.
  • Able to download videos directly onto my phone with relative ease.
  • Good video quality.

What needs to be improved

  • Wifi will sometimes connect while the car is on, which disconnects the data on the phone.
  • Manual could be a little better.

Final thoughts

Overall, I think I really liked the iRoad X9 camera. It is reliable and has excellent video quality, has good software, and it looks nice in my car. The price tag is quite hefty though, and since I would not use any of the added features and will use it solely as a camera to protect myself in case of an accident or incident, this would not fit into my price/value range. However, if you have the money to spend and want a very nice camera, the iRoad X9 is a nice one to look into.

Price: $449.00 – $625.00 (depending on what size MicroSD card you want with it)
Where to buy: BlackboxMyCar.com
Source: The sample of this product was provided by BlackboxMyCar.com.

Filed in categories: Reviews

Tagged: ,

iRoad X9 front and rear dashcam review originally appeared on The Gadgeteer on October 28, 2018 at 9:00 am.

Note: If you are subscribed to this feed through FeedBurner, please switch to our native feed URL http://the-gadgeteer.com/feed/ in order to ensure continuous delivery.
Vantrue N1 Pro Mini Dash Cam review


REVIEW – For many years, I really disliked dash cameras. I felt like they were in the way of my vision, and always had some sort of shortcoming, whether it was the quality of the footage or connectivity that made me say away from them. Most recently I have been able to test and review a few of them, and I have begun to like them more as the overall quality has increased. This dashcam really caught my interest because of its really tiny size and yet indications of nice built-in features.

What is it?

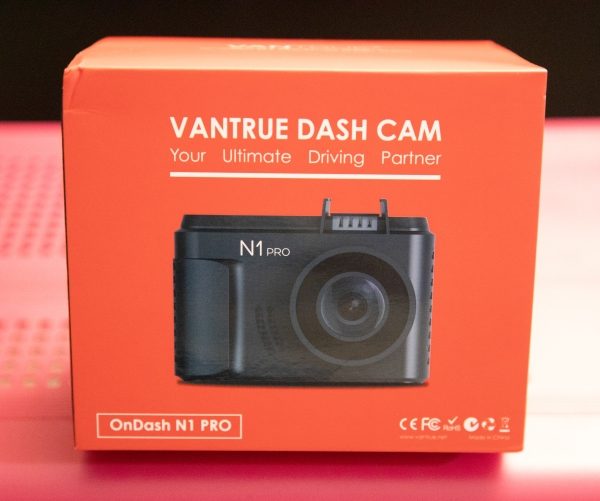
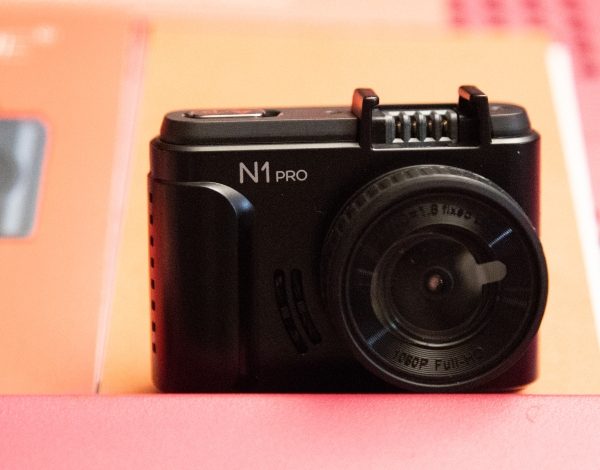
The Vantrue Dash Cam is a “tiny” dash cam with a 1.5″ LCD and a 160-degree wide angle lens that produces full 1080P HD footage and includes features like Parking Mode and collision detection.

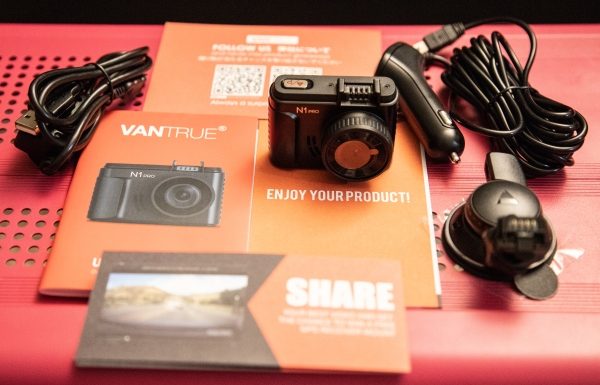
What’s in the box


1 x Vantrue N1 Pro Dash Cam
1 x Suction cup mount
1 x 3’ Micro USB data cable
1 x Car charger/power adapter with connected 10’ mini USB cable
1 x User Guide
1 x Quick Start Guide
1 x Warranty card

Design and features

This dash cam has a tiny and compact design and measures 1″ x  2 1/2″ x 1 1/2″.

Specifications:

Display: 1.5 inch TFT LCD (4:3)
Lens: 160-degree wide viewing angle and a full 6 layer glass lens with a wide aperture of F/2.0
Languages: English/Japanese/Germany/简体中文
Video Format: .MOV; H.264 compressed format
Video Resolution: 1920x1080P30, 1280x720P30
Image Resolution: 12M Pixels
Image Format: JPEG
Motion Detection: ON/OFF
Parking Monitor: ON/OFF
Audio Recording: ON/OFF
Memory Card: Micro SD Card up to 64GB (Class 10; in FAT32 format)
MIC/Speaker: Built-In
Backlight: Off ON/OFF
USB Port: USB 2.0, mini
Battery Capacity: 130mAh
PC Operation System: Windows XP/Vista/Windows 7/Windows 8/Window 10/Mac

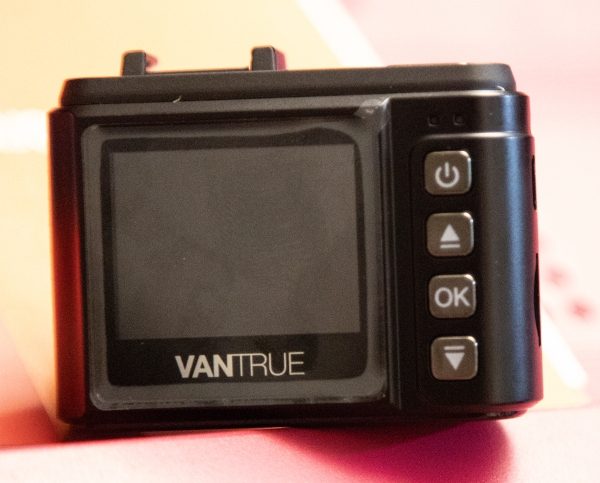
On the front of the camera, there is the logo and to the right of it the camera lens. On the back on the top right-hand corner, there are 2 LED indicators that show when the camera is charging and when it is recording. In the column of the 4 buttons, the top button is on/off power button, the second is the upward selection button that also serves as the fast forward playback button and as the microphone on/off switch. Next, there is the OK button that starts and stops video recording and performs the “confirmed” function, and last, there is the downward selection button that also serves as the slow forward playback button and to turn the screen on or off.

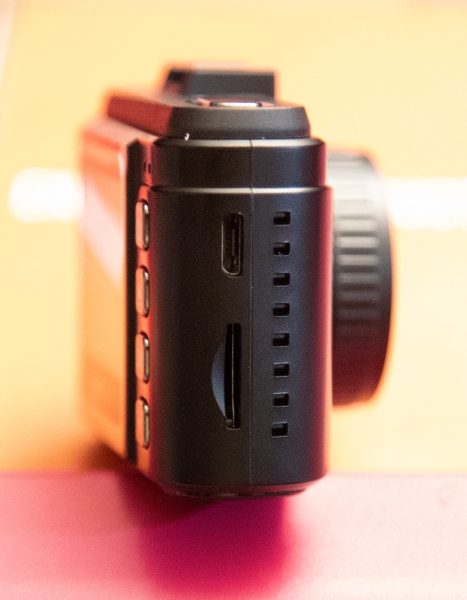
On one side of the camera, there is a micro USB port on top for charging or data transfers, and a micro SD card slot below.


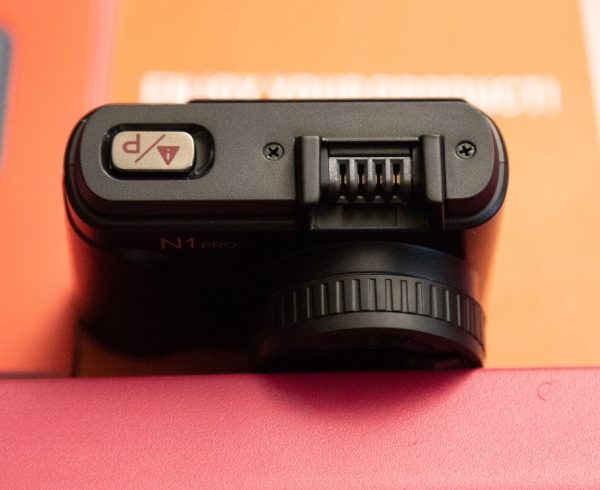
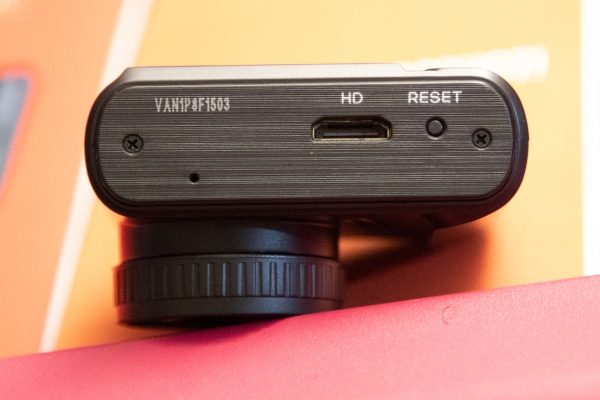
At the top of the dash cam to the left, there is the emergency mode button that you press to capture a photo while the camera is recording, and a long press, while the camera is recording, will put it in Parking Mode. To the right of the emergency mode button, is the connection that receives power for the camera once it is connected to the mount and the mount is plugged in. At the bottom of the camera as shown below is the HDMI port and the factory reset button.


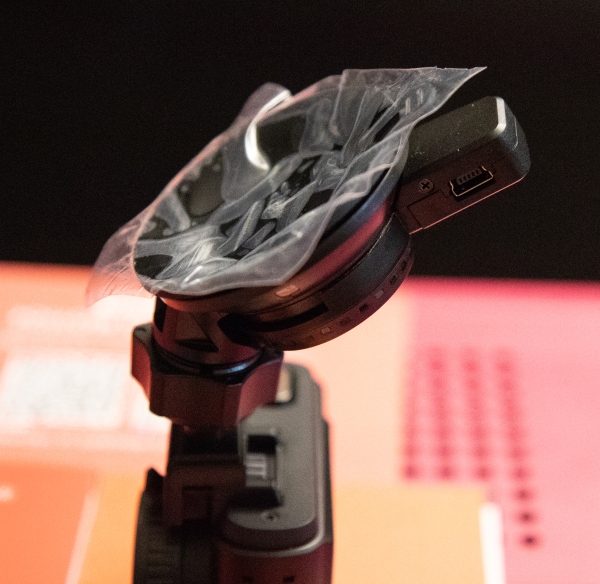
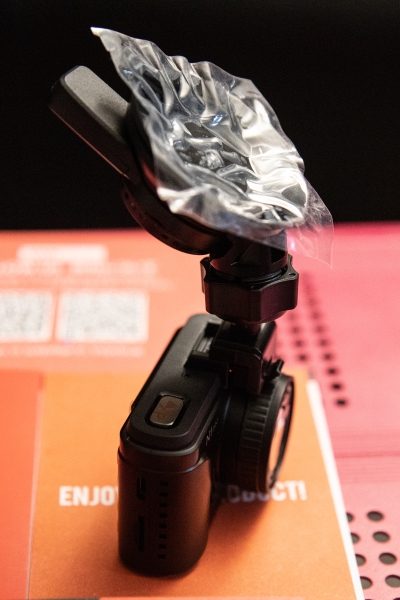
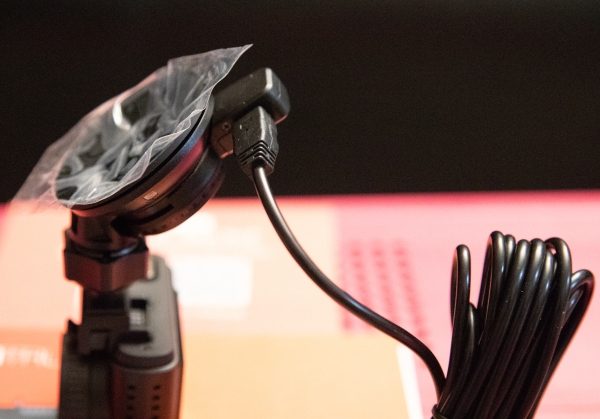
The 3 pictures below are of the windshield mount and they show how it is positioned when connected to the dash cam, the mini USB power jack and how the power adapter is connected to the mount.


Performance

This dashcam really performs well. The settings are easy to navigate and the choices are very straightforward. The image stabilization works well and the video and images are clear even in overcast and/or rainy conditions. Its “tiny” size, it has no noticeable effect on your view when driving.


It includes features like 1080P/30 fps HD video with Supper Night Vision, seamless loop recording on micro SD cards up to 256GB, and a G-sensor that automatically detects a sudden shake/collision and locks the footage to prevent the video from being overwritten even in loop recording. The 24-hour Parking Monitor motion activated parking mode allows the camera to automatically record when it detects motion in front of your car. To take advantage of this feature, the power adapter should be plugged into an “always on” outlet or hard-wired to the battery. This way, if the dash cam is off and it detects a crash to the front of the vehicle, it will turn on and end recording after 20 seconds, and the recorded videos are saved and locked.

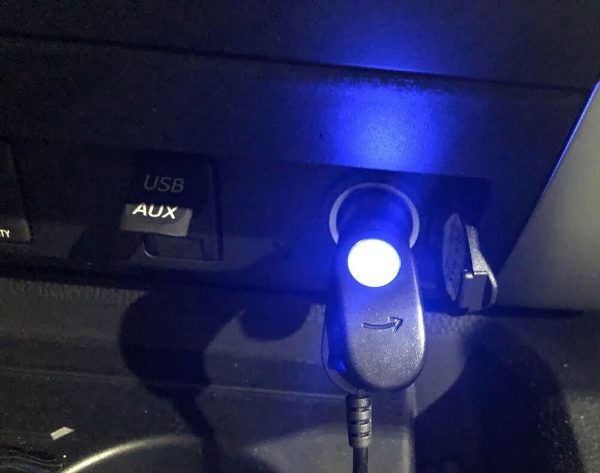
If you enable the time-lapse feature, the Vantrue N1 will keep taking photos at the set time interval and then auto edit them together to a video clip. This reduces the size of the video file. The dash cam also provides excellent audio quality. I also like that the power adapter has a nice blue LED on the end that plugs into your vehicle. Not only does it indicate power on/off, but it is a nice interior light.

Videos


What I like

  • I love the size
  • The video quality
  • The features and ease of use

What can be improved

  • The connector to the dash/windshield mount

Final thoughts

Out of all of the dash cams that I have owned and/or tested, I like this one the best. It is so small that it does not present any type of bothersome obstruction of your view and yet it functions much like the bigger and more expensive dash cams. While it is not 4K, its footage is perfect for its function and quite “crisp and clean”. It is simple and effective, and gets an exuberant thumbs up from me!!

Price: $79.99
Where to buy: Amazon
Source: The sample for this review was provided by Vantrue.

Filed in categories: Reviews

Tagged: ,

Vantrue N1 Pro Mini Dash Cam review originally appeared on The Gadgeteer on September 26, 2018 at 9:00 am.

Note: If you are subscribed to this feed through FeedBurner, please switch to our native feed URL http://the-gadgeteer.com/feed/ in order to ensure continuous delivery.
GEKO STARLIT S200 Full HD 1080p Dashcam review


REVIEW – I’ve reviewed a couple of dash cams, but both were from the same company (PAPAGO), so I jumped at the opportunity to review the Geko Starlit S200 dash cam so I could see how other cams measured up to those. Turns out the Geko is also made by or at least owned by PAPAGO, so I’m not sure if this is really “another brand”.

What is it?

The Geko Starlit S200 dash cam is a vehicle dashcam that can record day or night Full HD video, or capture photos. It features a 140-degree wide-view lens, Sony Starvis sensor, and a 64GB SD card capability.
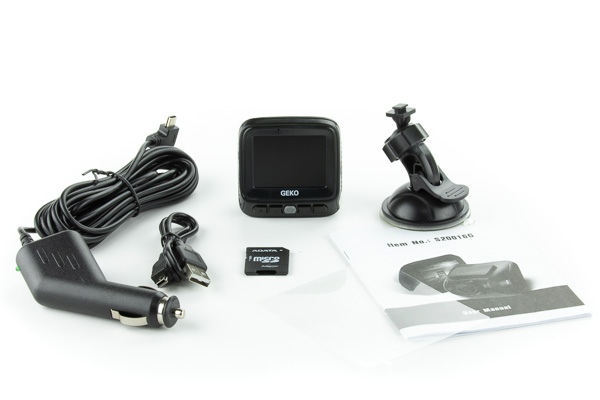
What’s in the box?

  • Geko S200 dash cam
  • Adhesive mount
  • Suction cup mount
  • Window Mount sticker
  • Power cord
  • Mini-USB cord
  • 16GB micro SD Card and Adapter
  • User Manual


Design and features

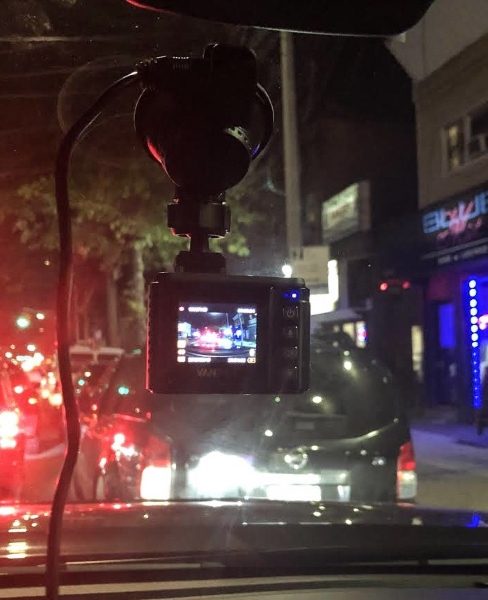
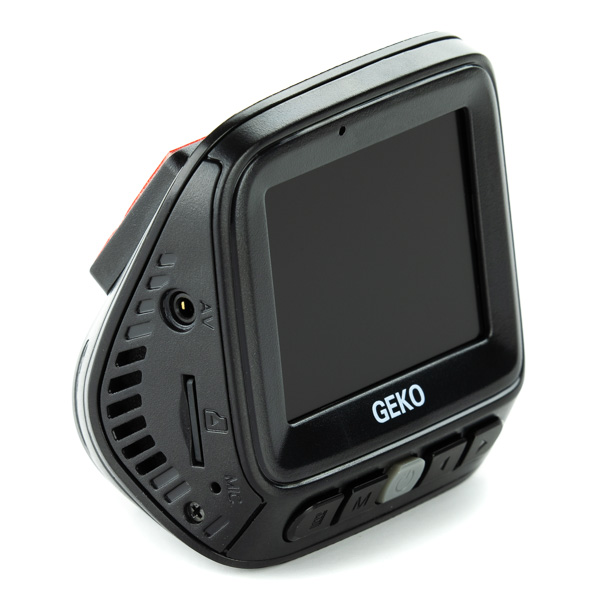
The Geko S200 is pretty much your typical dash cam, featuring a 2-inch screen and five control buttons. It comes with 2 mounting options, a window sticker with an adhesive mount and an adjustable suction cup mount.
The S200 can record in 1280×720, 1920×1080, or 1728×1296 resolutions. The photo capture mode can record in various sizes up to 14mp. The video mode can capture in 1080p at 30 frames per second, h.264 mov format.

I had difficulty using both mounts in my pickup truck. The adhesive mount wasn’t the correct angle for my windshield and the suction cup mount would not adjust to an angle that I could see the screen correctly, however, the camera view was correct. The lens pivots and adjusts, but it doesn’t appear to stay where you put it. It appears as though they designed this camera to be high on the windshield and for a driver that sits lower in the seat.

The video captured by the camera is outstanding. The Sony Starvis sensor in this camera really is one of the best. Signs and license plates could be made out at a fair distance, and the image was clear even when driving into the setting sun.

Daytime
Sunset
Night time

The Geko S200 has the ability to playback captured video and photos, which is something that the other dash cams I reviewed didn’t do. I had assumed that was simply because it took more processing power to playback than to record, but apparently, it is possible in these small devices.

I found the buttons a bit hard to press. When you press them it requires enough force that it also moves the camera position. There’s no reason to have such buttons on a device like this where you won’t really be accidentally pushing the buttons.

The Geko S200 has three modes: Video, Photo, and Playback. The video mode is self-explanatory, capturing video as you drive. The photo mode will take a single photo, or multiple photos at specified intervals of 2, 5, or 10 seconds. The Playback mode will allow you to view videos and photos that reside on the memory card.

It took me quite a while to figure out how to get the camera to switch between video, photo or playback mode while it was plugged in. The menu system gets locked at various times, which is indicated by a key icon on the screen. To enter the settings, you have to press the power button to unlock it. That’s very non-intuitive.

The S200 also has G-Sensor-enabled recording that detects impacts, drastic braking, or sharp turns and will save the video so it will not be overwritten. As a typical dash cam does, when the memory card is full, it deletes the oldest clips so that you’re always recording. The camera can record loops in the following lengths: None, 3 min, 5 min, or 10 min.

The following is a list of the menus. The included manual includes what settings are possible with each menu. You can download the manual PDF here.

Video Mode Menus
Resolution
Loop Recording
HDR
Exposure
Motion Detection
Record Audio
Date Stamp
GSENSOR
Date/Time
Parking Monitor
Beep Sound
Language
Screensavers
Frequency
Format
Default Setting
Version

Camera Mode Menus
Capture Mode: Single, 2, 5, 10-second intervals
Resolution: 2M to 14M
Sequence: On/Off
Quality: Fine/Normal/Economy
Sharpness, White Balance, Color, ISO, Exposure
Anti-Shaking: On/Off
Quick ReviewOff/2 sec/5 sec
Date Stamp: On/Off

One thing that I really didn’t care for is the on-screen icons that are always visible. This includes a battery icon that is always blinking when the camera is plugged in.

Sample Video

Night video starts at 3:00 minutes into the video.

What I like

  • Excellent video quality
  • Video playback capability

What needs to be improved

  • Too many on-screen icons
  • Mounting bracket needs to be designed differently
  • Constant blinking battery icon
  • Hard to press buttons

Final thoughts

The S200 records great video and photos, which would be expected for an item at this price point. The playback feature is very nice and could be quite handy if you needed to transfer a video file via a smartphone or tablet while away from home. However, the camera and screen positioning features leave much to be desired unless you just happen to have the right vehicle.

Price: $159.99
Where to buy: BestBuy
Source: The sample of this product was provided by Geko.

Filed in categories: Reviews

Tagged: ,

GEKO STARLIT S200 Full HD 1080p Dashcam review originally appeared on The Gadgeteer on August 26, 2018 at 9:00 am.

Note: If you are subscribed to this feed through FeedBurner, please switch to our native feed URL http://the-gadgeteer.com/feed/ in order to ensure continuous delivery.