Hedkayse One foldable helmet review

REVIEW – I survived a helmet-less era growing up and began wearing a helmet for my own preservation in action sports. Doing so had the added benefit of instilling that behavior in my kids which I’m tremendously thankful for. It’s pretty easy to grab a helmet with all your other gear as you head out of the house for a specific activity. It’s a different story when it comes to dealing with a helmet after getting to work, or having it handy as you decide to hop on a sharing service bike or electric vehicle to run lunch errands or get to a meeting across town. Hedkayse has introduced a helmet claiming to address these additional needs and more while meeting the standard needs of a cycling helmet. As luck would have it, I’ve got one here for review.

What is it?

Hedkayse One is a one-size-fits-all cycling helmet built to protect against impacts as well as being able to collapse to a compact size so you’re more likely to keep it with you.

What’s in the box?
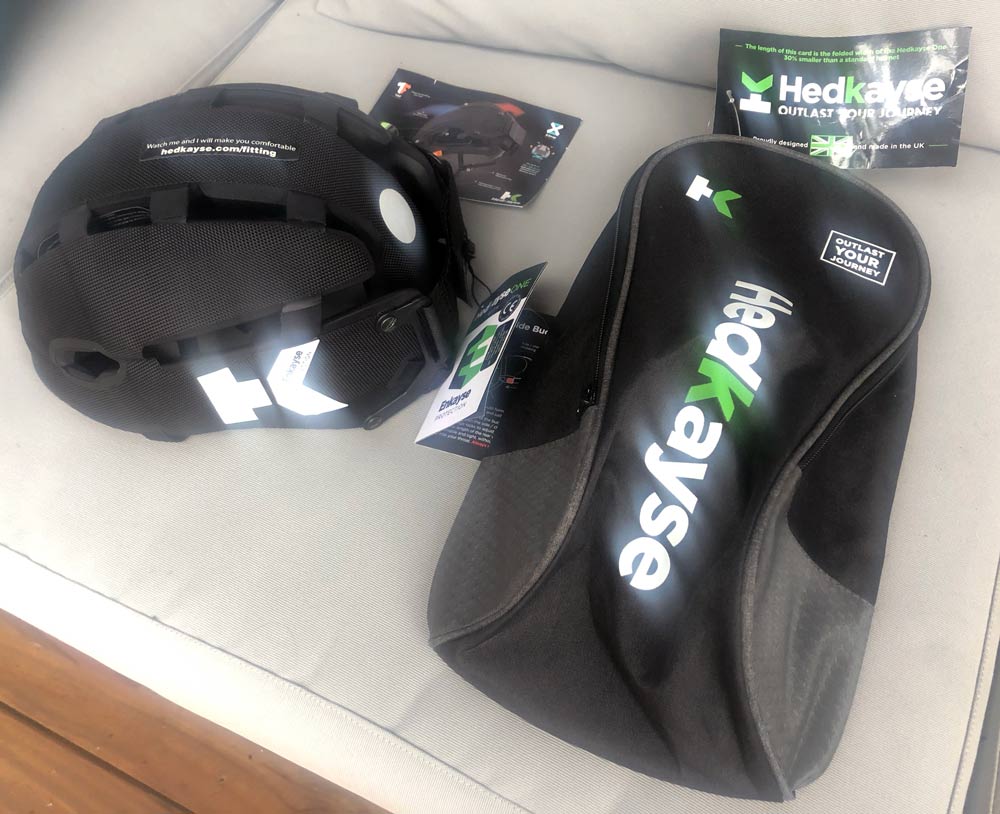
  • Hedkayse helmet
  • Helmet bag
  • Compression strap (not pictured above)
  • Info cards

Hardware specs

Weight: 500g
Size range: 49.5-58.5cm
CE certification: EN1078 safety standard

Design and features

On first look it’s the materials and construction that stand out.
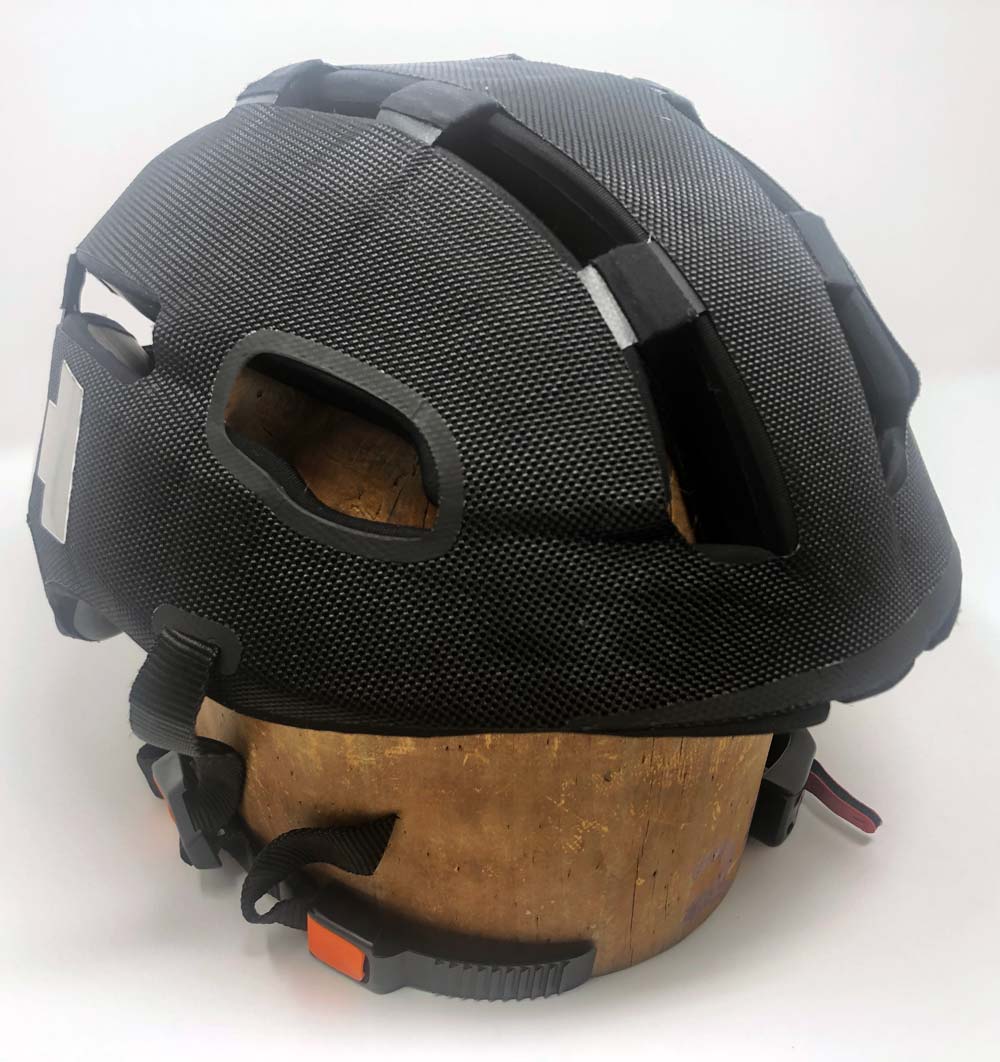
The heavy-weight cordura adds a sturdy but refined texture to the exterior of the helmet. All the materials are expertly cut and welded to flex and fold in the right places.

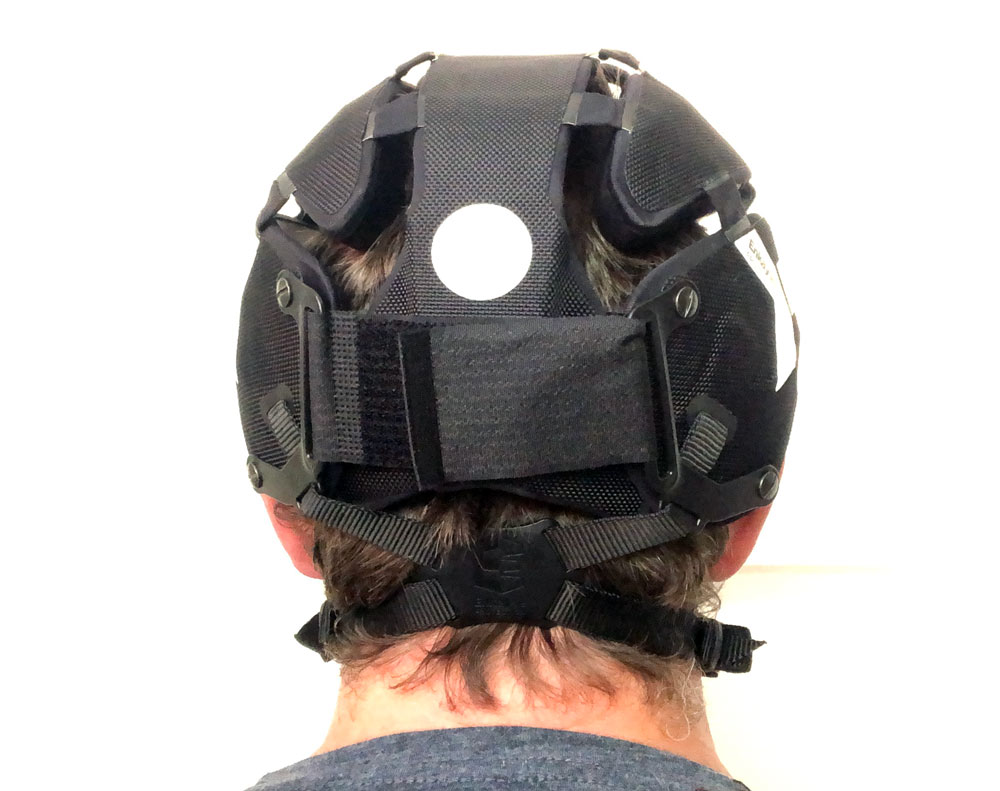
Part of the Hedkayse logos on the sides and all of the large dot on the rear are all retro-reflective for high visibility when hit with oncoming lights.
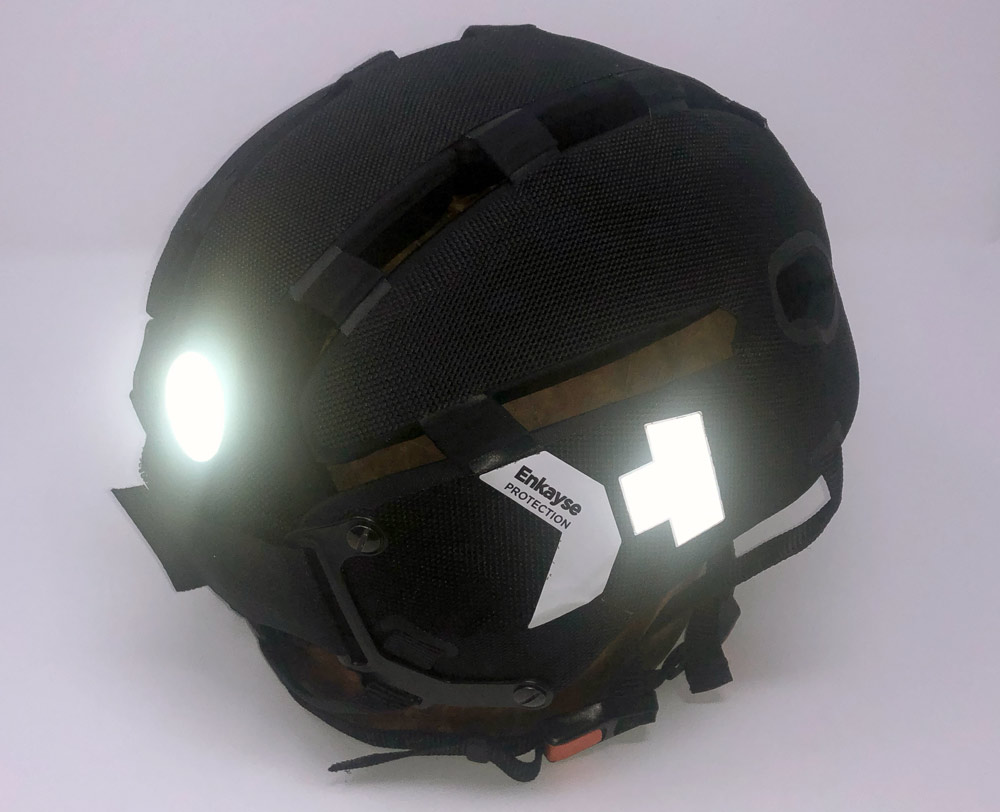
The rear has two plastic brackets that hug close to the shell and allow for the wide velcro to easily adjust the sizing and fit with a single motion.
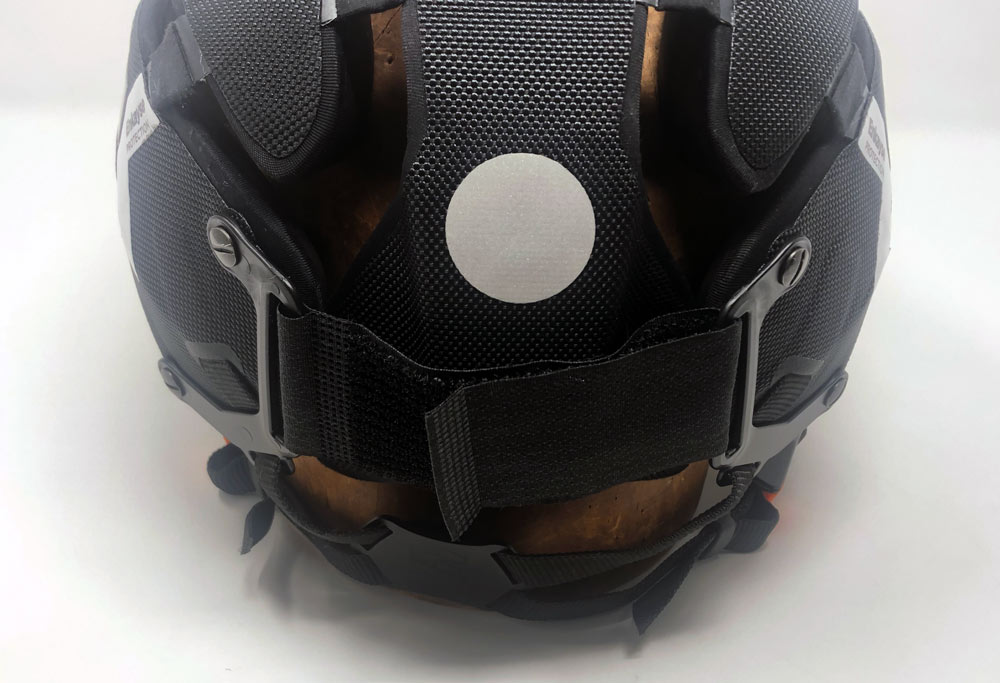
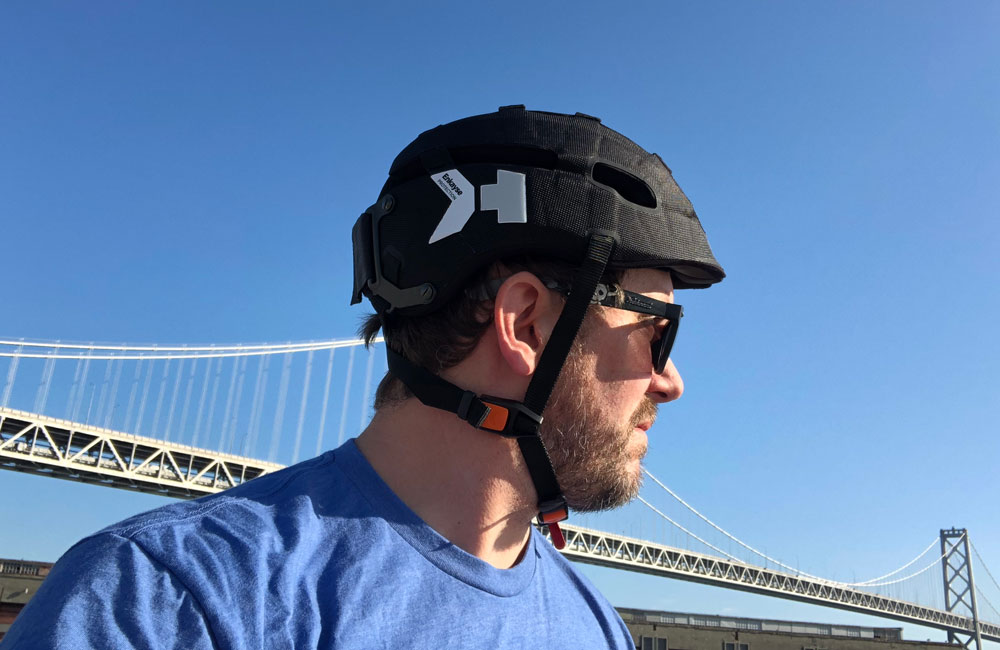
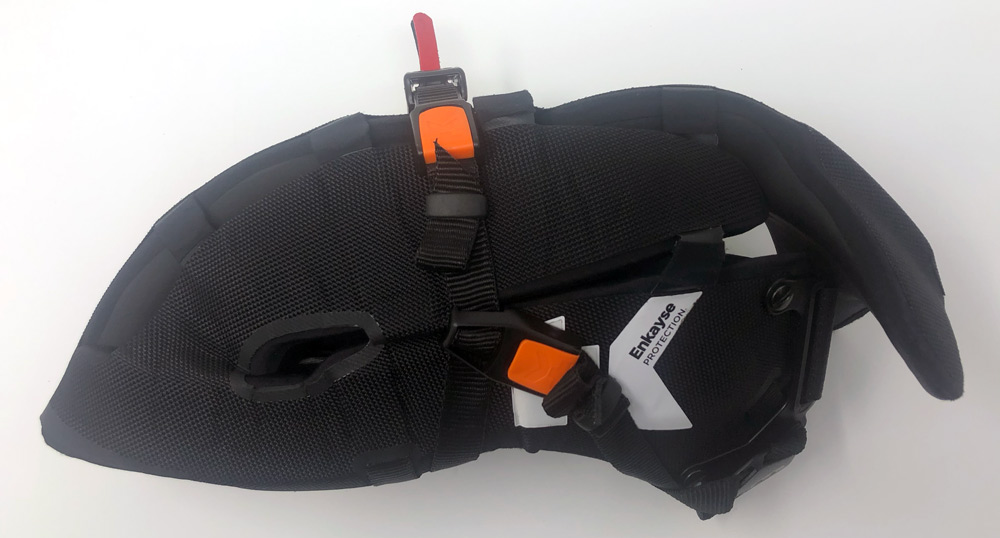
The straps form an X from the rear of the helmet through the plastic clip down to under your chin. This auto adjusts to hug the base of your skull.
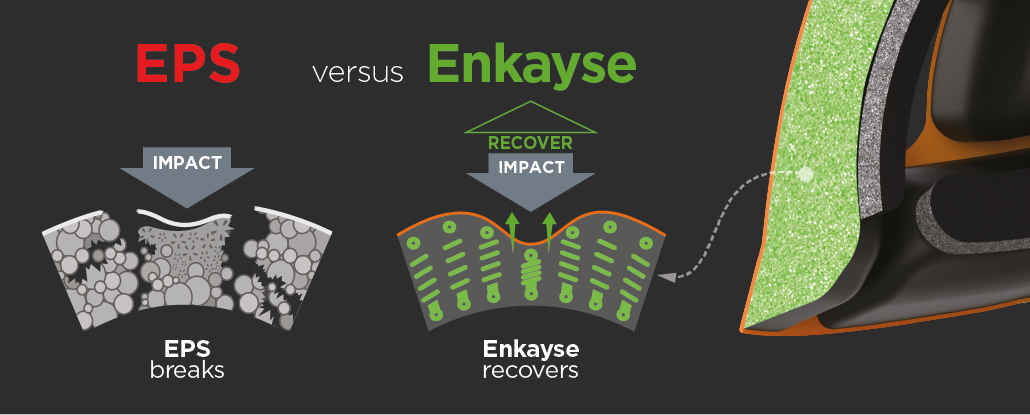
Enkyase is the material that they’ve developed to use as the foundation for the majority of the helmet. Helmets traditionally use a polystyrene (EPS) as a “good-enough” material that deforms to absorb large dangerous impacts while smaller impacts get transferred through to your head. It’s a key reason why you should replace your helmet after any serious crash. Enkayse is able to meet safety requirements and maintain that performance across multiple impacts both large and small. Here’s an image from their site depicting that information.
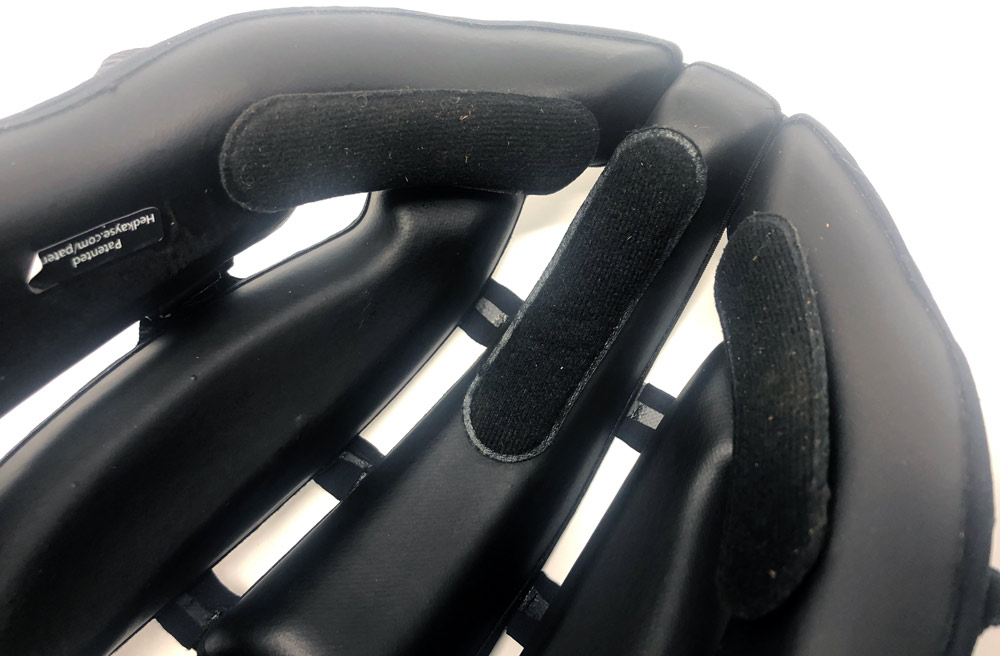
The inside of the helmet is super smooth and appears to be the “skin” of the Enkayse material as molded. It’s both flexible and wipeable. Small, soft pads are adhered in a few places for comfort, fit and to help absorb persperation during use.
Under the chin, the helmet closes with a ratchet strap that allows for micro adjustment and releases with a small pull tab that’s easy to find.

Folding is one of the key features of the Headkayse One. It’s not hard, but takes a time or two to start to do it quickly. Here’s how that works.

To fold: Undo the velcro on the rear completely and pull the whale tail outside the two velcro brackets. The helmet can now collapse in width and you can use the accessory wrap strap to keep it compressed if needed.
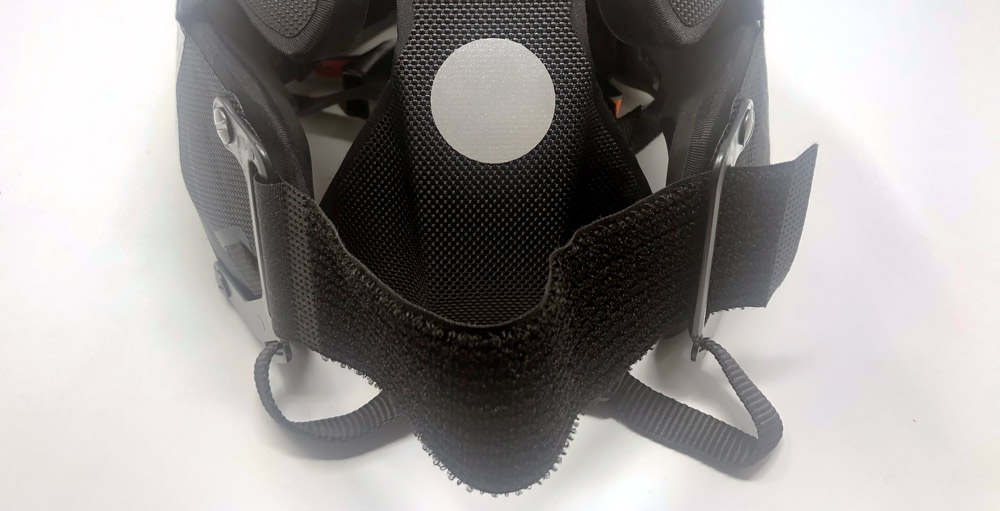
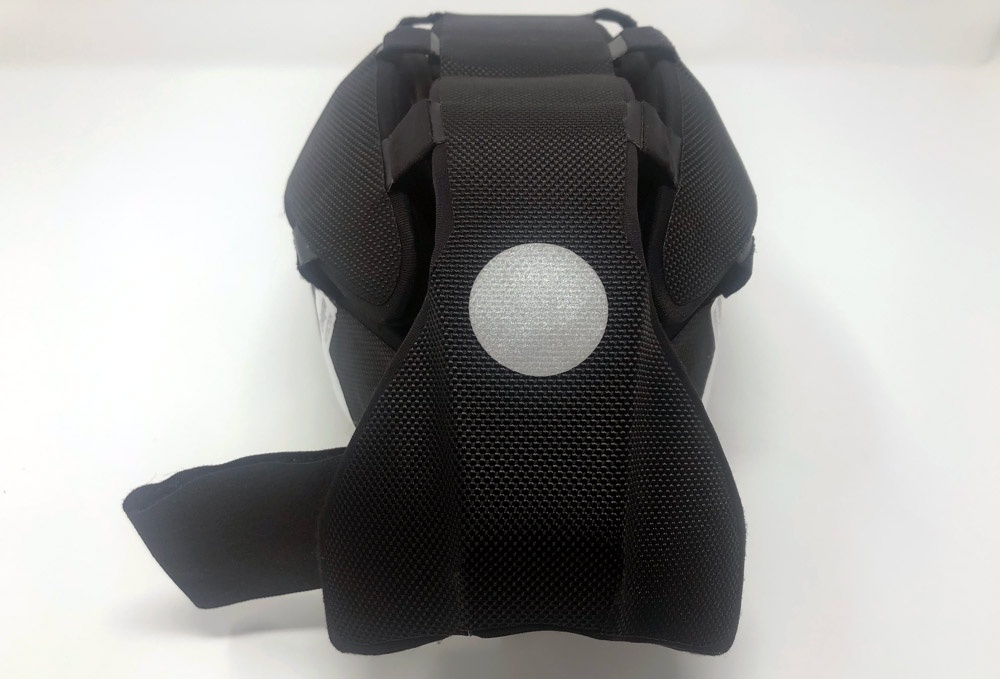
To unfold: Remove the wrap strap if used and repeat the process in reverse. Push the whale tail inside the two side panels and feed the velcro strap back through the receiver side and close the velcro in a loose position.

Setup

Unlike traditional, sized helmets the Headkayse One is designed to fit all users with a single size. Getting it setup for your head is a few adjustments and then some small tweaks for comfort. Let’s walk through it.

Put the helmet on and reach around to the velcro.
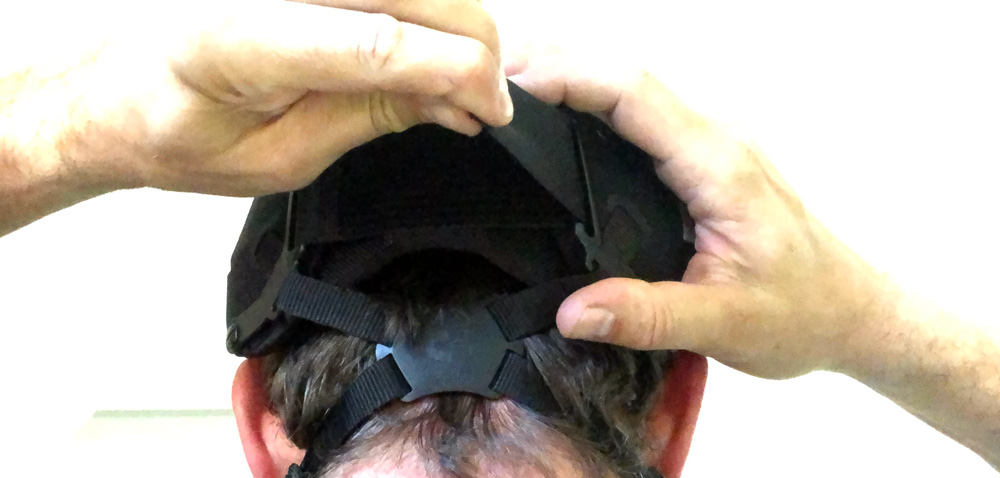
Find the loose end, pull until the fit feels comfortably snug then close the velcro. This is an adjustment you’ll need to make everytime you put on the helmet after unfolding.

The remaining adjustments should be a one-time affair unless you’re sharing this helmet with someone else. Reach behind and grab the straps running behind your ears.
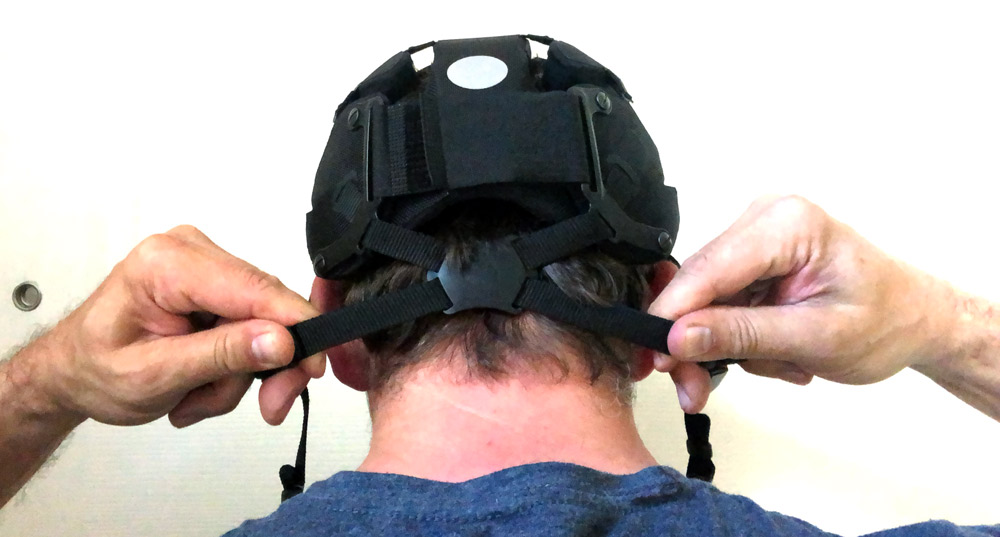
Pull across away from your ears and the plastic guide in the back will slide up and automatically center. You should now be able to get a feeling for how much you will need to adjust the positioning clips that should sit under your ears and slightly above your jawline.
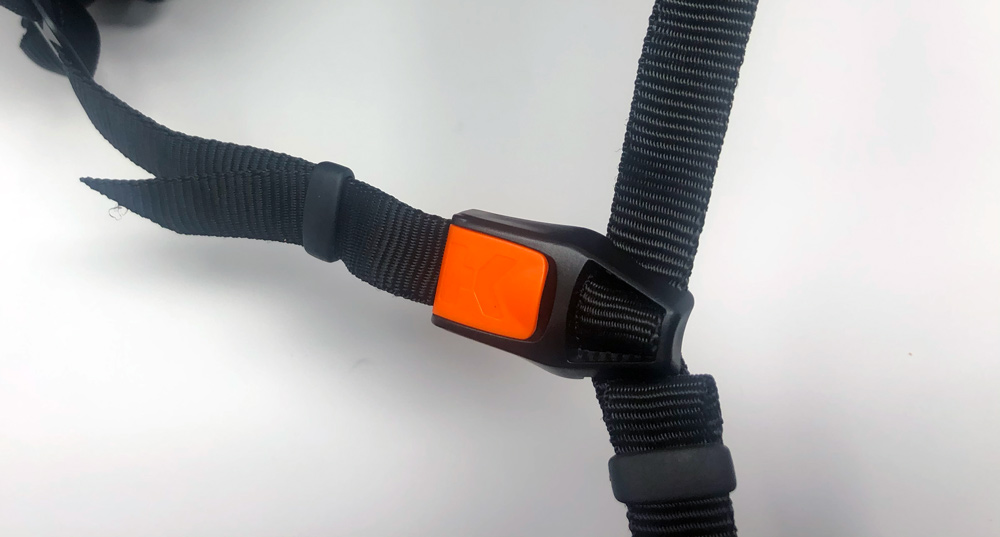
These clips adjust fore/aft with a cam-lever and up/down with a tension path through the clip. Play around with these until you get the fit comfortable and out of any annoying ear lobe contact. You may also want to check your fit with any sunglasses you wear in case further adjustment is needed.

Performance

Ok. So here’s the deal. How do you review the crash performance of a helmet without putting yourself in danger? Well, you don’t, or you spend a fair amount to have an independent lab run impact tests. (Fill this out)

What I can review is all the other things that come with wearing and living with a helmet.

How about fit and comfort? I was skeptical that a one-size solution could be a good choice for me. I mean, flex-fit baseball caps hurt my head after a short span of time. The Velcro adjustment here works well and more than that feels very secure. Additionally the helmet feels substantial which is a good thing, like you actually have protection up there.

Actually, the only area where I had a fit concern was at the base of my skull. Hedkayse One provides better coverage than most of the foldable designs that I’ve seen and more than a lot of standard helmets for that matter. Turns out that my regular cycling helmet has a dial that I crank in and provides more pressure. There’s actually the same amount of coverage, just a little less hugging feeling down low.

If you need to adjust the positions of the “sweat” pads, peel them back slowly and hold the adhesive velcro dots against the shell as you remove the pads as they don’t seem to stick to the Enkayse skin very securely until you’ve worn it a bit as now they’re stuck real solidly.

The ratchet mechanism under the chin is easy to close and open and the micro-adjustability is a great feature should you need a little more room to run a thin wind-block beanie under your helmet on a cold day.
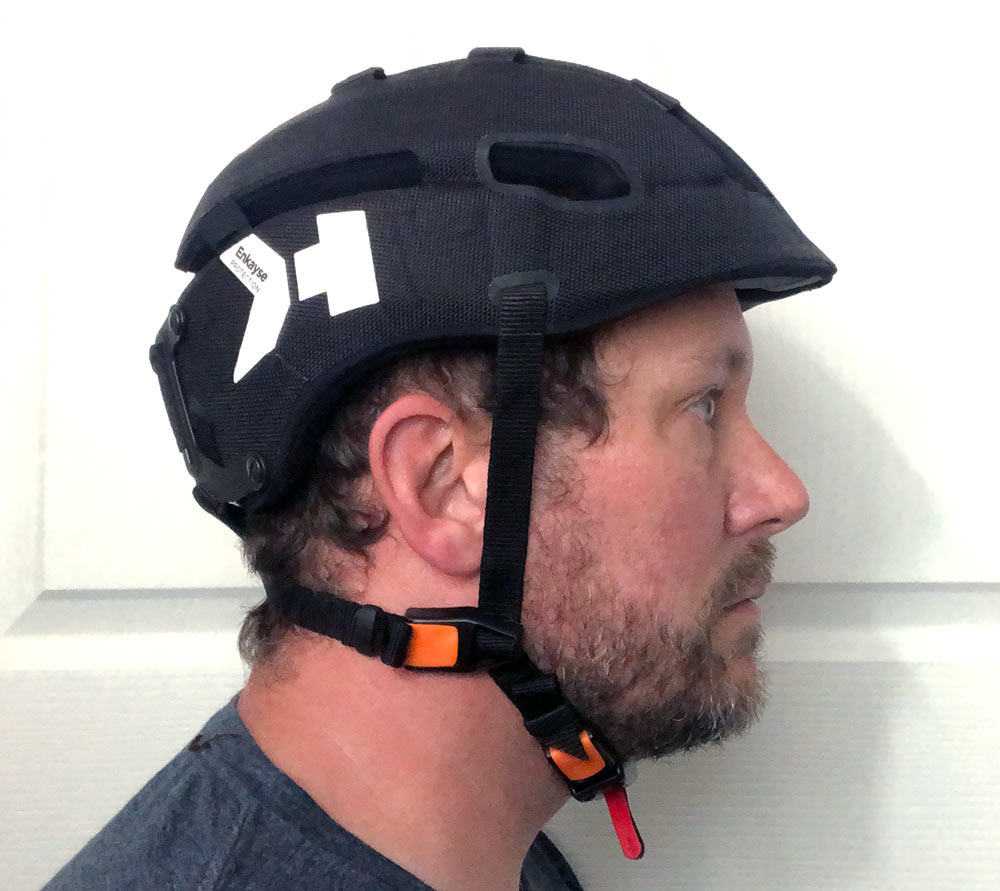
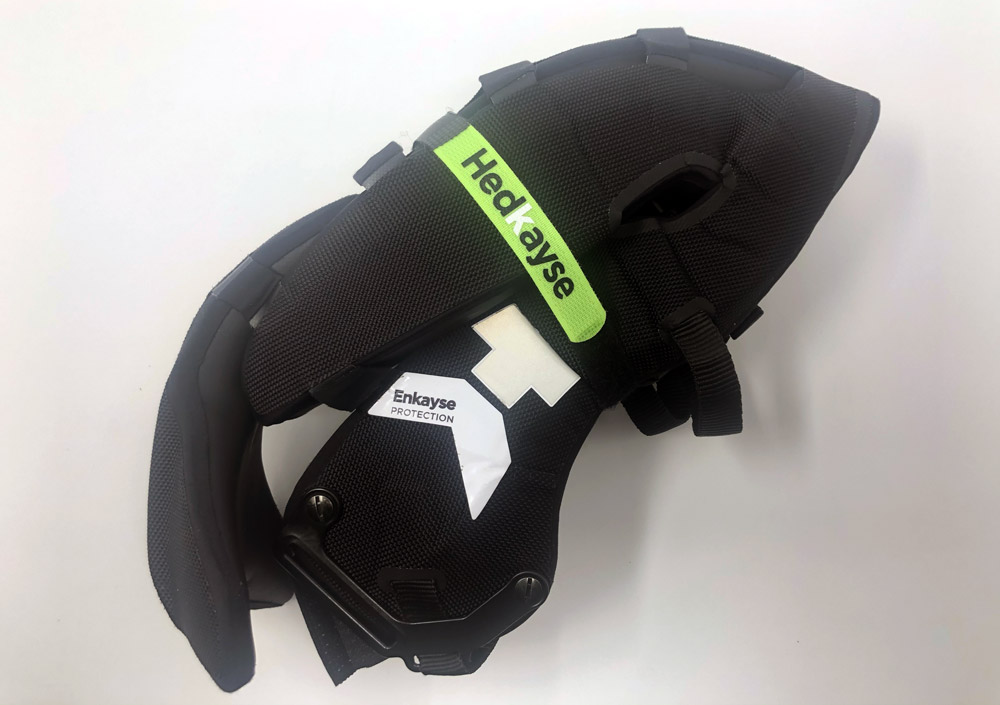
How about folding? There are a number of folding helmets available on the market and they all seem to address it differently, many by possibly compromising protection. I can confidently say that Hedkayse kept protection their top priority. Folding the helmet reduces its width by about a third into a shape that almost resembles a football.
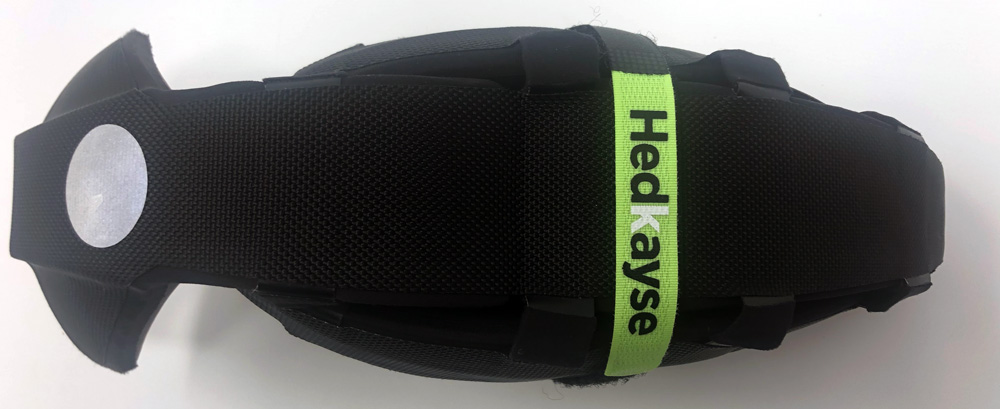
Using the compression strap creatively you can get that even flatter.
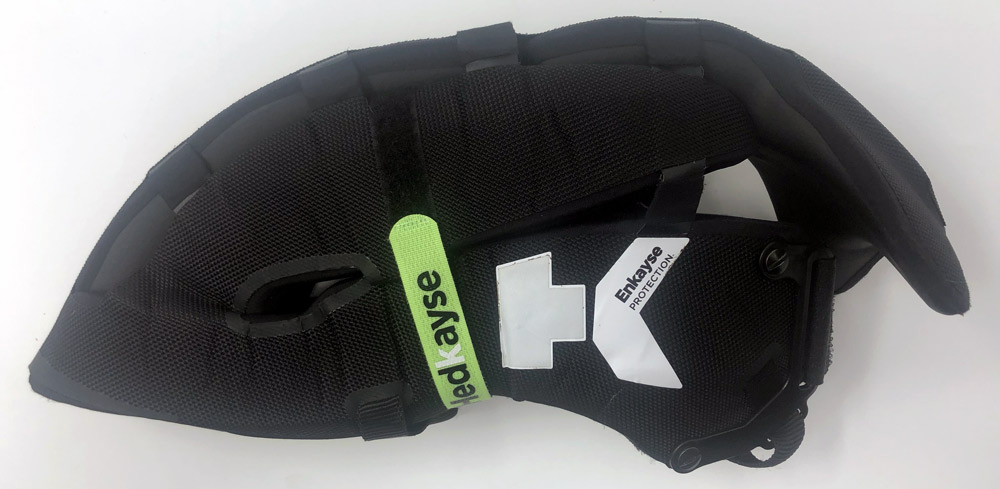
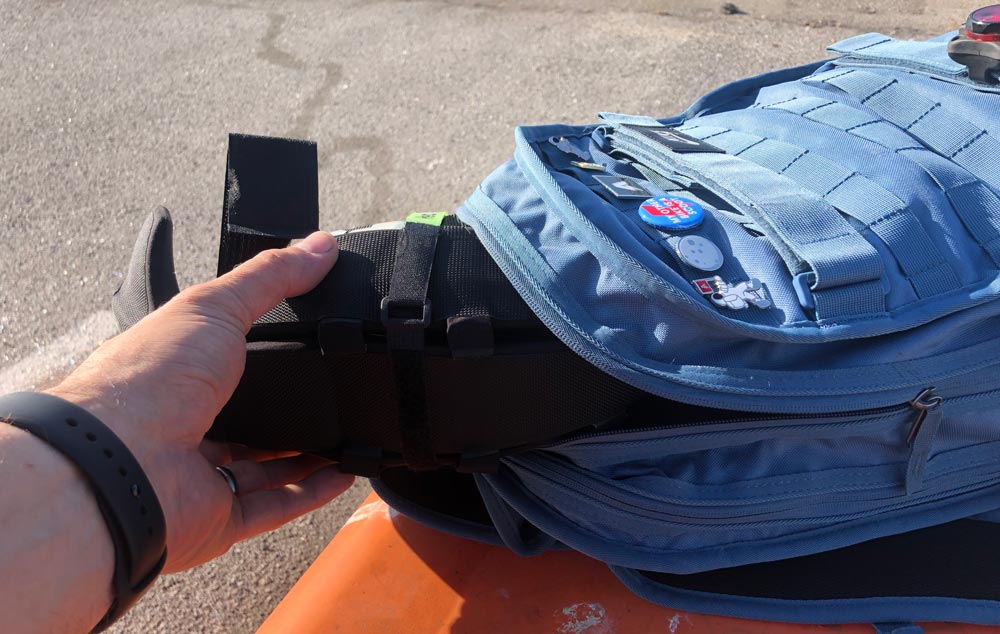
Either way it takes up a good deal less room in your bag than a full-size helmet which is super useful if you want to keep a helmet on hand.
There’s really only two small nitpicks that I’ve encountered in a month of using the helmet that I’ll poke at.
One: On unfolding, make sure to close the velcro after feeding it back through the receiver otherwise it’s real easy to have the velcro pull back out when putting the helmet on your head and it’s a real pain to feed it through while wearing it.
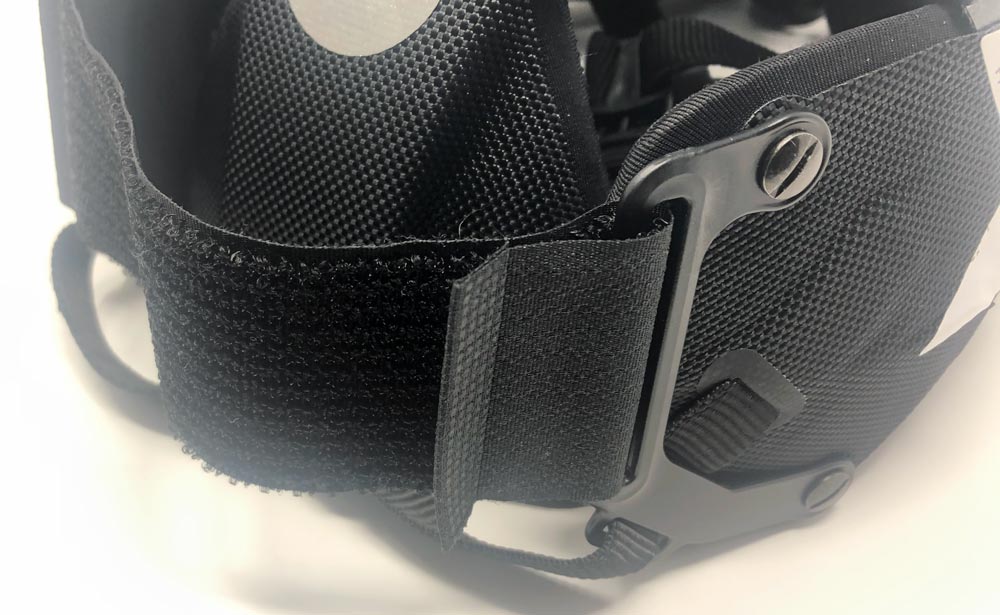
I’m not sure there’s a better way to do this as you do need to fully disengage while folding, but if you remember to close on unfold this becomes a non-issue.

Two: The compression strap is definitely helpful for keeping the folded helmet as small as possible, but it’s an additional thing to keep track of.
I got to work one morning and the strap was not in my bag or any of my pockets. At the end of the day I found it on the ground next to my car and was surprised it hadn’t blow away. I did find that with the straps adjusted to my head I was able to loop that strap around and just get one click. If one of the two chin strap sides were easier to slide, this might be a great solution for all.
I didn’t use the storage bag at all as it’s just an extra step. It will come in handy in the rainy season, or for storage for anyone that does have an off season.

What I like

  • The fit, comfort and look
  • Quality construction and hardware
  • Enkayse material and cordura shell

What I’d change

  • A solution for completely unthreading the velcro when folding/unfolding
  • A solution for folded compression that doesn’t require a separate strap that can get lost

Final thoughts

I live in Oakland, work in San Francisco and ride a bicycle almost every day. The number of cyclists I see without helmets scares me. When you look at riders on shared electric vehicles that ratio falls through the floor. I get it that as a cyclist or rider you feel in control of your vehicle, but road conditions can be abysmal and cars… well they’re just large and unforgivingly metal and heavy. Please recommend a helmet (any helmet!) to someone you know that is routinely on a personal vehicle in traffic. Help keep them safe. I’ve said my piece.

Overall I’m really happy with how the Hedkayse One fits me. The composition is reassuringly solid and if you do bump your head (or a friend bonks you on the helmet) it has a diminished feel to it instead of that instant jolt normal helmets tend translate.Hedkayse has an amazing product here. They didn’t set out to just create a foldable helmet, but have instead created a helmet that arguably protects better and collapses to make it easier to keep on your person.

Price: $180
Where to buy: Hedkayse
Source: The sample of this product was provided by Hedkayse.

Filed in categories: Reviews

Tagged: ,

Hedkayse One foldable helmet review originally appeared on The Gadgeteer on August 24, 2019 at 10:30 am.

Note: If you are subscribed to this feed through FeedBurner, please switch to our native feed URL http://the-gadgeteer.com/feed/ in order to ensure continuous delivery.

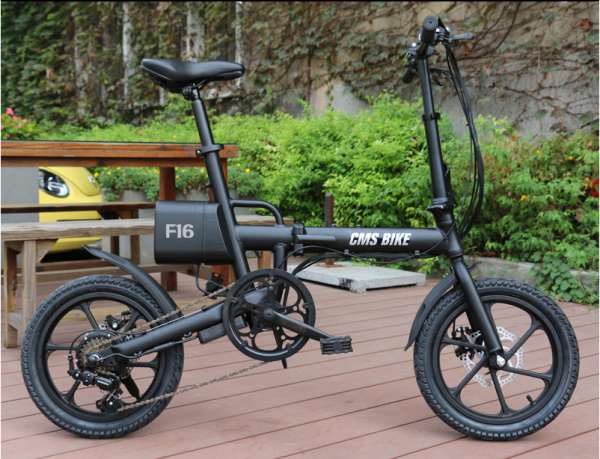
The CMSBIKE F16 Folding Electric Bicycle provides power on the go in more than one way!


NEWS – I can remember my boyhood days when riding a bicycle was not only one of my important daily activities for fun, but it was also my only mode of transportation if I wanted to be independent and to travel wherever I wanted in a reasonable amount of time. Back in those days, every bicycle was a pedal bike, and whenever I got tired the only options were to stop and rest or to discontinue any further travel plans and return home once rested.

These days, now that we have become accustomed to having every convenience when on the go and to getting where we need to go with minimal effort, there are electric bikes to replace our pedal bikes if that is our intended mode of transportation.
The CMSBIKE F16 is exactly such an option/alternative. This electric bike features three riding modes; the human mode, the assistant mode, the electric mode. It is built on a light and flexible frame that is foldable for easy storage and carrying if/when necessary.

It also features a front and rear dual-disc brake system on 16” wheels, with a frame made out aluminum alloy, a 36V 250W brushless high speed toothed motor, a maximum speed of 25km/h/15.5mph, a built-in 2600mAh Li-ion battery for charging and powering mobile devices, an LCD Instrument panel, LED headlights and it weighs 20kg/55lbs.

The CMSBILE F16 is available for purchase on the Bangood website for $690.

Filed in categories: News

Tagged:

The CMSBIKE F16 Folding Electric Bicycle provides power on the go in more than one way! originally appeared on The Gadgeteer on August 2, 2019 at 10:00 am.

Note: If you are subscribed to this feed through FeedBurner, please switch to our native feed URL http://the-gadgeteer.com/feed/ in order to ensure continuous delivery.
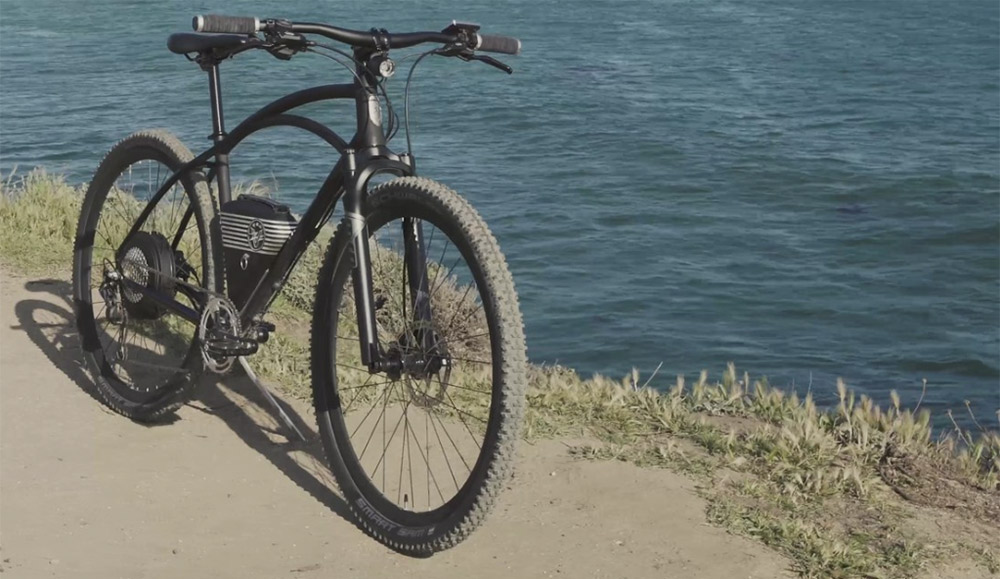
Vintage Electric’s new Rally may have you commuting off-road

NEWS – Andrew Davidge and his team have been steadily evolving their unique blend of electric bikes since 2013. With the exception of the Cafe model, all of their bikes have looked and felt more like motos in a good way. If you haven’t checked them out, you definitely should.

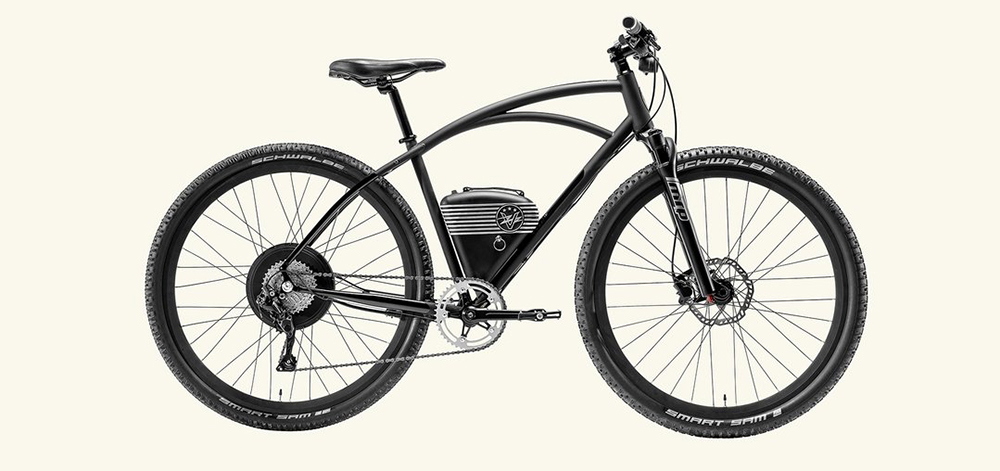
Sifting through today’s onslaught of emails I found an announcement of their brand new model, The Rally. It looks to leverage the Cafe’s frame, but everything else looks custom specified to let the bike tear up any terrain with lots of control over performance.

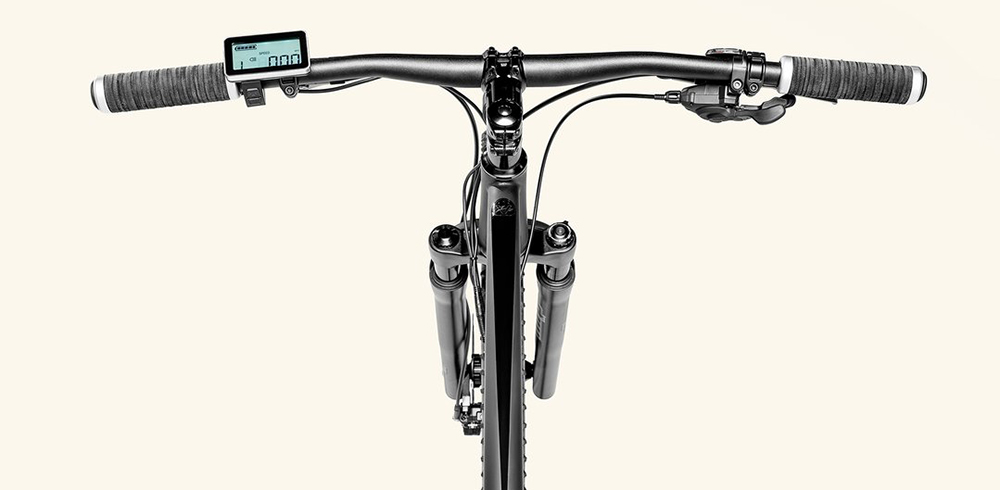
A removable battery pack that charges in 2 hours powers a 750w motor and provide 20-60 miles of range depending on how much effort you’re adding with your legs and which of the 5 assist levels you’re running.

With a total weight of 53lbs including the battery and a custom MRP Baxter suspension fork, my guess is you’ll be trying to figure out where you can’t go with this. Rally on!

Pricing starts at $4995 and it’s available now although quantities are limited. Hit up Vintage Electric Bikes to find out more or get your reservation in. Who needs a car?

Filed in categories: News

Tagged:

Vintage Electric’s new Rally may have you commuting off-road originally appeared on The Gadgeteer on June 5, 2019 at 8:00 am.

Note: If you are subscribed to this feed through FeedBurner, please switch to our native feed URL http://the-gadgeteer.com/feed/ in order to ensure continuous delivery.
Silca Seat Roll Grande Americano review

REVIEW – If you’re a cyclist, chances are you’ve heard of Silca. They’re known around the world for their bicycle pumps which they’ve been making for over 100 years. They also make amazing tools and accessories that all have an attention to detail that would be hard to call anything other than obsessive. My first job was building BMX bikes at my local bike shop. I picked up the wrenches again in college before my first real career in snowboarding. What’s the point of memory lane here? Silca recently launched an under-seat pack that uses a Boa reel for cinching it to the bike. I use a Boa system on my snowboard boots today and remember their launch almost 20 year ago. My two favorite sports coming together – Sign me up. Detail time.

What is it?

Silca’s Seat Roll Grande Americano is a fold-and-roll pouch that stores under the seat on your bicycle. Under seat bags are great for holding the necessities (like tools) that you don’t want in your jersey pockets or in a backpack.

What’s in the box?

  • Seat Roll Grande Americano
  • Hanging Card Packaging

Hardware specs

  • Ballistic nylon with a DWR coating (Durable Water Repellent finish)
  • Uni-body, one piece construction
  • Boa® closure system
  • Rail guard – Protects and grips seat rails
  • 3 internal pockets
  • Heavy duty elastic for adjustable volume closure
  • Sewn in the USA

Design and features

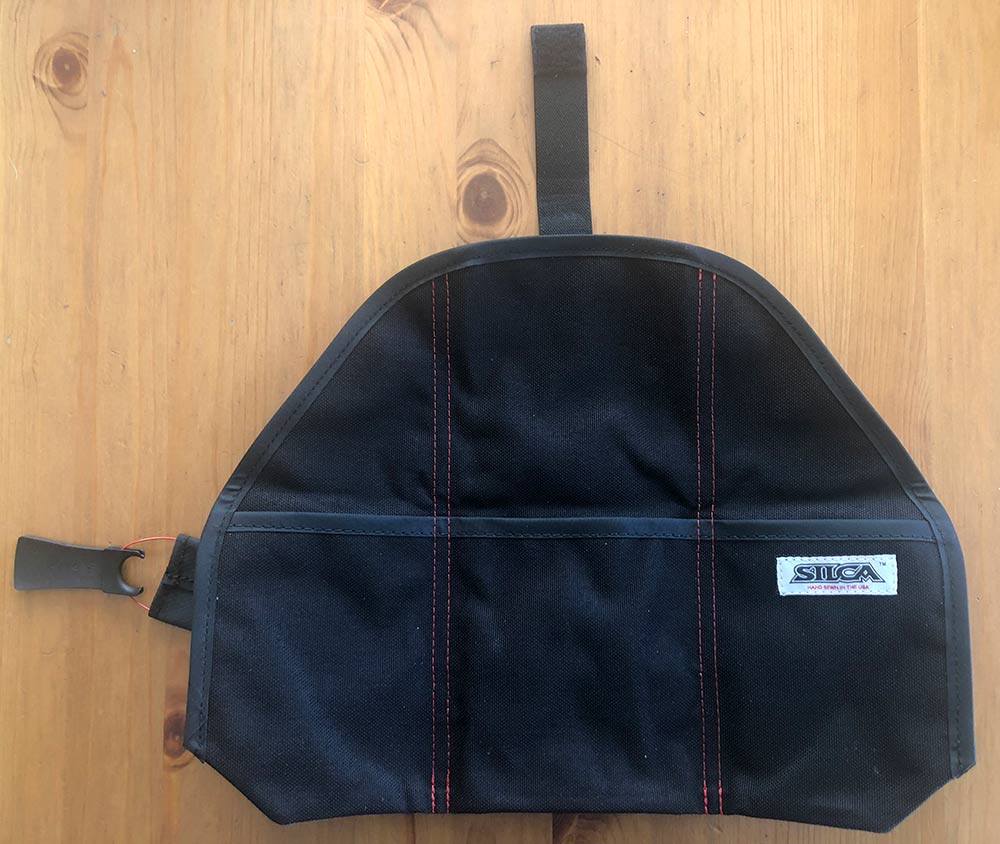
Deceptively simple, the Seat Roll Grande Americano is essentially a tool roll. It’s made out of a single pattern that’s folded and securely stitched to create it’s three pockets and flap and then a strong elastic strap to help hold the thing together.

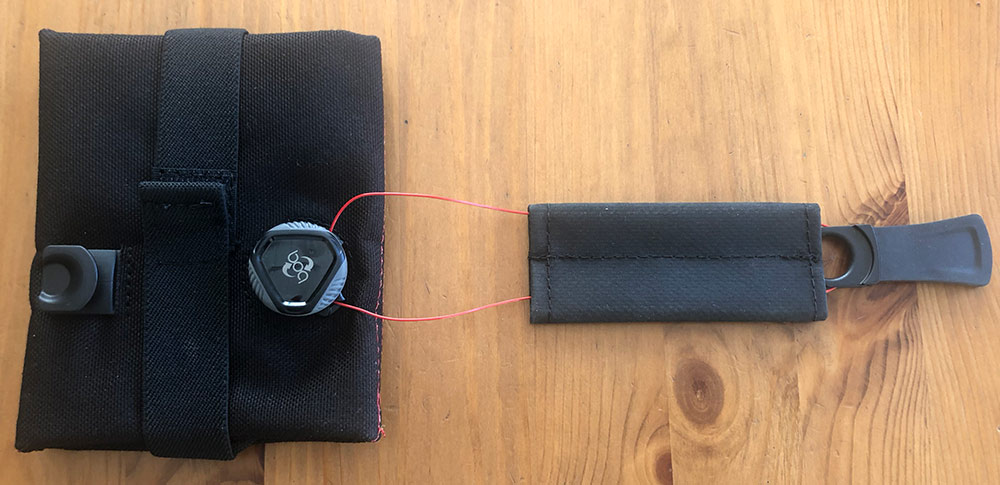
The other major design feature is a Boa closure system that uses a very thin cable that retracts and releases with a very intuitive reel. I’ll explain how to use one in just a minute, but what you should know is that it’s crazy durable, super light weight and leaves nothing dangling behind. Velcro can be a mess, pick up mud and the hook side can wreck clothing. Yay Boa!

Setup

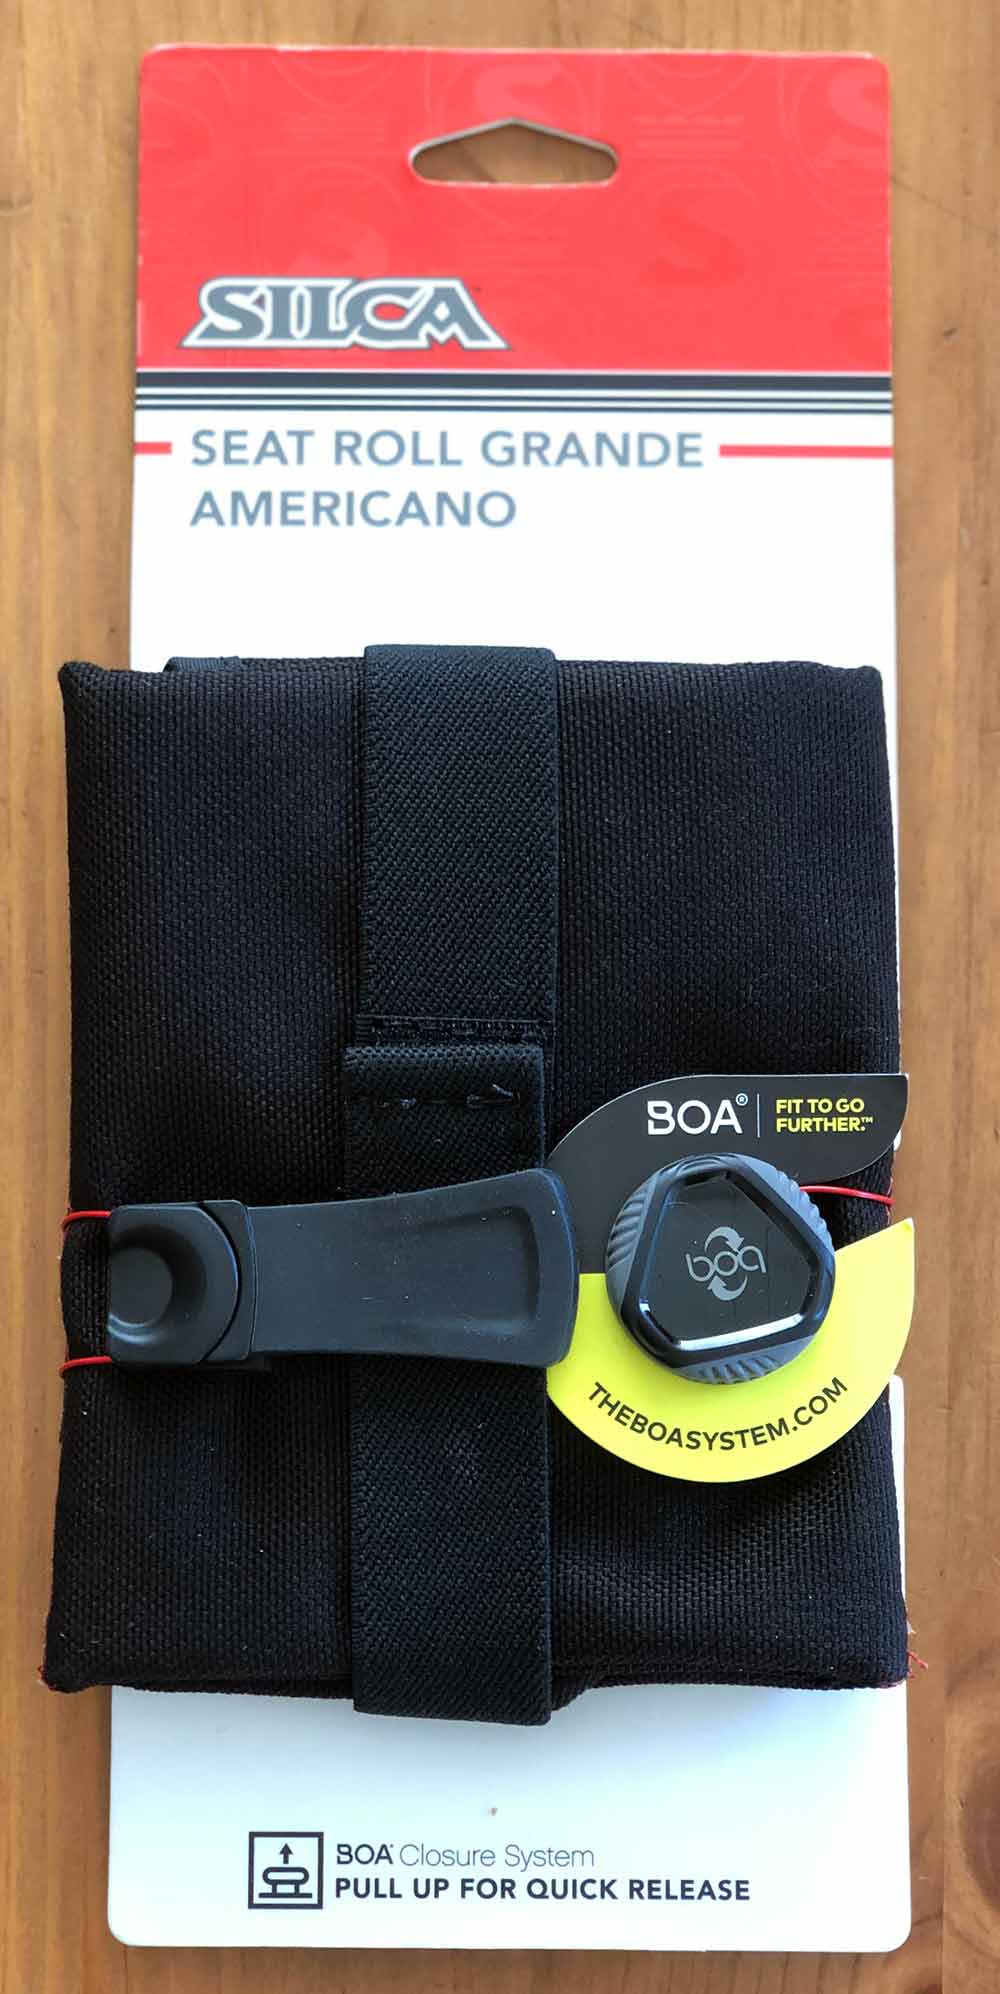
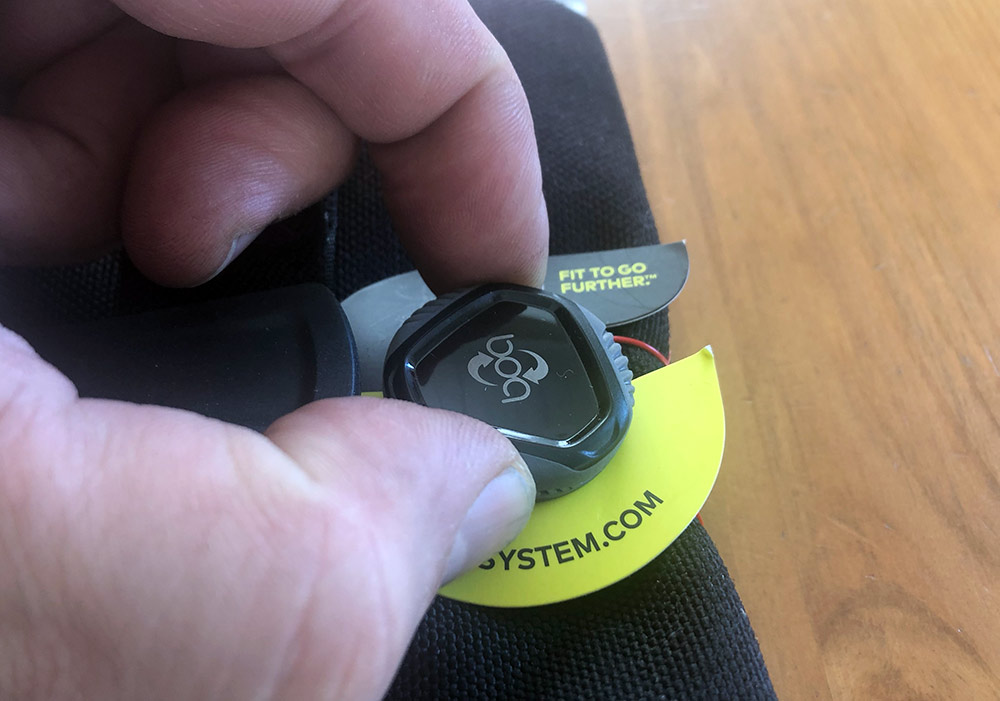
Removing the pack from the card can be a bit confusing if you haven’t used a Boa reel before. Grab the Boa reel with your thumb and forefinger and pull straight up until you hear a click.

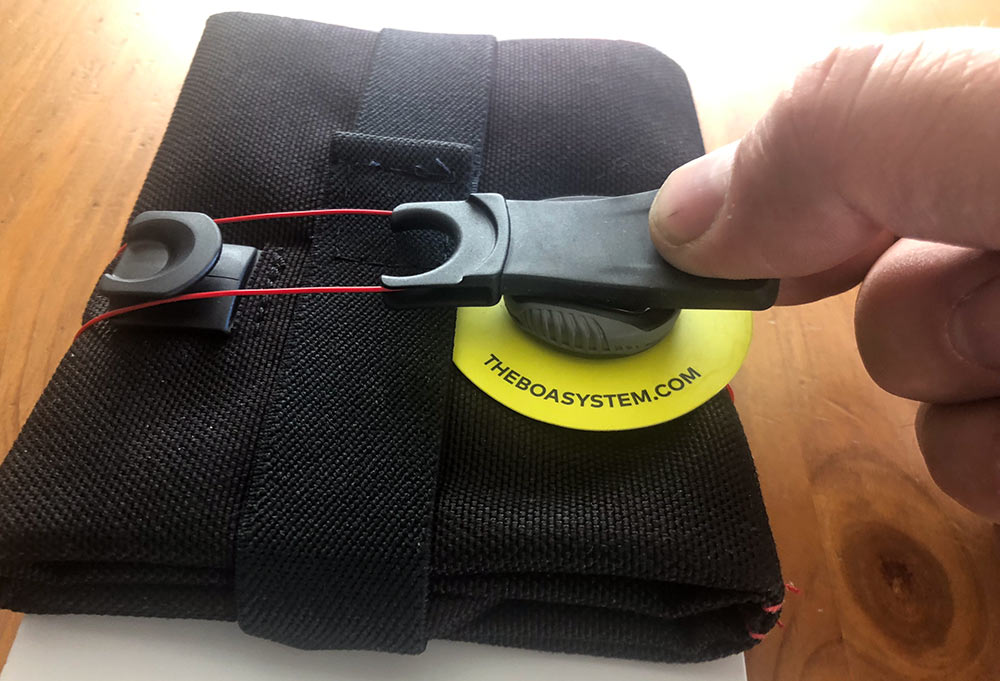
Then grab the pull tab and pull sideways to free the tab and “unspool” the reel.

Now you’re free of the hang card.

From there go ahead and undo the velcro and unfold your pouch.

Performance

As I mentioned up above I’ve been using a Boa system on snowboard boots for a while. I trust them to keep my feet safely in my boots, so lashing a pouch under a bike seat seems like a pretty easy task for this ingenious little reel.

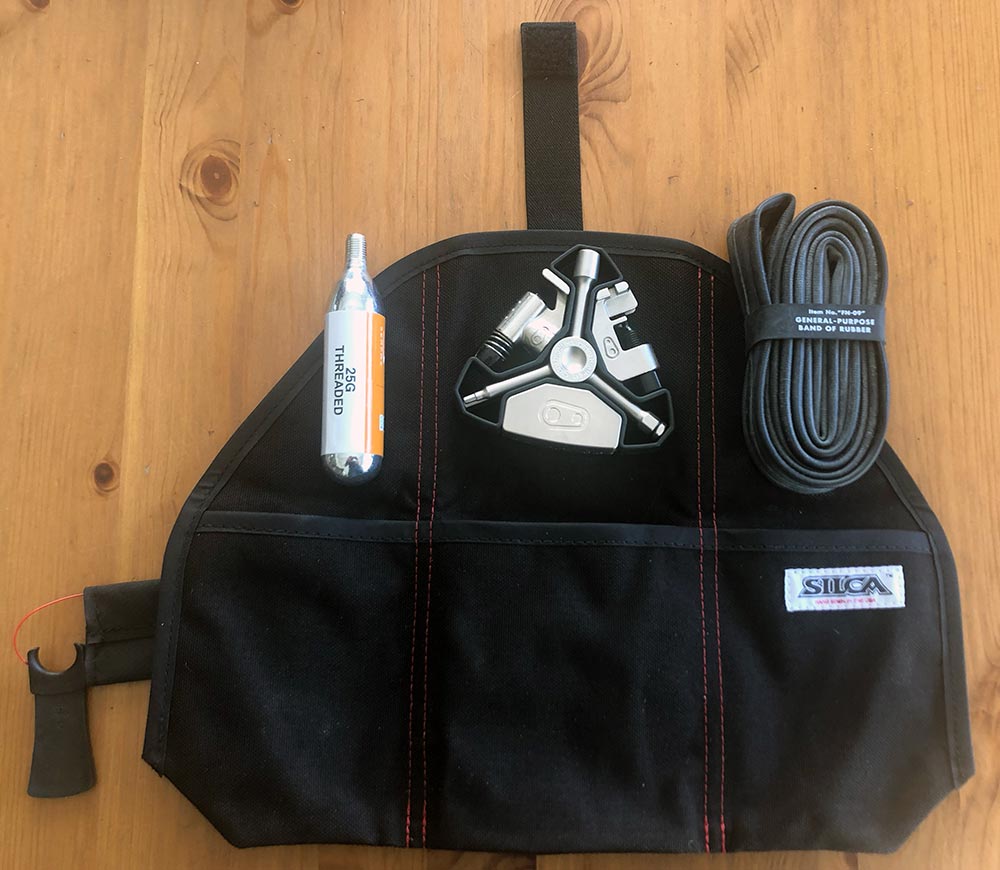
The three pockets are evenly divided with the center pocket being the largest.

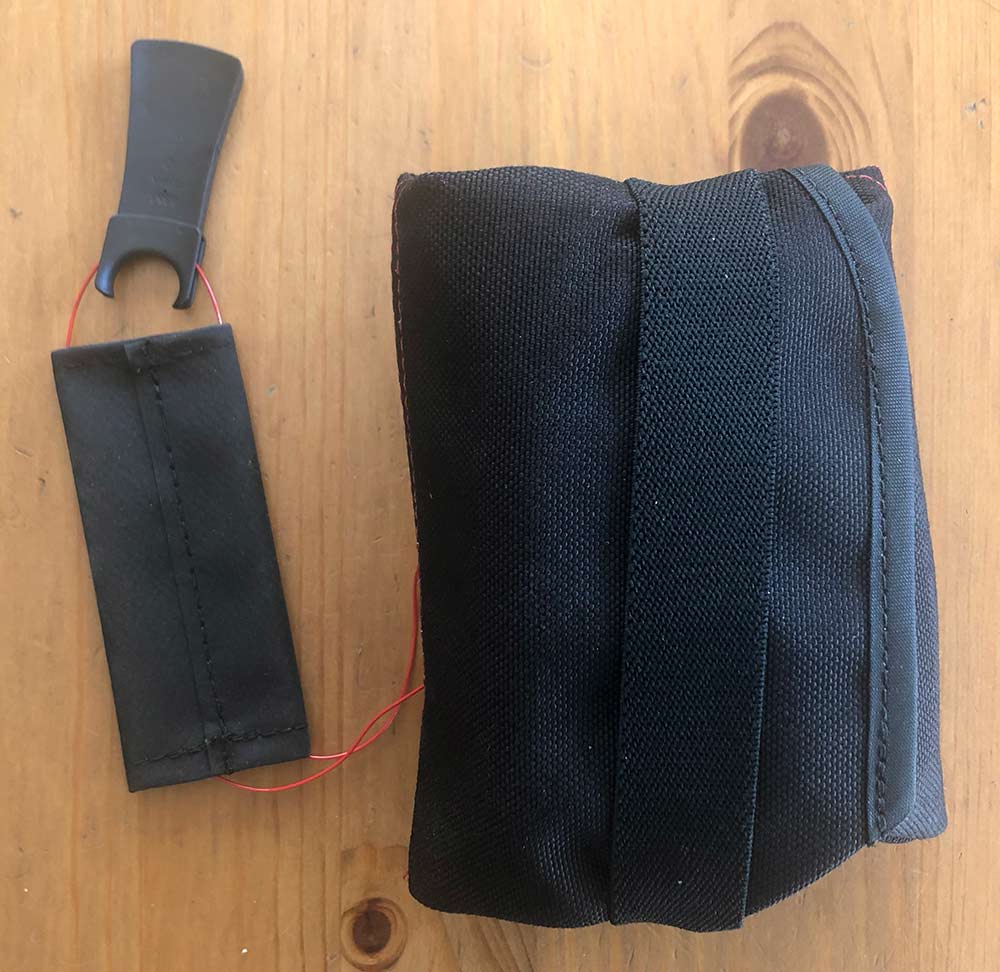
I carry a rather large multi-tool with a CO2 regulator that only fit in the center pocket, so that decision’s made. The 700c x30 tube is in the right pocket and a CO2 cartridge and maybe some tire levers over in the left pocket.

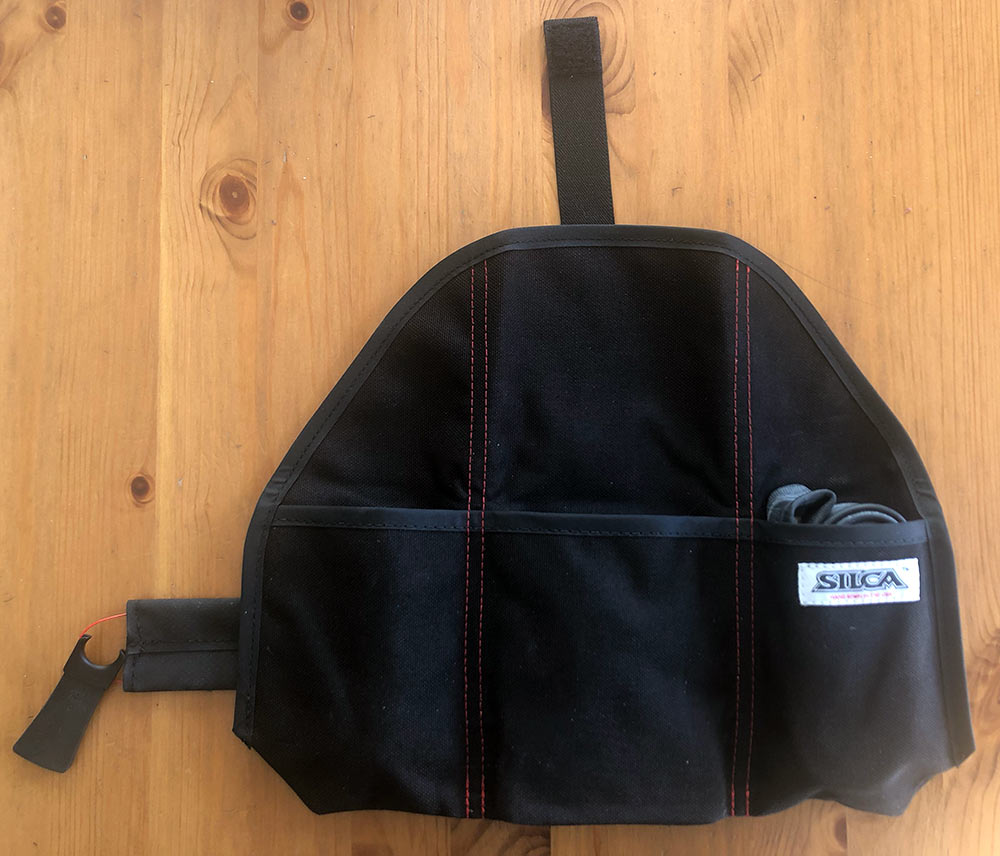
Here’s all those tucked firmly down in.

When folding down the top, you’ll want to fold as close to or actually on the pocket top if you can to reduce the risk of any gaps for stuff to get out or muck to get in. Fold each of the sides in and secure with the big, sturdy elastic band.

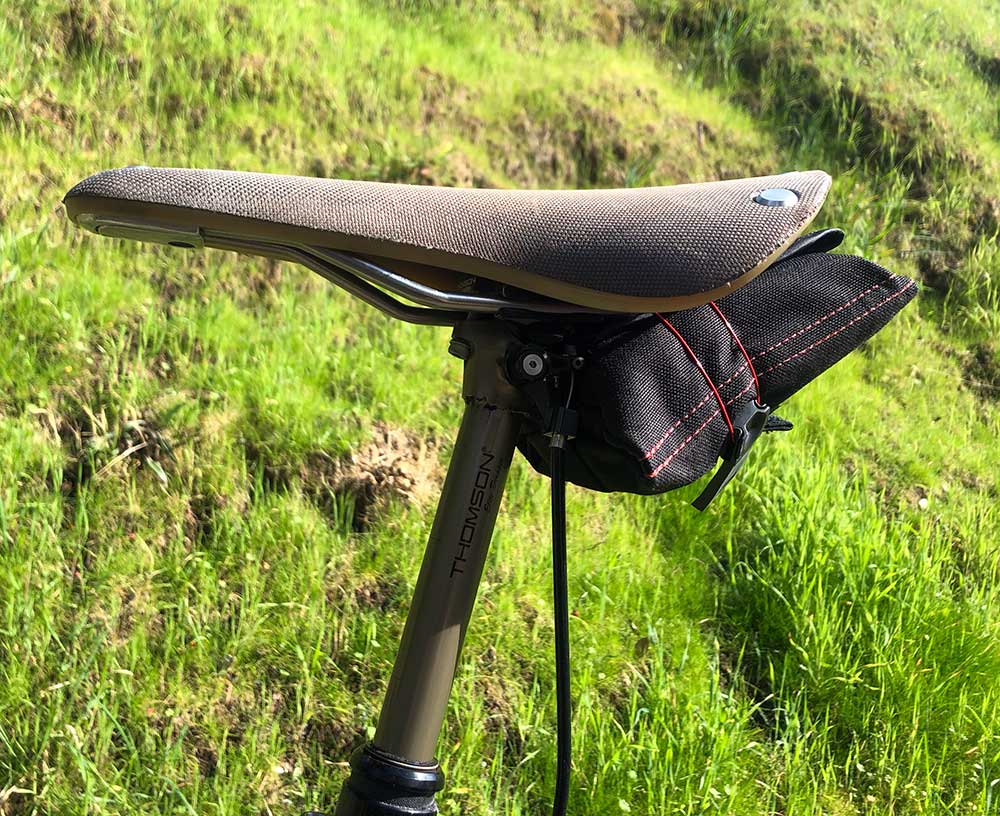
Putting it on your bike is a simple process of feeding the flat rail guard section shown above over your seat rails, hooking the pull tab on the receiver and then ratcheting it down. You may need to hold the guard in place, but it’s an easy process and you literally just turn until it gets hard to turn. Make sure you push the Boa reel down for the click to ratchet mode.

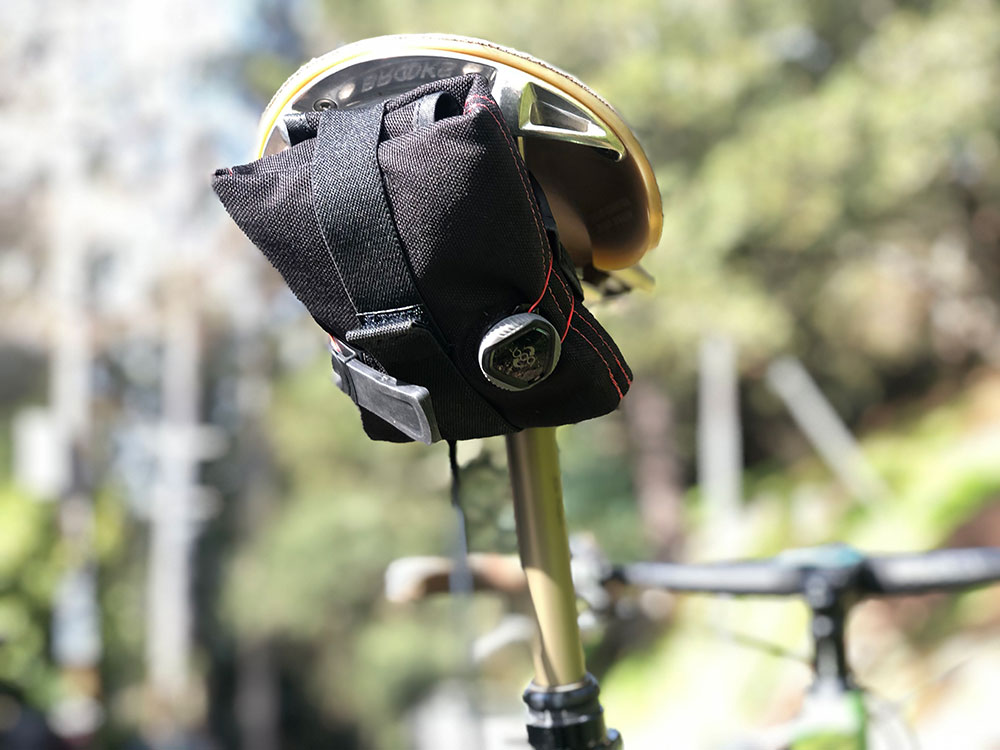
Here’s how it snugs up under a seat.

You may want to play with the organization of your stuff in the pockets to get them as flat as possible and pushed to the outer edges of the outside pockets as this will give you the smallest pack when folded.

One thing to know is that as a tool roll, it gets completely removed from the bike when you need access to your stuff. This is a good thing as all your tools can be visible at once on a flat surface, rather than digging in a tiny bag still on your bike.

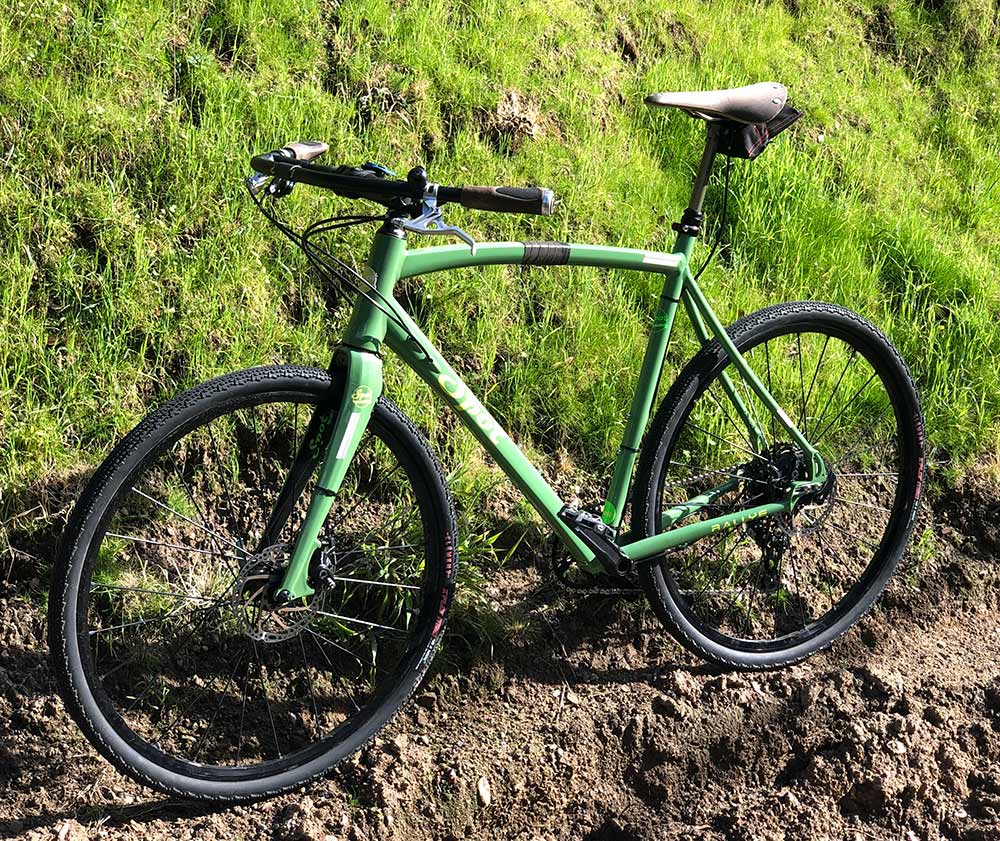
The Boa system is ideal for this scenario as the volume completely adjusts depending on what you have in the roll, and then how tight you ratchet it down onto your seat. As a result, there’s no rattle or noise or swinging weight from under your seat. In a word… perfect. Great addition to my gravel bike.

What I like

  • Boa closure system
  • Materials and construction
  • Security to bike when riding
  • Jangle free

What needs to be improved

  • None that I could find

Final thoughts

I usually run a lightweight waterbag for rides, but the Silca Seat Roll Grande Americano holds my tools and some of the bulkier items so securely and silently that I’ll be throwing a cage and bottle on my bike now for shorter rides. Silca’s pack doesn’t move once it’s ratcheted down and there’s something immensely satisfying about the click and unspool of the Boa to get to your gear. It almost creates a desire for a flat tire to occur… Almost.

Price: $58
Where to buy: Silca.cc
Source: The sample of this product was provided by Silca.

Filed in categories: Reviews

Tagged: ,

Silca Seat Roll Grande Americano review originally appeared on The Gadgeteer on March 29, 2019 at 9:00 am.

Note: If you are subscribed to this feed through FeedBurner, please switch to our native feed URL http://the-gadgeteer.com/feed/ in order to ensure continuous delivery.
Shanren Di-Pro bicycle computer review

REVIEW – When it comes to technology to track your personal athletic training en devours, there are a ton of options out there.  When you focus in on bicycle computers that only lessens the field a little bit.  The big players out there are currently Garmin and Wahoo.  I have had my current bicycle computer the Garmin Edge 205 for well over ten years now. (Amazing considering how often I upgrade my personal technology!) That being said, I have been on the lookout for a new bicycle computer.  I was offered the chance to review their Di-Pro bicycle computer by a company called Shanren.  Let’s see how it worked out for me.

What’s in the box?

Shanren sent me three additional items along with the Di-Pro bicycle computer.  They sent a speed sensor, cadence sensor and a fly out bicycle mount.  I am going to focus on the Di-Pro bicycle computer first.  What was inside the box was pretty simple.  There was the computer itself which was nicely packed in cut out foam as you can see in the picture below.

In the box below the computer there were the bar mount and USB charging cable.  Underneath the computer was the fold out instruction manual.

Design and Features

First off let me state that this is a big computer.  It is trying to do several things along with being a computer.  The first picture above shows you the layout of the screen.  I could not find any way to adjust what was displayed on the screen.  I know a lot of competitors will let you pick what fields are being displayed.  I am going to assume that since it is such a large computer with a big display, they figured they will show everything because they can.  Looking at that display you can see they show your speed,  distance, total time riding, RPM (this is cadence and will only be available if you have a cadence sensor), elevation, heart rate (only available if you have a heart rate monitor) and an power meter wattage percent (only if you have an output sensor).  It should be noted that the Amazon web site says sensors must be Bluetooth capable.  However the manual that came with the device says it does support ANT+.  All of the devices I connected supported both Bluetooth and ANT+ so I can’t really tell you which method it used to connect to the computer.

Part of what makes this computer large is that it has a couple of lights on the computer.  The second picture above shows the highest level of light which is supposed to be 260 lumens.  The light is a CREE LED light.  The light is rated for 3-6 hours.  I tested and the light will run out just before the computer does.  So when you see that light go out, end your ride soon or data will be lost.  Right above the Shanren logo is a set of multi-color LEDs which can show various colors for different options.   The light is a nice option and will hopefully make you more visible as you ride on the road  The colorful LED strip is a nice feature to quickly know what your heart rate is or your speed.

The back of the computer has the mounting point and a nicely sealed micro USB port to charge the computer.  When you pop the rubber gasket off it dangles nicely by a small rubber cord so you can’t lose it and makes it really easy to attach the charging cable without having to worry about holding the rubber gasket out of the way.

To give you an idea of the size of the computer I took a picture of it next to my Garmin Edge 205.  You can see it is quite large.  My manually measured dimensions are 4 and a quarter inches long and 2 and 3/8ths inches wide.  The light makes it pretty deep at 1 and 1/4 inch deep.  The weight is listed at 135g.

The three images above show the menu functions of the computer itself.  This computer does a lot.  A big plus is that you can set a lot of them through the app.  However, setting up sensors requires quite a bit of clicking on the computer.  Pressing and holding the Set and Mode buttons at the same time put a menu at the bottom of the screen where you can do several things.  You can manage the light settings, manage sensor connections, handle general settings and handle power meter settings.   The power meter settings are the most complicated.  I have never owned a power meter except on the Peloton stationary bicycle I have at home.  Looking at the power meter settings it seems like all of the options necessary to set one up and calibrate properly are there and ready to go.  Now let’s get into the external accessory setups.

Speed Accessory Set Up

The first accessory I set up was the speed sensor.  The first picture above shows what came in the box.  You have the rubber mounting kit and the actual speed sensor.  The sensor came with a battery already installed. Opening the cover on the back of the device was really easy compared to how I have had to get to some Garmin batteries on various sensors.  It uses a standard 2032 battery and had a plastic liner I had to remove in order to allow the sensor to start working.  It has a small red led that flashes in the bottom right corner below the logo to show it is working.  In order to conserve battery, it will go into a sleep state until it recognizes movement which I thought was a nice feature.  I don’t see why this sensor which is ANT+ and Bluetooth could not be used with any other bicycle computer out there that accepts ANT+ or Bluetooth.  I slipped the computer into the rubber mount (that was a bit tricky, but I often make things harder than they should be!)  The second picture above shows the speed sensor in the mount.  The third picture shows it mounted on the front axle of my road/gravel bicycle.  I simply held the sensor in place and wrapped the rubber loop around the axle and caught it on the notch on the computer.  It has held up nicely and I do not see any slippage of the sensor.

To connect it to the Di-Pro, I pressed the Set and Mode buttons to get to the setup menus.  I had to press Mode once to set to the sensor setup and then press the Set button to get into the sensor setup.  Once I was in the Sensor menu SPD or speed was my first option.  I press mode again to highlight the SPD sensor and then pressed SET for it to start searching for the sensor.  I made sure to rotate the front wheel so the computer could find it.  I found it with no problem and immediately started registering a speed.   I actually set the wheel size through the app which I will talk about later in the review.

Cadence Accessory Set Up

The next sensor I set up was the cadence sensor.  It uses the same battery as the speed sensor.  It was also easy to open the battery compartment and remove the plastic protecting the battery.  Unlike the speed sensor, this device did not have a rubber mount for me to insert the sensor into.  The sensor has lips on both sides where a Silicone loop can be attached to.  The first picture shows the sensor mounted on the inside of my left pedal.  The next picture shows the silicone loop going around the pedal and attaching to the sensor on the other side.  Shanren provides 2 small and 2 large loops.  I found the small loop worked for my bicycle.   I then connected the sensor to the computer following the same steps I did above for the speed sensor.  The only difference is when I got into the sensor menu I had to press Set and extra time to get to the cadence sensor.

Mounting the Computer with Off Bar Accessory

As I mentioned at the beginning of the review, the computer did come with a standard handlebar mount.  Shanren does offer what they call a Fly Off computer mount.  This mount lets you put the computer in front of the handlebars and not take up any room and the handlebar itself.  This seems to be the trend for all bicycle computers out there now.  I personally like this feature as it puts the computer in a better place to quickly see how you are doing on your ride.  The first picture shows you everything that came in the box.  There is the mount itself, an Allen wrench and two sizes of Silicone adapters you put in the mount to make it work with your particular handlebar size.    The item in plastic is a 3D printed Garmin mount.  They called it a prototype and it was a bit rough on the edges.  I could see how it would go into the existing mount and then you could use it to mount various Garmin computers that are designed for that particular mount.  I don’t own any Garmin devices that would work with it so I could not test it out.

I used the smaller Silicone adapters and quickly mounted it to my bicycle handlebars as you can see in the second picture.  The third picture shows the mount with the computer on.  You can see how nicely the computer is mounted this way and how it would be in a better position to see how you are doing while riding.

Using the Shanren App

When I first got the Di-Pro I loaded the app on my Samsung Galaxy S9 which at the time was running Android 8.  The first screen above shows what you get when you first get into the app. The next two screens show creating an account and setting up my personal profile.  They do have an option for imperial settings along with metric but that was on another screen.  Even though I did pick imperial later I found the app a bit inconsistent when it came to displaying numbers.  Some were imperial and some were metric.

The next screenshot above shows the home page for the profile icon on the bottom right.  You can click on the satxbiker at the top and it will take you to the personal settings page you see on the third screenshot.  You can see it is now displaying in imperial units.  The advanced setting screen is the second screenshot.  There you can link to your Strava account.  Note – I did connect to my Strava account and not once did the computer ever send data to Strava.  My Garmin Fenix 5s sends data to Strava right after I end my exercise and press save.  I never figured out how to get it to send data to Strava.  There is also a voice broadcast option where you can get it to give you audibles on time or distance.  I never turned that on but I assume it works like the app RunKeeper .  The next setting is where you set your unit type and then there is an option for recovery from a firmware upgrade.  I never had a firmware upgrade at any time.

The next screenshot shows you what the heart rate zone screen looks like from the profile page.  I think it is a really nice feature in that you can use the default age calculation for heart rate zones or set your own.  I set my own as you can see.  The next screenshot is the home page.  I want to note that the Navigation link at the top does not work.  When you click on it, it says it is coming soon.  That really bummed me out because part of the reason I want a new computer is I want it to be able to upload maps and give turn by turn directions.   I next clicked on the Devices link at the top.  That will take you to the third screenshot.  You only get this screen if the device is connected to your phone.  Initially, when I tried to search for the Di-Pro the Android app did not work at all.  It acted like it never even searched and kept telling me to turn on location services for the app which they were already on.  So I initially set the computer up through my IPad Pro which could find the device.

You can see you can set a lot of options through the app.  The backlight option will simply turn the backlight on the display on or off.  On Android, it is an on/off option.  On the IOS it also offered auto.  The next option was for the front light shift which supposedly changes the level of the main light depending on your speed.  This is pretty cool because the faster you go, the more light you want.  I could not test this because I try not to ever ride at night and I could not tell if the light got brighter the faster I got.  The next option is for the smart LED light.  You can set it to display different colors based on your speed or heart rate, just flash or stay on consistently.  A nice color wheel is given and you can pick a specific color for it to be.  The next option is your wheel size setting.  This is a perfect example of the unit displaying metric when I have it set to imperial.  When you click on that option you get a huge table of wheel sizes.  I picked my wheel size (700 x 32c) and I got 2155 mm.  You need to have a proper wheel size set so the speed sensor is calibrated properly.  The next option takes you to all of the power meter settings. I have a screenshot below showing all of those options.  You can then set your current elevation and check for firmware updates.

The screenshot above shows the advanced settings page.  The data backup was supposed to back up all of your settings, but I found that did not work on Android.  The data read would read those settings.  I am not sure what the enable notification does.  I had it turned on to see what it would do, but I never received any kind of notifications from the app.  Finally, I have a screenshot of the power meter settings.

End of Ride and Uploading Back to App

So with the computer all set, I took off on a short 14-mile ride.  I was wearing my Garmin Fenix 5s.  One really nice feature of the Di-Pro is that if I stopped the bike along my ride, the time stopped.  This, in the end, provided a much more accurate average speed calculation than my Garmin watch.  I stopped several times for stop signs and one time halfway through to talk to someone.  What I want to mention and it was just a brief blurb in the fold-out manual is that to start a session and GPS tracking, you must press and hold the SET button.  You will get a countdown from 3..2..1 and it will start tracking.   IMPORTANT – when you are done with your ride, press and hold SET again and you will get the word FINISH displayed where you see the checkered flag.   If you forget to press SET to stop it and just turn off the computer, your phone will not find any data to download.  I spent a frustrating amount of time trying to find a data file to download and never did.

Luckily for me, the next weekend provided some nice weather so I wanted to try the computer again.  The first thing I noted was the computer would not pick up the speed, cadence or my heart rate monitor.  I had to spend a frustrating 15 minutes going through the setup menu again trying to get the Di-Pro to discover the sensors.  I got speed and cadence, but I never did get the heart rate sensor connected.  I have a Scosche Rhythm 24 heart rate monitor.  My Peloton and Garmin Fenix 5s always find it and the computer did the first time I rode but not the second time.  This time after the ride was done I made sure to press SET again to tell it I was done.

The first screen shows the file from the Di-Pro showing up on my phone.   I want to note that the app was finally able to find the computer after my phone upgraded to Android 9.0.  What it is displaying is that on 2/23/19 I rode at 3:50 pm.  My home page on the app now shows I road a total of one hour and 4 minutes in one session   If you click on that area where the total time is displayed you get the third screen showing calories burned (pure estimate I guess based on body weight and time because  I had no HR connection).

This last screen shows you the detail of the rides for the week.  What disappointed me was there were no maps of my actual route anywhere on the app.  I can only hope that the navigation features come soon.

Another bad thing that happened to me after the end of my first ride was the Fly Out mount broke.  The lever you push down on to release the computer just snapped off as you can see in the first picture.  The second picture is the basic handlebar mount.  You can see how the lever is much sturdier than the Fly Out.  So for my second ride, I mounted the computer directly to my handlebars.

This is a picture of the computer using the standard mount it comes with.

What I like

I like that it comes with a light.  Anything to make you more visible on the road is a plus for me.  It lasts quite a long time.  I turned it on and left it at full brightness and it lasted over 5 hours.  A pro is that because the screen is so big,  you can see everything at once.  This is also a con down below.  It was very accurate on distance calculation and the cadence also seemed accurate.  When my heart rate was displaying it was right along with the Garmin which was also connected to the same monitor.

What can be improved

This computer is trying really hard to play with the big boys Garmin and Wahoo and it is doing it at a lower price point.  However, you do get what you pay for.  There is no navigation yet.  I also found the sensor lack of detection very annoying.  When I am ready to ride, I don’t want to spend time messing around trying to get sensors connected.  The app was flaky on displaying imperial units everywhere.  The Android app still has a lot of catching up to do compared to IOS though I noticed the power meter settings in IOS were all in Chinese.  Finally, I really need that app to communicate my rides back to Strava.  If anyone is trying to compete in this space, they have to have a device that uploads to Strava.  A lot of athletes and even low-letes (hah!) like me, want to see all of our training data in one place.  My Peloton rides go up there and I really want my outside bicycle rides to be there also.  Finally, I would not recommend spending any money on the Fly Out mount.  It was too brittle to be of use beyond a single ride.

All in all, I recommend waiting a few more months to a year and see how they try to improve this computer over time.  I will personally try to use the speed and cadence sensors with my new computer when I get one and report back how they work.  They are slightly cheaper than what I see out there now by other manufacturers.

Price: $179.90 for the Di-Pro computer, $26.99 for the cadence sensor, $34.99 for the speed sensor and $19.99 for the fly out bracket mount
Where to buy: Amazon Shanren Di-Pro Bicycle Computer, Amazon Shanren Bike Cadence Sensor, Amazon Shanren Bike Speed Sensor, Amazon Shanren Fly Out Computer Mount
Source: The sample for this review was provided by Shanren

Filed in categories: Reviews

Tagged:

Shanren Di-Pro bicycle computer review originally appeared on The Gadgeteer on March 3, 2019 at 10:00 am.

Note: If you are subscribed to this feed through FeedBurner, please switch to our native feed URL http://the-gadgeteer.com/feed/ in order to ensure continuous delivery.